0
items
$0


Lovely Lard
Eating animal fat is important to our body's health. But eating enough fat can be challenging, especially when there is a dairy allergy. Lard is a great alternative to butter, and its taste is more mild than that of tallow.
You can buy lard at the store, but it is expensive and may be hydrogenated or of poor quality. Making your own lard is simple and easy, and can be done for a fraction of the price.
To make lard, you first start out with pig fat. This can be obtained from a butcher, or even trimmed off of fatty cuts of pork like the Boston butt. The process of turning fat into lard or tallow is called rendering. In this post I describe rendering lard, but the process for rendering tallow (which is fat from beef, bison, deer, lamb, or elk) is the same, although for tallow it may take a few more hours.
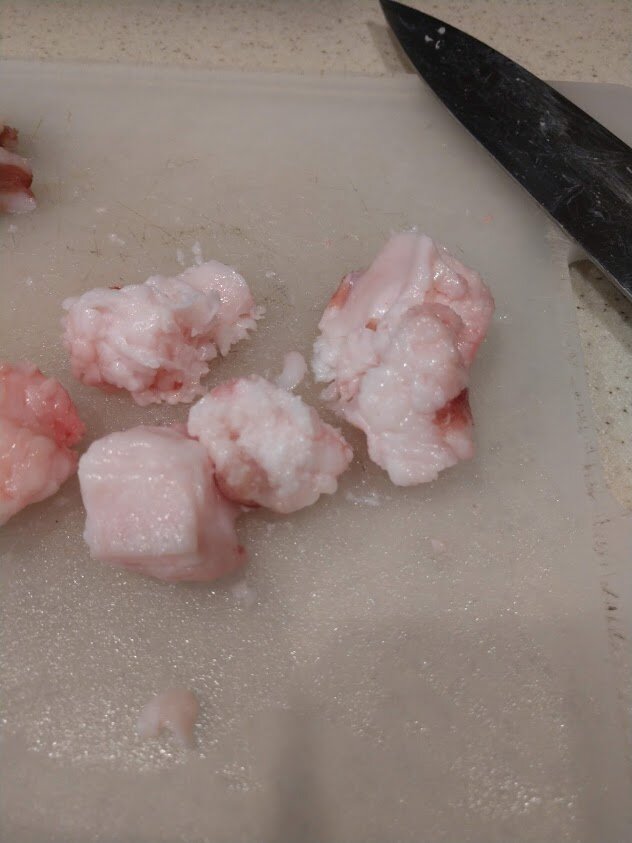
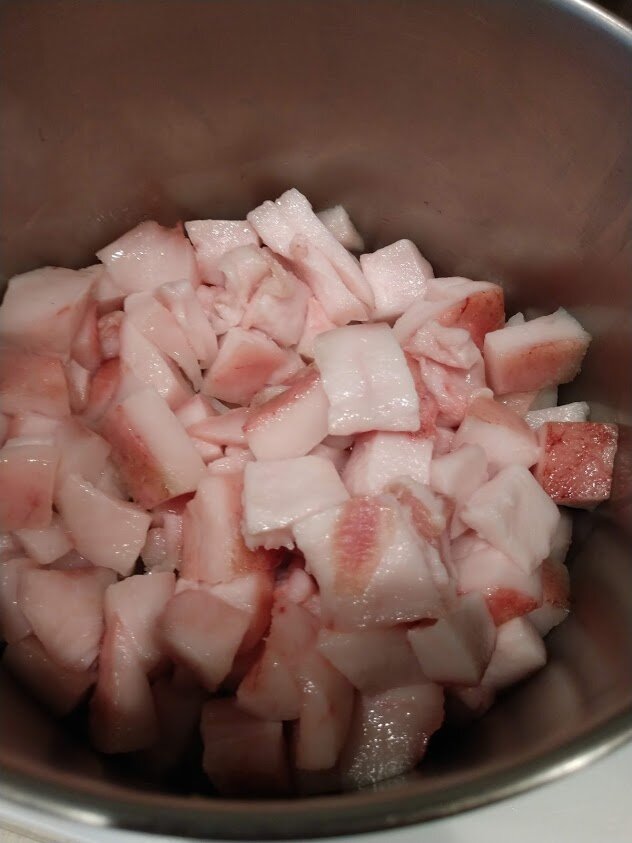
There are two kinds of pig fat. Leaf fat is from fat surrounding the internal organs. It is very mild in taste and used to be reserved for making pies and pastries. Body fat is from the layer of fat beneath the skin. This has a slightly stronger pork taste, and is better used in cooking meat and vegetables. Along with a different taste, there is a different look to the two types of fat. Body fat is in large pieces, and appears more dense and flat. Leaf fat is in smaller pieces, has a fluffier texture, and may contain membranes. The fat you get from a butcher may contain both types of fat. If that is the case, I recommend separating out the two types of fat and rendering them separately so you can use them for different purposes. However, there is no problem in mixing them and rendering them together.
Leaf fat
Body Fat
Watch the video below to learn how to make lard and then scroll down for the recipe and directions!
Making Lard:
First, cut up the pig fat into small 1-2 inch sized cubes. If using leaf fat, remove as much membrane as possible.
Put the fat cubes in a medium saucepan on low heat. You may use a crockpot, but it must have a very low setting or the fat will burn. Stir occasionally and watch closely. Don't let the lard smoke!
With time, the solid pieces of fat will get smaller, and the liquid will increase.
After a few hours, when the lard is liquefied, set up your strainer and cloth. A metal strainer is best because the lard is hot! For extra strained lard which will last even longer you can additionally strain through a cloth. You can use an old napkin or other cloth, or several layers of cheesecloth. I have a dedicated cloth I use just for straining lard because you can never really wash out all the grease.
Pour the liquid into the strainer. The liquid will go into the jar and the cracklings will stay in the cloth or strainer.
Squeeze the rest of the liquid out of the cracklings.
Once cracklings are separated from the liquid lard, salt and fry them. You can eat them like bacon bits, or just by themselves.
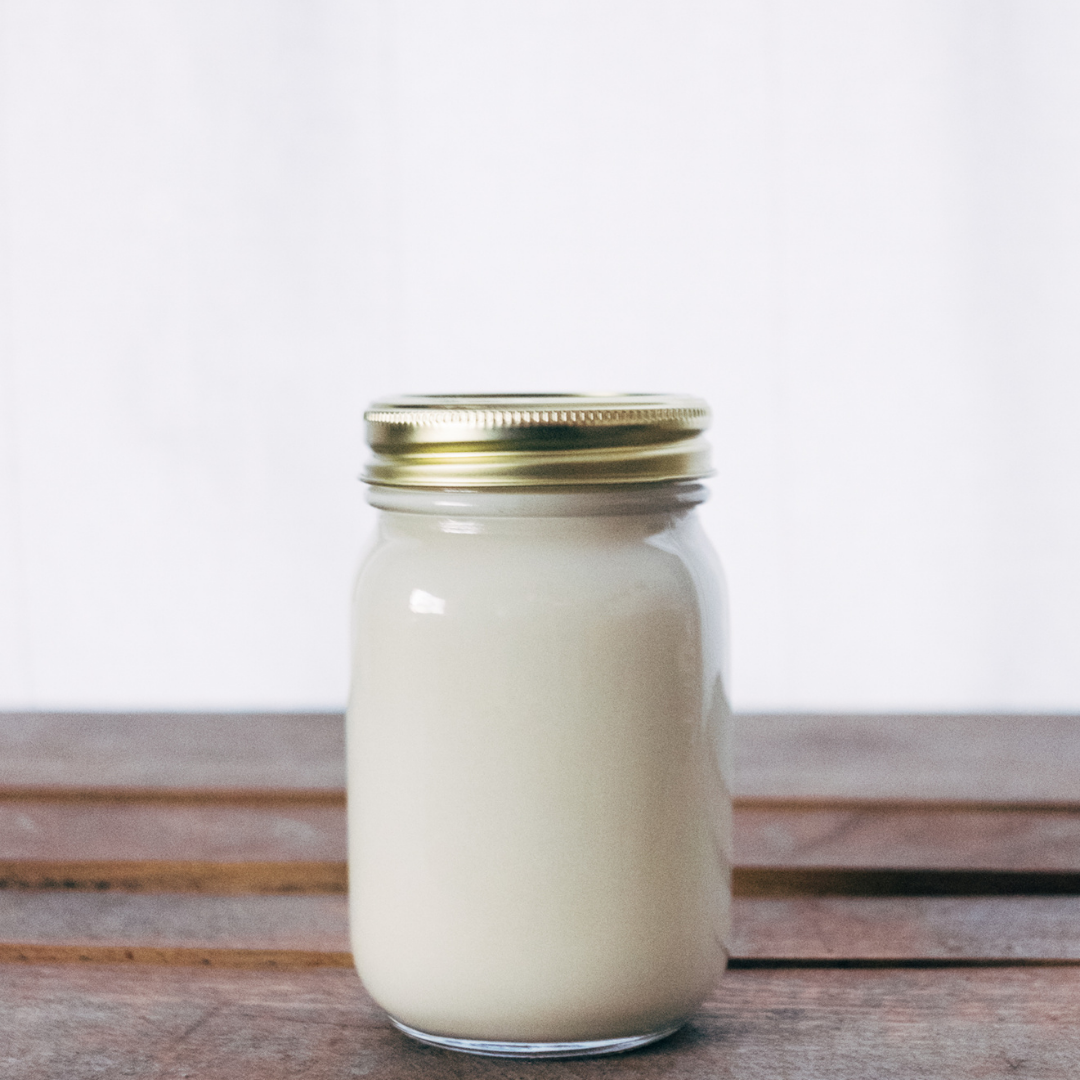
Allow the jar of lard to cool on the counter.
When the lard is cool you can move it to the fridge, or leave it on the counter.
If you are careful not to contaminate the jar, the lard will last for several months, even left out at room temperature. Use the lard in your cooking— it is a wonderful thing to fry up vegetables or meat and add fat to your diet. Bon appétit!
Onward!
How to Make Lard
prep time: cook time: total time:
instructions:
How to cook How to Make Lard
- First, cut up the pig fat into small 1-2 inch sized cubes. If using leaf fat, remove as much membrane as possible.
- Put the fat cubes in a medium saucepan on low heat. You may use a crockpot, but it must have a very low setting or the fat will burn. Stir occasionally and watch closely. Don't let the lard smoke!
- With time, the solid pieces of fat will get smaller, and the liquid will increase.
- After a few hours, when the lard is liquified, set up your strainer and cloth.
- Below you see pictured a jar, jar funnel, and metal strainer. Metal is best because the lard is hot! To finish it off, place a cloth. You can use an old napkin or other cloth, or several layers of cheesecloth.
- Pour the liquid into the strainer. The liquid will go into the jar and the cracklings will stay in the cloth.
- Squeeze the rest of the liquid out of the cracklings.
- Cracklings separated from the liquid lard. Salt and fry these. You can eat them like bacon bits, or just plain.
- Allow the jar of lard to cool on the counter.
- When the lard is cool you can move it to the fridge, or leave it on the counter.
- If you are careful not to contaminate the jar, the lard will last for several months, even left out at room temperature. Use the lard in your cooking— it is a wonderful thing to fry up vegetables or meat and add fat to your diet. Bon appétit!
