Loveland

GAPS Friendly Waffle Recipe

Recently the idea struck me to try to make a GAPS waffle. I had made many GAPS pancakes, so I thought maybe it could be done. And it turns out... it can! It was not a simple task, however.

The ratios are fairly different than a GAPS pancake... for one thing, putting in too many eggs caused it to overflow and made quite a mess. But after some trial and error I found a recipe that is delicious, and delivered consistent results (which is a big deal when cooking without flour).

I was also excited to make this a dairy-free recipe (except for the whey). Unfortunately, I can't make it nut free, the almond butter is essential! I hope you enjoy them!

GAPS Friendly Waffles

(makes about 8 waffle squares or 2 full-size waffles)

GAPs legal waffle Batter Ingredients

  • 1 cup cooked butternut squash

  • 4 TBS fermented almond butter (see note)

  • 1 TBS melted lard

  • 2 eggs

  • ¼ tsp sea salt

Additional Ingredients

  • About ¼ cup melted lard or butter to grease the waffle iron

Tools for gaps legal waffles

  • Food processor or high-powered blender

  • Waffle iron

  • Chopsticks (this is very helpful to get the waffles off in one piece)

Directions for gaps legal waffles

This recipe is quick to put together if you do a little prep work first!

Prep the Fermented Almond Butter:
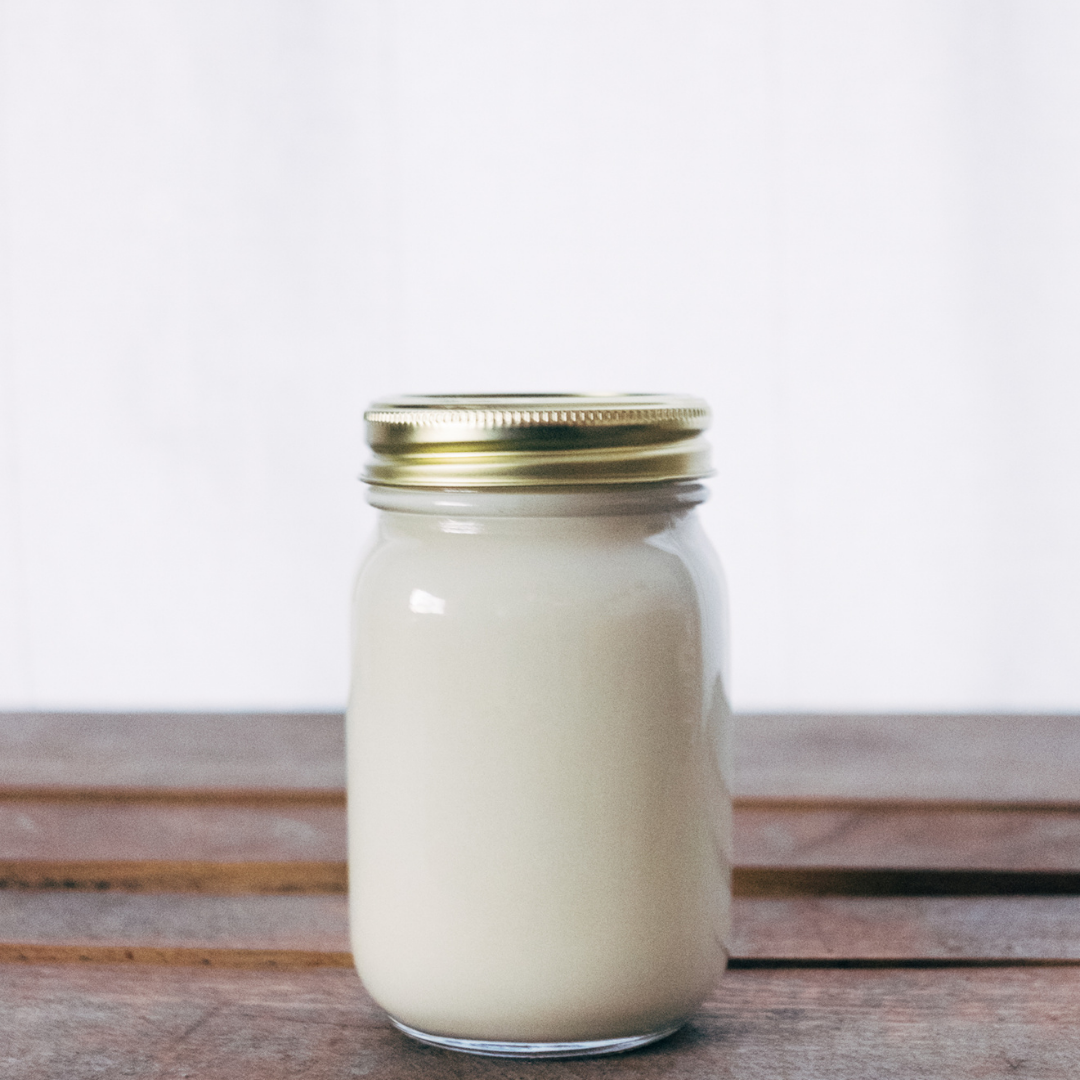
At least 24 hours in advance, ferment the almond butter. Add 2 TBS whey to 1 cup almond butter. Stir. Leave at room temperature for 24 hours. This will keep in the fridge for at least 2 weeks.

Prep the Butternut Squash:
Cut the butternut squash in half and place face down on a baking sheet lined with parchment paper. Bake at 350 degrees for 35-45 min until soft. Remove the squash flesh and place in a bowl.

For the GAPS Waffles:
Combine all ingredients in a food processor and blend until very smooth and mixed.

gaps-legal-waffles-how-to-make-waffles-for-the-gaps-diet-paleo-waffles-butternut-squash-waffles-how-to-make-waffles-gaps-legal-waffle-recipe-waffles-for-the-gaps-protocol-healing-gut-waffles

I recommend pouring the mixture into a bag and using it like a pastry bag. The more quickly you can get the waffle batter on the iron and close the lid, the better it turns out!

gaps-legal-waffles-how-to-make-waffles-for-the-gaps-diet-paleo-waffles-butternut-squash-waffles-how-to-make-waffles-gaps-legal-waffle-recipe-waffles-for-the-gaps-protocol-healing-gut-waffles

When everything is ready, and the waffle iron is hot, use the pastry brush to spread fat on the upper and lower waffle irons. Do this as quickly as possible.

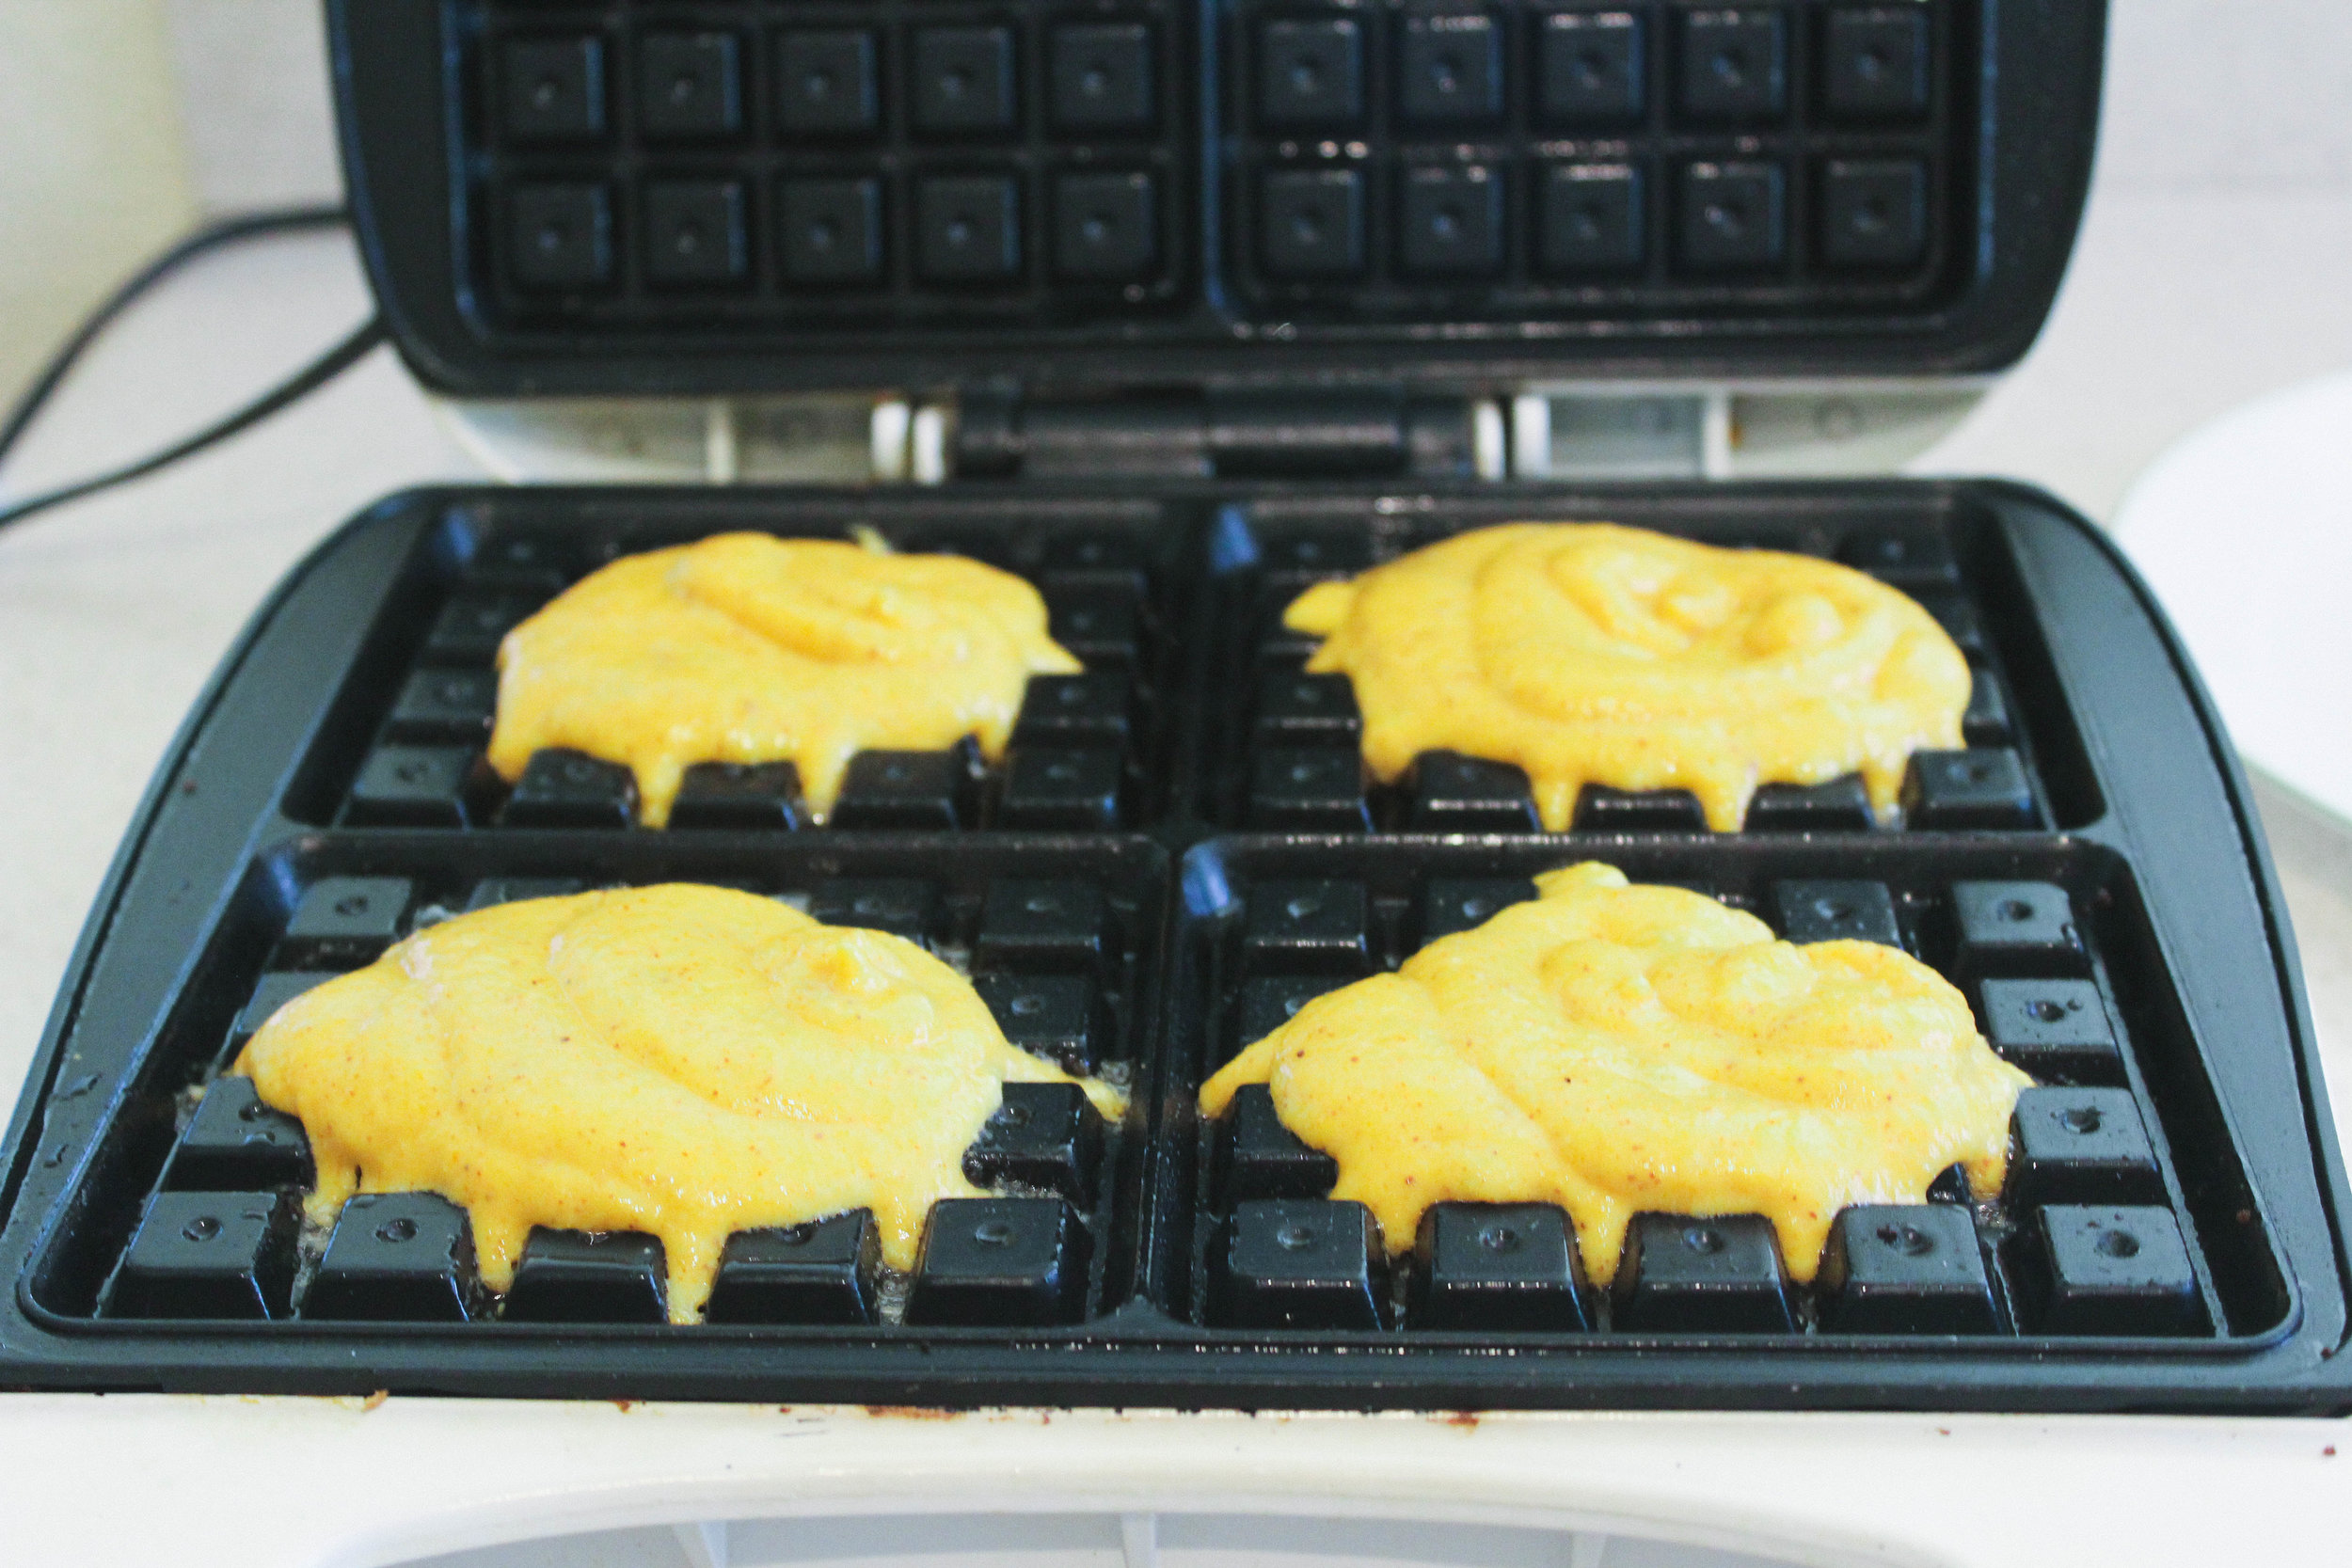
Add batter to the waffle iron, then close the lid.

gaps-legal-waffles-how-to-make-waffles-for-the-gaps-diet-paleo-waffles-butternut-squash-waffles-how-to-make-waffles-gaps-legal-waffle-recipe-waffles-for-the-gaps-protocol-healing-gut-waffles

There is a lot of moisture in this recipe, so expect a lot of steam!

Wait for the green light to go on, and then another 30 seconds or so.

Slowly open the waffle iron.

gaps-legal-waffles-how-to-make-waffles-for-the-gaps-diet-paleo-waffles-butternut-squash-waffles-how-to-make-waffles-gaps-legal-waffle-recipe-waffles-for-the-gaps-protocol-healing-gut-waffles

Remove the waffles from the iron, using the chopstick in the groves in any areas it is sticking.Top with fried eggs, honey, date syrup, berries, homemade whipped cream, or anything you want to!

gaps-legal-waffles-how-to-make-waffles-for-the-gaps-diet-paleo-waffles-butternut-squash-waffles-how-to-make-waffles-gaps-legal-waffle-recipe-waffles-for-the-gaps-protocol-healing-gut-waffles

Enjoy!


GAPS Friendly Waffle Recipe

Author:
prep time: cook time: total time:

ingredients:

Waffle Batter Ingredients
  • 1 cup cooked butternut squash
  • 4 TBS fermented almond butter (see note)
  • 1 TBS melted lard
  • 2 eggs
  • ¼ tsp sea salt
Additional Ingredients
  • About ¼ cup melted lard or butter to grease the waffle iron
Tools Needed
  • Food processor or high-powered blender
  • Waffle iron
  • Chopsticks (this is very helpful to get the waffles off in one piece)

instructions:

How to cook GAPS Friendly Waffle Recipe

  1. This recipe is quick to put together if you do a little prep work first!
  2. Prep the Fermented Almond Butter:
  3. At least 24 hours in advance, ferment the almond butter. Add 2 TBS whey to 1 cup almond butter. Stir. Leave at room temperature for 24 hours. This will keep in the fridge for at least 2 weeks.
  4. Prep the Butternut Squash:
  5. Cut the butternut squash in half and place face down on a baking sheet lined with parchment paper. Bake at 350 degrees for 35-45 min until soft. Remove the squash flesh and place in a bowl.
  6. For the GAPS Waffles:
  7. Combine all ingredients in a food processor and blend until very smooth and mixed.
  8. I recommend pouring the mixture into a bag and using it like a pastry bag. The more quickly you can get the waffle batter on the iron and close the lid, the better it turns out!
  9. When everything is ready, and the waffle iron is hot, use the pastry brush to spread fat on the upper and lower waffle irons. Do this as quickly as possible.
  10. Add batter to the waffle iron, then close the lid.
  11. There is a lot of moisture in this recipe, so expect a lot of steam!
  12. Wait for the green light to go on, and then another 30 seconds or so.
  13. Slowly open the waffle iron.
  14. Remove the waffles from the iron, using the chopstick in the groves in any areas it is sticking. Top with fried eggs, honey, date syrup, berries, homemade whipped cream, or anything you want to!
Created using The Recipes Generator

New Year's Resolutions: Six Habits I Recommend on a Regular Basis

New Year's Resolutions: Six Habits I Recommend on a Regular Basis

In the last post, I shared about mindsets to have (or not) that will help with successful habit change. This week I want to share about some of the habits I think are most important to consider integrating into your family. This is not an exhaustive list! These habits are simple and sound.

Buckeye Cookies

Another one of my favorite Christmas cookies are Buckeyes. These delicious cookies are traditionally peanut butter and powder sugar balls dipped in chocolate, made to look like the buckeye nut. The buckeye nut is commonly found back East, like Ohio and Michigan, where my family is originally from.

The roots for this recipe go deep in our family. Much like the Force.  

Ok, maybe not the Force (although I am excited for the new Star Wars movie that comes out this week!)

But we do make Buckeye cookies a lot. Since powdered sugar is hardly GAPS legal, I haven't had these cookies for a while either. But all that is about the change!  

Introducing Buckeye cookies, made with real food!  

These no-bake cookies are egg free, and casein and lactose free (contains whey and butter). They are also coconut free!  

Please note that while cassava flour is not technically on the GAPS-illegal list, it is still quite starchy. These cookies should be a special treat, and consumed infrequently and in small amounts. Same with cocoa powder. And, as always, observe if YOUR body is okay with this particular food at this time. Just because something is "GAPS legal" does not give you a free pass to eat it! Pay attention to what your body is telling you. But if it's telling you that these cookies are okay for you, then by all means ENJOY THEM!!!

GAPS Legal Buckeye Cookies

Makes about 48 cookies

Ingredients:

Filling:

  • 1 cup peanut butter

  • 2 cups cassava flour

  • 8 TBS whey

  • 1/2-1 cup honey

  • 8 oz butter

  • 2 tsp vanilla

Coating:

  • 1 1/2 cup cocoa butter chips

  • 1/8 cup raw honey

  • 1 TBS cocoa powder

Directions:

Prep time: Need to start this recipe 24 hours in advance, 5 minutes prep time. Then it takes about 30-45 minutes to finish on the following day.  

Filling:

IMG_0070.jpg

Twenty-four hours in advance: mix 1/2 cup peanut butter, 4 TBS whey, and 1 cup cassava flour together until everything is moist and crumbly. Try to eliminate as many clumps as possible. Leave on the countertop in a glass container with a lid. This is to give the legumes and cassava flour a chance to lacto-ferment. This makes them more digestible and increase the nutritional value. For more on why we should only eat nuts and seeds that have been properly prepared, watch my video on this.

After 24 hours, the mixture should look something like this...just a little more moist than what you started with the day before.

IMG_0087.jpg

Add to this the vanilla extract, honey and 8 oz of softened butter (it's not the end of the world if you melt it, but try not to).

I used 1 cup of honey for this recipe, and to my non-sugar eating palate they are very sweet (which is the point, I suppose)! I plan to reduce the honey by about half the next time I make this. The mixture just needs to be formed into balls.

Mix well, and smooth out as many clumps as possible. You should be able to easily for this mixture into little balls.

IMG_0085.jpg

Form the dough into 1 inch balls and place on a cookie sheet covered in parchment paper

Place the balls in the freezer to chill (about 10-15 minutes)   Next, make the coating   The most important part of making the coating is to heat things just hot enough to melt. Nothing should be cooked here! You are gently heating them up to mix. Then gradually cooling them back down again.  

IMG_0090.jpg

Using a double boiler (or as I just discovered, my glass 2 cup measuring container fits perfectly into a medium saucepan) On low heat, melt the cacao butter chips.

When they are fully melted, turn off the heat and add the honey.

Next, stir in the cocoa powder (I recommend using a whisk to mix well.) 

Finally, remove the mixture in the top half of the double boiler to the coating is allowed to start cooling   Continue whisking the coating mixture occasionally. The honey cools faster than the cocoa butter, and you need to keep them mixed.

IMG_0099.jpg

When the mixture is cool enough, remove the dough balls from the freezer. Stick a toothpick (or broken-off bamboo skewer in our case) into a ball and dip it into the coating. Depending on the temperature of the coating, you may need to dip more than once to achieve a satisfactory coating. After allowing the extra coating to drip off for a few moments, return the ball to the parchment paper.

Maintain the coating within a narow temperature margin. Keep the water from the lower part of your double-boiler ready. If your coating begins to cool too much, slip the top of the double-boiler back on top of the hot water for a minute or so to warm it back up (you probably don't need to turn on the heat). Do not let it cool too much or reheat it too quickly or too much—these can cause the chocolate to clump (this happened), and there's not going back from this. You would just need to start over making the coating.  

Traditionally the coating is darker than this recipe. I originally made a darker coating, but more cocoa powder required more honey, which seemed to throw everything off balance. I think this is part of why it clumped. Once you master the basics of temperature and consistency, you can try increasing the cocoa powder to darken the color. I will be doing that myself. In the meantime, even though this isn't as dark as traditional Buckeye cookies, the coating dries hard at room temperature. I'm calling that a win!

When they are all dipped to your satisfaction, use a toothpick to roll over the holes, filling them in.

There you have it! Rich, delicious Buckeye cookies.

Enjoy!


Buckeye Cookies

Author:
prep time: cook time: total time:

ingredients:

Filling:
  • 1 cup peanut butter
  • 2 cups cassava flour
  • 8 TBS whey
  • 1/2-1 cup honey
  • 8 oz butter
  • 2 tsp vanilla
Coating:
  • 1 1/2 cup cocoa butter chips
  • 1/8 cup raw honey
  • 1 TBS cocoa powder

instructions:

How to cook Buckeye Cookies

24 Hours in Advance:
  1. Twenty-four hours in advance: mix 1/2 cup peanut butter, 4 TBS whey, and 1 cup cassava flour together until everything is moist and crumbly. Try to eliminate as many clumps as possible. Leave on the countertop in a glass container with a lid. This is to give the legumes and cassava flour a chance to lacto-ferment. This makes them more digestible and increase the nutritional value. For more on why we should only eat nuts and seeds that have been properly prepared, watch my video onthis.
The Next Day:
  1. After 24 hours, the mixture should look something like this...just a little more moist than what you started with the day before.
  2. Add to this the vanilla extract, honey and 8 oz of softened butter (it's not the end of the world if you melt it, but try not to).
  3. I used 1 cup of honey for this recipe, and to my non-sugar eating palate they are very sweet (which is the point, I suppose)! I plan to reduce the honey by about half the next time I make this. The mixture just needs to be formed into balls.
  4. Mix well, and smooth out as many clumps as possible. You should be able to easily for this mixture into little balls.
  5. Form the dough into 1 inch balls and place on a cookie sheet covered in parchment paper
  6. Place the balls in the freezer to chill (about 10-15 minutes) Next, make the coating The most important part of making the coating is to heat things just hot enough to melt. Nothing should be cooked here! You are gently heating them up to mix. Then gradually cooling them back down again.
  7. Using a double boiler (or as I just discovered, my glass 2 cup measuring container fits perfectly into a medium saucepan) On low heat, melt the cacao butter chips.
  8. When they are fully melted, turn off the heat and add the honey.
  9. Next, stir in the cocoa powder (I recommend using a whisk to mix well.)
  10. Finally, remove the mixture in the top half of the double boiler to the coating is allowed to start cooling Continue whisking the coating mixture occasionally. The honey cools faster than the cocoa butter, and you need to keep them mixed.
  11. When the mixture is cool enough, remove the dough balls from the freezer. Stick a toothpick (or broken-off bamboo skewer in our case) into a ball and dip it into the coating. Depending on the temperature of the coating, you may need to dip more than once to achieve a satisfactory coating. After allowing the extra coating to drip off for a few moments, return the ball to the parchment paper.
  12. Maintain the coating within a narow temperature margin. Keep the water from the lower part of your double-boiler ready. If your coating begins to cool too much, slip the top of the double-boiler back on top of the hot water for a minute or so to warm it back up (you probably don't need to turn on the heat). Do not let it cool too much or reheat it too quickly or too much—these can cause the chocolate to clump (this happened), and there's not going back from this. You would just need to start over making the coating.
  13. Traditionally the coating is darker than this recipe. I originally made a darker coating, but more cocoa powder required more honey, which seemed to throw everything off balance. I think this is part of why it clumped. Once you master the basics of temperature and consistency, you can try increasing the cocoa powder to darken the color. I will be doing that myself. In the meantime, even though this isn't as dark as traditional Buckeye cookies, the coating dries hard at room temperature. I'm calling that a win!
  14. When they are all dipped to your satisfaction, use a toothpick to roll over the holes, filling them in.
  15. There you have it! Rich, delicious Buckeye cookies.
Created using The Recipes Generator

New Year's Resolutions: How to Make Successful Habit Changes

New Year's Resolutions: How to Make Successful Habit Changes

As I'm writing this, we are almost half way through December. This time of year is about getting ready for the holidays AND the new year. As we are looking forward to the new year, most of us are thinking about new habits we want to start (or renew). But this can be tricky. You only have so much time and energy to spend on habit change, and some health trends are not actually helpful to you. I want to help you plan for this upcoming year. Let's talk about how decide what habits are right for you!

Christmas Wreath Cookies {GAPS Legal}

It's the holiday season! More specifically, it's cookie season!   I love making, giving away (and eating) Christmas cookies. But it's been a long time since I have enjoyed many of the cookies I grew up making, so this year I decided I wanted to create real-food versions of some of my favorite Christmas cookie recipes.  

First up, Christmas Wreath cookies!

  This cookie is traditionally a mix of corn flakes, marshmallows, and butter. So let's look at the ingredients...

  • The butter is already a real food!

  • Marshmallows I have made before, modified from Mommypotamus' marshmallow recipe.

So all I had to do was figure out a substitution for the corn flakes (and see if the marshmallows actually work the same as the commercial variety).   Challenge accepted!

Christmas Wreath Cookies

Makes about 36 cookies (recipe can be halved)

Ingredients

For Marshmallows

  • 2 cups honey

  • 1 cup of filtered water

  • 2 tsp vanilla

  • 1 tsp sea salt

  • 6 TBS grass-fed beef gelatin

  • 1 cup of filtered water

For Wreath Cookies

  • Marshmallow paste (above)

  • 8 ounces organic butter

  • 14 cups coconut flakes (approximately 20 ounces)

  • Red hots (my homemade recipe)

  • Natural food coloring, blue and yellow packets (I used this one)

Directions

IMG_9987.jpg

Place the coconut flakes in the oven at 200°

Toast the coconut until they are light brown—this makes the cookies crispier! When done, remove them from the oven Place in a large bowl, set aside.

IMG_9996.jpg

Melt the butter in a saucepan over low heat When melted, remove from heat and set aside   Next, make the marshmallow paste. See recipe here.

Soften the gelatin

  • Add gelatin to 1 cup hot water

  • Stir and allow to to sit, keep warm (not on stove)

While gelatin is softening... Heat honey and water in a medium saucepan (medium to high heat), stirring frequently, until it reaches the soft ball candy stage (about 235°F).

If you don't have a thermometer, you can check by dripping the heated honey into a glass of cold water. When the candy forms a ball, it is ready!

When the honey has reached the soft ball stage, remove from heat. Add the heated mixture to the softened gelatin in a large bowl. Add vanilla.

Do these steps quickly, you don't want honey mixture to cool off too much!

Whisk the mixture using an electric mixer or stand mixer for about 10 minutes.

When the mixture is thick and looks like marshmallow paste, it's done!  

If you want marshmallows, you can stop here. Put the marshmallow paste in a greased glass 9x11 dish and allow to cool and dry for a 24-36 hrs. Then cut up and serve.  

But we are not stopping here! To make traditional Christmas wreath cookies you melt the marshmallows and turn them back into paste-which is what you just created!  

Next, stir the melted butter into the mixture. It will deflate the mixture somewhat, this is normal.

Mix in the blue and yellow food coloring packets. This will turn it green (not neon green—that's an artificial color). But when it's made into wreathes it does look green—although you're going to have to take my word for it!

IMG_0006.jpg

Pour the marshmallow mixture into the bowl with the toasted coconut flakes. Mix until the flakes are coated.

Finally, form the warm mixture into wreath-shaped cookies on parchment paper.

IMG_0019.jpg

Add decorative red hots as berries (see my homemade recipe) Allow to cool.

See, I told you they look green!

All that's left is to share and enjoy these delicious treats!

Disclosure: This post contains affiliate links. Your trust is important. I only recommend products I trust. 

IMG_0021.jpg

Christmas Wreath Cookies

Author:
prep time: cook time: total time:

ingredients:

For Marshmallows
  • 2 cups honey
  • 1 cup of filtered water
  • 2 tsp vanilla
  • 1 tsp sea salt
  • 6 TBS grass-fed beef gelatin
  • 1 cup of filtered water
For Wreath Cookies
  • Marshmallow paste (above)
  • 8 ounces organic butter
  • 14 cups coconut flakes (approximately 20 ounces)
  • Red hots (my homemaderecipe)
  • Natural food coloring, blue and yellow packets (I used this one)

instructions:

How to cook Christmas Wreath Cookies

  1. Place the coconut flakes in the oven at 200°
  2. Toast the coconut until they are light brown—this makes the cookies crispier! When done, remove them from the oven Place in a large bowl, set aside.
  3. Melt the butter in a saucepan over low heat When melted, remove from heat and set aside Next, make the marshmallow paste. See recipe here.
  4. Soften the gelatin
  5. Add gelatin to 1 cup hot water
  6. Stir and allow to to sit, keep warm (not on stove)
  7. While gelatin is softening... Heat honey and water in a medium saucepan (medium to high heat), stirring frequently, until it reaches the soft ball candy stage (about 235°F).
  8. If you don't have a thermometer, you can check by dripping the heated honey into a glass of cold water. When the candy forms a ball, it is ready!
  9. When the honey has reached the soft ball stage, remove from heat. Add the heated mixture to the softened gelatin in a large bowl. Add vanilla.
  10. Do these steps quickly, you don't want honey mixture to cool off too much!
  11. Whisk the mixture using an electric mixer or stand mixer for about 10 minutes.
  12. When the mixture is thick and looks like marshmallow paste, it's done!
  13. If you want marshmallows, you can stop here. Put the marshmallow paste in a greased glass 9x11 dish and allow to cool and dry for a 24-36 hrs. Then cut up and serve.
  14. But we are not stopping here! To make traditional Christmas wreath cookies you melt the marshmallows and turn them back into paste-which is what you just created!
  15. Next, stir the melted butter into the mixture. It will deflate the mixture somewhat, this is normal.
  16. Mix in the blue and yellow food coloring packets. This will turn it green (not neon green—that's an artificial color). But when it's made into wreathes it does look green—although you're going to have to take my word for it!
  17. Pour the marshmallow mixture into the bowl with the toasted coconut flakes. Mix until the flakes are coated.
  18. Finally, form the warm mixture into wreath-shaped cookies on parchment paper.
  19. Add decorative red hots as berries (see my homemade recipe) Allow to cool.
  20. See, I told you they look green!
  21. All that's left is to share and enjoy these delicious treats!
Created using The Recipes Generator

Homemade Red Hots {GAPS Legal}

I have been getting more bold in the kitchen, and this December I decided to create alternative recipes featuring some of my favorite Christmas cookies. To enjoy.

I decided on my first cookie to make, Christmas Wreath cookies. And as I was running through my ingredients and working out substitutions I came to the decorative red hots.

And I was faced with a dilemma... could I create a red hot, or should I simply bite the bullet and just use traditional red hots. Maybe I could even find a healthy brand...

But my all-or-nothing attitude kicked in. If I was going to do this, I was going to do it right.

And that meant making red hots. From scratch. A quick search revealed that it was possible... in essence red hots are a sugar brittle flavored with spices, like cinnamon.

I knew how to make candy out of honey. This could work.

It did work. But I'll admit that when I make the Christmas Wreaths in the future I may use boughten red hots... and tell people they are just for decoration and to pick them off.  

Because making homemade red hots is a labor of love. There is no other way to put it. But being able to put healthy, three ingredient red hots on your Christmas cookies is amazing! And if you don't care if they are rounded into tiny, holly-berry decorative balls, then this is a really easy candy to make!  

GAPS Legal Homemade Red Hots / Cinnamon Hard Candy

Ingredients:

  • 1/2 cup water

  • 1 cup honey

  • 1/4-1/2 tsp cinnamon

  • 1 package natural red coloring (I used this one)

Directions:

IMG_9966.jpg

Combine the honey and water on the stovetop in a medium saucepan, stirring frequently.

You want to heat it at a temperature that is not too hot that it burns, but if it's too low it will take forever to get to temperature.

You're going to have to find your heat sweet spot. It should take between 5-10 minutes to get to soft ball stage, if it's taking longer, turn it up!

Soft ball stage occurs around 235°. If you don't have a thermometer available, you can drip some into a clear glass of cold water. It will form into a little ball upon hitting the water. For a little harder candy (I recommend this), let it go a minute or two after you hit the soft-ball stage.  

IMG_9967.jpg

After whisking thoroughly, pour the liquid onto some parchment paper to cool When it has cooled enough to touch (doesn't take very long), then use well buttered fingers to form tiny little balls

Not tolerating butter? Any fat will do—the key is to prevent sticking!

Roll those little suckers quickly... after a while the candy will get too hard to work with. You can reheat it to soften in up, but believe me, you will be ready to stop rolling balls. Better yet, recruit a friend (or two) to roll with you!

IMG_9975.jpg

Set the balls in a cold place (outside works for us right now!) When they are hard, gather them up and store them in a container in the fridge. This prevents the balls from clumping.   This candy could be made into any size (I only chose red hot size because of the Christmas wreath cookies)... or simply cooled and broken into pieces. It is a delicious treat!

Enjoy!

Disclosure: This post contains affiliate links. Your trust is important. I only recommend products I trust. 


Homemade Red Hots

Author:
prep time: cook time: total time:

ingredients:

  • 1/2 cup water
  • 1 cup honey
  • 1/4-1/2 tsp cinnamon
  • 1 package natural red coloring (I usedthis one)

instructions:

How to cook Homemade Red Hots

  1. Combine the honey and water on the stovetop in a medium saucepan, stirring frequently.
  2. You want to heat it at a temperature that is not too hot that it burns, but if it's too low it will take forever to get to temperature.
  3. You're going to have to find your heat sweet spot. It should take between 5-10 minutes to get to soft ball stage, if it's taking longer, turn it up!
  4. Soft ball stage occurs around 235°. If you don't have a thermometer available, you can drip some into a clear glass of cold water. It will form into a little ball upon hitting the water. For a little harder candy (I recommend this), let it go a minute or two after you hit the soft-ball stage.
  5. After whisking thoroughly, pour the liquid onto some parchment paper to cool When it has cooled enough to touch (doesn't take very long), then use well buttered fingers to form tiny little balls
  6. Not tolerating butter? Any fat will do—the key is to prevent sticking!
  7. Roll those little suckers quickly... after a while the candy will get too hard to work with. You can reheat it to soften in up, but believe me, you will be ready to stop rolling balls. Better yet, recruit a friend (or two) to roll with you!
  8. Set the balls in a cold place (outside works for us right now!) When they are hard, gather them up and store them in a container in the fridge. This prevents the balls from clumping. This candy could be made into any size (I only chose red hot size because of the Christmas wreath cookies)... or simply cooled and broken into pieces. It is a delicious treat!
  9. Enjoy!
Created using The Recipes Generator

Fruit Chutney for your Thanksgiving

Happy Thanksgiving!

One of the best things about November is the focus on being grateful and thankful. Everywhere you look there are posts and tweets showing gratitude. And we sure have a lot to be thankful for! Some things are so obvious we often forget to be thankful for. These are things like safe drinking water, warm houses, smart phones and electricity are so everyday for us that we forget how much we have.

Sometime this week, I encourage you to write a list of all the things you have to be thankful for. Don't feel silly including things like water, or your favorite pair of jeans. See how long you can make the list! Even if you don't feel like being thankful, I encourage you to do this exercise—gratitude changes our perception and experience of life, even if nothing is circumstantially different.

This is not to say that you don't have hard things in your life, or that you should pretend they aren't difficult. They are. Hard things are part of life and are very, very real. Remembering that there are good things in your life as well will help YOU through difficult situations.  

As you know, most of my posts (so far, at least) aren't recipes. But it's Thanksgiving! The start of holidays and delicious, rich, made-with-love food. Well this recipe is definitely delicious, rich and made-with-love!

I took the recipe out of Gut and Psychology Syndrome by Dr. Natasha Cambell-McBride. If you are following the GAPS diet this is legal on stage 5 or 6, when you are tolerating dried spices and peppercorns.

This recipe is very simple—chop and combine ingredients, simmer for a while, then store in jars. It would be a great recipe to make in a crockpot... you really could fix it and forget it! But simple doesn't mean plain. It's delicious and adds flavor to any meat you are eating. And I'm told, quite excellent with turkey!  

*This dairy-free, gluten-free, nut-free, sugar-free recipe would be great for gifts as well—ladle into pint jars and add a bow!

Fruit Chutney

Makes 3-4 quarts

Ingredients

  • 2 lbs dried dates (without stones, cut in half)

  • 2 lbs cooking apples (about 7 cups of pieces)

  • 1 lb plumbs (I used packaged prunes)

  • 3 medium onions (about 3 cups, finely diced)

  • 3 peppers (about 2 cups, finely diced)

  • 2 cups raw apple cider vinegar

  • 1-2 tsp whole peppercorns (freshly crushed)

  • 1-2 tsp aromatic seeds (I used cumin and dill)

  • 1 tsp cayenne pepper

  • 1-2 tsp natural salt

Directions:

Cut dates in half (and remove stones (seeds) if needed)

Slowly boil the dates in about 1 cup of water in a large pot until soft (about 10 minutes)

If you live in Colorado like me, and don't use a lid (also like me), you may need to add extra water during this process.

When the dates are soft, turn off heat and mash them with a potato masher—they don't have to be perfectly smooth, just mashed.  

While you were softening the dates, I hope you were furiously chopping! I completely underestimated the time it was going to take to chop everything I needed for this recipe. If you want the process to go smoother, I would recommend chopping everything at the beginning. Then as soon as the dates are soft you can add the rest, stir occasionally, and walk away!

The directions from Dr. Natasha are:

Add everything else to the dates and simmer 1-1/2 hours on very low heat, stirring occasionally.

If you are like me and work better with a little note of panic, then by all means, chop furiously and add things as you chop. For all you step-by-steppers like me, below are pictures to show what I added.

Sterilize the jars.

Dr. Natasha recommends doing this in an oven. I had never done this but it seemed to work great! Place cold jars in a cold oven. Heat the oven to 250°F, then leave it at that temperature for 40 minutes to sterilize the jars. Pull the jars out of the oven one-by-one as you are ready to fill them so they stay hot. Use oven mitts!

Ladle the hot chutney into the jars.

A jar funnel is a lifesaver here!

I left just a little room for air, much less than my fermenting self wanted, but no jars exploded so it must be okay!

Wipe off any chutney on the rim of the jar. Then immediately seal the jar, tightening the lid.

Again, use an oven mitt—the jars are hot!  

Place the jar on the counter, some distance between them.

It's better to not move the jars until they are cool, so place them where you will not need to move them for many hours, overnight is better.

When cool, place the jars into the refrigerator.

This is not a fermented food, so it does require refrigeration.  

Serve with meats and fish. Good cold or warm.

It's delicious! I made this for our Thanksgiving feast in a few days, but tried it out with some chicken today. I enjoyed it thoroughly! I hope you enjoy it as well!

Onward!


Fruit Chutney

Author:
prep time: cook time: total time:

ingredients:

  • 2 lbs dried dates (without stones, cut in half)
  • 2 lbs cooking apples (about 7 cups of pieces)
  • 1 lb plumbs (I used packaged prunes)
  • 3 medium onions (about 3 cups, finely diced)
  • 3 peppers (about 2 cups, finely diced)
  • 2 cups raw apple cider vinegar
  • 1-2 tsp whole peppercorns (freshly crushed)
  • 1-2 tsp aromatic seeds (I used cumin and dill)
  • 1 tsp cayenne pepper
  • 1-2 tsp natural salt

instructions:

How to cook Fruit Chutney

  1. Cut dates in half (and remove stones (seeds) if needed)
  2. Slowly boil the dates in about 1 cup of water in a large pot until soft (about 10 minutes)
  3. If you live in Colorado like me, and don't use a lid (also like me), you may need to add extra water during this process.
  4. When the dates are soft, turn off heat and mash them with a potato masher—they don't have to be perfectly smooth, just mashed.
  5. While you were softening the dates, I hope you were furiously chopping! I completely underestimated the time it was going to take to chop everything I needed for this recipe. If you want the process to go smoother, I would recommend chopping everything at the beginning. Then as soon as the dates are soft you can add the rest, stir occasionally, and walk away!
  6. The directions from Dr. Natasha are:
  7. Add everything else to the dates and simmer 1-1/2 hours on very low heat, stirring occasionally.
  8. If you are like me and work better with a little note of panic, then by all means, chop furiously and add things as you chop. For all you step-by-steppers like me, below are pictures to show what I added.
  9. Sterilize the jars.
  10. Dr. Natasha recommends doing this in an oven. I had never done this but it seemed to work great! Place cold jars in a cold oven. Heat the oven to 250°F, then leave it at that temperature for 40 minutes to sterilize the jars. Pull the jars out of the oven one-by-one as you are ready to fill them so they stay hot. Use oven mitts!
  11. Ladle the hot chutney into the jars.
  12. A jar funnel is a lifesaver here!
  13. I left just a little room for air, much less than my fermenting self wanted, but no jars exploded so it must be okay!
  14. Wipe off any chutney on the rim of the jar. Then immediately seal the jar, tightening the lid.
  15. Again, use an oven mitt—the jars are hot!
  16. Place the jar on the counter, some distance between them.
  17. It's better to not move the jars until they are cool, so place them where you will not need to move them for many hours, overnight is better.
  18. When cool, place the jars into the refrigerator.
  19. This is not a fermented food, so it does require refrigeration.
  20. Serve with meats and fish. Good cold or warm.
Created using The Recipes Generator

Fermented Garlic: A Powerful Food for Health

Fermented Garlic: A Powerful Food for Health

Heard of fermented garlic? Wondered what the health benefits of garlic are? Then this post is for you!

The Silver Lining to the Omnivore's Dilemma

The Silver Lining to the Omnivore's Dilemma

In 2006, a book was published that sought to give the reader a better understanding of where their food comes from. The Omnivore’s Dilemma by Michael Pollan followed three major tracks, or sourcing, of food. The public reaction to this book was significant and varied, and it evoked discussion from vegetarians and meat-lovers alike.

Immunity: The Best Defense is a Good Offense {Part One}

Immunity: The Best Defense is a Good Offense {Part One}

Fall is coming! I hope you have been enjoying the cooler nights (and sometimes day) like I have! The onset of cooler weather also means that cold and flu season is coming!

Lovely Lard

Eating animal fat is important to our body's health. But eating enough fat can be challenging, especially when there is a dairy allergy. Lard is a great alternative to butter, and its taste is more mild than that of tallow.

You can buy lard at the store, but it is expensive and may be hydrogenated or of poor quality. Making your own lard is simple and easy, and can be done for a fraction of the price.

To make lard, you first start out with pig fat. This can be obtained from a butcher, or even trimmed off of fatty cuts of pork like the Boston butt. The process of turning fat into lard or tallow is called rendering. In this post I describe rendering lard, but the process for rendering tallow (which is fat from beef, bison, deer, lamb, or elk) is the same, although for tallow it may take a few more hours.  

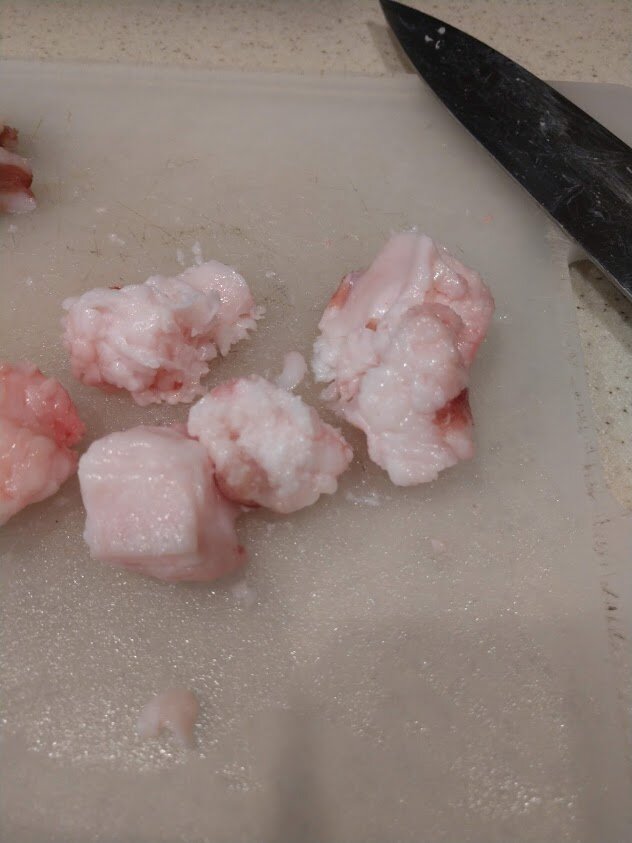
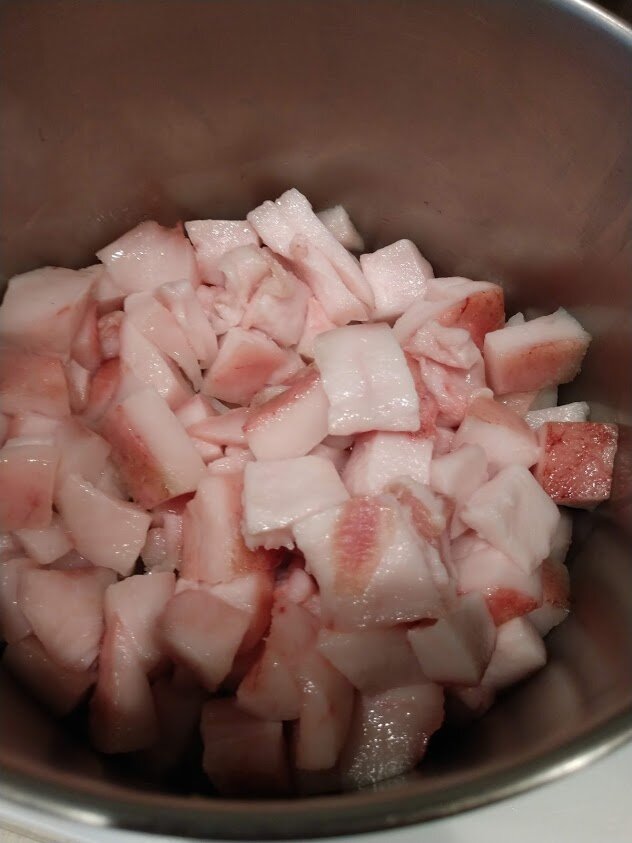
There are two kinds of pig fat. Leaf fat is from fat surrounding the internal organs. It is very mild in taste and used to be reserved for making pies and pastries. Body fat is from the layer of fat beneath the skin. This has a slightly stronger pork taste, and is better used in cooking meat and vegetables. Along with a different taste, there is a different look to the two types of fat. Body fat is in large pieces, and appears more dense and flat. Leaf fat is in smaller pieces, has a fluffier texture, and may contain membranes. The fat you get from a butcher may contain both types of fat. If that is the case, I recommend separating out the two types of fat and rendering them separately so you can use them for different purposes. However, there is no problem in mixing them and rendering them together.

Leaf fat

IMG_20190605_084127513.jpg

Body Fat

IMG_20190605_084134159.jpg

Watch the video below to learn how to make lard and then scroll down for the recipe and directions!

Making Lard:

First, cut up the pig fat into small 1-2 inch sized cubes. If using leaf fat, remove as much membrane as possible.

Put the fat cubes in a medium saucepan on low heat. You may use a crockpot, but it must have a very low setting or the fat will burn. Stir occasionally and watch closely. Don't let the lard smoke!

With time, the solid pieces of fat will get smaller, and the liquid will increase.

After a few hours, when the lard is liquefied, set up your strainer and cloth. A metal strainer is best because the lard is hot! For extra strained lard which will last even longer you can additionally strain through a cloth. You can use an old napkin or other cloth, or several layers of cheesecloth. I have a dedicated cloth I use just for straining lard because you can never really wash out all the grease.

Pour the liquid into the strainer. The liquid will go into the jar and the cracklings will stay in the cloth or strainer.

Squeeze the rest of the liquid out of the cracklings.

Once cracklings are separated from the liquid lard, salt and fry them. You can eat them like bacon bits, or just by themselves.

Allow the jar of lard to cool on the counter.

When the lard is cool you can move it to the fridge, or leave it on the counter.

If you are careful not to contaminate the jar, the lard will last for several months, even left out at room temperature. Use the lard in your cooking— it is a wonderful thing to fry up vegetables or meat and add fat to your diet. Bon appétit!

Onward!


How to Make Lard

Author:
prep time: cook time: total time:

instructions:

How to cook How to Make Lard

  1. First, cut up the pig fat into small 1-2 inch sized cubes. If using leaf fat, remove as much membrane as possible.
  2. Put the fat cubes in a medium saucepan on low heat. You may use a crockpot, but it must have a very low setting or the fat will burn. Stir occasionally and watch closely. Don't let the lard smoke!
  3. With time, the solid pieces of fat will get smaller, and the liquid will increase.
  4. After a few hours, when the lard is liquified, set up your strainer and cloth.
  5. Below you see pictured a jar, jar funnel, and metal strainer. Metal is best because the lard is hot! To finish it off, place a cloth. You can use an old napkin or other cloth, or several layers of cheesecloth.
  6. Pour the liquid into the strainer. The liquid will go into the jar and the cracklings will stay in the cloth.
  7. Squeeze the rest of the liquid out of the cracklings.
  8. Cracklings separated from the liquid lard. Salt and fry these. You can eat them like bacon bits, or just plain.
  9. Allow the jar of lard to cool on the counter.
  10. When the lard is cool you can move it to the fridge, or leave it on the counter.
  11. If you are careful not to contaminate the jar, the lard will last for several months, even left out at room temperature. Use the lard in your cooking— it is a wonderful thing to fry up vegetables or meat and add fat to your diet. Bon appétit!
Created using The Recipes Generator