fruit

How to Make Apple Chips - Dehydrated Apples

I love apples! I think they’re one of the easiest things to preserve. If you are trying to eat in season and preserve your own food, apples are a great way to start! (Check out our other recipes using apples!)

My dad is the best at stopping to ask people if they are going to use their apples. I have so many memories of spending hours with him in the evening drying apples and making applesauce. Every evening when he brings them home, he will spend hours making applesauce and getting them in a dehydrator.

For a long time my parents gave up making dried apples because my siblings and I would open up the dehydrator before the apples were ready and eat them.

You can use any variety of apples to do these. Some apples will end up sweeter than others but when you dry them, it doesn’t really matter much as we don’t generally eat dried apples for sweetness, only for crunch. I like to use firm apples only for dried apples. If you have any apples that are older or softer, you can turn them into apple sauce! 

I have an antique apple corer & slicer that I love to use and that makes this process so much faster. You can also manually peel, core or slice them using a knife or a mandolin but that takes longer.

Any dehydrator will do for this recipe! I’ve been using this one recently but have to keep a close eye on the temperature. You can also make them in the oven but you must keep a close eye on them. Use the lowest temperature setting. It takes about 2-4 hours depending on how crunchy you want them. Err on the side of caution when checking dryness levels. They will continue to dry when you take them out of the oven as they cool so if you dry them too much in the oven, you’ll end up with an apple that is too dry. 

When I process large amounts of apples, I always think about making apple cider vinegar! Save your peels and cores (but not any rotting or bruised parts) to make your own apple cider vinegar.

These dried apples should keep for a few months if you manage proper moisture control on them but we always ate them much faster!

P.s> Raw apples are stage 6 on the GAPS Diet. Dried fruit counts as raw fruit.

Ingredients for Dried Apples:

  • Apples: Peeled, Cored & Sliced

  • Lemons

  • Filtered Water

  • Essential Oils (Optional)

  • Cinnamon (Optional)

  • Dehydrator


Directions for Dried Apples:

IMG_0369.jpg

Fill a bowl with filtered water and lemon juice. You can also add some drops of essential oils if you’d like. On Guard is pretty delicious! Lemon essential oil will not work to keep the apples from turning brown; it is the acid in the lemon that does that.

IMG_0371.jpg

Rinse your apples & start to peel and core them. As they come off the machine, add them to the bowl with lemon juice and water. 

Set the peels and cores aside to use to make your own Apple Cider Vinegar. 

IMG_0400.jpg

Once you have the amount of apples that you want to dry, lay them out in single layers on dehydrator racks or on a pan. You can top them with cinnamon if you’d like.

Allow the apples to dry in a dehydrator for 5 to 6 hours.

Enjoy!

IMG_0776.jpg

HowToDryApplesDIYAppleChips.png
Author: The Be Well Clinic

Ingredients

  • Apples: Peeled, Cored & Sliced
  • Lemons
  • Filtered Water
  • Essential Oils (Optional)
  • Cinnamon (Optional)
  • Dehydrator

Instructions

  1. Fill a bowl with filtered water and lemon juice. You can also add some drops of essential oils if you’d like. On Guard is pretty delicious! Lemon essential oil will not work to keep the apples from turning brown; it is the acid in the lemon that does that.
  2. Rinse your apples & start to peel and core them. As they come off the machine, add them to the bowl with lemon juice and water.
  3. Set the peels and cores aside to use to make your own Apple Cider Vinegar.
  4. Once you have the amount of apples that you want to dry, lay them out in single layers on dehydrator racks or on a pan. You can top them with cinnamon if you’d like.
  5. Allow the apples to dry in a dehydrator for 5 hours.

Notes:


Created using The Recipes Generator

Fruit Chutney for your Thanksgiving

Happy Thanksgiving!

One of the best things about November is the focus on being grateful and thankful. Everywhere you look there are posts and tweets showing gratitude. And we sure have a lot to be thankful for! Some things are so obvious we often forget to be thankful for. These are things like safe drinking water, warm houses, smart phones and electricity are so everyday for us that we forget how much we have.

Sometime this week, I encourage you to write a list of all the things you have to be thankful for. Don't feel silly including things like water, or your favorite pair of jeans. See how long you can make the list! Even if you don't feel like being thankful, I encourage you to do this exercise—gratitude changes our perception and experience of life, even if nothing is circumstantially different.

This is not to say that you don't have hard things in your life, or that you should pretend they aren't difficult. They are. Hard things are part of life and are very, very real. Remembering that there are good things in your life as well will help YOU through difficult situations.  

As you know, most of my posts (so far, at least) aren't recipes. But it's Thanksgiving! The start of holidays and delicious, rich, made-with-love food. Well this recipe is definitely delicious, rich and made-with-love!

I took the recipe out of Gut and Psychology Syndrome by Dr. Natasha Cambell-McBride. If you are following the GAPS diet this is legal on stage 5 or 6, when you are tolerating dried spices and peppercorns.

This recipe is very simple—chop and combine ingredients, simmer for a while, then store in jars. It would be a great recipe to make in a crockpot... you really could fix it and forget it! But simple doesn't mean plain. It's delicious and adds flavor to any meat you are eating. And I'm told, quite excellent with turkey!  

*This dairy-free, gluten-free, nut-free, sugar-free recipe would be great for gifts as well—ladle into pint jars and add a bow!

Fruit Chutney

Makes 3-4 quarts

Ingredients

  • 2 lbs dried dates (without stones, cut in half)

  • 2 lbs cooking apples (about 7 cups of pieces)

  • 1 lb plumbs (I used packaged prunes)

  • 3 medium onions (about 3 cups, finely diced)

  • 3 peppers (about 2 cups, finely diced)

  • 2 cups raw apple cider vinegar

  • 1-2 tsp whole peppercorns (freshly crushed)

  • 1-2 tsp aromatic seeds (I used cumin and dill)

  • 1 tsp cayenne pepper

  • 1-2 tsp natural salt

Directions:

Cut dates in half (and remove stones (seeds) if needed)

Slowly boil the dates in about 1 cup of water in a large pot until soft (about 10 minutes)

If you live in Colorado like me, and don't use a lid (also like me), you may need to add extra water during this process.

When the dates are soft, turn off heat and mash them with a potato masher—they don't have to be perfectly smooth, just mashed.  

While you were softening the dates, I hope you were furiously chopping! I completely underestimated the time it was going to take to chop everything I needed for this recipe. If you want the process to go smoother, I would recommend chopping everything at the beginning. Then as soon as the dates are soft you can add the rest, stir occasionally, and walk away!

The directions from Dr. Natasha are:

Add everything else to the dates and simmer 1-1/2 hours on very low heat, stirring occasionally.

If you are like me and work better with a little note of panic, then by all means, chop furiously and add things as you chop. For all you step-by-steppers like me, below are pictures to show what I added.

Sterilize the jars.

Dr. Natasha recommends doing this in an oven. I had never done this but it seemed to work great! Place cold jars in a cold oven. Heat the oven to 250°F, then leave it at that temperature for 40 minutes to sterilize the jars. Pull the jars out of the oven one-by-one as you are ready to fill them so they stay hot. Use oven mitts!

Ladle the hot chutney into the jars.

A jar funnel is a lifesaver here!

I left just a little room for air, much less than my fermenting self wanted, but no jars exploded so it must be okay!

Wipe off any chutney on the rim of the jar. Then immediately seal the jar, tightening the lid.

Again, use an oven mitt—the jars are hot!  

Place the jar on the counter, some distance between them.

It's better to not move the jars until they are cool, so place them where you will not need to move them for many hours, overnight is better.

When cool, place the jars into the refrigerator.

This is not a fermented food, so it does require refrigeration.  

Serve with meats and fish. Good cold or warm.

It's delicious! I made this for our Thanksgiving feast in a few days, but tried it out with some chicken today. I enjoyed it thoroughly! I hope you enjoy it as well!

Onward!


Fruit Chutney

Author:
prep time: cook time: total time:

ingredients:

  • 2 lbs dried dates (without stones, cut in half)
  • 2 lbs cooking apples (about 7 cups of pieces)
  • 1 lb plumbs (I used packaged prunes)
  • 3 medium onions (about 3 cups, finely diced)
  • 3 peppers (about 2 cups, finely diced)
  • 2 cups raw apple cider vinegar
  • 1-2 tsp whole peppercorns (freshly crushed)
  • 1-2 tsp aromatic seeds (I used cumin and dill)
  • 1 tsp cayenne pepper
  • 1-2 tsp natural salt

instructions:

How to cook Fruit Chutney

  1. Cut dates in half (and remove stones (seeds) if needed)
  2. Slowly boil the dates in about 1 cup of water in a large pot until soft (about 10 minutes)
  3. If you live in Colorado like me, and don't use a lid (also like me), you may need to add extra water during this process.
  4. When the dates are soft, turn off heat and mash them with a potato masher—they don't have to be perfectly smooth, just mashed.
  5. While you were softening the dates, I hope you were furiously chopping! I completely underestimated the time it was going to take to chop everything I needed for this recipe. If you want the process to go smoother, I would recommend chopping everything at the beginning. Then as soon as the dates are soft you can add the rest, stir occasionally, and walk away!
  6. The directions from Dr. Natasha are:
  7. Add everything else to the dates and simmer 1-1/2 hours on very low heat, stirring occasionally.
  8. If you are like me and work better with a little note of panic, then by all means, chop furiously and add things as you chop. For all you step-by-steppers like me, below are pictures to show what I added.
  9. Sterilize the jars.
  10. Dr. Natasha recommends doing this in an oven. I had never done this but it seemed to work great! Place cold jars in a cold oven. Heat the oven to 250°F, then leave it at that temperature for 40 minutes to sterilize the jars. Pull the jars out of the oven one-by-one as you are ready to fill them so they stay hot. Use oven mitts!
  11. Ladle the hot chutney into the jars.
  12. A jar funnel is a lifesaver here!
  13. I left just a little room for air, much less than my fermenting self wanted, but no jars exploded so it must be okay!
  14. Wipe off any chutney on the rim of the jar. Then immediately seal the jar, tightening the lid.
  15. Again, use an oven mitt—the jars are hot!
  16. Place the jar on the counter, some distance between them.
  17. It's better to not move the jars until they are cool, so place them where you will not need to move them for many hours, overnight is better.
  18. When cool, place the jars into the refrigerator.
  19. This is not a fermented food, so it does require refrigeration.
  20. Serve with meats and fish. Good cold or warm.
Created using The Recipes Generator

Garden-fresh Vegetables Without the Garden

Summer is the time that vegetables shine! Many people are pulling beautiful zucchini, tomatoes, beans, peppers and greens out of their gardens. Fresh vegetables are in season, and you may find yourself desiring them more than usual. Go with it! Until the recent days of automobiles, airplanes and refrigeration, our bodies were used to getting fresh vegetables only during the short months of the growing season. Thousands of years of eating does leave an impression, and a healthy body will naturally crave more fresh fruits and vegetables in the summertime.

Side note: I have observed that people who are in a focused time of healing don't have this craving for fresh produce, and people who are needing to focus on detox can have fresh vegetable cravings year-round. That's okay, your body knows what it needs! Listen to your body's innate intelligence!

But depending on your situation, you may not have a garden, which makes fresh vegetables a little harder to come by. This is the case for me again this year. So today I thought I would share some ways to get fresh vegetables.

#1 Find a friend who gardens

Now, I am not telling you to mooch off a friend, leaving them to do all the hardwork. But many gardeners find themselves overflowing with vegetables right about now. Some of them may be happy just to see their hard work end up in a grateful stomach, while others would appreciate some help harvesting, preserving, or weeding in exchange for some produce. This is the best way to get vegetables, in my opinion. You will get to spend time in the wonderful sun, get to know your friend better, and maybe even learn a little about gardening. And nothing beats a fresh, hand-picked vegetable served up for dinner!

#2 Join a CSA

CSA stands for community supported agriculture. In a "working share," individuals come together under the leadership of the organizer and spend a set amount of time working around in a garden or farm for a share of the produce. There is usually a monetary investment as well. Most CSAs accept members only around the beginning of the year, so look for one to join for the next growing season. Some CSAs also offer a "non-working share," which allows an individual to pay only, and is a great option for those with jobs or situations that don't allow them the flexibility to work in the garden.

#3 Visit a local farmer's market

This one is an option for most people, but it can be a little tricky. Just because it's at a farmers market does not mean it was grown in a way that is different than the commercial food. That being said, there is going to be some benefit from eating local, naturally-ripened food, so don't rule it out if it's all you can get. The best way to know what you are buying is to talk to the farmers. Ask them how where they are located, and about their farm or garden. See what types of things they use for pesticides (organic food is often grown with organic pesticides), and what other farming/gardening practices they use. While it is not a guarantee, you may be able to find amazing and fresh produce, and at the same time provide support to that small local farm.

#4 Buy local produce at your grocery store

Here is Colorado, at the peak of the season, stores carry many things that are "Colorado Proud," meaning they are grown in Colorado. Not all stores label where their produce comes from, so ask your grocer which items are grown in your area, state, or in the United States. Made in the USA does not automatically make that food better, but knowledge is always power!

So there you go! Four ways to get garden-fresh produce without a garden. How about you? Where do you get your garden-fresh produce?

How to Shop Like Betty: Tips on Nutrient-Dense Shopping

In the last post we discussed the differences in food quality, and explored the intricate way God designed our senses to be able to taste, smell, and see the difference. But, as amazing as all this is, we hit a reality check.

We can't all grow our own garden vegetables, have our seafood overnighted, or raise a cow in the backyard. It can be a struggle to even afford purchasing these things.

And that's okay. Most of us are in the same boat.

While I still encourage people to think differently about food budget—considering it instead as part of your health-care budget, I understand that at some point, cash-flow is a limiting factor. You can only do the best you can, prioritizing the things that seem important to your body and family, and go from there.

I want to share a few tips with you. Ones that can help you put more nutrient-dense food on the table. Today let's talk about how to shop.

canstockphoto14919872.jpg

Nutrient-Dense Shopping:

  • Shop sales, coupon, or go to wholesale stores (like Costco), and buy in bulk when the food is a good price.

I actually specifically recommend Costco because of their conscientious sourcing, and their larger selection of organic items. This automatically leads to better quality food options. Buying in bulk, and on sale are also great ways to get things like coconut oil and sugar (to feed your SCOBY, of course), as well as non-grocery items like Epsom salt, soaps and shampoos.

  • Find out when your favorite organic-carrying grocery store marks things down for quick-sale.

Stores go through their produce, dairy and meat products on a regular basis in order to catch and mark-down food that is about to expire. Usually this is scheduled, and if you know the time and day you can show up soon after (or during) this mark-down period and get incredible deals! You can also check to see if there is a local discount grocery store, that takes almost out-of-date items and sells them at a large discount.

Produce: The small health food stores that I shop at usually put the older assorted produce in $2 bags. Often times it comes out to roughly a 90% discount! You have to be creative with using it, and be willing to give away food you may not be able to eat (like maybe potatoes, for example), but I often walk out of these stores with $15-30 worth of organic produce that cost me $4-6.

Meat: Similarly, stores mark down meat when it is nearing it's expiration date. Find out what days they go through the organic produce, and shop at that time. Again, I have found even better deals in smaller stores, where they have more to loose by throwing away food. And don't be afraid to buy frozen meat! Very few nutrients are lost when the meat is frozen. If it comes down to buying fresh commercial meat, or frozen natural or organic meat, the latter will definitely give you more nutrition for your buck.

canstockphoto41638296.jpg
  • Know when to spend your money: when quality really matters, or when it varies tremendously.

There are some foods that are more difficult to find on sale, and ones that I recommend paying more for. Many of these items can be purchased much "cheaper," but the quality ranges from very poor to very good, and you get what you pay for. Dairy products in particular are very manipulated by manufacturers, and should be bought with that in consideration.

Dairy: If you can get raw milk, then do it! Otherwise, I do not recommend consuming pasteurized milk unless it has been cultured, like in yogurt or cheese. Aside from milk, most dairy products tend to keep longer, and may be more difficult to find on sale. Organic is important here, because commercial cows are given many antibiotics and hormones that will come through the milk and affect you. Don't "buy cheap" in these areas, especially butter, as it may be a main source of cholesterol (fat) for you. Cream can be purchased at the store, and although it has been pasteurized (some more than others), it is more stable than milk, and is less affected by pasteurization. Cheese, yogurt and sour cream have all been cultured, and those active cultures are working hard to counteract the damaging effects of pasteurization.

Eggs: Deciding which eggs to buy will depend on your area. If you can't purchase them from a local farm (real free-range are better than store-bought organic), then choose your egg based on the color of the yolk, and the taste. The yolk should be bright yellow or orange, meaning the chickens have been out in the sun and may even be able to eat bugs and fresh greens. Never buy eggs from vegetarian-fed hens. Believe me, hens are not vegetarians! Eggs are another large source of cholesterol, and it's best to buy the best quality of eggs you can find (these are not always the most expensive).

canstockphoto13062197.jpg
  • Look for bulk ordering companies or clubs.

You don't have to join a CSA to get farm-fresh produce. There are companies like Azure Standard, Miller's Organic Farm, and others that send you meat and produce from a farm (maybe in another state) and deliver it to you. This is a great way to buy things that are more difficult to get, like lard, nuts or dried fruit. This can also be a good way to get non-grocery items.

I hope these tips help you make more nutrient-dense food purchases. What other ways have you found to make nutrient-dense food affordable? Share your knowledge with the community in the comments below. Happy shopping!

Onward!

GAPS Milkshake

Our recipe this week is a simple, but powerful one! It is called the GAPS™ milkshake, and it packs a powerful punch! This delicious, satisfying and helpful beverage is a wonderful way to daily consume your freshly-pressed juices, and can even be a meal.

The GAPS™ milkshake is mix of juice, protein, and fat. Because it is easily digested, usually in about 20 minutes, it can be eaten when you don't have much time to sit and digest. But because it contains fat and protein, as well as sugar, it can sustain you for a while, often a few hours.

Let's get down to making it! You need a few simple ingredients.

  1. Freshly pressed juices (I like carrots, but you can use any juice mixture)

  2. Sour cream (creme fraische), coconut oil, or another fat

  3. Raw egg (whole or just the yoke)

  4. Raw honey (optional, and only a little!)

IMG_7397.jpg

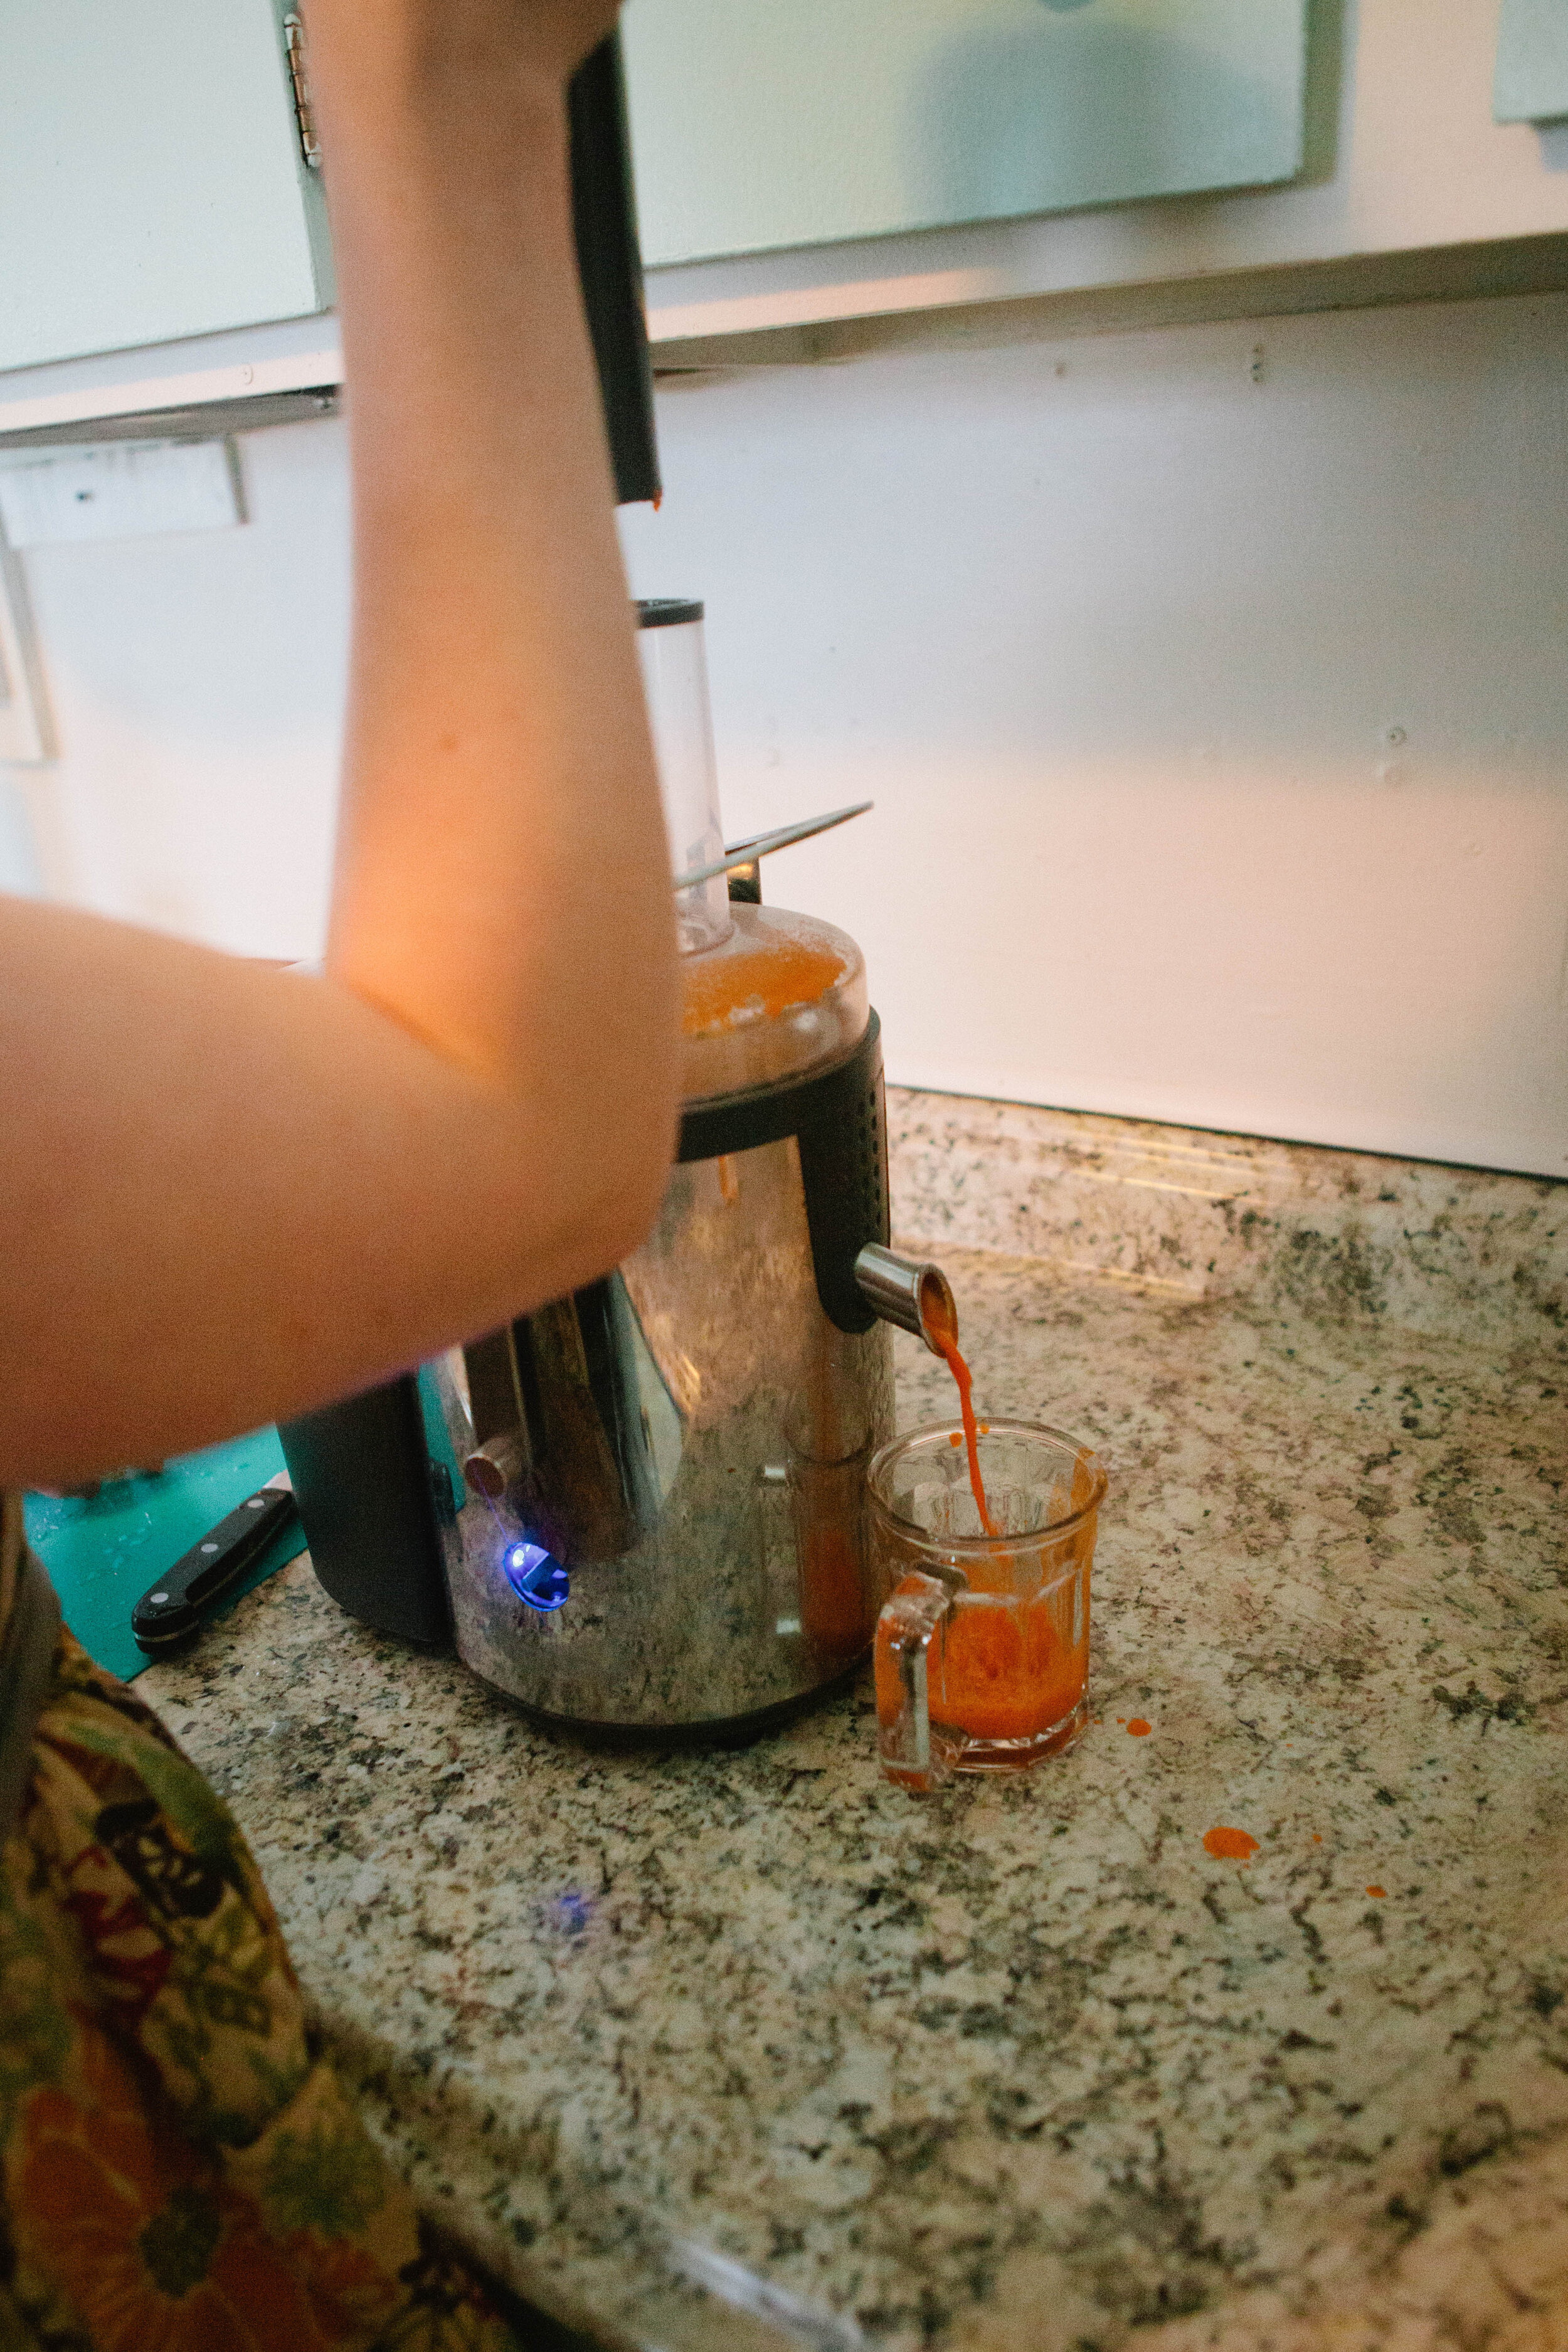
Juice the carrot (and/or other vegetables and fruits). I use organic vegetables so I just rinse them off (sometimes). You can see my (not) high-end juicer in the picture! But it works! Don't feel like you have to spend hundreds of dollars to juice (this one was about $40). It is a centrifuge juicer, and I try to consume the juices within 15 minutes to get the most enzyme activity, but again, it works! Successful GAPS is not about perfection, it is about action!

IMG_7433.jpg

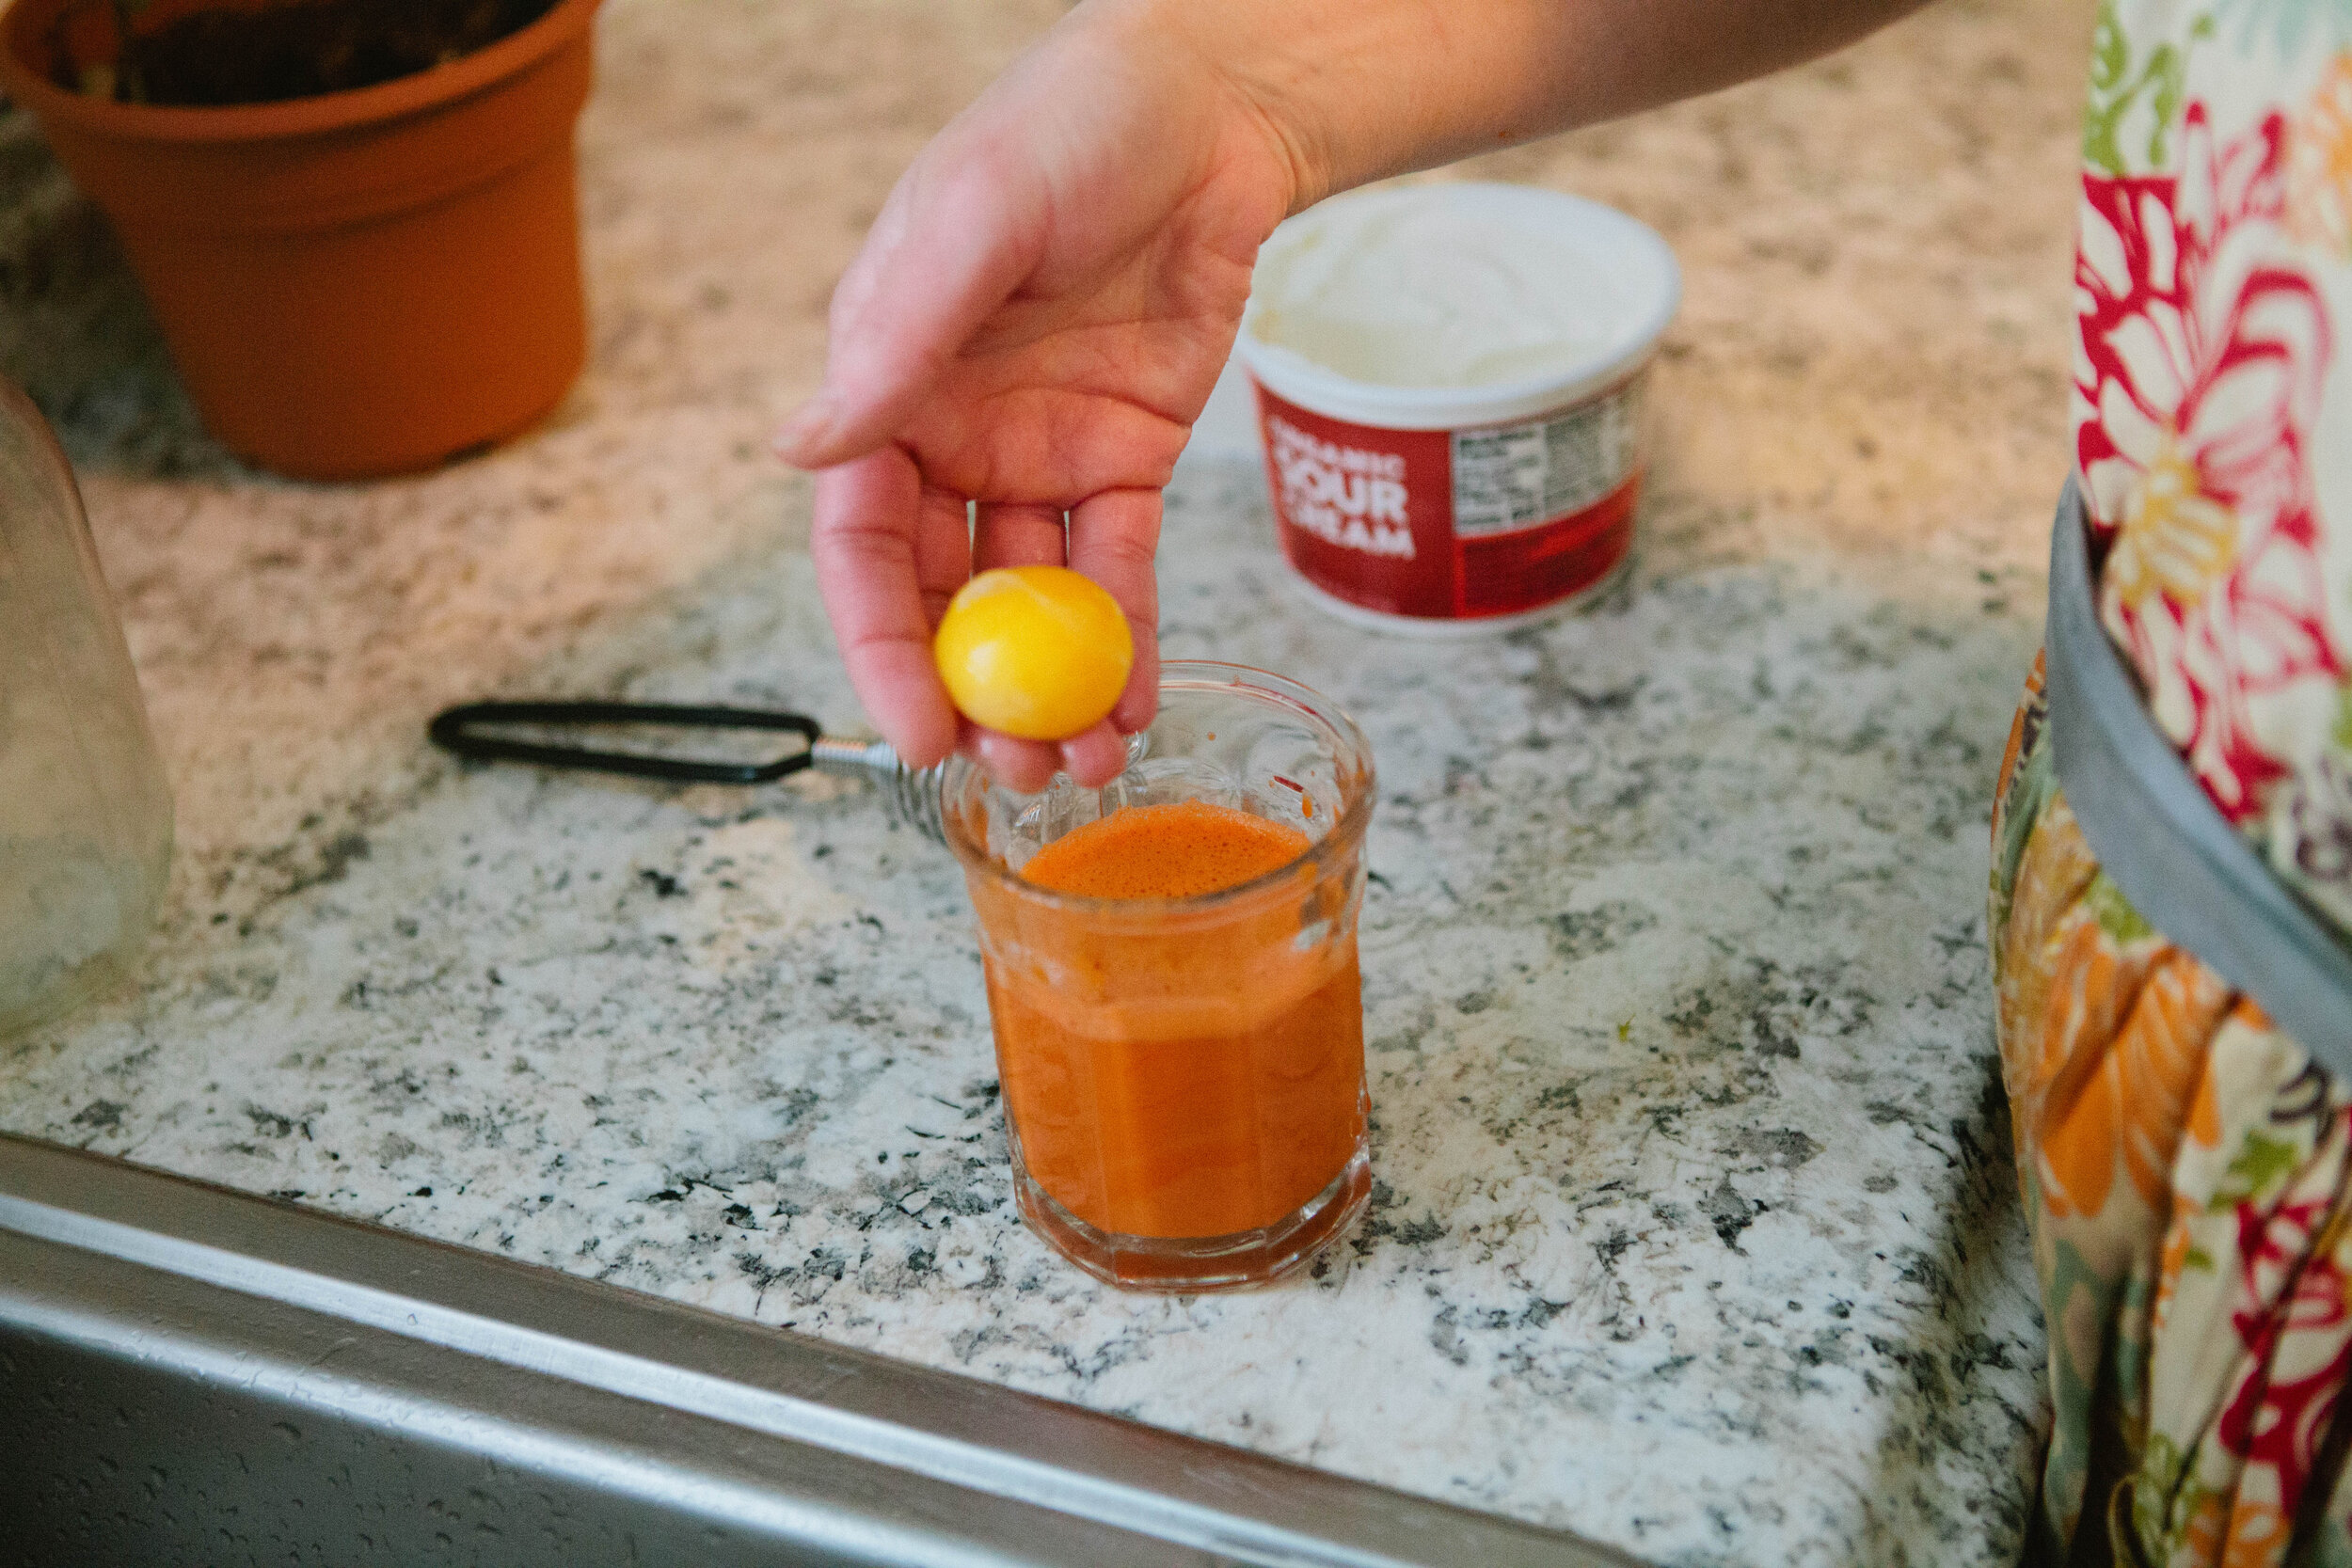
Once you have your juice in a glass, you are ready to add your other ingredients. Add 1-2 raw egg yolks or whole raw eggs. If you do add the white, I recommend using a spring whisk or a blender to break up the white--that is a hard texture to get down! With raw eggs, it is also important to know the source of your eggs (were the chickens healthy) and try not to touch the shell with the egg. If there happens to be any salmonella present, it is likely still on the outside of the egg, not the inside. Of course, there is no guarantee, especially if the eggs are washed (this breaks down the protective layer around the egg), so consume at your own risk! But I have yet to get sick, even using store bought eggs sometimes.

IMG_7441.jpg

Add the sour cream (a good-sized dollop). The sour cream is there primarily to slow the absorption of sugar from the juice—add to taste. You can also add coconut oil if you are not tolerating dairy (technically this makes it a GAPS Smoothie) Stir, whisk or blend together.

You can add a little honey if you need to. It is better to add some fruit to your juice ingredients instead of honey, but that isn't always an option, especially on early stages. I have found that the egg whites are a little bitter, and when I add a whole egg instead of just the yolk, I often need a little honey to help it go down. That's it! All that's left is to enjoy it!

As I said, this is a great "meal" for those on-the-go mornings. Especially if you are hungry early in the morning, this is a great thing to drink, as it is not a burden to the digestive system. The juices support your body's cleansing processes, which are often happening from 4am-10am every day. You could also add beet kvass to this beverage as an extra liver cleanser. It can overwhelm the flavor, so I prefer to drink mine separately. Experiment with your preferences, and with the recipe! Let us know how you like it best!

Onward!

GAPS Milkshake

GAPSmilkshake-150x150.jpg
  • Freshly Pressed Juices

  • Sour cream, creme faiche, coconut oil, or another fat

  • Raw Egg ((whole or just the yoke))

  • Raw Honey ((optional and only a little))

  1. Juice the carrot (and/or other vegetables and fruits).

  2. Add 1-2 raw egg yolks or whole raw eggs. If you do add the white, I recommend using a spring whisk or a blender to break up the white–that is a hard texture to get down!

  3. Add the sour cream to taste. The sour cream is there primarily to slow the absorption of sugar from the juice.

  4. Stir, whisk or blend together.

  5. Add a little honey if you need to

With raw eggs, it is also important to know the source of your eggs (were the chickens healthy) and try not to touch the shell with the egg. If there happens to be any salmonella present, it is likely still on the outside of the egg, not the inside. Of course, there is no guarantee, especially if the eggs are washed (this breaks down the protective layer around the egg), so consume at your own risk! 

I have found that the egg whites are a little bitter, and when I add a whole egg instead of just the yolk, I often need a little honey to help it go down.


HowtoMaketheGAPSMilkshakeJuiceCleanseGAPSDietRecipe.png

GAPS Milkshake

Author:
prep time: cook time: total time:

ingredients:

  • Freshly Pressed Juices
  • Sour cream, creme faiche, coconut oil, or another fat
  • Raw Egg ((whole or just the yoke))
  • Raw Honey ((optional and only a little))

instructions:

How to cook GAPS Milkshake

  1. Juice the carrot (and/or other vegetables and fruits).
  2. Add 1-2 raw egg yolks or whole raw eggs. If you do add the white, I recommend using a spring whisk or a blender to break up the white–that is a hard texture to get down!
  3. Add the sour cream to taste. The sour cream is there primarily to slow the absorption of sugar from the juice.
  4. Stir, whisk or blend together.
  5. Add a little honey if you need to

NOTES:

With raw eggs, it is also important to know the source of your eggs (were the chickens healthy) and try not to touch the shell with the egg. If there happens to be any salmonella present, it is likely still on the outside of the egg, not the inside. Of course, there is no guarantee, especially if the eggs are washed (this breaks down the protective layer around the egg), so consume at your own risk! I have found that the egg whites are a little bitter, and when I add a whole egg instead of just the yolk, I often need a little honey to help it go down.
Created using The Recipes Generator

Vintage Food Hack: Fermenting (Part 1)

Ever kept a book around forever unopened? Then you finally crack it open and realize you have been missing out?I recently had this experience with The Art of Fermentation by Katz. I loved the idea of this book, (and of having time to read all its 438 pages) but I just never did. In fact, I didn’t even open it, not once!

That is, until I had to write an article on lacto-fermentation. I opened “the book” to see if it would be useful and credible as a reference. Wow, was it ever! If I didn’t have a deadline, I would have sat down and read the entire thing cover to cover then and there!

Side note: In the category of things you should know about me. I love to read, and I am a procrastinate-until-the-last-minute-but-somehow-get-it-done kind of person. Hence, my situation. Okay, back to the point.

I wrote a pretty good article, if I do say so myself. It was informative and official and all that jazz (and you can read it here). But what I want to share with you, my readers, is the joy and excitement I get when I learn about and think about fermenting!

Why, you ask?

Well let me tell you...

  • I LOVE learning to do things that our ancestors knew how to do. I am an Old Soul, and I try to make the most of every opportunity I have to do things the old-fashioned way.

  • I HATE throwing food away. It comes from growing up in a large family, I suppose. Or perhaps my Hungarian ancestry. But fermenting allow me to preserve food longer.

  • I LOVE using fermenting as a hack! I can get more out of my vegetables by fermenting them because it increases the nutritional availability of what is present in the vegetable naturally, without adding anything else!

  • I CAN buy vegetables in season, and locally!

  • I GET probiotic benefit from the vegetables, and variety matters.

  • I KNOW what I am eating in my sauerkraut, banana peppers, etc because I added the ingredients.

  • I SAVE money by making my own ferments.

  • I GET to know and connect with what I am consuming, which is an important part of thoughtful eating.

Does that jazz you up at all?

Can’t wait to get started, you say?

Keep calm and hold on.

Soon we will talk a little more about what fermenting is and how to get started.

Stay tuned!

And Onward!