gaps basics

A Guide to Commercial Egg Quality

Eggs are one of the best nutrient dense foods but not all eggs are created equal! Just like choosing good meat and vegetables, it’s important to choose good, quality eggs. This topic is not discussed very often, so in this post I’d like to lay out for you some of the main character qualities to look for in a good nourishing egg.

Just like with any food, it’s best to rely on your five senses to determine a particular food’s quality. Some of this can only be done with experimentation, so I encourage you to purchase a variety of brands or eggs from local farmers and make your own observations on freshness, quality, and nutrient density.

I love that I was able to see first hand what a best quality egg looks like when I had my own chickens. They were fed small grain, organic, non-GMO, corn free soy free feed, they had constant access to outside during the day, and ran over half an acre of pasture. I understand not everyone has access to a farmer, and not everyone can have their own laying hens,so this blog post is to help you determine which eggs that are available to you are the best quality.


First, let’s talk about some confusing terms. There’s not a lot of regulation on these terms, and marketing experts often use them to promote their product, but it does not necessarily mean their eggs are of higher quality.

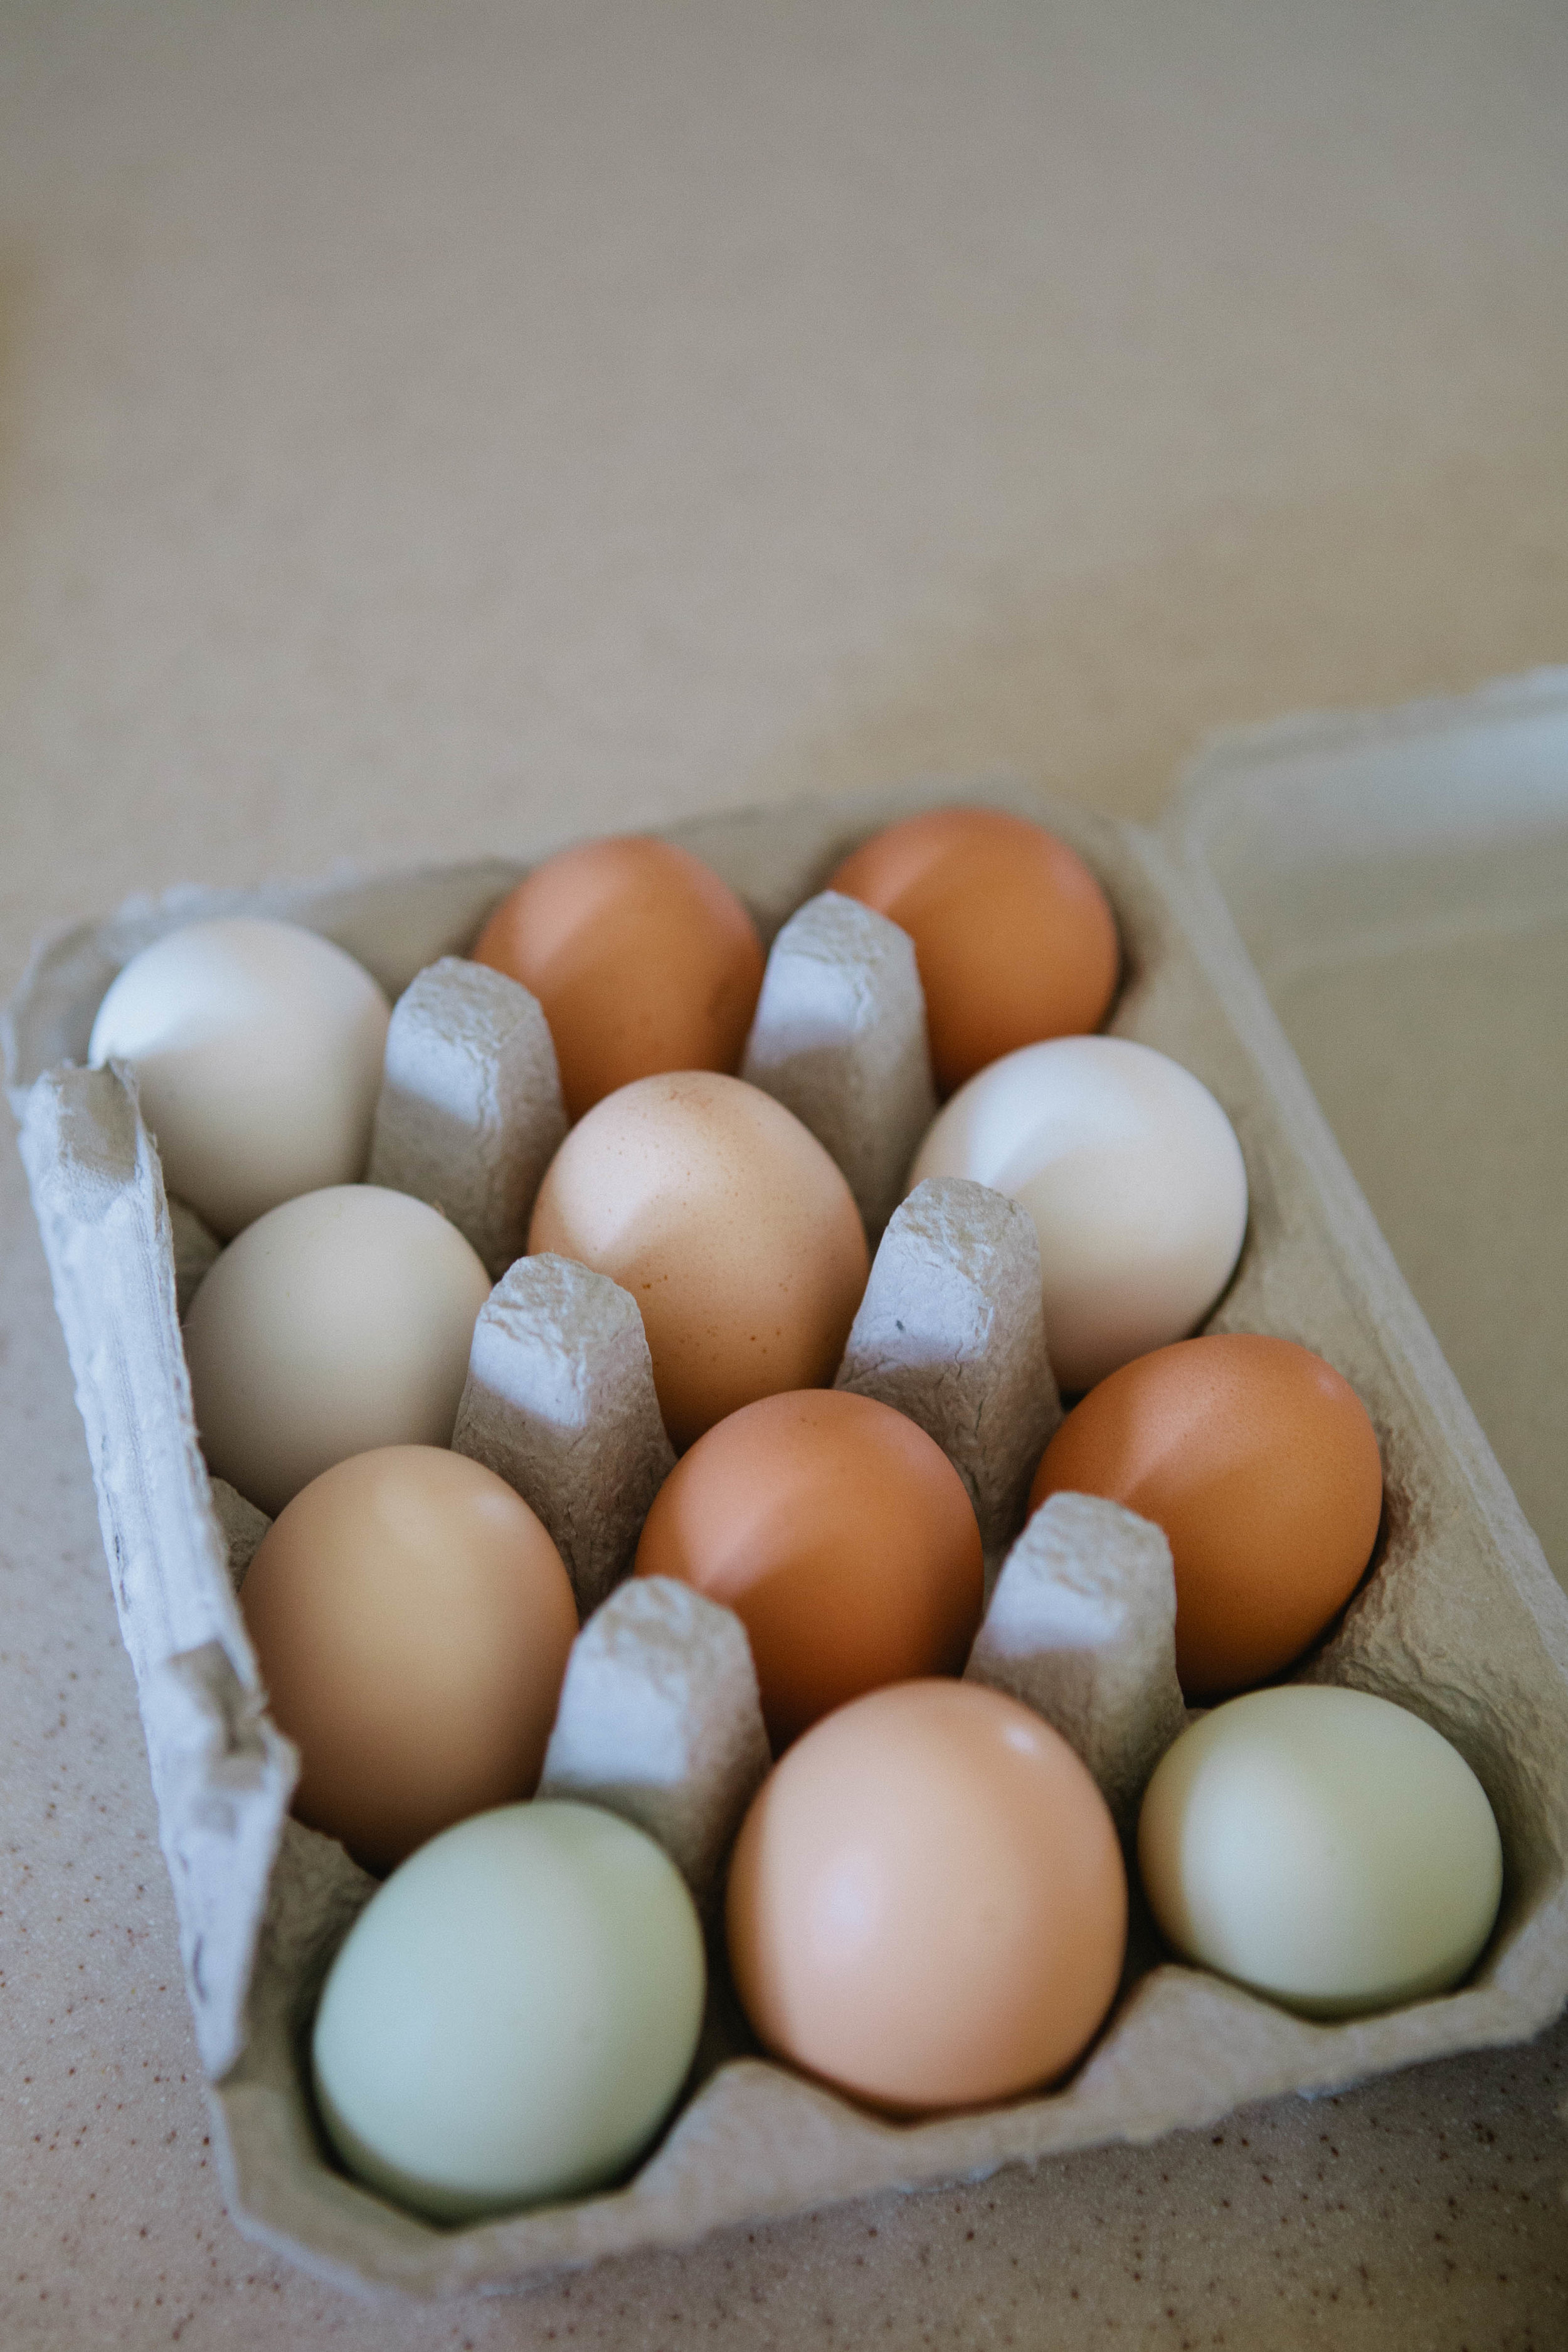
Color of Egg: The color of an egg is determined by the breed of chicken that lays it. No chickens are inherently better than others, so the color of your egg alone doesn’t matter in terms of nutritional content or quality.

Cage Free: This term only indicates that the chickens are not confined in a small, individual cage for 24 hours a day. Cage free does not mean the chickens have access to outside and they may be confined in crowded spaces.

Organic: This refers to the food the chicken is eating. Organic food is better than conventional food because it decreases the number of nasty pesticides and GMOs, but these chickens’ diets are likely heavy in soy and corn or anything else as long as it’s labeled organic.

Vegetarian Fed: This is not a natural diet for a chicken! A natural chicken diet consists of bugs, roadkill, grasses, grains and seeds. They are omnivores! If you limit a chicken to a vegetarian diet, you are messing with nature and your egg will not contain the full amount of nutrition it should.

Free Range: Free range indicates that chickens have to “have access to the outdoors” but it doesn’t specify the amount of space or the amount of time the chickens have to be outside. There may not even be enough room outside for each chicken so some chickens may never be outside.

Pasture Raised: Pasture Raised indicates chickens who are given enough space for all of them to be outside and are moved to fresh pasture regularly, giving them access to new bugs and grass. This is the best choice for any egg you purchase. These chickens have the best opportunity to eat the appropriate chicken diet, get sunshine, and be happy!

Omega-3: Omega-3’s are important in our diet, but an egg from a chicken fed a natural diet will have plenty of Omega-3 in it. If a company is advertising Omega-3 eggs, it is very likely they are giving supplements to ensure a certain level of Omega-3’s in their eggs. Depending on the quality of supplement, this may or may not be good for you, and again if the chicken is given access to sun and an omnivore diet, an additional supplement is unnecessary. On that note, there are different foods and supplements that can be fed to chickens to make their yolks more orange or darker yellow. This does not, of course, equal the same quality of nutrition that a pastured chicken can put in their egg.

Certified Humane: This is a label given to egg raisers who meet the requirements of the Humane Farm Animal Care. In essence, it means the birds are treated well, not starved or debeaked, but does not necessarily mean they are given access to outdoors and beak trimming is also allowed.

Grades: The grades AA, A, & B on the side of the package don’t just refer to size. They refers to the quality and freshness of the egg. “AA” is the best, according to the USDA, but we will teach you how to grade your own eggs!

New advertising measures are used constantly! If you see something new advertised on a carton of eggs, it’s a great idea to look up what qualifications, if any, are necessary to add that label to their carton.

Now that we understand some of the marketing definitions, you can purchase the best quality eggs and do some observations to determine the freshness and quality of an individual egg.

First, look at the thickness and smoothness of the egg shell. A shell that is very thin is deficient in calcium. An overly thick shell likely has an artificial amount of calcium supplementation in the chicken’s diet. A bumpy or disfigured egg shell can indicate health problems or deficiencies in the chicken.

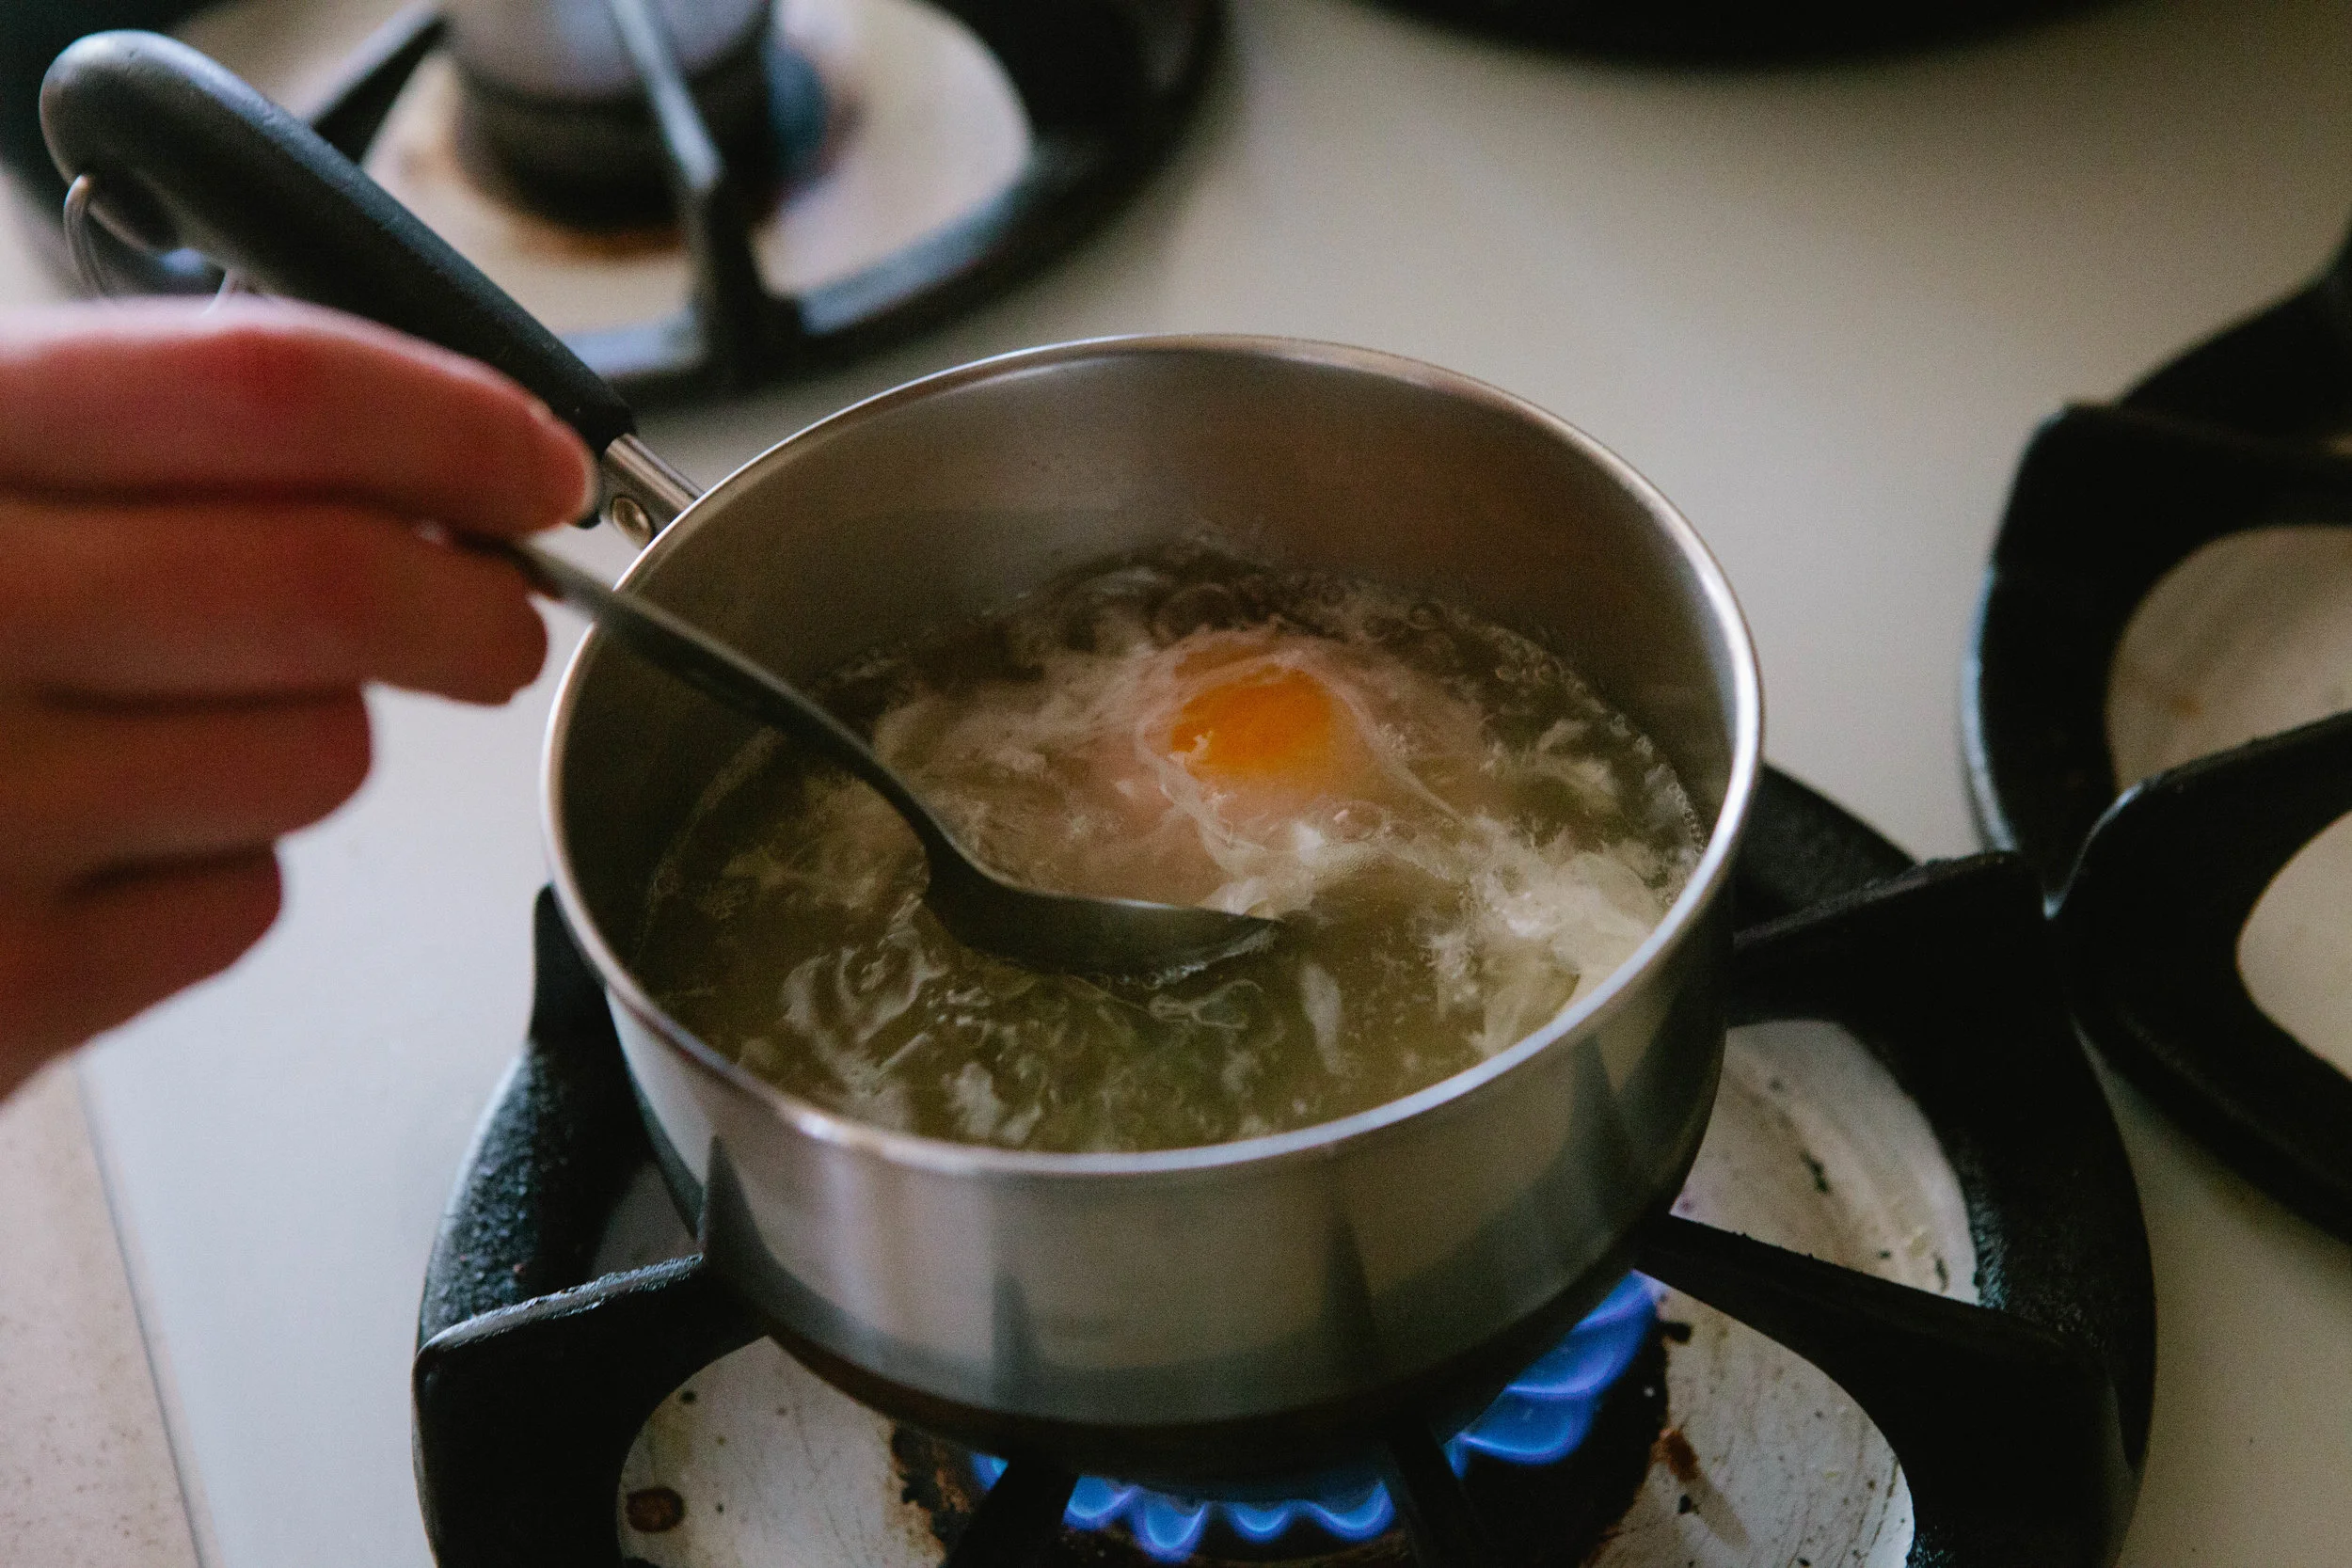
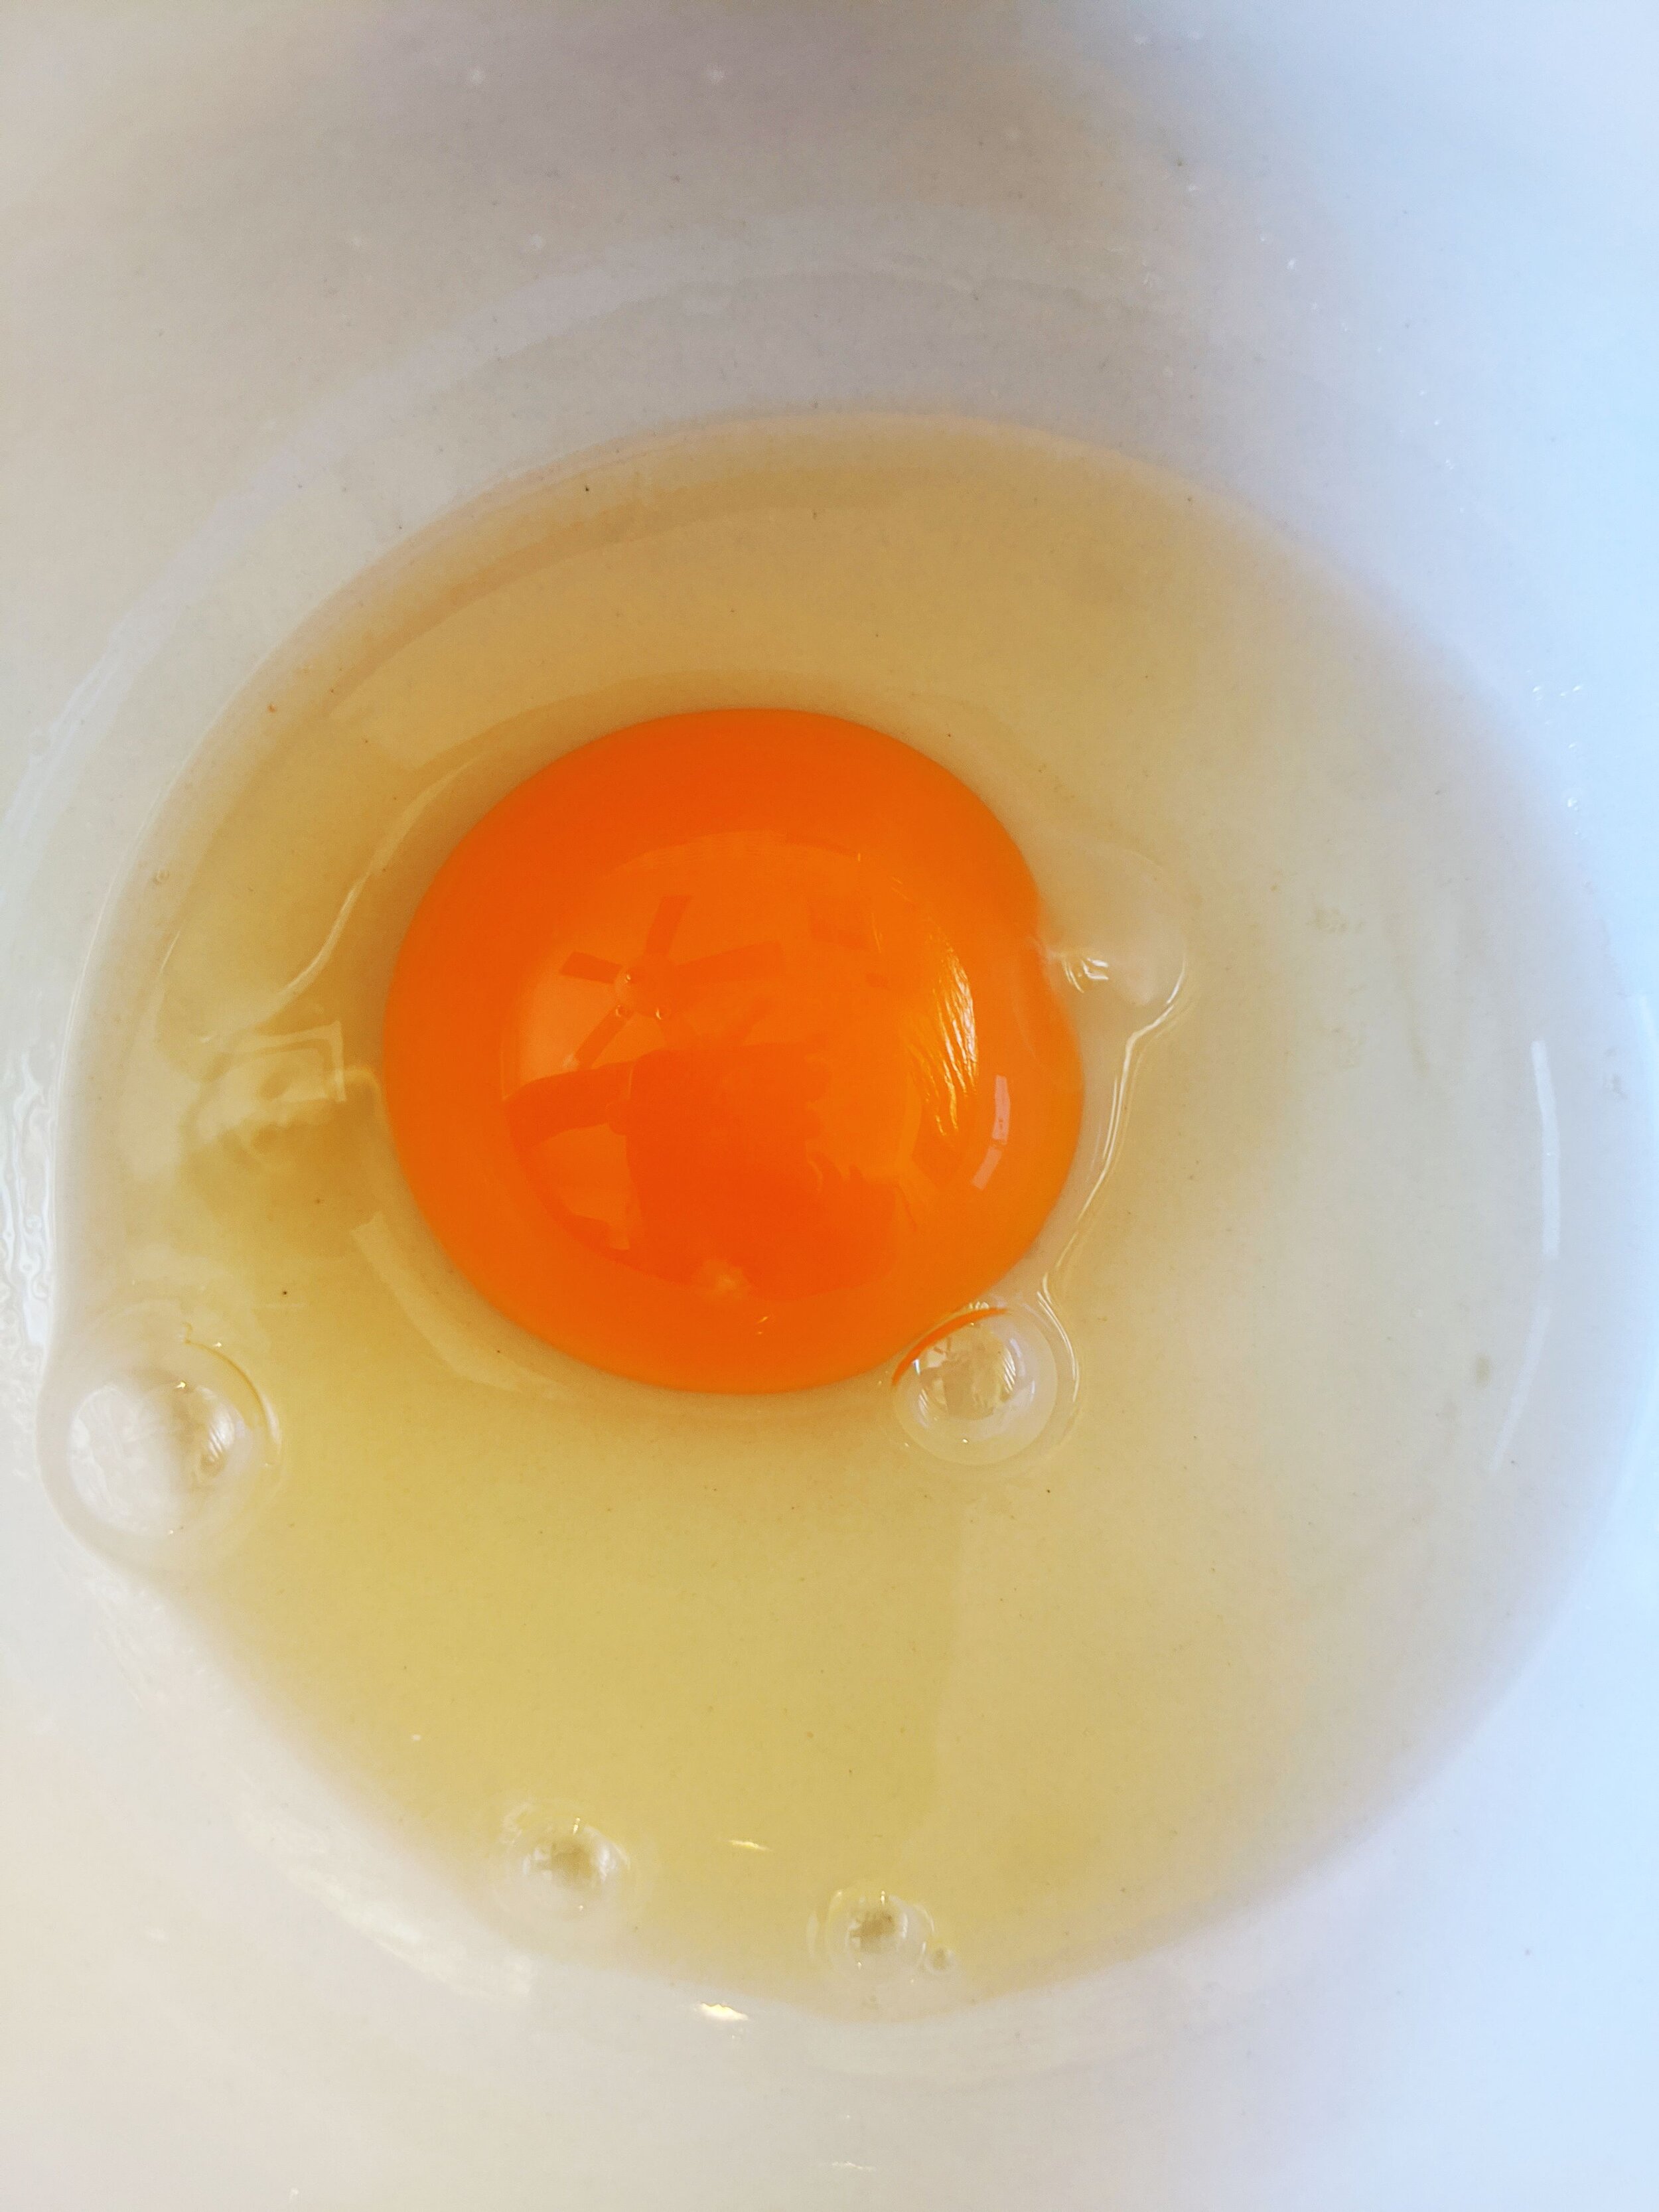
Second, we look at the color of the yolk. Chickens given access to bugs and grass lay eggs with deeper yellow to orange yolks. As a reminder, there are substances, including natural ones, that can be fed to a chicken to make their egg yolk artificially more yellow. Also keep in mind that there is less green plants and bugs in the winter, so even good quality eggs will likely have lighter yellow yolks in the winter.

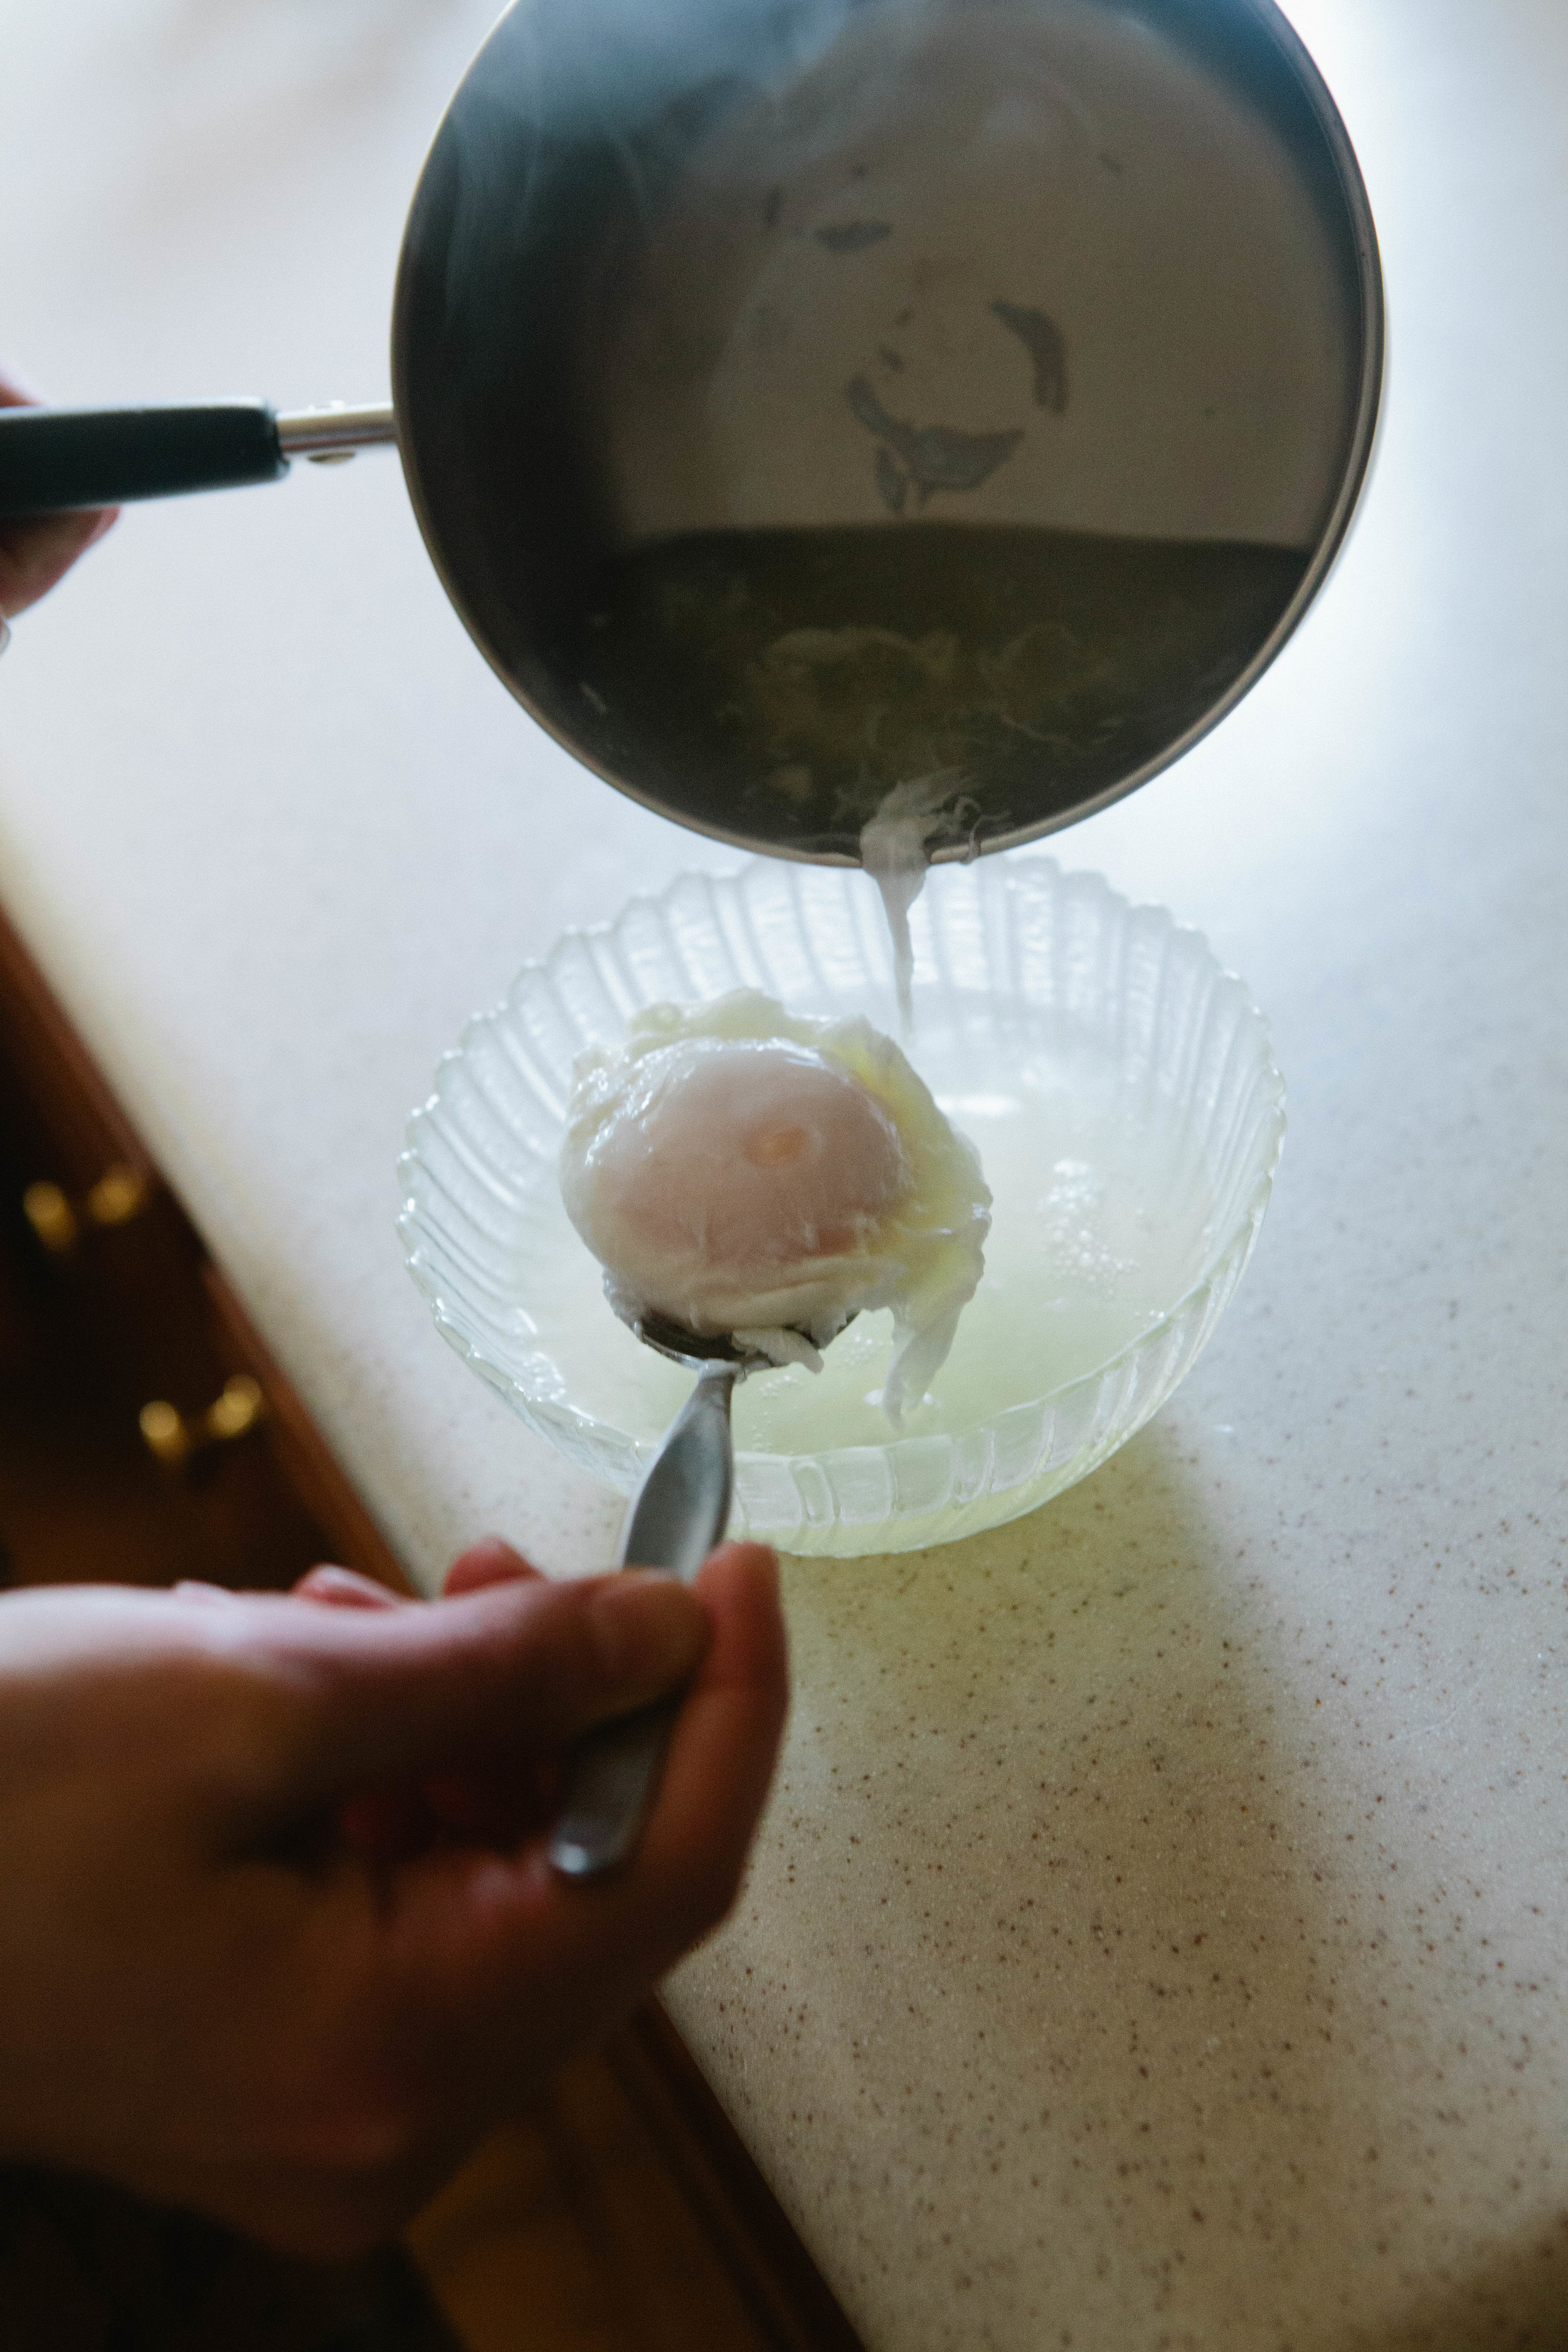
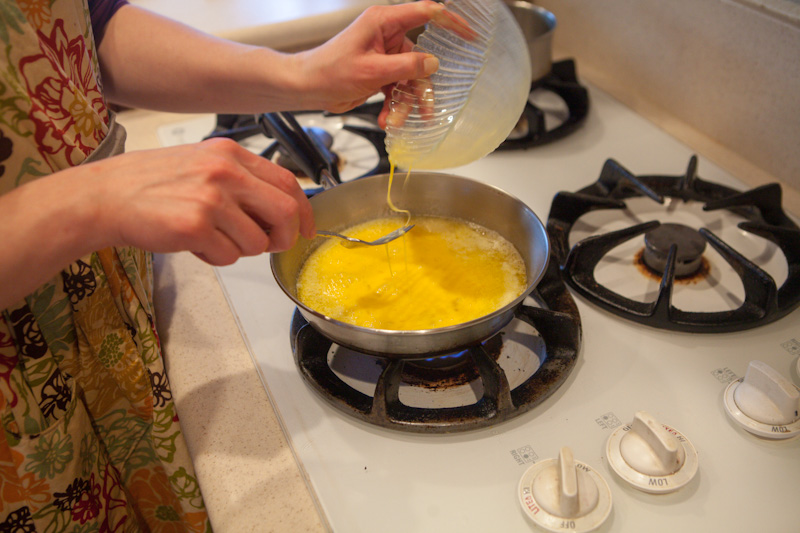
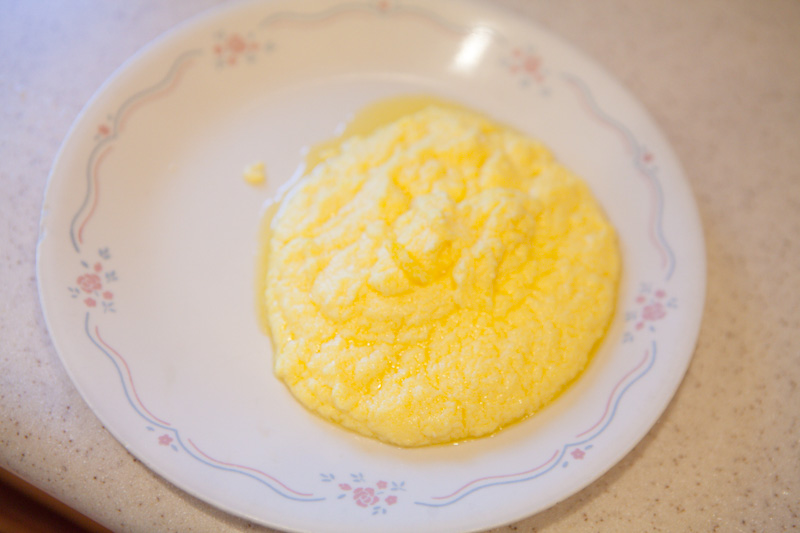
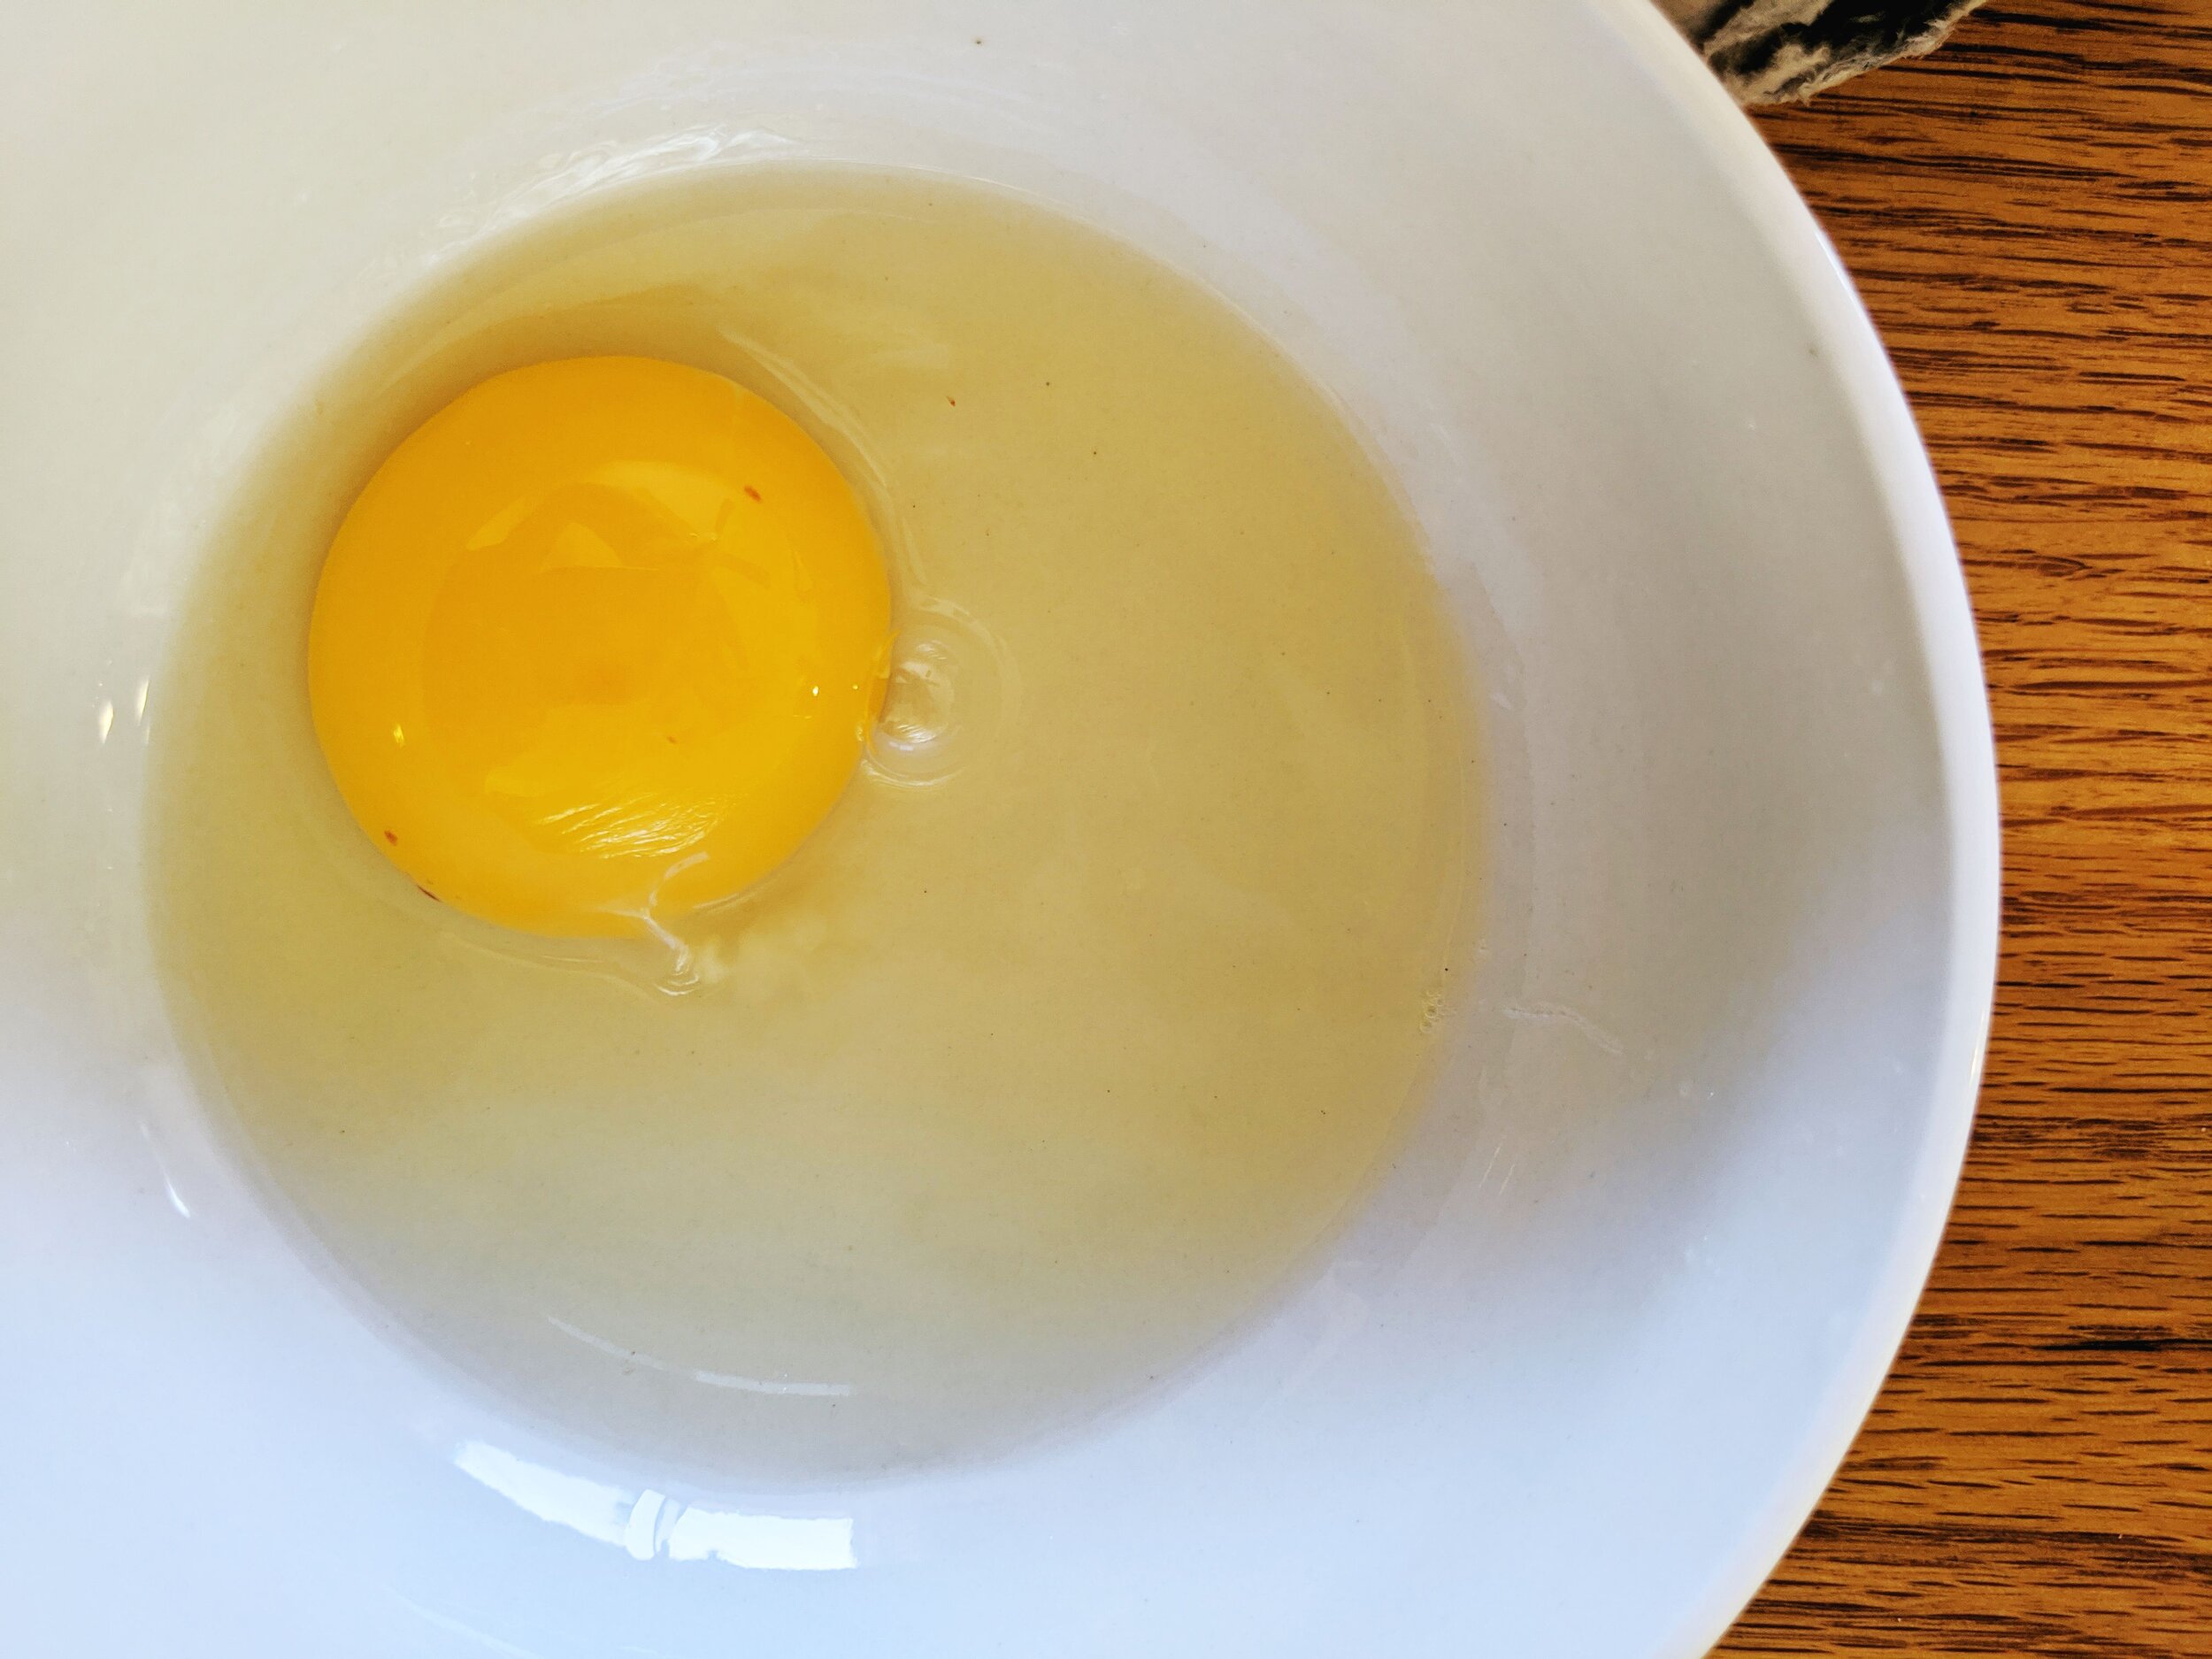
Third, we look at the white of the egg. A fresh and nutrient rich white will hold together and stand together in the pan. A poor quality or old egg white will spread out over the entire area. I’ve heard that the quality of the egg white is what professional chefs use to judge the quality of an egg.

We purchased a variety of eggs from King Soopers and Natural Grocers to do these observations for this experiment. Please refer to the pictures and analysis below!
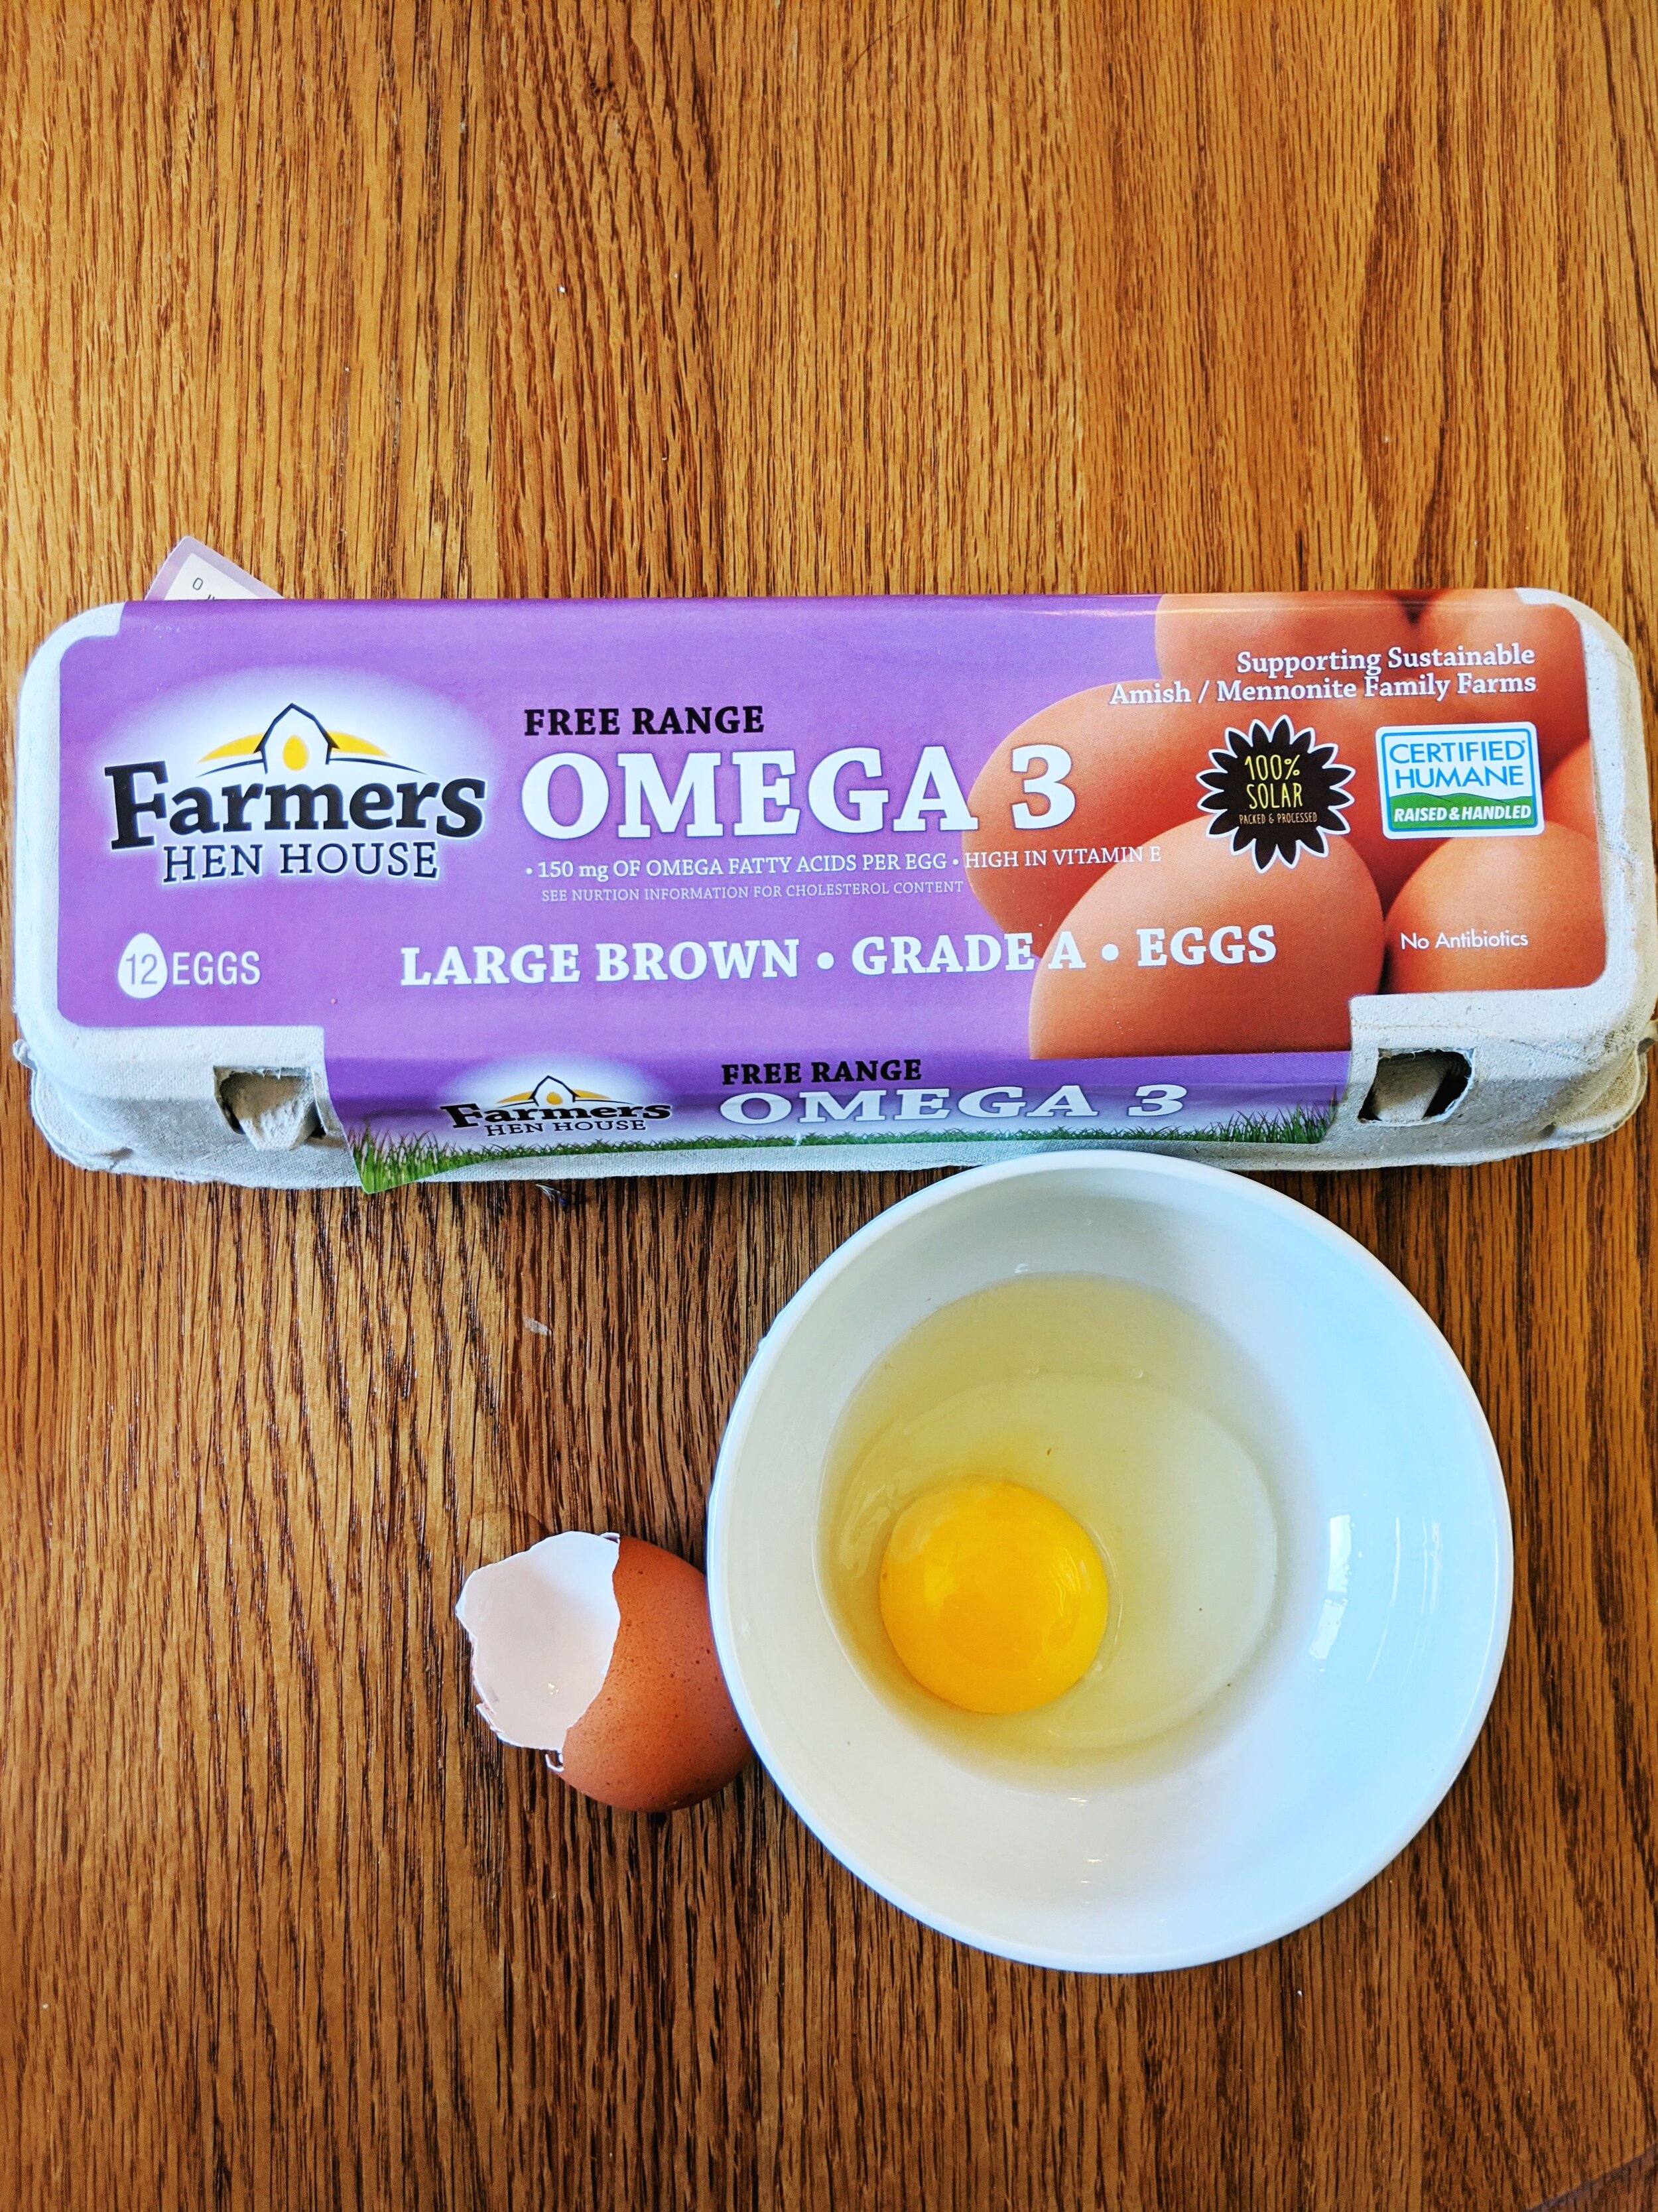
20200531_132911.jpg
20200531_132937.jpg

Farmer’s Hen House

This brand is my “bulk” go to egg for washing my hair.

Type of Egg: Free Range Large Brown Grade A from Natural Grocers
Price at Purchase Time:
$3.45
Labels on Carton:
Free Range
Description of Shell:
Good thickness, cracked only where hit and didn’t splinter. Fairly smooth.
Color of Yolk:
Dark yellow.
Spread of White:
Mostly holds together, with a little spread.

20200531_132810.jpg
20200531_132837.jpg

Vital Farms Pasture Raised

Type of Egg: Pasture Raised Large Brown Grade A
Price at Purchase Time:
$5.69
Labels on Carton:
Pasture Raised
Description of Shell:
Very smooth, a little thin but broke mostly clean.
Color of Yolk:
Dark, deep yellow
Spread of White:
Held tightly together

20200531_132727.jpg
20200531_132751.jpg

Happy Egg Free Range Eggs

This is the brand that I recommend as a good starting point in looking at higher quality eggs. They are a more accessible egg brand, available at both King Soopers and Natural Grocers.

Type of Egg: Happy Egg Free Range Eggs
Price at Purchase Time:
$5.99
Labels on Carton:
Free Range Pasture Raised Large Brown Grade A Eggs
Description of Shell:
Smooth but a little thin
Color of Yolk:
Very deep orange
Spread of White:
Held together a little but runnier

20200531_132552.jpg
20200531_132638.jpg

Simple Truth Cage Free Eggs

Type of Egg: Cage Free Large Brown Eggs from Simple Truth
Price at Purchase Time:
$2.99
Labels on Carton:
Cage Free Large Brown Eggs Grade AA
Description of Shell:
A little difficult to crack and slightly bumpy
Color of Yolk:
Light yellow
Spread of White:
Runny and not held together

20200531_132434.jpg
20200531_132457.jpg

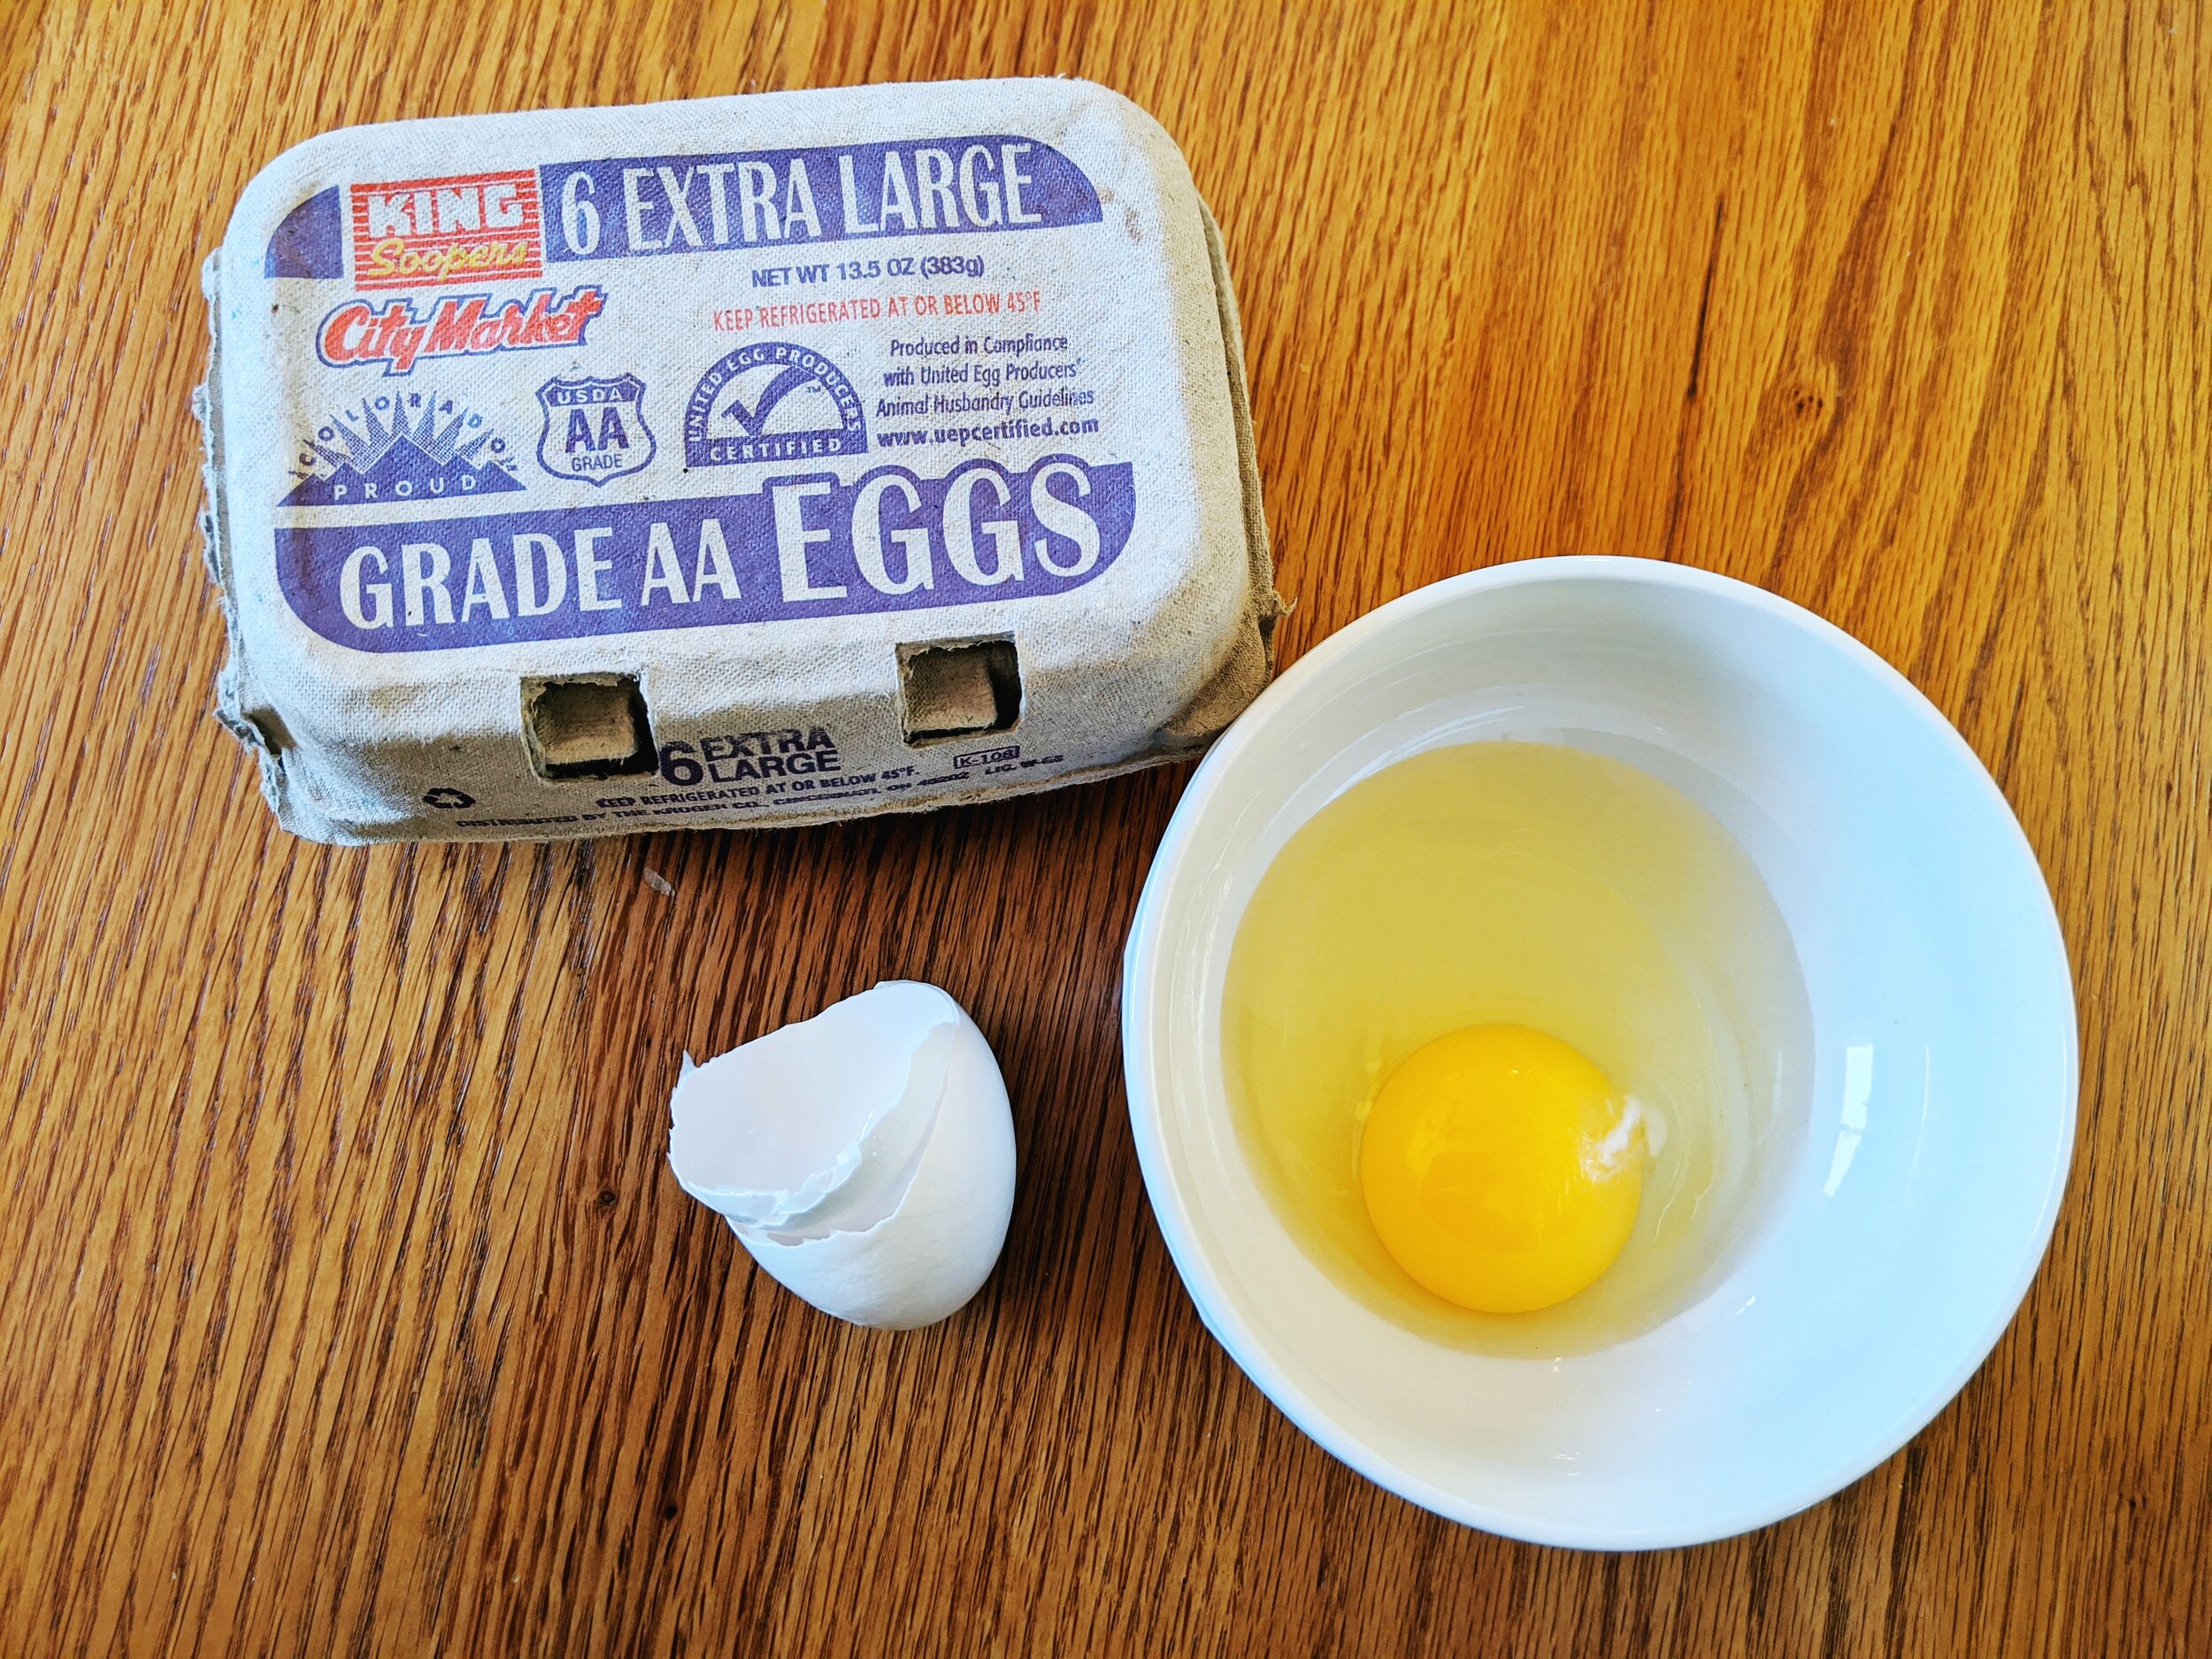
King Soopers City Market Extra Large Eggs

Type of Egg: King Soopers City Market Extra Large Grade AA Eggs
Price at Purchase Time:
$1.39
Labels on Carton:
Extra Large
Description of Shell:
Thin and bumpy
Color of Yolk:
Light yellow
Spread of White:
Liquid, doesn’t hold together.
Taste of Egg:

20200531_132158.jpg
20200531_132221.jpg

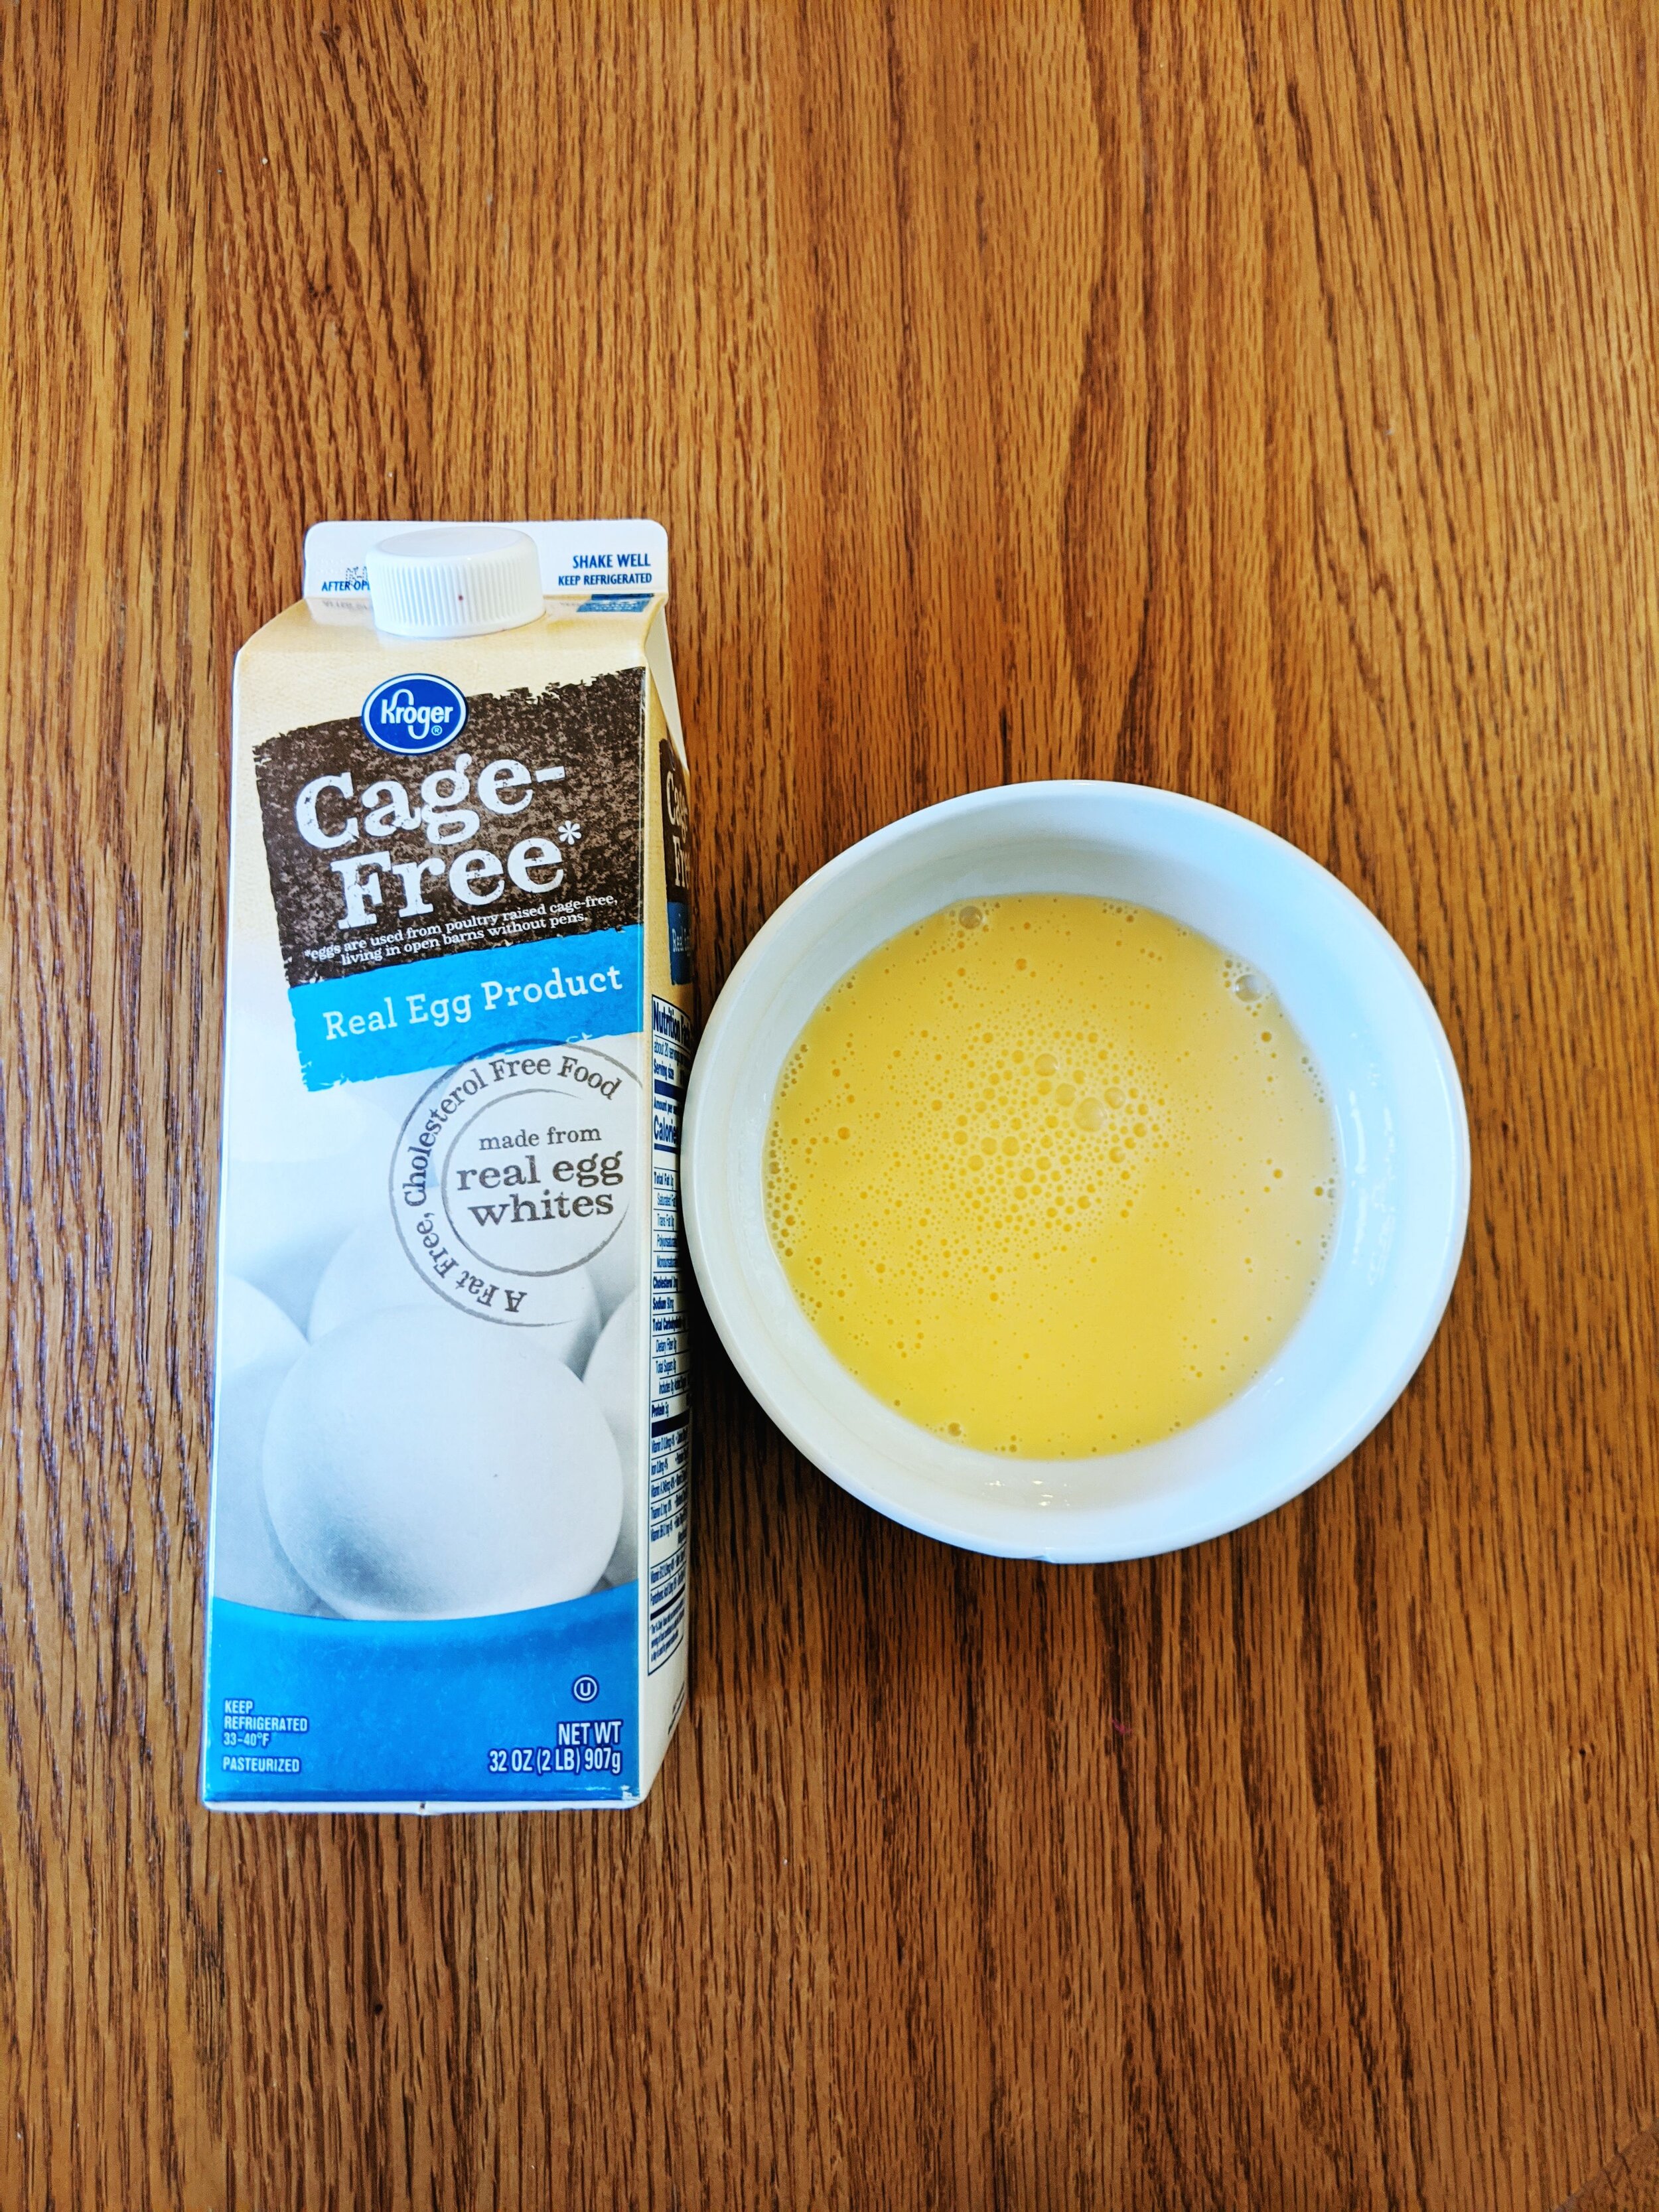
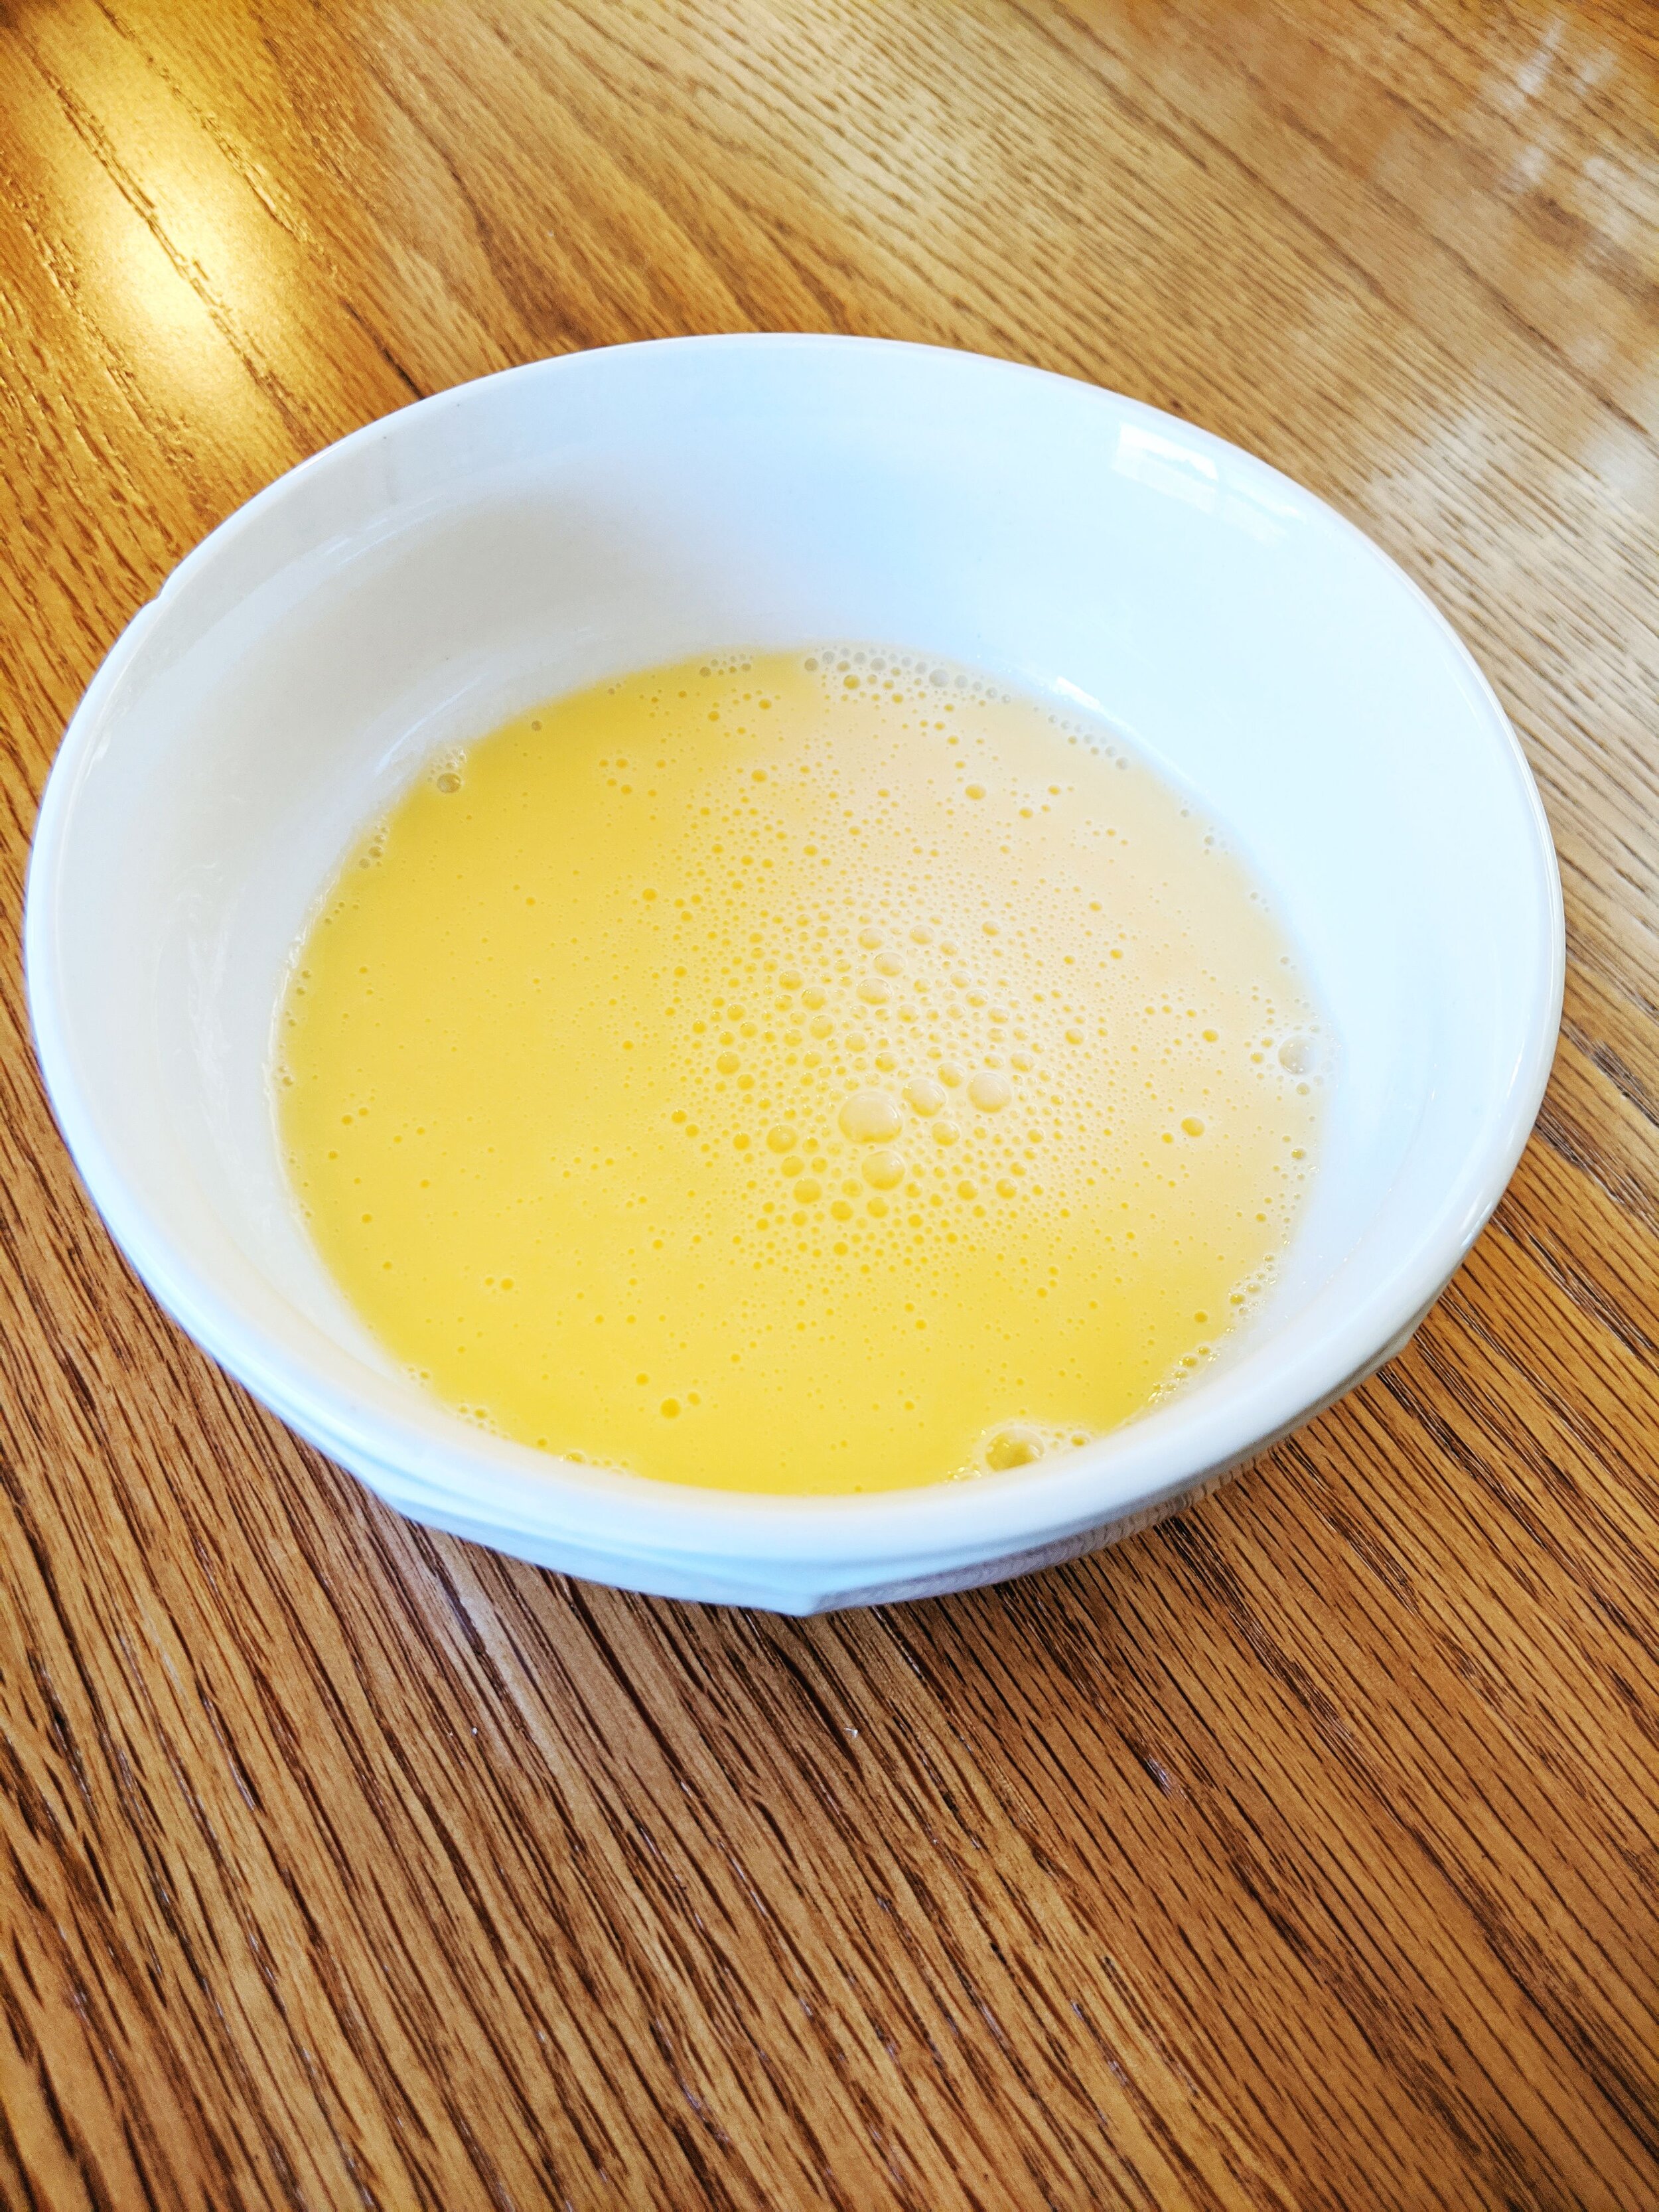
Cage Free Real Egg Product

For comparison, we purchased a “real egg product.” Unlike an egg, which needs no ingredient description, this product contains 19 added ingredients, vitamins, and minerals. I think in this product they are making up for lack of egg yolk (which they omitted) which contains most of the nutritional value of an egg. Let’s do the same analysis of this product!

Type of Egg: Cage Free “Real Egg Product'“ from Kroger
Price at Purchase Time:
$4.49
Labels on Carton:
Cage Free, Made from Real Egg Whites, Cholesterol Free, Fat Free Food
Description of Shell:
Unknown, Not Present
Color of Yolk:
Unknown, Not Present
Spread of White:
Unknown

Recipes for Fermented Food

FERMENTING - ONE OF THE BEST THINGS I DISCOVERED ON MY JOURNEY OF HEALING!

The process of preserving food by fermenting it is something that’s been around for centuries and is practiced all other world. It’s not just the process of creating alcoholic beverages like beer or wine, or creating different types of dairy like cheese or yogurt.  Eating fermented foods is a huge part of the GAPS Diet, but anyone who adds fermented foods to their diet will see some benefit.


Videos About Fermenting


Blogs About Fermentation

Vintage Food Hacks Part 1

Today, let’s talk about what in the world lacto-fermentation is, and how you can start doing it yourself!

Vintage Food Hacks Part 2

Today, let’s talk about what in the world lacto-fermentation is, and how you can start doing it yourself!

The Best Way to Add Fermented Food to Your Diet

Today, let’s talk about what in the world lacto-fermentation is, and how you can start doing it yourself!


Recipes for Creating Your Own Ferments

Beet Kvass

Beet Kvass is a liver tonic. Anyone can make this simple fermented drink! It requires only a few ingredients, and only a few minutes to "put up."

Vegetable Medley

One of the most important ferments in the GAPS™ diet is the vegetable medley. You can find this recipe in Dr. Natasha Campbell-McBride's book, Gut and Psychology Syndrome. Her recipe is for a bowl ferment, but you can also make it in a jar, which is how I prefer to make it.

Fermented Garlic

Most of us have heard that garlic supports our immune system. But did you know that only applies to raw garlic?

Cooked garlic does have some benefit, but most of the health properties are lost when the garlic is heated. Raw garlic, however, has many supportive health benefits. And when raw garlic is fermented, many of these increase.

Fruit Chutney

This recipe is very simple—chop and combine ingredients, simmer for a while, then store in jars. It would be a great recipe to make in a crockpot... you really could fix it and forget it! But simple doesn't mean plain. It's delicious and adds flavor to any meat you are eating. And I'm told, quite excellent with turkey!  

Trail Mix

With all the hiking and camping that happens in Colorado, trail mix is almost a main food group. But commercial trail mixes contain candy, sweetened fruit, and unprepared nuts: not the superfoods they claim to be!

Swedish Gravlax

This is a brined fish meal legal on GAPS stage 2. You eat little pieces, one small piece a day.

Fermented Almond Flour

This is a great way to make fermented almond flour if your recipe calls for a very specific ratio of wet to dry ingredients. It’s also great for recipes that call for frying, like these onion rings!

You can also make fermented flour with almonds already made into flour. See the recipe here.

Fermented Almond Butter

Sauerkraut

While good quality sauerkraut can be obtained in most stores now, I still prefer to make my own as I think it tastes the best. I put a lot of love and anticipation into my sauerkraut, as I don’t eat it until it has been fermenting for at least three months.

Sourdough

I by no means consider myself a sourdough expert. But I’ve enjoyed learning about sourdough. Once you understand the basics of sourdough, you can experiment with lots of ways to prepare it. This post is just an intro into the amazing world of sourdough!

Fermented Pumpkin Seeds

Pumpkin seeds also have an especially helpful quality in that they help rid your body of parasites by attacking the parasites and intestinal worms. If you suspect you have parasites or worms, consuming pumpkin seeds is a good idea. However, be sure to take it slow and don’t overdo it.

Cabbage Tonic

Fermented cabbage is very high in vitamin C which is essential for healing a leaky gut. This cabbage tonic can be taken from the beginning of the Intro Diet of GAPS. Use this tonic daily to help change your gut flora.

Kefir

Kefir is a fermented drink made from kefir grains. It’s a bit like a very thin yogurt and has great health benefits!

The great news is, like many fermented drinks, kefir is very easy to make on your own!

GAPS Legal Pumpkin Soup

Pumpkin is a winter squash but it contains less sugar than most winter squashes, making it ideal for the GAPS Introduction Diet. Pumpkins are also very easily grown so if you’re a beginner gardener looking for an easy first crop or if you only have a small amount of growing space available. 

While other winter squashes like butternut squash can be tolerated by people on the GAPS Introduction Diet, it’s best to do pumpkin because it’s milder and with less sugar.

Pumpkin puree is very easy to freeze in individual portions. You can also sprout the pumpkin seeds. Both mean you can enjoy your own homegrown produce throughout the winter! Once you have the puree for this pumpkin soup recipe, you can also use it to make a pumpkin pie or use it to make GAPS Pancakes.

I usually eat a small bowl of pureed soup alongside a much larger bowl of another soup. It’s a great way to have a multi course meal on the GAPS Intro Diet. 

Ingredients for Pumpkin Soup:

  • 2-3 Small Pumpkins

  • 4 cups of Chicken Stock

  • ¼ of a White Onion

  • 1 inch of Fresh Ginger

  • 1 tsp Salt

  • 2 Bay Leaves

  • 1 Cinnamon Stick

Directions for Pumpkin Soup:

Pumpkins are great for your digestive system! This pumpkin soup is made with a few simple ingredients and is legal on the GAPS Diet. Find the pumpkin soup recipe and other GAPS recipes at bewellclinic.net. Recipe by Amy Mihaly, Certified GAPS Practi…

Preheat the oven to 400.

Cut each pumpkin in half. Remove the seeds and set aside to make sprouted pumpkin seeds.

Set each pumpkin open face side down on a baking sheet lined with parchment paper. Place the pumpkins in the oven.

Pumpkins are great for your digestive system! This pumpkin soup is made with a few simple ingredients and is legal on the GAPS Diet. Find the pumpkin soup recipe and other GAPS recipes at bewellclinic.net. Recipe by Amy Mihaly, Certified GAPS Practi…

Roast the pumpkins for about 45 minutes in the oven until the tops are soft.

Remove them from the oven and flip the pumpkins over so they cool faster.

Pumpkins are great for your digestive system! This pumpkin soup is made with a few simple ingredients and is legal on the GAPS Diet. Find the pumpkin soup recipe and other GAPS recipes at bewellclinic.net. Recipe by Amy Mihaly, Certified GAPS Practi…

Using a fork, carefully remove the pumpkin flesh from the skin and add to a bowl. If it’s not well cooked, it won’t remove from the skin easily.

Warm chicken stock on the stove.

Pumpkins are great for your digestive system! This pumpkin soup is made with a few simple ingredients and is legal on the GAPS Diet. Find the pumpkin soup recipe and other GAPS recipes at bewellclinic.net. Recipe by Amy Mihaly, Certified GAPS Practi…

Add 3 cups of pumpkin to the warmed stock. Immersion blend until well pureed. Pureeing the pumpkin on it’s own will allow the flavors of the other ingredients to meld better.

Pumpkins are great for your digestive system! This pumpkin soup is made with a few simple ingredients and is legal on the GAPS Diet. Find the pumpkin soup recipe and other GAPS recipes at bewellclinic.net. Recipe by Amy Mihaly, Certified GAPS Practi…

Chop onions into bite size pieces so they cook quickly. Add to the pureed mixture. 

Slice ginger and add to the pureed mixture. Add the salt and mix well.

Add bay leaves and cinnamon stick. Simmer for 20 minutes. Be sure to stir as the pumpkin and liquid will separate and the pumpkin will stick to the bottom of the pan. 

Pumpkins are great for your digestive system! This pumpkin soup is made with a few simple ingredients and is legal on the GAPS Diet. Find the pumpkin soup recipe and other GAPS recipes at bewellclinic.net. Recipe by Amy Mihaly, Certified GAPS Practi…

Remove the bay leaves and cinnamon stick from the mixture. Immersion blend everything again.

Enjoy! I topped mine with a dollop of creme fraiche but this is optional. Leave it off if you are not tolerating dairy.

Pumpkins are great for your digestive system! This pumpkin soup is made with a few simple ingredients and is legal on the GAPS Diet. Find the pumpkin soup recipe and other GAPS recipes at bewellclinic.net. Recipe by Amy Mihaly, Certified GAPS Practi…

Pumpkins are great for your digestive system! This pumpkin soup is made with a few simple ingredients and is legal on the GAPS Diet. Find the pumpkin soup recipe and other GAPS recipes at bewellclinic.net. Recipe by Amy Mihaly, Certified GAPS Practi…

GAPS Legal Pumpkin Soup

Author:
prep time: cook time: total time:

ingredients:

  • 2-3 Small Pumpkins
  • 4 cups of Chicken Stock
  • ¼ of a White Onion
  • 1 inch of Fresh Ginger
  • 1 tsp Salt
  • 2 Bay Leaves
  • 1 Cinnamon Stick

instructions:

How to cook GAPS Legal Pumpkin Soup

  1. Preheat the oven to 400.
  2. Cut each pumpkin in half. Remove the seeds and set aside to make sprouted pumpkin seeds.
  3. Set each pumpkin open face side down on a baking sheet lined with parchment paper. Place the pumpkins in the oven.
  4. Roast the pumpkins for about 45 minutes in the oven until the tops are soft.
  5. Remove them from the oven and flip the pumpkins over so they cool faster.
  6. Using a fork, carefully remove the pumpkin flesh from the skin and add to a bowl. If it’s not well cooked, it won’t remove from the skin easily.
  7. Warm chicken stock on the stove.
  8. Add 3 cups of pumpkin to the warmed stock. Immersion blend until well pureed. Pureeing the pumpkin on it’s own will allow the flavors of the other ingredients to meld better.
  9. Chop onions into bite size pieces so they cook quickly. Add to the pureed mixture.
  10. Slice ginger and add to the pureed mixture. Add the salt and mix well.
  11. Add bay leaves and cinnamon stick. Simmer for 20 minutes. Be sure to stir as the pumpkin and liquid will separate and the pumpkin will stick to the bottom of the pan.
  12. Remove the bay leaves and cinnamon stick from the mixture. Immersion blend everything again.
  13. Enjoy! I topped mine with a dollop of creme fraiche but this is optional. Leave it off if you are not tolerating dairy.
Created using The Recipes Generator

Creamy Garlic Chicken Soup

This is one of my favorite soups! It’s warm and creamy and so delicious.

This soup is easy to make in large or small batches depending on how many servings you need. A small batch requires one small chicken, about 4 lbs, one head of garlic, and one glass baking dish of vegetables. A small batch will make about 4-6 hearty servings of soup. A large batch requires a larger chicken, about 6 lbs, two heads of garlic, and two glass baking dishes of vegetables.

Keeping the garlic in their paper shells roasts the garlic while preventing them from getting burnt. Don’t worry if your paper peels a little off the garlic - it’s still ok!

This soup requires a LOT of salt. If you don’t salt this soup enough, it is very bland and boring.

Because you immersion blend the vegetables into the stock, this is a great recipe to also blend in the the joint cartilage, skin and any of the other parts of the chicken that you may be tempted to throw away. I separate the chicken into three parts usually - bones, chicken meat, and everything else.

Ingredients for Creamy Garlic Chicken Soup:

  • 1 Chicken

  • 1 Zucchini (Courgettes)

  • 1 Yellow Squash

  • ½ Large Head of Cauliflower or 1 Small Cauliflower

  • 1-2 Heads of Garlic, Cloves separated but still in their paper

  • 3-4 tbsp Lard (Learn to make your own lard here.)

  • 1 tbsp Salt

  • ½ Bunch Parsley

Directions for Creamy Garlic Chicken Soup:

Zucchini, yellow squash, cauliflower and garlic are roasted with lard and then blended together to form the base of this creamy garlic chicken soup. This soup is GAPS legal and great for Whole 30 or Paleo. It’s dairy free and gluten free but still c…

Start a chicken stock on the stove. (Find the recipe for a chicken stock here.)

Cut the vegetables into even size pieces for even roasting. For the cauliflower, you can remove or keep however much of the fibrous material (stems), depending on how much you are tolerating.  Start the oven preheating to 400 degrees.

Roasted zucchini, cauliflower, yellow squash and garlic are the base for this soup. It’s delicious and filling while still being dairy free and gluten free. It’s a soup for the GAPS diet but is also great for Whole 30 or Paleo diets since it’s made …

Add the squash, zucchini, cauliflower and garlic to a baking dish with the lard. Melt the lard in the oven on top of the vegetables and then stir to fully coat the vegetables with the melted lard. If you do not have enough lard to fully coat your vegetables, add more! Season with salt.

Roast the coated vegetables uncovered in the oven for about an hour. The vegetables are done when they are softened and slightly browned. Set them aside to cool. 

You can make your own chicken stock to use in this recipe for creamy garlic chicken soup. It’s a GAPS legal soup but is also great for Paleo or Whole 30 diets since it’s made with real food. It gets it’s creaminess from a medley of blended vegetable…

About ten minutes before the stock is done, add in ½ bunch of parsley for an added dose of Vitamin C and magnesium. 

Strain your stock but keep the joint meats, skin and everything else to blend into this creamy garlic chicken soup. It’s delicious, full of fat, hearty and made with real food so it’s perfect for the GAPS Diet, Whole 30, Weston A Price or Paleo. Rec…

Once the stock is done, strain the stock and set the cooked meat aside to cool. 

Once the roasted vegetables have cooled, peel the garlic paper off. Wait until the garlic is cooled - if you are impatient and peel it too early, it will burn your hands.

Add the roasted vegetables to a large pot. Add 12 cups of stock to the pot. 

This creamy garlic chicken soup uses a whole chicken. Set aside the bones and meat from your stock but blend everything else into the soup base to create a creamy soup that can’t be beat! It’s great for the GAPS Diet, Weston A Price, Whole 30 or Pal…

Once your meat is cooled, remove it from the bone. Separate the joint cartilage and skin from the meat. In the above photo, the top left is the bones, the bottom plate is the meat and the plate on the right has everything else that will be added into the stock and blended.

Roasted cauliflower, zucchini, yellow squash and garlic get blended with chicken skins to create a creamy base that keeps this creamy garlic chicken soup dairy free but still delicious! Recipe for GAPS Diet, Whole 30, Weston A Price or Paleo by Amy …

Add the skin, cartilage and other non-meat bits (no bones) to the pot. 

Immersion blend everything together until it is well blended and the vegetables are in small pieces.

Add shredded chicken to a base of roasted vegetables and blended chicken skins for a creamy, dreamy soup. Creamy Garlic Chicken Soup recipe for the GAPS Diet, Whole 30, Weston A Price or Paleo by Amy Mihaly, Certified GAPS Practitioner in Colorado.

Add the meat from your chicken into the blended stock. Add 1 tbsp of salt.

Cook for 15-20 minutes to blend the flavors.

This soup is a dream! Creamy Garlic Chicken soup is made with a blend of cauliflower, zucchini, yellow squash and garlic. It’s legal for the GAPS Diet, Whole30, Weston A Price and Paleo diets because it’s made with simple, real food. Recipe by Amy M…

Enjoy! I topped mine with sliced avocado. However, this does make it legal on GAPS Stage 3.


Creamy Garlic Chicken Soup

Author:
prep time: cook time: total time:

ingredients:

  • 1 Chicken
  • 1 Zucchini (Courgettes)
  • 1 Yellow Squash
  • ½ Large Head of Cauliflower or 1 Small Cauliflower
  • 1-2 Heads of Garlic, Cloves separated but still in their paper
  • 3-4 tbsp Lard
  • 1 tbsp Salt
  • ½ Bunch Parsley

instructions:

How to cook Creamy Garlic Chicken Soup

  1. Start a chicken stock on the stove.
  2. Cut the vegetables into even size pieces for even roasting. For the cauliflower, you can remove or keep however much of the fibrous material (stems), depending on how much you are tolerating. Start the oven preheating to 400 degrees.
  3. Add the squash, zucchini, cauliflower and garlic to a baking dish with the lard. Melt the lard in the oven on top of the vegetables and then stir to fully coat the vegetables with the melted lard. If you do not have enough lard to fully coat your vegetables, add more! Season with salt.
  4. Roast the coated vegetables uncovered in the oven for about an hour. The vegetables are done when they are softened and slightly browned. Set them aside to cool.
  5. About ten minutes before the stock is done, add in ½ bunch of parsley for an added dose of Vitamin C and magnesium.
  6. Once the stock is done, strain the stock and set the cooked meat aside to cool.
  7. Once the roasted vegetables have cooled, peel the garlic paper off. Wait until the garlic is cooled - if you are impatient and peel it too early, it will burn your hands.
  8. Add the roasted vegetables to a large pot. Add 12 cups of stock to the pot.
  9. Once your meat is cooled, remove it from the bone. Separate the joint cartilage and skin from the meat. Add the skin, cartilage and other non-meat bits (no bones) to the pot.
  10. Immersion blend everything together until it is well blended and the vegetables are in small pieces.
  11. Add the meat from your chicken into the blended stock. Add 1 tbsp of salt.
  12. Cook for 15-20 minutes to blend the flavors.
  13. Enjoy! I topped mine with sliced avocado. However, this does make it legal on GAPS Stage 3.
Created using The Recipes Generator
This soup is a dream! Creamy Garlic Chicken soup is made with a blend of cauliflower, zucchini, yellow squash and garlic. It’s legal for the GAPS Diet, Whole30, Weston A Price and Paleo diets because it’s made with simple, real food. Recipe by Amy M…

Making Your Own Kefir from Milk Kefir Grains

Kefir is a fermented drink made from kefir grains. It’s a bit like a very thin yogurt and has great health benefits!

The great news is, like many fermented drinks, kefir is very easy to make on your own!

IMG_5046.jpg

Kefir grains are very sensitive to metal so it is best if you use little to no metal when you’re preparing this recipe.

If you use a dishwasher, rinse your bowl thoroughly before using to ensure there is no detergent residue on it. 

You will need:

  • A strainer (preferably not metal)

  • A jar to put your kefir in

  • A bowl

Ingredients for Kefir

  • Fresh Milk (raw or freshly repasteurized, depending on what your grains are used to)

  • Kefir with Grains, 4 to 5 healthy grains will make a pint 

Directions for Kefir

IMG_5035.jpg

Separate kefir grains from kefir by pouring into a non metal strainer. Gently separate the kefir from the grains with a non metal spoon. Don’t push too hard - be very gentle! 

IMG_5037.jpg

What falls below is your kefir. What stays in the strainer is the kefir grains. 

Leave out on the counter for about 24 hours to ferment. After 24 hours, put the grains into milk into the fridge. OR if you are not needing so much kefir, store it in the fridge directly.

IMG_5056.jpg

If you store the kefir in the fridge, continue to feed your kefir in the fridge. It takes about two to three weeks before you need to feed it again by changing the milk.

You can use the kefir itself to make kefir cream.

Enjoy!

Making Your Own Kefir

prep time: cook time: total time:

ingredients:

  • Fresh Milk (raw or freshly repasteurized, depending on what your grains are used to)
  • Kefir with Grains, 4 to 5 healthy grains will make a pint

instructions:

How to cook Making Your Own Kefir

  1. Separate kefir grains from kefir by pouring into a non metal strainer. Gently separate the kefir from the grains with a non metal spoon. Don’t push too hard - be very gentle!
  2. What falls below is your kefir. What stays in the strainer is the kefir grains.
  3. Leave out on the counter for about 24 hours to ferment. After 24 hours, put the grains into milk into the fridge. OR if you are not needing so much kefir, store it in the fridge directly.
  4. If you store the kefir in the fridge, continue to feed your kefir in the fridge. It takes about two to three weeks before you need to feed it again by changing the milk.
  5. You can use the kefir itself to make kefir cream.
  6. Enjoy!
Created using The Recipes Generator
40.png

Sprouted Refried Navy Beans Recipe

Beans make everything delicious! The old adage about beans isn’t true. If you’re worried about the unsightly smells and noises that beans so often bring, worry no more. The reason that beans are known for producing flatulence is because of the strong anti-nutrients present in the bean seed. Once you properly prepare these beans, the anti-nutrients are no longer present so there’s no reason for any symptoms.  When they’re properly prepared and you can tolerate them, navy beans are a good addition to your diet. If you do experience flatulence while eating the beans, it means your body is not ready for the starch and you still have work to do on your gut flora. 

Even if you are tolerating them well, remember that beans are a starch and should always be consumed alongside a generous amount of animal fat. 

These are great served with anything that has a Mexican theme with them. I like them next to eggs, like a Huervos Rancheros sort of feel.

IMG_5209.jpg

You can freeze this recipe into smaller portion sizes so that you can pull it out quickly to use as a side for a meal. I tried freezing this in muffin tins since they are about the correct proportion of a serving of beans. I lined the muffin tin with unbleached large baking cups and then scooped beans into them. I let them freeze over a weekend and then took them out of the muffin tin and placed them in a gallon bag to protect them from freezer burn. 

Makes about 12 servings

Ingredients for Sprouted Refried Beans

  • 6 cups sprouted navy beans

  • ½ onion

  • ½ jalapeno

Directions for Sprouted Refried Beans

IMG_4871.jpg

Add sprouted navy beans to a large pot.

IMG_4975.jpg

Bring to a boil and cook for about 2 hours until the beans are very soft. The beans will foam as they cook. You can skim the foam and the extra bean pods off of the top if you’d like. Just be sure not to scoop out any of your good sprouted beans!

Add onion and jalapeno into the pot once beans are soft. If too much water is gone, add a little bit into the pot so you don’t scorch the beans on the bottom of the pot. 

IMG_5126.jpg

Immersion blend the beans when they are soft. They should be smoother but still have a little bit of texture to them.

Put them back on the stove. Stir frequently for five minutes over medium high heat to evaporate the liquid.

This is the basic refried bean recipe.

IMG_5173.jpg

My favorite way to eat these is to add a cup of beans to a cast iron skillet. Add in a half a stick of butter. Cook together until well mixed.

IMG_5197.jpg

Add a fried egg and a few softened pepper pieces. 

Sprouted Refried Beans

prep time: cook time: total time:

ingredients:

  • 6 cups sprouted navy beans
  • ½ onion
  • ½ jalapeno

instructions:

How to cook Sprouted Refried Beans

  1. Add sprouted navy beans to a large pot.
  2. Bring to a boil and cook for about 2 hours until the beans are very soft. The beans will foam as they cook. You can skim the foam and the extra bean pods off of the top if you’d like. Just be sure not to scoop out any of your good sprouted beans!
  3. Add onion and jalapeno into the pot once beans are soft. If too much water is gone, add a little bit into the pot so you don’t scorch the beans on the bottom of the pot.
  4. Immersion blend the beans when they are soft. They should be smoother but still have a little bit of texture to them.
  5. Put them back on the stove. Stir frequently for five minutes over medium high heat to evaporate the liquid.
  6. This is the basic refried bean recipe.
  7. My favorite way to eat these is to add a cup of beans to a cast iron skillet. Add in a half a stick of butter. Cook together until well mixed.
  8. Add a fried egg and a few softened pepper pieces.
Created using The Recipes Generator
39.png

How to Properly Prepare Grains

IMG_5198.jpg

How to Properly Prepare White Rice on the GAPS Diet:

On the transition to the GAPS Intro diet, or at any time during the GAPS Intro diet, if you or your practitioner feel that your body is in need of some carbohydrates, this is a simple carbohydrate that many of us relate to. While it’s  not a whole grain, which generally we prefer, the husk of a whole grain can be harder to digest. White rice that’s been soaked is fairly easy to digest and fairly untroublesome for the gut.

Soak your rice overnight before using it in any recipe. Place in warm filtered water with 4 tbsp of yogurt or whey. Put a lid on the bowl and place on the counter overnight.

How to Properly Prepare Quinoa on the GAPS Diet:

As a non gluten grain, quinoa is one of the first grains we can try in coming off the GAPS Diet. It is a seed so as with all other seeds it should be properly prepared. Quinoa has never been my favorite, but most of the times I have eaten it in the past were before I understood about anti-nutrients. I wonder if quinoa used to give me a stomach ache and that’s why I didn’t care for it. This quinoa can be used as an exact substitution for any other quinoa recipe, including a cold quinoa salad or a quinoa pudding. 

Soak and sprout your quinoa 24 hours in advance. To sprout the quinoa, put the quinoa in filtered water (2 cups of quinoa to 4 cups of water.) Add in 2 tbsp of yogurt or whey. Leave on the counter covered for 24 hours.

IMG_5407.jpg

How to Properly Prepare Wild Rice on the GAPS Diet:

Wild rice is not actually a grain. It’s actually the seed of a marsh growing plant. It’s pretty low in fat so it should be eaten with lots of fat. Because it falls into the seed family, wild rice can be eaten on the GAPS Diet. Of course, you should properly prepare it before eating it. I would serve it in place of white rice in many dishes, like in this fried rice recipe.

At least 7 hours before:

Rinse rice well.

Add 1.5 cups of wild rice to 3 cups of warm filtered water. Add 2-3 tbsp of whey or yogurt to the mix. Let sit in a warm place for at least seven hours.

When You’re Ready to Cook

Add water to cover, about half a liter. Cover and place in the oven at 200 degrees. Cook for 45 minutes.


37.png

Mushroom Ketchup Recipe

I found this recipe from my new favorite show on YouTube, 18th Century Cooking. It is a GAPS Legal sauce and since many people do not tolerate tomatoes, I thought it would be a delicious option for a sauce!

I’m excited to add this sauce to many dishes!

This is Stage 1 legal on the GAPS Diet if you can tolerate the dried spices. Most can tolerate these spices unless you still have significant intestinal symptoms.

Ingredients for Mushroom Ketchup

  • 30 oz Mushrooms

  • 2 tbsp Salt

  • 4 Bay Leaves

  • 1 chopped onion

  • 1 Lemon, zested

  • 1 tbsp finely grated horseradish, fresh or prepared

  • ¼ tsp cloves

  • Pinch of Cayenne Pepper

  • ½ tsp allspice

  • ¼ - ½ cup apple cider vinegar

Directions for Mushroom Ketchup

Rub the top of the mushrooms to clean them. Do not wash your mushrooms!

Roughly chop the mushrooms and add to a large pot. Add in salt and bay leaves.

The mushrooms will begin reducing within a few minutes.

When they’ve reduced in size, add them to a glass container. Adding them to a glass container is important so they don’t take on the metal taste from the pot.

Leave the mushrooms on the counter overnight and no longer because mushrooms are a fungus.

mushroom-ketchup-recipe-18th-century-cooking-youtube-eighteenth-century-cooking-old-recipe-mushroom-sauce-ketchup-made-with-mushrooms-gaps-legal-mushroom-recipe-what-to-eat-on-gaps

The next day, add mushrooms, chopped onions, zest of 1 lemon, grated horseradish, cloves, cayenne, allspice, and apple cider vinegar to a pot.

mushroom-ketchup-recipe-18th-century-cooking-youtube-eighteenth-century-cooking-old-recipe-mushroom-sauce-ketchup-made-with-mushrooms-gaps-legal-mushroom-recipe-what-to-eat-on-gaps

Bring to a boil and then let simmer for 15 minutes.

mushroom-ketchup-recipe-18th-century-cooking-youtube-eighteenth-century-cooking-old-recipe-mushroom-sauce-ketchup-made-with-mushrooms-gaps-legal-mushroom-recipe-what-to-eat-on-gaps

Let sauce cool. Put into a cloth and squeeze to strain the sauce.

mushroom-ketchup-recipe-18th-century-cooking-youtube-eighteenth-century-cooking-old-recipe-mushroom-sauce-ketchup-made-with-mushrooms-gaps-legal-mushroom-recipe-what-to-eat-on-gaps

Save the solid pieces and dry them in a dehydrator. Once the solid pieces are dry, you can crush them and use them as a powdered flavoring or use the pieces as flavoring.

mushroom-ketchup-recipe-18th-century-cooking-youtube-eighteenth-century-cooking-old-recipe-mushroom-sauce-ketchup-made-with-mushrooms-gaps-legal-mushroom-recipe-what-to-eat-on-gaps

Pour into a glass sealable jar.

Mushroom Ketchup

prep time: cook time: total time:

ingredients:

  • 30 oz Mushrooms
  • 2 tbsp Salt
  • 4 Bay Leaves
  • 1 chopped onion
  • 1 Lemon, zested
  • 1 tbsp finely grated horseradish, fresh or prepared
  • ¼ tsp cloves
  • Pinch of Cayenne Pepper
  • ½ tsp allspice
  • ¼ - ½ cup apple cider vinegar

instructions:

How to cook Mushroom Ketchup

  1. Rub the top of the mushrooms to clean them. Do not wash your mushrooms!
  2. Roughly chop the mushrooms and add to a large pot. Add in salt and bay leaves.
  3. The mushrooms will begin reducing within a few minutes.
  4. When they’ve reduced in size, add them to a glass container. Adding them to a glass container is important so they don’t take on the metal taste from the pot.
  5. Leave the mushrooms on the counter overnight and no longer because mushrooms are a fungus.
  6. The next day, add mushrooms, chopped onions, zest of 1 lemon, grated horseradish, cloves, cayenne, allspice, and apple cider vinegar to a pot.
  7. Bring to a boil and then let simmer for 15 minutes.
  8. Let sauce cool. Put into a cloth and squeeze to strain the sauce.
  9. Save the solid pieces and dry them in a dehydrator. Once the solid pieces are dry, you can crush them and use them as a powdered flavoring or use the pieces as flavoring.
  10. Pour into a glass sealable jar.
Created using The Recipes Generator
31.png

Eggs Poached in Stock

Eggs poached in stock  was a new food for me when I started the GAPS Diet. It quickly became one of my favorite breakfasts that I am still enjoying. Sometimes, I poach an entire egg in the stock but I often I simply poach the yolks in stock.

Poaching your eggs in stock is great on cold winter’s days. It really helps you get going and warms you right off! It’s also a great way to get in your stock for the day in the summer, as it’s often cool enough in the mornings still to enjoy a warm beverage.

Beef Stock Recipe

Chicken Stock Recipe

IMG_1260.jpg

I’ve always liked over easy eggs so I enjoy runny yolks. If you don’t like runny yolks, you can poach your eggs longer, or if you are poaching in your mug, you can break the yolk in the mug. The warmth of the soup will help to cook the yolk but very gently, which will help to leave much of the beneficial enzymes of the yolks intact.

Egg whites are best consumed cooked and egg yolks are best consumed raw. This is for ease of digestion as well as full nutrient potential.

You can use any stock of your choice to poach your eggs in. I had chicken stock on hand when making this recipe so I used that! Be sure to salt your eggs in the stock generously while cooking them and after.

Ingredients to Make Eggs Poached in Stock

  • 2 cups of Your Choice of Stock

  • 1-2 Eggs

  • Salt and pepper

Directions for Eggs Poached in Stock:

Bring two cups of stock to a boil. Add a generous shake of salt.

IMG_1269.jpg

Once stock is rapidly boiling, use a spoon to create a swirling vortex.

To the vortex, break in one to two eggs.

IMG_1284.jpg

Move them gently off the bottom, where they will settle.

IMG_1294.jpg

When your yolk gets to your desired firmness, remove the egg or pour the entire thing into a bowl or mug. This takes anywhere between 3 to 5 minutes.


GAPS Diet Stage 2 Modification: If you are on Stage 2 of the GAPS Diet, this modification will make this recipe legal.

Bring a mug’s worth of stock to a boil.

IMG_1315.jpg

Once the stock is boiling, add it to a mug.

IMG_1322.jpg

To the mug, add one to three egg yolks.

IMG_1345.jpg

I like to let them warm for a couple minutes. Then, I pop one entire egg yolk into my mouth, whole.  Others prefer to break the egg in the mug and stir it around. This only lightly cooks the egg yolk.


Eggs Poached in Stock

Author:
prep time: cook time: total time:

ingredients:

  • 2 cups of Your Choice of Stock
  • 1-2 Eggs
  • Salt and pepper

instructions:

How to cook Eggs Poached in Stock

  1. Bring two cups of stock to a boil. Add a generous shake of salt.
  2. Once stock is rapidly boiling, use a spoon to create a swirling vortex.
  3. To the vortex, break in one to two eggs.
  4. Move them gently off the bottom, where they will settle.
  5. When your yolk gets to your desired firmness, remove the egg or pour the entire thing into a bowl or mug. This takes anywhere between 3 to 5 minutes.
GAPS Diet Stage 1 Modification:
  1. If you are on Stage 1 of the GAPS Diet, this modification will make this recipe legal.
  2. Bring a mug’s worth of stock to a boil.
  3. Once the stock is boiling, add it to a mug.
  4. To the mug, add one to three egg yolks.
  5. I like to let them warm for a couple minutes. Then, I pop one entire egg yolk into my mouth, whole. Others prefer to break the egg in the mug and stir it around. This only lightly cooks the egg yolk.
Created using The Recipes Generator
18.png

How to Ferment Almond Flour

Fermenting Almond Flour for Proper Digestion

Any seed wants to be a plant. Seeds include nuts, seeds, beans, and grains. To protect itself, a seed has phytic acid and other enzyme inhibitors and anti-nutrients. These substances attack the body of the animal that ate the seed, preventing the digestion of the seed. This is why we see whole seeds in bird poop.

Manually grinding seeds into flours does nothing to negate these enzyme inhibitors and anti-nutrients. We may not necessarily see whole seeds in our stools but we don’t need to for our bodies to experience the effects of these substances. Inflammation, poor absorption of foods, and leaky gut are some of the effects on our bodies of eating seeds that are not properly prepared. To learn more about properly preparing grains, check out my video.

How to Prepare Grains Properly

When we properly prepare our grains however, we begin the germination process, which changes the seeds chemical structure. It neutralizes the anti-nutrients and enzyme inhibitors, and the seed prepares to bring life. When we eat a seed in this state, it’s nutrients are available to us and it brings life to our bodies.  

All seeds can be prepared in three ways - soaking, sprouting or fermenting. Fermenting is by far the most simple and the most beneficial. All it requires is whey. These directions are for almond flour but you can use the same concept to any nut, seed, or grain. For specific instructions on how to do this with whole seeds, see my recipe on trail mix.

The other benefit of using fermented almond flour is that it makes a much lighter end product. The fermentation process acts somewhat like a baking soda or powder, increasing the air space as your treat bakes, making it less dense.

Preparing fermented almond flour is quite easy. After letting it ferment for 24 hours, this base can be kept in the fridge for about a week. If you have a family that loves sweet treats, this is a food that you can keep on hand at all times to create a quick twenty minute cookie. Fermented almond flour is a great base for many baked goods.

Ingredients for Fermented Almond Flour:

  • 2 Cups Almond Flour

  • 1/4 Cup Whey

Directions for Fermented Almond Flour

Fermented almond flour makes for a much lighter baked good. The fermentation process acts like a baking soda, increasing air as your treat bakes. Fermenting almond flour is quite easy; it just needs to be done 24 hours before you bake. How to Fermen…

Add almond flour to a glass bowl.

Fermented almond flour makes for a much lighter baked good. The fermentation process acts like a baking soda, increasing air as your treat bakes. Fermenting almond flour is quite easy; it just needs to be done 24 hours before you bake. How to Fermen…

Pour whey over almond flour.

Fermented almond flour makes for a much lighter baked good. The fermentation process acts like a baking soda, increasing air as your treat bakes. Fermenting almond flour is quite easy; it just needs to be done 24 hours before you bake. How to Fermen…

Stir to moisten. Add additional whey if needed. Flour should be moist and crumbly but not wet.

Fermented almond flour makes for a much lighter baked good. The fermentation process acts like a baking soda, increasing air as your treat bakes. Fermenting almond flour is quite easy; it just needs to be done 24 hours before you bake. How to Fermen…

Cover and leave for 24 hours to properly ferment. During this time, your fermenting almond flour can be left with other jar ferments because it is covered.


Fermented Almond Flour

Author:
prep time: cook time: total time:

ingredients:

  • 2 Cups Almond Flour
  • 1/4 Cup Whey

instructions:

How to cook Fermented Almond Flour

  1. Add almond flour to a glass bowl.
  2. Pour whey over almond flour.
  3. Stir to moisten. Add additional whey if needed. Flour should be moist and crumbly but not wet.
  4. Cover and leave for 24 hours to properly ferment. During this time, your fermenting almond flour can be left with other jar ferments because it is covered.
Created using The Recipes Generator
15.png

Chicken Stock Recipe

Meat stock is a pillar in healing a leaky gut but this rich food is beneficial to anyone. It provides large amounts of the immune system’s favorite foods, is very easy to digest, and is a great base to modify for other healing and nutritious recipes.  

Meat stock is meant to be a meal in itself. It’s short cooking time allows the meat to remain edible while still enriching stock with easy to absorb nutrients. This is the perfect thing to eat anytime you are feeling ill or stressed or “can’t get filled up” hungry. These are some of the reasons meat stock is such an important part of the healing process of the GAPS Diet. Any time you are consuming meat stock on a regular basis, your body will be receiving the healing benefit.

Meat stock can be made into a soup or simply drunk on its own as a hot beverage with a meal. You can also poach a couple eggs in your stock for a rich breakfast. Stock can also be used to cook rice or other soaked grains to increase their digestibility and nutritional content. In short, this should be considered a staple to have in your kitchen at all times, either in the fridge or the freezer.

This recipe is stock without aromatics. I prefer stock this way currently because it’s a neutral base ingredient that can be changed in any way for any other recipe. Making stock this way, you can also feed your dog the extra chicken meat because the base doesn’t have onions. Make sure you debone the chicken before giving to your dog; they should not have chicken bones.

You’ll notice I set aside the breasts of the chicken. Good stock should be 80% meat and 20% bone with a joint. Using a whole chicken, this ratio is fulfilled without needed the breasts. You can use the breasts in other recipes or add to the soup later for more tender meat.

Basic-Chicken-Stock-Recipe-GAPS-Legal-Meat-Stock-Easy-Recipe-GAPS-Diet-Stock

There are a variety of ways you can skim the scum off the top of your stock. I usually use a slotted spoon but you can also use a mesh scum skimmer, a slotted spoon, a small strainer, or a large soup spoon.

Skimming the scum off the top is where you can tell the quality of your meat. If your meat is poor quality, had a lot of hormones or was poorly processed, you’ll get scum that’s heavy, grey and unappetizing. If you have a good quality chicken, you will have a small amount of light almost white colored scum that appears as a lighter foam. This is also where you can tell if your meat has gone bad at this point. If your chicken is not good, you will smell an obvious sulfur smell.

You can store your stock in the fridge or the freezer, depending on how quickly you’ll consume the batch.

A note about Meat Stock and the GAPS Intro Diet:

When Dr. Natasha Campbell talks about meat in stage 1, she’s referring to eating primarily the gelatinous meats like skin, joints and connective tissue. When meat is added on Stage 2, she means the muscle meats, the only thing we Americans consider to be meat. Eating a lot of muscle meat can be constipating so if this is your issue, be sure to eat every last bit of the skin and joints.

Basic-Chicken-Stock-Recipe-GAPS-Legal-Meat-Stock-Easy-Recipe-GAPS-Diet-Stock

Fill large stock pot with water.

Remove chicken from package and remove giblets from interior. Rinse chicken.

Basic-Chicken-Stock-Recipe-GAPS-Legal-Meat-Stock-Easy-Recipe-GAPS-Diet-Stock

Cut chicken into 8 pieces, joints exposed. First, remove the wings at the base of the joint.

Basic-Chicken-Stock-Recipe-GAPS-Legal-Meat-Stock-Easy-Recipe-GAPS-Diet-Stock

Slice the drumsticks, pop the joint out of the meat and finish slicing off the drumstick.

Basic-Chicken-Stock-Recipe-GAPS-Legal-Meat-Stock-Easy-Recipe-GAPS-Diet-Stock

Slice down the center of the bird, exposing the back. Slice the back off.

Basic-Chicken-Stock-Recipe-GAPS-Legal-Meat-Stock-Easy-Recipe-GAPS-Diet-Stock

With the chest cavity down, slice to the right of the breast bone, removing one breast and then the other.

Pull the tenders off the breast (the underside of the breast) and remove the skin from the breast. Set the breasts aside for a different recipe.

Optionally, seperate the drumstick from the thigh.

Basic-Chicken-Stock-Recipe-GAPS-Legal-Meat-Stock-Easy-Recipe-GAPS-Diet-Stock

This is how your chicken should look once you've cut it into the pieces.

Place pieces of chicken into the water. First, the back, then breastbone, then wings, thighs, then the drumsticks. Add in all giblets and extra skin from breasts.

Basic-Chicken-Stock-Recipe-GAPS-Legal-Meat-Stock-Easy-Recipe-GAPS-Diet-Stock

Meat should be covered with about two inches of water. Here I am measuring the water level with my finger.

Basic-Chicken-Stock-Recipe-GAPS-Legal-Meat-Stock-Easy-Recipe-GAPS-Diet-Stock

Bring to a boil. It usually takes 10-15 minutes to bring to a boil.

Basic-Chicken-Stock-Recipe-GAPS-Legal-Meat-Stock-Easy-Recipe-GAPS-Diet-Stock

Skim the scum off the top using a mesh scum skimmer, a slotted spoon or a large soup spoon. Try to leave as much fat as you can in the pot.

If you miss skimming the scum, your meat stock is fine. The scum is simply impurities. Removing them improves the overall taste of your meat stock but leaving them is not harmful.

Basic-Chicken-Stock-Recipe-GAPS-Legal-Meat-Stock-Easy-Recipe-GAPS-Diet-Stock

Reduce your heat and leave the pot at a simmer for 1 - 1 ½ hours.

Longer simmering will make the meat tasteless. Longer than 8 hours causes the histamine amounts to be higher which can cause nerve irritation symptoms in people with a leaky gut.

Simmering means movement in the water and very little movement on the surface.

Basic-Chicken-Stock-Recipe-GAPS-Legal-Meat-Stock-Easy-Recipe-GAPS-Diet-Stock

Remove the whole pieces of chicken onto a platter. I use a strainer to make it easier.

Allow the chicken pieces to cool.

Basic-Chicken-Stock-Recipe-GAPS-Legal-Meat-Stock-Easy-Recipe-GAPS-Diet-Stock

Debone the chicken chunks.

Basic-Chicken-Stock-Recipe-GAPS-Legal-Meat-Stock-Easy-Recipe-GAPS-Diet-Stock

When you find the heart - SCORE! Eat it! This is my reward to myself for deboning the chicken.

Basic-Chicken-Stock-Recipe-GAPS-Legal-Meat-Stock-Easy-Recipe-GAPS-Diet-Stock

Make sure you remove only the bones! Everything else is delicious and healthy for you. This photo shows all that should be left after you have deboned the chicken.

Toss the bones or freeze them for bone broth at a later time. I don’t like bone broth so I toss them.

Basic-Chicken-Stock-Recipe-GAPS-Legal-Meat-Stock-Easy-Recipe-GAPS-Diet-Stock

Once stock has cooled slightly, pour into jars or use immediately for soup, like this GAPS Legal Chicken Tortilla Soup.

Basic-Chicken-Stock-Recipe-GAPS-Legal-Meat-Stock-Easy-Recipe-GAPS-Diet-Stock

If you’d like to freeze your stock, wait for it to cool to room temperature. This inhibits bacteria growth.

Then, to cool completely, store in the fridge.

Once your stock has completely cooled, add to a BPA free freezer bag. Lay inside a container to shape your bag. Freeze solid.

Do this one bag at a time!

Basic-Chicken-Stock-Recipe-GAPS-Legal-Meat-Stock-Easy-Recipe-GAPS-Diet-Stock

After deboning the chicken, sift through the meat picking out all the skin and organ meat.

Add these back to your stock and blend them with an immersion blender or blender.

It will get frothy! Don’t be alarmed!

Basic-Chicken-Stock-Recipe-GAPS-Legal-Meat-Stock-Easy-Recipe-GAPS-Diet-Stock-683x1024.png

Chicken Stock

Author:
prep time: cook time: total time:

ingredients:

  • Filtered Water
  • 1 Whole Chicken

instructions:

How to cook Chicken Stock

  1. Fill large stock pot with water.
  2. Remove chicken from package and remove giblets from interior. Rinse chicken.
  3. Cut chicken into 8 pieces, joints exposed. First, remove the wings at the base of the joint.
  4. Slice the drumsticks, pop the joint out of the meat and finish slicing off the drumstick.
  5. Slice down the center of the bird, exposing the back. Slice the back off.
  6. With the chest cavity down, slice to the right of the breast bone, removing one breast and then the other.
  7. Pull the tenders off the breast (the underside of the breast) and remove the skin from the breast. Set the breasts aside for a different recipe.
  8. Optionally, separate the drumstick from the thigh.
  9. This is how your chicken should look once you've cut it into the pieces.
  10. Place pieces of chicken into the water. First, the back, then breastbone, then wings, thighs, then the drumsticks. Add in all giblets and extra skin from breasts.
  11. Meat should be covered with about two inches of water. Here I am measuring the water level with my finger.
  12. Bring to a boil. It usually takes 10-15 minutes to bring to a boil.
  13. Skim the scum off the top using a mesh scum skimmer, a slotted spoon or a large soup spoon. Try to leave as much fat as you can in the pot.
  14. If you miss skimming the scum, your meat stock is fine. The scum is simply impurities. Removing them improves the overall taste of your meat stock but leaving them is not harmful.
  15. Reduce your heat and leave the pot at a simmer for 1 - 1 ½ hours.
  16. Longer simmering will make the meat tasteless. Longer than 8 hours causes the histamine amounts to be higher which can cause nerve irritation symptoms in people with a leaky gut.
  17. Simmering means movement in the water and very little movement on the surface.
  18. Remove the whole pieces of chicken onto a platter. I use a strainer to make it easier.
  19. Allow the chicken pieces to cool.
  20. Debone the chicken chunks.
  21. When you find the heart - SCORE! Eat it! This is my reward to myself for deboning the chicken.
  22. Make sure you remove only the bones! Everything else is delicious and healthy for you. This photo shows all that should be left after you have deboned the chicken.
  23. Toss the bones or freeze them for bone broth at a later time. I don’t like bone broth so I toss them.
  24. Once stock has cooled slightly, pour into jars or use immediately for soup, like this GAPS Legal Chicken Tortilla Soup.
  25. If you’d like to freeze your stock, wait for it to cool to room temperature. This inhibits bacteria growth.
  26. Then, to cool completely, store in the fridge.
  27. Once your stock has completely cooled, add to a BPA free freezer bag. Lay inside a container to shape your bag. Freeze solid.
  28. Do this one bag at a time!
  29. After deboning the chicken, sift through the meat picking out all the skin and organ meat.
  30. Add these back to your stock and blend them with an immersion blender or blender.
  31. It will get frothy! Don’t be alarmed!
Created using The Recipes Generator

Russian Custard

GAPS Legal Custard Dessert

Russian custard is a delicious desert or afternoon snack. It is rich, and just sweet enough. You can whip it up in just a few minutes, and it is easy to double or triple to feed another (or more for yourself).

Russian custard is just two ingredients: raw egg yolks and honey. Don't let the raw egg yolk stop you! The texture and taste of the custard are very different than that of a raw egg yolk. I've had multiple people express their pleasant surprise at how much they like it (despite being reluctant to try it because of the egg yolks). So give it a try—it just might become a favorite of yours!

For people on GAPS, this recipe is legal as early as Intro Stage 2

Russian Custard Recipe

Ingredients for Russian Custard:

  • 2 Eggs*

  • 1/2 - 1 tsp Honey

*As per the usual warning, eating undercooked or raw eggs may increase your risk of foodborne illness.

You can multiply this recipe for as many servings as you want. The above ratio is for one serving.

Directions for Russian Custard:

This custard recipe is no bake and includes only two ingredients. It's dairy free and gluten free. It makes for a delicious dessert for one or you can multiple it for as many servings as you like. The entire recipe takes about five minutes. Recipe b…

Separate the egg yolks from the egg whites. Place the yolks in a separate bowl.

This custard recipe is no bake and includes only two ingredients. It's dairy free and gluten free. It makes for a delicious dessert for one or you can multiple it for as many servings as you like. The entire recipe takes about five minutes. Recipe b…

Add honey to the egg yolks. I find 1/2 tsp of honey to be plenty and very sweet. You can add more if you need it. Or less.

This custard recipe is no bake and includes only two ingredients. It's dairy free and gluten free. It makes for a delicious dessert for one or you can multiple it for as many servings as you like. The entire recipe takes about five minutes. Recipe b…

Beat the egg yolks with a whisk until they are thick and change color. They should look much lighter, with a little white undertone. This takes about five minutes. A fork does not work well for whisking!

This custard recipe is no bake and includes only two ingredients. It's dairy free and gluten free. It makes for a delicious dessert for one or you can multiple it for as many servings as you like. The entire recipe takes about five minutes. Recipe b…

Serve in a small bowl for a delicious dessert or mid-afternoon snack.

This custard recipe is no bake and includes only two ingredients. It's dairy free and gluten free. It makes for a delicious dessert for one or you can multiple it for as many servings as you like. The entire recipe takes about five minutes. Recipe b…

Russian Custard

Author:
prep time: cook time: total time:

ingredients:

  • 2 Eggs*
  • 1/2 - 1 tsp Honey
  • *As per the usual warning, eating undercooked or raw eggs may increase your risk of foodborne illness.
  • You can multiply this recipe for as many servings as you want. The above ratio is for one serving.

instructions:

How to cook Russian Custard

  1. Separate the egg yolks from the egg whites. Place the yolks in a separate bowl.
  2. Add honey to the egg yolks. I find 1/2 tsp of honey to be plenty and very sweet. You can add more if you need it. Or less.
  3. Beat the egg yolks with a whisk until they are thick and change color. They should look much lighter, with a little white undertone. This takes about five minutes. A fork does not work well for whisking!
  4. Serve in a small bowl for a delicious dessert or mid-afternoon snack.
Created using The Recipes Generator

Simple Easy Hollandaise Sauce Recipe

GAPS Legal Hollandaise Sauce Recipe Made with Limes

What do you do when you are bored or eggs two ways (scrambled or fried?)... make hollandaise sauce, of course!

I'm not sure how the true chefs will react to this recipe because I'm sure I don't get my hollandaise sauce as smooth as it's supposed to be, but so many of you have asked for this favorite recipe of mine that I want to share it here! I have now made this sauce dozens of times and there are a few principles I have learned about what makes this dish different than plain scrambled eggs.

#1 Don't do this in a cast-iron or your eggs will taste like iron.

#2 Lower heat makes for smoother sauce. But if you are in a hurry and don't mind lumps, more heat and less time still creates a delicious meal.

#3 The acid (lime or lemon juice) is the real key to this dish. I make my plain scrambled eggs with similar amounts of butter, but it is the lime that makes the eggs more smooth.

#4 I prefer lime over lemon because it is more mild and I feel I can add more of it without overpowering the dish. I believe this makes the hollandaise sauce easier to successfully make. After having done this many times there is a color change I look for when adding the lime juice. When I achieve this color change I know that my sauce will turn out decently smooth.

As you make this sauce, don't give up if you don't achieve your desired smoothness the first time! As with most cooking, this is an art and skill that you will get better at with practice. Enjoy your hollandaise sauce!

Simple Hollandaise Sauce

Ingredients

  • 2 eggs

  • 3 (ish) tablespoons Butter

  • ½ lime, freshly squeezed

Directions

Hollandaise-Sauce-Easy-Sauce-for-Eggs-Hollandaise-with-Limes-

Melt butter in pan on very low heat.

Hollandaise-Sauce-Easy-Sauce-for-Eggs-Hollandaise-with-Limes

A smooth hollandaise sauce is achievable! Whisk the eggs quickly before adding to melted butter. Recipe by certified GAPS Practitioner Amy Mihaly, Be Well Clinic.

Beat two eggs in a bowl.

Hollandaise-Sauce-Easy-Sauce-for-Eggs-Hollandaise-with-Limes

Hollandaise Sauce is my most requested recipe! I eat this GAPS Legal and GAPS friendly sauce on chicken, vegetables and with eggs. It's also Whole 30 and Paleo friendly! Recipe by certified GAPS Practitioner Amy Mihaly, Be Well Clinic.

Add eggs to pan as soon as butter is melted.

Hollandaise-Sauce-Easy-Sauce-for-Eggs-Hollandaise-with-Limes

The key to making a good Hollandaise Sauce is to whisk constantly for a smooth sauce. This GAPS legal recipe couldn't be easier! Recipe by certified GAPS Practitioner Amy Mihaly, Be Well Clinic.

Mix sauce together, stirring constantly. Add lime juice. Using a whisk will get you a smoother sauce but I don’t mind a chunkier sauce.

If your eggs start to thicken, turn down your heat or add more lime juice.

Hollandaise-Sauce-Easy-Sauce-for-Eggs-Hollandaise-with-Limes

An easy simple recipe for Hollandaise Sauce with only three ingredients. This recipe is legal on the GAPS Diet, Whole 30 and Paleo. Recipe by certified GAPS Practitioner Amy Mihaly, Be Well Clinic.

The sauce is done when it holds together more and you can start to see the bottom of the pan.

Serve immediately! Serve with chicken, artichokes, vegetables.

Note:

Do not cook this is in an cast iron pan! Use a stainless steel pan with good heat protection.

HollandaiseSauce-683x1024.png

Hollandaise Sauce with Limes

Author:
prep time: cook time: total time:

ingredients:

  • 2 eggs
  • 3 (ish) tablespoons Butter
  • ½ lime, freshly squeezed

instructions:

How to cook Hollandaise Sauce with Limes

  1. Melt butter in pan on very low heat.
  2. A smooth hollandaise sauce is achievable! Whisk the eggs quickly before adding to melted butter. Recipe by certified GAPS Practitioner Amy Mihaly, Be Well Clinic.
  3. Beat two eggs in a bowl.
  4. Hollandaise Sauce is my most requested recipe! I eat this GAPS Legal and GAPS friendly sauce on chicken, vegetables and with eggs. It's also Whole 30 and Paleo friendly! Recipe by certified GAPS Practitioner Amy Mihaly, Be Well Clinic.
  5. Add eggs to pan as soon as butter is melted.
  6. The key to making a good Hollandaise Sauce is to whisk constantly for a smooth sauce. This GAPS legal recipe couldn't be easier! Recipe by certified GAPS Practitioner Amy Mihaly, Be Well Clinic.
  7. Mix sauce together, stirring constantly. Add lime juice. Using a whisk will get you a smoother sauce but I don’t mind a chunkier sauce.
  8. If your eggs start to thicken, turn down your heat or add more lime juice.
  9. An easy simple recipe for Hollandaise Sauce with only three ingredients. This recipe is legal on the GAPS Diet, Whole 30 and Paleo. Recipe by certified GAPS Practitioner Amy Mihaly, Be Well Clinic.
  10. The sauce is done when it holds together more and you can start to see the bottom of the pan.
  11. Serve immediately! Serve with chicken, artichokes, vegetables.
  12. Note:
  13. Do not cook this is in an cast iron pan! Use a stainless steel pan with good heat protection.
Created using The Recipes Generator

Liver Pâté Recipe

Liver pâté makes me feel like I am eating a treat when I'm really eating something healthy—very healthy and good for me! You can make pate out of any type of liver, but chicken liver is the most mild, so that is a great one to start with if you are not used to eating liver. Once you make this delicious mixture, you can eat it many ways. Honestly, I mostly just eat it by the spoonful, but there are many other ways you can eat pate, including the ones listed below. After you make this wonderful superfood, let us know in the comments your favorite ways to spice and eat pate.

Ways to Eat liver Pate:

  • It’s good on it’s own

  • Spread it on crackers or bread if you are not following the GAPS diet

  • Create GAPS Legal “crackers” with slices of avocado or zucchini

  • Layer with fermented veggies like cabbage or sauerkraut

  • Spread on pieces of cheese

  • Dip veggies such as carrot sticks,

  • Add the pate to lean meats like chicken or turkey or game meat like venison or turkey to give it a boost of fat

GAPS Legal Liver Pate Ingredients

  • ½ c Liver

  • Butter or lard

  • 2 tbsp chopped Onion

  • 3 cloves of Garlic

  • Spices (If you’re on the GAPS Diet, omit spices until you are tolerating them on a later stage!)

    • 1/16 tsp nutmeg, cloves and ginger

    • ¼ tsp of cinnamon

    • ¼ to ½ tsp Salt

  • 2 small pans

  • Blender or Food Processor

Directions for making liver pate for the gaps diet

liver-pate-how-to-make-liver-pate-eating-pate-on-the-gaps-diet-organ-meat-on-gaps-liver-pate-recipe-for-gaps-protocol-loveland-colorado-health-clinic

Roughly chop about 2 tbsp of an onion. The smaller you chop your onion, the quicker it will cook but careful - too small and it’s easy to burn!

liver-pate-how-to-make-liver-pate-eating-pate-on-the-gaps-diet-organ-meat-on-gaps-liver-pate-recipe-for-gaps-protocol-loveland-colorado-health-clinic

Add about ½ inch of water to a pan. Add liver to pan to poach.

After 2-3 minutes, flip the liver to poach the other side.

liver-pate-how-to-make-liver-pate-eating-pate-on-the-gaps-diet-organ-meat-on-gaps-liver-pate-recipe-for-gaps-protocol-loveland-colorado-health-clinic

Add butter or lard to a small skillet.  Add the onions to the skillet, stir. Add the garlic to the skillet.

The liver is done when it is still a little pink inside but not red. A little blood coming out of the liver when it’s done. If the juices are all clear, the liver is overcooked.

Add liver to the food processor or blender. Process quickly on its own.

liver-pate-how-to-make-liver-pate-eating-pate-on-the-gaps-diet-organ-meat-on-gaps-liver-pate-recipe-for-gaps-protocol-loveland-colorado-health-clinic

Add cooked onions and garlic to food processor or blender. Add enough fat so that the ratio is about 40% fat, 60% liver, about 3 tbsp for ½ cup of liver. Lard has less of a flavor than butter, butter will give your pate a different flavor.

Blend until smooth.

liver-pate-how-to-make-liver-pate-eating-pate-on-the-gaps-diet-organ-meat-on-gaps-liver-pate-recipe-for-gaps-protocol-loveland-colorado-health-clinic

Add spices and ¼ tsp salt to the blender or food processor. Blend until smooth. If needed, add remaining ½ tsp of salt.

Serve pate warm or chilled.


Liver Pate

Author:
prep time: cook time: total time:

ingredients:

  • ½ c Liver
  • Butter or lard
  • 2 tbsp chopped Onion
  • 3 cloves of Garlic
  • Spices
  • 1/16 tsp nutmeg, cloves and ginger
  • ¼ tsp of cinnamon
  • ¼ to ½ tsp Salt
  • 2 small pans
  • Blender or Food Processor

instructions:

How to cook Liver Pate

  1. Roughly chop about 2 tbsp of an onion. The smaller you chop your onion, the quicker it will cook but careful - too small and it’s easy to burn!
  2. Add about ½ inch of water to a pan. Add liver to pan to poach.
  3. After 2-3 minutes, flip the liver to poach the other side.
  4. Add butter or lard to a small skillet. Add the onions to the skillet, stir. Add the garlic to the skillet.
  5. The liver is done when it is still a little pink inside but not red. A little blood coming out of the liver when it’s done. If the juices are all clear, the liver is overcooked.
  6. Add liver to the food processor or blender. Process quickly on its own.
  7. Add cooked onions and garlic to food processor or blender. Add enough fat so that the ratio is about 40% fat, 60% liver, about 3 tbsp for ½ cup of liver. Lard has less of a flavor than butter, butter will give your pate a different flavor.
  8. Blend until smooth.
  9. Add spices and ¼ tsp salt to the blender or food processor. Blend until smooth. If needed, add remaining ½ tsp of salt.
  10. Serve pate warm or chilled.
Created using The Recipes Generator

Butternut Squash GAPS Pancakes Recipe

This recipe was adapted from the GAPS Pancake Recipe in the Gut and Psychology Syndrome book by Dr. Natasha Campbell. Makes 3 Pancakes.

GAPS Legal Pancakes Ingredients

  • 1/2 c. cooked Butternut Squash

  • 3 Farm Fresh Eggs

  • Fat such as lard, butter or sour cream

  • Salt

  • Toppings such as date syrup or cinnamon

  • Food Processor or Blender

Directions for gaps legal pancakes

gaps-legal-pancakes-pancakes-made-with-butternut-squash-gaps-diet-gaps-protocol

Cut butternut squash into halves. Deseed and bake face down on a parchment lined baking tray for 40 minutes at 400 degrees until very soft.

When squash has cooled and can be handled, scoop out the flesh with a spoon into a large bowl.

gaps-legal-pancakes-pancakes-made-with-butternut-squash-gaps-diet-gaps-protocol

Add squash, eggs and fat to blender. For every 1/2 cup of squash, add 3 eggs, 1 tbsp of fat and 2 pinches of salt. The traditional GAPS pancake recipe uses almond butter to thicken instead of fat. Since this is a nut free recipe, I used fat to thicken instead. Blend until smooth.

gaps-legal-pancakes-pancakes-made-with-butternut-squash-gaps-diet-gaps-protocol

Add a couple tablespoons of fat to a pan. Heat on low heat until oil is simmering.

Make sure your fat is glistening in the pan before adding your pancake batter. You can also add one drop of water into the pan. If it sizzles, the oil is ready.When pan is ready, add scoop of pancake batter. Cook pancake on low heat for about 10 minutes.

You can cook multiple pancakes at a time but I’ve had the best luck cooking one at a time!

gaps-legal-pancakes-pancakes-made-with-butternut-squash-gaps-diet-gaps-protocol

Similar to traditional pancakes, they will bubble on top when they are ready to flip.

Cook on the second side for about two to three minutes. Be careful - this second side will cook much faster than the first!

gaps-legal-pancakes-pancakes-made-with-butternut-squash-gaps-diet-gaps-protocol

Once cooked, add butter. Keep as a savory pancake or for a sweeter treat, add date syrup or cinnamon. Do not add cinnamon to the mixture before you cook - it will burn!

Notes: If your fat gets too hot and burns, rinse your pan out and start with new fat for the next pancake. Otherwise, all the pancakes will taste burn.

Blackened and burnt sections of the pancake contain high levels of carbon, which is difficult to digest. These should be avoided as much as possible on the introduction stages of the GAPS diet.


Butternut Squash Pancakes

Author:
prep time: cook time: total time:
This recipe was adapted from the GAPS Pancake Recipe in the Gut and Psychology Syndrome book by Dr. Natasha Campbell. Makes 3 Pancakes.

ingredients:

  • 1/2 c. cooked Butternut Squash
  • 3 Farm Fresh Eggs
  • Fat such as lard, butter or sour cream
  • Salt
  • Toppings such as date syrup or cinnamon
  • Food Processor or Blender

instructions:

How to cook Butternut Squash Pancakes

  1. Cut butternut squash into halves. Deseed and bake face down on a parchment lined baking tray for 40 minutes at 400 degrees until very soft.
  2. When squash has cooled and can be handled, scoop out the flesh with a spoon into a large bowl.
  3. Add squash, eggs and fat to blender. For every 1/2 cup of squash, add 3 eggs, 1 tbsp of fat and 2 pinches of salt. The traditional GAPS pancake recipe uses almond butter to thicken instead of fat. Since this is a nut free recipe, I used fat to thicken instead. Blend until smooth.
  4. Add a couple tablespoons of fat to a pan. Heat on low heat until oil is simmering.
  5. Make sure your fat is glistening in the pan before adding your pancake batter. You can also add one drop of water into the pan. If it sizzles, the oil is ready.When pan is ready, add scoop of pancake batter. Cook pancake on low heat for about 10 minutes.
  6. You can cook multiple pancakes at a time but I’ve had the best luck cooking one at a time!
  7. Similar to traditional pancakes, they will bubble on top when they are ready to flip.
  8. Cook on the second side for about two to three minutes. Be careful - this second side will cook much faster than the first!
  9. Once cooked, add butter. Keep as a savory pancake or for a sweeter treat, add date syrup or cinnamon. Do not add cinnamon to the mixture before you cook - it will burn!
  10. Notes: If your fat gets too hot and burns, rinse your pan out and start with new fat for the next pancake. Otherwise, all the pancakes will taste burn.
  11. Blackened and burnt sections of the pancake contain high levels of carbon, which is difficult to digest. These should be avoided as much as possible on the introduction stages of the GAPS diet.
Created using The Recipes Generator

Fermented Garlic: A Powerful Food for Health

Fermented Garlic: A Powerful Food for Health

Heard of fermented garlic? Wondered what the health benefits of garlic are? Then this post is for you!

Lovely Lard

Eating animal fat is important to our body's health. But eating enough fat can be challenging, especially when there is a dairy allergy. Lard is a great alternative to butter, and its taste is more mild than that of tallow.

You can buy lard at the store, but it is expensive and may be hydrogenated or of poor quality. Making your own lard is simple and easy, and can be done for a fraction of the price.

To make lard, you first start out with pig fat. This can be obtained from a butcher, or even trimmed off of fatty cuts of pork like the Boston butt. The process of turning fat into lard or tallow is called rendering. In this post I describe rendering lard, but the process for rendering tallow (which is fat from beef, bison, deer, lamb, or elk) is the same, although for tallow it may take a few more hours.  

There are two kinds of pig fat. Leaf fat is from fat surrounding the internal organs. It is very mild in taste and used to be reserved for making pies and pastries. Body fat is from the layer of fat beneath the skin. This has a slightly stronger pork taste, and is better used in cooking meat and vegetables. Along with a different taste, there is a different look to the two types of fat. Body fat is in large pieces, and appears more dense and flat. Leaf fat is in smaller pieces, has a fluffier texture, and may contain membranes. The fat you get from a butcher may contain both types of fat. If that is the case, I recommend separating out the two types of fat and rendering them separately so you can use them for different purposes. However, there is no problem in mixing them and rendering them together.

Leaf fat

IMG_20190605_084127513.jpg

Body Fat

IMG_20190605_084134159.jpg

Watch the video below to learn how to make lard and then scroll down for the recipe and directions!

Making Lard:

First, cut up the pig fat into small 1-2 inch sized cubes. If using leaf fat, remove as much membrane as possible.

Put the fat cubes in a medium saucepan on low heat. You may use a crockpot, but it must have a very low setting or the fat will burn. Stir occasionally and watch closely. Don't let the lard smoke!

With time, the solid pieces of fat will get smaller, and the liquid will increase.

After a few hours, when the lard is liquefied, set up your strainer and cloth. A metal strainer is best because the lard is hot! For extra strained lard which will last even longer you can additionally strain through a cloth. You can use an old napkin or other cloth, or several layers of cheesecloth. I have a dedicated cloth I use just for straining lard because you can never really wash out all the grease.

Pour the liquid into the strainer. The liquid will go into the jar and the cracklings will stay in the cloth or strainer.

Squeeze the rest of the liquid out of the cracklings.

Once cracklings are separated from the liquid lard, salt and fry them. You can eat them like bacon bits, or just by themselves.

Allow the jar of lard to cool on the counter.

When the lard is cool you can move it to the fridge, or leave it on the counter.

If you are careful not to contaminate the jar, the lard will last for several months, even left out at room temperature. Use the lard in your cooking— it is a wonderful thing to fry up vegetables or meat and add fat to your diet. Bon appétit!

Onward!


How to Make Lard

Author:
prep time: cook time: total time:

instructions:

How to cook How to Make Lard

  1. First, cut up the pig fat into small 1-2 inch sized cubes. If using leaf fat, remove as much membrane as possible.
  2. Put the fat cubes in a medium saucepan on low heat. You may use a crockpot, but it must have a very low setting or the fat will burn. Stir occasionally and watch closely. Don't let the lard smoke!
  3. With time, the solid pieces of fat will get smaller, and the liquid will increase.
  4. After a few hours, when the lard is liquified, set up your strainer and cloth.
  5. Below you see pictured a jar, jar funnel, and metal strainer. Metal is best because the lard is hot! To finish it off, place a cloth. You can use an old napkin or other cloth, or several layers of cheesecloth.
  6. Pour the liquid into the strainer. The liquid will go into the jar and the cracklings will stay in the cloth.
  7. Squeeze the rest of the liquid out of the cracklings.
  8. Cracklings separated from the liquid lard. Salt and fry these. You can eat them like bacon bits, or just plain.
  9. Allow the jar of lard to cool on the counter.
  10. When the lard is cool you can move it to the fridge, or leave it on the counter.
  11. If you are careful not to contaminate the jar, the lard will last for several months, even left out at room temperature. Use the lard in your cooking— it is a wonderful thing to fry up vegetables or meat and add fat to your diet. Bon appétit!
Created using The Recipes Generator

Making the Vegetable Medley

One of the most important ferments in the GAPS™ diet is the vegetablemedley. You can find this recipe in Dr. Natasha Cambell-McBride's book, Gut and Psychology Syndrome. Her recipe is for a bowl ferment, but you can also make it in a jar, which is how I prefer to make it. And this is the recipe we are going to do today! This recipe contains five different vegetables: beets (good for liver and blood cleansing), cabbage (stimulates digestion), carrots (contain vitamin A), and cauliflower (makes it taste better, believe me), and garlic (good for immune support). It makes a very rich and flavorful liquid, which is also a wonderful probiotic drink.

No matter how delicious this is, and how much you like it, drink only a little bit in the beginning to avoid die-off. Respect the ferments, man!

IMG_7729.jpg

Ingredients and Supplies for Vegetable Medley

  • Glass jar, 1/2 gallon

  • Sea salt, 3-4 TBS

  • 1 Medium beet

  • 3 Carrots

  • 1/2 Cauliflower

  • 1/2 Cabbage

  • Garlic (5-7 cloves), fresh or fermented

Instructions for Vegetable Medley

IMG_7693.jpg

To a clean half-gallon jar, add about 1/2 cup of each vegetable. You can add them in any order you like. The main purpose of the vegetable medley is to drink the liquid, so make sure the ingredients you add only fill the jar half way (or a little more). This will create enough liquid to make it worth it!

IMG_7715.jpg

Add the beets. Then the carrots. And so on...

IMG_7727.jpg

Last of all, add the garlic. When all the ingredients are in the jar, it should be less than 3/4 full.

IMG_7732.jpg

Create a brine of the salt and about a 1 cup of filtered water. Swirl and shake to dissolve the salt.

Add filtered water, to the shoulder of the jar.

IMG_7754.jpg

Finally, add a cabbage leaf or two to hold all the ingredients under the water. I add a pinch of salt after the cabbage leaves are in place to discourage bad bacterial growth. All that's left is to tightly screw on the lid and leave it on the counter.

After 7 days, move the jar to the fridge and consume the liquid until it's gone, and eat the vegetable pieces. This can be a perpetual ferment. To do this, daily drink what you need, then replace that amount with filtered water, and continue to leave it out on the counter. Keep up with this process until the vegetables are spent (they turn grey and tasteless).

That's it! You have successfully made the veggie medley! Once you get the basics down, you can experiment with different vegetable combinations (eg. broccoli instead of cauliflower). Let us know your favorite combinations!

Onward!


Vegetable Medley

Author:
prep time: cook time: total time:

ingredients:

  • Glass jar, 1/2 gallon
  • Sea salt, 3-4 TBS
  • Medium beet
  • Carrots (3)
  • Cauliflower
  • Cabbage
  • Garlic (5-7 cloves), fresh or fermented

instructions:

How to cook Vegetable Medley

  1. To a clean half-gallon jar, add about 1/2 cup of each vegetable.You can add them in any order you like. The main purpose of the vegetable medley is to drink the liquid, so make sure the ingredients you add only fill the jar half way (or a little more). This will create enough liquid to make it worth it!
  2. Add the beets
  3. And carrots
  4. And so on...
  5. Last of all, garlic and salt
  6. When all the ingredients are in the jar, it should be less than 3/4 full. Add filtered water, to the shoulder of the jar. Finally, add a cabbage leaf or two to hold all the ingredients under the water. I add a pinch of salt after the cabbage leaves are in place to discourage bad bacterial growth. All that's left is to tightly screw on the lid and leave it on the counter.
  7. After 7 days, move the jar to the fridge and consume the liquid until it's gone, and eat the vegetable pieces. This can be a perpetual ferment. To do this, daily drink what you need, then replace that amount with filtered water, and continue to leave it out on the counter. Keep up with this process until the vegetables are spent (they turn grey and tasteless).
  8. That's it! You have successfully made the veggie medley! Once you get the basics down, you can experiment with different vegetable combinations (eg. broccoli instead of cauliflower). 
Created using The Recipes Generator
VegetableMedley.png

GAPS Milkshake

Our recipe this week is a simple, but powerful one! It is called the GAPS™ milkshake, and it packs a powerful punch! This delicious, satisfying and helpful beverage is a wonderful way to daily consume your freshly-pressed juices, and can even be a meal.

The GAPS™ milkshake is mix of juice, protein, and fat. Because it is easily digested, usually in about 20 minutes, it can be eaten when you don't have much time to sit and digest. But because it contains fat and protein, as well as sugar, it can sustain you for a while, often a few hours.

Let's get down to making it! You need a few simple ingredients.

  1. Freshly pressed juices (I like carrots, but you can use any juice mixture)

  2. Sour cream (creme fraische), coconut oil, or another fat

  3. Raw egg (whole or just the yoke)

  4. Raw honey (optional, and only a little!)

IMG_7397.jpg

Juice the carrot (and/or other vegetables and fruits). I use organic vegetables so I just rinse them off (sometimes). You can see my (not) high-end juicer in the picture! But it works! Don't feel like you have to spend hundreds of dollars to juice (this one was about $40). It is a centrifuge juicer, and I try to consume the juices within 15 minutes to get the most enzyme activity, but again, it works! Successful GAPS is not about perfection, it is about action!

IMG_7433.jpg

Once you have your juice in a glass, you are ready to add your other ingredients. Add 1-2 raw egg yolks or whole raw eggs. If you do add the white, I recommend using a spring whisk or a blender to break up the white--that is a hard texture to get down! With raw eggs, it is also important to know the source of your eggs (were the chickens healthy) and try not to touch the shell with the egg. If there happens to be any salmonella present, it is likely still on the outside of the egg, not the inside. Of course, there is no guarantee, especially if the eggs are washed (this breaks down the protective layer around the egg), so consume at your own risk! But I have yet to get sick, even using store bought eggs sometimes.

IMG_7441.jpg

Add the sour cream (a good-sized dollop). The sour cream is there primarily to slow the absorption of sugar from the juice—add to taste. You can also add coconut oil if you are not tolerating dairy (technically this makes it a GAPS Smoothie) Stir, whisk or blend together.

You can add a little honey if you need to. It is better to add some fruit to your juice ingredients instead of honey, but that isn't always an option, especially on early stages. I have found that the egg whites are a little bitter, and when I add a whole egg instead of just the yolk, I often need a little honey to help it go down. That's it! All that's left is to enjoy it!

As I said, this is a great "meal" for those on-the-go mornings. Especially if you are hungry early in the morning, this is a great thing to drink, as it is not a burden to the digestive system. The juices support your body's cleansing processes, which are often happening from 4am-10am every day. You could also add beet kvass to this beverage as an extra liver cleanser. It can overwhelm the flavor, so I prefer to drink mine separately. Experiment with your preferences, and with the recipe! Let us know how you like it best!

Onward!

GAPS Milkshake

GAPSmilkshake-150x150.jpg
  • Freshly Pressed Juices

  • Sour cream, creme faiche, coconut oil, or another fat

  • Raw Egg ((whole or just the yoke))

  • Raw Honey ((optional and only a little))

  1. Juice the carrot (and/or other vegetables and fruits).

  2. Add 1-2 raw egg yolks or whole raw eggs. If you do add the white, I recommend using a spring whisk or a blender to break up the white–that is a hard texture to get down!

  3. Add the sour cream to taste. The sour cream is there primarily to slow the absorption of sugar from the juice.

  4. Stir, whisk or blend together.

  5. Add a little honey if you need to

With raw eggs, it is also important to know the source of your eggs (were the chickens healthy) and try not to touch the shell with the egg. If there happens to be any salmonella present, it is likely still on the outside of the egg, not the inside. Of course, there is no guarantee, especially if the eggs are washed (this breaks down the protective layer around the egg), so consume at your own risk! 

I have found that the egg whites are a little bitter, and when I add a whole egg instead of just the yolk, I often need a little honey to help it go down.


HowtoMaketheGAPSMilkshakeJuiceCleanseGAPSDietRecipe.png

GAPS Milkshake

Author:
prep time: cook time: total time:

ingredients:

  • Freshly Pressed Juices
  • Sour cream, creme faiche, coconut oil, or another fat
  • Raw Egg ((whole or just the yoke))
  • Raw Honey ((optional and only a little))

instructions:

How to cook GAPS Milkshake

  1. Juice the carrot (and/or other vegetables and fruits).
  2. Add 1-2 raw egg yolks or whole raw eggs. If you do add the white, I recommend using a spring whisk or a blender to break up the white–that is a hard texture to get down!
  3. Add the sour cream to taste. The sour cream is there primarily to slow the absorption of sugar from the juice.
  4. Stir, whisk or blend together.
  5. Add a little honey if you need to

NOTES:

With raw eggs, it is also important to know the source of your eggs (were the chickens healthy) and try not to touch the shell with the egg. If there happens to be any salmonella present, it is likely still on the outside of the egg, not the inside. Of course, there is no guarantee, especially if the eggs are washed (this breaks down the protective layer around the egg), so consume at your own risk! I have found that the egg whites are a little bitter, and when I add a whole egg instead of just the yolk, I often need a little honey to help it go down.
Created using The Recipes Generator

Beet Kvass

Beet Kvass is a liver tonic. Anyone can make this simple fermented drink! It requires only a few ingredients, and only a few minutes to "put up."

Want to learn how? Good!

But first, some definitions:

  • Kvass: beverage

  • "Put up" a ferment: combine ingredients and set it aside to let it ferment

  • Sea Salt: unrefined salt, salt that is the same way it was found in nature

    • contains many trace minerals, depending on which type it is

    • Celtic Sea Salt, Real Salt, Himalayan Salt, others

    • most fermenting enthusiasts prefer Himalayan for fermenting (it's a taste thing)

  • Shoulder of the jar: the area of a jar where the jar narrows to become the mouth


Ingredients & Supplies to make beet kvass

  • 1/2 gallon glass mason jar

  • 1 medium-large beet

  • 2 TBS sea salt

  • cold, filtered water

Directions to Make Your Own Beet Kvass

Cut the beet into 1-2 inch cubes. Do not cut too small or shred the beet! Too much surface area and the beets will ferment too fast and create alcohol!

You do not need to peel the beets, just wash fairly well and cut off the top. A little organic dirt will add minerals and soil bacterium.

Place the cut beet in the mason jar. The beets should fill the jar about 1/4-1/3 of the way

Add salt to the jar. 2 TBS is the traditional amount when whey is not added.

Fill the jar up to the shoulder with cold, filtered water.

Seal the jar with a metal lid and ring, closing tightly.

Gently tip and swirl the jar to help the salt dissolve.

Set on the counter for 3-5 days, until the kvass is a rich purple color.

Move to the fridge (the beets stay in the liquid)

Consume daily!

You can use the beets for two batches

  • when the liquid is almost gone (about a pint left) then refill with water and salt

  • set on the counter for another 3-5 days

  • when the liquid is gone the second time, discard the beets and start fresh

Tips and Tricks for beet kvass

  • My beets are floating!

    • It's okay if the beets are floating-they often do, but will eventually sink. You don't need a weight for this ferment.

  • How much salt?????

    • The amount of salt largely depends on you--your taste, and your climate.

    • The salt is there to inhibit bad bacteria growth until the good bacteria are strong enough.

    • Beet kvass doesn't seem to go bad often, especially in the dry climate of Colorado.

    • I use about 2 TBS salt and no whey, with no problem. No whey! Ha ha ha, get it?

    • People like their kvass with more or less salt, so see how it tastes best to you.

  • I have a white film on the top and/or the bottom of my kvass.

    • DON'T start over!

    • This is merely the hard working lactobacillus bacterium thriving!

    • You can shake or stir in the white film, or skim it off, if you prefer.

  • I have blue or black, or another color of mold!

    • This is NOT okay. If you find this, throw it out and start over!

  • How much do I take each day?

    • It is generally recommended that you take up to 4 ounces 2x/day.

    • As with all ferments, it is important to START SLOW and increase gradually.

    • It's best to take this on an empty stomach, like first thing in the morning.

Love beets?!?!?!?

Can't get enough of them?!?!?

Learn about other great ways to eat beets here!

Happy fermenting!

Onward!


Beet Kvass

Author: Amy Mihaly, Be Well Clinic

Ingredients

  • 1/2 gallon glass mason jar
  • 1 medium-large beet
  • 2 TBS sea salt
  • cold, filtered water

Instructions

  1. Cut the beet into 1-2 inch cubes. Do not cut too small or shred the beet! Too much surface area and the beets will ferment too fast and create alcohol!
  2. You do not need to peel the beets, just wash fairly well and cut off the top. A little organic dirt will add minerals and soil bacterium.
  3. Place the cut beet in the mason jar. The beets should fill the jar about 1/4-1/3 of the way
  4. Add salt to the jar. 2 TBS is the traditional amount if no whey added.
  5. Fill the jar up to the shoulder with cold, filtered water.
  6. Seal the jar with a metal lid and ring, closing tightly.
  7. Gently tip and swirl the jar to help the salt dissolve.
  8. Set on the counter for 3-5 days, until the kvass is a rich purple color.
  9. Move to the fridge (the beets stay in the liquid)
  10. Consume daily!
  11. You can use the beets for two batches: when the liquid is almost gone (about a pint left) then refill with water and salt, set on the counter for another 3-5 day. When the liquid is gone the second time, discard the beets and start fresh.
BeetKvassBlogPost.png