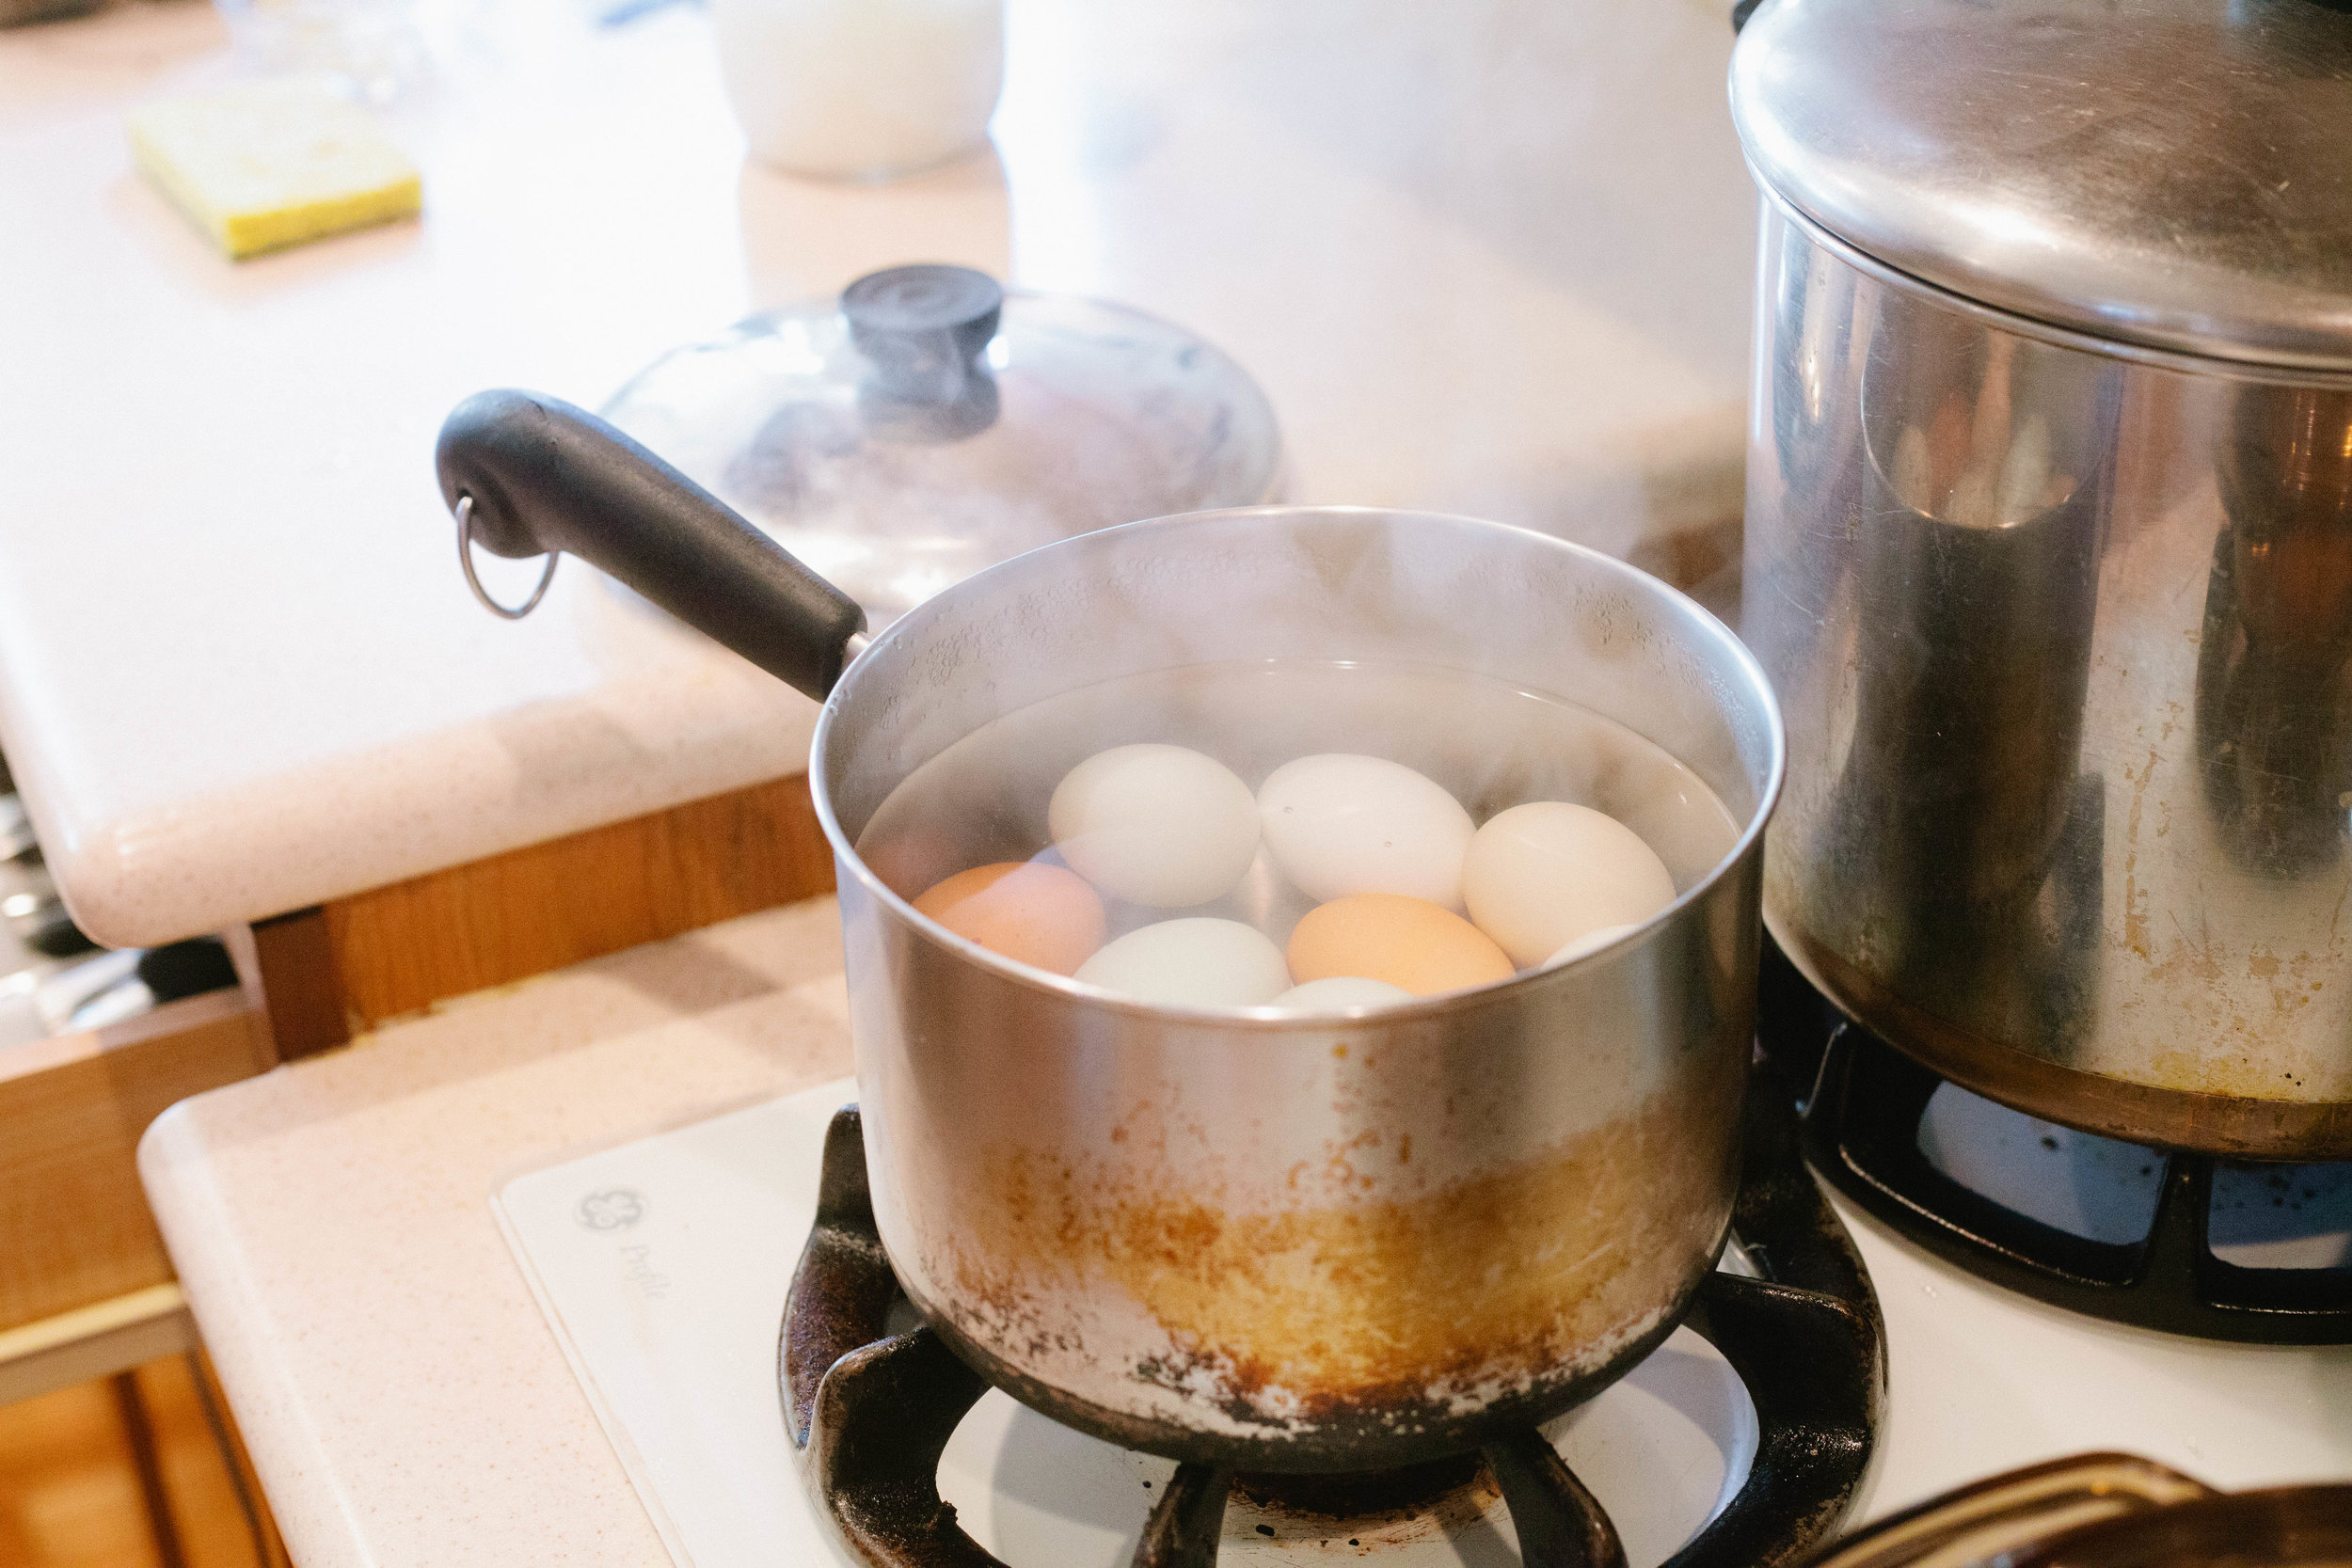
eggs

GAPS Legal Turkish Eggs

Eating eggs is a huge part of a healthy diet. However, it is easy to get bored with traditional egg recipes like omelets, scrambled eggs, or hard boiled eggs. This recipe is quick and simple, with an exciting blend of flavors, making it a great way to change up eating eggs.

Most consumers know greek yogurt as a thick, high protein yogurt. Greek yogurt is not just yogurt with whey strained out but is actually a unique culture used to inoculate the milk (growing bacteria on purpose to make the cultured dairy.) It is these particular probiotic strains that make the particular taste and texture of greek yogurt. You can buy these specific cultures online including from Cultures for Health.

If you don’t like Greek Yogurt, you can use any yogurt. Simply strain some of the whey out of it to make it thicker. While this recipe is traditionally made with greek yogurt, you could also make this particular recipe using any thick yogurt, creme fraiche, or sour cream.

While I prepared this with only one egg per bowl, you could easily add two or three eggs to the herbed yogurt. Feel free to play with the spices you add to find a palate and flavor profile that you like. I ate this simply with a spoon but you could also dip cut vegetables like carrots into it.

Ingredients for Turkish Eggs

  • 3 tbsp Butter

  • 1 cup Greek Yogurt

  • ½ tsp Hot Smoked or Hungarian Paprika

  • 1 tbsp High Quality Olive Oil

  • 1 Clove Garlic, Minced

  • 1 tsp Dried Oregano

  • 2 eggs

Directions for Turkish Eggs

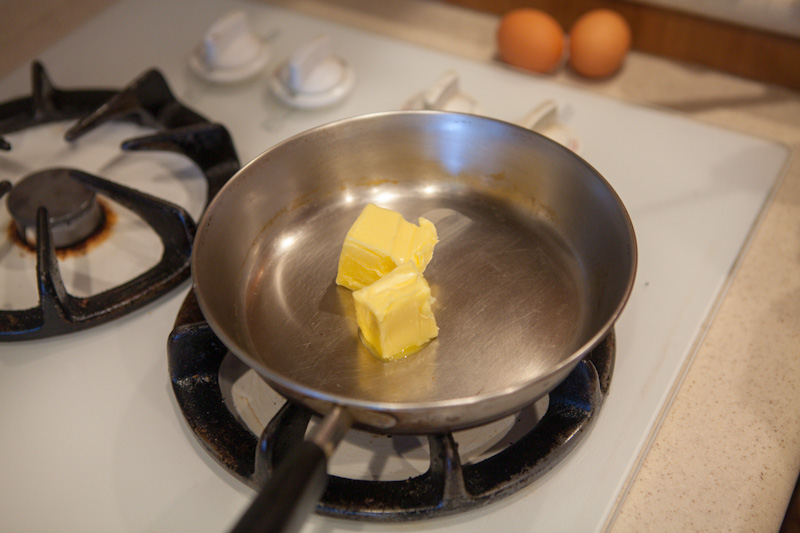
Melt butter in a small sauce pan on the stove. Add the paprika.

IMG_0828.jpg

In a bowl, mix the greek yogurt, olive oil, garlic, and oregano. 

Add filtered water to a pot. Bring to a gentle simmer.

IMG_0870.jpg

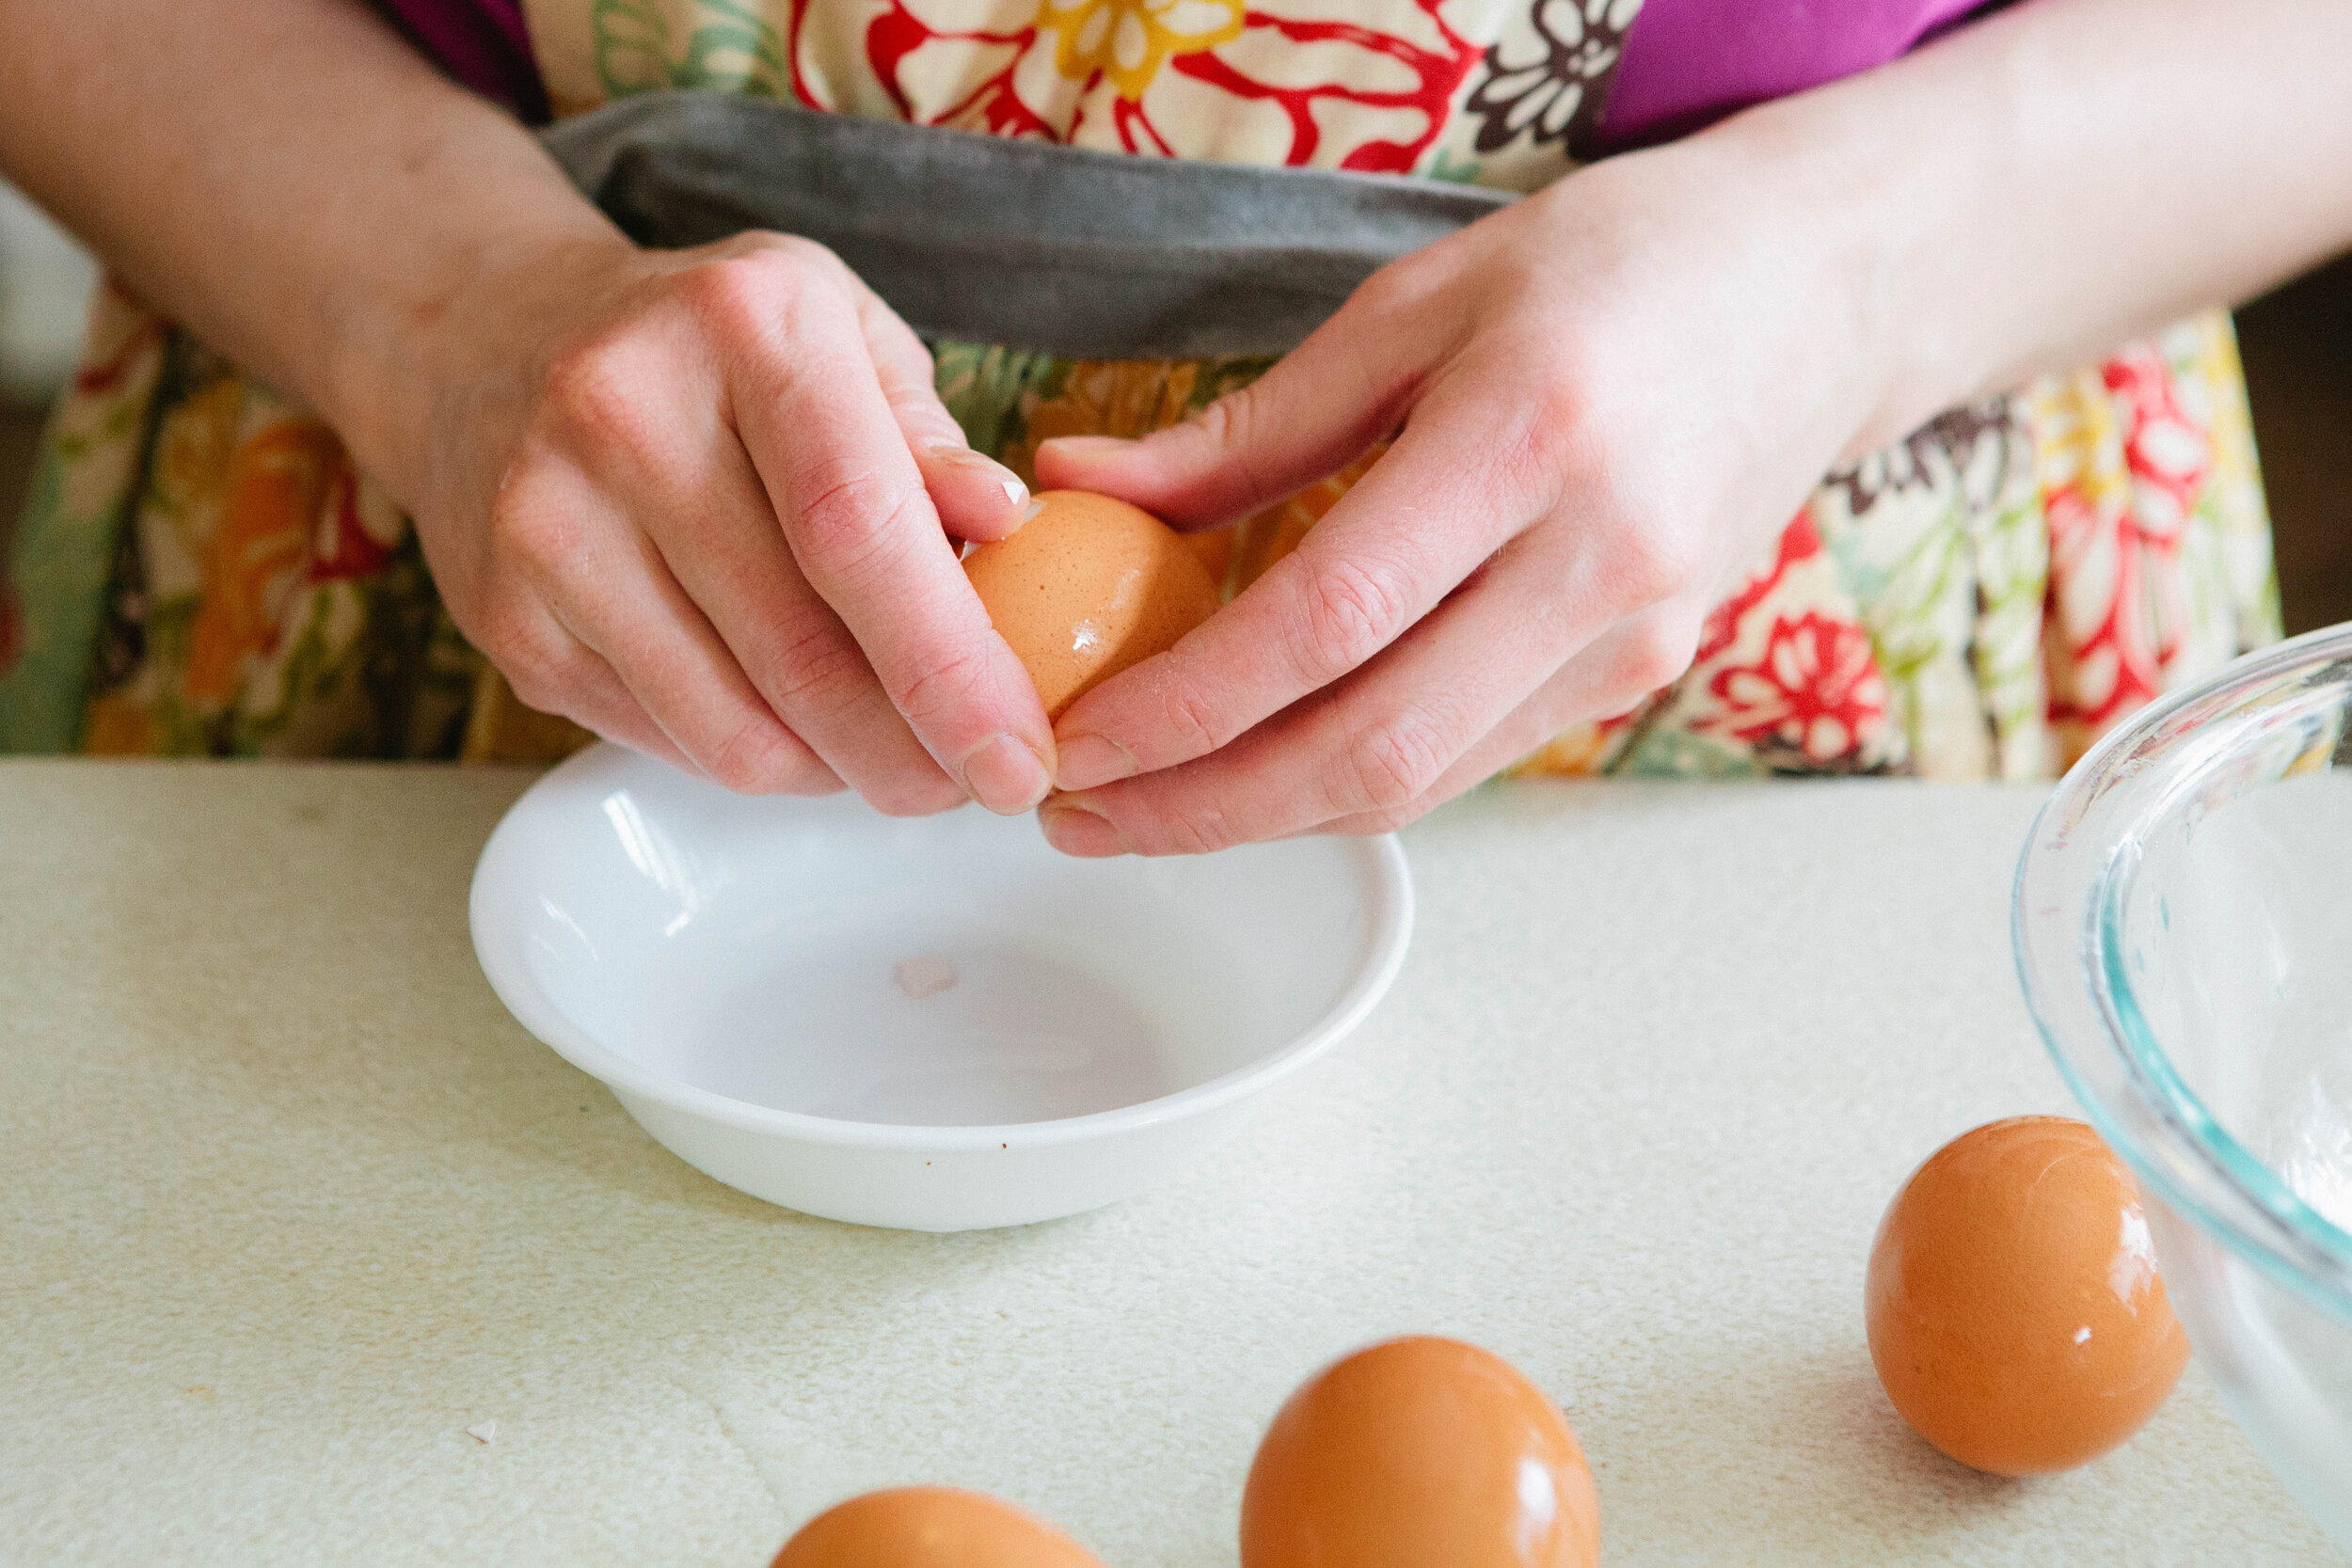
Add eggs gently to poach them. Simmer for 2-3 minutes depending on how done you’d like the yolk to be. 

Divide the yogurt mixture between two bowls. Add one egg to each bowl. 

IMG_0884.jpg

Drizzle half the butter mixture over each bowl. Top with parsley.

If you are not on GAPS, serve with a toasted piece of sourdough, topped with plenty of butter or not. 


HowtoMakeGAPSLegalTurkishEggs.png

GAPS Legal Turkish Eggs

Author: Amy Mihaly, Be Well Clinic

Ingredients

  • 3 tbsp Butter
  • 1 cup Greek Yogurt
  • ½ tsp Hot Smoked or Hungarian Paprika
  • 1 tbsp High Quality Olive Oil
  • 1 Clove Garlic, Minced
  • 1 tsp Dried Oregano
  • 2 eggs

Instructions

  1. Melt butter in a small sauce pan on the stove. Add the paprika.
  2. In a bowl, mix the greek yogurt, olive oil, garlic, and oregano.
  3. Add filtered water to a pot. Bring to a gentle simmer.
  4. Add eggs gently to poach them. Simmer for 2-3 minutes depending on how done you’d like the yolk to be.
  5. Divide the yogurt mixture between two bowls. Add one egg to each bowl.
  6. Drizzle half the butter mixture over each bowl. Top with parsley.
  7. If you are not on GAPS, serve with a toasted piece of sourdough, topped with plenty of butter or not.
Created using The Recipes Generator

How to Make Homemade Raw Milk Eggnog

Fun fact about eggnog - it’s mentioned in Laura Ingalls Wilder’s Farmer Boy. “Father always maintained that a man would do more work in his twelve hours, if he had a rest and all the egg-nog he could drink, morning and afternoon.”

Not only did I learn that eggnog was a way to preserve bountiful milk and eggs for summer to winter, this recipe has historically been used to maintain productive work in the sun and nurse the sick back to health. I believe that the high fat content combined with the rich vitamins A & D in milk, specifically raw milk, which are known to be very helpful to the immune system, is what is so helpful about this recipe.

Since you are using raw eggs for this recipe, you want to make sure they are from healthy chickens - and good eggs! If you don’t have access to farm fresh eggs, learn more about commercial egg quality here.

If you are not working with raw milk for your recipe, you may want to re-pasteurize your milk before making this recipe. Because pasteurized milk can putrefy, it’s probably not safe to leave it to age for as long, depending on your alcohol content of the mixture. 

This has a fairly mild sweet. If you are looking for a sweeter drink, I recommend adding more sweetener.

Ingredients for Homemade Eggnog:

  • 6 Eggs

  • 3 Egg Whites

  • 1 Quart Raw Milk

  • Generous ½ cup Maple Syrup (If you’re looking for a sweet drink, add more!)

  • ¼ - ½ tsp Freshly Ground Nutmeg

  • 200 ml Brandy or Bourbon

Directions for Homemade Eggnog:

Learn to make your own eggnog from rawmilk. a recipe full of healthy fats! Recipe by Amy Mihaly, Certified GAPS Practitioner from Be Well Clinic, Loveland, Colorado.

Separate 6 eggs into yolks and whites. Beat the egg whites until stiff peaks form. Beat the egg yolks until the color changes. 

In a separate large bowl, add the raw milk. If you plan to serve this at a party function, add the raw milk to what you plan to serve the eggnog in so as not to disrupt the mixture later. Carefully mix the egg whites and egg yolks together.

Learn to make your own eggnog from rawmilk. a recipe full of healthy fats! Recipe by Amy Mihaly, Certified GAPS Practitioner from Be Well Clinic, Loveland, Colorado.

Add the maple syrup, nutmeg and brandy to the egg white/yolk/raw milk mixture.

Chill the mixture in the fridge while you whip the remaining 3 egg whites into stiff peaks.

Learn to make your own eggnog from rawmilk. a recipe full of healthy fats! Recipe by Amy Mihaly, Certified GAPS Practitioner from Be Well Clinic, Loveland, Colorado.

Carefully fold the egg whites into the chilled mixture. 

Place in fridge to chill again for a couple hours to a couple days.

Learn to make your own eggnog from rawmilk. a recipe full of healthy fats! Recipe by Amy Mihaly, Certified GAPS Practitioner from Be Well Clinic, Loveland, Colorado.

Ladle into glasses and top with more grated nutmeg.

Serve and enjoy!


Learn to make your own eggnog from rawmilk. a recipe full of healthy fats! Recipe by Amy Mihaly, Certified GAPS Practitioner from Be Well Clinic, Loveland, Colorado.

Homemade Raw Milk Eggnog

Author: Amy Mihaly, Be Well Clinic

Ingredients

  • 6 Eggs
  • 3 Egg Whites
  • 1 Quart Raw Milk
  • Generous ½ cup Maple Syrup (If you’re looking for a sweet drink, add more!)
  • ¼ - ½ tsp Freshly Ground Nutmeg
  • 200 ml Brandy or Bourbon

Instructions

  1. Separate 6 eggs into yolks and whites. Beat the egg whites until stiff peaks form. Beat the egg yolks until the color changes.
  2. In a separate large bowl, add the raw milk. If you plan to serve this at a party function, add the raw milk to what you plan to serve the eggnog in so as not to disrupt the mixture later. Carefully mix the egg whites and egg yolks together.
  3. Add the maple syrup, nutmeg and brandy to the egg white/yolk/raw milk mixture.
  4. Chill the mixture in the fridge while you whip the remaining 3 egg whites into stiff peaks.
  5. Carefully fold the egg whites into the chilled mixture.
  6. Place in fridge to chill again for a couple hours to a couple days.
  7. Ladle into glasses and top with more grated nutmeg.
  8. Serve and enjoy!
Created using The Recipes Generator

A Guide to Commercial Egg Quality

Eggs are one of the best nutrient dense foods but not all eggs are created equal! Just like choosing good meat and vegetables, it’s important to choose good, quality eggs. This topic is not discussed very often, so in this post I’d like to lay out for you some of the main character qualities to look for in a good nourishing egg.

Just like with any food, it’s best to rely on your five senses to determine a particular food’s quality. Some of this can only be done with experimentation, so I encourage you to purchase a variety of brands or eggs from local farmers and make your own observations on freshness, quality, and nutrient density.

I love that I was able to see first hand what a best quality egg looks like when I had my own chickens. They were fed small grain, organic, non-GMO, corn free soy free feed, they had constant access to outside during the day, and ran over half an acre of pasture. I understand not everyone has access to a farmer, and not everyone can have their own laying hens,so this blog post is to help you determine which eggs that are available to you are the best quality.


First, let’s talk about some confusing terms. There’s not a lot of regulation on these terms, and marketing experts often use them to promote their product, but it does not necessarily mean their eggs are of higher quality.

Color of Egg: The color of an egg is determined by the breed of chicken that lays it. No chickens are inherently better than others, so the color of your egg alone doesn’t matter in terms of nutritional content or quality.

Cage Free: This term only indicates that the chickens are not confined in a small, individual cage for 24 hours a day. Cage free does not mean the chickens have access to outside and they may be confined in crowded spaces.

Organic: This refers to the food the chicken is eating. Organic food is better than conventional food because it decreases the number of nasty pesticides and GMOs, but these chickens’ diets are likely heavy in soy and corn or anything else as long as it’s labeled organic.

Vegetarian Fed: This is not a natural diet for a chicken! A natural chicken diet consists of bugs, roadkill, grasses, grains and seeds. They are omnivores! If you limit a chicken to a vegetarian diet, you are messing with nature and your egg will not contain the full amount of nutrition it should.

Free Range: Free range indicates that chickens have to “have access to the outdoors” but it doesn’t specify the amount of space or the amount of time the chickens have to be outside. There may not even be enough room outside for each chicken so some chickens may never be outside.

Pasture Raised: Pasture Raised indicates chickens who are given enough space for all of them to be outside and are moved to fresh pasture regularly, giving them access to new bugs and grass. This is the best choice for any egg you purchase. These chickens have the best opportunity to eat the appropriate chicken diet, get sunshine, and be happy!

Omega-3: Omega-3’s are important in our diet, but an egg from a chicken fed a natural diet will have plenty of Omega-3 in it. If a company is advertising Omega-3 eggs, it is very likely they are giving supplements to ensure a certain level of Omega-3’s in their eggs. Depending on the quality of supplement, this may or may not be good for you, and again if the chicken is given access to sun and an omnivore diet, an additional supplement is unnecessary. On that note, there are different foods and supplements that can be fed to chickens to make their yolks more orange or darker yellow. This does not, of course, equal the same quality of nutrition that a pastured chicken can put in their egg.

Certified Humane: This is a label given to egg raisers who meet the requirements of the Humane Farm Animal Care. In essence, it means the birds are treated well, not starved or debeaked, but does not necessarily mean they are given access to outdoors and beak trimming is also allowed.

Grades: The grades AA, A, & B on the side of the package don’t just refer to size. They refers to the quality and freshness of the egg. “AA” is the best, according to the USDA, but we will teach you how to grade your own eggs!

New advertising measures are used constantly! If you see something new advertised on a carton of eggs, it’s a great idea to look up what qualifications, if any, are necessary to add that label to their carton.

Now that we understand some of the marketing definitions, you can purchase the best quality eggs and do some observations to determine the freshness and quality of an individual egg.

First, look at the thickness and smoothness of the egg shell. A shell that is very thin is deficient in calcium. An overly thick shell likely has an artificial amount of calcium supplementation in the chicken’s diet. A bumpy or disfigured egg shell can indicate health problems or deficiencies in the chicken.

Second, we look at the color of the yolk. Chickens given access to bugs and grass lay eggs with deeper yellow to orange yolks. As a reminder, there are substances, including natural ones, that can be fed to a chicken to make their egg yolk artificially more yellow. Also keep in mind that there is less green plants and bugs in the winter, so even good quality eggs will likely have lighter yellow yolks in the winter.

Third, we look at the white of the egg. A fresh and nutrient rich white will hold together and stand together in the pan. A poor quality or old egg white will spread out over the entire area. I’ve heard that the quality of the egg white is what professional chefs use to judge the quality of an egg.

We purchased a variety of eggs from King Soopers and Natural Grocers to do these observations for this experiment. Please refer to the pictures and analysis below!

20200531_132911.jpg
20200531_132937.jpg

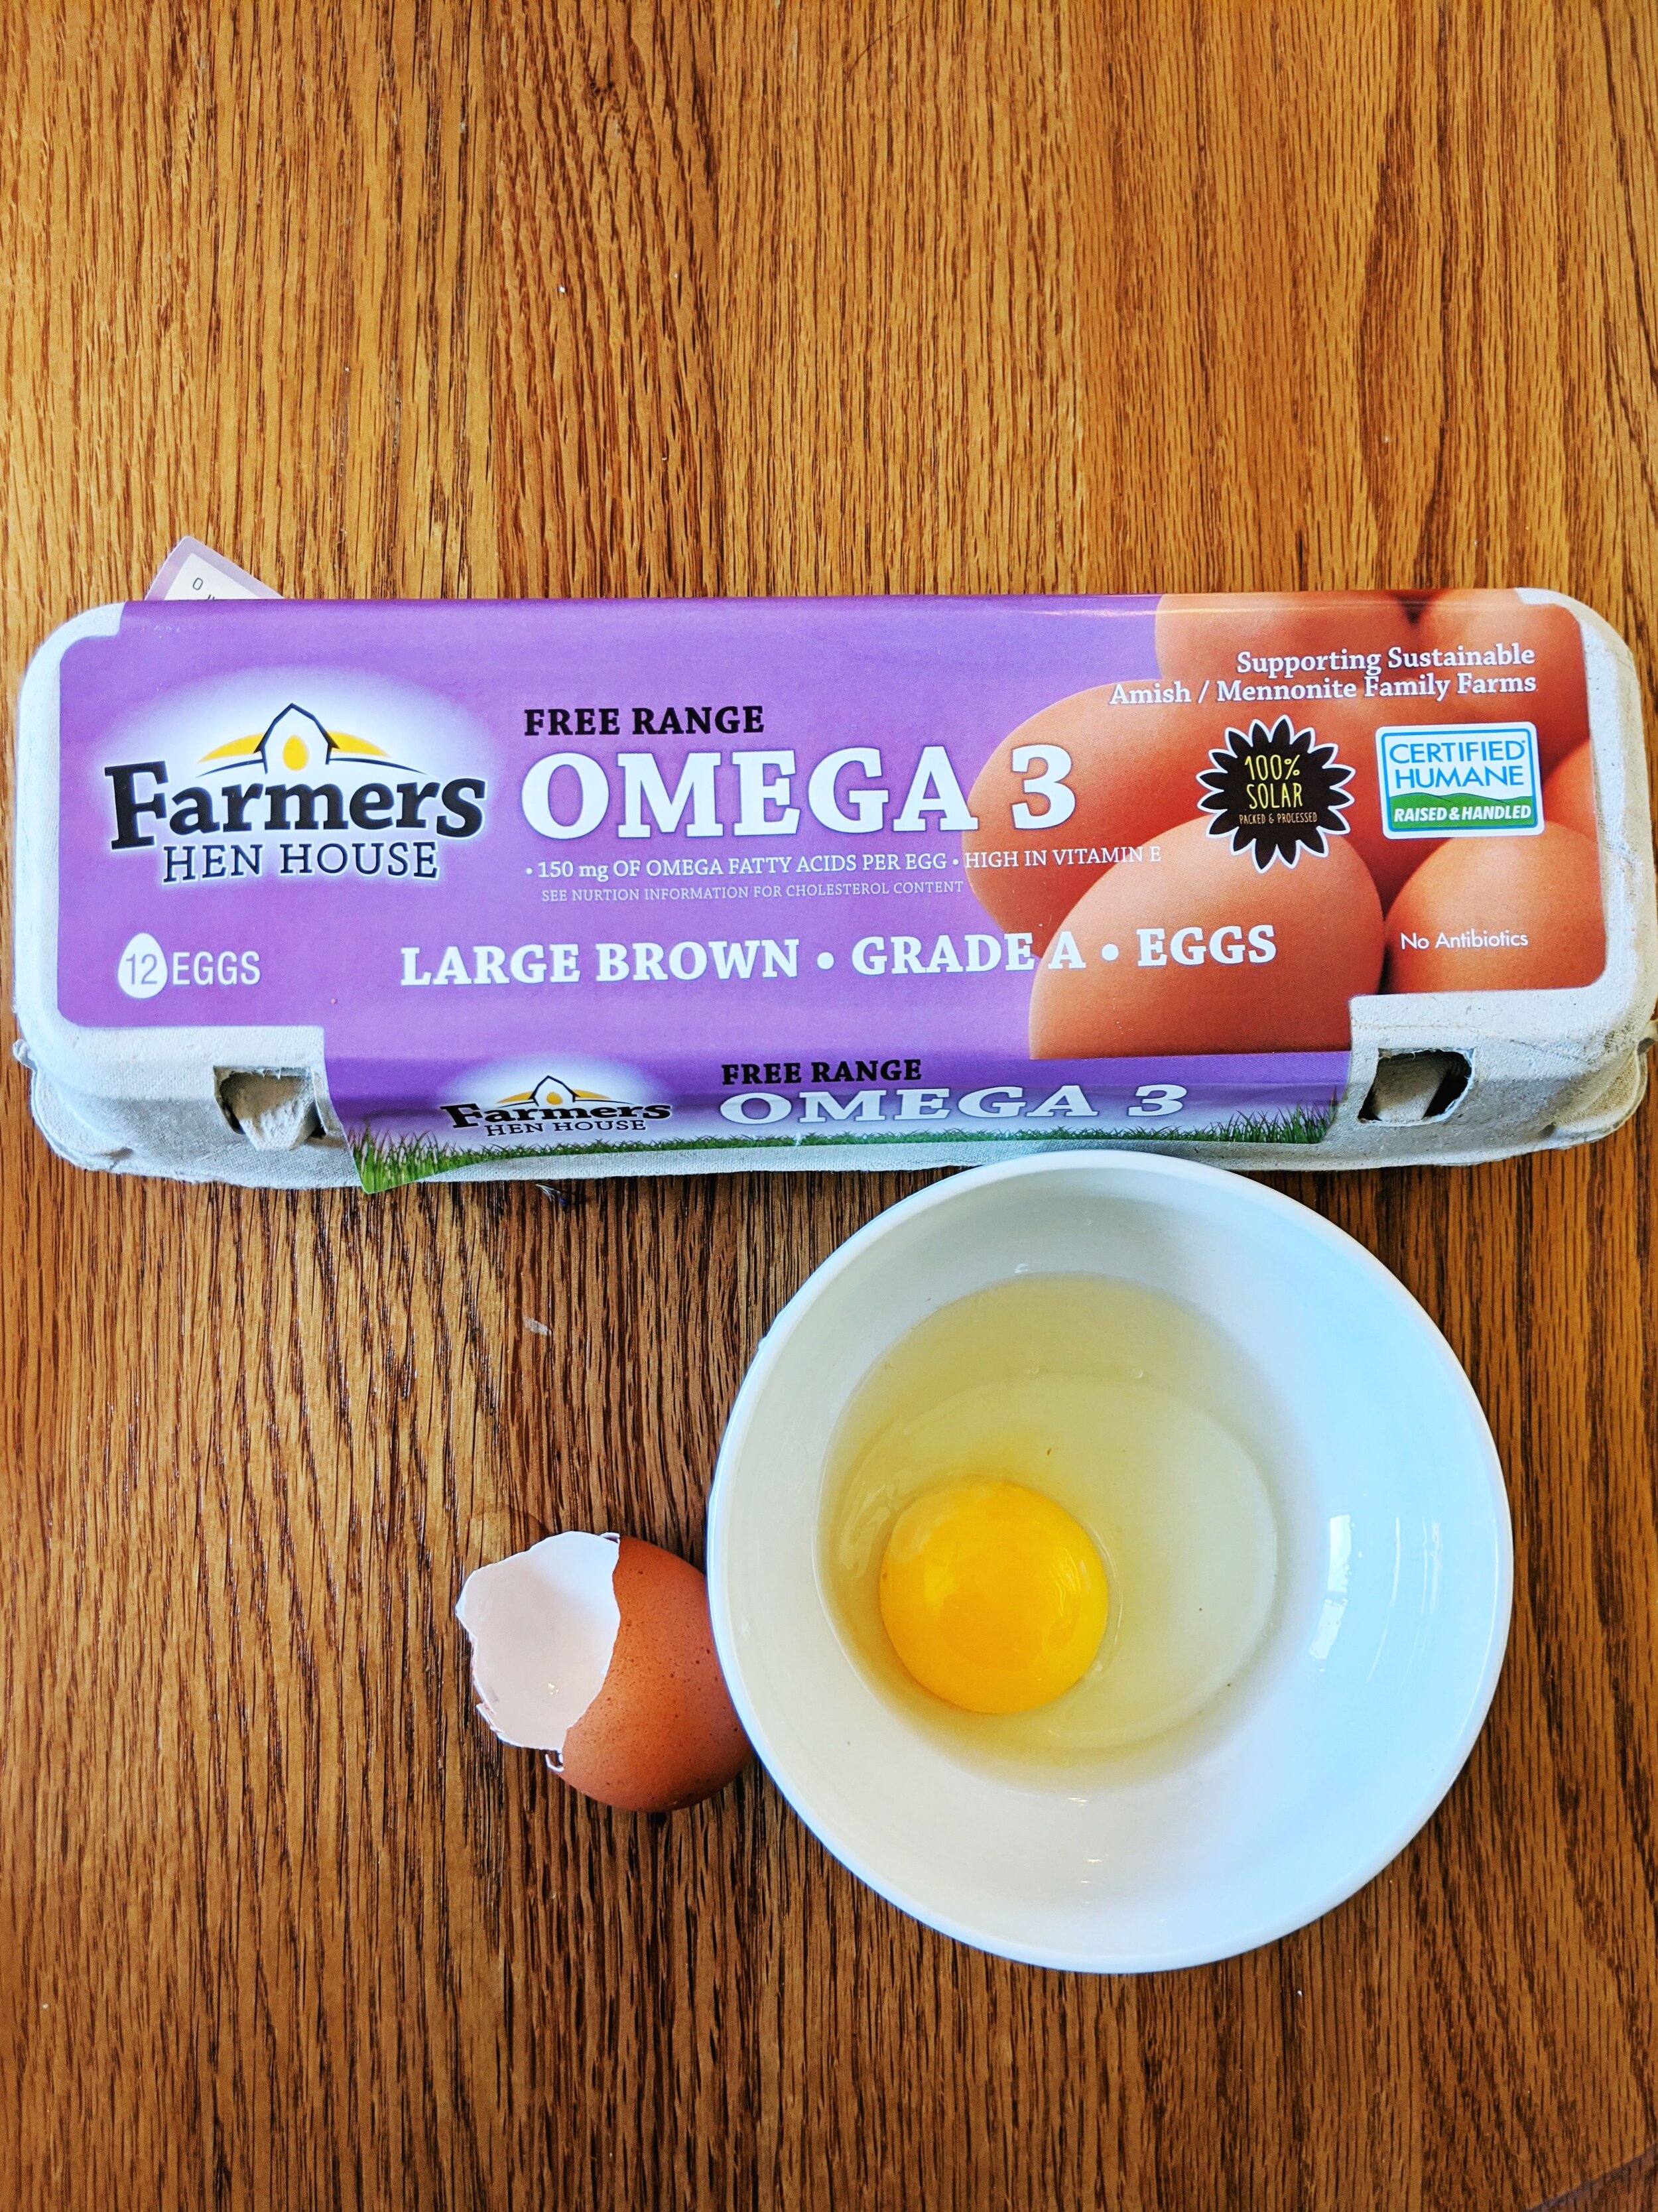
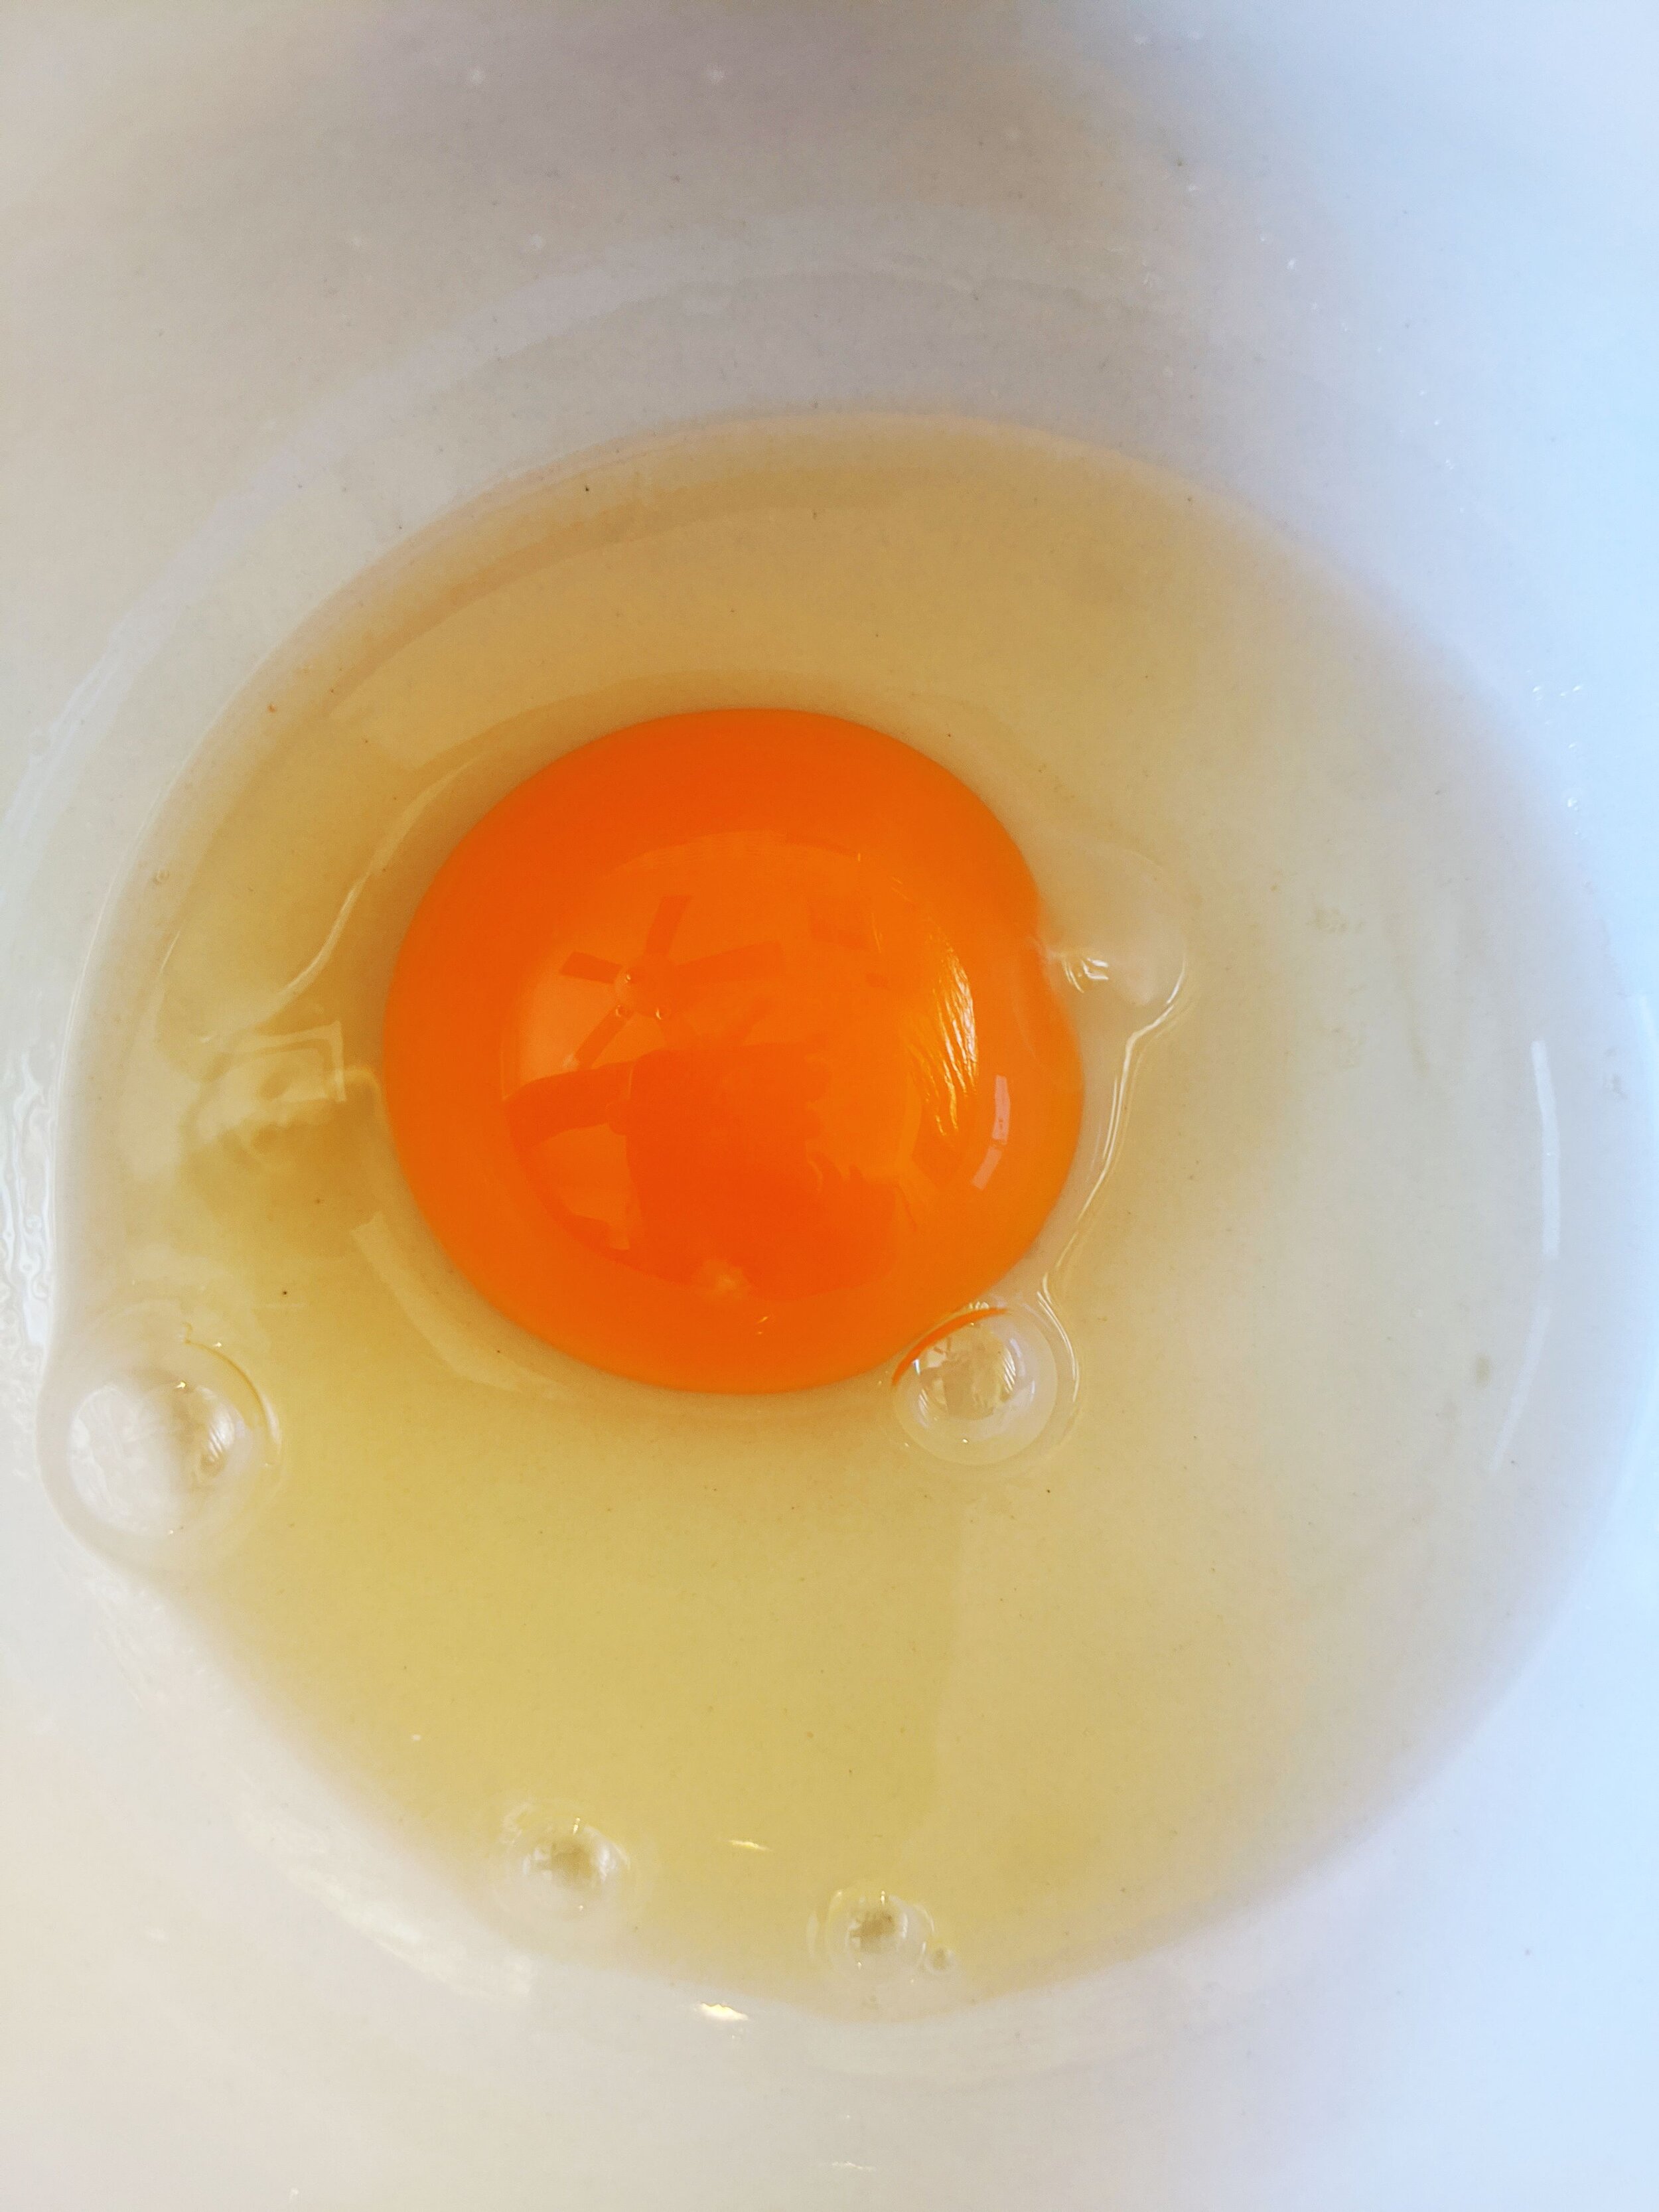
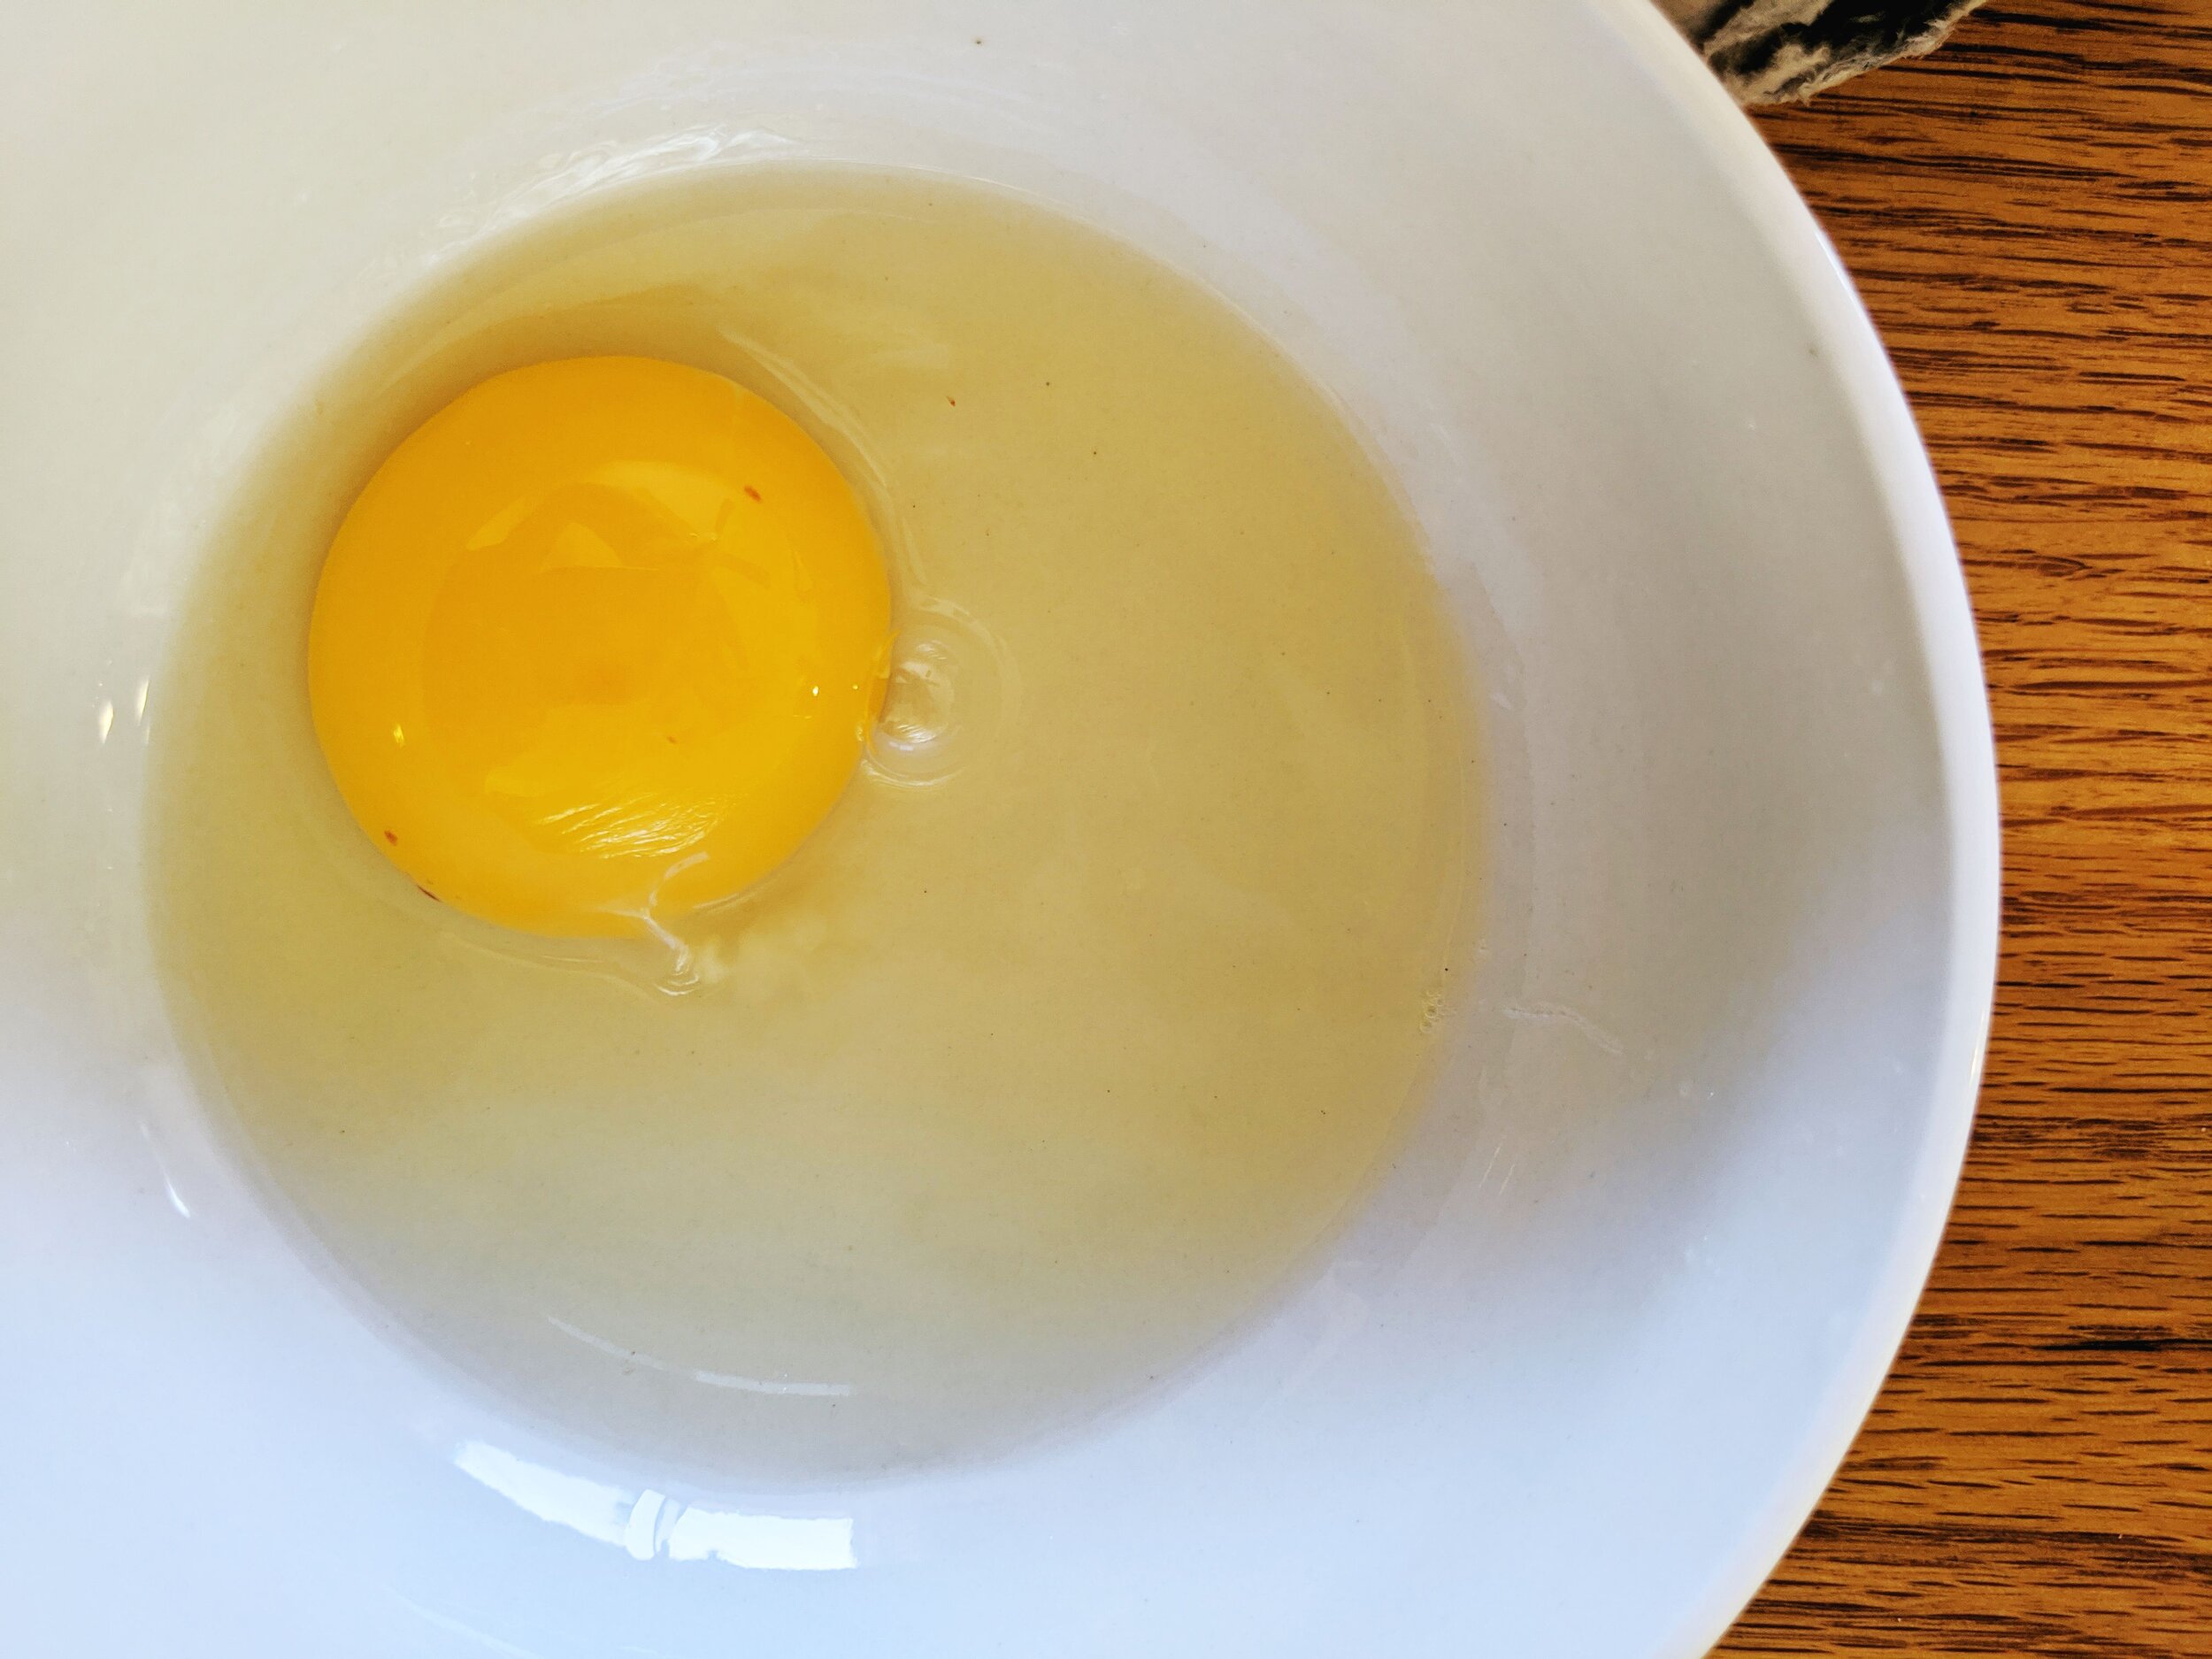
Farmer’s Hen House

This brand is my “bulk” go to egg for washing my hair.

Type of Egg: Free Range Large Brown Grade A from Natural Grocers
Price at Purchase Time:
$3.45
Labels on Carton:
Free Range
Description of Shell:
Good thickness, cracked only where hit and didn’t splinter. Fairly smooth.
Color of Yolk:
Dark yellow.
Spread of White:
Mostly holds together, with a little spread.

20200531_132810.jpg
20200531_132837.jpg

Vital Farms Pasture Raised

Type of Egg: Pasture Raised Large Brown Grade A
Price at Purchase Time:
$5.69
Labels on Carton:
Pasture Raised
Description of Shell:
Very smooth, a little thin but broke mostly clean.
Color of Yolk:
Dark, deep yellow
Spread of White:
Held tightly together

20200531_132727.jpg
20200531_132751.jpg

Happy Egg Free Range Eggs

This is the brand that I recommend as a good starting point in looking at higher quality eggs. They are a more accessible egg brand, available at both King Soopers and Natural Grocers.

Type of Egg: Happy Egg Free Range Eggs
Price at Purchase Time:
$5.99
Labels on Carton:
Free Range Pasture Raised Large Brown Grade A Eggs
Description of Shell:
Smooth but a little thin
Color of Yolk:
Very deep orange
Spread of White:
Held together a little but runnier

20200531_132552.jpg
20200531_132638.jpg

Simple Truth Cage Free Eggs

Type of Egg: Cage Free Large Brown Eggs from Simple Truth
Price at Purchase Time:
$2.99
Labels on Carton:
Cage Free Large Brown Eggs Grade AA
Description of Shell:
A little difficult to crack and slightly bumpy
Color of Yolk:
Light yellow
Spread of White:
Runny and not held together

20200531_132434.jpg
20200531_132457.jpg

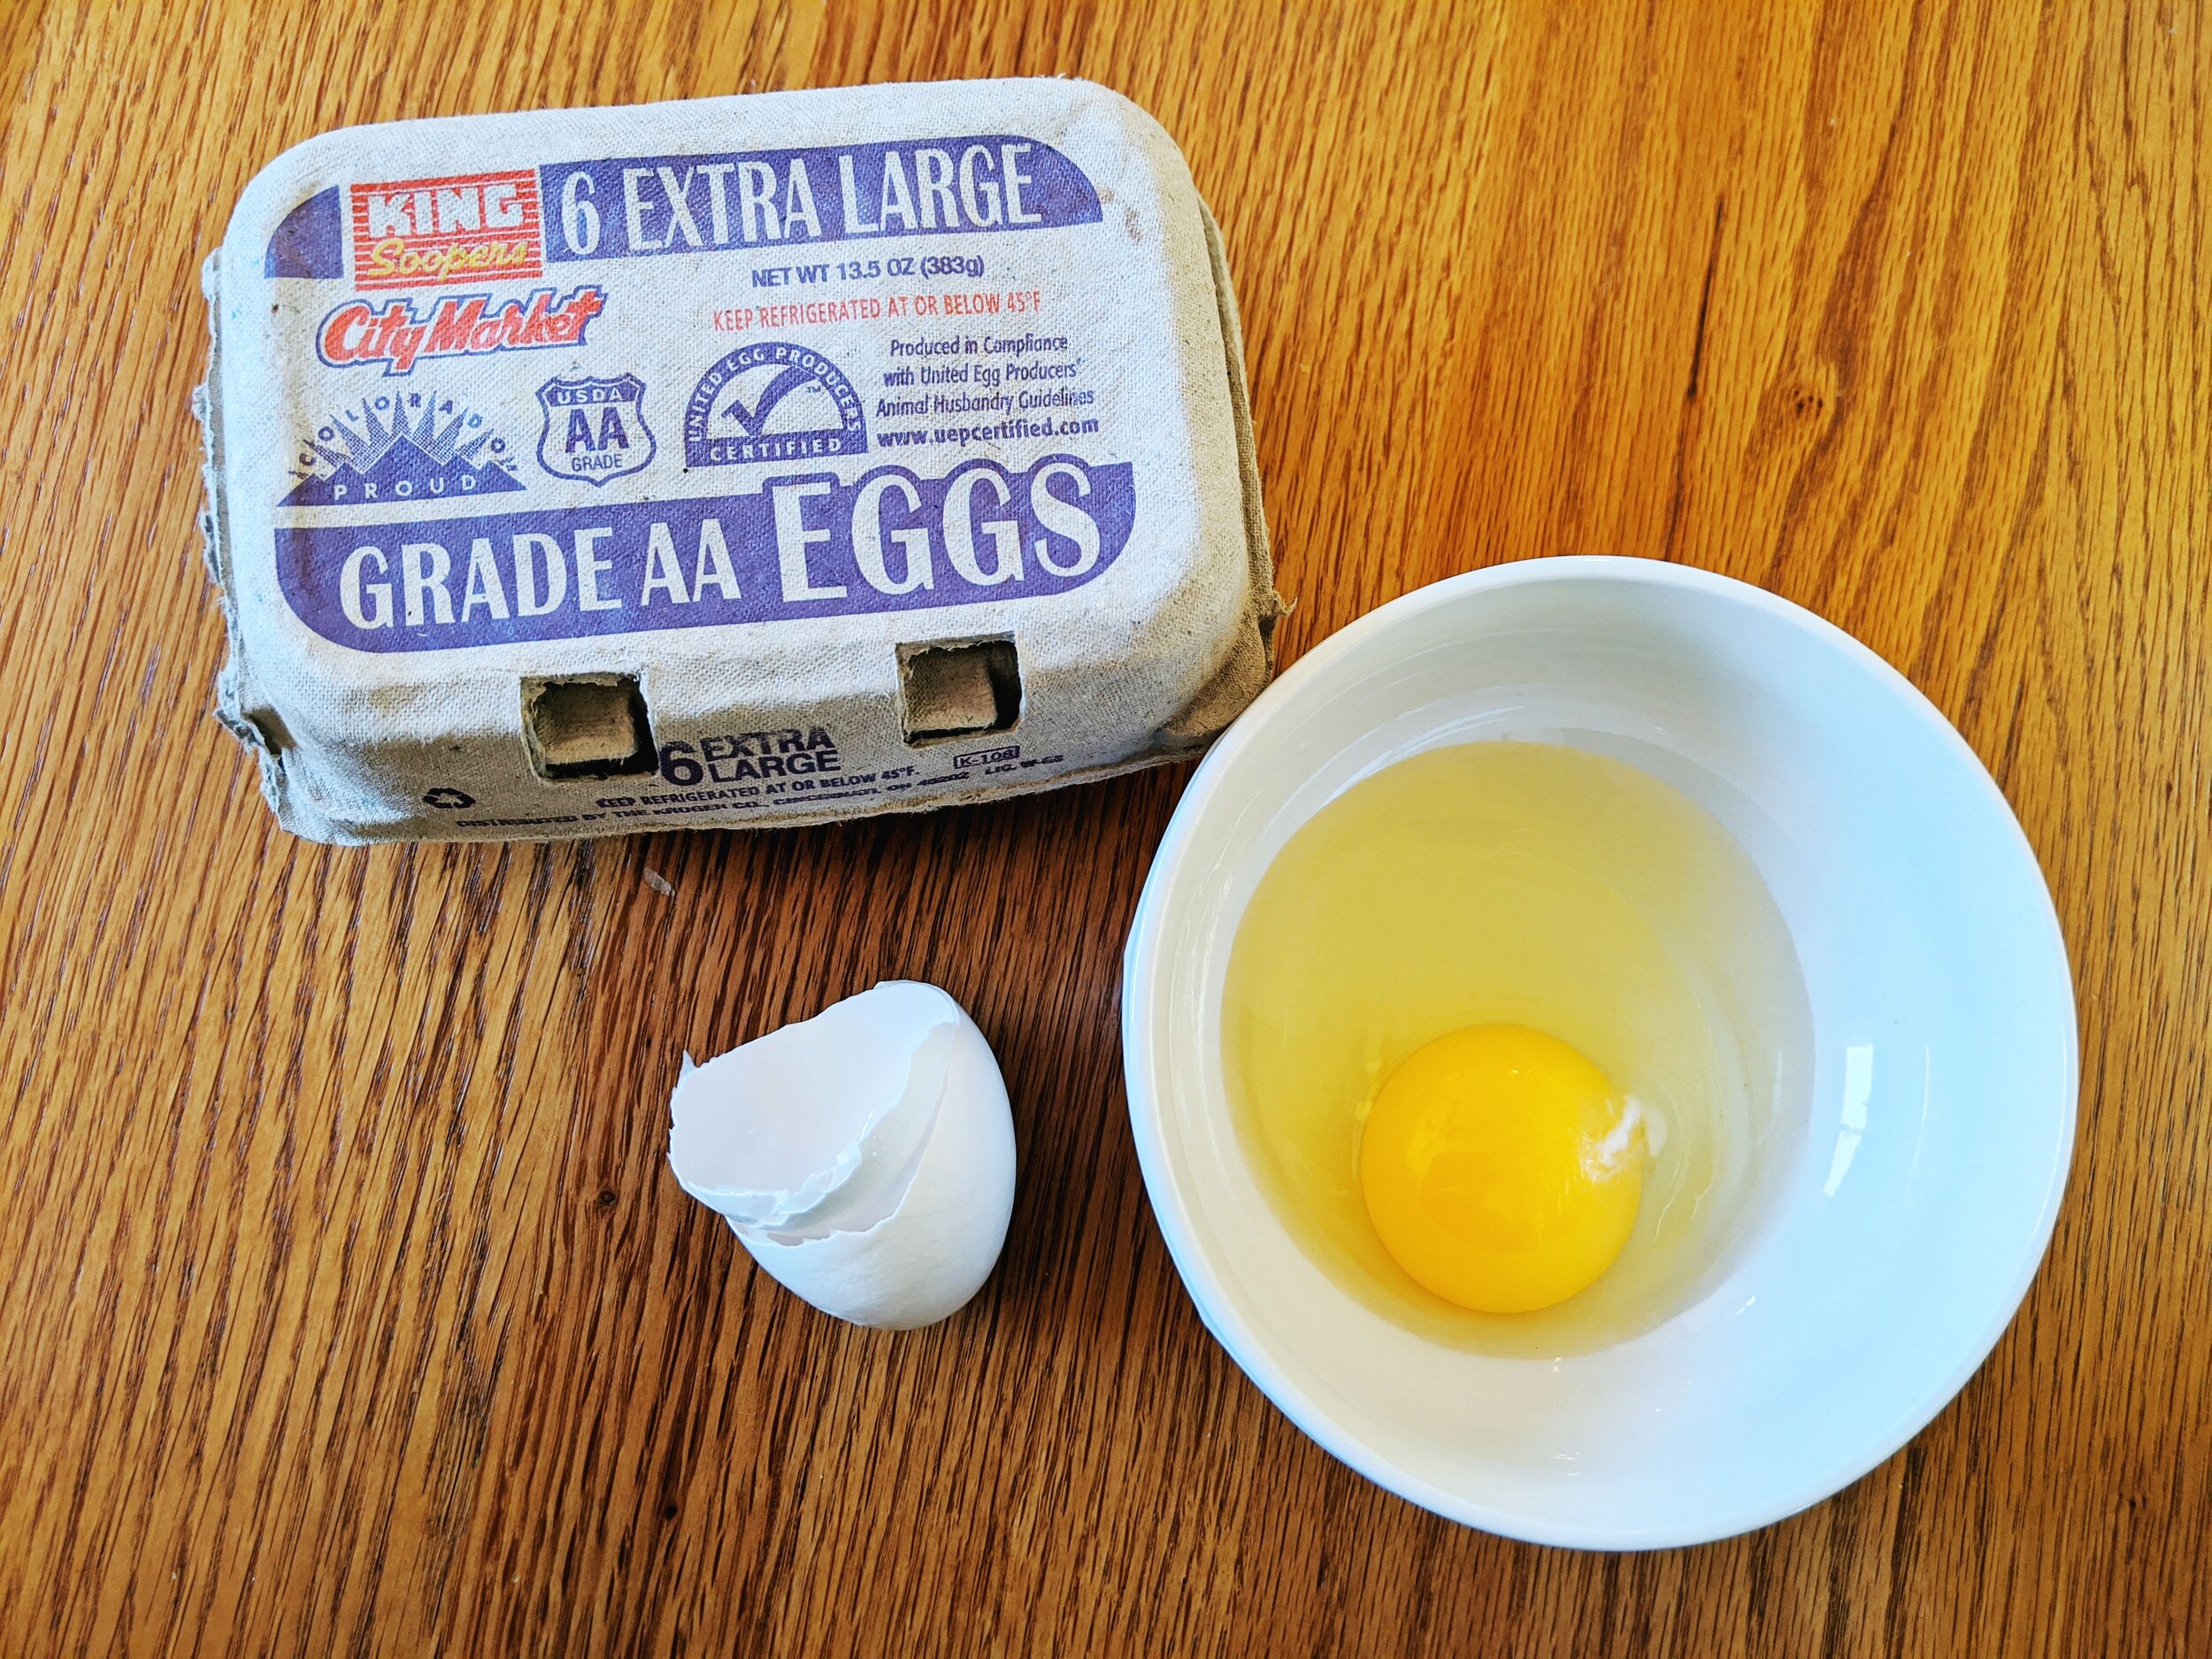
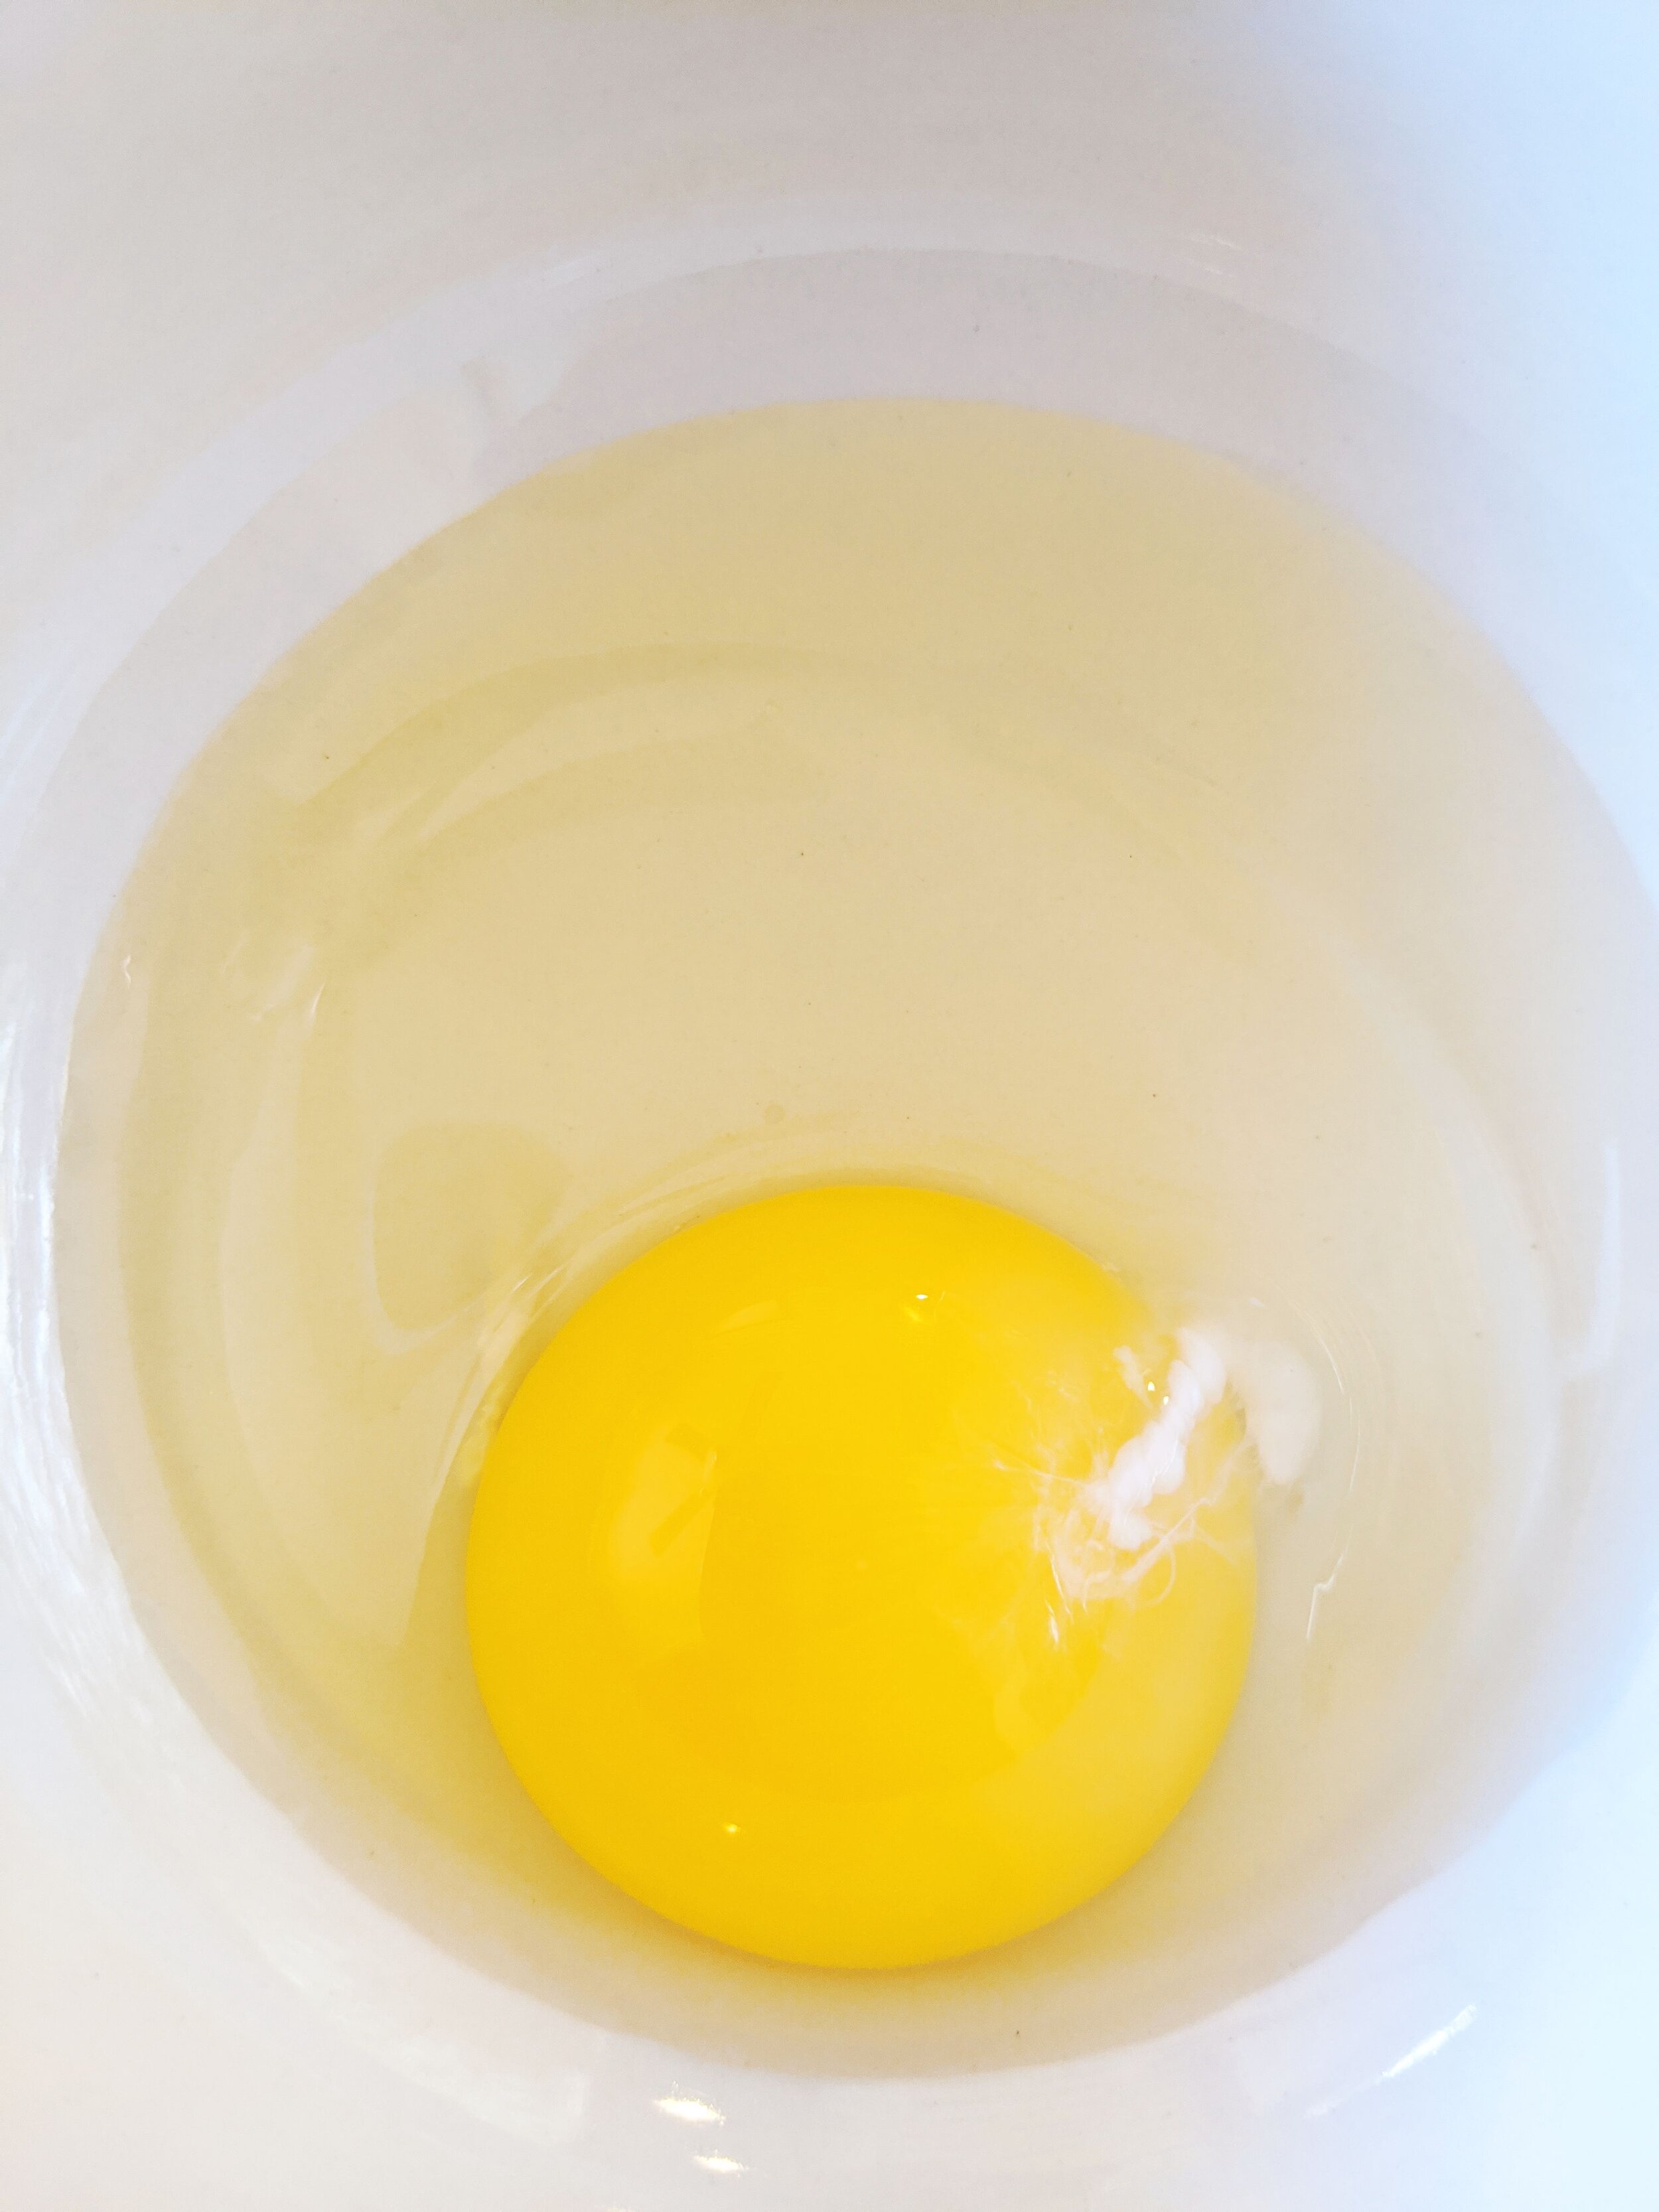
King Soopers City Market Extra Large Eggs

Type of Egg: King Soopers City Market Extra Large Grade AA Eggs
Price at Purchase Time:
$1.39
Labels on Carton:
Extra Large
Description of Shell:
Thin and bumpy
Color of Yolk:
Light yellow
Spread of White:
Liquid, doesn’t hold together.
Taste of Egg:

20200531_132158.jpg
20200531_132221.jpg

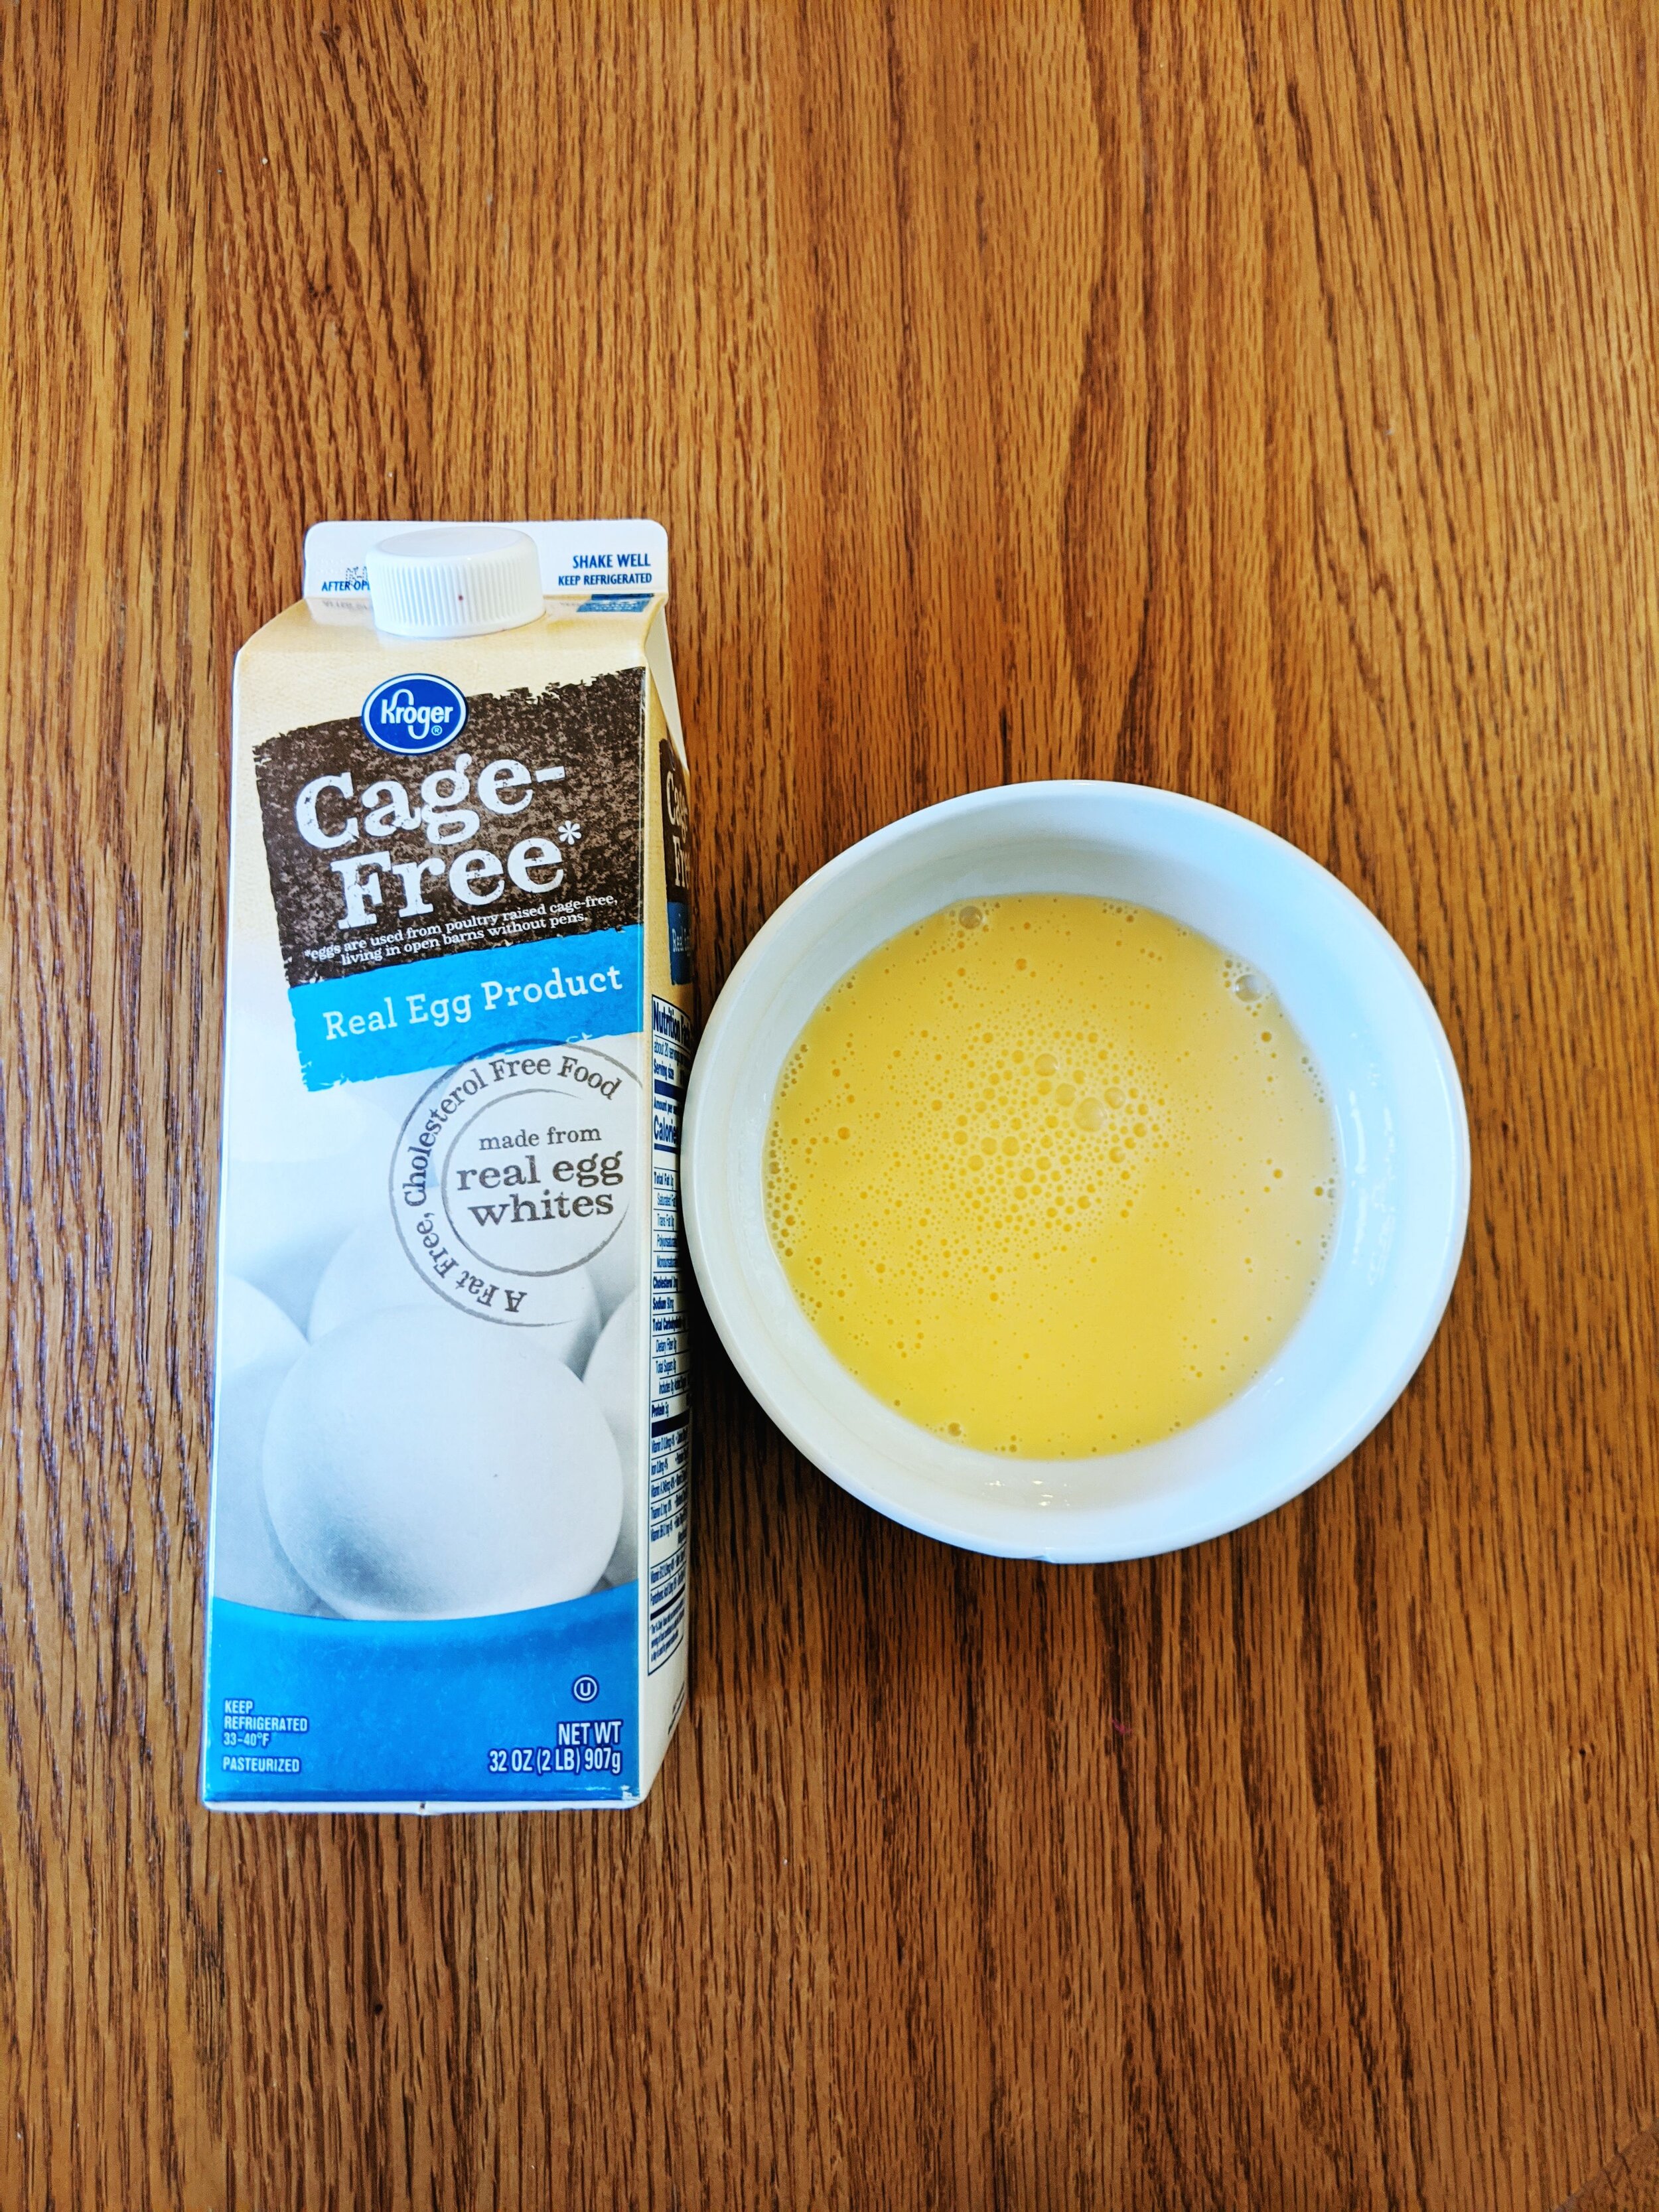
Cage Free Real Egg Product

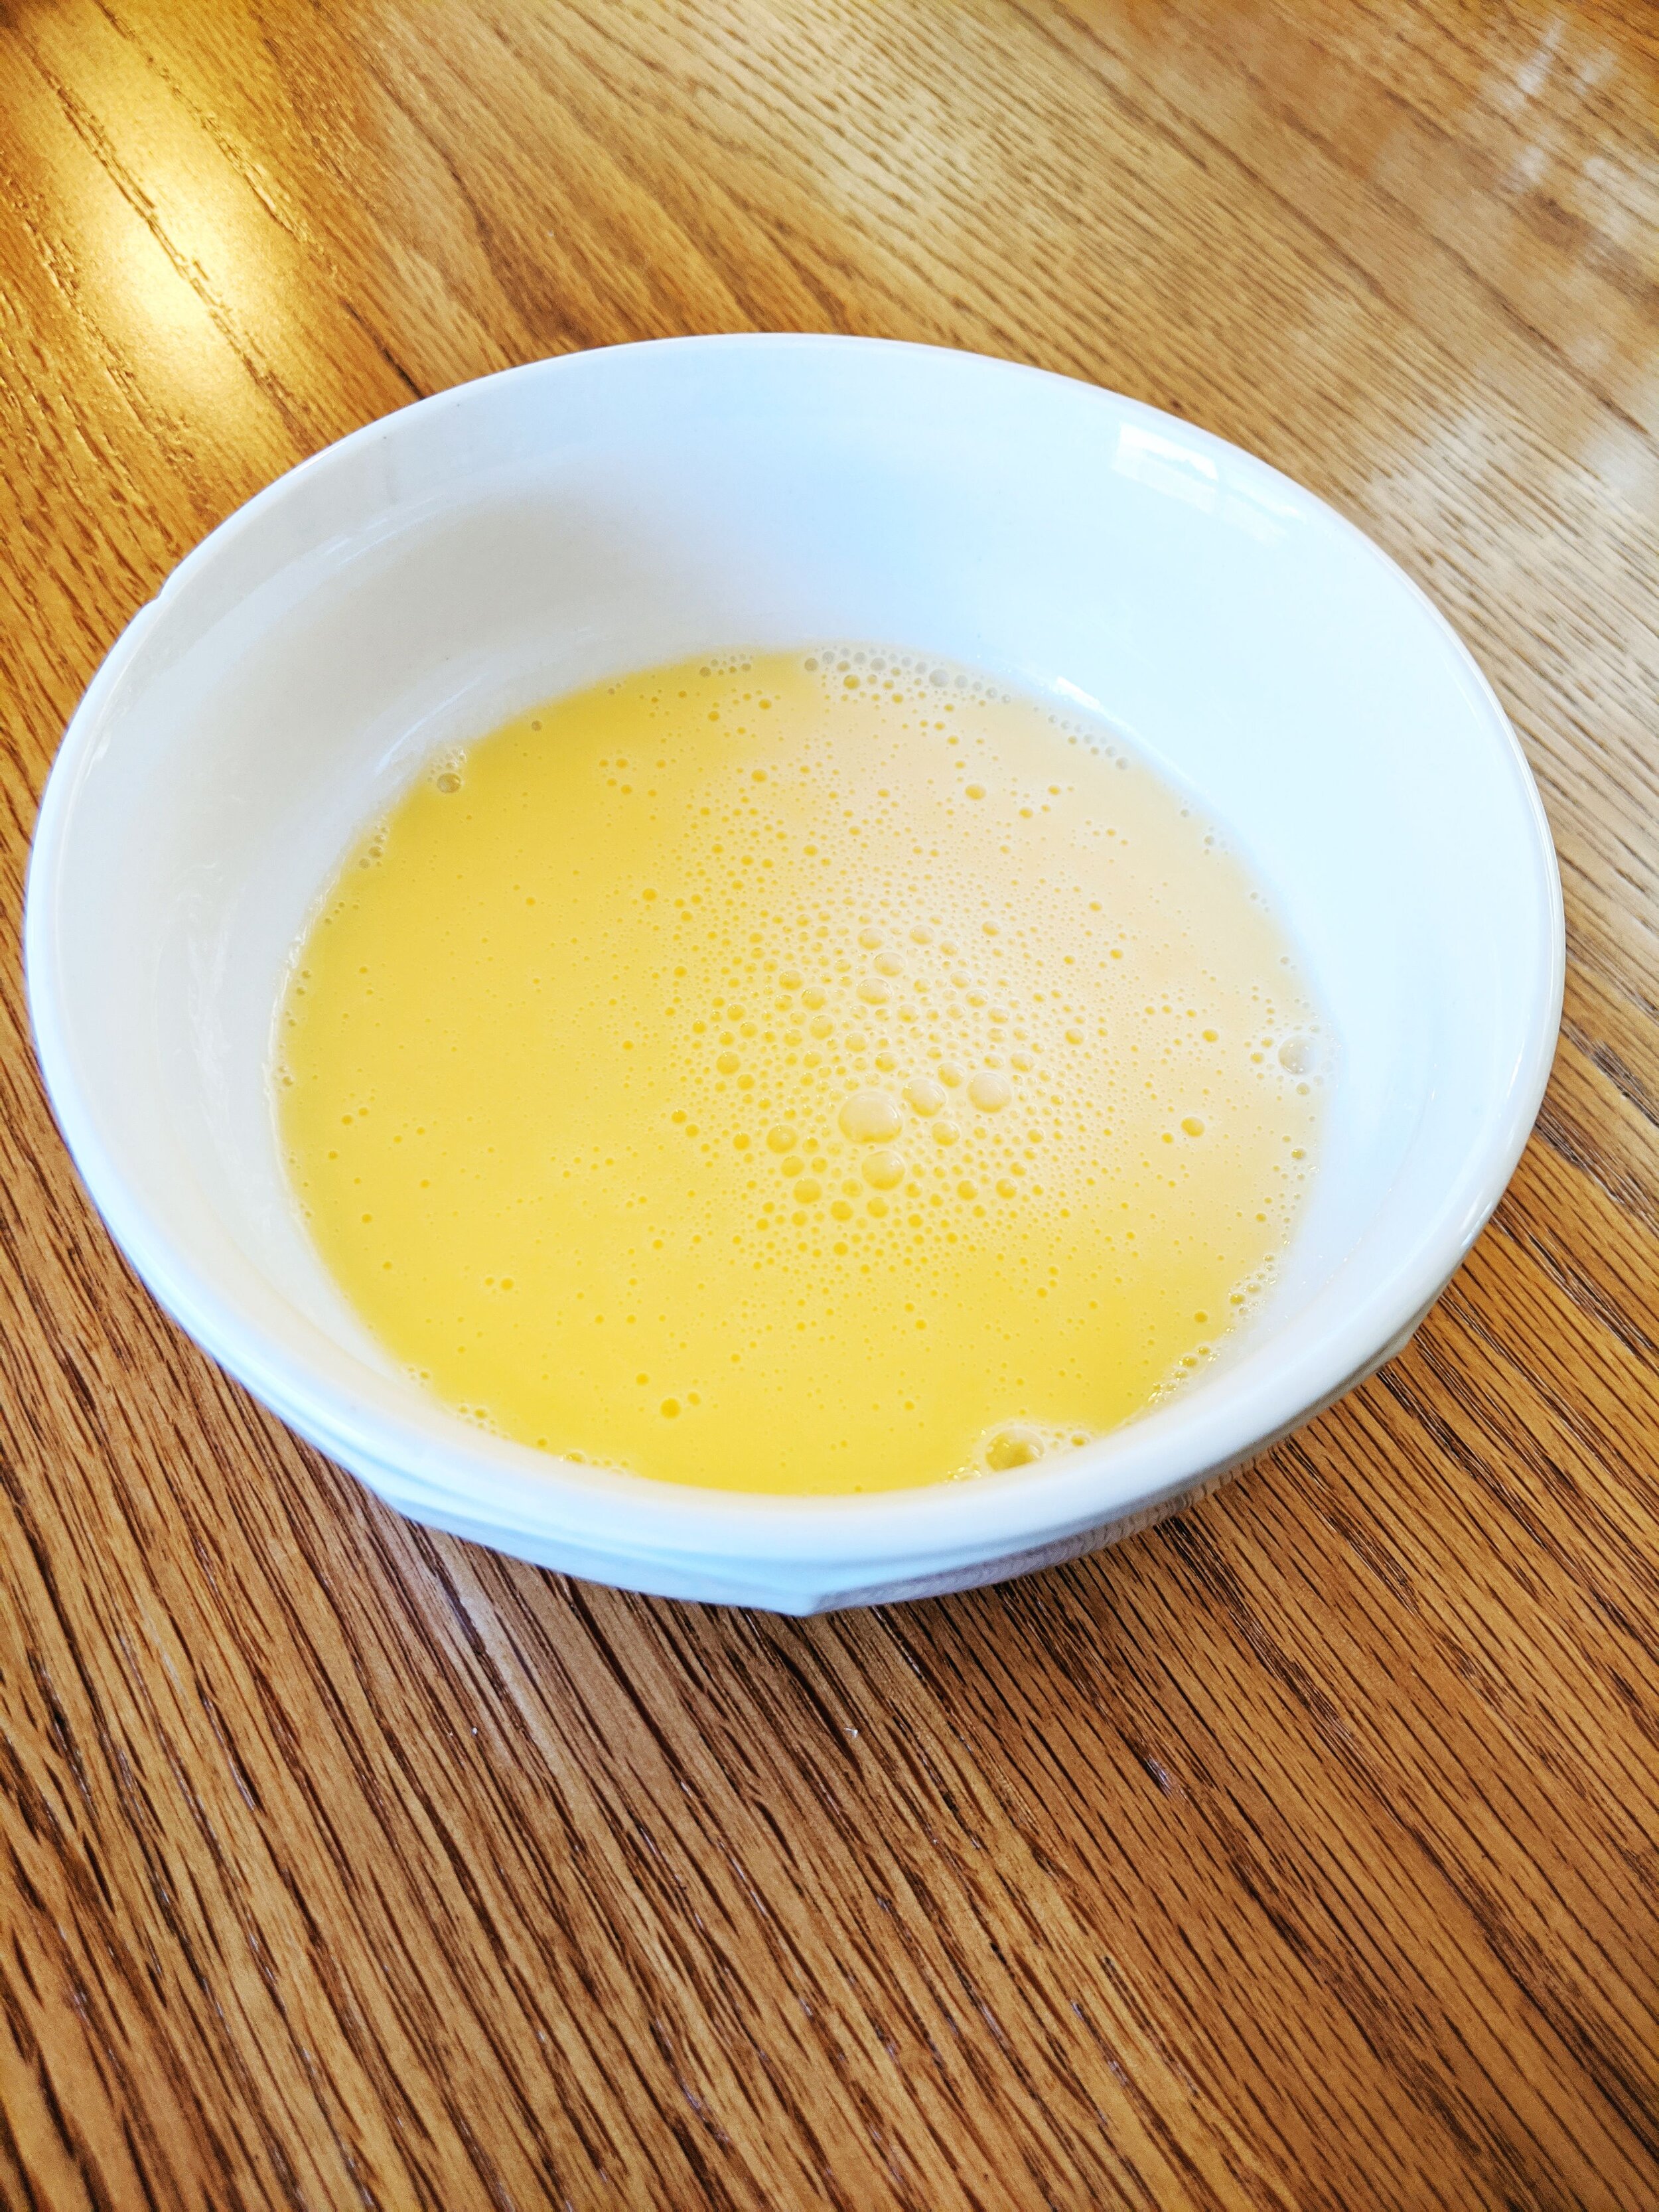
For comparison, we purchased a “real egg product.” Unlike an egg, which needs no ingredient description, this product contains 19 added ingredients, vitamins, and minerals. I think in this product they are making up for lack of egg yolk (which they omitted) which contains most of the nutritional value of an egg. Let’s do the same analysis of this product!

Type of Egg: Cage Free “Real Egg Product'“ from Kroger
Price at Purchase Time:
$4.49
Labels on Carton:
Cage Free, Made from Real Egg Whites, Cholesterol Free, Fat Free Food
Description of Shell:
Unknown, Not Present
Color of Yolk:
Unknown, Not Present
Spread of White:
Unknown

Mayo Free Egg Salad

Eggs are a great non-meat protein source. While I usually recommend eating eggs yolks running to preserve the cholesterol on them, sometimes a hard boiled egg is hard to beat!

This is a recipe that could easily be doubled or tripled for a party. You can serve it spread on a romaine lettuce leaf, as shown, or you can use it as a dip for cucumber slices or carrots.. Feel free to use whatever herbs you have in the fridge and experiment to find your favorites.

This recipe is legal on GAPS Stage 3 if you omit the paprika. Otherwise, it is legal on GAPS Stage 6. The ingredient list is for 1-2 servings.

Ingredients for Mayo Free Egg Salad:

  • 4 Eggs

  • ½ cup Sour Cream or Creme Fraiche

  • 1 small stalk Celery

  • 1 large Green Onion

  • ¼ - ½  tsp Salt

  • 1 tsp Pepper

  • ½ tsp Paprika

  • Parsley

Directions for Mayo Free Egg Salad:

Hard boil eggs. (Recipe here)

mayo-free-egg-salad-recipe-egg-salad-on-gaps-sour-cream-egg-salad

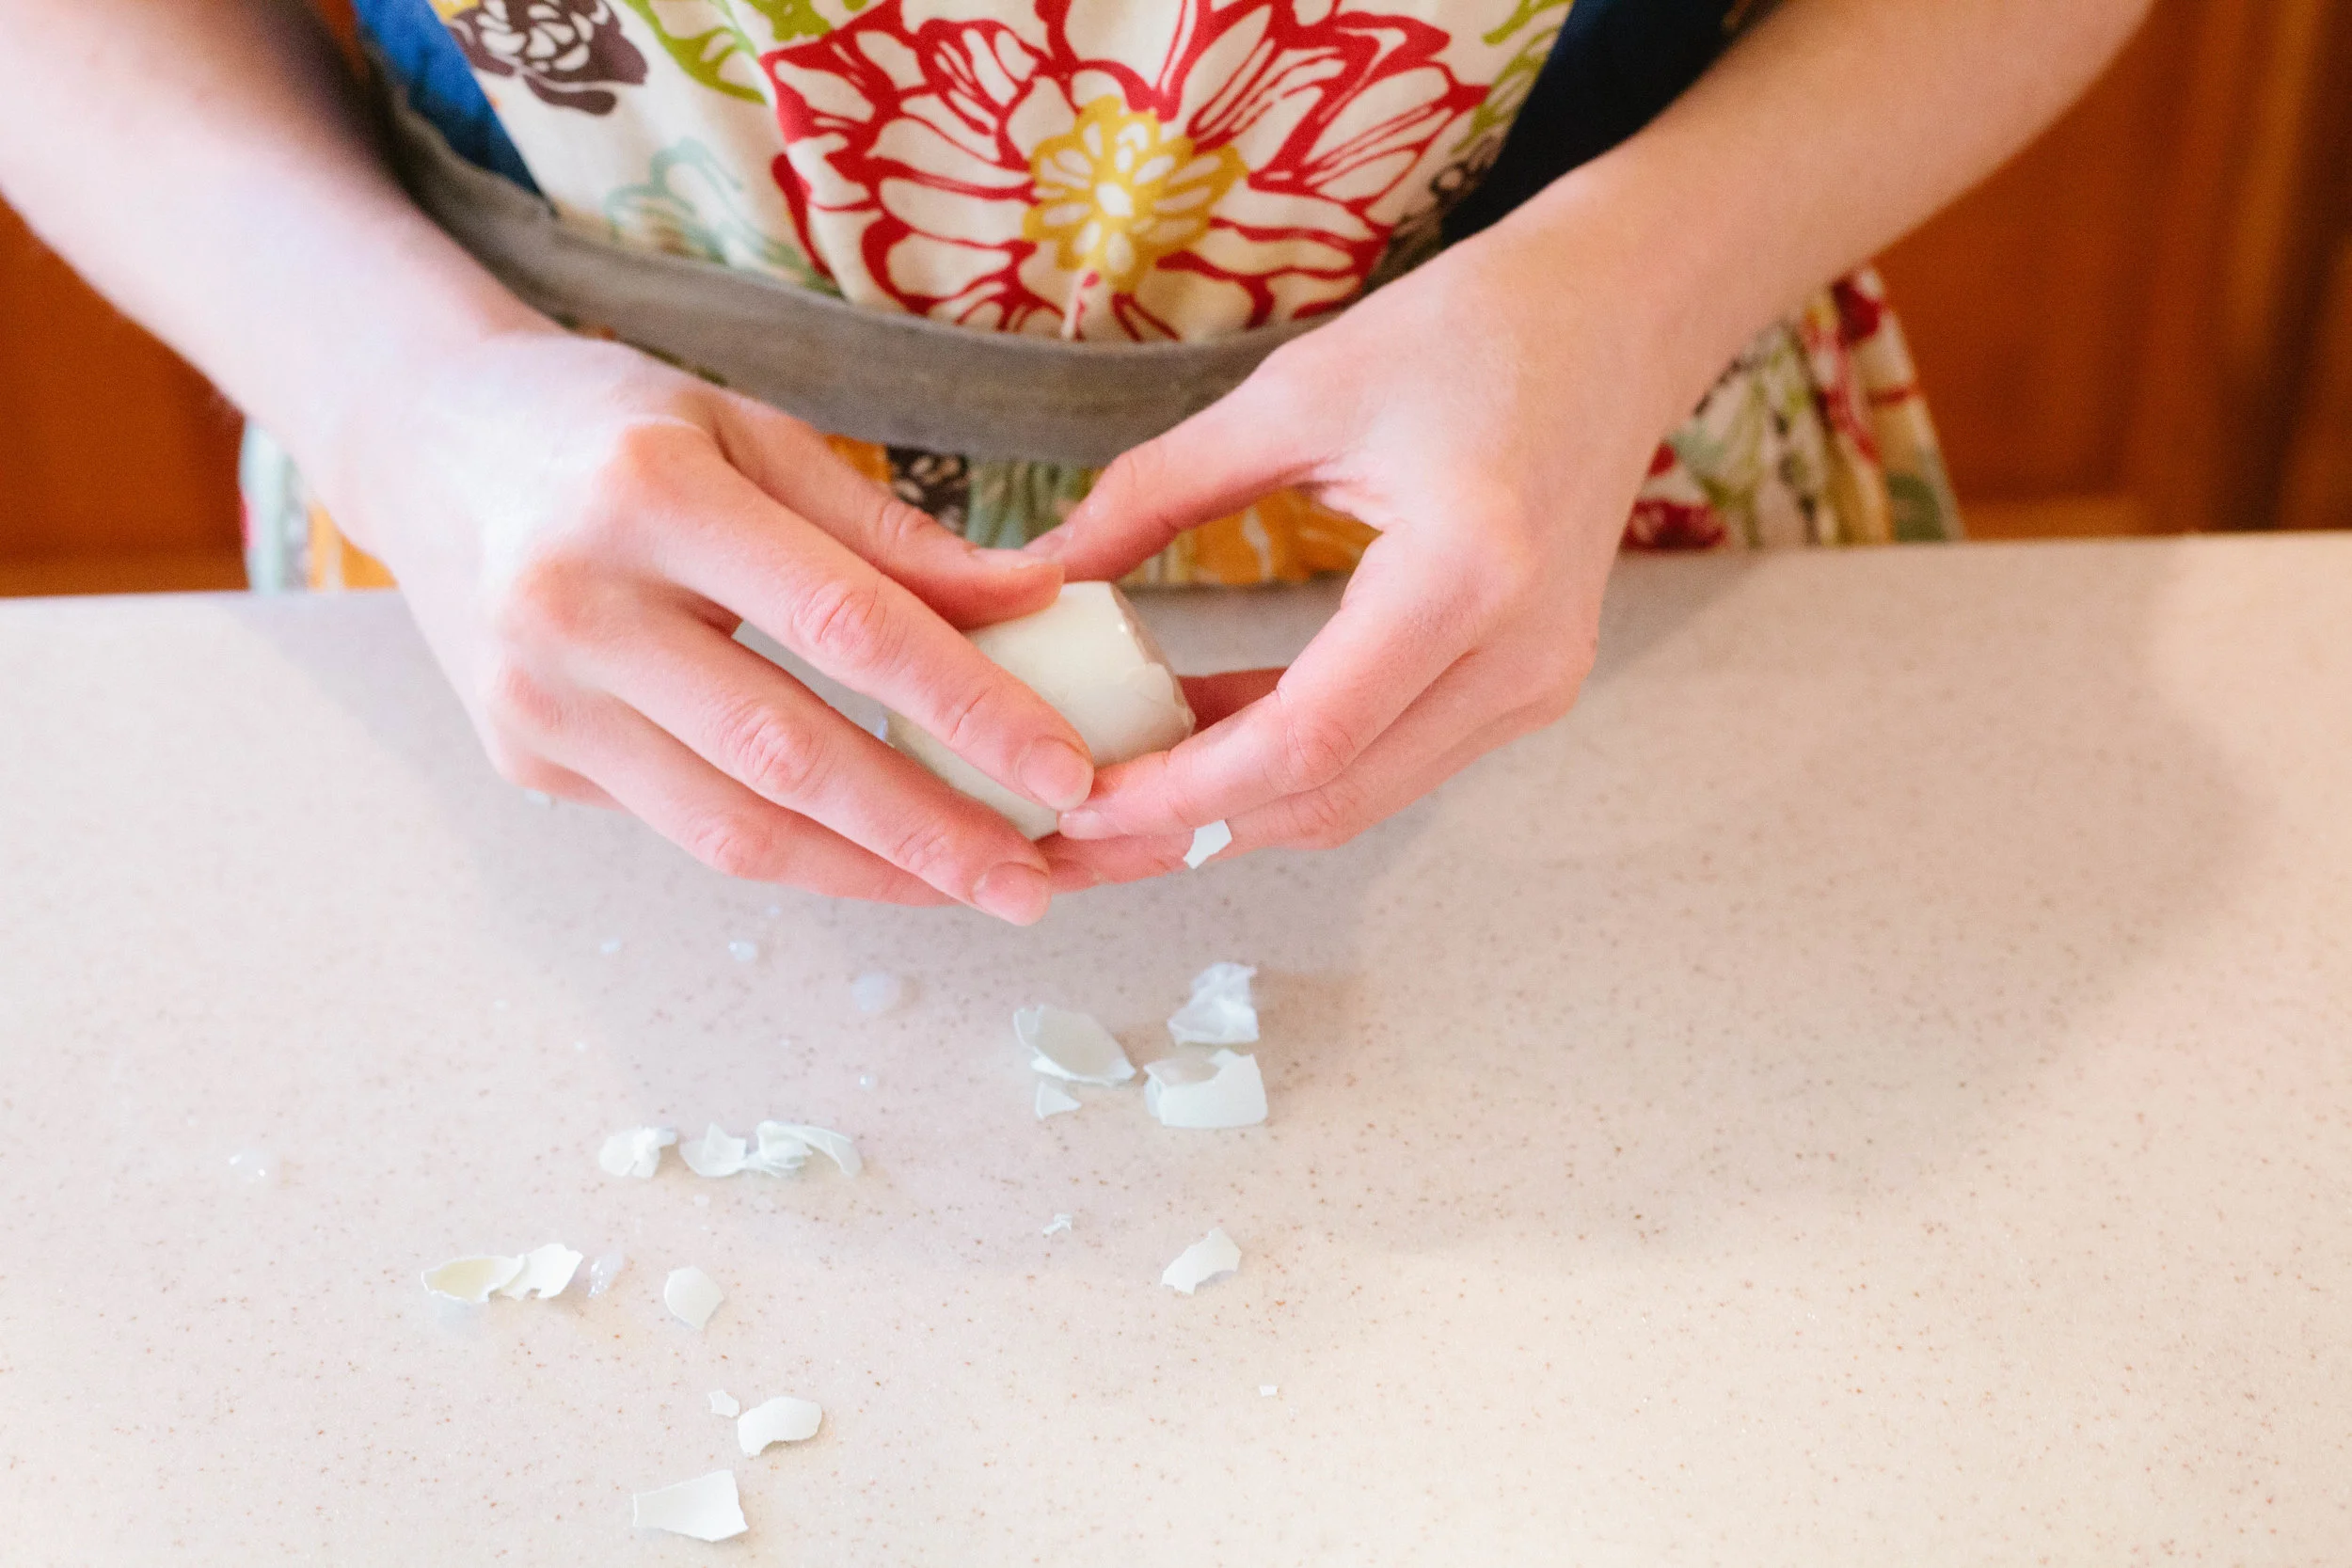
Once eggs are cooled, peel them.

mayo-free-egg-salad-recipe-egg-salad-on-gaps-sour-cream-egg-salad

Coarsely chop eggs, celery and green onion.

Add to a mixing bowl and add in pepper, salt to taste, and sour cream. 

mayo-free-egg-salad-recipe-egg-salad-on-gaps-sour-cream-egg-salad

Gently mix to coat and then sprinkle paprika over the top. Mix gently.

Serve and enjoy!

mayo-free-egg-salad-recipe-egg-salad-on-gaps-sour-cream-egg-salad

Mayo Free Egg Salad

Author:
Prep time: Cook time: Total time:

Ingredients:

  • 4 Eggs
  • ½ cup Sour Cream or Creme Fraiche
  • 1 small stalk Celery
  • 1 large Green Onion
  • ¼ - ½ tsp Salt
  • 1 tsp Pepper
  • ½ tsp Paprika
  • Parsley

Instructions:

How to cook Mayo Free Egg Salad

  1. Hard boil eggs. (Recipe here.)
  2. Once eggs are cooled, peel them.
  3. Coarsely chop eggs, celery and green onion.
  4. Add to a mixing bowl and add in pepper, salt to taste, and sour cream.
  5. Gently mix to coat and then sprinkle paprika over the top. Mix gently.
  6. Serve and enjoy!
Created using The Recipes Generator
EggSalad.png

Simple Easy Hollandaise Sauce Recipe

GAPS Legal Hollandaise Sauce Recipe Made with Limes

What do you do when you are bored or eggs two ways (scrambled or fried?)... make hollandaise sauce, of course!

I'm not sure how the true chefs will react to this recipe because I'm sure I don't get my hollandaise sauce as smooth as it's supposed to be, but so many of you have asked for this favorite recipe of mine that I want to share it here! I have now made this sauce dozens of times and there are a few principles I have learned about what makes this dish different than plain scrambled eggs.

#1 Don't do this in a cast-iron or your eggs will taste like iron.

#2 Lower heat makes for smoother sauce. But if you are in a hurry and don't mind lumps, more heat and less time still creates a delicious meal.

#3 The acid (lime or lemon juice) is the real key to this dish. I make my plain scrambled eggs with similar amounts of butter, but it is the lime that makes the eggs more smooth.

#4 I prefer lime over lemon because it is more mild and I feel I can add more of it without overpowering the dish. I believe this makes the hollandaise sauce easier to successfully make. After having done this many times there is a color change I look for when adding the lime juice. When I achieve this color change I know that my sauce will turn out decently smooth.

As you make this sauce, don't give up if you don't achieve your desired smoothness the first time! As with most cooking, this is an art and skill that you will get better at with practice. Enjoy your hollandaise sauce!

Simple Hollandaise Sauce

Ingredients

  • 2 eggs

  • 3 (ish) tablespoons Butter

  • ½ lime, freshly squeezed

Directions

Hollandaise-Sauce-Easy-Sauce-for-Eggs-Hollandaise-with-Limes-

Melt butter in pan on very low heat.

Hollandaise-Sauce-Easy-Sauce-for-Eggs-Hollandaise-with-Limes

A smooth hollandaise sauce is achievable! Whisk the eggs quickly before adding to melted butter. Recipe by certified GAPS Practitioner Amy Mihaly, Be Well Clinic.

Beat two eggs in a bowl.

Hollandaise-Sauce-Easy-Sauce-for-Eggs-Hollandaise-with-Limes

Hollandaise Sauce is my most requested recipe! I eat this GAPS Legal and GAPS friendly sauce on chicken, vegetables and with eggs. It's also Whole 30 and Paleo friendly! Recipe by certified GAPS Practitioner Amy Mihaly, Be Well Clinic.

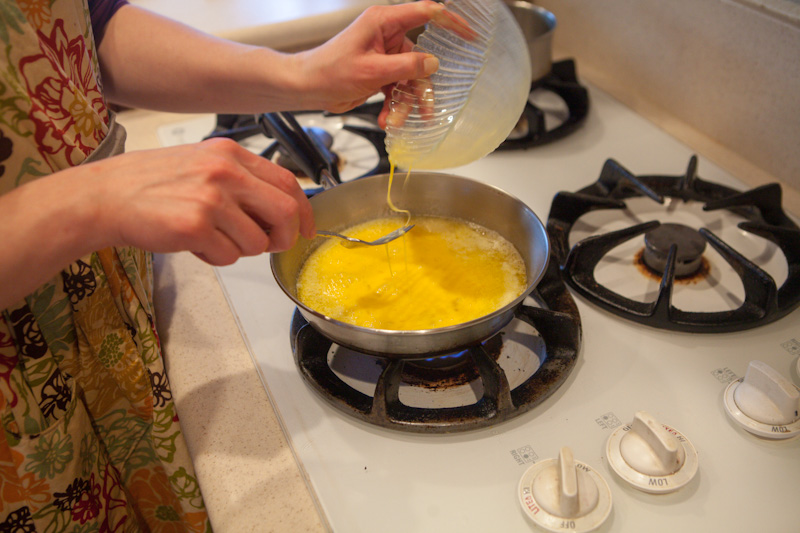
Add eggs to pan as soon as butter is melted.

Hollandaise-Sauce-Easy-Sauce-for-Eggs-Hollandaise-with-Limes

The key to making a good Hollandaise Sauce is to whisk constantly for a smooth sauce. This GAPS legal recipe couldn't be easier! Recipe by certified GAPS Practitioner Amy Mihaly, Be Well Clinic.

Mix sauce together, stirring constantly. Add lime juice. Using a whisk will get you a smoother sauce but I don’t mind a chunkier sauce.

If your eggs start to thicken, turn down your heat or add more lime juice.

Hollandaise-Sauce-Easy-Sauce-for-Eggs-Hollandaise-with-Limes

An easy simple recipe for Hollandaise Sauce with only three ingredients. This recipe is legal on the GAPS Diet, Whole 30 and Paleo. Recipe by certified GAPS Practitioner Amy Mihaly, Be Well Clinic.

The sauce is done when it holds together more and you can start to see the bottom of the pan.

Serve immediately! Serve with chicken, artichokes, vegetables.

Note:

Do not cook this is in an cast iron pan! Use a stainless steel pan with good heat protection.

HollandaiseSauce-683x1024.png

Hollandaise Sauce with Limes

Author:
prep time: cook time: total time:

ingredients:

  • 2 eggs
  • 3 (ish) tablespoons Butter
  • ½ lime, freshly squeezed

instructions:

How to cook Hollandaise Sauce with Limes

  1. Melt butter in pan on very low heat.
  2. A smooth hollandaise sauce is achievable! Whisk the eggs quickly before adding to melted butter. Recipe by certified GAPS Practitioner Amy Mihaly, Be Well Clinic.
  3. Beat two eggs in a bowl.
  4. Hollandaise Sauce is my most requested recipe! I eat this GAPS Legal and GAPS friendly sauce on chicken, vegetables and with eggs. It's also Whole 30 and Paleo friendly! Recipe by certified GAPS Practitioner Amy Mihaly, Be Well Clinic.
  5. Add eggs to pan as soon as butter is melted.
  6. The key to making a good Hollandaise Sauce is to whisk constantly for a smooth sauce. This GAPS legal recipe couldn't be easier! Recipe by certified GAPS Practitioner Amy Mihaly, Be Well Clinic.
  7. Mix sauce together, stirring constantly. Add lime juice. Using a whisk will get you a smoother sauce but I don’t mind a chunkier sauce.
  8. If your eggs start to thicken, turn down your heat or add more lime juice.
  9. An easy simple recipe for Hollandaise Sauce with only three ingredients. This recipe is legal on the GAPS Diet, Whole 30 and Paleo. Recipe by certified GAPS Practitioner Amy Mihaly, Be Well Clinic.
  10. The sauce is done when it holds together more and you can start to see the bottom of the pan.
  11. Serve immediately! Serve with chicken, artichokes, vegetables.
  12. Note:
  13. Do not cook this is in an cast iron pan! Use a stainless steel pan with good heat protection.
Created using The Recipes Generator

Almond Flour Cookies with Cacao Nibs

GAPS Legal Almond Cookies

Adapted from The Paleo Plan Makes 24 Cookies GAPS Legal on Stage 4

Ingredients for gaps legal chocolate chip cookies

  • 2 cups Almond Flour

  • ¼ cup Whey

  • 2 large eggs

  • 1/3 cup Room Temperature Coconut Oil

  • 1 tsp Baking Soda

  • ½ tsp Vanilla

  • ⅛ tsp Salt

  • ¼ cup Honey (or ⅓ cup date syrup)

  • ⅛-¼ cup Raw Cacao Nibs

Directions for chocolate chip cookies on the gaps diet

gaps-legal-chocolate-chip-cookies-with-almond-flour-fermented-almond-flour-cookies-what-to-do-with-fermented-almond-flour

24 Hours in Advance

Add whey to almond flour. Stir to moisten.

Leave covered on counter for 24 hours to ferment.

gaps-legal-chocolate-chip-cookies-with-almond-flour-fermented-almond-flour-cookies-what-to-do-with-fermented-almond-flour

The Next Day

Preheat oven to 350. Add your baking sheet to the oven to preheat. These cookies bake better on a hot dish.To fermented flour, add eggs and stir.

gaps-legal-chocolate-chip-cookies-with-almond-flour-fermented-almond-flour-cookies-what-to-do-with-fermented-almond-flour

Add coconut oil to mixture. The coconut oil should be room temperature. If it is melted, you won’t have the right consistency.

Add the baking soda, vanilla, salt and honey (or date paste) to the mixture. Mix well.

gaps-legal-chocolate-chip-cookies-with-almond-flour-fermented-almond-flour-cookies-what-to-do-with-fermented-almond-flour

Add cacao nibs to dough mixture.

Remove baking sheet from oven. Line with parchment paper.

gaps-legal-chocolate-chip-cookies-with-almond-flour-fermented-almond-flour-cookies-what-to-do-with-fermented-almond-flour

Spoon approx. 1 tbsp size rounds of dough onto parchment paper.

Bake at 350 degrees for 10-15 minutes until edges are golden brown and cookies seem firm. Watch them closely after 8 minutes. They will go from raw to burnt quickly!

gaps-legal-chocolate-chip-cookies-with-almond-flour-fermented-almond-flour-cookies-what-to-do-with-fermented-almond-flour

Almond Flour Cookies with Cacao Nibs

Author:
prep time: cook time: total time:

ingredients:

  • 2 cups Almond Flour
  • ¼ cup Whey
  • 2 large eggs
  • 1/3 cup Room Temperature Coconut Oil
  • 1 tsp Baking Soda
  • ½ tsp Vanilla
  • ⅛ tsp Salt
  • ¼ cup Honey (or ⅓ cup date syrup)
  • ⅛-¼ cup Raw Cacao Nibs

instructions:

How to cook Almond Flour Cookies with Cacao Nibs

24 Hours in Advance
  1. Add whey to almond flour. Stir to moisten.
  2. Leave covered on counter for 24 hours to ferment.
The Next Day
  1. Preheat oven to 350. Add your baking sheet to the oven to preheat. These cookies bake better on a hot dish.To fermented flour, add eggs and stir.
  2. Add coconut oil to mixture. The coconut oil should be room temperature. If it is melted, you won’t have the right consistency.
  3. Add the baking soda, vanilla, salt and honey (or date paste) to the mixture. Mix well.
  4. Add cacao nibs to dough mixture.
  5. Remove baking sheet from oven. Line with parchment paper.
  6. Spoon approx. 1 tbsp size rounds of dough onto parchment paper.
  7. Bake at 350 degrees for 10-15 minutes until edges are golden brown and cookies seem firm. Watch them closely after 8 minutes. They will go from raw to burnt quickly!
Created using The Recipes Generator

Mayo Free Deviled Eggs Recipe

Mayo Free GAPS Legal Deviled Eggs 2 Ways

The story of these GAPS legal deviled eggs has a long beginning.

One of the foods I miss most? Mayonnaise. Now I know there are different mayos out there, even ones you can make yourself that are GAPS legal. But unless it tastes like the Real Mayo deliciousness that I remember, I have no interest in consuming it. I was a mayo snob long before I payed attention to what I ate!

Because I haven't found a mayo my taste buds approve of there is no mayonnaise in my refrigerator, even if it's just to make recipes like deviled eggs with. So one day when I had a hankerin' for deviled eggs I got the creative juices flowing and started experimenting with recipes. My first thought was to substitute the mayo for butter. After all, fat is the main reason deviled eggs are so good, right? A batch with butter resulted in delicious and very rich eggs, but the texture was very strange (hard), especially if refrigeration was required. Then I thought to add some sour cream to the mixture. At first I still had too much butter (50:50 ratio), but eventually found a ratio that works well—the butter adds some firmness to the "runnier" sour cream. This gives you a good base that allows you to flavor your deviled eggs as desired.

Next I wanted to come up with a dairy-free egg that my sister could enjoy. I immediately thought of using avocado as the fat. This also resulted in a delicious deviled egg, that's just a little green. I have served these eggs to many people, and as long as they know there is avocado in it, no one has had an issue with the color. And these are perfect for serving at a Dr. Seuss gathering as part of green eggs and ham! No artificial coloring required!

I have discovered that deviled egg recipes can be very familial. If these don't taste like the deviled eggs your grandma made, I encourage you to springboard off the base ingredients and modify the recipe to try and recreate your family memories. After all, that's what recipes are all about, aren't they? If you come up with something particularly delicious, we'd love if you share it with us in the comments below!

Enjoy these GAPS Legal Deviled Eggs, 2 Ways!

Dairy Free Deviled Eggs with Avocado

Ingredients for Avocado Deviled Eggs

  • 6 eggs

  • 1 medium or ½ cup Avocado

  • 1 tsp Mustard Powder

  • 1 tbsp of water

  • 1 tsp Vinegar

  • ½ tsp Honey

  • ¼ tsp Salt

  • Lemon

  • Chili Powder (optional)

  • Paprika (optional)

  • Cilantro (optional)

Directions for Avocado Deviled Eggs

Deviled-Eggs-Made-Without-Mayo-Mayo-Free-Deviled-Eggs-Deviled-Eggs-For-GAPS-Diet-Deviled-Eggs-Made-With-Sour-Cream

Fill a medium saucepan with cold water. Add eggs. Bring eggs to a boil and cook for 5-6 minutes covered.

Remove eggs from heat. Let set for 5 minutes. Test if your egg is hard boiled by removing one from the pan and spinning it. A hard boiled egg will spin upright if the yolk is hard.

Rinse the eggs under cold water or place them in an ice bath.

Deviled-Eggs-Made-Without-Mayo-Mayo-Free-Deviled-Eggs-Deviled-Eggs-For-GAPS-Diet-Deviled-Eggs-Made-With-Avocado

Peel the eggs. Peeling them while they are still a little warm will help get the shell off.

Cut the peeled eggs in half.

Deviled-Eggs-Made-Without-Mayo-Mayo-Free-Deviled-Eggs-Deviled-Eggs-For-GAPS-Diet-Deviled-Eggs-Made-With-Avocado

In a bowl, scoop out all the egg yolks. They should easily slide out with your finger.Set the egg whites onto a plate.

Crumble the egg yolks with a fork.

Deviled-Eggs-Made-Without-Mayo-Mayo-Free-Deviled-Eggs-Deviled-Eggs-For-GAPS-Diet-Deviled-Eggs-Made-With-Avocado

Mash the avocado into the egg yolks with a fork.

Add mustard powder to the egg yolk mixture.

Add water and vinegar to mixture. Mix well.

Add honey, salt and lemon. Mix well.

Deviled-Eggs-Made-Without-Mayo-Mayo-Free-Deviled-Eggs-Deviled-Eggs-For-GAPS-Diet-Deviled-Eggs-Made-With-Avocado

Fill the egg whites with a generous scoop.

Sprinkle with chili powder or paprika or top with sprigs of cilantro.

Deviled-Eggs-Made-Without-Mayo-Mayo-Free-Deviled-Eggs-Deviled-Eggs-For-GAPS-Diet-Deviled-Eggs-Made-With-Avocado

If you have leftover egg mixture, you can dip vegetables into it or smear onto scrambled eggs or crackers.

For a spicier egg, add more mustard powder!

These are legal on GAPS stage 4.


Sour Cream Deviled Eggs

Ingredients for Deviled Eggs with Sour Cream

  • 6 eggs

  • ½ c Sour Cream

  • 1 tbsp Room Temperature Butter

  • 1 - 1 ½ tsp Vinegar

  • 1 tsp Honey

  • ¼ tsp Mustard Powder

  • ⅛ tsp salt

  • Paprika (optional)

Directions for Deviled Eggs with Sour Cream

Deviled-Eggs-Made-Without-Mayo-Mayo-Free-Deviled-Eggs-Deviled-Eggs-For-GAPS-Diet-Deviled-Eggs-Made-With-Sour-Cream

Fill a medium saucepan with cold water. Add eggs. Bring eggs to a boil and cook for 5-6 minutes covered.

Remove eggs from heat. Let set for 5 minutes. Test if your egg is hard boiled by removing one from the pan and spinning it. A hard boiled egg will spin upright if the yolk is hard.

Rinse the eggs under cold water or place them in an ice bath.

Deviled-Eggs-Made-Without-Mayo-Mayo-Free-Deviled-Eggs-Deviled-Eggs-For-GAPS-Diet-Deviled-Eggs-Made-With-Sour-Cream

Peel the eggs. Peeling them while they are still a little warm will help get the shell off.

Cut the peeled eggs in half.

Deviled-Eggs-Made-Without-Mayo-Mayo-Free-Deviled-Eggs-Deviled-Eggs-For-GAPS-Diet-Deviled-Eggs-Made-With-Sour-Cream

In a bowl, scoop out all the egg yolks. They should easily slide out with your finger.

Set the egg whites onto a plate.

Crumble the egg yolks with a fork.

Deviled-Eggs-Made-Without-Mayo-Mayo-Free-Deviled-Eggs-Deviled-Eggs-For-GAPS-Diet-Deviled-Eggs-Made-With-Sour-Cream

Add the butter to the mixture and mix well.

Add the sour cream. Mix.

Add 1 tsp of the vinegar plus all the honey and salt. Mix.

Deviled-Eggs-Made-Without-Mayo-Mayo-Free-Deviled-Eggs-Deviled-Eggs-For-GAPS-Diet-Deviled-Eggs-Made-With-Sour-Cream

These are less tangy than a traditional deviled egg. To add more tang, add up to ½ tsp of vinegar.

Fill the egg whites with a generous scoop.

Sprinkle with paprika.


Mayo Free Deviled Eggs with Avocado

Author:
prep time: cook time: total time:

ingredients:

  • 6 eggs
  • 1 medium or ½ cup Avocado
  • 1 tsp Mustard Powder
  • 1 tbsp of water
  • 1 tsp Vinegar
  • ½ tsp Honey
  • ¼ tsp Salt
  • Lemon
  • Chili Powder (optional)
  • Paprika (optional)
  • Cilantro (optional

instructions:

How to cook Mayo Free Deviled Eggs with Avocado

  1. Fill a medium saucepan with cold water. Add eggs. Bring eggs to a boil and cook for 5-6 minutes covered.
  2. Remove eggs from heat. Let set for 5 minutes. Test if your egg is hard boiled by removing one from the pan and spinning it. A hard boiled egg will spin upright if the yolk is hard.
  3. Rinse the eggs under cold water or place them in an ice bath.
  4. Peel the eggs. Peeling them while they are still a little warm will help get the shell off.
  5. Cut the peeled eggs in half.
  6. In a bowl, scoop out all the egg yolks. They should easily slide out with your finger.Set the egg whites onto a plate.
  7. Crumble the egg yolks with a fork.
  8. Mash the avocado into the egg yolks with a fork.
  9. Add mustard powder to the egg yolk mixture.
  10. Add water and vinegar to mixture. Mix well.
  11. Add honey, salt and lemon. Mix well.
  12. Fill the egg whites with a generous scoop.
  13. Sprinkle with chili powder or paprika or top with sprigs of cilantro.
  14. If you have leftover egg mixture, you can dip vegetables into it or smear onto scrambled eggs or crackers.
  15. For a spicier egg, add more mustard powder!
  16. These are legal on GAPS stage 4.
Created using The Recipes Generator

Mayo Free Deviled Eggs with Sour Cream

Author:
prep time: cook time: total time:

ingredients:

  • 6 eggs
  • ½ c Sour Cream
  • 1 tbsp Room Temperature Butter
  • 1 - 1 ½ tsp Vinegar
  • 1 tsp Honey
  • ¼ tsp Mustard Powder
  • ⅛ tsp salt
  • Paprika (optional)

instructions:

How to cook Mayo Free Deviled Eggs with Sour Cream

  1. Fill a medium saucepan with cold water. Add eggs. Bring eggs to a boil and cook for 5-6 minutes covered.
  2. Remove eggs from heat. Let set for 5 minutes. Test if your egg is hard boiled by removing one from the pan and spinning it. A hard boiled egg will spin upright if the yolk is hard.
  3. Rinse the eggs under cold water or place them in an ice bath.
  4. Peel the eggs. Peeling them while they are still a little warm will help get the shell off.
  5. Cut the peeled eggs in half.
  6. In a bowl, scoop out all the egg yolks. They should easily slide out with your finger.
  7. Set the egg whites onto a plate.
  8. Crumble the egg yolks with a fork.
  9. Add the butter to the mixture and mix well.
  10. Add the sour cream. Mix.
  11. Add 1 tsp of the vinegar plus all the honey and salt. Mix.
  12. These are less tangy than a traditional deviled egg. To add more tang, add up to ½ tsp of vinegar.
  13. Fill the egg whites with a generous scoop.
  14. Sprinkle with paprika.
Created using The Recipes Generator

New Year's Resolutions: How to Make Successful Habit Changes

New Year's Resolutions: How to Make Successful Habit Changes

As I'm writing this, we are almost half way through December. This time of year is about getting ready for the holidays AND the new year. As we are looking forward to the new year, most of us are thinking about new habits we want to start (or renew). But this can be tricky. You only have so much time and energy to spend on habit change, and some health trends are not actually helpful to you. I want to help you plan for this upcoming year. Let's talk about how decide what habits are right for you!

Immunity: The Best Defense is a Good Offense {Part One}

Immunity: The Best Defense is a Good Offense {Part One}

Fall is coming! I hope you have been enjoying the cooler nights (and sometimes day) like I have! The onset of cooler weather also means that cold and flu season is coming!

Zucchini Bread {GAPS legal}

Zucchini... if there is one harvest that defines summer, it's zucchini.

Zucchini is great because of its versatility: it can be used hot or cold, baked or fried, and in soups, salads, breads, or even as a noodle substitute.

Today I want to share with you a recipe for a zucchini bread that is legal on the full GAPS diet, WAPF diet, Paleo diet and Whole30. I want you to remember (and take hope in) the fact that I am not primarily a chef. I am just average in the kitchen. If I can make this, so can you! This recipe is very forgiving—so try it!

There are a couple keys to this recipe that need to be followed. Don't shortcut them...they are what make this recipe forgiving, and the bread yummy! The first key is also the first step: fermenting the almond flour. Have you eaten baked goods made of almond flour that are dense and dry? Fermenting the flour creates a lighter, fluffier end product. But that's not all! Fermenting is one of the three processes that can be used to make nuts more digestible.

For more about soaking, sprouting or fermenting, watch this video.

The other key is using sour cream (you could also substitute in a full-fat yogurt) for the fat. As a cultured food, sour cream helps make the bread lighter as well.

Fermented Almond Flour Zucchini Bread

Ingredients

  • 2 1/2 cups almond flour (organic preferred)

  • 1/2 cup whey (strained from yogurt or kefir)

  • 2 cups zucchini (grated and squeezed to remove the liquid)

  • 2-3 eggs (chicken or duck)

  • 1 tsp cinnamon

  • 1/4 tsp ginger

  • 1/4 tsp nutmeg

  • 1 tsp sea salt (source)

  • 1/2 cup sour cream

  • 2/3 cup date syrup (source)

Directions

24 hours (or more) before

Mix almond flour and whey together in a bow.l Cover and set on the counter for 24 hours

This fermentation, which takes place at room temperature, will change the texture of the "flour." At the end of 24 hours you will have something that resembles dough more than wet flour. This is a base that can be used for many recipes. It will keep in the fridge about a week, so many people make this ahead of time and keep it in their fridge for future use. With this step done ahead of time, you can pull it out, add ingredients, and have a fermented baked good in about an hour.

The Next Day

Preheat the oven to 350° F Grate more than 2 cups of zucchini. The zucchini is very wet, so squeeze it dry using a cloth or towel (you can see it in the picture below).

Next, measure 2 cups of the zucchini (dry, but not compressed) and mix it into the 24 hour fermented flour. Add 2-3 eggs (it depends on the size of your egg, those pictured are duck eggs, which are larger than chicken eggs).

Mix in the rest of the ingredients (sour cream, date syrup, salt and spices).

I used date paste instead of honey because cooking honey is thought to turn the honey toxic. You can also make your own date paste in a strong blender like a Vitamix.

Pour into a greased pan (I prefer lining mine with parchment paper, but this is optional).

Bake at 350° for 45-50 minutes, or until toothpick comes out clean from the middle. Wait at least 10 minutes before cutting into the bread. This allows the steam to finish the cooking progress, and will make the texture of the bread better. Add butter, and enjoy!

This post contains affiliate links. Your trust is important to me, and I only recommend products that I trust.


Fermented Almond Flour Zucchini Bread

Author:
prep time: cook time: total time:

ingredients:

  • 2 1/2 cups almond flour (organic preferred)
  • 1/2 cup whey (strained from yogurt or kefir)
  • 2 cups zucchini (grated and squeezed to remove the liquid)
  • 2-3 eggs (chicken or duck)
  • 1 tsp cinnamon
  • 1/4 tsp ginger
  • 1/4 tsp nutmeg
  • 1 tsp sea salt (source)
  • 1/2 cup sour cream
  • 2/3 cup date syrup (source)

instructions:

How to cook Fermented Almond Flour Zucchini Bread

24 hours (or more) before
  1. Mix almond flour and whey together in a bow.l Cover and set on the counter for 24 hours
  2. This fermentation, which takes place at room temperature, will change the texture of the "flour." At the end of 24 hours you will have something that resembles dough more than wet flour. This is a base that can be used for many recipes. It will keep in the fridge about a week, so many people make this ahead of time and keep it in their fridge for future use. With this step done ahead of time, you can pull it out, add ingredients, and have a fermented baked good in about an hour.
The Next Day
  1. Preheat the oven to 350° F Grate more than 2 cups of zucchini. The zucchini is very wet, so squeeze it dry using a cloth or towel (you can see it in the picture below).
  2. Next, measure 2 cups of the zucchini (dry, but not compressed) and mix it into the 24 hour fermented flour. Add 2-3 eggs (it depends on the size of your egg, those pictured are duck eggs, which are larger than chicken eggs).
  3. Mix in the rest of the ingredients (sour cream, date syrup, salt and spices).
  4. I used date paste instead of honey because cooking honey is thought to turn the honey toxic. You can also make your own date paste in a strong blender like a Vitamix.
  5. Pour into a greased pan (I prefer lining mine with parchment paper, but this is optional).
  6. Bake at 350° for 45-50 minutes, or until toothpick comes out clean from the middle. Wait at least 10 minutes before cutting into the bread. This allows the steam to finish the cooking progress, and will make the texture of the bread better. Add butter, and enjoy!
Created using The Recipes Generator

Spring! And Natural Allergy Management

Spring has come to my neighborhood! Over the last week, things have been budding and growing. Green has been showing, and flowers blooming. The sounds of spring have been happening for awhile, but are now in full force—birds chirping, squirrels chattering, and children playing. I took an sunset tour around my neighborhood to enjoy the spring evening, and I want to share with you some of the pictures I took. Then keep reading for some natural ways to manage your spring allergies!

There is another way I know that spring is here… my allergies have started to flare. Since going through the GAPS diet, my allergies are mild compared to what they used to be, but they still cause minor irritation—enough that I need to address them. So today I am going to share with you what I do to manage my allergies naturally. But before we discuss management techniques, let’s review what allergies are. Allergy symptoms are a product of the immune system. And we can think of them as a signal from our body to let us know that something is going on. Basically, they signal two things:

The first is that an allergen (a protein chain that is usually referred to as an antigen) has bypassed the body’s protective mechanisms. When this happens, the body mounts a non-specific immune response (an inflammatory response) against that allergen. In this process, certain cells (called mast cells) are degranulated, and release things like histamine into the bloodstream. Histamine travels to receptor sites in the GI tract, respiratory tract and the skin. These receptors then trigger a further response to the allergen, and we see symptoms like hives, mucus production, and swelling.

The second is that our liver is unable to keep up with processing mediators (like histamine) that have been released in the inflammatory response. As we saw above, histamine triggers the symptoms we are accustomed to in an allergic reaction. Histamine is not a problem when it is being processed and removed by the liver fairly quickly. But when it continues to circulate (because the liver isn’t pulling it out fast enough) it will continue to cause unpleasant symptoms—sending you signals that your body needs some assistance.

Okay, now that we are on the same page about what allergy symptoms are, let’s talk about ways to support your body so you don't suffer from them! Again, these symptoms are signals that your body needs some help. So what can we do to help support the liver and immune system?

Feed it Fat

The immune system is a very hungry organ, and what it likes best to eat is fat! Especially the Vitamins A and D that it contains. These are both found in abundance in butter, as well as lard, fermented cod liver oil, and other animal fats. The cholesterol found in these fats also plays an important role, for it is cholesterol that helps the body repairdamage from inflammation (watch this video for more on this).

Eat Sauerkraut

There are two benefits to eating sauerkraut (or fermented cabbage any way). The first is the probiotic benefit. The root cause of allergies is a leaky gut. Bad gut flora has everything to do with this. (This is too much to discuss in this post, so if you have further questions, I recommend chapter 6 of my book Notes From a GAPS Practitioner.) So eating probiotics will help the allergy problem, both long-term and short-term. However, if you are unused to eating large amounts of sauerkraut, I recommend you work up to it slowly. The second benefit of sauerkraut is the high amount of Vitamin C available in it. Lacto-fermenting cabbage increased the bioavailability of Vitamin C by about 4 times. Our immune system also needs Vitamin C to function well. So consuming large amounts of sauerkraut is like taking Vitamin C daily (which you could take in other ways, like arceola cherry powder). I enjoy sauerkraut, and find that if I eat between 1-3 cups a day (broken up with meals, or as a snack), my allergy symptoms are fairly well managed. I generally feel that my itchy eyes and throat are calmed down within about 20 minutes of eating it.

Apply Lavender Essential Oil

This is my quick-acting go-to if my symptoms are overwhelming. Lavender is a powerful antihistamine. If I run into a situation where my allergies flare up quickly, like having a cat rub against me, or when the cottonwood trees are seeding, I pull out my lavender oil. There are several ways to use it. You can apply it topically near the area that is affected (best for skin issues) or on the bottoms of your feet (if you don’t like the smell). You can diffuse it, so you breathe it into your mucus membranes and calm the histamine response there. Or (if you have a pure and safe brand like the one I use), you can take it internally. I prefer to place a drop or two under my tongue and let it absorb sublingually. This is the quickest way to get it into the bloodstream. Lavender tastes about like it smells, but the quick relief I get far outweighs the bitter taste it leaves. I usually feel relief from my symptoms in 2-5 minutes, but for most people it may take 10-20 minutes to feel the effect.

Support Your Liver

There are ways to help the liver when it is overtaxed. First, reduce the amount of toxins you are asking the liver to process, thus adding to its workload. In the spring I am more careful about what I eat. There are some foods I have “graduated” to that can be too much for my body to handle when it also has to deal with extra histamines in my “allergy season.” In the same way, it is good to be cautious about other toxins from chemicals in the environment (or on our skin) that are overloading the body. It is also important to use other methods of detox, such as detox baths and juicing, to help remove toxins and thus reducing the workload of the liver. Finally, eating liver (consuming the animal organ that matches our struggling organ is always helpful) regularly can be helpful. If you don’t like it, you can take desiccated liver. And for a little extra support, I will sometimes take the Standard Process supplement Antronex.

Try Something New

I have not tried this yet because I just learned about it, but this season I am going to try lacto-fermenting honey! Most of us have heard that honey can help with allergies, but it turns out that lacto-fermenting the honey increases these benefits even more! I’m interested to see how it turns out, and if it helps. The honey does have to be local to have a strong effect, and I fortunately have a little honey left over from the year I tried beekeeping. If you want to learn more about it, I would recommend starting HERE.

If you have tried lacto-fermenting honey, found success with any of these natural means, or want to share other things you have found helpful with the community, then leave it in a comment below!  

Onward!

References: McCance, K. and Huether, S. (2006). Pathophysiology: The Biologic Basis for Disease in Adults and Children. Elsevier Mosby. Philadelphia, PA. Pg. 249-255. Lavender and the Nervous System. Koulivarnd, P. Ghadiri, M., Gorji, A. (September 4, 2012) Retrieved March 20, 2017 from https://www.hindawi.com/journals/ecam/2013/681304/

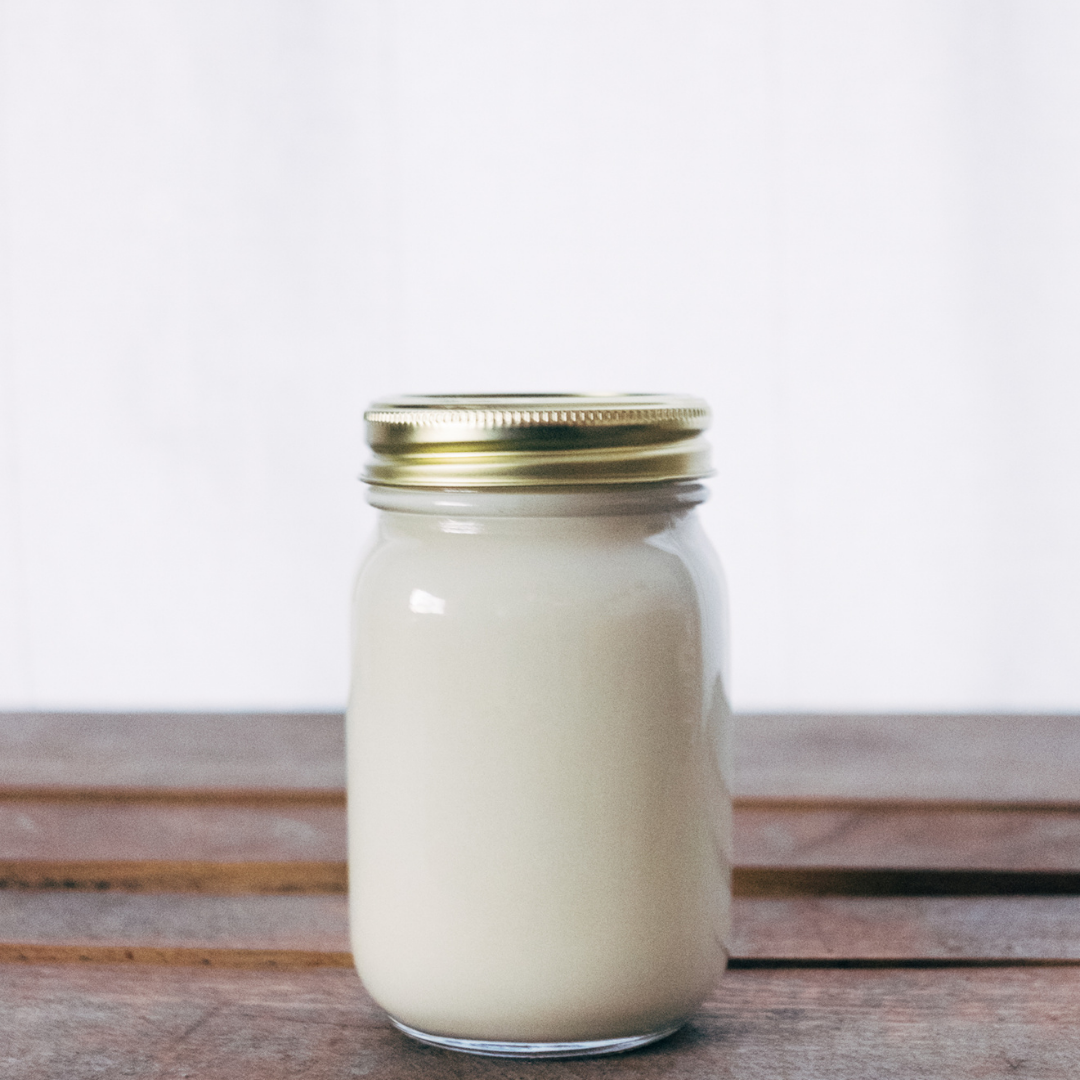
Raw Milk Chocolate Pudding

Some days don't you just miss pudding cups? I know I do.

Now you can make your own! The most frequent comment about this pudding (besides "yum", "delicious", and "mmm...") is that it tastes just like a chocolate pudding cup! This simple recipe is a wonderful treat for you and your family, and because it's made of real food ingredients it can be enjoyed without guilt.

Of course this, like all sweet items, should be enjoyed in moderation and not as a meal replacement. And if you are following a healing protocol, you will need to wait until significant gut healing has occurred before enjoying this.

A note for those on the GAPS diet: While this is technically (advanced) full GAPS legal, not everyone is able to tolerate raw milk, cream or cocoa. Listen to your body and only eat this when it is a good choice for you.

Enjoy this video, then scroll down for the recipe. We hope you enjoy it!

Raw Milk Chocolate Pudding

Recipe by Erin Goodin

Warm on stovetop (medium heat)

Heat to 95°F to activate the gelatin, then remove from heat

In a blender, combine

  • 2 cups raw milk

  • 1/2 cup raw honey

  • 3 egg yolks

  • 1/4 cup cocoa powder

  • heated mixture

  • 1 tsp vanilla extract

Blend until combined

Pour into desired container(s)

Chill for 12-24 hrs in the fridge

Whipped Cream Topping

  • 2 cups cream

  • 2 TBS honey

Whip until stiff, then use to top the pudding

Enjoy!

Affiliate disclosure: There are affiliate links contained in the post. The small commission I receive helps to keep this blog going. I do not recommend products that I do not trust.


Raw Milk Chocolate Pudding

Author:
prep time: cook time: total time:

ingredients:

Raw Milk Chocolate Pudding
Whipped Topping
  • 2 cups cream
  • 2 TBS honey

instructions:

How to cook Raw Milk Chocolate Pudding

  1. Warm on stovetop (medium heat): 1 cup raw milk, 1 TBS gelatin (brand I recommend), 1/2 tsp sea salt (brands I recommend),  1 TBS butter.
  2. Heat to 95°F to activate the gelatin, then remove from heat
  3. In a blender, combine: 2 cups raw milk, 1/2 cup raw honey, 3 egg yolks, 1/4 cup cocoa powder, heated mixture, 1 tsp vanilla extract.
  4. Blend until combined
  5. Pour into desired container(s)
  6. Chill for 12-24 hrs in the fridge
  7. Whipped Cream Topping: 2 cups cream,  2 TBS honey.
  8. Whip until stiff, then use to top the pudding
  9. Enjoy!

NOTES:

Recipe by Erin Goodin
Created using The Recipes Generator

How to Shop Like Betty: Tips on Nutrient-Dense Shopping

In the last post we discussed the differences in food quality, and explored the intricate way God designed our senses to be able to taste, smell, and see the difference. But, as amazing as all this is, we hit a reality check.

We can't all grow our own garden vegetables, have our seafood overnighted, or raise a cow in the backyard. It can be a struggle to even afford purchasing these things.

And that's okay. Most of us are in the same boat.

While I still encourage people to think differently about food budget—considering it instead as part of your health-care budget, I understand that at some point, cash-flow is a limiting factor. You can only do the best you can, prioritizing the things that seem important to your body and family, and go from there.

I want to share a few tips with you. Ones that can help you put more nutrient-dense food on the table. Today let's talk about how to shop.

canstockphoto14919872.jpg

Nutrient-Dense Shopping:

  • Shop sales, coupon, or go to wholesale stores (like Costco), and buy in bulk when the food is a good price.

I actually specifically recommend Costco because of their conscientious sourcing, and their larger selection of organic items. This automatically leads to better quality food options. Buying in bulk, and on sale are also great ways to get things like coconut oil and sugar (to feed your SCOBY, of course), as well as non-grocery items like Epsom salt, soaps and shampoos.

  • Find out when your favorite organic-carrying grocery store marks things down for quick-sale.

Stores go through their produce, dairy and meat products on a regular basis in order to catch and mark-down food that is about to expire. Usually this is scheduled, and if you know the time and day you can show up soon after (or during) this mark-down period and get incredible deals! You can also check to see if there is a local discount grocery store, that takes almost out-of-date items and sells them at a large discount.

Produce: The small health food stores that I shop at usually put the older assorted produce in $2 bags. Often times it comes out to roughly a 90% discount! You have to be creative with using it, and be willing to give away food you may not be able to eat (like maybe potatoes, for example), but I often walk out of these stores with $15-30 worth of organic produce that cost me $4-6.

Meat: Similarly, stores mark down meat when it is nearing it's expiration date. Find out what days they go through the organic produce, and shop at that time. Again, I have found even better deals in smaller stores, where they have more to loose by throwing away food. And don't be afraid to buy frozen meat! Very few nutrients are lost when the meat is frozen. If it comes down to buying fresh commercial meat, or frozen natural or organic meat, the latter will definitely give you more nutrition for your buck.

canstockphoto41638296.jpg
  • Know when to spend your money: when quality really matters, or when it varies tremendously.

There are some foods that are more difficult to find on sale, and ones that I recommend paying more for. Many of these items can be purchased much "cheaper," but the quality ranges from very poor to very good, and you get what you pay for. Dairy products in particular are very manipulated by manufacturers, and should be bought with that in consideration.

Dairy: If you can get raw milk, then do it! Otherwise, I do not recommend consuming pasteurized milk unless it has been cultured, like in yogurt or cheese. Aside from milk, most dairy products tend to keep longer, and may be more difficult to find on sale. Organic is important here, because commercial cows are given many antibiotics and hormones that will come through the milk and affect you. Don't "buy cheap" in these areas, especially butter, as it may be a main source of cholesterol (fat) for you. Cream can be purchased at the store, and although it has been pasteurized (some more than others), it is more stable than milk, and is less affected by pasteurization. Cheese, yogurt and sour cream have all been cultured, and those active cultures are working hard to counteract the damaging effects of pasteurization.

Eggs: Deciding which eggs to buy will depend on your area. If you can't purchase them from a local farm (real free-range are better than store-bought organic), then choose your egg based on the color of the yolk, and the taste. The yolk should be bright yellow or orange, meaning the chickens have been out in the sun and may even be able to eat bugs and fresh greens. Never buy eggs from vegetarian-fed hens. Believe me, hens are not vegetarians! Eggs are another large source of cholesterol, and it's best to buy the best quality of eggs you can find (these are not always the most expensive).

canstockphoto13062197.jpg
  • Look for bulk ordering companies or clubs.

You don't have to join a CSA to get farm-fresh produce. There are companies like Azure Standard, Miller's Organic Farm, and others that send you meat and produce from a farm (maybe in another state) and deliver it to you. This is a great way to buy things that are more difficult to get, like lard, nuts or dried fruit. This can also be a good way to get non-grocery items.

I hope these tips help you make more nutrient-dense food purchases. What other ways have you found to make nutrient-dense food affordable? Share your knowledge with the community in the comments below. Happy shopping!

Onward!

Decadent Hot Chocolate

Winter is here in full force... the weather is cold, snow storms are common, and the evenings are dark and long. It's a great time to stay in, cuddle up in a blanket, and drink hot chocolate.

"Hot chocolate?" you ask. "I'm on (GAPS, WAPF, SCD, Paleo) and not eating processed food—how in the world can I drink hot chocolate?" Well, I'm about to tell you. I have also been without hot chocolate for a long time, but inspiration struck and I can now present you with an amazing hot chocolate recipe.

No really, it's amazing. Rich, thick, decadent, filling, indulging, chocolaty goodness.   

It even passed the skeptical, hot chocolate-loving teenage boy test.  

Which is a big deal.   And it's a nutrient-dense food!  

Are you ready?

Without further ado, here is the...

Decadent Hot Chocolate Recipe

*Legal on Paleo, SCD, WAPF, and Full GAPS (if tolerating milk and cocoa powder)

—Makes 2 large or 3 medium mugs of hot cocoa—

Ingredients:

  • 3 cups Milk (Raw)

  • 2 Eggs

  • 6-8 TBS Honey

  • 4 tsp Cocoa Powder

  • 1/8 tsp Sea Salt

  • 1/4 tsp Vanilla

Directions for raw milk hot chocolate:

Over low-medium heat, mix:

  • 2 cups milk

  • 2 eggs

  • 6-8 TBS honey

  • 1/8 tsp salt

IMG_0914.JPG

Stir or whisk constantly:

Whisk over low to medium heat for about 5-8 minutes, until the mixture coats the back of a spoon (if you have ever made ice cream, this is the same process as making the base)

IMG_0924.JPG

Remove From Heat:

When the spoon is coated, remove from the heat (or you will get milky scrambled eggs!)

Whisk in:

  • 1/4 tsp Vanilla

  • 4 tsp Cocoa powder

IMG_0939.JPG

(in this picture we did this in a cup because we were experimenting... you should add these ingredients to the saucepan—it's much easier)

Whisk until frothy

Pour into mugs, filling each mug about 2/3 full

Finish filling the mugs by carefully pouring plain milk (warmed or cool) down the inside of the mug (so as not to disturb the foam on top)

Add a few GAPS marshmallows if desired

For an added option (adults only!) I recommend adding a little rum

Serve and enjoy!

...you can clean up the mess later..


Raw Milk Hot Chocolate

Author:
prep time: cook time: total time:

ingredients:

  • 3 cups Milk (Raw)
  • 2 Eggs
  • 6-8 TBS Honey
  • 4 tsp Cocoa Powder
  • 1/8 tsp Sea Salt
  • 1/4 tsp Vanilla

instructions:

How to cook Raw Milk Hot Chocolate

  1. Over low-medium heat, mix:  cups milk, 2 eggs, 6-8 TBS honey, 1/8 tsp salt.
  2. Whisk over low to medium heat for about 5-8 minutes, until the mixture coats the back of a spoon (if you have ever made ice cream, this is the same process as making the base)
  3. When the spoon is coated, remove from the heat (or you will get milky scrambled eggs!)
  4. Whisk in: 1/4 tsp Vanilla, 4 tsp Cocoa powder
  5. (in this picture we did this in a cup because we were experimenting... you should add these ingredients to the saucepan—it's much easier)
  6. Whisk until frothy
  7. Pour into mugs, filling each mug about 2/3 full
  8. Finish filling the mugs by carefully pouring plain milk (warmed or cool) down the inside of the mug (so as not to disturb the foam on top)
  9. Add a few GAPS marshmallows if desired
  10. For an added option (adults only!) I recommend adding a little rum
  11. Serve and enjoy!
Created using The Recipes Generator

Thanksgiving in October

There is something exciting and magical about Fall! I am part of a garden co-op, and we had our harvest feast last night! Everything (essentially) was from our garden and harvest, including the honey and eggs! What a feast we had--and it was great knowing that it was grown and picked (very) locally, and in season. We actually had a tough year--a fungus on our sprouts, a late frost (in June), hail, bugs, an early freeze... yet the yield was exciting!

I have enough winter squash to last me months; apples, plumbs and herbs to dry; tomatoes cooked and frozen; kale to make into chips; and salad to eat for weeks still!  This is on top of the fresh veggies we have been eating (as fast as possible) for the last 2 months. Colorado does have a short growing season, but with a good gardener (not me, I am just learning) and commitment to cover things during freak freezes, you can grow many wonderful things.  

The bees had a hard time as well, but we still ended up with over 3 gallons of honey! And their busy work brought beautiful flowers, fruit, and vegetables! I am so thankful for them, and my friend who is doing bees with me, and is not afraid of them still (even though she got stung 9 times)  

And so we were discussing last night that Thanksgiving should be in October in Colorado, when harvest is in here. Because it is then that we are remembering how much we have to be so thankful for! Even if you don't have a garden, take a moment to think about all the great and beautiful things around you--everything from changing leaves and the start of sweater weather, to holidays coming and routine re-appearing after the whirlwind-of-a-summer is over. So... what are you thankful for?

Onward!