sides

Liver Jalapeno Poppers

Recently I put up a recipe about bacon wrapped liver pieces, a suggestion from a patient of mine. They turned out amazing! As I was eating them, I thought “a little cream cheese would be nice with these '' which then led me to thinking of jalapeno poppers.

Thus began the quest to find the perfect ratio of liver in a jalapeno popper that would go unnoticed by the general public. My idea was to put a small sliver of liver inside each jalapeno, filling them with cream cheese and wrapping them in bacon. 

Store bought cream cheese is not technically GAPS Legal. If you are following the GAPS Protocol, you could instead substitute a yogurt cheese, which is made by dripping the whey from the yogurt. 

For the bacon, you have multiple options. You can cure your own bacon (see directions here) or if tolerating, you can purchase a commercially available bacon following these guidelines. It’s best if the pigs were not fed antibiotics or hormones and uncured bacon, depending on the ingredients, can also be considered Full GAPS Legal. Curing agents include high nitrates which can be irritating to your body and detrimental to your healing journey. Also to legally be called a curing brine, it must contain a certain ratio of salt and sugar thus any bacon that is labeled cured will contain some amount of sugar, which is not GAPS Legal. Uncured bacon may avoid these issues but be sure to read your labels. 

If possible, wear gloves when you are cutting your jalapenos. If you don’t have gloves, coat your hands in fat to avoid having the oils seep into your skin. If you have burning on your skin from the jalapenos, fill a cup with 50% apple cider vinegar and 50% filtered water to dilute it. Place your fingers in the cup for 5 to 10 minutes until the sting goes away. 

While you may not be able to pass these off at a party, hopefully this is a treat your real food eating family can enjoy.

Ingredients for Liver Jalapeno Poppers:

  • 10 Jalapenos

  • 12 oz. Bacon

  • 3 Chicken Livers (this is the mildest liver, you can use other liver if you have it)

  • 6 - 8 oz Cream Cheese or Yogurt Cheese

Directions for Liver Jalapeno Poppers:

IMG_8441.jpg

Put on your gloves OR coat your hands in oil. If at any point you start to feel heat, add more oil!

IMG_8448.jpg

Rinse your jalapenos in filtered water. Slice in half longways and remove the pith and seeds. Optionally, rinse the jalapenos again in filtered water to remove any leftover seeds. Dry with a paper towel.

Preheat your oven to 400 degrees.

Cut the bacon in half. Put the cream cheese on another plate so you don’t cross contaminate any remaining cream cheese from your package with blood from the livers. Allow the cream cheese to warm slightly so it is pliable but not soft.

IMG_8475.jpg

Rinse the livers in filtered water. Cut into long slices.

IMG_8482.jpg

Assemble the poppers by placing a piece of bacon on a cutting board or plate. Add one half of the jalapeno on top. Place long strips of liver inside the jalapeno. Take a chunk of cream cheese and squish it to make a log. Place on top of the liver pieces. Wrap the bacon around the livers.

Place in a glass baking dish. No other fat is needed. If you have extra livers and bacon when you are done assembling your jalapenos, I suggest making bacon wrapped livers.

Bake at 400 degrees for 30-40 minutes until bacon is crispy.

Enjoy!


LiverJalapenoPoppers.png

Bacon Wrapped Livers

I’m always searching for new ways and additional recipes to recommend for eating livers. Liver is an important superfood because the nutrients in liver are very important to our health. It’s recommended to consume liver on a regular basis. However, many people do not enjoy eating liver in the previous ways they have had it prepared.

This is a basic recipe but you can experiment in adding other things to your stuffing mixture like onions, cheese, cream cheese, carrots, etc.

IMG_7590.jpg

Ingredients for Bacon Wrapped Liver:

  • ½ lb. Bacon, 1 piece per liver bite

  • ½ lb. Liver, I’m using chicken

Directions for Bacon Wrapped Liver

IMG_7567.jpg

Pre-heat oven to 400. Rinse your livers and pat to dry. Slice livers into chunks, approximately two bite size. Cut bacon strips in half.

IMG_7572.jpg

Fold bacon around livers. Place seam side down in a deep sided baking dish.

IMG_7593.jpg

Cover with parchment paper and aluminum foil. Do not allow foil to touch your food.

Place in oven covered for 15 minutes.

Uncover and cook for 10 minutes.

Serve and enjoy!


BaconWrappedLiver.png

Bacon Wrapped Livers

Author: Amy Mihaly, Be Well Clinic

Ingredients

  • ½ lb. Bacon, 1 piece per liver bite
  • ½ lb. Liver, I’m using chicken

Instructions

  1. Pre-heat oven to 400. Rinse your livers and pat to dry. Slice livers into chunks, approximately two bite size. Cut bacon strips in half.
  2. Fold bacon around livers. Place seam side down in a deep sided baking dish.
  3. Cover with parchment paper and aluminum foil. Do not allow foil to touch your food.
  4. Place in oven covered for 15 minutes.
  5. Uncover and cook for 10 minutes.
  6. Serve and enjoy!

Simple Applesauce

I love apples! I think they’re one of the easiest things to preserve. If you are trying to eat in season and preserve your own food, apples are a great way to start! (Check out our other recipes using apples!)

My dad’s love language is making food for people. Although he usually made plenty of delicious applesauce, he often gave so much of it away that it didn’t last long in our house. 

IMG_0380.jpg

Because my corer and peeler didn’t peel my apples very well, I removed the skins from my apples manually. This is important if you are just starting on apples on GAPS Stage 5. After you know you can tolerate apple skins, you can skip the peeling step if you want to.

When I process large amounts of apples, I always think about making apple cider vinegar! Save your peels and cores (but not any rotting or bruised parts) to make your own apple cider vinegar.

You can make applesauce in large batches or small ones. For most of the year, I make applesauce batches with just two or three apples. If you make a very large batch of applesauce, it is easy to can preserve it in a water bath or freeze it to enjoy later. 

You can use any kind of apple to make applesauce, or even a mixture of apple varieties. It’s a great use for slightly wrinkly apples, which is why I often do 1 or 2 at a time. 

IMG_0470.jpg

Apples should be eaten with plenty of animal fat. Butter is my favorite but lard or ghee are ok choices as well. Apples contain a lot of sugar so the fat helps keep your blood sugar from spiking and, as we talked about in The One About Fat, fat soluble vitamins help us absorb other nutrients. 

Ingredients for Applesauce:

  • Apples: Peeled and Cored or just Peeled and Sliced

  • Filtered Water

  • Butter

Directions for Applesauce:

IMG_0386.jpg

Rinse your apples and cut and slice them.

Cut your apples into fairly similarly sized pieces so they cook down evenly.

Add a tiny bit of filtered water, 1-3 tbsp, to the bottom of a pot so the apples don’t burn as you are waiting for them to soften.

IMG_0427.jpg

Add apples to the pot and set on a stove on medium low heat.

Stir the apples every few minutes as they cook so they do not burn. 

IMG_0460.jpg

When your apples are soft, mash them with a fork or potato masher. If they are not covered, you may need to add a little bit more water. 

I prefer my apple sauce to be chunky but you can put it through a blender, food processor or masher to smooth it. 

IMG_0467.jpg

Serve it warm or cold, fresh or freeze it for later! To freeze it, cool your applesauce completely. I use BPA free plastic bags. If I have a lot to freeze, I measure it out in 1-2 cup increments.

When you eat it, be sure to add lots of butter!


SimpleGAPSLegalAppleSauce.png

Simple Apple Sauce

Author: The Be Well Clinic

Ingredients

  • Apples: Peeled and Cored or just Peeled and Sliced
  • Filtered Water
  • Butter

Instructions

  1. Rinse your apples and cut and slice them.
  2. Cut your apples into fairly similarly sized pieces so they cook down evenly.
  3. Add a tiny bit of filtered water, 1-3 tbsp, to the bottom of a pot so the apples don’t burn as you are waiting for them to soften.
  4. Add apples to the pot and set on a stove on medium low heat.
  5. Stir the apples every few minutes as they cook so they do not burn.
  6. When your apples are soft, mash them with a fork or potato masher. If they are not covered, you may need to add a little bit more water.
  7. I prefer my apple sauce to be chunky but you can put it through a blender, food processor or masher to smooth it.
  8. Serve it warm or cold, fresh or freeze it for later! To freeze it, cool your applesauce completely. I use BPA free plastic bags. If I have a lot to freeze, I measure it out in 1-2 cup increments.
Created using The Recipes Generator

Real Food Onion Dip

Onion dip used to be my favorite party dip. For a long time, I have not eaten it because commercially prepared dips are full of chemicals. However, like with many foods that are now available commercially, these used to be available made from scratch. This is my attempt at making a real food onion dip.

Making delicious dips is not just about good food although pleasure in food is important and should never be underestimated. But when we make dips from real food ingredients we are also adding nutrition to our bodies with every bite. I love that the foods I used to eat that I thought weren’t best for my body are now foods I can make purposefully and joyfully knowing that each bite will bring nutrients to my body. It’s taken me many years to get where I am and I still have far to go but I want to encourage you to keep pursuing learning how to make real nutritious food for yourself and your family. You will never regret it!

Ingredients for Onion Dip:

2 Small or 1 Medium Onions

2 tbsp Butter

4-5 Cloves of Garlic

¼ tsp Salt + more for seasoning onions

8 oz Sour Cream

2 tsp Mushroom Ketchup

1 tsp Apple Cider Vinegar

Directions for Onion Dip:

IMG_8272.jpg

Finely chop onions. Like really tiny. Add to a frying pan with butter and stir to evenly coat. Season with salt.

IMG_8279.jpg

Cook the onions until they are caramelized. Peel the garlic cloves and finely chop. Add to the pan and stir.

Watch your onions, stirring every 5-10 minutes to keep them from burning. They should take around 20-30 minutes to fully caramelize.

Once the onions have caramelized, turn off the heat so they cool slightly.

IMG_8298.jpg

In a bowl, add sour cream, slightly cooled onions, mushroom ketchup, apple cider vinegar and the ¼ tsp of salt. Stir to combine.

Allow the mixture to sit at room temperature for a few hours for the flavors to blend.

Dip carrot sticks, cheese sticks or quesadillas. Enjoy!

HowtoMakeRealFoodOnionDip.png

Real Food Onion Dip

Author: The Be Well Clinic
Prep time: Cook time: Total time:

Ingredients:

  • 2 Small or 1 Medium Onions
  • 2 tbsp Butter
  • 4-5 Cloves of Garlic
  • ¼ tsp Salt + more for seasoning onions
  • 8 oz Sour Cream
  • 2 tsp Mushroom Ketchup
  • 1 tsp Apple Cider Vinegar

Instructions:

  1. Finely chop onions. Like really tiny. Add to a frying pan with butter and stir to evenly coat. Season with salt.
  2. Cook the onions until they are caramelized. Peel the garlic cloves and finely chop. Add to the pan and stir.
  3. Watch your onions, stirring every 5-10 minutes to keep them from burning. They should take around 20-30 minutes to fully caramelize.
  4. Once the onions have caramelized, turn off the heat so they cool slightly.
  5. In a bowl, add sour cream, slightly cooled onions, mushroom ketchup, apple cider vinegar and the ¼ tsp of salt. Stir to combine.
  6. Allow the mixture to sit at room temperature for a few hours for the flavors to blend.
  7. Dip carrot sticks, cheese sticks or quesadillas.
Created using The Recipes Generator

Make Your Own Ranch Dressing

My brother absolutely loves ranch dressing! I have fond memories of it as well but I mostly remember how much he loved it. Making your own ranch dressing is fairly simple and allows you to avoid the undesirable additives like MSG that are commonly found in commercially made condiments. 

Ranch dressing is typically used as a dip and you can definitely dip any number of cut vegetables into this mixture. However, you could also use this delicious blend as an added flavoring for lots of dishes, like on top of a steak, in this Chicken Pot Pie Soup or in this Pumpkin Soup.

Making your own ranch dressing is very easy! You can make it with dried herbs or fresh herbs. It’s GAPS Legal and you can use it as a dressing or as a dip. Recipe by Amy Mihaly, Certified GAPS Practitioner in Colorado.

This is legal on GAPS Stage 5 because of the herbs, even though we’re using fresh herbs. If you’re tolerating dried herbs, you could use a dried Italian Herb mixture. Otherwise, think Italian herbs like thyme, parsely, and oregano. 

Once I’ve mixed everything, I like to return it to the original container. I would suggest making this dressing about an hour before you’re going to use it so that the flavors can meld. If you use it immediately after you mix it, it’s still delicious but not as flavorful.

Ingredients for Making Your Own Ranch Dressing:

  • 7.5 oz Sour Cream or Creme Fraiche

  • Italian Herbs

  • 1 clove garlic

  • 1 tbsp minced onion

  • 5-6 Grinds of Pepper

Directions for Making Your Own Ranch Dressing:

Making your own ranch dressing is very easy! You can make it with dried herbs or fresh herbs. It’s GAPS Legal and you can use it as a dressing or as a dip. Recipe by Amy Mihaly, Certified GAPS Practitioner in Colorado.

Finely mince garlic, onion and herbs.

Making your own ranch dressing is very easy! You can make it with dried herbs or fresh herbs. It’s GAPS Legal and you can use it as a dressing or as a dip. Recipe by Amy Mihaly, Certified GAPS Practitioner in Colorado.

Add to a bowl with sour cream or creme fraiche. Mix well and enjoy!

Making your own ranch dressing is very easy! You can make it with dried herbs or fresh herbs. It’s GAPS Legal and you can use it as a dressing or as a dip. Recipe by Amy Mihaly, Certified GAPS Practitioner in Colorado.

HowToMakeYourOwnRanchDressing.png

How to Make Your Own Ranch Dressing

Author:
prep time: cook time: total time:

ingredients:

  • 7.5 oz Sour Cream or Creme Fraiche
  • Italian Herbs
  • 1 clove garlic
  • 1 tbsp minced onion
  • 5-6 Grinds of Pepper

instructions:

How to cook How to Make Your Own Ranch Dressing

  1. Finely mince garlic, onion and herbs.
  2. Add to a bowl with sour cream or creme fraiche.
  3. Mix well and enjoy!
  4. I would suggest making this dressing about an hour before you’re going to use it so that the flavors can meld. If you use it immediately after you mix it, it’s still delicious but not as flavorful.
Created using The Recipes Generator

Full GAPS Legal Fried Rice

We had fried rice a lot growing up! It’s a good “kitchen sink” recipe. You can use almost any ingredients you have on hand. It also comes together fairly quickly, especially if you’re like us and usually have rice in the fridge.

One of the reasons I chose white rice for this recipe is because on the transition to the GAPS Intro diet, or at any time during the GAPS Intro diet, if you or your practitioner feel that your body is in need of some carbohydrates, this is a simple carbohydrate that many of us relate to. While it’s  not a whole grain, which generally we prefer, the husk of a whole grain can be harder to digest. White rice that’s been soaked is fairly easy to digest and fairly untroublesome for the gut.

This is a quick and easy meal.

To make it GAPS legal, substitute wild rice for the white rice. 

One of the keys to the recipe is find a true correctly fermented soy sauce. Soy should only ever be eaten in a properly fermented state. When it’s properly fermented, it’s legal on the Full GAPS Diet. I found a properly fermented soy sauce from Ohsawa Organic called Nama Shoyu. It’s an unpasteurized soy sauce and delicious!

IMG_5388.jpg

There are “classic” fried rice vegetables but truly you can change this recipe to use any vegetables you have in the fridge. In this version I used carrots, celery, onions, red cabbage and green onion. You could also use any type of summer squash like yellow squash or zucchini, broccoli, cauliflower, swiss chard, shredded brussel sprouts, snow peas, snap peas, green peas, or green beans. We always made it with water chestnuts and bean sprouts growing up. I’m not sure if these are GAPS legal but I’m very doubtful they would be. What vegetable combination is your favorite?

Ingredients for GAPS Legal Fried Rice

  • 2 cups of rice

  • 4 cups stock

  • Carrots

  • Onions

  • Red Cabbage

  • Green Onions

  • 3 tbsp Lard or Other Animal Fat

  • 4-6 cloves of Garlic, depending on size

  • 2 Eggs

  • 1.5 tbsp Soy Sauce (see note about correctly fermented soy sauce)

Directions for GAPS Legal Fried Rice:

24 Hours Before:

Soak your rice overnight. Place in warm filtered water with 4 tbsp of yogurt or whey.

The Next Day:

Rinse rice under filtered water.

Add 2 cups of rice to 4 cups of stock. Cook rice in the stock for 15 minutes until the stock is absorbed. 

Chop all vegetables. The smaller you chop them, the faster they’ll cook. Make sure you slice your vegetables the same size for even cooking. 

Add 3 tbsp of lard to a  cast iron pan. 

IMG_5311.jpg

When adding vegetables, add the ones that take the longest to cook in first, usually the hardest ones. So for me, I added the carrots and celery first. Add in cabbage and onions.

Add 1-2 tsps of soy sauce into the cast iron pan. This will start to create the sticky sauce. 

IMG_5316.jpg

A tip in sauteing vegetables: let them sit for a minute or two to get brown. Then move them to cook other sides. 

IMG_5352.jpg

Once your vegetables have cooked, add in the rice and stir.

IMG_5359.jpg

Crack two eggs into a bowl and scramble them. Add them into the cast iron pan and mix well.

IMG_5370.jpg

Add in about 1 tbsp of soy sauce and mix everything together.

Serve alongside more soy sauce on the table and enjoy!

GAPS Legal Fried Rice

prep time: cook time: total time:

ingredients:

  • 2 cups of rice
  • 4 cups stock
  • Carrots
  • Onions
  • Red Cabbage
  • Green Onions
  • 3 tbsp Lard or Other Animal Fat
  • 4-6 cloves of Garlic, depending on size
  • 2 Eggs
  • 1.5 tbsp Soy Sauce (see note about correctly fermented soy sauce)

instructions:

How to cook GAPS Legal Fried Rice

  1. 24 Hours Before:
  2. Soak your rice overnight. Place in warm filtered water with 4 tbsp of yogurt or whey.
  3. The Next Day:
  4. Rinse rice under filtered water.
  5. Add 2 cups of rice to 4 cups of stock. Cook rice in the stock for 15 minutes until the stock is absorbed.
  6. Chop all vegetables. The smaller you chop them, the faster they’ll cook. Make sure you slice your vegetables the same size for even cooking.
  7. Add 3 tbsp of lard to a cast iron pan.
  8. When adding vegetables, add the ones that take the longest to cook in first, usually the hardest ones. So for me, I added the carrots and celery first. Add in cabbage and onions.
  9. Add 1-2 tsps of soy sauce into the cast iron pan. This will start to create the sticky sauce.
  10. A tip in sauteing vegetables: let them sit for a minute or two to get brown. Then move them to cook other sides.
  11. Once your vegetables have cooked, add in the rice and stir.
  12. Crack two eggs into a bowl and scramble them. Add them into the cast iron pan and mix well.
  13. Add in about 1 tbsp of soy sauce and mix everything together.
  14. Serve alongside more soy sauce on the table and enjoy!
Created using The Recipes Generator
35.png

Homemade Salad Dressing

I have recently been learning the importance of essential fatty acids from plants (EFAs.) These should be incorporated in every day diets. If you’re on GAPS, these are introduced on Introduction Stage 4.

When making real food, quality matters! This is especially true of cold pressed plant oils. For that reason, I recommend getting and using a high quality olive oil is very important. I am lucky to have a local shop, Rocky Mountain Olive Oil Company, that sources their oils from small family farms around the world who know the importance of good quality oils. You can even taste test the different oils so you know exactly what you’re getting.  Before I discovered the shop, I had no idea that olive oils can taste so differently from each other. If you’re not in Northern Colorado, try to find a olive oil store near you. There are even a few high quality olive oils available online, including Jovial and Olea. If none of these are an option for you, get an organic olive oil from your local health food store.

This is a simple base salad dressing but once you understand the ratios, the possibilities are endless! This recipe is a triple batch but the basic ratio is 3 tbsp oil and 2 tbsp of vinegar. For a cream based dressing, add sour cream. Find a salad dressing that your family loves but don’t forget to mix it up from time to time. Variety is key!

Add this dressing cold to any salad that makes sense. Never heat any olive oil or other plant pressed oils because heat will oxidize the molecules of the oil, creating rancidity and changing it from the health food that it is.

Letting this dressing meld overnight is important. The dressing becomes more flavorful and delicious as it sets longer.

Ingredients for Homemade Salad Dressing:

  • 9 tbsp Olive Oil

  • 8 tbsp Vinegar

  • 1 tbsp Honey

  • 4 Cloves Freshly Chopped Garlic

  • Freshly Chopped Herbs of Your Choice (I used 3 sprigs thyme and 1 sprig of rosemary.)

Directions for Homemade Salad Dressing

homemade-salad-dressing-recipe-how-to-make-home-made-salad-dressing-diy-salad-dressing-whole-food-salad-dressing-whole-30-gaps-diet-gaps-protocol-paleo-salad-dressing

Mince garlic finely.

Strip the thyme from the stem.

homemade-salad-dressing-recipe-how-to-make-home-made-salad-dressing-diy-salad-dressing-whole-food-salad-dressing-whole-30-gaps-diet-gaps-protocol-paleo-salad-dressing

Add olive oil, vinegar and honey to jar. 

homemade-salad-dressing-recipe-how-to-make-home-made-salad-dressing-diy-salad-dressing-whole-food-salad-dressing-whole-30-gaps-diet-gaps-protocol-paleo-salad-dressing

Add garlic, thyme and rosemary or other herbs.

homemade-salad-dressing-recipe-how-to-make-home-made-salad-dressing-diy-salad-dressing-whole-food-salad-dressing-whole-30-gaps-diet-gaps-protocol-paleo-salad-dressing

Shake to mix.

Store at room temperature. 

Homemade Salad Dressing

prep time: cook time: total time:

ingredients:

  • 9 tbsp Olive Oil
  • 8 tbsp Vinegar
  • 1 tbsp Honey
  • 4 Cloves Freshly Chopped Garlic
  • Freshly Chopped Herbs of Your Choice (I used 3 sprigs thyme and 1 sprig of rosemary.)

instructions:

How to cook Homemade Salad Dressing

  1. Mince garlic finely.
  2. Strip the thyme from the stem.
  3. Add olive oil, vinegar and honey to jar.
  4. Add garlic, thyme and rosemary or other herbs.
  5. Shake to mix.
  6. Store at room temperature.
Created using The Recipes Generator
30.png

How to Properly Caramelize Onions

Caramelized onions are an amazing supporting food because they are high in vitamin C, calcium, and quercetin. It’s especially helpful for sore throats but is an excellent food to eat anytime you are starting to feel under the weather! (Check out more of my helpful tips for caring for yourself when you’re sick here.)

I recommend a whole onion per person because the onions will reduce in size. You want to use a lot of animal fat with this recipe! I like both butter or lard, so whatever you happen to have on hand is ok. The fat is also great for you while you’re sick. Make sure you add enough salt for the added minerals, which is also very important when you’re ill.

White or yellow onions work for this recipe. I prefer the yellow onions and often have them on hand so that is what I usually use.

For great caramelized onions, make sure your heat is on low. This is a food that is best with patience - and burnt with impatience. Allow 20 - 30 minutes of cooking time to get really good caramelized onions. You can cook multiple onions at a time as long as you are using a large enough pan. If your entire family is sick, you can make a batch for everyone in about the same amount of time as cooking just one.

When slicing your onions, you want to slice them in short slices. Don’t give into the temptation of dicing your onions! Even if it seems they will cook faster, you’ll most likely end up with a burnt or mushy dish.

Make sure you don’t crowd your pan of onions or they won’t properly caramelize. Above is the maximum amount of onions I would put in one pan.

Caramelized onions should be sweet! They shouldn’t really taste like onions at all when they’re finished! As they cook, take a taster. If it still tastes like onions, keep stirring.

Dr Natasha recommends topping a caramelized onion with a little olive oil and a couple fried eggs. (Again fried in plenty of fat.) This is a very filling meal that’s amazing when you’re sick.

However, you don’t need to be sick to enjoy this nourishing food! It can be very soothing when you’ve had a long day and are needing a comfort food.

Ingredients for Caramelized Onions:

  • 2-3 Tbsp Fat of Your Choice Per Onion

  • Onion (1 Per Person)

  • Salt (The amount of salt will vary if you’re using salted butter or unsalted lard.)

Directions for Caramelized Onions:

how-to-properly-caramelize-onions-how-to-make-caramelized-onions-onions-when-sick-what-to-eat-while-sick-gaps-diet-gaps-protocol-holistic-health-northern-colorado

Slice the ends of your onion and peel. Put the peels and “extras” into a bag for use in stock later.

Cut the onion in half. Then cut into half again.

how-to-properly-caramelize-onions-how-to-make-caramelized-onions-onions-when-sick-what-to-eat-while-sick-gaps-diet-gaps-protocol-holistic-health-northern-colorado

Slice the onion so long strips form.

how-to-properly-caramelize-onions-how-to-make-caramelized-onions-onions-when-sick-what-to-eat-while-sick-gaps-diet-gaps-protocol-holistic-health-northern-colorado

Start your pan heating on medium high and add the fat of your choice. Heating your pan before your onion is sliced will result in a pan that is too hot.

how-to-properly-caramelize-onions-how-to-make-caramelized-onions-onions-when-sick-what-to-eat-while-sick-gaps-diet-gaps-protocol-holistic-health-northern-colorado

Add your onions to the pan. Stir to coat in the fat.

how-to-properly-caramelize-onions-how-to-make-caramelized-onions-onions-when-sick-what-to-eat-while-sick-gaps-diet-gaps-protocol-holistic-health-northern-colorado

Cook onions over medium heat, stirring every few minutes.

When they are nearing translucency (about 25 ish minutes) add a little salt if you are not using salted butter. Even if you are using salted butter, adding a little extra salt will help them break down.

Make sure everyone salts their onions to taste once the onions are on their plates!

how-to-properly-caramelize-onions-how-to-make-caramelized-onions-onions-when-sick-what-to-eat-while-sick-gaps-diet-gaps-protocol-holistic-health-northern-colorado

Your onions are done when they are golden brown. Enjoy them on their own or as part of a larger meal.


Caramelized Onions

Author:
prep time: cook time: total time:

ingredients:

  • 2-3 Tbsp Fat of Your Choice Per Onion
  • Onion (1 Per Person)
  • Salt (The amount of salt will vary if you’re using salted butter or unsalted lard.)

instructions:

How to cook Caramelized Onions

  1. Slice the ends of your onion and peel. Put the peels and “extras” into a bag for use in stock later.
  2. Cut the onion in half. Then cut into half again.
  3. Slice the onion so long strips form.
  4. Start your pan heating on medium high and add the fat of your choice. Heating your pan before your onion is sliced will result in a pan that is too hot.
  5. Add your onions to the pan. Stir to coat in the fat.
  6. Cook onions over medium heat, stirring every few minutes.
  7. When they are nearing translucency (about 25 ish minutes) add a little salt if you are not using salted butter. Even if you are using salted butter, adding a little extra salt will help them break down.
  8. Make sure everyone salts their onions to taste once the onions are on their plates!
  9. Your onions are done when they are golden brown. Enjoy them on their own or as part of a larger meal.
Created using The Recipes Generator
46.png

Steamed Broccoli Recipe

GAPS Legal Broccoli Recipe

My main reason for eating broccoli is to use it as a vehicle for butter.

Need I say more?

Broccoli itself does have some amazing nutritional content on its own, separate from carrying butter. It's high in both soluble and insoluble fiber, potassium, and the vitamins B6, C and A.

What exactly is broccoli? Broccoli is a cruciferous vegetable like cabbage, kale, turnips, cauliflower, and brussel sprouts. It is a wonderful vegetable to eat regularly. Some people avoid broccoli because they experience gas. But if broccoli makes you gassy, your gut flora is unbalanced! You can (and should) address your gut flora, then you can enjoy broccoli again without fear!

I don’t use the stems of the broccoli, which are very fibrous, in this recipe. If you want, you can use them in a soup or fry them up with butter and garlic (which is delicious.) But if you’re early in your healing on the GAPS Intro diet, toss or compost the stems. They are too fibrous for you to eat!

This is a great and simple side dish to serve with any main dish. But whatever you serve it with, the key here is to remember to enjoy your butter!

Ingredients for Steamed Broccoli:

  • 2- 3 Small Broccoli Crowns

  • Water

  • Butter for serving.

Directions for Steamed Broccoli:

I eat broccoli purely as a vehicle for butter. Serve this quick steamed broccoli recipe alongside any meat of your choice for a great GAPS Legal meal. Steamed Broccoli Recipe by Northern Colorado Certified GAPS Practitioner Amy Mihaly.

Insert steamer into a medium size pot. Add a few inches of filtered water to a pot.

I eat broccoli purely as a vehicle for butter. Serve this quick steamed broccoli recipe alongside any meat of your choice for a great GAPS Legal meal. Steamed Broccoli Recipe by Northern Colorado Certified GAPS Practitioner Amy Mihaly.

Rinse broccoli well with filtered water.

I eat broccoli purely as a vehicle for butter. Serve this quick steamed broccoli recipe alongside any meat of your choice for a great GAPS Legal meal. Steamed Broccoli Recipe by Northern Colorado Certified GAPS Practitioner Amy Mihaly.

Cut off stems. Discard if you are on the GAPS Intro diet. Otherwise, set aside for another recipe.

Break broccoli florets apart at the base.

I eat broccoli purely as a vehicle for butter. Serve this quick steamed broccoli recipe alongside any meat of your choice for a great GAPS Legal meal. Steamed Broccoli Recipe by Northern Colorado Certified GAPS Practitioner Amy Mihaly.

Add florets to the steamer and cover with a lid.

Steam for 15-20 minutes until fork tender, meaning a fork easily slides in and out. If you’re on GAPS Intro, be extra sure it’s fully cooked.

Make sure you don’t run out of water on the bottom of the pan or you will scorch the bottom. To check for water, you can tip the pan without opening it and feel if there is still water shifting. If you are unsure, check! You don't want to run out of water or you could ruin your pan.

I eat broccoli purely as a vehicle for butter. Serve this quick steamed broccoli recipe alongside any meat of your choice for a great GAPS Legal meal. Steamed Broccoli Recipe by Northern Colorado Certified GAPS Practitioner Amy Mihaly.

Serve as a side alongside meat of your choice. I prefer steak; it just seems to be better that way! Top with plenty of butter! You want to eat about a teaspoon of butter with each piece. I cut a slice to eat with each piece. Enjoy!


Steamed Broccoli Recipe

Author:
prep time: cook time: total time:

ingredients:

  • 2- 3 Small Broccoli Crowns
  • Water
  • Butter for serving

instructions:

How to cook Steamed Broccoli Recipe

  1. Insert steamer into a medium size pot. Add a few inches of filtered water to a pot.
  2. Rinse broccoli well with filtered water.
  3. Cut off stems. Discard if you are on the GAPS Intro diet. Otherwise, set aside for another recipe.
  4. Break broccoli florets apart at the base.
  5. Add florets to the steamer and cover with a lid.
  6. Steam for 15-20 minutes until fork tender, meaning a fork easily slides in and out. If you’re on GAPS Intro, be extra sure it’s fully cooked.
  7. Make sure you don’t run out of water on the bottom of the pan or you will scorch the bottom. To check for water, you can tip the pan without opening it and feel if there is still water shifting. If you are unsure, check! You don't want to run out of water or you could ruin your pan.
  8. Serve as a side alongside meat of your choice. I prefer steak; it just seems to be better that way! Top with plenty of butter! You want to eat about a teaspoon of butter with each piece. I cut a slice to eat with each piece. Enjoy!
Created using The Recipes Generator
13.png

Cast Iron Roasted Brussels Sprouts

I know most people don’t care for brussels sprouts. I’ve never shared their view. I think it’s probably because my grandma drowned brussels sprouts in butter when she cooked them. Back in the day, we used to talk about how unhealthy this was but now I know better. Not only does fat provide a delicious taste, it actually makes it easier for your body to use the nutrition in your food.

Even if you have never liked brussels sprouts before, please give them one more try with this recipe. I don’t even like brussels sprouts all ways! For example, I’ve never liked them in soup. If eating brussels sprouts makes you very gassy, it means your gut flora is imbalanced.

Having enough salt on the brussels sprouts helps to break up the cell walls which allows them to cook faster and better. Salt allows them to cook more evenly which makes them more delicious. Make sure you add salt after you plate them as well! If they’re not delicious, you haven’t added enough salt to them.

I also cook the brussels sprouts on a low to medium heat to start with. The goal is to cook the brussels sprouts thoroughly before crisping them. If your heat is too high, you’ll brown them before they are cooked all the way which will result in a questionably edible food. The brown bits are my favorite part so I make sure there are a LOT of them! If you’re on the GAPS Intro Diet, you’ll want to brown sparingly as the browned bits are harder to digest.

Ingredients for Cast Iron Roasted Brussels Sprouts

  • 16 oz brussel sprouts

  • 5 tbsp of Butter or another fat.

Directions for Cast Iron Roasted Brussels Sprouts

Brussels-Sprouts-Recipe-Brussel-Sprout-Cooking-How-To-Make-Brussel-Sprouts-How-To-Cook-Brussels-Sprouts-Roasted-Cast-Iron-Pan-Roasting-Crispy-Brussel-Sprouts-GAPS-Diet-Vegetables-What-To-Eat-On-GAPS

Wash and rinse brussels sprouts.

Brussels-Sprouts-Recipe-Brussel-Sprout-Cooking-How-To-Make-Brussel-Sprouts-How-To-Cook-Brussels-Sprouts-Roasted-Cast-Iron-Pan-Roasting-Crispy-Brussel-Sprouts-GAPS-Diet-Vegetables-What-To-Eat-On-GAPS

Heat a cast iron pan over medium heat. Add in butter to melt.

Brussels-Sprouts-Recipe-Brussel-Sprout-Cooking-How-To-Make-Brussel-Sprouts-How-To-Cook-Brussels-Sprouts-Roasted-Cast-Iron-Pan-Roasting-Crispy-Brussel-Sprouts-GAPS-Diet-Vegetables-What-To-Eat-On-GAPS

Trim brussels sprouts by cutting off the ends and cutting them in half. You want them to be similarly sized pieces so they cook evenly.

If you have an extremely large brussels sprout, consider cutting it in fourths to keep all pieces approximately the same size.

Brussels-Sprouts-Recipe-Brussel-Sprout-Cooking-How-To-Make-Brussel-Sprouts-How-To-Cook-Brussels-Sprouts-Roasted-Cast-Iron-Pan-Roasting-Crispy-Brussel-Sprouts-GAPS-Diet-Vegetables-What-To-Eat-On-GAPS

Add brussels sprouts to the pan. I add in a handful at a time as I’m cutting but you could add all of them at once.

You might need to add your brussels sprouts in batches to the pan depending on how many brussels sprouts you have and the size of your pan. You want them to be in one layer on the bottom of the pan. It’s important not to crowd the pan to allow for even cooking.

Stir to coat with butter or other fat. Add about five shakes of salt.

Slowly cook on a low-medium heat for 8 to 10 minutes, stirring occasionally.

Brussels-Sprouts-Recipe-Brussel-Sprout-Cooking-How-To-Make-Brussel-Sprouts-How-To-Cook-Brussels-Sprouts-Roasted-Cast-Iron-Pan-Roasting-Crispy-Brussel-Sprouts-GAPS-Diet-Vegetables-What-To-Eat-On-GAPS

Once your brussels sprouts are soft but not mushy, turn the heat up higher to brown them. Cook for another 3-5 minutes. Stir frequently on the higher heat to ensure even browning. If your brussels sprouts are larger, they may take longer to cook.

Once your brussels sprouts have browned, transfer to a plate. Add salt to taste. Serve immediately for best taste!

Brussels-Sprouts-Recipe-Brussel-Sprout-Cooking-How-To-Make-Brussel-Sprouts-How-To-Cook-Brussels-Sprouts-Roasted-Cast-Iron-Pan-Roasting-Crispy-Brussel-Sprouts-GAPS-Diet-Vegetables-What-To-Eat-On-GAPS

Cast Iron Roasted Brussels Sprouts

Author:
prep time: cook time: total time:

ingredients:

  • 16 oz brussel sprouts
  • 5 tbsp of Butter or another fat

instructions:

How to cook Cast Iron Roasted Brussels Sprouts

  1. Wash and rinse brussels sprouts.
  2. Heat a cast iron pan over medium heat. Add in butter to melt.
  3. Trim brussels sprouts by cutting off the ends and cutting them in half. You want them to be similarly sized pieces so they cook evenly.
  4. If you have an extremely large brussels sprout, consider cutting it in fourths to keep all pieces approximately the same size.
  5. Add brussels sprouts to the pan. I add in a handful at a time as I’m cutting but you could add all of them at once.
  6. You might need to add your brussels sprouts in batches to the pan depending on how many brussels sprouts you have and the size of your pan. You want them to be in one layer on the bottom of the pan. It’s important not to crowd the pan to allow for even cooking.
  7. Stir to coat with butter or other fat. Add about five shakes of salt.
  8. Slowly cook on a low-medium heat for 8 to 10 minutes, stirring occasionally.
  9. Once your brussels sprouts are soft but not mushy, turn the heat up higher to brown them. Cook for another 3-5 minutes. Stir frequently on the higher heat to ensure even browning. If your brussels sprouts are larger, they may take longer to cook.
  10. Once your brussels sprouts have browned, transfer to a plate. Add salt to taste. Serve immediately for best taste!
Created using The Recipes Generator
Brussels-Sprouts-Recipe-Brussel-Sprout-Cooking-How-To-Make-Brussel-Sprouts-How-To-Cook-Brussels-Sprouts-Roasted-Cast-Iron-Pan-Roasting-Crispy-Brussel-Sprouts-GAPS-Diet-Vegetables-What-To-Eat-On-GAPS

Roasted Sweet Potatoes or Butternut Squash with Homemade Marshmallows

Roasted Sweet Potatoes with Marshmallows

Ingredients for Roasted Sweet Potatoes with Marshmallows

  • 2 Sweet Potatoes

  • 1 stick of butter or 1/2 cup lard

  • 1/8 tsp Cinnamon

  • 1/2 tsp Fresh Ginger

  • 1/4 tsp Salt

  • GAPS Marshmallows

Directions for Roasted Sweet Potatoes with Marshmallows

roasted-sweet-potatoes-how-to-make-sweet-potatoes-on-gaps-gaps-diet-thanksgiving-meals-holiday-meals-on-the-gaps-diet-what-do-i-eat-on-gaps

Preheat oven to 350°Rinse and peel potatoes.Slice potatoes into 1 in to 1.5 in rounds. The key is to cut the potatoes into similar thickness so that they will cook evenly.

Place the potato rounds snugly into a baking dish.

roasted-sweet-potatoes-how-to-make-sweet-potatoes-on-gaps-gaps-diet-thanksgiving-meals-holiday-meals-on-the-gaps-diet-what-do-i-eat-on-gaps

Peel a 1/2 in. piece of ginger. Finely mince the ginger.

roasted-sweet-potatoes-how-to-make-sweet-potatoes-on-gaps-gaps-diet-thanksgiving-meals-holiday-meals-on-the-gaps-diet-what-do-i-eat-on-gaps

In a small saucepan, melt  ½ cup of fat on low heat.

Once melted, add cinnamon, ginger, and salt. You may need more salt if you’re using a fat other than salted butter.

Stir to combine.

roasted-sweet-potatoes-how-to-make-sweet-potatoes-on-gaps-gaps-diet-thanksgiving-meals-holiday-meals-on-the-gaps-diet-what-do-i-eat-on-gaps

Once combined, pour the mixture over your potatoes.

Flip potatoes to evenly coat with butter mixture.

Cover with aluminum foil. Add parchment paper if the aluminum foil will touch your food.

roasted-sweet-potatoes-how-to-make-sweet-potatoes-on-gaps-gaps-diet-thanksgiving-meals-holiday-meals-on-the-gaps-diet-what-do-i-eat-on-gaps

Roast for 60 minutes or until fork tender.

Remove from oven and top with marshmallows (GAPS legal recipe here). If you’ve made marshmallows ahead of time, you can add the hardened squares. Or you can make the marshmallows while you wait for the sweet potatoes to cook and add a tablespoon dollup of marshmallow paste onto the top of the sweet potatoes. Since the potatoes are warm and these are not commercial marshmallows, they will run.

Serve warm!

Roasted Butternut Squash with Marshmallows

Ingredients for Roasted Butternut Squash with Marshmallows

  • 4 cups Cubed Butternut Squash

  • 1 stick of butter or 1/2 cup lard

  • 1/8 tsp Cinnamon

  • 1/2 tsp Fresh Ginger

  • 1/4 tsp Salt

  • GAPS Marshmallows

Directions for Roasted Butternut Squash with Marshmallows

roasted-butternut-squash-with-marshmellows-how-to-make-butternut-squash-with-marshmallows-on-gaps-gaps-diet-thanksgiving-meals-holiday-meals-on-the-gaps-diet-what-do-i-eat-on-gaps

Preheat oven to 350°

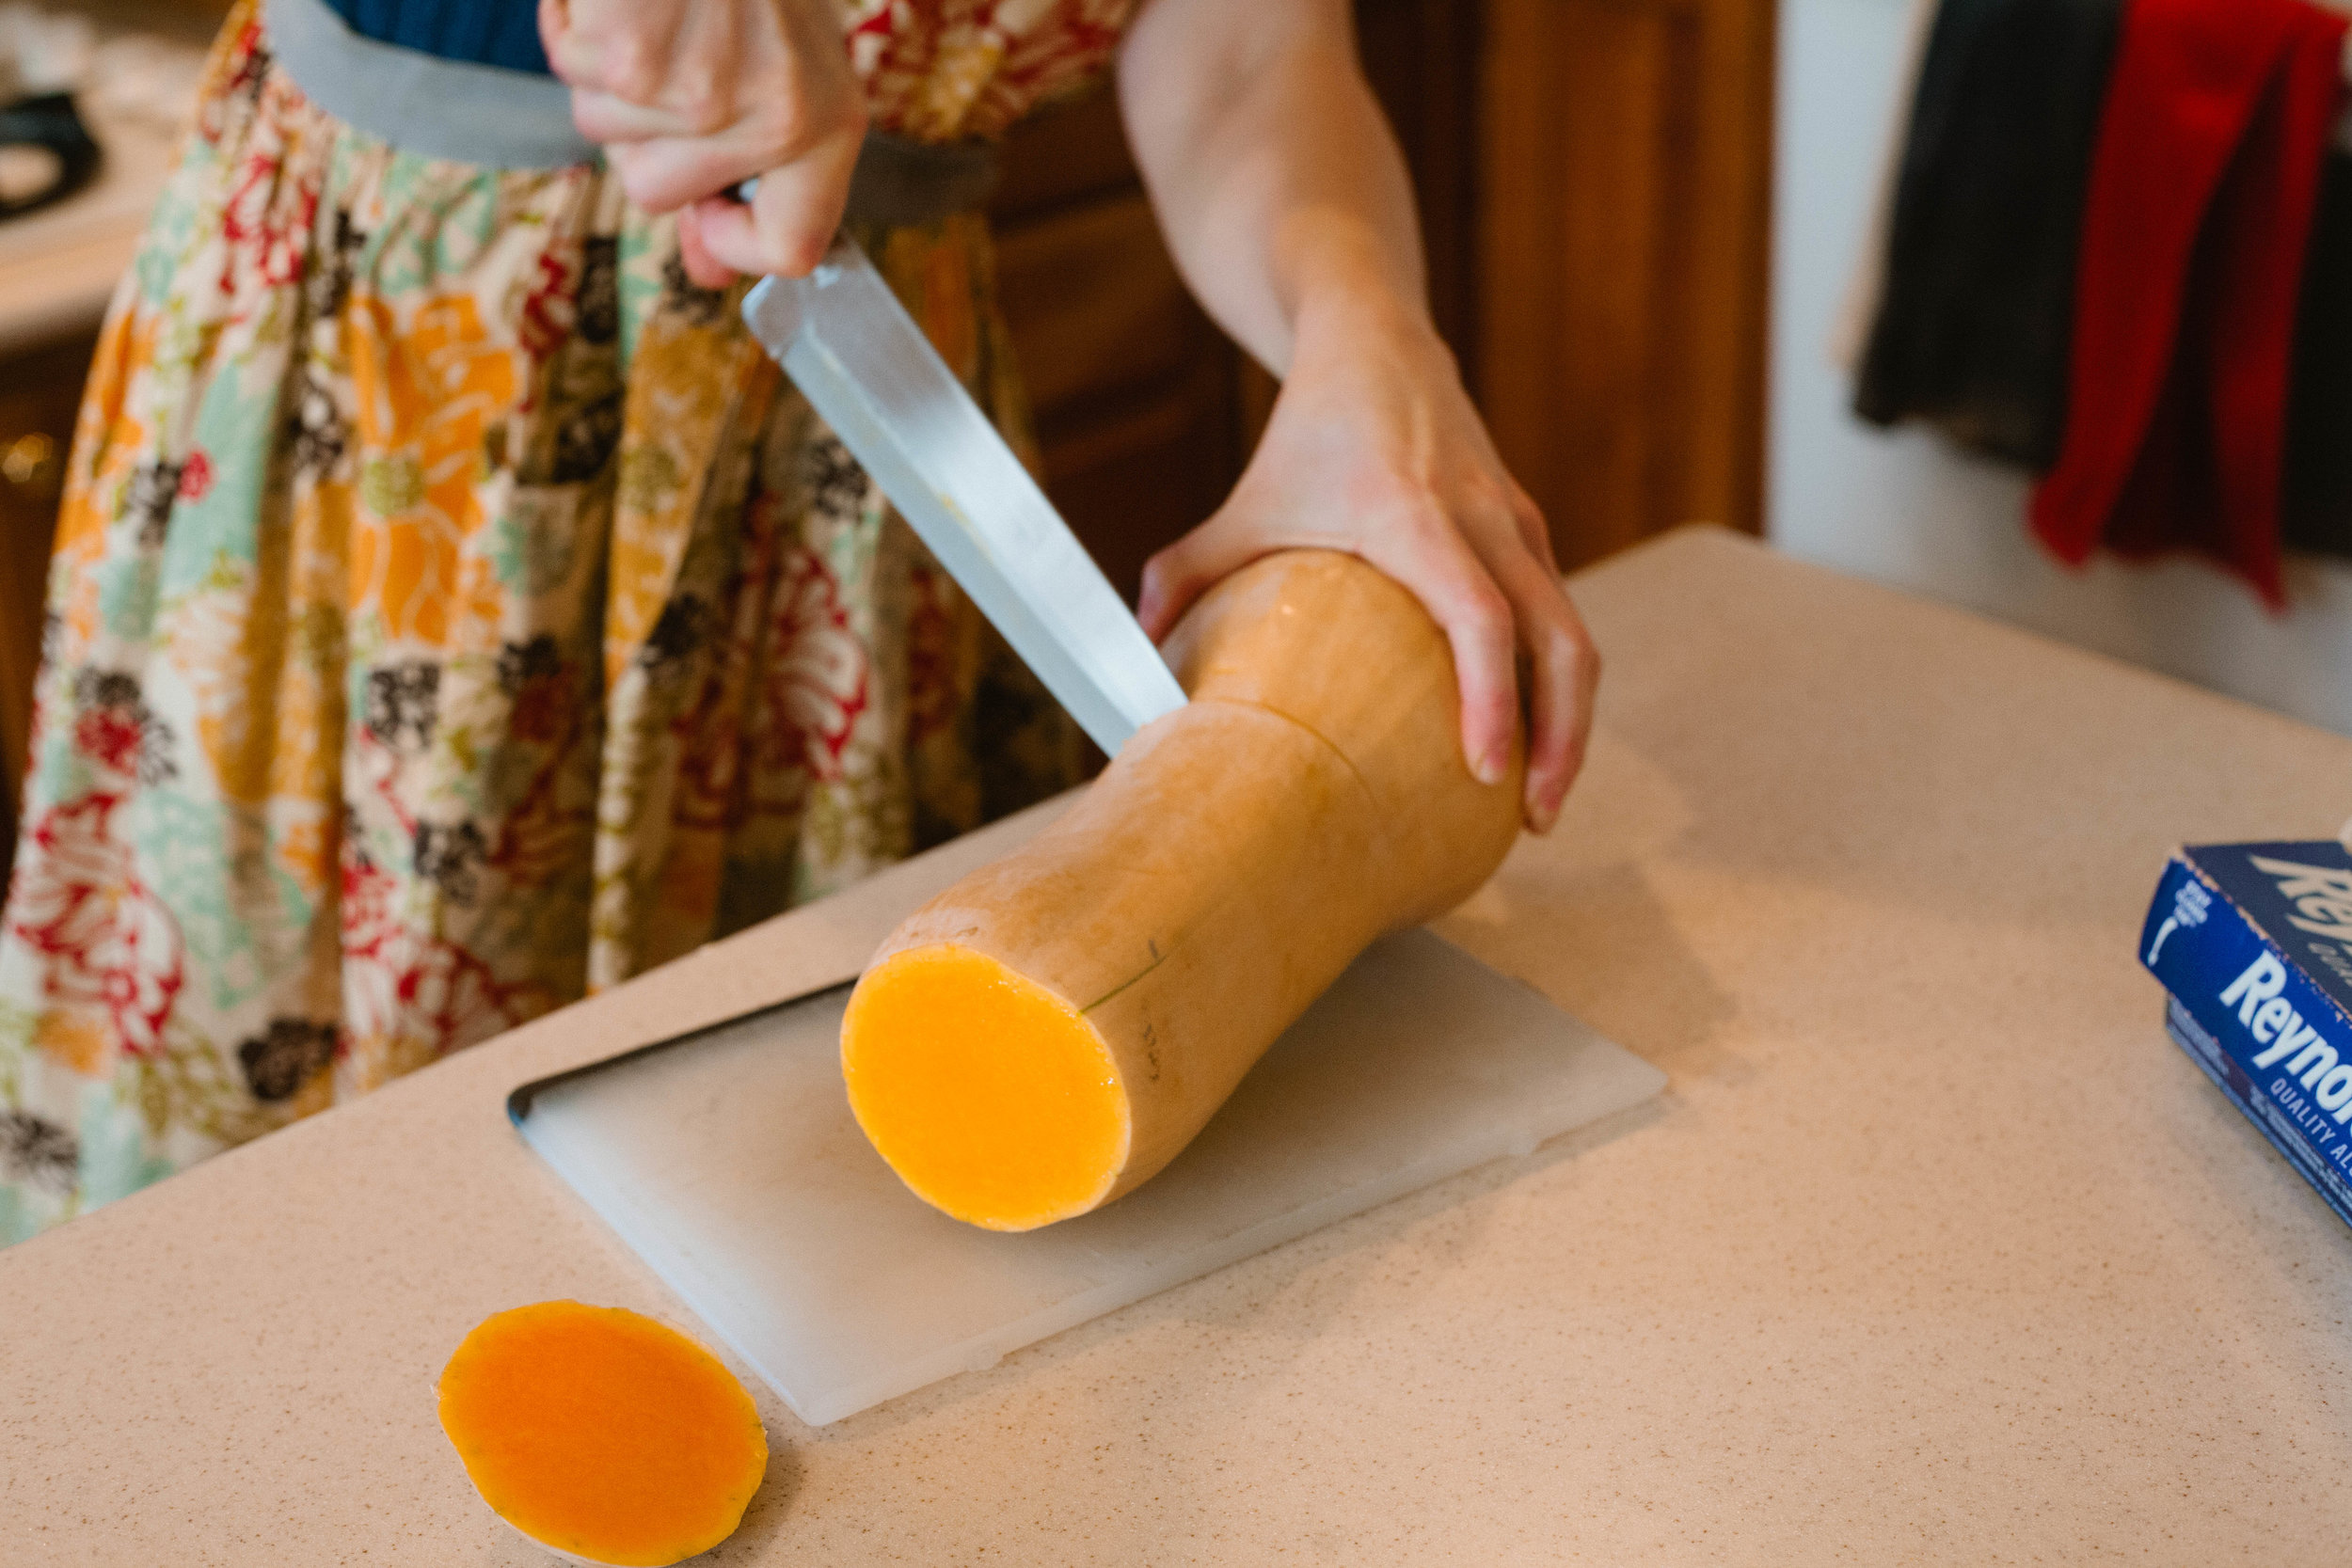
Cut and peel the squash. I’ve found it’s easier to cut the squash into two pieces for easier peeling by slicing at the bottom of the neck of the squash. Serrated knives can also make peeling the squash a little easier. The bottom of the squash has more seeds and is more difficult to cut.

IMG_17roasted-butternut-squash-with-marshmellows-how-to-make-butternut-squash-with-marshmallows-on-gaps-gaps-diet-thanksgiving-meals-holiday-meals-on-the-gaps-diet-what-do-i-eat-on-gaps91.jpg

Cut the squash into cubes. It’s best to keep the cubes of the squash roughly the same size for easy roasting.

IMG_1758.jpg

Peel a 1/2 in. piece of ginger. Finely mince the ginger.In a small saucepan, melt ½ cup of fat on low heat.

Once the fat has melted, add cinnamon, nutmeg, ginger, and salt to the pan and mix. You may need more salt if you’re using a fat other than salted butter.

Pour the melted butter mixture over the cubed squash. Stir to coat.Cover pan with a lid or aluminum foil. If foil will touch your food, cover with parchment paper first.

roasted-butternut-squash-with-marshmellows-how-to-make-butternut-squash-with-marshmallows-on-gaps-gaps-diet-thanksgiving-meals-holiday-meals-on-the-gaps-diet-what-do-i-eat-on-gaps

Roast for 45 minutes or until fork tender.

Remove from oven and top with marshmallows (GAPS legal recipe here). If you’ve made marshmallows ahead of time, you can add the hardened squares. Or you can make the marshmallows while you wait for the squash to cook and add dollups over the top.Since the butternut squash is warm and these are not commercial marshmallows, they will run and melt over the top.

Serve warm!


ROASTED SWEET POTATOES WITH MARSHMALLOWS

Author: Amy Mihaly, Be Well Clinic

Ingredients

  • 2 Sweet Potatoes
  • 1 stick of butter or 1/2 cup lard
  • 1/8 tsp Cinnamon
  • 1/2 tsp Fresh Ginger
  • 1/4 tsp Salt
  • GAPS Marshmallows

Instructions

  1. Preheat oven to 350°
  2. Rinse and peel potatoes.
  3. Slice potatoes into 1 in to 1.5 in rounds. The key is to cut the potatoes into similar thickness so that they will cook evenly.
  4. Place the potato rounds snugly into a baking dish.
  5. Peel a 1/2 in. piece of ginger. Finely mince the ginger.
  6. In a small saucepan, melt ½ cup of fat on low heat.
  7. Once melted, add cinnamon, ginger, and salt. You may need more salt if you’re using a fat other than salted butter.
  8. Stir to combine.
  9. Once combined, pour the mixture over your potatoes.
  10. Flip potatoes to evenly coat with butter mixture.
  11. Cover with aluminum foil. Add parchment paper if the aluminum foil will touch your food.
  12. Roast for 60 minutes or until fork tender.
  13. Remove from oven and top with marshmallows (GAPS legal recipe here). If you’ve made marshmallows ahead of time, you can add the hardened squares. Or you can make the marshmallows while you wait for the sweet potatoes to cook and add a tablespoon dollop of marshmallow paste onto the top of the sweet potatoes. Since the potatoes are warm and these are not commercial marshmallows, they will run.
  14. Serve warm!

ROASTED BUTTERNUT SQUASH WITH MARSHMALLOWS

Author: Amy Mihaly, Be Well Clinic

Ingredients

  • 4 cups Cubed Butternut Squash
  • 1 stick of butter or 1/2 cup lard
  • 1/8 tsp Cinnamon
  • 1/2 tsp Fresh Ginger
  • 1/4 tsp Salt
  • GAPS Marshmallows

Instructions

  1. Preheat oven to 350°
  2. Cut and peel the squash. I’ve found it’s easier to cut the squash into two pieces for easier peeling by slicing at the bottom of the neck of the squash. Serrated knives can also make peeling the squash a little easier. The bottom of the squash has more seeds and is more difficult to cut.
  3. Cut the squash into cubes. It’s best to keep the cubes of the squash roughly the same size for easy roasting.
  4. Peel a 1/2 in. piece of ginger. Finely mince the ginger.In a small saucepan, melt ½ cup of fat on low heat.
  5. Once the fat has melted, add cinnamon, nutmeg, ginger, and salt to the pan and mix. You may need more salt if you’re using a fat other than salted butter.
  6. Pour the melted butter mixture over the cubed squash. Stir to coat.Cover pan with a lid or aluminum foil. If foil will touch your food, cover with parchment paper first.
  7. Roast for 45 minutes or until fork tender.
  8. Remove from oven and top with marshmallows (GAPS legal recipe here). If you’ve made marshmallows ahead of time, you can add the hardened squares. Or you can make the marshmallows while you wait for the squash to cook and add dollups over the top.Since the butternut squash is warm and these are not commercial marshmallows, they will run and melt over the top.
  9. Serve warm!

Twice Baked Cauliflower with Cheese Recipe

GAPS Legal Twice Baked Cauliflower "Mashed Potato" with Cheese Recipe

Stop whatever dinner plans you have and go buy a cauliflower! This recipe is the best side dish I have ever had... and I don't even really like cauliflower that much!

Every time I think about it I involuntarily smile and say "yum" to myself (or out loud).

It may be the butter.

Truly, this is a scrumptious recipe. And you can make it dairy-free by using lard (or ghee) and omitting the cheese. It's still delicious that way.

You can make this recipe as a side for a larger party, or make a batch for just yourself to re-heat as leftovers (but not in a microwave... see this post about reheating without a microwave). This recipe is just as good (if not slightly better) when reheated.

In these pictures I used a deeper dish. This works great but the cheese-to-potatoes ratio is sometimes a bit thin, so if you have a choice I would recommend using a dish that is more shallow. Or you can always added some extra grated cheese to each serving immediately after serving, or when reheating.

This dish goes great with poultry (Thanksgiving is coming!), but also pairs with steak.

I hope you enjoy it as much as I do!

Twice Baked Cauliflower "Mashed Potatoes"

This recipe can easily be halved!

Ingredients for Twice Baked Cauliflower

  • 14 cups of Cauliflower (for me, this was 1 large and 1 medium cauliflower)

  • 1 cup of Butter or Lard

  • 1 tsp of Salt

  • 5 oz Cheddar Cheese (If you are the GAPS Diet, omit the cheese until you are on Full GAPS.)

Directions for Twice Baked Cauliflower

twice-baked-cauliflower-recipe-riced-cauliflower-gaps-legal-cauliflower-recipe-what-to-eat-on-the-gaps-diet-gaps-protocol-how-to-eat-on-gaps-gaps-diet-recipe

Preheat your oven to 350. In a large pot, add about 1 cup of water. Place a steam basket in the bottom.

Cut cauliflower into cubes for quick steaming. You can also steam the head whole if you need to.

Remove the stem of the cauliflower. It’s too fibrous to eat. Once you’re past the stem of the cauliflower, you can also break the florets off instead of cutting them.

Steam the cauliflower for 15 minutes. Check every 5 minutes to make sure you have enough water and aren’t burning the bottom of your pan. The cauliflower only needs to be soft enough to go in a food processor because they’ll be baked again.

twice-baked-cauliflower-recipe-riced-cauliflower-gaps-legal-cauliflower-recipe-what-to-eat-on-the-gaps-diet-gaps-protocol-how-to-eat-on-gaps-gaps-diet-recipe

Working in batches, add cauliflower to food processor and process until smooth or riced.

Add riced cauliflower to a baking safe dish, with a lid if you have one.

Add your butter or lard to top of the cauliflower and stir.

twice-baked-cauliflower-recipe-riced-cauliflower-gaps-legal-cauliflower-recipe-what-to-eat-on-the-gaps-diet-gaps-protocol-how-to-eat-on-gaps-gaps-diet-recipe

Smooth out the top of the cauliflower.

Put in the oven covered at 350 degrees for 40-50 minutes and bubbling.

twice-baked-cauliflower-recipe-riced-cauliflower-gaps-legal-cauliflower-recipe-what-to-eat-on-the-gaps-diet-gaps-protocol-how-to-eat-on-gaps-gaps-diet-recipe

Slice or grate your cheese while you wait.

After 40-50 minutes, when the cauliflower is bubbling, remove from the oven. Immediately add cheese to the top.

twice-baked-cauliflower-recipe-riced-cauliflower-gaps-legal-cauliflower-recipe-what-to-eat-on-the-gaps-diet-gaps-protocol-how-to-eat-on-gaps-gaps-diet-recipe

Bake uncovered for 5-10 additional minutes to melt and slightly brown the cheese. Enjoy!


Twice Baked Cauliflower with Cheese

Author:
prep time: cook time: total time:

ingredients:

  • 14 cups of Cauliflower (for me, this was 1 large and 1 medium cauliflower)
  • 1 cup of Butter or Lard
  • 1 tsp of Salt
  • 5 oz Cheddar Cheese

instructions:

How to cook Twice Baked Cauliflower with Cheese

  1. Preheat your oven to 350. In a large pot, add about 1 cup of water. Place a steam basket in the bottom.
  2. Cut cauliflower into cubes for quick steaming. You can also steam the head whole if you need to.
  3. Remove the stem of the cauliflower. It’s too fibrous to eat. Once you’re past the stem of the cauliflower, you can also break the florets off instead of cutting them.
  4. Steam the cauliflower for 15 minutes. Check every 5 minutes to make sure you have enough water and aren’t burning the bottom of your pan. The cauliflower only needs to be soft enough to go in a food processor because they’ll be baked again.
  5. Working in batches, add cauliflower to food processor and process until smooth or riced.
  6. Add riced cauliflower to a baking safe dish, with a lid if you have one.
  7. Add your butter or lard to top of the cauliflower and stir.
  8. Smooth out the top of the cauliflower.
  9. Put in the oven covered at 350 degrees for 40-50 minutes and bubbling.
  10. Slice or grate your cheese while you wait.
  11. After 40-50 minutes, when the cauliflower is bubbling, remove from the oven. Immediately add cheese to the top.
  12. Bake uncovered for 5-10 additional minutes to melt and slightly brown the cheese. Enjoy!
Created using The Recipes Generator

Mayo Free Deviled Eggs Recipe

Mayo Free GAPS Legal Deviled Eggs 2 Ways

The story of these GAPS legal deviled eggs has a long beginning.

One of the foods I miss most? Mayonnaise. Now I know there are different mayos out there, even ones you can make yourself that are GAPS legal. But unless it tastes like the Real Mayo deliciousness that I remember, I have no interest in consuming it. I was a mayo snob long before I payed attention to what I ate!

Because I haven't found a mayo my taste buds approve of there is no mayonnaise in my refrigerator, even if it's just to make recipes like deviled eggs with. So one day when I had a hankerin' for deviled eggs I got the creative juices flowing and started experimenting with recipes. My first thought was to substitute the mayo for butter. After all, fat is the main reason deviled eggs are so good, right? A batch with butter resulted in delicious and very rich eggs, but the texture was very strange (hard), especially if refrigeration was required. Then I thought to add some sour cream to the mixture. At first I still had too much butter (50:50 ratio), but eventually found a ratio that works well—the butter adds some firmness to the "runnier" sour cream. This gives you a good base that allows you to flavor your deviled eggs as desired.

Next I wanted to come up with a dairy-free egg that my sister could enjoy. I immediately thought of using avocado as the fat. This also resulted in a delicious deviled egg, that's just a little green. I have served these eggs to many people, and as long as they know there is avocado in it, no one has had an issue with the color. And these are perfect for serving at a Dr. Seuss gathering as part of green eggs and ham! No artificial coloring required!

I have discovered that deviled egg recipes can be very familial. If these don't taste like the deviled eggs your grandma made, I encourage you to springboard off the base ingredients and modify the recipe to try and recreate your family memories. After all, that's what recipes are all about, aren't they? If you come up with something particularly delicious, we'd love if you share it with us in the comments below!

Enjoy these GAPS Legal Deviled Eggs, 2 Ways!

Dairy Free Deviled Eggs with Avocado

Ingredients for Avocado Deviled Eggs

  • 6 eggs

  • 1 medium or ½ cup Avocado

  • 1 tsp Mustard Powder

  • 1 tbsp of water

  • 1 tsp Vinegar

  • ½ tsp Honey

  • ¼ tsp Salt

  • Lemon

  • Chili Powder (optional)

  • Paprika (optional)

  • Cilantro (optional)

Directions for Avocado Deviled Eggs

Deviled-Eggs-Made-Without-Mayo-Mayo-Free-Deviled-Eggs-Deviled-Eggs-For-GAPS-Diet-Deviled-Eggs-Made-With-Sour-Cream

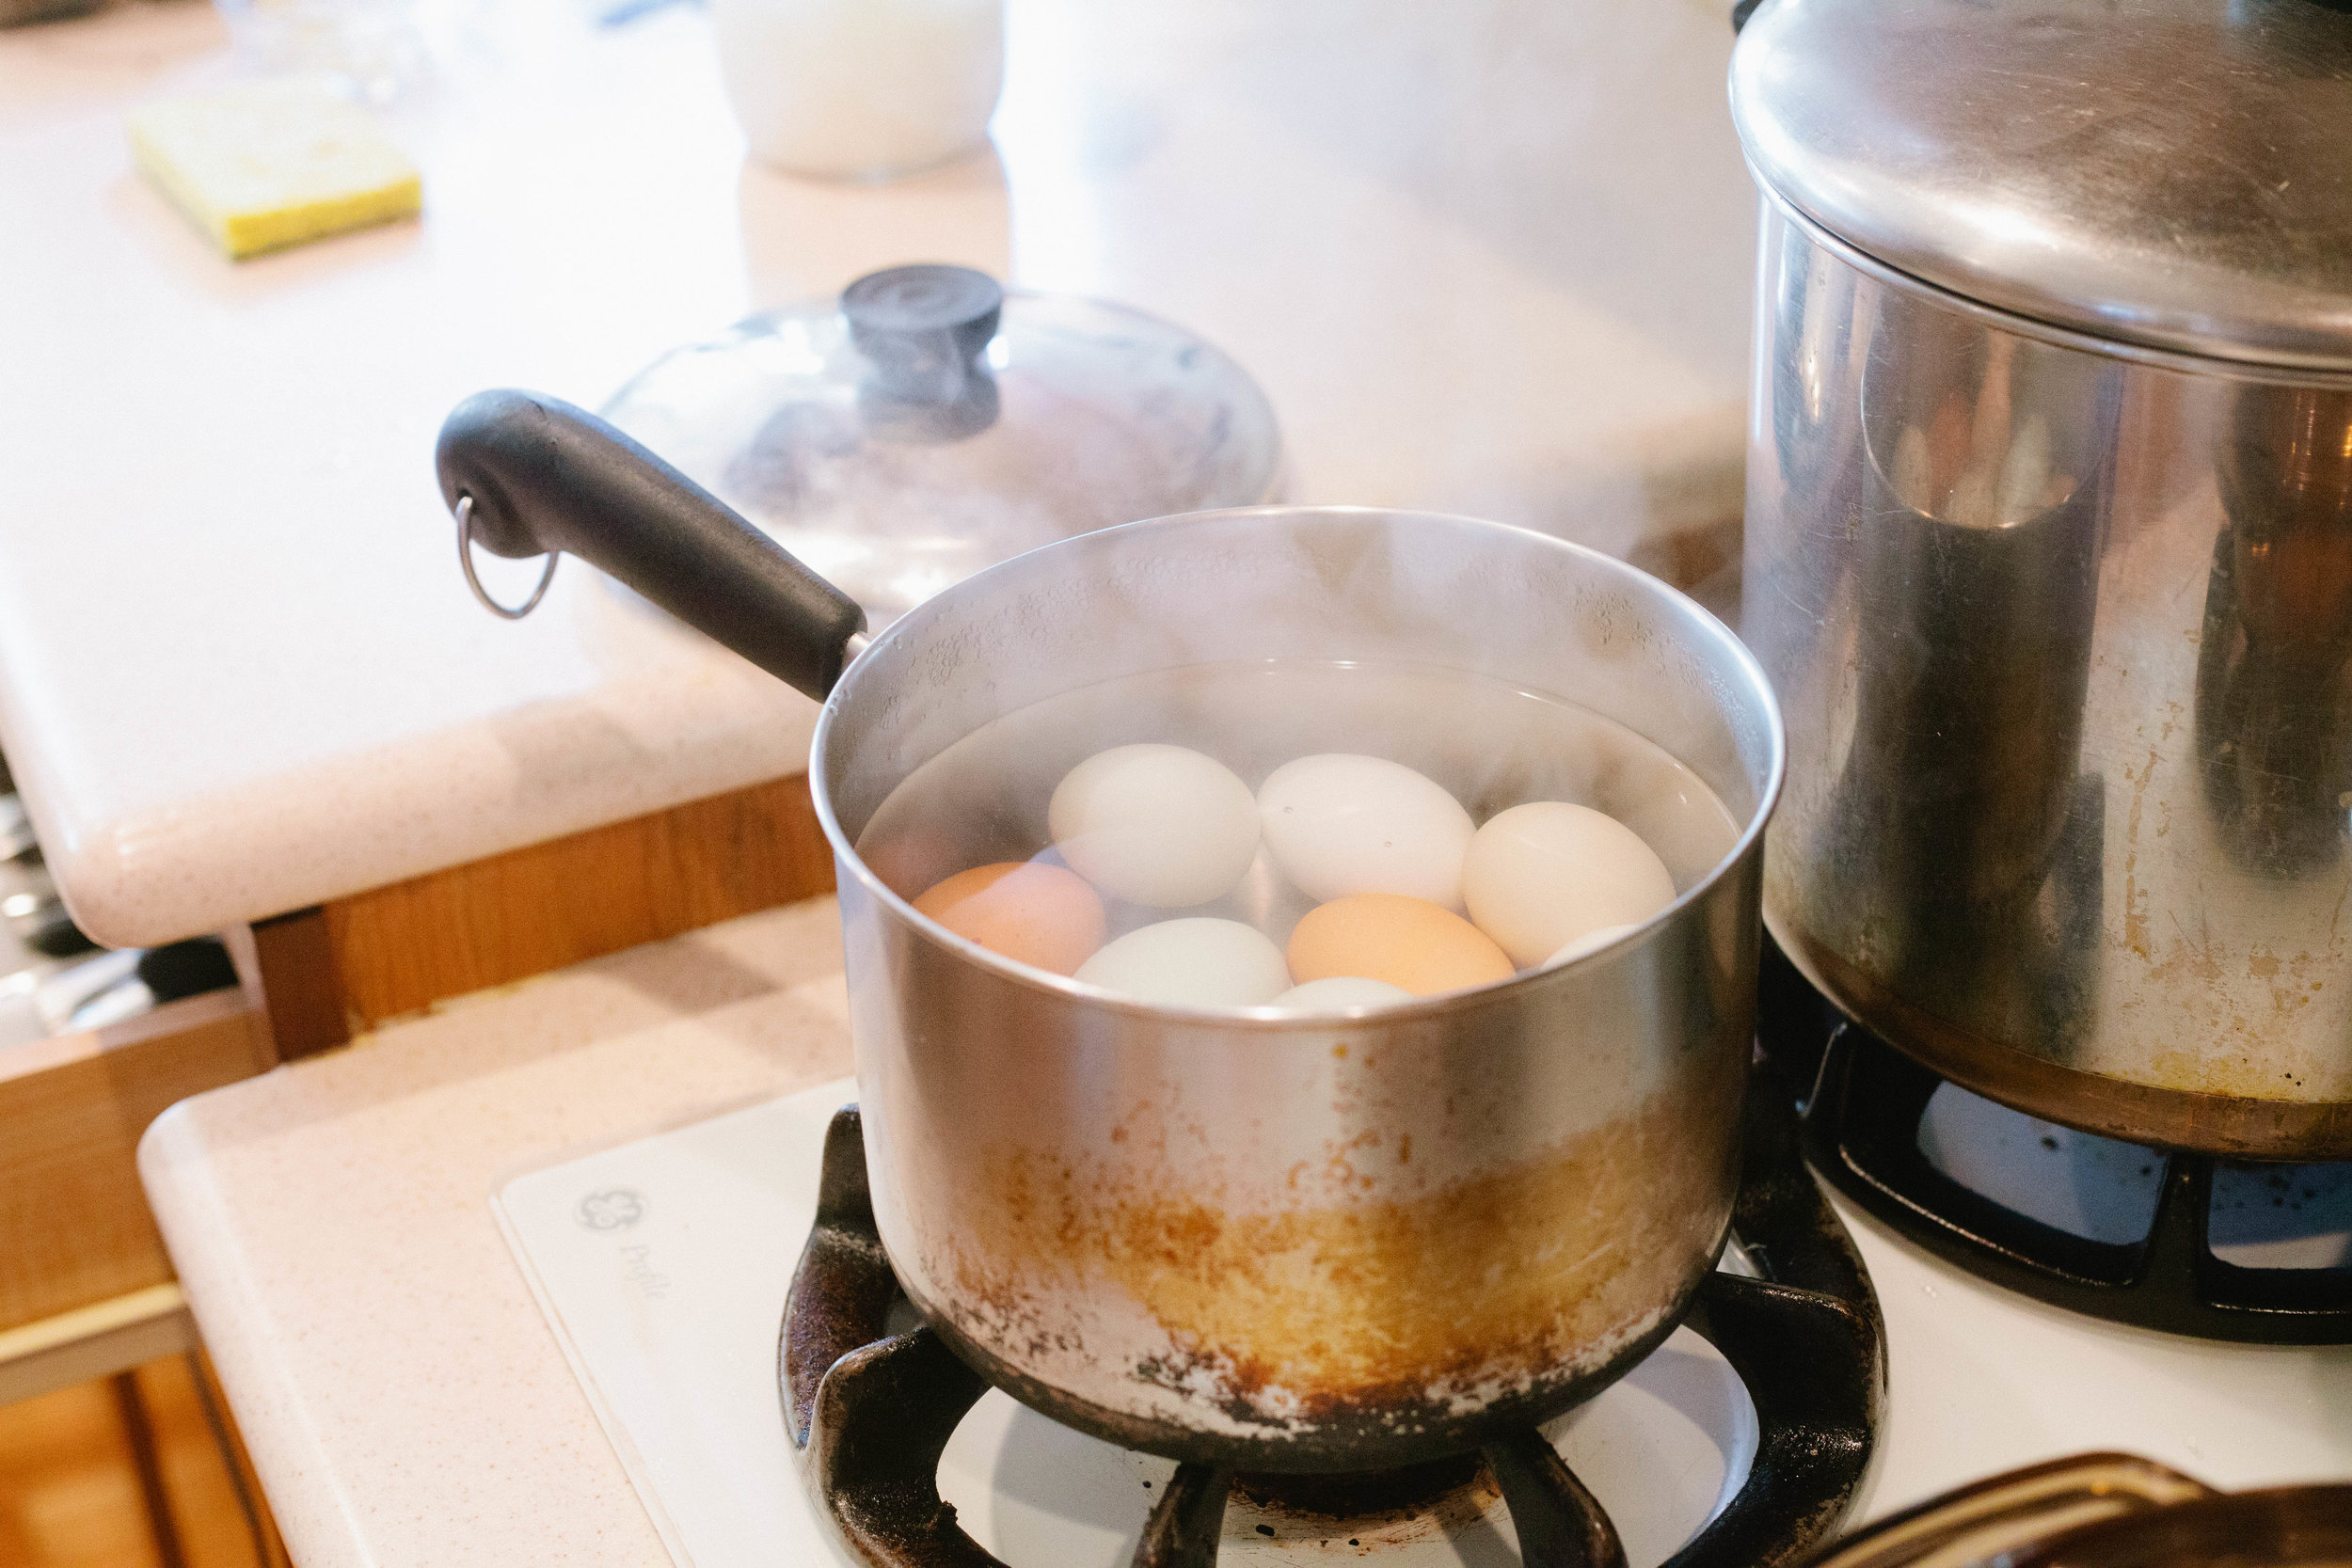
Fill a medium saucepan with cold water. Add eggs. Bring eggs to a boil and cook for 5-6 minutes covered.

Remove eggs from heat. Let set for 5 minutes. Test if your egg is hard boiled by removing one from the pan and spinning it. A hard boiled egg will spin upright if the yolk is hard.

Rinse the eggs under cold water or place them in an ice bath.

Deviled-Eggs-Made-Without-Mayo-Mayo-Free-Deviled-Eggs-Deviled-Eggs-For-GAPS-Diet-Deviled-Eggs-Made-With-Avocado

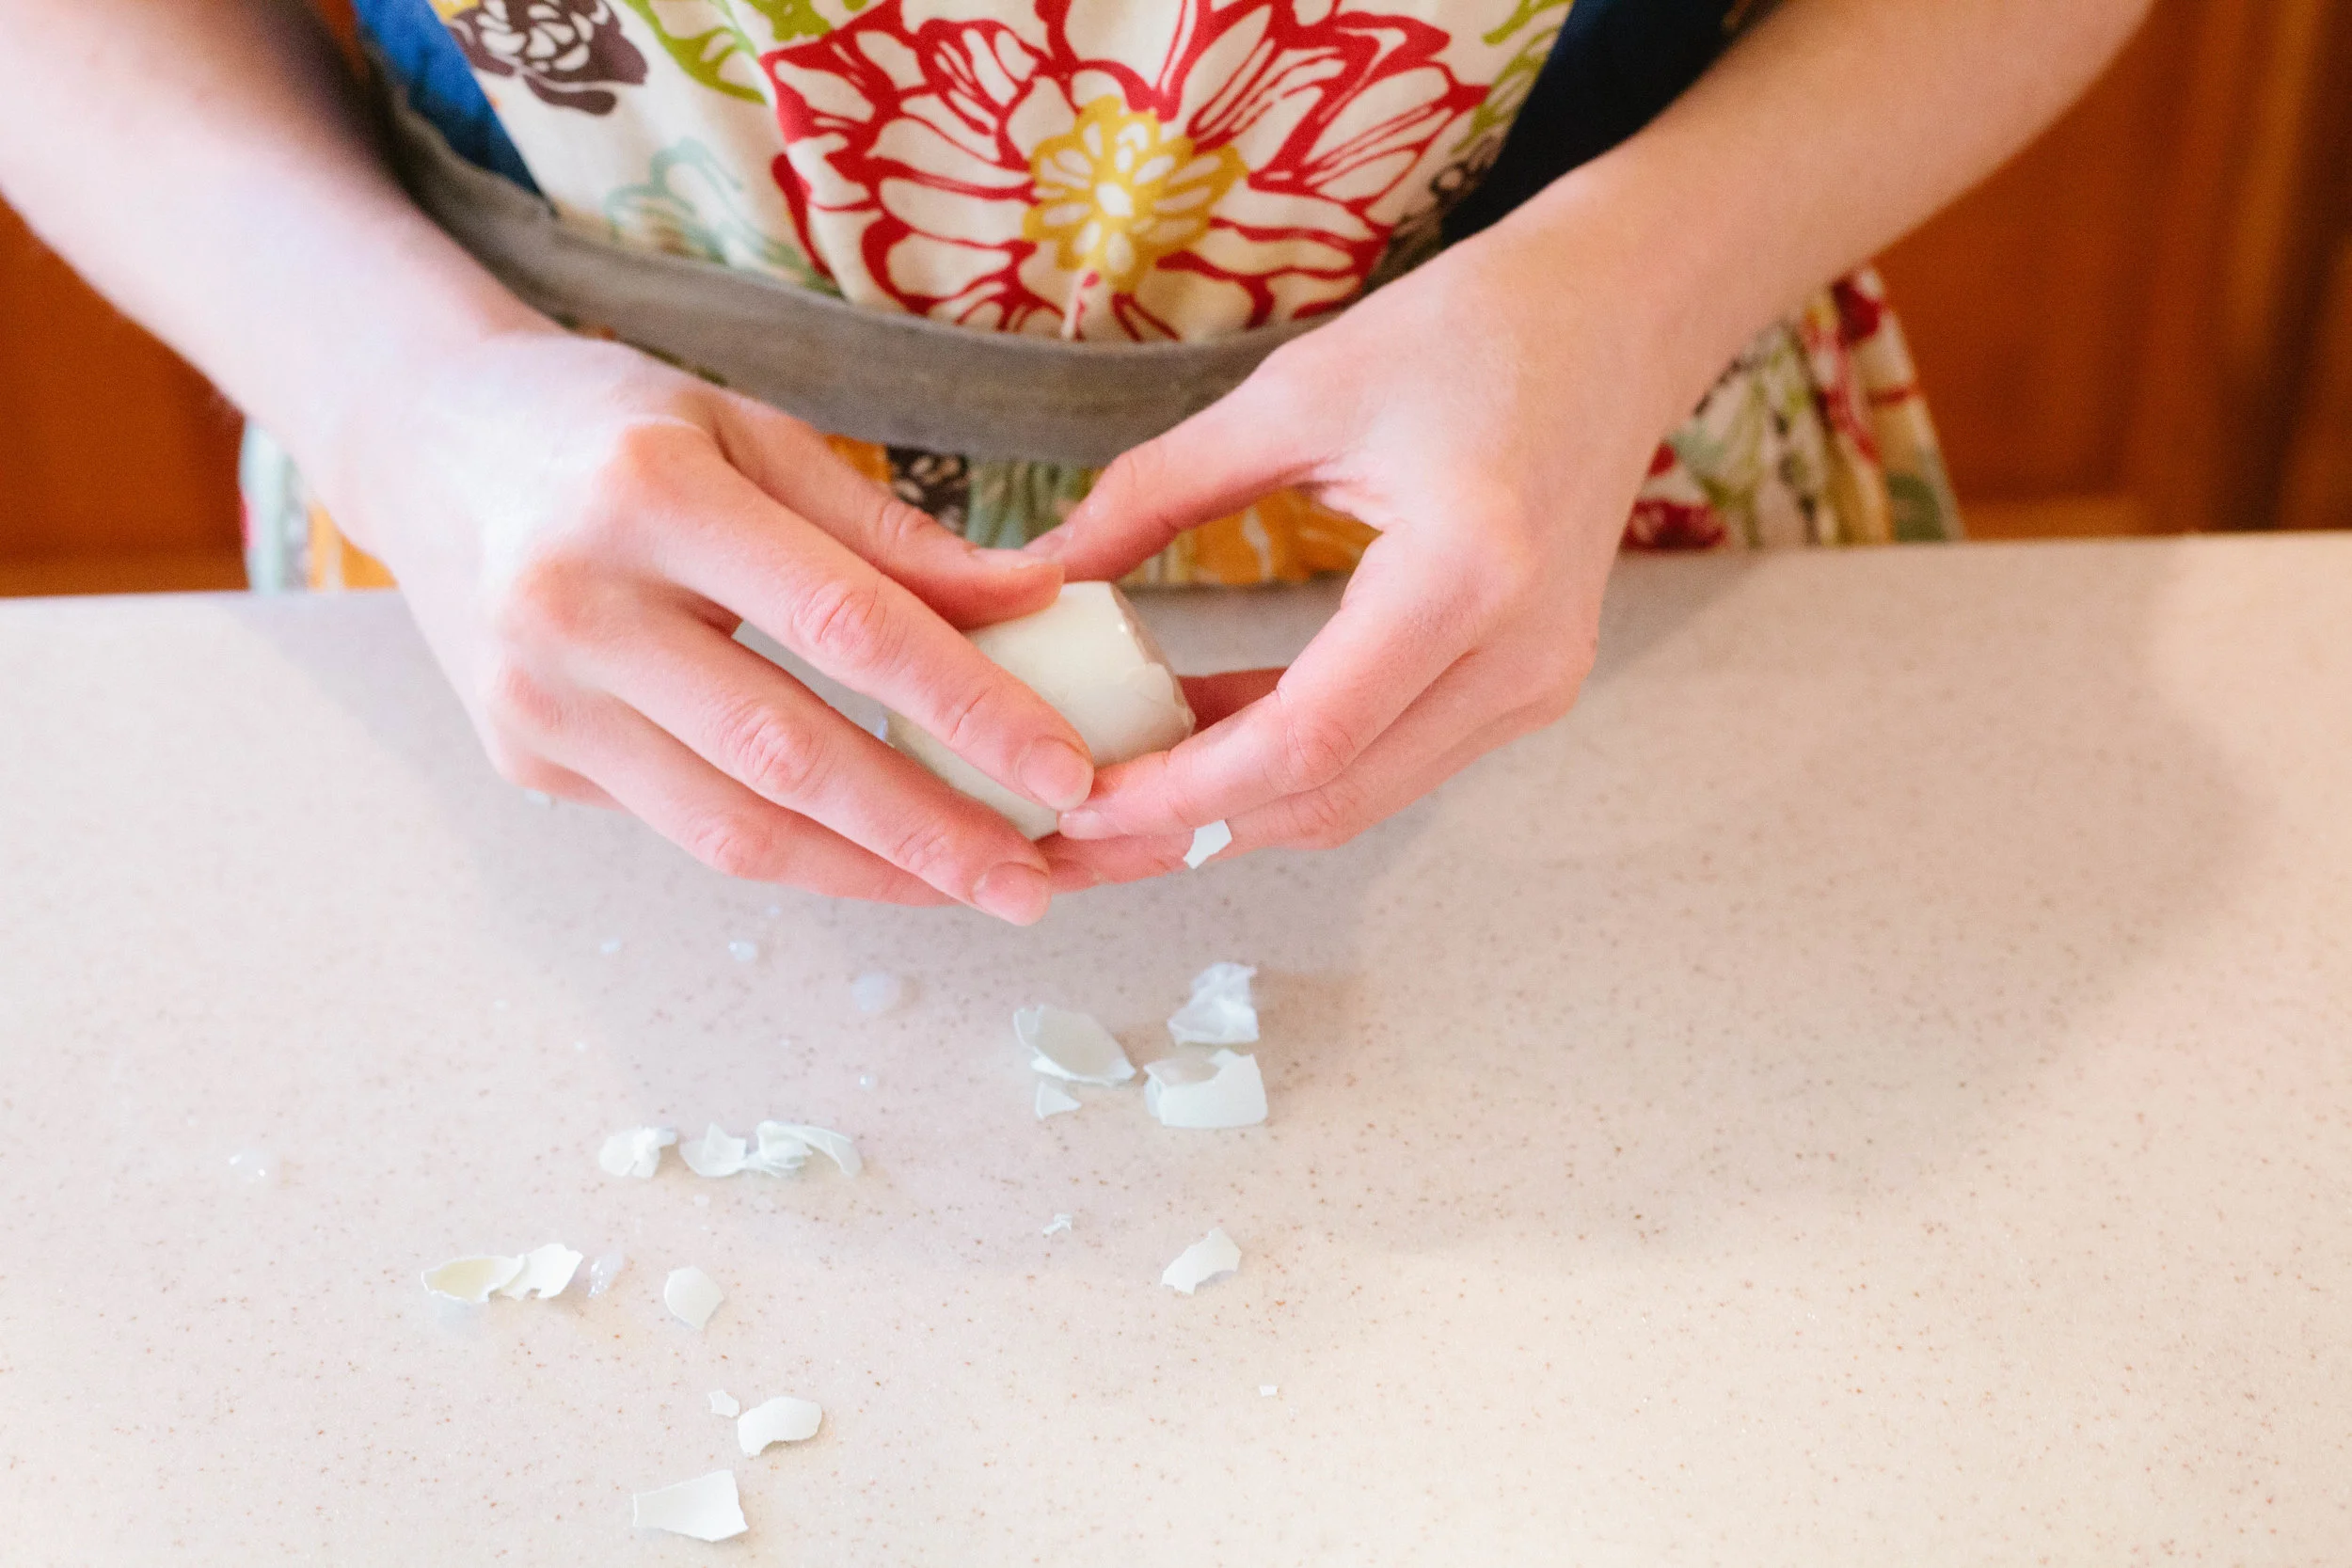
Peel the eggs. Peeling them while they are still a little warm will help get the shell off.

Cut the peeled eggs in half.

Deviled-Eggs-Made-Without-Mayo-Mayo-Free-Deviled-Eggs-Deviled-Eggs-For-GAPS-Diet-Deviled-Eggs-Made-With-Avocado

In a bowl, scoop out all the egg yolks. They should easily slide out with your finger.Set the egg whites onto a plate.

Crumble the egg yolks with a fork.

Deviled-Eggs-Made-Without-Mayo-Mayo-Free-Deviled-Eggs-Deviled-Eggs-For-GAPS-Diet-Deviled-Eggs-Made-With-Avocado

Mash the avocado into the egg yolks with a fork.

Add mustard powder to the egg yolk mixture.

Add water and vinegar to mixture. Mix well.

Add honey, salt and lemon. Mix well.

Deviled-Eggs-Made-Without-Mayo-Mayo-Free-Deviled-Eggs-Deviled-Eggs-For-GAPS-Diet-Deviled-Eggs-Made-With-Avocado

Fill the egg whites with a generous scoop.

Sprinkle with chili powder or paprika or top with sprigs of cilantro.

Deviled-Eggs-Made-Without-Mayo-Mayo-Free-Deviled-Eggs-Deviled-Eggs-For-GAPS-Diet-Deviled-Eggs-Made-With-Avocado

If you have leftover egg mixture, you can dip vegetables into it or smear onto scrambled eggs or crackers.

For a spicier egg, add more mustard powder!

These are legal on GAPS stage 4.


Sour Cream Deviled Eggs

Ingredients for Deviled Eggs with Sour Cream

  • 6 eggs

  • ½ c Sour Cream

  • 1 tbsp Room Temperature Butter

  • 1 - 1 ½ tsp Vinegar

  • 1 tsp Honey

  • ¼ tsp Mustard Powder

  • ⅛ tsp salt

  • Paprika (optional)

Directions for Deviled Eggs with Sour Cream

Deviled-Eggs-Made-Without-Mayo-Mayo-Free-Deviled-Eggs-Deviled-Eggs-For-GAPS-Diet-Deviled-Eggs-Made-With-Sour-Cream

Fill a medium saucepan with cold water. Add eggs. Bring eggs to a boil and cook for 5-6 minutes covered.

Remove eggs from heat. Let set for 5 minutes. Test if your egg is hard boiled by removing one from the pan and spinning it. A hard boiled egg will spin upright if the yolk is hard.

Rinse the eggs under cold water or place them in an ice bath.

Deviled-Eggs-Made-Without-Mayo-Mayo-Free-Deviled-Eggs-Deviled-Eggs-For-GAPS-Diet-Deviled-Eggs-Made-With-Sour-Cream

Peel the eggs. Peeling them while they are still a little warm will help get the shell off.

Cut the peeled eggs in half.

Deviled-Eggs-Made-Without-Mayo-Mayo-Free-Deviled-Eggs-Deviled-Eggs-For-GAPS-Diet-Deviled-Eggs-Made-With-Sour-Cream

In a bowl, scoop out all the egg yolks. They should easily slide out with your finger.

Set the egg whites onto a plate.

Crumble the egg yolks with a fork.

Deviled-Eggs-Made-Without-Mayo-Mayo-Free-Deviled-Eggs-Deviled-Eggs-For-GAPS-Diet-Deviled-Eggs-Made-With-Sour-Cream

Add the butter to the mixture and mix well.

Add the sour cream. Mix.

Add 1 tsp of the vinegar plus all the honey and salt. Mix.

Deviled-Eggs-Made-Without-Mayo-Mayo-Free-Deviled-Eggs-Deviled-Eggs-For-GAPS-Diet-Deviled-Eggs-Made-With-Sour-Cream

These are less tangy than a traditional deviled egg. To add more tang, add up to ½ tsp of vinegar.

Fill the egg whites with a generous scoop.

Sprinkle with paprika.


Mayo Free Deviled Eggs with Avocado

Author:
prep time: cook time: total time:

ingredients:

  • 6 eggs
  • 1 medium or ½ cup Avocado
  • 1 tsp Mustard Powder
  • 1 tbsp of water
  • 1 tsp Vinegar
  • ½ tsp Honey
  • ¼ tsp Salt
  • Lemon
  • Chili Powder (optional)
  • Paprika (optional)
  • Cilantro (optional

instructions:

How to cook Mayo Free Deviled Eggs with Avocado

  1. Fill a medium saucepan with cold water. Add eggs. Bring eggs to a boil and cook for 5-6 minutes covered.
  2. Remove eggs from heat. Let set for 5 minutes. Test if your egg is hard boiled by removing one from the pan and spinning it. A hard boiled egg will spin upright if the yolk is hard.
  3. Rinse the eggs under cold water or place them in an ice bath.
  4. Peel the eggs. Peeling them while they are still a little warm will help get the shell off.
  5. Cut the peeled eggs in half.
  6. In a bowl, scoop out all the egg yolks. They should easily slide out with your finger.Set the egg whites onto a plate.
  7. Crumble the egg yolks with a fork.
  8. Mash the avocado into the egg yolks with a fork.
  9. Add mustard powder to the egg yolk mixture.
  10. Add water and vinegar to mixture. Mix well.
  11. Add honey, salt and lemon. Mix well.
  12. Fill the egg whites with a generous scoop.
  13. Sprinkle with chili powder or paprika or top with sprigs of cilantro.
  14. If you have leftover egg mixture, you can dip vegetables into it or smear onto scrambled eggs or crackers.
  15. For a spicier egg, add more mustard powder!
  16. These are legal on GAPS stage 4.
Created using The Recipes Generator

Mayo Free Deviled Eggs with Sour Cream

Author:
prep time: cook time: total time:

ingredients:

  • 6 eggs
  • ½ c Sour Cream
  • 1 tbsp Room Temperature Butter
  • 1 - 1 ½ tsp Vinegar
  • 1 tsp Honey
  • ¼ tsp Mustard Powder
  • ⅛ tsp salt
  • Paprika (optional)

instructions:

How to cook Mayo Free Deviled Eggs with Sour Cream

  1. Fill a medium saucepan with cold water. Add eggs. Bring eggs to a boil and cook for 5-6 minutes covered.
  2. Remove eggs from heat. Let set for 5 minutes. Test if your egg is hard boiled by removing one from the pan and spinning it. A hard boiled egg will spin upright if the yolk is hard.
  3. Rinse the eggs under cold water or place them in an ice bath.
  4. Peel the eggs. Peeling them while they are still a little warm will help get the shell off.
  5. Cut the peeled eggs in half.
  6. In a bowl, scoop out all the egg yolks. They should easily slide out with your finger.
  7. Set the egg whites onto a plate.
  8. Crumble the egg yolks with a fork.
  9. Add the butter to the mixture and mix well.
  10. Add the sour cream. Mix.
  11. Add 1 tsp of the vinegar plus all the honey and salt. Mix.
  12. These are less tangy than a traditional deviled egg. To add more tang, add up to ½ tsp of vinegar.
  13. Fill the egg whites with a generous scoop.
  14. Sprinkle with paprika.
Created using The Recipes Generator

GAPS Legal Zucchini Pizza Bites

Recently I needed a bit of a change. I needed something exciting to eat! And I really wanted pizza. But even though I know how to make a GAPS legal pizza crust I did not want to spend the time or energy to make it. Then I came up with this brilliant idea... pizza bites... on zucchini! and what's better? They are stage 4 (and beyond) GAPS legal!

I happened to have just bought some good-quality uncured pepperoni at the store, and had some sauce in the cabinet (although if I don't happen to have that I just as easily throw a couple tomatoes in a blender and make my own sauce on the stove). I tried it, and it worked! Delicious pizza bites that really taste like pizza (with zucchini on it) and can be made to suit any taste or dietary guidelines.

Unless you can't eat zucchini, you should be able to modify this for anyone. The fat used can be anything. You could leave off the tomato sauce, or make a while sauce. You can top with anything you can tolerate. Most people can tolerate raw cheese by the time they get to full GAPS And I guarantee that even if you can't do pepperoni, there is some type of meat you can have! Part of what makes a pizza is cheese and tomato sauce, so without these you will have a little different taste, but that doesn't mean you won't have something delicious!

Ingredients for gaps friendly pizza made with zucchini:

  • Zucchini

  • 2 TBS Lard, Butter or Other Fat

  • Italian Seasonings

  • Salt & Pepper

  • Pizza Sauce (make your own or buy a sugar free version in a glass jar)

  • Mozzarella Cheese

  • Uncured Pepperoni

  • Other Pizza Toppings of Your Choice

Directions for gaps friendly pizza made with zucchini:

GAPS Legal pizza is a thing! These pizza bites are gluten free because they’re made with zucchini. Zucchini pizza bites are GAPS legal past stage four and are a great summer recipe on what to do with too much zucchini. GAPS Friendly pizza made with …

Sliced the zucchini into rounds, approx ¼ thick. Don’t slice too thin!

Add your preferred fat to a pan on medium heat. Once hot, add zucchini slices. Your zucchini should not be swimming in the fat!

GAPS Legal pizza is a thing! These pizza bites are gluten free because they’re made with zucchini. Zucchini pizza bites are GAPS legal past stage four and are a great summer recipe on what to do with too much zucchini. GAPS Friendly pizza made with …

Sprinkle zucchini slices with salt, pepper and Italian seasonings.

Grate the mozzarella cheese.

GAPS Legal pizza is a thing! These pizza bites are gluten free because they’re made with zucchini. Zucchini pizza bites are GAPS legal past stage four and are a great summer recipe on what to do with too much zucchini. GAPS Friendly pizza made with …

Once the zucchini slices are golden brown (8-10 min), flip them to the other side.

GAPS Legal pizza is a thing! These pizza bites are gluten free because they’re made with zucchini. Zucchini pizza bites are GAPS legal past stage four and are a great summer recipe on what to do with too much zucchini. GAPS Friendly pizza made with …

Spoon tomato sauce on top of each zucchini slice. Top with uncured pepperoni or other toppings of your choice and add grated mozzarella cheese. Cover for 2 - 3 minutes so the cheese melts.

GAPS Legal pizza is a thing! These pizza bites are gluten free because they’re made with zucchini. Zucchini pizza bites are GAPS legal past stage four and are a great summer recipe on what to do with too much zucchini. GAPS Friendly pizza made with …

Once the cheese is melted, your zucchini pizzas are done!

Other toppings you could try would be artichoke hearts, olives. anchovies, or cooked chicken pieces. (Think your favorite pizza toppings!) Enjoy! Careful, they are hot! Once they have cooled a little, you can cut them into fourths to be served to those with small mouths. And as any good pizza is, they are delicious cold as well!  

What are your favorite toppings? Did you find good combinations? Let us know!


Zucchini Pizza Bites

Author:
prep time: cook time: total time:

ingredients:

  • Zucchini
  • 2 TBS Lard, Butter or Other Fat
  • Italian Seasonings
  • Salt & Pepper
  • Pizza Sauce (make your own or buy a sugar free version in a glass jar)
  • Mozzarella Cheese
  • Uncured Pepperoni
  • Other Pizza Toppings of Your Choice

instructions:

How to cook Zucchini Pizza Bites

  1. Sliced the zucchini into rounds, approx ¼ thick. Don’t slice too thin!
  2. Add your preferred fat to a pan on medium heat. Once hot, add zucchini slices. Your zucchini should not be swimming in the fat!
  3. Sprinkle zucchini slices with salt, pepper and Italian seasonings.
  4. Grate the mozzarella cheese.
  5. Once the zucchini slices are golden brown (8-10 min), flip them to the other side.
  6. Spoon tomato sauce on top of each zucchini slice. Top with uncured pepperoni or other toppings of your choice and add grated mozzarella cheese. Cover for 2 - 3 minutes so the cheese melts.
  7. Once the cheese is melted, your zucchini pizzas are done!
  8. Other toppings you could try would be artichoke hearts, olives. anchovies, or cooked chicken pieces. (Think your favorite pizza toppings!) Enjoy! Careful, they are hot! Once they have cooled a little, you can cut them into fourths to be served to those with small mouths. And as any good pizza is, they are delicious cold as well!
Created using The Recipes Generator

GAPS Friendly Waffle Recipe

Recently the idea struck me to try to make a GAPS waffle. I had made many GAPS pancakes, so I thought maybe it could be done. And it turns out... it can! It was not a simple task, however.

The ratios are fairly different than a GAPS pancake... for one thing, putting in too many eggs caused it to overflow and made quite a mess. But after some trial and error I found a recipe that is delicious, and delivered consistent results (which is a big deal when cooking without flour).

I was also excited to make this a dairy-free recipe (except for the whey). Unfortunately, I can't make it nut free, the almond butter is essential! I hope you enjoy them!

GAPS Friendly Waffles

(makes about 8 waffle squares or 2 full-size waffles)

GAPs legal waffle Batter Ingredients

  • 1 cup cooked butternut squash

  • 4 TBS fermented almond butter (see note)

  • 1 TBS melted lard

  • 2 eggs

  • ¼ tsp sea salt

Additional Ingredients

  • About ¼ cup melted lard or butter to grease the waffle iron

Tools for gaps legal waffles

  • Food processor or high-powered blender

  • Waffle iron

  • Chopsticks (this is very helpful to get the waffles off in one piece)

Directions for gaps legal waffles

This recipe is quick to put together if you do a little prep work first!

Prep the Fermented Almond Butter:
At least 24 hours in advance, ferment the almond butter. Add 2 TBS whey to 1 cup almond butter. Stir. Leave at room temperature for 24 hours. This will keep in the fridge for at least 2 weeks.

Prep the Butternut Squash:
Cut the butternut squash in half and place face down on a baking sheet lined with parchment paper. Bake at 350 degrees for 35-45 min until soft. Remove the squash flesh and place in a bowl.

For the GAPS Waffles:
Combine all ingredients in a food processor and blend until very smooth and mixed.

gaps-legal-waffles-how-to-make-waffles-for-the-gaps-diet-paleo-waffles-butternut-squash-waffles-how-to-make-waffles-gaps-legal-waffle-recipe-waffles-for-the-gaps-protocol-healing-gut-waffles

I recommend pouring the mixture into a bag and using it like a pastry bag. The more quickly you can get the waffle batter on the iron and close the lid, the better it turns out!

gaps-legal-waffles-how-to-make-waffles-for-the-gaps-diet-paleo-waffles-butternut-squash-waffles-how-to-make-waffles-gaps-legal-waffle-recipe-waffles-for-the-gaps-protocol-healing-gut-waffles

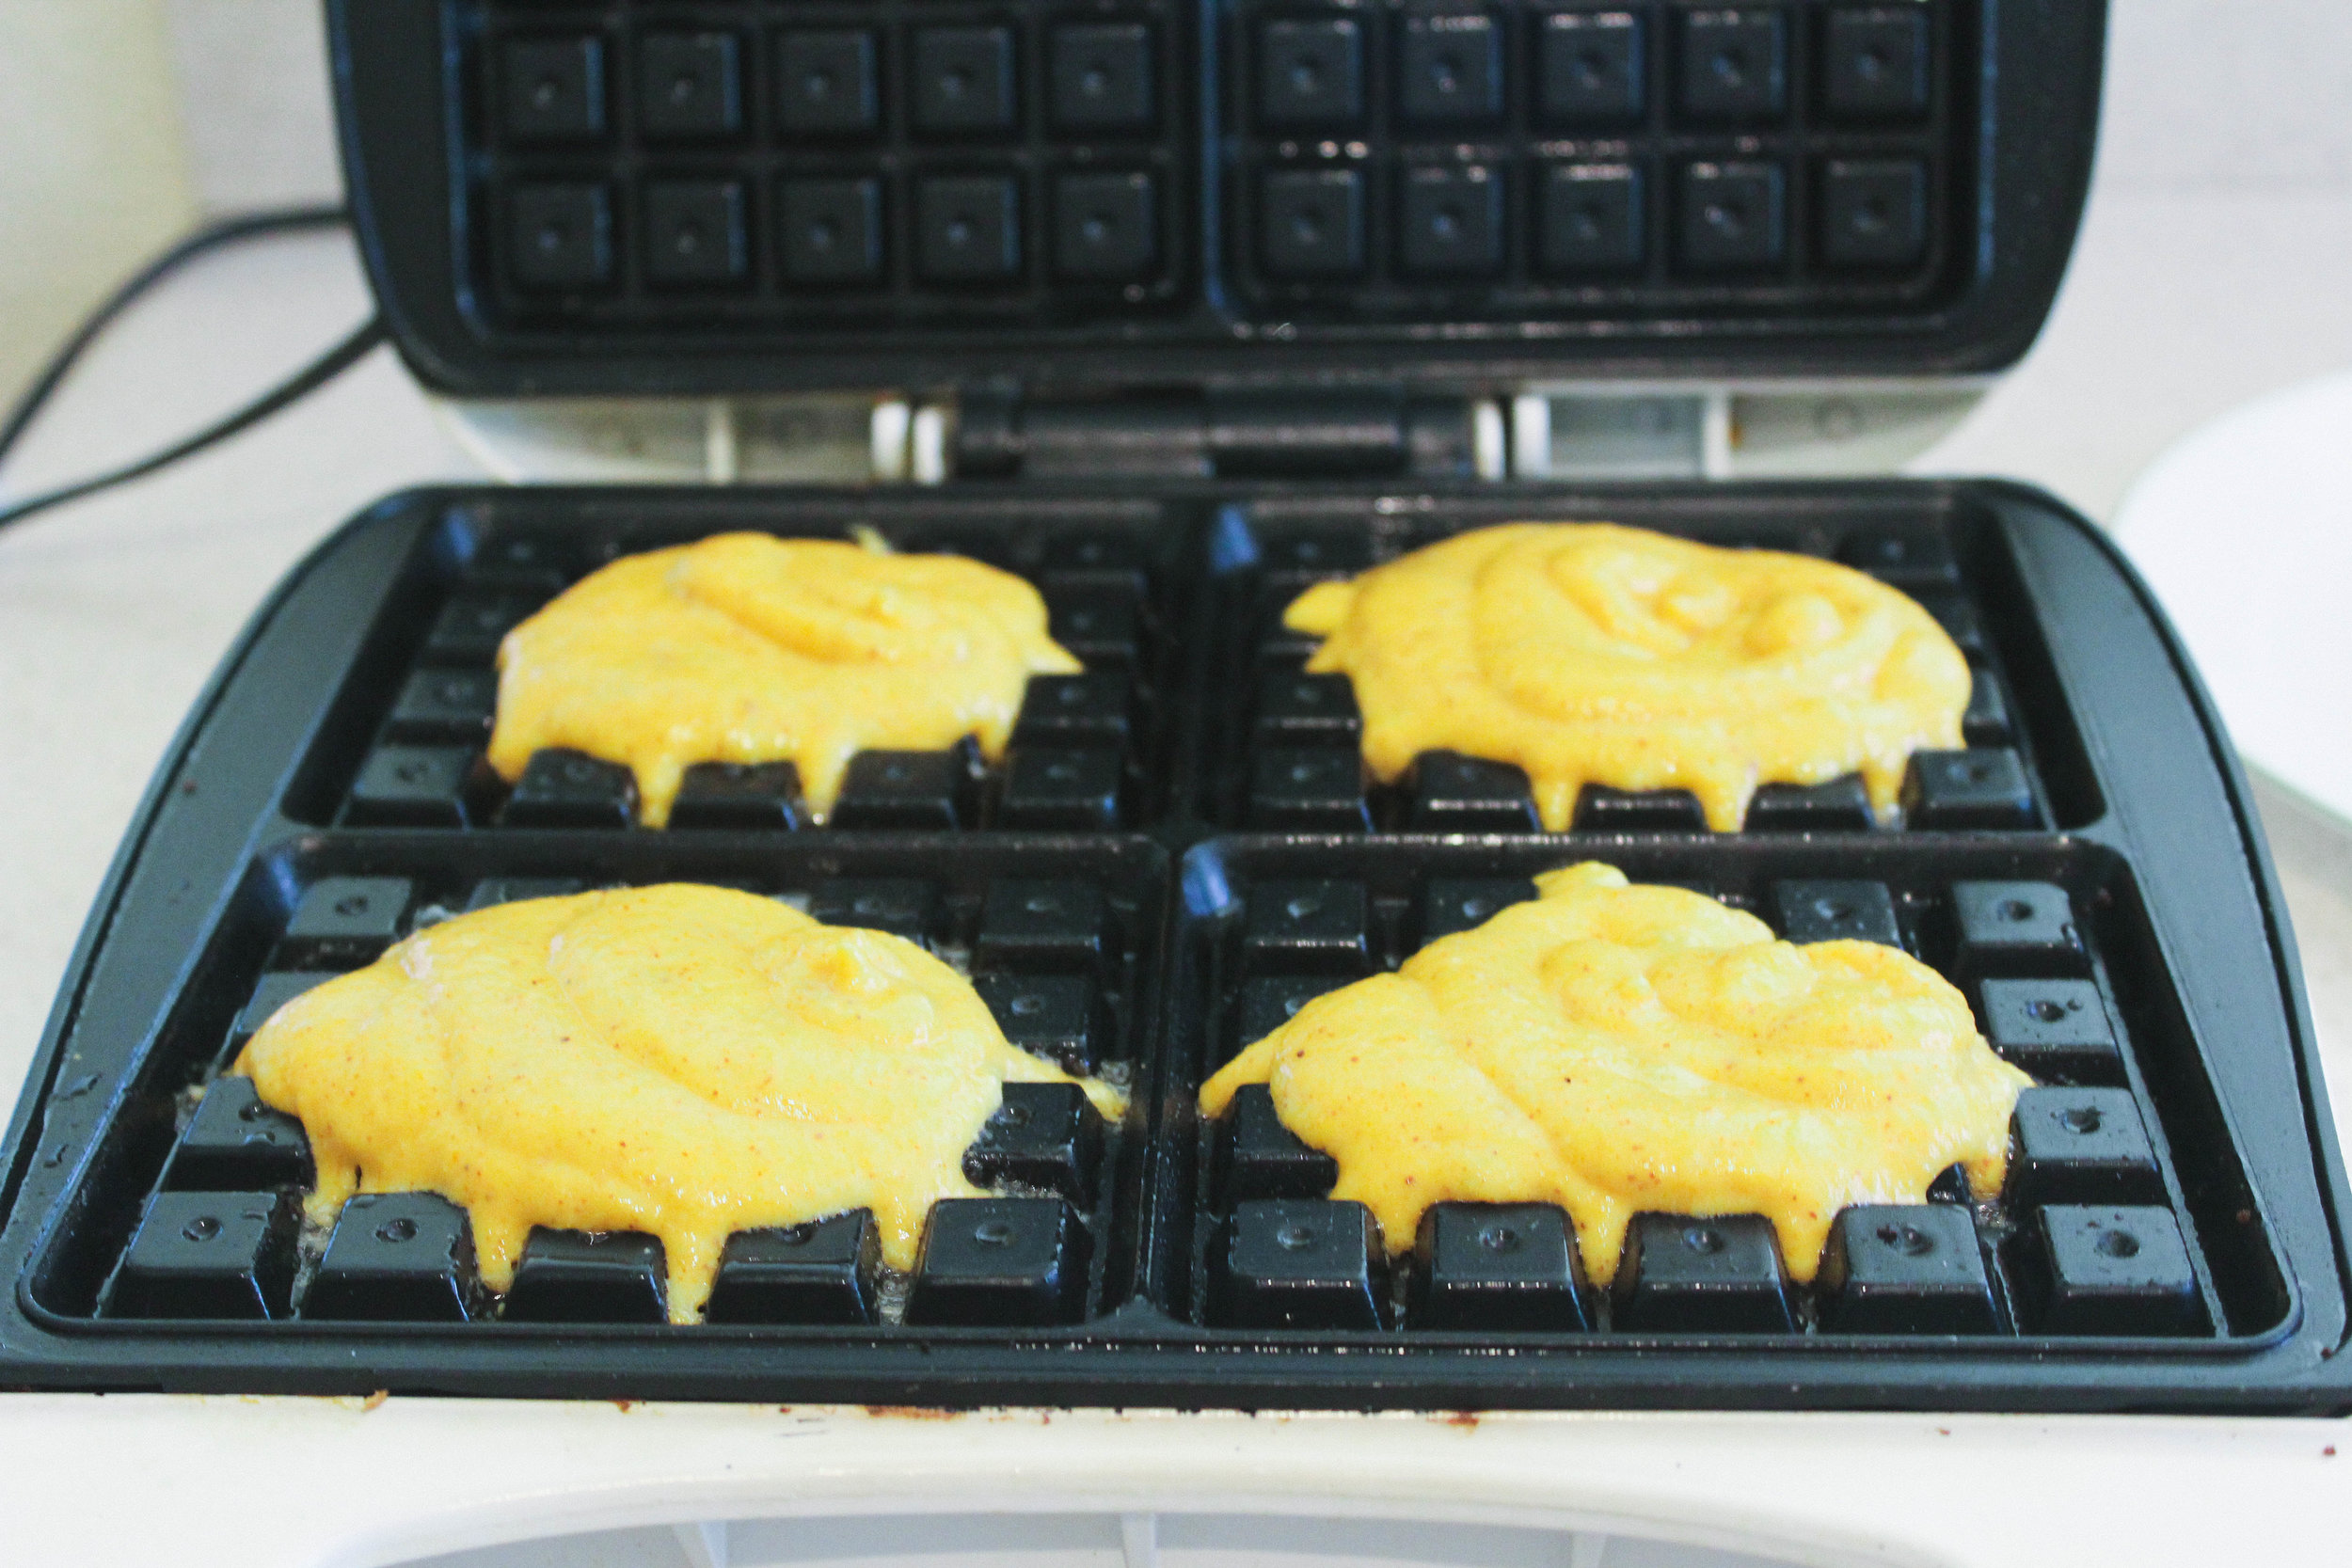
When everything is ready, and the waffle iron is hot, use the pastry brush to spread fat on the upper and lower waffle irons. Do this as quickly as possible.

Add batter to the waffle iron, then close the lid.

gaps-legal-waffles-how-to-make-waffles-for-the-gaps-diet-paleo-waffles-butternut-squash-waffles-how-to-make-waffles-gaps-legal-waffle-recipe-waffles-for-the-gaps-protocol-healing-gut-waffles

There is a lot of moisture in this recipe, so expect a lot of steam!

Wait for the green light to go on, and then another 30 seconds or so.

Slowly open the waffle iron.

gaps-legal-waffles-how-to-make-waffles-for-the-gaps-diet-paleo-waffles-butternut-squash-waffles-how-to-make-waffles-gaps-legal-waffle-recipe-waffles-for-the-gaps-protocol-healing-gut-waffles

Remove the waffles from the iron, using the chopstick in the groves in any areas it is sticking.Top with fried eggs, honey, date syrup, berries, homemade whipped cream, or anything you want to!

gaps-legal-waffles-how-to-make-waffles-for-the-gaps-diet-paleo-waffles-butternut-squash-waffles-how-to-make-waffles-gaps-legal-waffle-recipe-waffles-for-the-gaps-protocol-healing-gut-waffles

Enjoy!


GAPS Friendly Waffle Recipe

Author:
prep time: cook time: total time:

ingredients:

Waffle Batter Ingredients
  • 1 cup cooked butternut squash
  • 4 TBS fermented almond butter (see note)
  • 1 TBS melted lard
  • 2 eggs
  • ¼ tsp sea salt
Additional Ingredients
  • About ¼ cup melted lard or butter to grease the waffle iron
Tools Needed
  • Food processor or high-powered blender
  • Waffle iron
  • Chopsticks (this is very helpful to get the waffles off in one piece)

instructions:

How to cook GAPS Friendly Waffle Recipe

  1. This recipe is quick to put together if you do a little prep work first!
  2. Prep the Fermented Almond Butter:
  3. At least 24 hours in advance, ferment the almond butter. Add 2 TBS whey to 1 cup almond butter. Stir. Leave at room temperature for 24 hours. This will keep in the fridge for at least 2 weeks.
  4. Prep the Butternut Squash:
  5. Cut the butternut squash in half and place face down on a baking sheet lined with parchment paper. Bake at 350 degrees for 35-45 min until soft. Remove the squash flesh and place in a bowl.
  6. For the GAPS Waffles:
  7. Combine all ingredients in a food processor and blend until very smooth and mixed.
  8. I recommend pouring the mixture into a bag and using it like a pastry bag. The more quickly you can get the waffle batter on the iron and close the lid, the better it turns out!
  9. When everything is ready, and the waffle iron is hot, use the pastry brush to spread fat on the upper and lower waffle irons. Do this as quickly as possible.
  10. Add batter to the waffle iron, then close the lid.
  11. There is a lot of moisture in this recipe, so expect a lot of steam!
  12. Wait for the green light to go on, and then another 30 seconds or so.
  13. Slowly open the waffle iron.
  14. Remove the waffles from the iron, using the chopstick in the groves in any areas it is sticking. Top with fried eggs, honey, date syrup, berries, homemade whipped cream, or anything you want to!
Created using The Recipes Generator