GAPS recipes

How to Make Your Own Dairy Free, Egg Free Sausage

I was searching for the perfect sausage recipe. I discovered I don’t like a sausage that is heavily flavored with sage. My ideal tasting sausage was Jimmy Dean’s sausage which, of course, contains MSG. 

I needed to find a recipe that would keep me from occasionally caving and eating Jimmy Dean. While watching one of my favorite YouTube shows, 18th Century Cooking, I saw their Oxford Gate sausage recipe from Martha Washington’s Book of Cookery which seemed ideal! I’ve modified it below.

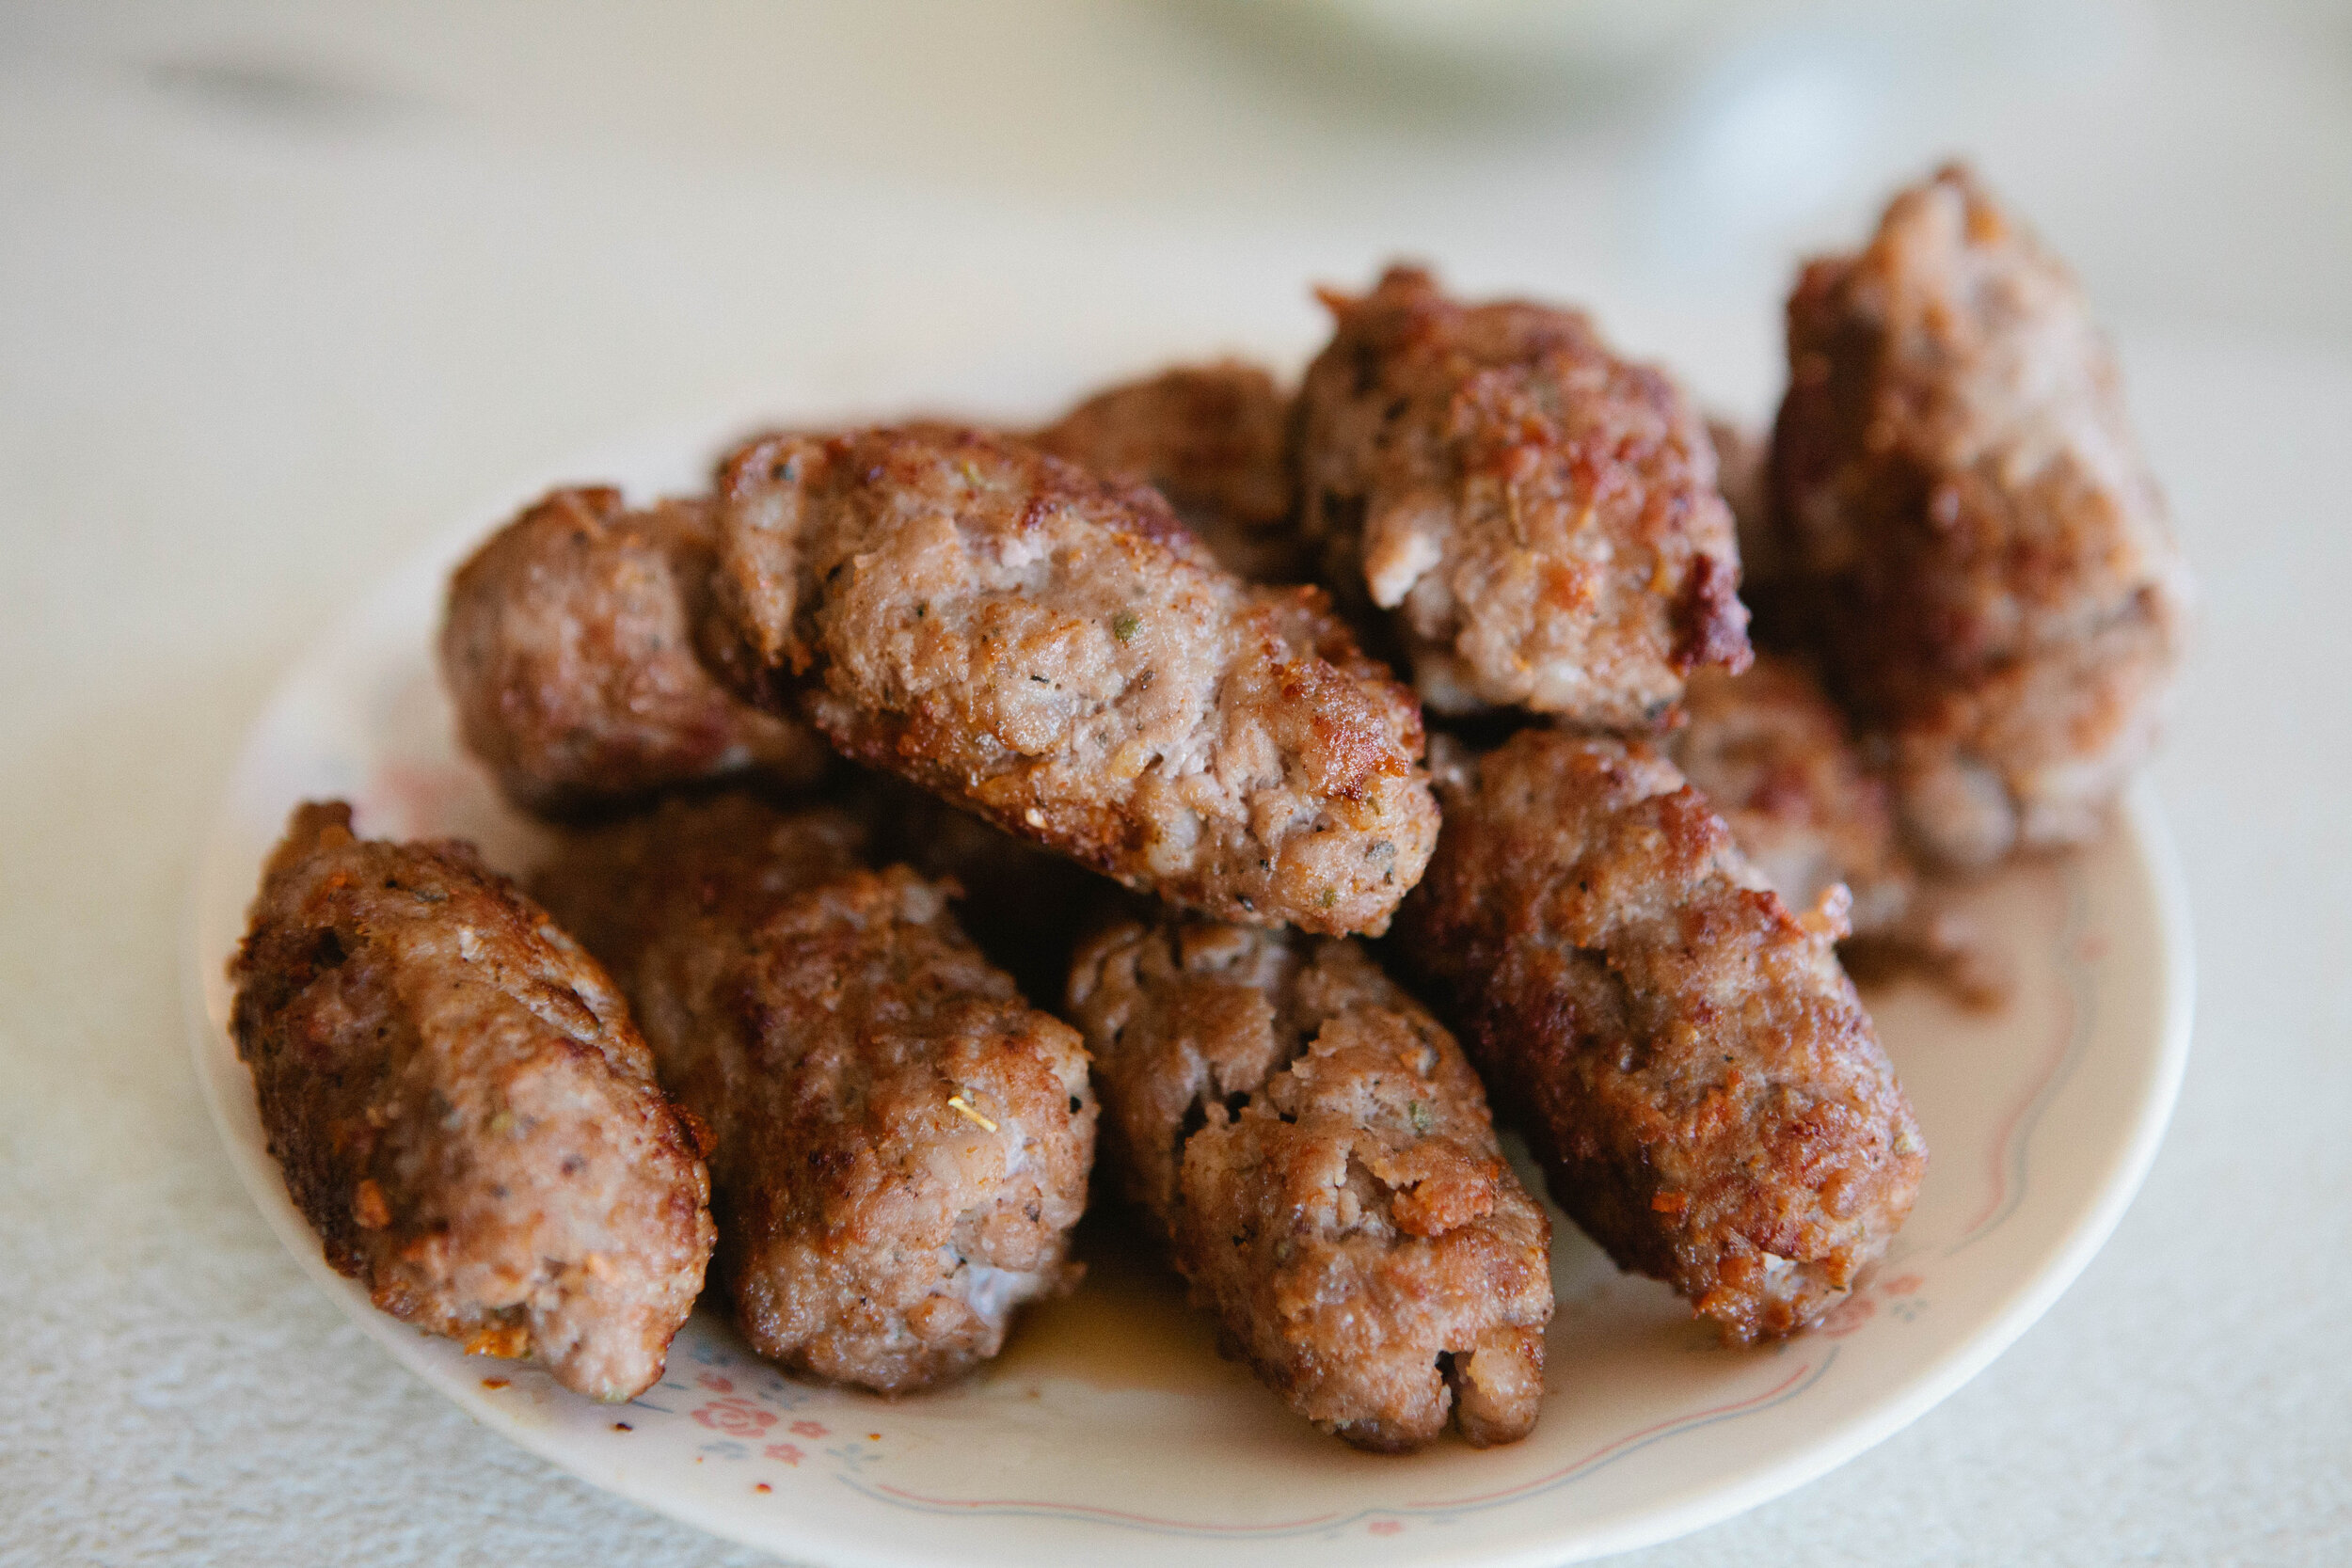
This sausage is the ideal breakfast sausage. It wouldn’t work well as a sausage with marinara sauce. It’s great alongside eggs or in an omelette. If I don’t want to eat cheese, it’s also a great, easy snack on the go.

The original recipe for this called for suet, which is rendered kidney fat. The suet melts while cooking and creates a lighter patty. That’s not something I usually have on hand but this recipe works just as well without it. If you don’t mind a denser patty (think like a hamburger) than you’ll enjoy this sausage without the suet.

This is a dairy free, egg free sausage recipe which is great if you’re not currently tolerating either.

You’ll notice a spice used in this recipe is Blade Mace. Blade mace is the shell that surrounds and protects nutmeg. Mace has a sharper taste than nutmeg but if you don’t have blade mace, equal amounts of ground nutmeg can be substituted.

What will you eat alongside this sausage?

If you’re looking for a DIY sausage recipe that tastes like Jimmy Dean but is made with real ingredients, try this one! It’s GAPS Legal, good for the Whole 30 Diet and paleo. Recipe by Amy Mihaly, Certified GAPS Practitioner in Colorado.

Ingredients for How to Make Your Own Sausage:

  • 1 lb fresh ground pork

  • 1 1/2 tsp. Salt

  • ½ tsp Ground Pepper

  • ¼ tsp Blade Mace, coarsely ground

  • 1 ½ tsp Sage

  • ¼ tsp Ground Cloves

  • 2 - 3 tbsp Lard

Directions for How to Make Your Own Sausage:

If you’re looking for a DIY sausage recipe that tastes like Jimmy Dean but is made with real ingredients, try this one! It’s GAPS Legal, good for the Whole 30 Diet and paleo. Recipe by Amy Mihaly, Certified GAPS Practitioner in Colorado.

In a large bowl, mix the meat with the spices.

If you’re looking for a DIY sausage recipe that tastes like Jimmy Dean but is made with real ingredients, try this one! It’s GAPS Legal, good for the Whole 30 Diet and paleo. Recipe by Amy Mihaly, Certified GAPS Practitioner in Colorado.

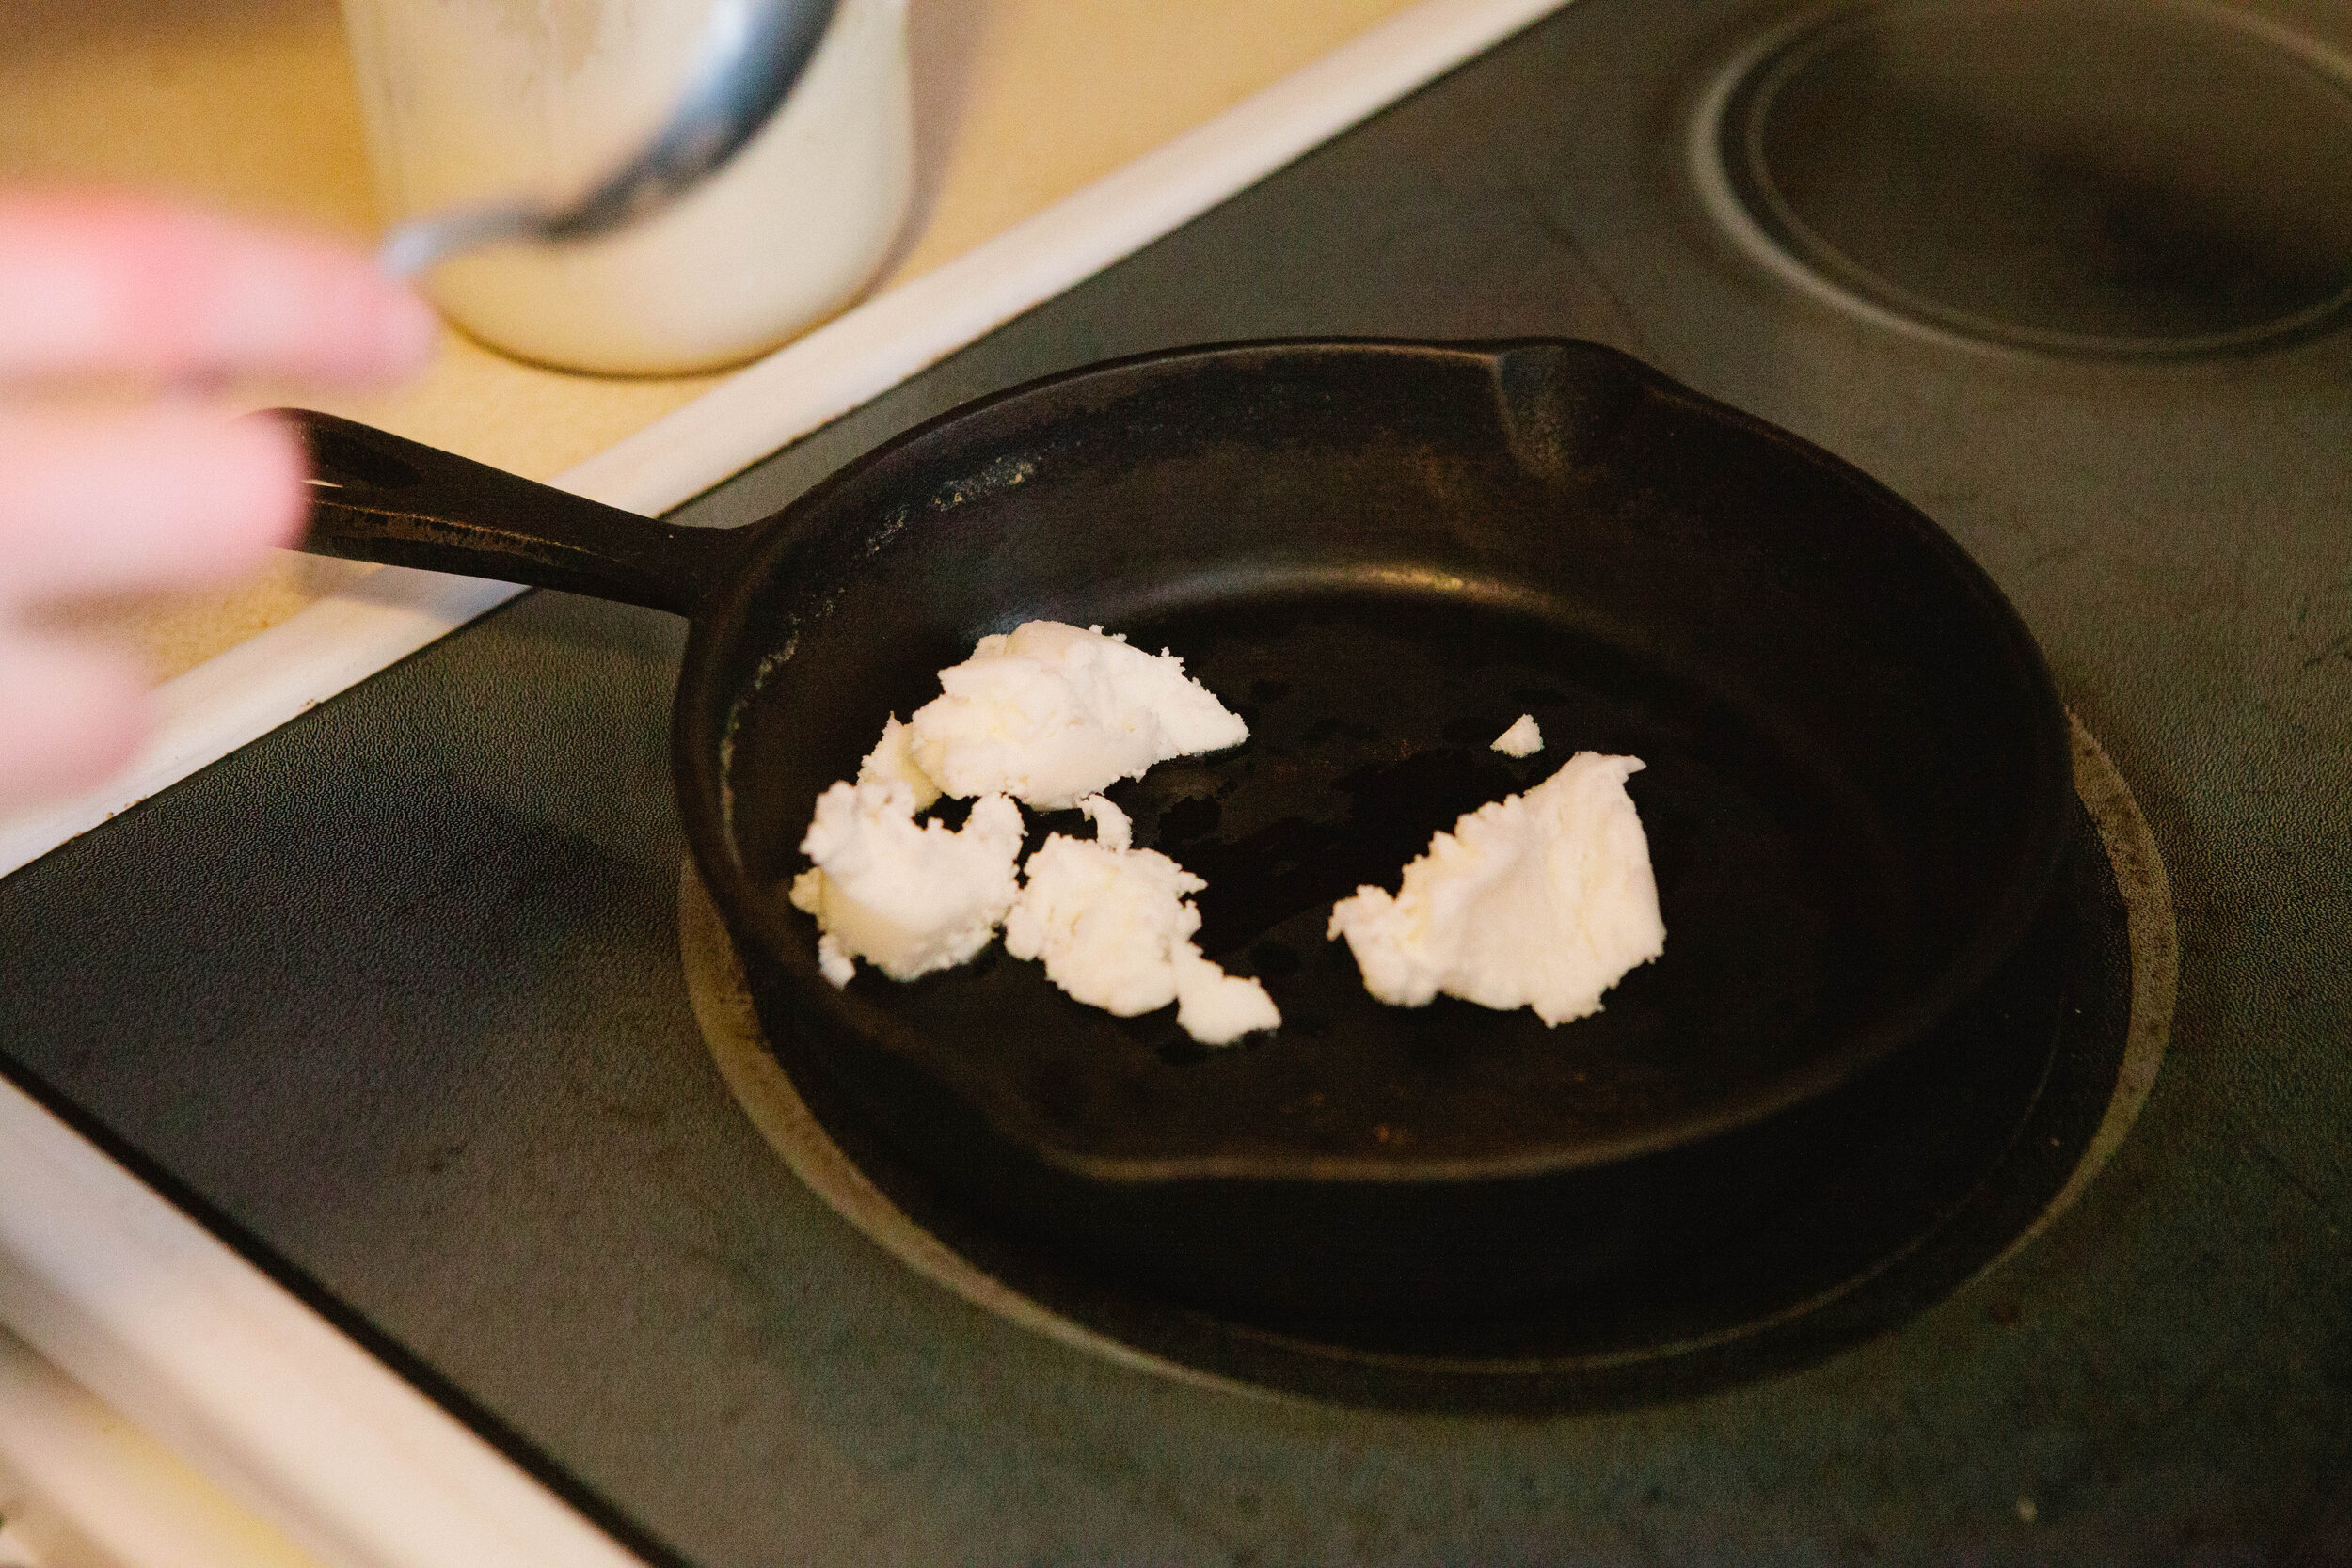
Heat a cast iron pan on low to medium heat. Add 2 - 3 tbsp of lard to the pan, enough to give yourself a good amount of cooking fat. If your pan is too hot, your sausages will burn!

If you’re looking for a DIY sausage recipe that tastes like Jimmy Dean but is made with real ingredients, try this one! It’s GAPS Legal, good for the Whole 30 Diet and paleo. Recipe by Amy Mihaly, Certified GAPS Practitioner in Colorado.

Roll sausages into finger like shapes. Add them to a pan, a small amount at a time.

These need tending! As soon as you can, move them on the bottom of the pan to prevent them from burning. Then roll them gently to cook on all sides. Because they are thicker and take longer to cook, you do need to roll them a bit to prevent them cooking too long on one side.

If you’re looking for a DIY sausage recipe that tastes like Jimmy Dean but is made with real ingredients, try this one! It’s GAPS Legal, good for the Whole 30 Diet and paleo. Recipe by Amy Mihaly, Certified GAPS Practitioner in Colorado.

Cook the sausage for about 5-7 minutes, depending on how thick you make them. They will start to feel more solid as they cook.

Enjoy warm or cold! Cold sausage tastes more salty to me so if you plan to eat them cold, adjust your salt slightly. These also freeze extremely well, cooked or raw! I cooked and took a large batch of them with me when I went hunting and ate them for breakfast cold. 

Snacks to Eat on the GAPS Diet

I’m often asked about snacking on the GAPS Diet. Below is a selection of ‘snack’ type foods that are all GAPS friendly, including a variety of ferments.

Some of these are great to take on the go, like the sausages or trail mix. I often also bring cheese, cuts of meat and cut up vegetables as snacks on the go. Some of these GAPS friendly snacks are great to feed a crowd and would be the perfect dish to bring to a potluck, like the spinach and artichoke dip and mayo free deviled eggs. These would be enjoyed even on those not on the GAPS Diet.

As the video below shows, sometimes the simplest food is the best!


Homemade sausage is easy

Homemade sausage is easy

Homemade Sausage

Enjoy these homemade sausages warm or cold! These also freeze extremely well, cooked or raw! I cooked and took a large batch of them with me when I went hunting and ate them for breakfast cold.

Gluten Free, Dairy Free, Egg Free

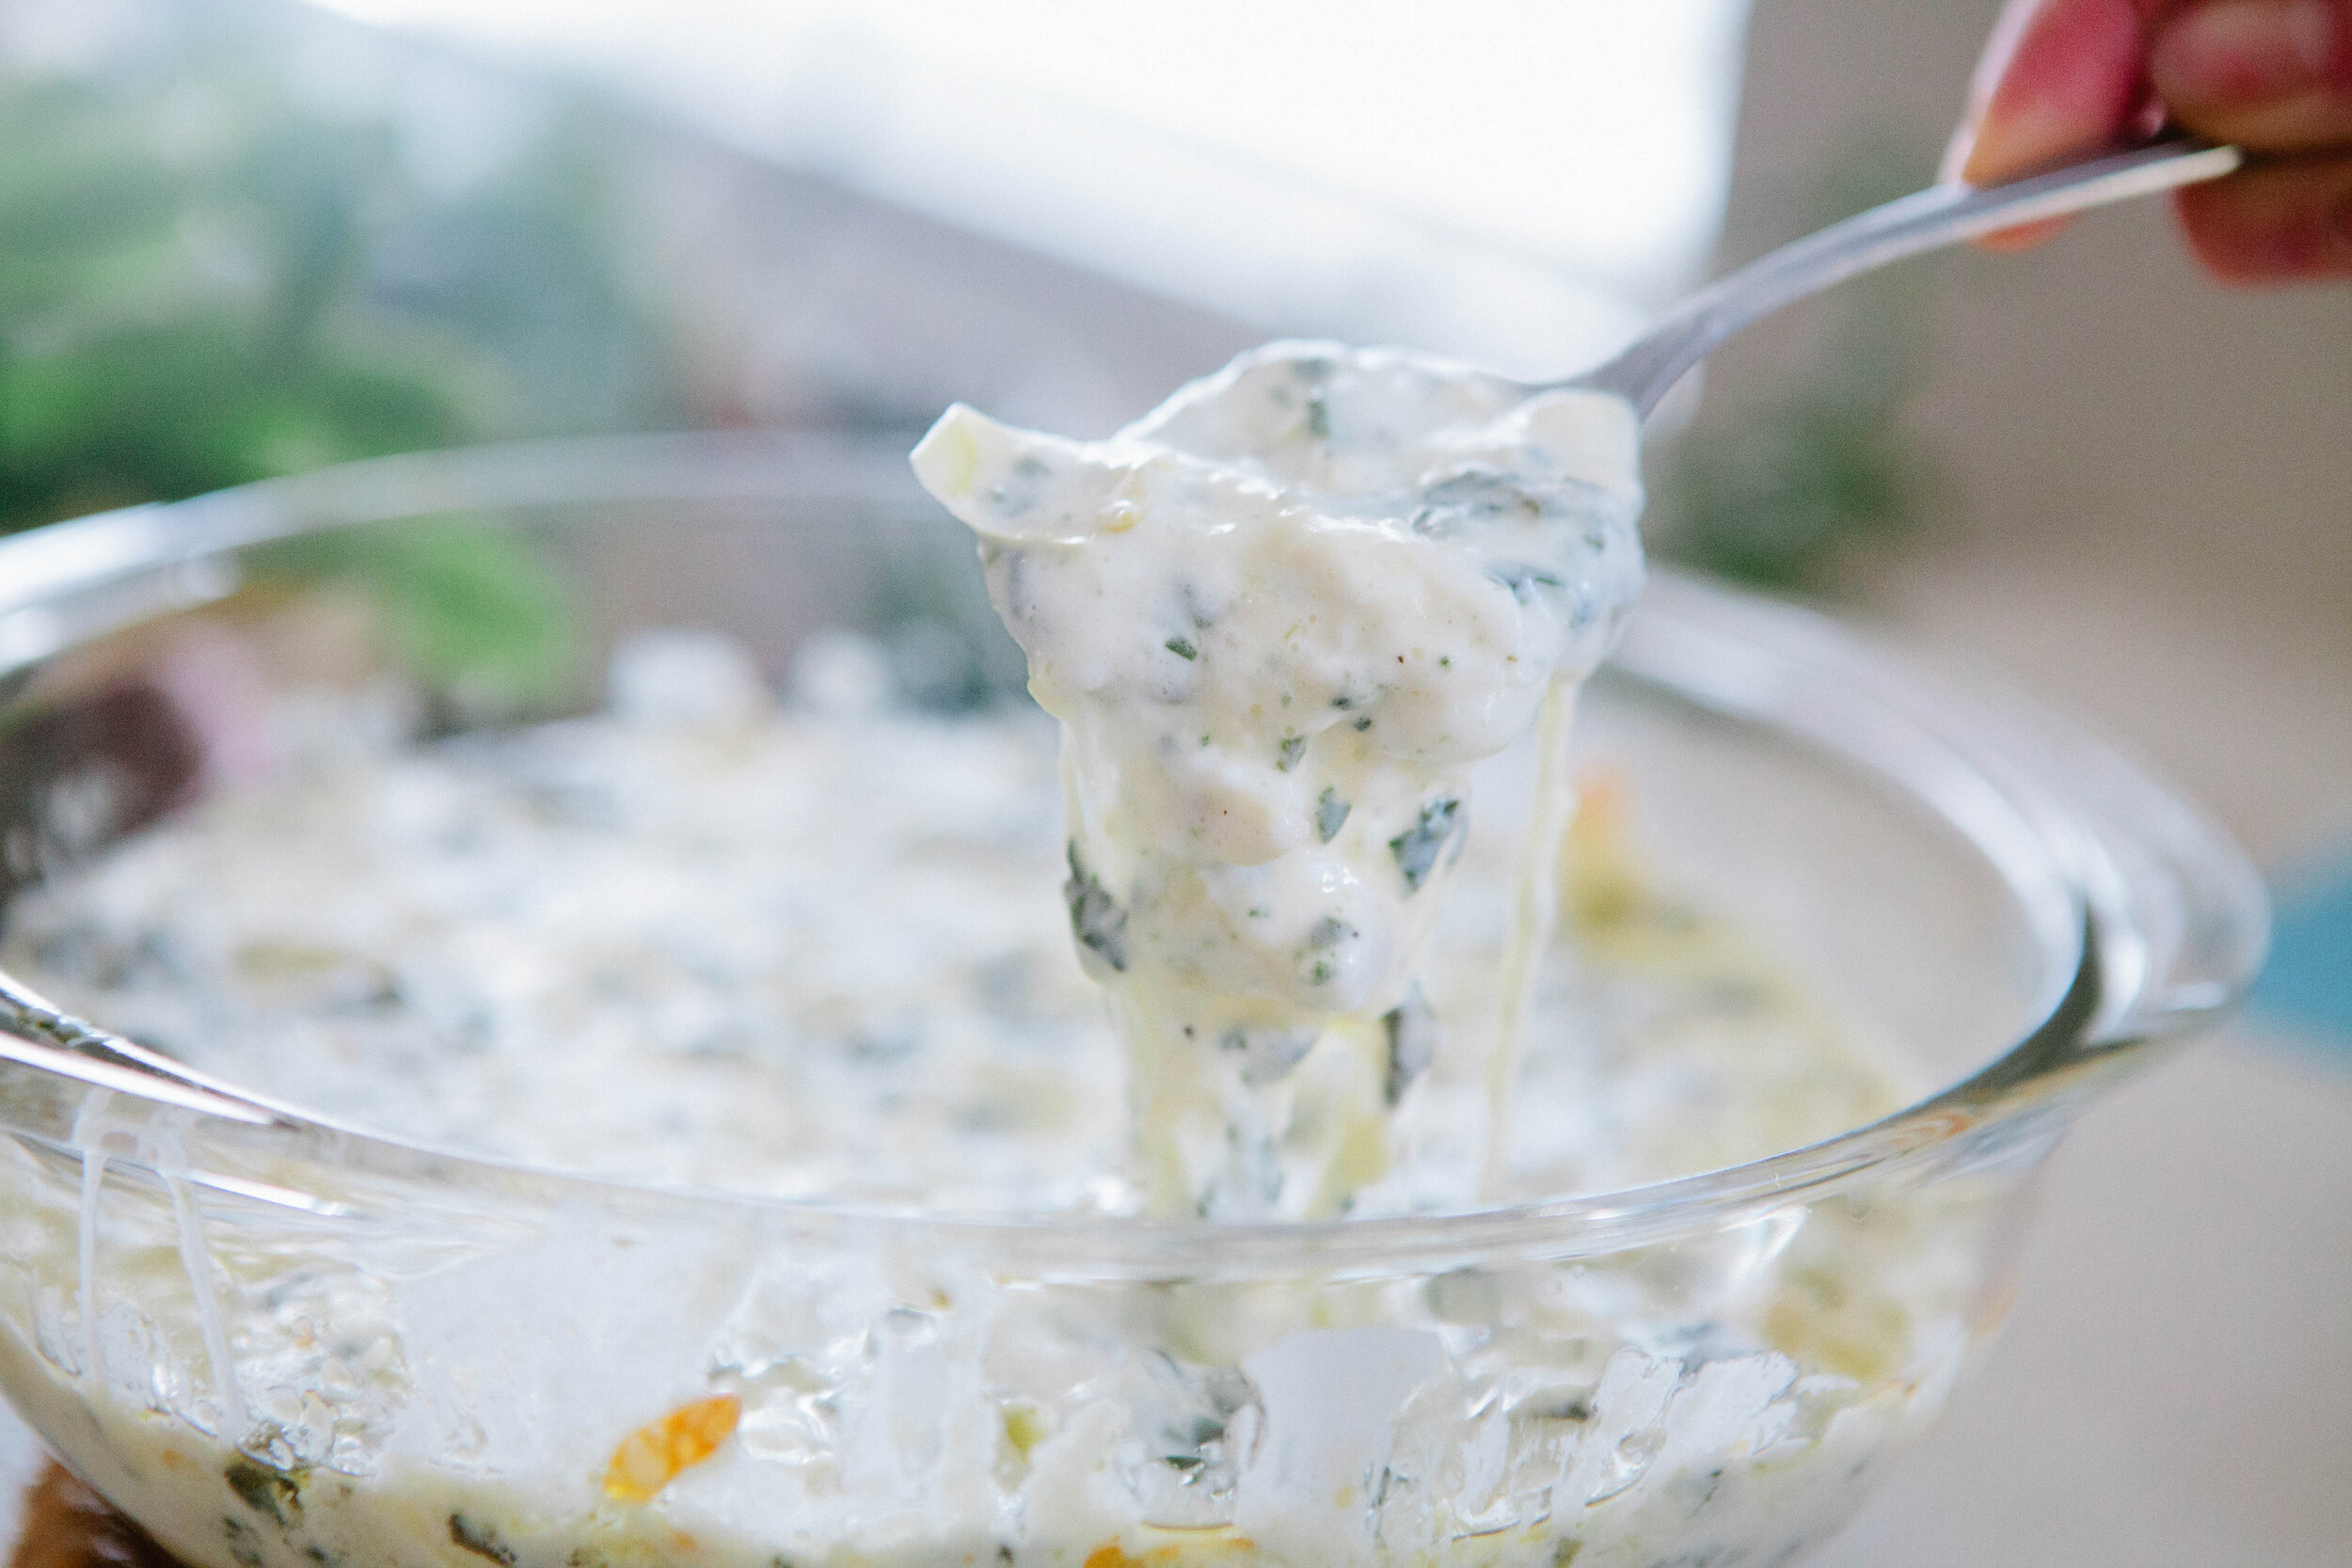
Full GAPS Spinach + Artichoke Dip

Spinach and artichoke dip - just the name conjures up images of a creamy, delicious dip. This one is made with real foods and no mayonnaise and is as delicious as a traditional spinach and artichoke dip.

Gluten Free, Egg Free

Homemade Gummy Snacks

These gummies are a good way for both children and adults to get collagen and vitamin c together! These gummies are stage five legal on the GAPS Diet because they are cooked fruit.

Gluten Free, Dairy Free, Egg Free

GAPS Legal Banana Splits

Ah, the banana split. It’s so delicious on a hot summer’s day. This one is made with all natural ingredients and real food. This recipe is GAPS Legal if you’ve been on full GAPS for about six months, and you’re tolerating raw milk, and you make it exactly as directed.

Gluten Free

GAPS Legal Onion Rings

These onion rings are my first foray into creating GAPS Legal fried foods. These onion rings use a fermented almond flour batter and are legal on the GAPS Diet at stage 4!

Gluten Free, Dairy Free, Egg Free

Mayo Free Deviled Eggs

Because I haven't found a mayo my taste buds approve of there is no mayonnaise in my refrigerator. So one day when I had a hankerin' for deviled eggs I got the creative juices flowing and started experimenting with recipes

Gluten Free, Dairy Free

Russian Custard

Russian custard is a delicious desert or afternoon snack. It is rich, and just sweet enough. You can whip it up in just a few minutes, and it is easy to double or triple to feed another (or more for yourself).

Gluten Free, Dairy Free

Swedish Gravlax

This is a brined fish meal legal on GAPS stage 2. You eat little pieces, one small piece a day.

Gluten Free, Dairy Free, Egg Free

Liver Pate

Liver pâté makes me feel like I am eating a treat when I'm really eating something healthy—very healthy and good for me! You can make pate out of any type of liver, but chicken liver is the most mild, so that is a great one to start with if you are not used to eating liver.

Gluten Free, Dairy Free, Egg Free

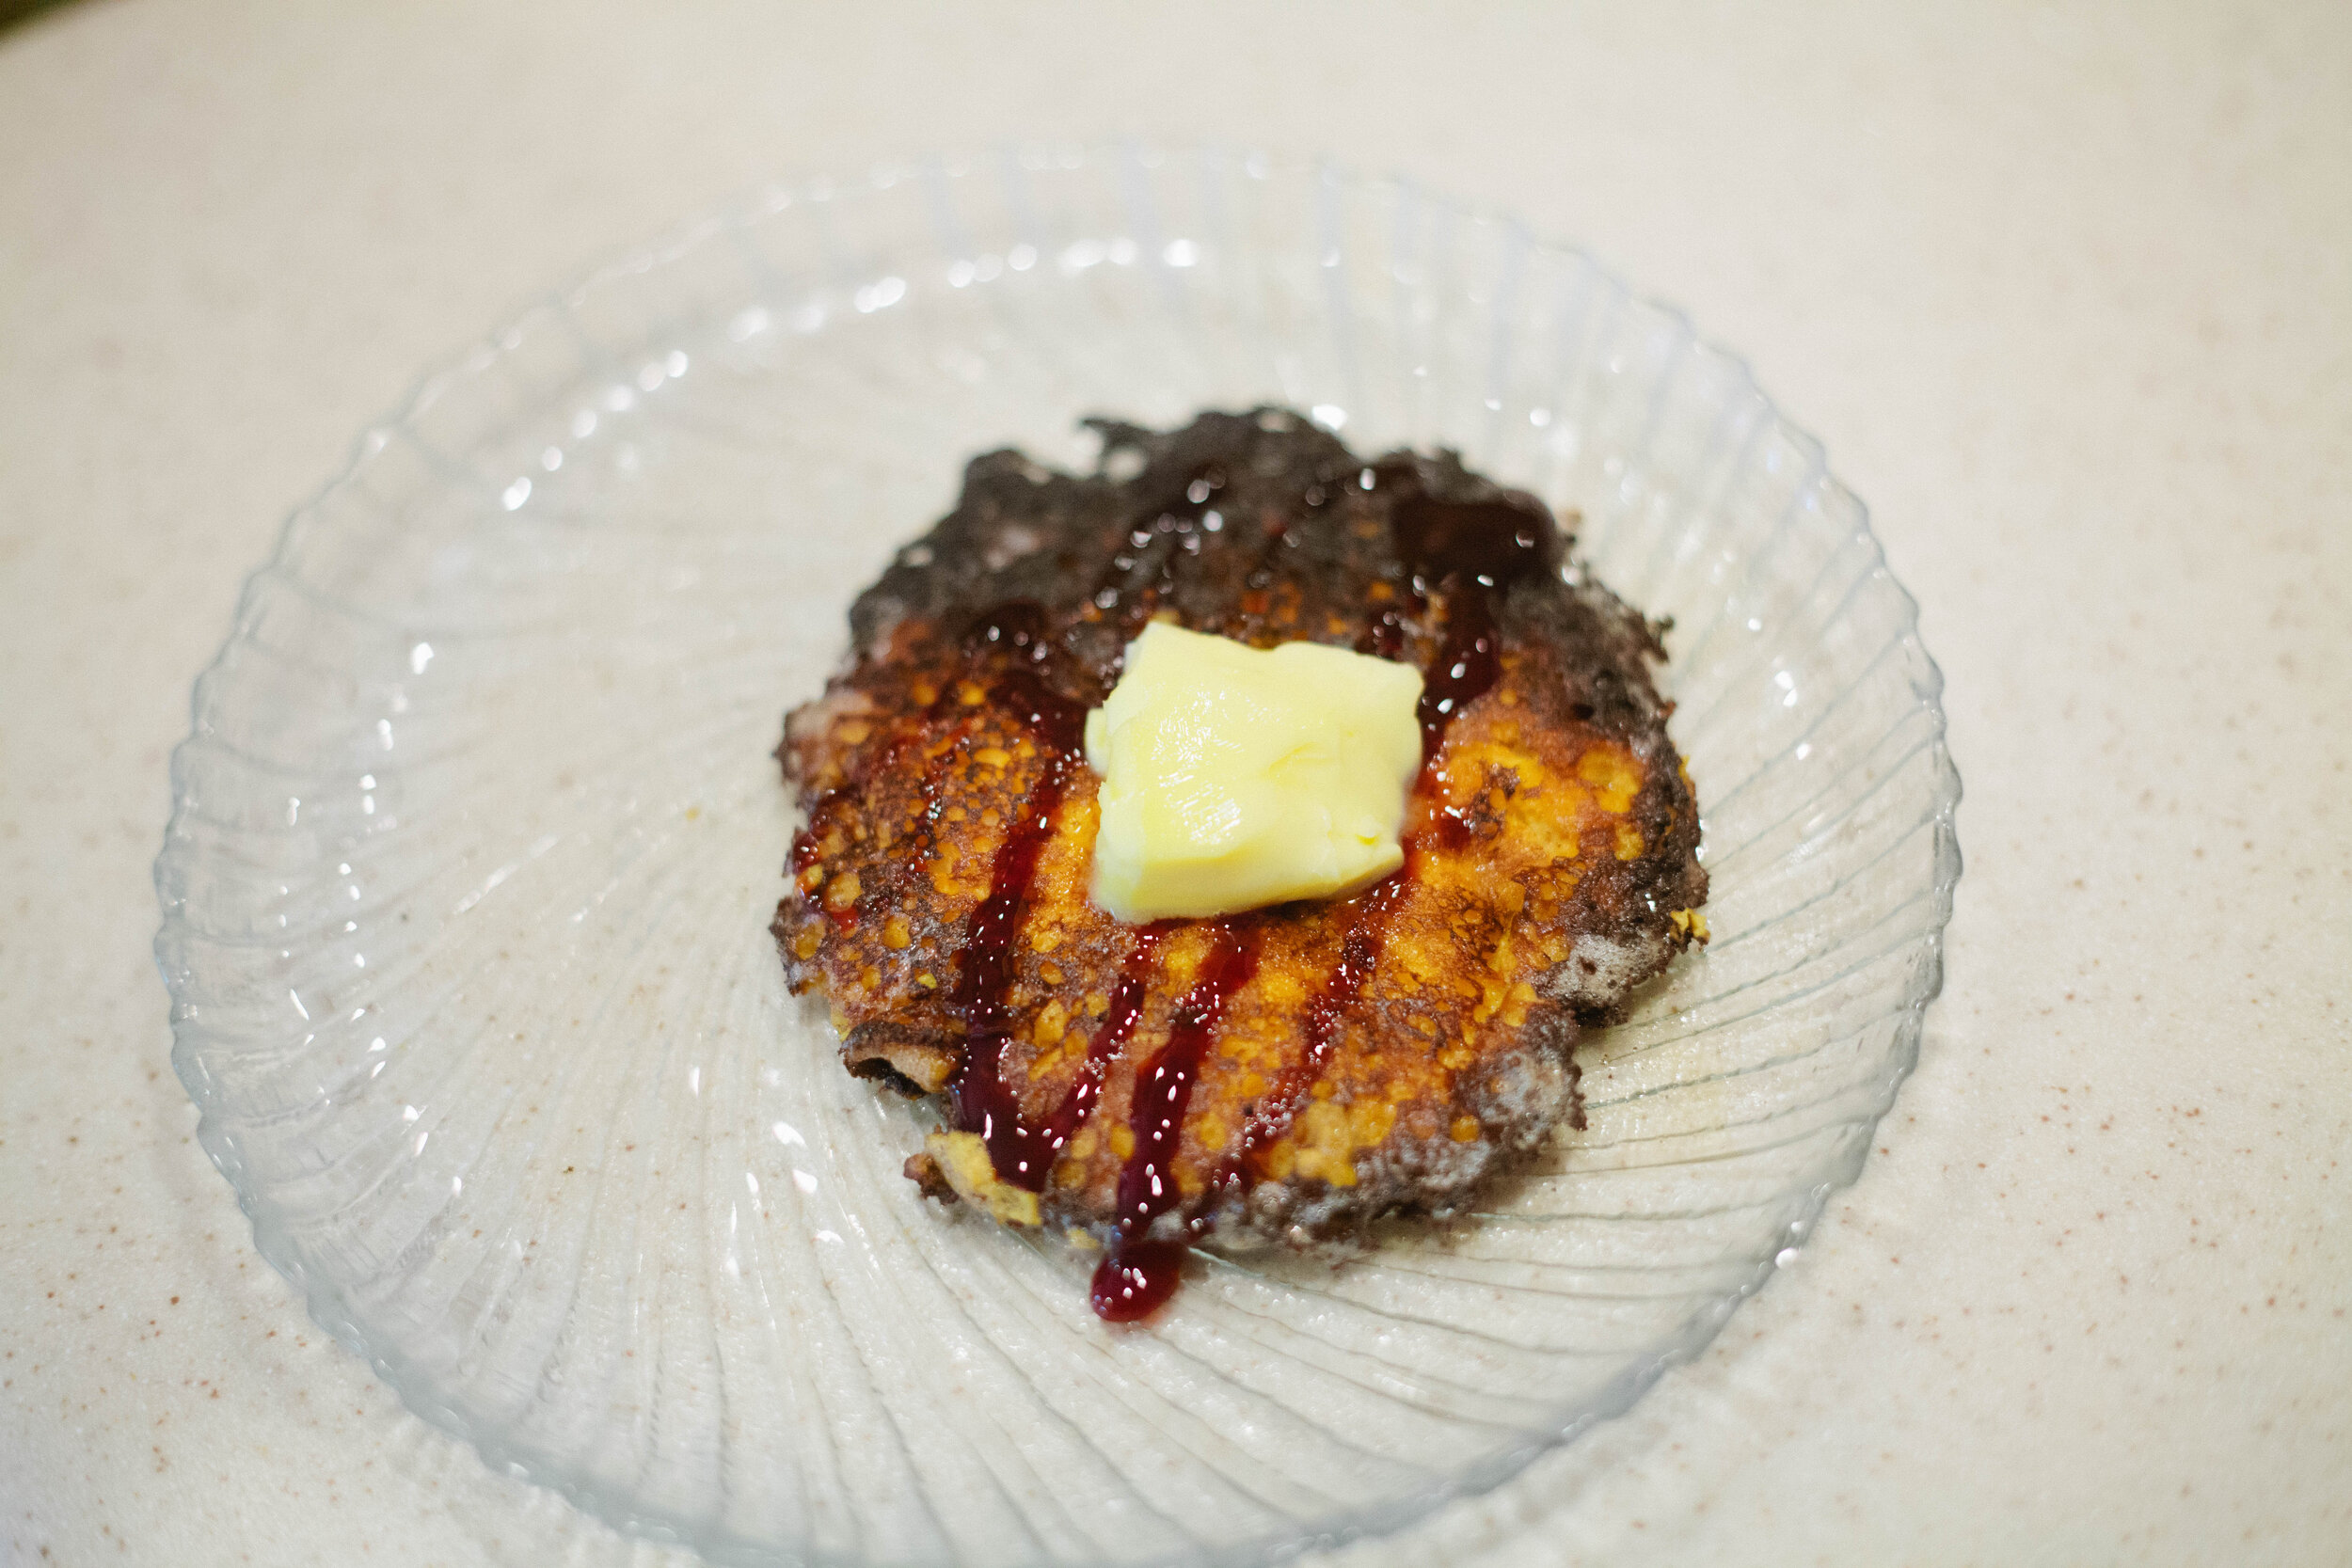
GAPS Pancakes

Make these pancakes with pumpkin or butternut squash. Keep as a savory pancake or for a sweeter treat, add date syrup or cinnamon to the toppings.

Gluten Free, Dairy Free, Egg Free


GAPS Legal Trail Mix

With all the hiking and camping that happens in Colorado, trail mix is almost a main food group. But commercial trail mixes contain candy, sweetened fruit, and unprepared nuts: not the superfoods they claim to be!

Gluten Free, Dairy Free, Egg Free

Fruit Chutney

If you are following the GAPS diet this is legal on stage 5 or 6, when you are tolerating dried spices and peppercorns. This recipe is very simple—chop and combine ingredients, simmer for a while, then store in jars.

Gluten Free, Dairy Free, Egg Free

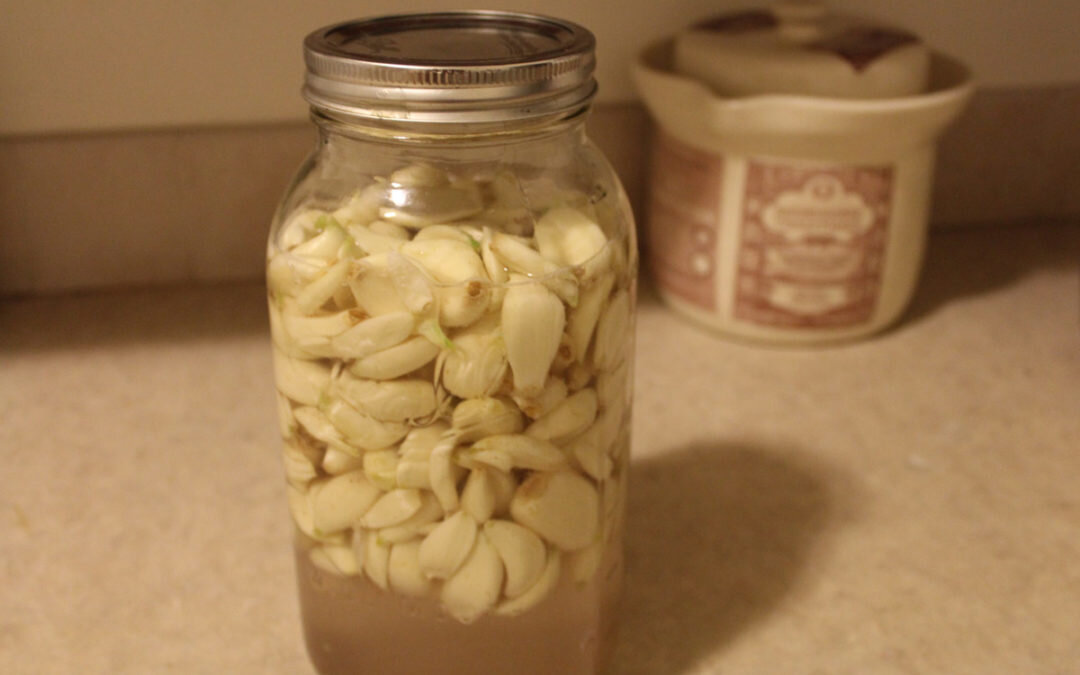
Fermented Garlic

Raw garlic, however, has many supportive health benefits. And when raw garlic is fermented, many of these increase. Fermenting garlic is very simple.

Gluten Free, Dairy Free, Egg Free

Vegetable Medley

This recipe contains five different vegetables: beets (good for liver and blood cleansing), cabbage (stimulates digestion), carrots (contain vitamin A), and cauliflower (makes it taste better, believe me), and garlic (good for immune support). It makes a very rich and flavorful liquid, which is also a wonderful probiotic drink.

Gluten Free, Dairy Free, Egg Free

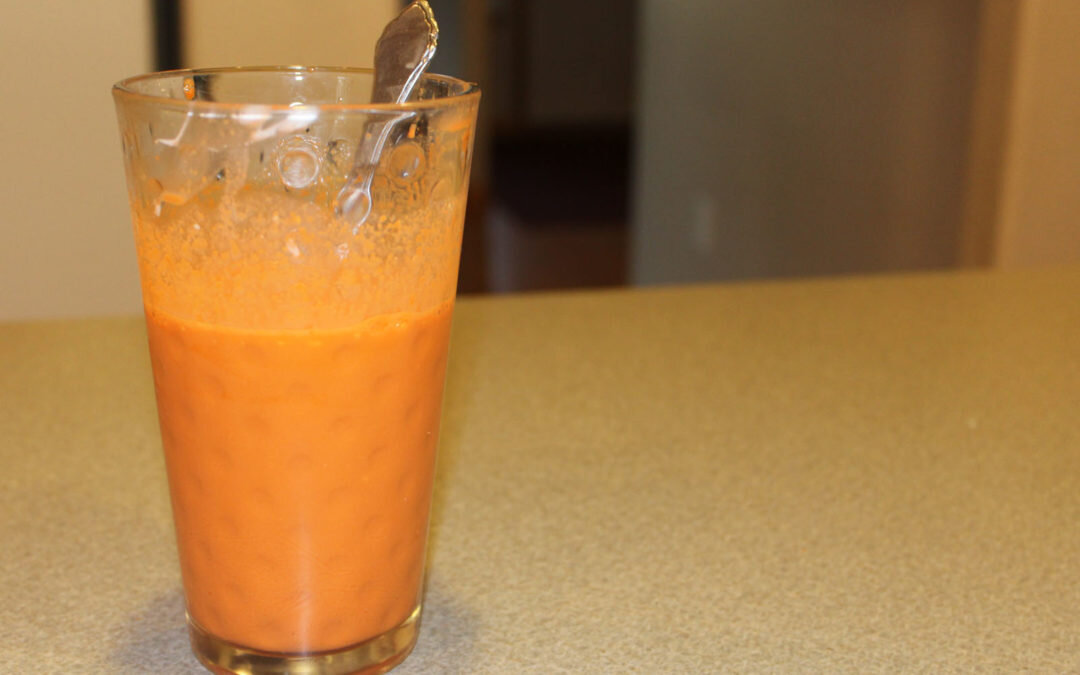
GAPS Milkshake

This delicious, satisfying and helpful beverage is a wonderful way to daily consume your freshly-pressed juices, and can even be a meal. The GAPS milkshake is mix of juice, protein, and fat.

Gluten Free, Dairy Free, Egg Free

Beet Kvass

Beet Kvass is a liver tonic. Anyone can make this simple fermented drink! It requires only a few ingredients, and only a few minutes to "put up."

Gluten Free, Dairy Free, Egg Free

Creamy Garlic Chicken Soup

This is one of my favorite soups! It’s warm and creamy and so delicious.

This soup is easy to make in large or small batches depending on how many servings you need. A small batch requires one small chicken, about 4 lbs, one head of garlic, and one glass baking dish of vegetables. A small batch will make about 4-6 hearty servings of soup. A large batch requires a larger chicken, about 6 lbs, two heads of garlic, and two glass baking dishes of vegetables.

Keeping the garlic in their paper shells roasts the garlic while preventing them from getting burnt. Don’t worry if your paper peels a little off the garlic - it’s still ok!

This soup requires a LOT of salt. If you don’t salt this soup enough, it is very bland and boring.

Because you immersion blend the vegetables into the stock, this is a great recipe to also blend in the the joint cartilage, skin and any of the other parts of the chicken that you may be tempted to throw away. I separate the chicken into three parts usually - bones, chicken meat, and everything else.

Ingredients for Creamy Garlic Chicken Soup:

  • 1 Chicken

  • 1 Zucchini (Courgettes)

  • 1 Yellow Squash

  • ½ Large Head of Cauliflower or 1 Small Cauliflower

  • 1-2 Heads of Garlic, Cloves separated but still in their paper

  • 3-4 tbsp Lard (Learn to make your own lard here.)

  • 1 tbsp Salt

  • ½ Bunch Parsley

Directions for Creamy Garlic Chicken Soup:

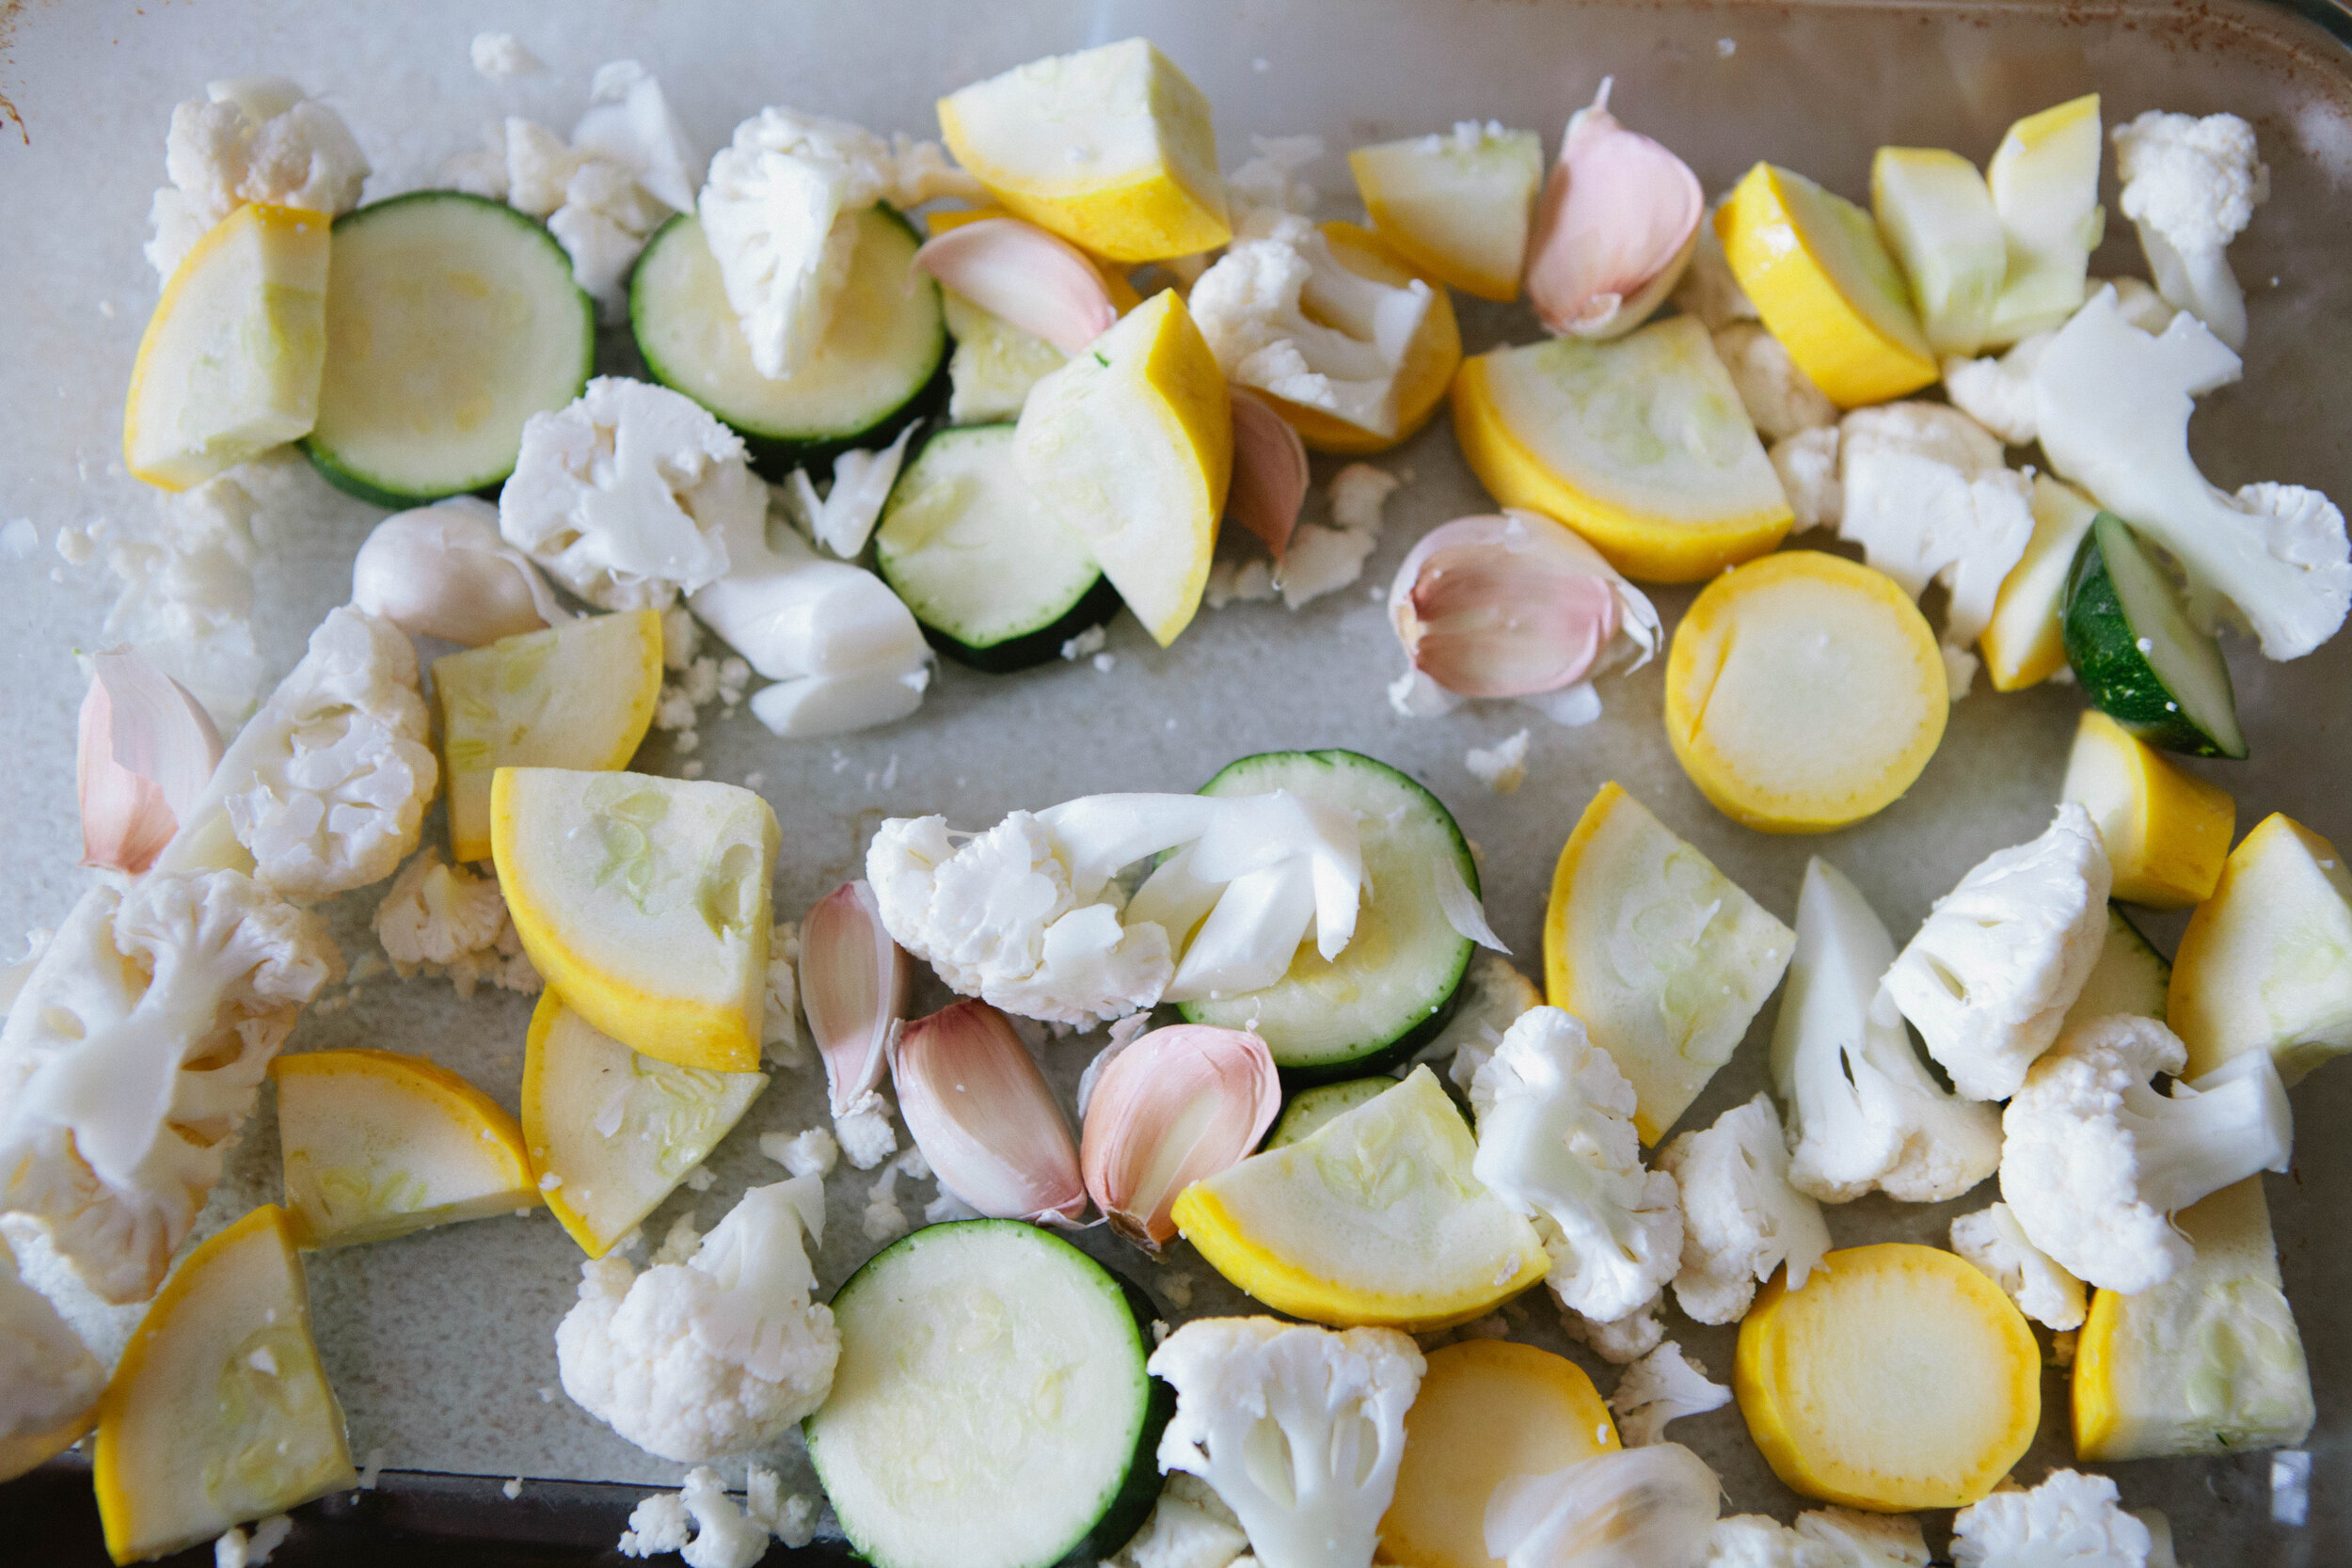
Zucchini, yellow squash, cauliflower and garlic are roasted with lard and then blended together to form the base of this creamy garlic chicken soup. This soup is GAPS legal and great for Whole 30 or Paleo. It’s dairy free and gluten free but still c…

Start a chicken stock on the stove. (Find the recipe for a chicken stock here.)

Cut the vegetables into even size pieces for even roasting. For the cauliflower, you can remove or keep however much of the fibrous material (stems), depending on how much you are tolerating.  Start the oven preheating to 400 degrees.

Roasted zucchini, cauliflower, yellow squash and garlic are the base for this soup. It’s delicious and filling while still being dairy free and gluten free. It’s a soup for the GAPS diet but is also great for Whole 30 or Paleo diets since it’s made …

Add the squash, zucchini, cauliflower and garlic to a baking dish with the lard. Melt the lard in the oven on top of the vegetables and then stir to fully coat the vegetables with the melted lard. If you do not have enough lard to fully coat your vegetables, add more! Season with salt.

Roast the coated vegetables uncovered in the oven for about an hour. The vegetables are done when they are softened and slightly browned. Set them aside to cool. 

You can make your own chicken stock to use in this recipe for creamy garlic chicken soup. It’s a GAPS legal soup but is also great for Paleo or Whole 30 diets since it’s made with real food. It gets it’s creaminess from a medley of blended vegetable…

About ten minutes before the stock is done, add in ½ bunch of parsley for an added dose of Vitamin C and magnesium. 

Strain your stock but keep the joint meats, skin and everything else to blend into this creamy garlic chicken soup. It’s delicious, full of fat, hearty and made with real food so it’s perfect for the GAPS Diet, Whole 30, Weston A Price or Paleo. Rec…

Once the stock is done, strain the stock and set the cooked meat aside to cool. 

Once the roasted vegetables have cooled, peel the garlic paper off. Wait until the garlic is cooled - if you are impatient and peel it too early, it will burn your hands.

Add the roasted vegetables to a large pot. Add 12 cups of stock to the pot. 

This creamy garlic chicken soup uses a whole chicken. Set aside the bones and meat from your stock but blend everything else into the soup base to create a creamy soup that can’t be beat! It’s great for the GAPS Diet, Weston A Price, Whole 30 or Pal…

Once your meat is cooled, remove it from the bone. Separate the joint cartilage and skin from the meat. In the above photo, the top left is the bones, the bottom plate is the meat and the plate on the right has everything else that will be added into the stock and blended.

Roasted cauliflower, zucchini, yellow squash and garlic get blended with chicken skins to create a creamy base that keeps this creamy garlic chicken soup dairy free but still delicious! Recipe for GAPS Diet, Whole 30, Weston A Price or Paleo by Amy …

Add the skin, cartilage and other non-meat bits (no bones) to the pot. 

Immersion blend everything together until it is well blended and the vegetables are in small pieces.

Add shredded chicken to a base of roasted vegetables and blended chicken skins for a creamy, dreamy soup. Creamy Garlic Chicken Soup recipe for the GAPS Diet, Whole 30, Weston A Price or Paleo by Amy Mihaly, Certified GAPS Practitioner in Colorado.

Add the meat from your chicken into the blended stock. Add 1 tbsp of salt.

Cook for 15-20 minutes to blend the flavors.

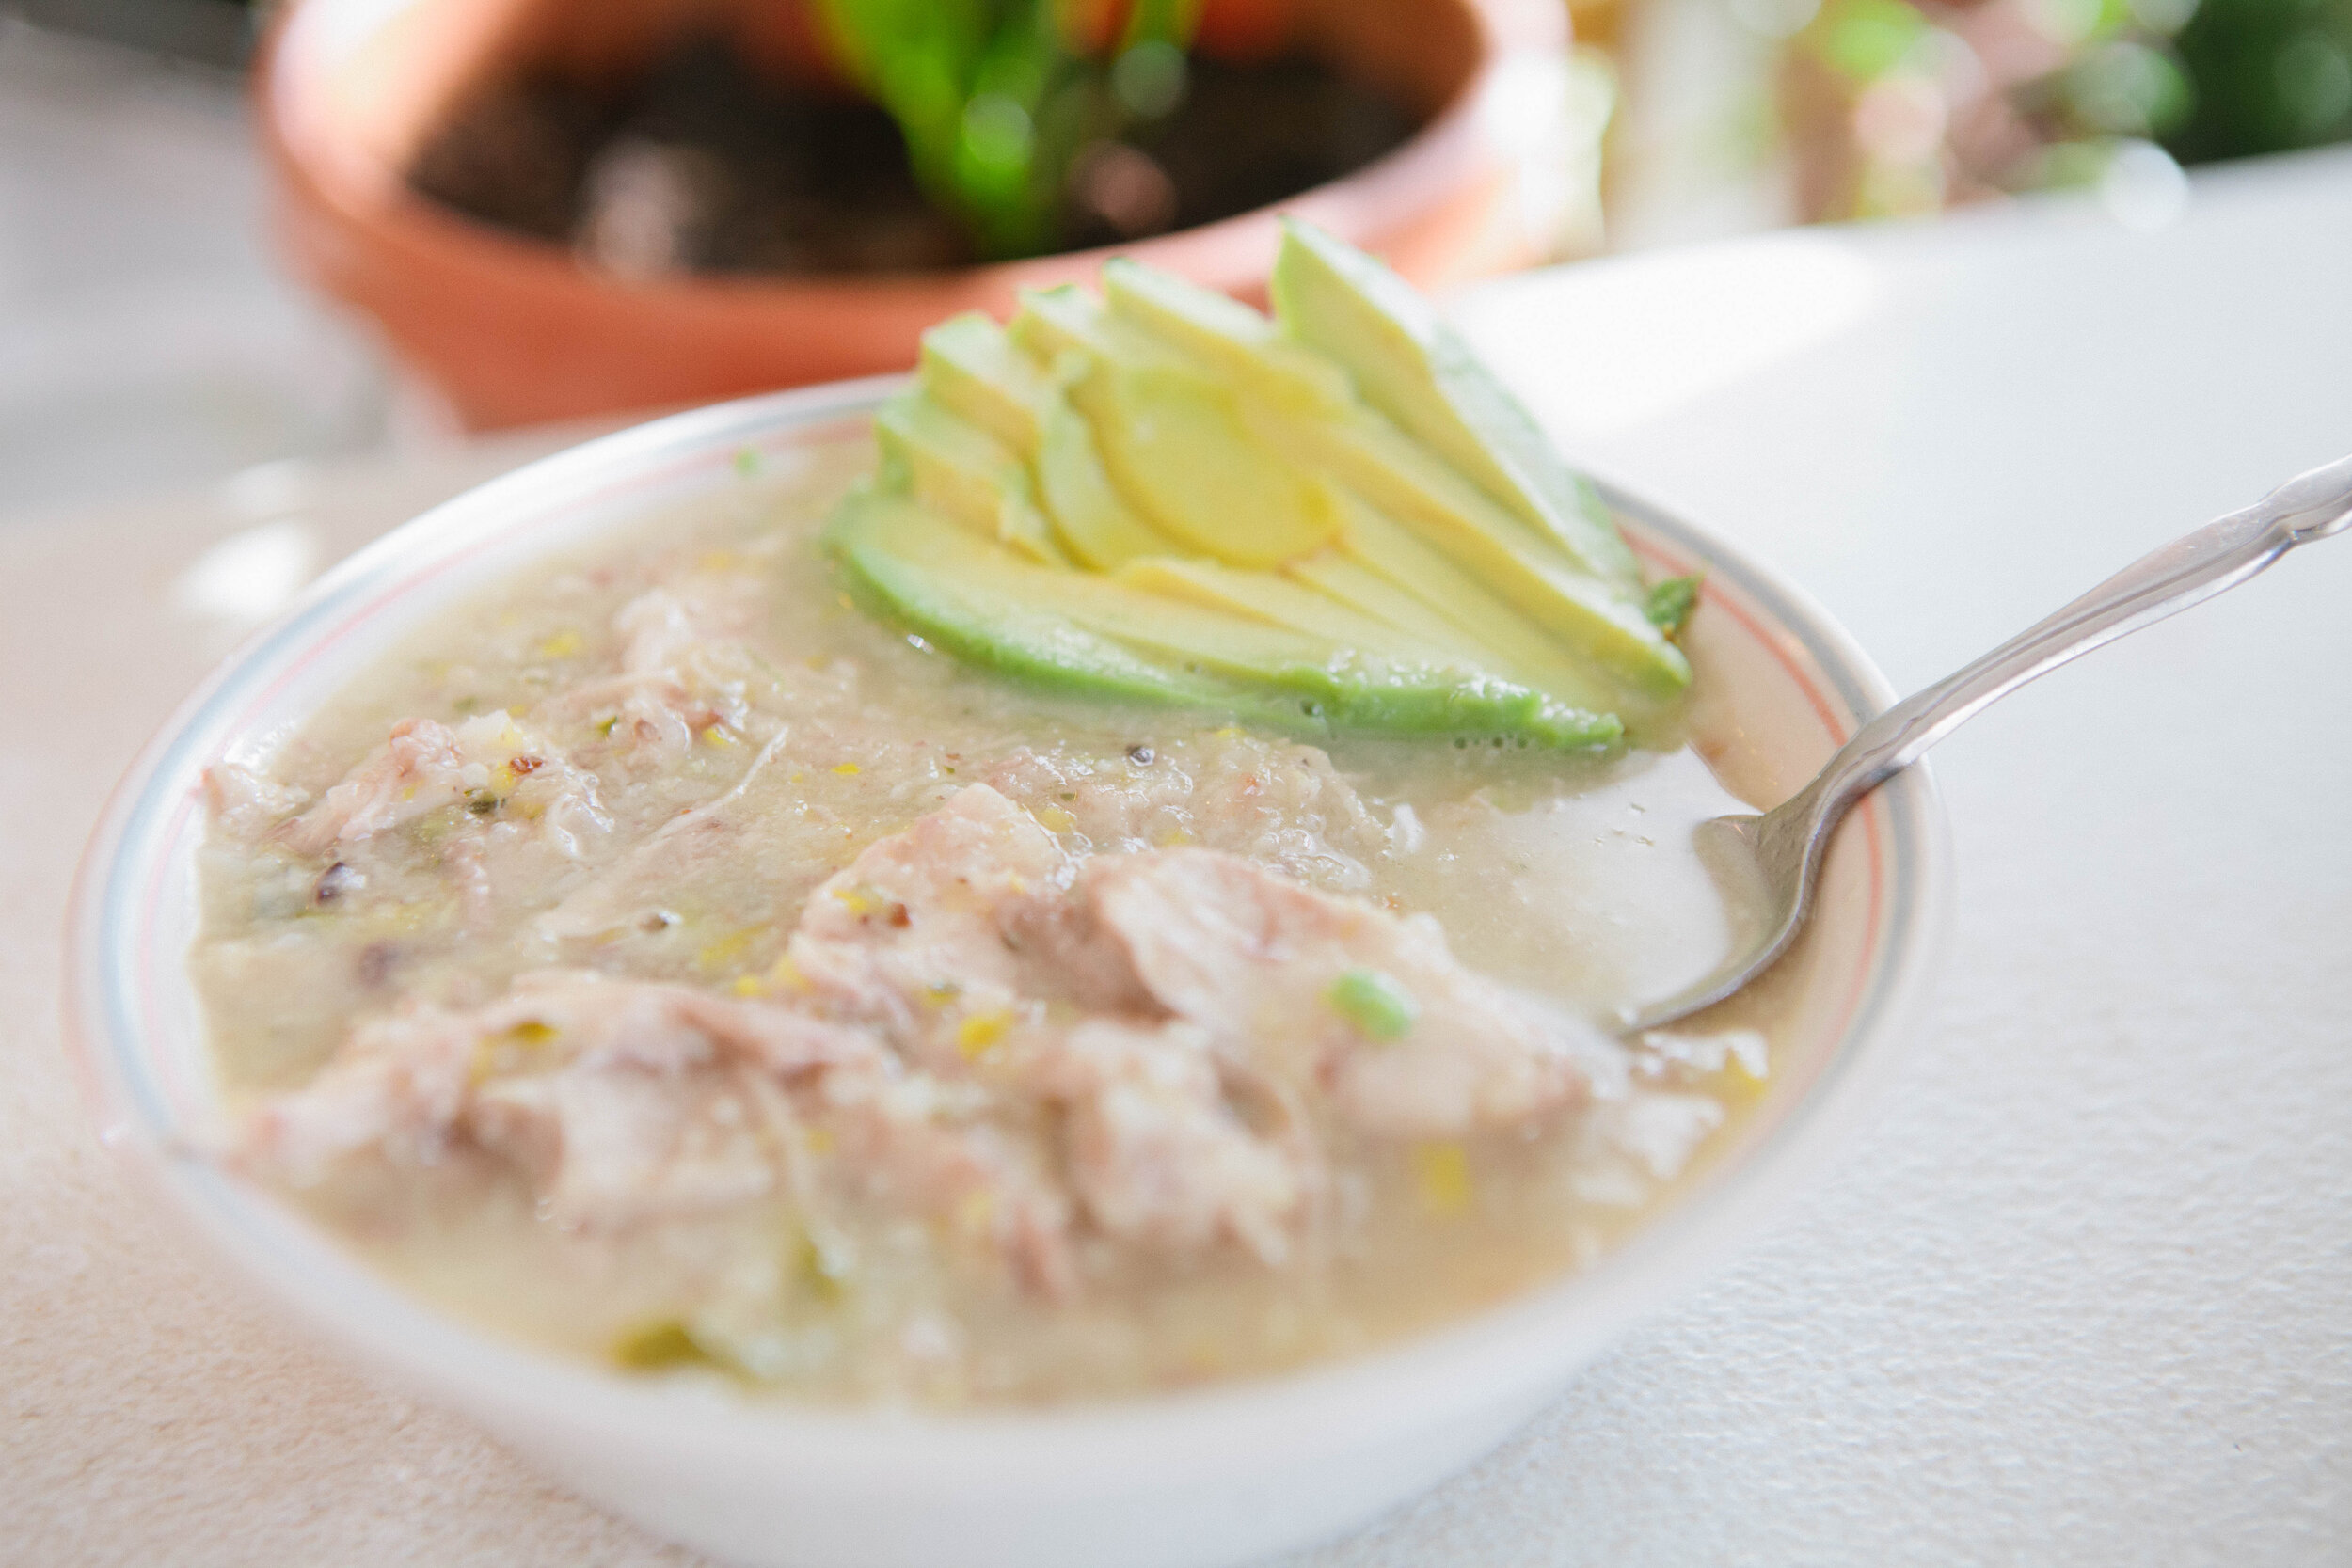
This soup is a dream! Creamy Garlic Chicken soup is made with a blend of cauliflower, zucchini, yellow squash and garlic. It’s legal for the GAPS Diet, Whole30, Weston A Price and Paleo diets because it’s made with simple, real food. Recipe by Amy M…

Enjoy! I topped mine with sliced avocado. However, this does make it legal on GAPS Stage 3.


Creamy Garlic Chicken Soup

Author:
prep time: cook time: total time:

ingredients:

  • 1 Chicken
  • 1 Zucchini (Courgettes)
  • 1 Yellow Squash
  • ½ Large Head of Cauliflower or 1 Small Cauliflower
  • 1-2 Heads of Garlic, Cloves separated but still in their paper
  • 3-4 tbsp Lard
  • 1 tbsp Salt
  • ½ Bunch Parsley

instructions:

How to cook Creamy Garlic Chicken Soup

  1. Start a chicken stock on the stove.
  2. Cut the vegetables into even size pieces for even roasting. For the cauliflower, you can remove or keep however much of the fibrous material (stems), depending on how much you are tolerating. Start the oven preheating to 400 degrees.
  3. Add the squash, zucchini, cauliflower and garlic to a baking dish with the lard. Melt the lard in the oven on top of the vegetables and then stir to fully coat the vegetables with the melted lard. If you do not have enough lard to fully coat your vegetables, add more! Season with salt.
  4. Roast the coated vegetables uncovered in the oven for about an hour. The vegetables are done when they are softened and slightly browned. Set them aside to cool.
  5. About ten minutes before the stock is done, add in ½ bunch of parsley for an added dose of Vitamin C and magnesium.
  6. Once the stock is done, strain the stock and set the cooked meat aside to cool.
  7. Once the roasted vegetables have cooled, peel the garlic paper off. Wait until the garlic is cooled - if you are impatient and peel it too early, it will burn your hands.
  8. Add the roasted vegetables to a large pot. Add 12 cups of stock to the pot.
  9. Once your meat is cooled, remove it from the bone. Separate the joint cartilage and skin from the meat. Add the skin, cartilage and other non-meat bits (no bones) to the pot.
  10. Immersion blend everything together until it is well blended and the vegetables are in small pieces.
  11. Add the meat from your chicken into the blended stock. Add 1 tbsp of salt.
  12. Cook for 15-20 minutes to blend the flavors.
  13. Enjoy! I topped mine with sliced avocado. However, this does make it legal on GAPS Stage 3.
Created using The Recipes Generator
This soup is a dream! Creamy Garlic Chicken soup is made with a blend of cauliflower, zucchini, yellow squash and garlic. It’s legal for the GAPS Diet, Whole30, Weston A Price and Paleo diets because it’s made with simple, real food. Recipe by Amy M…

Egg Free, Dairy Free Liver Meatballs

Liver is an amazing superfood! It contains lots of vitamins and minerals, including zinc, iron, B vitamins, A vitamins, and folate. In our modern world, all of our livers are well taxed because of our exposure to chemicals. Anytime we know we need to support a particular organ, one of the best ways to do that is to consume the organ meat of the organ you’re trying to support.

You can spice your meatballs with anything you want but think of strong flavors. You want to neutralize the flavor of the liver.  You can also add any additional vegetables that you know your family likes. If you add additional vegetables like zucchini, eggplant or peppers and are finding the consistency of the meatball mixture to not be very sticky, you may want to add an egg to help bind everything together. Otherwise, these meatballs are egg free and dairy free!

This is a recipe that I recommend to a lot of moms! It’s a great way to help your kids eat a little bit of liver every day, which is the best way to eat liver. This recipe makes a lot of meatballs so you can freeze them and take out a few at a time to have for lunch or dinner.

Makes 27-30 Meatballs

Ingredients for Liver Meatballs:

  • 2 lb ground beef

  • ½ lb beef liver

  • 2 carrots, about 1 cup grated

  • ⅓ large white onion, about ⅔ a cup grated

  • 6 large cloves of Garlic

  • Oregano, 1 bunch Fresh or 1 tbsp Dried

  • Basil, 1 bunch Fresh or 1 tbsp Dried

  • ¼ - ½ tsp Pepper

  • 2 tsp Salt

  • 1 tbsp lard

Directions for Liver Meatballs:

IMG_6158.jpg

For milder tasting liver, soak it in some kind of acid. Cover the liver in filtered water and then add the juice of one lemon or 1-2 tablespoons of apple cider vinegar. Leave to soak for 30 minutes. Be sure not to soak it for too long. The acid will break down the liver and start it “cooking” prematurely.

Preheat your oven to 375.

IMG_6175.jpg

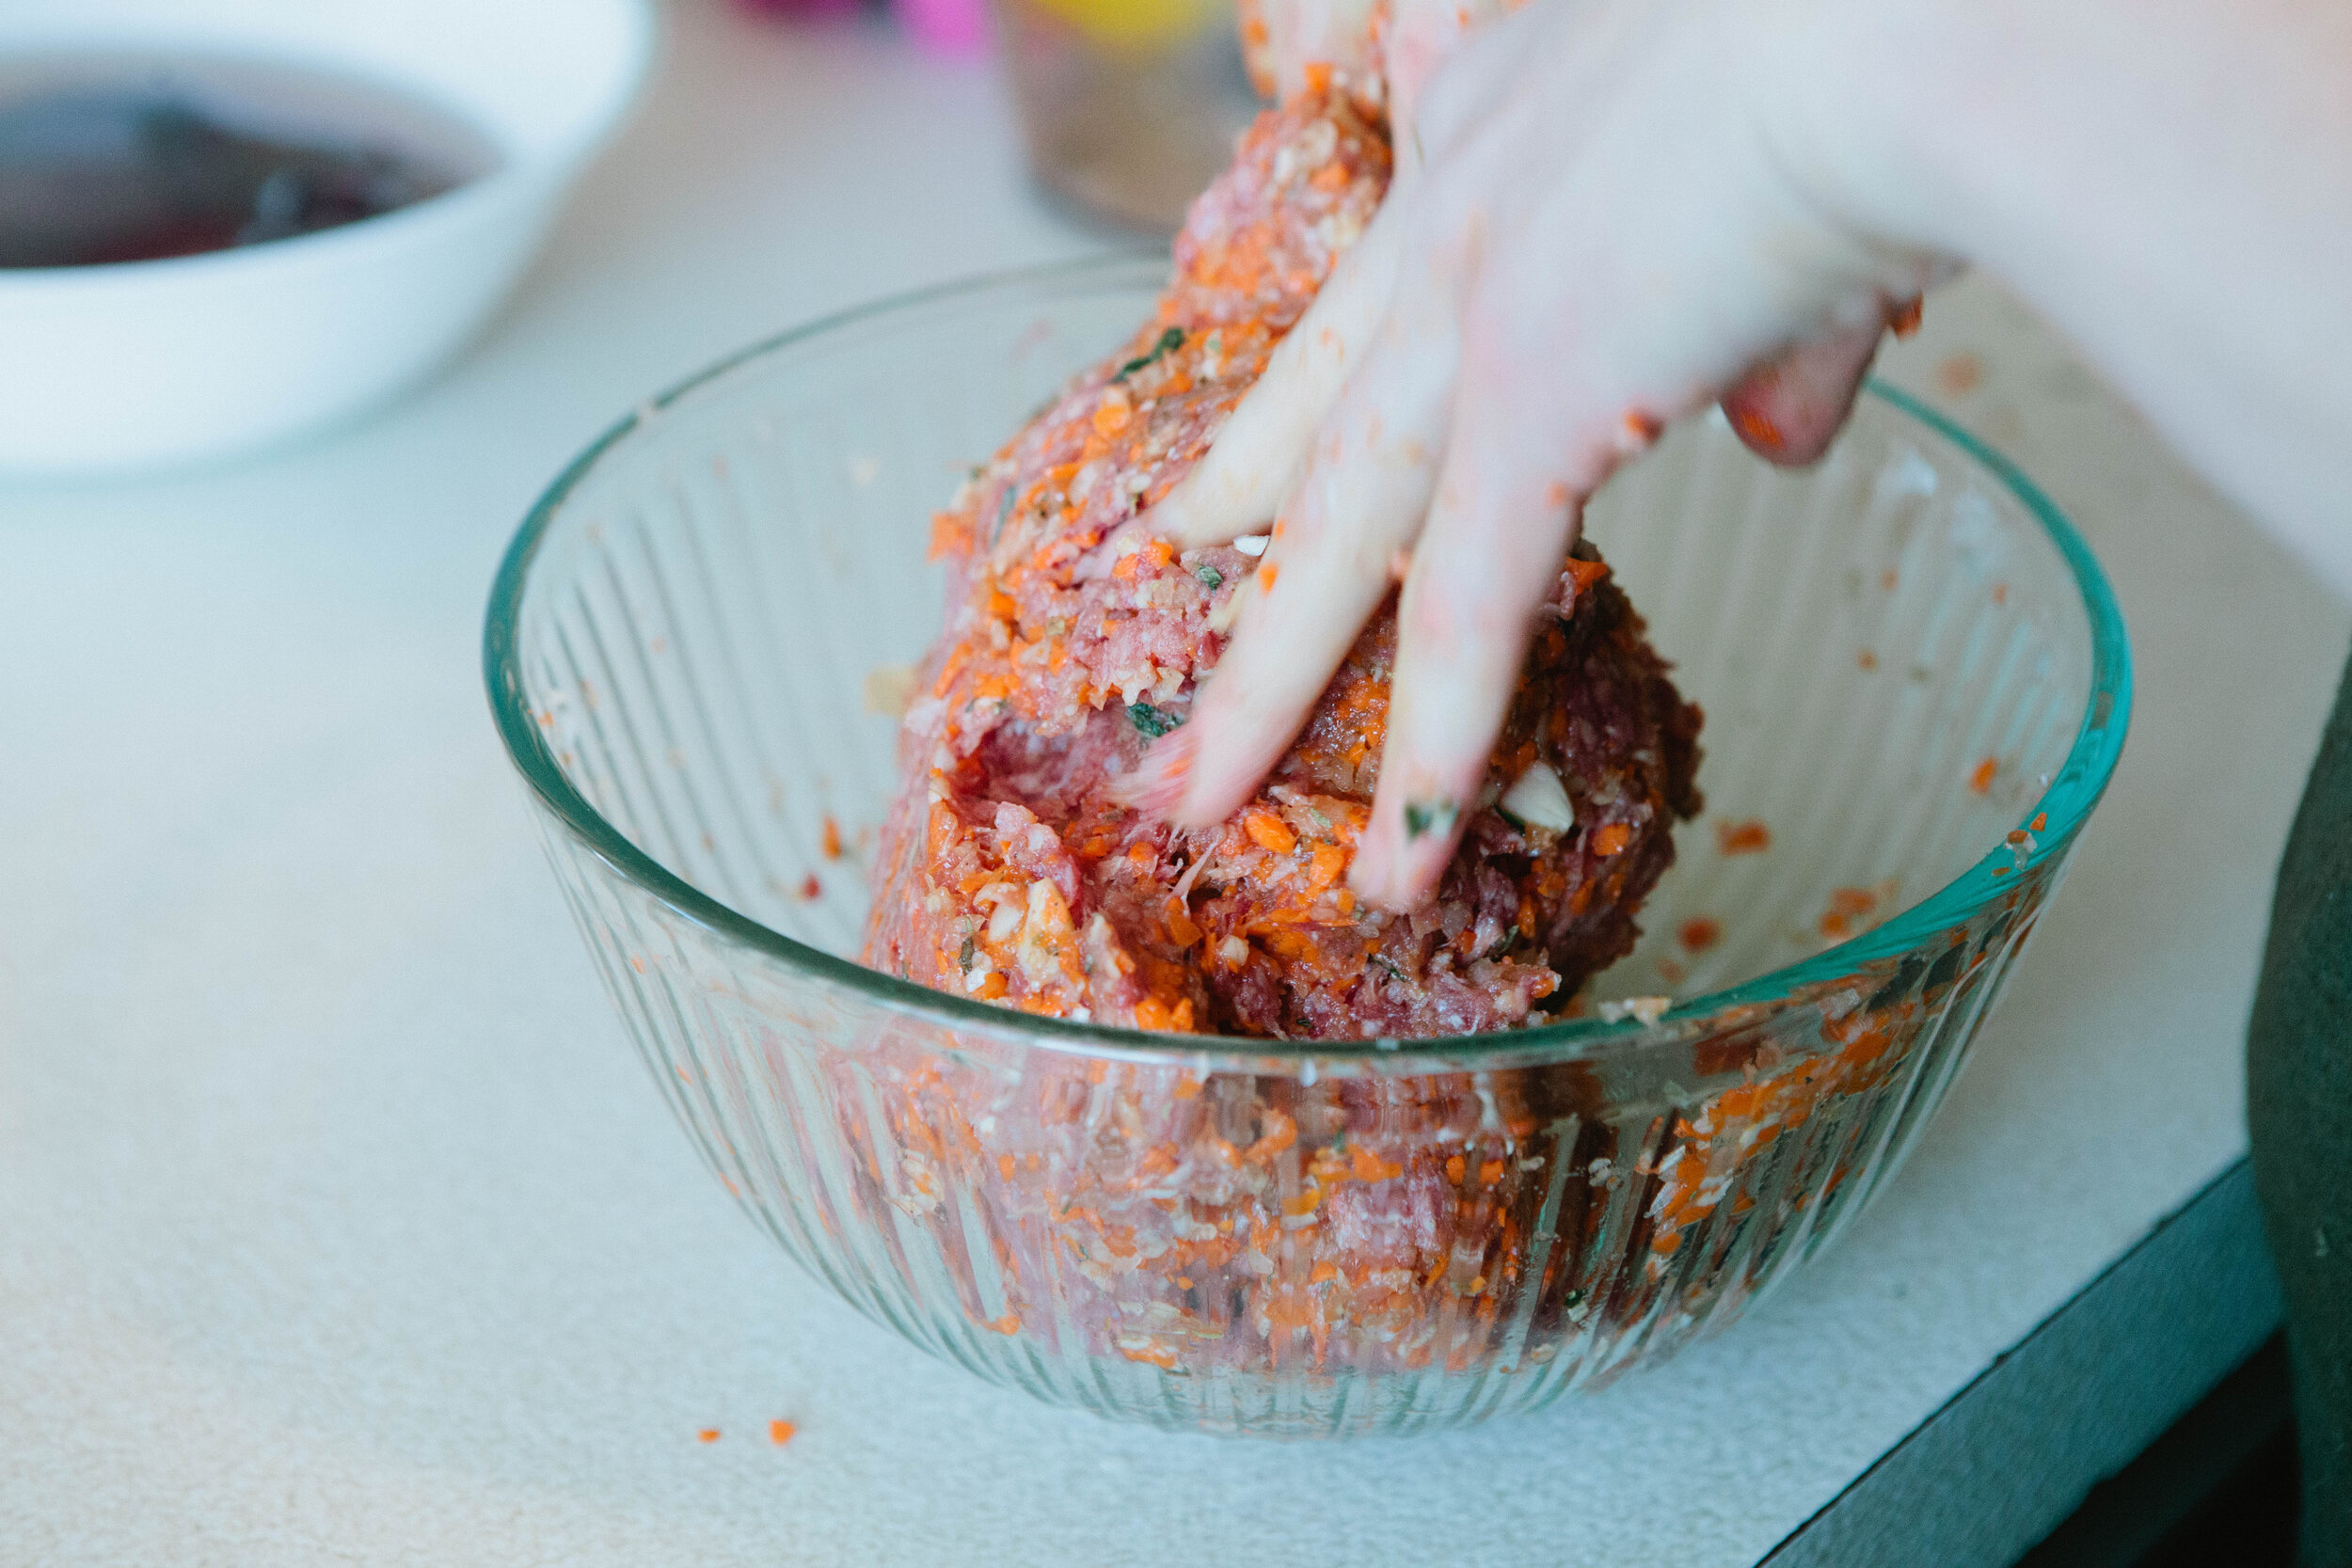
Grate your carrot, onion and garlic into very fine pieces. Add to a large bowl with ground beef. Add in oregano, basil and salt and pepper. Mix with your hands. 

IMG_6189.jpg

Place your liver into a food processor once it has soaked. Pulse until smooth. Add to the bowl with the beef, vegetables and spices and mix again.

IMG_6214.jpg

Spread lard onto the bottom of a glass oven safe casserole dish. 

IMG_6224.jpg

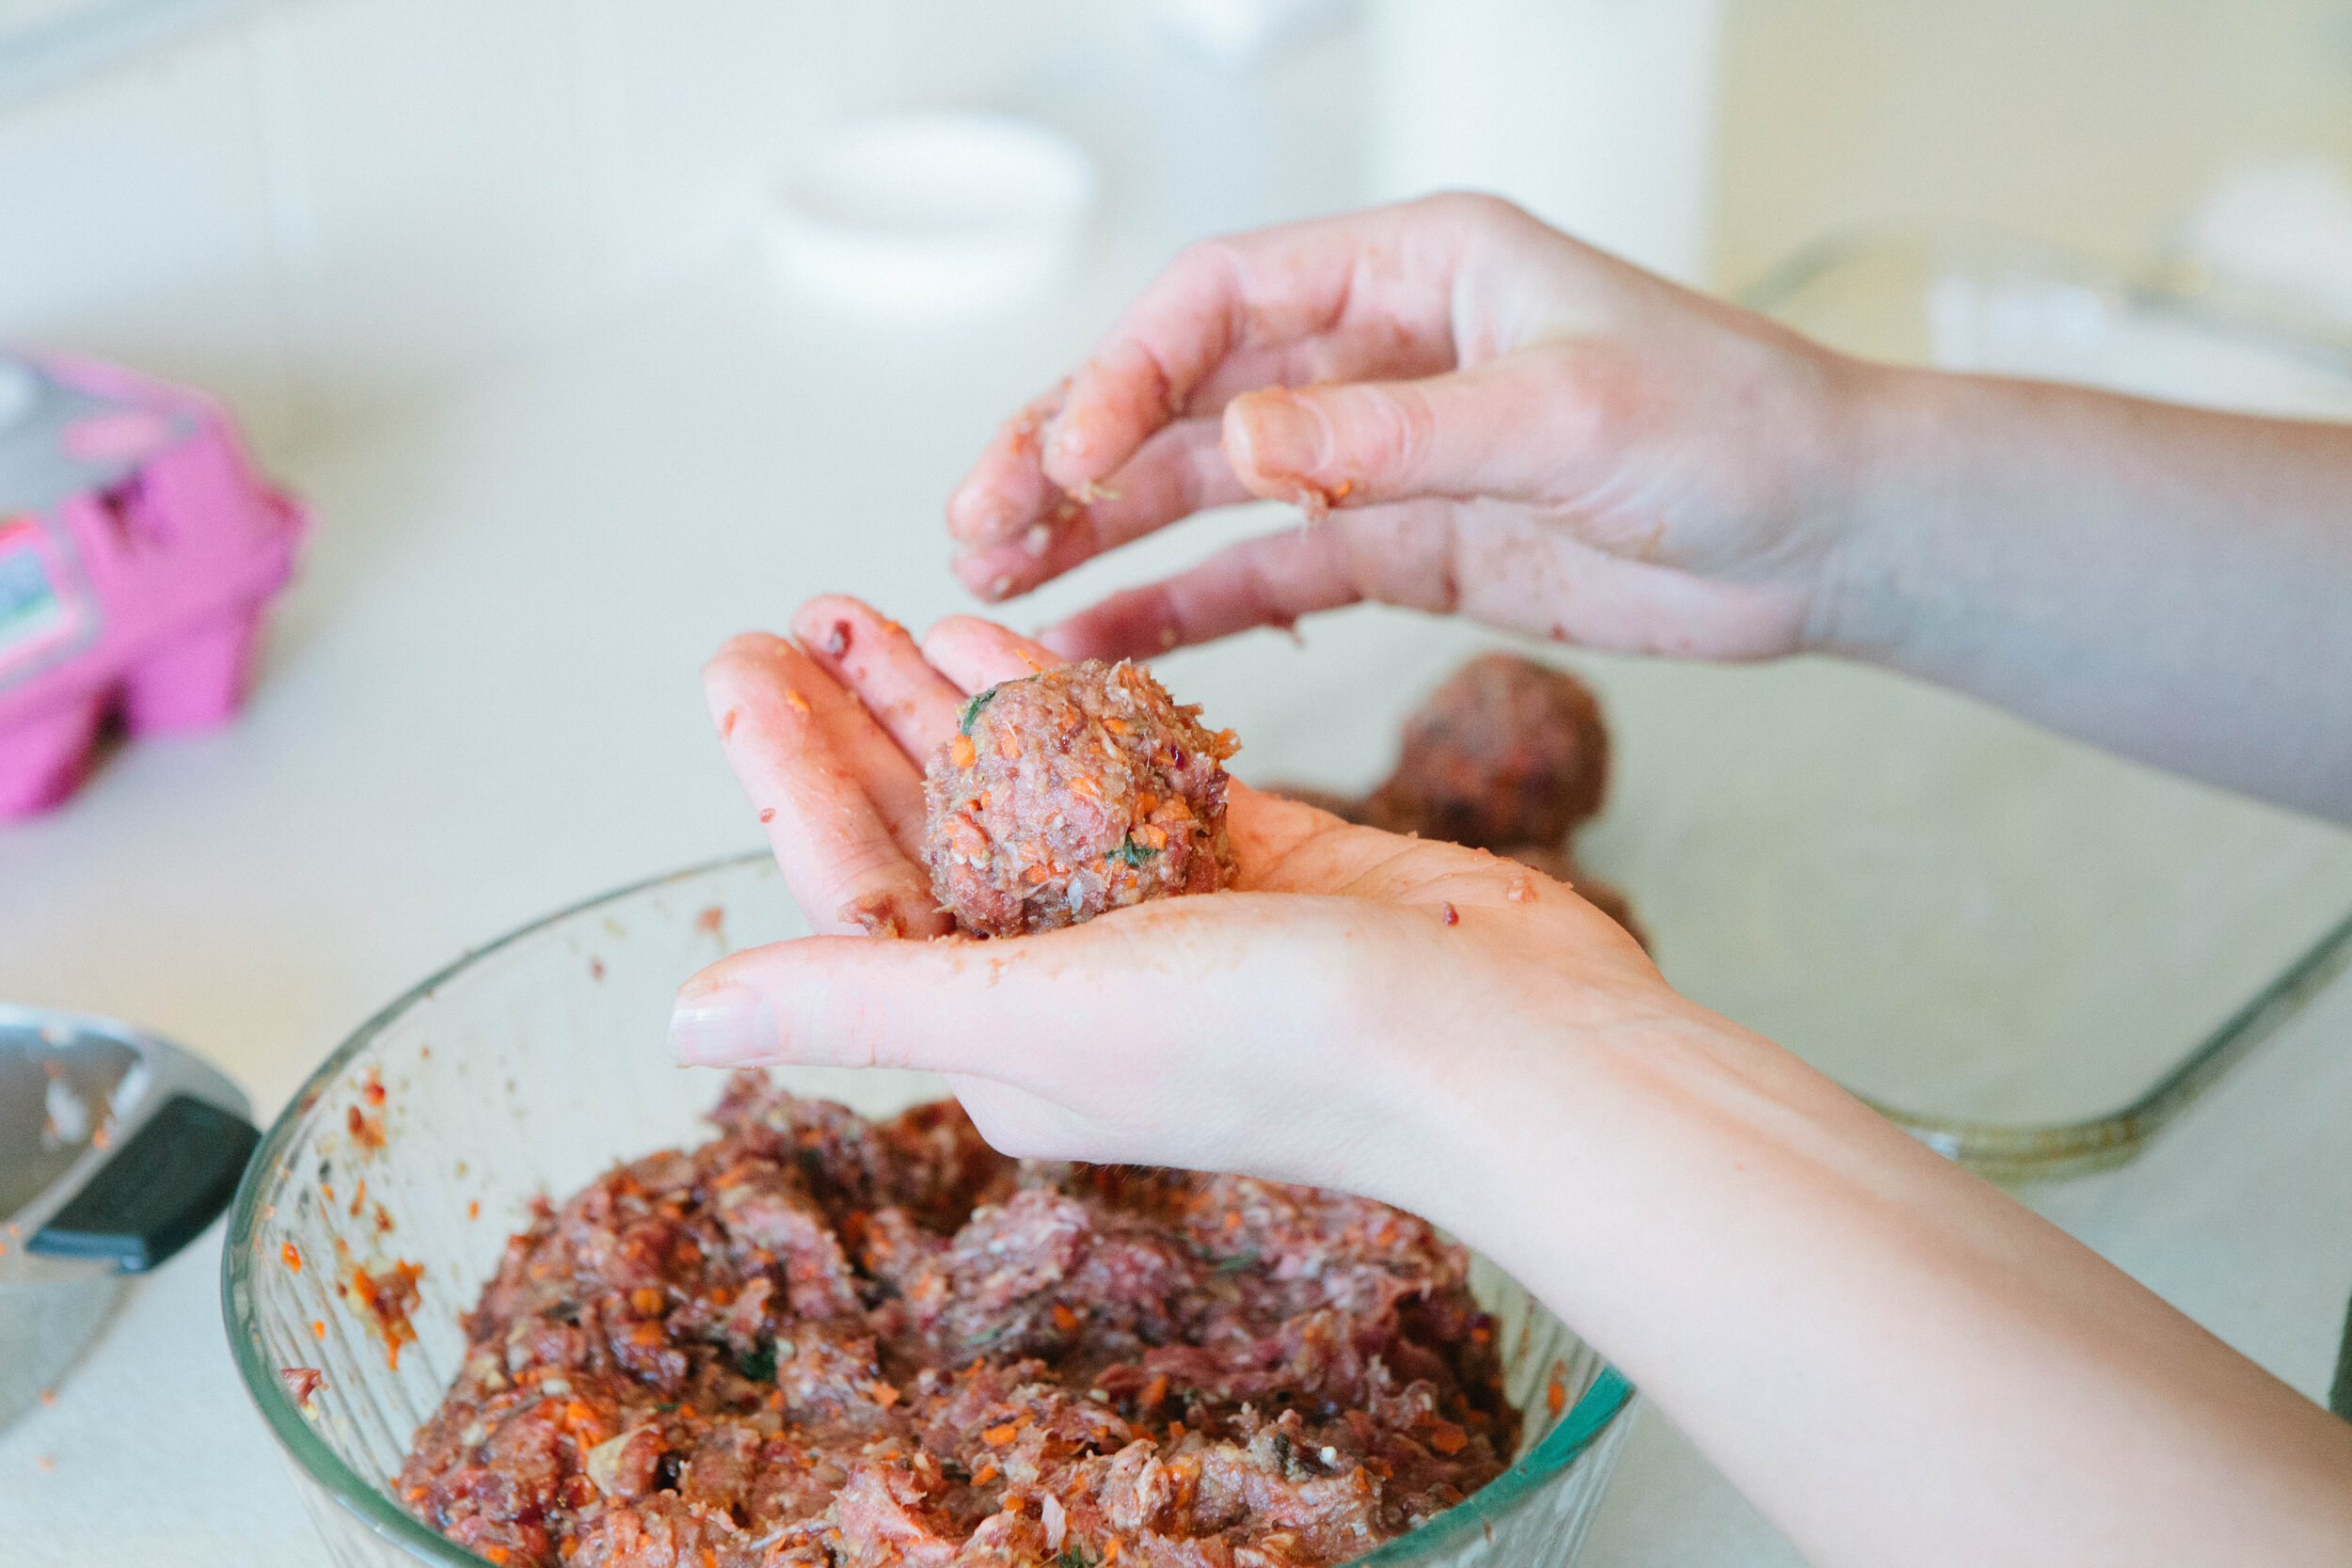
Take a small handful of meat at a time and roll into a meatball. Continue to roll meatballs until you have filled your casserole dish. Keep consistency in the size and shape of your meatballs to ensure even cooking time.

IMG_6229.jpg

Line meatballs, leaving some space between them.

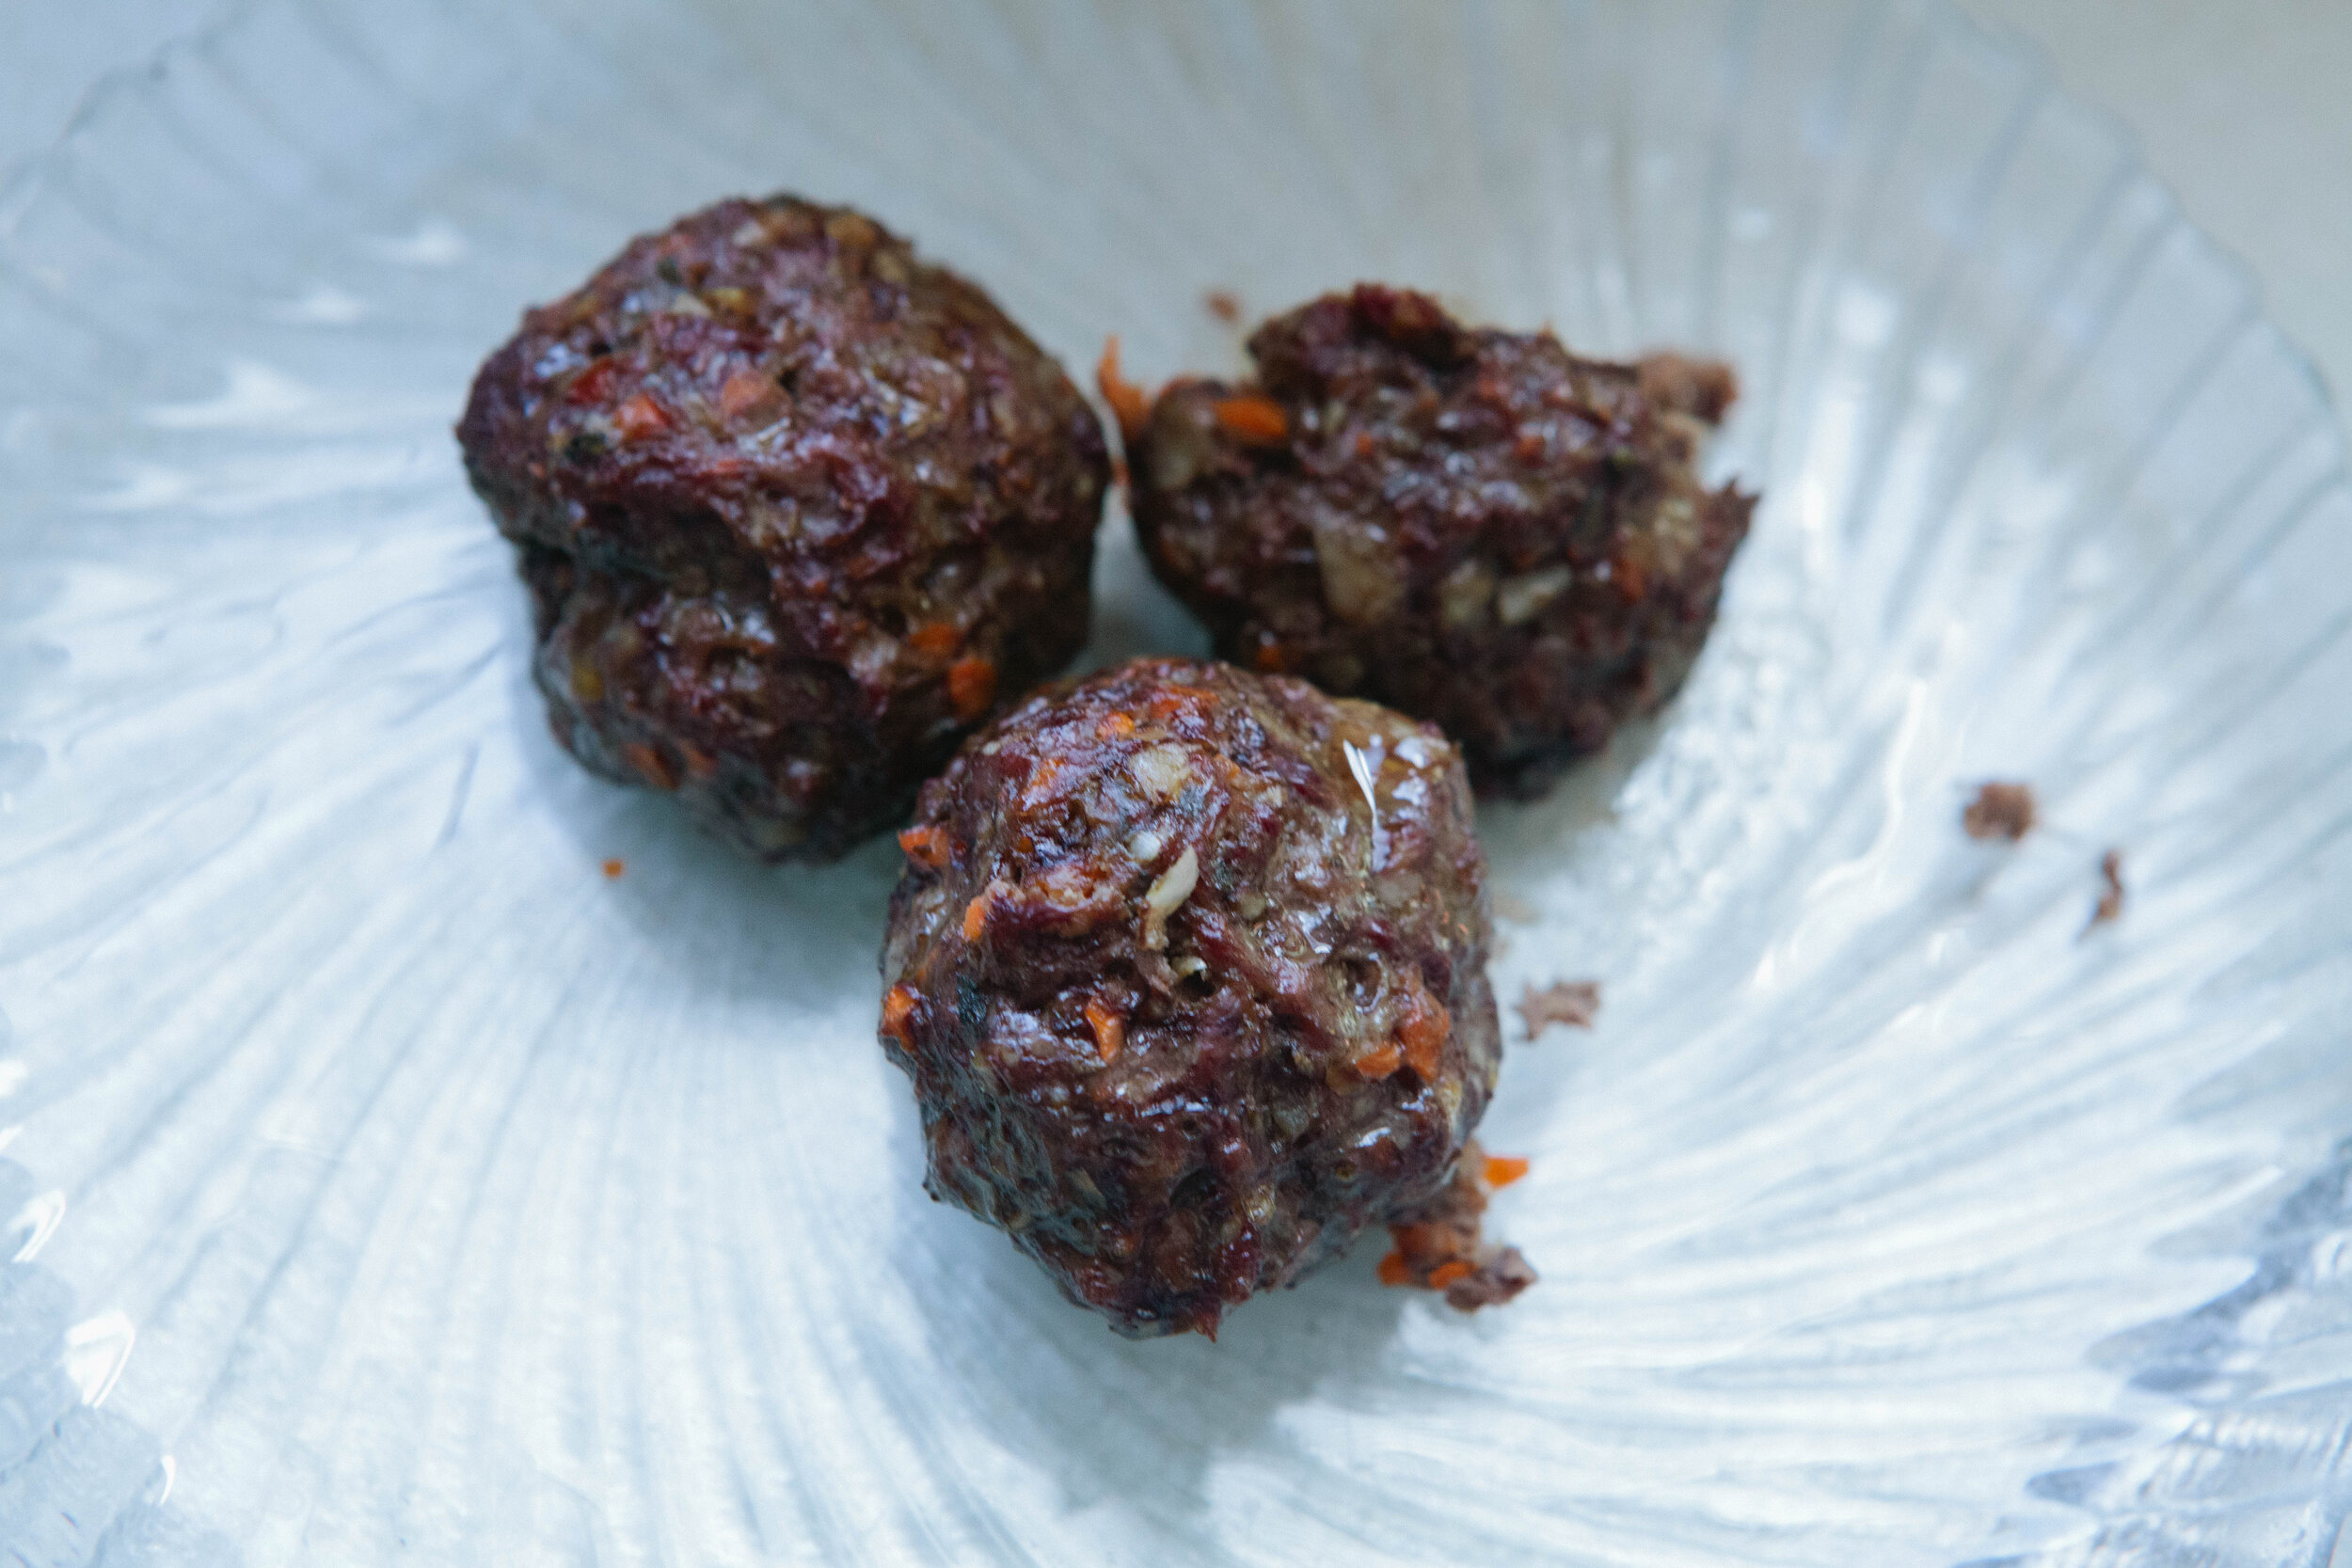
Bake for 45 minutes.

IMG_6353.jpg

Enjoy with spaghetti squash and make your own spaghetti sauce for a spaghetti night. Or enjoy with any variety of vegetables like brussels sprouts or broccoli!

Egg Free, Dairy Free Liver Meatballs

prep time: cook time: total time:

ingredients:

  • 2 lb ground beef
  • ½ lb beef liver
  • 2 carrots, about 1 cup grated
  • ⅓ large white onion, about ⅔ a cup grated
  • 6 large cloves of Garlic
  • Oregano, 1 bunch Fresh or 1 tbsp Dried
  • Basil, 1 bunch Fresh or 1 tbsp Dried
  • ¼ - ½ tsp Pepper
  • 2 tsp Salt
  • 1 tbsp lard

instructions:

How to cook Egg Free, Dairy Free Liver Meatballs

  1. For milder tasting liver, soak it in some kind of acid. Cover the liver in filtered water and then add the juice of one lemon or 1-2 tablespoons of apple cider vinegar. Leave to soak for 30 minutes. Be sure not to soak it for too long. The acid will break down the liver and start it “cooking” prematurely.
  2. Preheat your oven to 375.
  3. Grate your carrot, onion and garlic into very fine pieces. Add to a large bowl with ground beef. Add in oregano, basil and salt and pepper. Mix with your hands.
  4. Place your liver into a food processor once it has soaked. Pulse until smooth. Add to the bowl with the beef, vegetables and spices and mix again.
  5. Spread lard onto the bottom of a glass oven safe casserole dish.
  6. Take a small handful of meat at a time and roll into a meatball. Continue to roll meatballs until you have filled your casserole dish. Keep consistency in the size and shape of your meatballs to ensure even cooking time.
  7. Line meatballs, leaving some space between them.
  8. Bake for 45 minutes.
  9. Enjoy with spaghetti squash and make your own spaghetti sauce for a spaghetti night. Or enjoy with any variety of vegetables like brussels sprouts or broccoli!
Created using The Recipes Generator
42.png

How to Properly Prepare Grains

IMG_5198.jpg

How to Properly Prepare White Rice on the GAPS Diet:

On the transition to the GAPS Intro diet, or at any time during the GAPS Intro diet, if you or your practitioner feel that your body is in need of some carbohydrates, this is a simple carbohydrate that many of us relate to. While it’s  not a whole grain, which generally we prefer, the husk of a whole grain can be harder to digest. White rice that’s been soaked is fairly easy to digest and fairly untroublesome for the gut.

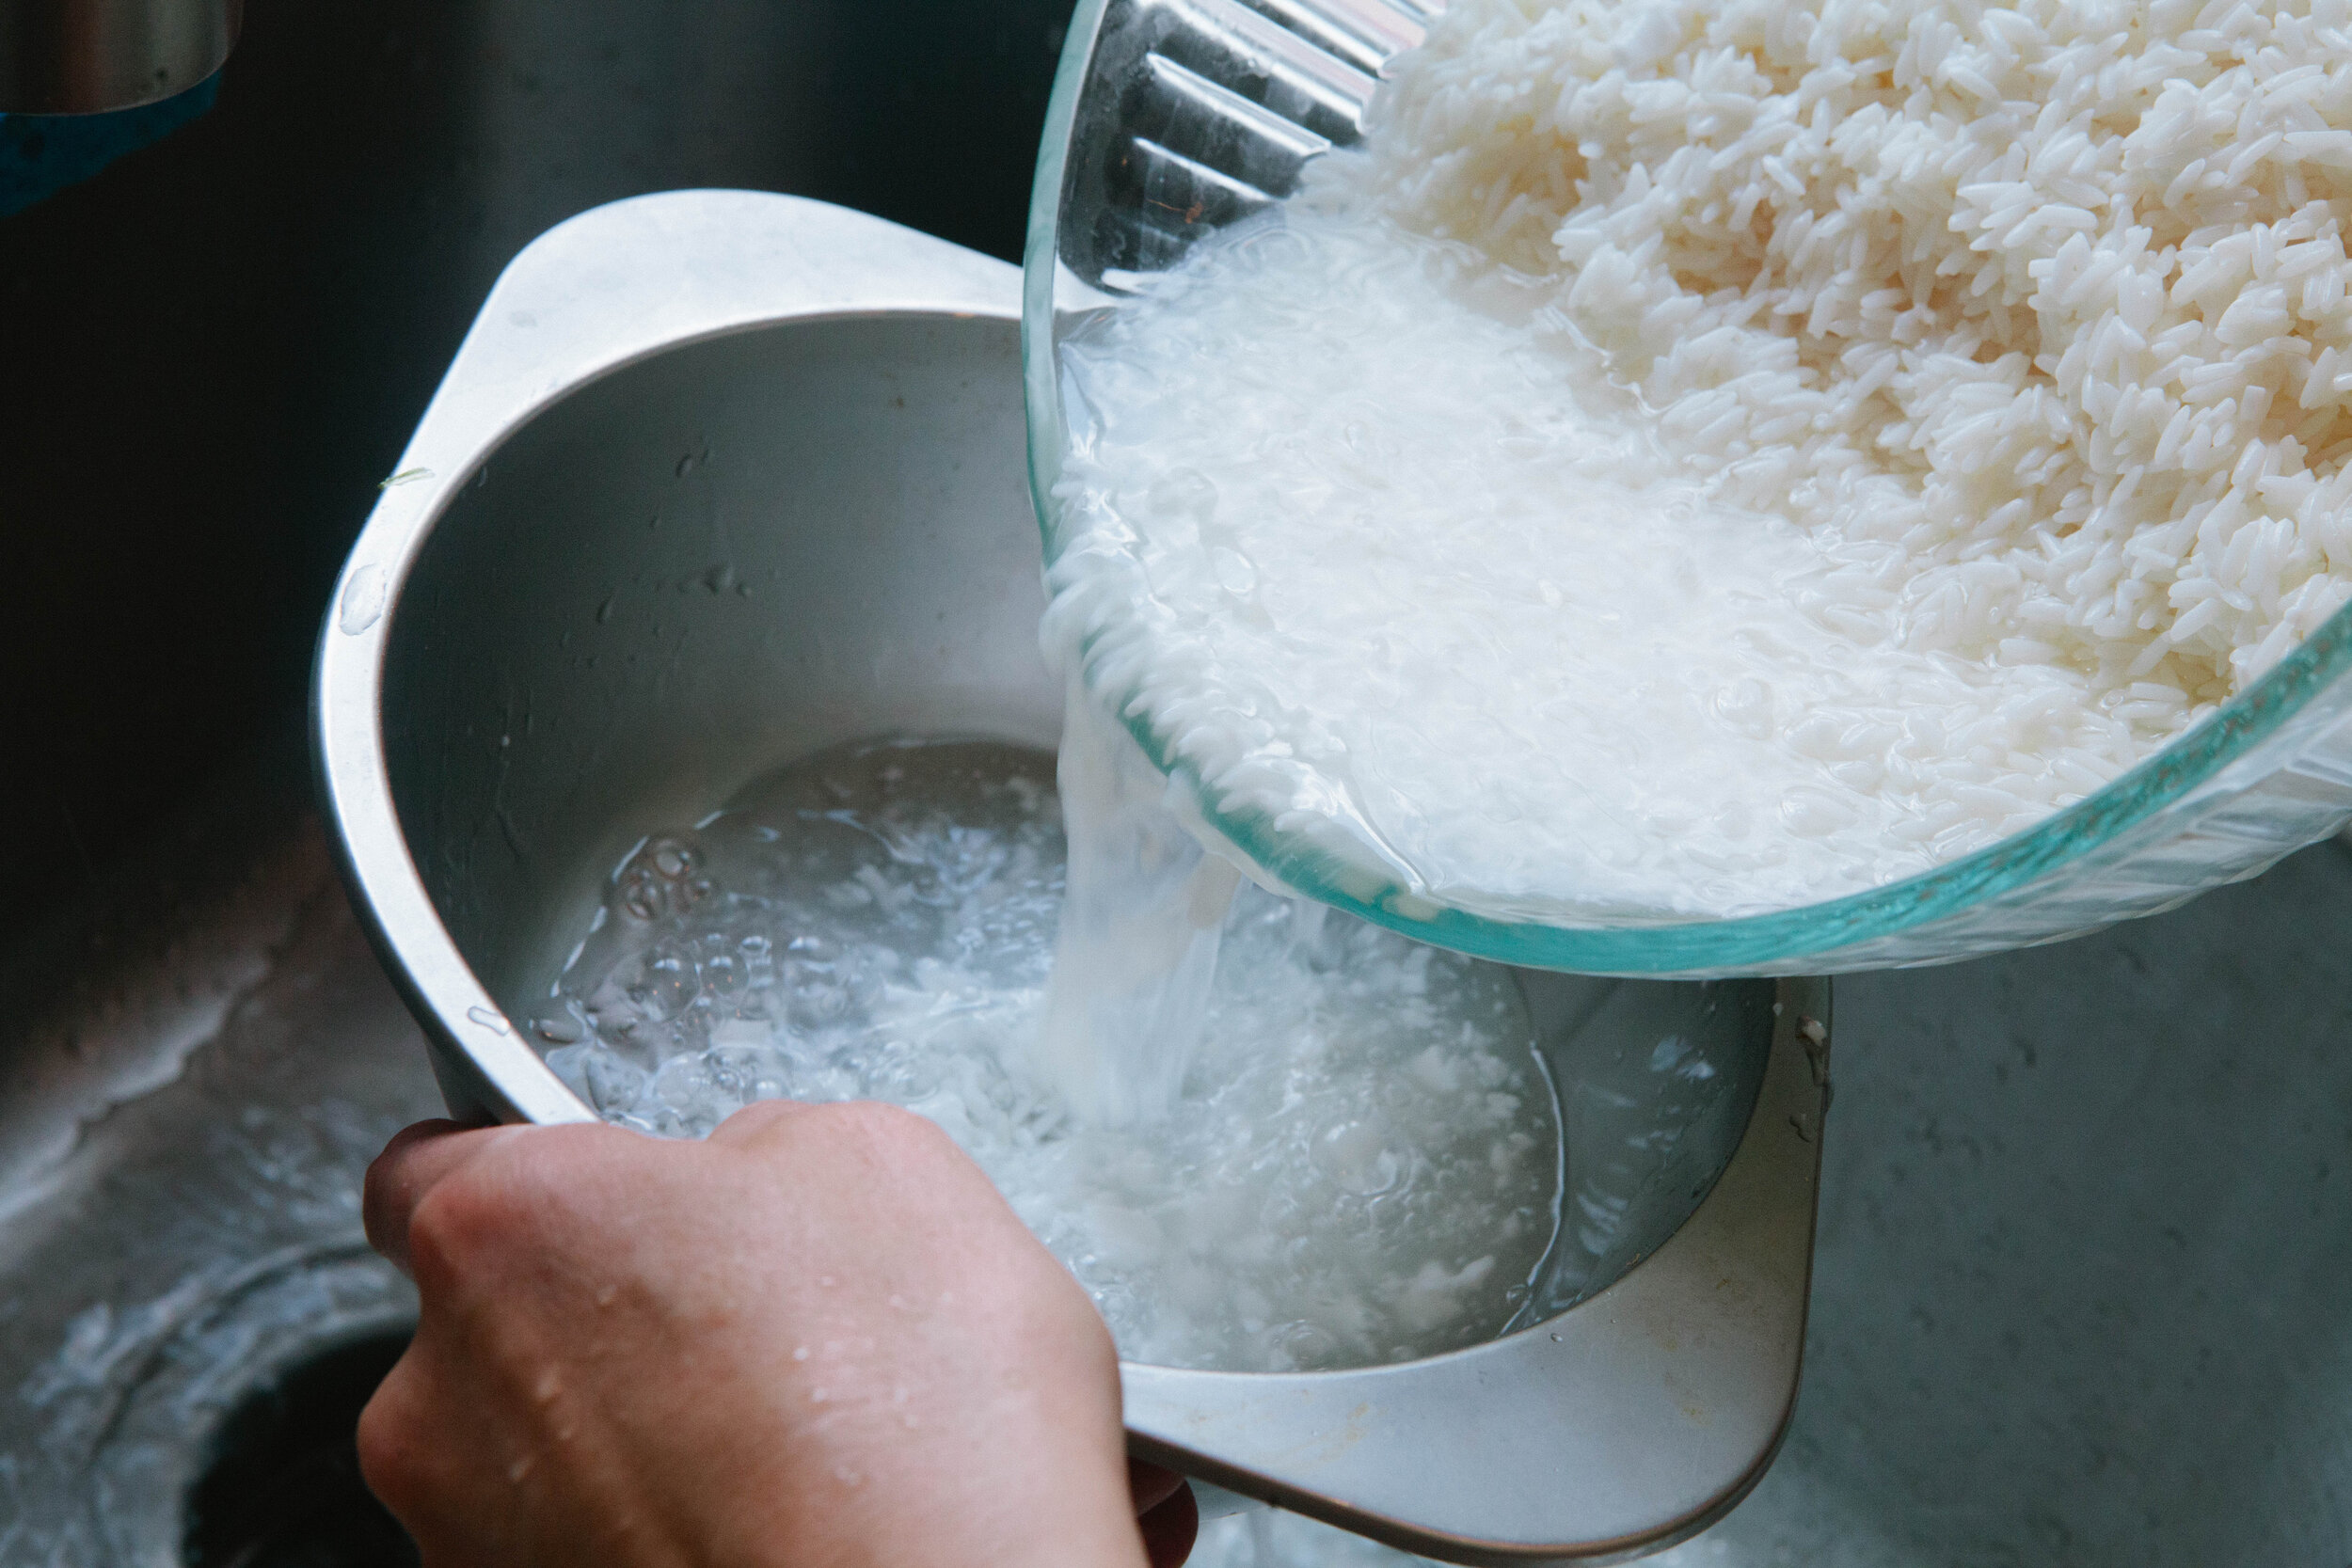
Soak your rice overnight before using it in any recipe. Place in warm filtered water with 4 tbsp of yogurt or whey. Put a lid on the bowl and place on the counter overnight.

How to Properly Prepare Quinoa on the GAPS Diet:

As a non gluten grain, quinoa is one of the first grains we can try in coming off the GAPS Diet. It is a seed so as with all other seeds it should be properly prepared. Quinoa has never been my favorite, but most of the times I have eaten it in the past were before I understood about anti-nutrients. I wonder if quinoa used to give me a stomach ache and that’s why I didn’t care for it. This quinoa can be used as an exact substitution for any other quinoa recipe, including a cold quinoa salad or a quinoa pudding. 

Soak and sprout your quinoa 24 hours in advance. To sprout the quinoa, put the quinoa in filtered water (2 cups of quinoa to 4 cups of water.) Add in 2 tbsp of yogurt or whey. Leave on the counter covered for 24 hours.

IMG_5407.jpg

How to Properly Prepare Wild Rice on the GAPS Diet:

Wild rice is not actually a grain. It’s actually the seed of a marsh growing plant. It’s pretty low in fat so it should be eaten with lots of fat. Because it falls into the seed family, wild rice can be eaten on the GAPS Diet. Of course, you should properly prepare it before eating it. I would serve it in place of white rice in many dishes, like in this fried rice recipe.

At least 7 hours before:

Rinse rice well.

Add 1.5 cups of wild rice to 3 cups of warm filtered water. Add 2-3 tbsp of whey or yogurt to the mix. Let sit in a warm place for at least seven hours.

When You’re Ready to Cook

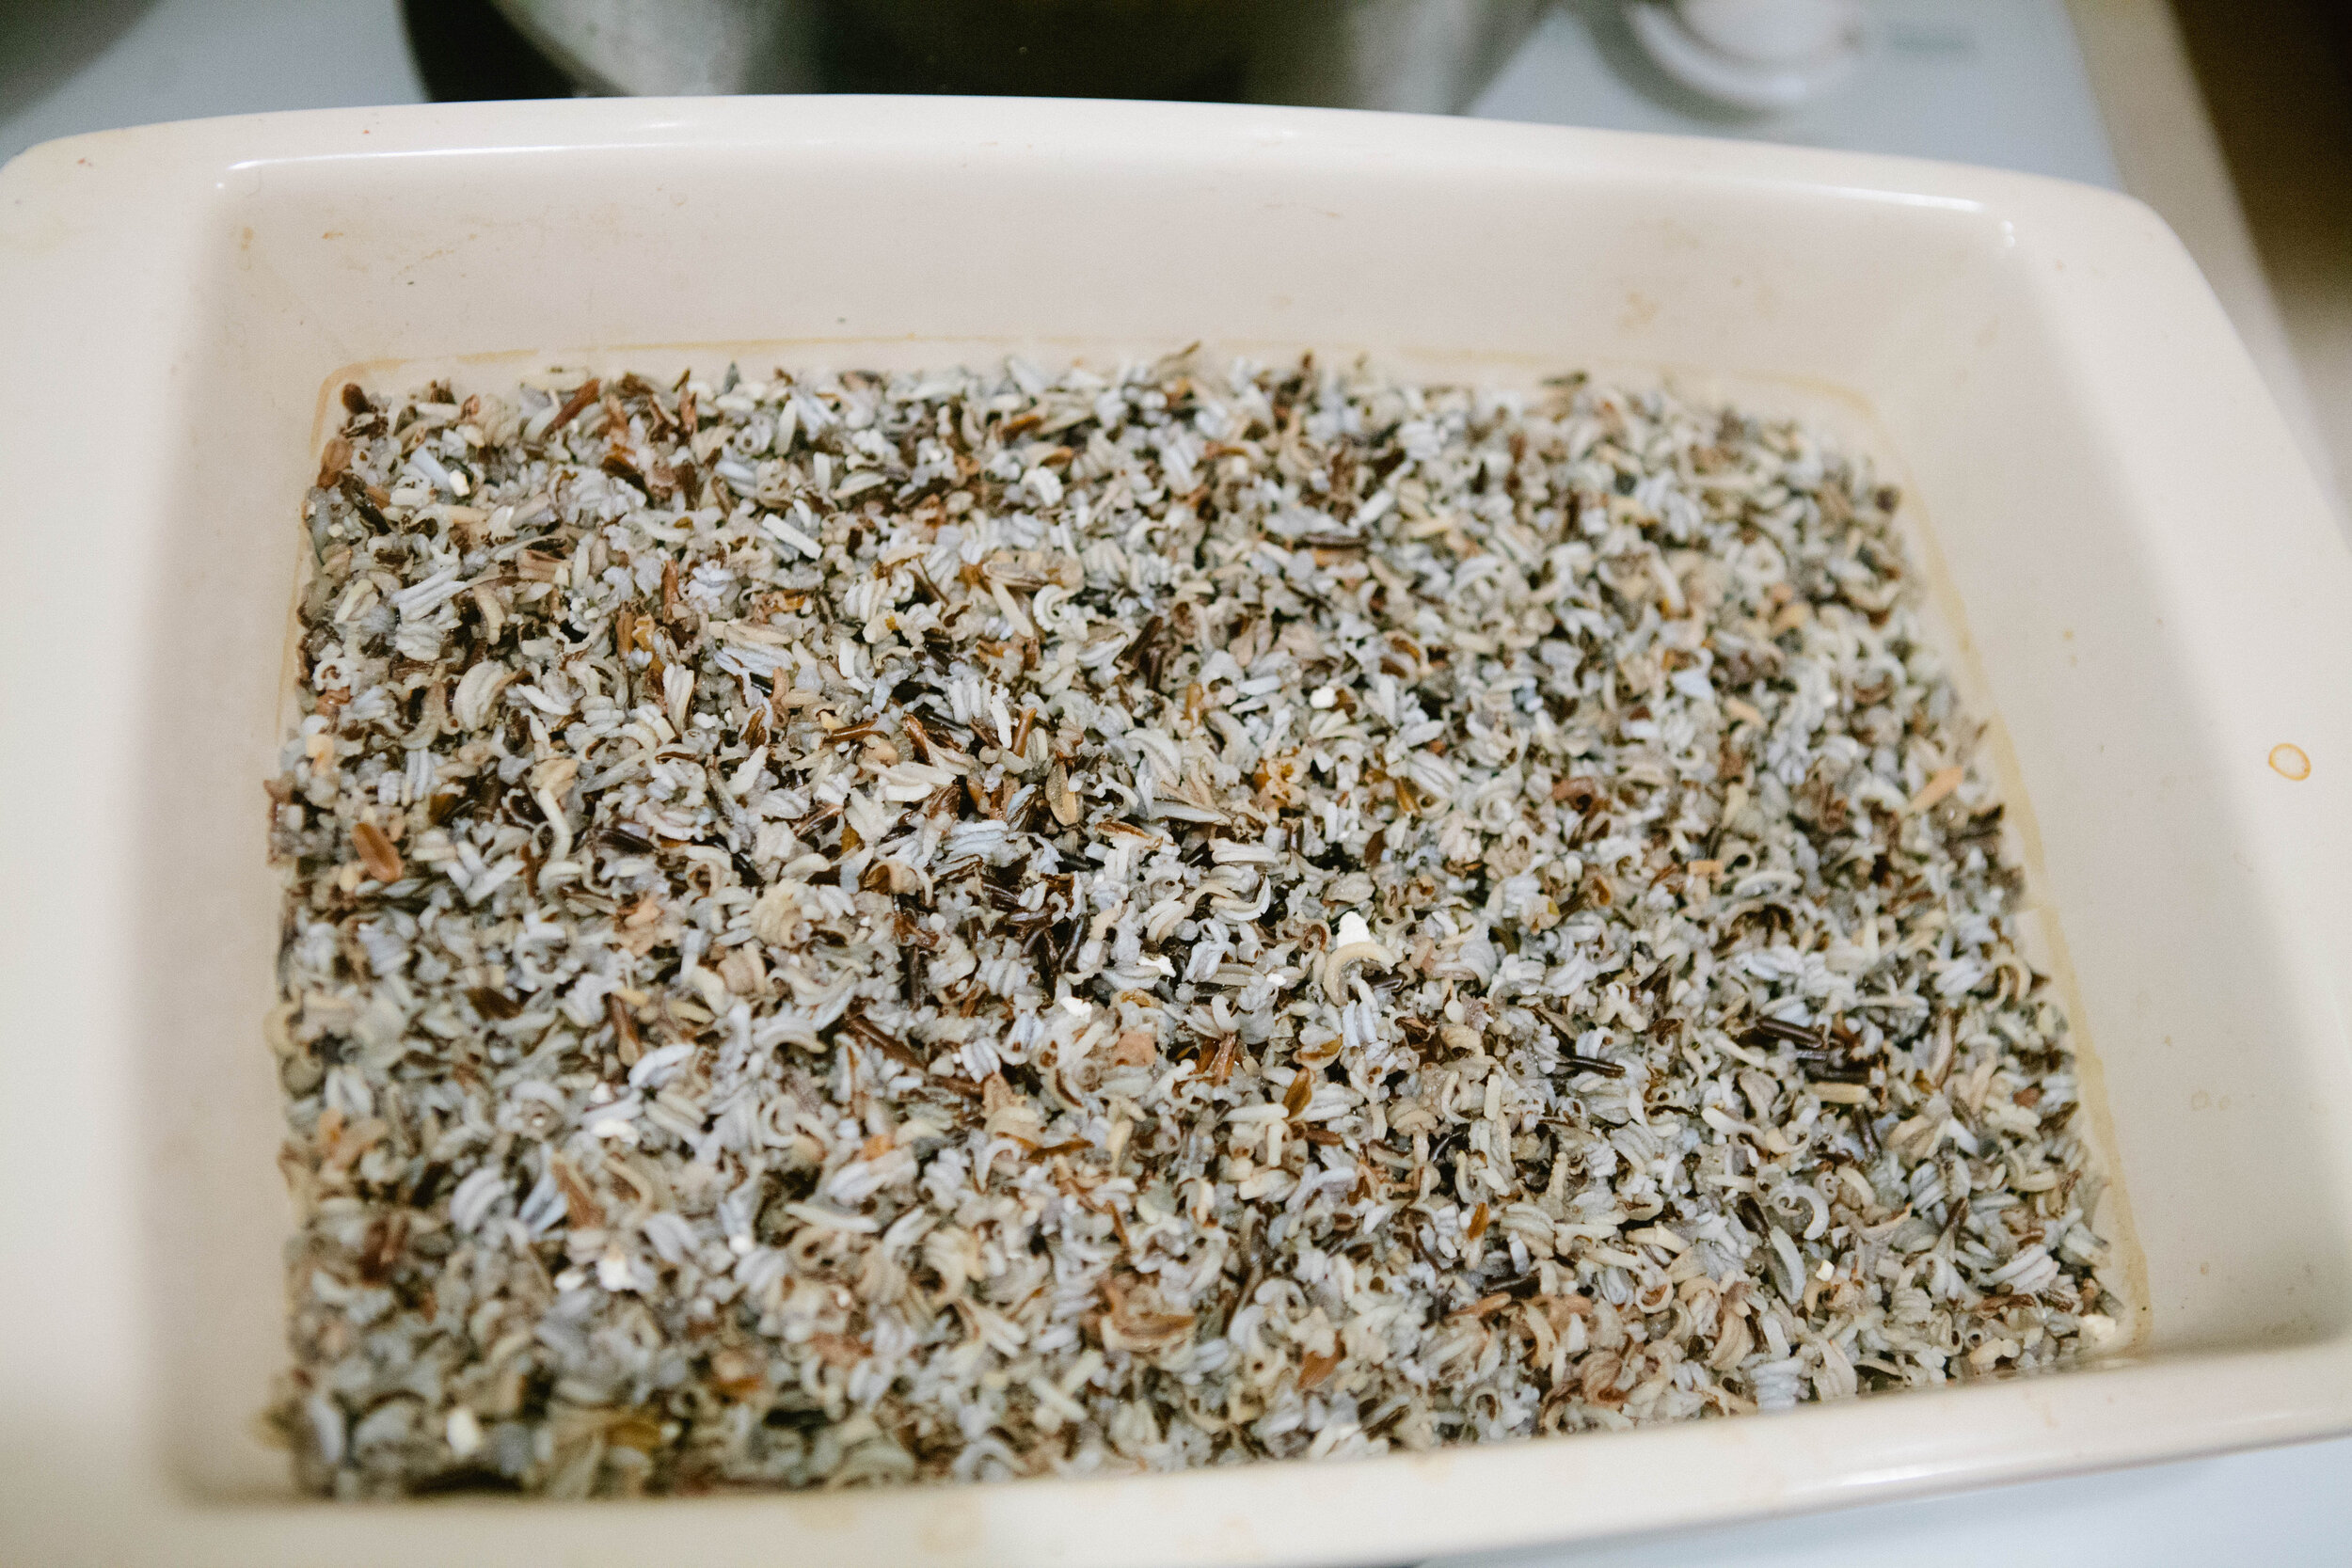
Add water to cover, about half a liter. Cover and place in the oven at 200 degrees. Cook for 45 minutes.


37.png

Mushroom Ketchup Recipe

I found this recipe from my new favorite show on YouTube, 18th Century Cooking. It is a GAPS Legal sauce and since many people do not tolerate tomatoes, I thought it would be a delicious option for a sauce!

I’m excited to add this sauce to many dishes!

This is Stage 1 legal on the GAPS Diet if you can tolerate the dried spices. Most can tolerate these spices unless you still have significant intestinal symptoms.

Ingredients for Mushroom Ketchup

  • 30 oz Mushrooms

  • 2 tbsp Salt

  • 4 Bay Leaves

  • 1 chopped onion

  • 1 Lemon, zested

  • 1 tbsp finely grated horseradish, fresh or prepared

  • ¼ tsp cloves

  • Pinch of Cayenne Pepper

  • ½ tsp allspice

  • ¼ - ½ cup apple cider vinegar

Directions for Mushroom Ketchup

Rub the top of the mushrooms to clean them. Do not wash your mushrooms!

Roughly chop the mushrooms and add to a large pot. Add in salt and bay leaves.

The mushrooms will begin reducing within a few minutes.

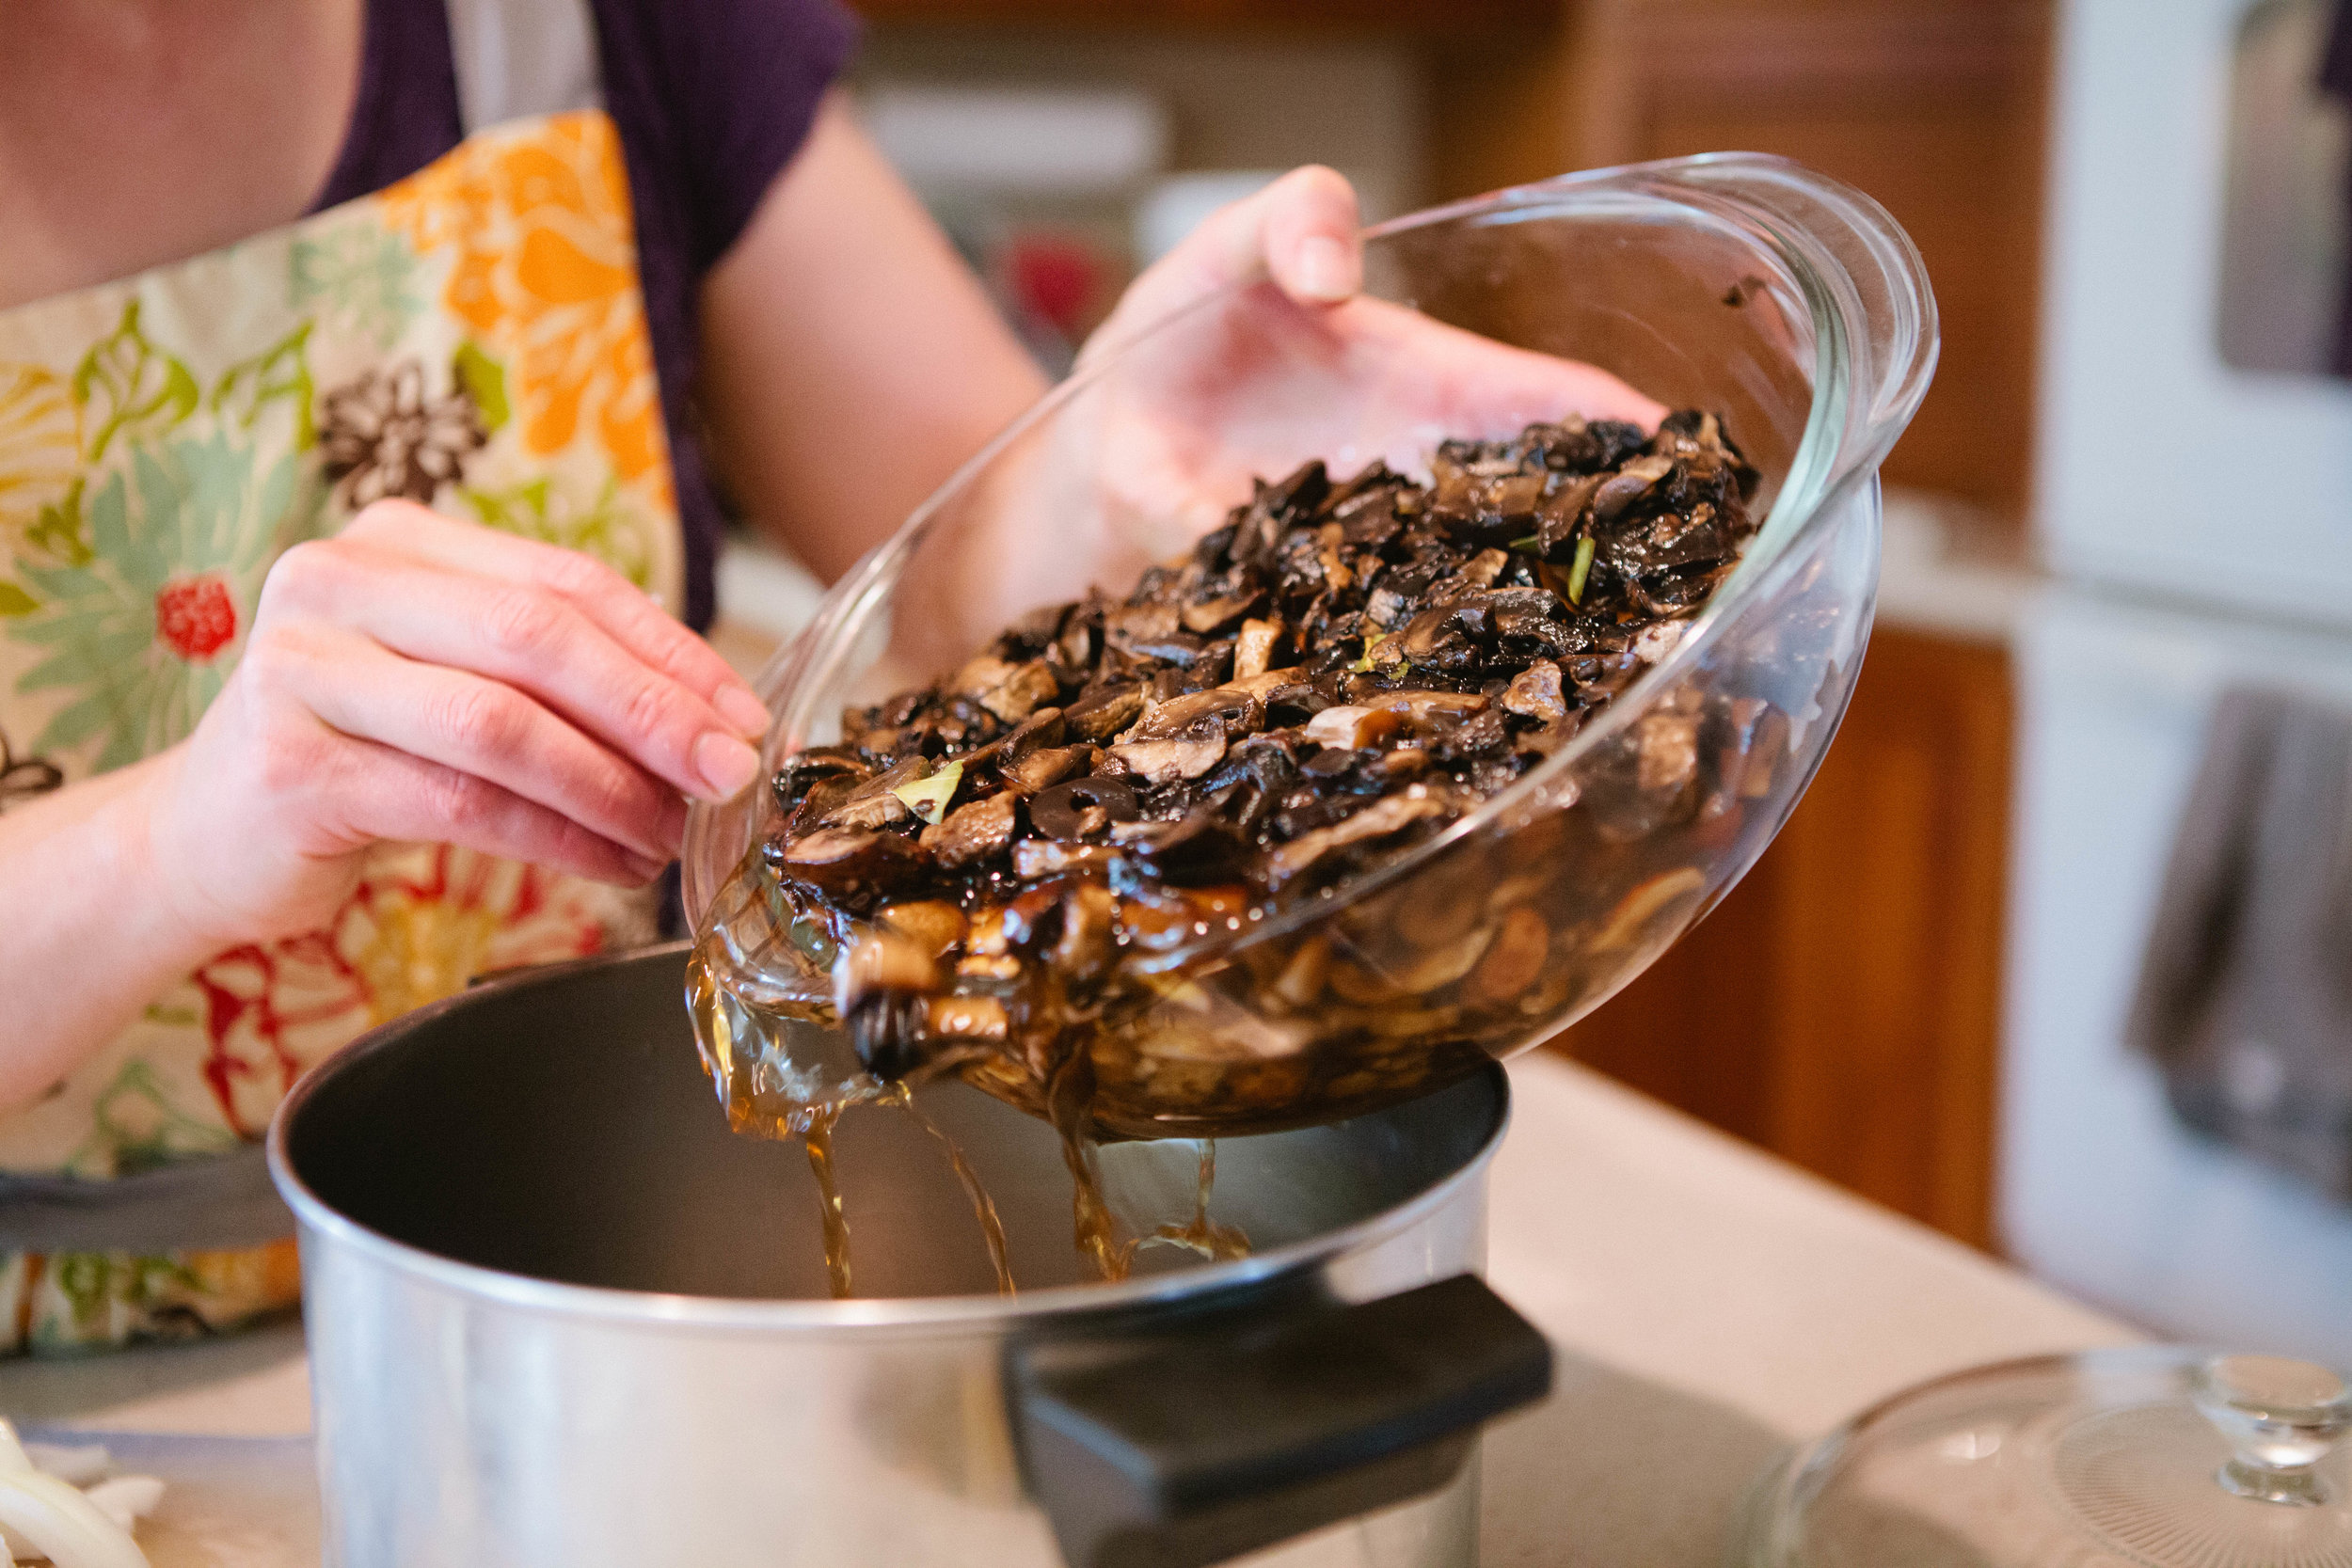
When they’ve reduced in size, add them to a glass container. Adding them to a glass container is important so they don’t take on the metal taste from the pot.

Leave the mushrooms on the counter overnight and no longer because mushrooms are a fungus.

mushroom-ketchup-recipe-18th-century-cooking-youtube-eighteenth-century-cooking-old-recipe-mushroom-sauce-ketchup-made-with-mushrooms-gaps-legal-mushroom-recipe-what-to-eat-on-gaps

The next day, add mushrooms, chopped onions, zest of 1 lemon, grated horseradish, cloves, cayenne, allspice, and apple cider vinegar to a pot.

mushroom-ketchup-recipe-18th-century-cooking-youtube-eighteenth-century-cooking-old-recipe-mushroom-sauce-ketchup-made-with-mushrooms-gaps-legal-mushroom-recipe-what-to-eat-on-gaps

Bring to a boil and then let simmer for 15 minutes.

mushroom-ketchup-recipe-18th-century-cooking-youtube-eighteenth-century-cooking-old-recipe-mushroom-sauce-ketchup-made-with-mushrooms-gaps-legal-mushroom-recipe-what-to-eat-on-gaps

Let sauce cool. Put into a cloth and squeeze to strain the sauce.

mushroom-ketchup-recipe-18th-century-cooking-youtube-eighteenth-century-cooking-old-recipe-mushroom-sauce-ketchup-made-with-mushrooms-gaps-legal-mushroom-recipe-what-to-eat-on-gaps

Save the solid pieces and dry them in a dehydrator. Once the solid pieces are dry, you can crush them and use them as a powdered flavoring or use the pieces as flavoring.

mushroom-ketchup-recipe-18th-century-cooking-youtube-eighteenth-century-cooking-old-recipe-mushroom-sauce-ketchup-made-with-mushrooms-gaps-legal-mushroom-recipe-what-to-eat-on-gaps

Pour into a glass sealable jar.

Mushroom Ketchup

prep time: cook time: total time:

ingredients:

  • 30 oz Mushrooms
  • 2 tbsp Salt
  • 4 Bay Leaves
  • 1 chopped onion
  • 1 Lemon, zested
  • 1 tbsp finely grated horseradish, fresh or prepared
  • ¼ tsp cloves
  • Pinch of Cayenne Pepper
  • ½ tsp allspice
  • ¼ - ½ cup apple cider vinegar

instructions:

How to cook Mushroom Ketchup

  1. Rub the top of the mushrooms to clean them. Do not wash your mushrooms!
  2. Roughly chop the mushrooms and add to a large pot. Add in salt and bay leaves.
  3. The mushrooms will begin reducing within a few minutes.
  4. When they’ve reduced in size, add them to a glass container. Adding them to a glass container is important so they don’t take on the metal taste from the pot.
  5. Leave the mushrooms on the counter overnight and no longer because mushrooms are a fungus.
  6. The next day, add mushrooms, chopped onions, zest of 1 lemon, grated horseradish, cloves, cayenne, allspice, and apple cider vinegar to a pot.
  7. Bring to a boil and then let simmer for 15 minutes.
  8. Let sauce cool. Put into a cloth and squeeze to strain the sauce.
  9. Save the solid pieces and dry them in a dehydrator. Once the solid pieces are dry, you can crush them and use them as a powdered flavoring or use the pieces as flavoring.
  10. Pour into a glass sealable jar.
Created using The Recipes Generator
31.png

Ways to Eat Eggs on the GAPS Diet

Dr. Natasha recommends that a child eats between three and six egg yolks a day and an adult should eat six to twelve. You may consume the whites with this if you are tolerating them or simply use the yolk only.

Egg whites are best eaten cooked. They are very detoxifying when they’re raw and when they’re raw, they require a lot of things to properly digest them. All the necessary things needed for digestion are in egg yolks so it’s important to consume the egg whites and egg yolks at the same time. Egg yolks are best eaten raw or very lightly cooked. This keeps the fragile nutrients inside egg yolks intact.

If you are having digestive issues, you should eat egg whites cooked only. After you have healed, you can consume raw egg whites.*

*Eating uncooked or raw eggs or feeding raw eggs to your pets can pose a risk to your health.

IMG_1345.jpg
Scrambled-Eggs-How-To-Make-Scrambled-Eggs-Eggs-on-the-GAPS-Diet-GAPS-Protocol-Best-Scrambled-Eggs-Ever.jpeg

How to Poach an Egg in Meat Stock

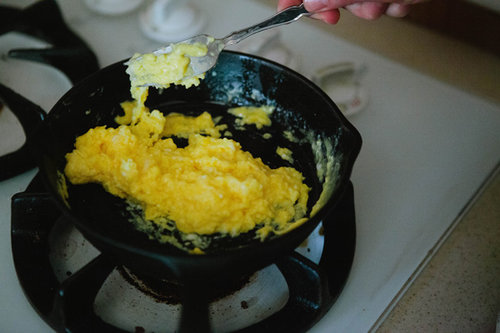
How to Make the Best Scrambled Eggs

download.jpeg
how-to-make-an-omelette-best-way-to-make-an-omelette-huge-omelette-gaps-legal-eggs-gaps-legal-omelette-gaps-friendly-breakfast-gaps-friendly-omelette-gaps-diet-gaps-protocol-cert.jpeg

How to Make a Soft or Hard Boiled Egg

How to Make the Best Omelette

IMG_2202.jpg
Hollandaise-Sauce-Easy-Sauce-for-Eggs-Hollandaise-with-Limes.jpeg

How to Make Russian Custard

How to Make Hollandaise Sauce

How to Make Mayo Free Deviled Eggs Two Ways


Egyptian Lentil Soup GAPS Legal Recipe

GAPS Legal Egyptian Lentil Soup

Are you getting bored with the same old flavor profile? It's easy to do, no matter what dietary guidelines you are following. Well, here is a soup to get you out of our rut!

This delicious soup is legal on Full GAPS, and have been a hit with every single one of the many people I have served it too. This is not a leftover that gets forgotten in the fridge... it has disappeared much sooner than you want it to be gone! I hope you enjoy this Egyptian lentil soup!

Egyptian Lentil Soup

Ingredients

  • 5 cups Meat Stock

  • 1 cup Dried Red Lentils, Sprouted

  • 2 cups Chopped Onions (about 1 medium onion)

  • 2 cups Chopped Cauliflower, about half a small cauliflower

  • 8 garlic cloves, peeled and left whole

  • 2 tablespoons Olive Oil or Other Fat

  • 2 tsp Ground Cumin

  • 1/2 tsp Turmeric

  • 1 tsp Salt

  • 1/3 cup Chopped Fresh Cilantro or 1 tsp Dried Cilantro

  • 3 tablespoons Fresh Lemon Juice

  • Sour Cream (optional)

  • Avocado (optional)

Directions

To sprout the red lentils, soak lentils overnight in filtered water. In the morning, rinse them with filtered water. Leave them drained with a mesh lid over the jar. Rinse every 12 hours until little tails grow, between 2 and 5 days. When they are dry, dehydrate them and store them in a jar until ready to use.

It's important to sprout the lentils for this GAPS Legal and GAPS Friendly Egyptian Lentil Soup recipe. Recipe by certified GAPS Practitioner Amy Mihaly, Be Well Clinic.

Add the lentils to the pot. After about 10-15 minutes, add cauliflower and cook for about ten minutes.

This Egyptian Lentil Soup recipe comes together easily because of the rough chop of the vegetables. Recipe by certified GAPS Practitioner Amy Mihaly, Be Well Clinic.

Roughly chop the cauliflower and onion.

Peel and crush garlic cloves. Add onions and garlic to pot.

Lower the heat and simmer 15-20 minutes or until the lentils and veggies are tender.

Take pot from stove burner and set aside for at least five minutes.

In a small saucepan, add the oil; warm over low heat until the oil is hot but not smoking.

This easy Egyptian Lentil Soup features toasted spices. It's GAPS Legal, GAPS Friendly and good for the Whole 30 and Paleo diets as well. Recipe by certified GAPS Practitioner Amy Mihaly, Be Well Clinic.

Add in the cumin, turmeric, and salt. Cook and stir constantly for 2-3 minutes or until the cumin has released its fragrance. Be careful not to scorch the spices.

Set spice mixture aside for 1 minute to cool.

Egyptian Lentil Soup is an easy GAPS Legal and GAPS Friendly recipe. Recipe by certified GAPS Practitioner Amy Mihaly, Be Well Clinic.

Stir spice mixture into the lentil mixture. Add cilantro. Stir to combine.

This Egyptian Lentil Soup recipe can be pureed to whatever consistency you'd like. It's a GAPS Friendly recipe and GAPS Legal. Recipe by certified GAPS Practitioner Amy Mihaly, Be Well Clinic.

You can puree the soup in batches in a blender or use an immersion blender. Blend to desired texture. I like to leave it a bit chunky.

Add in lemon juice, stir to combine.

Don't skip this step! The lemon really makes the soup, and if it is tasting blah and boring, you need more lemon (and probably a little more salt).

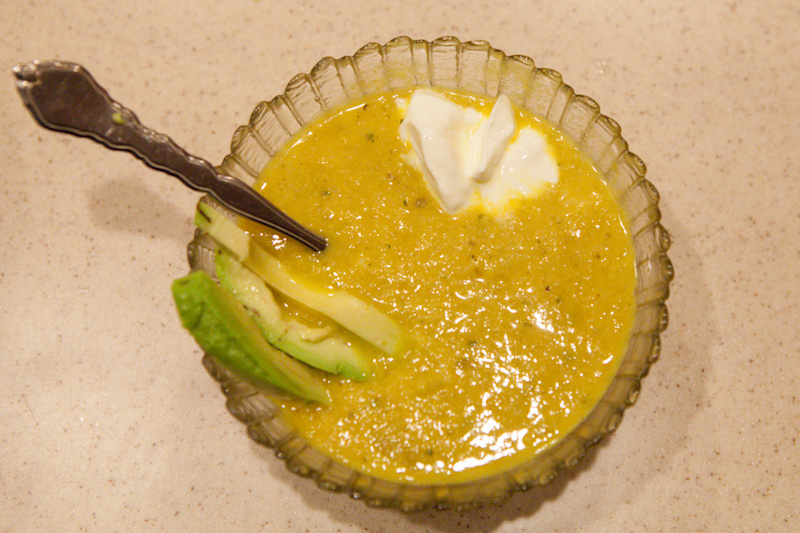
Finish your GAPS Legal Egyptian Lentil soup with a dollop of sour cream and a few slices of avocado for a healthy dose of fat. Recipe by certified GAPS Practitioner Amy Mihaly, Be Well Clinic.

Serve with a dollop of sour cream and slices of avocado. And, as always, I recommend that everyone add additional salt as needed to taste.

Note:

To make this soup go further, you can add a potato. This makes the recipe not GAPS legal and you’ll also need to add a little bit of extra stock.

Finish your GAPS Legal Egyptian Lentil soup with a dollop of sour cream and a few slices of avocado for a healthy dose of fat. Recipe by certified GAPS Practitioner Amy Mihaly, Be Well Clinic.

Egyptian Lentil Soup

Author:
prep time: cook time: total time:

ingredients:

  • 5 cups Meat Stock
  • 1 cup Dried Red Lentils, Sprouted
  • 2 cups Chopped Onions (about 1 medium onion)
  • 2 cups Chopped Cauliflower, about half a small cauliflower
  • 8 garlic cloves, peeled and left whole
  • 2 tablespoons Olive Oil or Other Fat
  • 2 tsp Ground Cumin
  • 1/2 tsp Turmeric
  • 1 tsp Salt
  • 1/3 cup Chopped Fresh Cilantro or 1 tsp Dried Cilantro
  • 3 tablespoons Fresh Lemon Juice
  • Sour Cream (optional)
  • Avocado (optional)

instructions:

How to cook Egyptian Lentil Soup

  1. To sprout the red lentils, soak lentils overnight in filtered water. In the morning, rinse them with filtered water. Leave them drained with a mesh lid over the jar. Rinse every 12 hours until little tails grow, between 2 and 5 days. When they are dry, dehydrate them and store them in a jar until ready to use.
  2. Add the lentils to the pot. After about 10-15 minutes, add cauliflower and cook for about ten minutes.
  3. Roughly chop the cauliflower and onion.
  4. Peel and crush garlic cloves. Add onions and garlic to pot.
  5. Lower the heat and simmer 15-20 minutes or until the lentils and veggies are tender.
  6. Take pot from stove burner and set aside for at least five minutes.
  7. In a small saucepan, add the oil; warm over low heat until the oil is hot but not smoking.
  8. Add in the cumin, turmeric, and salt. Cook and stir constantly for 2-3 minutes or until the cumin has released its fragrance. Be careful not to scorch the spices.
  9. Set spice mixture aside for 1 minute to cool.
  10. Stir spice mixture into the lentil mixture. Add cilantro. Stir to combine.
  11. You can puree the soup in batches in a blender or use an immersion blender. Blend to desired texture. I like to leave it a bit chunky.
  12. Add in lemon juice, stir to combine. Don't skip this step! The lemon really makes the soup, and if it is tasting blah and boring, you need more lemon (and probably a little more salt).
  13. Serve with a dollop of sour cream and slices of avocado. And, as always, I recommend that everyone add additional salt as needed to taste.
  14. Note:
  15. To make this soup go further, you can add a potato. This makes the recipe not GAPS legal and you’ll also need to add a little bit of extra stock.
Created using The Recipes Generator

Swedish Gravlax Recipe

This meal is adapted from GAPS Cookbook by Dr. Natasha Campbell

This is a brined fish meal legal on GAPS stage 2. You eat little pieces, one small piece a day.

Swedish Gravlax Recipe

Ingredients for Swedish Gravlax:

  • ½ lb Fresh Wild Caught Salmon

  • Fresh Dill

  • Freshly Coarsely Ground Black Pepper

  • 4 cup Room Temperature Filtered Water

  • 1 tbsp Honey

  • 1 ½ tbsp Salt

Directions for Swedish Gravlax:

Swedish-Gravlax-Fermented-Salmon-Wild-Caught-Salmon-What-To-Do-With-Salmon-GAPS-Legal-Salmon-Recipe-GAPS-Diet-Salmon-Fish-On-GAPS-GAPS-Diet-Snack

Thinly slice the fish.

Swedish-Gravlax-Fermented-Salmon-Wild-Caught-Salmon-What-To-Do-With-Salmon-GAPS-Legal-Salmon-Recipe-GAPS-Diet-Salmon-Fish-On-GAPS-GAPS-Diet-Snack

Place fish slices into a deep tray.

Sprinkle with dill sprigs and pepper.

Swedish-Gravlax-Fermented-Salmon-Wild-Caught-Salmon-What-To-Do-With-Salmon-GAPS-Legal-Salmon-Recipe-GAPS-Diet-Salmon-Fish-On-GAPS-GAPS-Diet-Snack

Dissolve honey and salt in water to make a brine.

Pour brine over fish.

Swedish-Gravlax-Fermented-Salmon-Wild-Caught-Salmon-What-To-Do-With-Salmon-GAPS-Legal-Salmon-Recipe-GAPS-Diet-Salmon-Fish-On-GAPS-GAPS-Diet-Snack

Leave at room temperature for 1 - 1 ½ hours.

Pour the water out.

Serve on lettuce or eat alone.

Store in refrigerator and consume within two days.


Swedish Gravlax Recipe

Author:
prep time: cook time: total time:

ingredients:

  • ½ lb Fresh Wild Caught Salmon
  • Fresh Dill
  • Freshly Coarsely Ground Black Pepper
  • 4 cup Room Temperature Filtered Water
  • 1 tbsp Honey
  • 1 ½ tbsp Salt

instructions:

How to cook Swedish Gravlax Recipe

  1. Thinly slice the fish.
  2. Place fish slices into a deep tray.
  3. Sprinkle with dill sprigs and pepper.
  4. Dissolve honey and salt in water to make a brine.
  5. Pour brine over fish.
  6. Leave at room temperature for 1 - 1 ½ hours.
  7. Pour the water out.
  8. Serve on lettuce or eat alone.
  9. Store in refrigerator and consume within two days.
Created using The Recipes Generator

Brownies Made with Dates

Dairy Free, Gluten Free, GAPS Legal Brownies Made with Dates

While these brownies are not as sweet as conventional brownies, they were deemed by some tasters on the GAPS Diet as being “Better than Brownies.” These GAPS legal brownies are dairy free, gluten free, sugar free, and egg free.

Even better, besides the 24 hour fermentation time needed for the almond flour, these brownies can be made very quickly! These brownies actually get better over time so it’s actually better to make them a day before to let the flavors meld. They would be delicious eaten alongside homemade ice cream or with homemade whipped cream and fruit.
Better Than Brownies - GAPS Legal Brownies

Ingredients for brownies made from dates

  • 2 cups of almond flour

  • 5 tablespoons Whey

  • 18 dates

  • ½ cup Filtered Water

  • 1/2 cup Coconut Oil + extra to grease the baking dish

  • ¼ cup Cacao Powder

  • ½ tsp Vanilla Extract

  • ¼ cup Cacao Nibs (optional)

  • ¼ cup Crispy Nuts (optional)

Directions for brownies made from dates

24 Hours Before:

These GAPS legal brownies were deemed as better than brownies. They are gluten free, dairy free, sugar free, egg free, and made with fermented almond flour and dates. Recipe by certified GAPS Practitioner Amy Mihaly, Be Well Clinic.

Add almond flour and cacao powder to a bowl. Use a fork to get rid of almond flour clumps.Add whey and stir to moisten.Cover and leave on counter to ferment for 24 hours.

The Next Day:

These GAPS legal brownies were deemed as better than brownies. They are gluten free, dairy free, sugar free, egg free, and made with fermented almond flour and dates. Recipe by certified GAPS Practitioner Amy Mihaly, Be Well Clinic.

Cut up 18 dates, removing the inner pit.Add ½ cup Filtered Water.

These GAPS legal brownies were deemed as better than brownies. They are gluten free, dairy free, sugar free, egg free, and made with fermented almond flour and dates. Recipe by certified GAPS Practitioner Amy Mihaly, Be Well Clinic.

Cook on low heat until dates are soft and water is absorbed, about 4-6 minutes. (think like making applesauce.) Watch closely to make sure dates don’t burn. You may need to add more water as you go depending on how dry your dates are so they’re able to fully hydrate without burning. Be sure not to add too much or it will thin the eventual date paste.

These GAPS legal brownies were deemed as better than brownies. They are gluten free, dairy free, sugar free, egg free, and made with fermented almond flour and dates. Recipe by certified GAPS Practitioner Amy Mihaly, Be Well Clinic.

When dates are soft, turn off the heat. Puree the mixture in the pot with an immersion blender or add to a blender or food processor until smooth. The smoother the date texture, the more appealing the brownies!Preheat oven to 350.Grease a baking dish or pie pan with coconut oil. Do not use a metal baking dish or the edges will burn.

These GAPS legal brownies were deemed as better than brownies. They are gluten free, dairy free, sugar free, egg free, and made with fermented almond flour and dates. Recipe by certified GAPS Practitioner Amy Mihaly, Be Well Clinic.

Combine coconut oil and dates into the almond flour mixture. If you’re using a blender, add the coconut oil to the blender and blend until smooth before adding to the flour mixture. Optionally, add cacao nibs and crispy nuts.

These GAPS legal brownies were deemed as better than brownies. They are gluten free, dairy free, sugar free, egg free, and made with fermented almond flour and dates. Recipe by certified GAPS Practitioner Amy Mihaly, Be Well Clinic.

Stir the mixture until smooth, being sure to get all the clumps out. You want the mixture to be as smooth as possible. The batter will be thick. Add batter to greased baking sheet and smooth out.

These GAPS legal brownies were deemed as better than brownies. They are gluten free, dairy free, sugar free, egg free, and made with fermented almond flour and dates. Recipe by certified GAPS Practitioner Amy Mihaly, Be Well Clinic.

Bake for 45 minutes until the knife comes out clean. Check after 30 minutes. Serve and enjoy!

Notes:

  • Instead of date paste, you can use applesauce but the brownies will not be as sweet and you will need to make your own applesauce that is thick so it creates the right consistency.

  • These brownies get better with age!

  • These are dairy free, gluten free, sugar free, egg free and legal on GAPS.


Brownies Made with Dates

Author:
prep time: cook time: total time:

ingredients:

  • 2 cups of almond flour
  • 5 tablespoons Whey
  • 18 dates
  • ½ cup Filtered Water
  • 1/2 cup Coconut Oil + extra to grease the baking dish
  • ¼ cup Cacao Powder
  • ½ tsp Vanilla Extract
  • ¼ cup Cacao Nibs (optional)
  • ¼ cup Crispy Nuts (optional)

instructions:

How to cook Brownies Made with Dates

24 Hours in Advance
  1. Add almond flour and cacao powder to a bowl. Use a fork to get rid of almond flour clumps.Add whey and stir to moisten.Cover and leave on counter to ferment for 24 hours.
The Next Day
  1. Cut up 18 dates, removing the inner pit. Add ½ cup Filtered Water.
  2. Cook on low heat until dates are soft and water is absorbed, about 4-6 minutes. (think like making applesauce.) Watch closely to make sure dates don’t burn. You may need to add more water as you go depending on how dry your dates are so they’re able to fully hydrate without burning. Be sure not to add too much or it will thin the eventual date paste.
  3. When dates are soft, turn off the heat. Puree the mixture in the pot with an immersion blender or add to a blender or food processor until smooth. The smoother the date texture, the more appealing the brownies!Preheat oven to 350.Grease a baking dish or pie pan with coconut oil. Do not use a metal baking dish or the edges will burn.
  4. Combine coconut oil and dates into the almond flour mixture. If you’re using a blender, add the coconut oil to the blender and blend until smooth before adding to the flour mixture. Optionally, add cacao nibs and crispy nuts.
  5. Stir the mixture until smooth, being sure to get all the clumps out. You want the mixture to be as smooth as possible. The batter will be thick. Add batter to greased baking sheet and smooth out.
  6. Bake for 45 minutes until the knife comes out clean. Check after 30 minutes. Serve and enjoy!
  7. Notes:
  8. Instead of date paste, you can use applesauce but the brownies will not be as sweet and you will need to make your own applesauce that is thick so it creates the right consistency.
  9. These brownies get better with age!
  10. These are dairy free, gluten free, sugar free, egg free and legal on GAPS.
Created using The Recipes Generator

GAPS Legal Zucchini Pizza Bites

Recently I needed a bit of a change. I needed something exciting to eat! And I really wanted pizza. But even though I know how to make a GAPS legal pizza crust I did not want to spend the time or energy to make it. Then I came up with this brilliant idea... pizza bites... on zucchini! and what's better? They are stage 4 (and beyond) GAPS legal!

I happened to have just bought some good-quality uncured pepperoni at the store, and had some sauce in the cabinet (although if I don't happen to have that I just as easily throw a couple tomatoes in a blender and make my own sauce on the stove). I tried it, and it worked! Delicious pizza bites that really taste like pizza (with zucchini on it) and can be made to suit any taste or dietary guidelines.

Unless you can't eat zucchini, you should be able to modify this for anyone. The fat used can be anything. You could leave off the tomato sauce, or make a while sauce. You can top with anything you can tolerate. Most people can tolerate raw cheese by the time they get to full GAPS And I guarantee that even if you can't do pepperoni, there is some type of meat you can have! Part of what makes a pizza is cheese and tomato sauce, so without these you will have a little different taste, but that doesn't mean you won't have something delicious!

Ingredients for gaps friendly pizza made with zucchini:

  • Zucchini

  • 2 TBS Lard, Butter or Other Fat

  • Italian Seasonings

  • Salt & Pepper

  • Pizza Sauce (make your own or buy a sugar free version in a glass jar)

  • Mozzarella Cheese

  • Uncured Pepperoni

  • Other Pizza Toppings of Your Choice

Directions for gaps friendly pizza made with zucchini:

GAPS Legal pizza is a thing! These pizza bites are gluten free because they’re made with zucchini. Zucchini pizza bites are GAPS legal past stage four and are a great summer recipe on what to do with too much zucchini. GAPS Friendly pizza made with …

Sliced the zucchini into rounds, approx ¼ thick. Don’t slice too thin!

Add your preferred fat to a pan on medium heat. Once hot, add zucchini slices. Your zucchini should not be swimming in the fat!

GAPS Legal pizza is a thing! These pizza bites are gluten free because they’re made with zucchini. Zucchini pizza bites are GAPS legal past stage four and are a great summer recipe on what to do with too much zucchini. GAPS Friendly pizza made with …

Sprinkle zucchini slices with salt, pepper and Italian seasonings.

Grate the mozzarella cheese.

GAPS Legal pizza is a thing! These pizza bites are gluten free because they’re made with zucchini. Zucchini pizza bites are GAPS legal past stage four and are a great summer recipe on what to do with too much zucchini. GAPS Friendly pizza made with …

Once the zucchini slices are golden brown (8-10 min), flip them to the other side.

GAPS Legal pizza is a thing! These pizza bites are gluten free because they’re made with zucchini. Zucchini pizza bites are GAPS legal past stage four and are a great summer recipe on what to do with too much zucchini. GAPS Friendly pizza made with …

Spoon tomato sauce on top of each zucchini slice. Top with uncured pepperoni or other toppings of your choice and add grated mozzarella cheese. Cover for 2 - 3 minutes so the cheese melts.

GAPS Legal pizza is a thing! These pizza bites are gluten free because they’re made with zucchini. Zucchini pizza bites are GAPS legal past stage four and are a great summer recipe on what to do with too much zucchini. GAPS Friendly pizza made with …

Once the cheese is melted, your zucchini pizzas are done!

Other toppings you could try would be artichoke hearts, olives. anchovies, or cooked chicken pieces. (Think your favorite pizza toppings!) Enjoy! Careful, they are hot! Once they have cooled a little, you can cut them into fourths to be served to those with small mouths. And as any good pizza is, they are delicious cold as well!  

What are your favorite toppings? Did you find good combinations? Let us know!


Zucchini Pizza Bites

Author:
prep time: cook time: total time:

ingredients:

  • Zucchini
  • 2 TBS Lard, Butter or Other Fat
  • Italian Seasonings
  • Salt & Pepper
  • Pizza Sauce (make your own or buy a sugar free version in a glass jar)
  • Mozzarella Cheese
  • Uncured Pepperoni
  • Other Pizza Toppings of Your Choice

instructions:

How to cook Zucchini Pizza Bites

  1. Sliced the zucchini into rounds, approx ¼ thick. Don’t slice too thin!
  2. Add your preferred fat to a pan on medium heat. Once hot, add zucchini slices. Your zucchini should not be swimming in the fat!
  3. Sprinkle zucchini slices with salt, pepper and Italian seasonings.
  4. Grate the mozzarella cheese.
  5. Once the zucchini slices are golden brown (8-10 min), flip them to the other side.
  6. Spoon tomato sauce on top of each zucchini slice. Top with uncured pepperoni or other toppings of your choice and add grated mozzarella cheese. Cover for 2 - 3 minutes so the cheese melts.
  7. Once the cheese is melted, your zucchini pizzas are done!
  8. Other toppings you could try would be artichoke hearts, olives. anchovies, or cooked chicken pieces. (Think your favorite pizza toppings!) Enjoy! Careful, they are hot! Once they have cooled a little, you can cut them into fourths to be served to those with small mouths. And as any good pizza is, they are delicious cold as well!
Created using The Recipes Generator

GAPS Friendly Marshmallow Recipe

What if I told you that you could have a treat that is GAPS legal AND is good for you??? The GAPS marshmallow does just that. This simple treat is basically made up of gelatin, honey, water and optional vanilla. You can use this treat to get extra gelatin if you are needing that. Just reduce the amount of honey*. And they are simple to make!

GAPS Friendly MARSHMALLOWS Ingredients

  • 2 cups honey

  • 1 cup of filtered water

  • 2 tsp vanilla (optional)

  • 1/2 tsp sea salt

  • 6 TBS grass-fed beef gelatin

  • 1 cup of filtered water

Directions for making your own marshmallows

IMG_1823.jpg

Soften the Gelatin by adding gelatin to 1 cup of hot water. Stir and allow to sit. Keep it warm but not on the stove.

While gelatin is softening… Heat honey and water in a medium saucepan (medium to high heat), stirring frequently, until it reaches the soft ball candy stage (about 235°F).

IMG_1854.jpg

If you don’t have a thermometer, you can check by dripping the heated honey into a glass of cold water. When the candy forms a ball, it is ready!

When the honey has reached the soft ball stage, remove from heat.

Add the heated honey mixture to the softened gelatin in a large bowl.

Add vanilla (optional)

Do these steps quickly, you don’t want honey mixture to cool off too much!

IMG_1927.jpg

Whisk the mixture using an electric mixer or stand mixer for about 10 minutes. When the mixture is thick and looks like marshmallow paste, it’s done!

IMG_1987.jpg

Put the marshmallow paste in a greased and parchment paper-lined glass 9x11 dish and allow to cool and dry for 24-36 hrs. Then cut up and serve.

These marshmallows won't have exactly the same consistency (and won't roast over the fire quite the same) as store-bought marshmallows, but you can roast them for things like s'mores, and they are delicious! You can also use them to top roasted sweet potatoes or butternut squash or to top your homemade ice cream for a sundae or banana split.

Enjoy!

*As a general rule I don't like to heat honey, as some research has shown that heating it can turn the honey toxic. On the other hand, these marshmallows are a whole lot better than commercially available marshmallows, so I think as a treat they are great! I still recommend using raw honey for these recipes, you will be heating it much less than most non-raw honey is heated.


Homemade Marshmallows

Author:
prep time: cook time: total time:

ingredients:

  • 2 cups honey
  • 1 cup of filtered water
  • 2 tsp vanilla (optional)
  • 1/2 tsp sea salt
  • 6 TBS grass-fed beef gelatin
  • 1 cup of filtered water

instructions:

How to cook Homemade Marshmallows

  1. Soften the Gelatin by adding gelatin to 1 cup of hot water. Stir and allow to sit. Keep it warm but not on the stove.
  2. While gelatin is softening… Heat honey and water in a medium saucepan (medium to high heat), stirring frequently, until it reaches the soft ball candy stage (about 235°F).
  3. If you don’t have a thermometer, you can check by dripping the heated honey into a glass of cold water. When the candy forms a ball, it is ready!
  4. When the honey has reached the soft ball stage, remove from heat.
  5. Add the heated honey mixture to the softened gelatin in a large bowl.
  6. Add vanilla (optional)
  7. Do these steps quickly, you don’t want honey mixture to cool off too much!
  8. Whisk the mixture using an electric mixer or stand mixer for about 10 minutes. When the mixture is thick and looks like marshmallow paste, it’s done!
  9. Put the marshmallow paste in a greased and parchment paper-lined glass 9x11 dish and allow to cool and dry for 24-36 hrs. Then cut up and serve.
  10. These marshmallows won't have exactly the same consistency (and won't roast over the fire quite the same) as store-bought marshmallows, but you can roast them for things like s'mores, and they are delicious! You can also use them to top roasted sweet potatoes or butternut squash or to top your homemade ice cream for a sundae or banana split.
Created using The Recipes Generator

Just two months...

Waiting in my inbox this week was a wonderful surprise!

At my training I had heard rumors, we had initiated discussions, and all of us knew that this would be a great idea... if only someone would do the work. Well, someone has! Coming September 16th, 2014...

The Heal Your Gut Cookbook by Hilary Boynton and Mary Brackett, with foreword by Dr. Natasha Campbell-McBride

This looks like an awesome book! It was created by 2 GAPS parents, and contains over 200 recipes you can use to heal your body--all GAPS legal! Sorting through the myriad of recipes (even GAPS specific recipes) is a challenge for anyone on this diet, including me. I cannot wait for this book to get published so I can get my hands on a copy and start cooking! Although I know it will not do the work for me, it will make the preparing to prepare time shorter. It will also make it easier to answer the "What are we having for dinner" question. And it comes with pictures! Did I mention that? This is almost a must for me when I am purchasing a cookbook. These are available to me on September 1st, and I will be purchasing several. Reserve your copy by contacting me today. You can check out more at http://www.chelseagreen.com/downloads/HealYourGut_PR.pdf  

*I did not receive any compensation for advertising this product