fermented

Kid Friendly Rainbow Ferment

One of the best ways to get kids excited about eating real food is to make it fun! You can do this by making the preparation or cooking process fun, giving it a fun name, or making the presentation fun, like eating “Ants on a Log”.

When giving fermented food to your children, it’s best to consider what vegetables they already like and in what forms. For example, if your child really likes coleslaw, then sauerkraut will likely be a favorite but if they like carrot sticks, ginger carrots will probably go over well.

IMG_2506.jpg

Feel free to discuss and replace any of these vegetables with vegetables of similar color that your family likes better. You should be able to make this fun and interactive ferment a family favorite.

Some of my favorite salts for ferments are baja gold and Redman’s real salt. 

Ingredients for Rainbow Ferment:

  • Red Beets

  • Carrots

  • Yellow Pepper

  • Broccoli

  • Purple Cabbage

  • Baja Salt

  • Water

Directions for Rainbow Ferment:

IMG_2496.jpg

Fill a quart mason jar most of the way with cold filtered water. Remember filtered water is very important here otherwise you will kill your ferment.

Add 3 tbsp of salt. Stir to dissolve completely.

IMG_2520.jpg

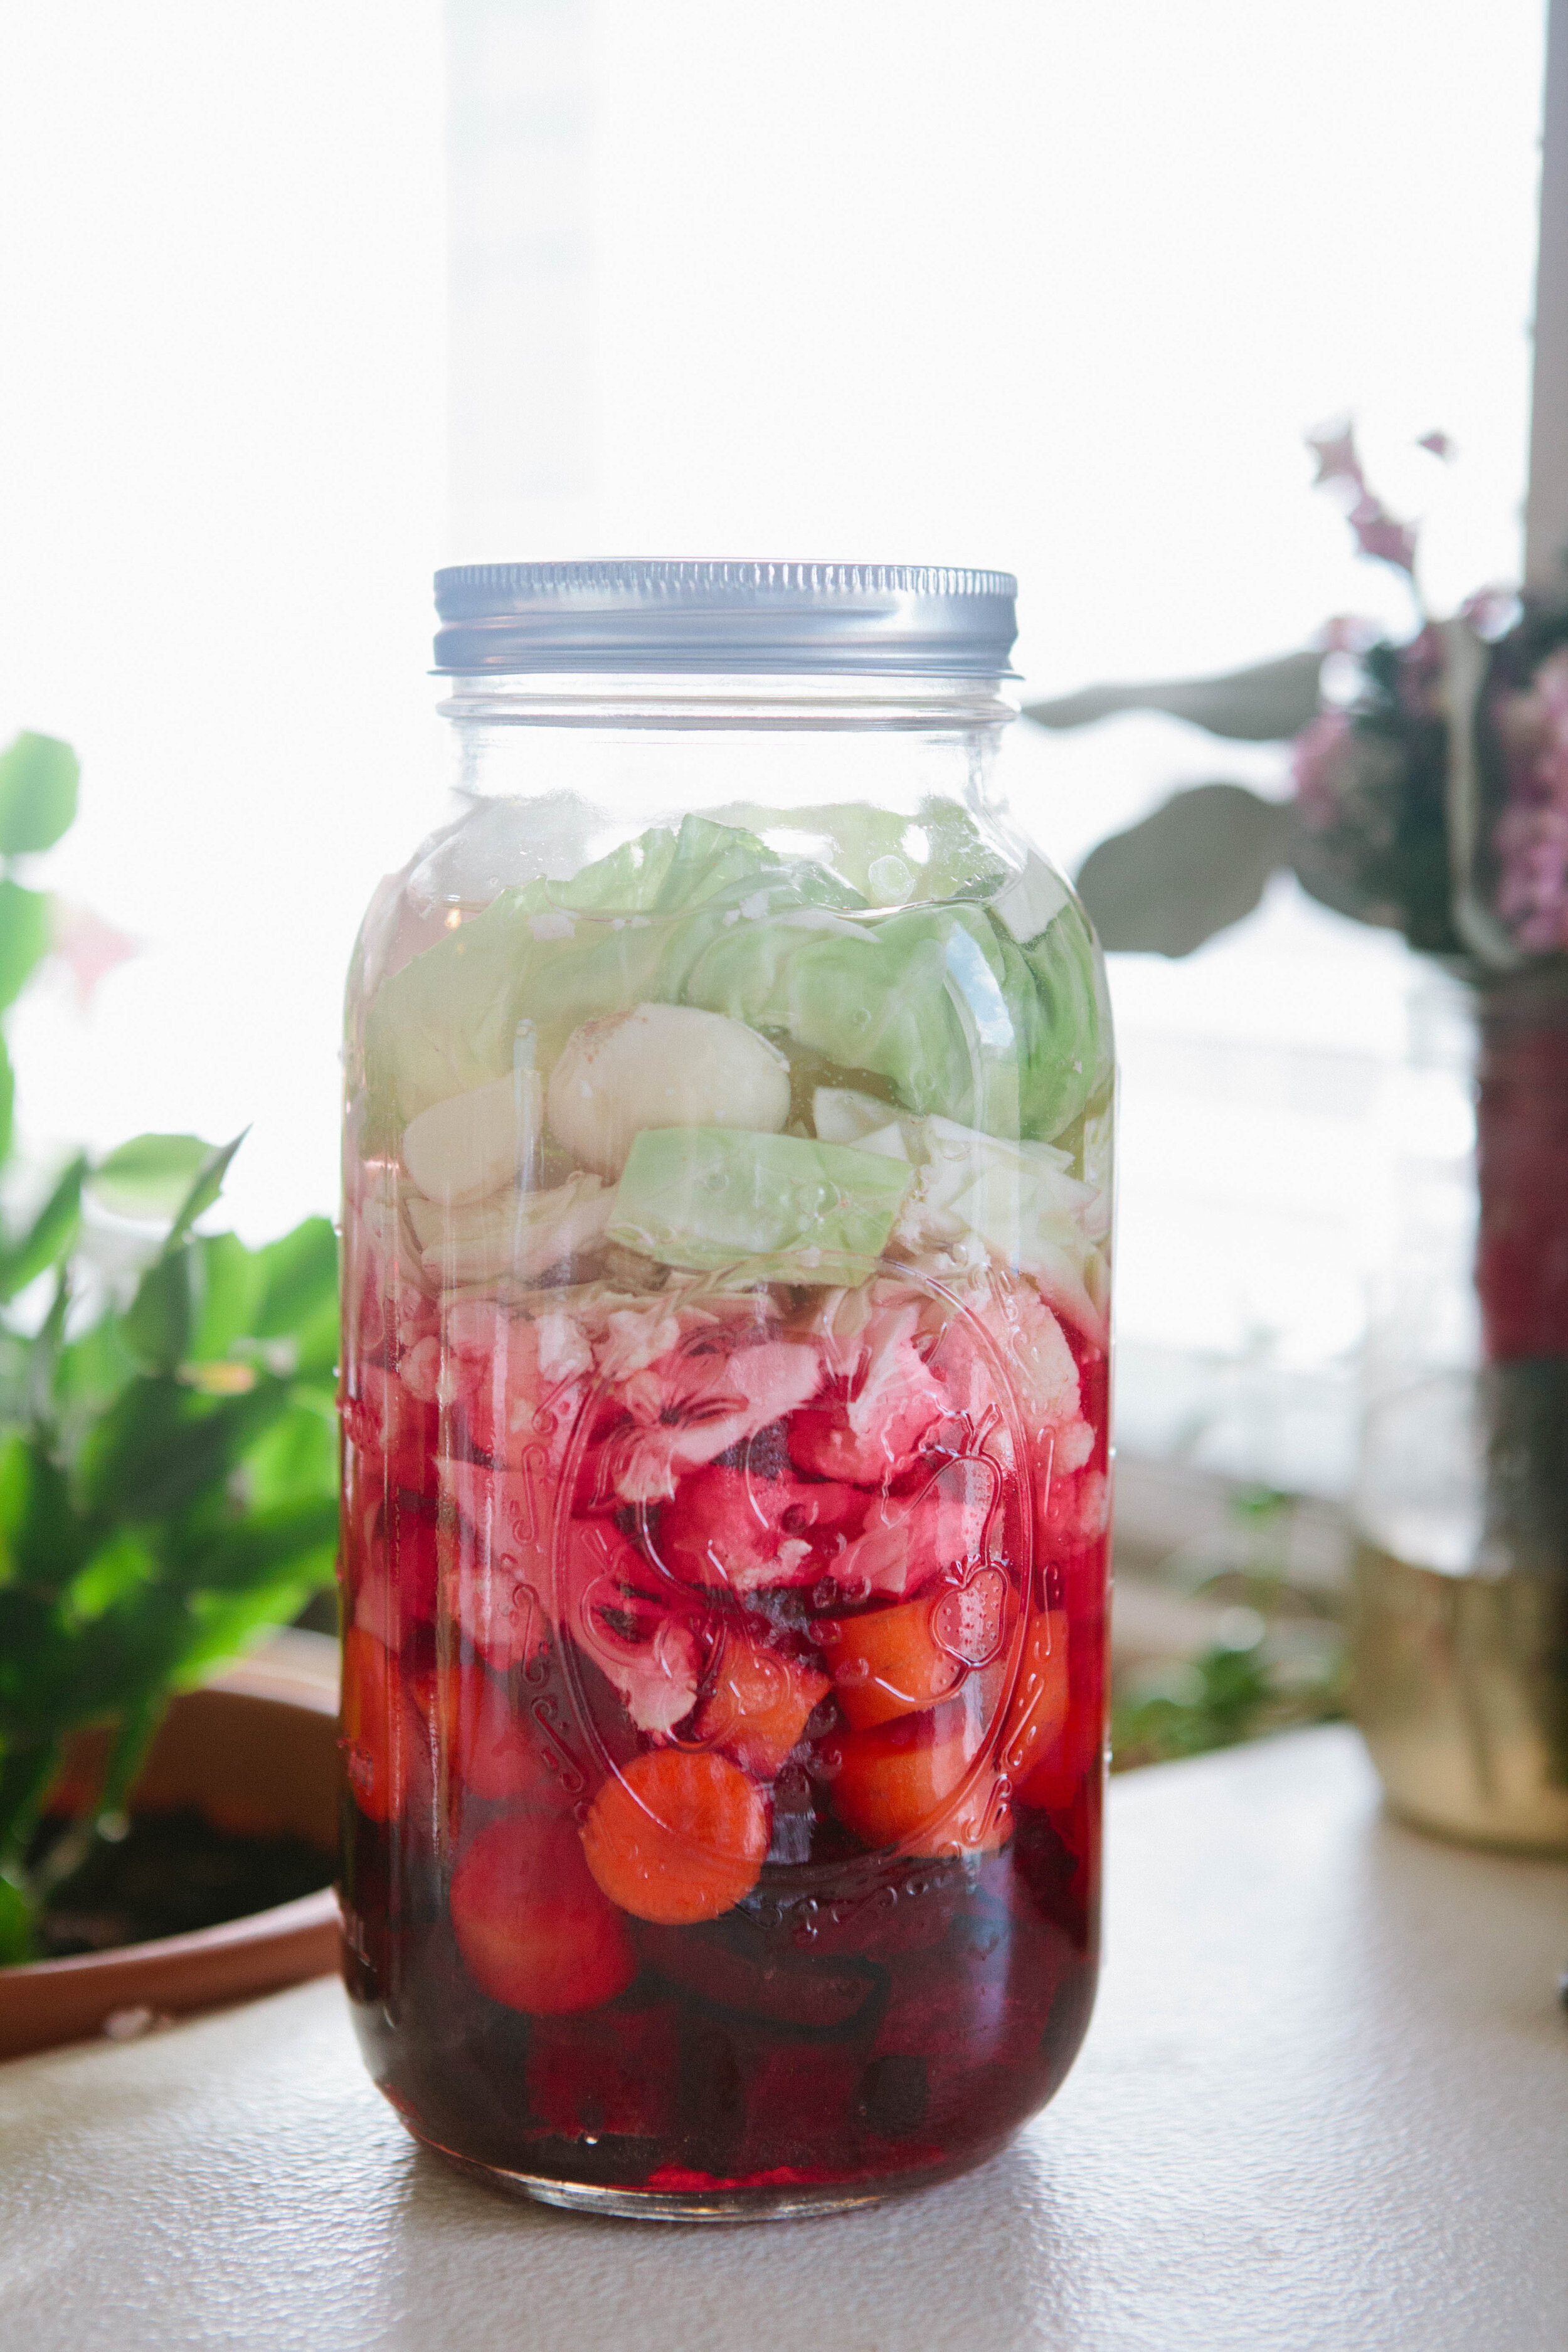
Cut the vegetables into bite size pieces and layer them in the jar in rainbow color order. Try not to overfill the jar. The vegetables should not come any taller than the shoulder of the jar. A jar that is too full is more likely to leak and make a mess in your kitchen.

IMG_2552.jpg

When you get to the cabbage, set aside one full small leaf. Fill the jar with the brine up to the shoulder. Add the cabbage leaf to the top to hold all the vegetables under the level of the water.

Wipe off the top of the jar & add a lid and band. Close to finger tightness.

Leave on the counter for 5-7 days. Then move to cold storage.


RecipeforKidFriendlyRainbowFerment.png

Kid Friendly Rainbow Ferment

Author: Amy Mihaly, Be Well Clinic

Ingredients

  • Red Beets
  • Carrots
  • Yellow Pepper
  • Broccoli
  • Purple Cabbage
  • Baja Salt
  • Water

Instructions

  1. Fill a quart mason jar most of the way with cold filtered water. Remember filtered water is very important here otherwise you will kill your ferment.
  2. Add 3 tbsp of salt. Stir to dissolve completely.
  3. Cut the vegetables into bite size pieces and layer them in the jar in rainbow color order. Try not to overfill the jar. The vegetables should not come any taller than the shoulder of the jar. A jar that is too full is more likely to leak and make a mess in your kitchen.
  4. When you get to the cabbage, set aside one full small leaf. Fill the jar with the brine up to the shoulder. Add the cabbage leaf to the top to hold all the vegetables under the level of the water.
  5. Wipe off the top of the jar & add a lid and band. Close to finger tightness.
  6. Leave on the counter for 5-7 days. Then move to cold storage.
Created using The Recipes Generator

Apple Scrap Vinegar

This recipe makes a type of apple cider vinegar. The difference is it’s made with apple scraps, as opposed to starting with apple cider that gets turned into apple cider vinegar. I love the idea of apple scrap vinegar because you utilize the entire apple! 

IMG_0419.jpg

My main use of apple cider vinegar is detox baths so I don’t necessarily need apple vinegar as rich in taste as apple vinegar made from cider. You can also use it to make this salad dressing.

This is so simple and easy that you can throw a jar together any time you are creating anything else with apples like dried apples or applesauce.

Ingredients for Apple Scrap Vinegar:

  • Apple Scraps from 5-6 Apples

  • Filtered Water

  • Apple Cider Vinegar with the Mother

Directions for Apple Scrap Vinegar:

IMG_2912.jpg

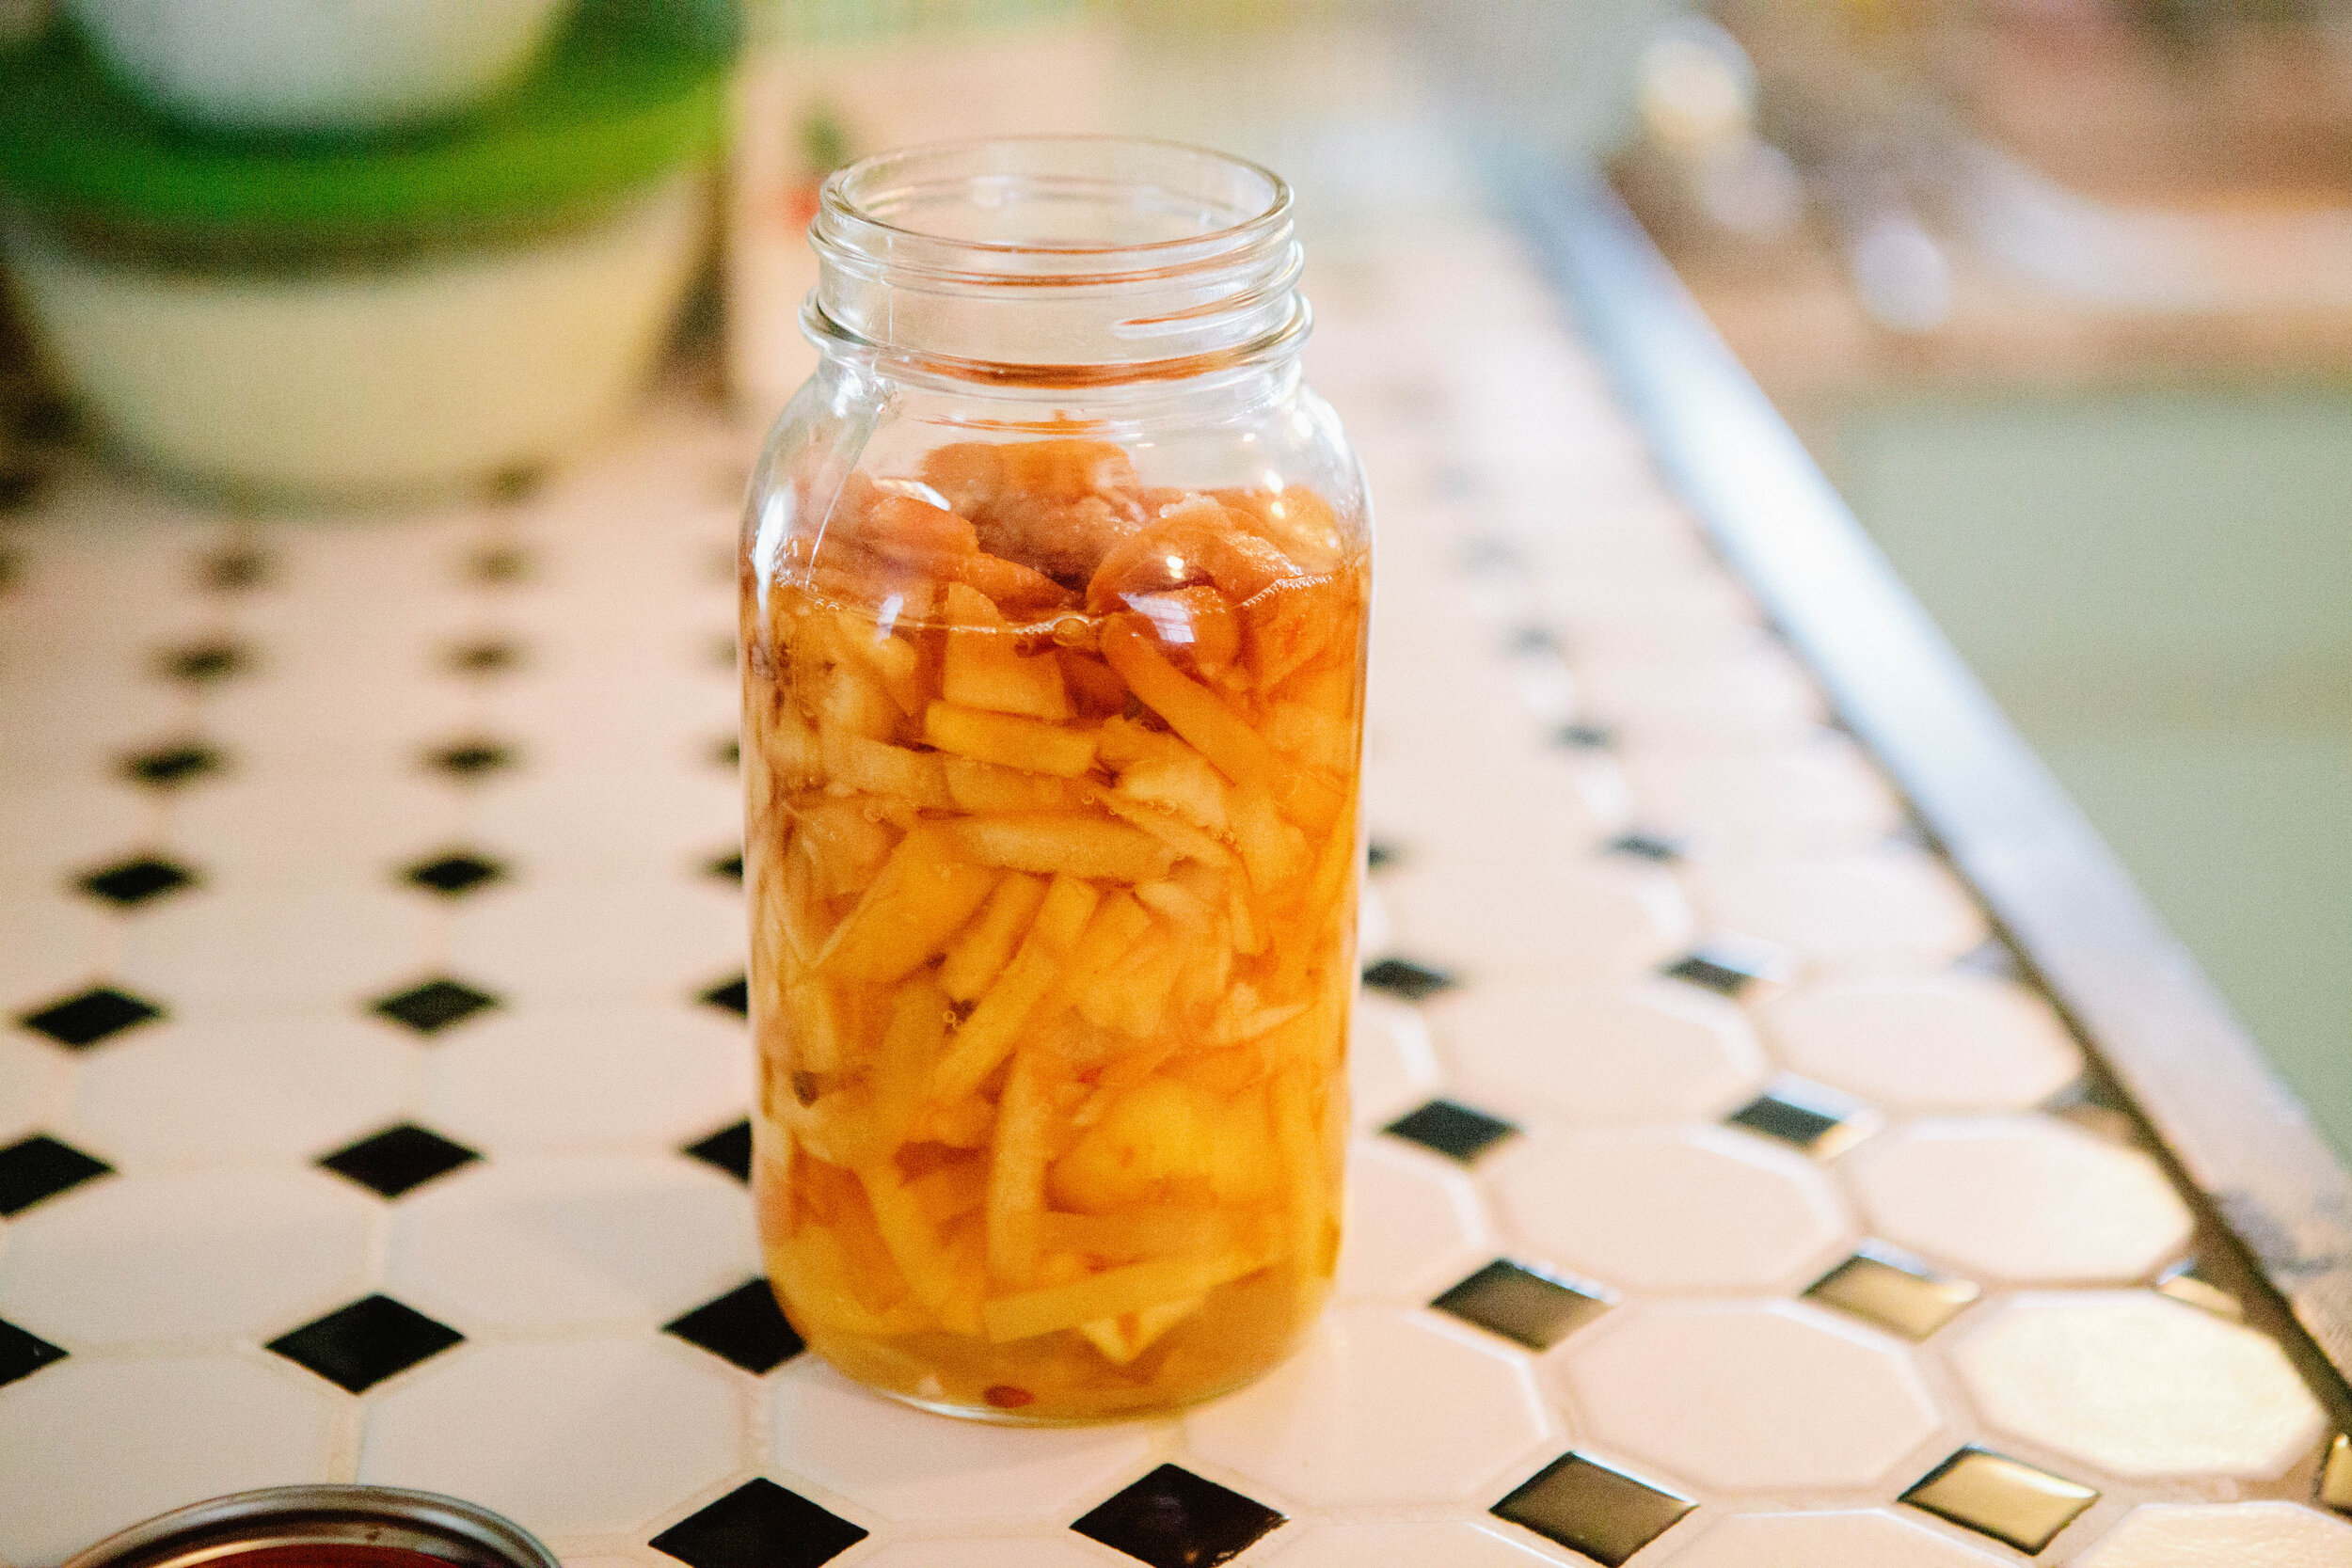
Add your apple scraps to a jar. You want the scraps to be packed into the jar fairly tightly.

Add filtered water almost to the shoulder.

Top with 2 tbsp of apple cider vinegar to jump start the fermentation process.

Seal with a lid. Leave on the counter for 3 weeks. 

IMG_2931.jpg

Strain out liquid into a separate jar.

Put the lid back on and set aside for 2-4 additional weeks.

It will develop a vinegar smell and taste. If, after 2 weeks, it does not have that, wait an additional two weeks. 

Once it’s done, keep it in the fridge if it will take you a while to use it.


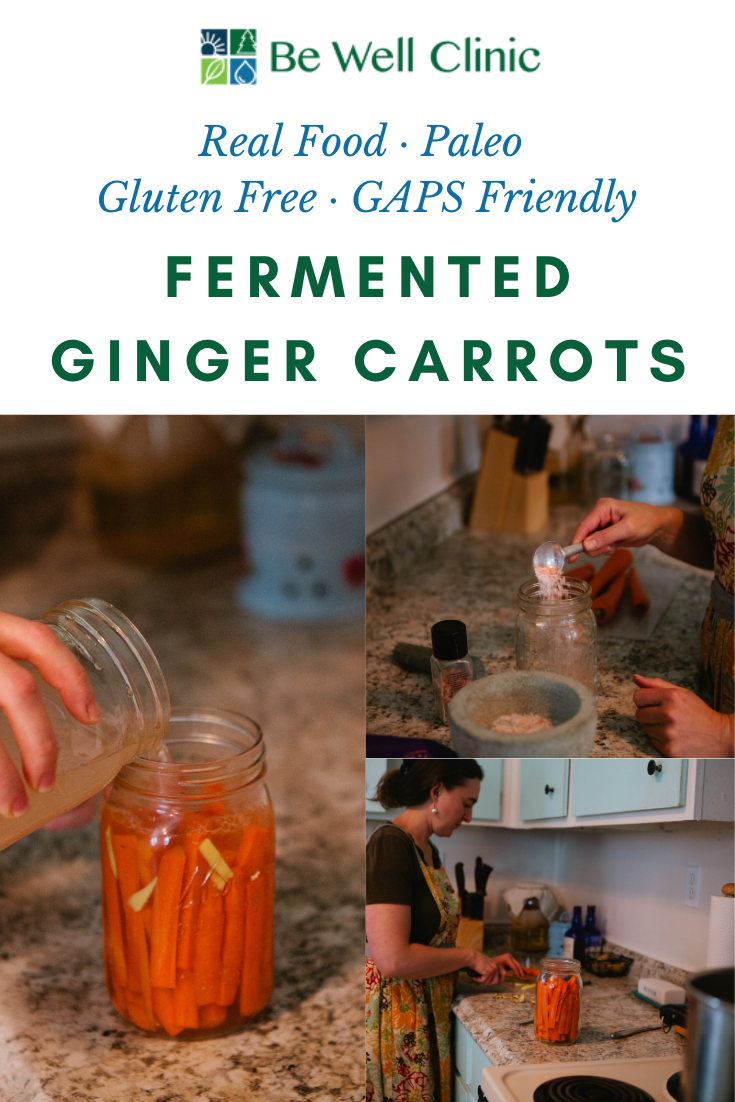
Fermented Ginger Carrots

These are a kid favorite!  This recipe is based on the Nourishing Traditions Cookbook but I’ve found most kids prefer carrots sliced rather than grated.

If you’re new to fermenting, read this section first! Otherwise, skip down to the recipe. 

Jars: I prefer using wide mouth jars for almost everything because small mouth jars are difficult to clean and access. There’s no need to sterilize jars for fermenting. If you clean your jars in your dishwasher, I recommend a quick rinse under hot water to remove any dishwasher soap residue.

Lids: Start with clean jar lids. You can reuse them as long as they are not very broken down or rusted. You can reuse lids from previous projects like water bath canning or other ferments as long as it is not rusty or the plastic is not visibly broken down.

Water: Be sure to use filtered water. The chlorine added to tap water kills microbial creatures so if you use it in your ferments, it will kill the good bacteria that we are trying to grow in our fermented food.

When you are jar fermenting, you need to have a tight seal with the metal lids but after you open a ferment, you can switch to a white plastic lid which will also save your metal lids from rusting and breaking down. 

I have found that simple tight lids work best, I do not use any gas releasing lids as I find them unnecessary and even detrimental. 

This is a super simple ferment to make and because these carrots taste almost fresh, it’s a great option for getting ferments into your children.  

I have just started creating a brine in a separate jar from the ferments. I really like it because it makes fermenting so much faster. All I have to do is pack my jars and then pour my liquid over it. This is especially great if I’m doing multiple types of ferment mixtures or vegetables.

Fun fact about carrots: if you’re growing your own carrots, leave them in the ground until after the first frost. They become sweeter. 

Ingredients

  • 3-4 tbsp Sea Salt (I find in Colorado, 3 is plenty!)

  • 5-6 Carrots

  • 2 inches Fresh Ginger

Directions

IMG_0481.jpg

Create a brine for the carrots. Fill a quart size jar with filtered water. Add salt. Stir. 

Slice carrots into jar sized spears. Cut off the ends. 

IMG_0501.jpg

Add carrots to jars. Shake them to make sure they fit completely. Leave 1 inch head room. 

Peel ginger with the back of a spoon or a knife. You can grate it or slice it. I prefer sliced because I don’t like the spice of ginger. 

IMG_0505.jpg

Wedge the slices of ginger in between the carrots so they don’t float.

Pour the brine of the carrots to the shoulder of the jar.

IMG_0525.jpg

Make sure all the carrots and ginger are under the water. 

Wipe the edge of the jar with a wet paper towel. 

IMG_0534.jpg

Put a lid on the jar and seal to hand tightness. You’re not securing it for take off!

Let set on the counter for a week because of the thickness of the carrots. You can always ferment longer or shorter. As long as there is pressure on the metal lid for at least 24 hours, I consider that fermented. The longer you ferment, the softer they will get. Because carrots are so hard, it will take a long time to get them too soft. If they do get too soft, you can simply cook with them!

I do not recommend burping ferments unless it appears that the jar lid is going to break. In general, I find this is only a problem when you have over filled your jars or when you are making garlic.

After a week, move the ferment to “cold storage.” This can be defined as the fridge, a cool place in your basement or a dark pantry. The lower the temperature, the slower the fermentation action will continue to happen. When you’re ready to eat it, switch the lid to a plastic lid. Wash and dry the metal lid to be used again.


FermentedGingerCarrots.png

Fermented Ginger Carrots

Author: The Be Well Clinic

Ingredients

  • 4 tbsp Sea Salt (I find in Colorado, 3 is plenty!)
  • 6 Carrots
  • 2 inches Fresh Ginger

Instructions

  1. Create a brine for the carrots. Fill a quart size jar with filtered water. Add salt. Stir.
  2. Slice carrots into jar sized spears. Cut off the ends.
  3. Add carrots to jars. Shake them to make sure they fit completely. Leave 1 inch head room.
  4. Peel ginger with the back of a spoon or a knife. You can grate it or slice it. I prefer sliced because I don’t like the spice of ginger.
  5. Wedge the slices of ginger in between the carrots so they don’t float.
  6. Pour the brine of the carrots to the shoulder of the jar.
  7. Make sure all the carrots and ginger are under the water.
  8. Wipe the edge of the jar with a wet paper towel.
  9. Put a lid on the jar and seal to hand tightness. You’re not securing it for take off!
  10. Let set on the counter for a week because of the thickness of the carrots. You can always ferment longer or shorter. As long as there is pressure on the metal lid for at least 24 hours, I consider that fermented. The longer you ferment, the softer they will get. Because carrots are so hard, it will take a long time to get them too soft. If they do get too soft, you can simply cook with them!
  11. I do not recommend burping ferments unless it appears that the jar lid is going to break. In general, I find this is only a problem when you have over filled your jars or when you are making garlic.
  12. After a week, move the ferment to “cold storage.” This can be defined as the fridge, a cool place in your basement or a dark pantry. The lower the temperature, the slower the fermentation action will continue to happen. When you’re ready to eat it, switch the lid to a plastic lid. Wash and dry the metal lid to be used again
Created using The Recipes Generator

Fermented Ketchup

Most of what I’ve learned about ketchup is from Sally Fallon in Nourishing Traditions. As she points out, ketchup has historically been a term for a fish sauce added to foods for flavor. Various cultures added available ingredients to it to make sauces with unique flavor profiles. Tomato ketchup was created by Americans by adding tomatoes from their neighbors in Mexico. 

Store Bought ketchup, while reminiscent of the traditional flavor, is an unhealthy food choice due to the added sugar. Traditional ketchup, such as this recipe based on Nourishing Traditions, is a live food, and thus healthy and beneficial to your body.

I’ve heard that some parents add this ketchup to empty store bought ketchup bottles because their kids will eat anything from the bottles. Try it if you’re worried about your kids enjoying this version of ketchup!

This ketchup can be used in any way that modern ketchup is used! Add it to our burgers, dip fries in, or top scrambled eggs if that suits your fancy. It is also one of the two homemade sauces in this BBQ sauce recipe. 

You could also choose to make your own fish sauce. Nourishing Traditions by Sally Fallon has a great recipe for how to make it at home. For this recipe I chose not to.

As some of you may also know, my current favorite form of ketchup is another traditional recipe of mushroom ketchup. It’s tomato free so it’s great for anyone with nightshade intolerance. 

I’m unsure exactly how long this will keep in the fridge. However, similar ferments are fine for 1-3 months. If there’s any obvious mold or any putrefied (vomit like) smells, it’s probably time to make a new batch!

Ingredients for Fermented Ketchup:

Makes one pint of ketchup

  • 1 ½ cups of  tomato paste, ideally glass canned and organic

  • ⅛ cup whey

  • 1 ½ tsp salt

  • ¼ cup maple syrup

  • ¼ tsp cayenne pepper

  • 3 cloves of garlic, peeled and mashed

  • ½ cup fish sauce

Directions for Fermented Ketchup:

IMG_2715_edited.jpg

Combine all the ingredients and mix well.

Add to a mason jar with a lid tightly closed. Allow to ferment at room temperature for two days.

IMG_2733_edited.jpg

Be sure to give some head space, at least an inch at the top of the jar.

After two days, move the ketchup to the fridge. 

Enjoy!

Recipes for Fermented Food

FERMENTING - ONE OF THE BEST THINGS I DISCOVERED ON MY JOURNEY OF HEALING!

The process of preserving food by fermenting it is something that’s been around for centuries and is practiced all other world. It’s not just the process of creating alcoholic beverages like beer or wine, or creating different types of dairy like cheese or yogurt.  Eating fermented foods is a huge part of the GAPS Diet, but anyone who adds fermented foods to their diet will see some benefit.


Videos About Fermenting


Blogs About Fermentation

Vintage Food Hacks Part 1

Today, let’s talk about what in the world lacto-fermentation is, and how you can start doing it yourself!

Vintage Food Hacks Part 2

Today, let’s talk about what in the world lacto-fermentation is, and how you can start doing it yourself!

The Best Way to Add Fermented Food to Your Diet

Today, let’s talk about what in the world lacto-fermentation is, and how you can start doing it yourself!


Recipes for Creating Your Own Ferments

Beet Kvass

Beet Kvass is a liver tonic. Anyone can make this simple fermented drink! It requires only a few ingredients, and only a few minutes to "put up."

Vegetable Medley

One of the most important ferments in the GAPS™ diet is the vegetable medley. You can find this recipe in Dr. Natasha Campbell-McBride's book, Gut and Psychology Syndrome. Her recipe is for a bowl ferment, but you can also make it in a jar, which is how I prefer to make it.

Fermented Garlic

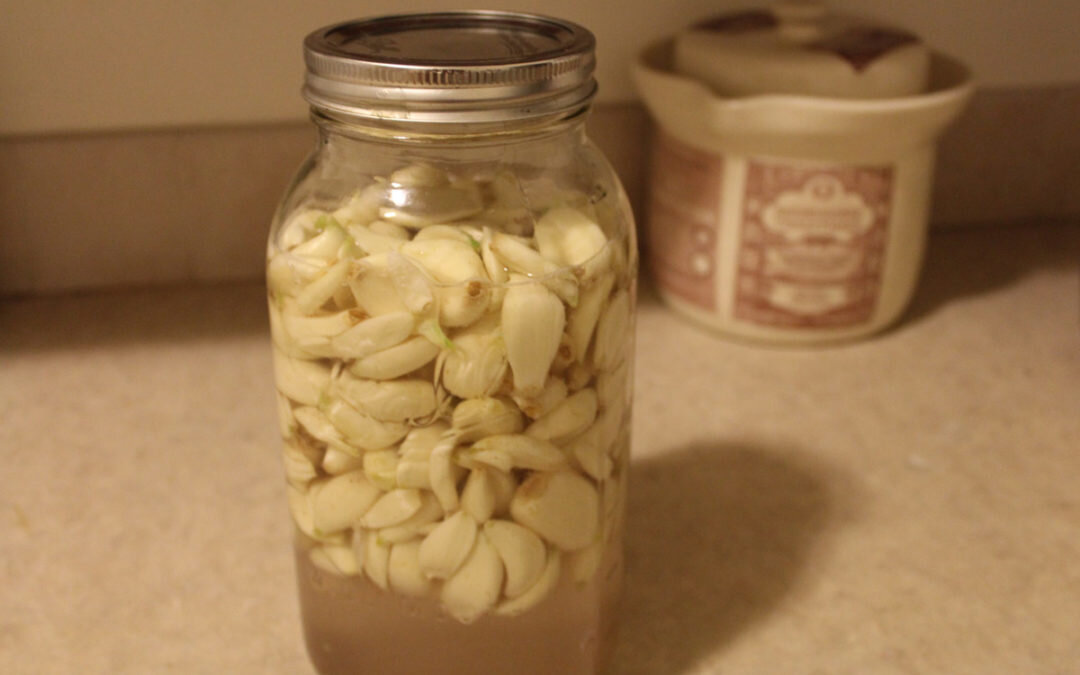
Most of us have heard that garlic supports our immune system. But did you know that only applies to raw garlic?

Cooked garlic does have some benefit, but most of the health properties are lost when the garlic is heated. Raw garlic, however, has many supportive health benefits. And when raw garlic is fermented, many of these increase.

Fruit Chutney

This recipe is very simple—chop and combine ingredients, simmer for a while, then store in jars. It would be a great recipe to make in a crockpot... you really could fix it and forget it! But simple doesn't mean plain. It's delicious and adds flavor to any meat you are eating. And I'm told, quite excellent with turkey!  

Trail Mix

With all the hiking and camping that happens in Colorado, trail mix is almost a main food group. But commercial trail mixes contain candy, sweetened fruit, and unprepared nuts: not the superfoods they claim to be!

Swedish Gravlax

This is a brined fish meal legal on GAPS stage 2. You eat little pieces, one small piece a day.

Fermented Almond Flour

This is a great way to make fermented almond flour if your recipe calls for a very specific ratio of wet to dry ingredients. It’s also great for recipes that call for frying, like these onion rings!

You can also make fermented flour with almonds already made into flour. See the recipe here.

Fermented Almond Butter

Sauerkraut

While good quality sauerkraut can be obtained in most stores now, I still prefer to make my own as I think it tastes the best. I put a lot of love and anticipation into my sauerkraut, as I don’t eat it until it has been fermenting for at least three months.

Sourdough

I by no means consider myself a sourdough expert. But I’ve enjoyed learning about sourdough. Once you understand the basics of sourdough, you can experiment with lots of ways to prepare it. This post is just an intro into the amazing world of sourdough!

Fermented Pumpkin Seeds

Pumpkin seeds also have an especially helpful quality in that they help rid your body of parasites by attacking the parasites and intestinal worms. If you suspect you have parasites or worms, consuming pumpkin seeds is a good idea. However, be sure to take it slow and don’t overdo it.

Cabbage Tonic

Fermented cabbage is very high in vitamin C which is essential for healing a leaky gut. This cabbage tonic can be taken from the beginning of the Intro Diet of GAPS. Use this tonic daily to help change your gut flora.

Kefir

Kefir is a fermented drink made from kefir grains. It’s a bit like a very thin yogurt and has great health benefits!

The great news is, like many fermented drinks, kefir is very easy to make on your own!

Scratching the Surface of Sourdough

I by no means consider myself a sourdough expert. But I’ve enjoyed learning about sourdough. Once you understand the basics of sourdough, you can experiment with lots of ways to prepare it. This post is just an intro into the amazing world of sourdough!

Sourdough-Starter-How-To-Start-Sourdough-Sourdough-Bread

Sourdough is a traditional way of preparing bread that’s been used for centuries. Once you understand the basics, it’s an incredibly easy process. Properly prepared, it’s the preferred way to prepare and eat wheat flour. If you’re able to tolerate it, it’s a delicious way to make bread! Sourdough isn’t GAPS Legal.

Here’s an awesome video that will help keep your starter happy.

I got my sourdough starter from a friend. If you don’t have a friend with a sourdough, you can also purchase it from Cultures for Health. 

How to Feed Sourdough:

Sourdough-Starter-How-To-Start-Sourdough-Sourdough-Bread

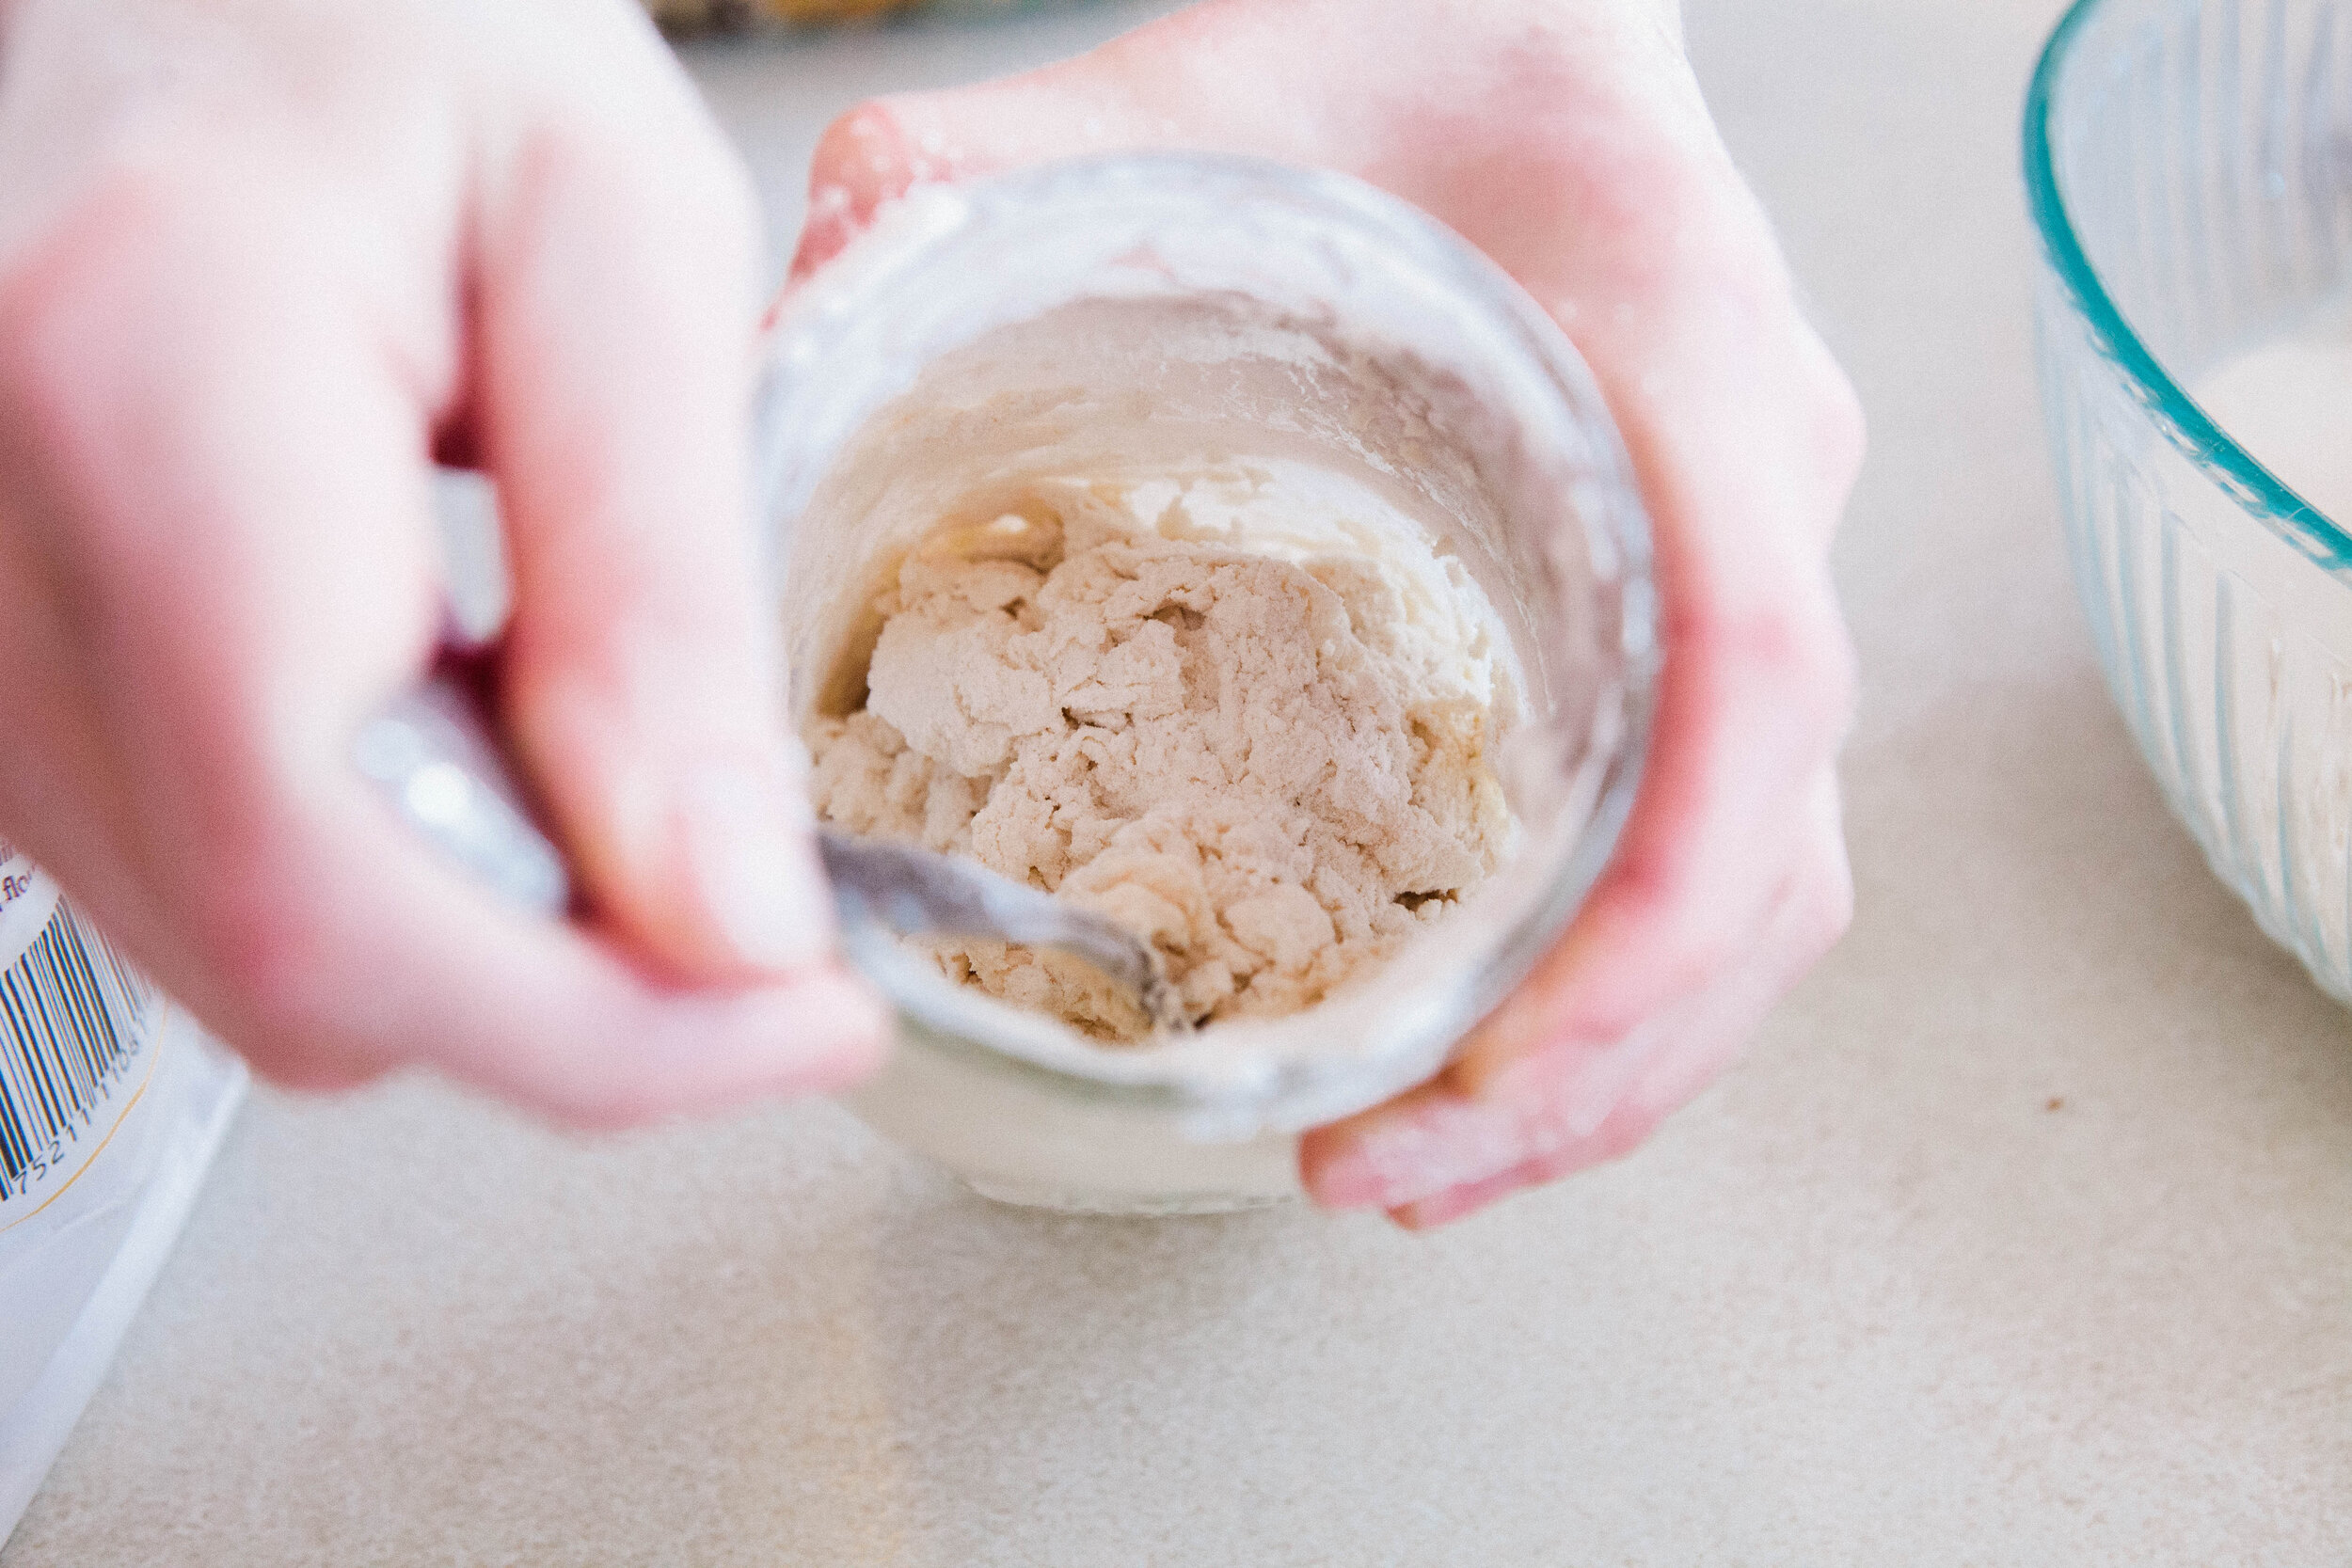
In the jar, add a few scoops of high quality white  (I use Central Milling Company unbleached white flour.) Mix until your sourdough has a crumbly texture.

Sourdough-Starter-How-To-Start-Sourdough-Sourdough-Bread

Add filtered water, a little bit at a time, mixing often. Add enough water so the sourdough starter resembles wet playdough.

You want to store it four feet away from any open ferments.

Once you have sourdough started, it can be added to lots of different recipes. I make it into flatbreads, crackers and of course breads. I like this one, adapted from “Baking with Sourdough” which makes a very dense bread.

Ingredients for Sourdough Bread:

  • 2 cups high quality organic white flour

  • 2 cups high quality organic whole wheat flour

  • 1 cup sourdough starter

  • 2 cups warm water

  • 2 tsp salt

  • 2 tsp sugar

  • 4 cups unbleached white flour

Sourdough-Starter-How-To-Start-Sourdough-Sourdough-Bread

Mix first 4 ingredients in a large bowl and light cover. Leave on the counter 10 - 24 hours, depending on how sour you want your bread to be.

When ready to bake bread, stir in salt and sugar. Add enough flour to make a handleable dough. Form the dough into a ball. Cover with a damp cloth and let rest for 15 to 20 minutes.

Knead the dough until it’s smooth and stiff so it will hold its shape.

Set the dough into a greased bowl, cover with a damp cloth and allow to rise again. It should double in size, about an hour. Shape into 2 long loaves and place on a cookie sheet sprinkled with corn meal. Let the loaves rise again until they have doubled, about an hour.

Brush the loaves with cold water and bake in a preheated 450 degree oven for 30 - 35 minutes until they are light brown and make a hollow noise when tapped.


SourdoughBread.png

How to Make Almond Butter

Ingredients for Fermented Almond Butter

  • 3 cups Almonds

  • ½ cup Whey

  • Filtered Water

  • Salt

Directions for Fermented Almond Butter

Place your almonds in filtered water with whey. Allow to soak for 24 hours.

IMG_4334.jpg

Drain the almonds in a colander and rinse with filtered water.

IMG_4505.jpg

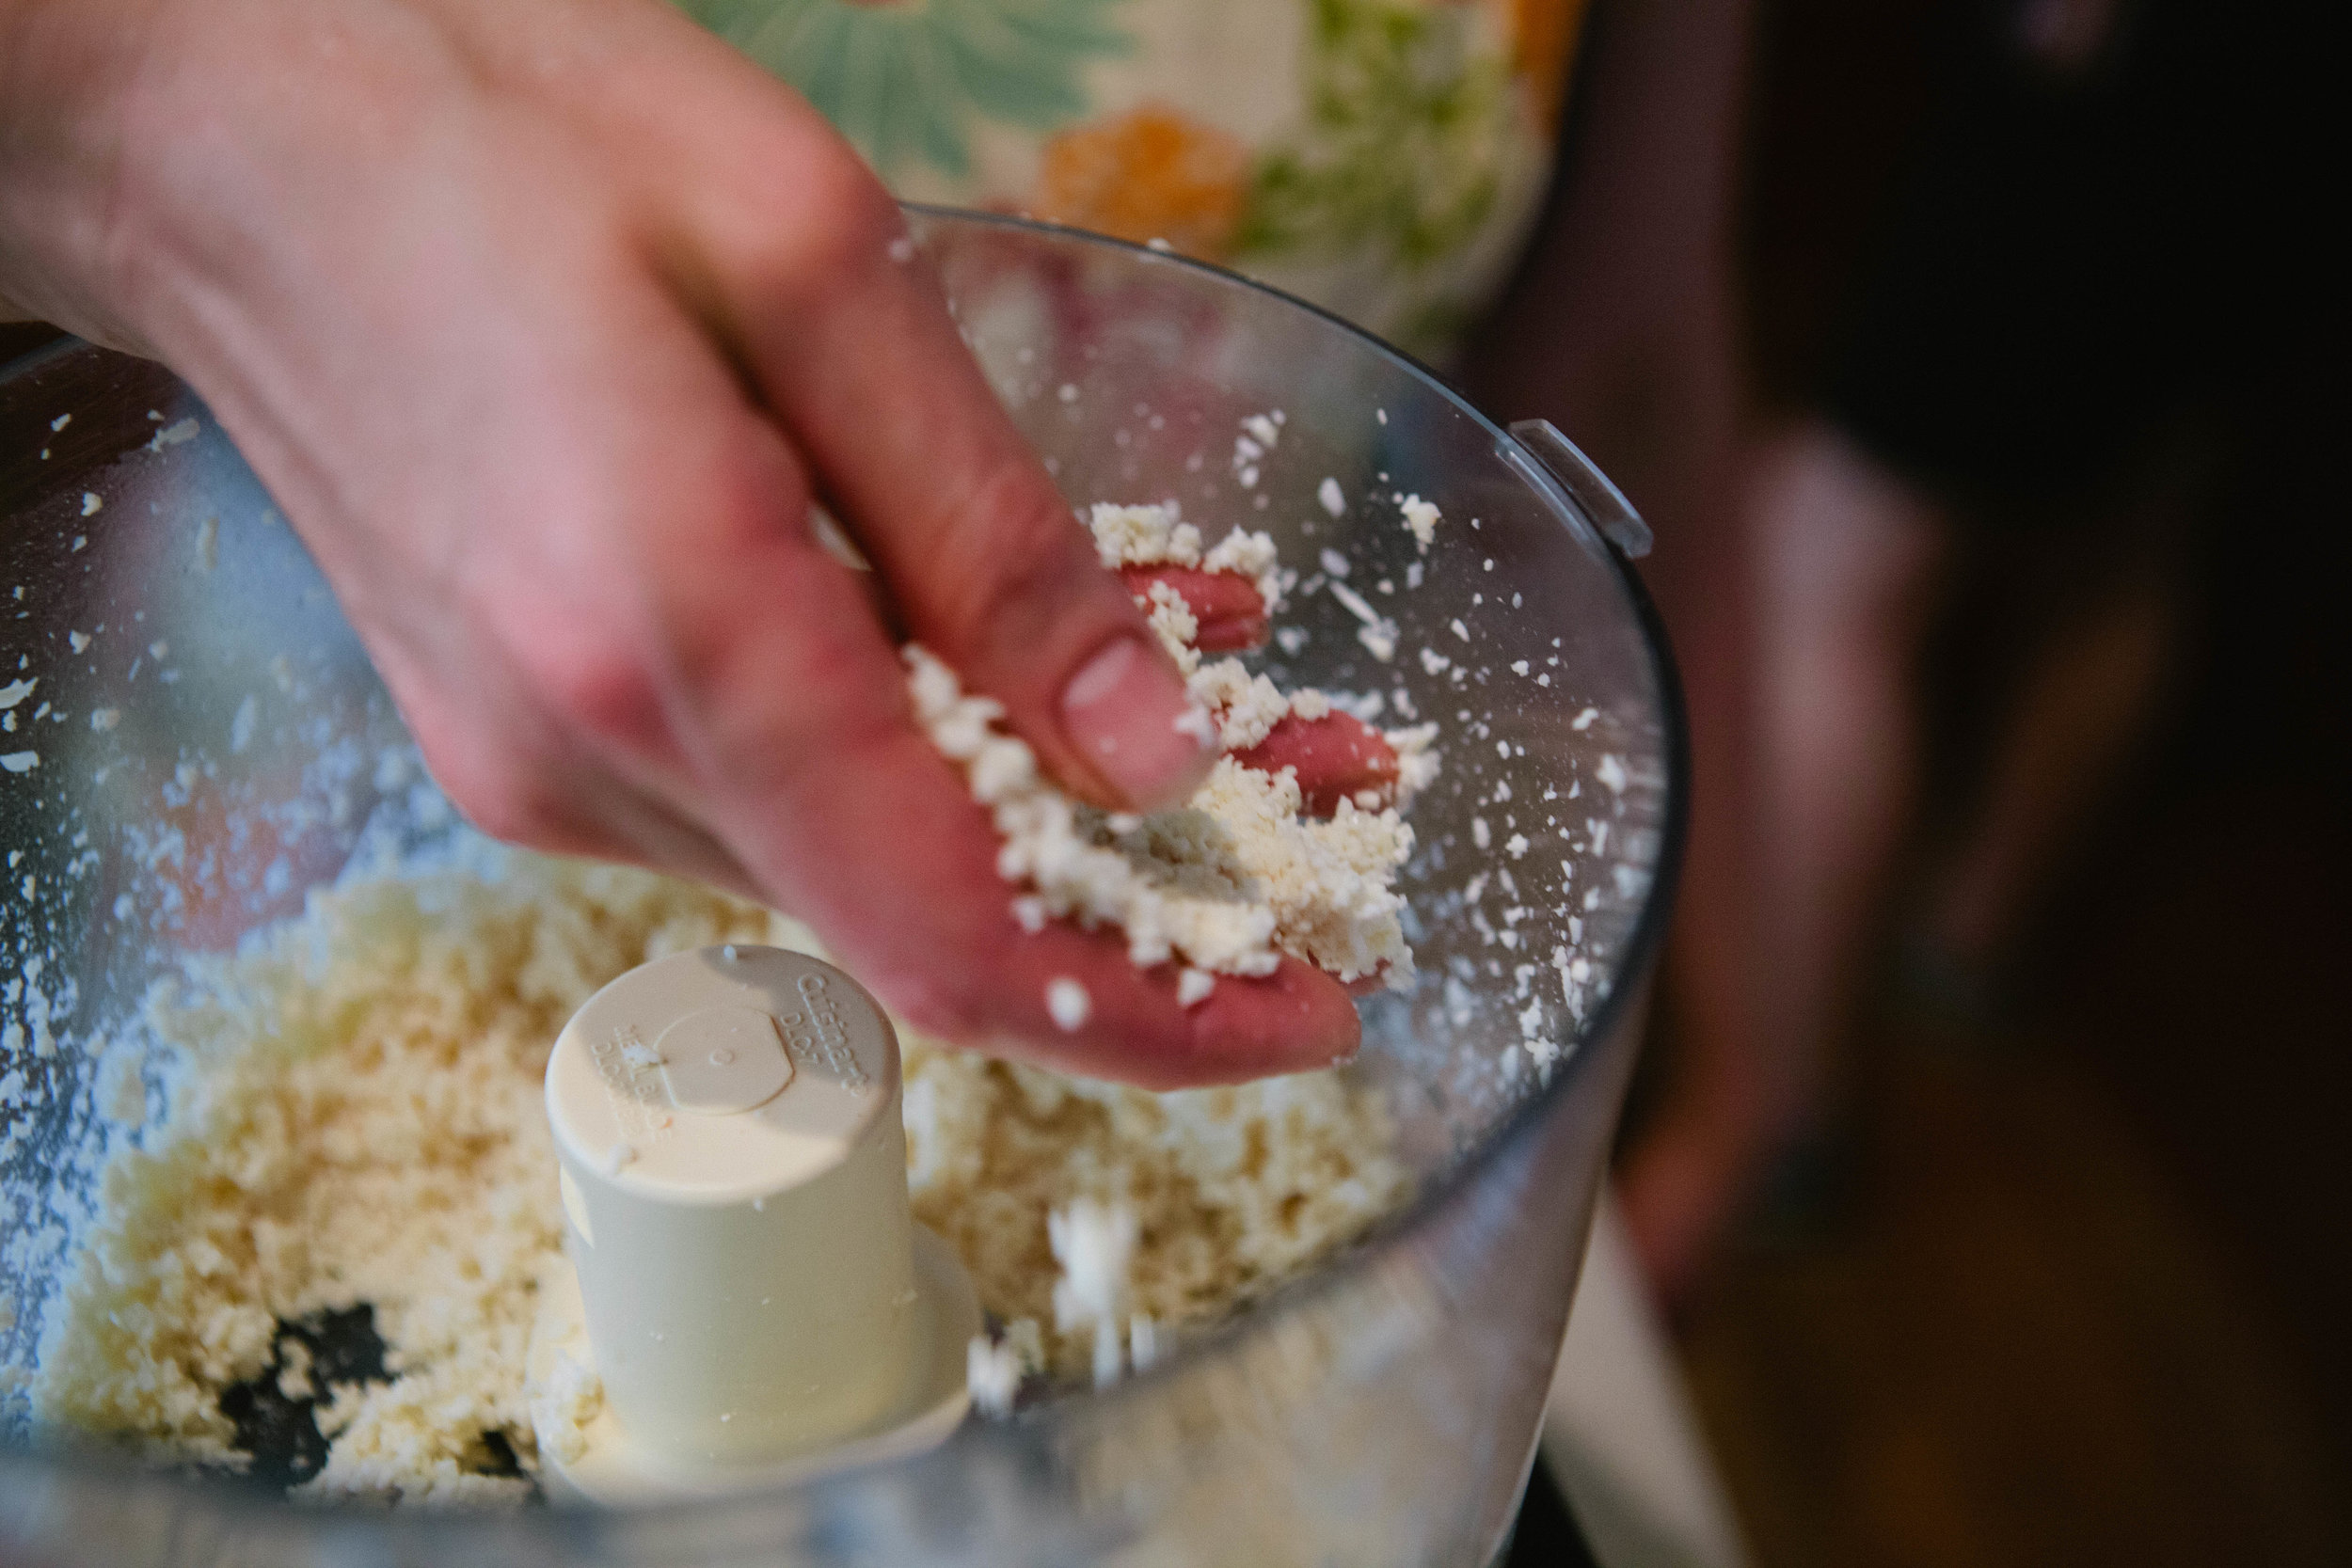
Place almonds into a food processor. Pulse them consistently until you get almond butter.

IMG_4627.jpg

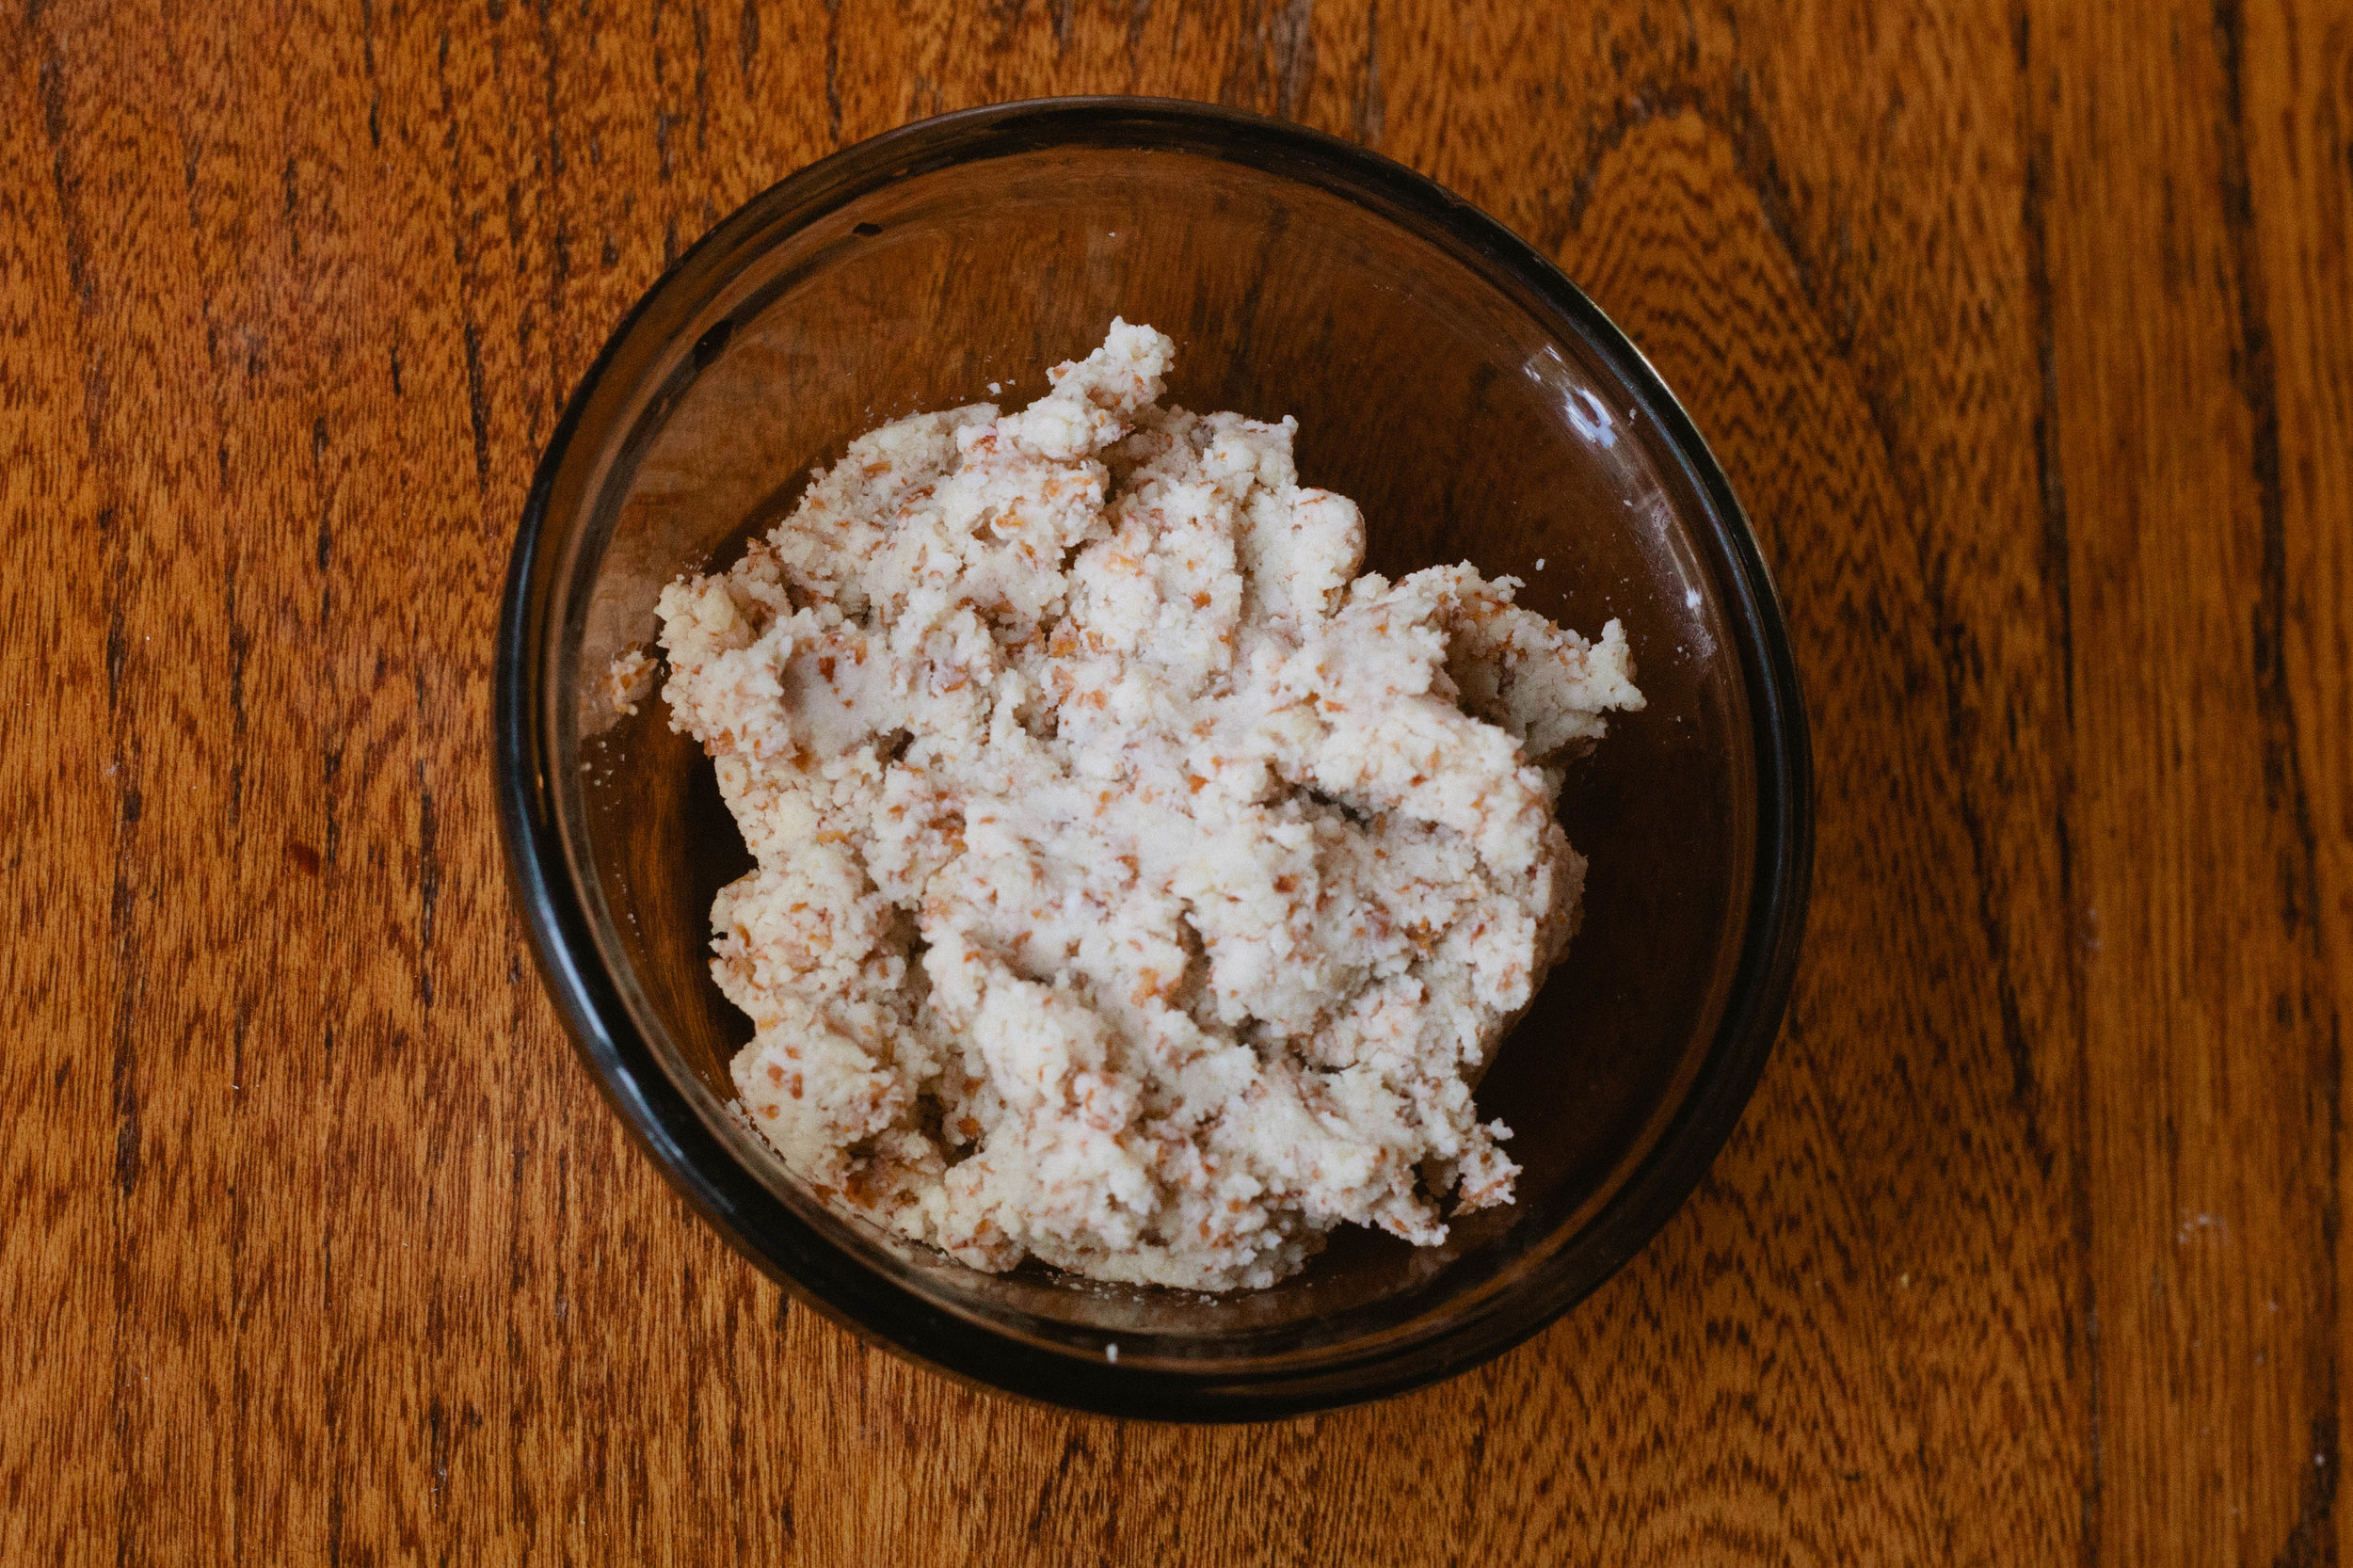
Once almonds are the consistency of almond butter, add four shakes of salt. Pulse for several more seconds. Add four more shakes of salt.


Almond Butter

Author:
prep time: cook time: total time:

ingredients:

  • 3 cups Almonds
  • ½ cup Whey
  • Filtered Water
  • Salt

instructions:

How to cook Almond Butter

  1. Place your almonds in filtered water with whey. Allow to soak for 24 hours.
  2. Drain the almonds in a colander and rinse with filtered water.
  3. Place almonds into a food processor. Pulse them consistently until you get almond butter.
  4. Once almonds are the consistency of almond butter, add four shakes of salt. Pulse for several more seconds. Add four more shakes of salt.
Created using The Recipes Generator
33.png

DIY Almond Flour from Nuts

Any seed wants to be a plant. Seeds include nuts, seeds, beans, and grains. To protect itself, a seed has phytic acid and other enzyme inhibitors and anti-nutrients. These substances attack the body of the animal that ate the seed, preventing the digestion of the seed. This is why we see whole seeds in bird poop.

Manually grinding seeds into flours does nothing to negate these enzyme inhibitors and anti-nutrients. We may not necessarily see whole seeds in our stools but we don’t need to for our bodies to experience the effects of these substances. Inflammation, poor absorption of foods, and leaky gut are some of the effects on our bodies of eating seeds that are not properly prepared. To learn more about properly preparing grains, check out my video.

HOW TO PREPARE GRAINS PROPERLY

When we properly prepare our grains however, we begin the germination process, which changes the seeds chemical structure. It neutralizes the anti-nutrients and enzyme inhibitors, and the seed prepares to bring life. When we eat a seed in this state, it’s nutrients are available to us and it brings life to our bodies.  

All seeds can be prepared in three ways - soaking, sprouting or fermenting. Fermenting is by far the most simple and the most beneficial. All it requires is whey. These directions are for almond flour but you can use the same concept to any nut, seed, or grain. For specific instructions on how to do this with whole seeds, see my recipe on trail mix.

The other benefit of using fermented almond flour is that it makes a much lighter end product. The fermentation process acts somewhat like a baking soda or powder, increasing the air space as your treat bakes, making it less dense.

This is a great way to make fermented almond flour if your recipe calls for a very specific ratio of wet to dry ingredients. It’s also great for recipes that call for frying, like these onion rings!

You can also make fermented flour with almonds already made into flour. See the recipe here.

Ingredients for Making Almond Flour from Fermented Nuts

  • 3 cups Almonds

  • ½ cup Whey

  • Filtered Water

Directions for Making Almond Flour from Fermented Nuts

Place your almonds in filtered water with whey. Allow to soak for 24 hours.

IMG_4326.jpg

Drain the almonds in a colander and rinse with filtered water.

For the easiest almond flour, peel the almonds by squeezing them between your fingers until the skins pop off.

Drain the almonds well. If you don’t drain them well, your flour will be wet.

IMG_4368.jpg

Place almonds into a food processor. Pulse them consistently for about 60 seconds in one second pulses. Scrape the sides of the food processor consistently to ensure almonds are all blended to the same size.

Don’t pulse for too long or you will get almond butter!


DIY Almond Flour

Author:
prep time: cook time: total time:

ingredients:

  • 3 cups Almonds
  • ½ cup Whey
  • Filtered Water

instructions:

How to cook DIY Almond Flour

  1. Place your almonds in filtered water with whey. Allow to soak for 24 hours.
  2. Drain the almonds in a colander and rinse with filtered water.
  3. For the easiest almond flour, peel the almonds by squeezing them between your fingers until the skins pop off.
  4. Drain the almonds well. If you don’t drain them well, your flour will be wet.
  5. Place almonds into a food processor. Pulse them consistently for about 60 seconds in one second pulses. Scrape the sides of the food processor consistently to ensure almonds are all blended to the same size.
  6. Don’t pulse for too long or you will get almond butter!
Created using The Recipes Generator
32.png

How to Make Sauerkraut - DIY Sauerkraut

Fermented cabbage is very high in vitamin C which is essential for healing a leaky gut. Vitamin C is anti-inflammatory and immune boosting.

While good quality sauerkraut can be obtained in most stores now, I still prefer to make my own as I think it tastes the best. I put a lot of love and anticipation into my sauerkraut, as I don’t eat it until it has been fermenting for at least three months.

Making your own sauerkraut is very cost effective if you are eating on a budget. Not only are you making it for pennies, fermenting vegetables increases the bioavailability of nutrients, making this a ‘food hack.’

I used to cut my cabbage in a food processor but I feel that all time considered, including clean up time, it’s actually faster to cut it yourself. Plus, I like touching the cabbage myself instead of letting a machine cut it.

Sauerkraut works anaerobically, meaning it does not require oxygen. Any vegetable that is above the level of the water can grow mold or undesirable bacteria strains.

I do my sauerkraut in one quart jars because I prefer to open a smaller amount at a time. You can use any size jar that you want. An open jar in the fridge will keep for six months to a year. If kept at cooler temperatures, unopened, like in a root cellar or in the fridge, sauerkraut will keep for two or more years.

You can add whey to your cabbage to make the sauerkraut. Not using whey is called wild fermentation. It allows for different bacteria to grow than using a dairy based whey. I prefer to make my sauerkraut without whey.

With all ferments, variety is key. Using both whey and simply salt to make your ferments provides good variety in your diet.

Ingredients for Making Your Own Sauerkraut:

  • 1 Medium Cabbage

  • 2 tbsp Salt

  • Filtered Water

Directions for Making Your Own Sauerkraut:

Remove and rinse outside leaves and reserve them for the tops of your jars to keep the vegetables from coming up the level of the water.

how-to-make-your-own-sauerkraut-how-to-make-my-own-sauerkraut-diy-sauerkraut-making-sauerkraut-cabbage-recipes-what-to-do-with-too-much-cabbage-gaps-diet-fermented-foods-gaps-protocol-northern-colorado-gaps-practitioner-certified-gaps-practitioner-l…

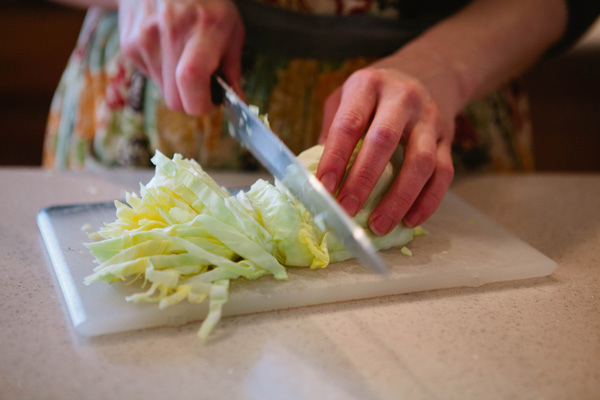
Slice cabbage into slivers. As you slice it, keep turning it to keep yourself safe and keep your cabbage evenly sized.

how-to-make-your-own-sauerkraut-how-to-make-my-own-sauerkraut-diy-sauerkraut-making-sauerkraut-cabbage-recipes-what-to-do-with-too-much-cabbage-gaps-diet-fermented-foods-gaps-protocol-northern-colorado-gaps-practitioner-certified-gaps-practitioner-l…

Add a little bit of salt and massage with your hands for a few minutes. The salt starts breaking down the cell walls of the cabbage, which will save you from having to beat the cabbage a lot.

After you have massaged your cabbage, let it sit for 10 - 15 minutes.

how-to-make-your-own-sauerkraut-how-to-make-my-own-sauerkraut-diy-sauerkraut-making-sauerkraut-cabbage-recipes-what-to-do-with-too-much-cabbage-gaps-diet-fermented-foods-gaps-protocol-northern-colorado-gaps-practitioner-certified-gaps-practitioner-l…

Knead your cabbage again.

how-to-make-your-own-sauerkraut-how-to-make-my-own-sauerkraut-diy-sauerkraut-making-sauerkraut-cabbage-recipes-what-to-do-with-too-much-cabbage-gaps-diet-fermented-foods-gaps-protocol-northern-colorado-gaps-practitioner-certified-gaps-practitioner-l…

Once you have kneaded your cabbage to the desire texture, fill your jars. It’s best to continue kneading until you can squeeze a little bit of water from the cabbage.

Fermenting cabbage produces a decent amount of gas, Make sure to leave head room in your jars to accommodate. This means lightly packing cabbage into your jar, about ¾ full.

Add water to just under the shoulder of the jar.

Sometimes cabbage produces enough liquid while it's fermenting. If it doesn’t feel free to add more liquid.

how-to-make-your-own-sauerkraut-how-to-make-my-own-sauerkraut-diy-sauerkraut-making-sauerkraut-cabbage-recipes-what-to-do-with-too-much-cabbage-gaps-diet-fermented-foods-gaps-protocol-northern-colorado-gaps-practitioner-certified-gaps-practitioner-l…

Top your sauerkraut off with a whole cabbage leaf, packing it along the sides of the jar to keep all the vegetables below the level of the liquid.

how-to-make-your-own-sauerkraut-how-to-make-my-own-sauerkraut-diy-sauerkraut-making-sauerkraut-cabbage-recipes-what-to-do-with-too-much-cabbage-gaps-diet-fermented-foods-gaps-protocol-northern-colorado-gaps-practitioner-certified-gaps-practitioner-l…

Seal with a two piece lid.

Leave on your counter. No need to burp this ferment! This process works anaerobically, without oxygen. If your jars burp, overflow or explode, you simply packed your jar too tight with vegetables.

47.png

How to Ferment Almond Flour

Fermenting Almond Flour for Proper Digestion

Any seed wants to be a plant. Seeds include nuts, seeds, beans, and grains. To protect itself, a seed has phytic acid and other enzyme inhibitors and anti-nutrients. These substances attack the body of the animal that ate the seed, preventing the digestion of the seed. This is why we see whole seeds in bird poop.

Manually grinding seeds into flours does nothing to negate these enzyme inhibitors and anti-nutrients. We may not necessarily see whole seeds in our stools but we don’t need to for our bodies to experience the effects of these substances. Inflammation, poor absorption of foods, and leaky gut are some of the effects on our bodies of eating seeds that are not properly prepared. To learn more about properly preparing grains, check out my video.

How to Prepare Grains Properly

When we properly prepare our grains however, we begin the germination process, which changes the seeds chemical structure. It neutralizes the anti-nutrients and enzyme inhibitors, and the seed prepares to bring life. When we eat a seed in this state, it’s nutrients are available to us and it brings life to our bodies.  

All seeds can be prepared in three ways - soaking, sprouting or fermenting. Fermenting is by far the most simple and the most beneficial. All it requires is whey. These directions are for almond flour but you can use the same concept to any nut, seed, or grain. For specific instructions on how to do this with whole seeds, see my recipe on trail mix.

The other benefit of using fermented almond flour is that it makes a much lighter end product. The fermentation process acts somewhat like a baking soda or powder, increasing the air space as your treat bakes, making it less dense.

Preparing fermented almond flour is quite easy. After letting it ferment for 24 hours, this base can be kept in the fridge for about a week. If you have a family that loves sweet treats, this is a food that you can keep on hand at all times to create a quick twenty minute cookie. Fermented almond flour is a great base for many baked goods.

Ingredients for Fermented Almond Flour:

  • 2 Cups Almond Flour

  • 1/4 Cup Whey

Directions for Fermented Almond Flour

Fermented almond flour makes for a much lighter baked good. The fermentation process acts like a baking soda, increasing air as your treat bakes. Fermenting almond flour is quite easy; it just needs to be done 24 hours before you bake. How to Fermen…

Add almond flour to a glass bowl.

Fermented almond flour makes for a much lighter baked good. The fermentation process acts like a baking soda, increasing air as your treat bakes. Fermenting almond flour is quite easy; it just needs to be done 24 hours before you bake. How to Fermen…

Pour whey over almond flour.

Fermented almond flour makes for a much lighter baked good. The fermentation process acts like a baking soda, increasing air as your treat bakes. Fermenting almond flour is quite easy; it just needs to be done 24 hours before you bake. How to Fermen…

Stir to moisten. Add additional whey if needed. Flour should be moist and crumbly but not wet.

Fermented almond flour makes for a much lighter baked good. The fermentation process acts like a baking soda, increasing air as your treat bakes. Fermenting almond flour is quite easy; it just needs to be done 24 hours before you bake. How to Fermen…

Cover and leave for 24 hours to properly ferment. During this time, your fermenting almond flour can be left with other jar ferments because it is covered.


Fermented Almond Flour

Author:
prep time: cook time: total time:

ingredients:

  • 2 Cups Almond Flour
  • 1/4 Cup Whey

instructions:

How to cook Fermented Almond Flour

  1. Add almond flour to a glass bowl.
  2. Pour whey over almond flour.
  3. Stir to moisten. Add additional whey if needed. Flour should be moist and crumbly but not wet.
  4. Cover and leave for 24 hours to properly ferment. During this time, your fermenting almond flour can be left with other jar ferments because it is covered.
Created using The Recipes Generator
15.png

Making Whey

Easy Do-It-Yourself Whey from Yogurt

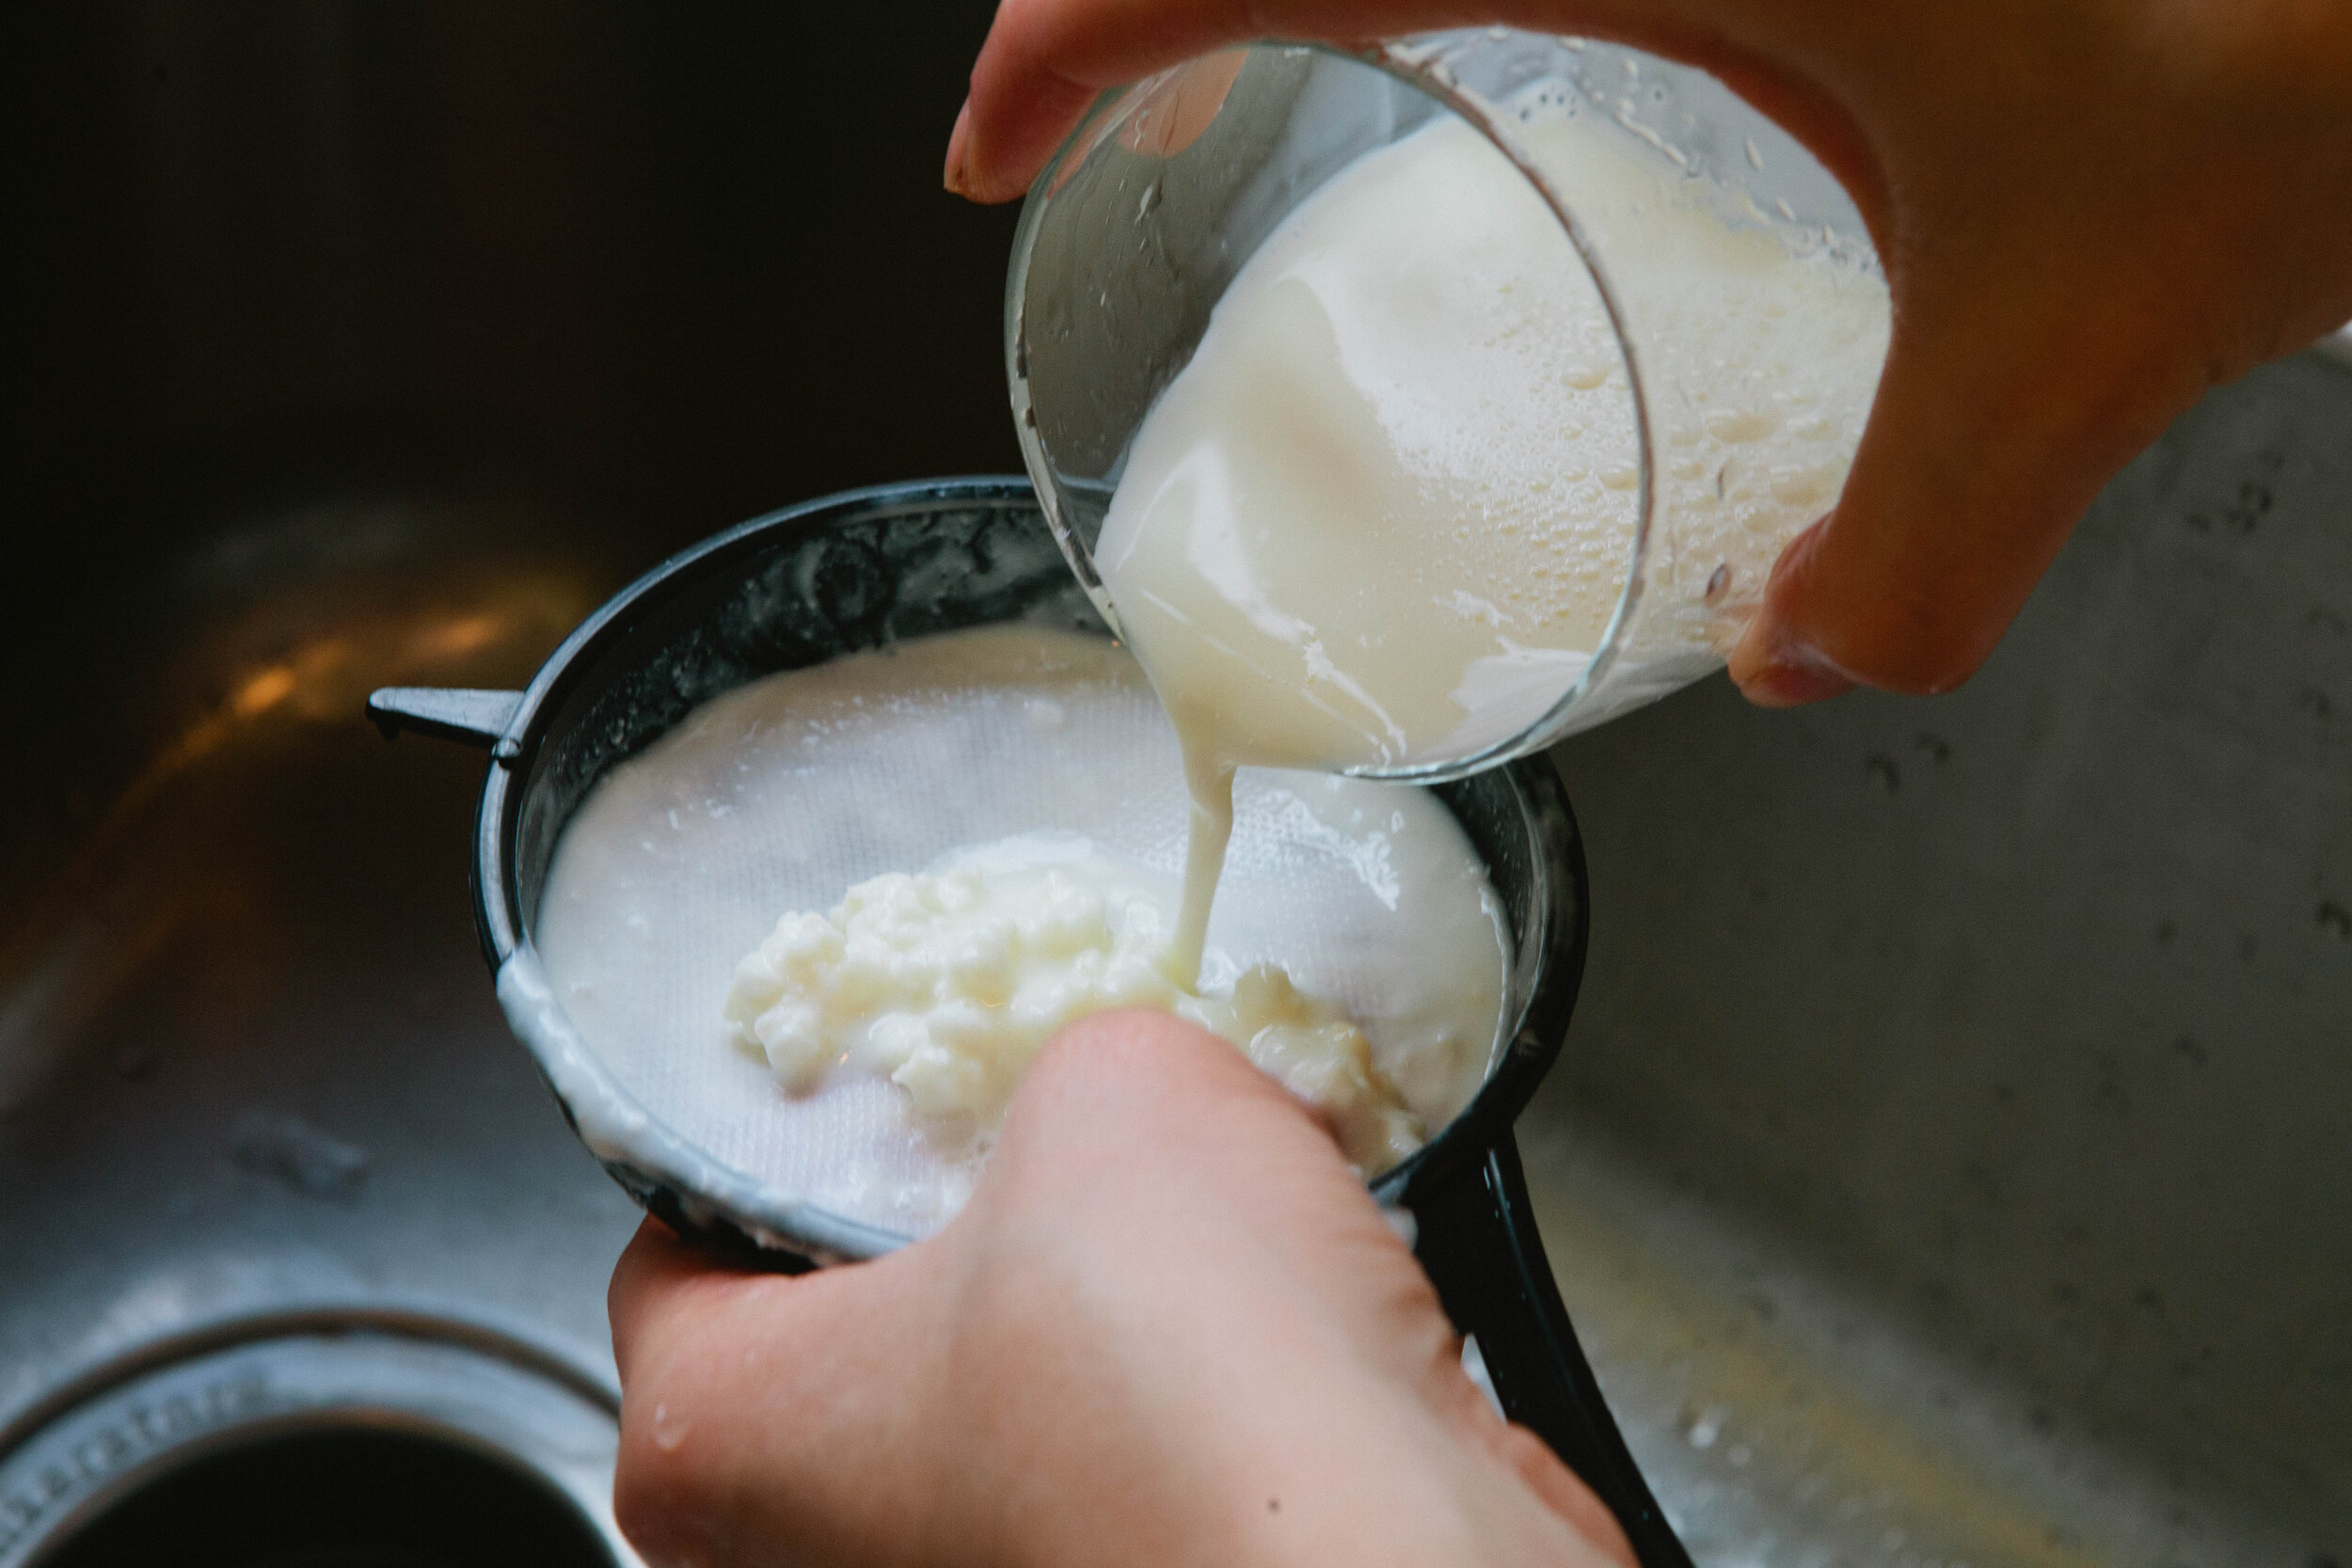
Whey is the other protein in milk aside from casein. It’s only present after milk products have been cultured and it’s a live food. This liquid is teeming with good lactic acid producing bacteria (LABs.) Whey is a basic to keep on hand because it can be used to ferment flours, seeds, nuts, vegetables, or as a starter to culture other dairy.

I use homemade yogurt to make my whey but you can use store bought yogurt to make your own whey. Make sure you get a full fat, grass fed yogurt that only contains milk and cultures. It’s ok if it’s pasteurized as the culturing process adds life back to this food! Greek yogurt will not work to make whey as there is very little whey naturally in that strain of yogurt. If you are sensitive to lactose or casein, you should leave your store bought yogurt out on the counter, unopened, for an additional 12 - 24 hours to finish culturing the yogurt before you strain the whey. (Essentially making it lactose free.)

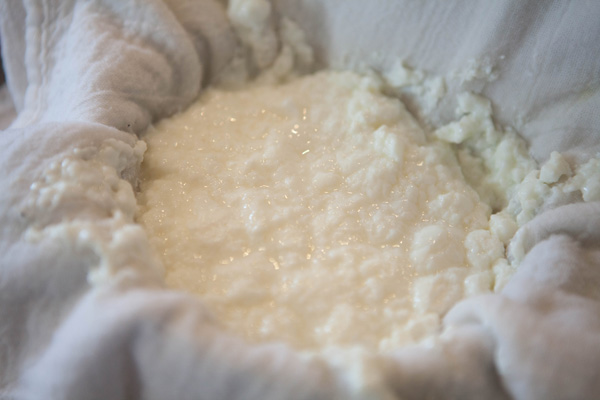
If you strain your yogurt for a long time, it becomes almost like a cream cheese substance. It’s great to add fresh herbs to and make a dip!

To speed along the straining time, stir your yogurt well before adding it to the cloth.

It is easy to make your own whey using yogurt, either homemade yogurt or store bought yogurt. Whey is used for many things like fermentation. DIY recipe on how to make whey by Northern Colorado Holistic Healthcare Provider and Certified GAPS Practit…

I really like using the villi life culture from the Heirloom Yogurt Starter pack at Cultures for Health. Not only is it a mesophilic culture, meaning it cultures at room temperature instead of at 110 degrees like most yogurts, but it is a runnier yogurt and produces a lot of whey for my baking and fermenting needs.

I enjoy to the runniness of the ville life culture. If you don’t, simply separate some of the whey out of each batch for a thicker end product.

It is easy to make your own whey using yogurt, either homemade yogurt or store bought yogurt. Whey is used for many things like fermentation. DIY recipe on how to make whey by Northern Colorado Holistic Healthcare Provider and Certified GAPS Practit…

The cloth I used is the single fold diaper cloth, you can purchase it at Walmart or find something similar at Cultures for Health.

It’s best to use a plastic funnel because metal can be damaging to the good bacteria inside the whey.

Whey keeps in the fridge for about six months if you’ve successfully removed most of the milk solids and strained well.

Ingredients for DIY Whey

  • 3 Cups Homemade Yogurt

Directions for DIY Whey

It is easy to make your own whey using yogurt, either homemade yogurt or store bought yogurt. Whey is used for many things like fermentation. DIY recipe on how to make whey by Northern Colorado Holistic Healthcare Provider and Certified GAPS Practit…

Set a plastic strainer inside a large measuring cup or bowl.

It is easy to make your own whey using yogurt, either homemade yogurt or store bought yogurt. Whey is used for many things like fermentation. DIY recipe on how to make whey by Northern Colorado Holistic Healthcare Provider and Certified GAPS Practit…

Fold the cloth four times and set inside the strainer.

It is easy to make your own whey using yogurt, either homemade yogurt or store bought yogurt. Whey is used for many things like fermentation. DIY recipe on how to make whey by Northern Colorado Holistic Healthcare Provider and Certified GAPS Practit…

Pour your yogurt into the cloth.

It is easy to make your own whey using yogurt, either homemade yogurt or store bought yogurt. Whey is used for many things like fermentation. DIY recipe on how to make whey by Northern Colorado Holistic Healthcare Provider and Certified GAPS Practit…

Gather the edges of your cloth and secure with a rubber band.

Leave to sit and strain for as long as desired.

If you want to simply thicken your yogurt, leaving it for only ten minutes is fine. If you’d like to strain all the whey out to make a cream cheese, you can leave it for much longer. I often leave mine out overnight.

It is easy to make your own whey using yogurt, either homemade yogurt or store bought yogurt. Whey is used for many things like fermentation. DIY recipe on how to make whey by Northern Colorado Holistic Healthcare Provider and Certified GAPS Practit…

Once you have strained enough whey out, pour it into a clean glass jar.

Rinse your cloth well in hot water. Don’t use soap! Hang to dry.

Use your whey to ferment flours, seeds, nuts, or vegetables, or as a starter to culture other dairy. What will you use your whey for?


How to Make Whey

Author:
prep time: cook time: total time:

ingredients:

  • 3 Cups Homemade Yogurt

instructions:

How to cook How to Make Whey

  1. Set a plastic strainer inside a large measuring cup or bowl.
  2. Fold the cloth four times and set inside the strainer.
  3. Pour your yogurt into the cloth.
  4. Gather the edges of your cloth and secure with a rubber band.
  5. Leave to sit and strain for as long as desired.
  6. If you want to simply thicken your yogurt, leaving it for only ten minutes is fine. If you’d like to strain all the whey out to make a cream cheese, you can leave it for much longer. I often leave mine out overnight.
  7. Once you have strained enough whey out, pour it into a clean glass jar.
  8. Rinse your cloth well in hot water. Don’t use soap! Hang to dry.
  9. Use your whey to ferment flours, seeds, nuts, or vegetables, or as a starter to culture other dairy. What will you use your whey for?
Created using The Recipes Generator
14.png

Swedish Gravlax Recipe

This meal is adapted from GAPS Cookbook by Dr. Natasha Campbell

This is a brined fish meal legal on GAPS stage 2. You eat little pieces, one small piece a day.

Swedish Gravlax Recipe

Ingredients for Swedish Gravlax:

  • ½ lb Fresh Wild Caught Salmon

  • Fresh Dill

  • Freshly Coarsely Ground Black Pepper

  • 4 cup Room Temperature Filtered Water

  • 1 tbsp Honey

  • 1 ½ tbsp Salt

Directions for Swedish Gravlax:

Swedish-Gravlax-Fermented-Salmon-Wild-Caught-Salmon-What-To-Do-With-Salmon-GAPS-Legal-Salmon-Recipe-GAPS-Diet-Salmon-Fish-On-GAPS-GAPS-Diet-Snack

Thinly slice the fish.

Swedish-Gravlax-Fermented-Salmon-Wild-Caught-Salmon-What-To-Do-With-Salmon-GAPS-Legal-Salmon-Recipe-GAPS-Diet-Salmon-Fish-On-GAPS-GAPS-Diet-Snack

Place fish slices into a deep tray.

Sprinkle with dill sprigs and pepper.

Swedish-Gravlax-Fermented-Salmon-Wild-Caught-Salmon-What-To-Do-With-Salmon-GAPS-Legal-Salmon-Recipe-GAPS-Diet-Salmon-Fish-On-GAPS-GAPS-Diet-Snack

Dissolve honey and salt in water to make a brine.

Pour brine over fish.

Swedish-Gravlax-Fermented-Salmon-Wild-Caught-Salmon-What-To-Do-With-Salmon-GAPS-Legal-Salmon-Recipe-GAPS-Diet-Salmon-Fish-On-GAPS-GAPS-Diet-Snack

Leave at room temperature for 1 - 1 ½ hours.

Pour the water out.

Serve on lettuce or eat alone.

Store in refrigerator and consume within two days.


Swedish Gravlax Recipe

Author:
prep time: cook time: total time:

ingredients:

  • ½ lb Fresh Wild Caught Salmon
  • Fresh Dill
  • Freshly Coarsely Ground Black Pepper
  • 4 cup Room Temperature Filtered Water
  • 1 tbsp Honey
  • 1 ½ tbsp Salt

instructions:

How to cook Swedish Gravlax Recipe

  1. Thinly slice the fish.
  2. Place fish slices into a deep tray.
  3. Sprinkle with dill sprigs and pepper.
  4. Dissolve honey and salt in water to make a brine.
  5. Pour brine over fish.
  6. Leave at room temperature for 1 - 1 ½ hours.
  7. Pour the water out.
  8. Serve on lettuce or eat alone.
  9. Store in refrigerator and consume within two days.
Created using The Recipes Generator

Buckeye Cookies

Another one of my favorite Christmas cookies are Buckeyes. These delicious cookies are traditionally peanut butter and powder sugar balls dipped in chocolate, made to look like the buckeye nut. The buckeye nut is commonly found back East, like Ohio and Michigan, where my family is originally from.

The roots for this recipe go deep in our family. Much like the Force.  

Ok, maybe not the Force (although I am excited for the new Star Wars movie that comes out this week!)

But we do make Buckeye cookies a lot. Since powdered sugar is hardly GAPS legal, I haven't had these cookies for a while either. But all that is about the change!  

Introducing Buckeye cookies, made with real food!  

These no-bake cookies are egg free, and casein and lactose free (contains whey and butter). They are also coconut free!  

Please note that while cassava flour is not technically on the GAPS-illegal list, it is still quite starchy. These cookies should be a special treat, and consumed infrequently and in small amounts. Same with cocoa powder. And, as always, observe if YOUR body is okay with this particular food at this time. Just because something is "GAPS legal" does not give you a free pass to eat it! Pay attention to what your body is telling you. But if it's telling you that these cookies are okay for you, then by all means ENJOY THEM!!!

GAPS Legal Buckeye Cookies

Makes about 48 cookies

Ingredients:

Filling:

  • 1 cup peanut butter

  • 2 cups cassava flour

  • 8 TBS whey

  • 1/2-1 cup honey

  • 8 oz butter

  • 2 tsp vanilla

Coating:

  • 1 1/2 cup cocoa butter chips

  • 1/8 cup raw honey

  • 1 TBS cocoa powder

Directions:

Prep time: Need to start this recipe 24 hours in advance, 5 minutes prep time. Then it takes about 30-45 minutes to finish on the following day.  

Filling:

IMG_0070.jpg

Twenty-four hours in advance: mix 1/2 cup peanut butter, 4 TBS whey, and 1 cup cassava flour together until everything is moist and crumbly. Try to eliminate as many clumps as possible. Leave on the countertop in a glass container with a lid. This is to give the legumes and cassava flour a chance to lacto-ferment. This makes them more digestible and increase the nutritional value. For more on why we should only eat nuts and seeds that have been properly prepared, watch my video on this.

After 24 hours, the mixture should look something like this...just a little more moist than what you started with the day before.

IMG_0087.jpg

Add to this the vanilla extract, honey and 8 oz of softened butter (it's not the end of the world if you melt it, but try not to).

I used 1 cup of honey for this recipe, and to my non-sugar eating palate they are very sweet (which is the point, I suppose)! I plan to reduce the honey by about half the next time I make this. The mixture just needs to be formed into balls.

Mix well, and smooth out as many clumps as possible. You should be able to easily for this mixture into little balls.

IMG_0085.jpg

Form the dough into 1 inch balls and place on a cookie sheet covered in parchment paper

Place the balls in the freezer to chill (about 10-15 minutes)   Next, make the coating   The most important part of making the coating is to heat things just hot enough to melt. Nothing should be cooked here! You are gently heating them up to mix. Then gradually cooling them back down again.  

IMG_0090.jpg

Using a double boiler (or as I just discovered, my glass 2 cup measuring container fits perfectly into a medium saucepan) On low heat, melt the cacao butter chips.

When they are fully melted, turn off the heat and add the honey.

Next, stir in the cocoa powder (I recommend using a whisk to mix well.) 

Finally, remove the mixture in the top half of the double boiler to the coating is allowed to start cooling   Continue whisking the coating mixture occasionally. The honey cools faster than the cocoa butter, and you need to keep them mixed.

IMG_0099.jpg

When the mixture is cool enough, remove the dough balls from the freezer. Stick a toothpick (or broken-off bamboo skewer in our case) into a ball and dip it into the coating. Depending on the temperature of the coating, you may need to dip more than once to achieve a satisfactory coating. After allowing the extra coating to drip off for a few moments, return the ball to the parchment paper.

Maintain the coating within a narow temperature margin. Keep the water from the lower part of your double-boiler ready. If your coating begins to cool too much, slip the top of the double-boiler back on top of the hot water for a minute or so to warm it back up (you probably don't need to turn on the heat). Do not let it cool too much or reheat it too quickly or too much—these can cause the chocolate to clump (this happened), and there's not going back from this. You would just need to start over making the coating.  

Traditionally the coating is darker than this recipe. I originally made a darker coating, but more cocoa powder required more honey, which seemed to throw everything off balance. I think this is part of why it clumped. Once you master the basics of temperature and consistency, you can try increasing the cocoa powder to darken the color. I will be doing that myself. In the meantime, even though this isn't as dark as traditional Buckeye cookies, the coating dries hard at room temperature. I'm calling that a win!

When they are all dipped to your satisfaction, use a toothpick to roll over the holes, filling them in.

There you have it! Rich, delicious Buckeye cookies.

Enjoy!


Buckeye Cookies

Author:
prep time: cook time: total time:

ingredients:

Filling:
  • 1 cup peanut butter
  • 2 cups cassava flour
  • 8 TBS whey
  • 1/2-1 cup honey
  • 8 oz butter
  • 2 tsp vanilla
Coating:
  • 1 1/2 cup cocoa butter chips
  • 1/8 cup raw honey
  • 1 TBS cocoa powder

instructions:

How to cook Buckeye Cookies

24 Hours in Advance:
  1. Twenty-four hours in advance: mix 1/2 cup peanut butter, 4 TBS whey, and 1 cup cassava flour together until everything is moist and crumbly. Try to eliminate as many clumps as possible. Leave on the countertop in a glass container with a lid. This is to give the legumes and cassava flour a chance to lacto-ferment. This makes them more digestible and increase the nutritional value. For more on why we should only eat nuts and seeds that have been properly prepared, watch my video onthis.
The Next Day:
  1. After 24 hours, the mixture should look something like this...just a little more moist than what you started with the day before.
  2. Add to this the vanilla extract, honey and 8 oz of softened butter (it's not the end of the world if you melt it, but try not to).
  3. I used 1 cup of honey for this recipe, and to my non-sugar eating palate they are very sweet (which is the point, I suppose)! I plan to reduce the honey by about half the next time I make this. The mixture just needs to be formed into balls.
  4. Mix well, and smooth out as many clumps as possible. You should be able to easily for this mixture into little balls.
  5. Form the dough into 1 inch balls and place on a cookie sheet covered in parchment paper
  6. Place the balls in the freezer to chill (about 10-15 minutes) Next, make the coating The most important part of making the coating is to heat things just hot enough to melt. Nothing should be cooked here! You are gently heating them up to mix. Then gradually cooling them back down again.
  7. Using a double boiler (or as I just discovered, my glass 2 cup measuring container fits perfectly into a medium saucepan) On low heat, melt the cacao butter chips.
  8. When they are fully melted, turn off the heat and add the honey.
  9. Next, stir in the cocoa powder (I recommend using a whisk to mix well.)
  10. Finally, remove the mixture in the top half of the double boiler to the coating is allowed to start cooling Continue whisking the coating mixture occasionally. The honey cools faster than the cocoa butter, and you need to keep them mixed.
  11. When the mixture is cool enough, remove the dough balls from the freezer. Stick a toothpick (or broken-off bamboo skewer in our case) into a ball and dip it into the coating. Depending on the temperature of the coating, you may need to dip more than once to achieve a satisfactory coating. After allowing the extra coating to drip off for a few moments, return the ball to the parchment paper.
  12. Maintain the coating within a narow temperature margin. Keep the water from the lower part of your double-boiler ready. If your coating begins to cool too much, slip the top of the double-boiler back on top of the hot water for a minute or so to warm it back up (you probably don't need to turn on the heat). Do not let it cool too much or reheat it too quickly or too much—these can cause the chocolate to clump (this happened), and there's not going back from this. You would just need to start over making the coating.
  13. Traditionally the coating is darker than this recipe. I originally made a darker coating, but more cocoa powder required more honey, which seemed to throw everything off balance. I think this is part of why it clumped. Once you master the basics of temperature and consistency, you can try increasing the cocoa powder to darken the color. I will be doing that myself. In the meantime, even though this isn't as dark as traditional Buckeye cookies, the coating dries hard at room temperature. I'm calling that a win!
  14. When they are all dipped to your satisfaction, use a toothpick to roll over the holes, filling them in.
  15. There you have it! Rich, delicious Buckeye cookies.
Created using The Recipes Generator

Fermented Garlic: A Powerful Food for Health

Fermented Garlic: A Powerful Food for Health

Heard of fermented garlic? Wondered what the health benefits of garlic are? Then this post is for you!

Zucchini Bread {GAPS legal}

Zucchini... if there is one harvest that defines summer, it's zucchini.

Zucchini is great because of its versatility: it can be used hot or cold, baked or fried, and in soups, salads, breads, or even as a noodle substitute.

Today I want to share with you a recipe for a zucchini bread that is legal on the full GAPS diet, WAPF diet, Paleo diet and Whole30. I want you to remember (and take hope in) the fact that I am not primarily a chef. I am just average in the kitchen. If I can make this, so can you! This recipe is very forgiving—so try it!

There are a couple keys to this recipe that need to be followed. Don't shortcut them...they are what make this recipe forgiving, and the bread yummy! The first key is also the first step: fermenting the almond flour. Have you eaten baked goods made of almond flour that are dense and dry? Fermenting the flour creates a lighter, fluffier end product. But that's not all! Fermenting is one of the three processes that can be used to make nuts more digestible.

For more about soaking, sprouting or fermenting, watch this video.

The other key is using sour cream (you could also substitute in a full-fat yogurt) for the fat. As a cultured food, sour cream helps make the bread lighter as well.

Fermented Almond Flour Zucchini Bread

Ingredients

  • 2 1/2 cups almond flour (organic preferred)

  • 1/2 cup whey (strained from yogurt or kefir)

  • 2 cups zucchini (grated and squeezed to remove the liquid)

  • 2-3 eggs (chicken or duck)

  • 1 tsp cinnamon

  • 1/4 tsp ginger

  • 1/4 tsp nutmeg

  • 1 tsp sea salt (source)

  • 1/2 cup sour cream

  • 2/3 cup date syrup (source)

Directions

24 hours (or more) before

Mix almond flour and whey together in a bow.l Cover and set on the counter for 24 hours

This fermentation, which takes place at room temperature, will change the texture of the "flour." At the end of 24 hours you will have something that resembles dough more than wet flour. This is a base that can be used for many recipes. It will keep in the fridge about a week, so many people make this ahead of time and keep it in their fridge for future use. With this step done ahead of time, you can pull it out, add ingredients, and have a fermented baked good in about an hour.

The Next Day

Preheat the oven to 350° F Grate more than 2 cups of zucchini. The zucchini is very wet, so squeeze it dry using a cloth or towel (you can see it in the picture below).

Next, measure 2 cups of the zucchini (dry, but not compressed) and mix it into the 24 hour fermented flour. Add 2-3 eggs (it depends on the size of your egg, those pictured are duck eggs, which are larger than chicken eggs).

Mix in the rest of the ingredients (sour cream, date syrup, salt and spices).

I used date paste instead of honey because cooking honey is thought to turn the honey toxic. You can also make your own date paste in a strong blender like a Vitamix.

Pour into a greased pan (I prefer lining mine with parchment paper, but this is optional).

Bake at 350° for 45-50 minutes, or until toothpick comes out clean from the middle. Wait at least 10 minutes before cutting into the bread. This allows the steam to finish the cooking progress, and will make the texture of the bread better. Add butter, and enjoy!

This post contains affiliate links. Your trust is important to me, and I only recommend products that I trust.


Fermented Almond Flour Zucchini Bread

Author:
prep time: cook time: total time:

ingredients:

  • 2 1/2 cups almond flour (organic preferred)
  • 1/2 cup whey (strained from yogurt or kefir)
  • 2 cups zucchini (grated and squeezed to remove the liquid)
  • 2-3 eggs (chicken or duck)
  • 1 tsp cinnamon
  • 1/4 tsp ginger
  • 1/4 tsp nutmeg
  • 1 tsp sea salt (source)
  • 1/2 cup sour cream
  • 2/3 cup date syrup (source)

instructions:

How to cook Fermented Almond Flour Zucchini Bread

24 hours (or more) before
  1. Mix almond flour and whey together in a bow.l Cover and set on the counter for 24 hours
  2. This fermentation, which takes place at room temperature, will change the texture of the "flour." At the end of 24 hours you will have something that resembles dough more than wet flour. This is a base that can be used for many recipes. It will keep in the fridge about a week, so many people make this ahead of time and keep it in their fridge for future use. With this step done ahead of time, you can pull it out, add ingredients, and have a fermented baked good in about an hour.
The Next Day
  1. Preheat the oven to 350° F Grate more than 2 cups of zucchini. The zucchini is very wet, so squeeze it dry using a cloth or towel (you can see it in the picture below).
  2. Next, measure 2 cups of the zucchini (dry, but not compressed) and mix it into the 24 hour fermented flour. Add 2-3 eggs (it depends on the size of your egg, those pictured are duck eggs, which are larger than chicken eggs).
  3. Mix in the rest of the ingredients (sour cream, date syrup, salt and spices).
  4. I used date paste instead of honey because cooking honey is thought to turn the honey toxic. You can also make your own date paste in a strong blender like a Vitamix.
  5. Pour into a greased pan (I prefer lining mine with parchment paper, but this is optional).
  6. Bake at 350° for 45-50 minutes, or until toothpick comes out clean from the middle. Wait at least 10 minutes before cutting into the bread. This allows the steam to finish the cooking progress, and will make the texture of the bread better. Add butter, and enjoy!
Created using The Recipes Generator

Garden-fresh Vegetables Without the Garden

Summer is the time that vegetables shine! Many people are pulling beautiful zucchini, tomatoes, beans, peppers and greens out of their gardens. Fresh vegetables are in season, and you may find yourself desiring them more than usual. Go with it! Until the recent days of automobiles, airplanes and refrigeration, our bodies were used to getting fresh vegetables only during the short months of the growing season. Thousands of years of eating does leave an impression, and a healthy body will naturally crave more fresh fruits and vegetables in the summertime.

Side note: I have observed that people who are in a focused time of healing don't have this craving for fresh produce, and people who are needing to focus on detox can have fresh vegetable cravings year-round. That's okay, your body knows what it needs! Listen to your body's innate intelligence!

But depending on your situation, you may not have a garden, which makes fresh vegetables a little harder to come by. This is the case for me again this year. So today I thought I would share some ways to get fresh vegetables.

#1 Find a friend who gardens

Now, I am not telling you to mooch off a friend, leaving them to do all the hardwork. But many gardeners find themselves overflowing with vegetables right about now. Some of them may be happy just to see their hard work end up in a grateful stomach, while others would appreciate some help harvesting, preserving, or weeding in exchange for some produce. This is the best way to get vegetables, in my opinion. You will get to spend time in the wonderful sun, get to know your friend better, and maybe even learn a little about gardening. And nothing beats a fresh, hand-picked vegetable served up for dinner!

#2 Join a CSA

CSA stands for community supported agriculture. In a "working share," individuals come together under the leadership of the organizer and spend a set amount of time working around in a garden or farm for a share of the produce. There is usually a monetary investment as well. Most CSAs accept members only around the beginning of the year, so look for one to join for the next growing season. Some CSAs also offer a "non-working share," which allows an individual to pay only, and is a great option for those with jobs or situations that don't allow them the flexibility to work in the garden.

#3 Visit a local farmer's market

This one is an option for most people, but it can be a little tricky. Just because it's at a farmers market does not mean it was grown in a way that is different than the commercial food. That being said, there is going to be some benefit from eating local, naturally-ripened food, so don't rule it out if it's all you can get. The best way to know what you are buying is to talk to the farmers. Ask them how where they are located, and about their farm or garden. See what types of things they use for pesticides (organic food is often grown with organic pesticides), and what other farming/gardening practices they use. While it is not a guarantee, you may be able to find amazing and fresh produce, and at the same time provide support to that small local farm.

#4 Buy local produce at your grocery store

Here is Colorado, at the peak of the season, stores carry many things that are "Colorado Proud," meaning they are grown in Colorado. Not all stores label where their produce comes from, so ask your grocer which items are grown in your area, state, or in the United States. Made in the USA does not automatically make that food better, but knowledge is always power!

So there you go! Four ways to get garden-fresh produce without a garden. How about you? Where do you get your garden-fresh produce?