dairy

Crème Fraiche

So you know what sour cream and yogurt are, maybe you’ve even dabbled with kefir a bit, but have you ever heard of creme fraiche? This is a go-to for my family, we try to make sure we always have a supply! It is not only delicious, but it is full of probiotics and high quality fat (so it’s very helpful for anyone dealing with constipation). For anyone who can do dairy, I recommend you try it out! A lot of the “sour cream” sold commercially in the United States is technically creme fraiche, but when you make it at home it is so much better (of course), and it is actually very easy to make! 

Check out the recipe below, and happy culturing! 


Ingredients for crème fraiche:

  • 1 pint raw cream or organic heavy cream from grass-fed cows (pasteurized is ok, just not UHT pasteurized - note the difference between methods with raw and pasteurized)

  • ¼ cup culture (whey, yogurt, or previous crème fraiche*)


Directions for Crème Fraiche:

  • Pour cream into small pot, place on stovetop

  • If using raw cream, slowly heat to 100-110F.

  • If using pasteurized cream, slowly heat to 180F then let cool to 100-110F

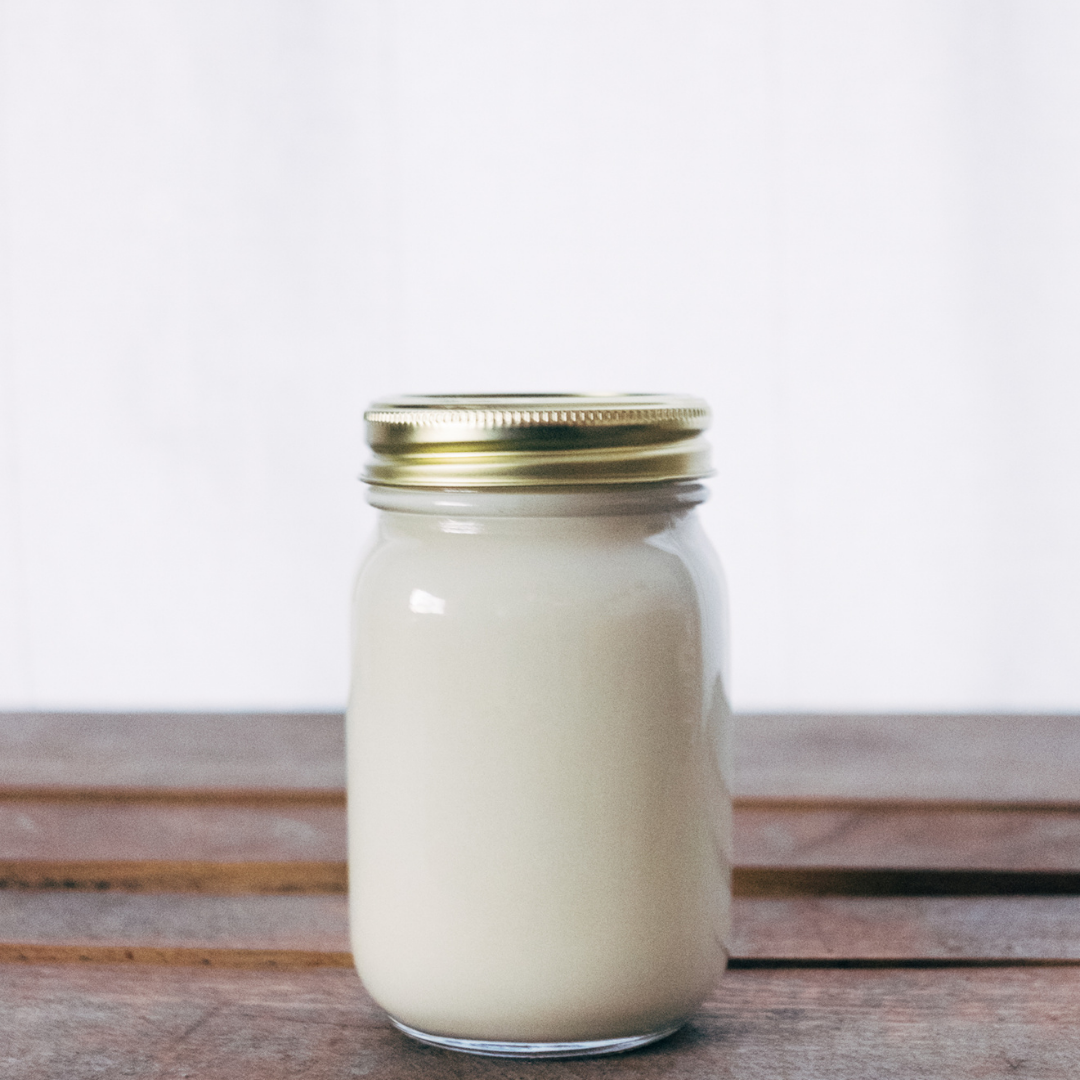
  • After appropriate heating is done, pour into a pint-sized wide-mouth glass jar (mason jar style)

  • Add your culture, stir to combine

  • Cover and leave on counter for 24-36 hours**

  • Store in the fridge.


*If you use whey, you will have a thinner product. If you use yogurt, it will be thicker, if you use a previous crème fraiche, it will be creamier.

**The longer it sits, the more sour and more probiotic it will be.

Crème Fraiche

Author:

Ingredients

  • 1 pint raw cream or organic heavy cream from grass-fed cows (pasteurized is ok, just not UHT pasteurized - note the difference between methods with raw and pasteurized)
  • ¼ cup culture (whey, yogurt, or previous crème fraiche*)

Instructions

  1. Pour cream into small pot, place on stovetop
  2. If using raw cream, slowly heat to 100-110F.
  3. If using pasteurized cream, slowly heat to 180F then let cool to 100-110F
  4. After appropriate heating is done, pour into a pint-sized wide-mouth glass jar (mason jar style)
  5. Add your culture, stir to combine
  6. Cover and leave on counter for 24-36 hours**
  7. Store in the fridge.
  8. *If you use whey, you will have a thinner product. If you use yogurt, it will be thicker, if you use a previous crème fraiche, it will be creamier.
Embed Block
Add an embed URL or code. Learn more

Switchel

What is switchel? Switchel is a fermented lemon/ginger drink that is especially refreshing during the summer when working in the heat! The fermented aspect provides probiotics for the gut, the apple cider vinegar helps you be able to drink greater amounts without feeling bloated, and the lemon and ginger help hydrate you more effectively! Plus, it is simply delicious. I try to always have a few bottles brewing throughout the summer.

Ingredients for switchel:

  • 2-3 inches of fresh ginger (peeled and chopped)

  • 1 cup hot water + enough filtered water to fill the jar

  • 4 Lemons (juiced)

  • ¼ - ⅓ cup Apple Cider Vinegar - raw, unfiltered with the mother 

  • ¼ cup raw honey

  • A ½ gallon mason jar (or similar vessel that can close tightly) 


Additional Supplies for switchel:

  • ½ Gallon sized mason jar or similar vessel with a sealing lid

  • Metal strainer

Directions for making switchel:

In a small bowl, combine the hot water with the honey. We want the water to be just hot enough to allow the honey to dissolve - it should not be boiling, or this will kill off the beneficial microbes in the honey. 


To the mason jar, add the chopped ginger, fresh lemon juice and apple cider vinegar. Add the honey-water mixture, then add filtered water to fill up to approximately 1 inch from the top of the jar. Cover tightly and give the jar a few shakes to mix everything up. Loosen the lid slightly and leave on the counter at room temperature for 24-36 hours.


Once done, strain the switchel into a clean glass vessel (I use just another mason jar or a swing-top bottle) and store in the refrigerator. 


Pour over ice and enjoy!


- Hollie

Switchel

Author:

Ingredients

  • 2-3 inches of fresh ginger (peeled and chopped)
  • 1 cup hot water + enough filtered water to fill the jar
  • 4 Lemons (juiced)
  • ¼ - ⅓ cup Apple Cider Vinegar - raw, unfiltered with the mother
  • ¼ cup raw honey
  • A ½ gallon mason jar (or similar vessel that can close tightly)

Instructions

  1. In a small bowl, combine the hot water with the honey. We want the water to be just hot enough to allow the honey to dissolve - it should not be boiling, or this will kill off the beneficial microbes in the honey.
  2. To the mason jar, add the chopped ginger, fresh lemon juice and apple cider vinegar. Add the honey-water mixture, then add filtered water to fill up to approximately 1 inch from the top of the jar. Cover tightly and give the jar a few shakes to mix everything up. Loosen the lid slightly and leave on the counter at room temperature for 24-36 hours.
  3. Once done, strain the switchel into a clean glass vessel (I use just another mason jar or a swing-top bottle) and store in the refrigerator.
  4. Pour over ice and enjoy!

Honey Sweetened Vanilla Custard

Honey Sweetened Vanilla Custard:


Ingredients for Honey Sweetened Vanilla Custard:

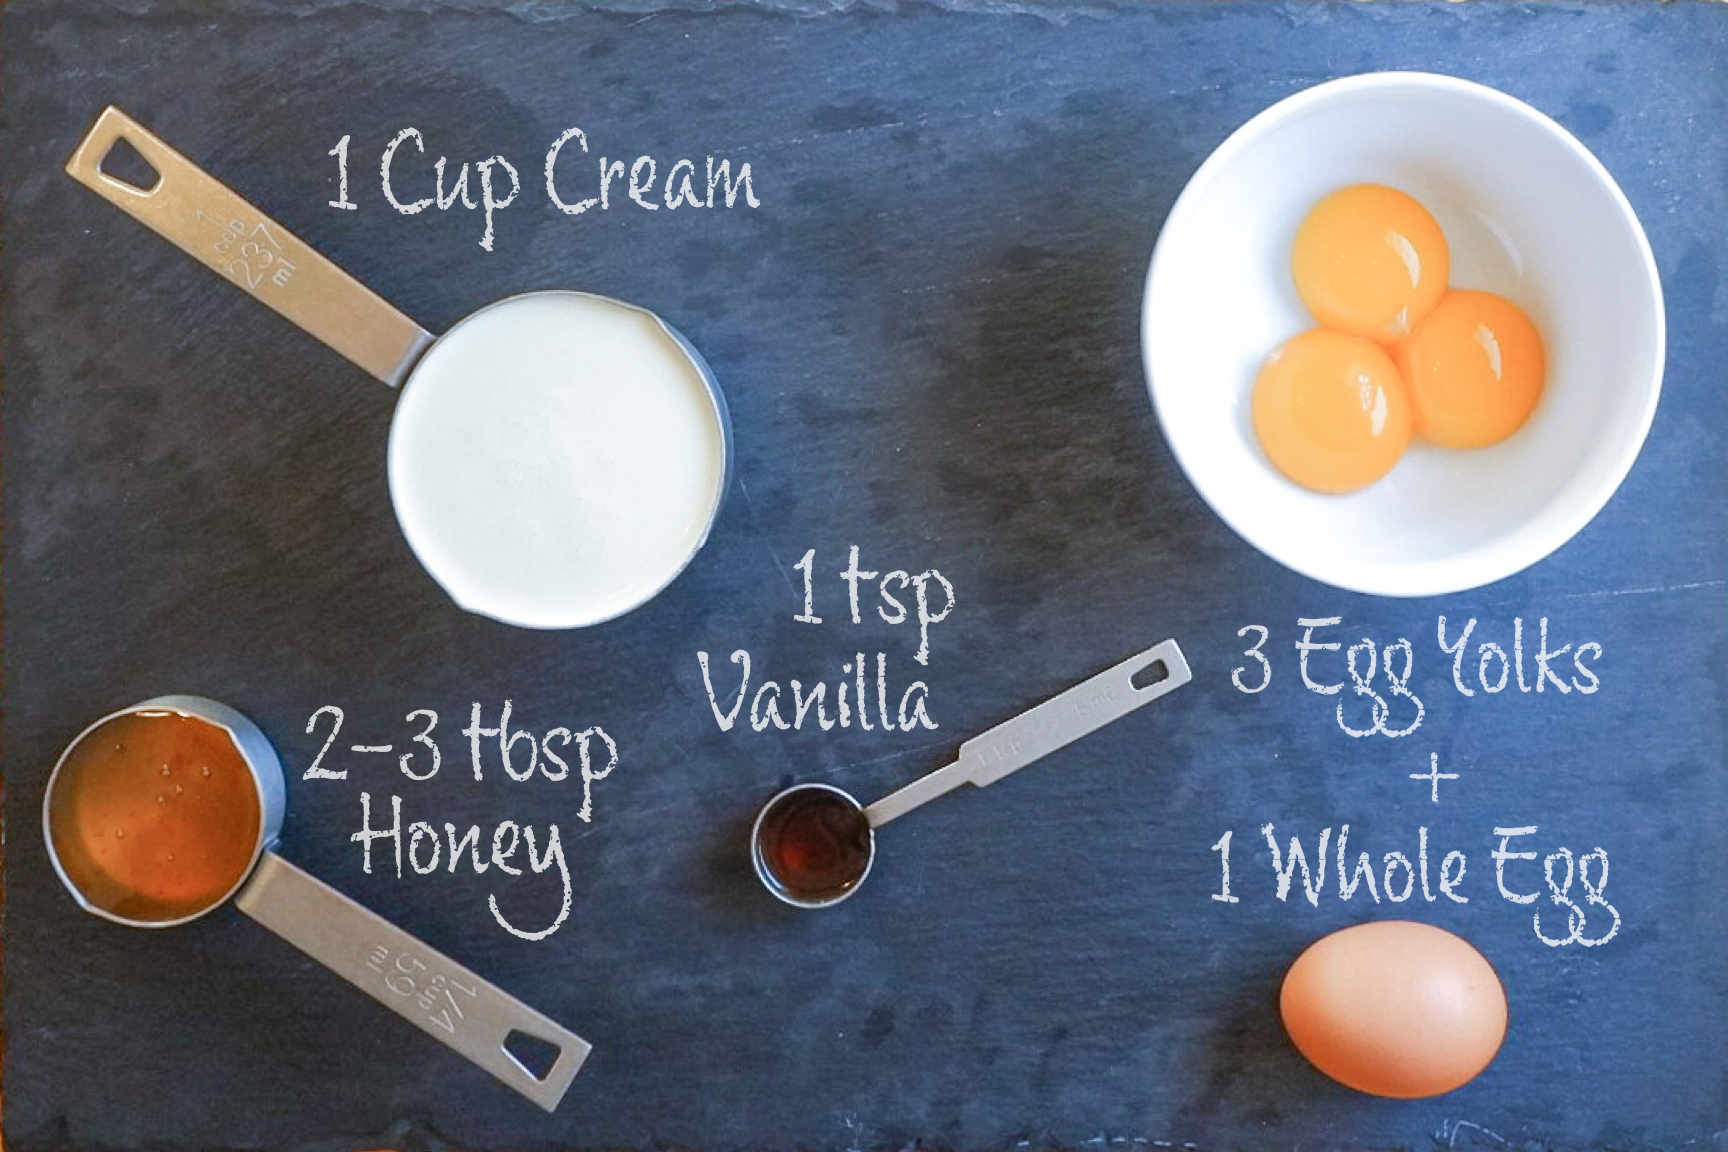
  • 1 cup cream 

  • 3 egg yolks + 1 whole egg

  • 1 tsp vanilla

  • 2-3 tbsp honey

  • (sprinkle of cinnamon or nutmeg if desired)


Directions for Honey Sweetened Vanilla Custard:

  1. Preheat oven to 340F

  2. Place all ingredients in a blender, blend on low until just combined. Try not to blend too long - we don’t want it getting frothy. 

3. Pour equally into small oven-safe cups (depending on the size, it will fill 6-10 cups).

4. Place all of the cups in a baking pan with sides at least 1.5 inches high. 

5. Add water to the pan (careful not to get it in the cups!) to fill about ⅔ of the height of the cups to create a water bath. 

6. Place the baking pan in the oven, bake for 45 minutes or until custard is set and not runny when poked with a toothpick. 


*Note: depending on the size of your cups, you may need to adjust the baking time. If you take it out and it is still runny you can leave the custard cups in the hot water bath to set.

Practical uses:

  • To help relieve headaches (while pregnant or not!)

  • For help sleeping if you typically wake up around 1-3 am

  • To help babies sleep (after you’ve introduced dairy/eggs) - for this one just omit the honey, it’s still great!

  • For a pick-me-up snack in the afternoon when you might crave sugar or caffeine

Honey Sweetened Vanilla Custard Pinterest

Honey Sweetened Vanilla Custard

Author: Hollie Bigham, Be Well Clinic

Ingredients

  • 1 cup cream
  • 3 egg yolks + 1 whole egg
  • 1 tsp vanilla
  • 3 tbsp honey
  • (sprinkle of cinnamon or nutmeg if desired)

Instructions

  1. Preheat oven to 340F
  2. Place all ingredients in a blender, blend on low until just combined. Try not to blend too long - we don’t want it getting frothy.
  3. Pour equally into small oven-safe cups (depending on the size, it will fill 6-10 cups).
  4. Place all of the cups in a baking pan with sides at least 1.5 inches high.
  5. Add water to the pan (careful not to get it in the cups!) to fill about ⅔ of the height of the cups to create a water bath.
  6. Place the baking pan in the oven, bake for 45 minutes or until custard is set and not runny when poked with a toothpick.
  7. Note: depending on the size of your cups, you may need to adjust the baking time. If you take it out and it is still runny you can leave the custard cups in the hot water bath to set.

GAPS Friendly Homemade Yogurt

Let’s make yogurt! Around here we are very into fermented and cultured foods. Not only are they delicious but they are so full of probiotics, vitamins and minerals that are easy for our bodies to utilize! 

Fermented and cultured foods can seem intimidating to those who have not made them, but once you’ve started in the world of ferments and cultures, you will see how easy, quick, and fun they are. 

Yogurt is one of my family’s favorites. We use raw milk, but you can use pasteurized milk if that is all you have access to. It will need to be whole milk, preferably organic, and grass fed, and it cannot be UHT (or ultra-high temperature) pasteurized. You’ll treat it a little differently than raw milk, so pay attention to those directions. You can also use numerous types of starters - whey, creme fraiche, another yogurt - if you have any of these on hand, you can make yogurt! Like the milk, if you are using yogurt as a starter, you can use one that you previously made, or you can use yogurt from the store. Just make sure it is whole milk, organic, plain, with no other ingredients added beside the milk and the probiotic strains. 

As far as cultured dairy products go, yogurt is high in protein versus fat. For this reason, we usually recommend it to people who are more prone to diarrhea or soft stools instead of people who are constipated (for whom we would recommend a higher fat content dairy like sour cream or creme fraiche). 

Let’s dive in! 

Ingredients for Homemade Yogurt:

  • Milk

  • Whey

Pour your milk into a pot and slowly heat it over the stove. Raw milk should be heated to 110 F. Pasteurized milk needs to be heated up to 180 F, then cooled to 110 F. 


This is very important because when milk is pasteurized, it starts growing bacteria that are not beneficial, and can actually be quite harmful (this is why pasteurized milk has an expiration date and why it “goes bad” when it is too old or left out of refrigeration). We have to kill these off first before we let the culturing process happen.

Milk heated for Homemade yogurt.jpg

Once your milk is at temperature, remove from heat and add your starter. This can be yogurt, whey or crème fraiche. Whey generally makes a thinner yogurt, a previous yogurt will make a thicker yogurt, and crème fraiche tends to make a creamier yogurt. Stir briefly to combine.

Adding starter to GAPS friendly homemade yogurt.jpg

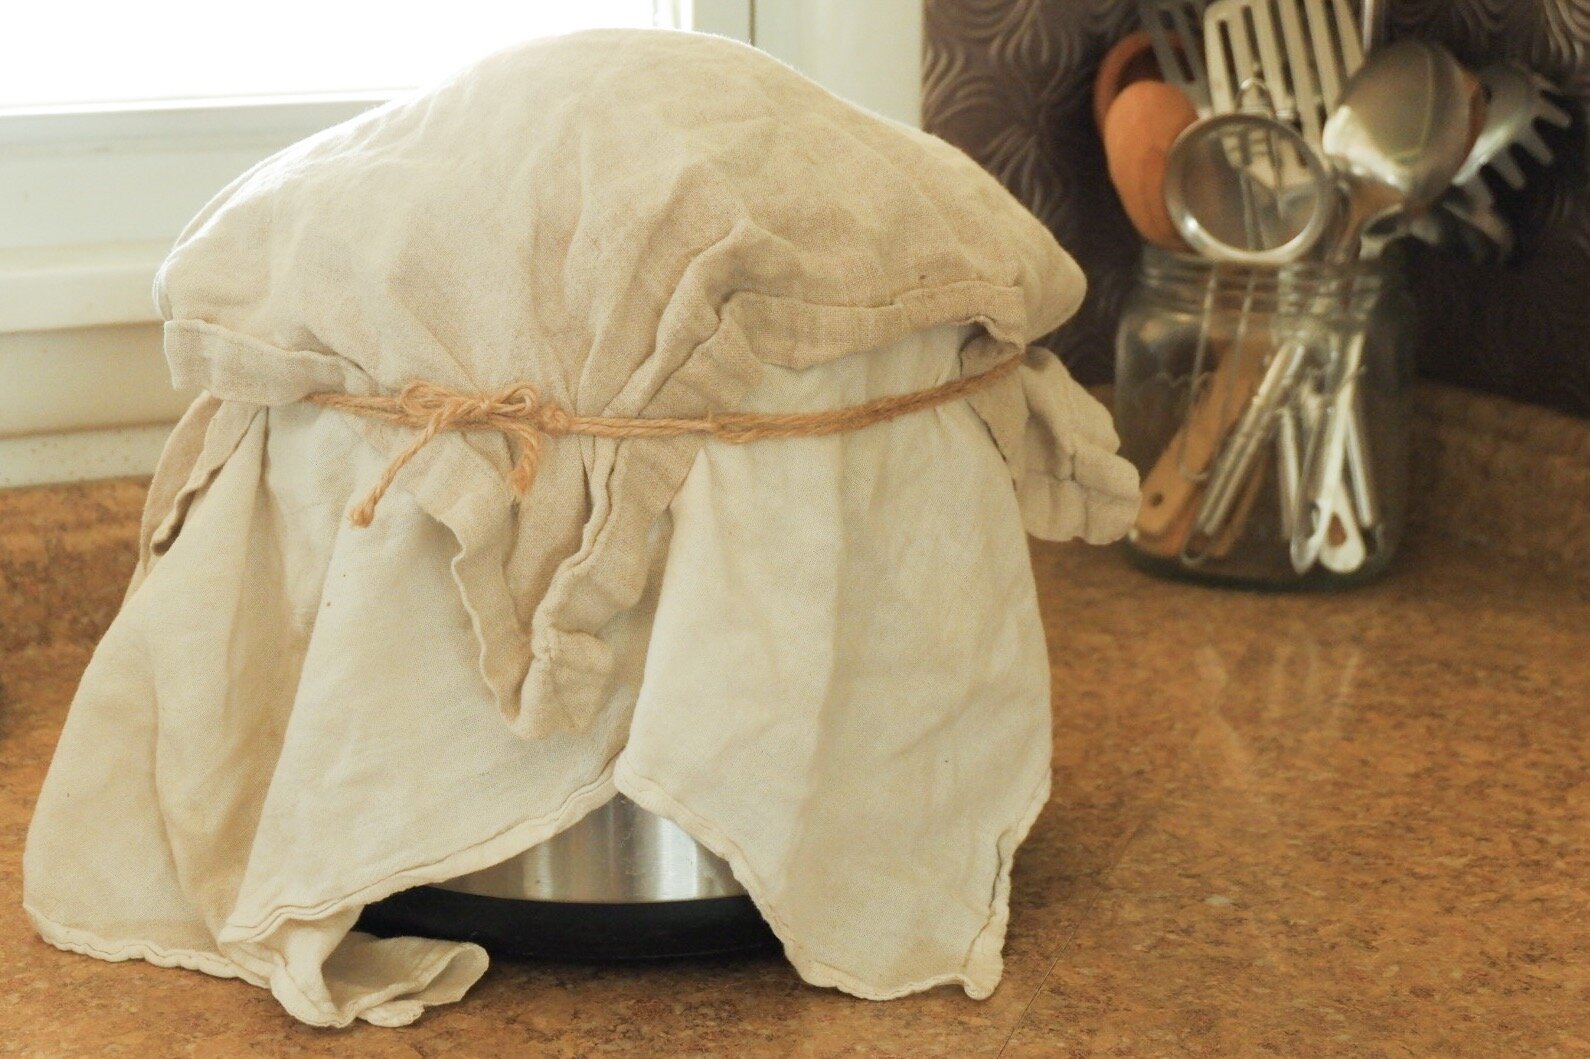
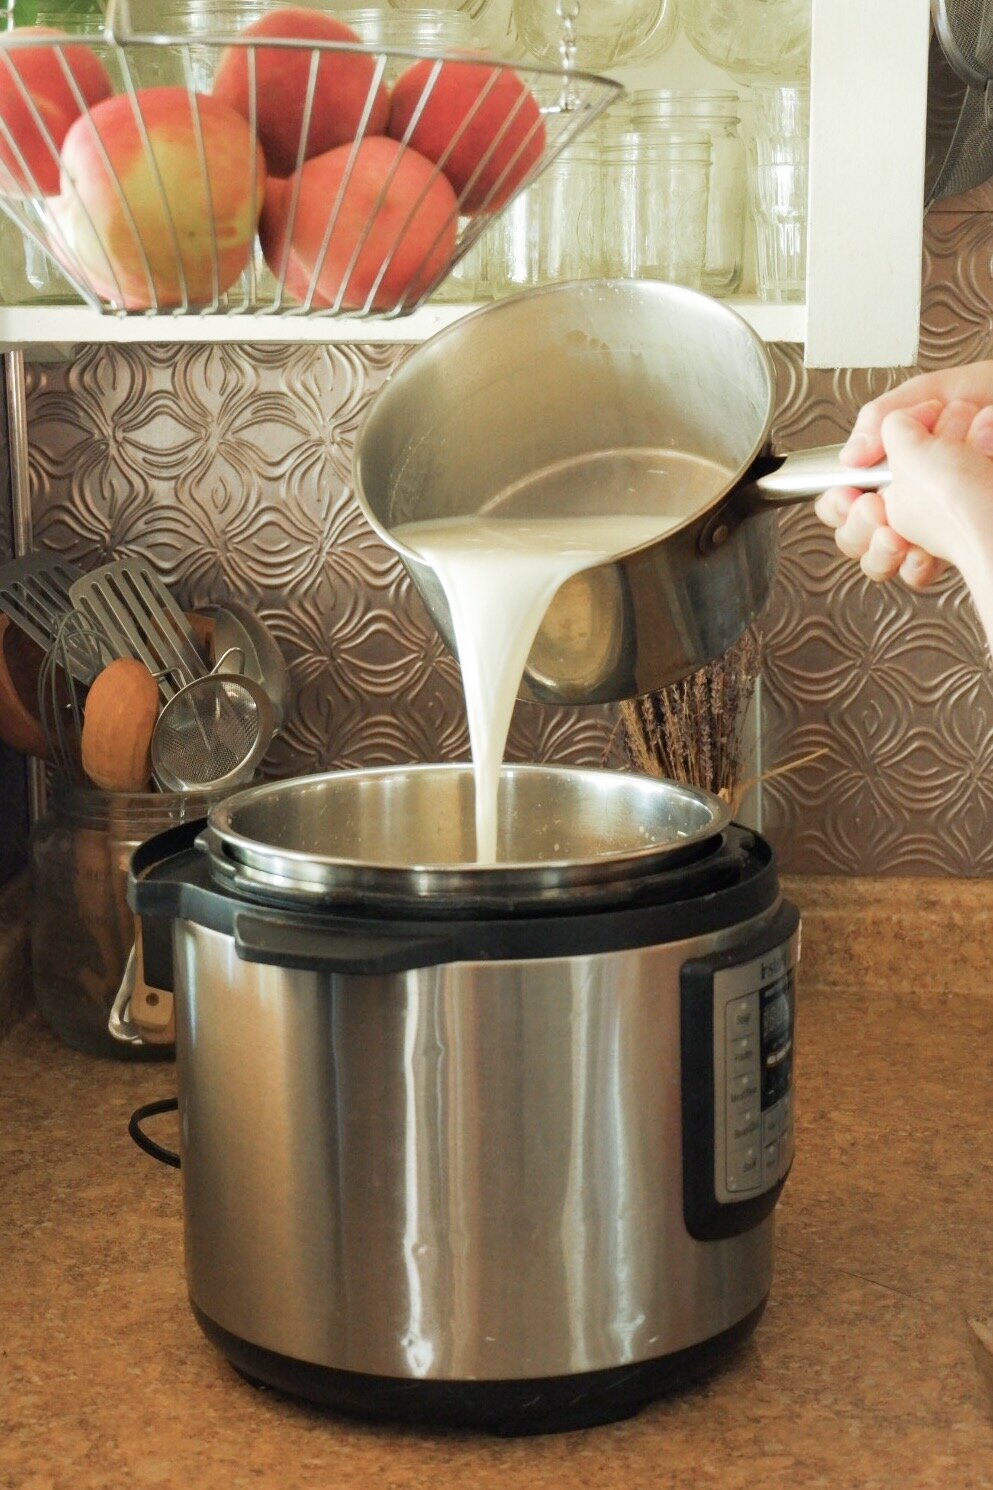
Pour the milk/starter mixture into an insulated container. I use my instant pot with it unplugged and covered. Then I wrap a couple towels around it to keep any heat from leaking out. You can use a thermos, or place your milk in a jar and put it somewhere where you can regulate the temperature such as in a dehydrator or in the oven with the pilot light on. The goal is to keep the milk at 110 F for the next 24-36 hours. Many recipes will say 8-12 hours is fine. When trying to reduce the lactose level and predigest the proteins as much as possible, we aim for at least 24 hours. I find that closer to 28-30 hours produces my favorite consistency/flavor balance. (If you are following the GAPS nutritional protocol, stick to the longer timeframe.)

When the culturing process is done (24-36 hours later), your yogurt is complete! Pour into a glass jar, store in the fridge and enjoy!

GAPS Friendly Homemade Yogurt.jpg
Be Well Clinic GAPS Friendly Homemade Yogurt Recipe.png

Homemade Yogurt

Author:

Ingredients

  • Milk
  • Whey

Instructions

  1. Pour your milk into a pot and slowly heat it over the stove. Raw milk should be heated to 110 F. Pasteurized milk needs to be heated up to 180 F, then cooled to 110 F.
  2. This is very important because when milk is pasteurized, it starts growing bacteria that are not beneficial, and can actually be quite harmful (this is why pasteurized milk has an expiration date and why it “goes bad” when it is too old or left out of refrigeration). We have to kill these off first before we let the culturing process happen.
  3. Once your milk is at temperature, remove from heat and add your starter. This can be yogurt, whey or crème fraiche. Whey generally makes a thinner yogurt, a previous yogurt will make a thicker yogurt, and crème fraiche tends to make a creamier yogurt. Stir briefly to combine.
  4. Pour the milk/starter mixture into an insulated container. I use my instant pot with it unplugged and covered. Then I wrap a couple towels around it to keep any heat from leaking out. You can use a thermos, or place your milk in a jar and put it somewhere where you can regulate the temperature such as in a dehydrator or in the oven with the pilot light on. The goal is to keep the milk at 110 F for the next 24-36 hours. Many recipes will say 8-12 hours is fine. When trying to reduce the lactose level and predigest the proteins as much as possible, we aim for at least 24 hours. I find that closer to 28-30 hours produces my favorite consistency/flavor balance. (If you are following the GAPS nutritional protocol, stick to the longer timeframe.)
  5. When the culturing process is done (24-36 hours later), your yogurt is complete! Pour into a glass jar, store in the fridge and enjoy!

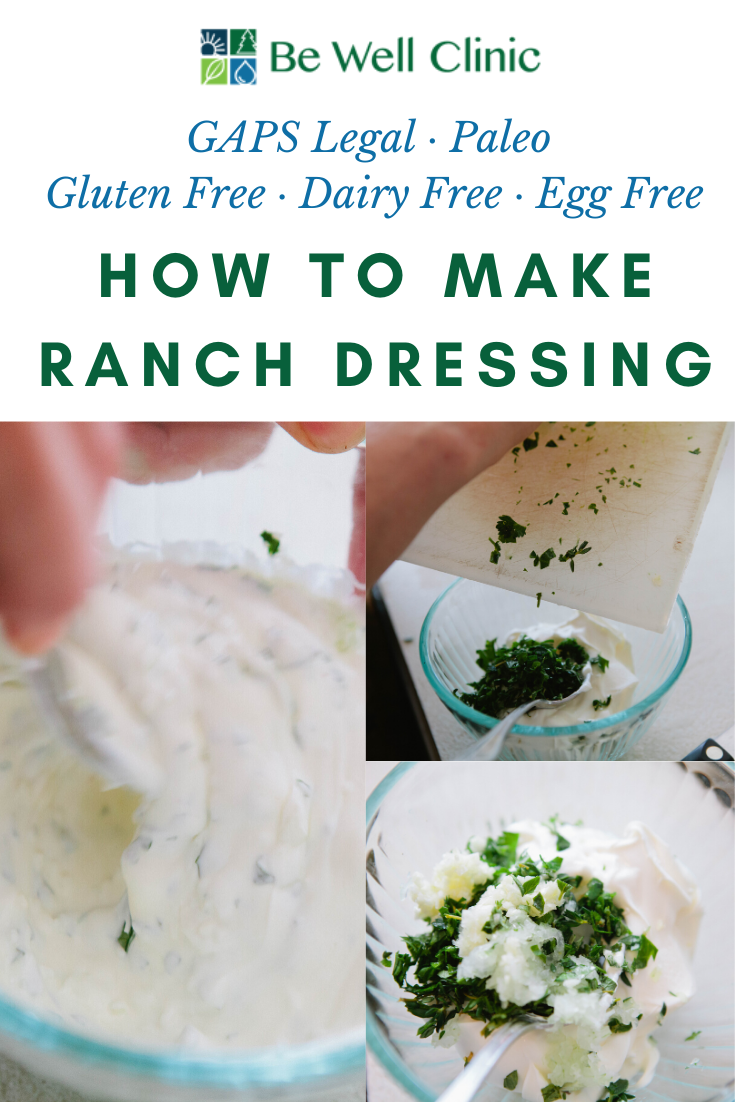
Make Your Own Ranch Dressing

My brother absolutely loves ranch dressing! I have fond memories of it as well but I mostly remember how much he loved it. Making your own ranch dressing is fairly simple and allows you to avoid the undesirable additives like MSG that are commonly found in commercially made condiments. 

Ranch dressing is typically used as a dip and you can definitely dip any number of cut vegetables into this mixture. However, you could also use this delicious blend as an added flavoring for lots of dishes, like on top of a steak, in this Chicken Pot Pie Soup or in this Pumpkin Soup.

Making your own ranch dressing is very easy! You can make it with dried herbs or fresh herbs. It’s GAPS Legal and you can use it as a dressing or as a dip. Recipe by Amy Mihaly, Certified GAPS Practitioner in Colorado.

This is legal on GAPS Stage 5 because of the herbs, even though we’re using fresh herbs. If you’re tolerating dried herbs, you could use a dried Italian Herb mixture. Otherwise, think Italian herbs like thyme, parsely, and oregano. 

Once I’ve mixed everything, I like to return it to the original container. I would suggest making this dressing about an hour before you’re going to use it so that the flavors can meld. If you use it immediately after you mix it, it’s still delicious but not as flavorful.

Ingredients for Making Your Own Ranch Dressing:

  • 7.5 oz Sour Cream or Creme Fraiche

  • Italian Herbs

  • 1 clove garlic

  • 1 tbsp minced onion

  • 5-6 Grinds of Pepper

Directions for Making Your Own Ranch Dressing:

Making your own ranch dressing is very easy! You can make it with dried herbs or fresh herbs. It’s GAPS Legal and you can use it as a dressing or as a dip. Recipe by Amy Mihaly, Certified GAPS Practitioner in Colorado.

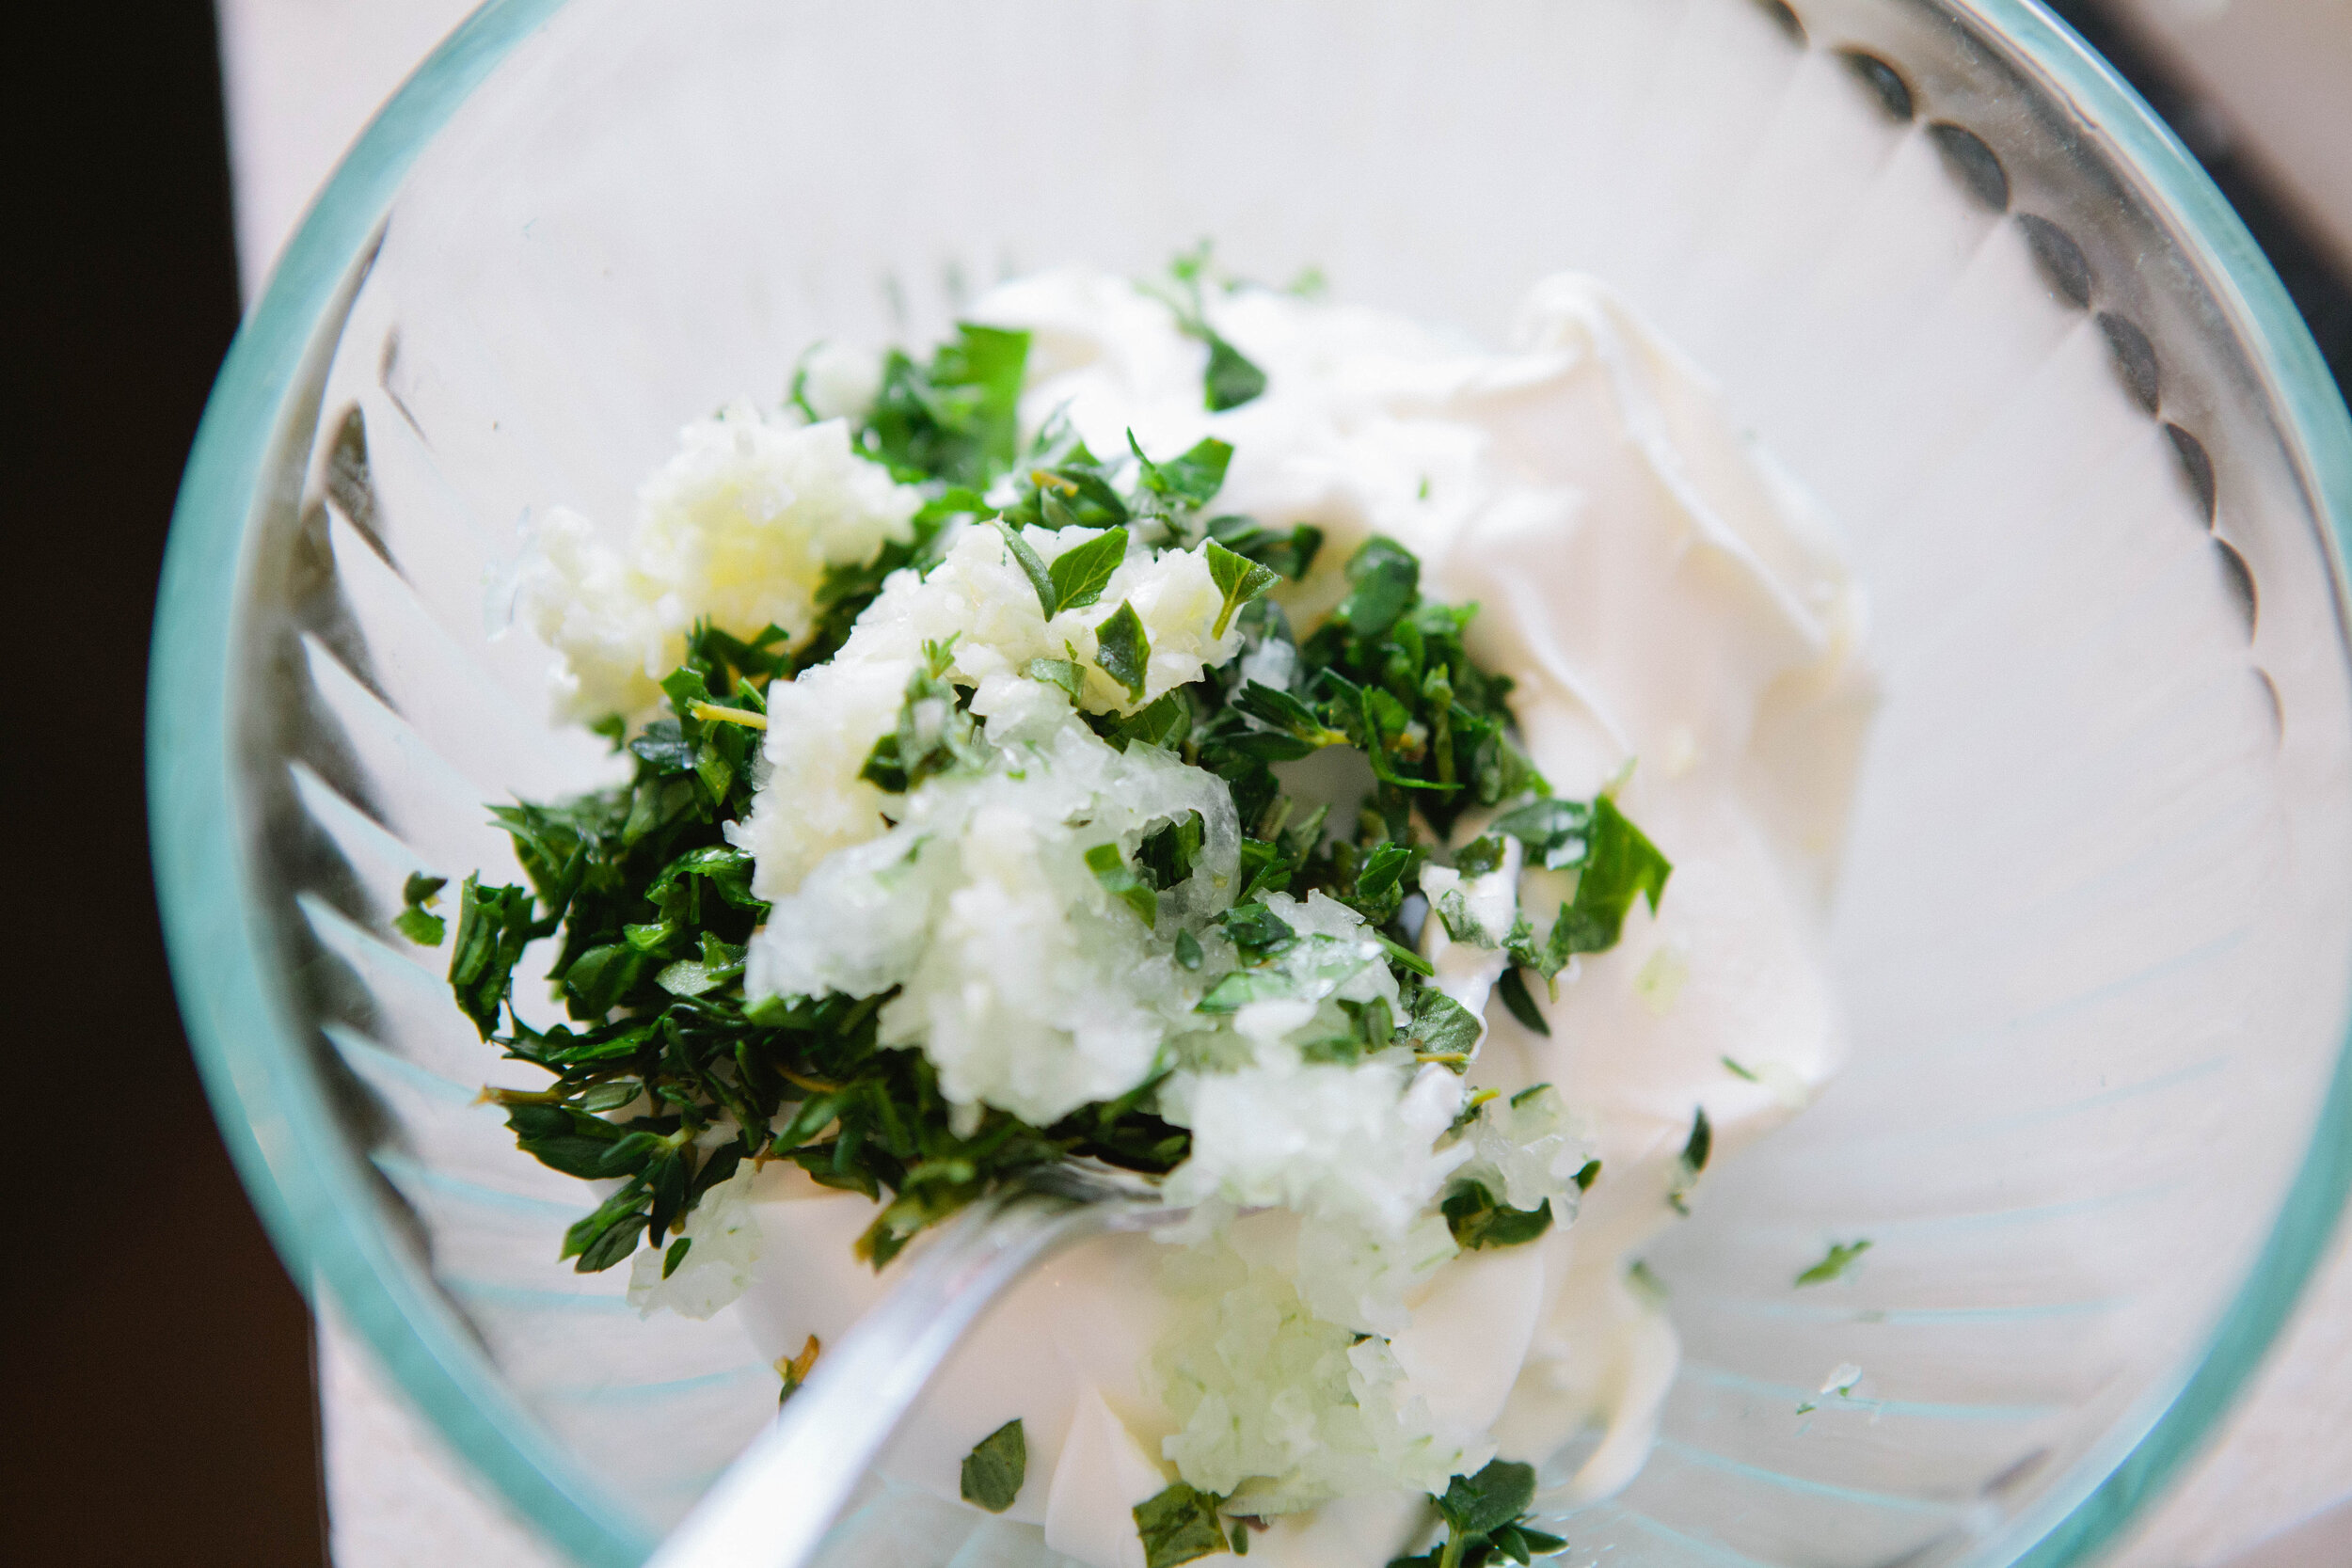
Finely mince garlic, onion and herbs.

Making your own ranch dressing is very easy! You can make it with dried herbs or fresh herbs. It’s GAPS Legal and you can use it as a dressing or as a dip. Recipe by Amy Mihaly, Certified GAPS Practitioner in Colorado.

Add to a bowl with sour cream or creme fraiche. Mix well and enjoy!

Making your own ranch dressing is very easy! You can make it with dried herbs or fresh herbs. It’s GAPS Legal and you can use it as a dressing or as a dip. Recipe by Amy Mihaly, Certified GAPS Practitioner in Colorado.

HowToMakeYourOwnRanchDressing.png

How to Make Your Own Ranch Dressing

Author:
prep time: cook time: total time:

ingredients:

  • 7.5 oz Sour Cream or Creme Fraiche
  • Italian Herbs
  • 1 clove garlic
  • 1 tbsp minced onion
  • 5-6 Grinds of Pepper

instructions:

How to cook How to Make Your Own Ranch Dressing

  1. Finely mince garlic, onion and herbs.
  2. Add to a bowl with sour cream or creme fraiche.
  3. Mix well and enjoy!
  4. I would suggest making this dressing about an hour before you’re going to use it so that the flavors can meld. If you use it immediately after you mix it, it’s still delicious but not as flavorful.
Created using The Recipes Generator

Chocolate Fudge Made with Coconut

GAPS Legal Chocolate Peppermint Coconut Fudge and Citrus Coconut Fudge

The GAPS Legal Fudge is a delicious holiday recipe and easy to share with family and friends! This recipe comes together quickly, besides the melting of the coconut butter and oil. I like making this recipe on a snowy day because it’s fun to chill the pans in a snowbank! It makes me feel like a pioneer.

For the citrus fudge, you can use any citrus you like. I prefer orange. You can also use all shredded coconut if you like. I prefer a little crunch in my fudge and like to add the flakes.You can make these flavors on their own and keep them separate. However, I prefer the two flavors together.

To combine the flavors, make the chocolate peppermint fudge first and put it in the freezer for 10 minutes to chill rapidly while you make the citrus fudge. Once chilled, pour the citrus fudge over the top and chill again.The fudge keeps for quite a while and doesn’t melt easily at room temperature. Even so, storing in the fridge is best.Enjoy!

Chocolate Peppermint Coconut Fudge

Ingredients for chocolate peppermint coconut fudge

  • ½ cup coconut butter

  • ½ cup coconut oil

  • ½ cup cocoa powder

  • ½ cup honey

  • 2 tsp peppermint extract or 2 drops peppermint oil

  • 1 tsp vanilla extract

  • 3/4 cup shredded coconut

  • ¼ cup coconut flakes

Directions for chocolate peppermint coconut fudge

This GAPS Legal Coconut Fudge comes in two flavors, citrus and peppermint. You can make the flavors separately but I prefer them layered together. Use coconut butter, coconut oil and coconut flakes for a delicious gluten free, dairy free and GAPS le…

Melt coconut butter on medium heat by adding water to the bottom of a pot and placing jar on top. Or add jar and water to crockpot and heat for two hours until melted.

Melt coconut oil in a separate pot. Crush coconut flakes into smaller pieces.

This GAPS Legal Coconut Fudge comes in two flavors, citrus and peppermint. You can make the flavors separately but I prefer them layered together. Use coconut butter, coconut oil and coconut flakes for a delicious gluten free, dairy free and GAPS le…

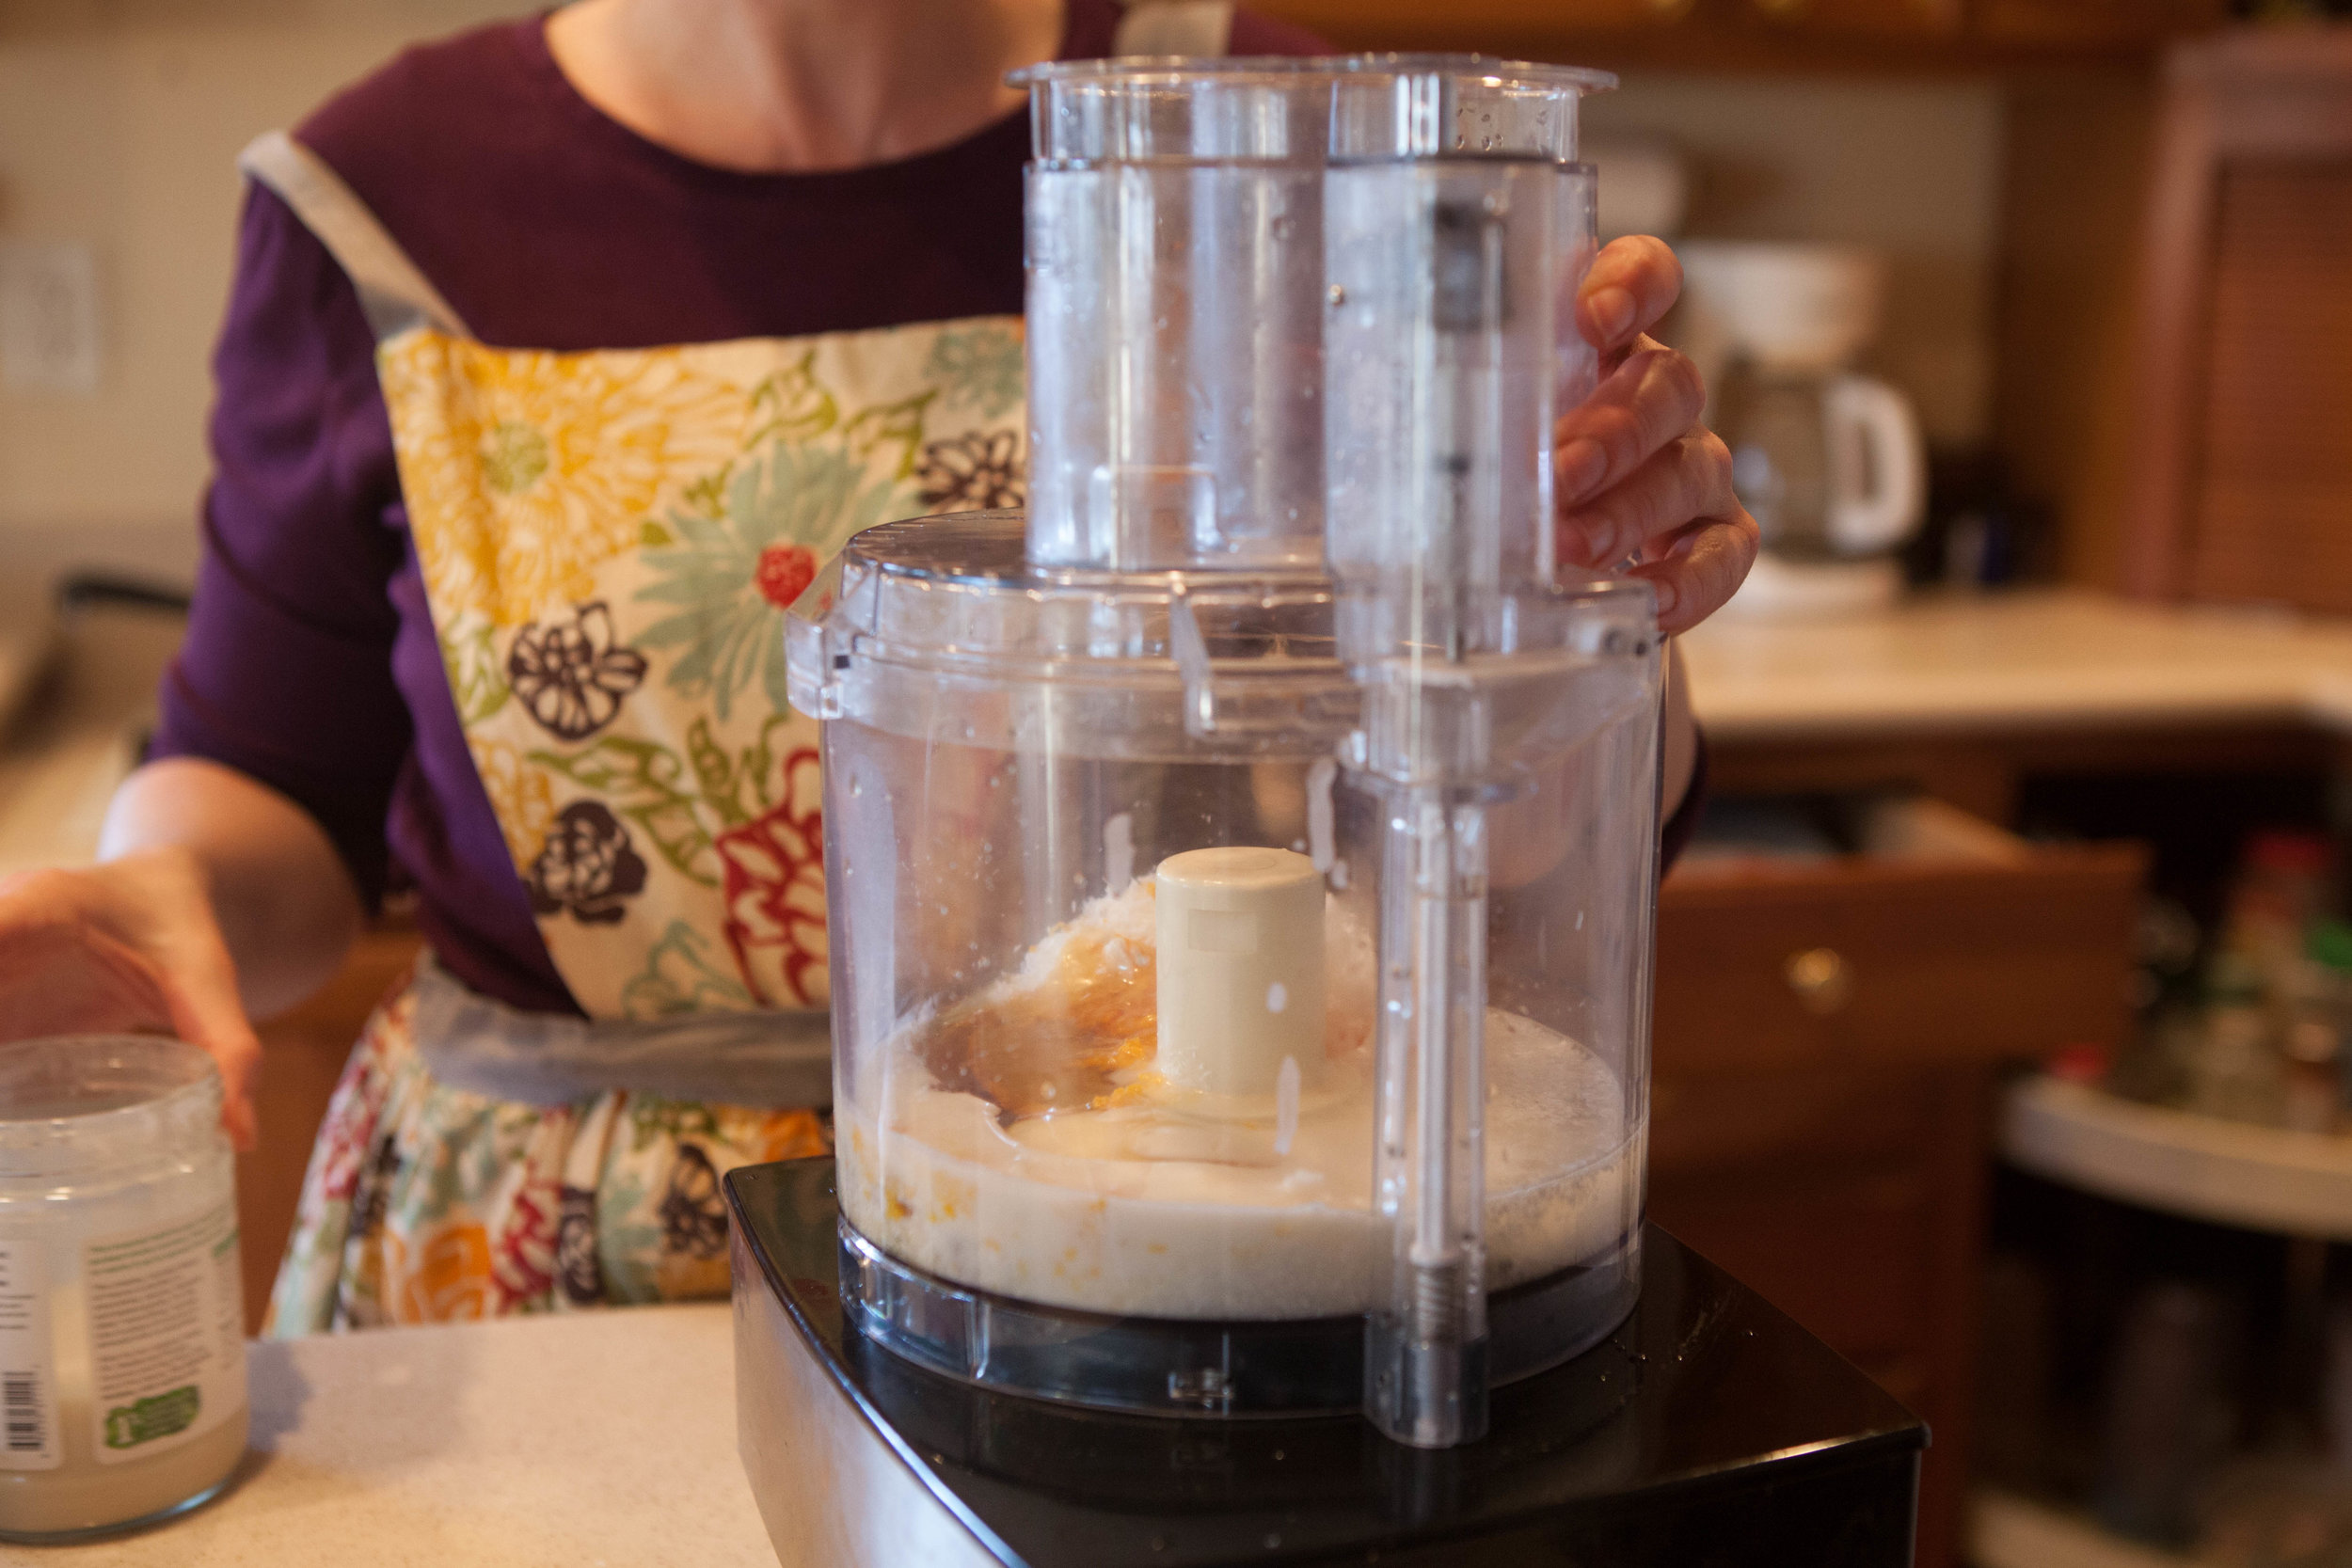
Combine coconut butter, coconut oil, cocoa powder, honey, peppermint, vanilla, shredded coconut and coconut flakes into a food processor.

This GAPS Legal Coconut Fudge comes in two flavors, citrus and peppermint. You can make the flavors separately but I prefer them layered together. Use coconut butter, coconut oil and coconut flakes for a delicious gluten free, dairy free and GAPS le…

Spread mixture into a pan.Chill for 30 minutes.

Add hot water to the sink. Float pan in mixture approx 1 minute until mixture releases from sides. Dip a knife in hot water then slice fudge into pieces.

How to Make Citrus coconut Fudge

Ingredients for citrus coconut fudge

  • ½ cup coconut butter

  • ½ cup coconut oil

  • ⅓ cup raw honey

  • 1 tbsp citrus zest

  • 2 tbs citrus juice

  • 3/4 cup shredded coconut

  • ¼ cup Coconut Flakes

Directions for citrus coconut fudge

This GAPS Legal Coconut Fudge comes in two flavors, citrus and peppermint. You can make the flavors separately but I prefer them layered together. Use coconut butter, coconut oil and coconut flakes for a delicious gluten free, dairy free and GAPS le…

Melt coconut butter on medium heat by adding water to the bottom of a pot and placing jar on top. Or add jar and water to crockpot and heat for two hours until melted. Melt coconut oil in a separate pot.

This GAPS Legal Coconut Fudge comes in two flavors, citrus and peppermint. You can make the flavors separately but I prefer them layered together. Use coconut butter, coconut oil and coconut flakes for a delicious gluten free, dairy free and GAPS le…

Combine coconut butter, coconut oil, cocoa powder, honey, peppermint, and vanilla into a food processor.

This GAPS Legal Coconut Fudge comes in two flavors, citrus and peppermint. You can make the flavors separately but I prefer them layered together. Use coconut butter, coconut oil and coconut flakes for a delicious gluten free, dairy free and GAPS le…

Spread mixture into a pan.Chill for 30 minutes.

This GAPS Legal Coconut Fudge comes in two flavors, citrus and peppermint. You can make the flavors separately but I prefer them layered together. Use coconut butter, coconut oil and coconut flakes for a delicious gluten free, dairy free and GAPS le…

Add hot water to the sink. Float pan in mixture approx 1 minute until mixture releases from sides. Dip a knife in hot water then slice fudge into pieces.


Chocolate Peppermint Fudge

Author:
prep time: cook time: total time:

ingredients:

  • ½ cup coconut butter
  • ½ cup coconut oil
  • ½ cup cocoa powder
  • ½ cup honey
  • 2 tsp peppermint extract or 2 drops peppermint oil
  • 1 tsp vanilla extract
  • 3/4 cup shredded coconut
  • ¼ cup coconut flakes

instructions:

How to cook Chocolate Peppermint Fudge

  1. Melt coconut butter on medium heat by adding water to the bottom of a pot and placing jar on top. Or add jar and water to crockpot and heat for two hours until melted.
  2. Melt coconut oil in a separate pot. Crush coconut flakes into smaller pieces.
  3. Combine coconut butter, coconut oil, cocoa powder, honey, peppermint, vanilla, shredded coconut and coconut flakes into a food processor.
  4. Spread mixture into a pan.Chill for 30 minutes.
  5. Add hot water to the sink. Float pan in mixture approx 1 minute until mixture releases from sides. Dip a knife in hot water then slice fudge into pieces.
Created using The Recipes Generator

Citrus Coconut Fudge

Author:
prep time: cook time: total time:

ingredients:

  • ½ cup coconut butter
  • ½ cup coconut oil
  • ⅓ cup raw honey
  • 1 tbsp citrus zest
  • 2 tbs citrus juice
  • 3/4 cup shredded coconut
  • ¼ cup Coconut Flakes

instructions:

How to cook Citrus Coconut Fudge

  1. Melt coconut butter on medium heat by adding water to the bottom of a pot and placing jar on top. Or add jar and water to crockpot and heat for two hours until melted. Melt coconut oil in a separate pot.
  2. Combine coconut butter, coconut oil, cocoa powder, honey, peppermint, and vanilla into a food processor.
  3. Spread mixture into a pan. Chill for 30 minutes.
  4. Add hot water to the sink. Float pan in mixture approx 1 minute until mixture releases from sides. Dip a knife in hot water then slice fudge into pieces.
Created using The Recipes Generator

Christmas Wreath Cookies {GAPS Legal}

It's the holiday season! More specifically, it's cookie season!   I love making, giving away (and eating) Christmas cookies. But it's been a long time since I have enjoyed many of the cookies I grew up making, so this year I decided I wanted to create real-food versions of some of my favorite Christmas cookie recipes.  

First up, Christmas Wreath cookies!

  This cookie is traditionally a mix of corn flakes, marshmallows, and butter. So let's look at the ingredients...

  • The butter is already a real food!

  • Marshmallows I have made before, modified from Mommypotamus' marshmallow recipe.

So all I had to do was figure out a substitution for the corn flakes (and see if the marshmallows actually work the same as the commercial variety).   Challenge accepted!

Christmas Wreath Cookies

Makes about 36 cookies (recipe can be halved)

Ingredients

For Marshmallows

  • 2 cups honey

  • 1 cup of filtered water

  • 2 tsp vanilla

  • 1 tsp sea salt

  • 6 TBS grass-fed beef gelatin

  • 1 cup of filtered water

For Wreath Cookies

  • Marshmallow paste (above)

  • 8 ounces organic butter

  • 14 cups coconut flakes (approximately 20 ounces)

  • Red hots (my homemade recipe)

  • Natural food coloring, blue and yellow packets (I used this one)

Directions

IMG_9987.jpg

Place the coconut flakes in the oven at 200°

Toast the coconut until they are light brown—this makes the cookies crispier! When done, remove them from the oven Place in a large bowl, set aside.

IMG_9996.jpg

Melt the butter in a saucepan over low heat When melted, remove from heat and set aside   Next, make the marshmallow paste. See recipe here.

Soften the gelatin

  • Add gelatin to 1 cup hot water

  • Stir and allow to to sit, keep warm (not on stove)

While gelatin is softening... Heat honey and water in a medium saucepan (medium to high heat), stirring frequently, until it reaches the soft ball candy stage (about 235°F).

If you don't have a thermometer, you can check by dripping the heated honey into a glass of cold water. When the candy forms a ball, it is ready!

When the honey has reached the soft ball stage, remove from heat. Add the heated mixture to the softened gelatin in a large bowl. Add vanilla.

Do these steps quickly, you don't want honey mixture to cool off too much!

Whisk the mixture using an electric mixer or stand mixer for about 10 minutes.

When the mixture is thick and looks like marshmallow paste, it's done!  

If you want marshmallows, you can stop here. Put the marshmallow paste in a greased glass 9x11 dish and allow to cool and dry for a 24-36 hrs. Then cut up and serve.  

But we are not stopping here! To make traditional Christmas wreath cookies you melt the marshmallows and turn them back into paste-which is what you just created!  

Next, stir the melted butter into the mixture. It will deflate the mixture somewhat, this is normal.

Mix in the blue and yellow food coloring packets. This will turn it green (not neon green—that's an artificial color). But when it's made into wreathes it does look green—although you're going to have to take my word for it!

IMG_0006.jpg

Pour the marshmallow mixture into the bowl with the toasted coconut flakes. Mix until the flakes are coated.

Finally, form the warm mixture into wreath-shaped cookies on parchment paper.

IMG_0019.jpg

Add decorative red hots as berries (see my homemade recipe) Allow to cool.

See, I told you they look green!

All that's left is to share and enjoy these delicious treats!

Disclosure: This post contains affiliate links. Your trust is important. I only recommend products I trust. 

IMG_0021.jpg

Christmas Wreath Cookies

Author:
prep time: cook time: total time:

ingredients:

For Marshmallows
  • 2 cups honey
  • 1 cup of filtered water
  • 2 tsp vanilla
  • 1 tsp sea salt
  • 6 TBS grass-fed beef gelatin
  • 1 cup of filtered water
For Wreath Cookies
  • Marshmallow paste (above)
  • 8 ounces organic butter
  • 14 cups coconut flakes (approximately 20 ounces)
  • Red hots (my homemaderecipe)
  • Natural food coloring, blue and yellow packets (I used this one)

instructions:

How to cook Christmas Wreath Cookies

  1. Place the coconut flakes in the oven at 200°
  2. Toast the coconut until they are light brown—this makes the cookies crispier! When done, remove them from the oven Place in a large bowl, set aside.
  3. Melt the butter in a saucepan over low heat When melted, remove from heat and set aside Next, make the marshmallow paste. See recipe here.
  4. Soften the gelatin
  5. Add gelatin to 1 cup hot water
  6. Stir and allow to to sit, keep warm (not on stove)
  7. While gelatin is softening... Heat honey and water in a medium saucepan (medium to high heat), stirring frequently, until it reaches the soft ball candy stage (about 235°F).
  8. If you don't have a thermometer, you can check by dripping the heated honey into a glass of cold water. When the candy forms a ball, it is ready!
  9. When the honey has reached the soft ball stage, remove from heat. Add the heated mixture to the softened gelatin in a large bowl. Add vanilla.
  10. Do these steps quickly, you don't want honey mixture to cool off too much!
  11. Whisk the mixture using an electric mixer or stand mixer for about 10 minutes.
  12. When the mixture is thick and looks like marshmallow paste, it's done!
  13. If you want marshmallows, you can stop here. Put the marshmallow paste in a greased glass 9x11 dish and allow to cool and dry for a 24-36 hrs. Then cut up and serve.
  14. But we are not stopping here! To make traditional Christmas wreath cookies you melt the marshmallows and turn them back into paste-which is what you just created!
  15. Next, stir the melted butter into the mixture. It will deflate the mixture somewhat, this is normal.
  16. Mix in the blue and yellow food coloring packets. This will turn it green (not neon green—that's an artificial color). But when it's made into wreathes it does look green—although you're going to have to take my word for it!
  17. Pour the marshmallow mixture into the bowl with the toasted coconut flakes. Mix until the flakes are coated.
  18. Finally, form the warm mixture into wreath-shaped cookies on parchment paper.
  19. Add decorative red hots as berries (see my homemade recipe) Allow to cool.
  20. See, I told you they look green!
  21. All that's left is to share and enjoy these delicious treats!
Created using The Recipes Generator

Zucchini Bread {GAPS legal}

Zucchini... if there is one harvest that defines summer, it's zucchini.

Zucchini is great because of its versatility: it can be used hot or cold, baked or fried, and in soups, salads, breads, or even as a noodle substitute.

Today I want to share with you a recipe for a zucchini bread that is legal on the full GAPS diet, WAPF diet, Paleo diet and Whole30. I want you to remember (and take hope in) the fact that I am not primarily a chef. I am just average in the kitchen. If I can make this, so can you! This recipe is very forgiving—so try it!

There are a couple keys to this recipe that need to be followed. Don't shortcut them...they are what make this recipe forgiving, and the bread yummy! The first key is also the first step: fermenting the almond flour. Have you eaten baked goods made of almond flour that are dense and dry? Fermenting the flour creates a lighter, fluffier end product. But that's not all! Fermenting is one of the three processes that can be used to make nuts more digestible.

For more about soaking, sprouting or fermenting, watch this video.

The other key is using sour cream (you could also substitute in a full-fat yogurt) for the fat. As a cultured food, sour cream helps make the bread lighter as well.

Fermented Almond Flour Zucchini Bread

Ingredients

  • 2 1/2 cups almond flour (organic preferred)

  • 1/2 cup whey (strained from yogurt or kefir)

  • 2 cups zucchini (grated and squeezed to remove the liquid)

  • 2-3 eggs (chicken or duck)

  • 1 tsp cinnamon

  • 1/4 tsp ginger

  • 1/4 tsp nutmeg

  • 1 tsp sea salt (source)

  • 1/2 cup sour cream

  • 2/3 cup date syrup (source)

Directions

24 hours (or more) before

Mix almond flour and whey together in a bow.l Cover and set on the counter for 24 hours

This fermentation, which takes place at room temperature, will change the texture of the "flour." At the end of 24 hours you will have something that resembles dough more than wet flour. This is a base that can be used for many recipes. It will keep in the fridge about a week, so many people make this ahead of time and keep it in their fridge for future use. With this step done ahead of time, you can pull it out, add ingredients, and have a fermented baked good in about an hour.

The Next Day

Preheat the oven to 350° F Grate more than 2 cups of zucchini. The zucchini is very wet, so squeeze it dry using a cloth or towel (you can see it in the picture below).

Next, measure 2 cups of the zucchini (dry, but not compressed) and mix it into the 24 hour fermented flour. Add 2-3 eggs (it depends on the size of your egg, those pictured are duck eggs, which are larger than chicken eggs).

Mix in the rest of the ingredients (sour cream, date syrup, salt and spices).

I used date paste instead of honey because cooking honey is thought to turn the honey toxic. You can also make your own date paste in a strong blender like a Vitamix.

Pour into a greased pan (I prefer lining mine with parchment paper, but this is optional).

Bake at 350° for 45-50 minutes, or until toothpick comes out clean from the middle. Wait at least 10 minutes before cutting into the bread. This allows the steam to finish the cooking progress, and will make the texture of the bread better. Add butter, and enjoy!

This post contains affiliate links. Your trust is important to me, and I only recommend products that I trust.


Fermented Almond Flour Zucchini Bread

Author:
prep time: cook time: total time:

ingredients:

  • 2 1/2 cups almond flour (organic preferred)
  • 1/2 cup whey (strained from yogurt or kefir)
  • 2 cups zucchini (grated and squeezed to remove the liquid)
  • 2-3 eggs (chicken or duck)
  • 1 tsp cinnamon
  • 1/4 tsp ginger
  • 1/4 tsp nutmeg
  • 1 tsp sea salt (source)
  • 1/2 cup sour cream
  • 2/3 cup date syrup (source)

instructions:

How to cook Fermented Almond Flour Zucchini Bread

24 hours (or more) before
  1. Mix almond flour and whey together in a bow.l Cover and set on the counter for 24 hours
  2. This fermentation, which takes place at room temperature, will change the texture of the "flour." At the end of 24 hours you will have something that resembles dough more than wet flour. This is a base that can be used for many recipes. It will keep in the fridge about a week, so many people make this ahead of time and keep it in their fridge for future use. With this step done ahead of time, you can pull it out, add ingredients, and have a fermented baked good in about an hour.
The Next Day
  1. Preheat the oven to 350° F Grate more than 2 cups of zucchini. The zucchini is very wet, so squeeze it dry using a cloth or towel (you can see it in the picture below).
  2. Next, measure 2 cups of the zucchini (dry, but not compressed) and mix it into the 24 hour fermented flour. Add 2-3 eggs (it depends on the size of your egg, those pictured are duck eggs, which are larger than chicken eggs).
  3. Mix in the rest of the ingredients (sour cream, date syrup, salt and spices).
  4. I used date paste instead of honey because cooking honey is thought to turn the honey toxic. You can also make your own date paste in a strong blender like a Vitamix.
  5. Pour into a greased pan (I prefer lining mine with parchment paper, but this is optional).
  6. Bake at 350° for 45-50 minutes, or until toothpick comes out clean from the middle. Wait at least 10 minutes before cutting into the bread. This allows the steam to finish the cooking progress, and will make the texture of the bread better. Add butter, and enjoy!
Created using The Recipes Generator

How to Shop Like Betty: Tips on Nutrient-Dense Shopping

In the last post we discussed the differences in food quality, and explored the intricate way God designed our senses to be able to taste, smell, and see the difference. But, as amazing as all this is, we hit a reality check.

We can't all grow our own garden vegetables, have our seafood overnighted, or raise a cow in the backyard. It can be a struggle to even afford purchasing these things.

And that's okay. Most of us are in the same boat.

While I still encourage people to think differently about food budget—considering it instead as part of your health-care budget, I understand that at some point, cash-flow is a limiting factor. You can only do the best you can, prioritizing the things that seem important to your body and family, and go from there.

I want to share a few tips with you. Ones that can help you put more nutrient-dense food on the table. Today let's talk about how to shop.

canstockphoto14919872.jpg

Nutrient-Dense Shopping:

  • Shop sales, coupon, or go to wholesale stores (like Costco), and buy in bulk when the food is a good price.

I actually specifically recommend Costco because of their conscientious sourcing, and their larger selection of organic items. This automatically leads to better quality food options. Buying in bulk, and on sale are also great ways to get things like coconut oil and sugar (to feed your SCOBY, of course), as well as non-grocery items like Epsom salt, soaps and shampoos.

  • Find out when your favorite organic-carrying grocery store marks things down for quick-sale.

Stores go through their produce, dairy and meat products on a regular basis in order to catch and mark-down food that is about to expire. Usually this is scheduled, and if you know the time and day you can show up soon after (or during) this mark-down period and get incredible deals! You can also check to see if there is a local discount grocery store, that takes almost out-of-date items and sells them at a large discount.

Produce: The small health food stores that I shop at usually put the older assorted produce in $2 bags. Often times it comes out to roughly a 90% discount! You have to be creative with using it, and be willing to give away food you may not be able to eat (like maybe potatoes, for example), but I often walk out of these stores with $15-30 worth of organic produce that cost me $4-6.

Meat: Similarly, stores mark down meat when it is nearing it's expiration date. Find out what days they go through the organic produce, and shop at that time. Again, I have found even better deals in smaller stores, where they have more to loose by throwing away food. And don't be afraid to buy frozen meat! Very few nutrients are lost when the meat is frozen. If it comes down to buying fresh commercial meat, or frozen natural or organic meat, the latter will definitely give you more nutrition for your buck.

canstockphoto41638296.jpg
  • Know when to spend your money: when quality really matters, or when it varies tremendously.

There are some foods that are more difficult to find on sale, and ones that I recommend paying more for. Many of these items can be purchased much "cheaper," but the quality ranges from very poor to very good, and you get what you pay for. Dairy products in particular are very manipulated by manufacturers, and should be bought with that in consideration.

Dairy: If you can get raw milk, then do it! Otherwise, I do not recommend consuming pasteurized milk unless it has been cultured, like in yogurt or cheese. Aside from milk, most dairy products tend to keep longer, and may be more difficult to find on sale. Organic is important here, because commercial cows are given many antibiotics and hormones that will come through the milk and affect you. Don't "buy cheap" in these areas, especially butter, as it may be a main source of cholesterol (fat) for you. Cream can be purchased at the store, and although it has been pasteurized (some more than others), it is more stable than milk, and is less affected by pasteurization. Cheese, yogurt and sour cream have all been cultured, and those active cultures are working hard to counteract the damaging effects of pasteurization.

Eggs: Deciding which eggs to buy will depend on your area. If you can't purchase them from a local farm (real free-range are better than store-bought organic), then choose your egg based on the color of the yolk, and the taste. The yolk should be bright yellow or orange, meaning the chickens have been out in the sun and may even be able to eat bugs and fresh greens. Never buy eggs from vegetarian-fed hens. Believe me, hens are not vegetarians! Eggs are another large source of cholesterol, and it's best to buy the best quality of eggs you can find (these are not always the most expensive).

canstockphoto13062197.jpg
  • Look for bulk ordering companies or clubs.

You don't have to join a CSA to get farm-fresh produce. There are companies like Azure Standard, Miller's Organic Farm, and others that send you meat and produce from a farm (maybe in another state) and deliver it to you. This is a great way to buy things that are more difficult to get, like lard, nuts or dried fruit. This can also be a good way to get non-grocery items.

I hope these tips help you make more nutrient-dense food purchases. What other ways have you found to make nutrient-dense food affordable? Share your knowledge with the community in the comments below. Happy shopping!

Onward!