desserts

Honey Sweetened Vanilla Custard

Honey Sweetened Vanilla Custard:


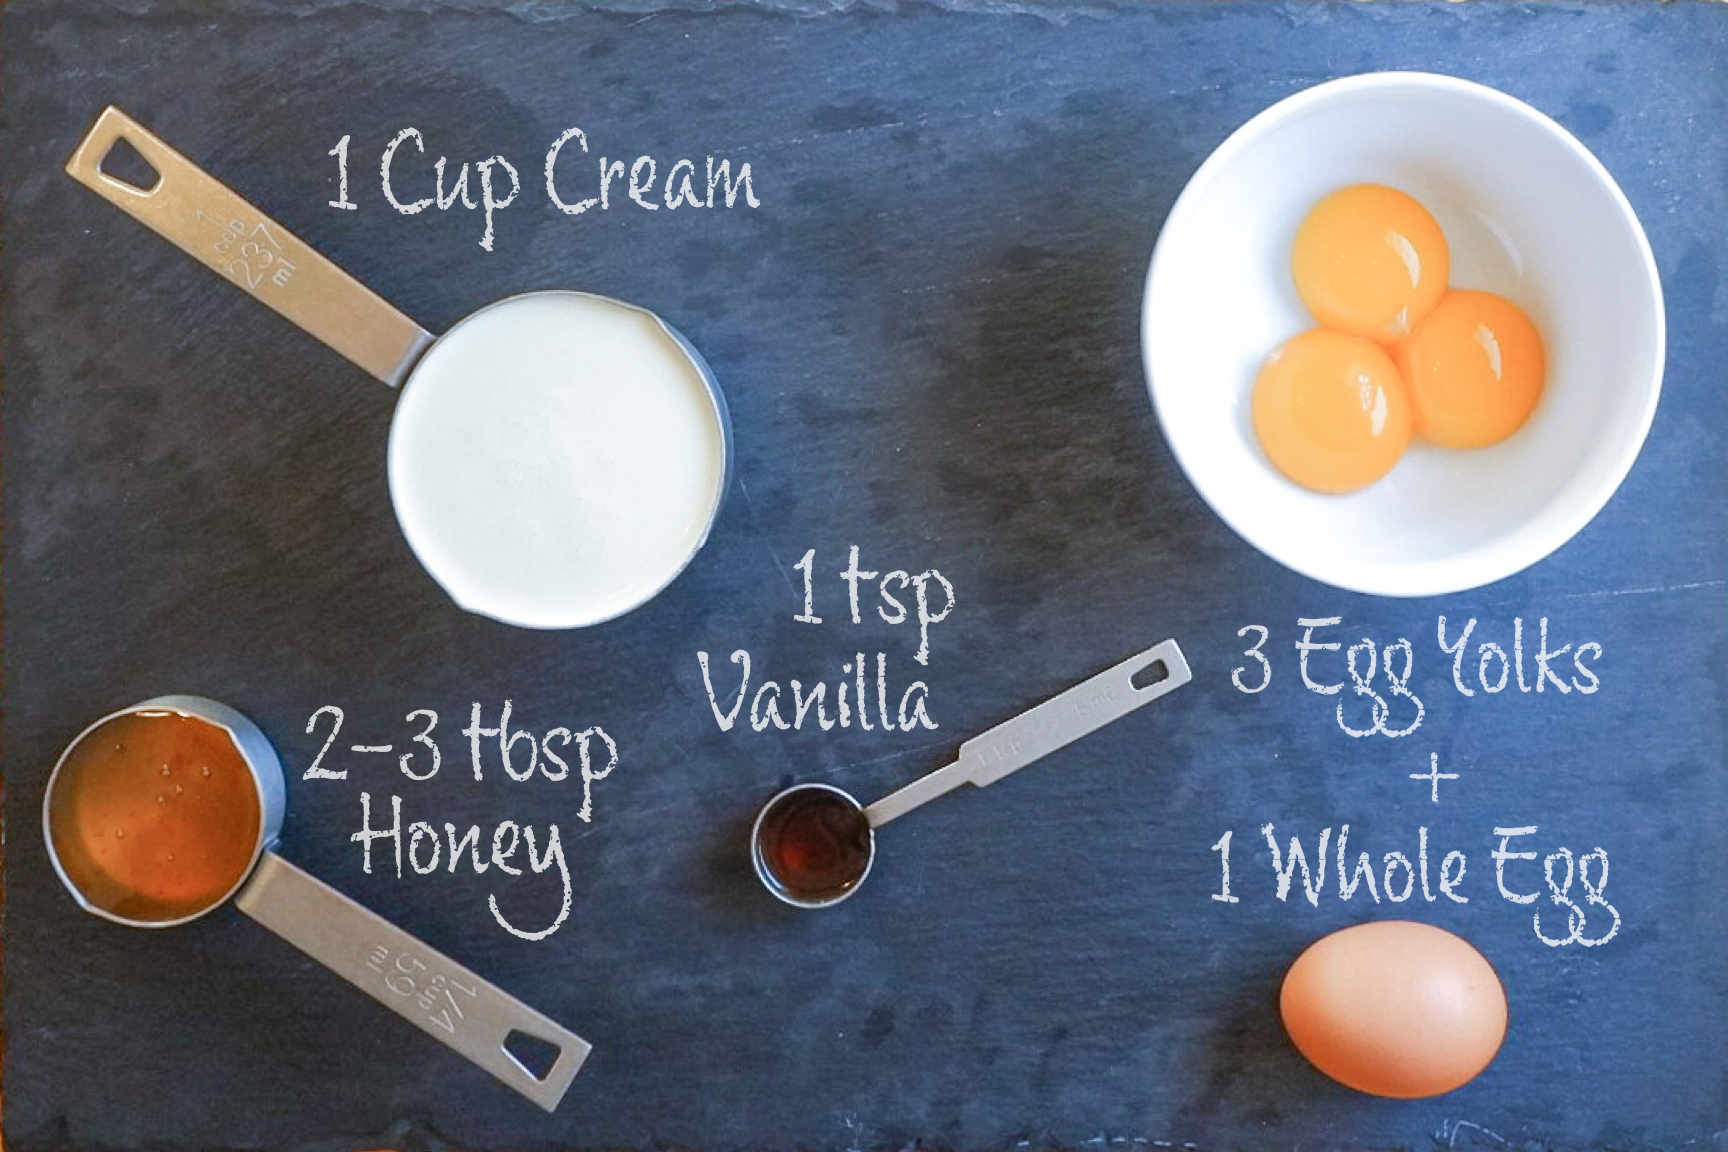
Ingredients for Honey Sweetened Vanilla Custard:

  • 1 cup cream 

  • 3 egg yolks + 1 whole egg

  • 1 tsp vanilla

  • 2-3 tbsp honey

  • (sprinkle of cinnamon or nutmeg if desired)


Directions for Honey Sweetened Vanilla Custard:

  1. Preheat oven to 340F

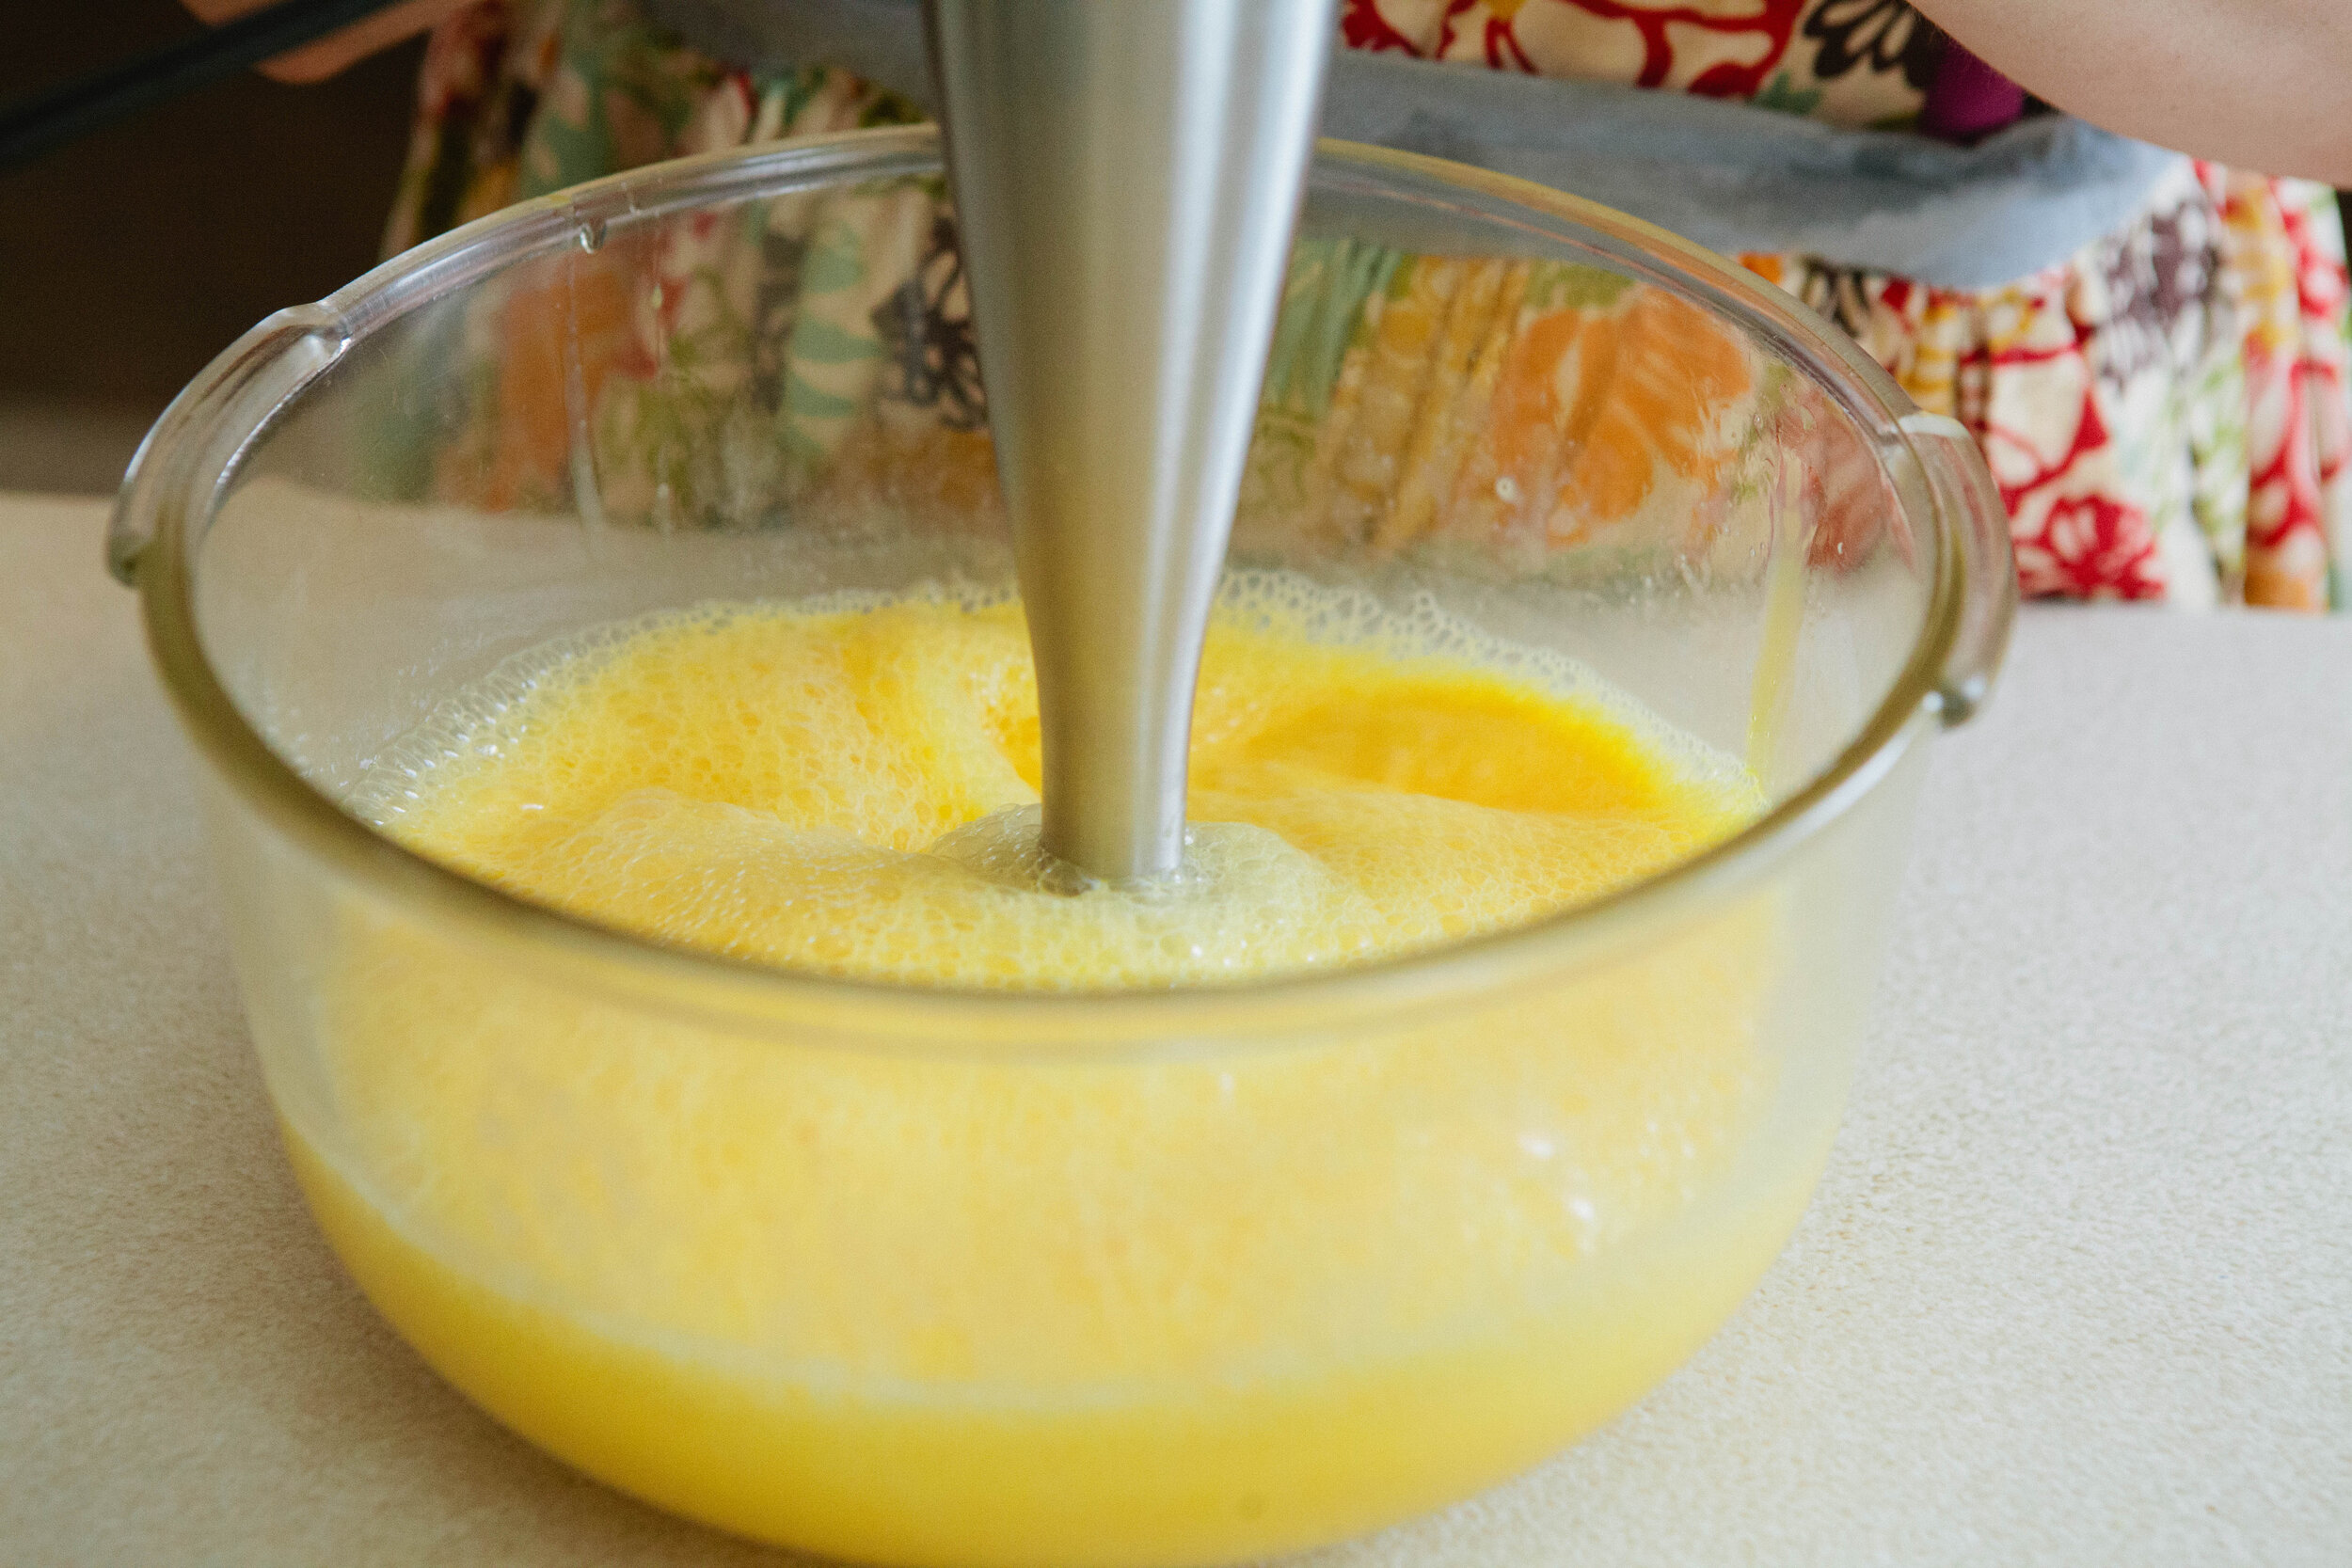
  2. Place all ingredients in a blender, blend on low until just combined. Try not to blend too long - we don’t want it getting frothy. 

3. Pour equally into small oven-safe cups (depending on the size, it will fill 6-10 cups).

4. Place all of the cups in a baking pan with sides at least 1.5 inches high. 

5. Add water to the pan (careful not to get it in the cups!) to fill about ⅔ of the height of the cups to create a water bath. 

6. Place the baking pan in the oven, bake for 45 minutes or until custard is set and not runny when poked with a toothpick. 


*Note: depending on the size of your cups, you may need to adjust the baking time. If you take it out and it is still runny you can leave the custard cups in the hot water bath to set.

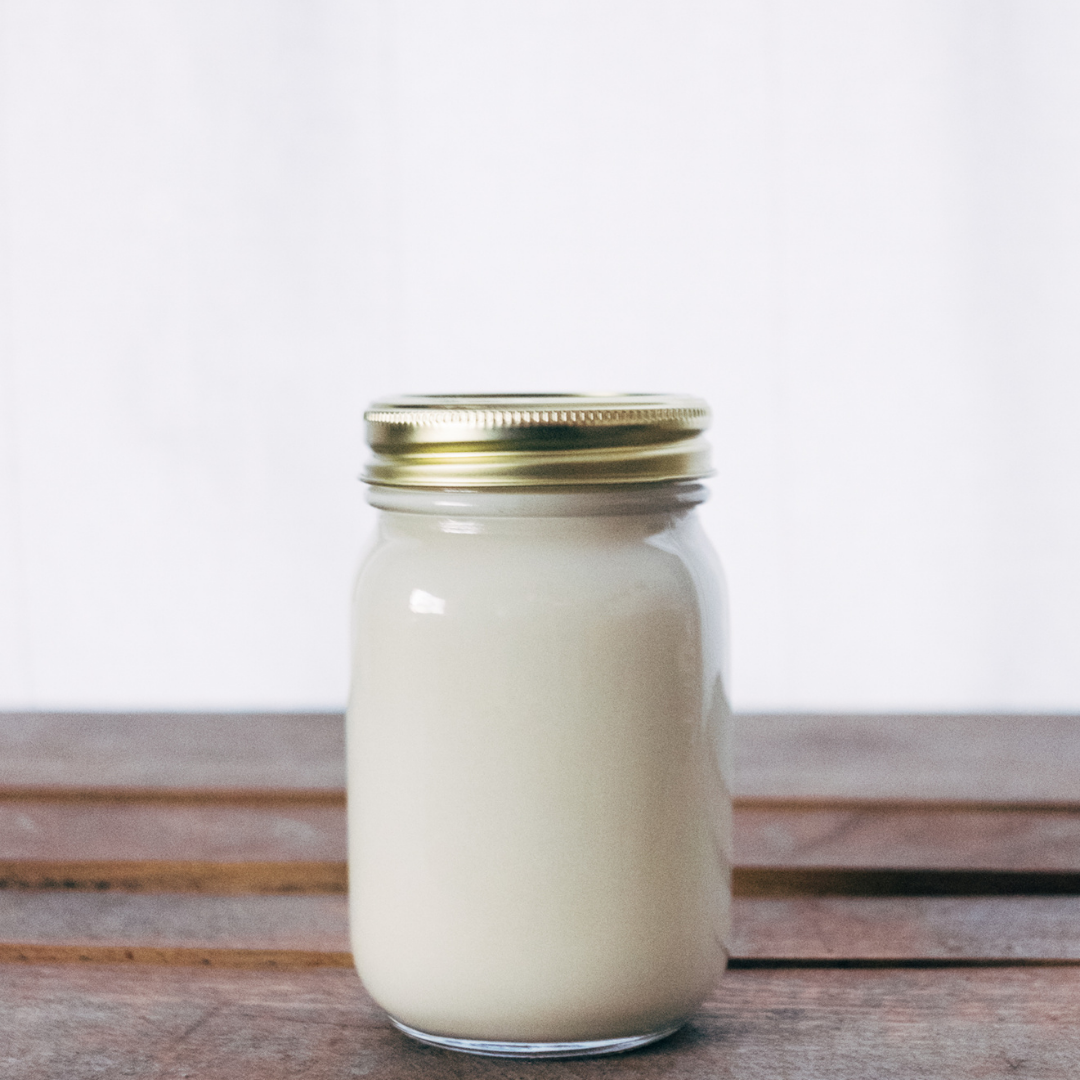
Practical uses:

  • To help relieve headaches (while pregnant or not!)

  • For help sleeping if you typically wake up around 1-3 am

  • To help babies sleep (after you’ve introduced dairy/eggs) - for this one just omit the honey, it’s still great!

  • For a pick-me-up snack in the afternoon when you might crave sugar or caffeine

Honey Sweetened Vanilla Custard Pinterest

Honey Sweetened Vanilla Custard

Author: Hollie Bigham, Be Well Clinic

Ingredients

  • 1 cup cream
  • 3 egg yolks + 1 whole egg
  • 1 tsp vanilla
  • 3 tbsp honey
  • (sprinkle of cinnamon or nutmeg if desired)

Instructions

  1. Preheat oven to 340F
  2. Place all ingredients in a blender, blend on low until just combined. Try not to blend too long - we don’t want it getting frothy.
  3. Pour equally into small oven-safe cups (depending on the size, it will fill 6-10 cups).
  4. Place all of the cups in a baking pan with sides at least 1.5 inches high.
  5. Add water to the pan (careful not to get it in the cups!) to fill about ⅔ of the height of the cups to create a water bath.
  6. Place the baking pan in the oven, bake for 45 minutes or until custard is set and not runny when poked with a toothpick.
  7. Note: depending on the size of your cups, you may need to adjust the baking time. If you take it out and it is still runny you can leave the custard cups in the hot water bath to set.

Tapioca Pudding

This is my favorite pudding of all time & I’ve been wanting to make this recipe for years! Finally, I got around to it. Be prepared for multiple steps to make tapioca pudding. I can see why most people choose the instant food version. The real food version is absolutely worth the effort!

This recipe needs to be started the night beforehand. So, make sure to plan ahead! This also can be done days ahead of time, as it is served well chilled. So, if you are planning on serving this delicious dessert, prepare at your convenience up to a week beforehand. 


Ingredients for Tapioca Pudding

  • 1 cup pearl tapioca

  • 4 cups raw milk 

  • 3 eggs

  • ½ teaspoon sea salt + pinch

  • ¾  cup date sugar

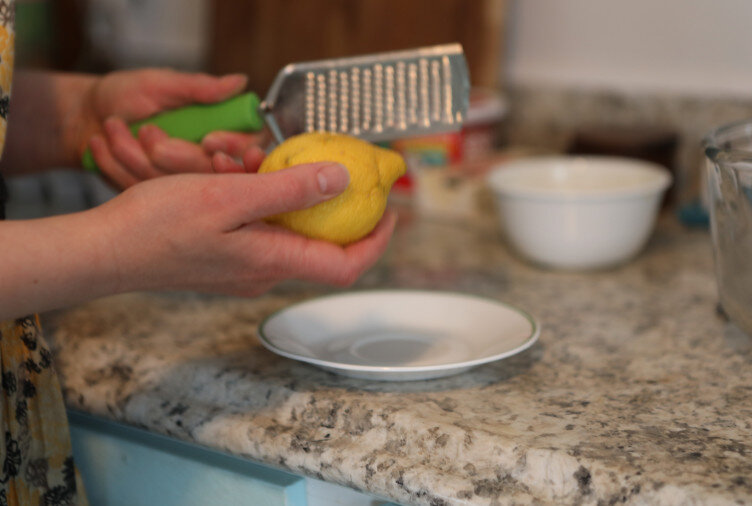
  • 1 lemon, grated

Directions for Tapioca Pudding

Soak tapioca overnight in 4 cups of raw milk. 

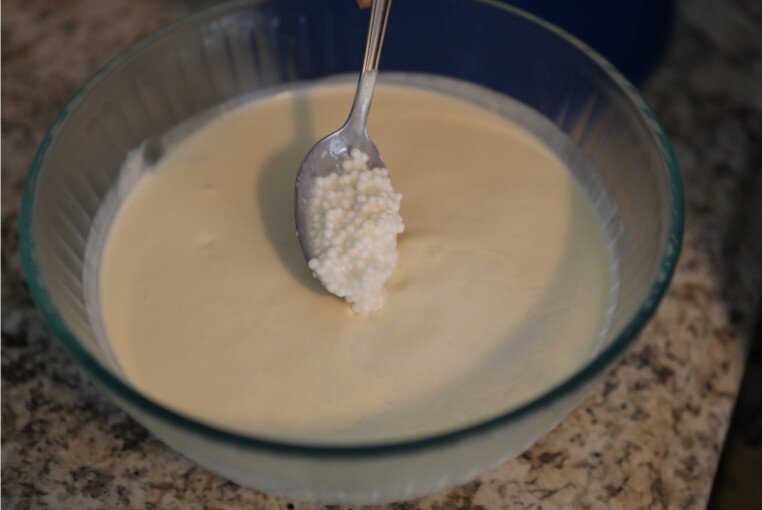
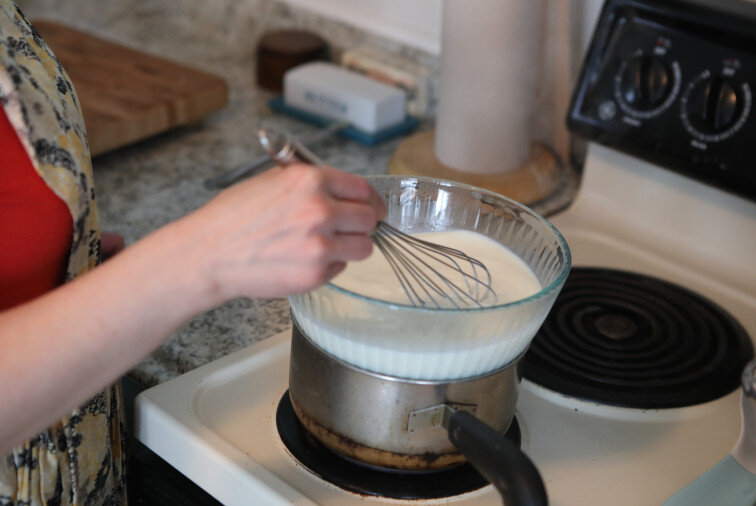
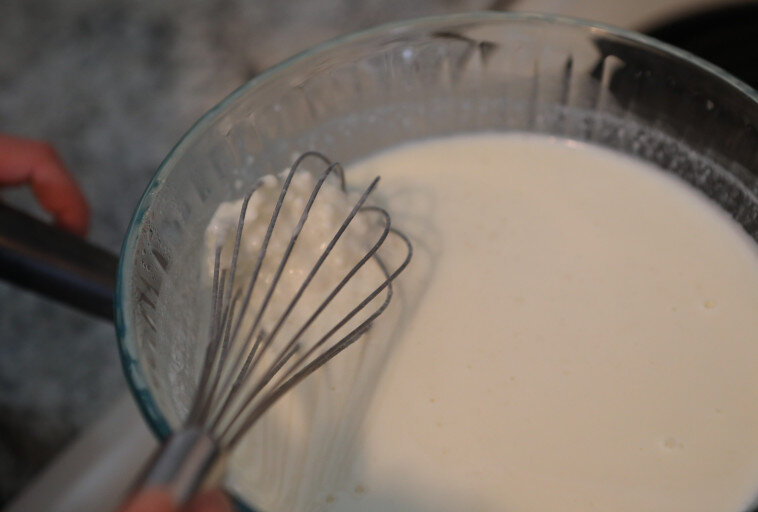
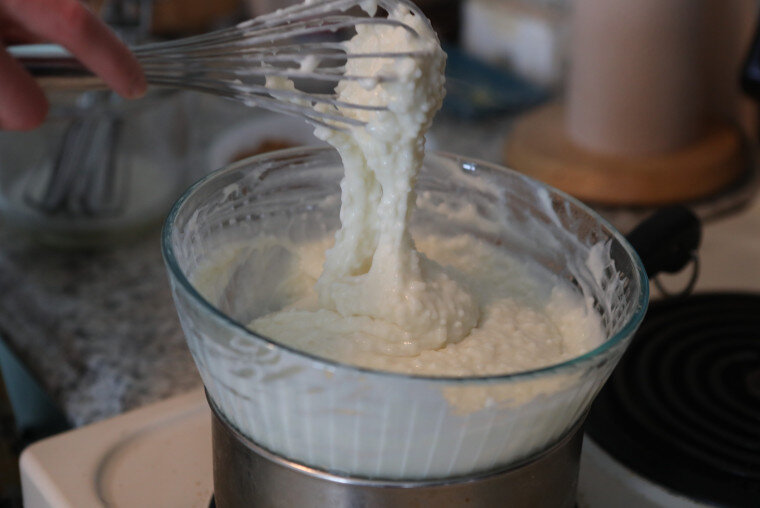
At least 8 hours later, add to a double broiler. Cook about 45 minutes or until thick. Keep stirring it every few minutes as it cooks to prevent it from clumping. Stir constantly near the end to prevent boiling. This is a great recipe to make with your children, as the tapioca will need to be stirred almost constantly near the end. It may be a job that’s best suited for an older child. When you think the mixture is thick and done enough, test your tapioca pearl to make sure they are cooked.

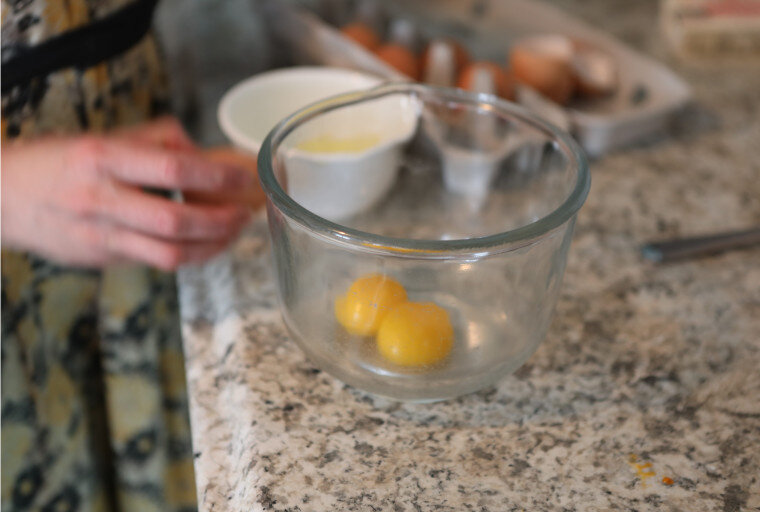
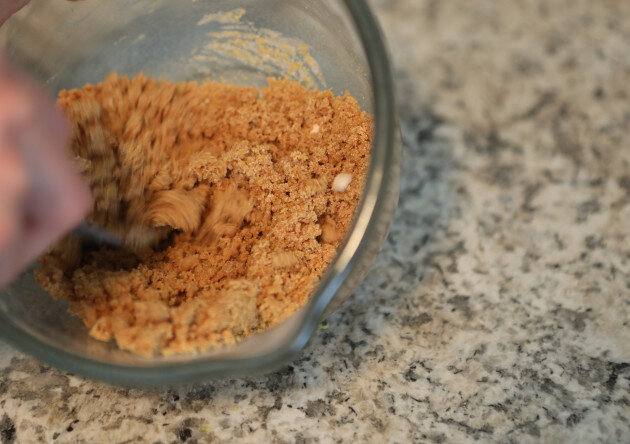
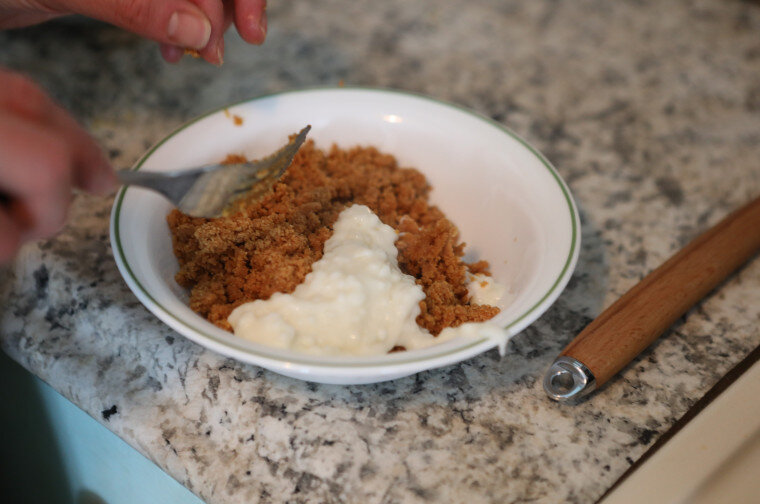
In a separate bowl, blend the egg yolks, ½ tsp of sea salt, date sugar and lemon rind.

When the tapioca is thick, temper the egg mixture by adding a spoonful of the hot mixture to the eggs. Then add the warmed egg yolk to the tapioca. Cook for 5-10 minutes over the double boiler or until the sugar is dissolved and the mixture is smooth.

Beat egg whites with sea salt until softly stiff and fold gently into the mixture.

Tapioca11.jpg

Chill and enjoy.

Tapioca12.jpg

The original recipe from nourishing traditions is to use rapadura. I find my body does better with fruit as a sweetener so I prefer to use date sugar. I find it to be a 1 to 1 substitution. If you choose rapadura or date sugar the end result will be off-white. 

*Eating uncooked or raw eggs or feeding raw eggs to your pets can pose a risk to your health.


Tapioca Pudding

Yield: 3-4
Author: Amy Mihaly, Be Well Clinic
This recipe needs to be started the night beforehand. Be prepared for multiple steps to make tapioca pudding. I can see why most people choose the instant food version, but the real food version is absolutely worth the effort!

Ingredients

  • 1 cup pearl tapioca
  • 4 cups raw milk
  • 3 eggs
  • ½ teaspoon sea salt + pinch
  • ¾ cup date sugar
  • 1 lemon, grated

Instructions

  1. Soak tapioca overnight in 4 cups of raw milk.
  2. At least 8 hours later, add to a double broiler. Cook about 45 minutes or until thick. Keep stirring it every few minutes as it cooks to prevent it from clumping. Stir constantly near the end to prevent boiling. This is a great recipe to make with your children, as the tapioca will need to be stirred almost constantly near the end. It may be a job that’s best suited for an older child. When you think the mixture is thick and done enough, test your tapioca pearl to make sure they are cooked.
  3. In a separate bowl, blend the egg yolks, ½ tsp of sea salt, date sugar and lemon rind.
  4. When the tapioca is thick, temper the egg mixture by adding a spoonful of the hot mixture to the eggs. Then add the warmed egg yolk to the tapioca. Cook for 5-10 minutes over the double boiler or until the sugar is dissolved and the mixture is smooth.
  5. Beat egg whites with sea salt until softly stiff and fold gently into the mixture.
  6. Chill and enjoy.
  7. The original recipe from nourishing traditions is to use rapadura. I find my body does better with fruit as a sweetener so I prefer to use date sugar. I find it to be a 1 to 1 substitution. If you choose rapadura or date sugar the end result will be off-white.
Created using The Recipes Generator

Real Food Raw Cheesecake

Cheesecake was never something I enjoyed until very recently. At first, when I was younger, I just didn’t like cheesecake. Then I was allergic to dairy for ten years. Then I started the GAPS Diet and didn’t eat sugar for years! Because of that, it never occurred to me to try to make a recipe similar to a cheesecake until my cousin, who’s very good at making cheesecake, made cheesecake with a gluten free crust and I tried some. I realized how delicious it is and how simple it is to create as a real food dessert. 

As I’ve been exploring the world of desserts, I’m realizing more and more how desserts were a way to eat a lot of animal fat and traditional recipes were very nutrient dense foods. One of the main problems of desserts is the processed sugars. Sugar can be a problem if you often eat too much of it at a sitting, especially if it is not accompanied by generous amounts of animal fat. Sugar is further a problem when processed and refined because refined sugar removes the important nutrients such as magnesium, B vitamins, and other trace nutrients that assist your body in breaking down the sugar naturally. Not only does processed sugar spike our blood sugar, we don’t have the magnesium molecules needed to safely break down the sugar and utilize it in our bodies. We can correct all of that. We can go back to using high concentrations of animal fats in our desserts and use sugars that are natural and whole. In this way, most people can enjoy desserts for special occasions once a certain amount of healing has been done in their bodies. 

From Nourishing Traditions by Sally Fallon, Measurements Adjusted for Round Pan

**The USDA warns against consuming raw dairy and egg products. Healthy animals have healthy raw milk and eggs. Source your food well. We’re not liable if you get sick.

Ingredients for Real Food Raw Cheesecake 

  • 1 1/2 cup dry Truly Raw Almonds (from Azure Farms) to make 2 cups Almond Flour

  • ¼ cup Yogurt

  • Filtered Water

  • ½ cup dates, if you do whole dates with pits, it’s about 6

  • 1 - 2 tsp butter

  • Generous ½ cup of Raw Milk

  • 2 Eggs

  • 1 Tablespoon of Gelatin

  • 14 - 16 ounces cream cheese

  • ¼ cup Honey

  • ½ tsp Vanilla

  • Salt

Directions for Real Food Raw Cheesecake

IMG_0641.jpg

Properly prepare your nuts. If you are just fermenting your almonds or almond flour, you need to start 24 hours before. If you are wanting to soak and then sprout your almonds, you need to start 2-3 days before. They can be prepared ahead of time and will keep for weeks to months if dehydrated. 

Take cream cheese out of the fridge a few hours before you are ready to prepare your cheesecake.

IMG_0657.jpg

When your nuts are properly prepared, rinse them thoroughly with filtered water. I left the brown skins on my almonds because I wanted the contrasting color to the pale cheesecake. You can definitely remove them if you’d like. Then grind your prepared nuts as finely as you can. You can use a food processor, hand food processor, blender, or VitaMix. They do not have to be dry to grind them.

You may have a little extra almond flour at this stage. Measure your almonds to get two cups.

Blend your nuts and dates together. I used an immersion blender but anything that will really pulverize them together is sufficient. 

IMG_0685.jpg

Generously butter a 9 inch round glass baking dish. Press the date almond paste into the pie crust pan to form the crust. Set aside.

IMG_0710.jpg

Add raw milk to a small saucepot. Separate egg yolks and whites. Add egg yolks to the pot with the raw milk. Mix together to break apart yolks. 

Turn the stove onto the medium low heat. Add gelatin to the milk and egg mixture. Mix together. Heat until the gelatin is just dissolved. DO NOT COOK. Gelatin is dissolved when you are able to only hold your finger in the liquid less than 3 seconds. Quickly remove from the heat.

To a large bowl, add the softened cream cheese, honey, and vanilla. Beat with an immersion blender or mixer until smooth and combined.

IMG_0725.jpg

Add in the slightly cooled milk mixture to the cream cheese mixture. Blend until completely smooth.

Place the mixture of cream cheese into the fridge.

IMG_0736.jpg

In a separate bowl with the egg whites, add a pinch of salt. Beat until stiff peaks form.

Gently fold the egg white mixture into the cream cheese mixture.

IMG_0749.jpg

Pour the mixture into the prepared pan with a crust.

Cool for several hours until hard.


RealFoodRawCheesecake.png

Real Food Raw Cheesecake

Author: Amy Mihaly, Be Well Clinic

Ingredients

  • 1 1/2 cup dry Truly Raw Almonds (from Azure Farms) to make 2 cups Almond Flour
  • ¼ cup Yogurt
  • Filtered Water
  • ½ cup dates, if you do whole dates with pits, it’s about 6
  • 2 tsp butter
  • Generous ½ cup of Raw Milk
  • 2 Eggs
  • 1 Tablespoon of Gelatin
  • 16 ounces cream cheese
  • ¼ cup Honey
  • ½ tsp Vanilla
  • Salt

Instructions

  1. Properly prepare your nuts. If you are just fermenting your almonds or almond flour, you need to start 24 hours before. If you are wanting to soak and then sprout your almonds, you need to start 2-3 days before. They can be prepared ahead of time and will keep for weeks to months if dehydrated.
  2. When your nuts are properly prepared, rinse them thoroughly with filtered water. I left the brown skins on my almonds because I wanted the contrasting color to the pale cheesecake. You can definitely remove them if you’d like. Then grind your prepared nuts as finely as you can. You can use a food processor, hand food processor, blender, or VitaMix. They do not have to be dry to grind them.
  3. You may have a little extra almond flour at this stage. Measure your almonds to get two cups.
  4. Take cream cheese out of the fridge a few hours before you are ready to prepare your cheesecake.
  5. Blend your nuts and dates together. I used an immersion blender but anything that will really pulverize them together is sufficient.
  6. Generously butter a 9 inch round glass baking dish. Press the date almond paste into the pie crust pan to form the crust. Set aside.
  7. Add raw milk to a small saucepot. Separate egg yolks and whites. Add egg yolks to the pot with the raw milk. Mix together to break apart yolks.
  8. Turn the stove onto the medium low heat. Add gelatin to the milk and egg mixture. Mix together. Heat until the gelatin is just dissolved. DO NOT COOK. Gelatin is dissolved when you are able to only hold your finger in the liquid less than 3 seconds. Quickly remove from the heat.
  9. To a large bowl, add the softened cream cheese, honey, and vanilla. Beat with an immersion blender or mixer until smooth and combined.
  10. Add in the slightly cooled milk mixture to the cream cheese mixture. Blend until completely smooth.
  11. Place the mixture of cream cheese into the fridge.
  12. In a separate bowl with the egg whites, add a pinch of salt. Beat until stiff peaks form.
  13. Gently fold the egg white mixture into the cream cheese mixture.
  14. Pour the mixture into the prepared pan with a crust.
  15. Cool for several hours until hard.
Created using The Recipes Generator

Panna Cotta

Panna cotta is Italian for “cooked cream.” I’ve never had panna cotta before but it seemed to be a good recipe to make as it is full of delicious fats and gelatin. I was not disappointed! This simple recipe turned out perfectly the first time and I will definitely be making it again!

I was gifted some goblets but you can really use any small bowl as a mold. You can also remove your panna cotta from the molds once it is set and top your panna cotta with a fruit sauce like this strawberry sauce or a rich chocolate fudge sauce. I felt that it was plenty sweet on it’s own but a sauce would take the wow factor up a notch.

I used date sugar for this recipe. I’m very excited to use this new sweetener for recipe! As far as I could tell, it’s minimally processed, just dried and pulverized dates. An additional test was to see how my body responded to it and it responded like it does to any other type of fruit sugar. I’m excited to use this as a fruit sweetener on GAPS and Full GAPS recipes!

Ingredients for Panna Cotta:

  • 1 cup raw milk

  • 2 ½ tsp gelatin

  • 2 cups cream

  • ½ cup + 1 tbsp date sugar

  • Pinch of Salt

  • 1 tsp vanilla extract

  • 1 cup sour cream

Directions for Panna Cotta:

An easy panna cotta recipe that is made with raw milk and is legal on the GAPS Diet. Panna Cotta recipe by Amy Mihaly, Certified GAPS Practitioner in Loveland, Colorado.

Place milk in a small sauce pan and sprinkle gelatin over. Let sit for 3 minutes until gelatin is soft.

Once gelatin is soft, place pan over low heat and stir until the gelatin fully dissolves. Do not boil!

An easy panna cotta recipe that is made with raw milk and is legal on the GAPS Diet. Panna Cotta recipe by Amy Mihaly, Certified GAPS Practitioner in Loveland, Colorado.

Add cream, date sugar, vanilla and salt. Stir constantly for five minutes until mixture is steaming and sugar is completely dissolved.

Remove from heat for 5 minutes.

An easy panna cotta recipe that is made with raw milk and is legal on the GAPS Diet. Panna Cotta recipe by Amy Mihaly, Certified GAPS Practitioner in Loveland, Colorado.

Place sour cream in a large measuring cup with a lip. Add the slightly cooled cream mixture & whisk constantly. Once the mixture is smoothed, pour into jars, ramekins, glasses or serving piece.


An easy panna cotta recipe that is made with raw milk and is legal on the GAPS Diet. Panna Cotta recipe by Amy Mihaly, Certified GAPS Practitioner in Loveland, Colorado.

Panna Cotta

Author: Amy Mihaly, Be Well Clinic

Ingredients

  • 1 cup raw milk
  • 2 ½ tsp gelatin
  • 2 cups cream
  • ½ cup + 1 tbsp date sugar
  • Pinch of Salt
  • 1 tsp vanilla extract
  • 1 cup sour cream

Instructions

  1. Place milk in a small sauce pan and sprinkle gelatin over. Let sit for 3 minutes until gelatin is soft.
  2. Once gelatin is soft, place pan over low heat and stir until the gelatin fully dissolves. Do not boil!
  3. Add cream, date sugar, vanilla and salt. Stir constantly for five minutes until mixture is steaming and sugar is completely dissolved.
  4. Remove from heat for 5 minutes.
  5. Place sour cream in a large measuring cup with a lip. Add the slightly cooled cream mixture & whisk constantly. Once the mixture is smoothed, pour into jars, ramekins, glasses or serving piece.
Created using The Recipes Generator

Coconut Macaroons

This is a really simple treat to make if you need an afternoon pick me up or to throw together a quick dessert for a special occasion.

Depending on what sugar you use for this recipe, you’ll be able to accommodate a wide variety of diets with this recipe. Because it’s also made mostly of air, it’s a nice way to eat a sweet treat without a lot of sugar.

With the leftover egg yolks from this recipe, try this easy Russian Custard recipe!

Ingredients for Coconut Macaroons:

  • 2 Egg Whites

  • 2 tbsp Date Sugar

  • 1 ½ cups Coconut Flakes

Directions:

These coconut macaroons are gluten free and dairy free. You can substitute any natural sugar you’d like, like date sugar. They are a great GAPS Legal treat!

Preheat oven to 325.

Beat egg whites until stiff with peaks.

These coconut macaroons are gluten free and dairy free. You can substitute any natural sugar you’d like, like date sugar. They are a great GAPS Legal treat!

Add in date sugar and mix gently. Fold in coconut flakes gently so as not to squish down air.

Form into cookies on a cookie sheet or heated baking stone.

Bake at 325 for 8-12 minutes.

The easiest way to remove these is to allow them to cool slightly first and then gently loosen with a spatula. 

Remove them from the baking sheet or stone and enjoy!

These coconut macaroons are gluten free and dairy free. You can substitute any natural sugar you’d like, like date sugar. They are a great GAPS Legal treat!

These coconut macaroons are gluten free and dairy free. You can substitute any natural sugar you’d like, like date sugar. They are a great GAPS Legal treat!

Coconut Macaroons

Author: The Be Well Clinic

Ingredients

  • 2 Egg Whites
  • 2 tbsp Date Sugar
  • 1 ½ cups Coconut Flakes

Instructions

  1. Preheat oven to 325.
  2. Beat egg whites until stiff with peaks.
  3. Add in date sugar and mix gently. Fold in coconut flakes gently so as not to squish down air.
  4. Form into cookies on a cookie sheet or heated baking stone.
  5. Bake at 325 for 8-12 minutes.
  6. The easiest way to remove these is to allow them to cool slightly first and then gently loosen with a spatula.
  7. Remove them from the baking sheet or stone and enjoy!
Created using The Recipes Generator

Simple Baked Apples

Apples should be eaten with plenty of animal fat so this is an ideal recipe for them! Apples contain a lot of sugar so the fat helps keep your blood sugar from spiking and, as we talked about in The One About Fat, fat soluble vitamins help us absorb other nutrients. 

This is a nostalgic warm winter treat for me. We used to start them when making dinner and then we’d have a great treat at the end of the meal. Because they take so long in the oven, it’s a great way to heat the house on a cold, snowy, winter day.

When I process large amounts of apples, I always think about making apple cider vinegar! Save your peels and cores (but not any rotting or bruised parts) to make your own apple cider vinegar.

Ingredients for Baked Apples:

  • Apples

  • Butter

  • Cinnamon

Directions for Baked Apples:

IMG_0410.jpg

Rinse your apples.

Remove the stems. Slice them in half around their equator (so the core is a star.)

Preheat the oven to 300.

IMG_0420.jpg

Using a melon baller or a knife, remove the core. Slice slightly into the apples around the core, not too deep, to allow the butter to really get into the apple.

IMG_0448.jpg

Place the apples in a glass baking dish. Add a decent sized chunk of butter to each the center of each apple.

Add a small amount of filtered water to the bottom of the baking dish so the apples do not burn.

IMG_0620.jpg

Place your apples in the oven for 1-2 hours. After about 30 minutes, remove the apples from the oven and baste them with any escaped butter. Put them back in the oven to continue cooking. 

Once the apples are soft, remove them from the oven.

Enjoy warm on their own or topped with raw milk ice cream and cinnamon. I also enjoy them cold the next day (but not as much as when they’re warm!)

IMG_0650.jpg

GAPSLegalBakedApples.png

GAPS Legal Baked Apples

Author: The Be Well Clinic

Ingredients

  • Apples
  • Butter
  • Cinnamon

Instructions

  1. Rinse your apples.
  2. Remove the stems. Slice them in half around their equator (so the core is a star.)
  3. Preheat the oven to 300.
  4. Using a melon baller or a knife, remove the core. Slice slightly into the apples around the core, not too deep, to allow the butter to really get into the apple.
  5. Place the apples in a glass baking dish. Add a decent sized chunk of butter to each the center of each apple.
  6. Add a small amount of filtered water to the bottom of the baking dish so the apples do not burn.
  7. Place your apples in the oven for 1-2 hours. After about 30 minutes, remove the apples from the oven and baste them with any escaped butter. Put them back in the oven to continue cooking.
  8. Once the apples are soft, remove them from the oven.
  9. Enjoy warm on their own or topped with raw milk ice cream and cinnamon. I also enjoy them cold the next day (but not as much as when they’re warm!)
Created using The Recipes Generator

Gummy Worms

For a birthday celebration or other special occasion, gummy worms can be a great treat! This recipe is full GAPS legal and although it should be consumed infrequently, it’s a sweet treat you can offer your kids with no guilt. 

These gummy worms are easy to make in any flavor or flavor combination you or your kids like. The ratio of fruit to gelatin is pretty forgiving. Just shoot for approximately two cups of fruit. You want to keep the ratio of gelatin to water the same. 

While I don’t normally recommend using silicone, there’s not really a different option to make gummy worms that are shaped like well worms. The molds I used are oven safe but I still try to avoid as much contact between something warm and plastic. I also purchased silicone trays that were trying. They are FDA approved for safety; not all the trays I found had the same certifications. Make sure you wash them before you use them!

Ingredients for Gummy Worms:

  • 2 heaping cups of fruit

  • ⅔ cup filtered water + more for the bottom of your pot

  • 2 tbsp of gelatin 

  • 2 tbsp of honey

Directions for Gummy Worms:

IMG_1652.jpg

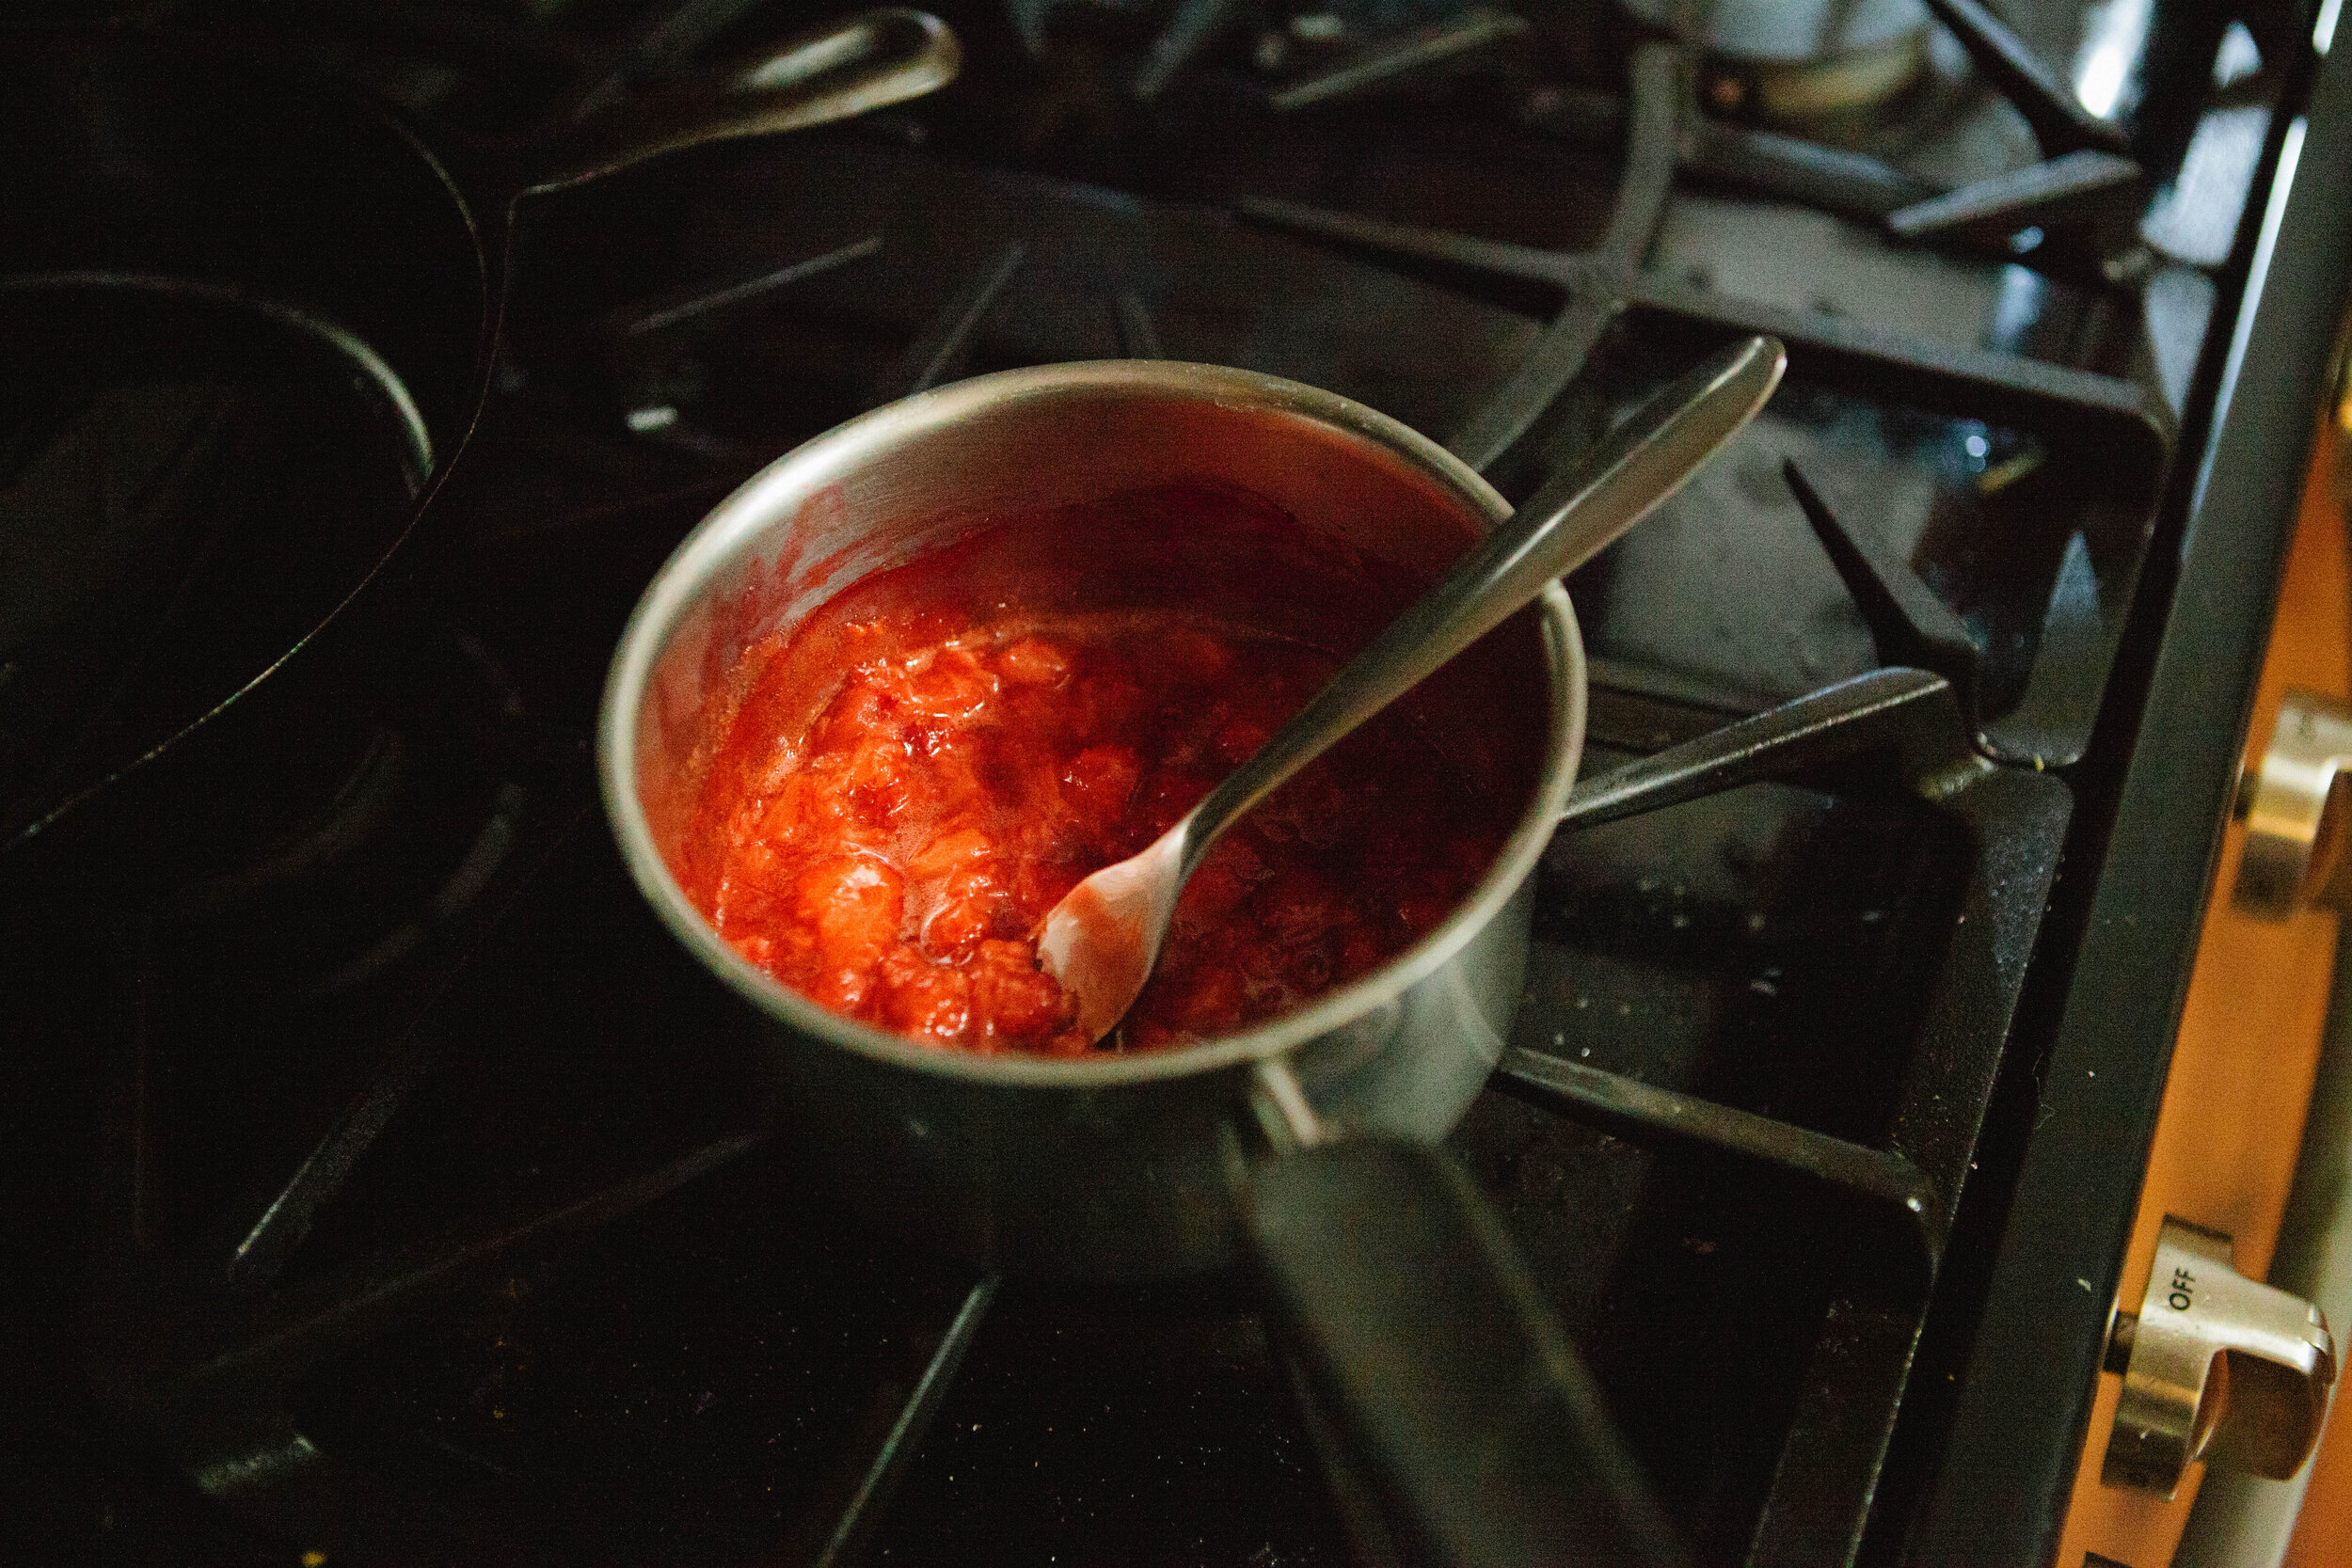
Add heaping cups of fruit to a small sauce pan. Add a little water on the bottom to keep them from burning. Turn the stove to medium heat. Simmer until the berries are very soft and mashable.

Warm ⅔ cup of water in another small sauce pan. When warmed at least to 90 degrees, add in gelatin and whisk for several minutes to mix completely. Cooler water will cause your gelatin to clump. The mixture needs to be “blood temperature.” 

IMG_1660.jpg

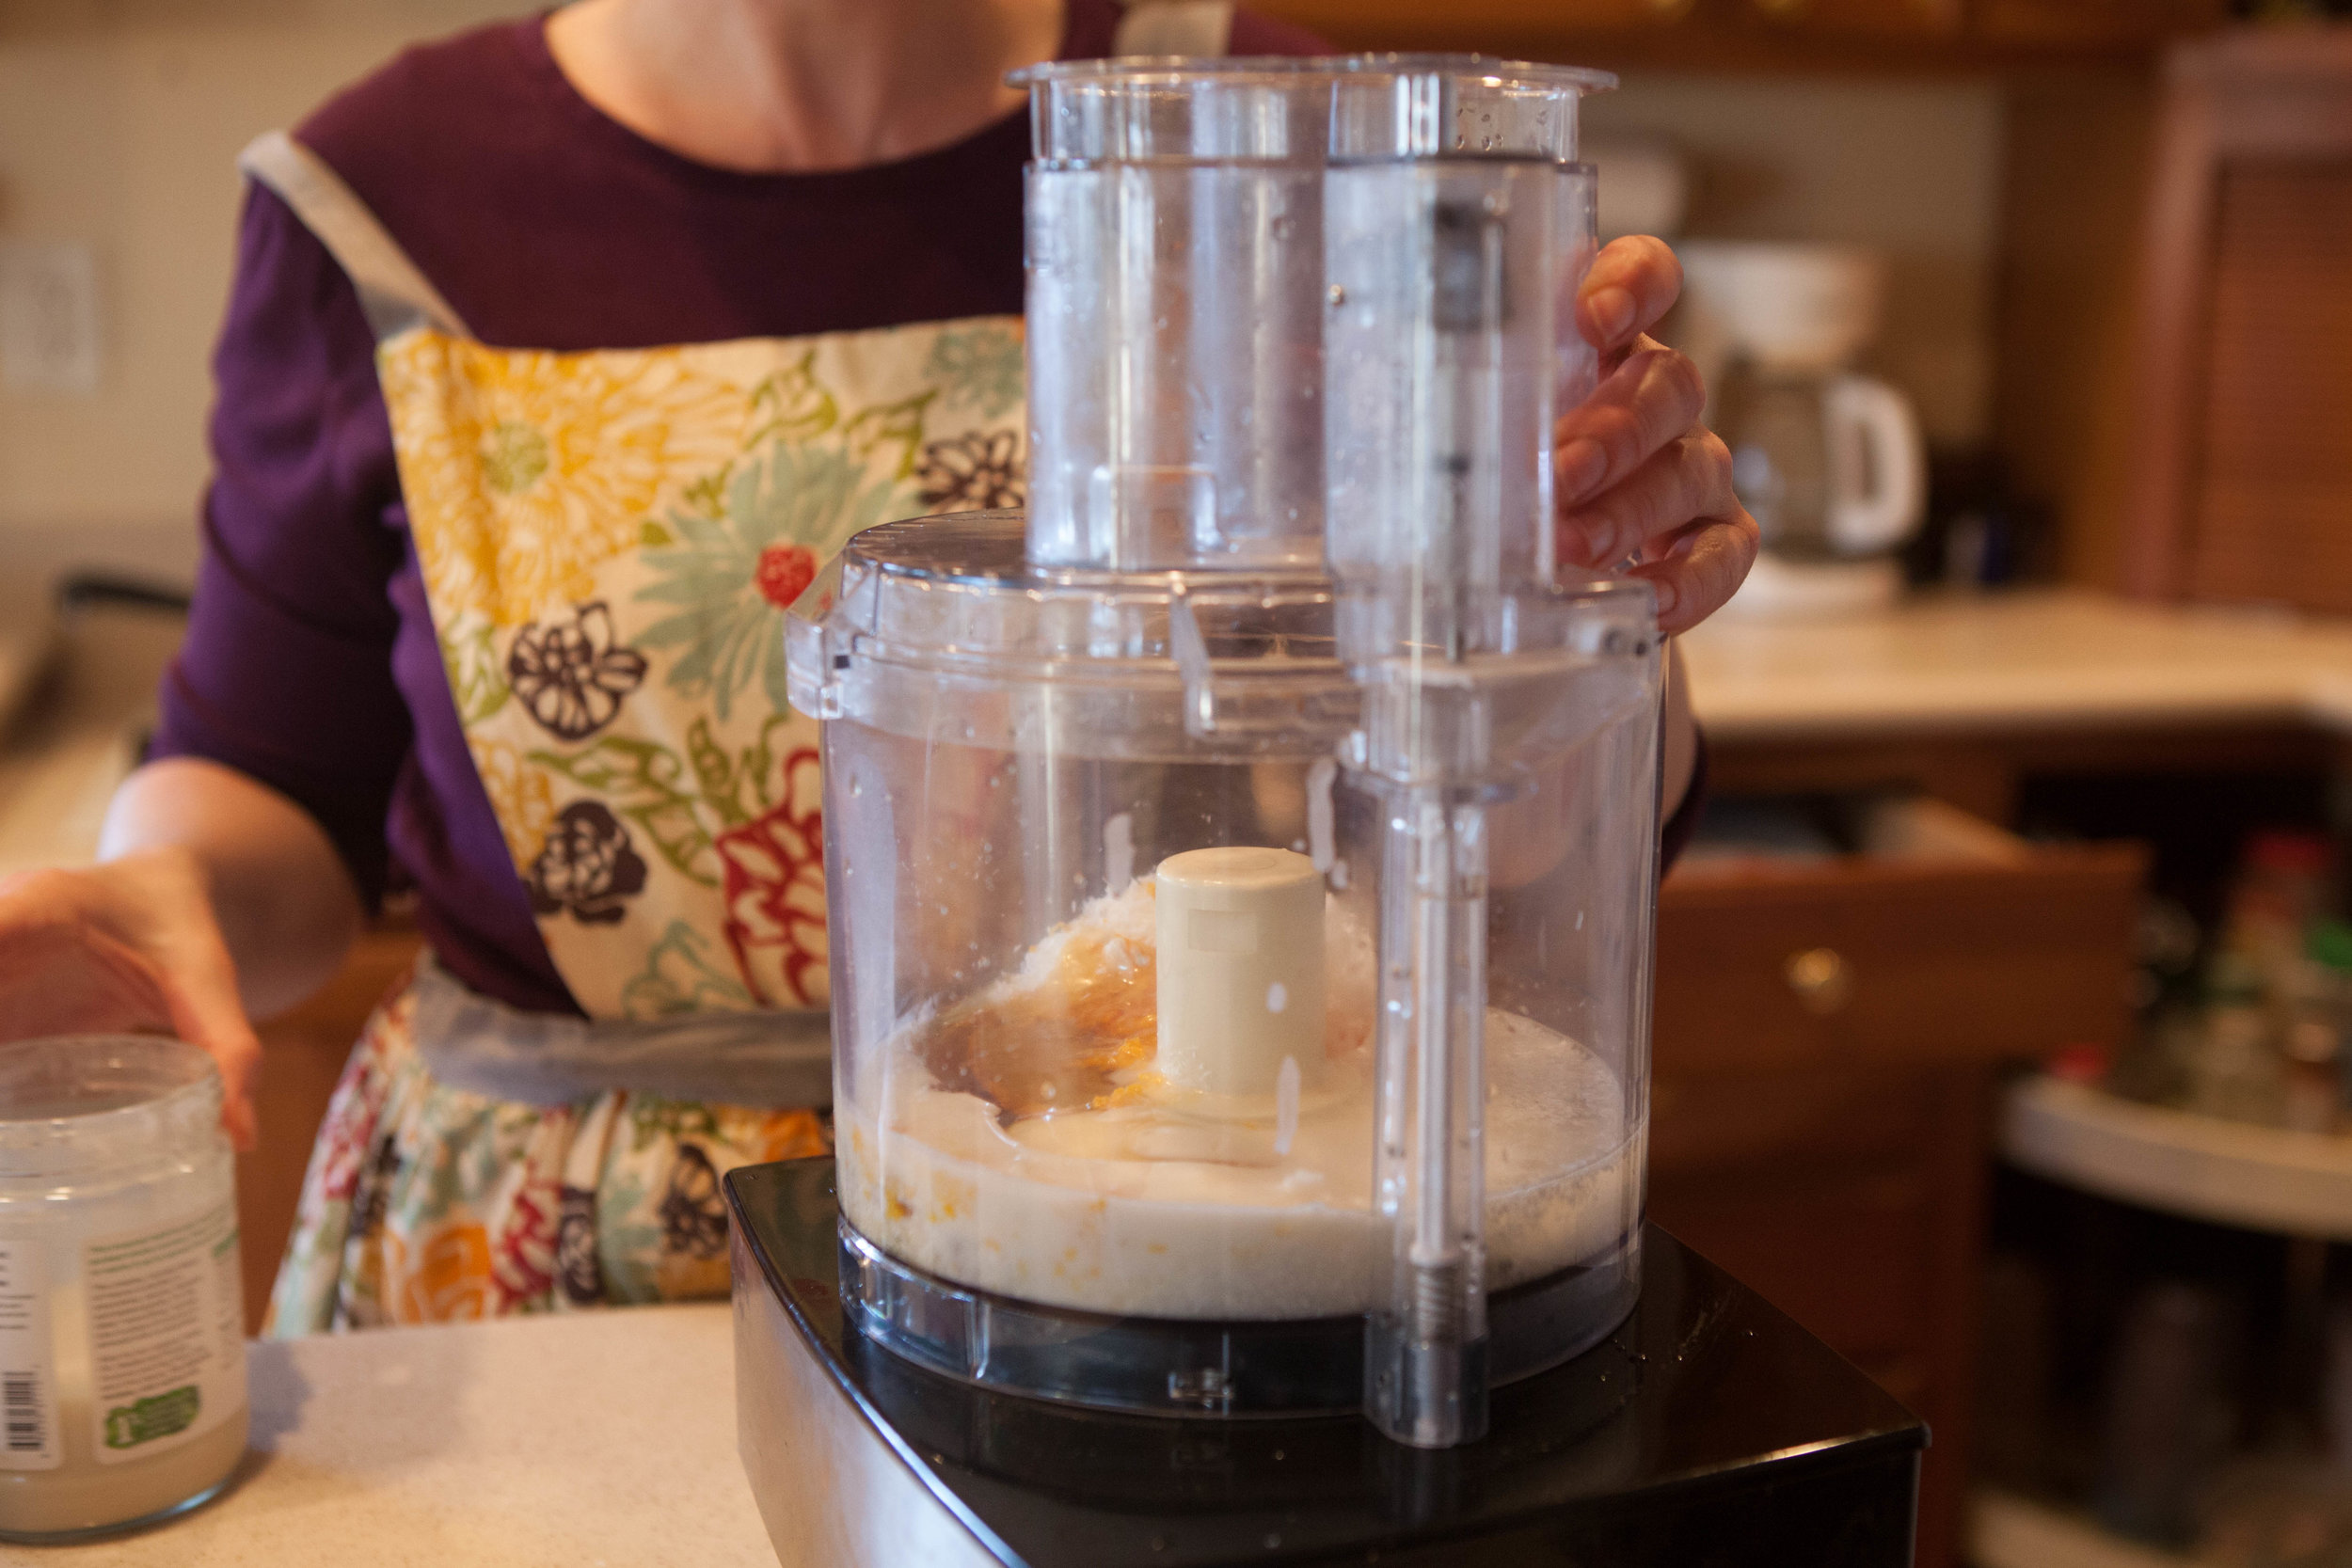
Add the fruit mixture to a food processor with the gelatin mixture. Blend until smooth.

Allow to cool and settle slightly. When cooled slightly, add the honey. It’s important not to add the honey to the mixture when it’s too hot or it will cook it. Optionally, strain the mixture through a small mesh strainer to catch any chunks. 

IMG_1681.jpg

Using a spoon, dropper, or turkey baster, fill your gummy molds until the mixture is to the top.

Set the mixture into the fridge to cool OR fill a tray with ice and water and set the mixture on top. 

IMG_1846.jpg

Chill for approximately one to two hours. Remove from the molds. I found it easiest to use a spoon to remove them.

Enjoy!


Howtomakerealfoodgummyworms.png

Gummy Worms

Author: The Be Well Clinic
Prep time: Cook time: Total time:

Ingredients:

  • 2 heaping cups of fruit
  • ⅔ cup filtered water + more for the bottom of your pot
  • 2 tbsp of gelatin
  • 2 tbsp of honey

Instructions:

  1. Add heaping cups of fruit to a small sauce pan. Add a little water on the bottom to keep them from burning. Turn the stove to medium heat. Simmer until the berries are very soft and mashable.
  2. Warm ⅔ cup of water in another small sauce pan. When warmed at least to 90 degrees, add in gelatin and whisk for several minutes to mix completely. Cooler water will cause your gelatin to clump. The mixture needs to be “blood temperature.”
  3. Add the fruit mixture to a food processor with the gelatin mixture. Blend until smooth.
  4. All to cool and settle slightly. When cooled slightly, add the honey. It’s important not to add the honey to the mixture when it’s too hot or it will cook it. Optionally, strain the mixture through a small mesh strainer to catch any chunks.
  5. Using a spoon, dropper, or turkey baster, fill your gummy molds until the mixture is to the top.
  6. Set the mixture into the fridge to cool OR fill a tray with ice and water and set the mixture on top.
  7. Chill for approximately one to two hours. Remove from the molds. I found it easiest to use a spoon to remove them.
  8. Enjoy!
Created using The Recipes Generator

GAPS Carrot Raisin Dessert Salad

This is a quick and easy recipe to whip up. It’s a GAPS Legal dish but is sure to be a crowd pleaser even for those who aren’t on GAPS.

While technically a salad, this is a very sweet dish. I recommend consuming it at the end of a meal as a treat. The amount of honey you add will depend on your own personal tastes and how sweet your carrots are.

This feeds approximately 4 people. It’s also great to bring to parties and something that’s so easy and quick to prepare. It’s also dairy free!

Ingredients for Carrot Raisin Dessert Salad:

  • 3-4 large carrots

  • ½ cup Raisins

  • 1- 2 tbsp Honey

Directions for Carrot Raisin Dessert Salad:

gaps-legal-carrot-salad-dessert-salad-dessert-on-gaps-sweet-food-on-gaps-gaps-party-dishes-gaps-diet-recipes

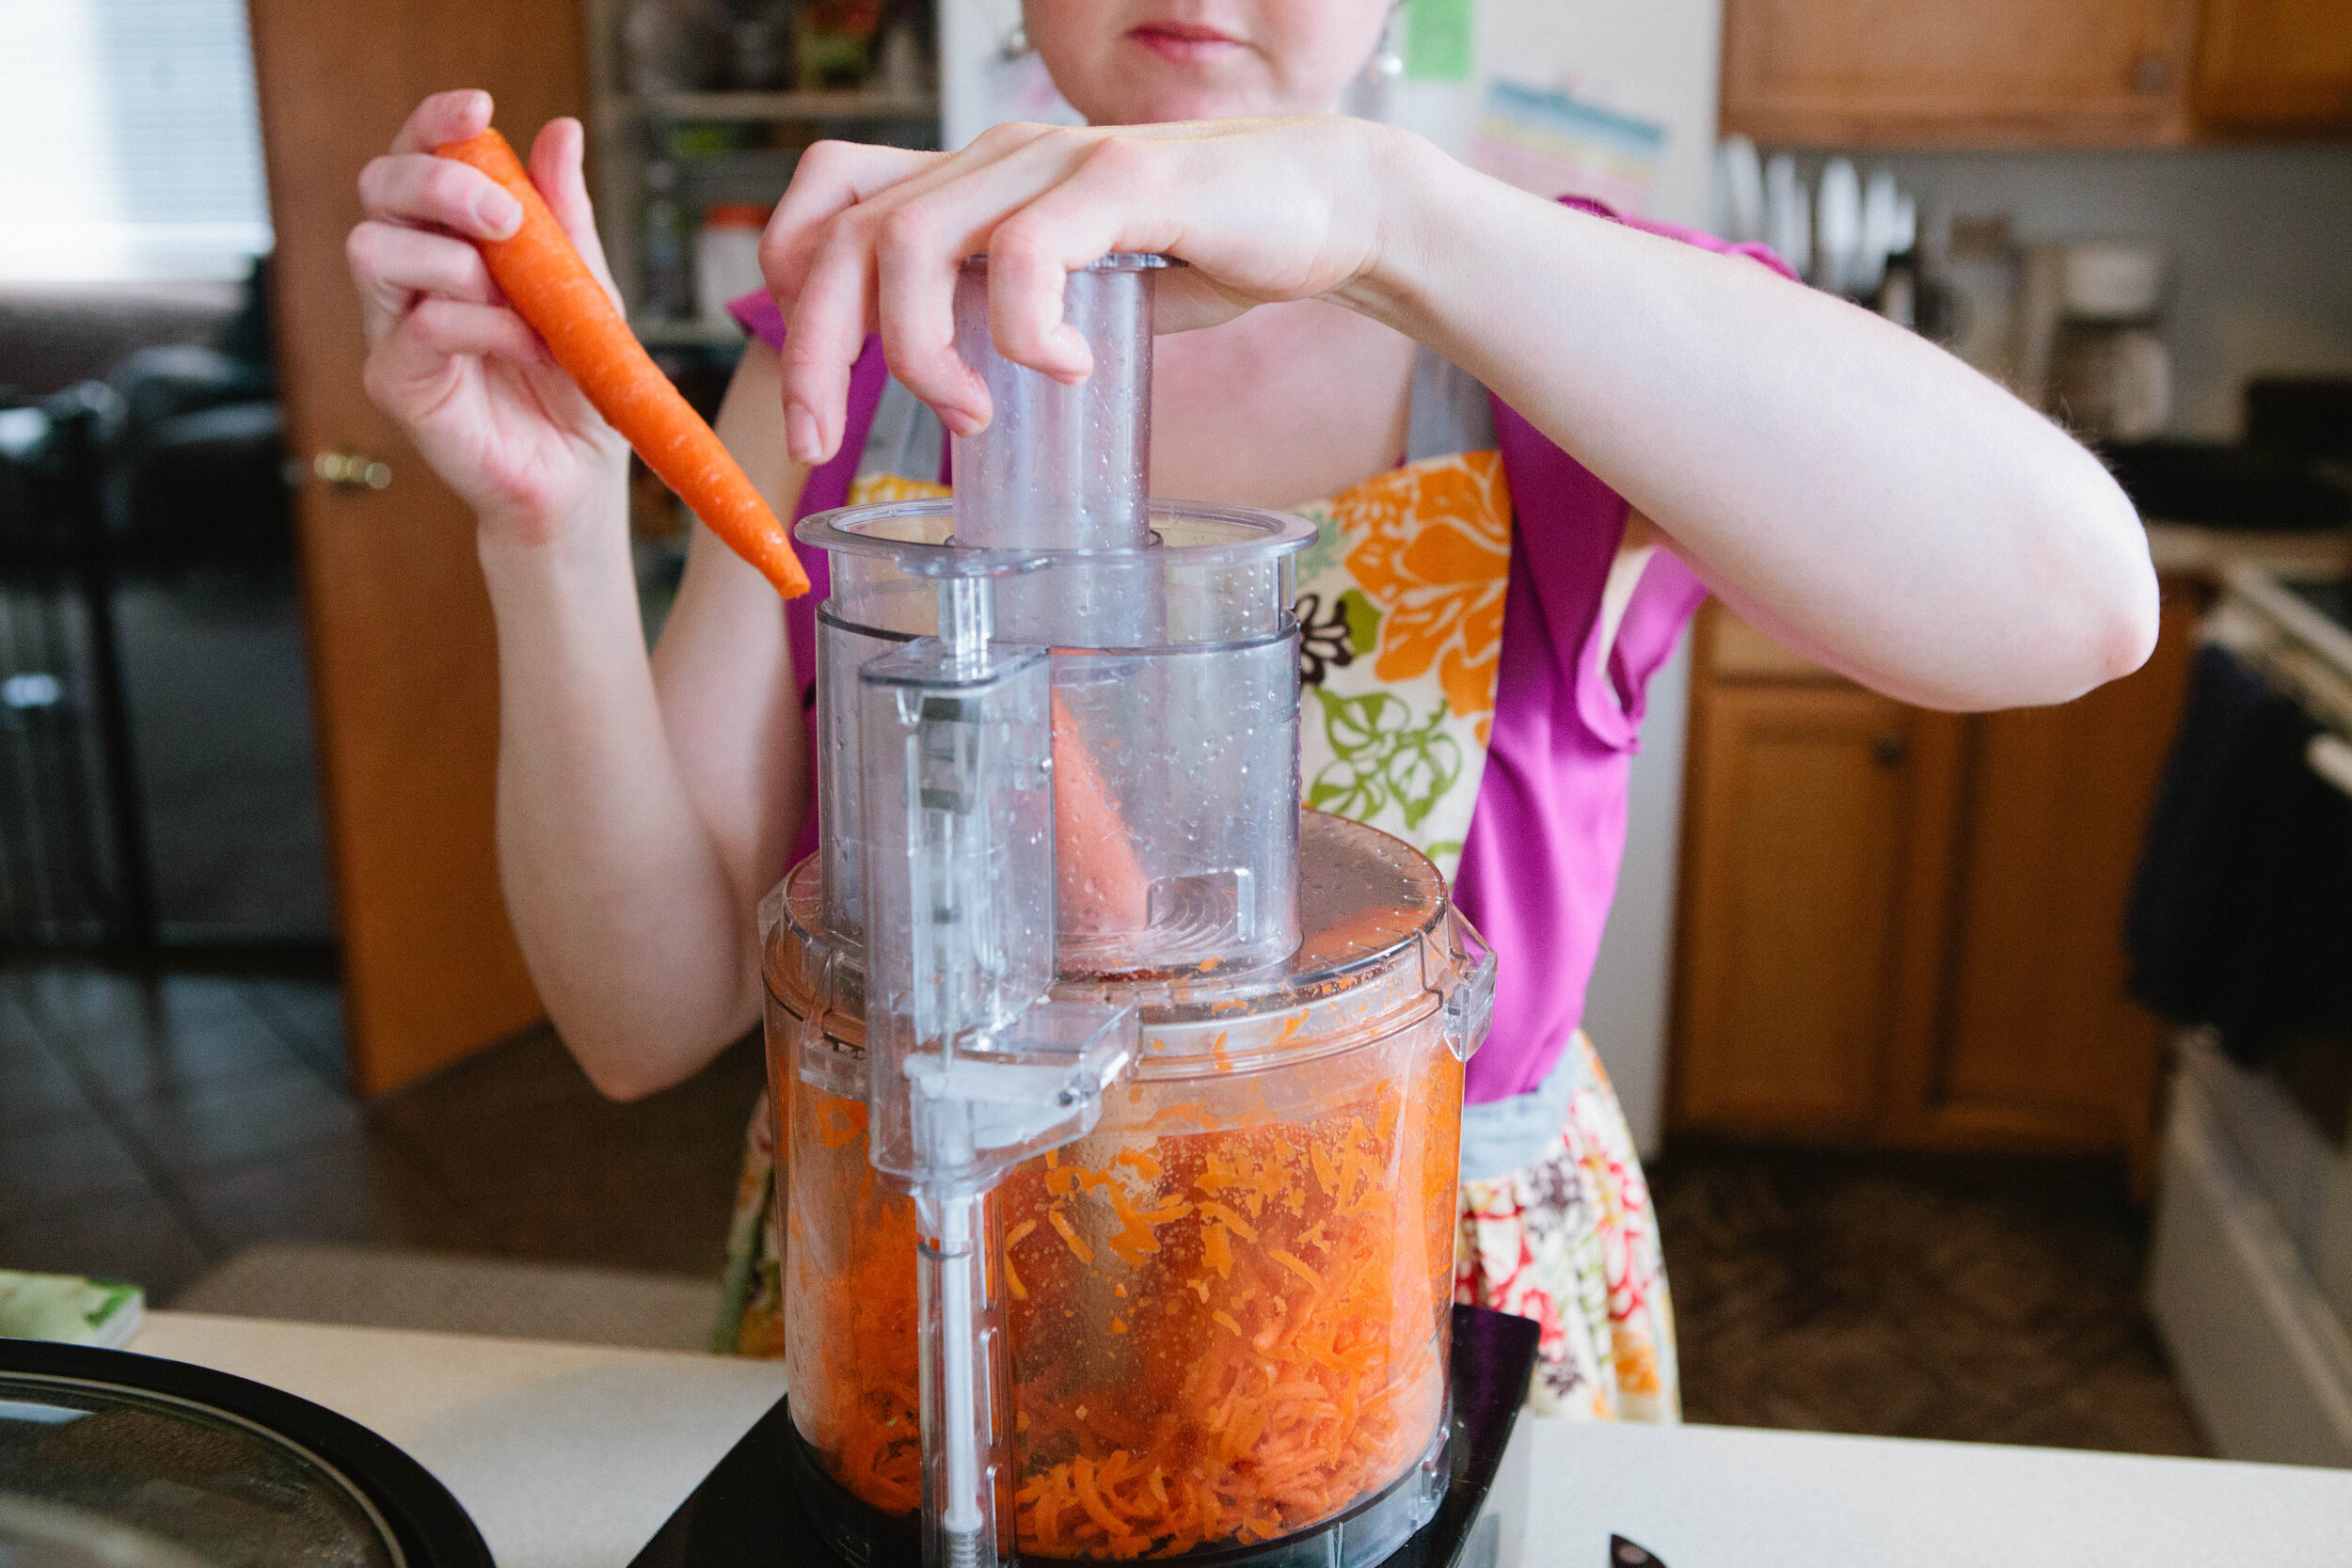
Finely shred carrots in a food processor.

gaps-legal-carrot-salad-dessert-salad-dessert-on-gaps-sweet-food-on-gaps-gaps-party-dishes-gaps-diet-recipes

Add carrots and raisins to a bowl.

gaps-legal-carrot-salad-dessert-salad-dessert-on-gaps-sweet-food-on-gaps-gaps-party-dishes-gaps-diet-recipes

Add in 1-2 tbsp of honey, depending on how sweet you want it to be. Toss to coat carrots well with honey.

Serve and enjoy!


GapsLegalCarrotRaisinSaladDessert.png

GAPS Carrot Raisin Dessert Salad

Author:
Prep time: Cook time: Total time:

Ingredients:

  • 3-4 large carrots
  • ½ cup Raisins
  • 1- 2 tbsp Honey

Instructions:

How to cook GAPS Carrot Raisin Dessert Salad

  1. Finely shred carrots in a food processor.
  2. Add carrots and raisins to a bowl.
  3. Add in 1-2 tbsp of honey, depending on how sweet you want it to be. Toss to coat carrots well with honey.
  4. Serve and enjoy!
Created using The Recipes Generator

Coconut Carrot Gluten Free Birthday Cake

IMG_9185.jpg

In celebration of my friend's birthday years ago, I made an "Amazingly Delicious Carrot Cake" (that's what the recipe was called, at least). I’ve modified the recipe a bit and I am so excited to have found such a delicious-looking recipe.

One ingredient in it that I have never even heard of *gasp, I know* is coconut butter (or coconut manna--they can be used interchangeably). This is not a more expensive version of coconut oil, as I first thought, but a coconut puree. I bought a jar (a bit pricey) at our local health food grocery store, or you can make your own.

Coconut butter is very sweet, and can be used as a little sweet snack. However, because there is more fiber, and it is much sweeter than coconut oil, if you are following GAPS, you should not introduce it until Introduction stage 6 or full GAPS. But if you can tolerate it, I would recommend trying this delicious coconut treat!

Sometimes I wonder why we even want to eat processed sugar, this cake is so rich, moist and delicious! Sadly for you, the photos cannot portray the enticing aroma I am experiencing! You will just have to try it out for yourself!

I have also made this recipe using the leftover pulp from juicing carrots. Add a little bit of additional water to keep the cake from getting too dry.

I made this as one cake in a 9x13 pan and then cut it in half and stacked to decorate it. You can also make it in two smaller pans. Just make sure you are using glass, not aluminum to bake with. Baking it as a sheet cake also means you can cut it into shapes for themed birthdays.

Ingredients for Coconut Carrot Gluten Free Birthday Cake:

For the Cake

  • 2 cups coconut manna (1 15 oz jar)

  • 9 dates

  • 1 cup carrots, about two large carrots

  • 2 tsp cinnamon

  • ½ cup raisins

  • ½ cup shredded coconut (if you have coconut flakes, just put them in a food processor for a minutes)

  • 1 tsp sea salt

  • 1 tsp vanilla extract

  • 10 organic eggs

For the Frosting

  • 2 cups cultured cream or sour cream

  • 2 tbsp honey 

  • 1 tsp vanilla extract

  • Zest of 1 Lemon

  • ½ tsp Lemon Juice

  • Pinch of sea salt

Directions for Coconut Carrot Gluten Free Birthday Cake:

IMG_8785.jpg

In a pot on the stove, start your coconut manna melting by adding the jar to water. Melt over low heat. It can take up to 30 minutes to melt depending on how big and full your jar is.

Start your dates rehydrating. Remove the pits and add the dates to a bowl that can have hot water in it (I use glass.). Add boiling water to the bowl, enough to cover the dates. Let sit for 20 minutes until dates are rehydrated

IMG_8810.jpg

Finely shred two large carrots with a food processor. 

Once dates are soft and squishy, about 20 minutes, put them in a food processor, without liquid. Slowly add more liquid as they blend until they are a smooth consistency but not too liquidy.

IMG_8804.jpg

In a large bowl, crack all the eggs. Whisk with an electric whisk or immersion blender to get the maximum amount of air into them.

Grease the baking dish with butter or the fat of your choice. If you have a butter allergy, coconut oil is acceptable.

Stir the ingredients into the bowl with eggs until they are all distributed evenly.

IMG_8880.jpg

Add the mixture to the greased baking dish.

Bake in the preheated oven for 40 minutes until the top is golden and the cake is set.

Allow to cool slightly before removing from the pan.

IMG_9123.jpg

Mix the frosting in a bowl. 

Decorate the cake as desired and enjoy!

IMG_9173.jpg

If you don’t have a tray, plate or board to decorate your cake on:

IMG_9134.jpg

Make one simply with leftover cardboard and aluminum foil.

IMG_9137.jpg

Cut your cardboard to size. Cover with aluminum foil and tape underneath so nothing slips.

Add parchment paper to the top where the cake will sit so your food is not sitting on metal.

IMG_9168.jpg

Decorate your cake!


Author:
prep time: cook time: total time:

ingredients:

For the Cake
  • 2 cups coconut manna (1 15 oz jar)
  • 9 dates
  • 1 cup carrots, about two large carrots
  • 2 tsp cinnamon
  • ½ cup raisins
  • ½ cup shredded coconut (if you have coconut flakes, just put them in a food processor for a minutes)
  • 1 tsp sea salt
  • 1 tsp vanilla extract
  • 10 organic eggs
For the Frosting
  • 2 cups cultured cream or sour cream
  • 2 tbsp honey
  • 1 tsp vanilla extract
  • Zest of 1 Lemon
  • ½ tsp Lemon Juice
  • Pinch of sea salt

instructions:

How to cook

  1. In a pot on the stove, start your coconut manna melting by adding the jar to water. Melt over low heat. It can take up to 30 minutes to melt depending on how big and full your jar is.
  2. Start your dates rehydrating. Remove the pits and add the dates to a bowl that can have hot water in it (I use glass.). Add boiling water to the bowl, enough to cover the dates. Let sit for 20 minutes until dates are rehydrated
  3. Finely shred two large carrots with a food processor.
  4. Once dates are soft and squishy, about 20 minutes, put them in a food processor, without liquid. Slowly add more liquid as they blend until they are a smooth consistency but not too liquidy.
  5. In a large bowl, crack all the eggs. Whisk with an electric whisk or immersion blender to get the maximum amount of air into them.
  6. Grease the baking dish with butter or the fat of your choice. If you have a butter allergy, coconut oil is acceptable.
  7. Stir the ingredients into the bowl with eggs until they are all distributed evenly.
  8. Add the mixture to the greased baking dish.
  9. Bake in the preheated oven for 40 minutes until the top is golden and the cake is set.
  10. Allow to cool slightly before removing from the pan.
  11. Mix the frosting in a bowl.
  12. Decorate the cake as desired and enjoy!
If you don’t have a tray, plate or board to decorate your cake on:
  1. Make one simply with leftover cardboard and aluminum foil.
  2. Cut your cardboard to size. Cover with aluminum foil and tape underneath so nothing slips.
  3. Add parchment paper to the top where the cake will sit so your food is not sitting on metal.
  4. Decorate your cake!
Created using The Recipes Generator
CoconutCarrotBirthdayCake.png

Chocolate Recipe Round Up

Ah chocolate. So delicious and so many different ways to enjoy it.

Good quality chocolate with high cocoa content also contains high levels of antioxidants, flavonoids, fiber, iron, magnesium, copper and manganese. It also contains caffeine. If you’re not tolerating caffeine yet, avoid chocolate.

If you are on the GAPS Diet, you can enjoy chocolate if you are on Full GAPS, meaning you have finished all the stages and your symptoms have gone away. Use pure organic cocoa powder or cacao! If you are reintroducing it for the first time, make sure to start with a small amount.

If you’re looking for a way to enjoy chocolate on Valentine’s Day, below is a selection of real food recipes that feature chocolate. Remember - chocolate should be enjoyed in moderation! But since these recipes are made with real food and some are nutrient dense foods, they can be enjoyed without guilt.

Chocolate Fudge Sauce

This rich chocolate sauce is made with cocoa powder and is a delicious topping to raw milk homemade ice cream.

Gluten Free, Dairy Free, Egg Free

Peppermint Chocolate Fudge with Coconut

The GAPS Legal Fudge is a delicious holiday recipe and easy to share with family and friends! Leave the chocolate fudge on it’s own or top it with the citrus fudge for an richer treat.

Gluten Free, Dairy Free, Egg Free

Raw Milk Chocolate Pudding

Some days don't you just miss pudding cups? I know I do. Now you can make your own! The most frequent comment about this pudding (besides "yum", "delicious", and "mmm...") is that it tastes just like a chocolate pudding cup!

Gluten Free

Decadent Hot Chocolate

I present you with an amazing hot chocolate recipe. No really, it's amazing. Rich, thick, decadent, filling, indulging, chocolaty goodness. And it's a nutrient-dense food!  

Gluten Free


Almond Flour Cookies with Cacao Nibs

These cookies are made with fermented almond flour and cacao nibs. Yet they taste just like chocolate chip cookies!

Gluten Free


Homemade Gummy Snacks

Vitamin C and collagen work together to build healthy cells and mucus membranes, as well as healthy joints and skin. Anything with a structure needs vitamin c alongside collagen. These gummies are a good way for both children and adults to get collagen and vitamin c together! These gummies are stage five legal on the GAPS Diet because they are cooked fruit.

I got the basics proportions for this recipe from Integrative Health Coaching Services and modified it to fit my own needs. Depending on what proportions you use, the chart included on the Integrative Health Coaching Services website can help you decide how many gelatin squares to eat. If your children really love these gummies, you can decrease the amount of acerola cherry powder so that they can consume more gummy treats. These can also be great ABA technique rewards to get your child to eat the foods you want them to eat.

I recommend experimenting with adding other things like probiotic powders,and other supplements in these gummies. Just make sure you add anything live when the gummies are not too hot. Wait until the later stages when the mixture is cool enough so you don’t kill it. 

I once made a bold choice and experimented with adding desiccated liver in a quest to figure out what other supplements can be added to the mixture. I don’t think liver was the best choice. There’s nothing wrong with consuming them; they just smell and taste like liver, which isn’t the flavor profile you’d expect. 

I made strawberry gummies but you could also make any berry into a gummy. Other fruit, like apples and bananas, will not work to make gummies at home. Frozen berries are actually a great choice because they are picked ripe and frozen while in season. You could also harvest your own berries locally and freeze them yourself.

Ingredients;

  • 1 heaping cup frozen berries

  • 1/2 Cup lemon juice

  • 1/4 Cup grass fed gelatin

  • 3-4 Tbsp.. Acerola cherry powder 

  • 1 tbsp honey

Directions:

strawberry-gummies-homemade-gummy-snacks-gaps-legal-gummies-gummy-snack-made-with-gelatin-diy-gummy-bear

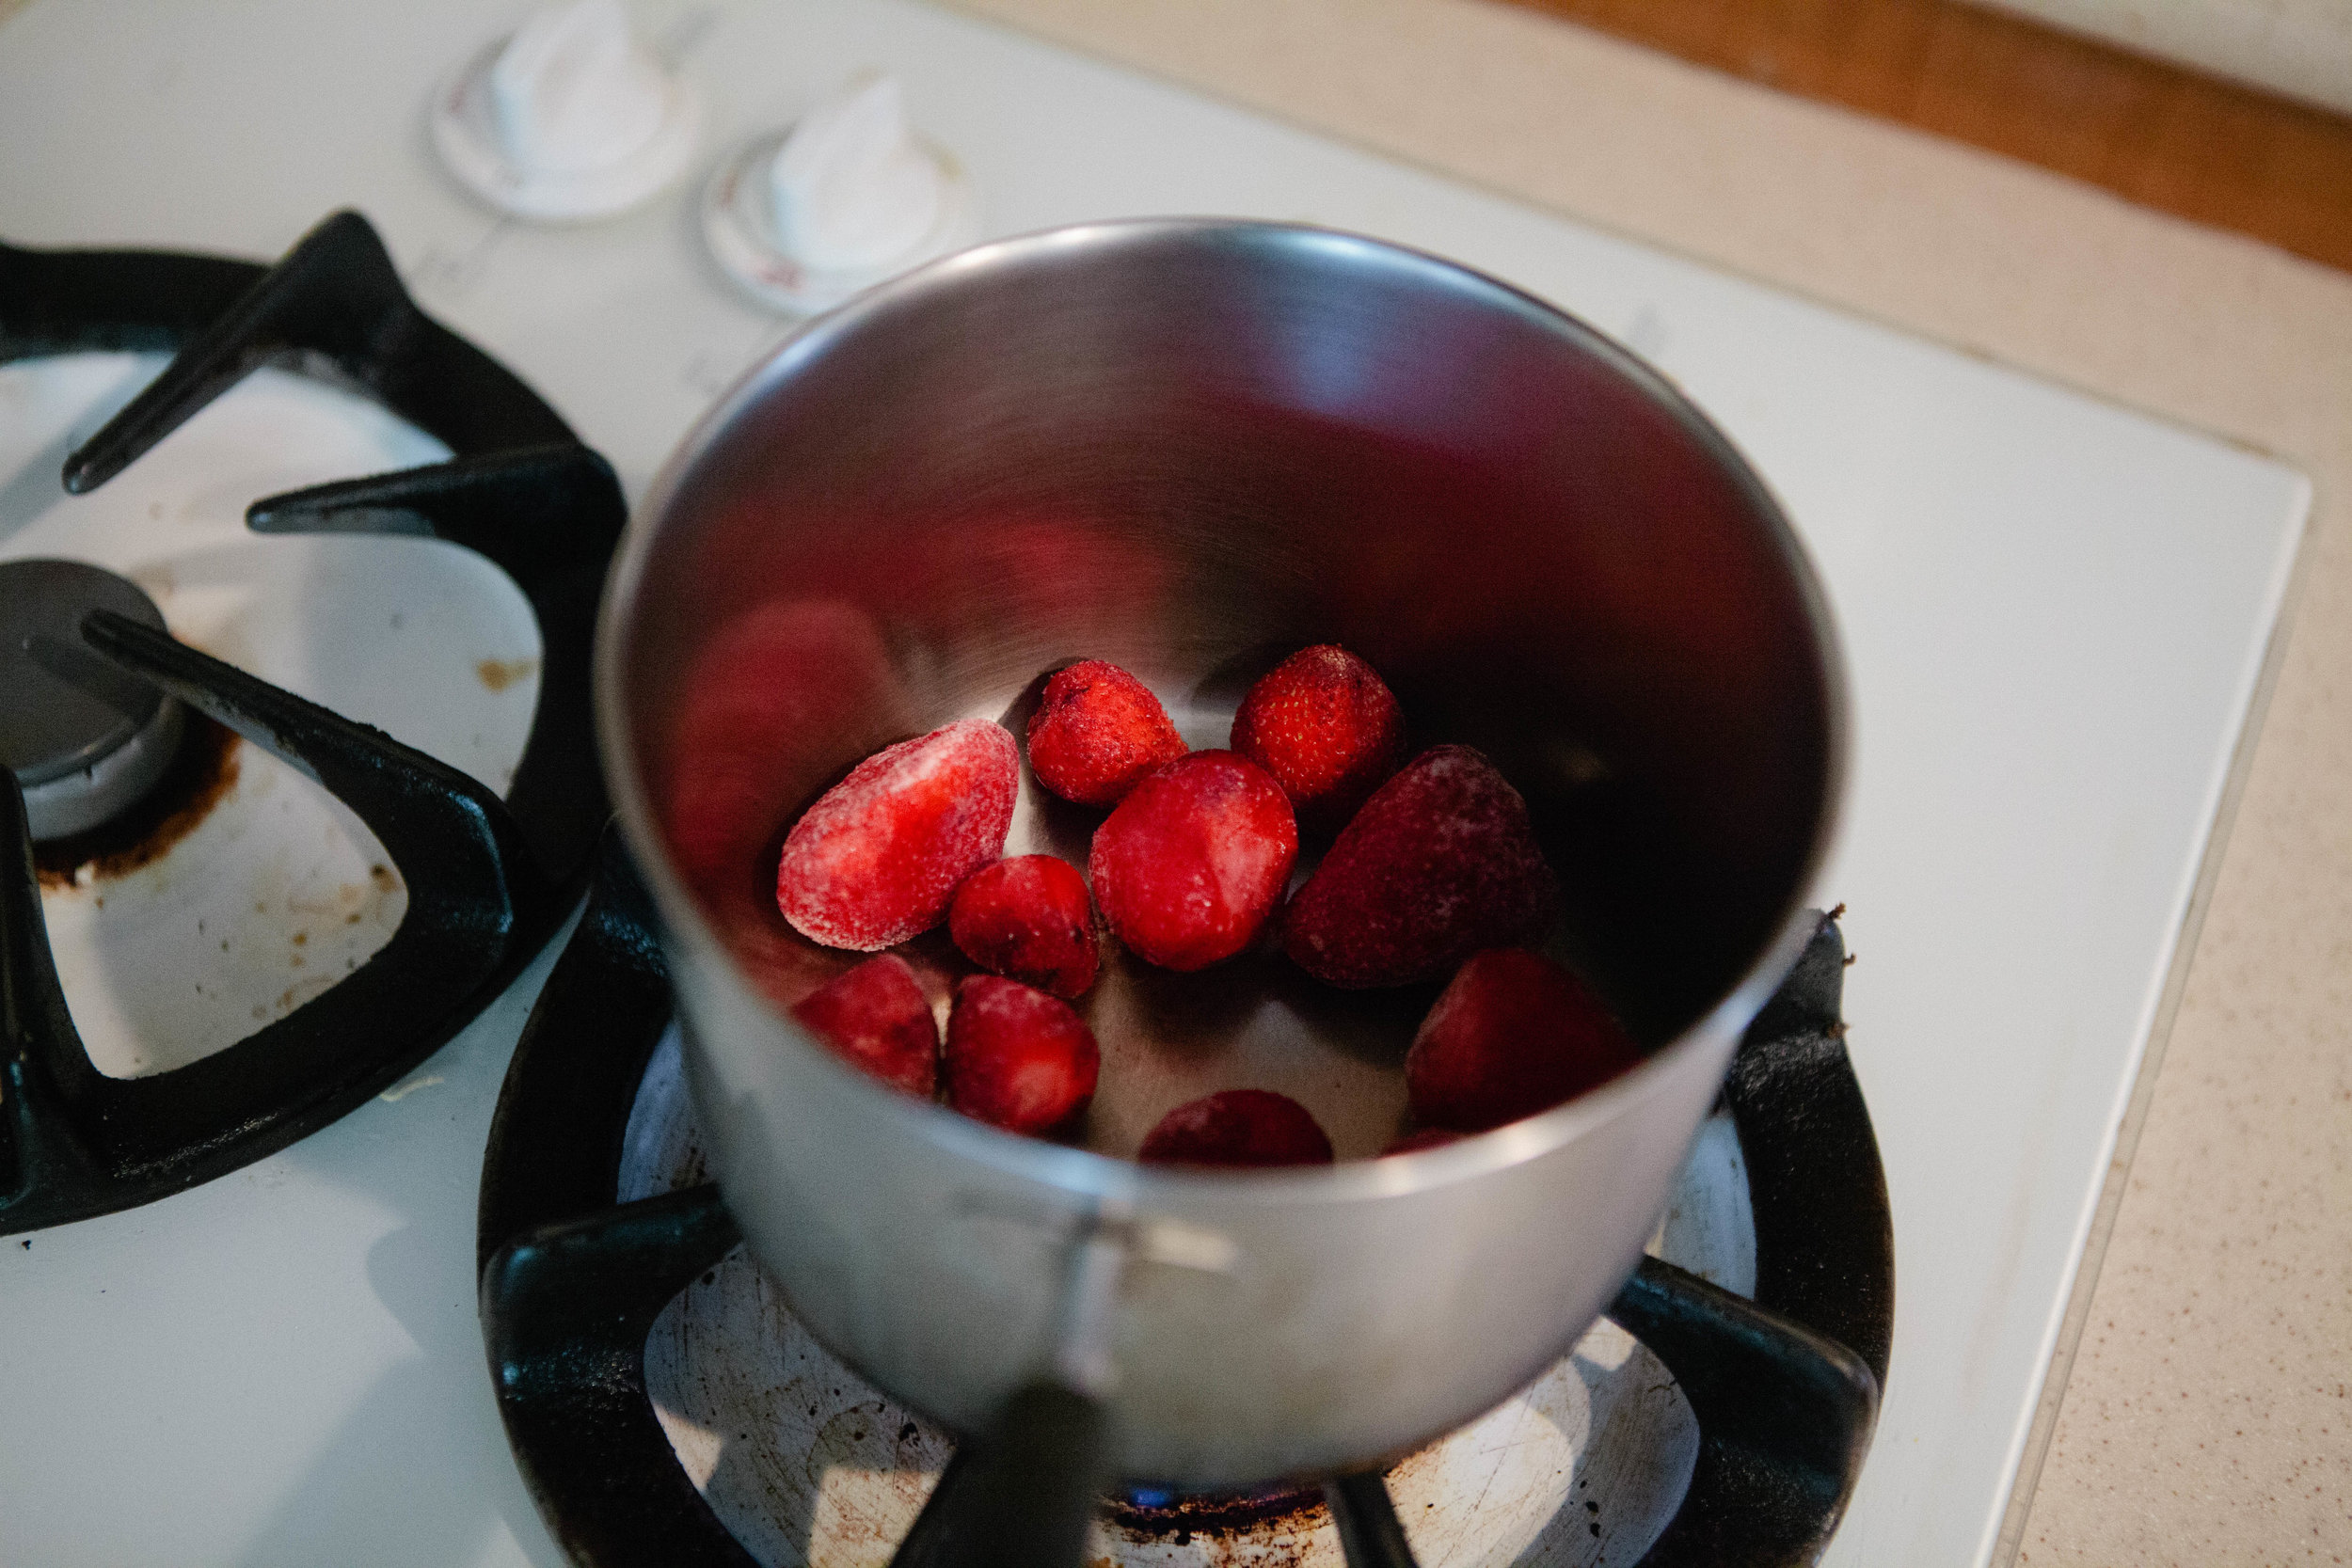
Add 1 heaping cup of frozen strawberries to a pot. Add enough water to cover the bottom. Turn the stove on to medium heat.

Help the berries break apart by stirring them with a spoon. 

When they start to get really soft, turn the stove to a low heat simmer.

strawberry-gummies-homemade-gummy-snacks-gaps-legal-gummies-gummy-snack-made-with-gelatin-diy-gummy-bear

Blend softened berries and lemon juice in a blender.

strawberry-gummies-homemade-gummy-snacks-gaps-legal-gummies-gummy-snack-made-with-gelatin-diy-gummy-bear

Once smooth, add back into pot. Add in gelatin and acerola cherry powder. Whisk well for about ten minutes until all combined.

Add honey at the end so that you are not cooking the honey.

strawberry-gummies-homemade-gummy-snacks-gaps-legal-gummies-gummy-snack-made-with-gelatin-diy-gummy-bear

Pour into a glass baking dish.

If you are adding a probiotic powder, make sure your mixture is cooled enough to where you can easily leave a finger in it before adding the powder. This will ensure you do not kill the probiotics.

strawberry-gummies-homemade-gummy-snacks-gaps-legal-gummies-gummy-snack-made-with-gelatin-diy-gummy-bear

Set in fridge to chill. Gummies should be chilled in about 40 minutes. Slice around the sides and cut into cubes to remove from glass pan.

Homemade Gummy Snacks

prep time: cook time: total time:

ingredients:

  • 1 heaping cup frozen berries
  • 1/2 Cup lemon juice
  • 1/4 Cup grass fed gelatin
  • 3-4 Tbsp.. Acerola cherry powder
  • 1 tbsp honey

instructions:

How to cook Homemade Gummy Snacks

  1. Add 1 heaping cup of frozen strawberries to a pot. Add enough water to cover the bottom. Turn the stove on to medium heat.
  2. Help the berries break apart by stirring them with a spoon.
  3. When they start to get really soft, turn the stove to a low heat simmer.
  4. Blend softened berries and lemon juice in a blender.
  5. Once smooth, add back into pot. Add in gelatin and acerola cherry powder. Whisk well for about ten minutes until all combined.
  6. Add honey at the end so that you are not cooking the honey.
  7. Pour into a glass baking dish.
  8. If you are adding a probiotic powder, make sure your mixture is cooled enough to where you can easily leave a finger in it before adding the powder. This will ensure you do not kill the probiotics.
  9. Set in fridge to chill. Gummies should be chilled in about 40 minutes. Slice around the sides and cut into cubes to remove from glass pan.
Created using The Recipes Generator
34.png

GAPS Legal Banana Split

Ah, the banana split. It’s so delicious on a hot summer’s day. This one is made with all natural ingredients and real food.

This recipe is GAPS Legal if you’ve been on full GAPS for about six months, and you’re tolerating raw milk, and you make it exactly as directed. It is Weston A Price legal as well.

Gaps-legal-banana-split-raw-milk-banana-split-whole-food-banana-split-weston-a-price-banana-split

Ingredients for GAPS Legal Banana Split

Directions for GAPS Legal Banana Split

If you’re going to add nuts to your banana split, start them 24 hours ahead of time so they are properly prepared. See how to properly prepare nuts here.

Gaps-legal-banana-split-raw-milk-banana-split-whole-food-banana-split-weston-a-price-banana-split

Make your homemade, raw milk ice cream. This is the piece that takes the longest.

Gaps-legal-banana-split-raw-milk-banana-split-whole-food-banana-split-weston-a-price-banana-split

Create your other toppings: your chocolate fudge sauce, strawberry fruit sauce, and maraschino cherries. You could also optionally make homemade marshmallow topping or homemade red hots if you wanted to top your ice cream with less than traditional banana split toppings.

I made my whipped cream in my Vitamix blender. Add raw milk into the blender. Use Variable 1 to start. Then increase to Variable 10 and High. Blend for 12 seconds or until peaks form.

Gaps-legal-banana-split-raw-milk-banana-split-whole-food-banana-split-weston-a-price-banana-split

Cut your banana in half. Add to a banana split bowl.

Gaps-legal-banana-split-raw-milk-banana-split-whole-food-banana-split-weston-a-price-banana-split

Top with your ice cream.

Gaps-legal-banana-split-raw-milk-banana-split-whole-food-banana-split-weston-a-price-banana-split

Top ice cream with whipped cream and sauces.

Serve and enjoy!

GAPS Legal Banana Split

prep time: cook time: total time:

instructions:

How to cook GAPS Legal Banana Split

  1. If you’re going to add nuts to your banana split, start them 24 hours ahead of time so they are properly prepared. See how to properly prepare nuts here.
  2. Make your homemade, raw milk ice cream. This is the piece that takes the longest.
  3. Create your other toppings: yourchocolate fudge sauce, strawberry fruit sauce, and maraschino cherries. You could also optionally make homemade marshmallow topping or homemade red hots if you wanted to top your ice cream with less than traditional banana split toppings.
  4. I made my whipped cream in my Vitamix blender. Add raw milk into the blender. Use Variable 1 to start. Then increase to Variable 10 and High. Blend for 12 seconds or until peaks form.
  5. Cut your banana in half. Add to a banana split bowl.
  6. Top with your ice cream.
  7. Top ice cream with whipped cream and sauces.
  8. Serve and enjoy!
Created using The Recipes Generator
29.png

Chocolate Fudge Sauce

Ingredients for Chocolate Fudge Sauce

  • 1 ¼  cup cocoa powder

  • 1 cup honey

  • ½ cup Cocoa Butter

  • ½ tsp salt

  • ¾ cup water

Directions for Chocolate Fudge Sauce

IMG_4527.jpg

In a small pot, combine cocoa powder, honey, salt, and water. Mix together. Add in cocoa butter.

IMG_4541.jpg

Bring to a boil. Simmer for five minutes until sauce thickens. Stir constantly to ensure no lumps.

IMG_4623.jpg

Let sauce cool slightly and serve immediately over ice cream!


Chocolate Fudge Sauce

Author:
prep time: cook time: total time:

ingredients:

Ingredients for Chocolate Fudge Sauce
  • 1 ¼ cup cocoa powder
  • 1 cup honey
  • ½ cup Cocoa Butter
  • ½ tsp salt
  • ¾ cup water

instructions:

How to cook Chocolate Fudge Sauce

Directions for Chocolate Fudge Sauce
  1. In a small pot, combine cocoa powder, honey, salt, and water. Mix together. Add in cocoa butter.
  2. Bring to a boil. Simmer for five minutes until sauce thickens. Stir constantly to ensure no lumps.
  3. Let sauce cool slightly and serve immediately over ice cream!
Created using The Recipes Generator
28.png

GAPS Legal Alcohol Free Maraschino Cherry Substitue

One of the few sweet commercial treats that I miss is maraschino cherries. I loved them in Shirley Temples, or chocolate covered cordial cherries. I was even known to eat them straight out of the jar.

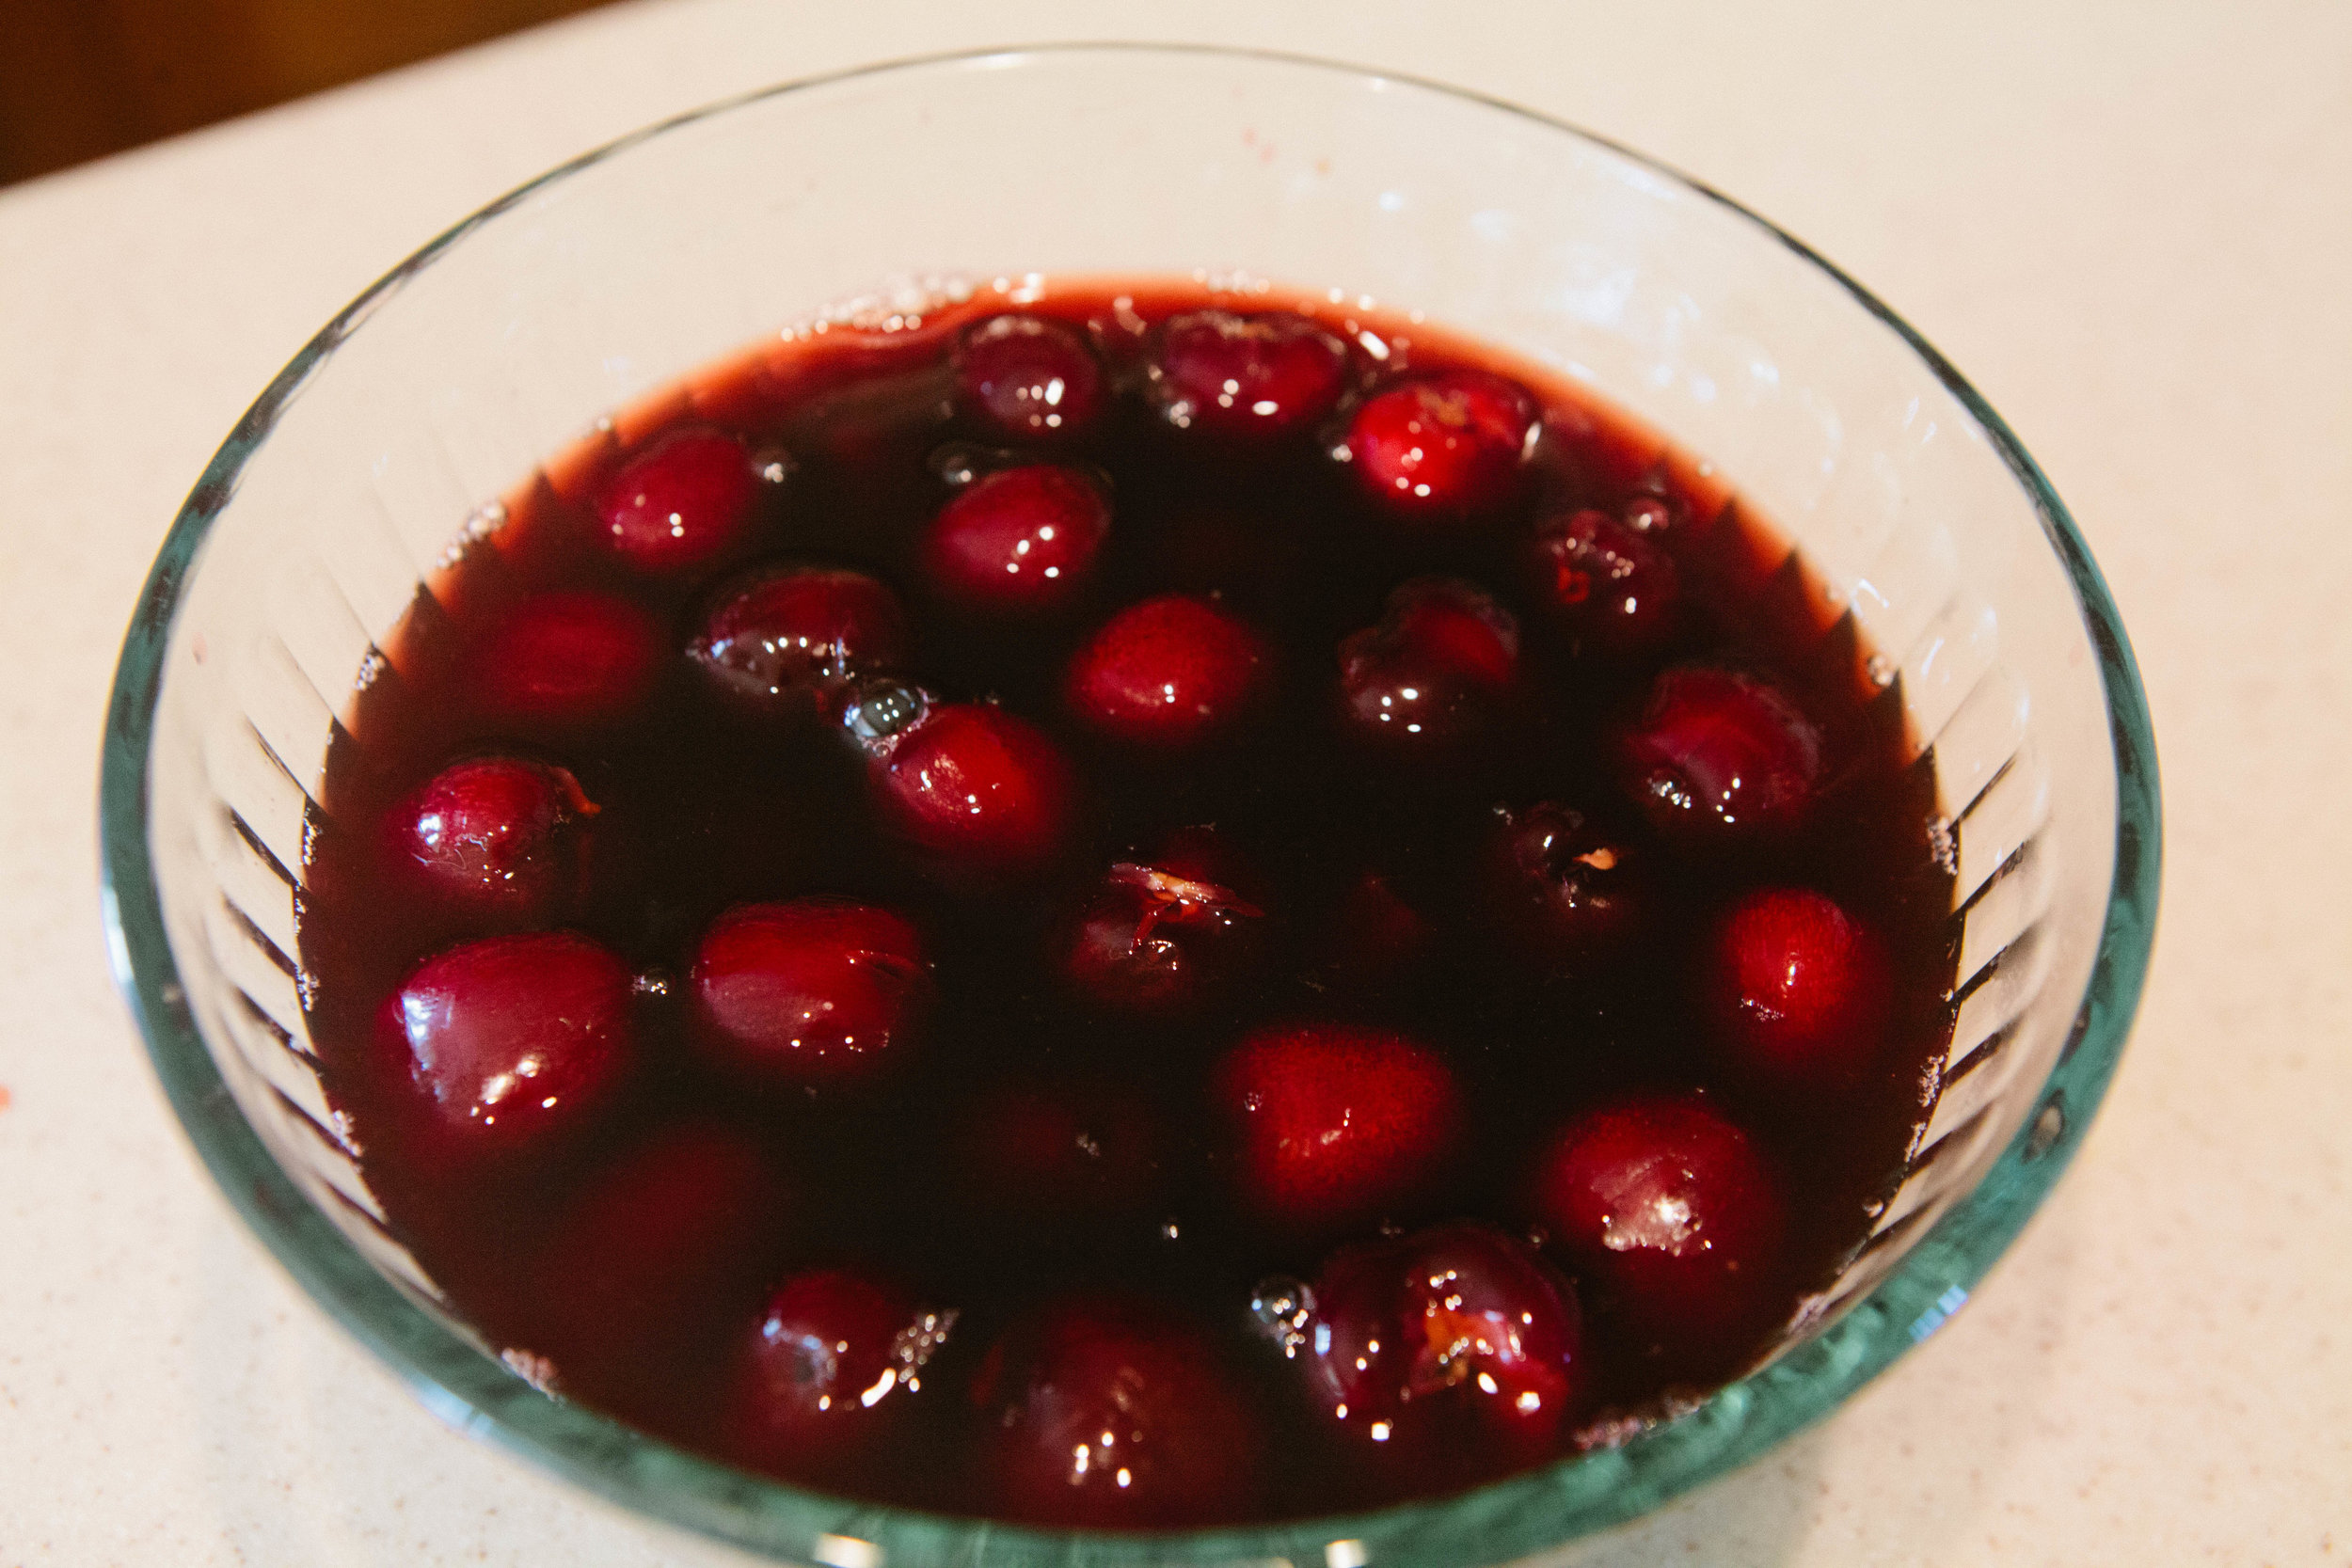
The ingredients in the commercially available products are so horrific that I haven’t been tempted to try them in the past. But when looking for what to top my homemade vanilla ice cream with, I wondered if there was a way to make my own. I stumbled upon this recipe from Real Food Whole Health which uses real ingredients to make maraschino cherries and I was sold. I’ve modified the recipe a little to make it GAPS Legal on the full GAPS Diet by removing the sugar and swapping the kind of cherry juice I used. These cherries are also alcohol free, unlike many other recipes I found to make your own maraschino cherries.

alcohol-free-maraschino-cherries-maraschino-cherry-substitute-how-to-make-your-own-maraschino-cherries-make-maraschino-cherries-with-cherry-juice-gaps-legal-maraschino-cherries-gaps-legal-ice-cream-topping-cherries-for-banana-splits-gaps-legal-desse…

The most labor intensive part of this recipe is in pitting the cherries. If you don’t have a cherry pitter, like I do not, try a straw or a chop stick to remove the pits. I found the easiest way to do it was to remove the stems, poke a hole in the top of the cherry, and then push the pit out the top hole from the bottom.

If you’re not making this recipe when cherries are in season, you can use frozen whole cherries with the pits removed. 

Ingredients for GAPS Legal “Maraschino” Cherries

1 cup organic, unsweetened Black Cherry Juice,  I used Lakewood Pure Black Cherry juice

1 cup filtered water

2 organic whole cinnamon sticks

3 Tbsp lemon juice

16 oz sweet red cherries, pitted

1 Tbsp pure almond extract

Directions for GAPS Legal “Maraschino” Cherries

alcohol-free-maraschino-cherries-maraschino-cherry-substitute-how-to-make-your-own-maraschino-cherries-make-maraschino-cherries-with-cherry-juice-gaps-legal-maraschino-cherries-gaps-legal-ice-cream-topping-cherries-for-banana-splits-gaps-legal-desse…

In a sauce pan, combine cherry juice, water, cinnamon sticks and lemon juice.  Bring to a low simmer.

alcohol-free-maraschino-cherries-maraschino-cherry-substitute-how-to-make-your-own-maraschino-cherries-make-maraschino-cherries-with-cherry-juice-gaps-legal-maraschino-cherries-gaps-legal-ice-cream-topping-cherries-for-banana-splits-gaps-legal-desse…

Pit your cherries while the sauce is simmering.

alcohol-free-maraschino-cherries-maraschino-cherry-substitute-how-to-make-your-own-maraschino-cherries-make-maraschino-cherries-with-cherry-juice-gaps-legal-maraschino-cherries-gaps-legal-ice-cream-topping-cherries-for-banana-splits-gaps-legal-desse…

Pour sauce over the cherries. Add in almond extract. This is the important piece because it gives them that distinct smell!

alcohol-free-maraschino-cherries-maraschino-cherry-substitute-how-to-make-your-own-maraschino-cherries-make-maraschino-cherries-with-cherry-juice-gaps-legal-maraschino-cherries-gaps-legal-ice-cream-topping-cherries-for-banana-splits-gaps-legal-desse…

Let cool on the counter. Cover tightly and keep in the fridge.


Gaps Legal Alcohol Free Maraschino Cherry Substitute

Author:
prep time: cook time: total time:

ingredients:

  • 1 cup organic, unsweetened Black Cherry Juice (I used Lakewood Pure Black Cherry juice)
  • 1 cup filtered water
  • 2 organic whole cinnamon sticks
  • 3 Tbsp lemon juice
  • 16 oz sweet red cherries, pitted
  • 1 Tbsp pure almond extract

instructions:

How to cook Gaps Legal Alcohol Free Maraschino Cherry Substitute

  1. In a sauce pan, combine cherry juice, water, cinnamon sticks and lemon juice. Bring to a low simmer.
  2. Pit your cherries while the sauce is simmering.
  3. Pour sauce over the cherries. Add in almond extract. This is the important piece because it gives them that distinct smell!
  4. Let cool on the counter. Cover tightly and keep in the fridge.
Created using The Recipes Generator
26.png

How to Make GAPS Legal Ice Cream

I discovered this delicious ice cream years and years ago from an old ice cream maker recipe book. This is really making a custard base which makes it thick and creamy and allows you to not have to add so many filler ingredients. 

Please note: this is only a full GAPS recipe when you are nearing the end of your GAPS Journey. I’m sorry if this was clickbait and I got your hopes up!

Milk (even raw) has a lot of sugar in it. This sugar will feed your dysbiotic flora and counteract your healing in Intro Diet and even early Full GAPS. It’s best to save this treat until you are getting close to coming off GAPS, and do it only occationally as a special treat.

When you are able to eat it freely, this ice cream is a rich treat but should be eaten with no guilt! It has very simple ingredients - milk, eggs, cream, honey, and optional vanilla extract. Any flavoring can be added to this ice cream base including chocolate or strawberries - you’re only limited by your imagination! What flavor combination is your favorite?

A few tips on how to make your own simple ice cream:

For best results, make the mixture the night before and let it chill in the freezer for at least eight hours. 

If you can’t find raw milk near you, you can use non homogenized organic milk as a less preferred but still acceptable alternative.


Ingredients for GAPS Legal Ice Cream

  • 2 cups Milk

  • 3 Eggs

  • 2 cups Cream

  • ½ cup Honey

  • 2 tsp. Vanilla Extract


Directions for GAPS Legal Ice Cream

gaps-legal-ice-cream-how-to-make-simple-ice-cream-make-your-own-vanilla-ice-cream-diy-ice-cream-easy-real-ice-cream-whole-30-ice-cream-raw-milk-ice-cream

Add the milk and eggs to a pot.

gaps-legal-ice-cream-how-to-make-simple-ice-cream-make-your-own-vanilla-ice-cream-diy-ice-cream-easy-real-ice-cream-whole-30-ice-cream-raw-milk-ice-cream

Whisk eggs immediately. If your milk gets too hot before you add your eggs, you will end up with very milky scrambled eggs! I prefer to start mixing with a fork and then whisk.

gaps-legal-ice-cream-how-to-make-simple-ice-cream-make-your-own-vanilla-ice-cream-diy-ice-cream-easy-real-ice-cream-whole-30-ice-cream-raw-milk-ice-cream

Once the mixture is warm, add the honey. Mix with a whisk and fork.

gaps-legal-ice-cream-how-to-make-simple-ice-cream-make-your-own-vanilla-ice-cream-diy-ice-cream-easy-real-ice-cream-whole-30-ice-cream-raw-milk-ice-cream

Leave mixture on low to medium low heat and stir constantly but not consistently until it thickens. The mixture is thick enough when it coats a spoon. 

gaps-legal-ice-cream-how-to-make-simple-ice-cream-make-your-own-vanilla-ice-cream-diy-ice-cream-easy-real-ice-cream-whole-30-ice-cream-raw-milk-ice-cream

Add to a large enough bowl that will also have room to accommodate the cream. If there are scrambled egg pieces or harder pieces of milk in the pot, leave them in! You just want all the creamy goodness.

Cover and cool in the fridge for 20 - 30 minutes.

gaps-legal-ice-cream-how-to-make-simple-ice-cream-make-your-own-vanilla-ice-cream-diy-ice-cream-easy-real-ice-cream-whole-30-ice-cream-raw-milk-ice-cream

Add your cream and vanilla.

Put the mixture back in the fridge and allow to cool completely overnight.

gaps-legal-ice-cream-how-to-make-simple-ice-cream-make-your-own-vanilla-ice-cream-diy-ice-cream-easy-real-ice-cream-whole-30-ice-cream-raw-milk-ice-cream

Add mixture into an ice cream maker.

Once mixture starts to resemble ice cream, you can remove it from the maker. It will resemble soft serve. If you’d like harder ice cream, leave the mixture in the freezer for a few hours.

Enjoy with your favorite toppings!


GAPS Legal Ice Cream

Author:
prep time: cook time: total time:

ingredients:

  • 2 cups Milk
  • 3 Eggs
  • 2 cups Cream
  • ½ cup Honey
  • 2 tsp. Vanilla Extract

instructions:

How to cook GAPS Legal Ice Cream

  1. Add the milk and eggs to a pot.
  2. Whisk eggs immediately. If your milk gets too hot before you add your eggs, you will end up with very milky scrambled eggs! I prefer to start mixing with a fork and then whisk.
  3. Once the mixture is warm, add the honey. Mix with a whisk and fork.
  4. Leave mixture on low to medium low heat and stir constantly but not consistently until it thickens. The mixture is thick enough when it coats a spoon.
  5. Add to a large enough bowl that will also have room to accommodate the cream. If there are scrambled egg pieces or harder pieces of milk in the pot, leave them in! You just want all the creamy goodness.
  6. Cover and cool in the fridge for 20 - 30 minutes.
  7. Add your cream and vanilla.
  8. Put the mixture back in the fridge and allow to cool completely overnight.
  9. Add mixture into an ice cream maker.
  10. Once mixture starts to resemble ice cream, you can remove it from the maker. It will resemble soft serve. If you’d like harder ice cream, leave the mixture in the freezer for a few hours.
  11. Enjoy with your favorite toppings!
Created using The Recipes Generator
25.png

Russian Custard

GAPS Legal Custard Dessert

Russian custard is a delicious desert or afternoon snack. It is rich, and just sweet enough. You can whip it up in just a few minutes, and it is easy to double or triple to feed another (or more for yourself).

Russian custard is just two ingredients: raw egg yolks and honey. Don't let the raw egg yolk stop you! The texture and taste of the custard are very different than that of a raw egg yolk. I've had multiple people express their pleasant surprise at how much they like it (despite being reluctant to try it because of the egg yolks). So give it a try—it just might become a favorite of yours!

For people on GAPS, this recipe is legal as early as Intro Stage 2

Russian Custard Recipe

Ingredients for Russian Custard:

  • 2 Eggs*

  • 1/2 - 1 tsp Honey

*As per the usual warning, eating undercooked or raw eggs may increase your risk of foodborne illness.

You can multiply this recipe for as many servings as you want. The above ratio is for one serving.

Directions for Russian Custard:

This custard recipe is no bake and includes only two ingredients. It's dairy free and gluten free. It makes for a delicious dessert for one or you can multiple it for as many servings as you like. The entire recipe takes about five minutes. Recipe b…

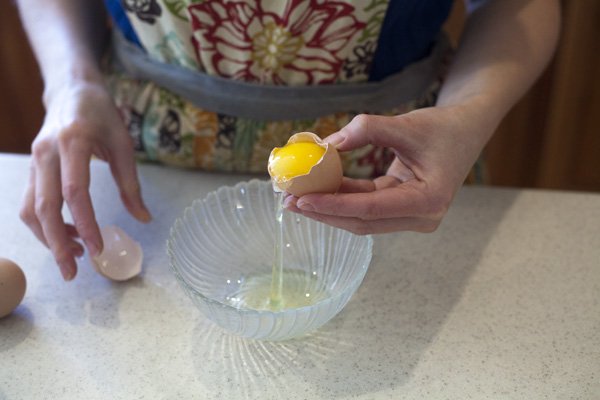
Separate the egg yolks from the egg whites. Place the yolks in a separate bowl.

This custard recipe is no bake and includes only two ingredients. It's dairy free and gluten free. It makes for a delicious dessert for one or you can multiple it for as many servings as you like. The entire recipe takes about five minutes. Recipe b…

Add honey to the egg yolks. I find 1/2 tsp of honey to be plenty and very sweet. You can add more if you need it. Or less.

This custard recipe is no bake and includes only two ingredients. It's dairy free and gluten free. It makes for a delicious dessert for one or you can multiple it for as many servings as you like. The entire recipe takes about five minutes. Recipe b…

Beat the egg yolks with a whisk until they are thick and change color. They should look much lighter, with a little white undertone. This takes about five minutes. A fork does not work well for whisking!

This custard recipe is no bake and includes only two ingredients. It's dairy free and gluten free. It makes for a delicious dessert for one or you can multiple it for as many servings as you like. The entire recipe takes about five minutes. Recipe b…

Serve in a small bowl for a delicious dessert or mid-afternoon snack.

This custard recipe is no bake and includes only two ingredients. It's dairy free and gluten free. It makes for a delicious dessert for one or you can multiple it for as many servings as you like. The entire recipe takes about five minutes. Recipe b…

Russian Custard

Author:
prep time: cook time: total time:

ingredients:

  • 2 Eggs*
  • 1/2 - 1 tsp Honey
  • *As per the usual warning, eating undercooked or raw eggs may increase your risk of foodborne illness.
  • You can multiply this recipe for as many servings as you want. The above ratio is for one serving.

instructions:

How to cook Russian Custard

  1. Separate the egg yolks from the egg whites. Place the yolks in a separate bowl.
  2. Add honey to the egg yolks. I find 1/2 tsp of honey to be plenty and very sweet. You can add more if you need it. Or less.
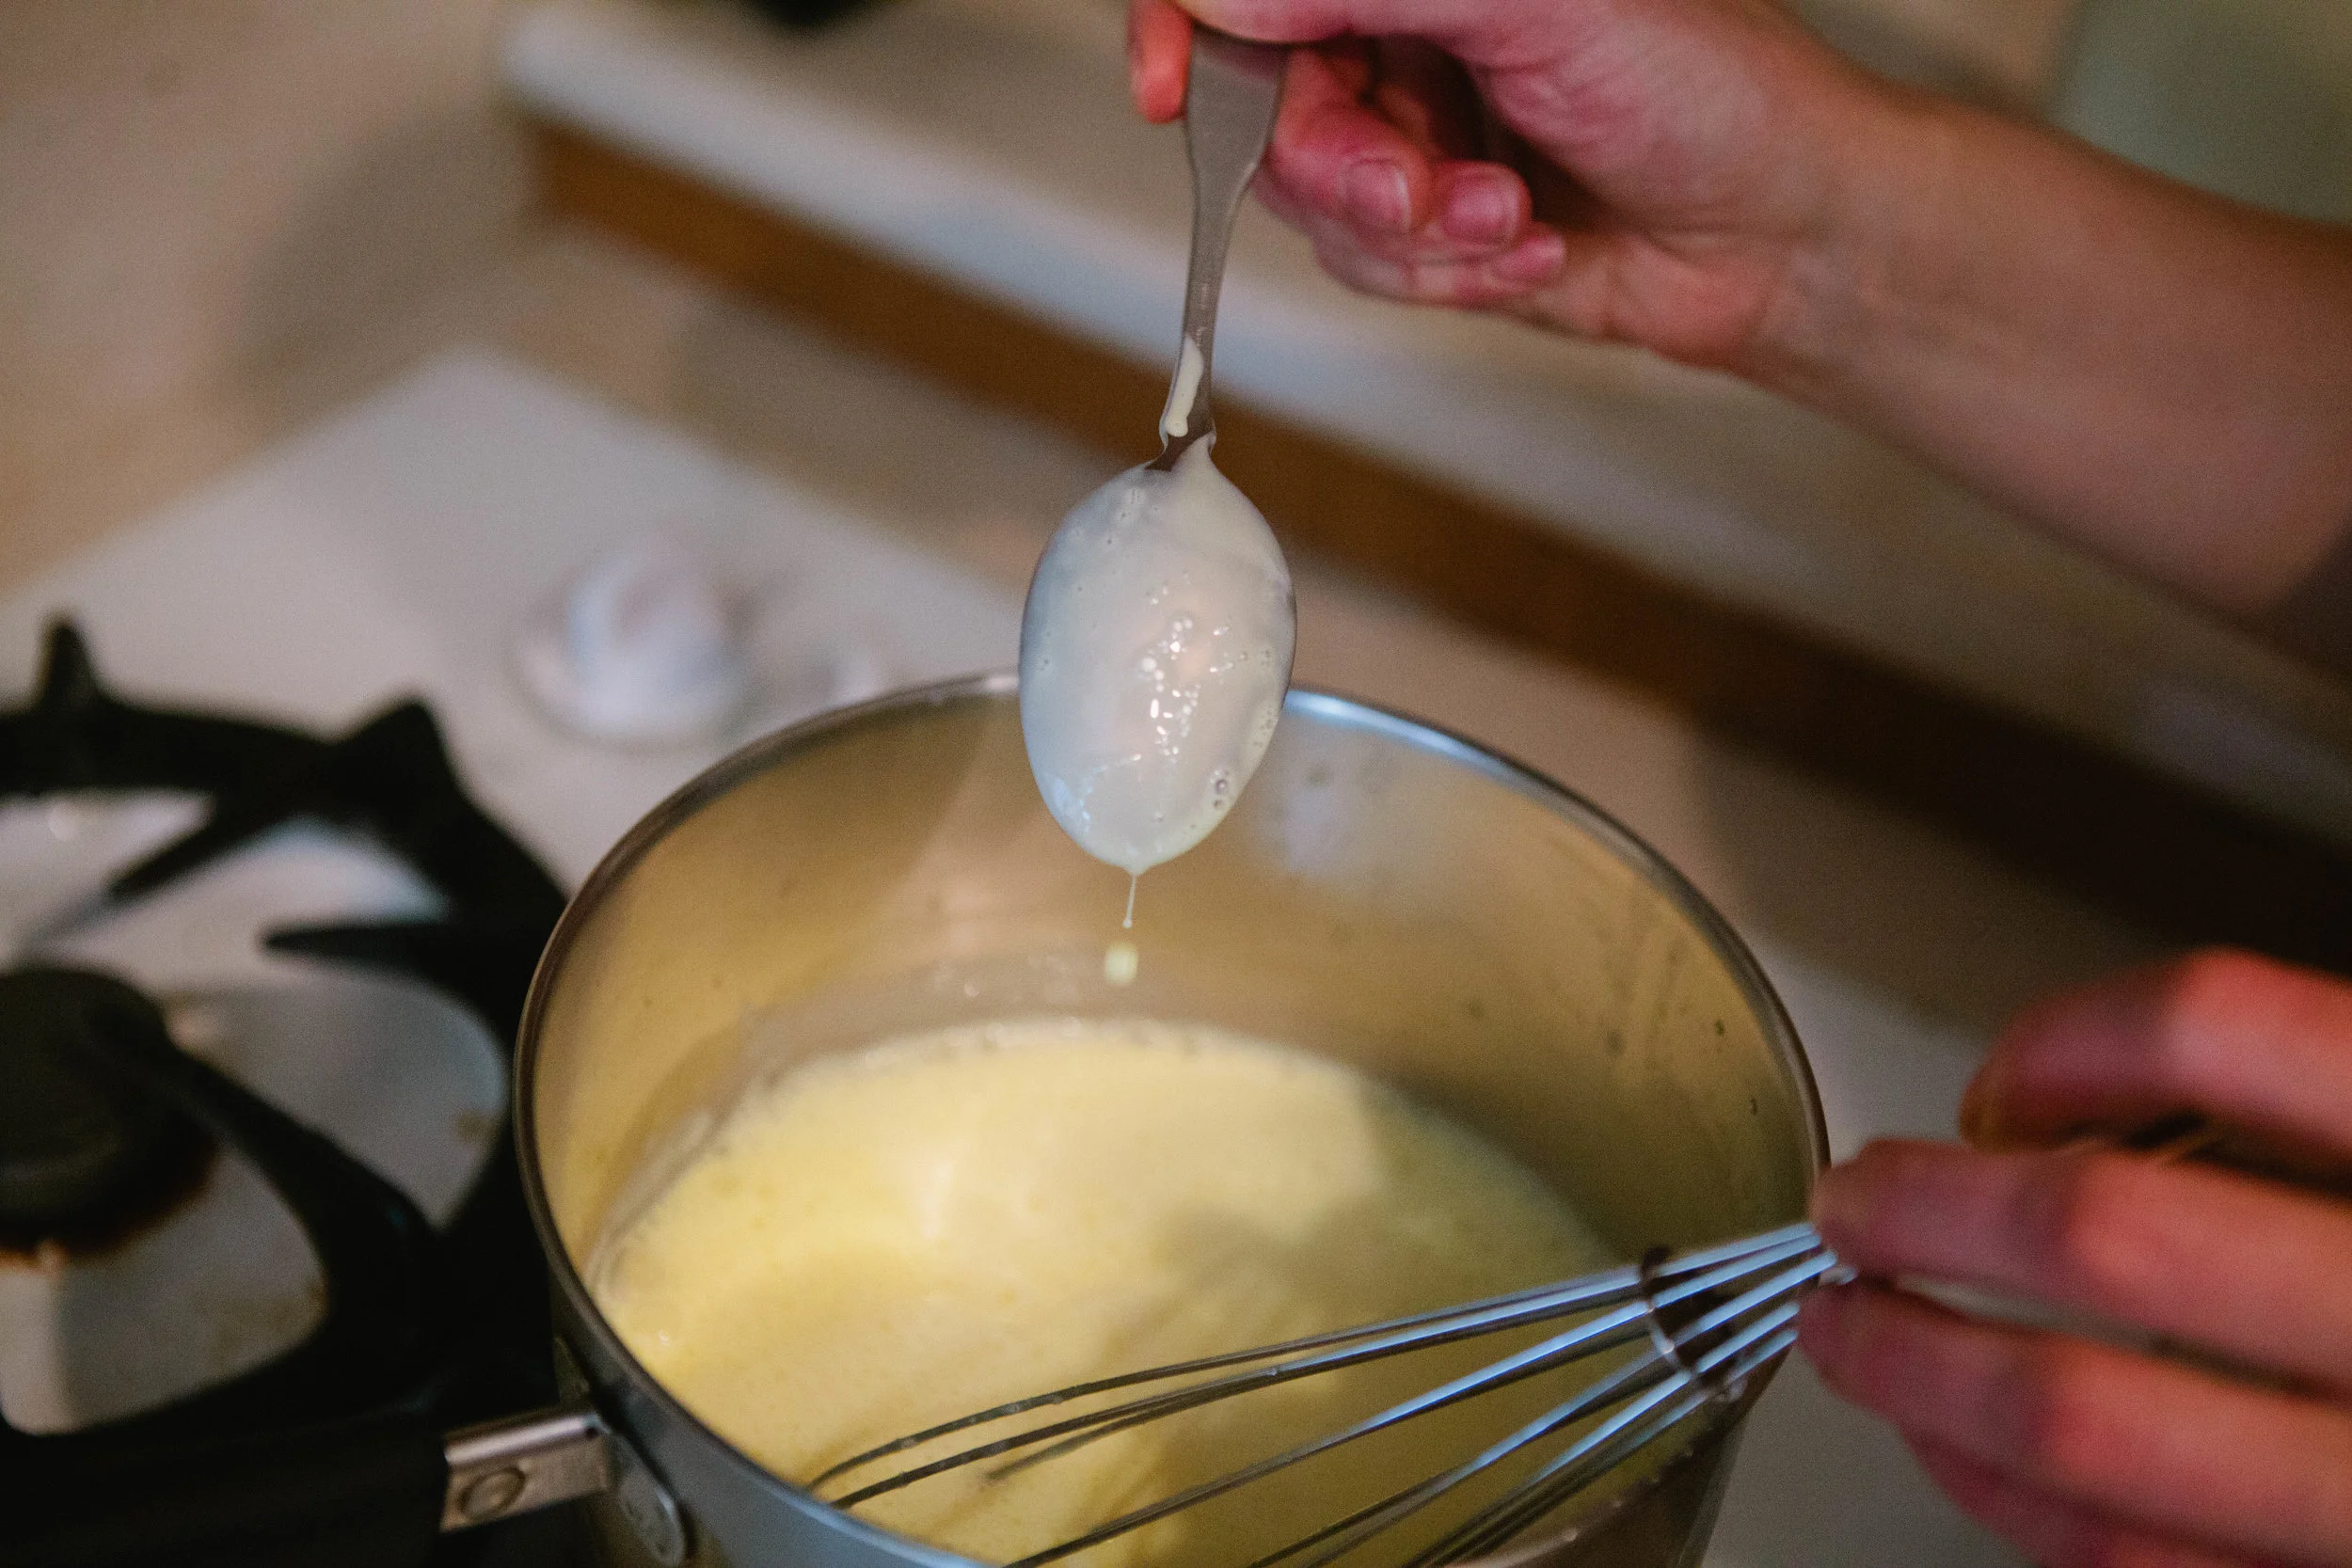
  3. Beat the egg yolks with a whisk until they are thick and change color. They should look much lighter, with a little white undertone. This takes about five minutes. A fork does not work well for whisking!
  4. Serve in a small bowl for a delicious dessert or mid-afternoon snack.
Created using The Recipes Generator

Chocolate Fudge Made with Coconut

GAPS Legal Chocolate Peppermint Coconut Fudge and Citrus Coconut Fudge

The GAPS Legal Fudge is a delicious holiday recipe and easy to share with family and friends! This recipe comes together quickly, besides the melting of the coconut butter and oil. I like making this recipe on a snowy day because it’s fun to chill the pans in a snowbank! It makes me feel like a pioneer.

For the citrus fudge, you can use any citrus you like. I prefer orange. You can also use all shredded coconut if you like. I prefer a little crunch in my fudge and like to add the flakes.You can make these flavors on their own and keep them separate. However, I prefer the two flavors together.

To combine the flavors, make the chocolate peppermint fudge first and put it in the freezer for 10 minutes to chill rapidly while you make the citrus fudge. Once chilled, pour the citrus fudge over the top and chill again.The fudge keeps for quite a while and doesn’t melt easily at room temperature. Even so, storing in the fridge is best.Enjoy!

Chocolate Peppermint Coconut Fudge

Ingredients for chocolate peppermint coconut fudge

  • ½ cup coconut butter

  • ½ cup coconut oil

  • ½ cup cocoa powder

  • ½ cup honey

  • 2 tsp peppermint extract or 2 drops peppermint oil

  • 1 tsp vanilla extract

  • 3/4 cup shredded coconut

  • ¼ cup coconut flakes

Directions for chocolate peppermint coconut fudge

This GAPS Legal Coconut Fudge comes in two flavors, citrus and peppermint. You can make the flavors separately but I prefer them layered together. Use coconut butter, coconut oil and coconut flakes for a delicious gluten free, dairy free and GAPS le…

Melt coconut butter on medium heat by adding water to the bottom of a pot and placing jar on top. Or add jar and water to crockpot and heat for two hours until melted.

Melt coconut oil in a separate pot. Crush coconut flakes into smaller pieces.

This GAPS Legal Coconut Fudge comes in two flavors, citrus and peppermint. You can make the flavors separately but I prefer them layered together. Use coconut butter, coconut oil and coconut flakes for a delicious gluten free, dairy free and GAPS le…

Combine coconut butter, coconut oil, cocoa powder, honey, peppermint, vanilla, shredded coconut and coconut flakes into a food processor.

This GAPS Legal Coconut Fudge comes in two flavors, citrus and peppermint. You can make the flavors separately but I prefer them layered together. Use coconut butter, coconut oil and coconut flakes for a delicious gluten free, dairy free and GAPS le…

Spread mixture into a pan.Chill for 30 minutes.

Add hot water to the sink. Float pan in mixture approx 1 minute until mixture releases from sides. Dip a knife in hot water then slice fudge into pieces.

How to Make Citrus coconut Fudge

Ingredients for citrus coconut fudge

  • ½ cup coconut butter

  • ½ cup coconut oil

  • ⅓ cup raw honey

  • 1 tbsp citrus zest

  • 2 tbs citrus juice

  • 3/4 cup shredded coconut

  • ¼ cup Coconut Flakes

Directions for citrus coconut fudge

This GAPS Legal Coconut Fudge comes in two flavors, citrus and peppermint. You can make the flavors separately but I prefer them layered together. Use coconut butter, coconut oil and coconut flakes for a delicious gluten free, dairy free and GAPS le…

Melt coconut butter on medium heat by adding water to the bottom of a pot and placing jar on top. Or add jar and water to crockpot and heat for two hours until melted. Melt coconut oil in a separate pot.

This GAPS Legal Coconut Fudge comes in two flavors, citrus and peppermint. You can make the flavors separately but I prefer them layered together. Use coconut butter, coconut oil and coconut flakes for a delicious gluten free, dairy free and GAPS le…

Combine coconut butter, coconut oil, cocoa powder, honey, peppermint, and vanilla into a food processor.

This GAPS Legal Coconut Fudge comes in two flavors, citrus and peppermint. You can make the flavors separately but I prefer them layered together. Use coconut butter, coconut oil and coconut flakes for a delicious gluten free, dairy free and GAPS le…

Spread mixture into a pan.Chill for 30 minutes.

This GAPS Legal Coconut Fudge comes in two flavors, citrus and peppermint. You can make the flavors separately but I prefer them layered together. Use coconut butter, coconut oil and coconut flakes for a delicious gluten free, dairy free and GAPS le…

Add hot water to the sink. Float pan in mixture approx 1 minute until mixture releases from sides. Dip a knife in hot water then slice fudge into pieces.


Chocolate Peppermint Fudge

Author:
prep time: cook time: total time:

ingredients:

  • ½ cup coconut butter
  • ½ cup coconut oil
  • ½ cup cocoa powder
  • ½ cup honey
  • 2 tsp peppermint extract or 2 drops peppermint oil
  • 1 tsp vanilla extract
  • 3/4 cup shredded coconut
  • ¼ cup coconut flakes

instructions:

How to cook Chocolate Peppermint Fudge

  1. Melt coconut butter on medium heat by adding water to the bottom of a pot and placing jar on top. Or add jar and water to crockpot and heat for two hours until melted.
  2. Melt coconut oil in a separate pot. Crush coconut flakes into smaller pieces.
  3. Combine coconut butter, coconut oil, cocoa powder, honey, peppermint, vanilla, shredded coconut and coconut flakes into a food processor.
  4. Spread mixture into a pan.Chill for 30 minutes.
  5. Add hot water to the sink. Float pan in mixture approx 1 minute until mixture releases from sides. Dip a knife in hot water then slice fudge into pieces.
Created using The Recipes Generator

Citrus Coconut Fudge

Author:
prep time: cook time: total time:

ingredients:

  • ½ cup coconut butter
  • ½ cup coconut oil
  • ⅓ cup raw honey
  • 1 tbsp citrus zest
  • 2 tbs citrus juice
  • 3/4 cup shredded coconut
  • ¼ cup Coconut Flakes

instructions:

How to cook Citrus Coconut Fudge

  1. Melt coconut butter on medium heat by adding water to the bottom of a pot and placing jar on top. Or add jar and water to crockpot and heat for two hours until melted. Melt coconut oil in a separate pot.
  2. Combine coconut butter, coconut oil, cocoa powder, honey, peppermint, and vanilla into a food processor.
  3. Spread mixture into a pan. Chill for 30 minutes.
  4. Add hot water to the sink. Float pan in mixture approx 1 minute until mixture releases from sides. Dip a knife in hot water then slice fudge into pieces.
Created using The Recipes Generator

Brownies Made with Dates

Dairy Free, Gluten Free, GAPS Legal Brownies Made with Dates

While these brownies are not as sweet as conventional brownies, they were deemed by some tasters on the GAPS Diet as being “Better than Brownies.” These GAPS legal brownies are dairy free, gluten free, sugar free, and egg free.

Even better, besides the 24 hour fermentation time needed for the almond flour, these brownies can be made very quickly! These brownies actually get better over time so it’s actually better to make them a day before to let the flavors meld. They would be delicious eaten alongside homemade ice cream or with homemade whipped cream and fruit.

Better Than Brownies - GAPS Legal Brownies

Ingredients for brownies made from dates

  • 2 cups of almond flour

  • 5 tablespoons Whey

  • 18 dates

  • ½ cup Filtered Water

  • 1/2 cup Coconut Oil + extra to grease the baking dish

  • ¼ cup Cacao Powder

  • ½ tsp Vanilla Extract

  • ¼ cup Cacao Nibs (optional)

  • ¼ cup Crispy Nuts (optional)

Directions for brownies made from dates

24 Hours Before:

These GAPS legal brownies were deemed as better than brownies. They are gluten free, dairy free, sugar free, egg free, and made with fermented almond flour and dates. Recipe by certified GAPS Practitioner Amy Mihaly, Be Well Clinic.

Add almond flour and cacao powder to a bowl. Use a fork to get rid of almond flour clumps.Add whey and stir to moisten.Cover and leave on counter to ferment for 24 hours.

The Next Day:

These GAPS legal brownies were deemed as better than brownies. They are gluten free, dairy free, sugar free, egg free, and made with fermented almond flour and dates. Recipe by certified GAPS Practitioner Amy Mihaly, Be Well Clinic.

Cut up 18 dates, removing the inner pit.Add ½ cup Filtered Water.

These GAPS legal brownies were deemed as better than brownies. They are gluten free, dairy free, sugar free, egg free, and made with fermented almond flour and dates. Recipe by certified GAPS Practitioner Amy Mihaly, Be Well Clinic.

Cook on low heat until dates are soft and water is absorbed, about 4-6 minutes. (think like making applesauce.) Watch closely to make sure dates don’t burn. You may need to add more water as you go depending on how dry your dates are so they’re able to fully hydrate without burning. Be sure not to add too much or it will thin the eventual date paste.

These GAPS legal brownies were deemed as better than brownies. They are gluten free, dairy free, sugar free, egg free, and made with fermented almond flour and dates. Recipe by certified GAPS Practitioner Amy Mihaly, Be Well Clinic.

When dates are soft, turn off the heat. Puree the mixture in the pot with an immersion blender or add to a blender or food processor until smooth. The smoother the date texture, the more appealing the brownies!Preheat oven to 350.Grease a baking dish or pie pan with coconut oil. Do not use a metal baking dish or the edges will burn.

These GAPS legal brownies were deemed as better than brownies. They are gluten free, dairy free, sugar free, egg free, and made with fermented almond flour and dates. Recipe by certified GAPS Practitioner Amy Mihaly, Be Well Clinic.

Combine coconut oil and dates into the almond flour mixture. If you’re using a blender, add the coconut oil to the blender and blend until smooth before adding to the flour mixture. Optionally, add cacao nibs and crispy nuts.

These GAPS legal brownies were deemed as better than brownies. They are gluten free, dairy free, sugar free, egg free, and made with fermented almond flour and dates. Recipe by certified GAPS Practitioner Amy Mihaly, Be Well Clinic.

Stir the mixture until smooth, being sure to get all the clumps out. You want the mixture to be as smooth as possible. The batter will be thick. Add batter to greased baking sheet and smooth out.

These GAPS legal brownies were deemed as better than brownies. They are gluten free, dairy free, sugar free, egg free, and made with fermented almond flour and dates. Recipe by certified GAPS Practitioner Amy Mihaly, Be Well Clinic.

Bake for 45 minutes until the knife comes out clean. Check after 30 minutes. Serve and enjoy!

Notes:

  • Instead of date paste, you can use applesauce but the brownies will not be as sweet and you will need to make your own applesauce that is thick so it creates the right consistency.

  • These brownies get better with age!

  • These are dairy free, gluten free, sugar free, egg free and legal on GAPS.


Brownies Made with Dates

Author:
prep time: cook time: total time:

ingredients:

  • 2 cups of almond flour
  • 5 tablespoons Whey
  • 18 dates
  • ½ cup Filtered Water
  • 1/2 cup Coconut Oil + extra to grease the baking dish
  • ¼ cup Cacao Powder
  • ½ tsp Vanilla Extract
  • ¼ cup Cacao Nibs (optional)
  • ¼ cup Crispy Nuts (optional)

instructions:

How to cook Brownies Made with Dates

24 Hours in Advance
  1. Add almond flour and cacao powder to a bowl. Use a fork to get rid of almond flour clumps.Add whey and stir to moisten.Cover and leave on counter to ferment for 24 hours.
The Next Day
  1. Cut up 18 dates, removing the inner pit. Add ½ cup Filtered Water.
  2. Cook on low heat until dates are soft and water is absorbed, about 4-6 minutes. (think like making applesauce.) Watch closely to make sure dates don’t burn. You may need to add more water as you go depending on how dry your dates are so they’re able to fully hydrate without burning. Be sure not to add too much or it will thin the eventual date paste.
  3. When dates are soft, turn off the heat. Puree the mixture in the pot with an immersion blender or add to a blender or food processor until smooth. The smoother the date texture, the more appealing the brownies!Preheat oven to 350.Grease a baking dish or pie pan with coconut oil. Do not use a metal baking dish or the edges will burn.
  4. Combine coconut oil and dates into the almond flour mixture. If you’re using a blender, add the coconut oil to the blender and blend until smooth before adding to the flour mixture. Optionally, add cacao nibs and crispy nuts.
  5. Stir the mixture until smooth, being sure to get all the clumps out. You want the mixture to be as smooth as possible. The batter will be thick. Add batter to greased baking sheet and smooth out.
  6. Bake for 45 minutes until the knife comes out clean. Check after 30 minutes. Serve and enjoy!
  7. Notes:
  8. Instead of date paste, you can use applesauce but the brownies will not be as sweet and you will need to make your own applesauce that is thick so it creates the right consistency.
  9. These brownies get better with age!
  10. These are dairy free, gluten free, sugar free, egg free and legal on GAPS.
Created using The Recipes Generator

Almond Flour Cookies with Cacao Nibs

GAPS Legal Almond Cookies

Adapted from The Paleo Plan Makes 24 Cookies GAPS Legal on Stage 4

Ingredients for gaps legal chocolate chip cookies

  • 2 cups Almond Flour

  • ¼ cup Whey

  • 2 large eggs

  • 1/3 cup Room Temperature Coconut Oil

  • 1 tsp Baking Soda

  • ½ tsp Vanilla

  • ⅛ tsp Salt

  • ¼ cup Honey (or ⅓ cup date syrup)

  • ⅛-¼ cup Raw Cacao Nibs

Directions for chocolate chip cookies on the gaps diet

gaps-legal-chocolate-chip-cookies-with-almond-flour-fermented-almond-flour-cookies-what-to-do-with-fermented-almond-flour

24 Hours in Advance

Add whey to almond flour. Stir to moisten.

Leave covered on counter for 24 hours to ferment.

gaps-legal-chocolate-chip-cookies-with-almond-flour-fermented-almond-flour-cookies-what-to-do-with-fermented-almond-flour

The Next Day

Preheat oven to 350. Add your baking sheet to the oven to preheat. These cookies bake better on a hot dish.To fermented flour, add eggs and stir.

gaps-legal-chocolate-chip-cookies-with-almond-flour-fermented-almond-flour-cookies-what-to-do-with-fermented-almond-flour

Add coconut oil to mixture. The coconut oil should be room temperature. If it is melted, you won’t have the right consistency.

Add the baking soda, vanilla, salt and honey (or date paste) to the mixture. Mix well.

gaps-legal-chocolate-chip-cookies-with-almond-flour-fermented-almond-flour-cookies-what-to-do-with-fermented-almond-flour

Add cacao nibs to dough mixture.

Remove baking sheet from oven. Line with parchment paper.

gaps-legal-chocolate-chip-cookies-with-almond-flour-fermented-almond-flour-cookies-what-to-do-with-fermented-almond-flour

Spoon approx. 1 tbsp size rounds of dough onto parchment paper.

Bake at 350 degrees for 10-15 minutes until edges are golden brown and cookies seem firm. Watch them closely after 8 minutes. They will go from raw to burnt quickly!

gaps-legal-chocolate-chip-cookies-with-almond-flour-fermented-almond-flour-cookies-what-to-do-with-fermented-almond-flour

Almond Flour Cookies with Cacao Nibs

Author:
prep time: cook time: total time:

ingredients:

  • 2 cups Almond Flour
  • ¼ cup Whey
  • 2 large eggs
  • 1/3 cup Room Temperature Coconut Oil
  • 1 tsp Baking Soda
  • ½ tsp Vanilla
  • ⅛ tsp Salt
  • ¼ cup Honey (or ⅓ cup date syrup)
  • ⅛-¼ cup Raw Cacao Nibs

instructions:

How to cook Almond Flour Cookies with Cacao Nibs

24 Hours in Advance
  1. Add whey to almond flour. Stir to moisten.
  2. Leave covered on counter for 24 hours to ferment.
The Next Day
  1. Preheat oven to 350. Add your baking sheet to the oven to preheat. These cookies bake better on a hot dish.To fermented flour, add eggs and stir.
  2. Add coconut oil to mixture. The coconut oil should be room temperature. If it is melted, you won’t have the right consistency.
  3. Add the baking soda, vanilla, salt and honey (or date paste) to the mixture. Mix well.
  4. Add cacao nibs to dough mixture.
  5. Remove baking sheet from oven. Line with parchment paper.
  6. Spoon approx. 1 tbsp size rounds of dough onto parchment paper.
  7. Bake at 350 degrees for 10-15 minutes until edges are golden brown and cookies seem firm. Watch them closely after 8 minutes. They will go from raw to burnt quickly!
Created using The Recipes Generator

Roasted Sweet Potatoes or Butternut Squash with Homemade Marshmallows

Roasted Sweet Potatoes with Marshmallows

Ingredients for Roasted Sweet Potatoes with Marshmallows

  • 2 Sweet Potatoes

  • 1 stick of butter or 1/2 cup lard

  • 1/8 tsp Cinnamon

  • 1/2 tsp Fresh Ginger

  • 1/4 tsp Salt

  • GAPS Marshmallows

Directions for Roasted Sweet Potatoes with Marshmallows

roasted-sweet-potatoes-how-to-make-sweet-potatoes-on-gaps-gaps-diet-thanksgiving-meals-holiday-meals-on-the-gaps-diet-what-do-i-eat-on-gaps

Preheat oven to 350°Rinse and peel potatoes.Slice potatoes into 1 in to 1.5 in rounds. The key is to cut the potatoes into similar thickness so that they will cook evenly.

Place the potato rounds snugly into a baking dish.

roasted-sweet-potatoes-how-to-make-sweet-potatoes-on-gaps-gaps-diet-thanksgiving-meals-holiday-meals-on-the-gaps-diet-what-do-i-eat-on-gaps

Peel a 1/2 in. piece of ginger. Finely mince the ginger.

roasted-sweet-potatoes-how-to-make-sweet-potatoes-on-gaps-gaps-diet-thanksgiving-meals-holiday-meals-on-the-gaps-diet-what-do-i-eat-on-gaps

In a small saucepan, melt  ½ cup of fat on low heat.

Once melted, add cinnamon, ginger, and salt. You may need more salt if you’re using a fat other than salted butter.

Stir to combine.

roasted-sweet-potatoes-how-to-make-sweet-potatoes-on-gaps-gaps-diet-thanksgiving-meals-holiday-meals-on-the-gaps-diet-what-do-i-eat-on-gaps

Once combined, pour the mixture over your potatoes.

Flip potatoes to evenly coat with butter mixture.

Cover with aluminum foil. Add parchment paper if the aluminum foil will touch your food.

roasted-sweet-potatoes-how-to-make-sweet-potatoes-on-gaps-gaps-diet-thanksgiving-meals-holiday-meals-on-the-gaps-diet-what-do-i-eat-on-gaps

Roast for 60 minutes or until fork tender.

Remove from oven and top with marshmallows (GAPS legal recipe here). If you’ve made marshmallows ahead of time, you can add the hardened squares. Or you can make the marshmallows while you wait for the sweet potatoes to cook and add a tablespoon dollup of marshmallow paste onto the top of the sweet potatoes. Since the potatoes are warm and these are not commercial marshmallows, they will run.

Serve warm!

Roasted Butternut Squash with Marshmallows

Ingredients for Roasted Butternut Squash with Marshmallows

  • 4 cups Cubed Butternut Squash

  • 1 stick of butter or 1/2 cup lard

  • 1/8 tsp Cinnamon

  • 1/2 tsp Fresh Ginger

  • 1/4 tsp Salt

  • GAPS Marshmallows

Directions for Roasted Butternut Squash with Marshmallows

roasted-butternut-squash-with-marshmellows-how-to-make-butternut-squash-with-marshmallows-on-gaps-gaps-diet-thanksgiving-meals-holiday-meals-on-the-gaps-diet-what-do-i-eat-on-gaps

Preheat oven to 350°

Cut and peel the squash. I’ve found it’s easier to cut the squash into two pieces for easier peeling by slicing at the bottom of the neck of the squash. Serrated knives can also make peeling the squash a little easier. The bottom of the squash has more seeds and is more difficult to cut.

IMG_17roasted-butternut-squash-with-marshmellows-how-to-make-butternut-squash-with-marshmallows-on-gaps-gaps-diet-thanksgiving-meals-holiday-meals-on-the-gaps-diet-what-do-i-eat-on-gaps91.jpg

Cut the squash into cubes. It’s best to keep the cubes of the squash roughly the same size for easy roasting.

IMG_1758.jpg

Peel a 1/2 in. piece of ginger. Finely mince the ginger.In a small saucepan, melt ½ cup of fat on low heat.

Once the fat has melted, add cinnamon, nutmeg, ginger, and salt to the pan and mix. You may need more salt if you’re using a fat other than salted butter.

Pour the melted butter mixture over the cubed squash. Stir to coat.Cover pan with a lid or aluminum foil. If foil will touch your food, cover with parchment paper first.

roasted-butternut-squash-with-marshmellows-how-to-make-butternut-squash-with-marshmallows-on-gaps-gaps-diet-thanksgiving-meals-holiday-meals-on-the-gaps-diet-what-do-i-eat-on-gaps

Roast for 45 minutes or until fork tender.

Remove from oven and top with marshmallows (GAPS legal recipe here). If you’ve made marshmallows ahead of time, you can add the hardened squares. Or you can make the marshmallows while you wait for the squash to cook and add dollups over the top.Since the butternut squash is warm and these are not commercial marshmallows, they will run and melt over the top.

Serve warm!


ROASTED SWEET POTATOES WITH MARSHMALLOWS

Author: Amy Mihaly, Be Well Clinic

Ingredients

  • 2 Sweet Potatoes
  • 1 stick of butter or 1/2 cup lard
  • 1/8 tsp Cinnamon
  • 1/2 tsp Fresh Ginger
  • 1/4 tsp Salt
  • GAPS Marshmallows

Instructions

  1. Preheat oven to 350°
  2. Rinse and peel potatoes.
  3. Slice potatoes into 1 in to 1.5 in rounds. The key is to cut the potatoes into similar thickness so that they will cook evenly.
  4. Place the potato rounds snugly into a baking dish.
  5. Peel a 1/2 in. piece of ginger. Finely mince the ginger.
  6. In a small saucepan, melt ½ cup of fat on low heat.
  7. Once melted, add cinnamon, ginger, and salt. You may need more salt if you’re using a fat other than salted butter.
  8. Stir to combine.
  9. Once combined, pour the mixture over your potatoes.
  10. Flip potatoes to evenly coat with butter mixture.
  11. Cover with aluminum foil. Add parchment paper if the aluminum foil will touch your food.
  12. Roast for 60 minutes or until fork tender.
  13. Remove from oven and top with marshmallows (GAPS legal recipe here). If you’ve made marshmallows ahead of time, you can add the hardened squares. Or you can make the marshmallows while you wait for the sweet potatoes to cook and add a tablespoon dollop of marshmallow paste onto the top of the sweet potatoes. Since the potatoes are warm and these are not commercial marshmallows, they will run.
  14. Serve warm!

ROASTED BUTTERNUT SQUASH WITH MARSHMALLOWS

Author: Amy Mihaly, Be Well Clinic

Ingredients

  • 4 cups Cubed Butternut Squash
  • 1 stick of butter or 1/2 cup lard
  • 1/8 tsp Cinnamon
  • 1/2 tsp Fresh Ginger
  • 1/4 tsp Salt
  • GAPS Marshmallows

Instructions

  1. Preheat oven to 350°
  2. Cut and peel the squash. I’ve found it’s easier to cut the squash into two pieces for easier peeling by slicing at the bottom of the neck of the squash. Serrated knives can also make peeling the squash a little easier. The bottom of the squash has more seeds and is more difficult to cut.
  3. Cut the squash into cubes. It’s best to keep the cubes of the squash roughly the same size for easy roasting.
  4. Peel a 1/2 in. piece of ginger. Finely mince the ginger.In a small saucepan, melt ½ cup of fat on low heat.
  5. Once the fat has melted, add cinnamon, nutmeg, ginger, and salt to the pan and mix. You may need more salt if you’re using a fat other than salted butter.
  6. Pour the melted butter mixture over the cubed squash. Stir to coat.Cover pan with a lid or aluminum foil. If foil will touch your food, cover with parchment paper first.
  7. Roast for 45 minutes or until fork tender.
  8. Remove from oven and top with marshmallows (GAPS legal recipe here). If you’ve made marshmallows ahead of time, you can add the hardened squares. Or you can make the marshmallows while you wait for the squash to cook and add dollups over the top.Since the butternut squash is warm and these are not commercial marshmallows, they will run and melt over the top.
  9. Serve warm!