Blog — Be Well Clinic

We’re Hiring Family Nurse Practitioners and more! Click here to learn more >>

desserts

GAPS Friendly Marshmallow Recipe

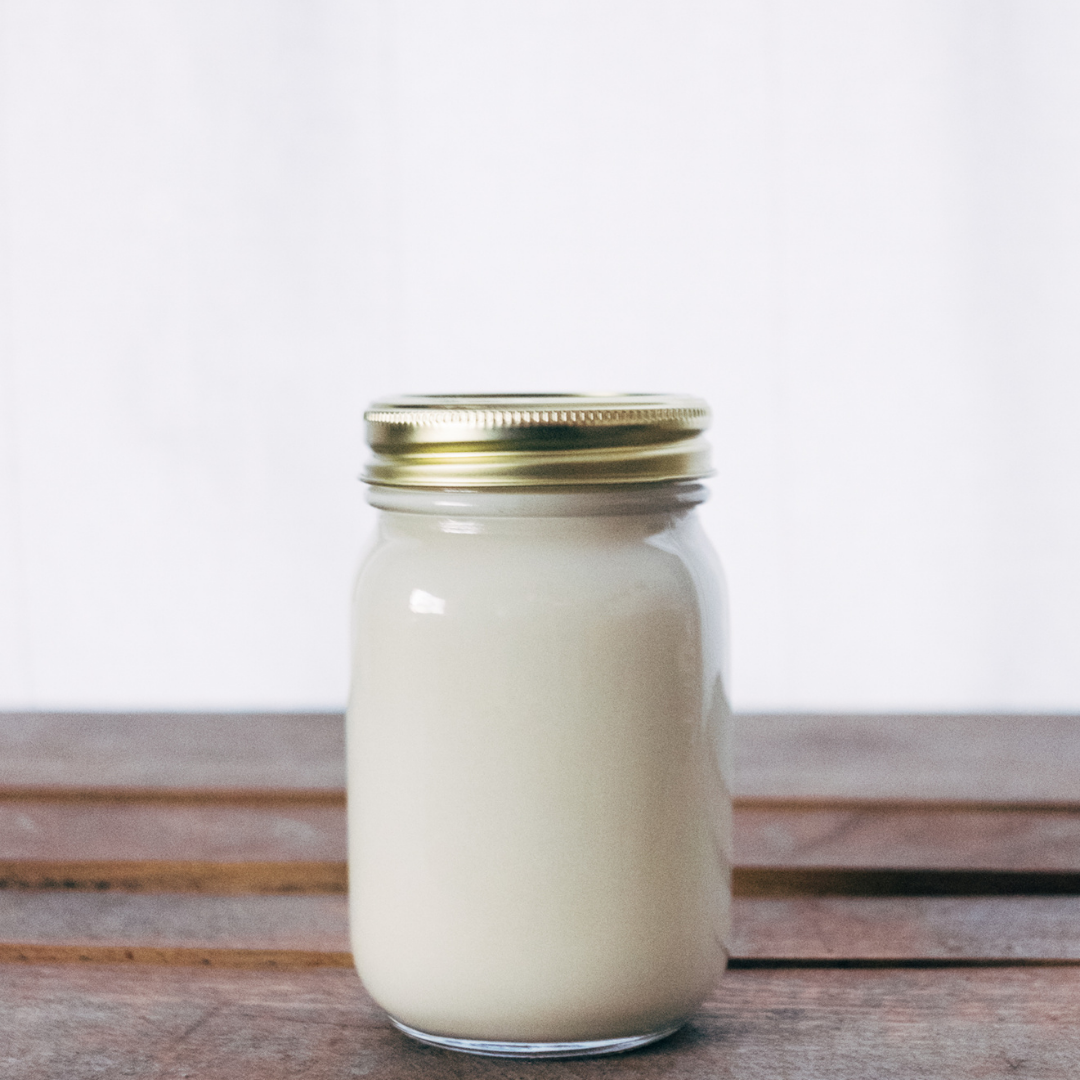
What if I told you that you could have a treat that is GAPS legal AND is good for you??? The GAPS marshmallow does just that. This simple treat is basically made up of gelatin, honey, water and optional vanilla. You can use this treat to get extra gelatin if you are needing that. Just reduce the amount of honey*. And they are simple to make!

GAPS Friendly MARSHMALLOWS Ingredients

  • 2 cups honey

  • 1 cup of filtered water

  • 2 tsp vanilla (optional)

  • 1/2 tsp sea salt

  • 6 TBS grass-fed beef gelatin

  • 1 cup of filtered water

Directions for making your own marshmallows

IMG_1823.jpg

Soften the Gelatin by adding gelatin to 1 cup of hot water. Stir and allow to sit. Keep it warm but not on the stove.

While gelatin is softening… Heat honey and water in a medium saucepan (medium to high heat), stirring frequently, until it reaches the soft ball candy stage (about 235°F).

IMG_1854.jpg

If you don’t have a thermometer, you can check by dripping the heated honey into a glass of cold water. When the candy forms a ball, it is ready!

When the honey has reached the soft ball stage, remove from heat.

Add the heated honey mixture to the softened gelatin in a large bowl.

Add vanilla (optional)

Do these steps quickly, you don’t want honey mixture to cool off too much!

IMG_1927.jpg

Whisk the mixture using an electric mixer or stand mixer for about 10 minutes. When the mixture is thick and looks like marshmallow paste, it’s done!

IMG_1987.jpg

Put the marshmallow paste in a greased and parchment paper-lined glass 9x11 dish and allow to cool and dry for 24-36 hrs. Then cut up and serve.

These marshmallows won't have exactly the same consistency (and won't roast over the fire quite the same) as store-bought marshmallows, but you can roast them for things like s'mores, and they are delicious! You can also use them to top roasted sweet potatoes or butternut squash or to top your homemade ice cream for a sundae or banana split.

Enjoy!

*As a general rule I don't like to heat honey, as some research has shown that heating it can turn the honey toxic. On the other hand, these marshmallows are a whole lot better than commercially available marshmallows, so I think as a treat they are great! I still recommend using raw honey for these recipes, you will be heating it much less than most non-raw honey is heated.


Homemade Marshmallows

Author:
prep time: cook time: total time:

ingredients:

  • 2 cups honey
  • 1 cup of filtered water
  • 2 tsp vanilla (optional)
  • 1/2 tsp sea salt
  • 6 TBS grass-fed beef gelatin
  • 1 cup of filtered water

instructions:

How to cook Homemade Marshmallows

  1. Soften the Gelatin by adding gelatin to 1 cup of hot water. Stir and allow to sit. Keep it warm but not on the stove.
  2. While gelatin is softening… Heat honey and water in a medium saucepan (medium to high heat), stirring frequently, until it reaches the soft ball candy stage (about 235°F).
  3. If you don’t have a thermometer, you can check by dripping the heated honey into a glass of cold water. When the candy forms a ball, it is ready!
  4. When the honey has reached the soft ball stage, remove from heat.
  5. Add the heated honey mixture to the softened gelatin in a large bowl.
  6. Add vanilla (optional)
  7. Do these steps quickly, you don’t want honey mixture to cool off too much!
  8. Whisk the mixture using an electric mixer or stand mixer for about 10 minutes. When the mixture is thick and looks like marshmallow paste, it’s done!
  9. Put the marshmallow paste in a greased and parchment paper-lined glass 9x11 dish and allow to cool and dry for 24-36 hrs. Then cut up and serve.
  10. These marshmallows won't have exactly the same consistency (and won't roast over the fire quite the same) as store-bought marshmallows, but you can roast them for things like s'mores, and they are delicious! You can also use them to top roasted sweet potatoes or butternut squash or to top your homemade ice cream for a sundae or banana split.
Created using The Recipes Generator

GAPS Friendly Strawberry Rhubarb Pie Recipe

Strawberry rhubarb pie has always been one of my favorites! In the past I have modified recipes to make a strawberry rhubarb dessert, but this year I decided I wanted to use my growing knowledge and skill in the kitchen and make a delicious GAPS-legal pie. My added challenges? I wanted to make it with a fermented almond crust, and use a different sweetener than honey. Finally, I wanted to have a modification that made not only GAPS legal, but dairy-free, nut-free and egg-free.

Overall, I would call the experiment a success. But to get that success I had to make more multiples of this recipe than I ever have for any previous recipe I've posted. Because of the crust. Not that my "tester" friends and family complained.

Turns out almond flour crust doesn't play nice with a wetter pie filling. Actually, the problem is that it plays too nice! It wants to combine with the filling; get up close and personal. Not what a pie crust is supposed to do. I did not fully overcome the pie-crust conundrum, but every recipe I made turned out delicious. So instead of chocking it up as a "failed recipe," I decided to share with you what I made... a good pie that happens to have a crust with boundary issues! And, of course, I will share the modified recipe for egg-free, nut-free, dairy-free strawberry rhubarb dessert. Keep reading!

Ingredients FOr Strawberry Rhubarb Pie

For the Pie Crust:

  • 2 1/2 cups almond flour

  • 1/4 cup whey (enough to moisten)

  • 1/2 cup room-temperature butter (or lard)

  • 1/2 tsp sea salt

For the Filling:

  • 3 1/2 cups rhubarb pieces

  • 2 1/2 cups sliced strawberries

  • 1/4 tsp salt

  • 1/2 cup date syrup (I use this one)

  • 2 TBS gelatin dissolved in 1/4 cup hot water

  • Optional: zest from 1/2 lemon

Directions for Strawberry Rhubarb Pie

IMG_1036.jpg

Mix almond flour and whey together. Cover and leave on the counter for 24 hours to ferment.

After 24 hours, this mixture keeps in the fridge for up to 1 week.

IMG_1054.jpg

To the fermented flour mixture, add butter or lard and sea salt. Mix well, getting all clumps out.

Then butter a pie pan well. Press the crust mixture into the pan and form a crust using your fingers.

IMG_1055.jpg

Bake at 400° for 5-8 minutes until a little dry and just turning brown.  

IMG_1019.jpg

Combine all ingredients for the filling. Let sit for 5-10 minutes until the juices increase.

IMG_1062.jpg

Add the filling to your pre-baked crust.

IMG_1136.jpg

Bake at 400° for 30-35 minutes until light brown.

Directions for Strawberry Rhubarb Dessert

A delicious nut free alternative served hot or at room temperature!

IMG_1074.jpg

Mix the filling the same, except add 2 additional TBS of gelatin and dissolve in 1/2 cup of hot water.

IMG_1081.jpg

Let the filling sit for 5-10 minutes to let the flavors mix.

Line muffin tins.

IMG_1108.jpg

Bake at 350° for 20-25 minutes until the tops are just browning.

IMG_1117.jpg

Serve warm or room temperature. These gooey treats are a bit messy, so eat with a spoon. They are delicious!  

Enjoy!


Strawberry Rhubarb Pie

Author:
prep time: cook time: total time:

ingredients:

For the Pie Crust:
  • 2 1/2 cups almond flour
  • 1/4 cup whey (enough to moisten)
  • 1/2 cup room-temperature butter (or lard)
  • 1/2 tsp sea salt
For the Filling:
  • 3 1/2 cups rhubarb pieces
  • 2 1/2 cups sliced strawberries
  • 1/4 tsp salt
  • 1/2 cup date syrup (I use this one)
  • 2 TBS gelatin dissolved in 1/4 cup hot water
  • Optional: zest from 1/2 lemon

instructions:

How to cook Strawberry Rhubarb Pie

24 Hours Before
  1. Mix almond flour and whey together. Cover and leave on the counter for 24 hours to ferment.
  2. After 24 hours, this mixture keeps in the fridge for up to 1 week.
The Next Day
  1. To the fermented flour mixture, add butter or lard and sea salt. Mix well, getting all clumps out.
  2. Then butter a pie pan well. Press the crust mixture into the pan and form a crust using your fingers.
  3. Bake at 400° for 5-8 minutes until a little dry and just turning brown.
  4. Combine all ingredients for the filling. Let sit for 5-10 minutes until the juices increase.
  5. Add the filling to your pre-baked crust.
  6. Bake at 400° for 30-35 minutes until light brown.
Created using The Recipes Generator

Strawberry Rhubarb Dessert

Author:
prep time: cook time: total time:

ingredients:

  • 3 1/2 cups rhubarb pieces
  • 2 1/2 cups sliced strawberries
  • 1/4 tsp salt
  • 1/2 cup date syrup (I use this one)
  • 2 TBS gelatin dissolved in 1/4 cup hot water
  • Optional: zest from 1/2 lemon

instructions:

How to cook Strawberry Rhubarb Dessert

  1. Mix the filling the same, except add 2 additional TBS of gelatin and dissolve in 1/2 cup of hot water.
  2. Let the filling sit for 5-10 minutes to let the flavors mix.
  3. Line muffin tins.
  4. Bake at 350° for 20-25 minutes until the tops are just browning.
  5. Serve warm or room temperature. These gooey treats are a bit messy, so eat with a spoon. They are delicious!
Created using The Recipes Generator

GAPS Legal Caramel Recipe

Several years ago I discovered that the mythical candy known as caramel was actually fairly simple to make. It merely involved heating a mixture of water and some type of sugar substance to a certain temperature to change the properties and create soft caramel syrup, chewy caramel candies, and even hard candy. This discovery has lead to many delicious treats and snacks!

And over the years I have become more and more comfortable with the caramel-making process. You can also make caramel more complicated by adding milk, coconut milk, or other ingredients. But I like the simplicity of honey, water and vanilla. And in this combination, it is full GAPS legal! Leave the vanilla out and it can be had in very small amounts starting on Intro Stage 4.

I would like to again point out that I do not like to heat honey on a regular basis. Ayurvedic tradition holds that heating honey over 104°F is unhealthy. The chemical changes that can be seen in heated honey* indicated that the honey becomes less healthy when it is heated over 140°F. For this reason I do not bake with honey. In fact, caramel and marshmallows are the only time I ever eat heated honey. But when caramel is needed, I'm sure that the homemade caramel I make with honey is much better than the commercially-made, sugar or corn-syrup based caramel alternative. Even so I recommend that if you do choose to eat heated honey, you do it in very small amounts, for special treats. And as soon as I discover another way to make caramel, I will let you know!

*It's also important to note that most honey commercially available has been heated to pasteurize it. For this reason it is very important to know your honey source, and make sure you are getting a raw honey.

Ok, back to caramel. You can easily look up the temperature ranges for your desired caramel range, from syrup to toffee. And depending on your purpose for the caramel, you should choose your temperature. The ingredients and procedure is exactly the same, only the end-point temperature varies.

Don't have a candy thermometer? No problem. You can check the stage of the candy by dripping a little caramel into a glass of clean, cold water. I prefer this way, and have learned at what "stage" I like by how the caramel behaves in the water.

Have fun with this! And don't be afraid to "mess up." The worst you can get (unless you let it burn) is a sugary treat in a different stage than you were hoping.

My final tip: Stir constantly and don't turn up the heat too high. Clean-up is a breeze. Just add hot water and the honey will clean itself off. But if you burn the sugar, you may never get it off the pan!

Now it's your turn!  

GAPS Legal Caramel

Ingredients:

  • 1/2 cup water

  • 1 cup honey

  • 1/2 - 1 tsp. vanilla (optional)

Directions:

In a saucepan, add water and honey.

Stir constantly on medium to high heat for 7-12 minutes.

As the mixture begins to form into a caramel sauce, slowly drip a few drops of the sauce into a cup of cool water to check for the beginnings of the 'softball stage' of candy making. Alternatively, use a candy thermometer. You're looking for temperatures between 116° & 120°.

Once sauce reaches this temperature, remove from heat.

Optional: add in vanilla.

Option 1: Caramel Candies

Prepare a glass dish with parchment paper.

Pour hot caramel sauce into the prepared pan.

Cool overnight.

Once cool, remove the parchment paper and caramel.

Cut the caramel into small square pieces.

Twirl or press the square pieces into candy shapes.

Option 2: Dipping Sauce

Simply serve the sauce warm once it reaches 116 - 120.

Dip in your favorite fruits!

Enjoy!


GAPS Legal Caramel

Author:
prep time: cook time: total time:

ingredients:

  • 1/2 cup water
  • 1 cup honey
  • 1/2 - 1 tsp. vanilla (optional)

instructions:

How to cook GAPS Legal Caramel

  1. In a saucepan, add water and honey. 
  2. Stir constantly on medium to high heat for 7-12 minutes. 
  3. As the mixture begins to form into a caramel sauce, slowly drip a few drops of the sauce into a cup of cool water to check for the beginnings of the 'softball stage' of candy making. Alternatively, use a candy thermometer. You're looking for temperatures between 116° & 120°. 
  4. Once sauce reaches this temperature, remove from heat. 
  5. Optional: add in vanilla.
Option 1: Caramel Candies
  1. Prepare a glass dish with parchment paper. 
  2. Pour hot caramel sauce into the prepared pan. 
  3. Cool overnight. 
  4. Once cool, remove the parchment paper and caramel. 
  5. Cut the caramel into small square pieces. 
  6. Twirl or press the square pieces into candy shapes.
Option 2: Dipping Sauce
  1. Simply serve the sauce warm once it reaches 116 - 120. 
  2. Dip in your favorite fruits! Enjoy!
Created using The Recipes Generator

Homemade Red Hots {GAPS Legal}

I have been getting more bold in the kitchen, and this December I decided to create alternative recipes featuring some of my favorite Christmas cookies. To enjoy.

I decided on my first cookie to make, Christmas Wreath cookies. And as I was running through my ingredients and working out substitutions I came to the decorative red hots.

And I was faced with a dilemma... could I create a red hot, or should I simply bite the bullet and just use traditional red hots. Maybe I could even find a healthy brand...

But my all-or-nothing attitude kicked in. If I was going to do this, I was going to do it right.

And that meant making red hots. From scratch. A quick search revealed that it was possible... in essence red hots are a sugar brittle flavored with spices, like cinnamon.

I knew how to make candy out of honey. This could work.

It did work. But I'll admit that when I make the Christmas Wreaths in the future I may use boughten red hots... and tell people they are just for decoration and to pick them off.  

Because making homemade red hots is a labor of love. There is no other way to put it. But being able to put healthy, three ingredient red hots on your Christmas cookies is amazing! And if you don't care if they are rounded into tiny, holly-berry decorative balls, then this is a really easy candy to make!  

GAPS Legal Homemade Red Hots / Cinnamon Hard Candy

Ingredients:

  • 1/2 cup water

  • 1 cup honey

  • 1/4-1/2 tsp cinnamon

  • 1 package natural red coloring (I used this one)

Directions:

IMG_9966.jpg

Combine the honey and water on the stovetop in a medium saucepan, stirring frequently.

You want to heat it at a temperature that is not too hot that it burns, but if it's too low it will take forever to get to temperature.

You're going to have to find your heat sweet spot. It should take between 5-10 minutes to get to soft ball stage, if it's taking longer, turn it up!

Soft ball stage occurs around 235°. If you don't have a thermometer available, you can drip some into a clear glass of cold water. It will form into a little ball upon hitting the water. For a little harder candy (I recommend this), let it go a minute or two after you hit the soft-ball stage.  

IMG_9967.jpg

After whisking thoroughly, pour the liquid onto some parchment paper to cool When it has cooled enough to touch (doesn't take very long), then use well buttered fingers to form tiny little balls

Not tolerating butter? Any fat will do—the key is to prevent sticking!

Roll those little suckers quickly... after a while the candy will get too hard to work with. You can reheat it to soften in up, but believe me, you will be ready to stop rolling balls. Better yet, recruit a friend (or two) to roll with you!

IMG_9975.jpg

Set the balls in a cold place (outside works for us right now!) When they are hard, gather them up and store them in a container in the fridge. This prevents the balls from clumping.   This candy could be made into any size (I only chose red hot size because of the Christmas wreath cookies)... or simply cooled and broken into pieces. It is a delicious treat!

Enjoy!

Disclosure: This post contains affiliate links. Your trust is important. I only recommend products I trust. 


Homemade Red Hots

Author:
prep time: cook time: total time:

ingredients:

  • 1/2 cup water
  • 1 cup honey
  • 1/4-1/2 tsp cinnamon
  • 1 package natural red coloring (I usedthis one)

instructions:

How to cook Homemade Red Hots

  1. Combine the honey and water on the stovetop in a medium saucepan, stirring frequently.
  2. You want to heat it at a temperature that is not too hot that it burns, but if it's too low it will take forever to get to temperature.
  3. You're going to have to find your heat sweet spot. It should take between 5-10 minutes to get to soft ball stage, if it's taking longer, turn it up!
  4. Soft ball stage occurs around 235°. If you don't have a thermometer available, you can drip some into a clear glass of cold water. It will form into a little ball upon hitting the water. For a little harder candy (I recommend this), let it go a minute or two after you hit the soft-ball stage.
  5. After whisking thoroughly, pour the liquid onto some parchment paper to cool When it has cooled enough to touch (doesn't take very long), then use well buttered fingers to form tiny little balls
  6. Not tolerating butter? Any fat will do—the key is to prevent sticking!
  7. Roll those little suckers quickly... after a while the candy will get too hard to work with. You can reheat it to soften in up, but believe me, you will be ready to stop rolling balls. Better yet, recruit a friend (or two) to roll with you!
  8. Set the balls in a cold place (outside works for us right now!) When they are hard, gather them up and store them in a container in the fridge. This prevents the balls from clumping. This candy could be made into any size (I only chose red hot size because of the Christmas wreath cookies)... or simply cooled and broken into pieces. It is a delicious treat!
  9. Enjoy!
Created using The Recipes Generator

Fruit Chutney for your Thanksgiving

Happy Thanksgiving!

One of the best things about November is the focus on being grateful and thankful. Everywhere you look there are posts and tweets showing gratitude. And we sure have a lot to be thankful for! Some things are so obvious we often forget to be thankful for. These are things like safe drinking water, warm houses, smart phones and electricity are so everyday for us that we forget how much we have.

Sometime this week, I encourage you to write a list of all the things you have to be thankful for. Don't feel silly including things like water, or your favorite pair of jeans. See how long you can make the list! Even if you don't feel like being thankful, I encourage you to do this exercise—gratitude changes our perception and experience of life, even if nothing is circumstantially different.

This is not to say that you don't have hard things in your life, or that you should pretend they aren't difficult. They are. Hard things are part of life and are very, very real. Remembering that there are good things in your life as well will help YOU through difficult situations.  

As you know, most of my posts (so far, at least) aren't recipes. But it's Thanksgiving! The start of holidays and delicious, rich, made-with-love food. Well this recipe is definitely delicious, rich and made-with-love!

I took the recipe out of Gut and Psychology Syndrome by Dr. Natasha Cambell-McBride. If you are following the GAPS diet this is legal on stage 5 or 6, when you are tolerating dried spices and peppercorns.

This recipe is very simple—chop and combine ingredients, simmer for a while, then store in jars. It would be a great recipe to make in a crockpot... you really could fix it and forget it! But simple doesn't mean plain. It's delicious and adds flavor to any meat you are eating. And I'm told, quite excellent with turkey!  

*This dairy-free, gluten-free, nut-free, sugar-free recipe would be great for gifts as well—ladle into pint jars and add a bow!

Fruit Chutney

Makes 3-4 quarts

Ingredients

  • 2 lbs dried dates (without stones, cut in half)

  • 2 lbs cooking apples (about 7 cups of pieces)

  • 1 lb plumbs (I used packaged prunes)

  • 3 medium onions (about 3 cups, finely diced)

  • 3 peppers (about 2 cups, finely diced)

  • 2 cups raw apple cider vinegar

  • 1-2 tsp whole peppercorns (freshly crushed)

  • 1-2 tsp aromatic seeds (I used cumin and dill)

  • 1 tsp cayenne pepper

  • 1-2 tsp natural salt

Directions:

Cut dates in half (and remove stones (seeds) if needed)

Slowly boil the dates in about 1 cup of water in a large pot until soft (about 10 minutes)

If you live in Colorado like me, and don't use a lid (also like me), you may need to add extra water during this process.

When the dates are soft, turn off heat and mash them with a potato masher—they don't have to be perfectly smooth, just mashed.  

While you were softening the dates, I hope you were furiously chopping! I completely underestimated the time it was going to take to chop everything I needed for this recipe. If you want the process to go smoother, I would recommend chopping everything at the beginning. Then as soon as the dates are soft you can add the rest, stir occasionally, and walk away!

The directions from Dr. Natasha are:

Add everything else to the dates and simmer 1-1/2 hours on very low heat, stirring occasionally.

If you are like me and work better with a little note of panic, then by all means, chop furiously and add things as you chop. For all you step-by-steppers like me, below are pictures to show what I added.

Sterilize the jars.

Dr. Natasha recommends doing this in an oven. I had never done this but it seemed to work great! Place cold jars in a cold oven. Heat the oven to 250°F, then leave it at that temperature for 40 minutes to sterilize the jars. Pull the jars out of the oven one-by-one as you are ready to fill them so they stay hot. Use oven mitts!

Ladle the hot chutney into the jars.

A jar funnel is a lifesaver here!

I left just a little room for air, much less than my fermenting self wanted, but no jars exploded so it must be okay!

Wipe off any chutney on the rim of the jar. Then immediately seal the jar, tightening the lid.

Again, use an oven mitt—the jars are hot!  

Place the jar on the counter, some distance between them.

It's better to not move the jars until they are cool, so place them where you will not need to move them for many hours, overnight is better.

When cool, place the jars into the refrigerator.

This is not a fermented food, so it does require refrigeration.  

Serve with meats and fish. Good cold or warm.

It's delicious! I made this for our Thanksgiving feast in a few days, but tried it out with some chicken today. I enjoyed it thoroughly! I hope you enjoy it as well!

Onward!


Fruit Chutney

Author:
prep time: cook time: total time:

ingredients:

  • 2 lbs dried dates (without stones, cut in half)
  • 2 lbs cooking apples (about 7 cups of pieces)
  • 1 lb plumbs (I used packaged prunes)
  • 3 medium onions (about 3 cups, finely diced)
  • 3 peppers (about 2 cups, finely diced)
  • 2 cups raw apple cider vinegar
  • 1-2 tsp whole peppercorns (freshly crushed)
  • 1-2 tsp aromatic seeds (I used cumin and dill)
  • 1 tsp cayenne pepper
  • 1-2 tsp natural salt

instructions:

How to cook Fruit Chutney

  1. Cut dates in half (and remove stones (seeds) if needed)
  2. Slowly boil the dates in about 1 cup of water in a large pot until soft (about 10 minutes)
  3. If you live in Colorado like me, and don't use a lid (also like me), you may need to add extra water during this process.
  4. When the dates are soft, turn off heat and mash them with a potato masher—they don't have to be perfectly smooth, just mashed.
  5. While you were softening the dates, I hope you were furiously chopping! I completely underestimated the time it was going to take to chop everything I needed for this recipe. If you want the process to go smoother, I would recommend chopping everything at the beginning. Then as soon as the dates are soft you can add the rest, stir occasionally, and walk away!
  6. The directions from Dr. Natasha are:
  7. Add everything else to the dates and simmer 1-1/2 hours on very low heat, stirring occasionally.
  8. If you are like me and work better with a little note of panic, then by all means, chop furiously and add things as you chop. For all you step-by-steppers like me, below are pictures to show what I added.
  9. Sterilize the jars.
  10. Dr. Natasha recommends doing this in an oven. I had never done this but it seemed to work great! Place cold jars in a cold oven. Heat the oven to 250°F, then leave it at that temperature for 40 minutes to sterilize the jars. Pull the jars out of the oven one-by-one as you are ready to fill them so they stay hot. Use oven mitts!
  11. Ladle the hot chutney into the jars.
  12. A jar funnel is a lifesaver here!
  13. I left just a little room for air, much less than my fermenting self wanted, but no jars exploded so it must be okay!
  14. Wipe off any chutney on the rim of the jar. Then immediately seal the jar, tightening the lid.
  15. Again, use an oven mitt—the jars are hot!
  16. Place the jar on the counter, some distance between them.
  17. It's better to not move the jars until they are cool, so place them where you will not need to move them for many hours, overnight is better.
  18. When cool, place the jars into the refrigerator.
  19. This is not a fermented food, so it does require refrigeration.
  20. Serve with meats and fish. Good cold or warm.
Created using The Recipes Generator

Raw Milk Chocolate Pudding

Some days don't you just miss pudding cups? I know I do.

Now you can make your own! The most frequent comment about this pudding (besides "yum", "delicious", and "mmm...") is that it tastes just like a chocolate pudding cup! This simple recipe is a wonderful treat for you and your family, and because it's made of real food ingredients it can be enjoyed without guilt.

Of course this, like all sweet items, should be enjoyed in moderation and not as a meal replacement. And if you are following a healing protocol, you will need to wait until significant gut healing has occurred before enjoying this.

A note for those on the GAPS diet: While this is technically (advanced) full GAPS legal, not everyone is able to tolerate raw milk, cream or cocoa. Listen to your body and only eat this when it is a good choice for you.

Enjoy this video, then scroll down for the recipe. We hope you enjoy it!

Raw Milk Chocolate Pudding

Recipe by Erin Goodin

Warm on stovetop (medium heat)

Heat to 95°F to activate the gelatin, then remove from heat

In a blender, combine

  • 2 cups raw milk

  • 1/2 cup raw honey

  • 3 egg yolks

  • 1/4 cup cocoa powder

  • heated mixture

  • 1 tsp vanilla extract

Blend until combined

Pour into desired container(s)

Chill for 12-24 hrs in the fridge

Whipped Cream Topping

  • 2 cups cream

  • 2 TBS honey

Whip until stiff, then use to top the pudding

Enjoy!

Affiliate disclosure: There are affiliate links contained in the post. The small commission I receive helps to keep this blog going. I do not recommend products that I do not trust.


Raw Milk Chocolate Pudding

Author:
prep time: cook time: total time:

ingredients:

Raw Milk Chocolate Pudding
Whipped Topping
  • 2 cups cream
  • 2 TBS honey

instructions:

How to cook Raw Milk Chocolate Pudding

  1. Warm on stovetop (medium heat): 1 cup raw milk, 1 TBS gelatin (brand I recommend), 1/2 tsp sea salt (brands I recommend),  1 TBS butter.
  2. Heat to 95°F to activate the gelatin, then remove from heat
  3. In a blender, combine: 2 cups raw milk, 1/2 cup raw honey, 3 egg yolks, 1/4 cup cocoa powder, heated mixture, 1 tsp vanilla extract.
  4. Blend until combined
  5. Pour into desired container(s)
  6. Chill for 12-24 hrs in the fridge
  7. Whipped Cream Topping: 2 cups cream,  2 TBS honey.
  8. Whip until stiff, then use to top the pudding
  9. Enjoy!

NOTES:

Recipe by Erin Goodin
Created using The Recipes Generator

Decadent Hot Chocolate

Winter is here in full force... the weather is cold, snow storms are common, and the evenings are dark and long. It's a great time to stay in, cuddle up in a blanket, and drink hot chocolate.

"Hot chocolate?" you ask. "I'm on (GAPS, WAPF, SCD, Paleo) and not eating processed food—how in the world can I drink hot chocolate?" Well, I'm about to tell you. I have also been without hot chocolate for a long time, but inspiration struck and I can now present you with an amazing hot chocolate recipe.

No really, it's amazing. Rich, thick, decadent, filling, indulging, chocolaty goodness.   

It even passed the skeptical, hot chocolate-loving teenage boy test.  

Which is a big deal.   And it's a nutrient-dense food!  

Are you ready?

Without further ado, here is the...

Decadent Hot Chocolate Recipe

*Legal on Paleo, SCD, WAPF, and Full GAPS (if tolerating milk and cocoa powder)

—Makes 2 large or 3 medium mugs of hot cocoa—

Ingredients:

  • 3 cups Milk (Raw)

  • 2 Eggs

  • 6-8 TBS Honey

  • 4 tsp Cocoa Powder

  • 1/8 tsp Sea Salt

  • 1/4 tsp Vanilla

Directions for raw milk hot chocolate:

Over low-medium heat, mix:

  • 2 cups milk

  • 2 eggs

  • 6-8 TBS honey

  • 1/8 tsp salt

IMG_0914.JPG

Stir or whisk constantly:

Whisk over low to medium heat for about 5-8 minutes, until the mixture coats the back of a spoon (if you have ever made ice cream, this is the same process as making the base)

IMG_0924.JPG

Remove From Heat:

When the spoon is coated, remove from the heat (or you will get milky scrambled eggs!)

Whisk in:

  • 1/4 tsp Vanilla

  • 4 tsp Cocoa powder

IMG_0939.JPG

(in this picture we did this in a cup because we were experimenting... you should add these ingredients to the saucepan—it's much easier)

Whisk until frothy

Pour into mugs, filling each mug about 2/3 full

Finish filling the mugs by carefully pouring plain milk (warmed or cool) down the inside of the mug (so as not to disturb the foam on top)

Add a few GAPS marshmallows if desired

For an added option (adults only!) I recommend adding a little rum

Serve and enjoy!

...you can clean up the mess later..


Raw Milk Hot Chocolate

Author:
prep time: cook time: total time:

ingredients:

  • 3 cups Milk (Raw)
  • 2 Eggs
  • 6-8 TBS Honey
  • 4 tsp Cocoa Powder
  • 1/8 tsp Sea Salt
  • 1/4 tsp Vanilla

instructions:

How to cook Raw Milk Hot Chocolate

  1. Over low-medium heat, mix:  cups milk, 2 eggs, 6-8 TBS honey, 1/8 tsp salt.
  2. Whisk over low to medium heat for about 5-8 minutes, until the mixture coats the back of a spoon (if you have ever made ice cream, this is the same process as making the base)
  3. When the spoon is coated, remove from the heat (or you will get milky scrambled eggs!)
  4. Whisk in: 1/4 tsp Vanilla, 4 tsp Cocoa powder
  5. (in this picture we did this in a cup because we were experimenting... you should add these ingredients to the saucepan—it's much easier)
  6. Whisk until frothy
  7. Pour into mugs, filling each mug about 2/3 full
  8. Finish filling the mugs by carefully pouring plain milk (warmed or cool) down the inside of the mug (so as not to disturb the foam on top)
  9. Add a few GAPS marshmallows if desired
  10. For an added option (adults only!) I recommend adding a little rum
  11. Serve and enjoy!
Created using The Recipes Generator