Basics of GAPS

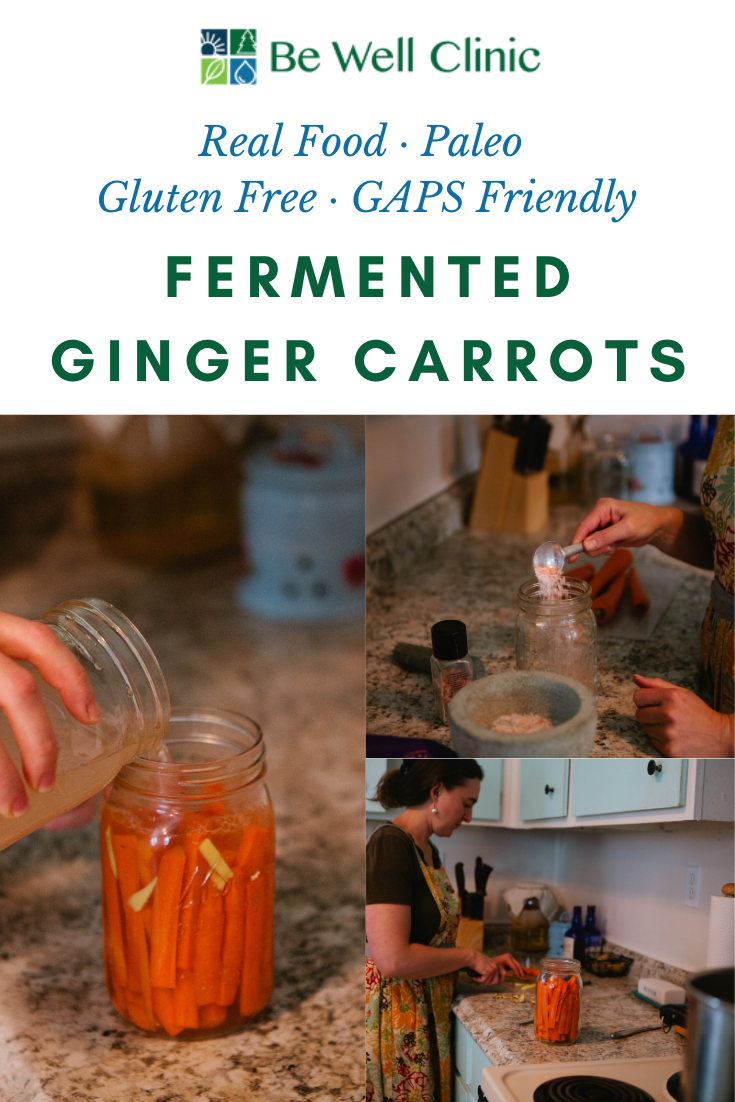
Fermented Ginger Carrots

These are a kid favorite!  This recipe is based on the Nourishing Traditions Cookbook but I’ve found most kids prefer carrots sliced rather than grated.

If you’re new to fermenting, read this section first! Otherwise, skip down to the recipe. 

Jars: I prefer using wide mouth jars for almost everything because small mouth jars are difficult to clean and access. There’s no need to sterilize jars for fermenting. If you clean your jars in your dishwasher, I recommend a quick rinse under hot water to remove any dishwasher soap residue.

Lids: Start with clean jar lids. You can reuse them as long as they are not very broken down or rusted. You can reuse lids from previous projects like water bath canning or other ferments as long as it is not rusty or the plastic is not visibly broken down.

Water: Be sure to use filtered water. The chlorine added to tap water kills microbial creatures so if you use it in your ferments, it will kill the good bacteria that we are trying to grow in our fermented food.

When you are jar fermenting, you need to have a tight seal with the metal lids but after you open a ferment, you can switch to a white plastic lid which will also save your metal lids from rusting and breaking down. 

I have found that simple tight lids work best, I do not use any gas releasing lids as I find them unnecessary and even detrimental. 

This is a super simple ferment to make and because these carrots taste almost fresh, it’s a great option for getting ferments into your children.  

I have just started creating a brine in a separate jar from the ferments. I really like it because it makes fermenting so much faster. All I have to do is pack my jars and then pour my liquid over it. This is especially great if I’m doing multiple types of ferment mixtures or vegetables.

Fun fact about carrots: if you’re growing your own carrots, leave them in the ground until after the first frost. They become sweeter. 

Ingredients

  • 3-4 tbsp Sea Salt (I find in Colorado, 3 is plenty!)

  • 5-6 Carrots

  • 2 inches Fresh Ginger

Directions

IMG_0481.jpg

Create a brine for the carrots. Fill a quart size jar with filtered water. Add salt. Stir. 

Slice carrots into jar sized spears. Cut off the ends. 

IMG_0501.jpg

Add carrots to jars. Shake them to make sure they fit completely. Leave 1 inch head room. 

Peel ginger with the back of a spoon or a knife. You can grate it or slice it. I prefer sliced because I don’t like the spice of ginger. 

IMG_0505.jpg

Wedge the slices of ginger in between the carrots so they don’t float.

Pour the brine of the carrots to the shoulder of the jar.

IMG_0525.jpg

Make sure all the carrots and ginger are under the water. 

Wipe the edge of the jar with a wet paper towel. 

IMG_0534.jpg

Put a lid on the jar and seal to hand tightness. You’re not securing it for take off!

Let set on the counter for a week because of the thickness of the carrots. You can always ferment longer or shorter. As long as there is pressure on the metal lid for at least 24 hours, I consider that fermented. The longer you ferment, the softer they will get. Because carrots are so hard, it will take a long time to get them too soft. If they do get too soft, you can simply cook with them!

I do not recommend burping ferments unless it appears that the jar lid is going to break. In general, I find this is only a problem when you have over filled your jars or when you are making garlic.

After a week, move the ferment to “cold storage.” This can be defined as the fridge, a cool place in your basement or a dark pantry. The lower the temperature, the slower the fermentation action will continue to happen. When you’re ready to eat it, switch the lid to a plastic lid. Wash and dry the metal lid to be used again.


FermentedGingerCarrots.png

Fermented Ginger Carrots

Author: The Be Well Clinic

Ingredients

  • 4 tbsp Sea Salt (I find in Colorado, 3 is plenty!)
  • 6 Carrots
  • 2 inches Fresh Ginger

Instructions

  1. Create a brine for the carrots. Fill a quart size jar with filtered water. Add salt. Stir.
  2. Slice carrots into jar sized spears. Cut off the ends.
  3. Add carrots to jars. Shake them to make sure they fit completely. Leave 1 inch head room.
  4. Peel ginger with the back of a spoon or a knife. You can grate it or slice it. I prefer sliced because I don’t like the spice of ginger.
  5. Wedge the slices of ginger in between the carrots so they don’t float.
  6. Pour the brine of the carrots to the shoulder of the jar.
  7. Make sure all the carrots and ginger are under the water.
  8. Wipe the edge of the jar with a wet paper towel.
  9. Put a lid on the jar and seal to hand tightness. You’re not securing it for take off!
  10. Let set on the counter for a week because of the thickness of the carrots. You can always ferment longer or shorter. As long as there is pressure on the metal lid for at least 24 hours, I consider that fermented. The longer you ferment, the softer they will get. Because carrots are so hard, it will take a long time to get them too soft. If they do get too soft, you can simply cook with them!
  11. I do not recommend burping ferments unless it appears that the jar lid is going to break. In general, I find this is only a problem when you have over filled your jars or when you are making garlic.
  12. After a week, move the ferment to “cold storage.” This can be defined as the fridge, a cool place in your basement or a dark pantry. The lower the temperature, the slower the fermentation action will continue to happen. When you’re ready to eat it, switch the lid to a plastic lid. Wash and dry the metal lid to be used again
Created using The Recipes Generator

GAPS Carrot Raisin Dessert Salad

This is a quick and easy recipe to whip up. It’s a GAPS Legal dish but is sure to be a crowd pleaser even for those who aren’t on GAPS.

While technically a salad, this is a very sweet dish. I recommend consuming it at the end of a meal as a treat. The amount of honey you add will depend on your own personal tastes and how sweet your carrots are.

This feeds approximately 4 people. It’s also great to bring to parties and something that’s so easy and quick to prepare. It’s also dairy free!

Ingredients for Carrot Raisin Dessert Salad:

  • 3-4 large carrots

  • ½ cup Raisins

  • 1- 2 tbsp Honey

Directions for Carrot Raisin Dessert Salad:

gaps-legal-carrot-salad-dessert-salad-dessert-on-gaps-sweet-food-on-gaps-gaps-party-dishes-gaps-diet-recipes

Finely shred carrots in a food processor.

gaps-legal-carrot-salad-dessert-salad-dessert-on-gaps-sweet-food-on-gaps-gaps-party-dishes-gaps-diet-recipes

Add carrots and raisins to a bowl.

gaps-legal-carrot-salad-dessert-salad-dessert-on-gaps-sweet-food-on-gaps-gaps-party-dishes-gaps-diet-recipes

Add in 1-2 tbsp of honey, depending on how sweet you want it to be. Toss to coat carrots well with honey.

Serve and enjoy!


GapsLegalCarrotRaisinSaladDessert.png

GAPS Carrot Raisin Dessert Salad

Author:
Prep time: Cook time: Total time:

Ingredients:

  • 3-4 large carrots
  • ½ cup Raisins
  • 1- 2 tbsp Honey

Instructions:

How to cook GAPS Carrot Raisin Dessert Salad

  1. Finely shred carrots in a food processor.
  2. Add carrots and raisins to a bowl.
  3. Add in 1-2 tbsp of honey, depending on how sweet you want it to be. Toss to coat carrots well with honey.
  4. Serve and enjoy!
Created using The Recipes Generator

Egg Free, Dairy Free Liver Meatballs

Liver is an amazing superfood! It contains lots of vitamins and minerals, including zinc, iron, B vitamins, A vitamins, and folate. In our modern world, all of our livers are well taxed because of our exposure to chemicals. Anytime we know we need to support a particular organ, one of the best ways to do that is to consume the organ meat of the organ you’re trying to support.

You can spice your meatballs with anything you want but think of strong flavors. You want to neutralize the flavor of the liver.  You can also add any additional vegetables that you know your family likes. If you add additional vegetables like zucchini, eggplant or peppers and are finding the consistency of the meatball mixture to not be very sticky, you may want to add an egg to help bind everything together. Otherwise, these meatballs are egg free and dairy free!

This is a recipe that I recommend to a lot of moms! It’s a great way to help your kids eat a little bit of liver every day, which is the best way to eat liver. This recipe makes a lot of meatballs so you can freeze them and take out a few at a time to have for lunch or dinner.

Makes 27-30 Meatballs

Ingredients for Liver Meatballs:

  • 2 lb ground beef

  • ½ lb beef liver

  • 2 carrots, about 1 cup grated

  • ⅓ large white onion, about ⅔ a cup grated

  • 6 large cloves of Garlic

  • Oregano, 1 bunch Fresh or 1 tbsp Dried

  • Basil, 1 bunch Fresh or 1 tbsp Dried

  • ¼ - ½ tsp Pepper

  • 2 tsp Salt

  • 1 tbsp lard

Directions for Liver Meatballs:

IMG_6158.jpg

For milder tasting liver, soak it in some kind of acid. Cover the liver in filtered water and then add the juice of one lemon or 1-2 tablespoons of apple cider vinegar. Leave to soak for 30 minutes. Be sure not to soak it for too long. The acid will break down the liver and start it “cooking” prematurely.

Preheat your oven to 375.

IMG_6175.jpg

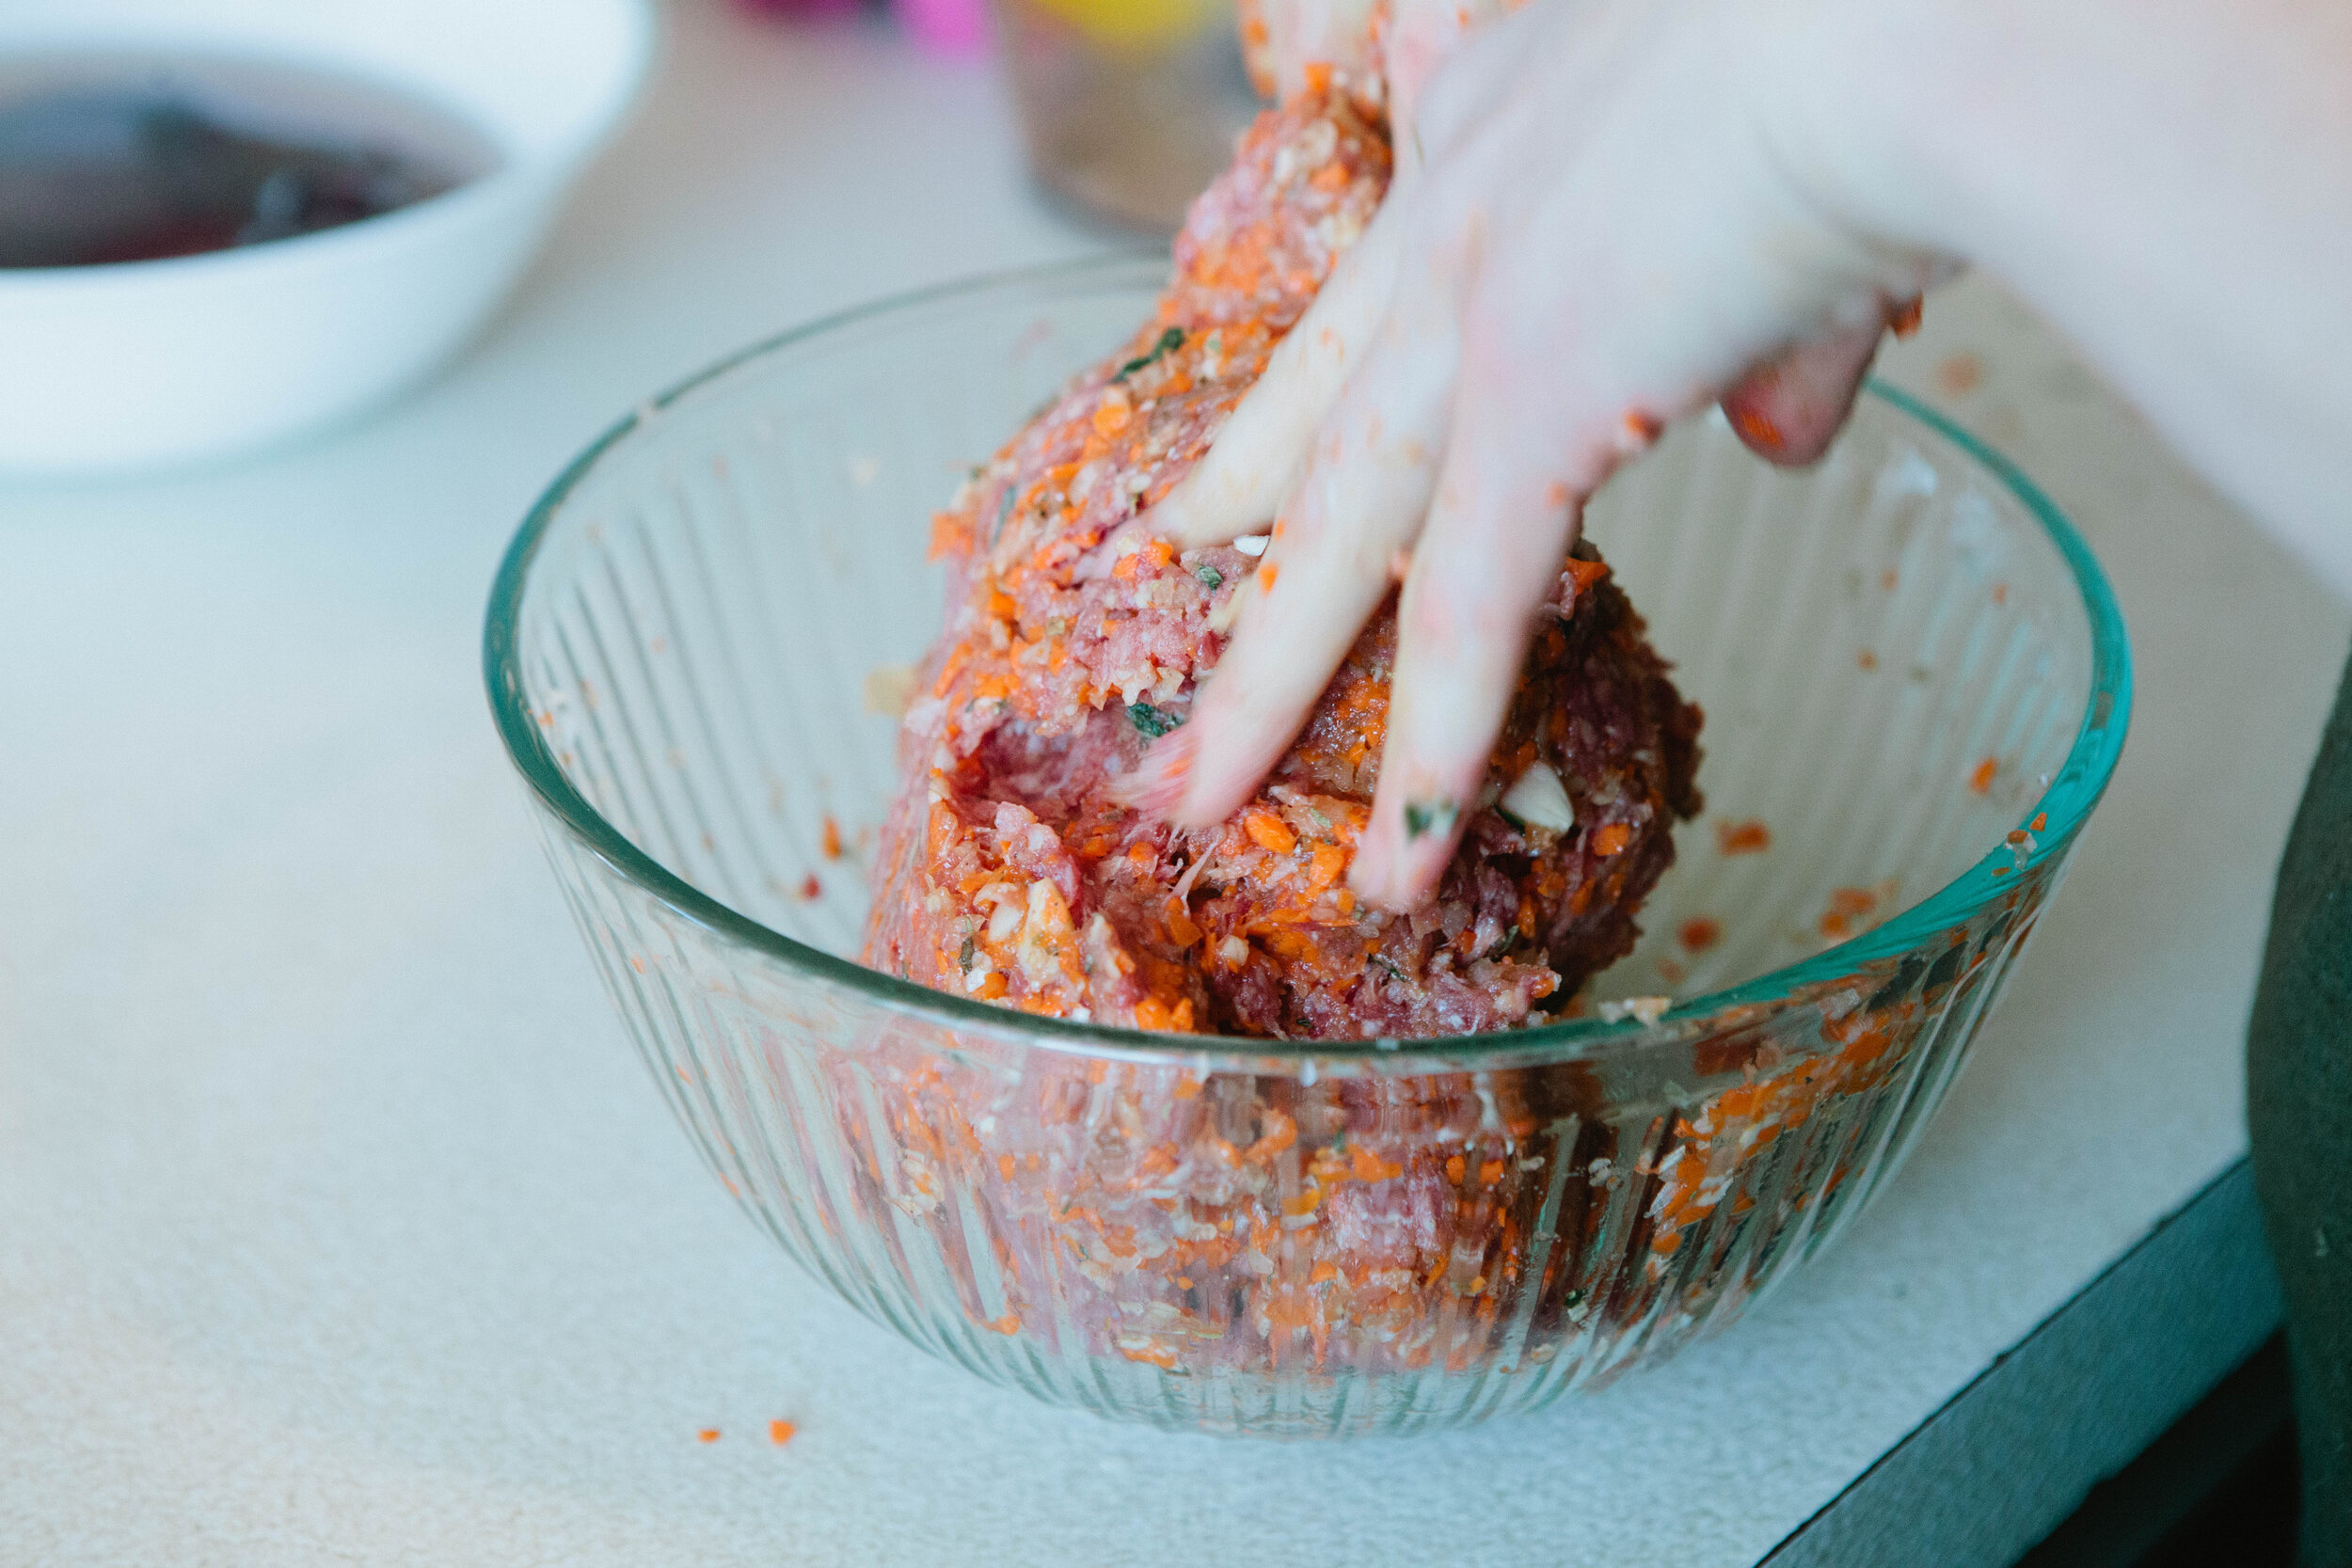
Grate your carrot, onion and garlic into very fine pieces. Add to a large bowl with ground beef. Add in oregano, basil and salt and pepper. Mix with your hands. 

IMG_6189.jpg

Place your liver into a food processor once it has soaked. Pulse until smooth. Add to the bowl with the beef, vegetables and spices and mix again.

IMG_6214.jpg

Spread lard onto the bottom of a glass oven safe casserole dish. 

IMG_6224.jpg

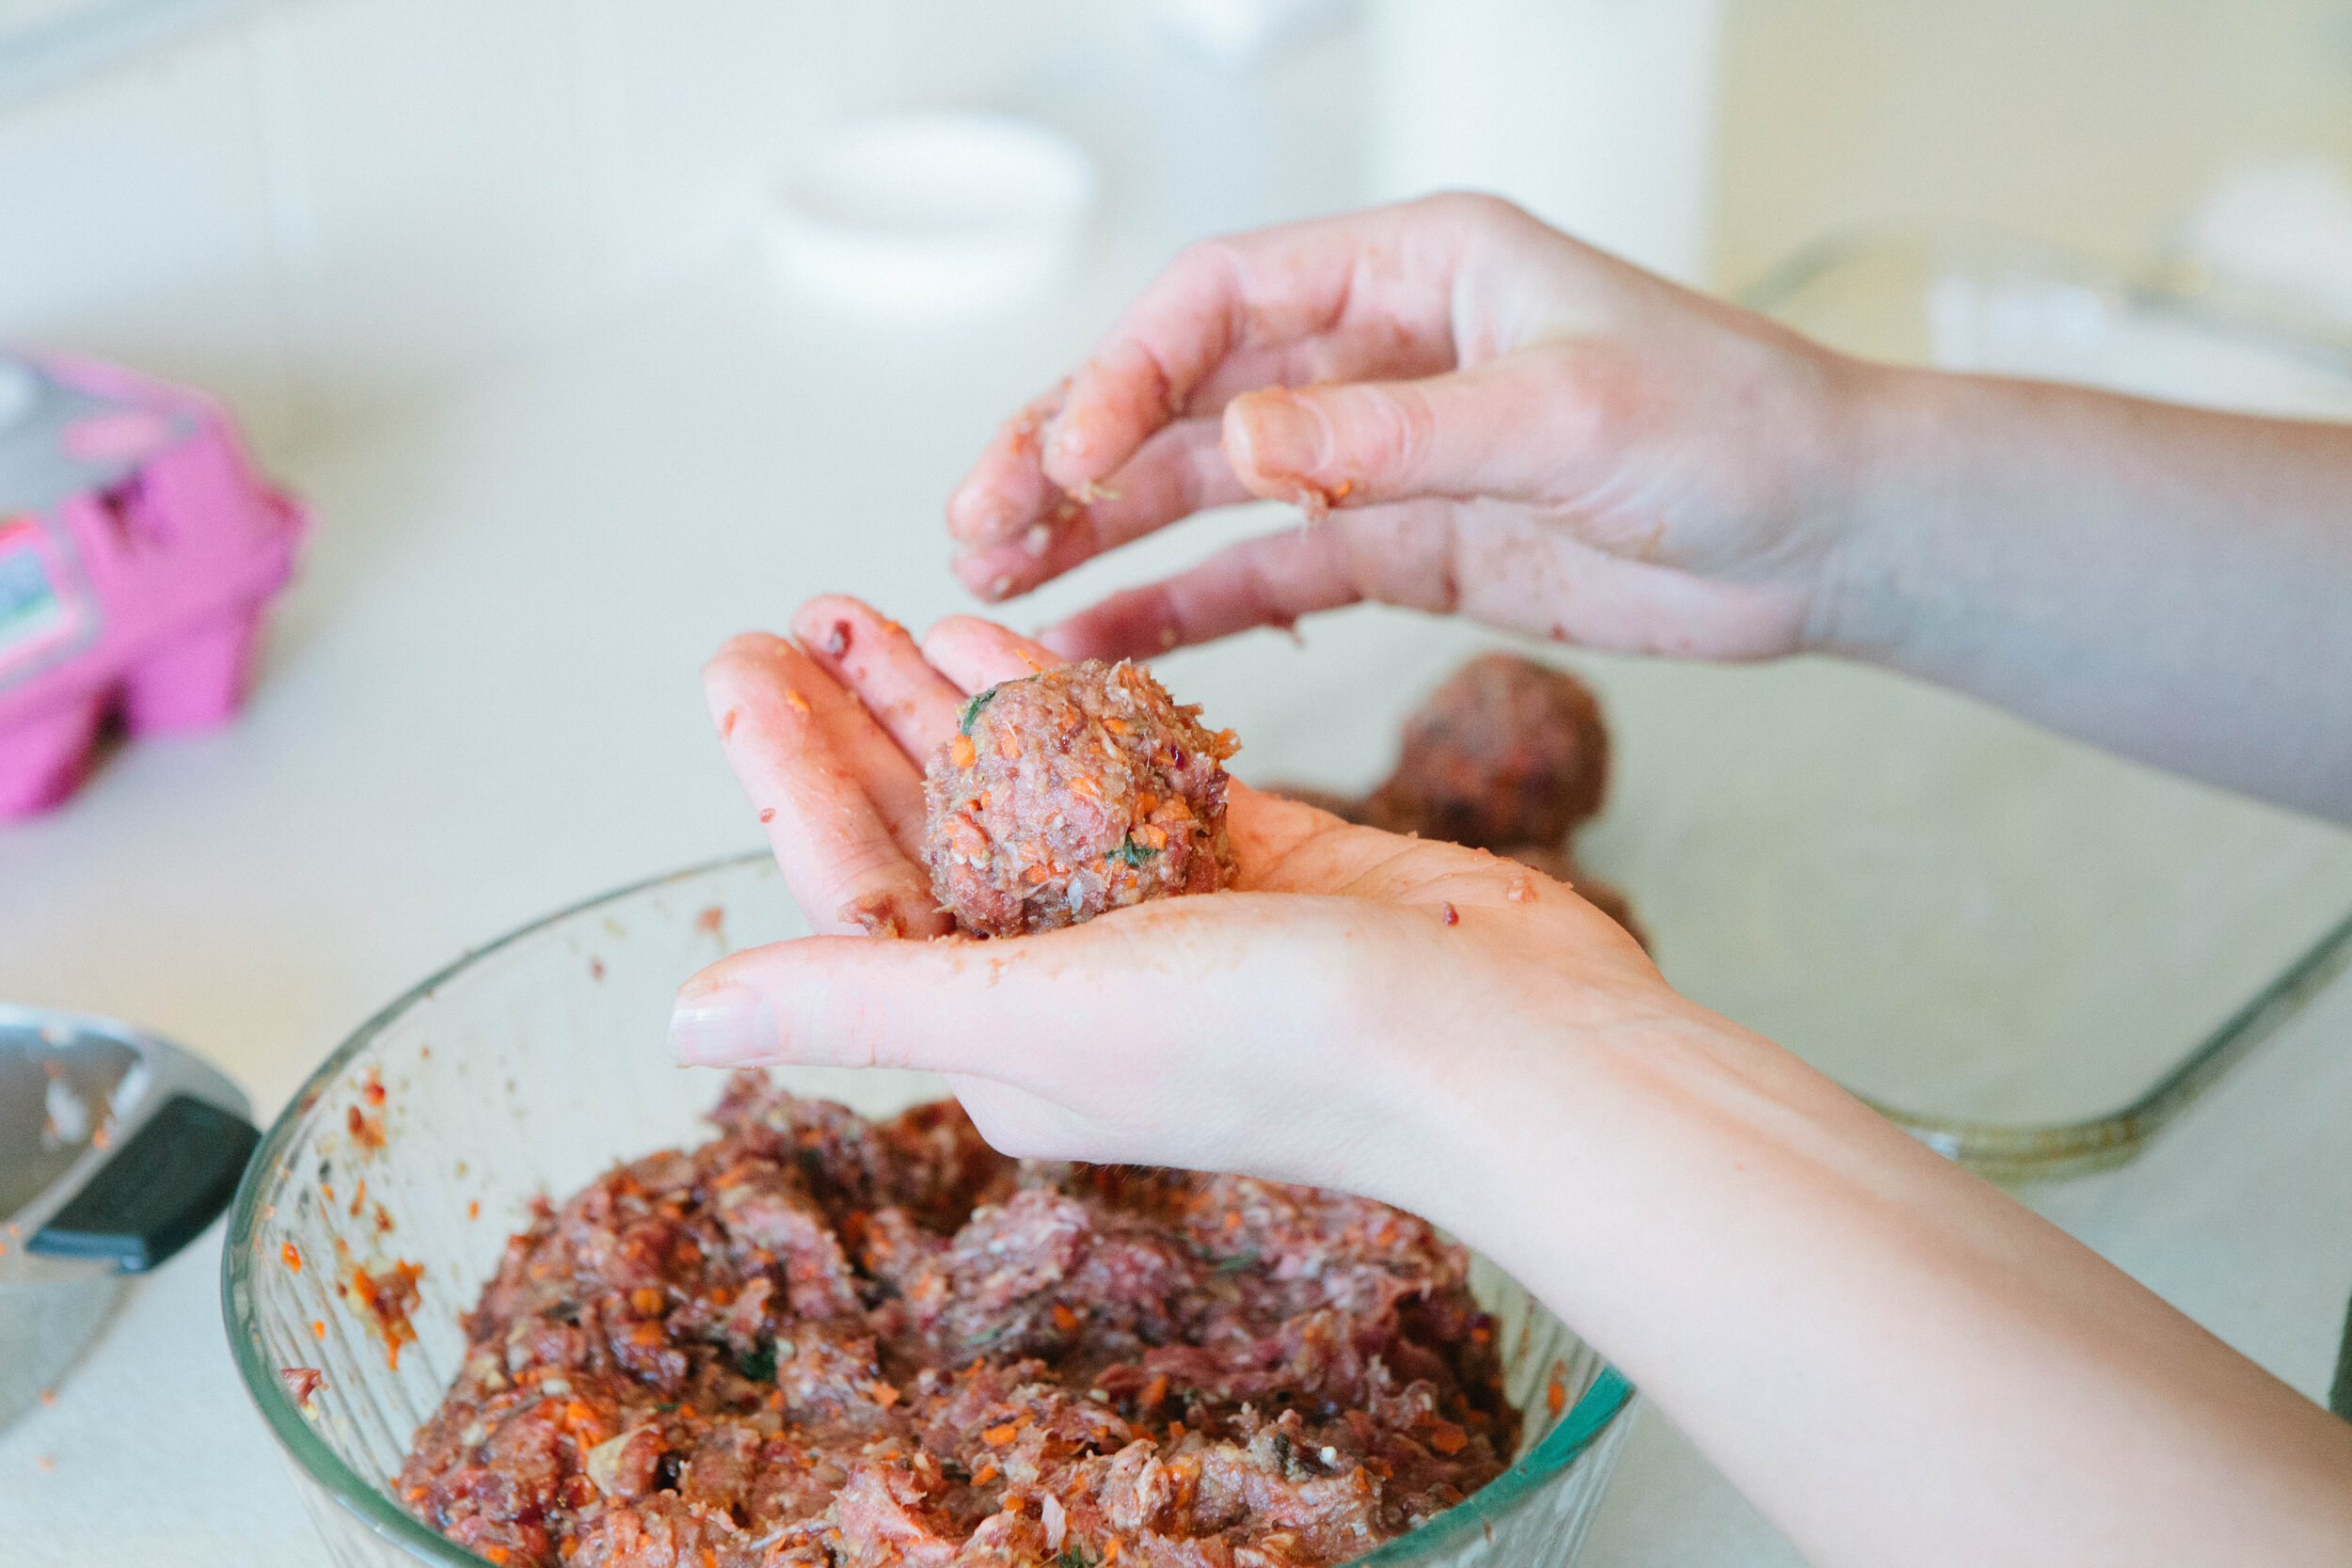
Take a small handful of meat at a time and roll into a meatball. Continue to roll meatballs until you have filled your casserole dish. Keep consistency in the size and shape of your meatballs to ensure even cooking time.

IMG_6229.jpg

Line meatballs, leaving some space between them.

Bake for 45 minutes.

IMG_6353.jpg

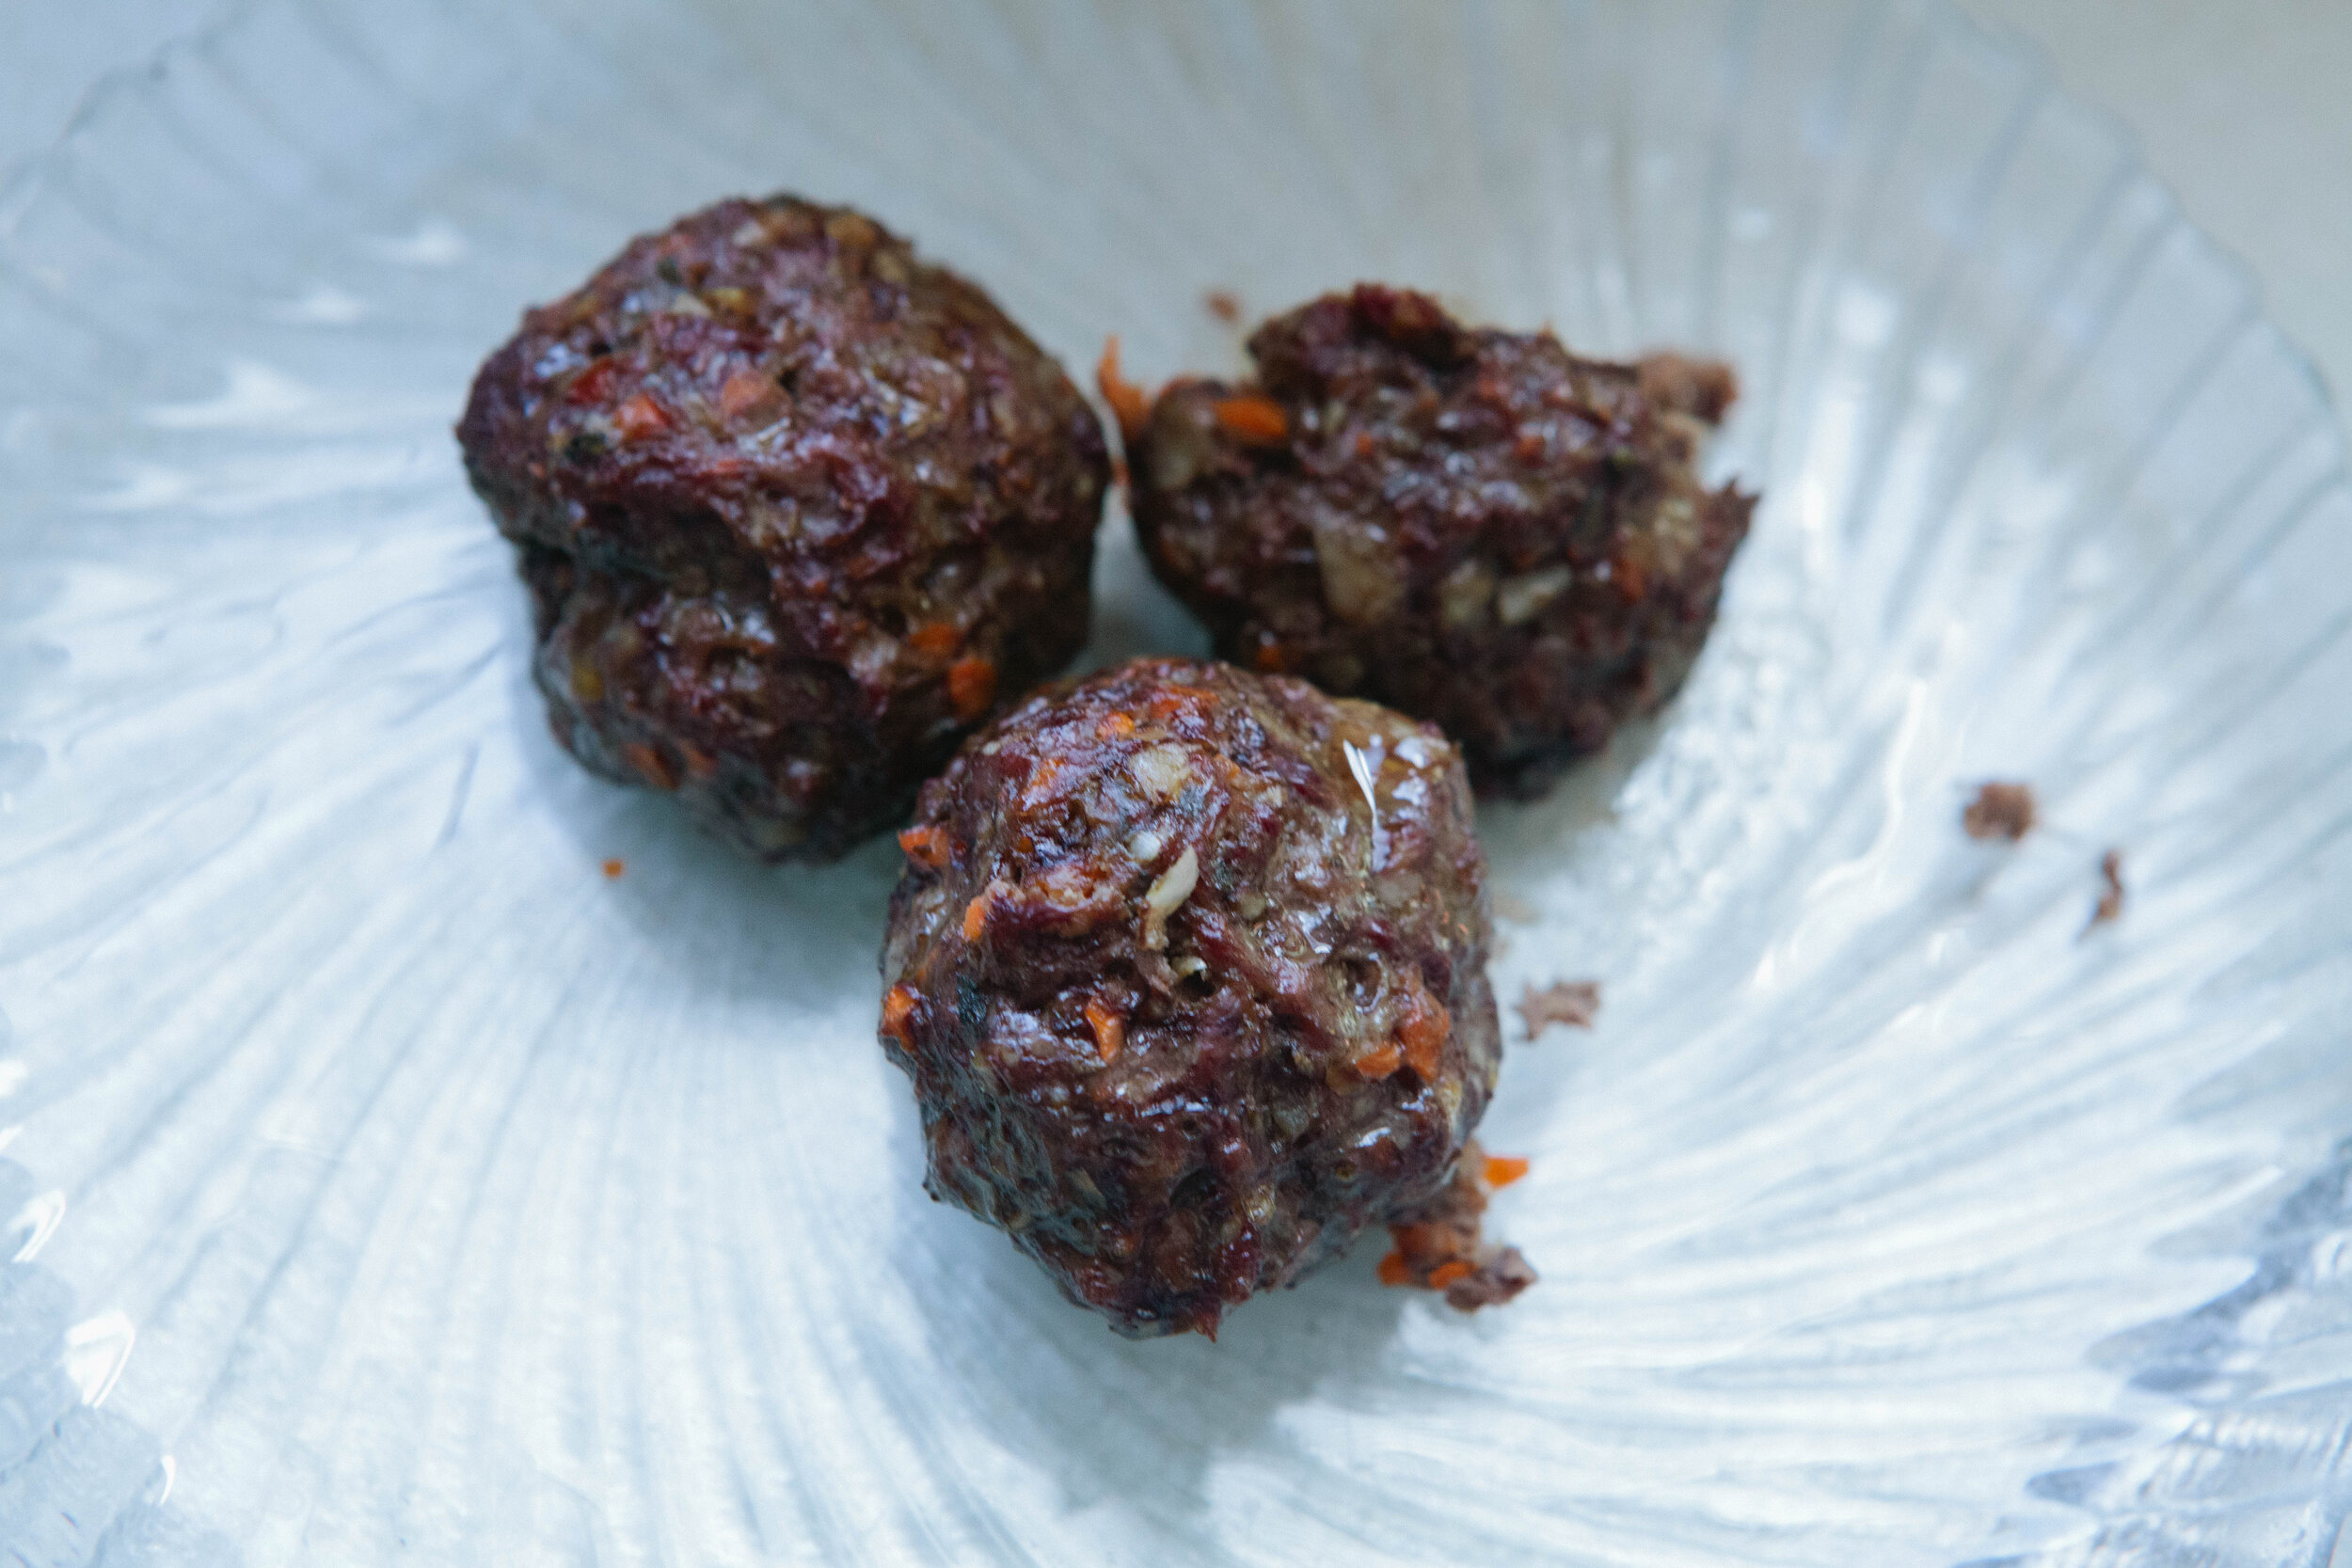
Enjoy with spaghetti squash and make your own spaghetti sauce for a spaghetti night. Or enjoy with any variety of vegetables like brussels sprouts or broccoli!

Egg Free, Dairy Free Liver Meatballs

prep time: cook time: total time:

ingredients:

  • 2 lb ground beef
  • ½ lb beef liver
  • 2 carrots, about 1 cup grated
  • ⅓ large white onion, about ⅔ a cup grated
  • 6 large cloves of Garlic
  • Oregano, 1 bunch Fresh or 1 tbsp Dried
  • Basil, 1 bunch Fresh or 1 tbsp Dried
  • ¼ - ½ tsp Pepper
  • 2 tsp Salt
  • 1 tbsp lard

instructions:

How to cook Egg Free, Dairy Free Liver Meatballs

  1. For milder tasting liver, soak it in some kind of acid. Cover the liver in filtered water and then add the juice of one lemon or 1-2 tablespoons of apple cider vinegar. Leave to soak for 30 minutes. Be sure not to soak it for too long. The acid will break down the liver and start it “cooking” prematurely.
  2. Preheat your oven to 375.
  3. Grate your carrot, onion and garlic into very fine pieces. Add to a large bowl with ground beef. Add in oregano, basil and salt and pepper. Mix with your hands.
  4. Place your liver into a food processor once it has soaked. Pulse until smooth. Add to the bowl with the beef, vegetables and spices and mix again.
  5. Spread lard onto the bottom of a glass oven safe casserole dish.
  6. Take a small handful of meat at a time and roll into a meatball. Continue to roll meatballs until you have filled your casserole dish. Keep consistency in the size and shape of your meatballs to ensure even cooking time.
  7. Line meatballs, leaving some space between them.
  8. Bake for 45 minutes.
  9. Enjoy with spaghetti squash and make your own spaghetti sauce for a spaghetti night. Or enjoy with any variety of vegetables like brussels sprouts or broccoli!
Created using The Recipes Generator
42.png

Making Your Own Kefir from Milk Kefir Grains

Kefir is a fermented drink made from kefir grains. It’s a bit like a very thin yogurt and has great health benefits!

The great news is, like many fermented drinks, kefir is very easy to make on your own!

IMG_5046.jpg

Kefir grains are very sensitive to metal so it is best if you use little to no metal when you’re preparing this recipe.

If you use a dishwasher, rinse your bowl thoroughly before using to ensure there is no detergent residue on it. 

You will need:

  • A strainer (preferably not metal)

  • A jar to put your kefir in

  • A bowl

Ingredients for Kefir

  • Fresh Milk (raw or freshly repasteurized, depending on what your grains are used to)

  • Kefir with Grains, 4 to 5 healthy grains will make a pint 

Directions for Kefir

IMG_5035.jpg

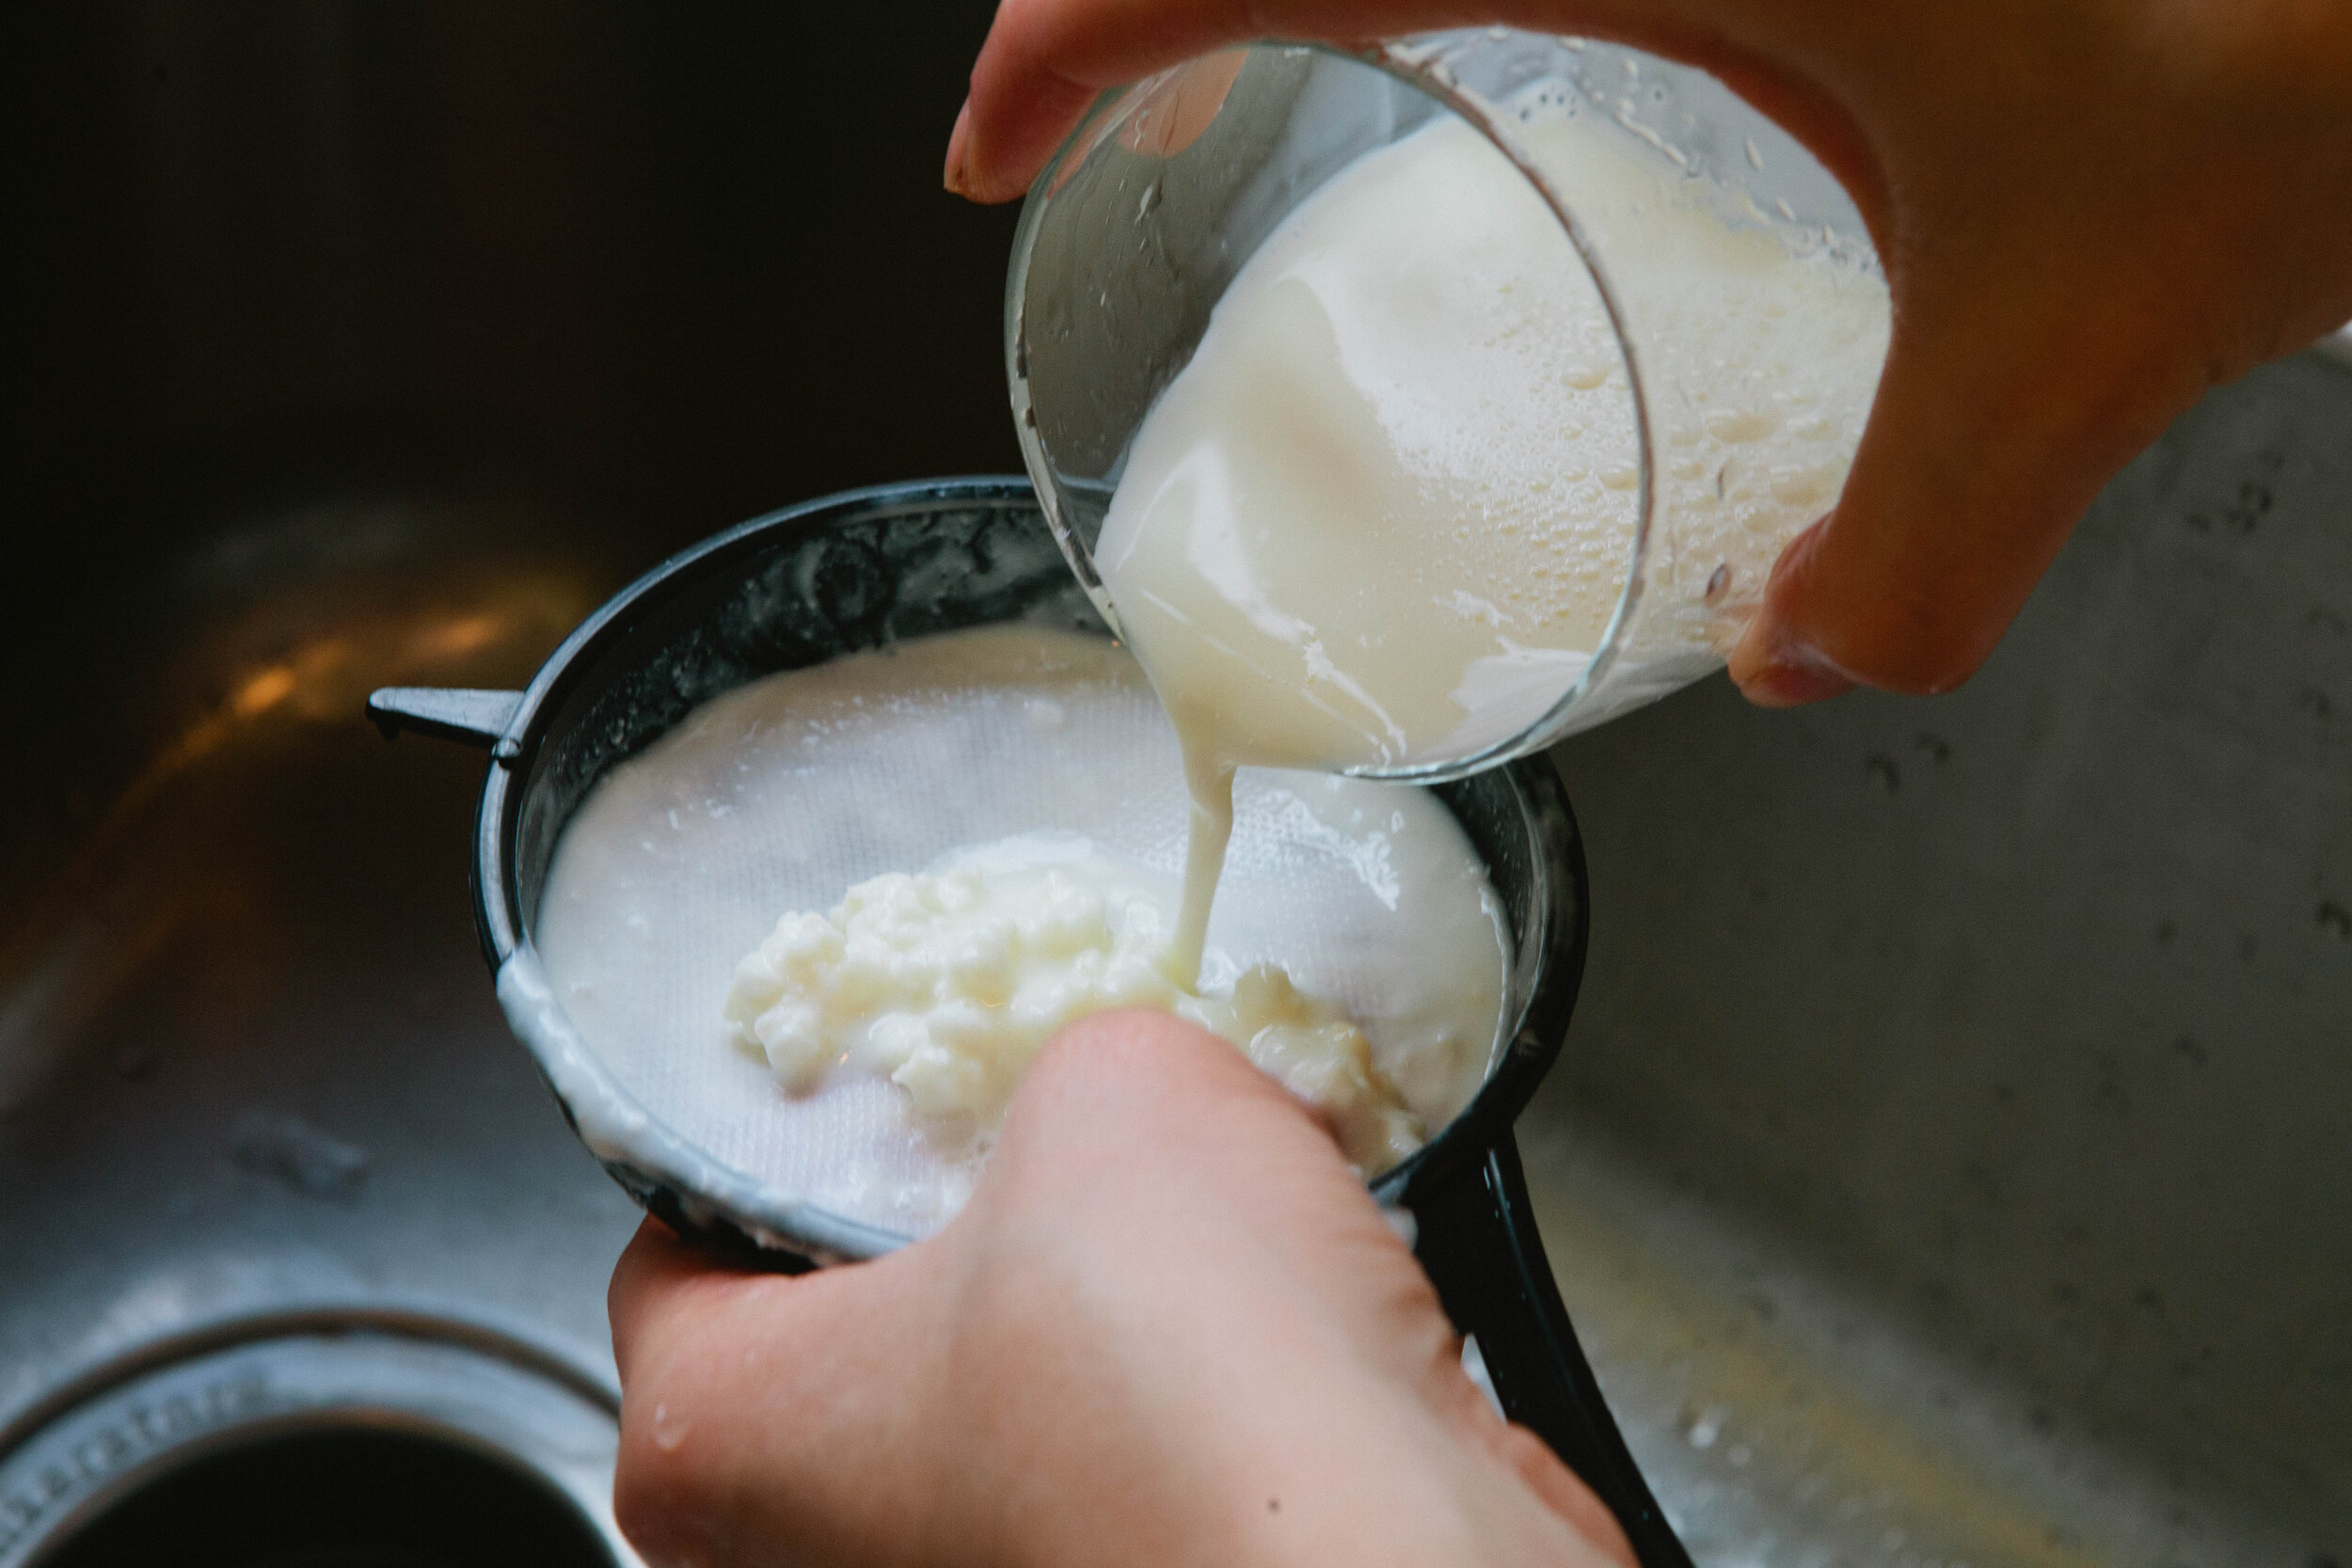
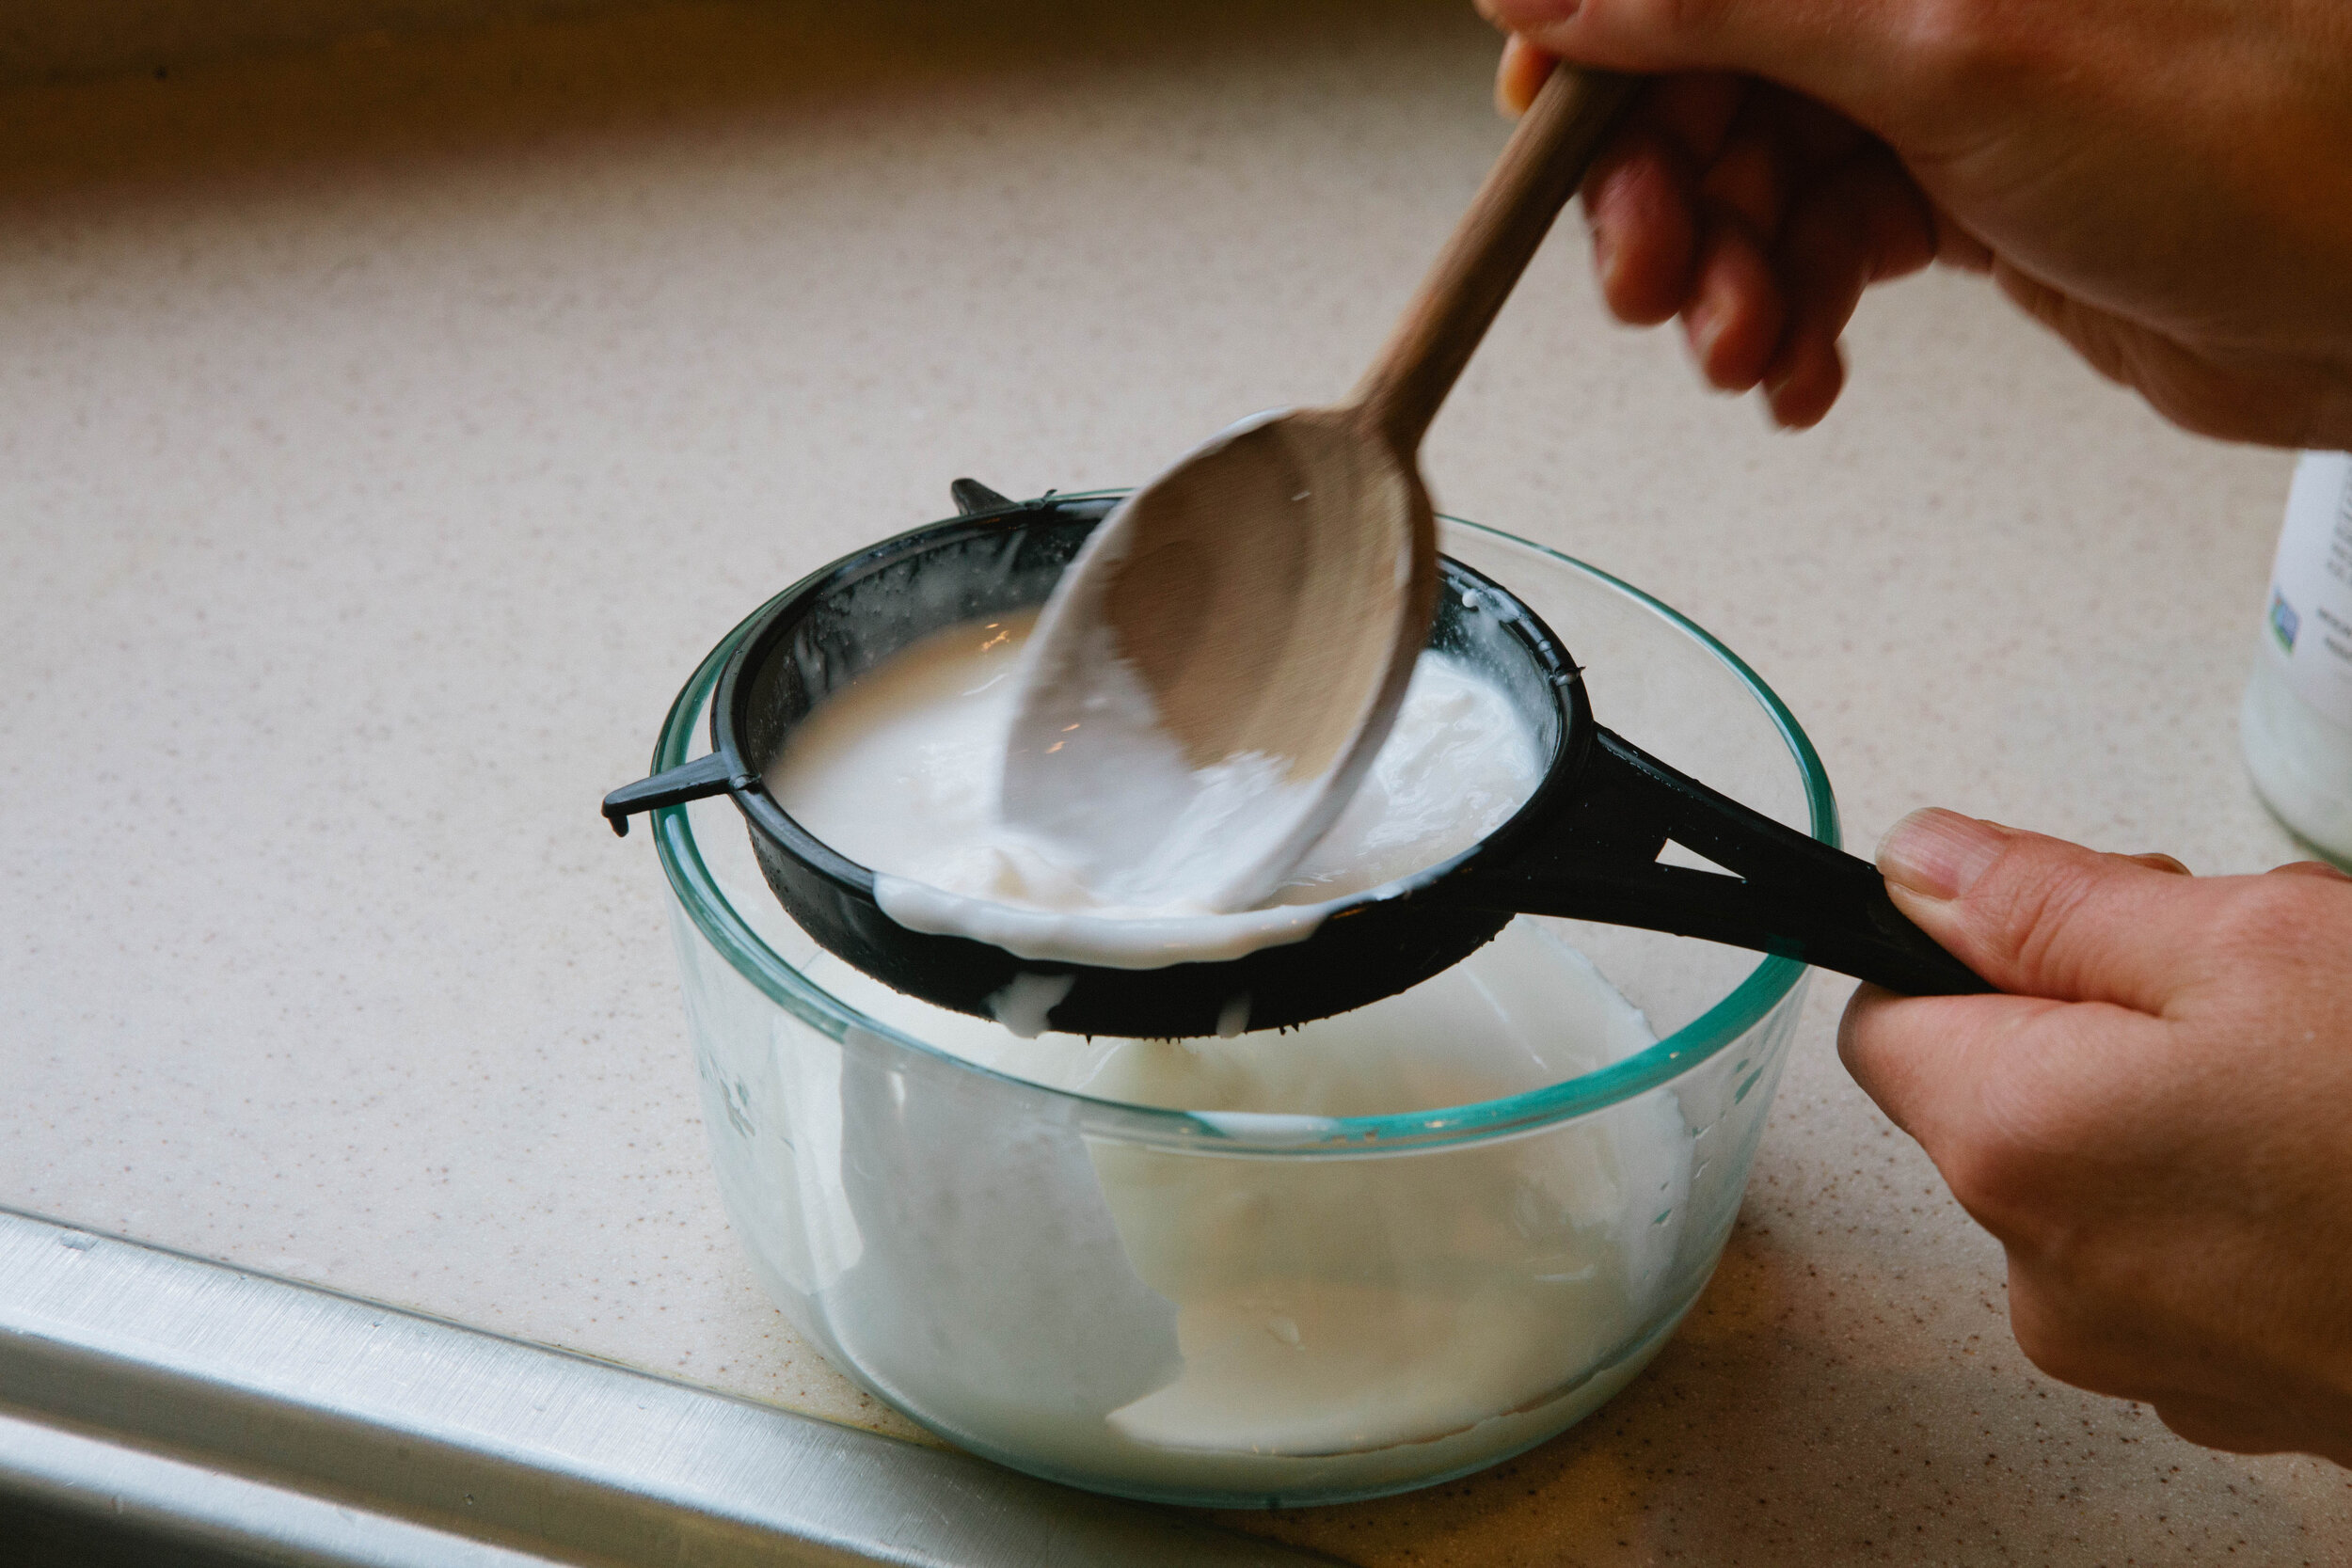
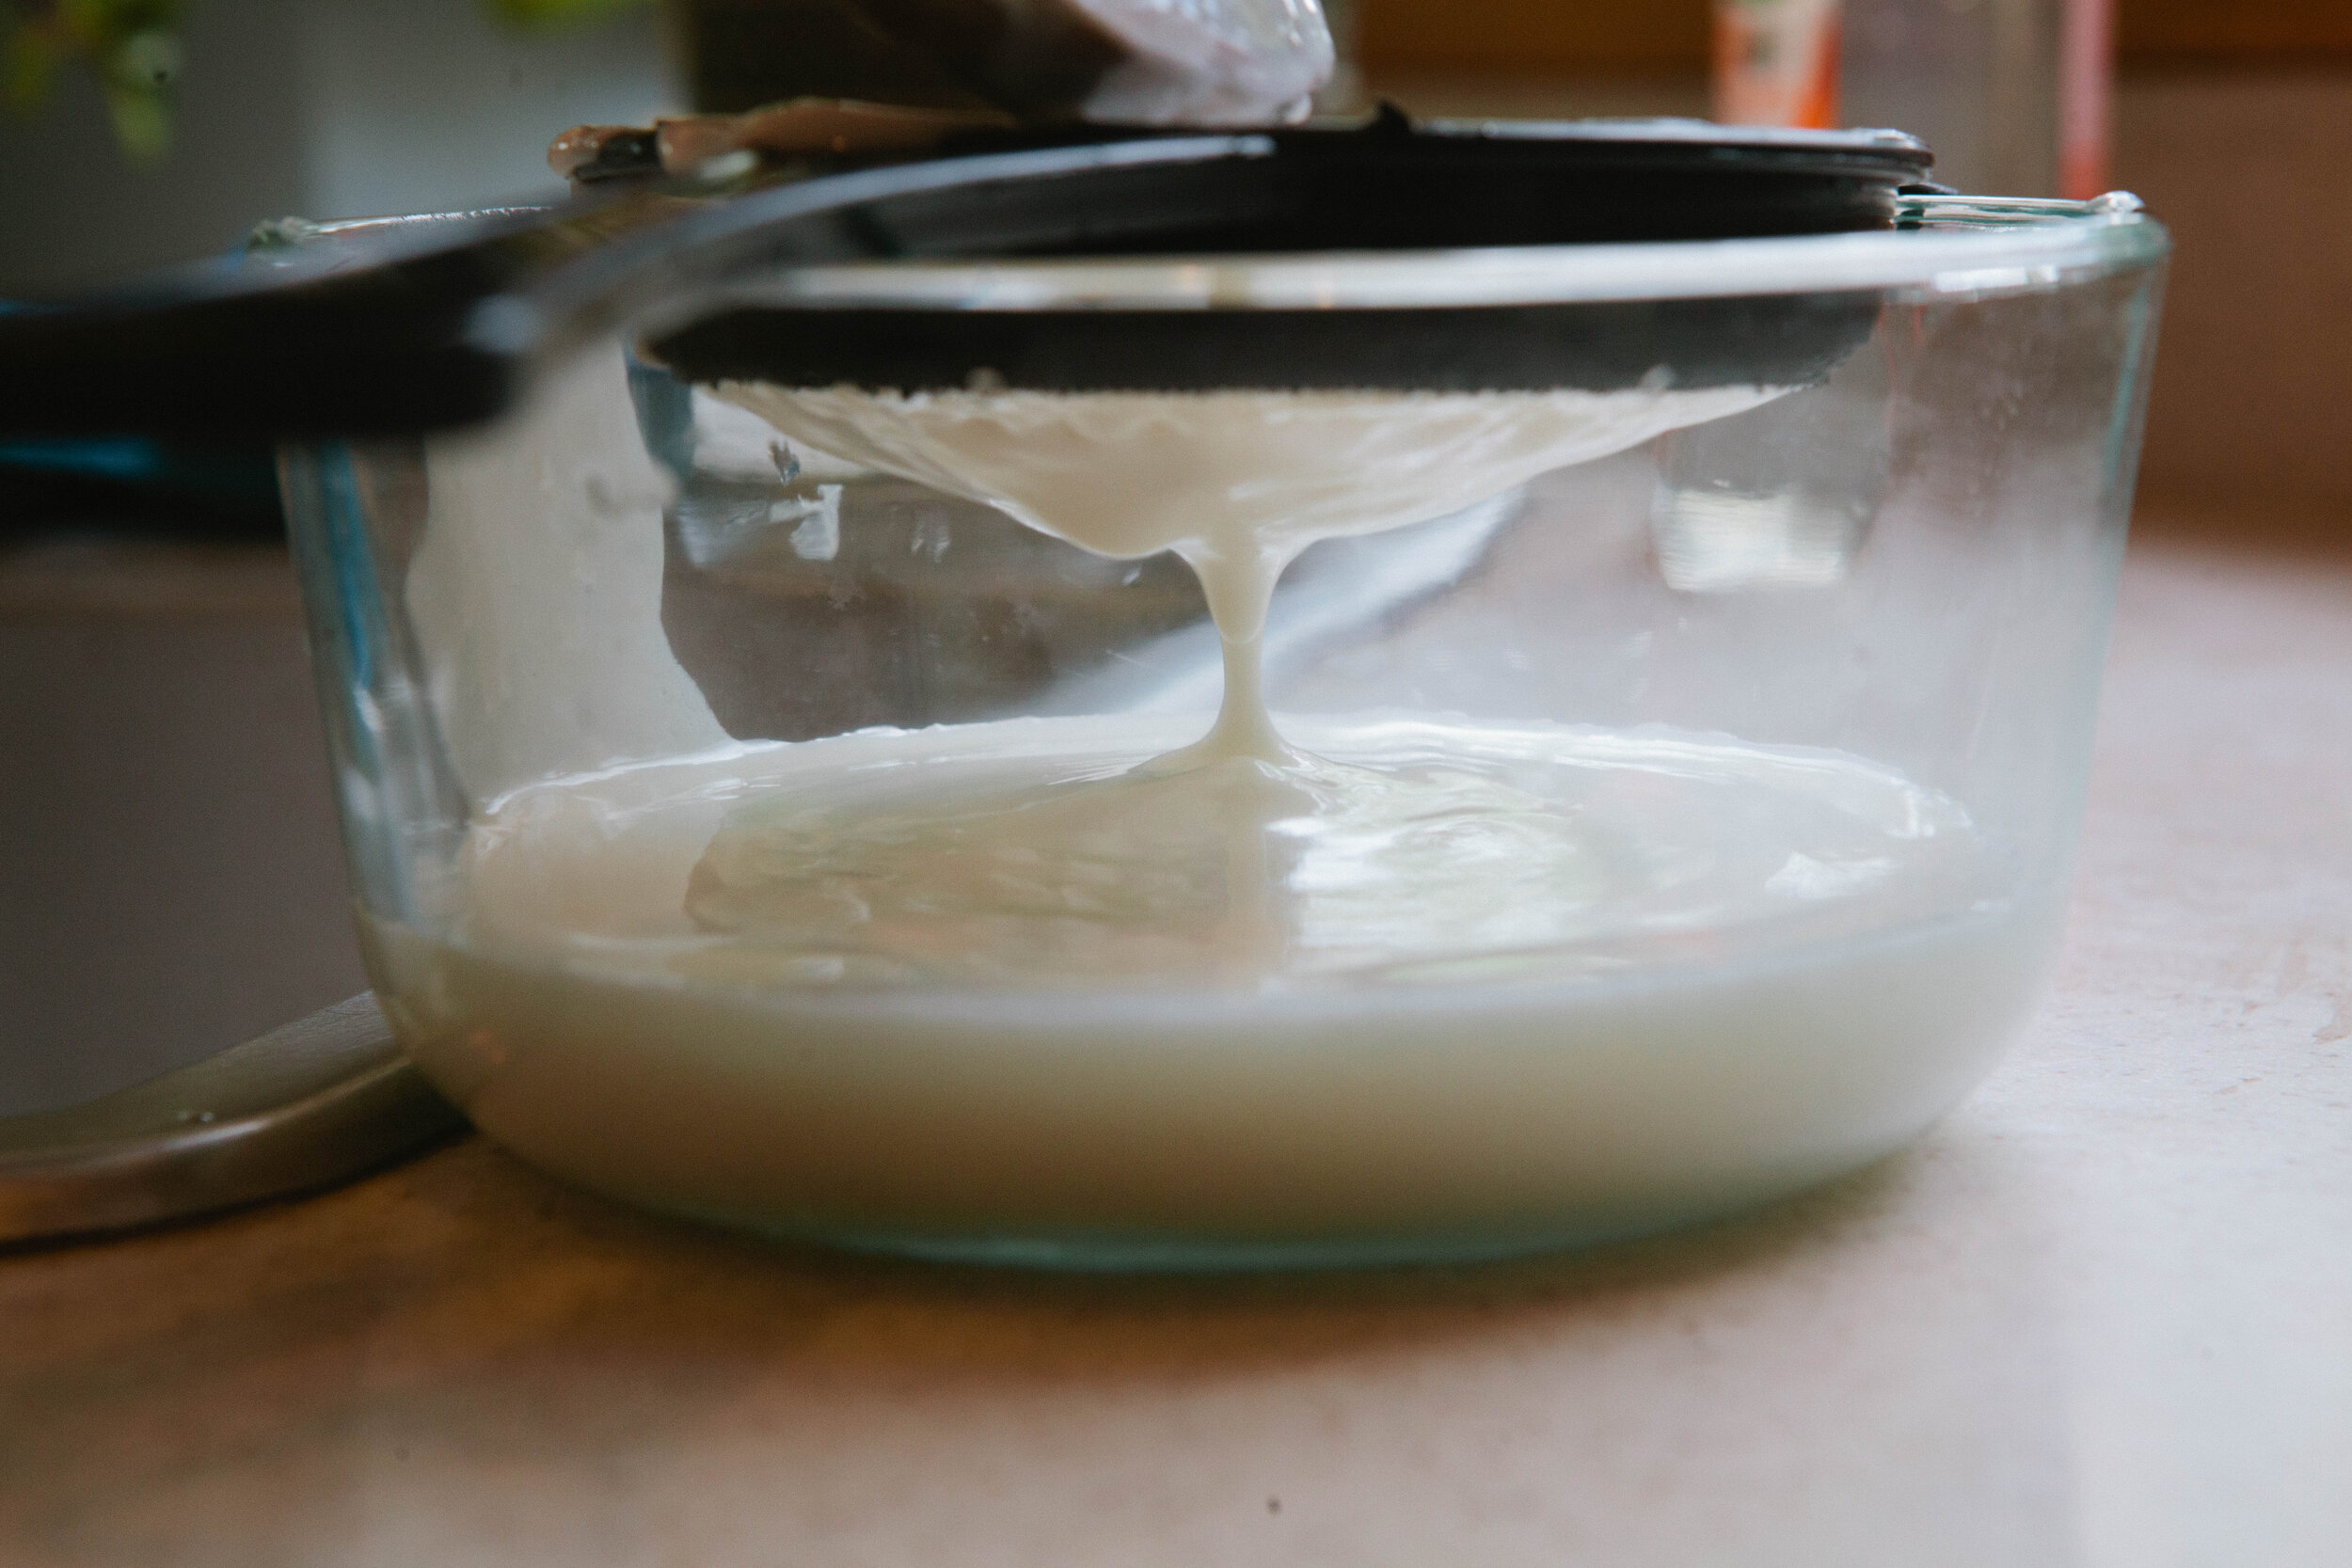
Separate kefir grains from kefir by pouring into a non metal strainer. Gently separate the kefir from the grains with a non metal spoon. Don’t push too hard - be very gentle! 

IMG_5037.jpg

What falls below is your kefir. What stays in the strainer is the kefir grains. 

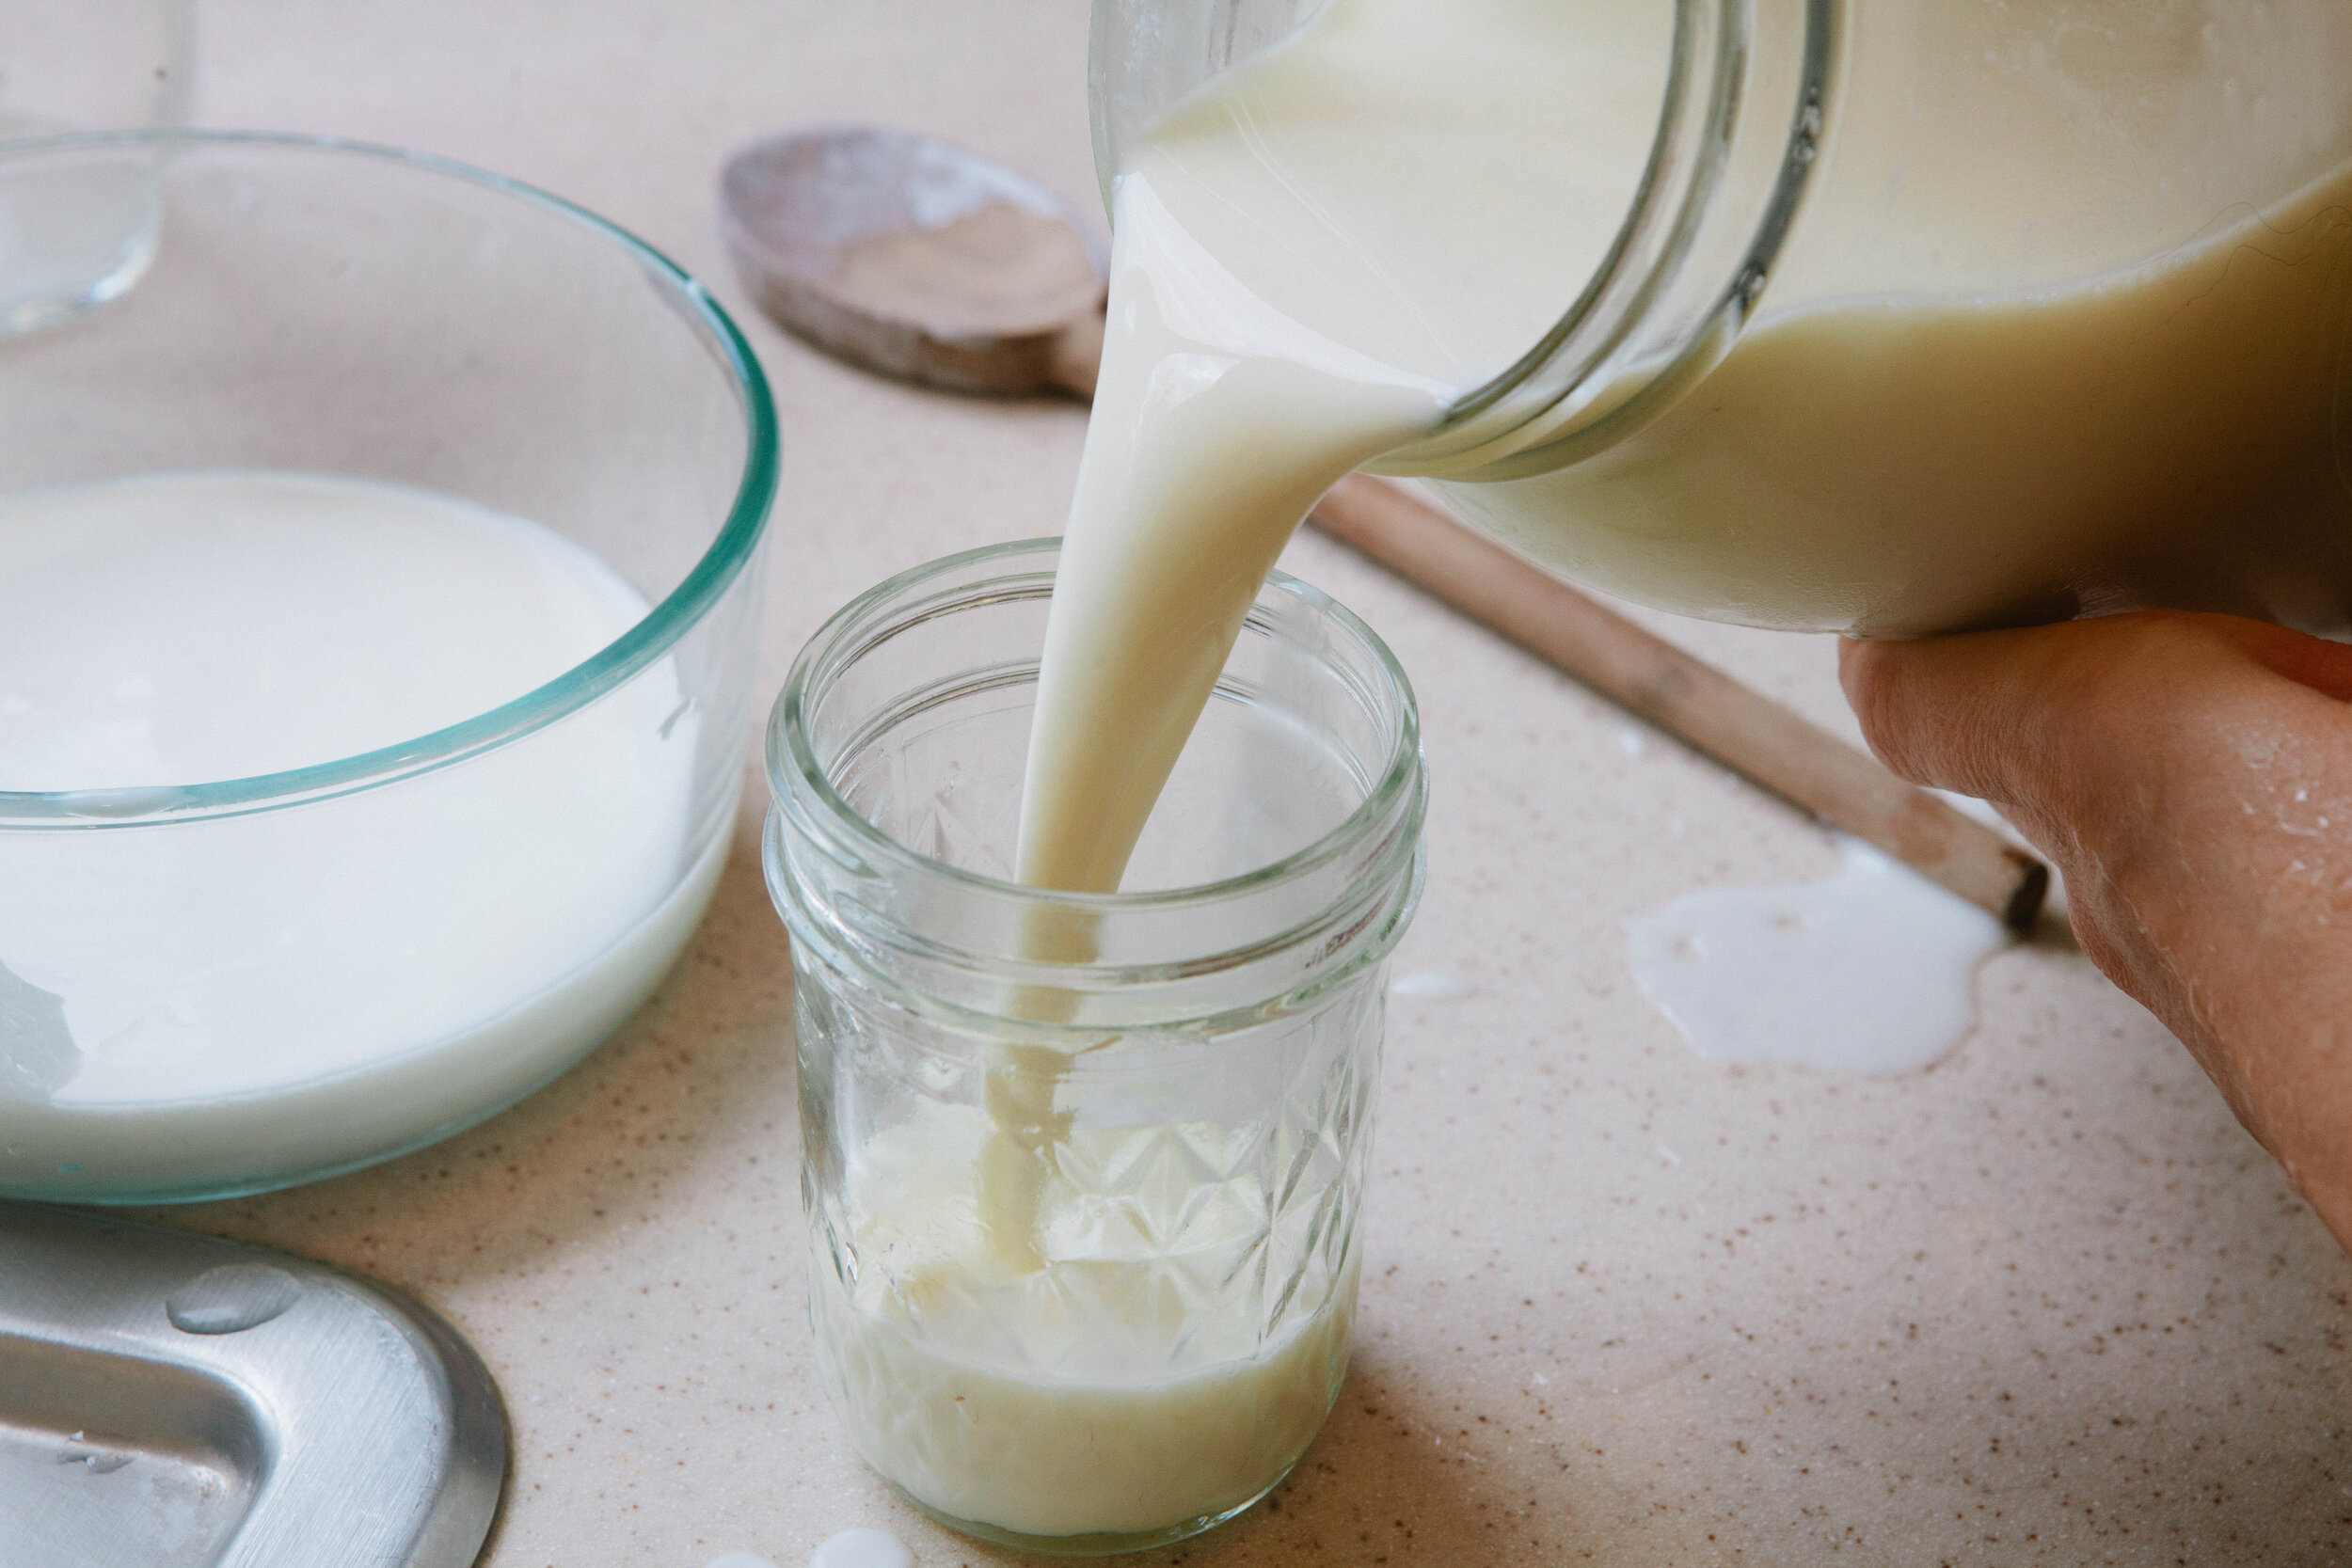
Leave out on the counter for about 24 hours to ferment. After 24 hours, put the grains into milk into the fridge. OR if you are not needing so much kefir, store it in the fridge directly.

IMG_5056.jpg

If you store the kefir in the fridge, continue to feed your kefir in the fridge. It takes about two to three weeks before you need to feed it again by changing the milk.

You can use the kefir itself to make kefir cream.

Enjoy!

Making Your Own Kefir

prep time: cook time: total time:

ingredients:

  • Fresh Milk (raw or freshly repasteurized, depending on what your grains are used to)
  • Kefir with Grains, 4 to 5 healthy grains will make a pint

instructions:

How to cook Making Your Own Kefir

  1. Separate kefir grains from kefir by pouring into a non metal strainer. Gently separate the kefir from the grains with a non metal spoon. Don’t push too hard - be very gentle!
  2. What falls below is your kefir. What stays in the strainer is the kefir grains.
  3. Leave out on the counter for about 24 hours to ferment. After 24 hours, put the grains into milk into the fridge. OR if you are not needing so much kefir, store it in the fridge directly.
  4. If you store the kefir in the fridge, continue to feed your kefir in the fridge. It takes about two to three weeks before you need to feed it again by changing the milk.
  5. You can use the kefir itself to make kefir cream.
  6. Enjoy!
Created using The Recipes Generator
40.png

How to Properly Caramelize Onions

Caramelized onions are an amazing supporting food because they are high in vitamin C, calcium, and quercetin. It’s especially helpful for sore throats but is an excellent food to eat anytime you are starting to feel under the weather! (Check out more of my helpful tips for caring for yourself when you’re sick here.)

I recommend a whole onion per person because the onions will reduce in size. You want to use a lot of animal fat with this recipe! I like both butter or lard, so whatever you happen to have on hand is ok. The fat is also great for you while you’re sick. Make sure you add enough salt for the added minerals, which is also very important when you’re ill.

White or yellow onions work for this recipe. I prefer the yellow onions and often have them on hand so that is what I usually use.

For great caramelized onions, make sure your heat is on low. This is a food that is best with patience - and burnt with impatience. Allow 20 - 30 minutes of cooking time to get really good caramelized onions. You can cook multiple onions at a time as long as you are using a large enough pan. If your entire family is sick, you can make a batch for everyone in about the same amount of time as cooking just one.

When slicing your onions, you want to slice them in short slices. Don’t give into the temptation of dicing your onions! Even if it seems they will cook faster, you’ll most likely end up with a burnt or mushy dish.

Make sure you don’t crowd your pan of onions or they won’t properly caramelize. Above is the maximum amount of onions I would put in one pan.

Caramelized onions should be sweet! They shouldn’t really taste like onions at all when they’re finished! As they cook, take a taster. If it still tastes like onions, keep stirring.

Dr Natasha recommends topping a caramelized onion with a little olive oil and a couple fried eggs. (Again fried in plenty of fat.) This is a very filling meal that’s amazing when you’re sick.

However, you don’t need to be sick to enjoy this nourishing food! It can be very soothing when you’ve had a long day and are needing a comfort food.

Ingredients for Caramelized Onions:

  • 2-3 Tbsp Fat of Your Choice Per Onion

  • Onion (1 Per Person)

  • Salt (The amount of salt will vary if you’re using salted butter or unsalted lard.)

Directions for Caramelized Onions:

how-to-properly-caramelize-onions-how-to-make-caramelized-onions-onions-when-sick-what-to-eat-while-sick-gaps-diet-gaps-protocol-holistic-health-northern-colorado

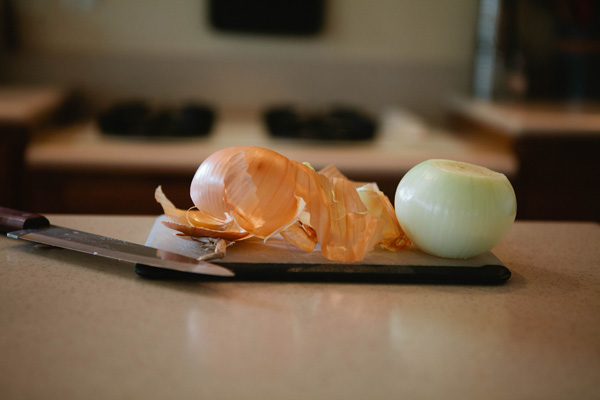
Slice the ends of your onion and peel. Put the peels and “extras” into a bag for use in stock later.

Cut the onion in half. Then cut into half again.

how-to-properly-caramelize-onions-how-to-make-caramelized-onions-onions-when-sick-what-to-eat-while-sick-gaps-diet-gaps-protocol-holistic-health-northern-colorado

Slice the onion so long strips form.

how-to-properly-caramelize-onions-how-to-make-caramelized-onions-onions-when-sick-what-to-eat-while-sick-gaps-diet-gaps-protocol-holistic-health-northern-colorado

Start your pan heating on medium high and add the fat of your choice. Heating your pan before your onion is sliced will result in a pan that is too hot.

how-to-properly-caramelize-onions-how-to-make-caramelized-onions-onions-when-sick-what-to-eat-while-sick-gaps-diet-gaps-protocol-holistic-health-northern-colorado

Add your onions to the pan. Stir to coat in the fat.

how-to-properly-caramelize-onions-how-to-make-caramelized-onions-onions-when-sick-what-to-eat-while-sick-gaps-diet-gaps-protocol-holistic-health-northern-colorado

Cook onions over medium heat, stirring every few minutes.

When they are nearing translucency (about 25 ish minutes) add a little salt if you are not using salted butter. Even if you are using salted butter, adding a little extra salt will help them break down.

Make sure everyone salts their onions to taste once the onions are on their plates!

how-to-properly-caramelize-onions-how-to-make-caramelized-onions-onions-when-sick-what-to-eat-while-sick-gaps-diet-gaps-protocol-holistic-health-northern-colorado

Your onions are done when they are golden brown. Enjoy them on their own or as part of a larger meal.


Caramelized Onions

Author:
prep time: cook time: total time:

ingredients:

  • 2-3 Tbsp Fat of Your Choice Per Onion
  • Onion (1 Per Person)
  • Salt (The amount of salt will vary if you’re using salted butter or unsalted lard.)

instructions:

How to cook Caramelized Onions

  1. Slice the ends of your onion and peel. Put the peels and “extras” into a bag for use in stock later.
  2. Cut the onion in half. Then cut into half again.
  3. Slice the onion so long strips form.
  4. Start your pan heating on medium high and add the fat of your choice. Heating your pan before your onion is sliced will result in a pan that is too hot.
  5. Add your onions to the pan. Stir to coat in the fat.
  6. Cook onions over medium heat, stirring every few minutes.
  7. When they are nearing translucency (about 25 ish minutes) add a little salt if you are not using salted butter. Even if you are using salted butter, adding a little extra salt will help them break down.
  8. Make sure everyone salts their onions to taste once the onions are on their plates!
  9. Your onions are done when they are golden brown. Enjoy them on their own or as part of a larger meal.
Created using The Recipes Generator
46.png

Swedish Gravlax Recipe

This meal is adapted from GAPS Cookbook by Dr. Natasha Campbell

This is a brined fish meal legal on GAPS stage 2. You eat little pieces, one small piece a day.

Swedish Gravlax Recipe

Ingredients for Swedish Gravlax:

  • ½ lb Fresh Wild Caught Salmon

  • Fresh Dill

  • Freshly Coarsely Ground Black Pepper

  • 4 cup Room Temperature Filtered Water

  • 1 tbsp Honey

  • 1 ½ tbsp Salt

Directions for Swedish Gravlax:

Swedish-Gravlax-Fermented-Salmon-Wild-Caught-Salmon-What-To-Do-With-Salmon-GAPS-Legal-Salmon-Recipe-GAPS-Diet-Salmon-Fish-On-GAPS-GAPS-Diet-Snack

Thinly slice the fish.

Swedish-Gravlax-Fermented-Salmon-Wild-Caught-Salmon-What-To-Do-With-Salmon-GAPS-Legal-Salmon-Recipe-GAPS-Diet-Salmon-Fish-On-GAPS-GAPS-Diet-Snack

Place fish slices into a deep tray.

Sprinkle with dill sprigs and pepper.

Swedish-Gravlax-Fermented-Salmon-Wild-Caught-Salmon-What-To-Do-With-Salmon-GAPS-Legal-Salmon-Recipe-GAPS-Diet-Salmon-Fish-On-GAPS-GAPS-Diet-Snack

Dissolve honey and salt in water to make a brine.

Pour brine over fish.

Swedish-Gravlax-Fermented-Salmon-Wild-Caught-Salmon-What-To-Do-With-Salmon-GAPS-Legal-Salmon-Recipe-GAPS-Diet-Salmon-Fish-On-GAPS-GAPS-Diet-Snack

Leave at room temperature for 1 - 1 ½ hours.

Pour the water out.

Serve on lettuce or eat alone.

Store in refrigerator and consume within two days.


Swedish Gravlax Recipe

Author:
prep time: cook time: total time:

ingredients:

  • ½ lb Fresh Wild Caught Salmon
  • Fresh Dill
  • Freshly Coarsely Ground Black Pepper
  • 4 cup Room Temperature Filtered Water
  • 1 tbsp Honey
  • 1 ½ tbsp Salt

instructions:

How to cook Swedish Gravlax Recipe

  1. Thinly slice the fish.
  2. Place fish slices into a deep tray.
  3. Sprinkle with dill sprigs and pepper.
  4. Dissolve honey and salt in water to make a brine.
  5. Pour brine over fish.
  6. Leave at room temperature for 1 - 1 ½ hours.
  7. Pour the water out.
  8. Serve on lettuce or eat alone.
  9. Store in refrigerator and consume within two days.
Created using The Recipes Generator

Liver Pâté Recipe

Liver pâté makes me feel like I am eating a treat when I'm really eating something healthy—very healthy and good for me! You can make pate out of any type of liver, but chicken liver is the most mild, so that is a great one to start with if you are not used to eating liver. Once you make this delicious mixture, you can eat it many ways. Honestly, I mostly just eat it by the spoonful, but there are many other ways you can eat pate, including the ones listed below. After you make this wonderful superfood, let us know in the comments your favorite ways to spice and eat pate.

Ways to Eat liver Pate:

  • It’s good on it’s own

  • Spread it on crackers or bread if you are not following the GAPS diet

  • Create GAPS Legal “crackers” with slices of avocado or zucchini

  • Layer with fermented veggies like cabbage or sauerkraut

  • Spread on pieces of cheese

  • Dip veggies such as carrot sticks,

  • Add the pate to lean meats like chicken or turkey or game meat like venison or turkey to give it a boost of fat

GAPS Legal Liver Pate Ingredients

  • ½ c Liver

  • Butter or lard

  • 2 tbsp chopped Onion

  • 3 cloves of Garlic

  • Spices (If you’re on the GAPS Diet, omit spices until you are tolerating them on a later stage!)

    • 1/16 tsp nutmeg, cloves and ginger

    • ¼ tsp of cinnamon

    • ¼ to ½ tsp Salt

  • 2 small pans

  • Blender or Food Processor

Directions for making liver pate for the gaps diet

liver-pate-how-to-make-liver-pate-eating-pate-on-the-gaps-diet-organ-meat-on-gaps-liver-pate-recipe-for-gaps-protocol-loveland-colorado-health-clinic

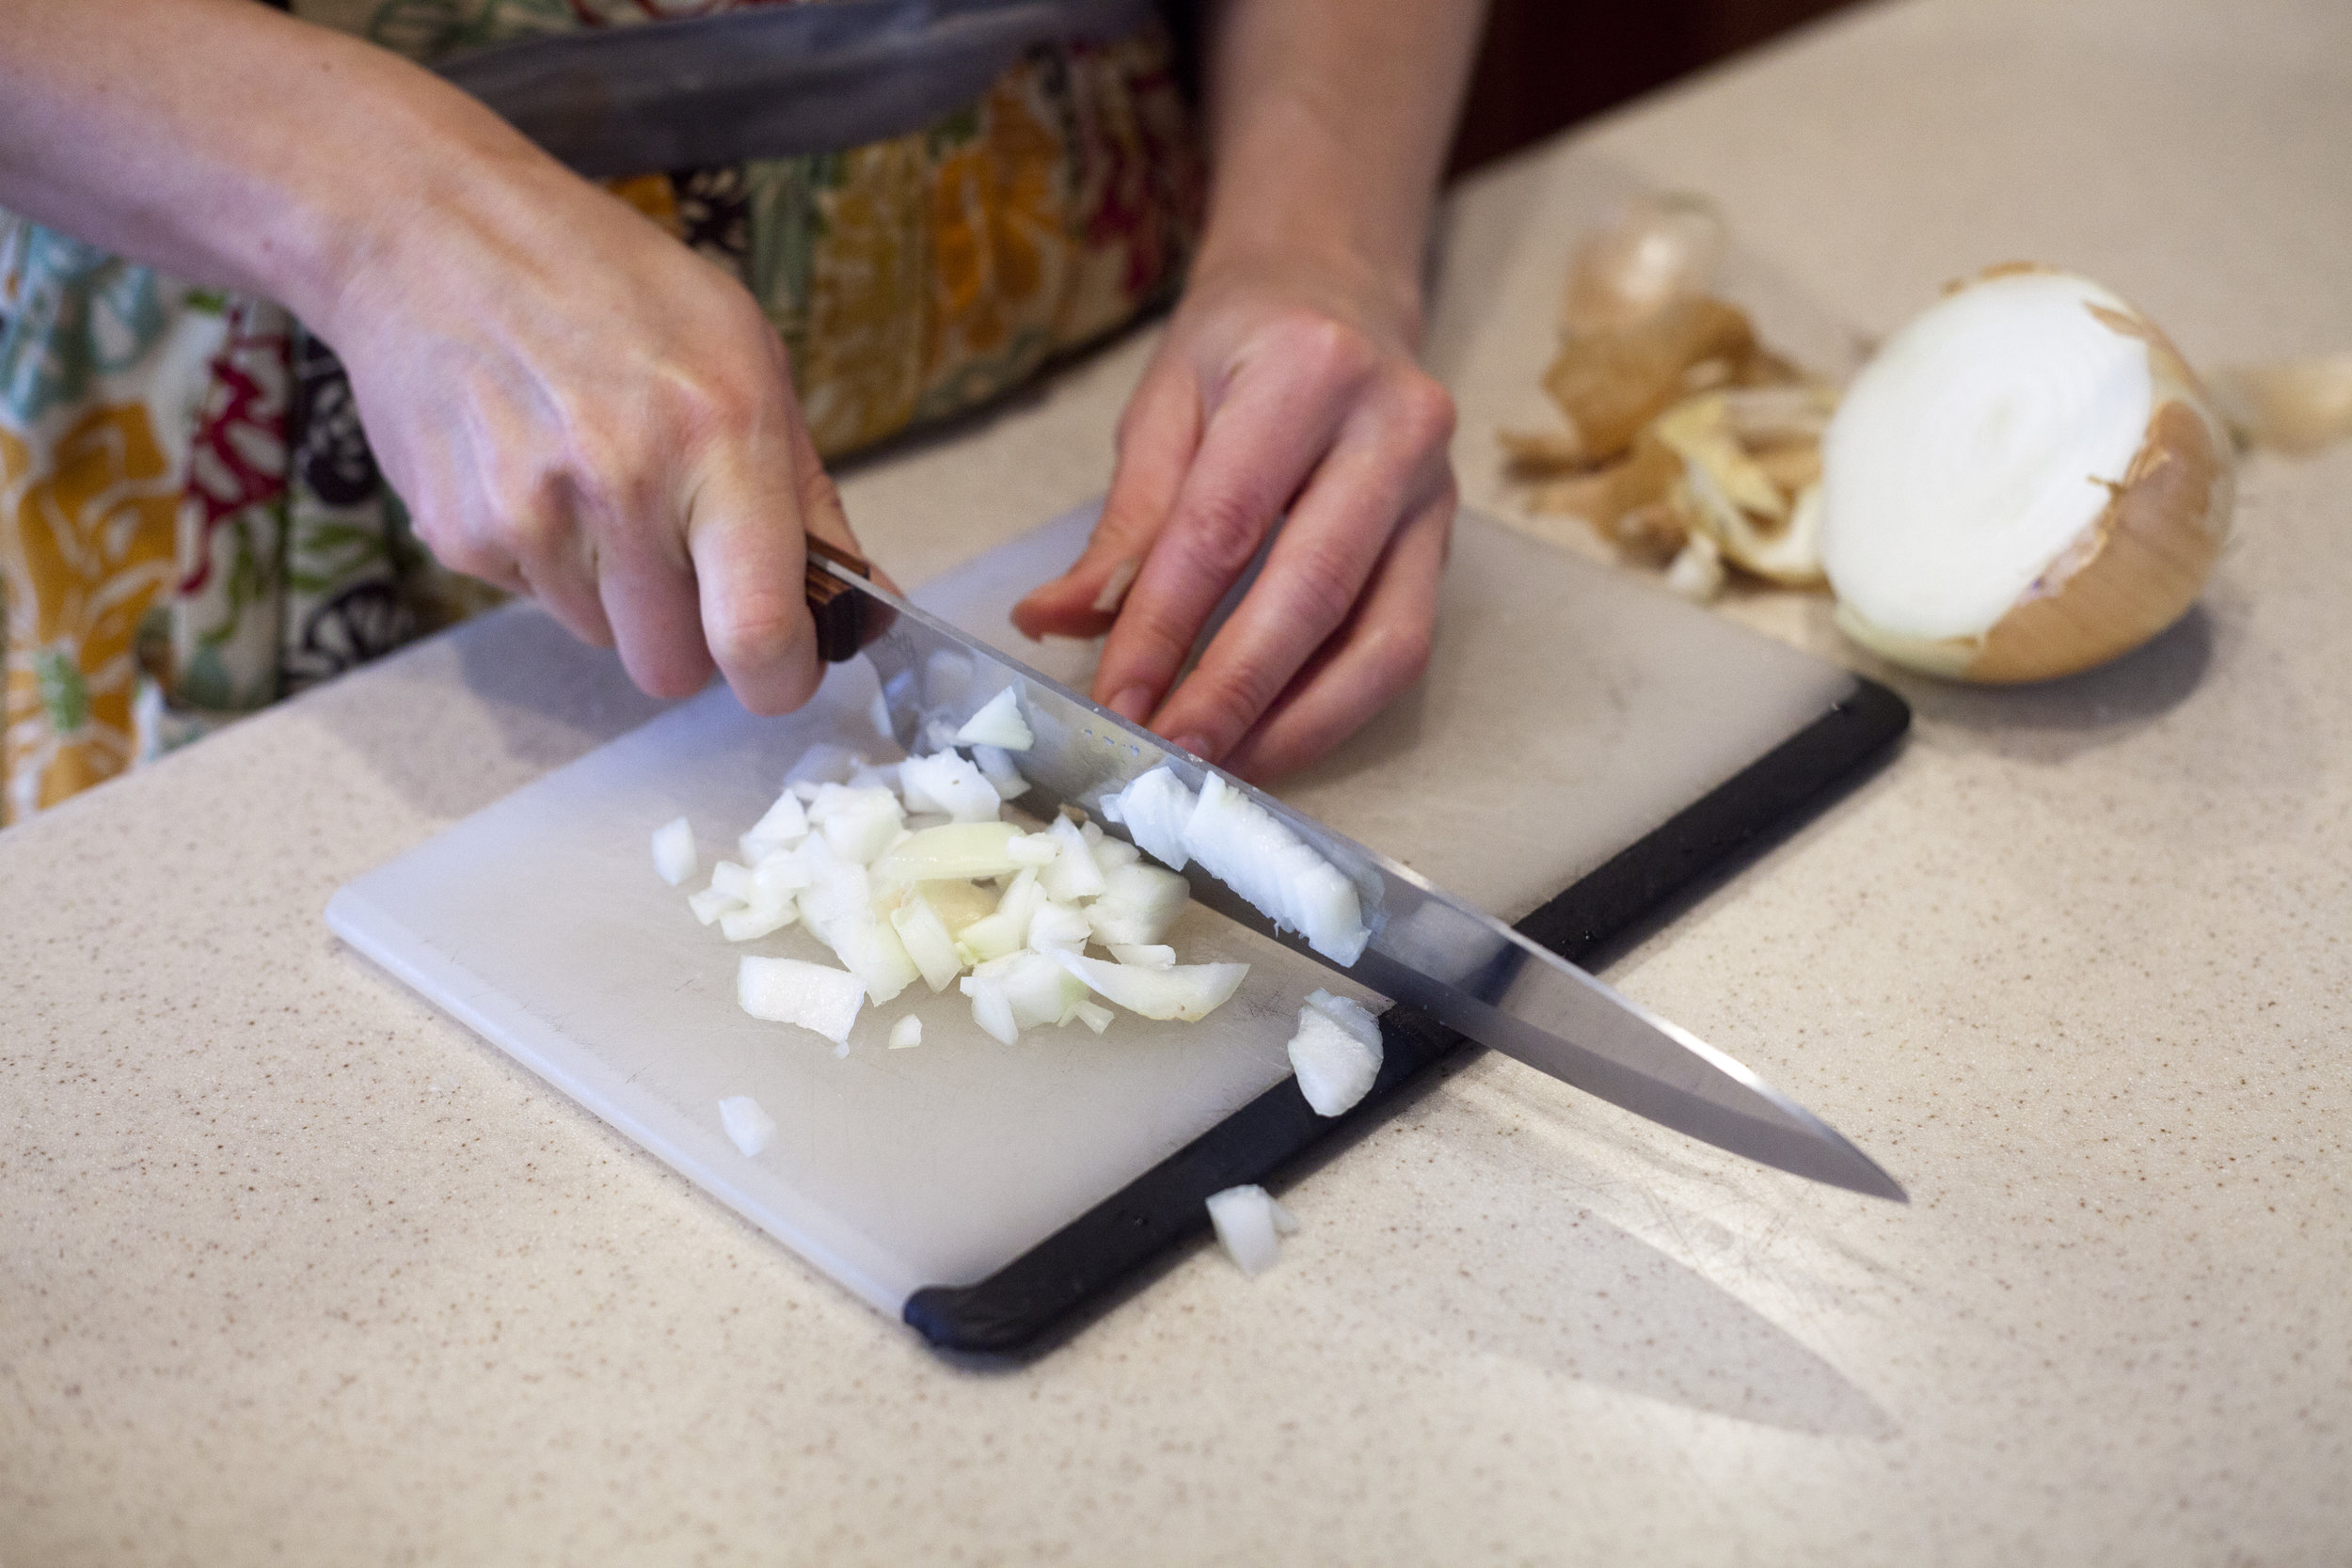
Roughly chop about 2 tbsp of an onion. The smaller you chop your onion, the quicker it will cook but careful - too small and it’s easy to burn!

liver-pate-how-to-make-liver-pate-eating-pate-on-the-gaps-diet-organ-meat-on-gaps-liver-pate-recipe-for-gaps-protocol-loveland-colorado-health-clinic

Add about ½ inch of water to a pan. Add liver to pan to poach.

After 2-3 minutes, flip the liver to poach the other side.

liver-pate-how-to-make-liver-pate-eating-pate-on-the-gaps-diet-organ-meat-on-gaps-liver-pate-recipe-for-gaps-protocol-loveland-colorado-health-clinic

Add butter or lard to a small skillet.  Add the onions to the skillet, stir. Add the garlic to the skillet.

The liver is done when it is still a little pink inside but not red. A little blood coming out of the liver when it’s done. If the juices are all clear, the liver is overcooked.

Add liver to the food processor or blender. Process quickly on its own.

liver-pate-how-to-make-liver-pate-eating-pate-on-the-gaps-diet-organ-meat-on-gaps-liver-pate-recipe-for-gaps-protocol-loveland-colorado-health-clinic

Add cooked onions and garlic to food processor or blender. Add enough fat so that the ratio is about 40% fat, 60% liver, about 3 tbsp for ½ cup of liver. Lard has less of a flavor than butter, butter will give your pate a different flavor.

Blend until smooth.

liver-pate-how-to-make-liver-pate-eating-pate-on-the-gaps-diet-organ-meat-on-gaps-liver-pate-recipe-for-gaps-protocol-loveland-colorado-health-clinic

Add spices and ¼ tsp salt to the blender or food processor. Blend until smooth. If needed, add remaining ½ tsp of salt.

Serve pate warm or chilled.


Liver Pate

Author:
prep time: cook time: total time:

ingredients:

  • ½ c Liver
  • Butter or lard
  • 2 tbsp chopped Onion
  • 3 cloves of Garlic
  • Spices
  • 1/16 tsp nutmeg, cloves and ginger
  • ¼ tsp of cinnamon
  • ¼ to ½ tsp Salt
  • 2 small pans
  • Blender or Food Processor

instructions:

How to cook Liver Pate

  1. Roughly chop about 2 tbsp of an onion. The smaller you chop your onion, the quicker it will cook but careful - too small and it’s easy to burn!
  2. Add about ½ inch of water to a pan. Add liver to pan to poach.
  3. After 2-3 minutes, flip the liver to poach the other side.
  4. Add butter or lard to a small skillet. Add the onions to the skillet, stir. Add the garlic to the skillet.
  5. The liver is done when it is still a little pink inside but not red. A little blood coming out of the liver when it’s done. If the juices are all clear, the liver is overcooked.
  6. Add liver to the food processor or blender. Process quickly on its own.
  7. Add cooked onions and garlic to food processor or blender. Add enough fat so that the ratio is about 40% fat, 60% liver, about 3 tbsp for ½ cup of liver. Lard has less of a flavor than butter, butter will give your pate a different flavor.
  8. Blend until smooth.
  9. Add spices and ¼ tsp salt to the blender or food processor. Blend until smooth. If needed, add remaining ½ tsp of salt.
  10. Serve pate warm or chilled.
Created using The Recipes Generator

Butternut Squash GAPS Pancakes Recipe

This recipe was adapted from the GAPS Pancake Recipe in the Gut and Psychology Syndrome book by Dr. Natasha Campbell. Makes 3 Pancakes.

GAPS Legal Pancakes Ingredients

  • 1/2 c. cooked Butternut Squash

  • 3 Farm Fresh Eggs

  • Fat such as lard, butter or sour cream

  • Salt

  • Toppings such as date syrup or cinnamon

  • Food Processor or Blender

Directions for gaps legal pancakes

gaps-legal-pancakes-pancakes-made-with-butternut-squash-gaps-diet-gaps-protocol

Cut butternut squash into halves. Deseed and bake face down on a parchment lined baking tray for 40 minutes at 400 degrees until very soft.

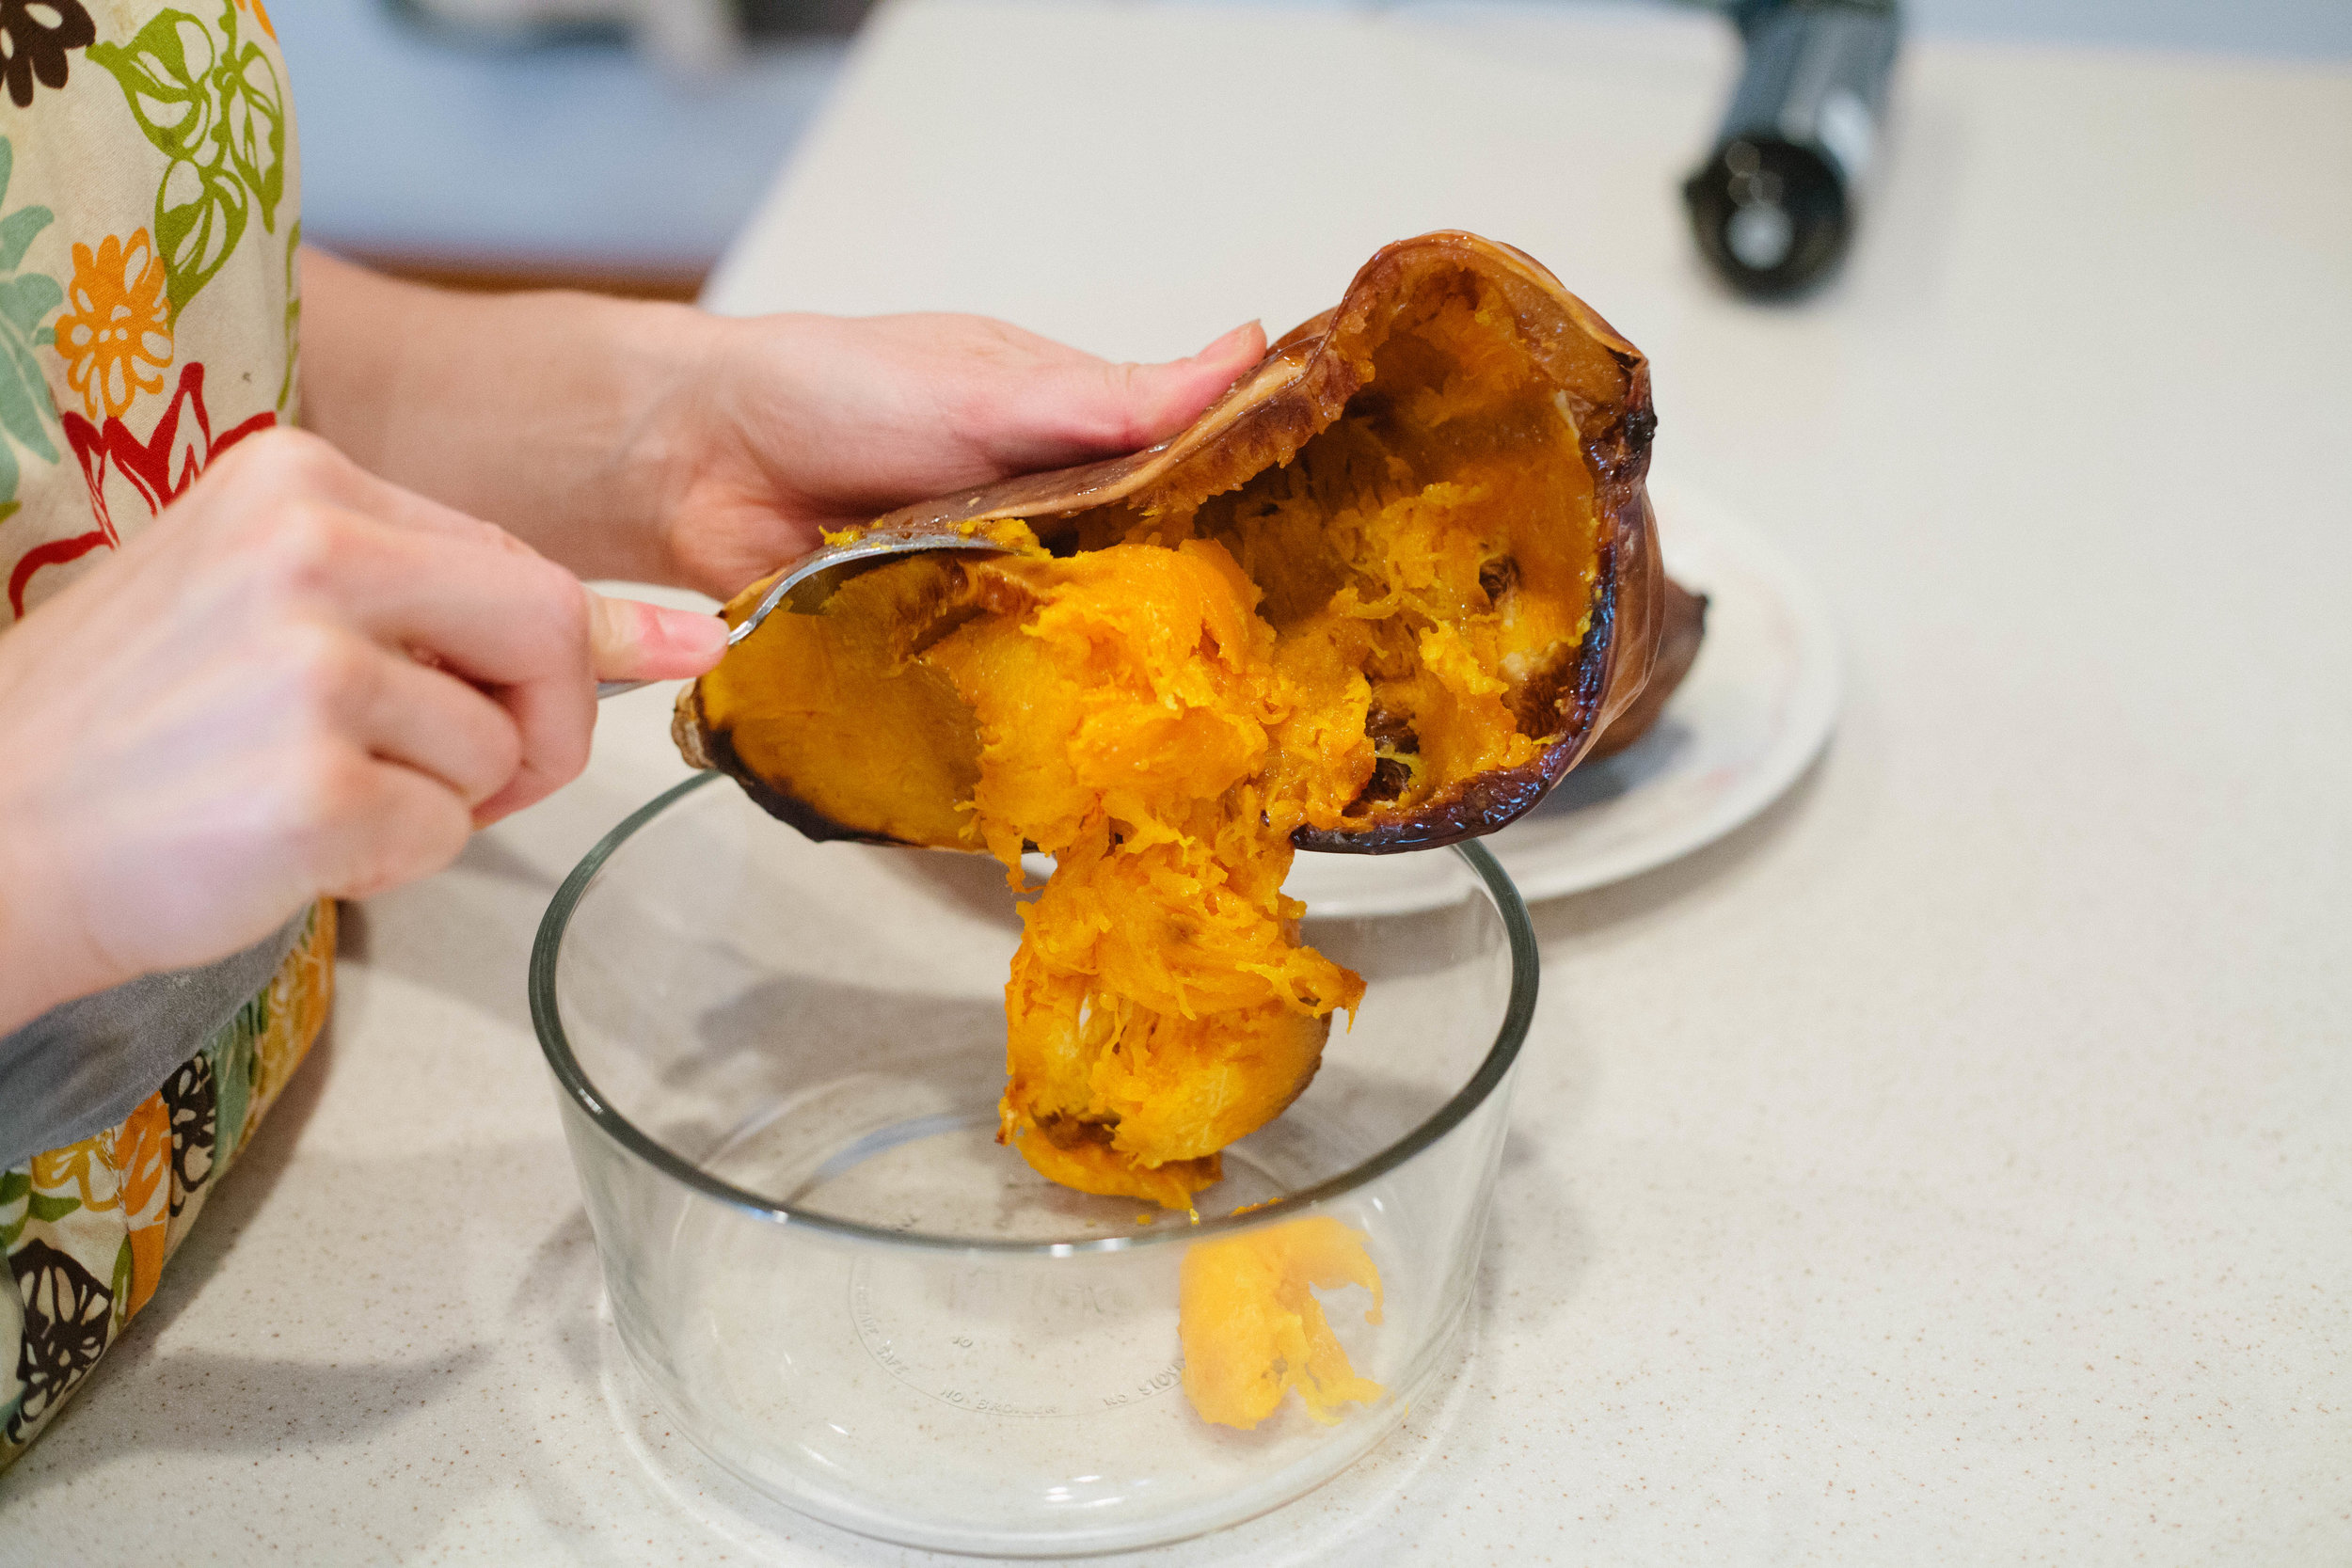
When squash has cooled and can be handled, scoop out the flesh with a spoon into a large bowl.

gaps-legal-pancakes-pancakes-made-with-butternut-squash-gaps-diet-gaps-protocol

Add squash, eggs and fat to blender. For every 1/2 cup of squash, add 3 eggs, 1 tbsp of fat and 2 pinches of salt. The traditional GAPS pancake recipe uses almond butter to thicken instead of fat. Since this is a nut free recipe, I used fat to thicken instead. Blend until smooth.

gaps-legal-pancakes-pancakes-made-with-butternut-squash-gaps-diet-gaps-protocol

Add a couple tablespoons of fat to a pan. Heat on low heat until oil is simmering.

Make sure your fat is glistening in the pan before adding your pancake batter. You can also add one drop of water into the pan. If it sizzles, the oil is ready.When pan is ready, add scoop of pancake batter. Cook pancake on low heat for about 10 minutes.

You can cook multiple pancakes at a time but I’ve had the best luck cooking one at a time!

gaps-legal-pancakes-pancakes-made-with-butternut-squash-gaps-diet-gaps-protocol

Similar to traditional pancakes, they will bubble on top when they are ready to flip.

Cook on the second side for about two to three minutes. Be careful - this second side will cook much faster than the first!

gaps-legal-pancakes-pancakes-made-with-butternut-squash-gaps-diet-gaps-protocol

Once cooked, add butter. Keep as a savory pancake or for a sweeter treat, add date syrup or cinnamon. Do not add cinnamon to the mixture before you cook - it will burn!

Notes: If your fat gets too hot and burns, rinse your pan out and start with new fat for the next pancake. Otherwise, all the pancakes will taste burn.

Blackened and burnt sections of the pancake contain high levels of carbon, which is difficult to digest. These should be avoided as much as possible on the introduction stages of the GAPS diet.


Butternut Squash Pancakes

Author:
prep time: cook time: total time:
This recipe was adapted from the GAPS Pancake Recipe in the Gut and Psychology Syndrome book by Dr. Natasha Campbell. Makes 3 Pancakes.

ingredients:

  • 1/2 c. cooked Butternut Squash
  • 3 Farm Fresh Eggs
  • Fat such as lard, butter or sour cream
  • Salt
  • Toppings such as date syrup or cinnamon
  • Food Processor or Blender

instructions:

How to cook Butternut Squash Pancakes

  1. Cut butternut squash into halves. Deseed and bake face down on a parchment lined baking tray for 40 minutes at 400 degrees until very soft.
  2. When squash has cooled and can be handled, scoop out the flesh with a spoon into a large bowl.
  3. Add squash, eggs and fat to blender. For every 1/2 cup of squash, add 3 eggs, 1 tbsp of fat and 2 pinches of salt. The traditional GAPS pancake recipe uses almond butter to thicken instead of fat. Since this is a nut free recipe, I used fat to thicken instead. Blend until smooth.
  4. Add a couple tablespoons of fat to a pan. Heat on low heat until oil is simmering.
  5. Make sure your fat is glistening in the pan before adding your pancake batter. You can also add one drop of water into the pan. If it sizzles, the oil is ready.When pan is ready, add scoop of pancake batter. Cook pancake on low heat for about 10 minutes.
  6. You can cook multiple pancakes at a time but I’ve had the best luck cooking one at a time!
  7. Similar to traditional pancakes, they will bubble on top when they are ready to flip.
  8. Cook on the second side for about two to three minutes. Be careful - this second side will cook much faster than the first!
  9. Once cooked, add butter. Keep as a savory pancake or for a sweeter treat, add date syrup or cinnamon. Do not add cinnamon to the mixture before you cook - it will burn!
  10. Notes: If your fat gets too hot and burns, rinse your pan out and start with new fat for the next pancake. Otherwise, all the pancakes will taste burn.
  11. Blackened and burnt sections of the pancake contain high levels of carbon, which is difficult to digest. These should be avoided as much as possible on the introduction stages of the GAPS diet.
Created using The Recipes Generator

Fruit Chutney for your Thanksgiving

Happy Thanksgiving!

One of the best things about November is the focus on being grateful and thankful. Everywhere you look there are posts and tweets showing gratitude. And we sure have a lot to be thankful for! Some things are so obvious we often forget to be thankful for. These are things like safe drinking water, warm houses, smart phones and electricity are so everyday for us that we forget how much we have.

Sometime this week, I encourage you to write a list of all the things you have to be thankful for. Don't feel silly including things like water, or your favorite pair of jeans. See how long you can make the list! Even if you don't feel like being thankful, I encourage you to do this exercise—gratitude changes our perception and experience of life, even if nothing is circumstantially different.

This is not to say that you don't have hard things in your life, or that you should pretend they aren't difficult. They are. Hard things are part of life and are very, very real. Remembering that there are good things in your life as well will help YOU through difficult situations.  

As you know, most of my posts (so far, at least) aren't recipes. But it's Thanksgiving! The start of holidays and delicious, rich, made-with-love food. Well this recipe is definitely delicious, rich and made-with-love!

I took the recipe out of Gut and Psychology Syndrome by Dr. Natasha Cambell-McBride. If you are following the GAPS diet this is legal on stage 5 or 6, when you are tolerating dried spices and peppercorns.

This recipe is very simple—chop and combine ingredients, simmer for a while, then store in jars. It would be a great recipe to make in a crockpot... you really could fix it and forget it! But simple doesn't mean plain. It's delicious and adds flavor to any meat you are eating. And I'm told, quite excellent with turkey!  

*This dairy-free, gluten-free, nut-free, sugar-free recipe would be great for gifts as well—ladle into pint jars and add a bow!

Fruit Chutney

Makes 3-4 quarts

Ingredients

  • 2 lbs dried dates (without stones, cut in half)

  • 2 lbs cooking apples (about 7 cups of pieces)

  • 1 lb plumbs (I used packaged prunes)

  • 3 medium onions (about 3 cups, finely diced)

  • 3 peppers (about 2 cups, finely diced)

  • 2 cups raw apple cider vinegar

  • 1-2 tsp whole peppercorns (freshly crushed)

  • 1-2 tsp aromatic seeds (I used cumin and dill)

  • 1 tsp cayenne pepper

  • 1-2 tsp natural salt

Directions:

Cut dates in half (and remove stones (seeds) if needed)

Slowly boil the dates in about 1 cup of water in a large pot until soft (about 10 minutes)

If you live in Colorado like me, and don't use a lid (also like me), you may need to add extra water during this process.

When the dates are soft, turn off heat and mash them with a potato masher—they don't have to be perfectly smooth, just mashed.  

While you were softening the dates, I hope you were furiously chopping! I completely underestimated the time it was going to take to chop everything I needed for this recipe. If you want the process to go smoother, I would recommend chopping everything at the beginning. Then as soon as the dates are soft you can add the rest, stir occasionally, and walk away!

The directions from Dr. Natasha are:

Add everything else to the dates and simmer 1-1/2 hours on very low heat, stirring occasionally.

If you are like me and work better with a little note of panic, then by all means, chop furiously and add things as you chop. For all you step-by-steppers like me, below are pictures to show what I added.

Sterilize the jars.

Dr. Natasha recommends doing this in an oven. I had never done this but it seemed to work great! Place cold jars in a cold oven. Heat the oven to 250°F, then leave it at that temperature for 40 minutes to sterilize the jars. Pull the jars out of the oven one-by-one as you are ready to fill them so they stay hot. Use oven mitts!

Ladle the hot chutney into the jars.

A jar funnel is a lifesaver here!

I left just a little room for air, much less than my fermenting self wanted, but no jars exploded so it must be okay!

Wipe off any chutney on the rim of the jar. Then immediately seal the jar, tightening the lid.

Again, use an oven mitt—the jars are hot!  

Place the jar on the counter, some distance between them.

It's better to not move the jars until they are cool, so place them where you will not need to move them for many hours, overnight is better.

When cool, place the jars into the refrigerator.

This is not a fermented food, so it does require refrigeration.  

Serve with meats and fish. Good cold or warm.

It's delicious! I made this for our Thanksgiving feast in a few days, but tried it out with some chicken today. I enjoyed it thoroughly! I hope you enjoy it as well!

Onward!


Fruit Chutney

Author:
prep time: cook time: total time:

ingredients:

  • 2 lbs dried dates (without stones, cut in half)
  • 2 lbs cooking apples (about 7 cups of pieces)
  • 1 lb plumbs (I used packaged prunes)
  • 3 medium onions (about 3 cups, finely diced)
  • 3 peppers (about 2 cups, finely diced)
  • 2 cups raw apple cider vinegar
  • 1-2 tsp whole peppercorns (freshly crushed)
  • 1-2 tsp aromatic seeds (I used cumin and dill)
  • 1 tsp cayenne pepper
  • 1-2 tsp natural salt

instructions:

How to cook Fruit Chutney

  1. Cut dates in half (and remove stones (seeds) if needed)
  2. Slowly boil the dates in about 1 cup of water in a large pot until soft (about 10 minutes)
  3. If you live in Colorado like me, and don't use a lid (also like me), you may need to add extra water during this process.
  4. When the dates are soft, turn off heat and mash them with a potato masher—they don't have to be perfectly smooth, just mashed.
  5. While you were softening the dates, I hope you were furiously chopping! I completely underestimated the time it was going to take to chop everything I needed for this recipe. If you want the process to go smoother, I would recommend chopping everything at the beginning. Then as soon as the dates are soft you can add the rest, stir occasionally, and walk away!
  6. The directions from Dr. Natasha are:
  7. Add everything else to the dates and simmer 1-1/2 hours on very low heat, stirring occasionally.
  8. If you are like me and work better with a little note of panic, then by all means, chop furiously and add things as you chop. For all you step-by-steppers like me, below are pictures to show what I added.
  9. Sterilize the jars.
  10. Dr. Natasha recommends doing this in an oven. I had never done this but it seemed to work great! Place cold jars in a cold oven. Heat the oven to 250°F, then leave it at that temperature for 40 minutes to sterilize the jars. Pull the jars out of the oven one-by-one as you are ready to fill them so they stay hot. Use oven mitts!
  11. Ladle the hot chutney into the jars.
  12. A jar funnel is a lifesaver here!
  13. I left just a little room for air, much less than my fermenting self wanted, but no jars exploded so it must be okay!
  14. Wipe off any chutney on the rim of the jar. Then immediately seal the jar, tightening the lid.
  15. Again, use an oven mitt—the jars are hot!
  16. Place the jar on the counter, some distance between them.
  17. It's better to not move the jars until they are cool, so place them where you will not need to move them for many hours, overnight is better.
  18. When cool, place the jars into the refrigerator.
  19. This is not a fermented food, so it does require refrigeration.
  20. Serve with meats and fish. Good cold or warm.
Created using The Recipes Generator

Fermented Garlic: A Powerful Food for Health

Fermented Garlic: A Powerful Food for Health

Heard of fermented garlic? Wondered what the health benefits of garlic are? Then this post is for you!

Lovely Lard

Eating animal fat is important to our body's health. But eating enough fat can be challenging, especially when there is a dairy allergy. Lard is a great alternative to butter, and its taste is more mild than that of tallow.

You can buy lard at the store, but it is expensive and may be hydrogenated or of poor quality. Making your own lard is simple and easy, and can be done for a fraction of the price.

To make lard, you first start out with pig fat. This can be obtained from a butcher, or even trimmed off of fatty cuts of pork like the Boston butt. The process of turning fat into lard or tallow is called rendering. In this post I describe rendering lard, but the process for rendering tallow (which is fat from beef, bison, deer, lamb, or elk) is the same, although for tallow it may take a few more hours.  

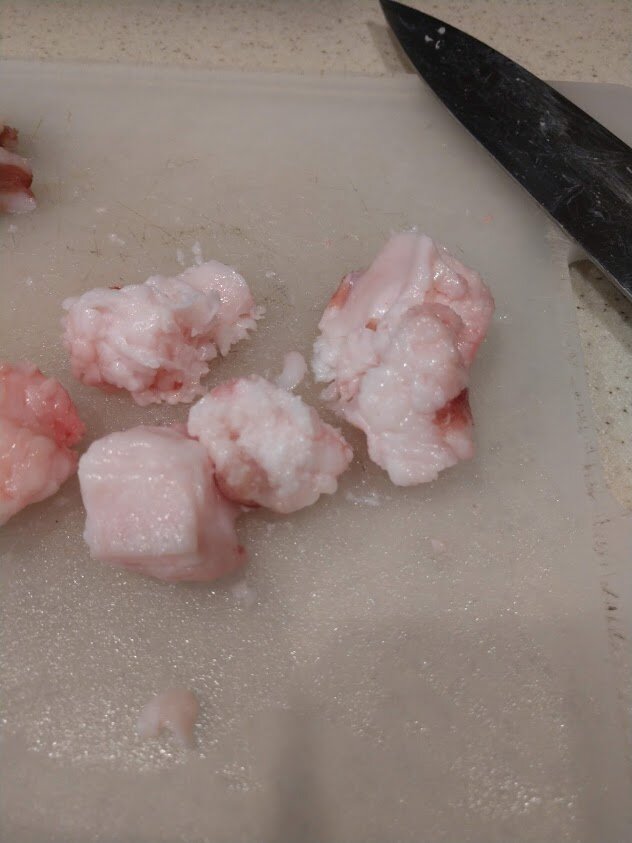
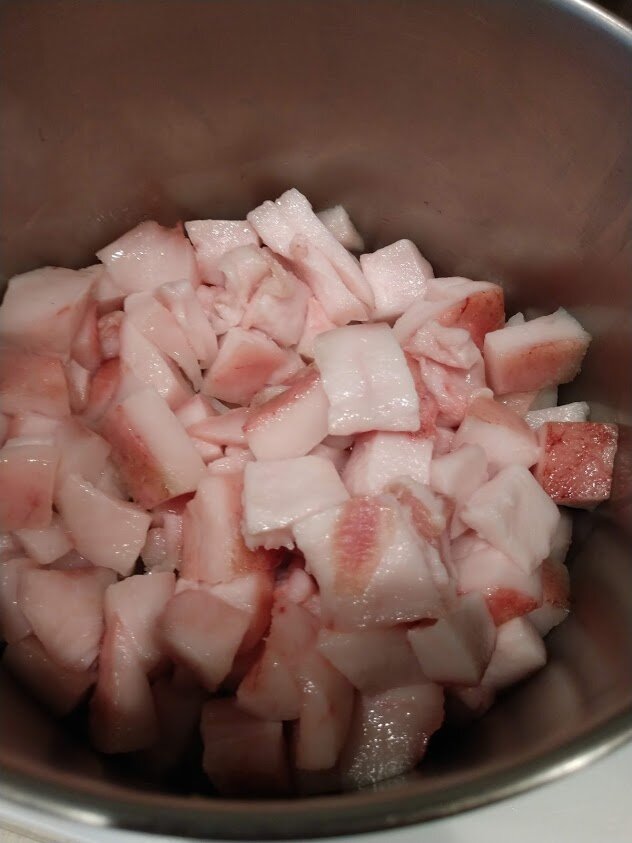
There are two kinds of pig fat. Leaf fat is from fat surrounding the internal organs. It is very mild in taste and used to be reserved for making pies and pastries. Body fat is from the layer of fat beneath the skin. This has a slightly stronger pork taste, and is better used in cooking meat and vegetables. Along with a different taste, there is a different look to the two types of fat. Body fat is in large pieces, and appears more dense and flat. Leaf fat is in smaller pieces, has a fluffier texture, and may contain membranes. The fat you get from a butcher may contain both types of fat. If that is the case, I recommend separating out the two types of fat and rendering them separately so you can use them for different purposes. However, there is no problem in mixing them and rendering them together.

Leaf fat

IMG_20190605_084127513.jpg

Body Fat

IMG_20190605_084134159.jpg

Watch the video below to learn how to make lard and then scroll down for the recipe and directions!

Making Lard:

First, cut up the pig fat into small 1-2 inch sized cubes. If using leaf fat, remove as much membrane as possible.

Put the fat cubes in a medium saucepan on low heat. You may use a crockpot, but it must have a very low setting or the fat will burn. Stir occasionally and watch closely. Don't let the lard smoke!

With time, the solid pieces of fat will get smaller, and the liquid will increase.

After a few hours, when the lard is liquefied, set up your strainer and cloth. A metal strainer is best because the lard is hot! For extra strained lard which will last even longer you can additionally strain through a cloth. You can use an old napkin or other cloth, or several layers of cheesecloth. I have a dedicated cloth I use just for straining lard because you can never really wash out all the grease.

Pour the liquid into the strainer. The liquid will go into the jar and the cracklings will stay in the cloth or strainer.

Squeeze the rest of the liquid out of the cracklings.

Once cracklings are separated from the liquid lard, salt and fry them. You can eat them like bacon bits, or just by themselves.

Allow the jar of lard to cool on the counter.

When the lard is cool you can move it to the fridge, or leave it on the counter.

If you are careful not to contaminate the jar, the lard will last for several months, even left out at room temperature. Use the lard in your cooking— it is a wonderful thing to fry up vegetables or meat and add fat to your diet. Bon appétit!

Onward!


How to Make Lard

Author:
prep time: cook time: total time:

instructions:

How to cook How to Make Lard

  1. First, cut up the pig fat into small 1-2 inch sized cubes. If using leaf fat, remove as much membrane as possible.
  2. Put the fat cubes in a medium saucepan on low heat. You may use a crockpot, but it must have a very low setting or the fat will burn. Stir occasionally and watch closely. Don't let the lard smoke!
  3. With time, the solid pieces of fat will get smaller, and the liquid will increase.
  4. After a few hours, when the lard is liquified, set up your strainer and cloth.
  5. Below you see pictured a jar, jar funnel, and metal strainer. Metal is best because the lard is hot! To finish it off, place a cloth. You can use an old napkin or other cloth, or several layers of cheesecloth.
  6. Pour the liquid into the strainer. The liquid will go into the jar and the cracklings will stay in the cloth.
  7. Squeeze the rest of the liquid out of the cracklings.
  8. Cracklings separated from the liquid lard. Salt and fry these. You can eat them like bacon bits, or just plain.
  9. Allow the jar of lard to cool on the counter.
  10. When the lard is cool you can move it to the fridge, or leave it on the counter.
  11. If you are careful not to contaminate the jar, the lard will last for several months, even left out at room temperature. Use the lard in your cooking— it is a wonderful thing to fry up vegetables or meat and add fat to your diet. Bon appétit!
Created using The Recipes Generator

Making the Vegetable Medley

One of the most important ferments in the GAPS™ diet is the vegetablemedley. You can find this recipe in Dr. Natasha Cambell-McBride's book, Gut and Psychology Syndrome. Her recipe is for a bowl ferment, but you can also make it in a jar, which is how I prefer to make it. And this is the recipe we are going to do today! This recipe contains five different vegetables: beets (good for liver and blood cleansing), cabbage (stimulates digestion), carrots (contain vitamin A), and cauliflower (makes it taste better, believe me), and garlic (good for immune support). It makes a very rich and flavorful liquid, which is also a wonderful probiotic drink.

No matter how delicious this is, and how much you like it, drink only a little bit in the beginning to avoid die-off. Respect the ferments, man!

IMG_7729.jpg

Ingredients and Supplies for Vegetable Medley

  • Glass jar, 1/2 gallon

  • Sea salt, 3-4 TBS

  • 1 Medium beet

  • 3 Carrots

  • 1/2 Cauliflower

  • 1/2 Cabbage

  • Garlic (5-7 cloves), fresh or fermented

Instructions for Vegetable Medley

IMG_7693.jpg

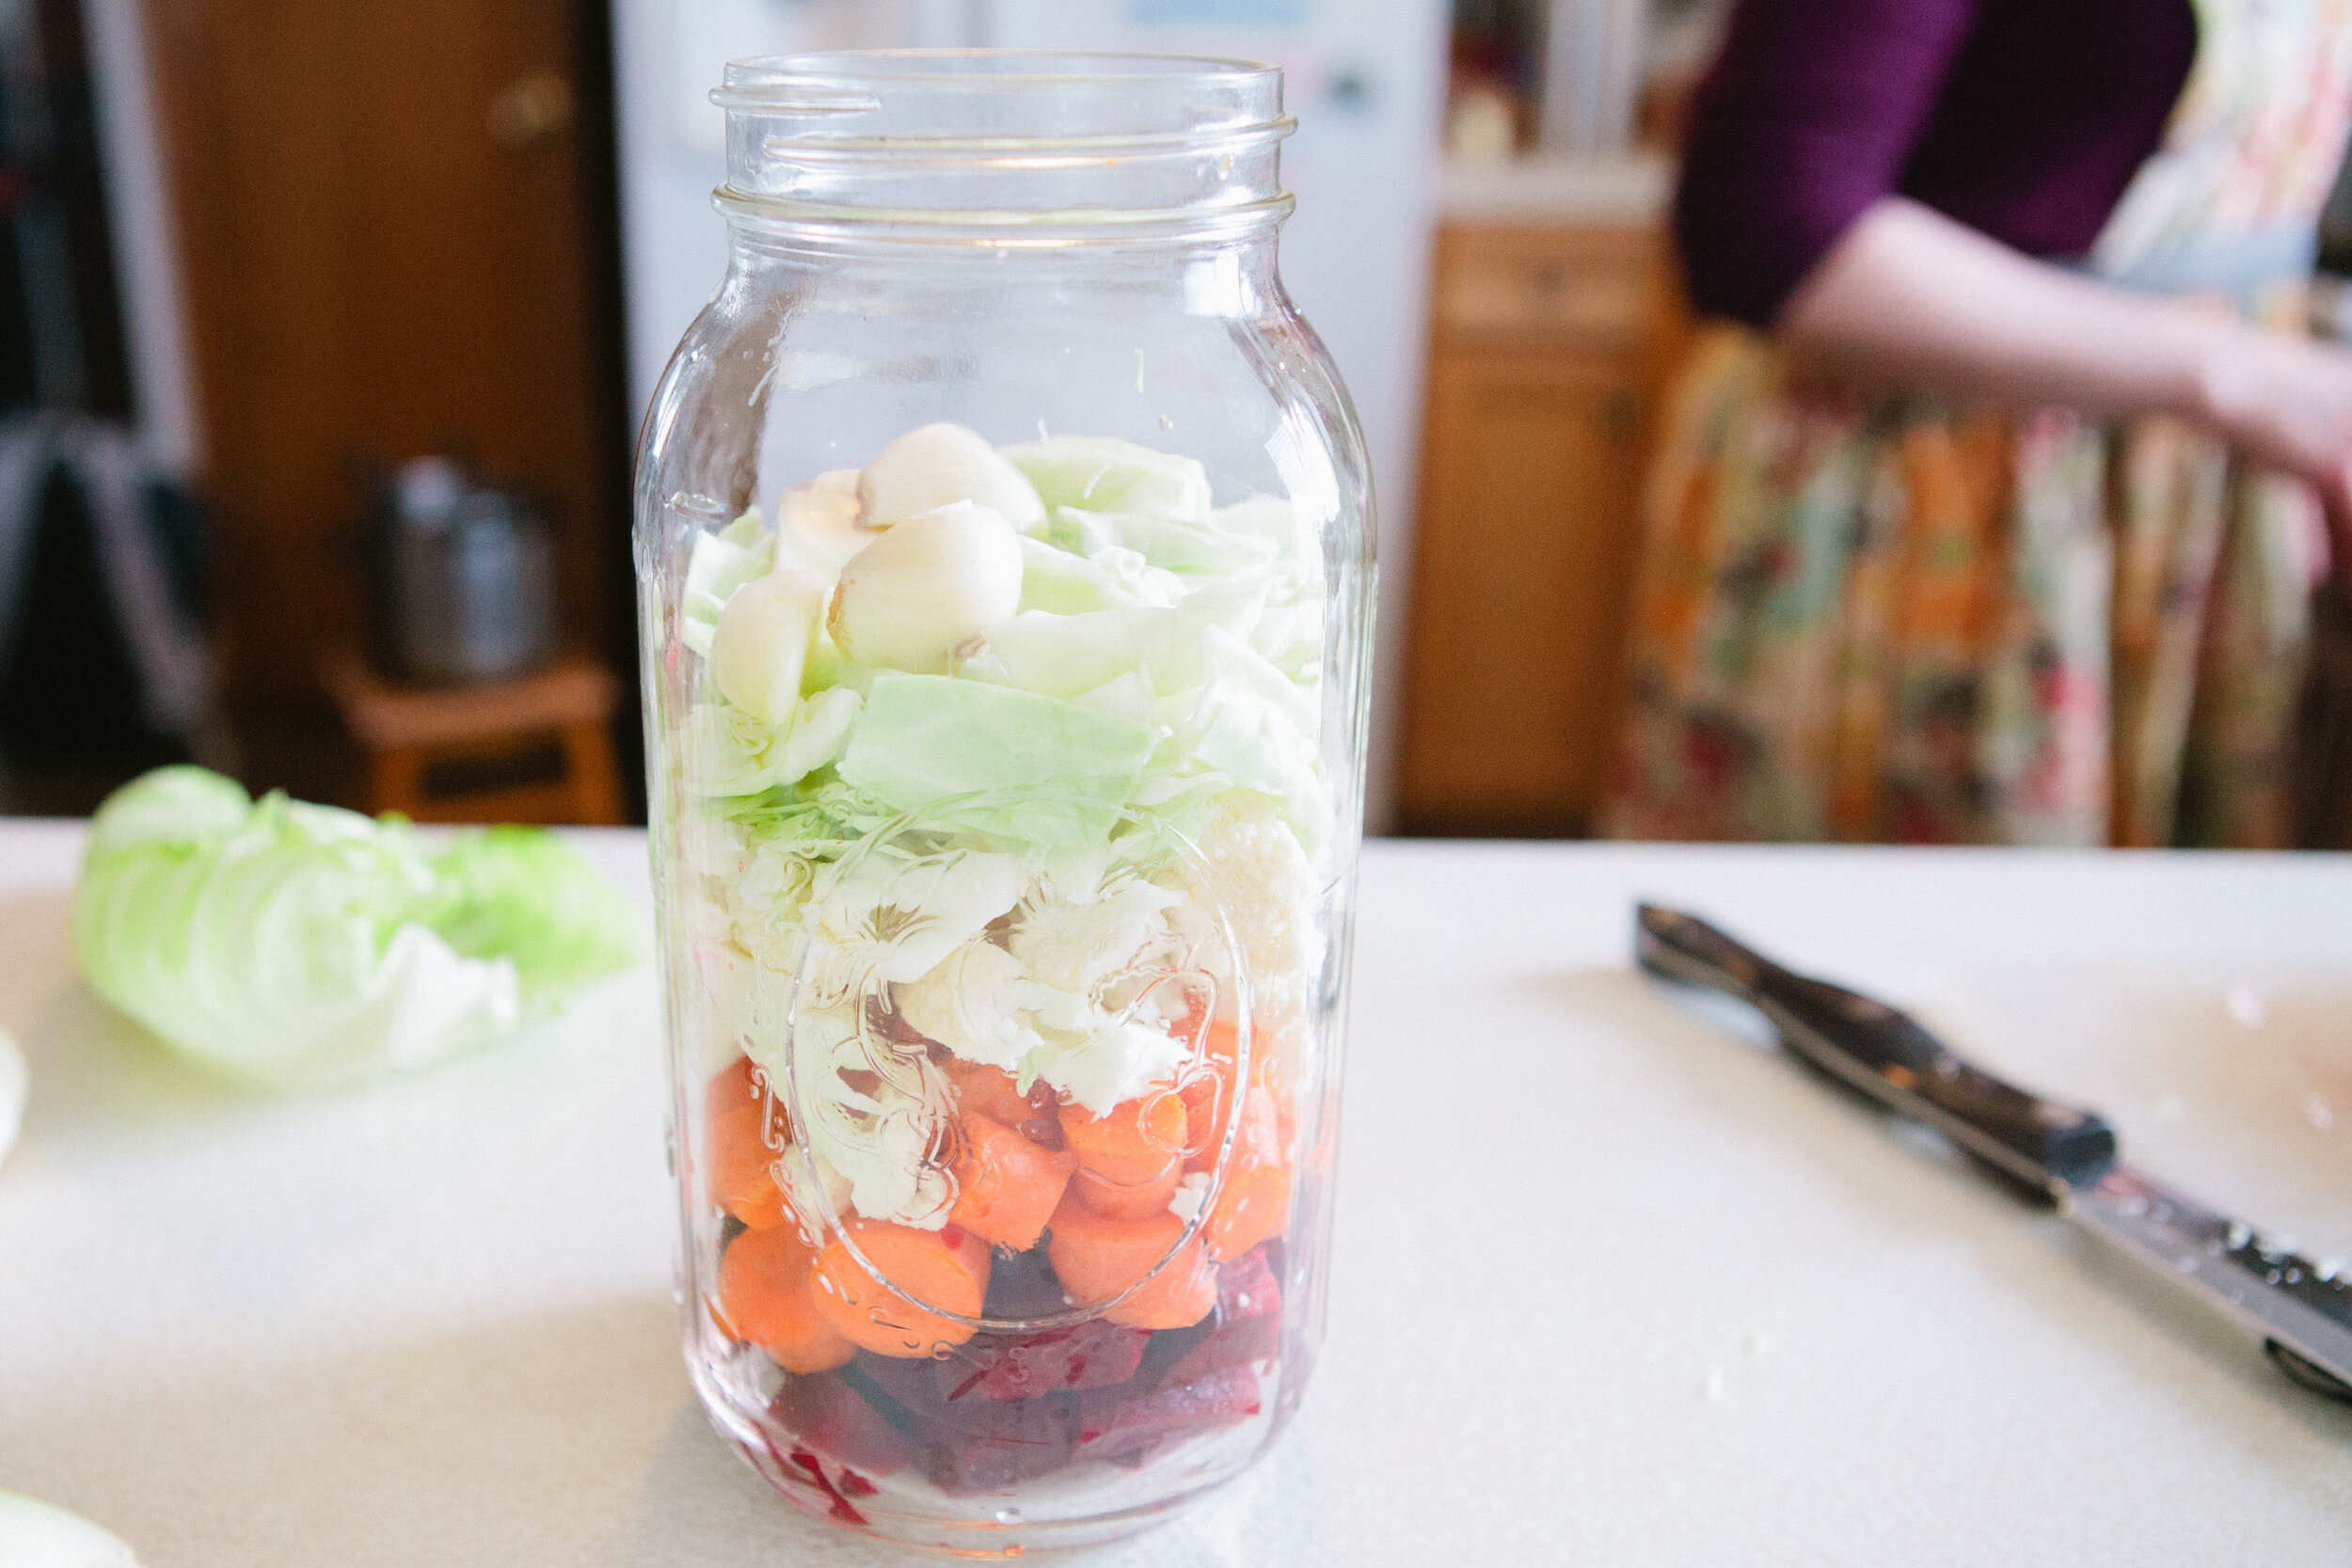
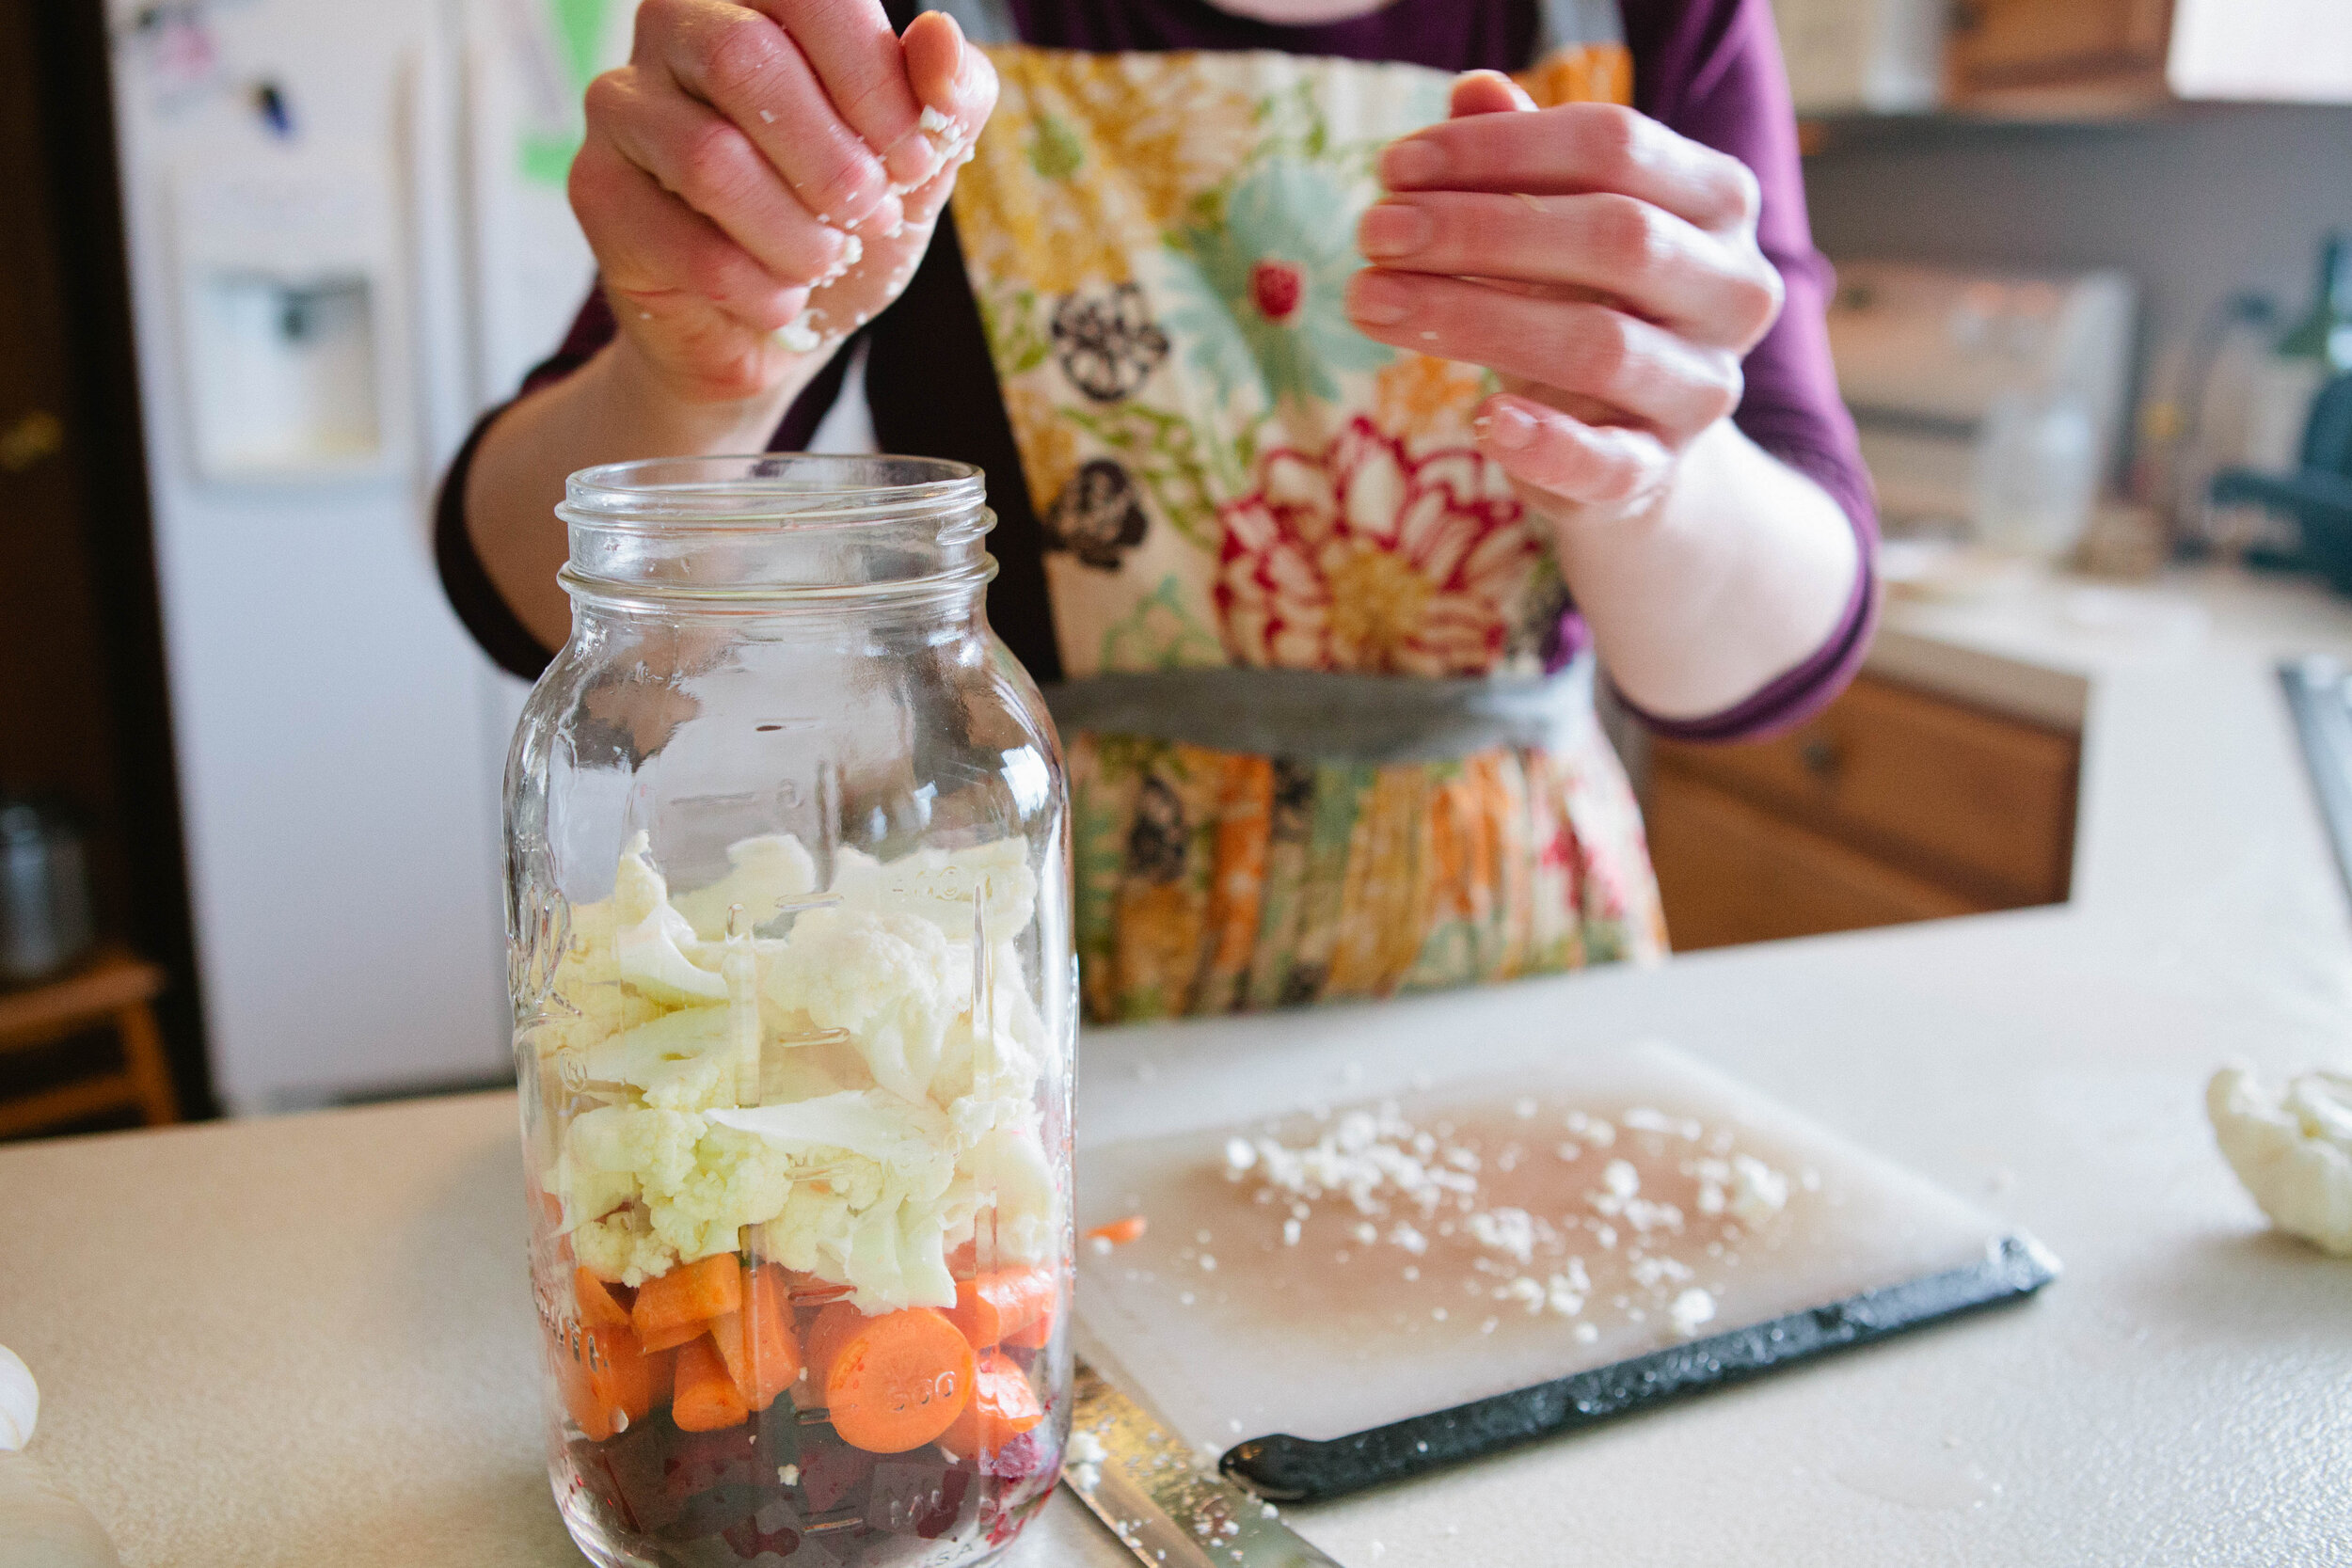
To a clean half-gallon jar, add about 1/2 cup of each vegetable. You can add them in any order you like. The main purpose of the vegetable medley is to drink the liquid, so make sure the ingredients you add only fill the jar half way (or a little more). This will create enough liquid to make it worth it!

IMG_7715.jpg

Add the beets. Then the carrots. And so on...

IMG_7727.jpg

Last of all, add the garlic. When all the ingredients are in the jar, it should be less than 3/4 full.

IMG_7732.jpg

Create a brine of the salt and about a 1 cup of filtered water. Swirl and shake to dissolve the salt.

Add filtered water, to the shoulder of the jar.

IMG_7754.jpg

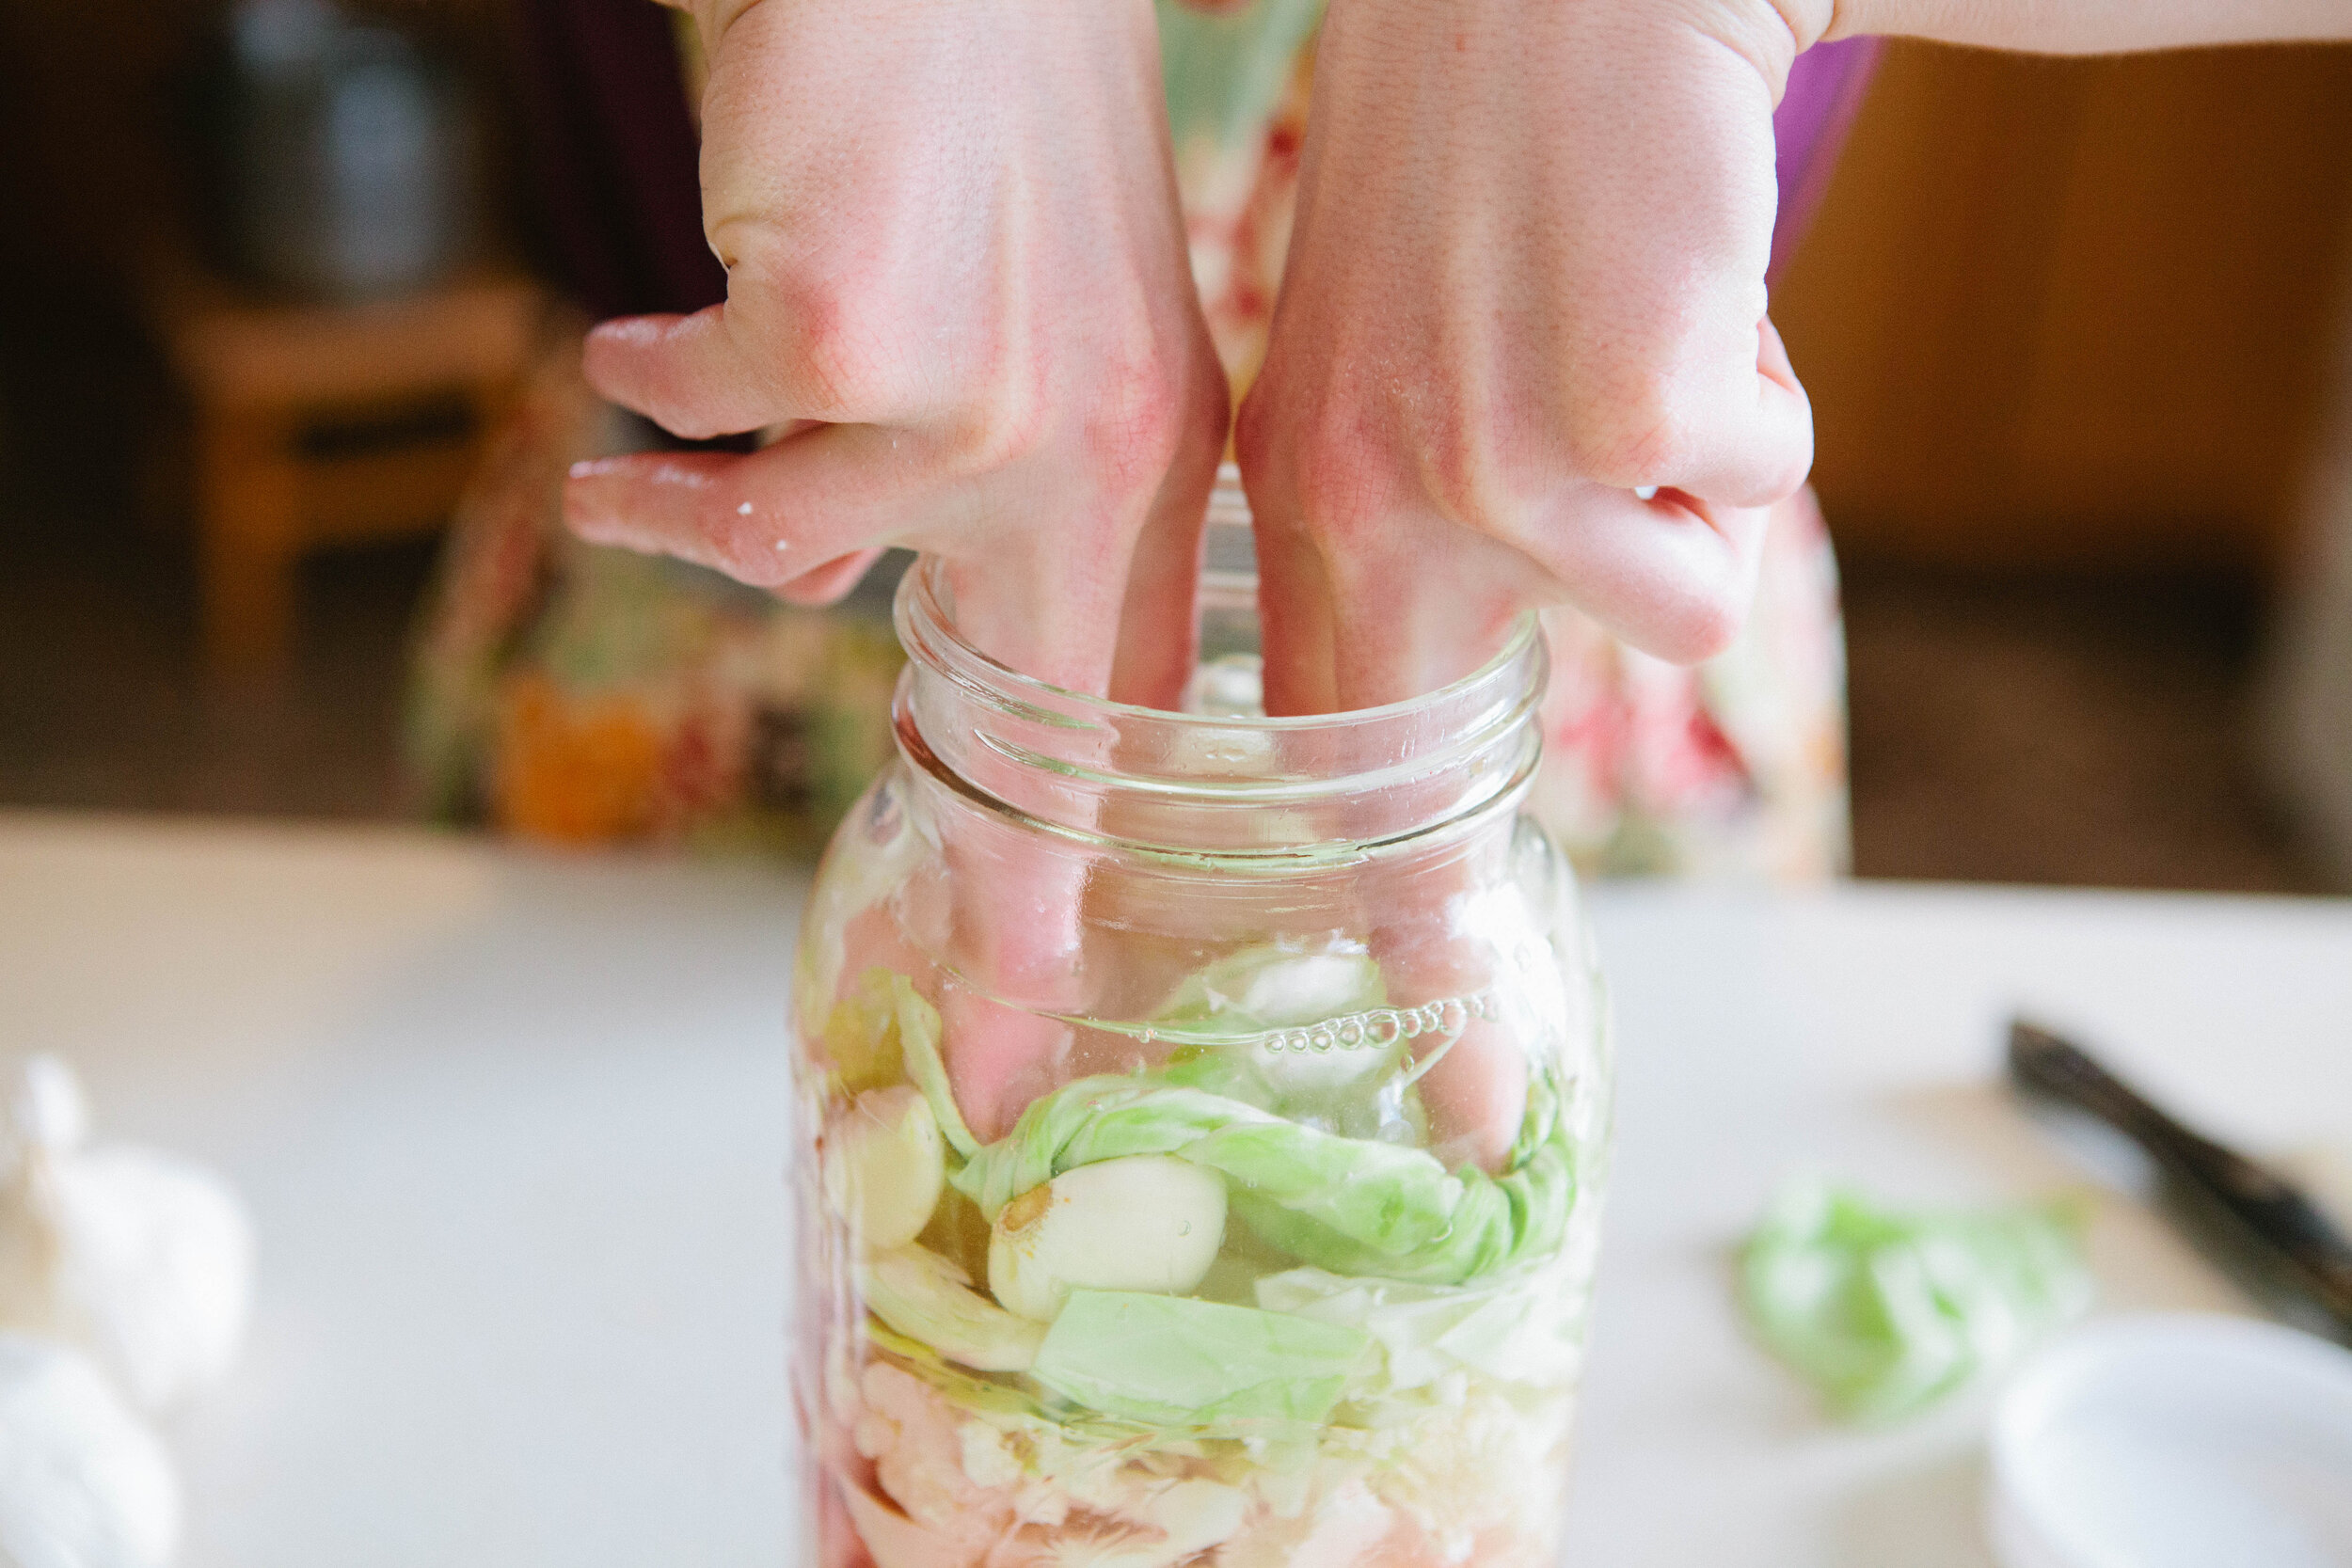
Finally, add a cabbage leaf or two to hold all the ingredients under the water. I add a pinch of salt after the cabbage leaves are in place to discourage bad bacterial growth. All that's left is to tightly screw on the lid and leave it on the counter.

After 7 days, move the jar to the fridge and consume the liquid until it's gone, and eat the vegetable pieces. This can be a perpetual ferment. To do this, daily drink what you need, then replace that amount with filtered water, and continue to leave it out on the counter. Keep up with this process until the vegetables are spent (they turn grey and tasteless).

That's it! You have successfully made the veggie medley! Once you get the basics down, you can experiment with different vegetable combinations (eg. broccoli instead of cauliflower). Let us know your favorite combinations!

Onward!


Vegetable Medley

Author:
prep time: cook time: total time:

ingredients:

  • Glass jar, 1/2 gallon
  • Sea salt, 3-4 TBS
  • Medium beet
  • Carrots (3)
  • Cauliflower
  • Cabbage
  • Garlic (5-7 cloves), fresh or fermented

instructions:

How to cook Vegetable Medley

  1. To a clean half-gallon jar, add about 1/2 cup of each vegetable.You can add them in any order you like. The main purpose of the vegetable medley is to drink the liquid, so make sure the ingredients you add only fill the jar half way (or a little more). This will create enough liquid to make it worth it!
  2. Add the beets
  3. And carrots
  4. And so on...
  5. Last of all, garlic and salt
  6. When all the ingredients are in the jar, it should be less than 3/4 full. Add filtered water, to the shoulder of the jar. Finally, add a cabbage leaf or two to hold all the ingredients under the water. I add a pinch of salt after the cabbage leaves are in place to discourage bad bacterial growth. All that's left is to tightly screw on the lid and leave it on the counter.
  7. After 7 days, move the jar to the fridge and consume the liquid until it's gone, and eat the vegetable pieces. This can be a perpetual ferment. To do this, daily drink what you need, then replace that amount with filtered water, and continue to leave it out on the counter. Keep up with this process until the vegetables are spent (they turn grey and tasteless).
  8. That's it! You have successfully made the veggie medley! Once you get the basics down, you can experiment with different vegetable combinations (eg. broccoli instead of cauliflower). 
Created using The Recipes Generator
VegetableMedley.png

GAPS Milkshake

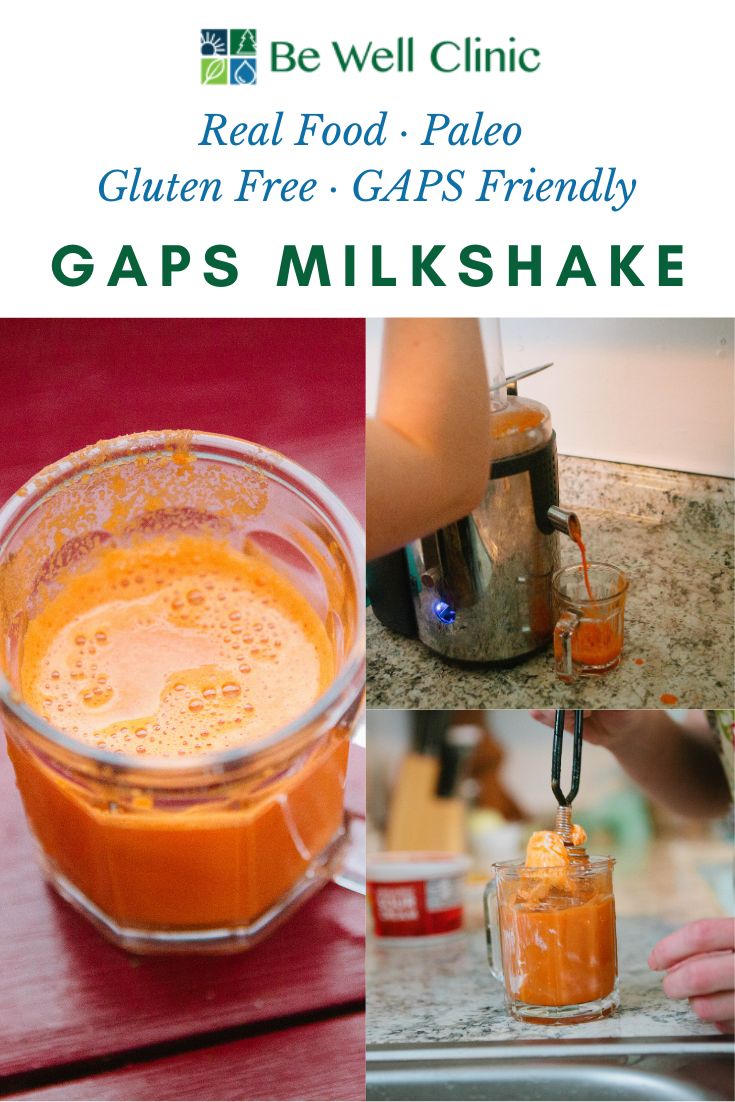
Our recipe this week is a simple, but powerful one! It is called the GAPS™ milkshake, and it packs a powerful punch! This delicious, satisfying and helpful beverage is a wonderful way to daily consume your freshly-pressed juices, and can even be a meal.

The GAPS™ milkshake is mix of juice, protein, and fat. Because it is easily digested, usually in about 20 minutes, it can be eaten when you don't have much time to sit and digest. But because it contains fat and protein, as well as sugar, it can sustain you for a while, often a few hours.

Let's get down to making it! You need a few simple ingredients.

  1. Freshly pressed juices (I like carrots, but you can use any juice mixture)

  2. Sour cream (creme fraische), coconut oil, or another fat

  3. Raw egg (whole or just the yoke)

  4. Raw honey (optional, and only a little!)

IMG_7397.jpg

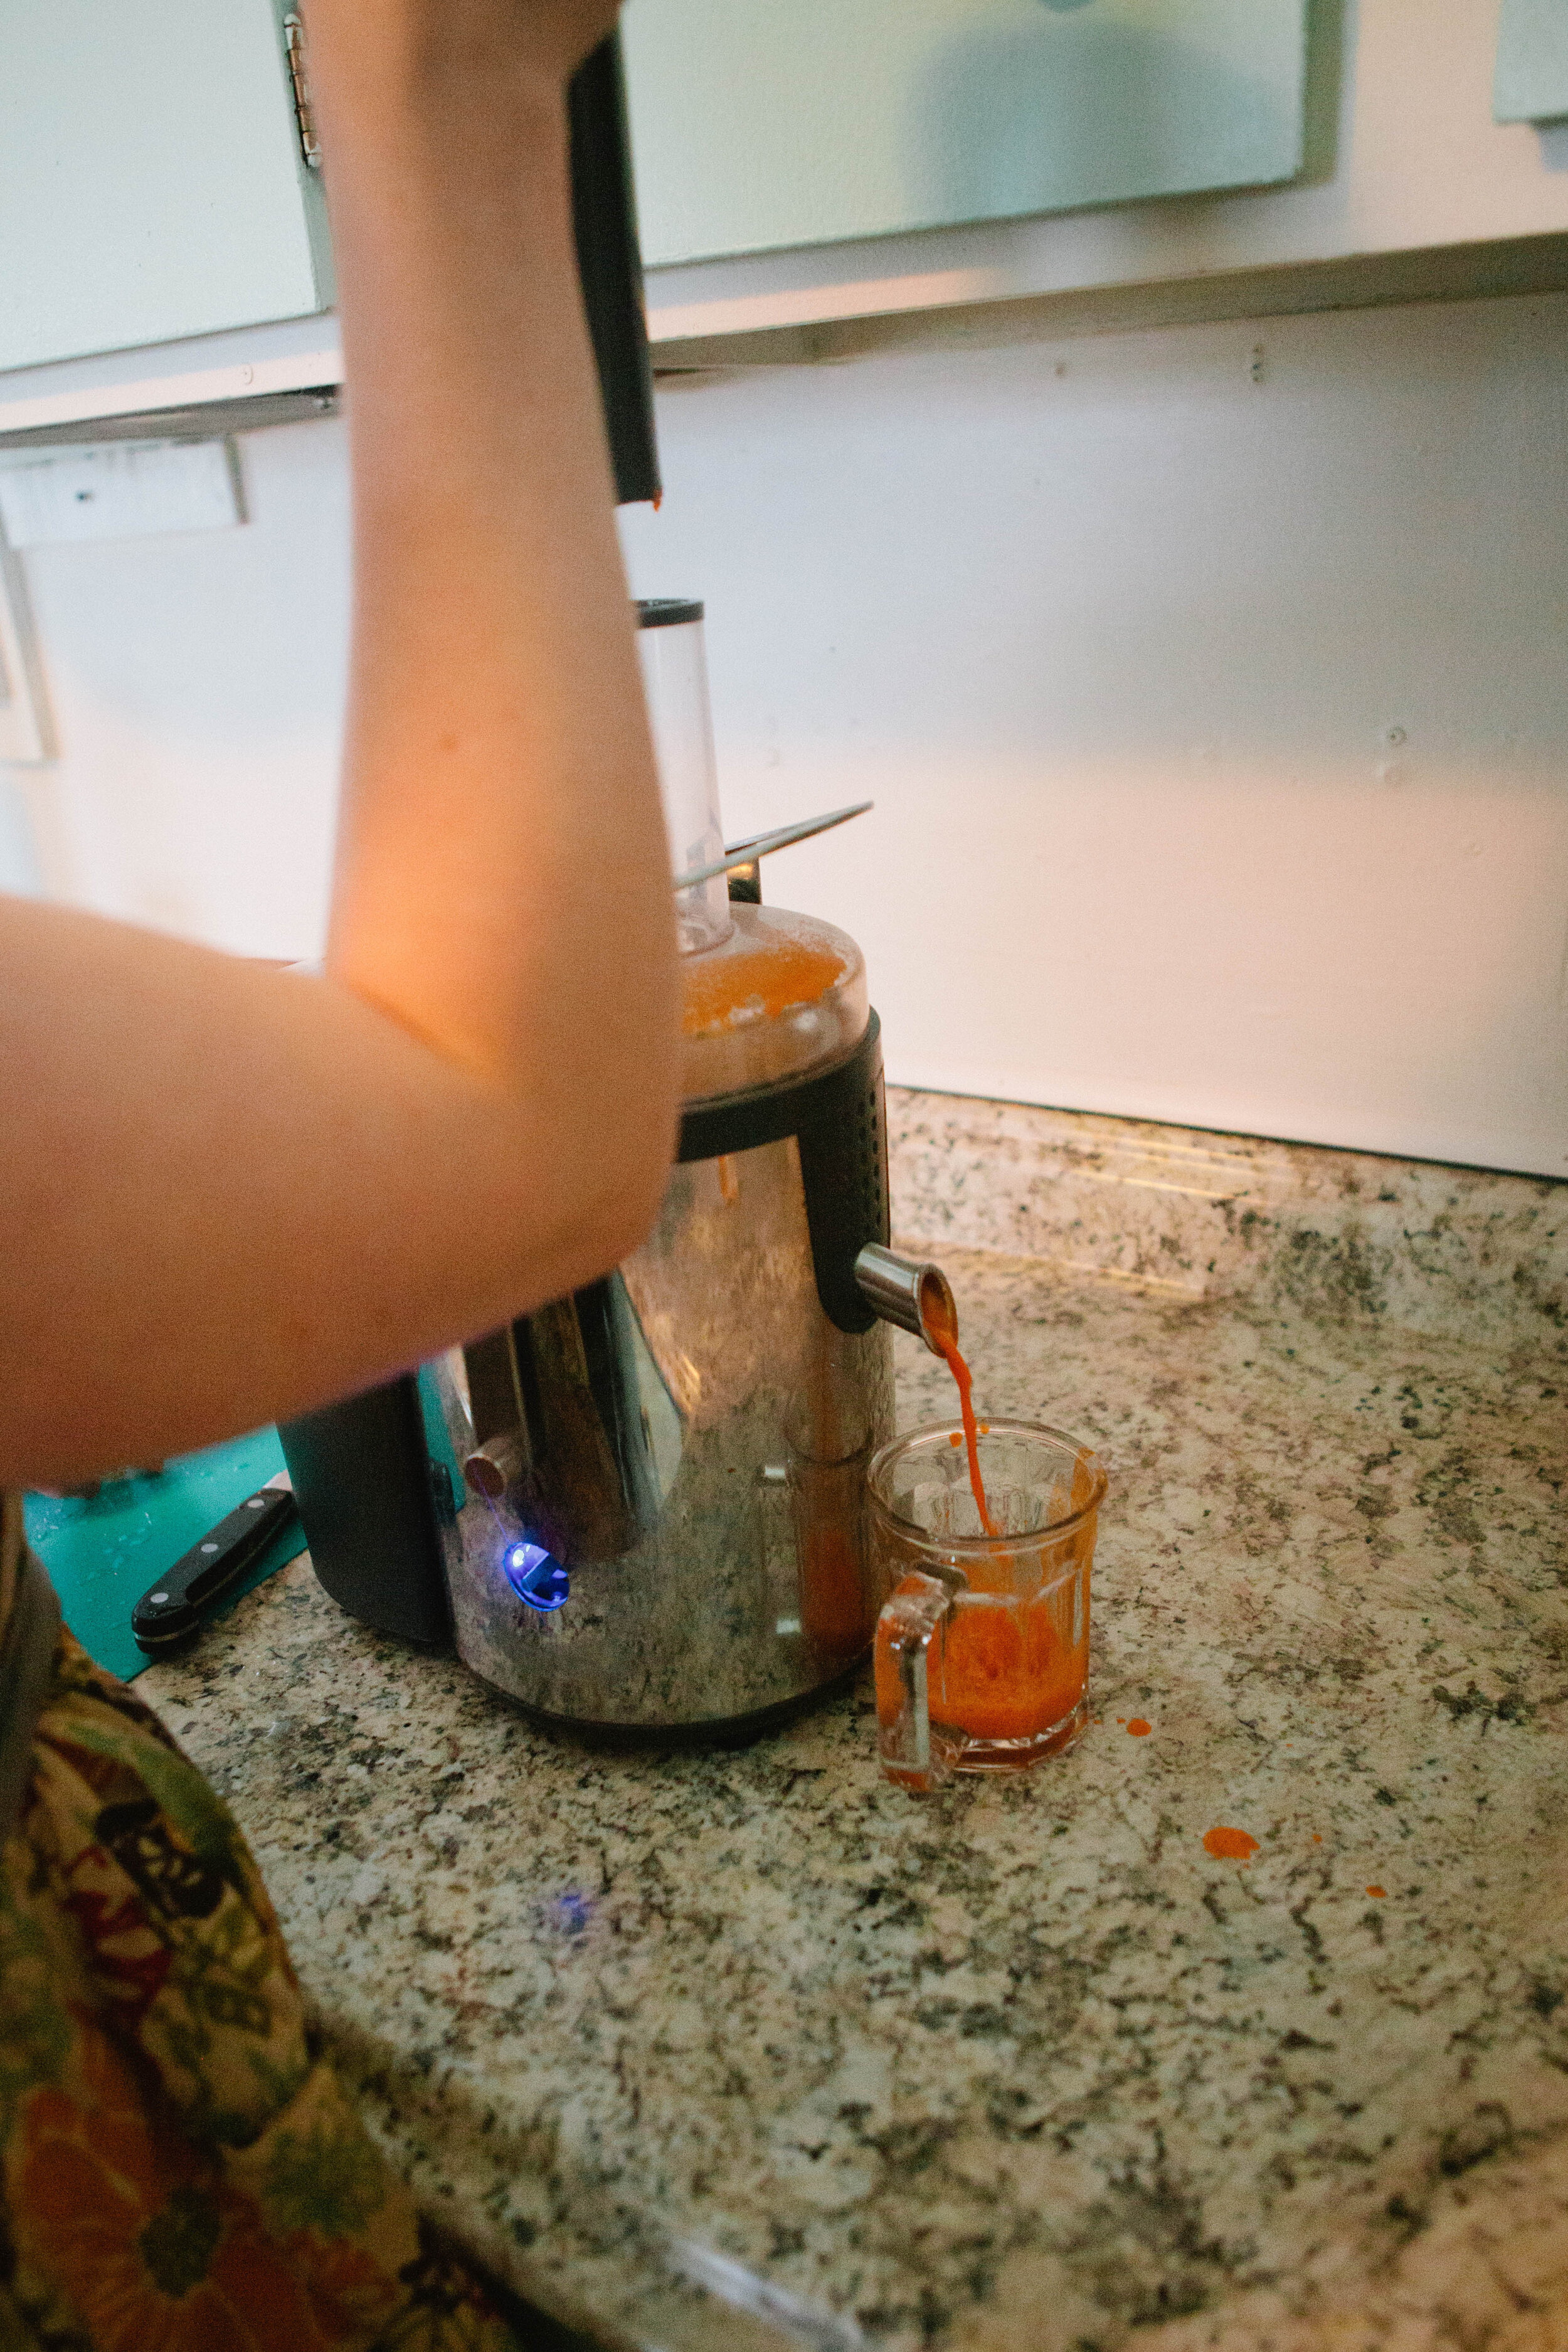
Juice the carrot (and/or other vegetables and fruits). I use organic vegetables so I just rinse them off (sometimes). You can see my (not) high-end juicer in the picture! But it works! Don't feel like you have to spend hundreds of dollars to juice (this one was about $40). It is a centrifuge juicer, and I try to consume the juices within 15 minutes to get the most enzyme activity, but again, it works! Successful GAPS is not about perfection, it is about action!

IMG_7433.jpg

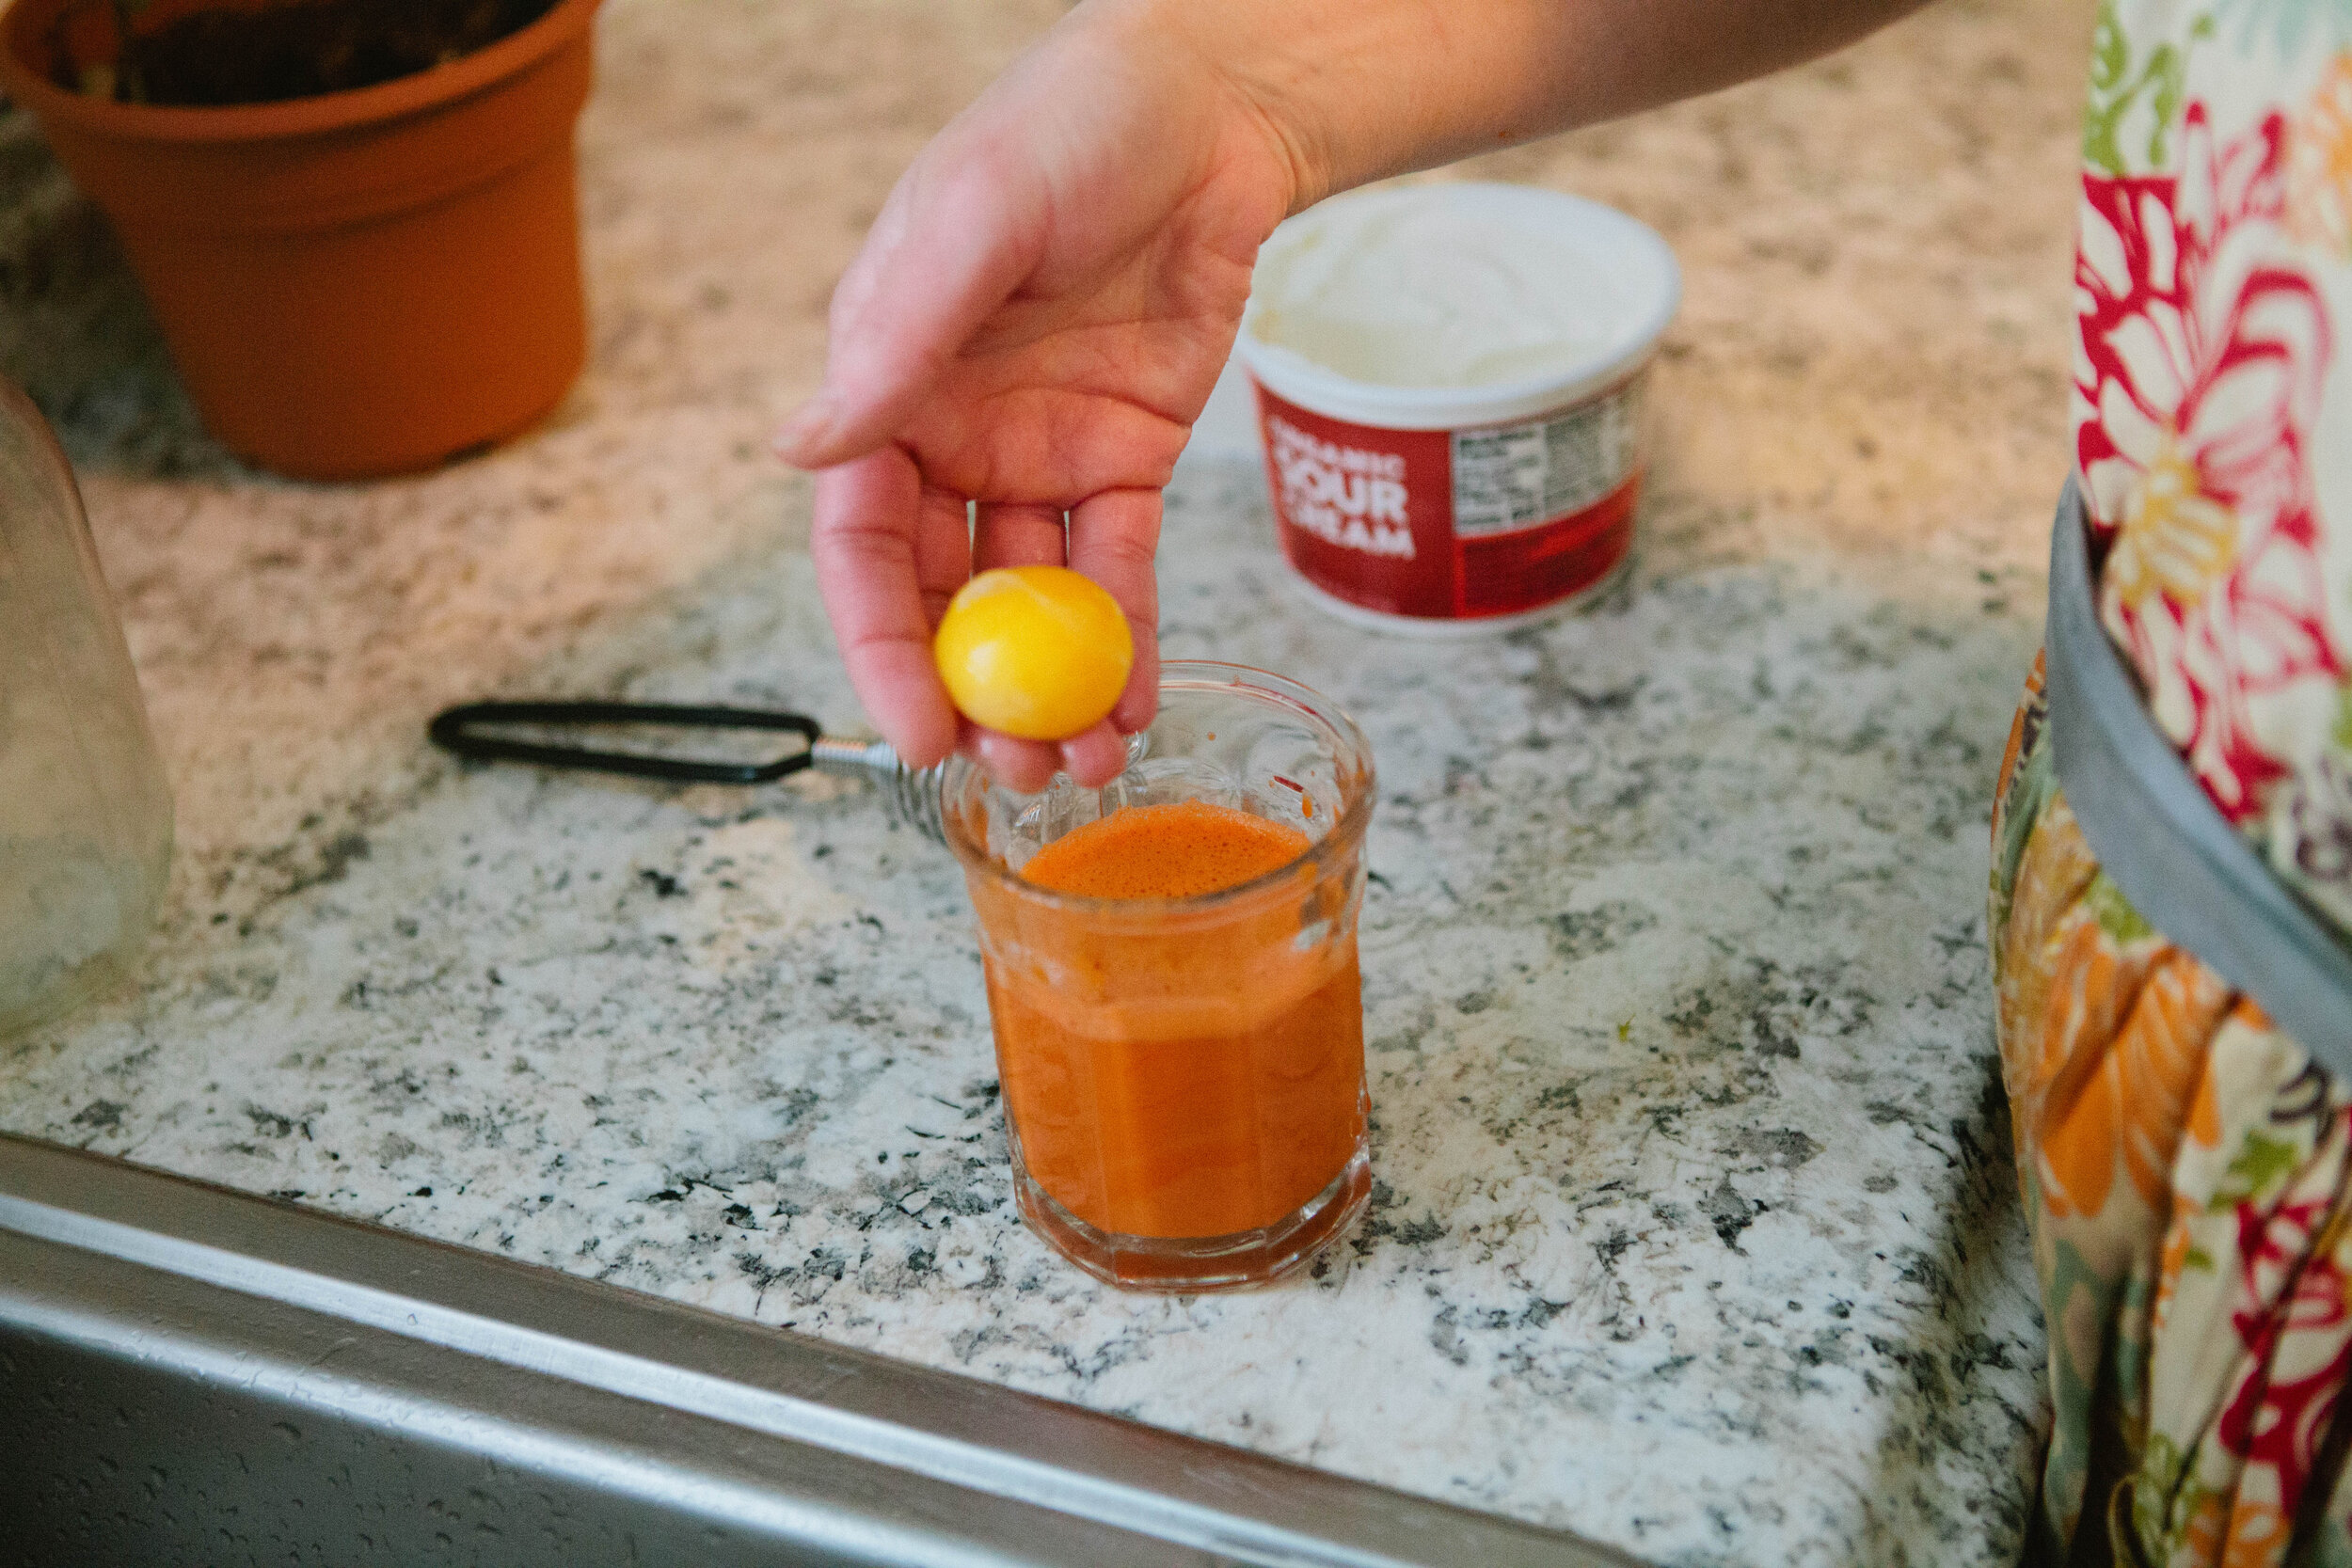
Once you have your juice in a glass, you are ready to add your other ingredients. Add 1-2 raw egg yolks or whole raw eggs. If you do add the white, I recommend using a spring whisk or a blender to break up the white--that is a hard texture to get down! With raw eggs, it is also important to know the source of your eggs (were the chickens healthy) and try not to touch the shell with the egg. If there happens to be any salmonella present, it is likely still on the outside of the egg, not the inside. Of course, there is no guarantee, especially if the eggs are washed (this breaks down the protective layer around the egg), so consume at your own risk! But I have yet to get sick, even using store bought eggs sometimes.

IMG_7441.jpg

Add the sour cream (a good-sized dollop). The sour cream is there primarily to slow the absorption of sugar from the juice—add to taste. You can also add coconut oil if you are not tolerating dairy (technically this makes it a GAPS Smoothie) Stir, whisk or blend together.

You can add a little honey if you need to. It is better to add some fruit to your juice ingredients instead of honey, but that isn't always an option, especially on early stages. I have found that the egg whites are a little bitter, and when I add a whole egg instead of just the yolk, I often need a little honey to help it go down. That's it! All that's left is to enjoy it!

As I said, this is a great "meal" for those on-the-go mornings. Especially if you are hungry early in the morning, this is a great thing to drink, as it is not a burden to the digestive system. The juices support your body's cleansing processes, which are often happening from 4am-10am every day. You could also add beet kvass to this beverage as an extra liver cleanser. It can overwhelm the flavor, so I prefer to drink mine separately. Experiment with your preferences, and with the recipe! Let us know how you like it best!

Onward!

GAPS Milkshake

GAPSmilkshake-150x150.jpg
  • Freshly Pressed Juices

  • Sour cream, creme faiche, coconut oil, or another fat

  • Raw Egg ((whole or just the yoke))

  • Raw Honey ((optional and only a little))

  1. Juice the carrot (and/or other vegetables and fruits).

  2. Add 1-2 raw egg yolks or whole raw eggs. If you do add the white, I recommend using a spring whisk or a blender to break up the white–that is a hard texture to get down!

  3. Add the sour cream to taste. The sour cream is there primarily to slow the absorption of sugar from the juice.

  4. Stir, whisk or blend together.

  5. Add a little honey if you need to

With raw eggs, it is also important to know the source of your eggs (were the chickens healthy) and try not to touch the shell with the egg. If there happens to be any salmonella present, it is likely still on the outside of the egg, not the inside. Of course, there is no guarantee, especially if the eggs are washed (this breaks down the protective layer around the egg), so consume at your own risk! 

I have found that the egg whites are a little bitter, and when I add a whole egg instead of just the yolk, I often need a little honey to help it go down.


HowtoMaketheGAPSMilkshakeJuiceCleanseGAPSDietRecipe.png

GAPS Milkshake

Author:
prep time: cook time: total time:

ingredients:

  • Freshly Pressed Juices
  • Sour cream, creme faiche, coconut oil, or another fat
  • Raw Egg ((whole or just the yoke))
  • Raw Honey ((optional and only a little))

instructions:

How to cook GAPS Milkshake

  1. Juice the carrot (and/or other vegetables and fruits).
  2. Add 1-2 raw egg yolks or whole raw eggs. If you do add the white, I recommend using a spring whisk or a blender to break up the white–that is a hard texture to get down!
  3. Add the sour cream to taste. The sour cream is there primarily to slow the absorption of sugar from the juice.
  4. Stir, whisk or blend together.
  5. Add a little honey if you need to

NOTES:

With raw eggs, it is also important to know the source of your eggs (were the chickens healthy) and try not to touch the shell with the egg. If there happens to be any salmonella present, it is likely still on the outside of the egg, not the inside. Of course, there is no guarantee, especially if the eggs are washed (this breaks down the protective layer around the egg), so consume at your own risk! I have found that the egg whites are a little bitter, and when I add a whole egg instead of just the yolk, I often need a little honey to help it go down.
Created using The Recipes Generator

Beet Kvass

Beet Kvass is a liver tonic. Anyone can make this simple fermented drink! It requires only a few ingredients, and only a few minutes to "put up."

Want to learn how? Good!

But first, some definitions:

  • Kvass: beverage

  • "Put up" a ferment: combine ingredients and set it aside to let it ferment

  • Sea Salt: unrefined salt, salt that is the same way it was found in nature

    • contains many trace minerals, depending on which type it is

    • Celtic Sea Salt, Real Salt, Himalayan Salt, others

    • most fermenting enthusiasts prefer Himalayan for fermenting (it's a taste thing)

  • Shoulder of the jar: the area of a jar where the jar narrows to become the mouth


Ingredients & Supplies to make beet kvass

  • 1/2 gallon glass mason jar

  • 1 medium-large beet

  • 2 TBS sea salt

  • cold, filtered water

Directions to Make Your Own Beet Kvass

Cut the beet into 1-2 inch cubes. Do not cut too small or shred the beet! Too much surface area and the beets will ferment too fast and create alcohol!

You do not need to peel the beets, just wash fairly well and cut off the top. A little organic dirt will add minerals and soil bacterium.

Place the cut beet in the mason jar. The beets should fill the jar about 1/4-1/3 of the way

Add salt to the jar. 2 TBS is the traditional amount when whey is not added.

Fill the jar up to the shoulder with cold, filtered water.

Seal the jar with a metal lid and ring, closing tightly.

Gently tip and swirl the jar to help the salt dissolve.

Set on the counter for 3-5 days, until the kvass is a rich purple color.

Move to the fridge (the beets stay in the liquid)

Consume daily!

You can use the beets for two batches

  • when the liquid is almost gone (about a pint left) then refill with water and salt

  • set on the counter for another 3-5 days

  • when the liquid is gone the second time, discard the beets and start fresh

Tips and Tricks for beet kvass

  • My beets are floating!

    • It's okay if the beets are floating-they often do, but will eventually sink. You don't need a weight for this ferment.

  • How much salt?????

    • The amount of salt largely depends on you--your taste, and your climate.

    • The salt is there to inhibit bad bacteria growth until the good bacteria are strong enough.

    • Beet kvass doesn't seem to go bad often, especially in the dry climate of Colorado.

    • I use about 2 TBS salt and no whey, with no problem. No whey! Ha ha ha, get it?

    • People like their kvass with more or less salt, so see how it tastes best to you.

  • I have a white film on the top and/or the bottom of my kvass.

    • DON'T start over!

    • This is merely the hard working lactobacillus bacterium thriving!

    • You can shake or stir in the white film, or skim it off, if you prefer.

  • I have blue or black, or another color of mold!

    • This is NOT okay. If you find this, throw it out and start over!

  • How much do I take each day?

    • It is generally recommended that you take up to 4 ounces 2x/day.

    • As with all ferments, it is important to START SLOW and increase gradually.

    • It's best to take this on an empty stomach, like first thing in the morning.

Love beets?!?!?!?

Can't get enough of them?!?!?

Learn about other great ways to eat beets here!

Happy fermenting!

Onward!


Beet Kvass

Author: Amy Mihaly, Be Well Clinic

Ingredients

  • 1/2 gallon glass mason jar
  • 1 medium-large beet
  • 2 TBS sea salt
  • cold, filtered water

Instructions

  1. Cut the beet into 1-2 inch cubes. Do not cut too small or shred the beet! Too much surface area and the beets will ferment too fast and create alcohol!
  2. You do not need to peel the beets, just wash fairly well and cut off the top. A little organic dirt will add minerals and soil bacterium.
  3. Place the cut beet in the mason jar. The beets should fill the jar about 1/4-1/3 of the way
  4. Add salt to the jar. 2 TBS is the traditional amount if no whey added.
  5. Fill the jar up to the shoulder with cold, filtered water.
  6. Seal the jar with a metal lid and ring, closing tightly.
  7. Gently tip and swirl the jar to help the salt dissolve.
  8. Set on the counter for 3-5 days, until the kvass is a rich purple color.
  9. Move to the fridge (the beets stay in the liquid)
  10. Consume daily!
  11. You can use the beets for two batches: when the liquid is almost gone (about a pint left) then refill with water and salt, set on the counter for another 3-5 day. When the liquid is gone the second time, discard the beets and start fresh.
BeetKvassBlogPost.png