GAPS Stage 3

Honey Fermented Garlic

What is the difference between fermented garlic and honey fermented garlic? The difference is mostly sweetness, but fermented garlic uses a saltwater brine, whereas honey garlic uses the liquid from the garlic cloves combined with the live enzymes and microbes in the honey to ferment. Both are very useful to support the immune system, but honey garlic has the additional benefit of raw honey. Most children like the sweetness, so it may be easier to get garlic into the children.

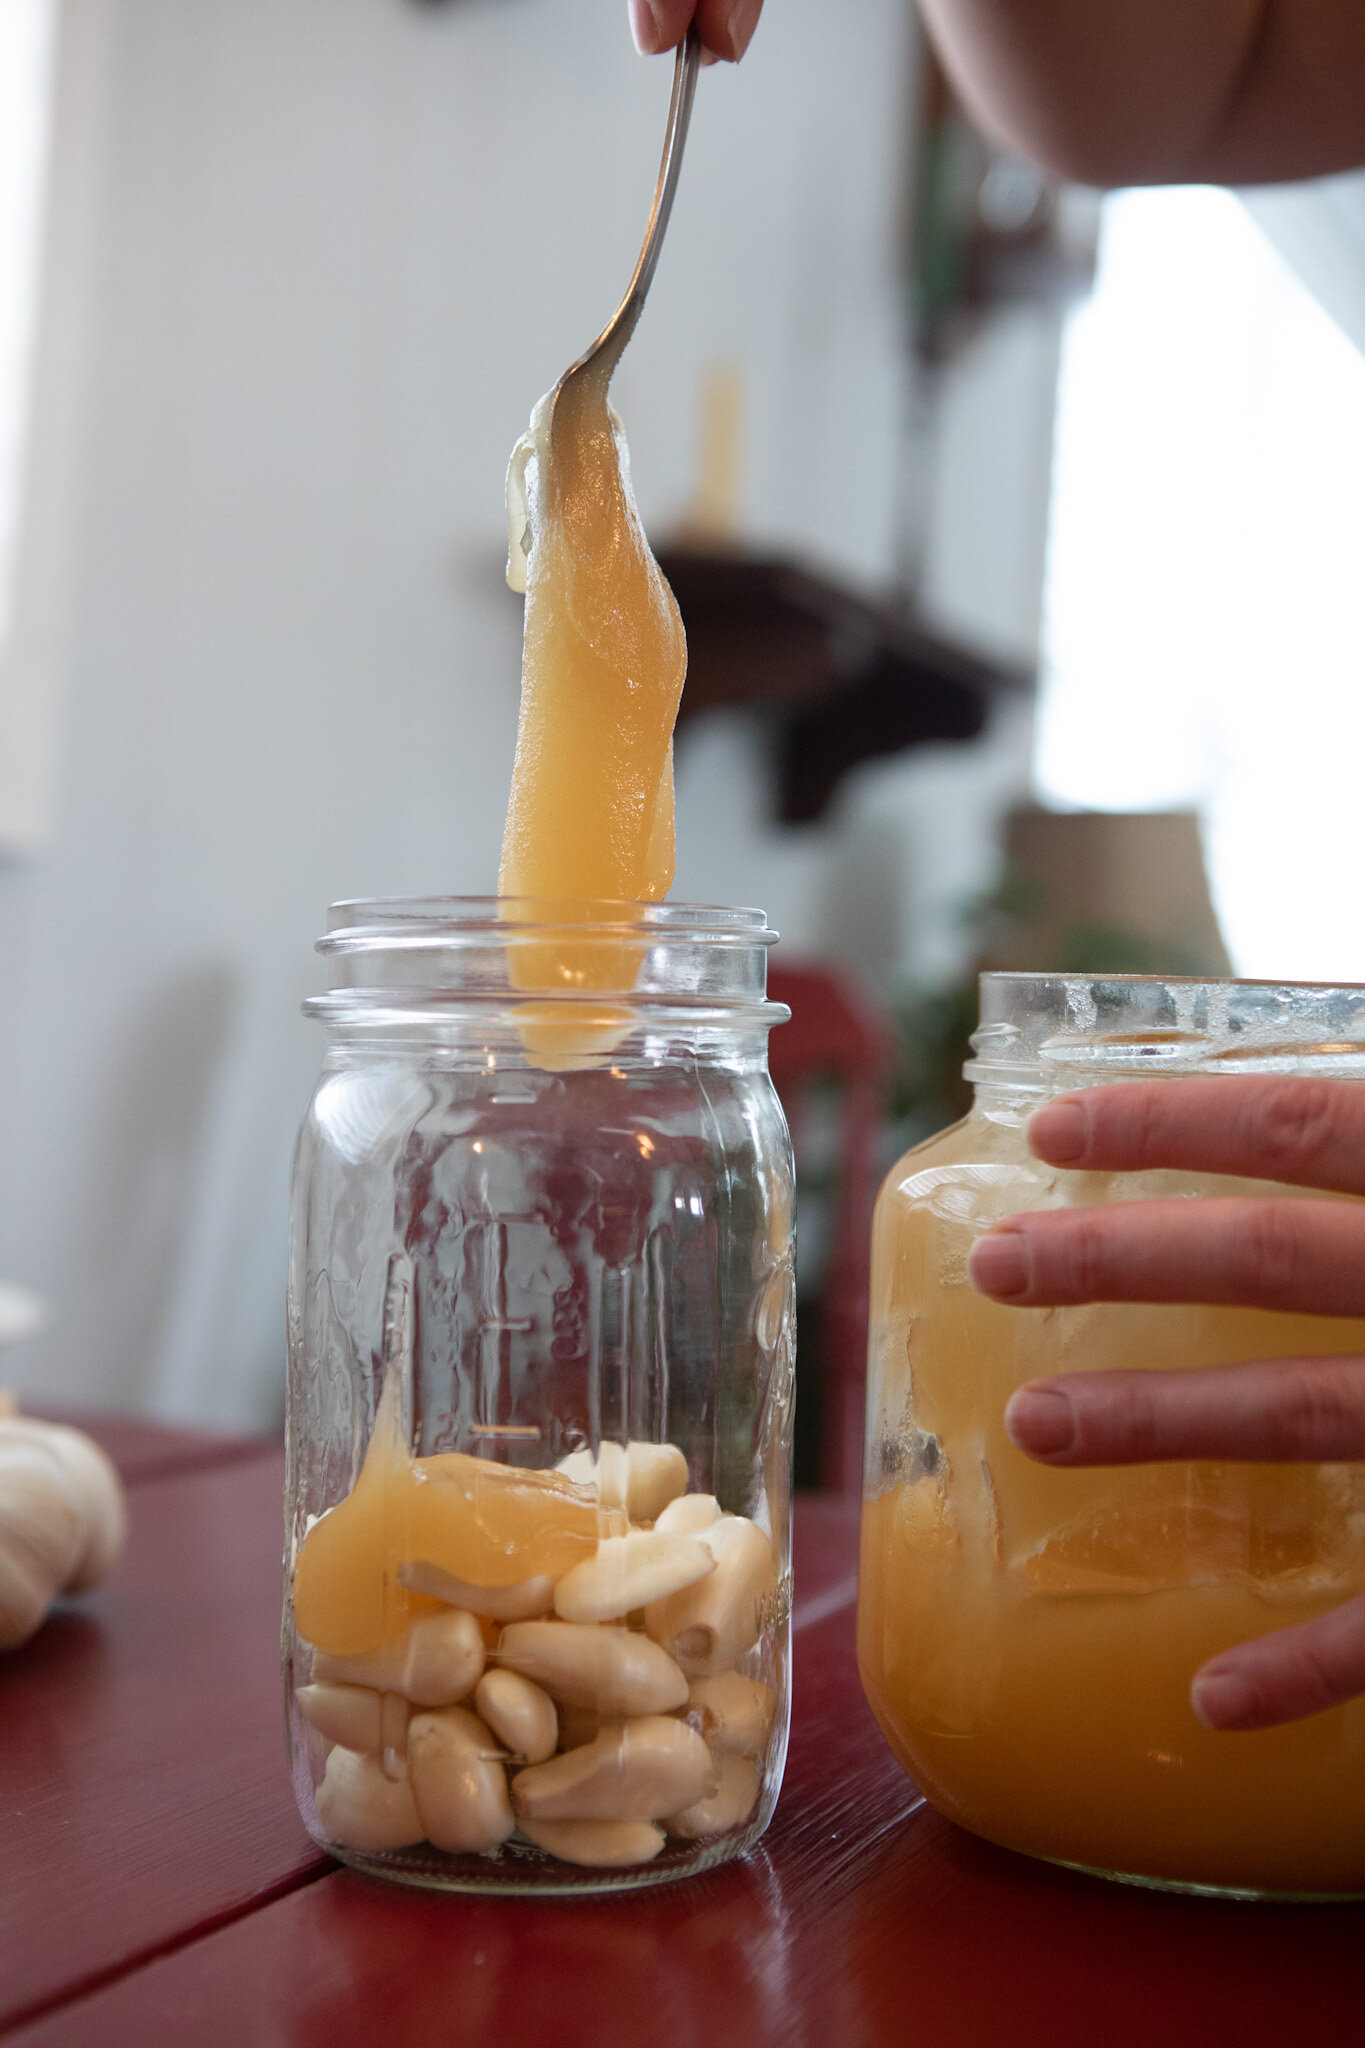
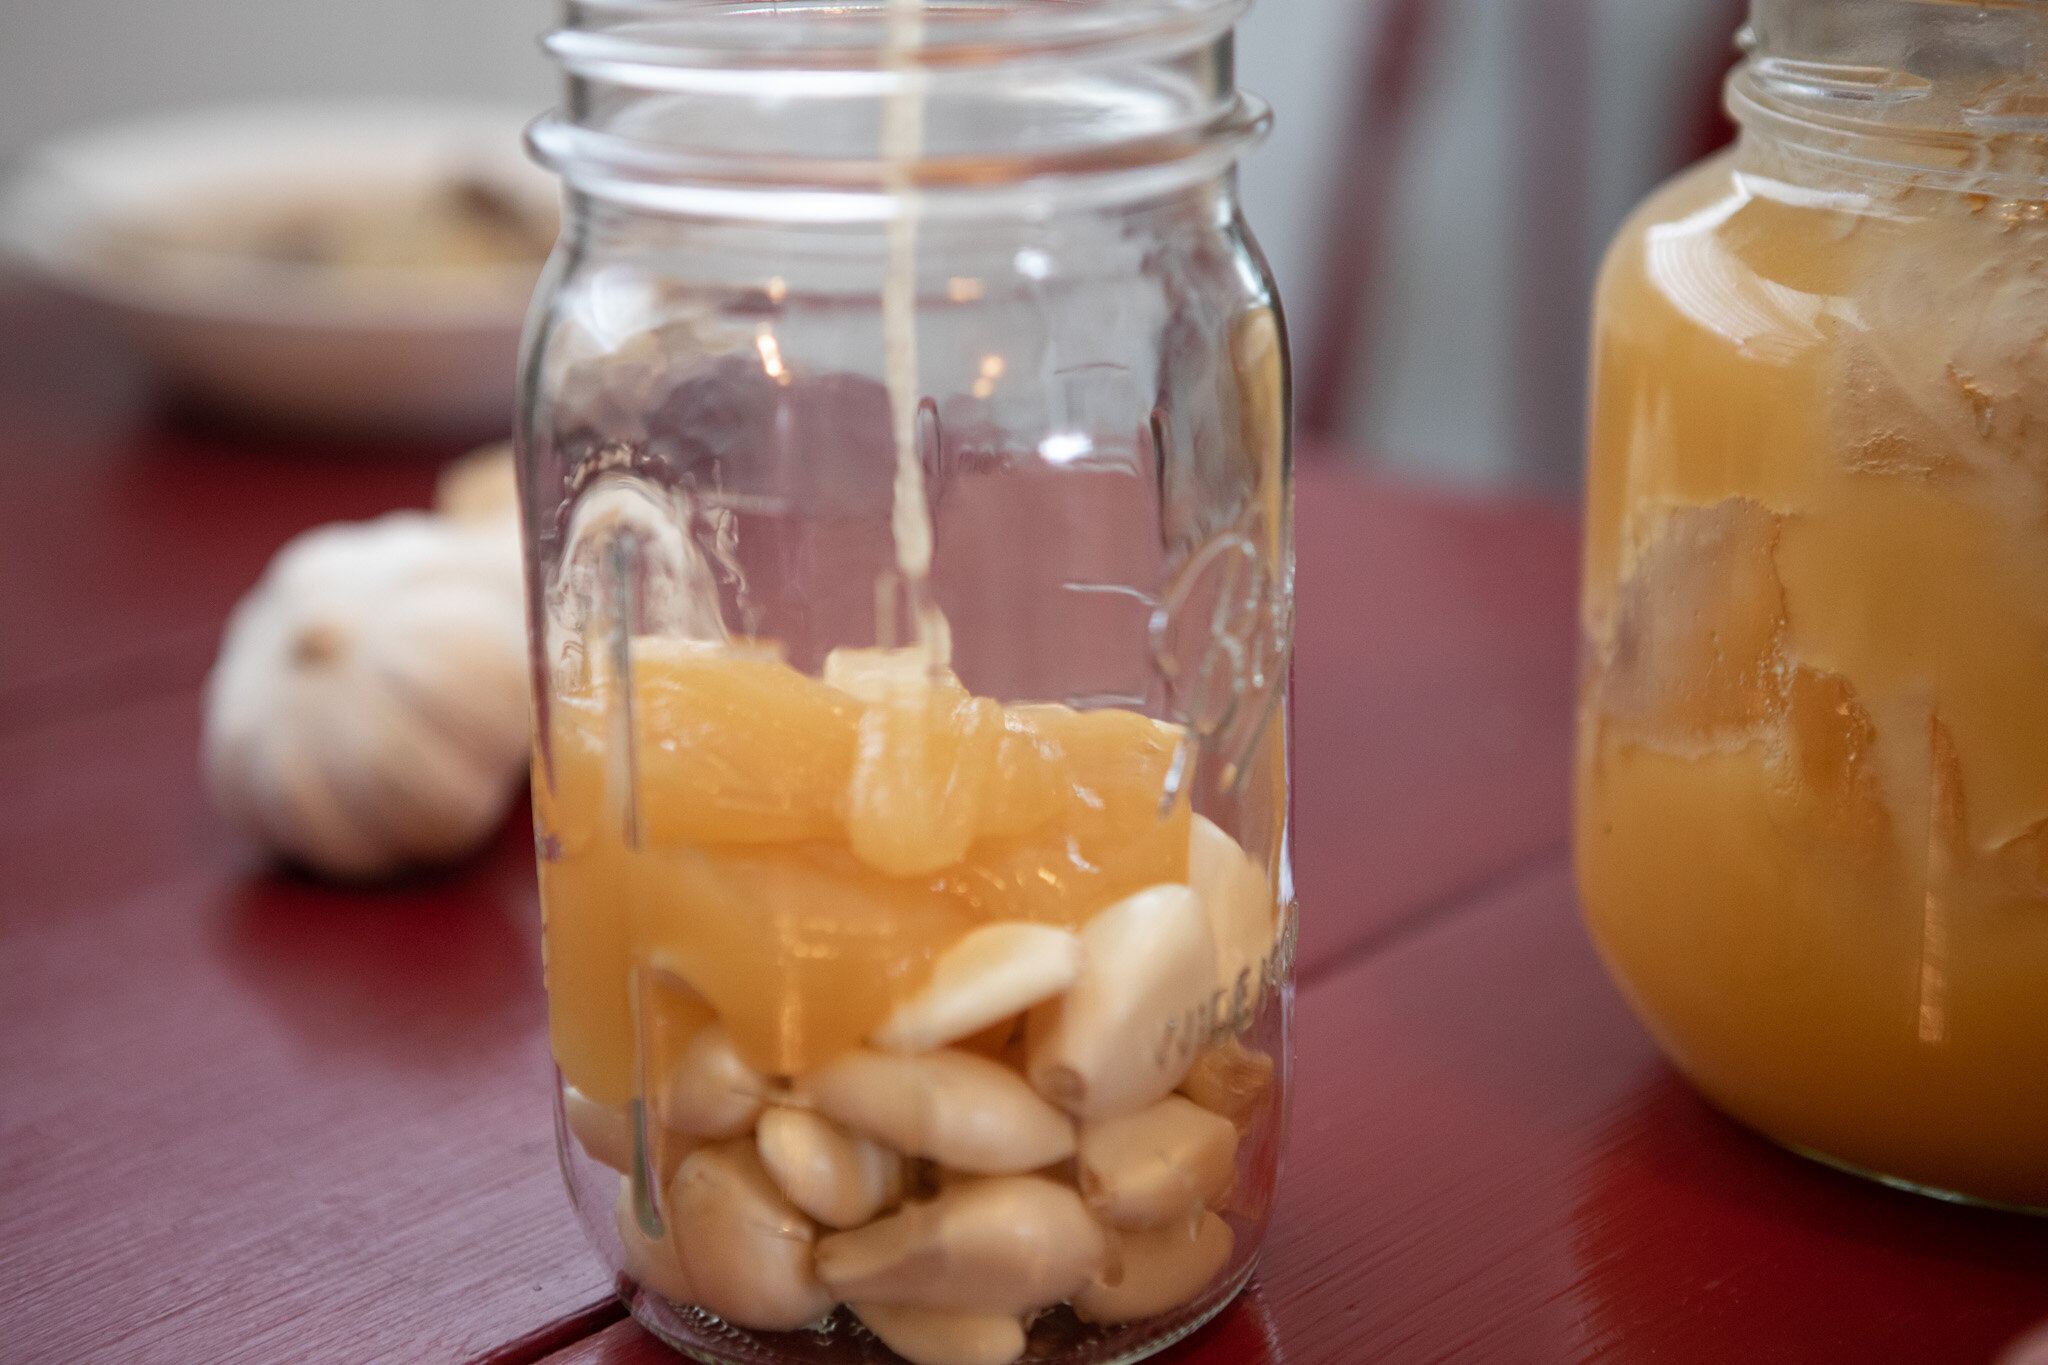
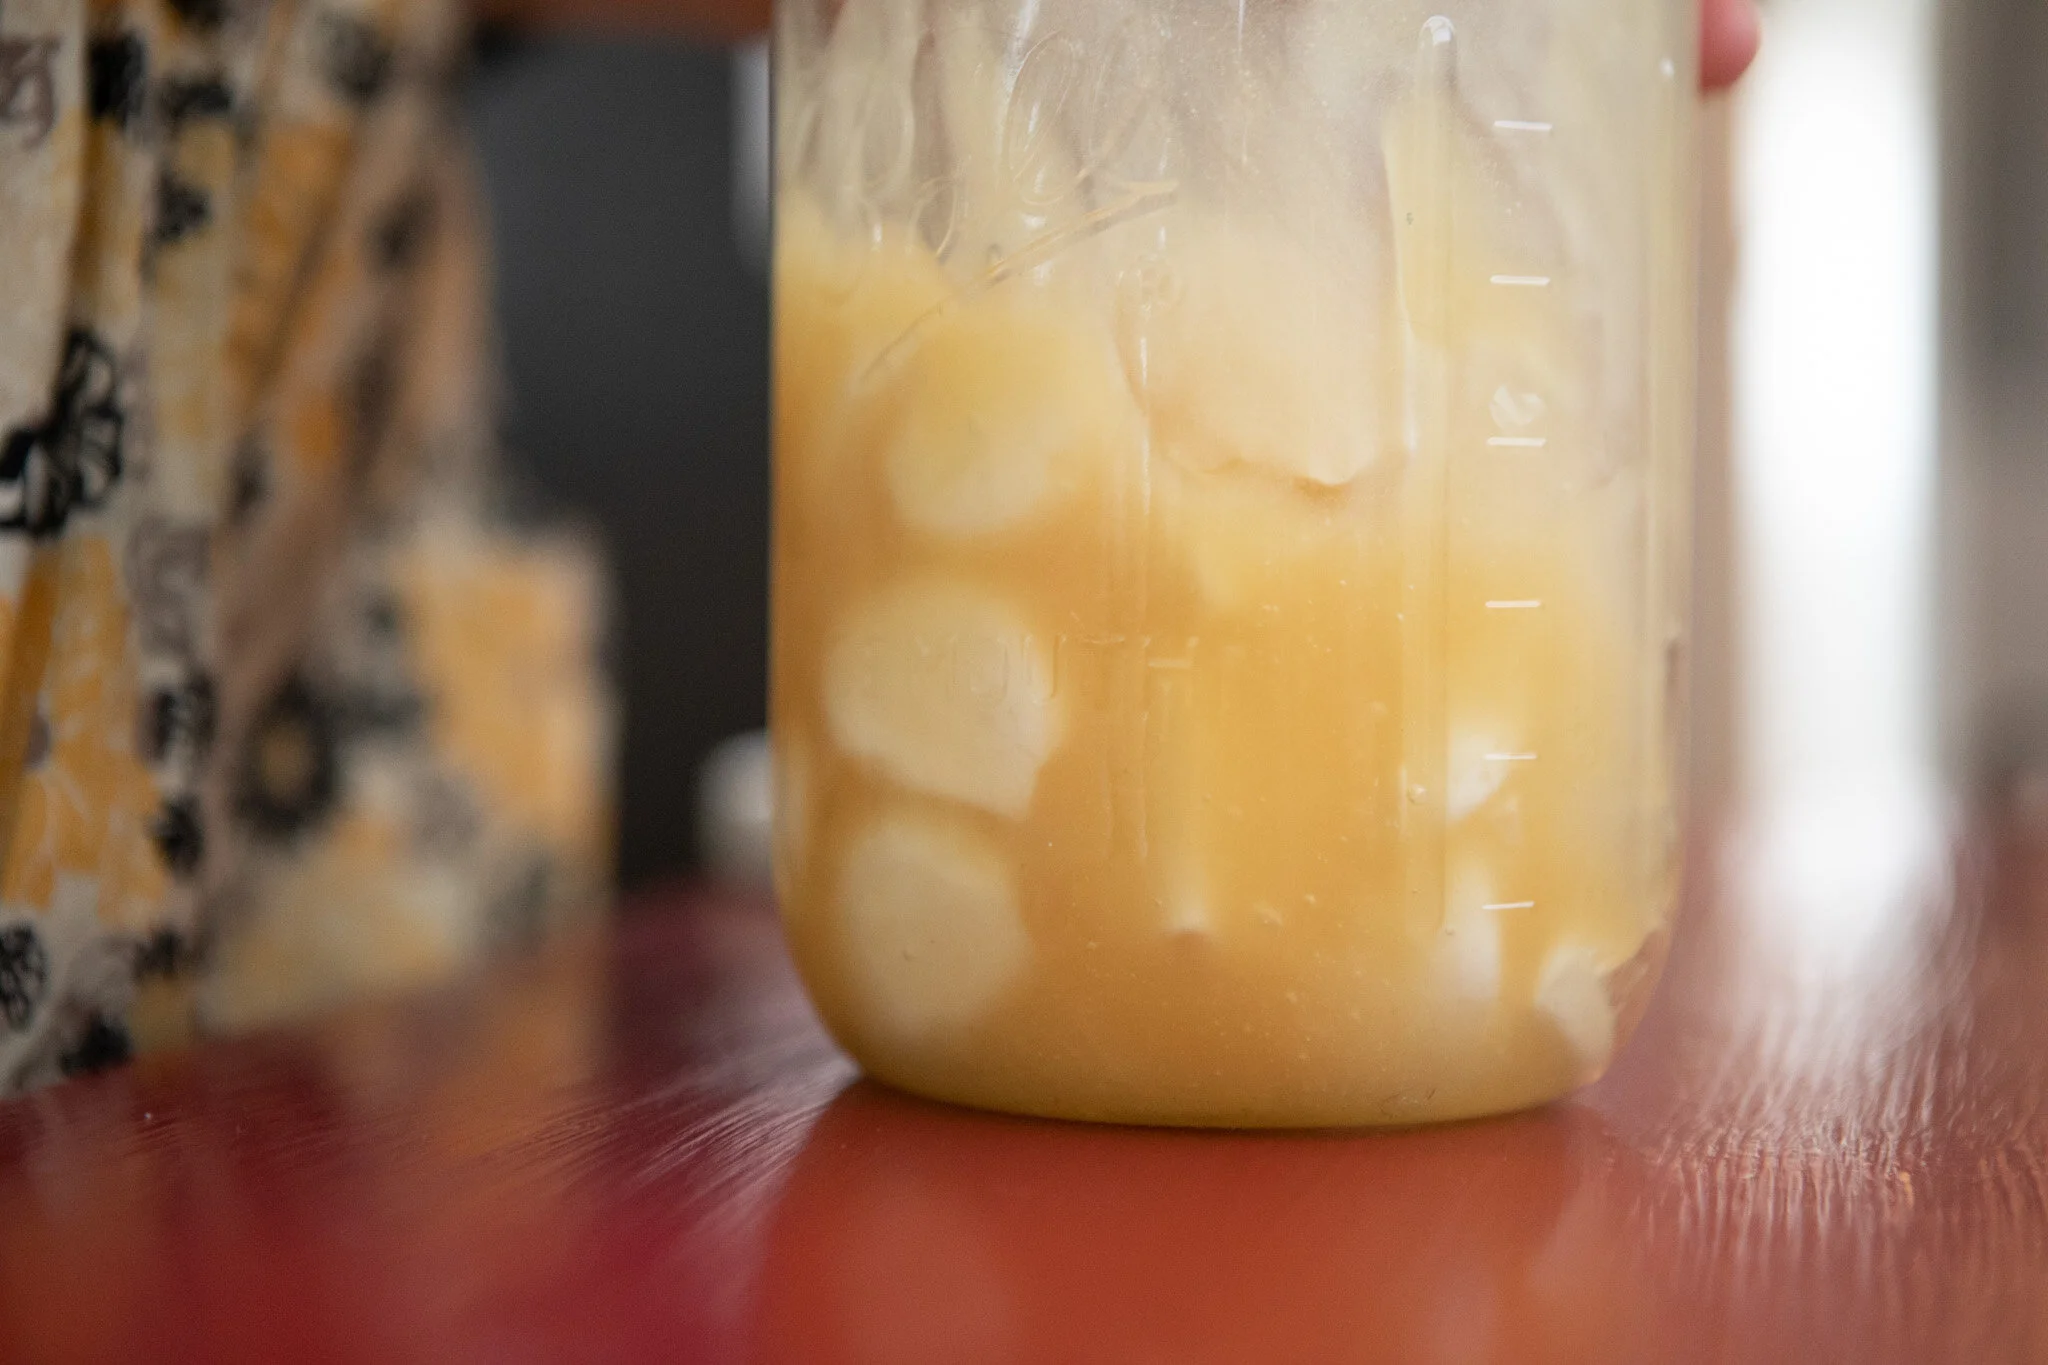
How long does it take to ferment? Fermentation will be well on its way in about a week, but most prefer to ferment for about a month. Even in this thick honey the garlic did float, so make sure to turn it over every day to make sure the garlic stays coated while it ferments. Check the lid before, it may come loose from the gassings.

Where do I source local, raw honey? You want to get your honey from a local farmer. One, because they’re the best. Two, local honey can help with allergies. When you buy your honey, ask the following questions to see how aligned your beekeeper is with your priorities of healthy honey:

  • Where are your bees located?

  • How do you process your honey?

  • Is it cold pressed or raw?

Their answers will give you an idea how close they are to pesticide areas and will give you an idea if your beekeeper is trying to avoid pesticide areas. The process they describe should include harvesting their honey, putting it in a cold spinner, and spinning the honey while filtering out pieces of beeswax and bee parts with a mesh filter. The honey then goes into buckets and is divided into the containers that you purchase. You want to find honey that is processed with no heat, and only the basic filtering. Most people who do this process will do only small batches, which is ideal.

Ingredients for Honey Fermented Garlic:

  • Garlic, peeled

  • Raw Honey

Directions for Honey Fermented Garlic:

Peel enough garlic to fit in your jar, you want both the honey and the garlic to be raw. Do not crush garlic. The bacteria and wild yeast in the raw honey and the juice in the garlic is what is used for the fermentation.

raw garlic

Add enough raw honey to the jar to cover the garlic cloves.

Place a lid on the jar and find a cool place for it to rest. The mixture can bubble up, so I recommend keeping a plate underneath. Turn over every day or so. Eat anytime, but it takes a month to be finished. 

A few notes:

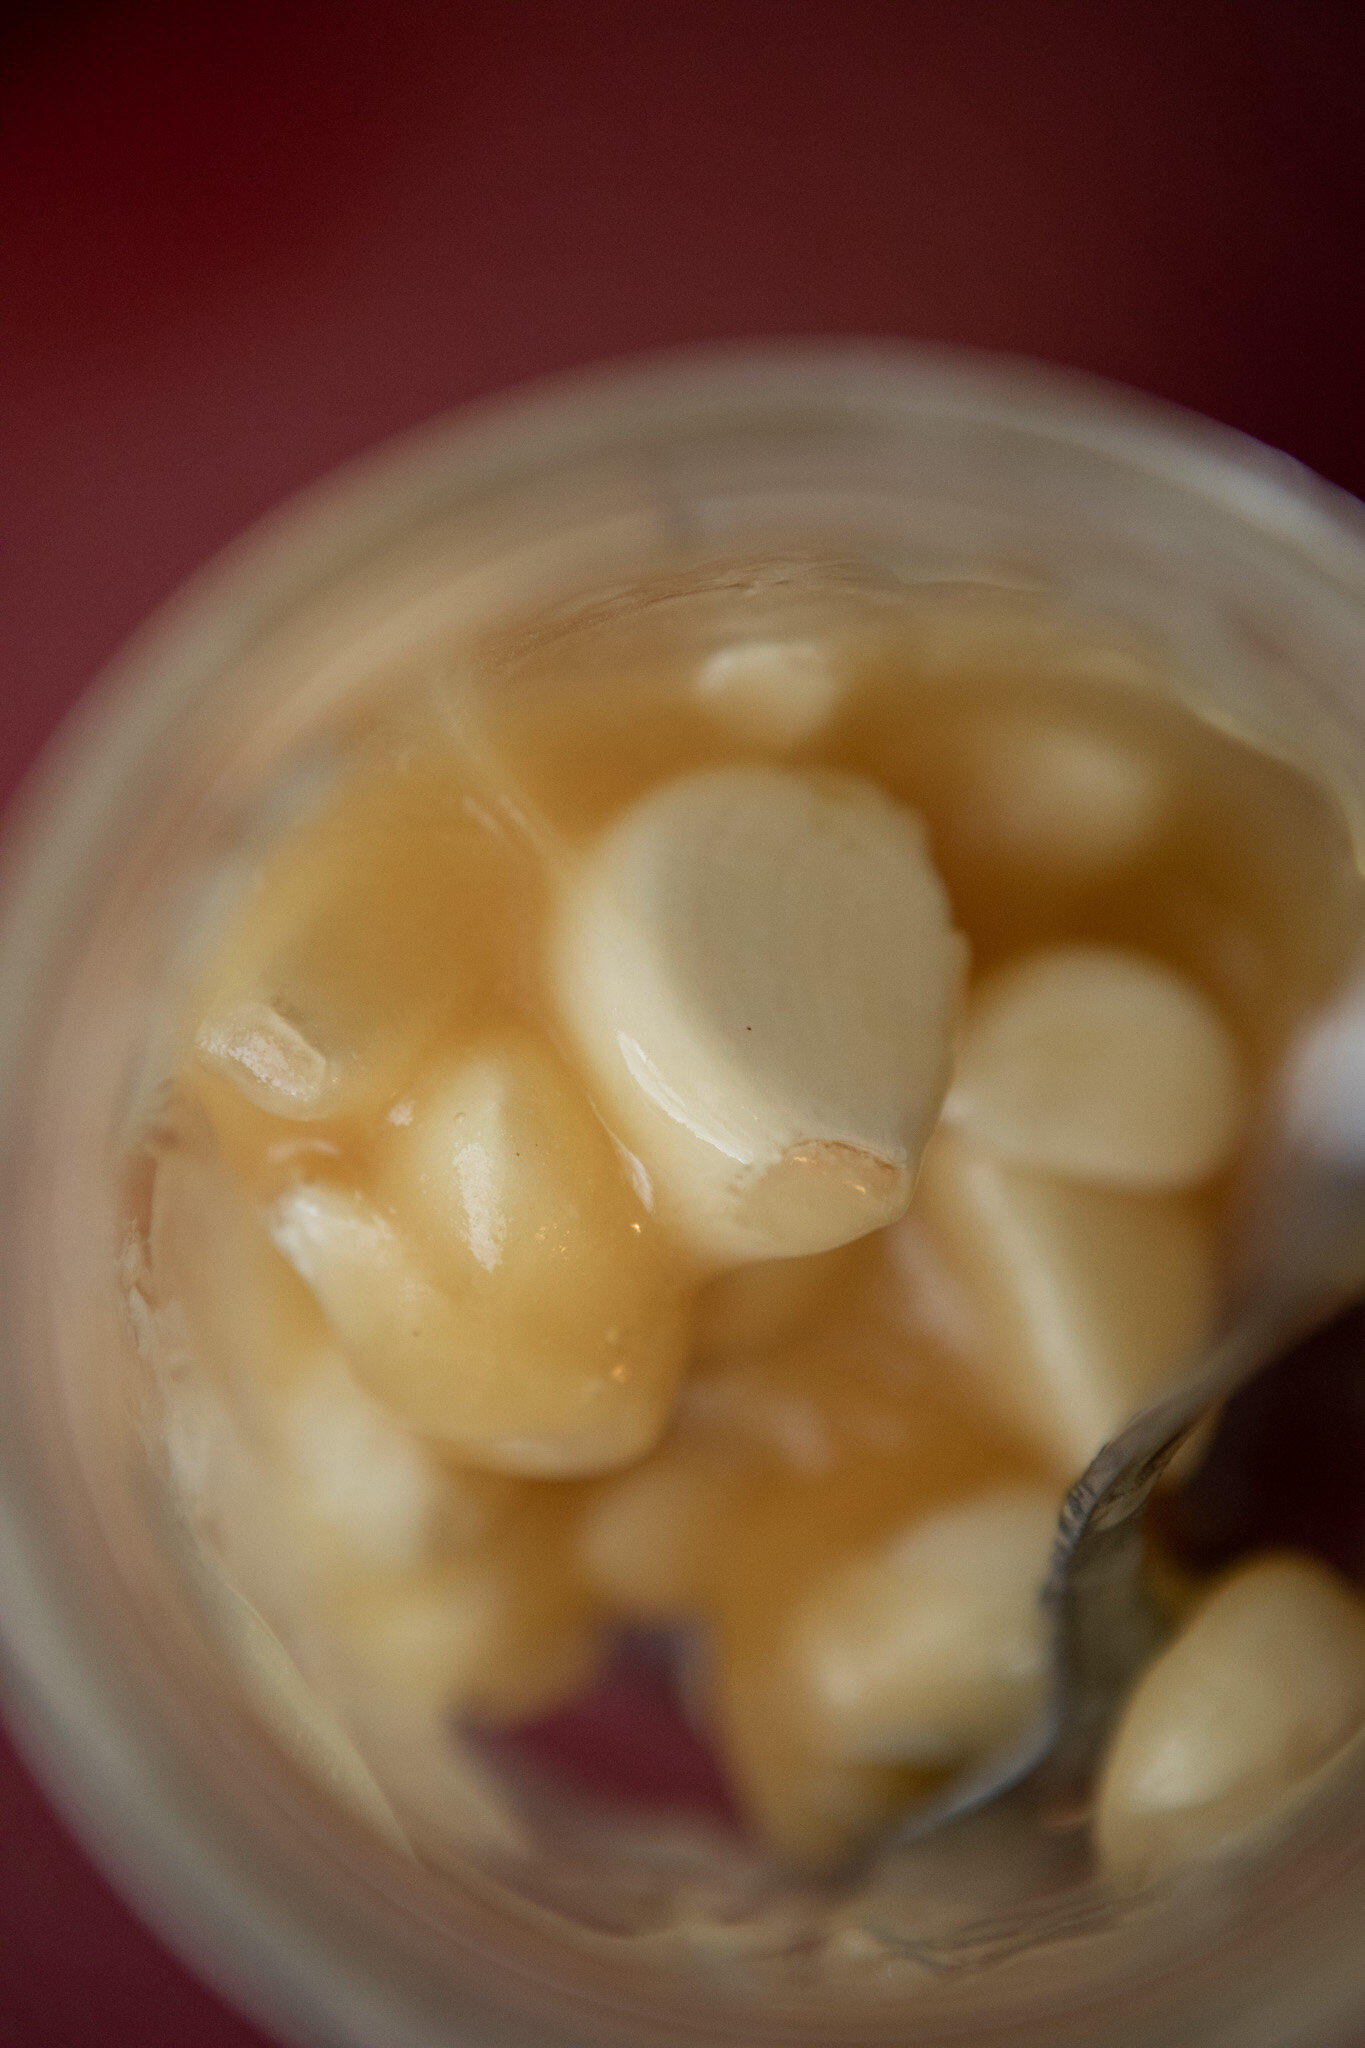
  • Garlic cloves can turn blue or green while fermenting. Not to worry, this is related to the sulfur content in the garlic.

  • Honey Fermented Garlic can be stored for long periods of time in a cool dark place.

  • The longer you ferment, the milder the flavor. 

To eat, you eat with the honey. Keep them together. Because it has medicinal properties. Enjoy!!

Honey Fermented Garlic

Honey Fermented Garlic

Author: Amy Mihaly, Be Well Clinic
Fermented Garlic is very useful to support the immune system, and honey fermented garlic has the additional benefit of raw honey. Most children like the sweetness, so it may be easier to get garlic into the children.

Ingredients

  • Garlic, peeled
  • Raw Honey

Instructions

  1. Peel enough garlic to fit in your jar, you want both the honey and the garlic to be raw. Do not crush garlic. The bacteria and wild yeast in the raw honey and the juice in the garlic is what is used for the fermentation.
  2. Add enough raw honey to the jar to cover the garlic cloves.
  3. Place a lid on the jar and find a cool place for it to rest. The mixture can bubble up, so I recommend keeping a plate underneath. Turn over every day or so. Eat anytime, but it takes a month to be finished.
  4. To eat, you eat with the honey. Keep them together. Because it has medicinal properties. Enjoy!!
Beef and Sauerkraut Soup

While you may be tempted to throw all the ingredients together, the taste is incredibly different when you follow the recipe step-by-step. I knew this experientially, but finally came fully onboard after reading many of my old recipe books and realizing how many recipes contain essentially the same ingredients but tasted completely different because of the preparation order. The difference between a good recipe and a great recipe is taking the time to prepare things in a specific order.

While this is a delicious soup for anyone, it can be very healing for anyone with a short term or long term illness. Each ingredient in this soup contains its own nourishing and healing properties. Onions are high in sulfur, read more here. Sauerkraut is predigested cabbage, link to recipe. Stock is high in easily accessible amino acids and meat contains proteins, minerals, fiber and other vitamins. Make sure to salt to taste using a good quality sea salt, adding minerals to complete this healing food. It also naturally contains copious amounts of animal fat which your body will use to heal and repair your cells as well as feed the immune system. The probiotics in the sauerkraut will be killed in the cooking process however, you still will get the benefits of predigested cabbage. There is also some evidence that even killed bacterial bodies from fermented foods has an immune benefit to your body. The lamb stock I used in the soup made for a delicious flavor. But all my taste senses were focused on the sauerkraut. Which brought a richness and layered complexity.


Ingredients for Beef and Sauerkraut Soup:

  • Chuck Roast

  • ½ Stick Butter

  • Chopped Onions

  • Salt

  • 6 Cups Meat Stock (beef or lamb)

  • Sauerkraut

Directions for Beef and Sauerkraut Soup

Cube by slicing perpendicular to the grain into half inch slices, then cubing from there. In this recipe, I use a chuck roast, but any cut of meat would be fine. You could also start with stew meat, but be sure to cube it down to bite-sized pieces. Stew meat is often very expensive cuts of meat that did not end up in a pretty cut, so I recommend purchasing and using stew meat to get quality, affordable meat. I often purchase stew meat to get tender cuts at affordable prices.

Slicing chuck roast

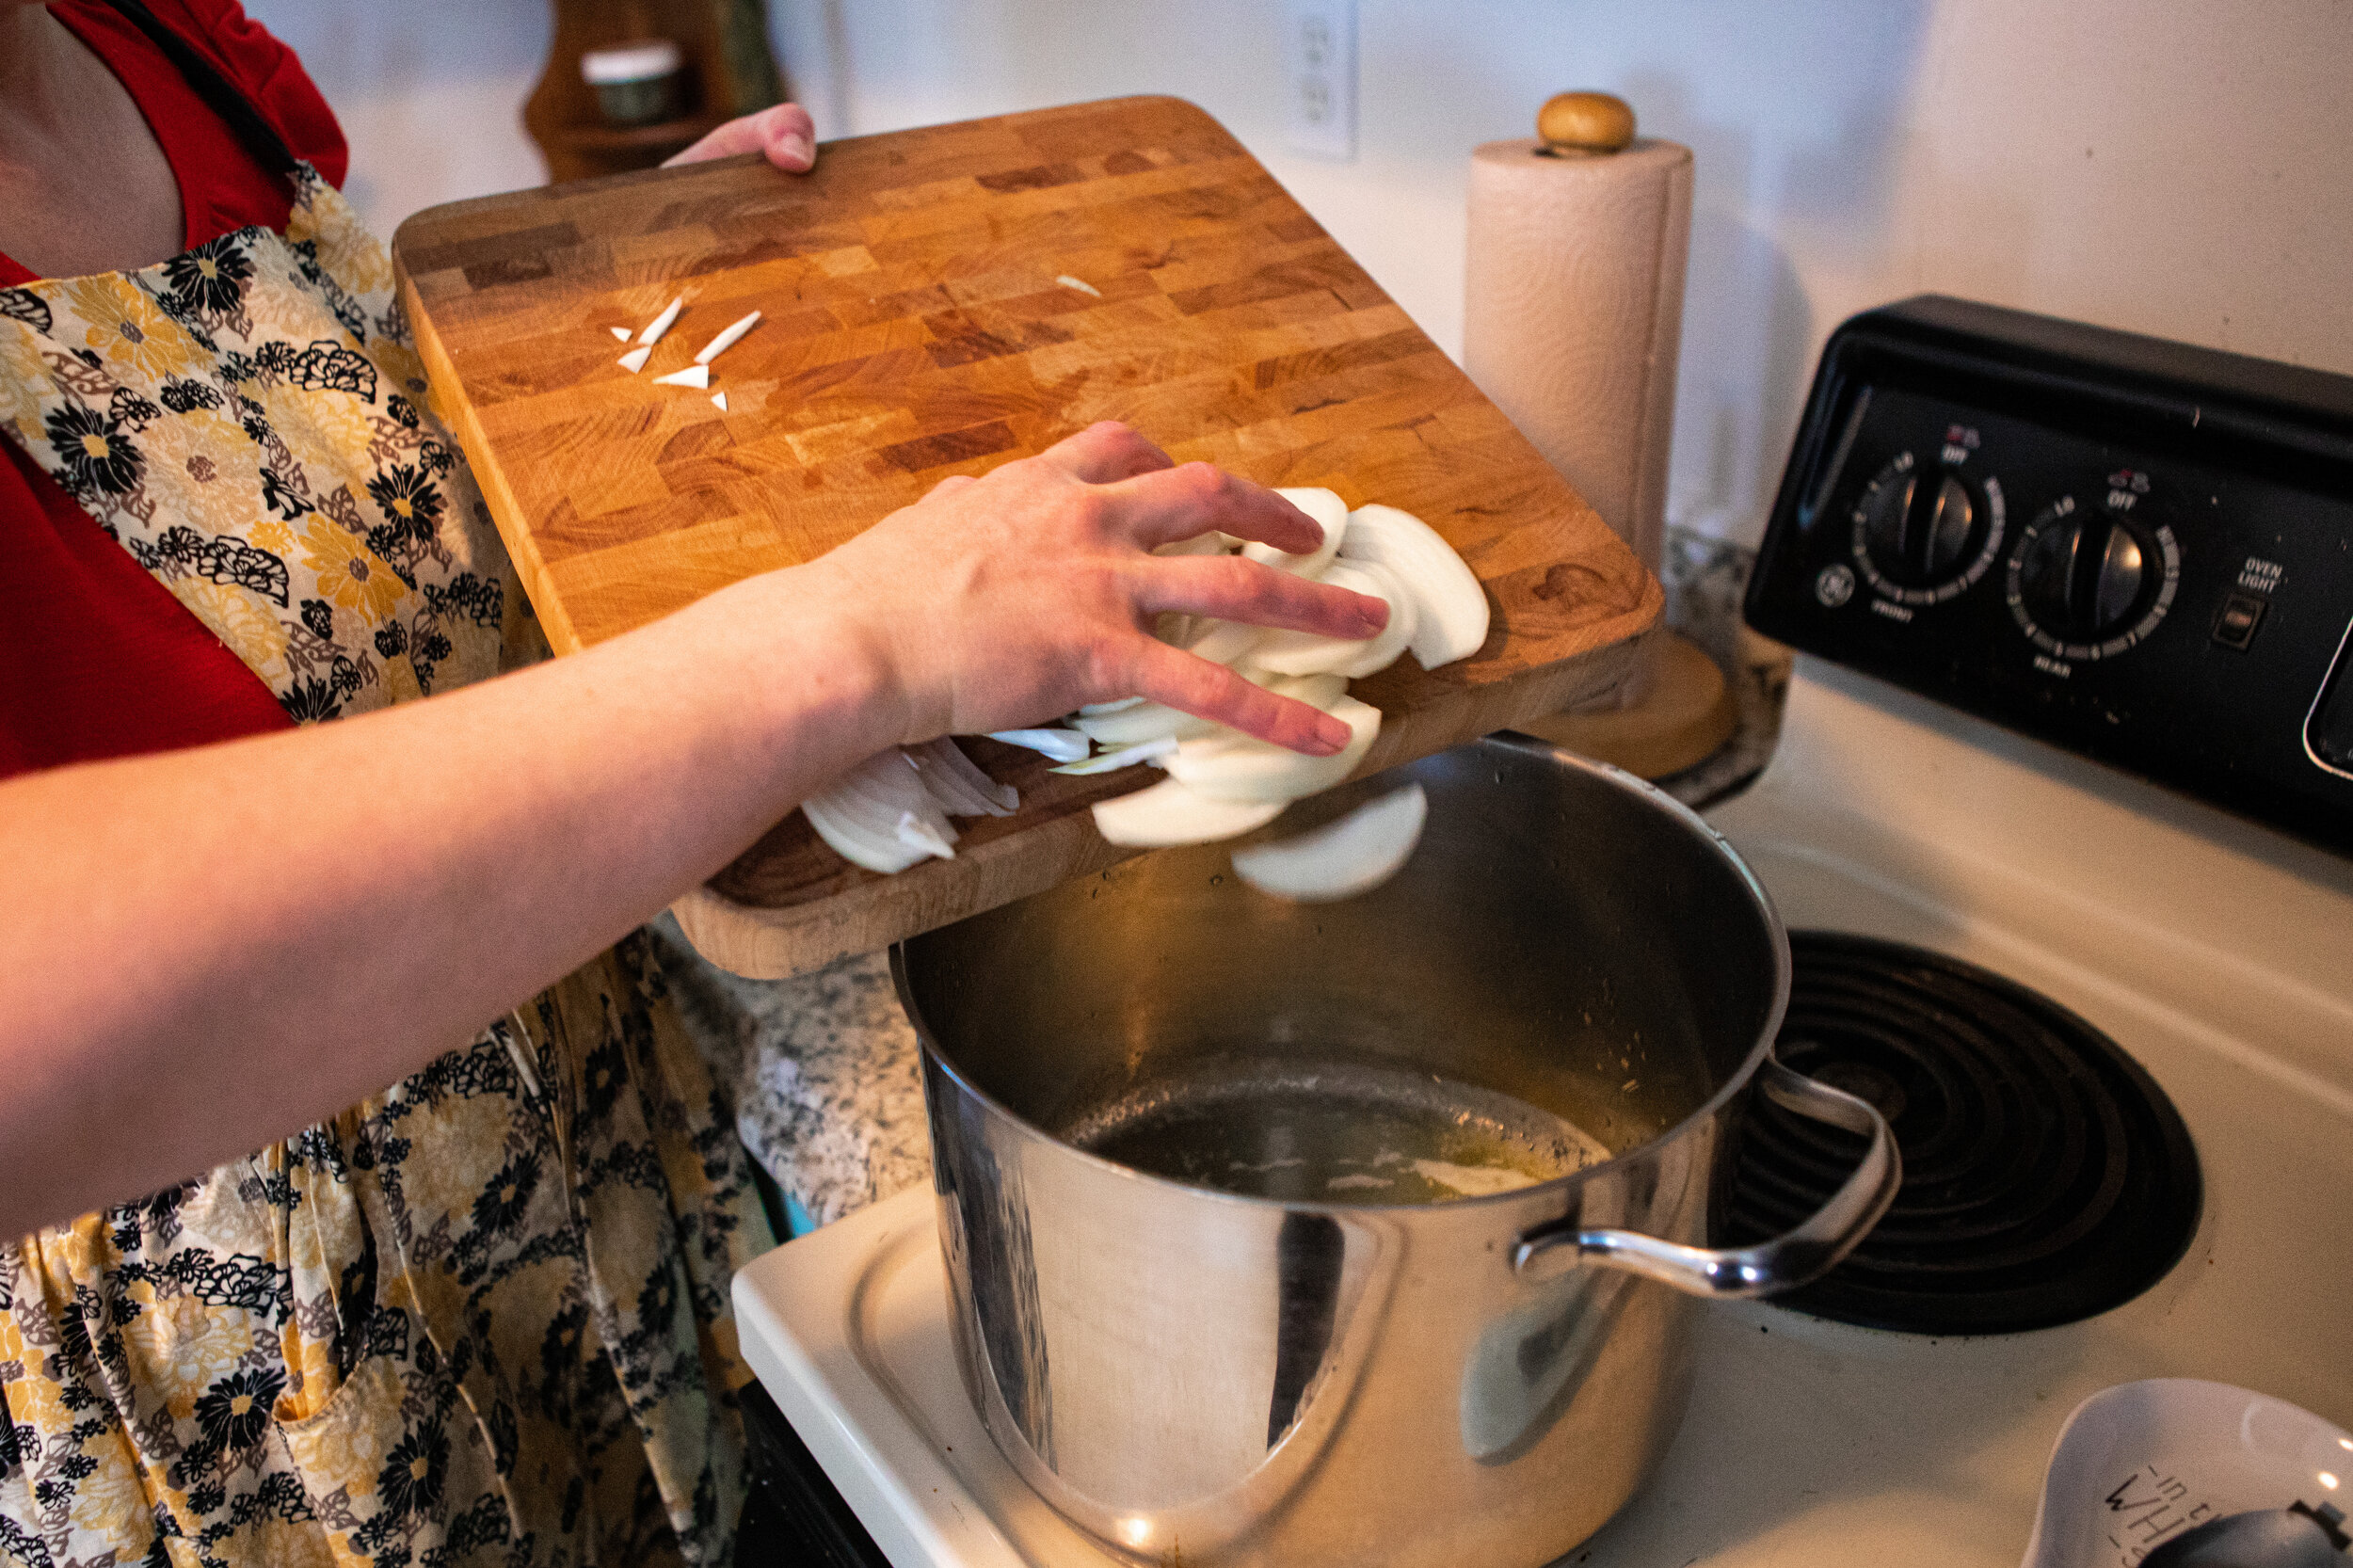
Melt ½ stick butter, add chopped onions, salt and cook 5-6 minutes until the onions begin to soften.

adding onions to stock pot

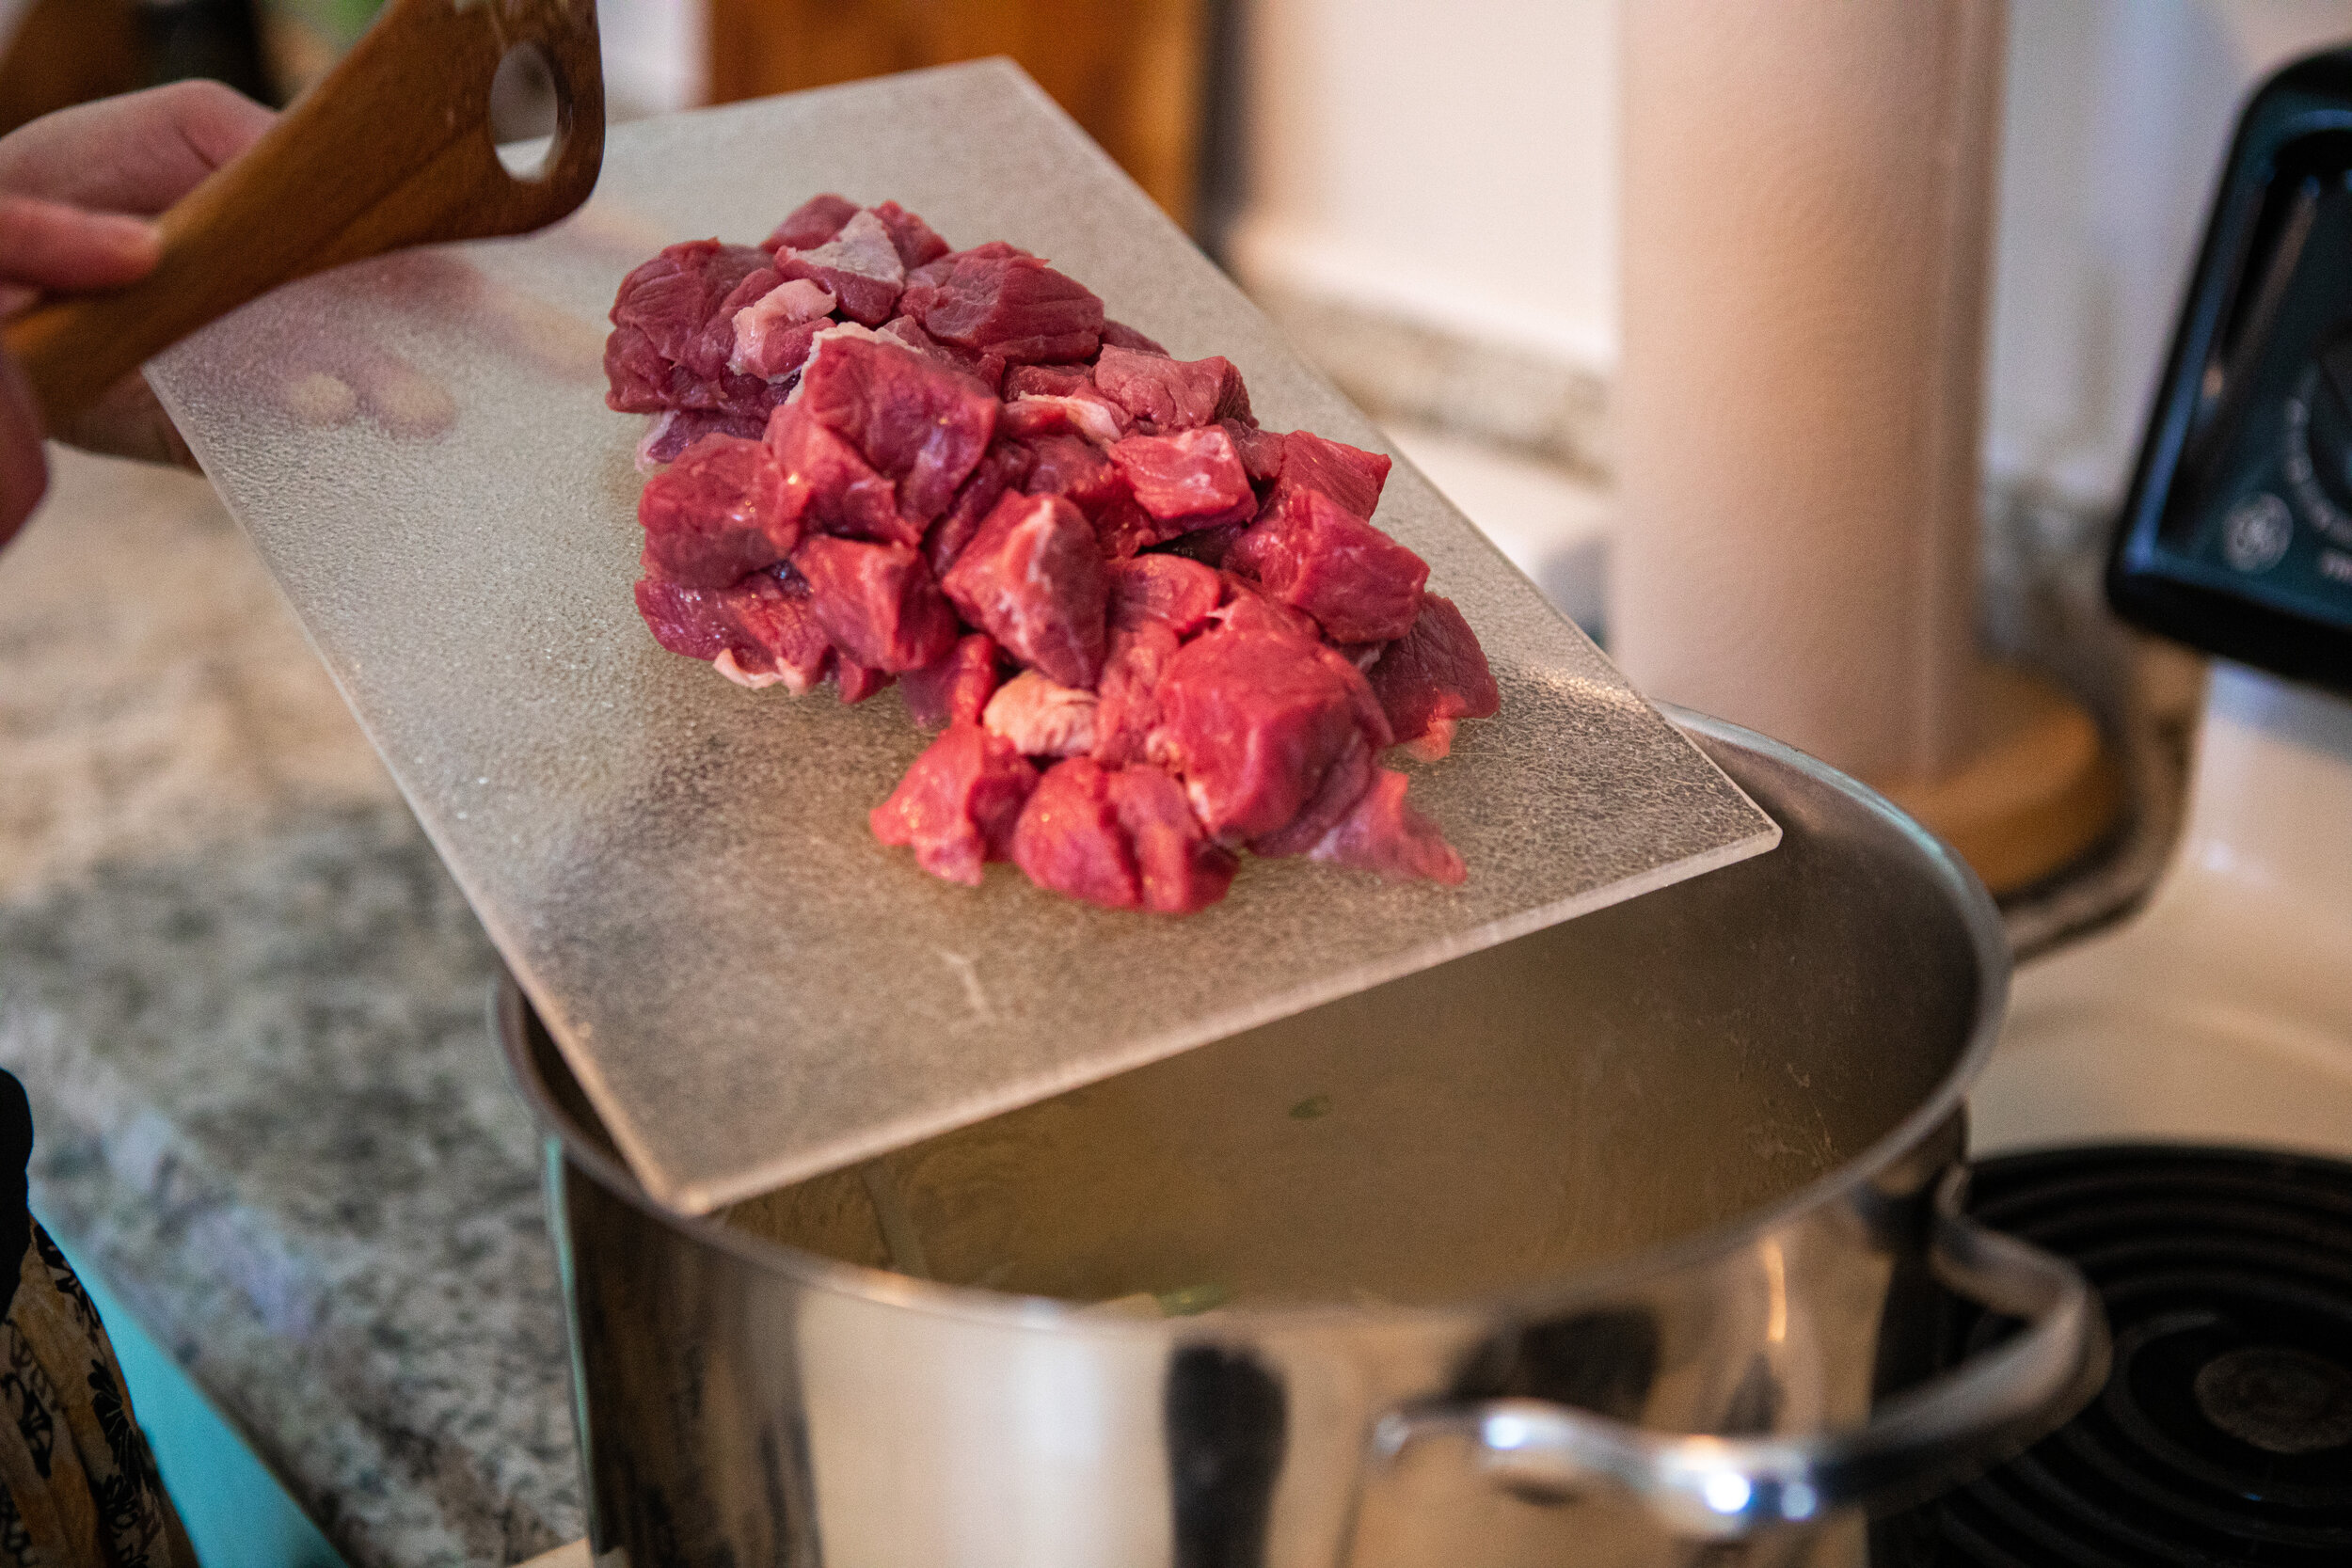
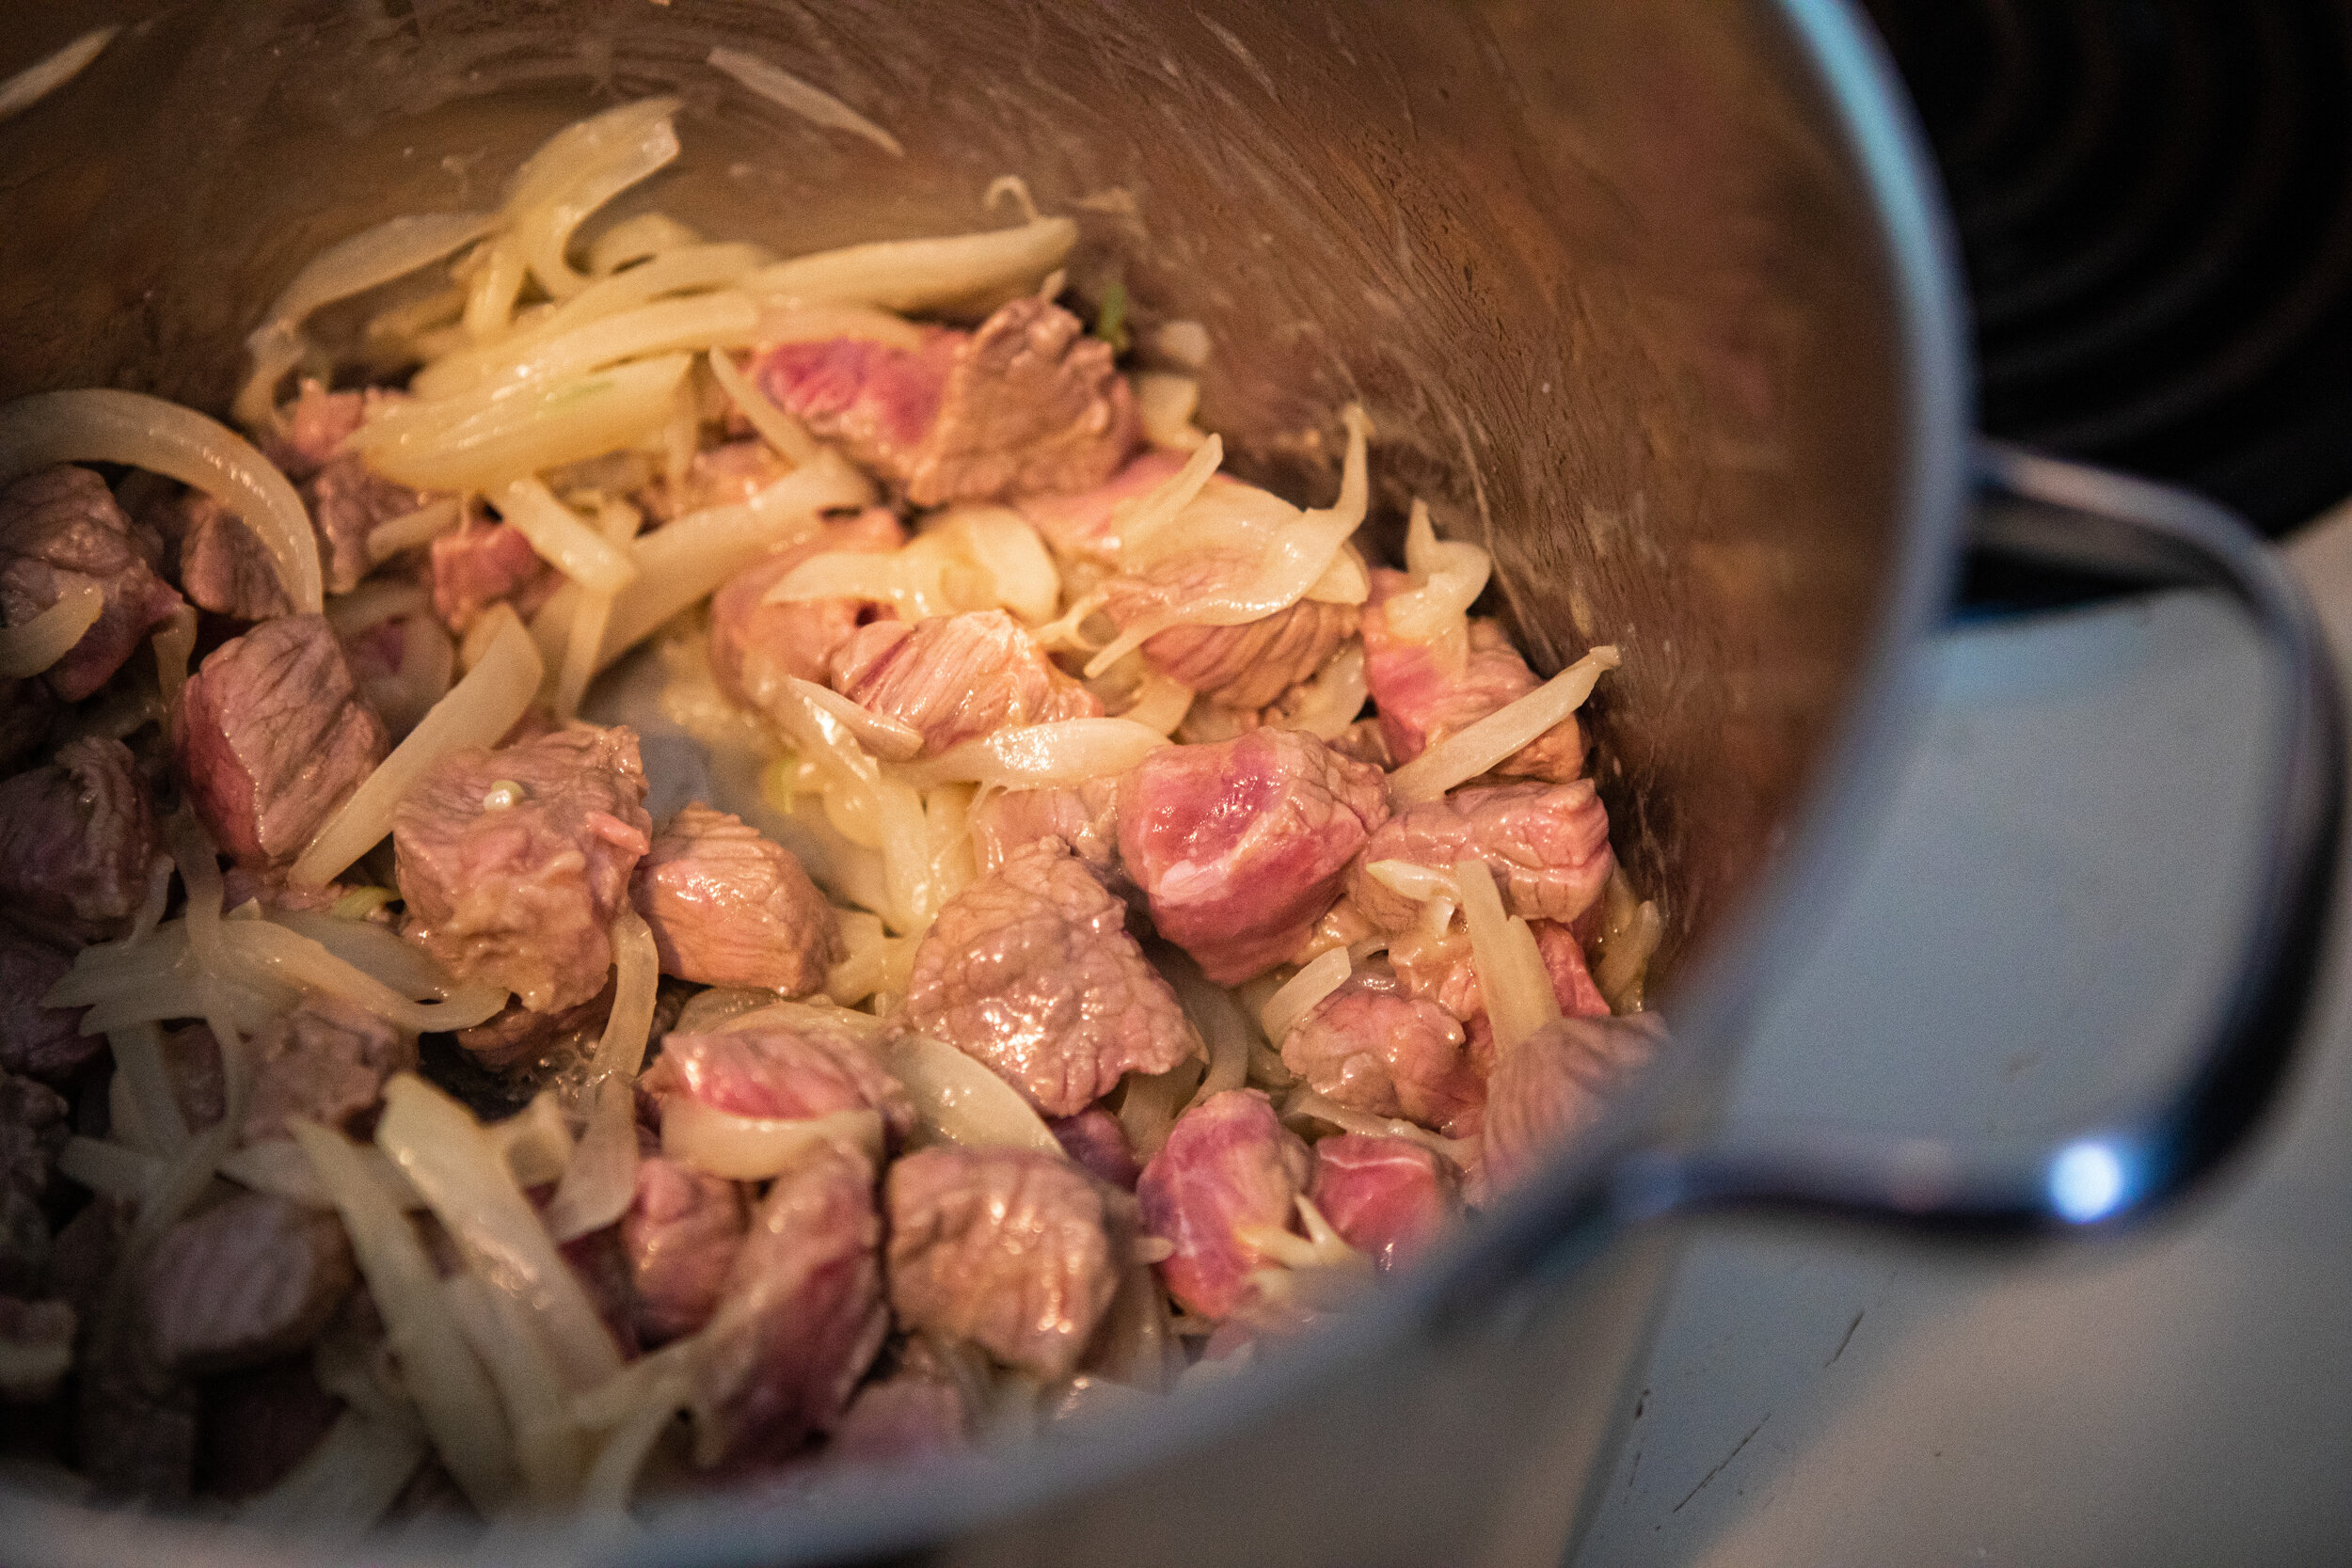
When the onions are becoming soft, add beef and brown the outside of the meat cubes to trap the flavors. Sauté for 5-7 minutes to brown the outside of the cubes to trap the flavor and moisture inside. Medium High Heat.

adding beef to soup

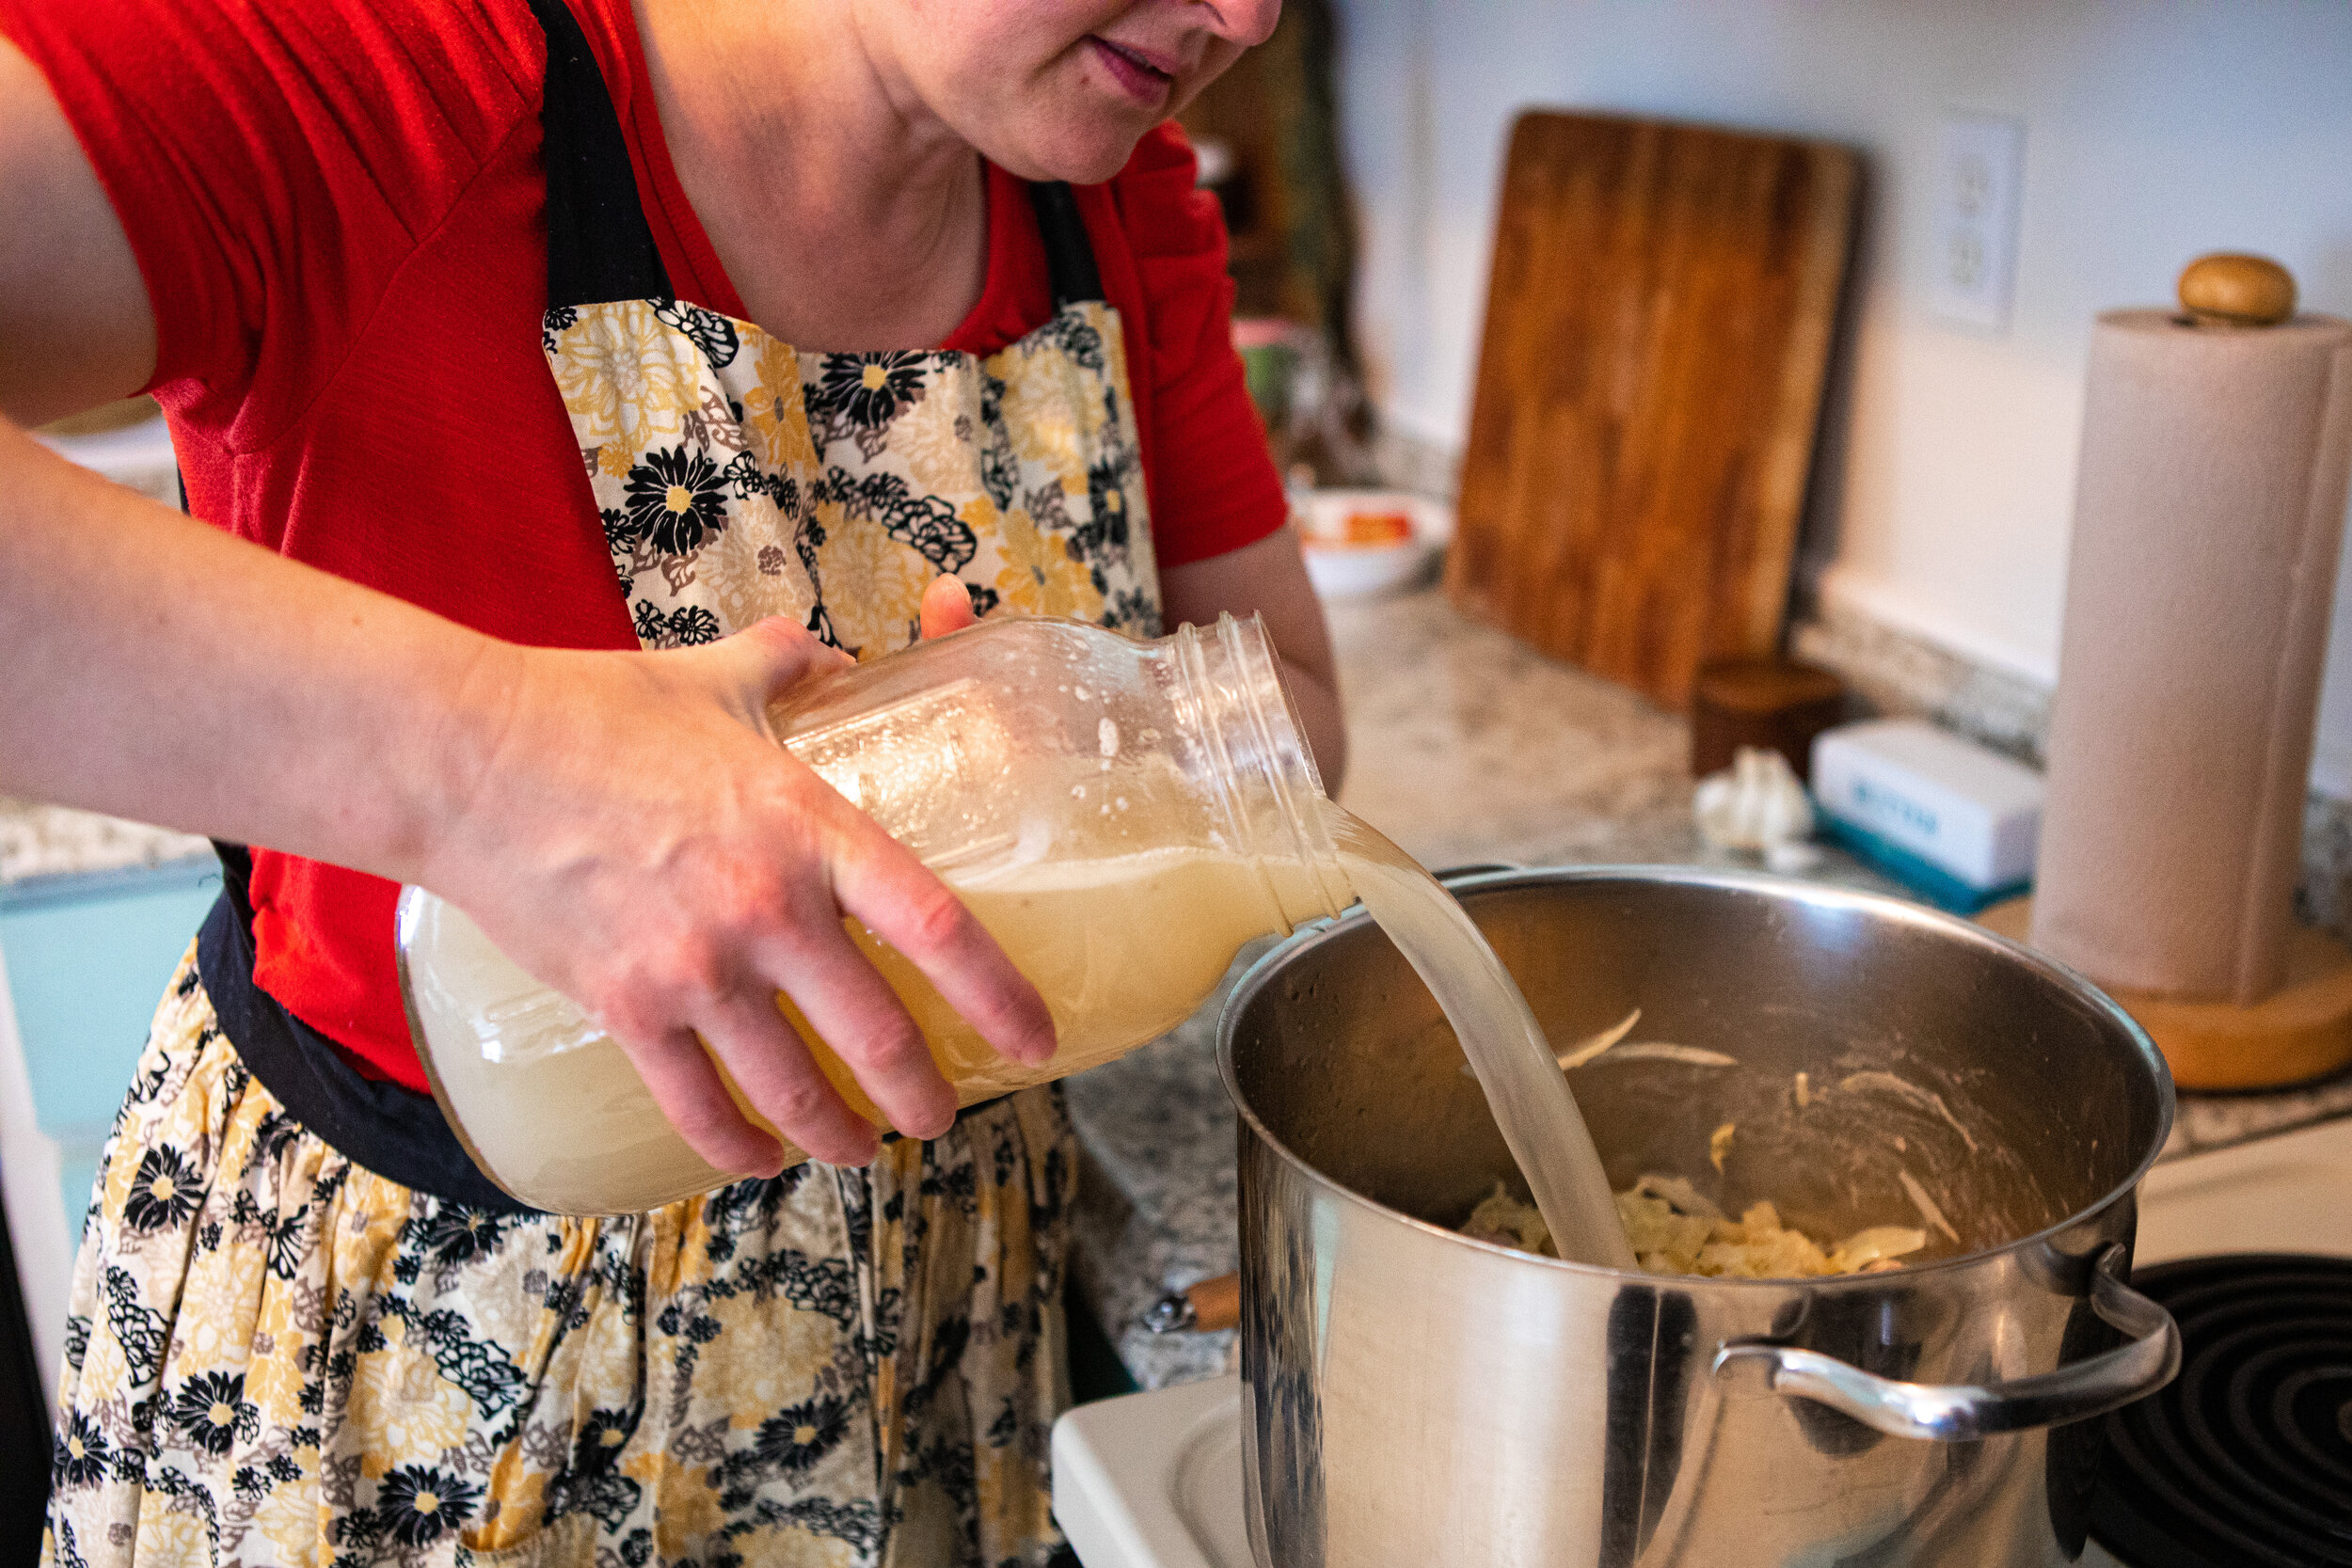
Drain the sauerkraut and set aside the juice. When most sides are brown-ish, add drained sauerkraut and stock. Turn down heat, cover and simmer for 30 minutes, salt to taste.

This recipe is not as boring as it looks, it is actually complex and rich. Feel free to add more sauerkraut and enjoy!!


Copy of Be Well Clinic Pinterest Blog Graphics - 4 (2).png

Beef and Sauerkraut Soup

Yield: 2-4
Author: Amy Mihaly, Be Well Clinic

Ingredients

  • Chuck Roast
  • ½ Stick Butter
  • Chopped Onions
  • Salt
  • 6 Cups Meat Stock (beef or lamb)
  • Sauerkraut

Instructions

  1. Cube by slicing perpendicular to the grain into half inch slices, then cubing from there. In this recipe I use a chuck roast, but any cut of meat would be fine. You could also start with stew meat, but be sure to cube it down to bite-sized pieces. Stew meat is often very expensive cuts of meat that did not end up in a pretty cut, so I recommend purchasing and using stew meat to get quality, affordable meat. I often purchase stew meat to get tender cuts at affordable prices.
  2. Melt ½ stick butter, add chopped onions, salt and cook 5-6 minutes until the onions begin to soften. 
  3. When the onions are becoming soft, add beef and brown the outside of the meat cubes to trap the flavors. Sauté for 5-7 minutes on medium high heat to brown the outside of the cubes and trap the flavor and moisture inside.
  4. Drain the sauerkraut and set aside the juice. When most sides are brown-ish, add drained sauerkraut and stock. Turn down heat, cover and simmer for 30 minutes, salt to taste.
  5. Add the sauerkraut juice and enjoy!!
Created using The Recipes Generator

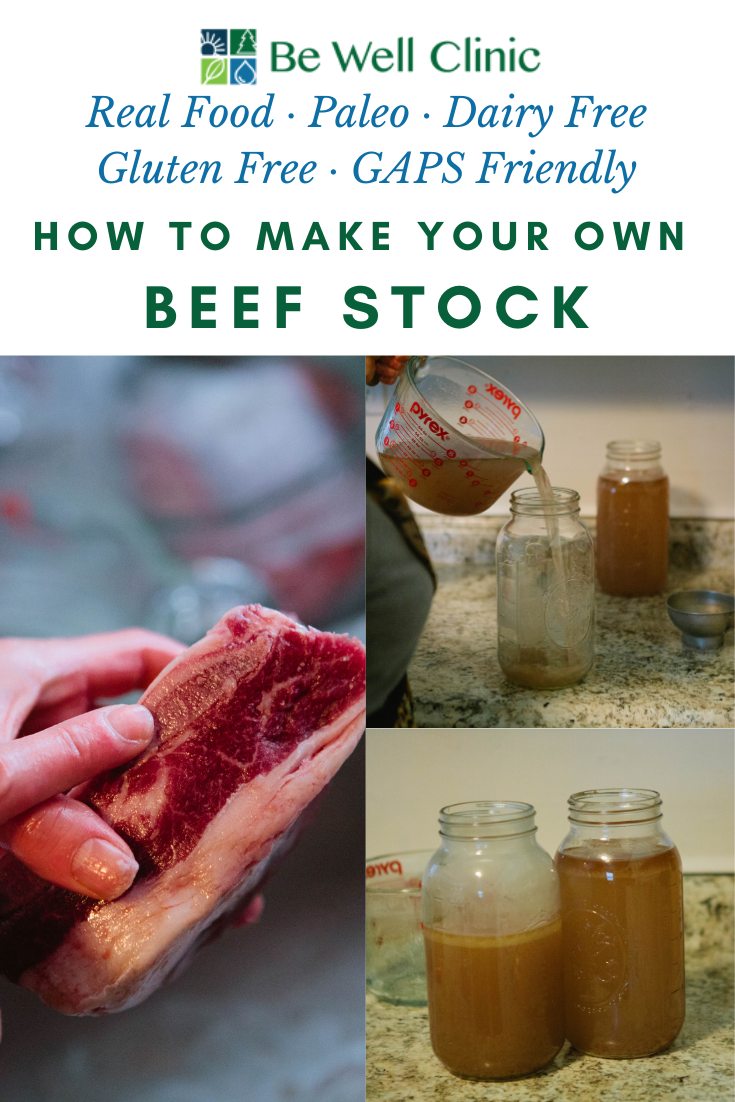
How to Make Beef Stock

We use a lot of chicken stock around here but that doesn’t mean it’s superior to other kinds of stock. We’ve recently been working on adding soup recipes that are especially delicious with beef stock.

IMG_8558.jpg

Whatever meat you use, remember it should be 80% meat and 20% bone with a joint. Depending on your cut, you might need to add additional meat to fulfill these ratios.

Meat stock is a pillar in healing a leaky gut but this rich food is beneficial to anyone. It provides large amounts of the immune system’s favorite foods, is very easy to digest, and is a great base to modify for other healing and nutritious recipes.  

Meat stock is meant to be a meal in itself. It’s short cooking time allows the meat to remain edible while still enriching stock with easy to absorb nutrients. This is the perfect thing to eat anytime you are feeling ill or stressed or “can’t get filled up” hungry. These are some of the reasons meat stock is such an important part of the healing process of the GAPS Diet. Any time you are consuming meat stock on a regular basis, your body will be receiving the healing benefit.

Meat stock can be made into a soup or simply drunk on its own as a hot beverage with a meal. You can also poach a couple eggs in your stock for a rich breakfast. Stock can also be used to cook rice or other soaked grains to increase their digestibility and nutritional content. In short, this should be considered a staple to have in your kitchen at all times, either in the fridge or the freezer.

There are a variety of ways you can skim the scum off the top of your stock. I usually use a slotted spoon but you can also use a mesh scum skimmer, a slotted spoon, a small strainer, or a large soup spoon.

Skimming the scum off the top is where you can tell the quality of your meat. If your meat is poor quality, had a lot of hormones or was poorly processed, you’ll get scum that’s heavy, grey and unappetizing. If you have a good quality meat, you will have a small amount of light almost white colored scum that appears as a lighter foam. This is also where you can tell if your meat has gone bad at this point.

You can store your stock in the fridge or the freezer, depending on how quickly you’ll consume the batch.

A NOTE ABOUT MEAT STOCK AND THE GAPS INTRO DIET:

When Dr. Natasha Campbell talks about meat in stage 1, she’s referring to eating primarily the gelatinous meats like skin, joints and connective tissue. When meat is added on Stage 2, she means the muscle eats, the only thing we Americans consider to be meat. Eating a lot of muscle meat can be constipating so if this is your issue, be sure to eat every last bit of the skin and joints.

Ingredients for Beef Stock:

  • Beef. I am using 3 ½ lbs of beef short ribs. Whatever meat you use, remember it should be 80% meat and 20% bone with a joint. Depending on your cut, you might need to add additional meat to fulfill these ratios.

  • Small handful of peppercorns

  • 2 Bay Leaves

  • Filtered Water

Directions for Beef Stock:

IMG_8567.jpg

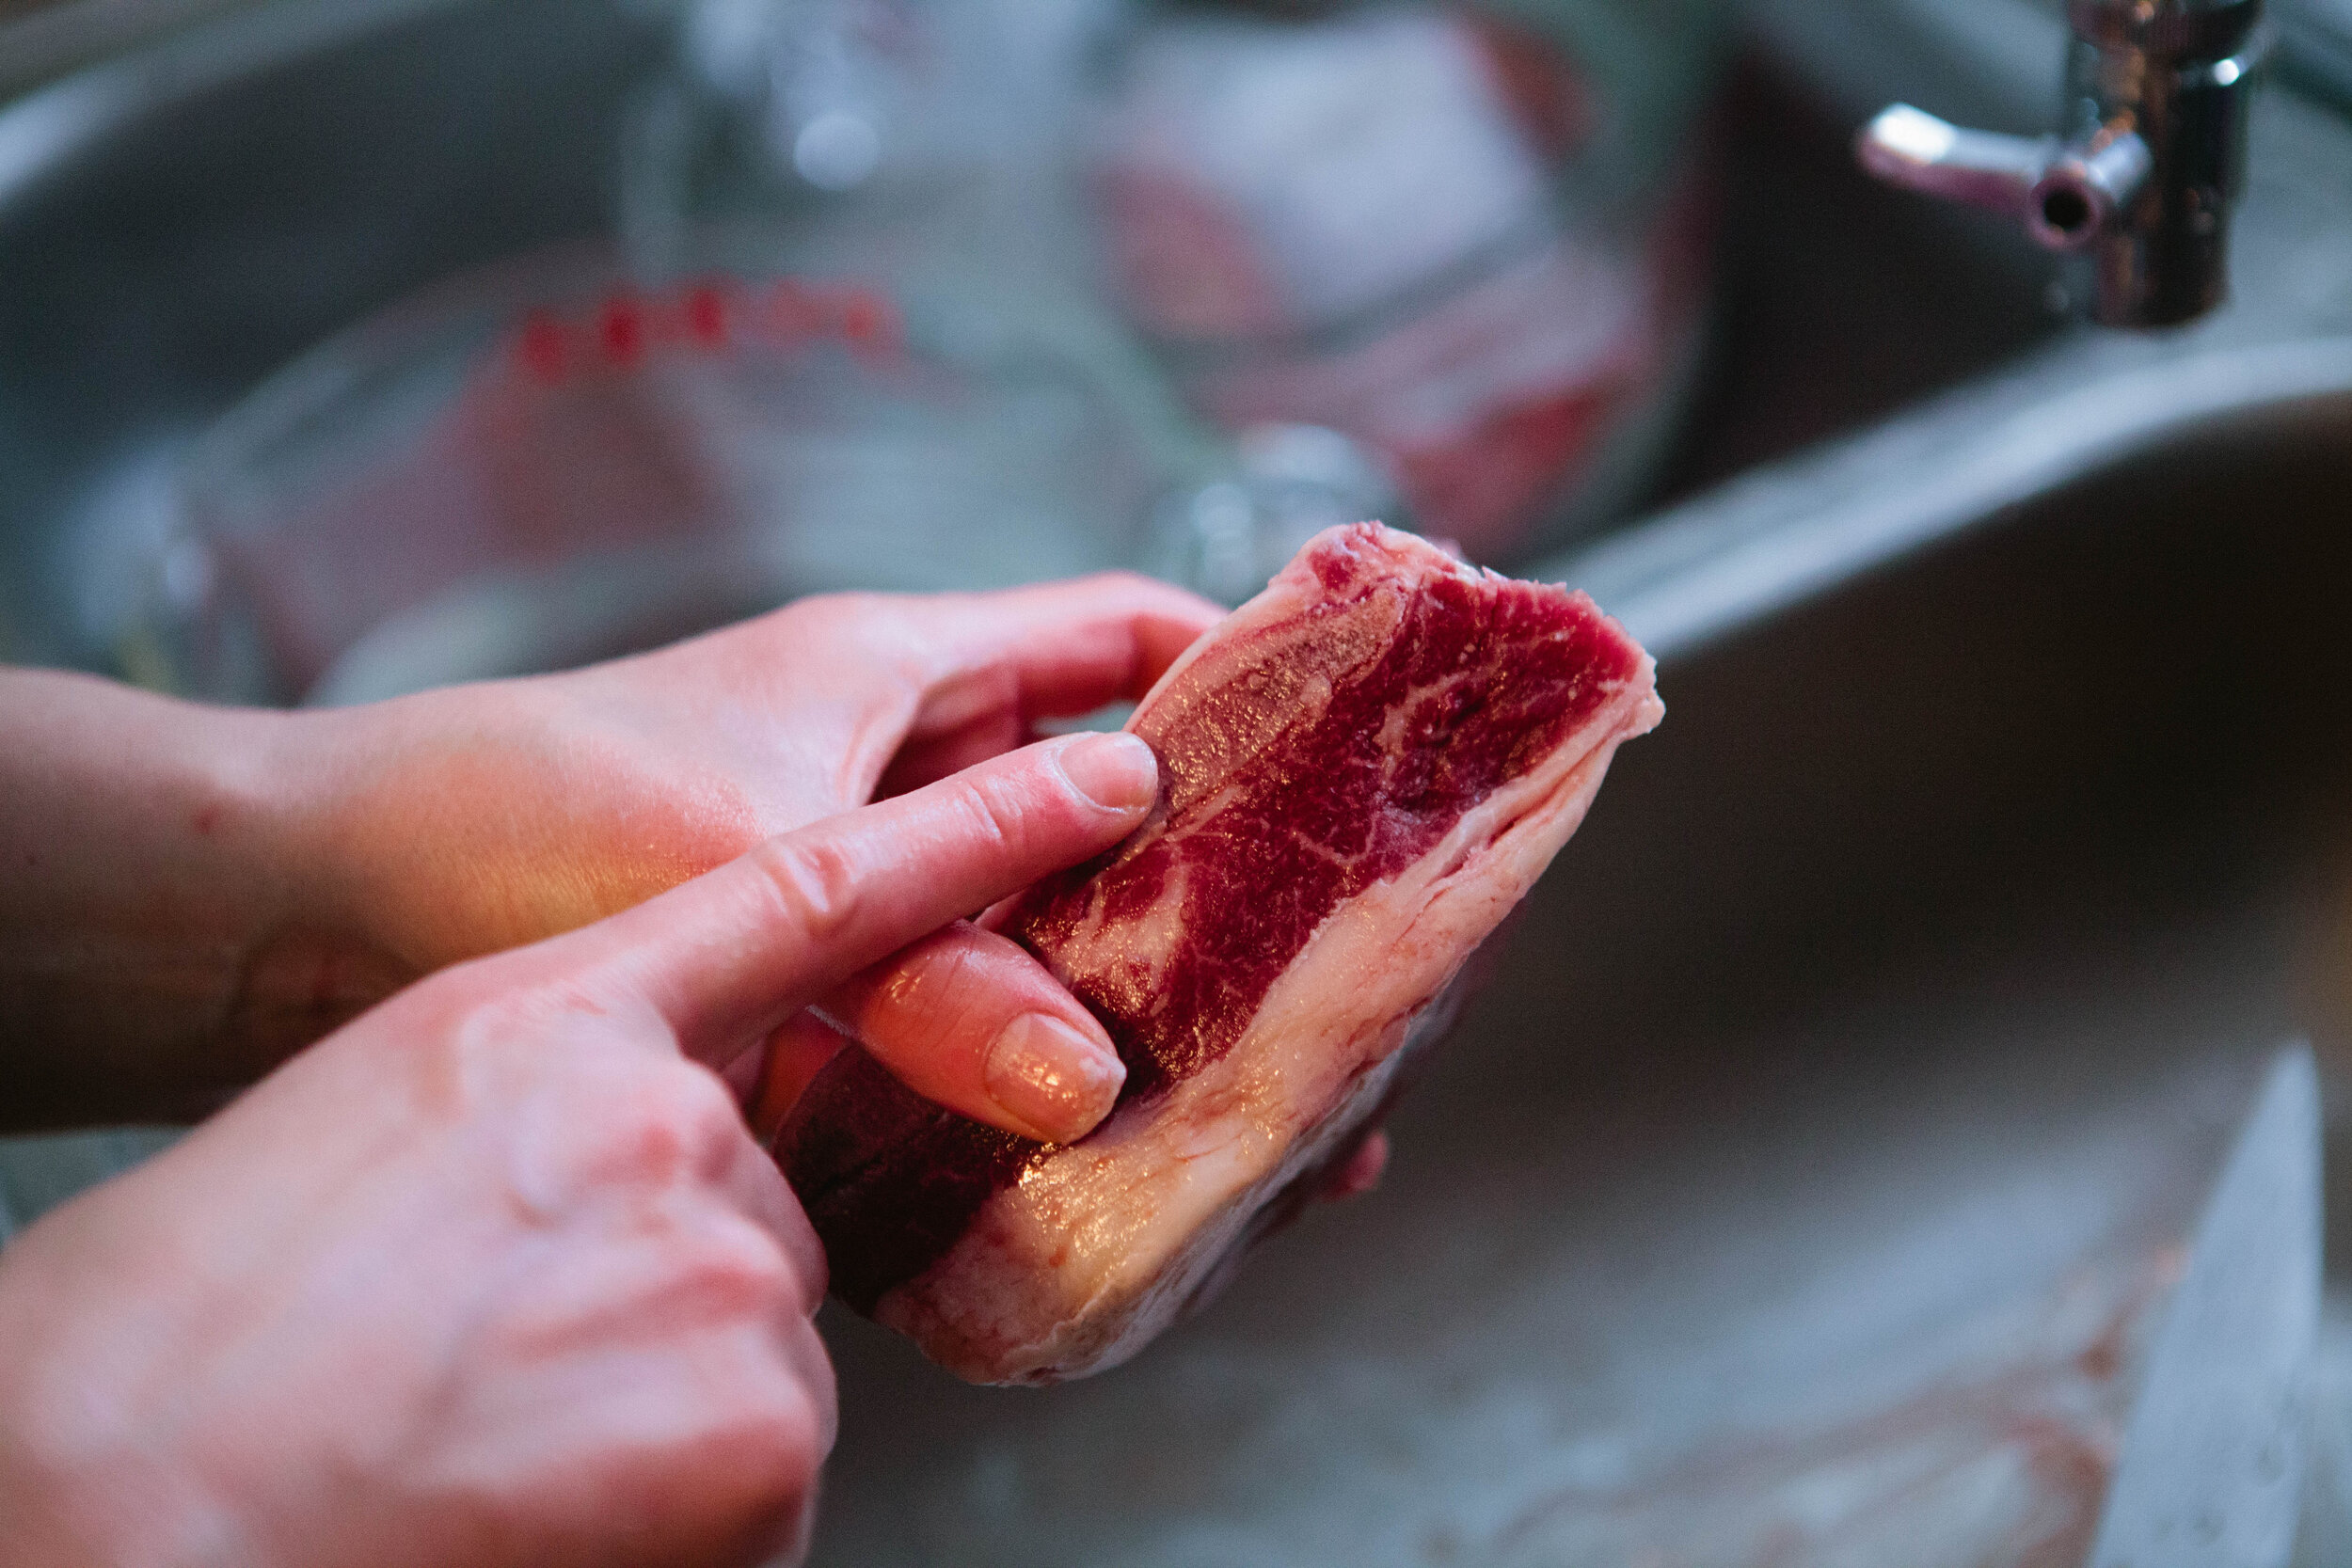
Cut your beef ribs apart so that each rib is separated.

Add to a pot and fill with filtered water.

IMG_8574.jpg

Add peppercorns whole and bay leaves to the pot.

If you are using dry herbs and are on Intro GAPS, pre-stage 4, put your herbs in a reusable herb or tea infuser or muslin pouch for easy removal. This is not necessary if you are using fresh herbs.

IMG_8580.jpg

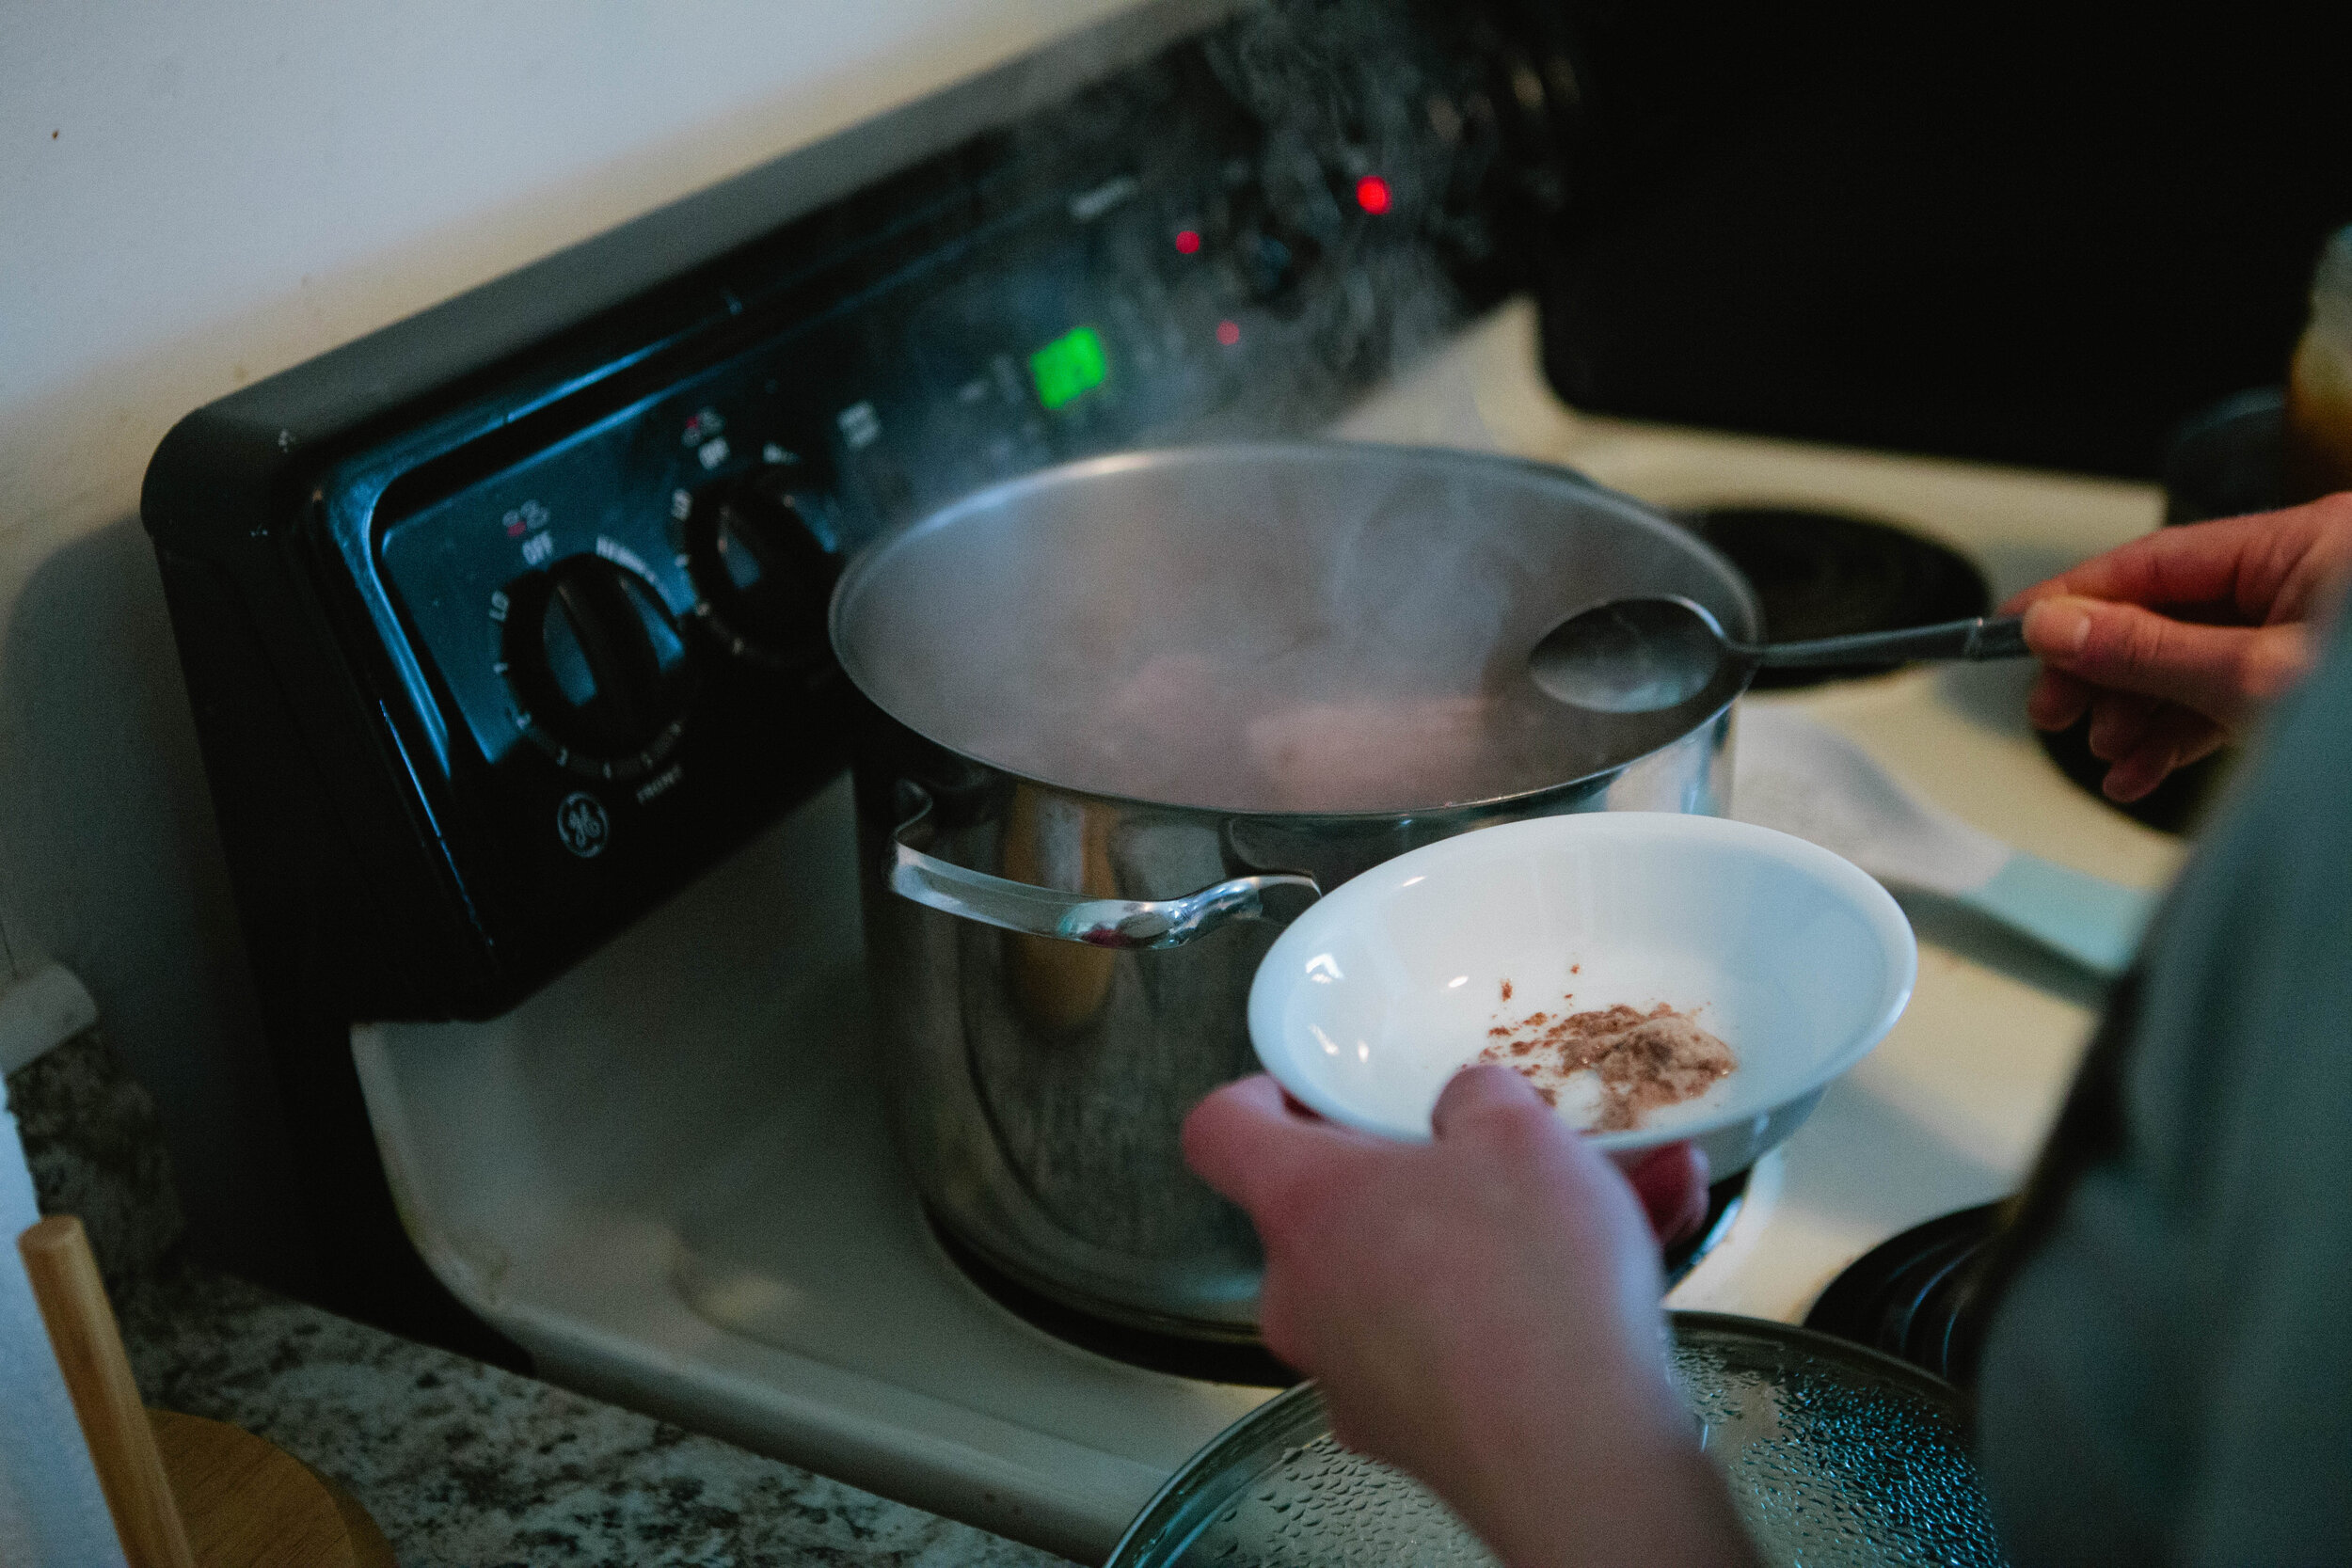
Turn pot up to high to bring to a boil. Skim the scum off the top of your pot.

Turn heat down lower to a simmer. Simmer beef stock for 3-5 hours. 

IMG_8725.jpg

Strain the beef stock using a large mesh strainer and a funnel or large measuring cup with a lip.

Place in jars or a large bowl and allow to cool completely before placing in the fridge or freezer.


HowtoMakeBeefStockfortheGAPSDiet.png

Stuffed Game Meat - 3 Ways!

I have recently been successful in harvesting an elk and am now undergoing the quest of finding ways to up the amount of fat I eat alongside the game meat. 

It is not advisable to eat lean protein frequently. When we eat protein, our bodies require a significant amount of vitamins, like Vitamin A, to utilize and absorb the protein. When we don’t eat fats that contain fat soluble vitamins like Vitamin A alongside our protein, we have to borrow it from our livers. If you do not regularly eat fat to replace what you’ve used, you will deplete your body of Vitamin A. Symptoms of Vitamin A deficiency dry skin, dry eyes, night blindness, infertility, poor growth, frequent infections, poor wound healing, acne, and memory problems. Learn more about the importance of fat here. 

The recipes below were three combinations that I came up with but I encourage you to experiment with your own combinations! I recommend choosing vegetables that can take plenty of fat as the whole point of this dish is to put more fat into your meat.

IMG_7643.jpg

Dairy Free Stuffed Game Steaks

Legal on GAPS Stage 2

Ingredients for Dairy Free Stuffed Game Meat:

  • 2-3 Small Elk Steaks

  • 3 tbsp Onion

  • 1 Small Stalk Celery

  • ¼ - ½ Red Pepper

  • 3 Small Cremini Mushrooms

  • 2-3 Cloves of Garlic

  • 2 tbsp of lard or other fat 

Directions:

IMG_7595.jpg

Butterfly the elk steaks. Do not cut all the way through.

Preheat the oven to 350°. Finely chop all the vegetables to the same size. 

IMG_7655.jpg

Add lard or other fat to a small pan and turn heat to medium. Once fat is melted, all add vegetables and stir to coat with fat. Add salt and pepper to taste. For added fat, you could also add pieces of bacon, marrow, or other pieces of fat. 

Once the mixture is soft and mostly cooked, remove from heat.

IMG_7671.jpg

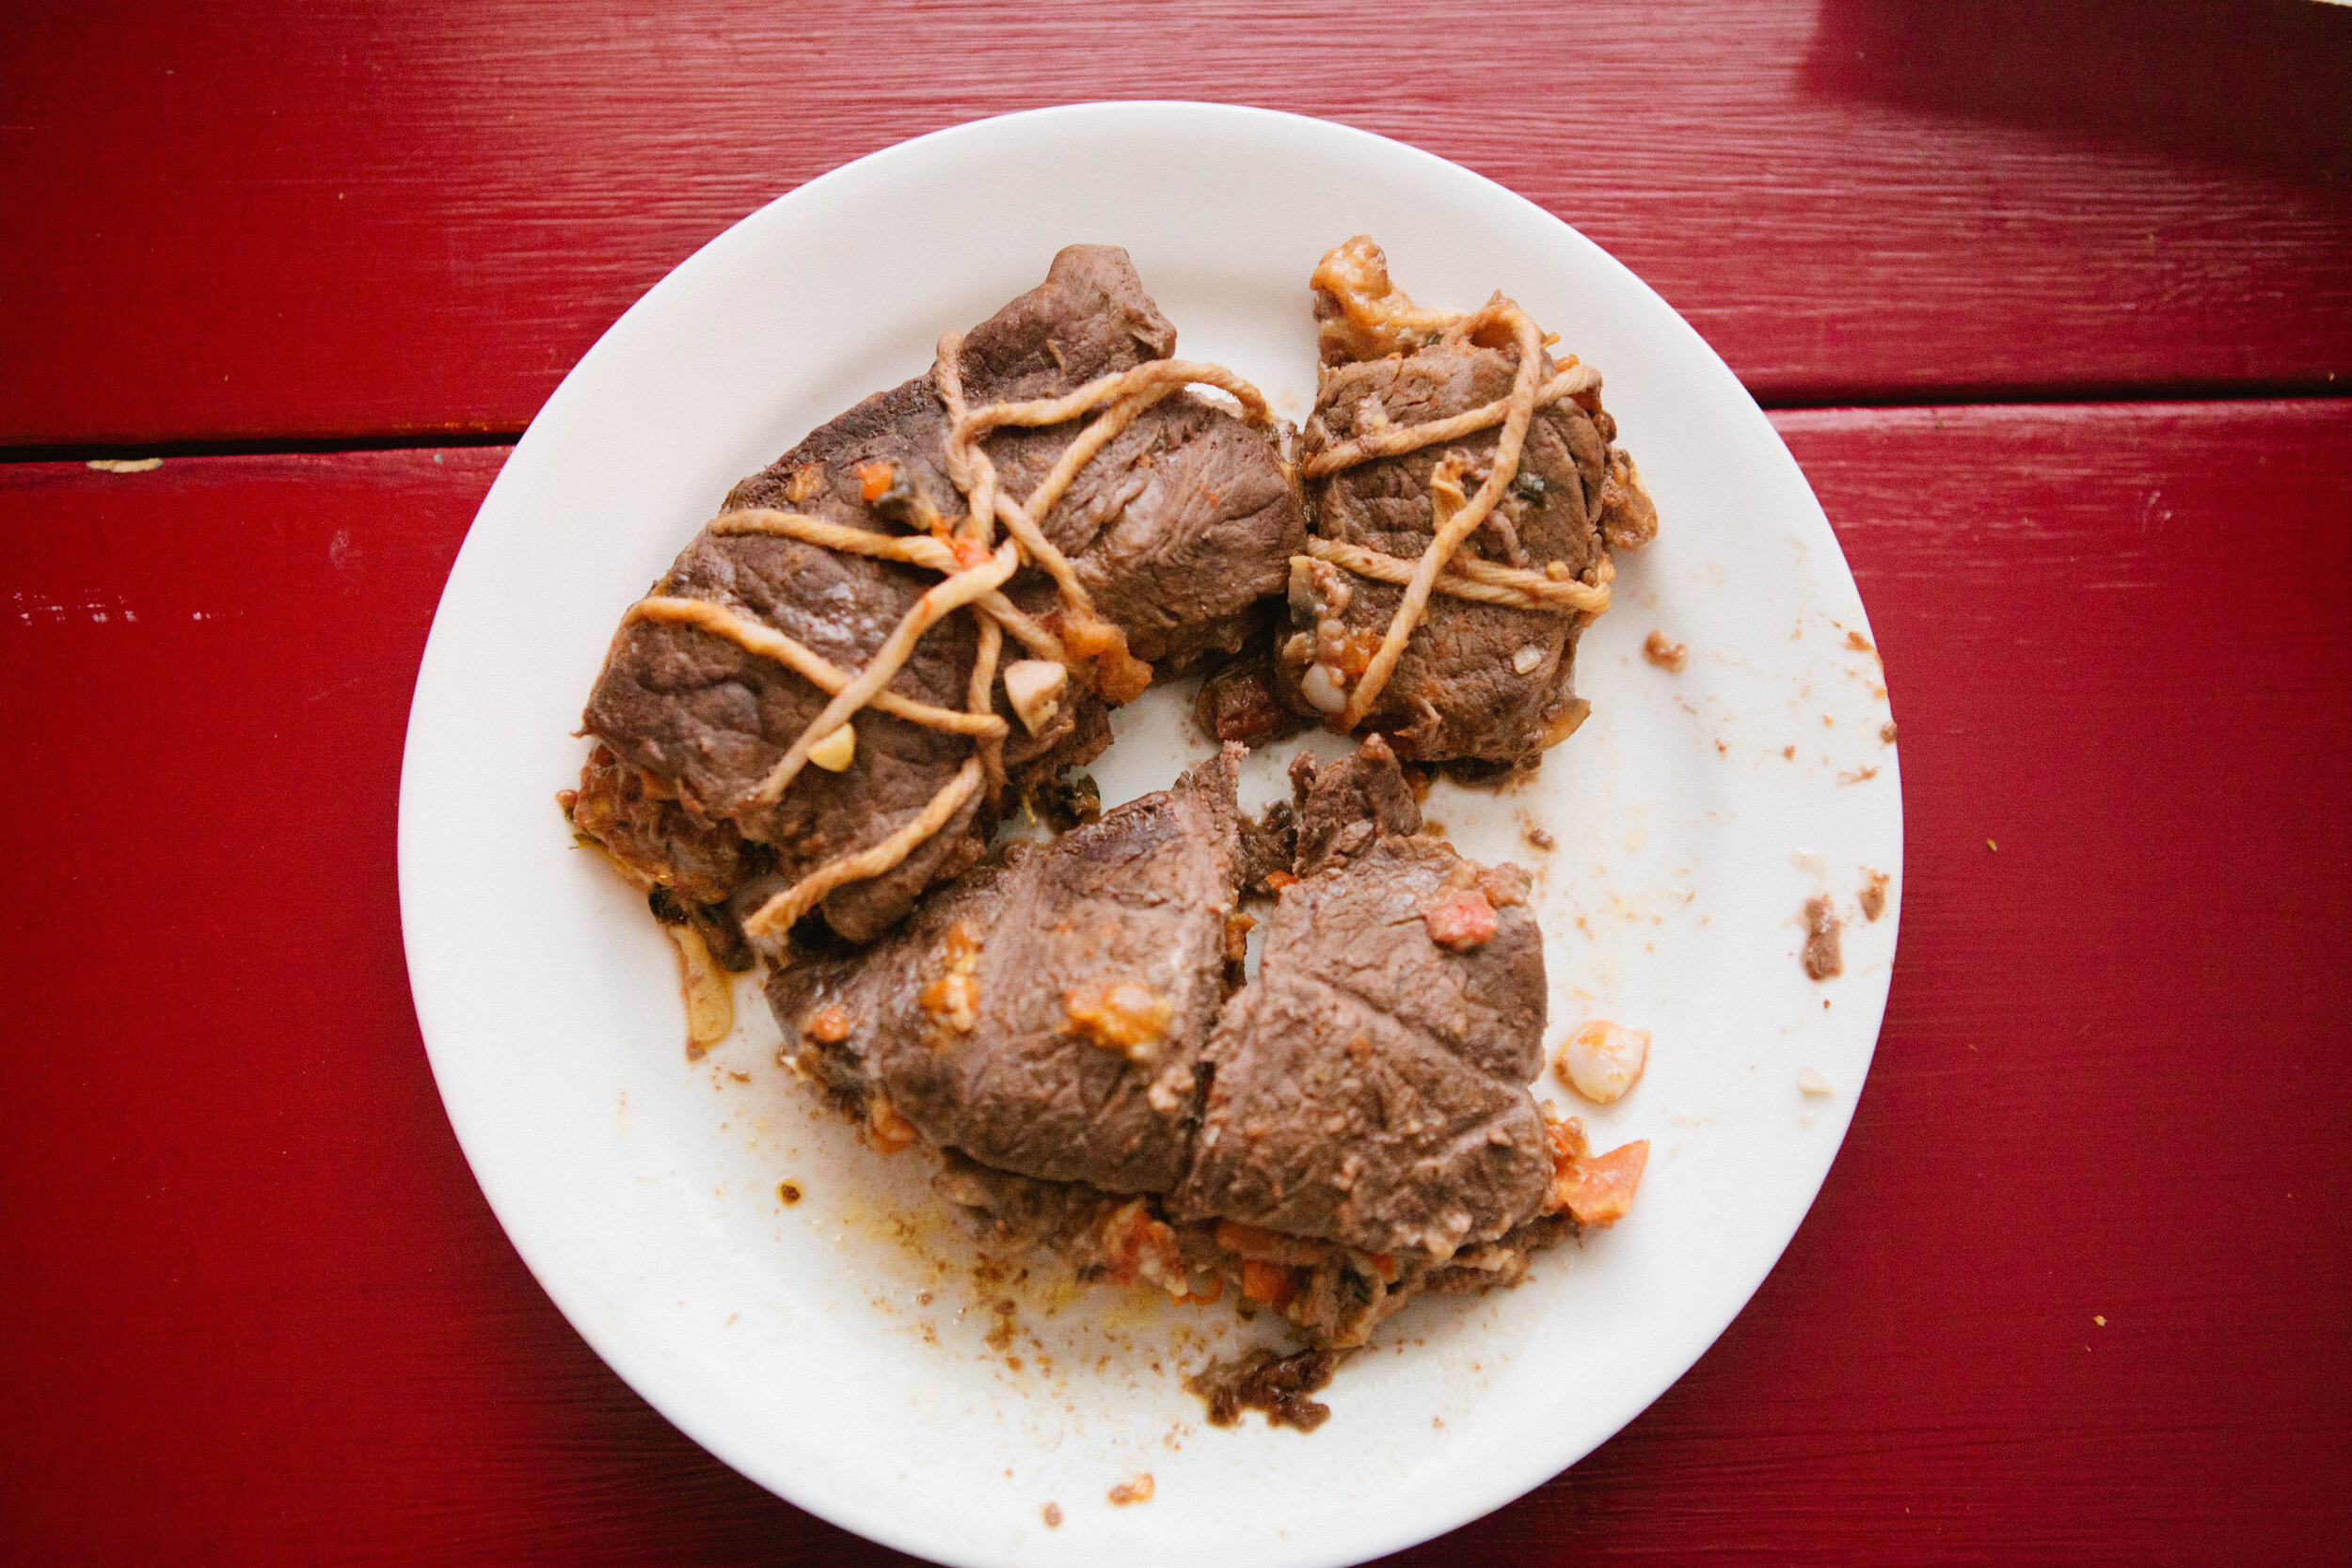
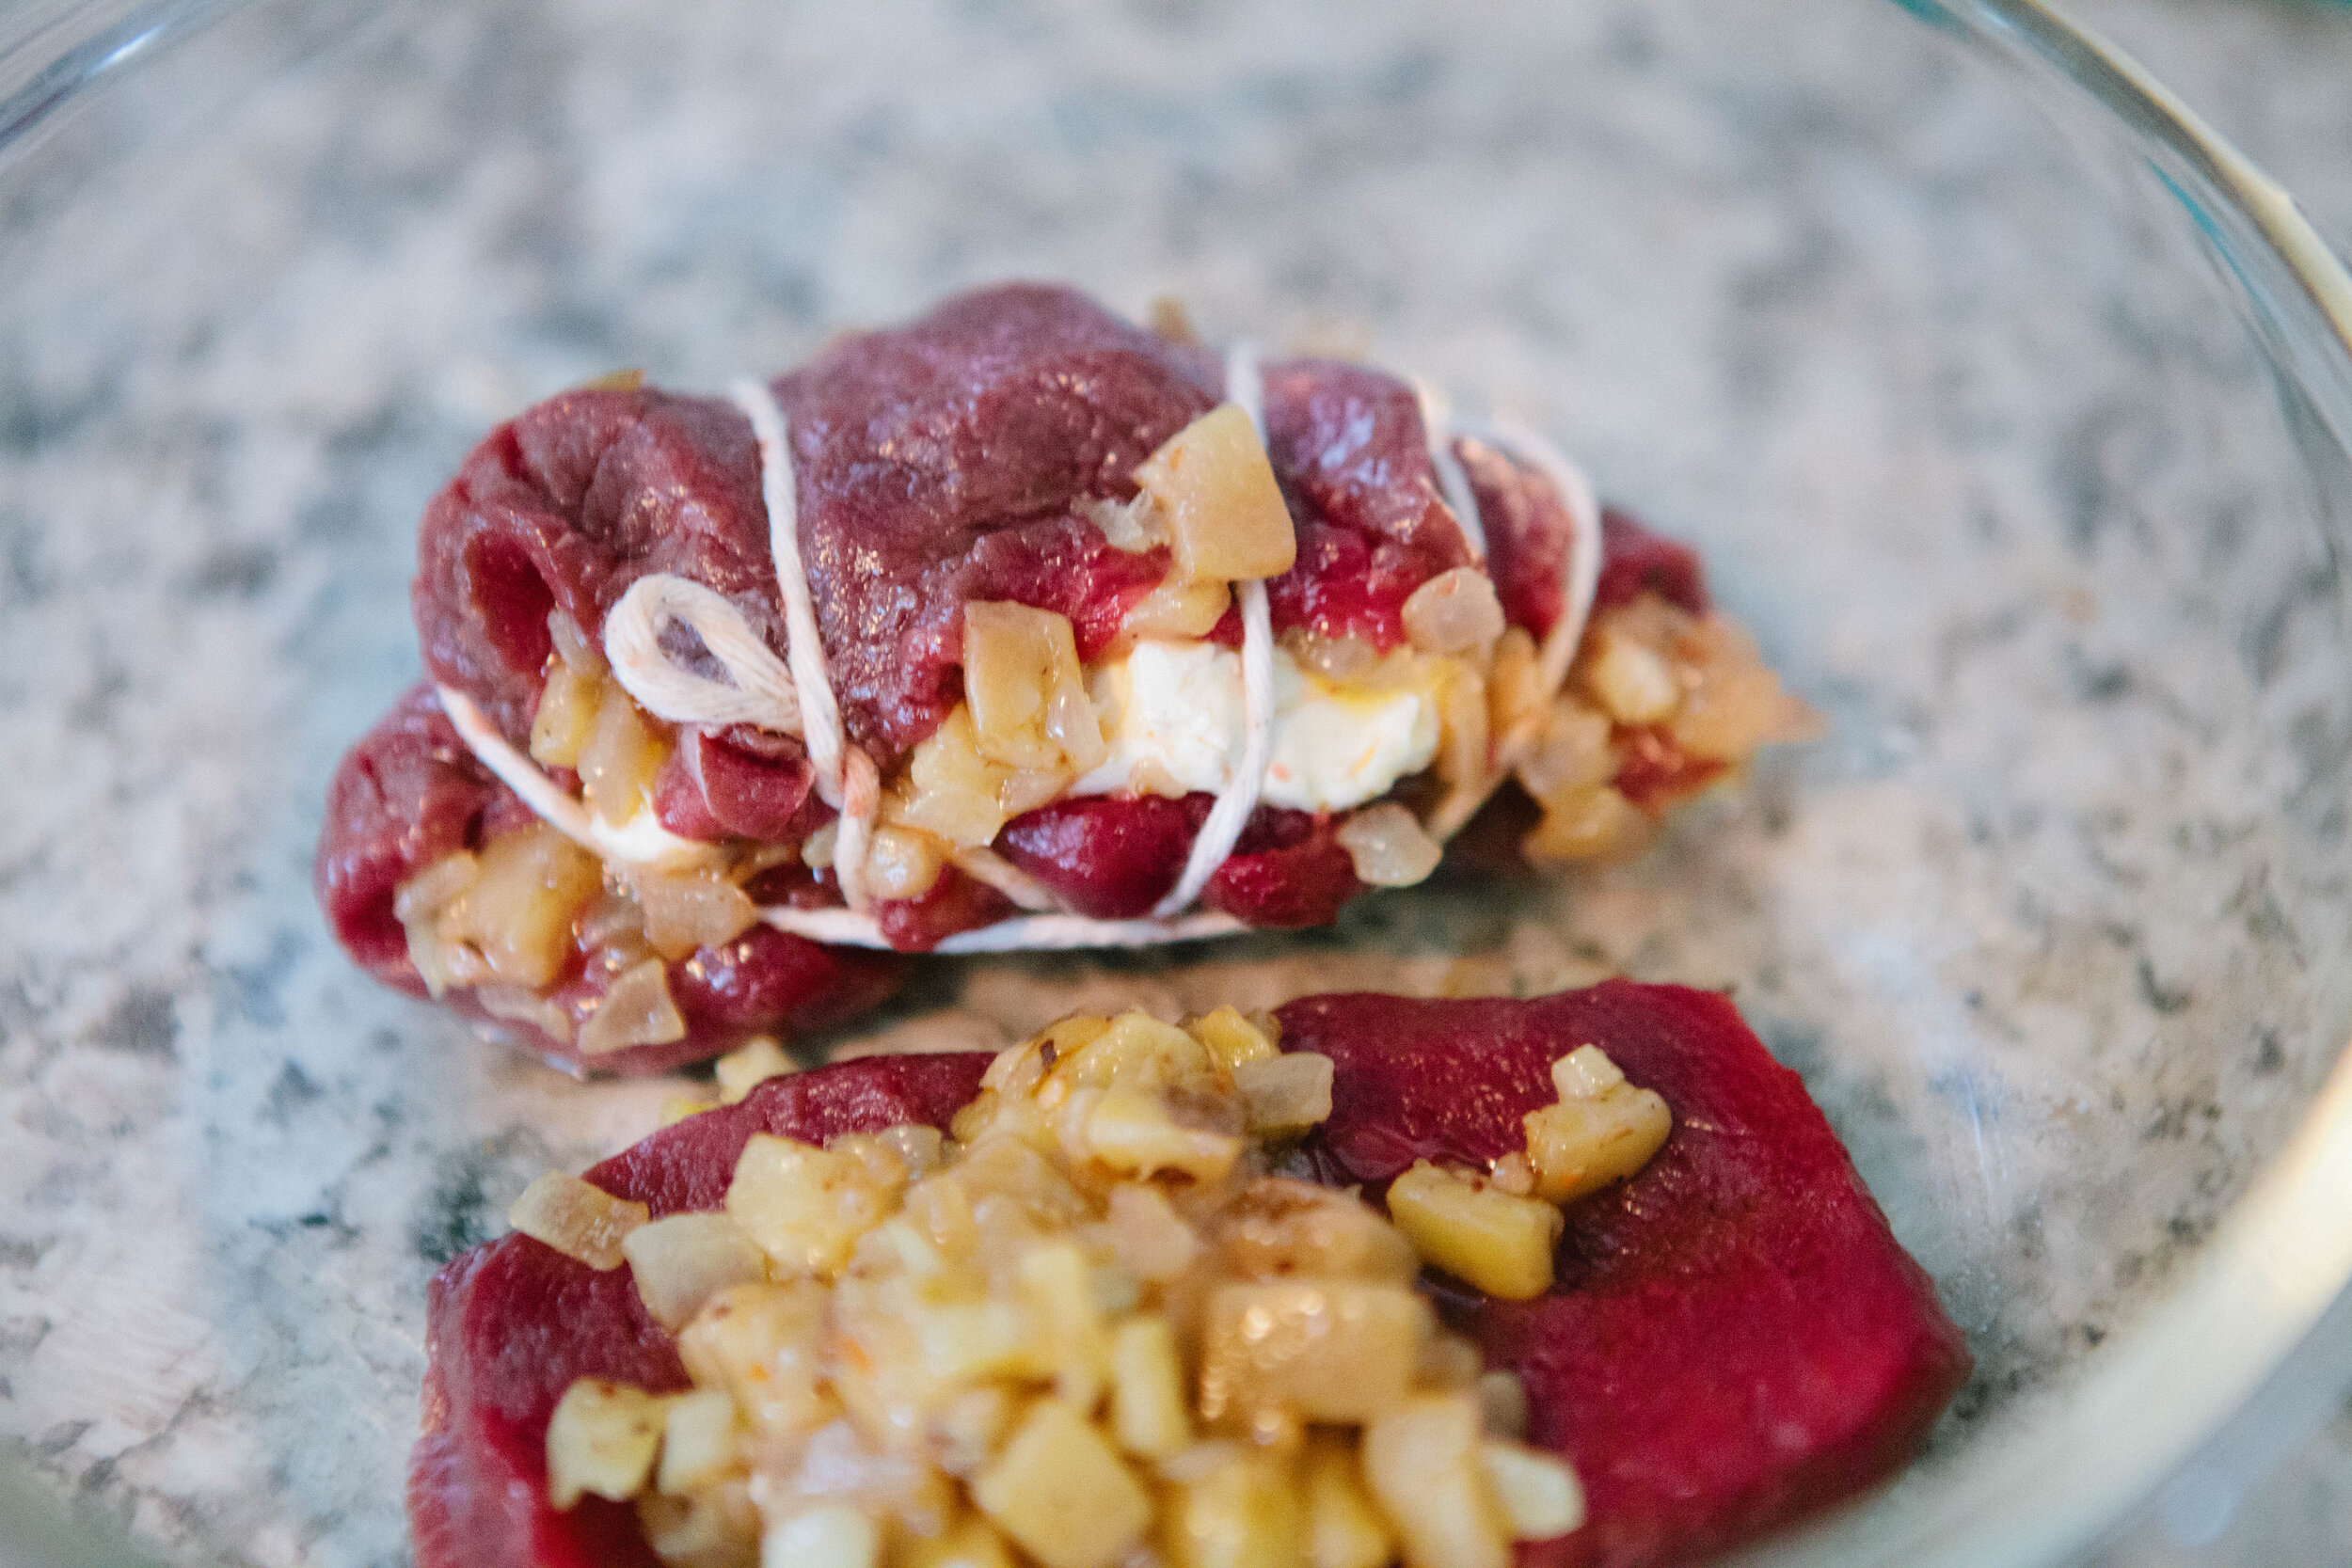
Using a spoon or your fingers, stuff the steaks with ⅓ of the mixture. Roll or fold the meat together, securing with butcher twine.

IMG_7678.jpg

Top with additional teaspoon of fat and salt. I recommend using tallow or lard on top as butter will burn easily (and is not dairy free.) Cover and place in an oven for 20-25 minutes until the juices are clear.

Let sit for 10 minutes to rest.

Dairy Free Stuffed Game Meat Steaks

Author: Amy Mihaly, Be Well Clinic

Ingredients

  • 2-3 Small Elk Steaks
  • 3 tbsp Onion
  • 1 Small Stalk Celery
  • ¼ - ½ Red Pepper
  • 3 Small Cremini Mushrooms
  • 3 Cloves of Garlic
  • 2 tbsp of lard or other fat

Instructions

  1. Butterfly the elk steaks. Do not cut all the way through.
  2. Preheat the oven to 350°. Finely chop all the vegetables to the same size.
  3. Add lard or other fat to a small pan and turn heat to medium. Once fat is melted, all add vegetables and stir to coat with fat. Add salt and pepper to taste. For added fat, you could also add pieces of bacon, marrow, or other pieces of fat.
  4. Once the mixture is soft and mostly cooked, remove from heat.
  5. Using a spoon or your fingers, stuff the steaks with ⅓ of the mixture. Roll or fold the meat together, securing with butcher twine.
  6. Top with additional teaspoon of fat and salt. I recommend using tallow or lard on top as butter will burn easily (and is not dairy free.) Cover and place in an oven for 20-25 minutes until the juices are clear.
  7. Let sit for 10 minutes to rest.

Italian Stuffed Game Steaks

Legal on Full GAPS

Ingredients for Italian Stuffed Game Meat:

  • 2-3 Small Elk Steaks

  • 3 Cloves Garlic

  • 1 Large Tomatoes

  • 2 Cremini Mushrooms

  • 1 ½  oz Freshly Grated Mozzarella Cheese

  • 2 tbsp of Butter or Other Fat

  • 1 Heaping tsp Oregano

  • 4 Fresh Leaves or 1 Heaping tsp Basil

  • Salt

  • Pepper

Directions:

IMG_7603.jpg

Butterfly the elk steaks. Do not cut all the way through.

IMG_7649.jpg

Preheat the oven to 350°. Finely dice the tomatoes and chop the garlic.

Add 2 tbsp of butter or other fat to a pan and turn heat to medium. Once fat is melted, add in the onion, mushrooms, and tomatoes.

While the mixture cooks, grate your mozzarella cheese.

Once the mixture is soft and mostly cooked, remove from heat. Add cheese into mixture and stir to melt slightly.

Using a spoon or your fingers, stuff the steaks with ⅓ of the mixture. Roll or fold the meat together, securing with butcher twine.

IMG_7756.jpg

Top with additional teaspoon of fat and salt. I recommend using tallow or lard on top as butter will burn easily. Cover and place in an oven for 20-25 minutes until the juices are clear.

Let sit for 10 minutes to rest.

Hello

Italian Stuffed Game Steaks

Author: Amy Mihaly, Be Well Clinic

Ingredients

  • 2-3 Small Elk Steaks
  • 3 Cloves Garlic
  • 1 Large Tomatoes
  • 2 Cremini Mushrooms
  • 1 ½ oz Freshly Grated Mozzarella Cheese
  • 2 tbsp of Butter or Other Fat
  • 1 Heaping tsp Oregano
  • 4 Fresh Leaves or 1 Heaping tsp Basil
  • Salt
  • Pepper

Instructions

  1. Butterfly the elk steaks. Do not cut all the way through.
  2. Preheat the oven to 350°. Finely dice the tomatoes and chop the garlic.
  3. Add 2 tbsp of butter or other fat to a pan and turn heat to medium. Once fat is melted, add in the onion, mushrooms, and tomatoes.
  4. While the mixture cooks, grate your mozzarella cheese.
  5. Once the mixture is soft and mostly cooked, remove from heat. Add cheese into mixture and stir to melt slightly.
  6. Using a spoon or your fingers, stuff the steaks with ⅓ of the mixture. Roll or fold the meat together, securing with butcher twine.
  7. Top with additional teaspoon of fat and salt. I recommend using tallow or lard on top as butter will burn easily. Cover and place in an oven for 20-25 minutes until the juices are clear.
  8. Let sit for 10 minutes to rest.
, World!


Cream Cheese Eggplant Stuffed Game Steaks

Legal on Full GAPS, as long as you’re tolerating cream cheese

Ingredients for Cream Cheese and Eggplant Stuffed Game Meat:

  • 2-3 Small Elk Steaks

  • 3 tbsp Chopped Onion

  • ½ cup of Chopped Eggplant

  • 3 cloves Garlic

  • 3-4 tbsp Butter

  • ½ tsp Mace

  • 4 Juniper Berries

  • 2-3 tbsp Cream Cheese

Directions:

IMG_7604.jpg

Butterfly the elk steaks. Do not cut all the way through.

Preheat the oven to 350°.

IMG_7633.jpg

Finely chop the onion, eggplant and garlic. In a pan add 3-4 tbsp of butter. Eggplant is notorious for grabbing up lots of fat, which makes it a great choice for this recipe. If you find your fat is disappearing, don’t be afraid to add more!

Crush mace and juniper berries.

Once the mixture is soft and mostly cooked, remove from heat.

IMG_7701.jpg

Using a spoon or your fingers, stuff the steaks with ⅓ of the mixture, a piece of cream cheese, and a small piece of fat. Roll or fold the meat together, securing with butcher twine.

Top with additional teaspoon of fat and salt. I recommend using tallow or lard on top as butter will burn easily. Cover and place in an oven for 20=25 minutes until the juices are clear.

Let sit for 10 minutes to rest.

IMG_7697.jpg

Cream Cheese Eggplant Stuffed Game Steaks

Author: Amy Mihaly, Be Well Clinic

Ingredients

  • 2-3 Small Elk Steaks3 tbsp Chopped Onion
  • ½ cup of Chopped Eggplant
  • 3 cloves Garlic
  • 4 tbsp Butter
  • ½ tsp Mace
  • 4 Juniper Berries
  • 3 tbsp Cream Cheese

Instructions

  1. Butterfly the elk steaks. Do not cut all the way through.
  2. Preheat the oven to 350°.
  3. Finely chop the onion, eggplant and garlic. In a pan add 3-4 tbsp of butter. Eggplant is notorious for grabbing up lots of fat, which makes it a great choice for this recipe. If you find your fat is disappearing, don’t be afraid to add more!
  4. Crush mace and juniper berries.
  5. Once the mixture is soft and mostly cooked, remove from heat.
  6. Using a spoon or your fingers, stuff the steaks with ⅓ of the mixture, a piece of cream cheese, and a small piece of fat. Roll or fold the meat together, securing with butcher twine.
  7. Top with additional teaspoon of fat and salt. I recommend using tallow or lard on top as butter will burn easily. Cover and place in an oven for 20=25 minutes until the juices are clear.
  8. Let sit for 10 minutes to rest.

StuffedGameMeat3Ways.png

15 Minute Meal: Chicken & Alfredo Sauce, Two Ways

Alfredo Sauce used to be my favorite growing up but it often gave me a stomach-ache. I learned that was caused by a dairy intolerance and so I stopped eating it for many years. Now that I’ve healed my gut using the GAPS Protocol, I can freely enjoy dairy and alfredo sauce again!

Alfredo is a beautiful food because it is full of nourishing fats. It’s a food that gets a bad rap precisely because of this. Read more about the importance of fat here. Use alfredo sauce on whatever, like chicken, zoodles, pasta (I prefer Jovial as an ethically real food made option), or add extra stock and eat your alfredo as a nourishing, fat filled soup! Because it is so thick, you can also dip veggies or sourdough crackers in it.

I prefer a chunky sauce to a smooth sauce. However, if you want a pure smooth alfredo, you can add this sauce to a blender or use an immersion blender to really smooth it out.

Adding cheese to the sauce when it is too warm will cause it to curdle and ruin your dish. Keep the temperature low but not cool when you are ready to add the cheese. I made sure I could leave my finger in the sauce for a second or two before adding the cheese.

Below are two recipes to make alfredo sauce. If you’re following the GAPS Protocol, the bottom “Early Stage” recipe is for you and can be eaten from GAPS Stage 3 on as long as you are gently frying the mushrooms and onions in plenty of fat and do not burn. On the early stages of GAPS, top boiled chicken pieces with the alfredo sauce. On later stages, fry your pieces in fat! This recipe is a great way to get a lot of fat in your diet!

This recipe makes for a very cheesy and thick sauce. If you’d like a less dense sauce similar to more commercial canned varieties, simply add less cheese.

If you’re topping chicken, remember chicken cooks best high and quick so have your pan hot before adding your meat. I prefer small slices and pieces of chicken. Cook over high heat, turning every minute or so, until cooked through. 

Traditional Alfredo Sauce Ingredients:

  • 4 oz Mushrooms

  • ½ Onions

  • 3 Cloves of Garlic

  • 2-3 tbsp of butter

  • ½ tsp Salt, to taste. Depending on the saltiness of the cheese that you add, you may want to add less salt.

  • 1 tbsp Gelatin 

  • 2 cups of Whole Cream

  • 8 ounces of Freshly Grated Cheese (I used Havarit and Montery Jack but you can use any white cheese that you like)

Directions:

Alfredo Sauce is a great, fat rich meal that is simple to put together. Top chicken, zoodles or gluten free pasta with this easy sauce. Also includes a recipe for early stage GAPS Protocol. Recipe by Amy Mihaly, Be Well Clinic.

Roughly chop onion and slice mushrooms. Dice garlic.

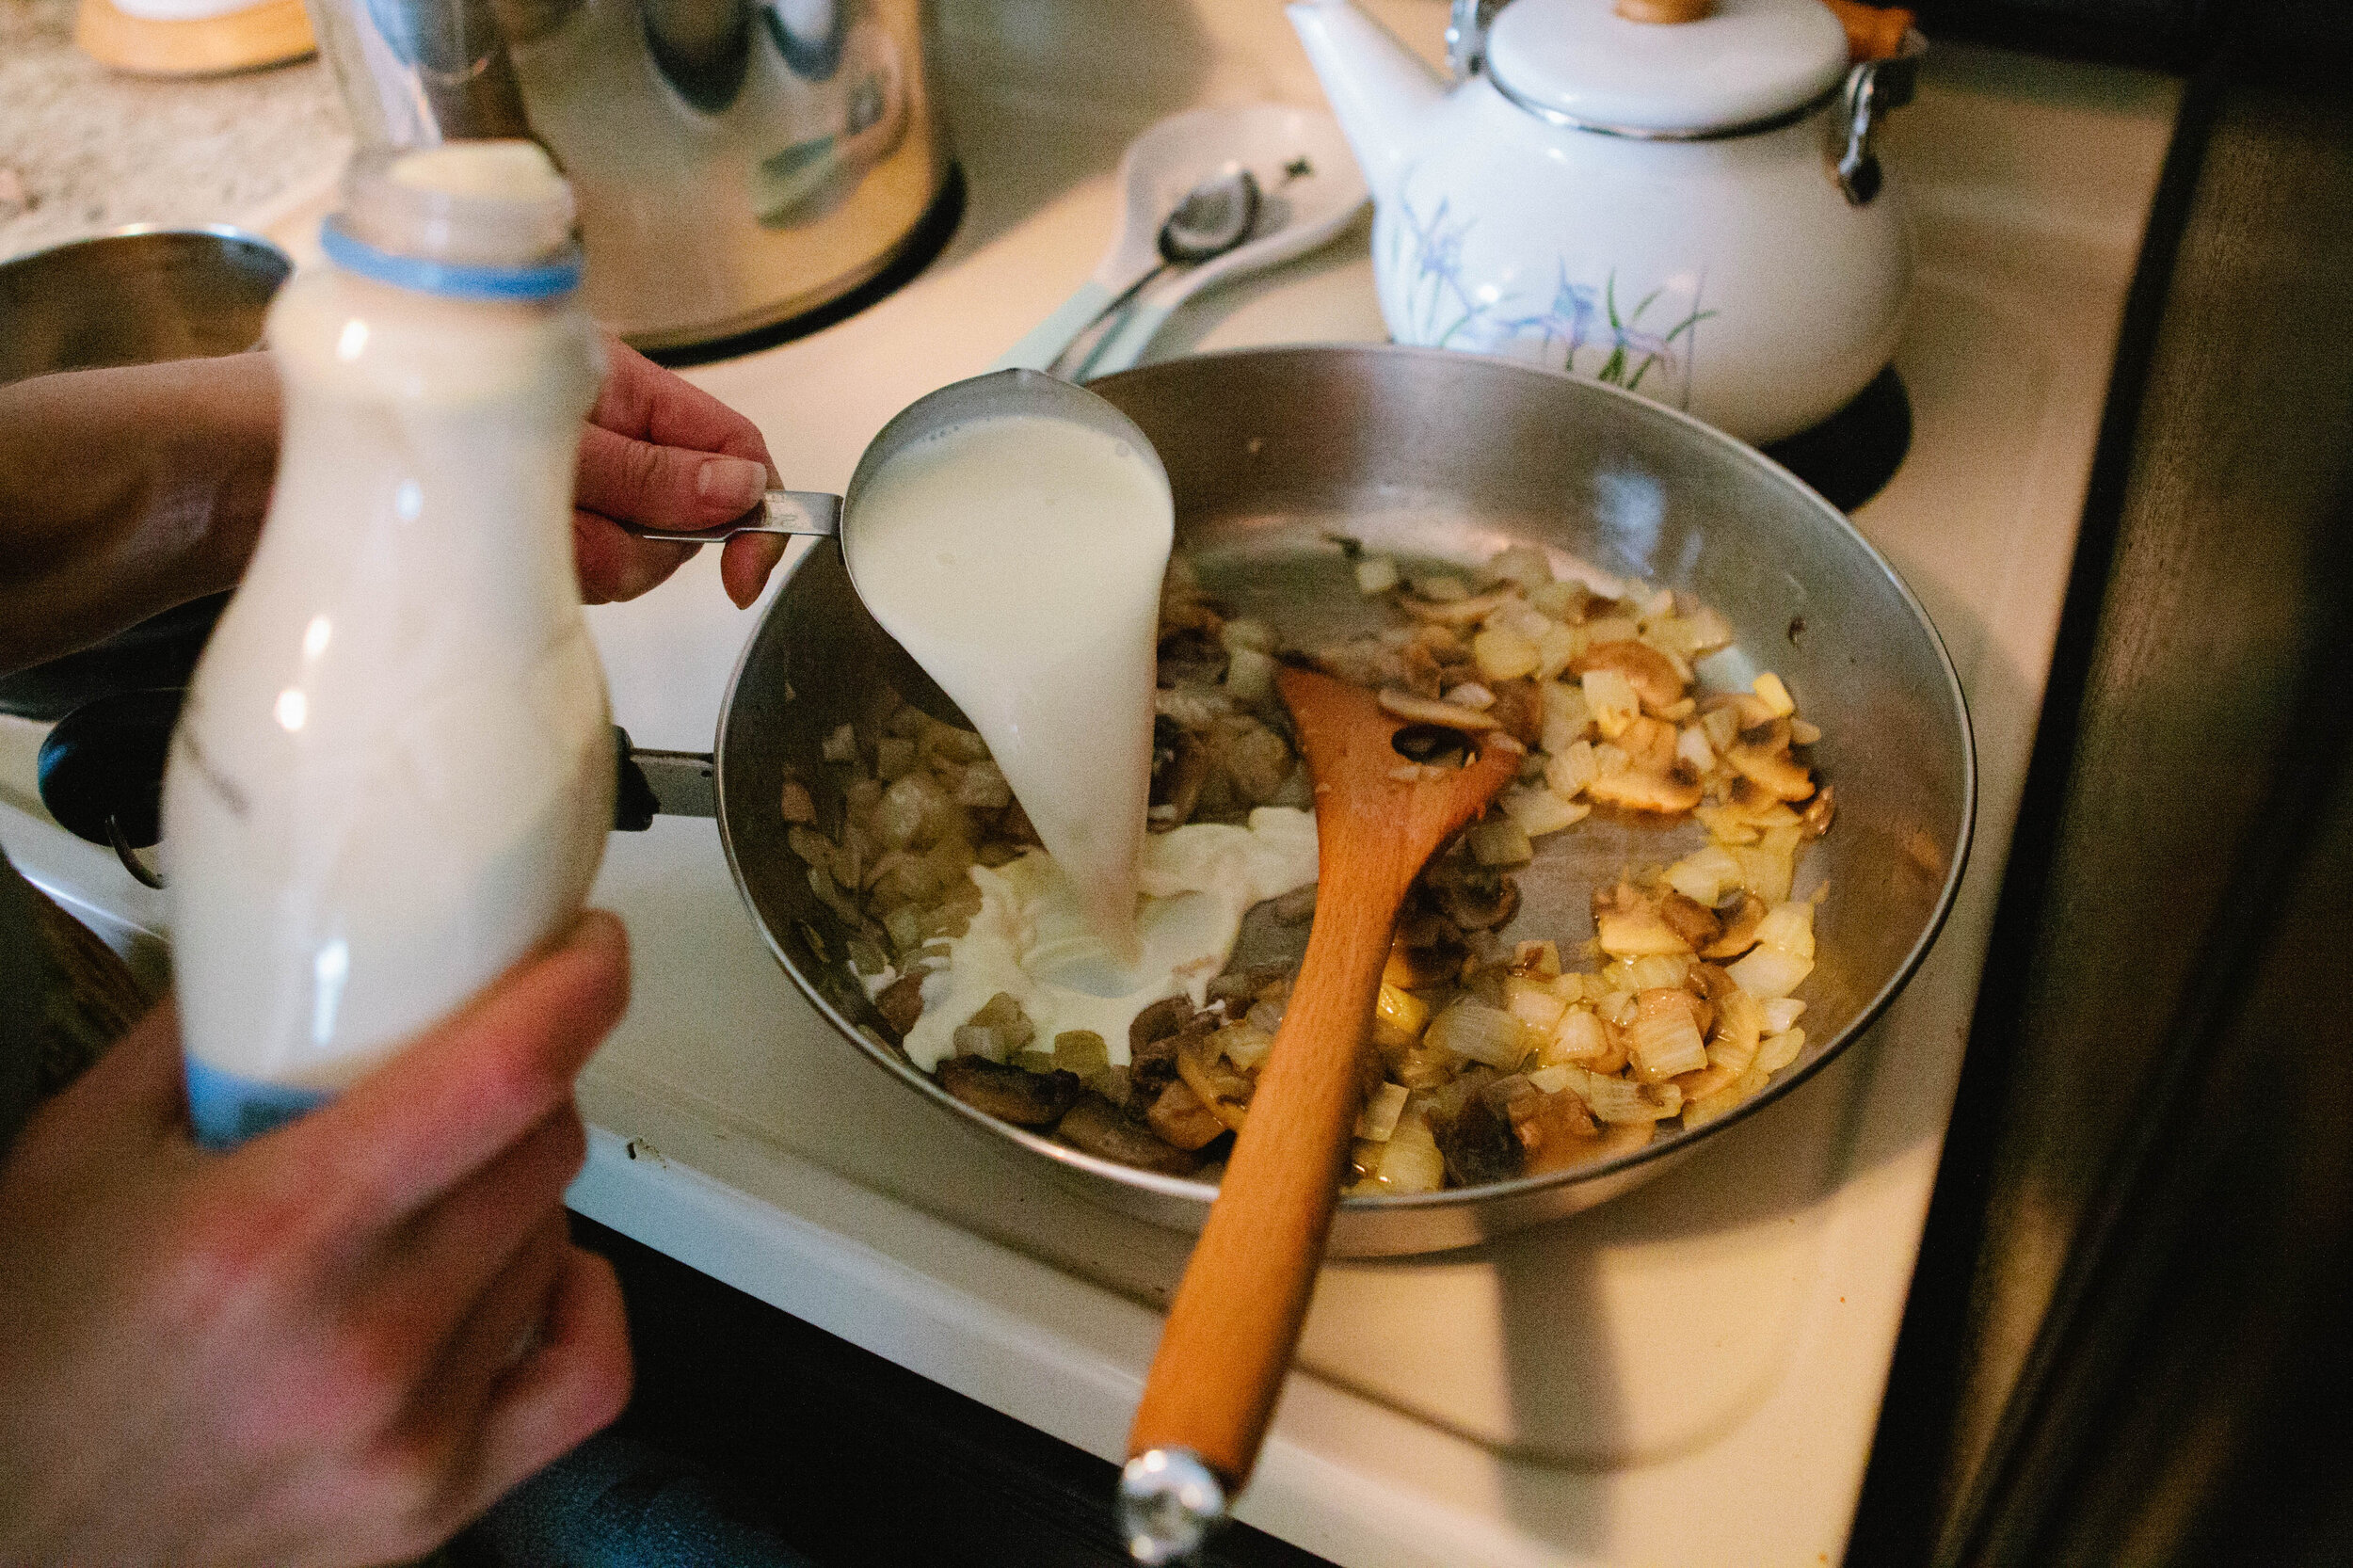
Add at least 2 tbsp butter to a flat, large skillet. Once melted, add onions. Allow to cook for several minutes then add the mushrooms. If needed, add additional butter to give the mushrooms more fat to cook in.

In a small stock pot, add ¼ cup of filtered water and gelatin. Whisk mixture and allow to warm to blood temperature, about 100 degrees. Stir constantly to avoid burning.

Alfredo Sauce is a great, fat rich meal that is simple to put together. Top chicken, zoodles or gluten free pasta with this easy sauce. Also includes a recipe for early stage GAPS Protocol. Recipe by Amy Mihaly, Be Well Clinic.

Reduce mushroom and onion mixture to a simmer. Add in the cream and heat to blood temperature. If gelatin is heated before the cream is heated, remove from heat.

Once cream is heated, add gelatin mixture and mix until smooth. Add ½ tsp of salt and freshly ground pepper to taste. You can also use white pepper if you’d like to keep the sauce white. Remove the sauce from the heat.

Grate your cheese fresh. Pre-grated cheese has additives in it that are no good!

Alfredo Sauce is a great, fat rich meal that is simple to put together. Top chicken, zoodles or gluten free pasta with this easy sauce. Also includes a recipe for early stage GAPS Protocol. Recipe by Amy Mihaly, Be Well Clinic.

Add your cheese into the slightly cooled sauce mixture and allow to melt. Whisk fully to melt and blend the cheese. Takes about 4-5 minutes to fully melt the cheese.

Pour over and enjoy!

When reheating this sauce, bring it to temperature slowly.

Alfredo Sauce is a great, fat rich meal that is simple to put together. Top chicken, zoodles or gluten free pasta with this easy sauce. Also includes a recipe for early stage GAPS Protocol. Recipe by Amy Mihaly, Be Well Clinic.

Traditional Alfredo Sauce

Author: The Be Well Clinic

Ingredients

  • 4 oz Mushrooms
  • ½ Onions
  • 3 Cloves of Garlic
  • 3 tbsp of butter
  • ½ tsp Salt, to taste. Depending on the saltiness of the cheese that you add, you may want to add less salt.
  • 1 tbsp Gelatin
  • 2 cups of Whole Cream 
  • 8 ounces of Freshly Grated Cheese (I used Havarit and Montery Jack but you can use any white cheese that you like)

Instructions

  1. Roughly chop onion and slice mushrooms. Dice garlic.
  2. Add at least 2 tbsp butter to a flat, large skillet. Once melted, add onions. Allow to cook for several minutes then add the mushrooms. If needed, add additional butter to give the mushrooms more fat to cook in.
  3. In a small stock pot, add ¼ cup of filtered water and gelatin. Whisk mixture and allow to warm to blood temperature, about 100 degrees. Stir constantly to avoid burning.
  4. Reduce mushroom and onion mixture to a simmer. Add in the cream and heat to blood temperature. If gelatin is heated before the cream is heated, remove from heat.
  5. Once cream is heated, add gelatin mixture and mix until smooth. Add ½ tsp of salt and freshly ground pepper to taste. You can also use white pepper if you’d like to keep the sauce white. Remove the sauce from the heat.
  6. Grate your cheese fresh. Pre-grated cheese has additives in it that are no good!
  7. Add your cheese into the slightly cooled sauce mixture and allow to melt. Whisk fully to melt and blend the cheese. Takes about 4-5 minutes to fully melt the cheese.
  8. Pour over and enjoy!
  9. When reheating this sauce, bring it to temperature slowly.
Created using The Recipes Generator

Early Stage Gaps Alfredo Sauce:

  • 4 oz Mushrooms

  • ½ Onion

  • 3 Large Cloves of Garlic

  • 16 oz. Sour Cream

Directions:

Alfredo Sauce is a great, fat rich meal that is simple to put together. Top chicken, zoodles or gluten free pasta with this easy sauce. Also includes a recipe for early stage GAPS Protocol. Recipe by Amy Mihaly, Be Well Clinic.

Roughly chop onion and slice mushrooms. Dice garlic.

Add at least 2 tbsp butter to a flat, large skillet. Once melted, add onions. Allow to cook for several minutes then add the mushrooms. If needed, add additional butter to give the mushrooms more fat to cook in.

Alfredo Sauce is a great, fat rich meal that is simple to put together. Top chicken, zoodles or gluten free pasta with this easy sauce. Also includes a recipe for early stage GAPS Protocol. Recipe by Amy Mihaly, Be Well Clinic.

Once onions and mushrooms, turn off the heat. Add in the sour cream. Return to very low heat to allow the sour cream to warm and melt.

Add over boiled chicken or eat on it’s own.

How to make GAPS Legal Alfredo Sauce for Early Stags of the GAPS Protocol by Amy Mihaly, Be Well Clinic.

Early Stage GAPS Alfredo Sauce

Author: The Be Well Clinic

Ingredients

  • 4 oz Mushrooms
  • ½ Onion
  • 3 Large Cloves of Garlic
  • 16 oz. Sour Cream

Instructions

  1. Roughly chop onion and slice mushrooms. Dice garlic.
  2. Add at least 2 tbsp butter to a flat, large skillet. Once melted, add onions. Allow to cook for several minutes then add the mushrooms. If needed, add additional butter to give the mushrooms more fat to cook in.
  3. Once onions and mushrooms, turn off the heat. Add in the sour cream. Return to very low heat to allow the sour cream to warm and melt.
  4. Add over boiled chicken or eat on it’s own.
Created using The Recipes Generator


Alfredo Sauce is a great, fat rich meal that is simple to put together. Top chicken, zoodles or gluten free pasta with this easy sauce. Also includes a recipe for early stage GAPS Protocol. Recipe by Amy Mihaly, Be Well Clinic.

GAPS Italian Casserole

Italian Casserole is a very versatile dish that can be made with virtually any cut of meat that you might have on hand and any seasonal vegetables you have on hand. In fact, this is the ideal seasonal eating dish because it’s so versatile! 

When choosing your meat, you do need to ensure there is a bone with a joint in it to achieve some amount of gelatinous healing stock. If your cut of meat is not very fatty, you can add some fat to the dish. Cooking with fat will help draw the nutrients out of the food because the fat helps your body absorb nutrients and makes them more readily available. Learn more about the benefits of fat here!

This is a Stage 2 food on the GAPS Protocol. It still makes a thick gelatinous stock but the meat isn’t fully immersed in water when it’s cooked which potentially makes it a little more difficult to digest.

I highly recommend making this in a dutch oven if you have one available. If you don’t, any covered casserole dish or slow cooker will work.

 Ingredients for GAPS Italian Casserole:

  • Meat: I used 2.75 lb Lamb Shoulder

  • Fresh Herbs: I used parsley, thyme, basil, oregano

  • Vegetables: I used zucchini squash, leeks, and carrots

  • 6 Cloves of Garlic

  • Salt

  • 1 liter Filtered Water or Stock

Directions for GAPS Italian Casserole:

IMG_8209.jpg

Cut up your vegetables and add them to your cooking dish. Mix them together.

Roughly chop your herbs and add them to your cooking dish. Salt as desired.

Peel the garlic cloves and smash them with the side of your knife. 

IMG_8247.jpg

Rinse the meat well. Nestle the meat fat side up into the dish with vegetables. Add salt to the meat.

IMG_8259.jpg

Add filtered water to the dish. I pour at the sides so that I don’t pour the delicious salt off. 

IMG_8451.jpg

Cook 4-8 hours in the oven or crock pot depending on the heat that you have and the time that you have. I wouldn’t go more than eight hours because of the glutamic acid. Low and slow will always be more delicious!

Enjoy as a meal on its own!


GAPS Italian Cassrole

Author: The Be Well Clinic
Prep time: Cook time: Total time:

Ingredients:

  • Meat: I used 2.75 lb Lamb Shoulder
  • Fresh Herbs: I used parsley, thyme, basil, oregano
  • Vegetables: I used zucchini squash, leeks, and carrots
  • 6 Cloves of Garlic
  • Salt
  • 1 liter Filtered Water or Stock

Instructions:

  1. Cut up your vegetables and add them to your cooking dish. Mix them together.
  2. Roughly chop your herbs and add them to your cooking dish. Salt as desired.
  3. Peel the garlic cloves and smash them with the side of your knife.
  4. Rinse the meat well. Nestle the meat fat side up into the dish with vegetables. Add salt to the meat.
  5. Add filtered water to the dish. I pour at the sides so that I don’t pour the delicious salt off.
  6. Cook 4-8 hours in the oven or crock pot depending on the heat that you have and the time that you have. I wouldn’t go more than eight hours because of the glutamic acid. Low and slow will always be more delicious!
  7. Enjoy as a meal on its own!
Created using The Recipes Generator
GAPSItalianCasserole.png

How to Make Soup Without a Recipe

I have made a lot of soup in the last seven years. For a long time, I was fine with a simple soup of onions, chicken, stock soup over and over and over...until I wasn’t! I longed for soups that were full of flavors and textures and that were interesting to my body but still nutritious.

Good soup is a great way to gets lots of nourishing food. It’s an essential part of the GAPS protocol because of it’s healing properties. Most of the digestion work is done for you already when soup is simmered for a long time. Nutrients are allowed to come of the protein or fiber where they are bound as free floating amino acids, vitamins, and minerals are all released. This makes them easily digested and able to be used and absorbed by our bodies quickly. Amino acids and collagen from meat stocks and meat are helpful to heal a leaky gut and help our organs be fed. Vegetables and salts add a lot of trace minerals.

Sometimes we don’t have everything we need for a particular soup recipe. Or we might get stuck in a rut, making the same recipe over and over. Variety is the key to success with soups because it’s easy to get bored. There’s a helpful algorithm to making soup. It will help you learn how to think through making a soup creatively.

Download my pdf on Making Soup Without a Recipe here to keep for later. You can also watch the video below on how to cook soup without a recipe.

If you were never taught cooking or aren’t comfortable in the kitchen, you might think you’re behind and unable to cook without a recipe. Fear not! There are many resources to help you get more comfortable. Look to others. Take cooking classes. And most of all, cook! The simple act of cooking and experimenting with your food will help you become more comfortable with creating meals without a recipe.

The basic components of a soup are:

  • Meat Stock or Bone Broth (we’ll talk about the difference below!)

  • Meat

  • Vegetables

  • Fat

  • Salt

  • Peppercorns

  • Herbs and/or Spices

Let’s go through them step by step.

IMG_0436.jpg

Meat Stock and Bone Broth

I almost always recommend meat stock over bone broth. The primary difference between the cooking of meat stock and bone broth is the ratio of meat to bone and the cooking time. Meat stock has a short cooking time and a ratio of 80/20 meat to bone. Bone broth has a longer cooking time and a ratio of 20/80 meat to bone.

Meat stock heals and seals the gut lining and reverses inflammation to complete the gut healing process. Bone broth is totally fine to eat once your gut is healed. It also has many minerals in it like meat stock. However, it also has high glutamic acid which can be neurologically irritating, which might cause migraines or joint pain among other things. Once your gut is healed, bone broth is a great way to reuse meat stock bones which helps with sustainable eating and eating well on a budget.

I recommend an adult eat 3-6 cups of meat stock a day if they are healing and a child 1-3 cups a day. You can of course have more if your body wants it. Getting 3-6 cups in a day can be difficult. Soup is a great way to consume meat stock! (See more ideas for consuming meat stock here.)

Any meat can be used for stock. Find good sources for your meat if you can. Beef, poultry, and seafood are all great choices but also try bison, rabbit, or duck. Even bear! Any game meat does tend to have a stronger taste so I would recommend using it for a more heavily flavored soup.

My preference is to choose meat and joints from the same animal when I make my stock but you can certainly mix and match if you need to.

To learn to make your own stock step by step, click this link or watch me make it below!

Meat

The meat you use can be deboned meat that was already cooked in your stock since it’s not cooked for very long or it can be fresh meat.

Meat can also be seared in good fat before you add it to a recipe to add additional flavor. If you’re following the GAPS Protocol, wait until Stage 4 before eating seared meat.

You can also add ground meat, either loose or made into meatballs. (Flavored or not!) Get a recipe for meatballs here. Fish and shellfish can also be added but be sure you don’t overcook them.

Be sure to add skin and cartilage back in with your meat! That’s the good stuff.

If you’re following the GAPS Protocol, make sure you are not using too much muscle meat, like a chicken breast or thigh. Muscle meat on its own is very low in nutrition and be constipating.

IMG_0171.jpg
creamy-garlic-chicken-soup-gaps-stage-1-soup-GAPS-diet-soups-recipes-for-the-GAPS-diets.jpg

Vegetables

Any vegetable is a good vegetable for most of us! IF you are following the GAPS Protocol, refer to the Allowed/Not Allowed vegetable list in the yellow GAPS Diet book. If you are No Plant GAPS, avoid vegetables.

There are two times you can add vegetables to a soup. The first is when you make your stock. Or you can wait to add vegetables when you make the soup itself. You can also reuse your vegetables from your stock if you like well cooked vegetables.

If you have any issues with bloating, cramping, ulcers or bleeding, avoid vegetables with a lot of fiber or starchy vegetables. (Celery might not be a good choice for you, for example…)

Experiment with what vegetables you like in your soup! You can also sear your vegetables in fat before you add them to the soup for more flavor. Be sure to add the fat into your soup that you cook your vegetables in. Eggplant, for example, absorbs a lot of fat so they will continue to absorb the fat while they are cooked in the soup.

Fat

The most healing healthy fats are mostly animal fats, like lard, tallow, butter, sour cream or creme fraiche, and ghee.

Eat as much fat in a day as you want and can tolerate. I recommend 1/2 cup per day. Work your way up gradually. If you experience issues like burping, nausea, headaches, etc. it probably means your bile is not moving fast enough to help digest the fat. Beet Kvass is a great way to help with this! Learn to make it here!

Bad fats are rancid oils, canola oil or other poorly processed oils, soy bean and peanut oil. Your body doesn’t know what to do with these fats.

To learn more about fat, click here.

How-To-Make-Your-Own-Sausage-GAPS-Legal-Sausage-Whole-30-Sausages-Recipe-DIY-Sausage-GAPS-Diet

Salt

Salt makes food taste GOOD but we also need salt for our bodies to function! Our immune and adrenal systems need minerals to function, which is what real salt is. Detoxification processes and our brain also require a lot of minerals!

When I talk about salt, I’m not talking about sodium chloride. That’s not salt! Everything “bad” about salt is true if you are eating sodium chloride.

A good, real, whole salt is where we get a lot of these minerals. It’s important to eat a variety of sea salts. From my understanding the highest to lowest salts by mineral content are Baja Gold Sea Salt, Celtic Sea Salt, Redmond’s Real Salt, and Himalayan Sea Salt. Learn more about choosing the right salt for you below!

I always recommend having salt on the table in addition to lightly salting your food while you’re cooking. Choosing how much salt we need is an important part of listening to our bodies. Some of us need more salt than others and some days we need more salt than others! Start children on eating salt too and help them salt their food.

Peppercorns

Peppercorns can be whole or ground when they are added to your soup. You can add them to your stock or to your soup after - or both!

Whole or freshly ground peppercorns provide the highest nutritional properties. Once a peppercorn is broken or ground, the nutritional properties decrease.

Sometimes, it can be irritating to have full peppercorns. Try adding whole peppercorns to your soup while it cooks and then remove them before you eat them.

Herbs and/or Spices

It’s important to flavor your soups well to provide variety, prevent soup burnout, and make a soup delicious!

If you are following the GAPS Protocol, fresh herbs can be used on GAPS Intro Stage 1. Be sure to listen to your body. Dried herbs can be irritation so, for most people, avoid adding them until Full GAPS.

Now that you know the components, it’s time to build your soup!

  1. Choose a flavor profile:

    Research different cuisines and what their recipes include. You’re not looking for a specific recipe here; you’re simply learning what other cuisines use for flavor profiles. For example, what spices and herbs make up Indian, Greek, or Moroccan food?

    Try experimenting with new herbs or spices than you normally use. This will change your soup’s flavor profile.

OR

  1. Choose ingredients from the fridge!

What ingredients do you need to use up right now? What do you have a lot of? Sometimes, the ingredients can make the taste profile.

2. Start your stock

How much stock you need will depend on how much soup you’re going to make. I tend to cook 6-8 cups of stock at a time as a single person. I want leftovers of soup to freeze and reuse. Plus, if it’s a really great soup, I tend to eat a few cups of it in the first day!

3. Add your vegetables and meat

Generally, vegetables take longer to get soft and well cooked than meat does. Some harder cuts of meat may do better with a long simmer but generally, I add my vegetables first and then my meat. Kale, spinach, and other leafy vegetables should be added near the end because of their short cooking time.

4. Add some herbs and spices

Be BOLD with flavors if your gut can handle it! This will keep soup interesting!

5. Add some salt

Salt lightly and be sure there’s more on the table. Go light even if you’re cooking only for yourself. Some days you will want more salt than others and overly salting is a good way to ruin a soup.

6. Finish with toppings

There’s few things I enjoy more with food than topping a delicious soup with a slice of avocado or dollop of sour cream. Freshly pressed garlic is a great topping that is both anti-parasitic and anti-fungal. Whey, the drippings from yogurt or milk kefir, has a lot of nutritive healing properties as well. Ferments and fermented juices can also be added to a soup. Start with just a little bit and work your way up.

Remember: salt, fat and acid help soup taste good and will help you avoid soup burnout.

Simmer everything for 20-30 minutes until everything is cooked then add your final toppings and enjoy!

Now you’re a soup master!

sometimes you just need a recipe…

Here are some of my favorite soups to make. Use these recipes as a jumping off point for creating your own!

Beef Sliders

This meal is very versatile! It’s a quick, easy, and mobile protein. However, it can also be dressed up to make an elegant dish. (Not pictured today.)

You can make sliders as simple as plain ground beef boiled in water or you can add spices to the ground beef mixture before cooking depending on what you are tolerating.

In general, I buy the highest quality meat I can. This means the flavor of the beef itself can stand on its own. I often do not need to add any additional spices for this as I enjoy the taste of the beef alone. If you also enjoy the taste of the beef alone, you can skip the mixing steps and go straight to the cooking. Otherwise, you can modify this recipe to your preferred spice palate before cooking these sliders.

One great way to get more fat into your diet is to buy 80% ground beef. Read more on why fat is important here.

Other potential ingredients, depending on what you are tolerating, are soy sauce or worcestershire sauce, chilis or jalapenos, or pepper flakes. If you’re feeling adventurous, try folding cheese into the center of your slider. I usually eat mine with sour cream on the side and slices of red pepper.

Ingredients for Beef Sliders:

  • 1 lb Ground Beef

  • 2-3 tbsp Onion

  • 3 cloves Garlic

  • ¼ - ½ tsp Salt

  • ¼ tsp Ground Pepper

Directions for Beef Sliders:

IMG_8992.jpg

Finely mince onion until you have 2-3 tbsp.

In a bowl, mix together beef, onion, garlic, salt and pepper. Add ¼ to ½ tsp of salt to the mixture. You can always salt more on the table!

IMG_9008.jpg

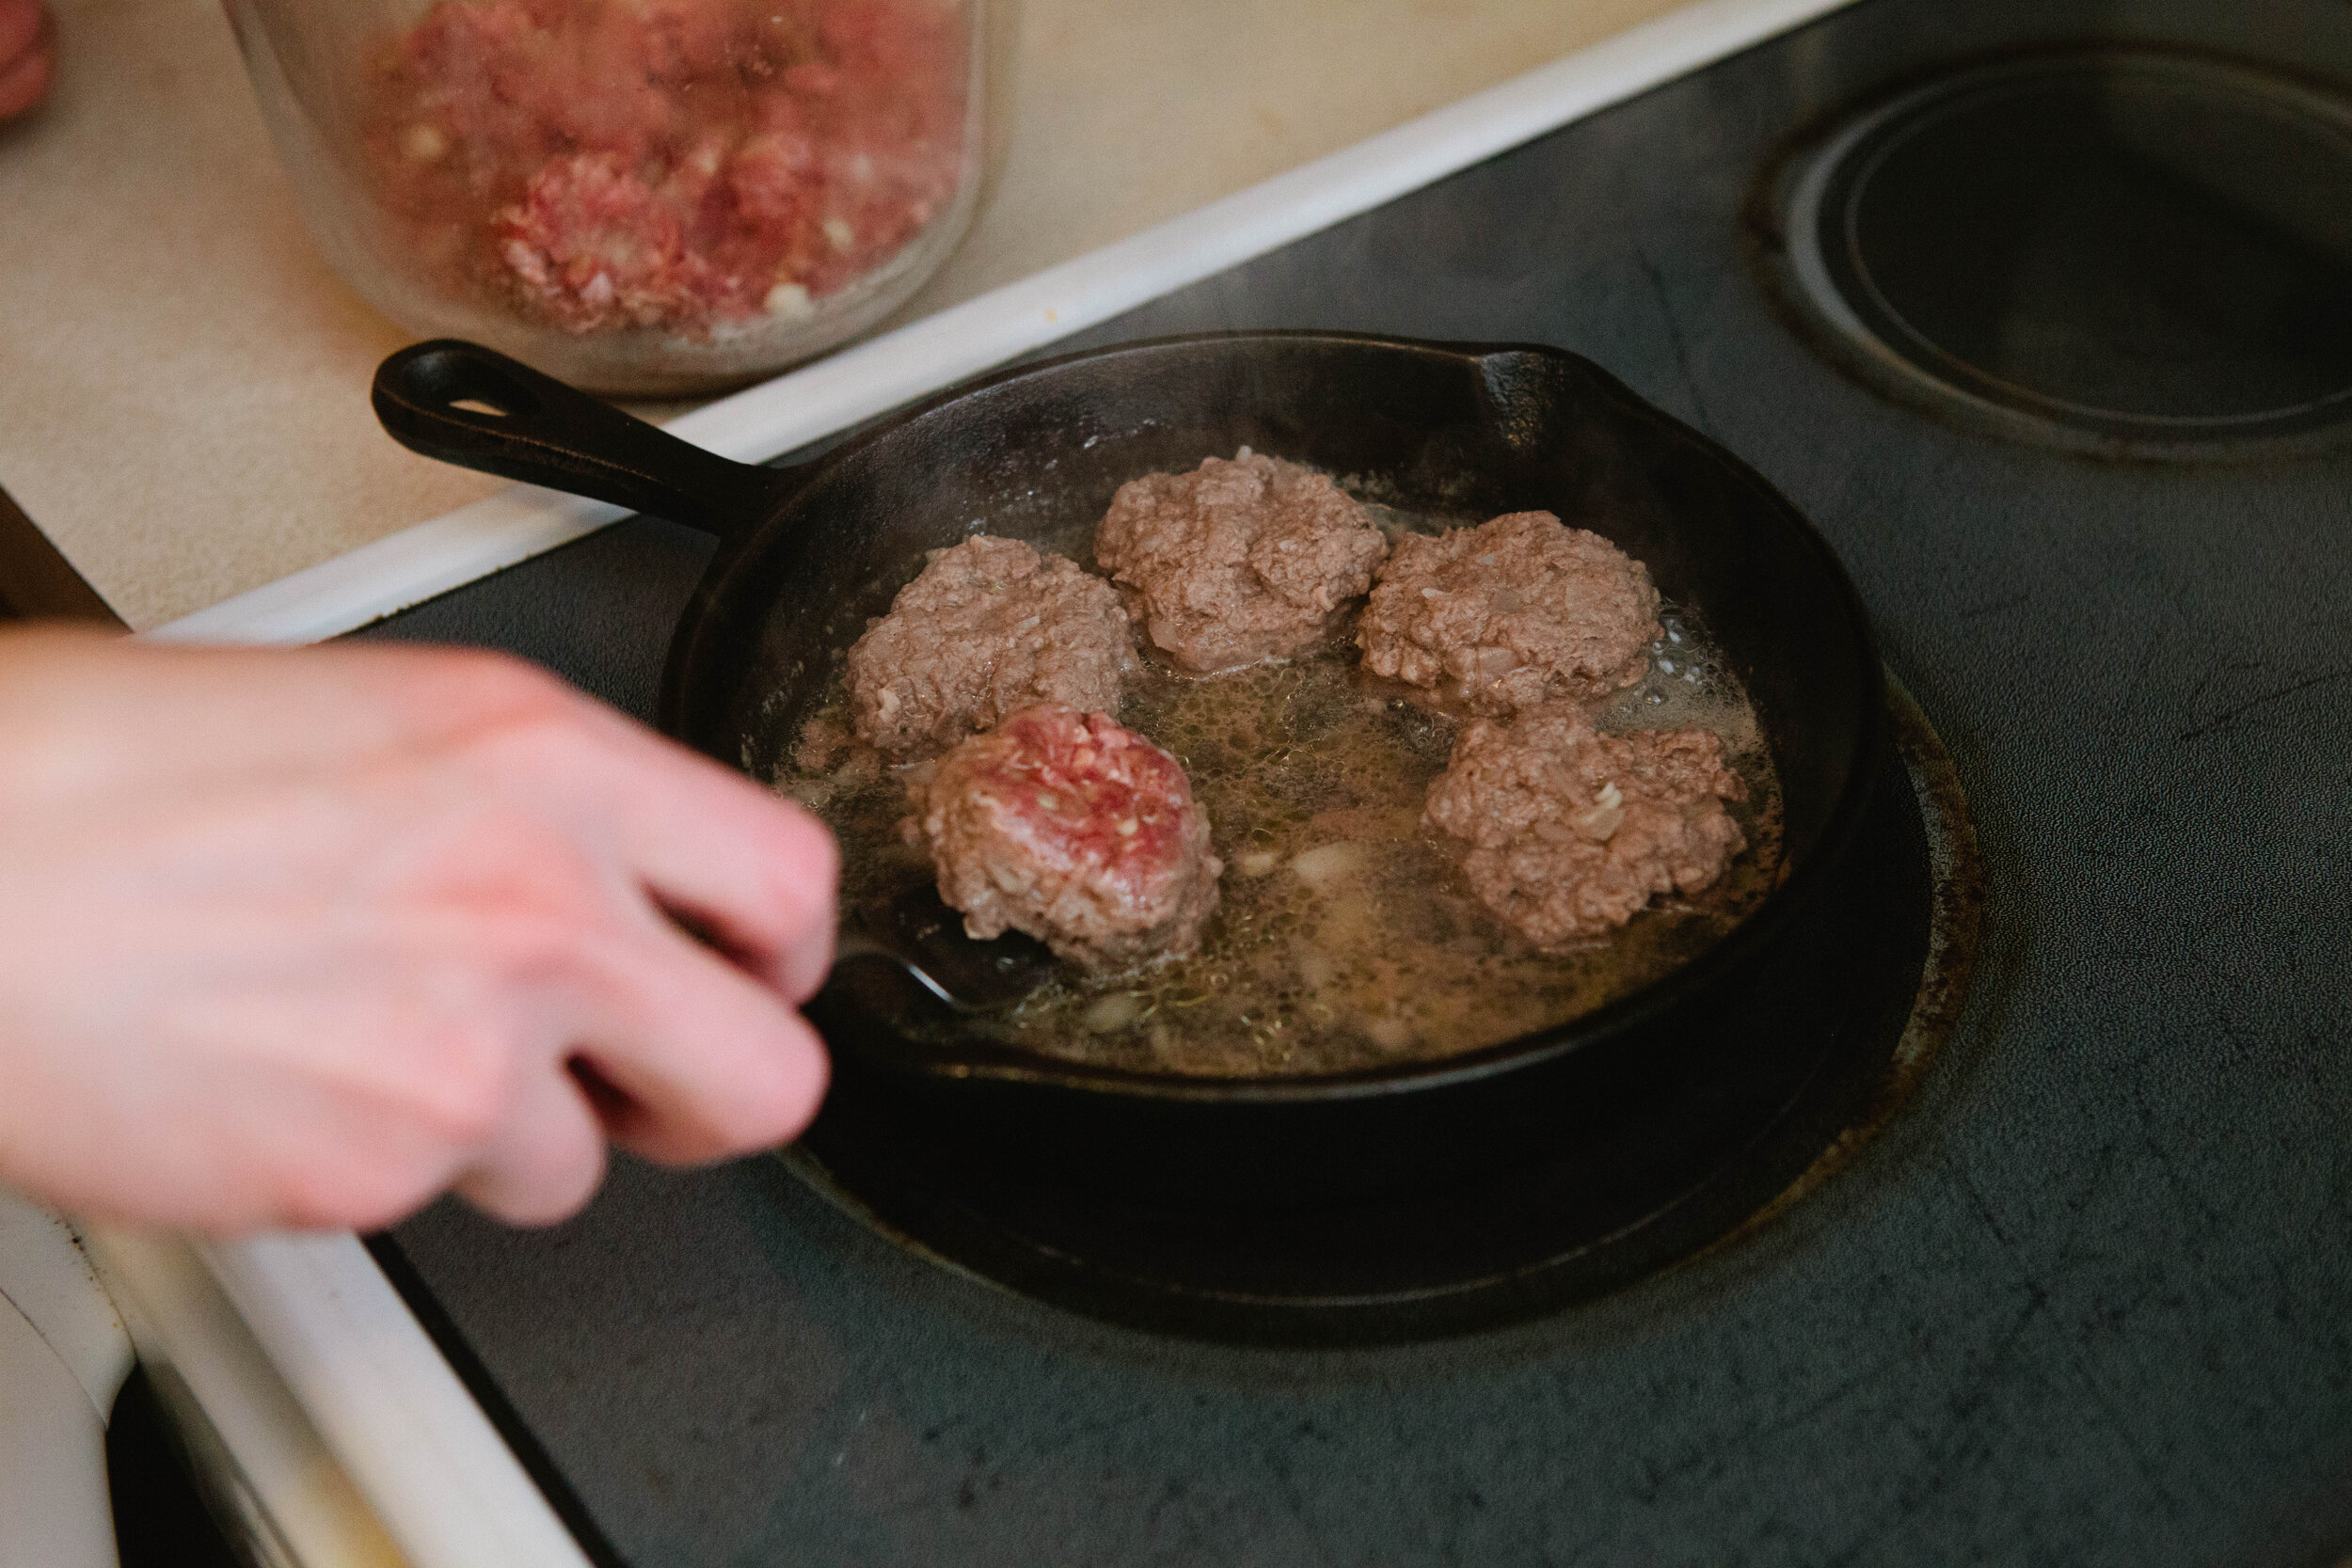
Add about ½ inch of water to a cast iron pan. 

Once the water is boiling, add small formed patties of similar sizes to the water.

If you are not adding seasoning to your patties, salt them once you add them to the pan.

IMG_9023.jpg

Turn as needed to ensure even cooking. Do not overcrowd the pan; only add as many as comfortably fit. They only take a couple minutes on each side to cook.

Top as you like and enjoy!


BeefSlidersforGAPS.png

Beef Sliders

Author:
Prep time: Cook time: Total time:

Ingredients:

  • 1 lb Ground Beef
  • 2-3 tbsp Onion
  • 3 cloves Garlic
  • ¼ - ½ tsp Salt
  • ¼ tsp Ground Pepper

Instructions:

  1. Finely mince onion until you have 2-3 tbsp.
  2. In a bowl, mix together beef, onion, garlic, salt and pepper. Add ¼ to ½ tsp of salt to the mixture. You can always salt more on the table!
  3. Add about ½ inch of water to a cast iron pan.
  4. Once the water is boiling, add small formed patties of similar sizes to the water.
  5. If you are not adding seasoning to your patties, salt them once you add them to the pan.
  6. Turn as needed to ensure even cooking. Do not overcrowd the pan; only add as many as comfortably fit. They only take a couple minutes on each side to cook.
  7. Top as you like and enjoy!
Created using The Recipes Generator

Mayo Free Egg Salad

Eggs are a great non-meat protein source. While I usually recommend eating eggs yolks running to preserve the cholesterol on them, sometimes a hard boiled egg is hard to beat!

This is a recipe that could easily be doubled or tripled for a party. You can serve it spread on a romaine lettuce leaf, as shown, or you can use it as a dip for cucumber slices or carrots.. Feel free to use whatever herbs you have in the fridge and experiment to find your favorites.

This recipe is legal on GAPS Stage 3 if you omit the paprika. Otherwise, it is legal on GAPS Stage 6. The ingredient list is for 1-2 servings.

Ingredients for Mayo Free Egg Salad:

  • 4 Eggs

  • ½ cup Sour Cream or Creme Fraiche

  • 1 small stalk Celery

  • 1 large Green Onion

  • ¼ - ½  tsp Salt

  • 1 tsp Pepper

  • ½ tsp Paprika

  • Parsley

Directions for Mayo Free Egg Salad:

Hard boil eggs. (Recipe here)

mayo-free-egg-salad-recipe-egg-salad-on-gaps-sour-cream-egg-salad

Once eggs are cooled, peel them.

mayo-free-egg-salad-recipe-egg-salad-on-gaps-sour-cream-egg-salad

Coarsely chop eggs, celery and green onion.

Add to a mixing bowl and add in pepper, salt to taste, and sour cream. 

mayo-free-egg-salad-recipe-egg-salad-on-gaps-sour-cream-egg-salad

Gently mix to coat and then sprinkle paprika over the top. Mix gently.

Serve and enjoy!

mayo-free-egg-salad-recipe-egg-salad-on-gaps-sour-cream-egg-salad

Mayo Free Egg Salad

Author:
Prep time: Cook time: Total time:

Ingredients:

  • 4 Eggs
  • ½ cup Sour Cream or Creme Fraiche
  • 1 small stalk Celery
  • 1 large Green Onion
  • ¼ - ½ tsp Salt
  • 1 tsp Pepper
  • ½ tsp Paprika
  • Parsley

Instructions:

How to cook Mayo Free Egg Salad

  1. Hard boil eggs. (Recipe here.)
  2. Once eggs are cooled, peel them.
  3. Coarsely chop eggs, celery and green onion.
  4. Add to a mixing bowl and add in pepper, salt to taste, and sour cream.
  5. Gently mix to coat and then sprinkle paprika over the top. Mix gently.
  6. Serve and enjoy!
Created using The Recipes Generator
EggSalad.png

Guacamole

I learned to make this guacamole recipe when I was in Guatemala. It reminds me of my time there and that’s why I like it so much! I have very fond memories of my time in Guatemala.

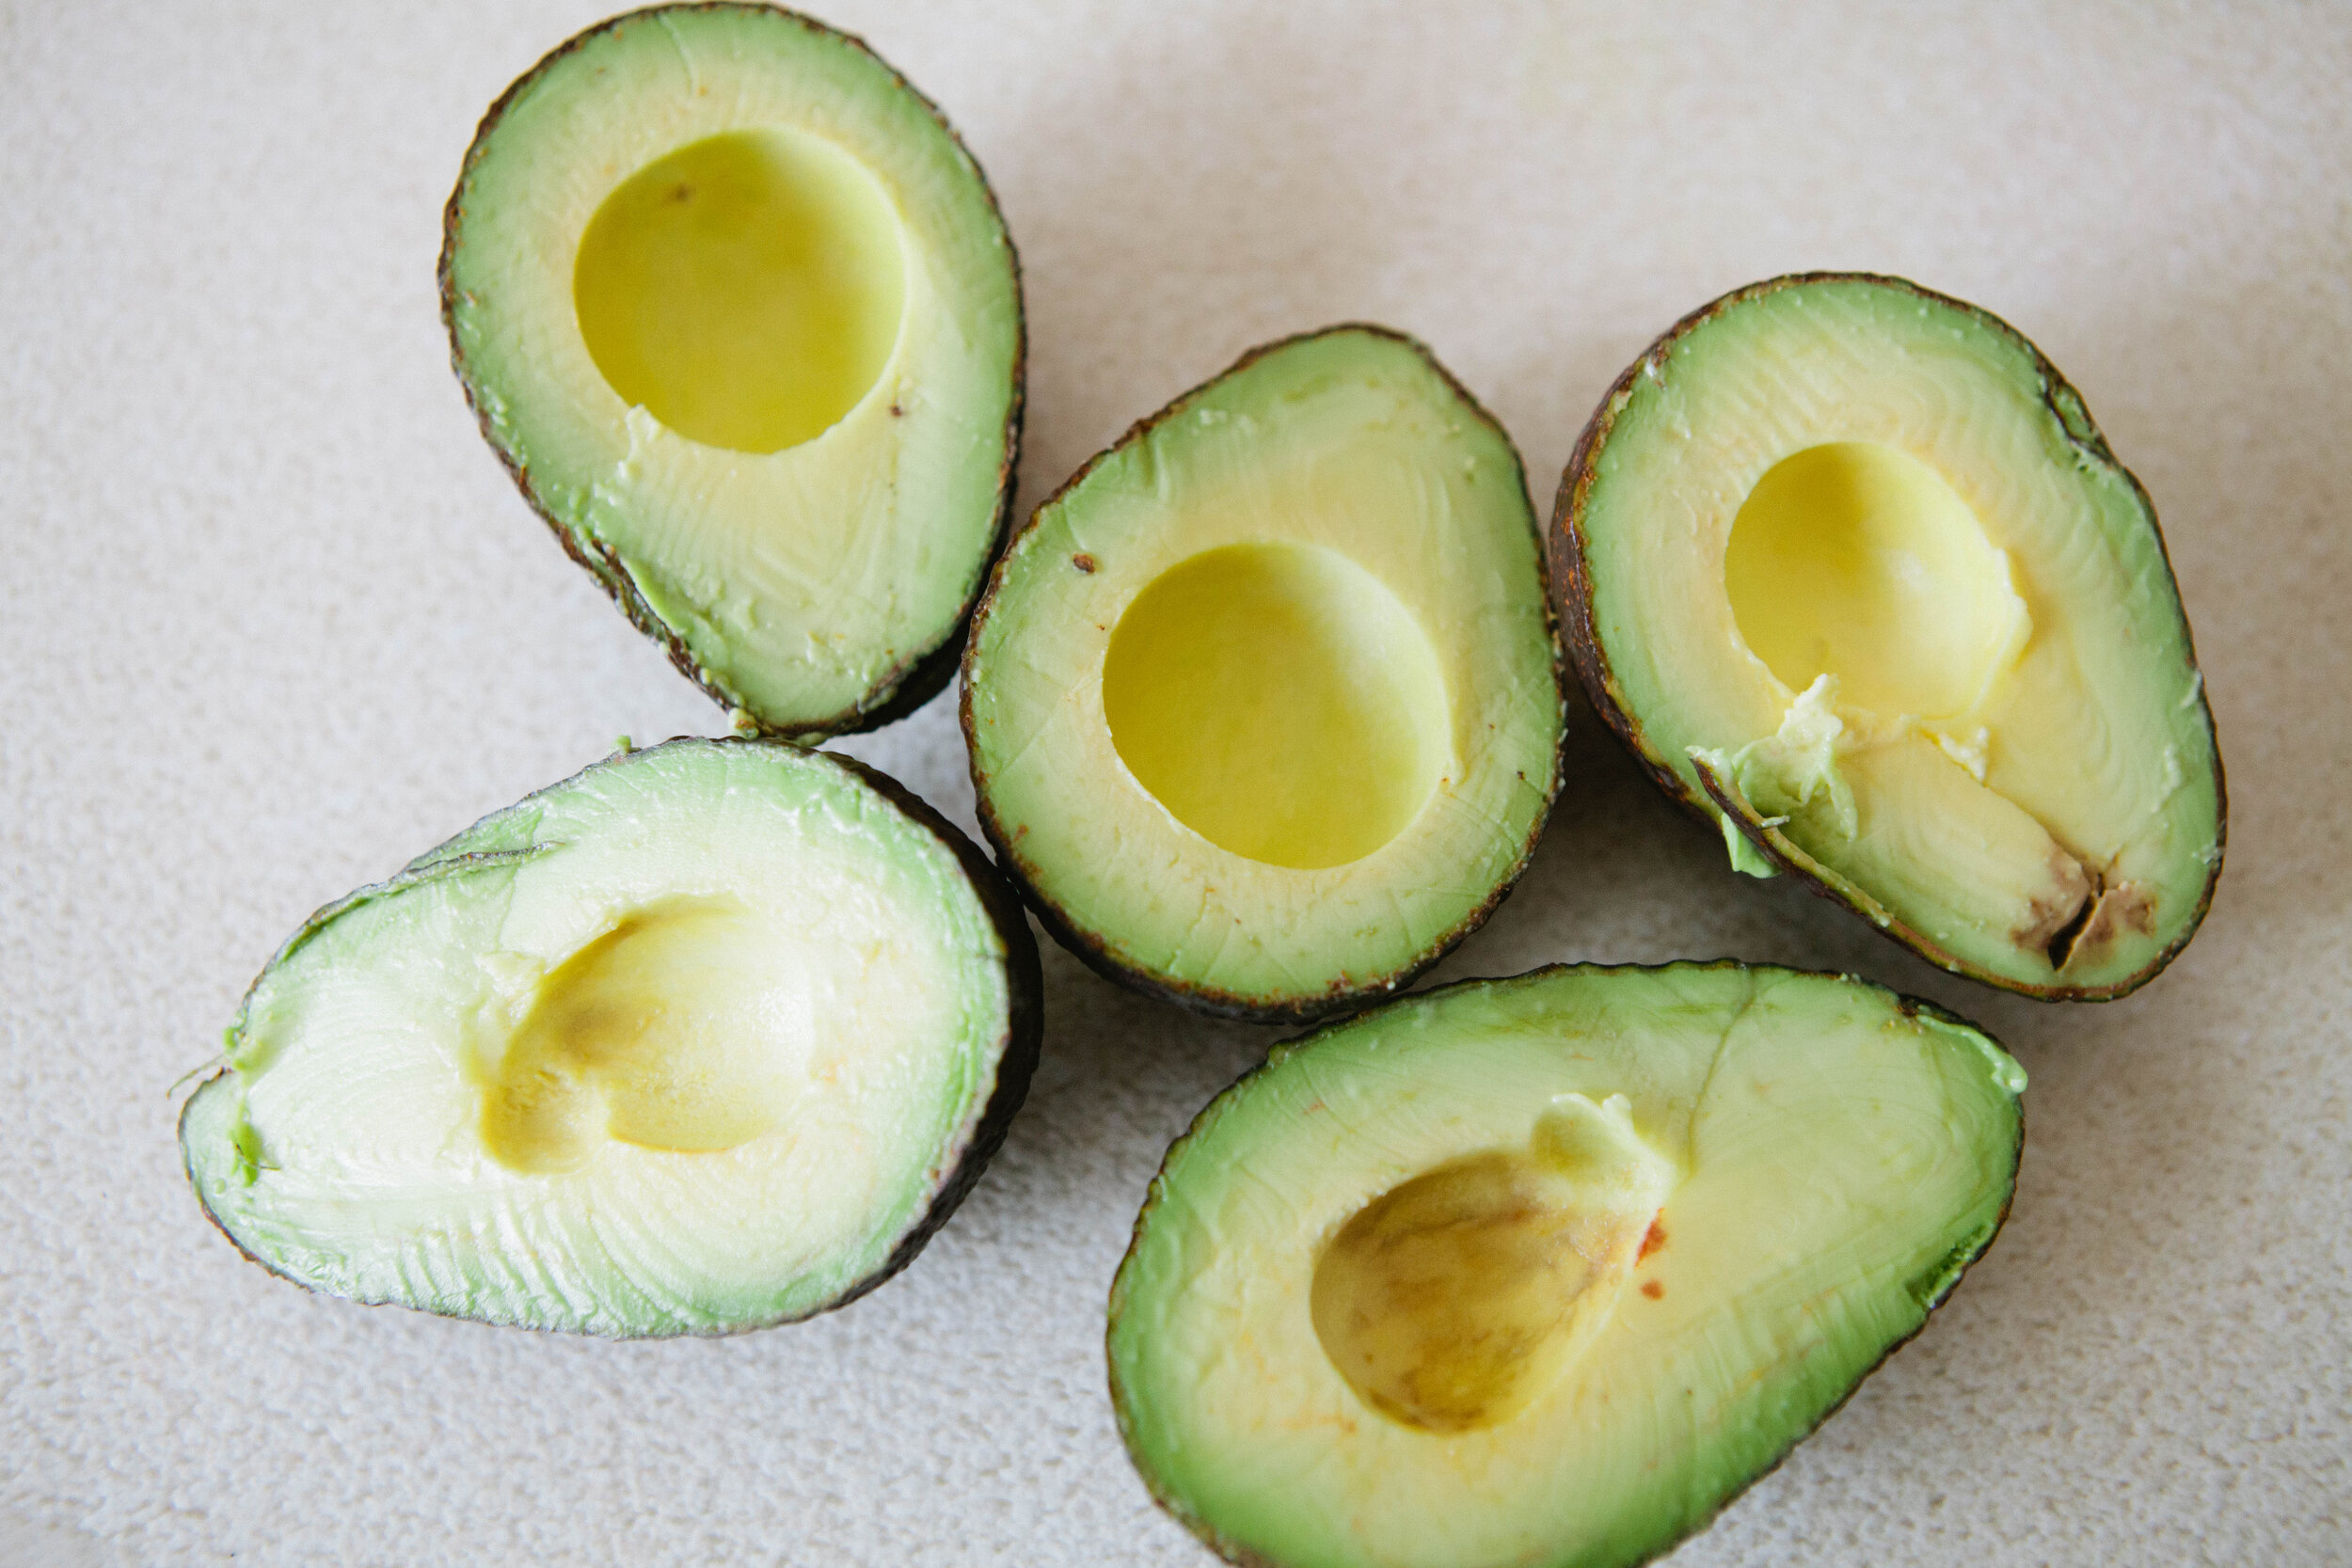
Avocados are legal on GAPS stage 3 as is salt. However, if you add citrus juice to your guacamole, it’s not legal until stage 6. 

You know the meme about avocados taking forever to ripen and then suddenly going to mush? I have found that organic avocados tend to stay riper a little longer without going mushy quickly or having brown spots soon after they ripen. 

Enjoy this guacamole with any type of cut up vegetables. I also like it on top of eggs, like an omelette. Pressing it tightly into a container and adding a pit to the top will help it to not turn brown. Off the GAPS diet, enjoy with your canola, soybean and safflower free corn chips! Coconut chips are the best option to buy in stores. 

Ingredients for Guacamole:

  • 3 ripe avocados

  • 1 tbsp Finely Minced Onions or Onion Powder

  • 2 cloves of Garlic

  • 1 tsp Salt

  • Juice of 1 Lime, about 1 tbsp.

Directions for Guacamole:

IMG_7780.jpg

Cut avocados in half and remove the pits. Using a spoon, scoop the avocados into a bowl. 

Finely mince onion and add to the bowl. Or add onion powder.

Finely chop garlic cloves and add to the bowl.

IMG_7818.jpg

Cut lime into wedges and add juice to a bowl. Add salt.

Mix well and enjoy!


Guacamole

Author:
prep time: cook time: total time:

ingredients:

  • 3 ripe avocados
  • 1 tbsp Finely Minced Onions or Onion Powder
  • 2 cloves of Garlic
  • 1 tsp Salt
  • Juice of 1 Lime, about 1 tbsp.

instructions:

How to cook Guacamole

  1. Cut avocados in half and remove the pits. Using a spoon, scoop the avocados into a bowl.
  2. Finely mince onion and add to the bowl. Or add onion powder.
  3. Finely chop garlic cloves and add to the bowl.
  4. Cut lime into wedges and add juice to a bowl. Add salt.
  5. Mix well and enjoy!
Created using The Recipes Generator
Guacamole.png

What to do with Chicken on the GAPS Diet

Chicken is such a versatile and easy to meat to cook! It’s a mild meat so it can be easily adapted to many different recipes and flavors.

Purchase the highest quality meat you can afford! For me, this means buying chickens directly from farmers whenever possible. If I buy a chicken from a store, I buy organic and antibiotic free. And make sure you get the organs whenever possible! If you have the space, time and allowance from your city, consider raising your own chickens. I loved raising chickens, both for the fresh eggs and the delicious meat. I knew exactly where my food was coming from - and everything that had gone into it!

To help your budget, make sure you’re using as much of your chicken as possible. Chicken feet and gizzards can be added to stocks. The skin and joint cartilage can be blended in a stock. Liver can be made into pate. And the chicken heart is my favorite treat!

Below are some of my favorite recipes for chicken!

Chicken Stock

Meat stock can be made into a soup or simply drunk on its own as a hot beverage with a meal. You can also poach a couple eggs in your stock for a rich breakfast. Stock can also be used to cook rice or other soaked grains to increase their digestibility and nutritional content. In short, this should be considered a staple to have in your kitchen at all times, either in the fridge or the freezer.

Gluten Free, Dairy Free, Egg Free

Whole Roasted Chicken with Salt

This is a very simple recipe that makes a whole, juicy roasted chicken. It takes just two simple ingredients and is a very hands off recipe.

Gluten Free, Dairy Free, Egg Free

Honey Roasted Chicken

Roasting a chicken is a great and simple way to make a meal. This particular roasting recipe requires a little more attention than others, as you need to baste and adjust the temperature often, but it's definitely worth it!

Gluten Free, Dairy Free, Egg Free

Chicken Tortilla Soup

This is a good GAPS soup because of all of the sour cream. It wasn't too spicy, and it's different than plain meat stock that you typically eat on Stage 1. There are many different ways to make it, so it's also easy to switch up to match your tastes.

Gluten Free, Dairy Free, Egg Free

Creamy Garlic Chicken Soup

Because you immersion blend the vegetables into the stock, this is a great recipe to also blend in the the joint cartilage, skin and any of the other parts of the chicken that you may be tempted to throw away. I separate the chicken into three parts usually - bones, chicken meat, and everything else.

Gluten Free, Dairy Free, Egg Free

Creamy Chicken Pot Pie Soup

The key to this soup being reminiscent of a pot pie is to cut the vegetables into bite size pieces and make a consistency that’s more like a stew than a soup. Included in this recipe are a few tricks to thicken the soup so it more closely resembles the gravy that we associate with chicken pot pie.

Gluten Free, Dairy Free, Egg Free

A Simple Cabbage Soup Recipe

I love this cabbage soup. Maybe it’s because of my German roots. 

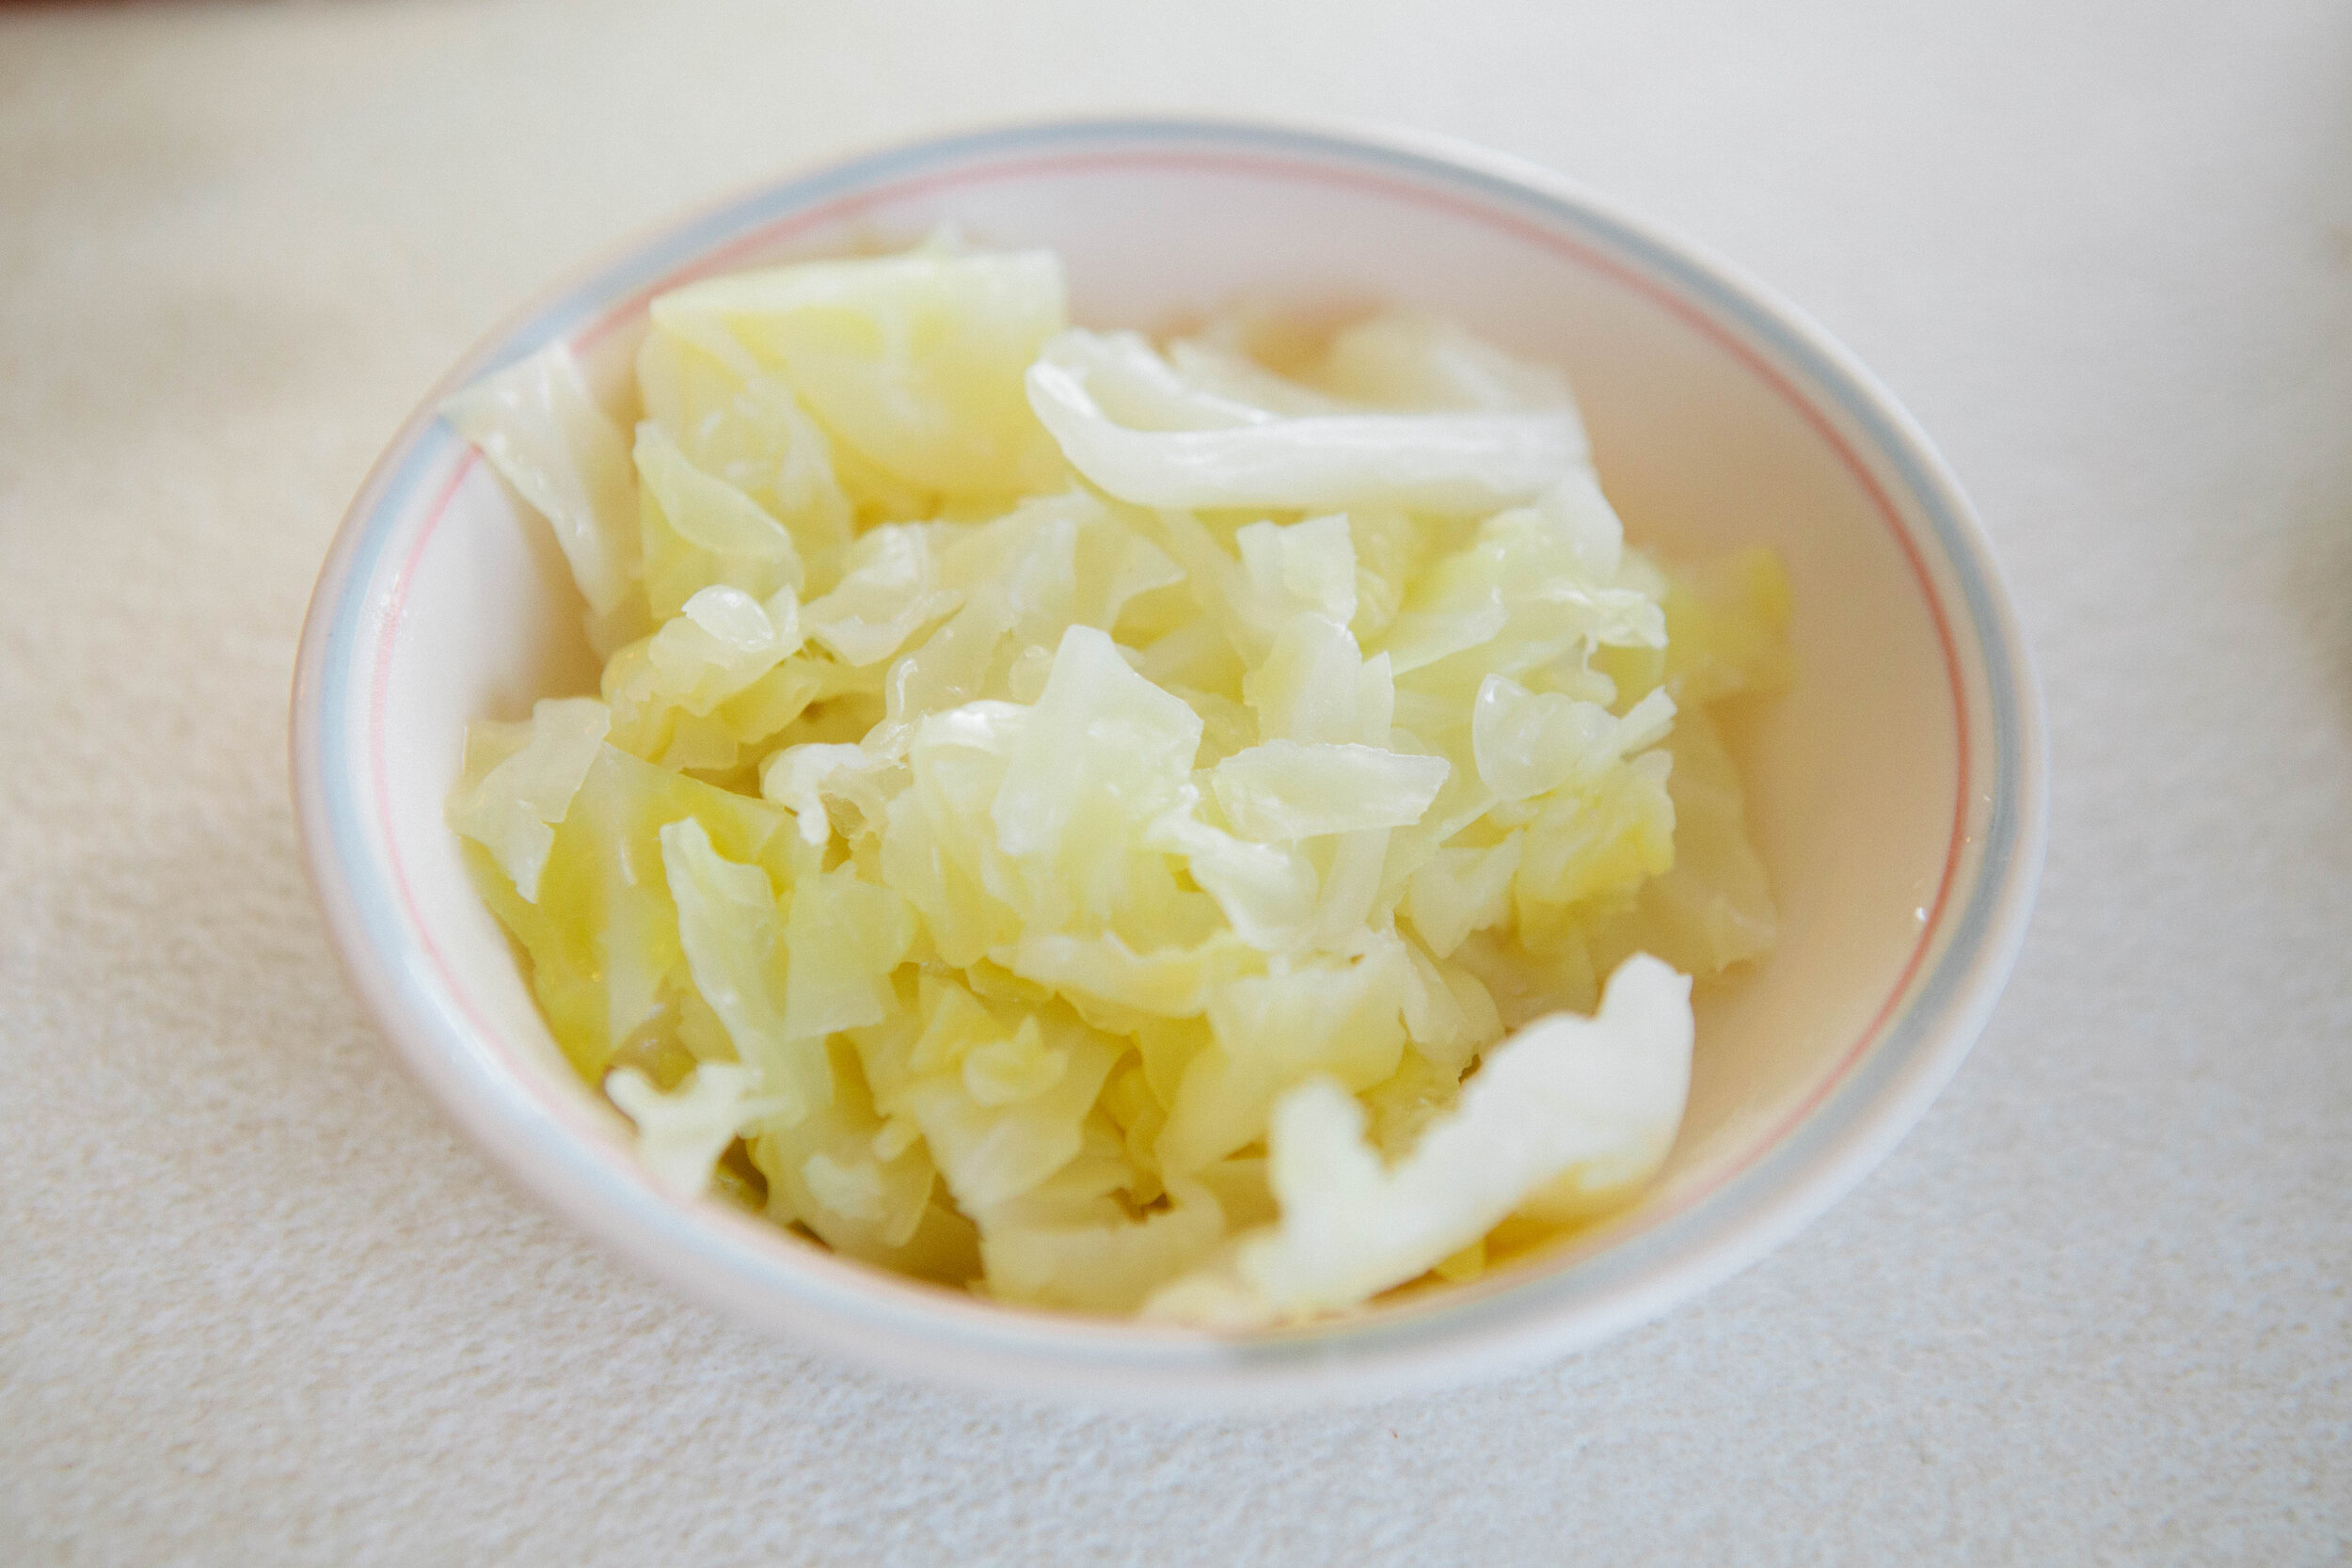
Cabbage is good for stimulating hydrochloric acid production in your stomach. This is an important first step of food digestion. If your stomach pH is greater than 3 (meaning less acidic) the enzymes that we use to digest protein don’t even get turned on! This means your body won’t give the signal to digest the protein and the proteins that you eat won’t get digested. Cabbage is also very high in Vitamin C. The Vitamin C concentration is much higher in sauerkraut, however eating cabbage in any form is a great way to get important nutrients into your body. Cabbage also contains high amounts of Vitamin K. Vitamin K is a fat soluble vitamin that helps with inflammation.

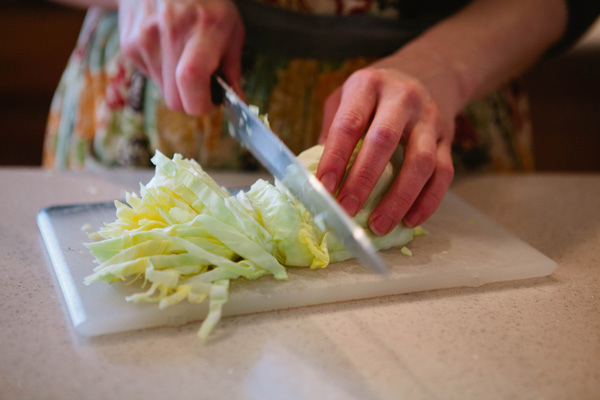
Try cutting your cabbage into long strips to resemble noodles for pasta loving children. 

I recommend pairing this soup with our meatballs. You can drop balls of raw meat in to cook in the stock and the pairing would be legal on GAPS Stage 1. If you’re on more advanced stages (or not following the GAPS Diet) you can drop frozen pre-cooked meatballs into the soup or serve the meatballs on the side.

Ingredients:

  • 1 Cabbage

  • 1 stalk of Celery

  • 5 cloves of Garlic

  • 6 cups Stock (I used pork as a nod to my German roots but you can also use chicken or beef)

  • 2 tsp salt

Directions:

Bring stock to a boil in a large pot.

Chop up cabbage into bite size pieces. Slice the celery into half moons. Remove the garlic wrappings and cut in half.

Cabbage soup is very simple! It takes just a few simple ingredients but it’s a very filling and nutritious soup. It’s GAPS legal so try it today! Recipe by Amy Mihaly, Certified GAPS Practitioner in Colorado.

Add the cabbage, celery and garlic into the stock. Add salt to the pot to help draw out the moisture in the cabbage.

Simmer on medium heat for 30 to 45 minutes until the cabbage is soft.

Enjoy!

Cabbage soup is very simple! It takes just a few simple ingredients but it’s a very filling and nutritious soup. It’s GAPS legal so try it today! Recipe by Amy Mihaly, Certified GAPS Practitioner in Colorado.

Cabbage soup is very simple! It takes just a few simple ingredients but it’s a very filling and nutritious soup. It’s GAPS legal so try it today! Recipe by Amy Mihaly, Certified GAPS Practitioner in Colorado.

Cabbage Soup

Author:
prep time: cook time: total time:

ingredients:

  • 1 Cabbage
  • 1 stalk of Celery
  • 5 cloves of Garlic
  • 6 cups Stock (I used pork as a nod to my German roots but you can also use chicken or beef)
  • 2 tsp salt

instructions:

How to cook Cabbage Soup

  1. Bring stock to a boil in a large pot.
  2. Chop up cabbage into bite size pieces. Slice the celery into half moons. Remove the garlic wrappings and cut in half.
  3. Add the cabbage, celery and garlic into the stock. Add salt to the pot to help draw out the moisture in the cabbage.
  4. Simmer on medium heat for 30 to 45 minutes until the cabbage is soft.
  5. Enjoy!
Created using The Recipes Generator

GAPS Legal Pumpkin Soup

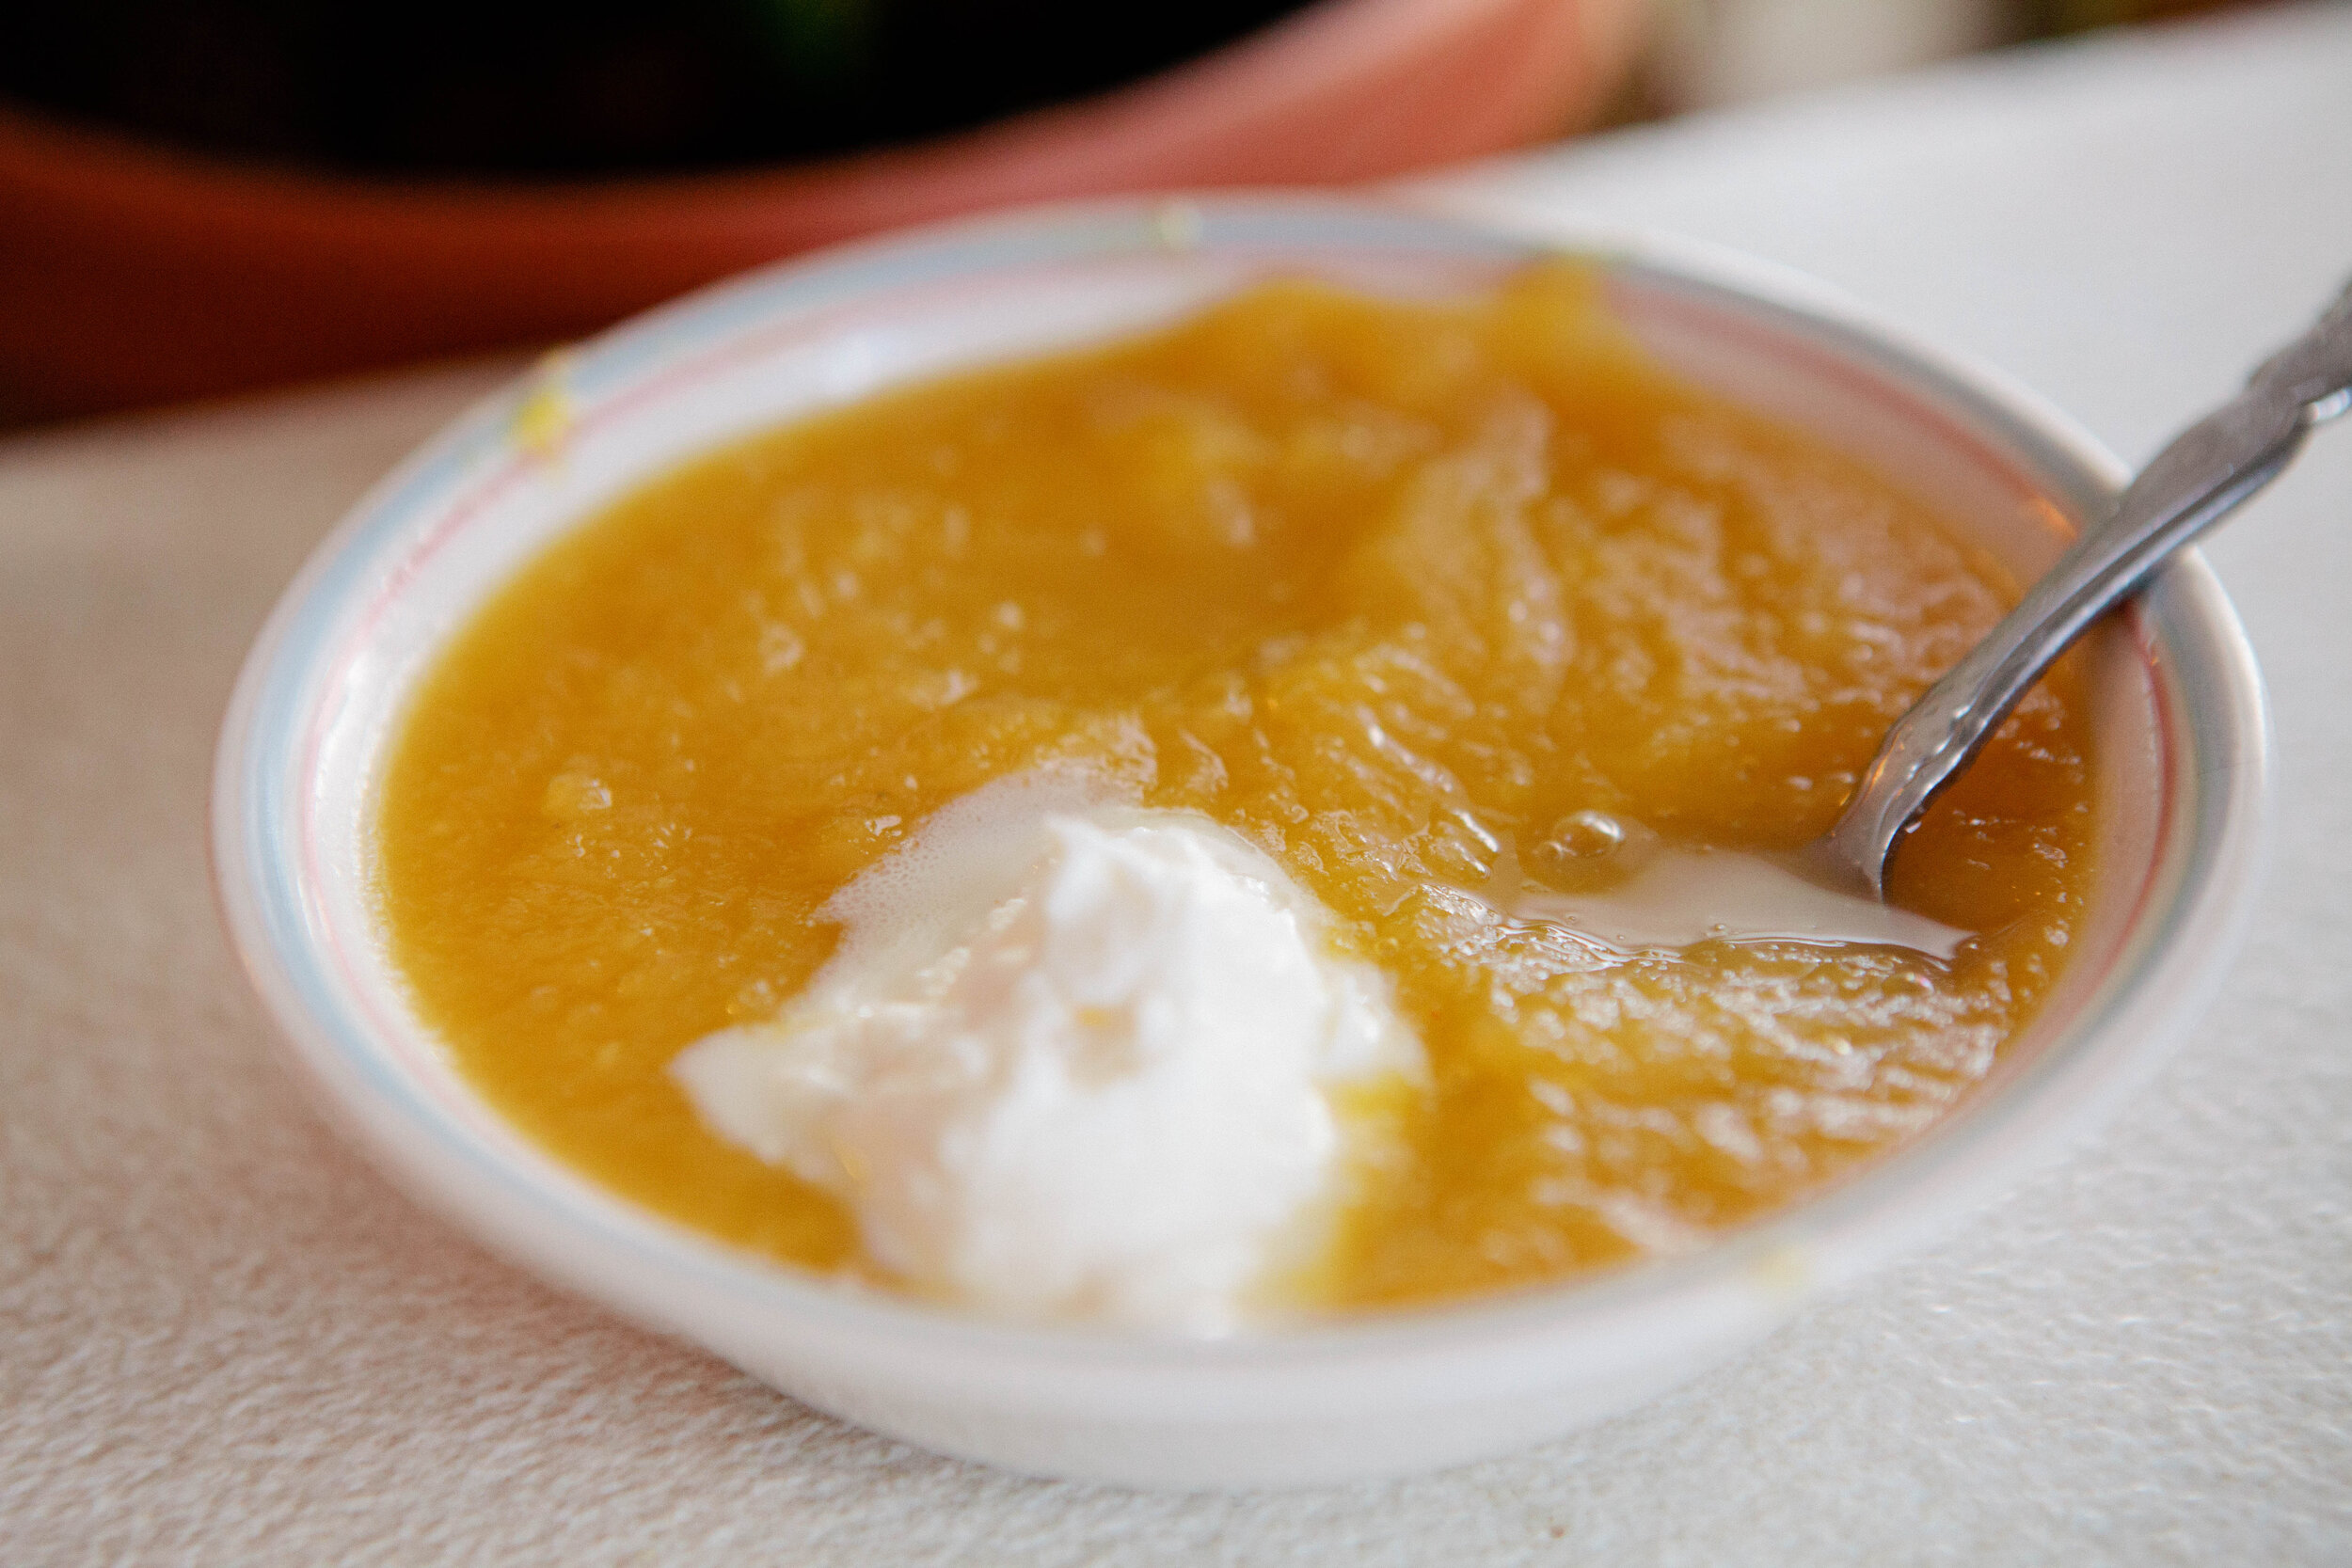
Pumpkin is a winter squash but it contains less sugar than most winter squashes, making it ideal for the GAPS Introduction Diet. Pumpkins are also very easily grown so if you’re a beginner gardener looking for an easy first crop or if you only have a small amount of growing space available. 

While other winter squashes like butternut squash can be tolerated by people on the GAPS Introduction Diet, it’s best to do pumpkin because it’s milder and with less sugar.

Pumpkin puree is very easy to freeze in individual portions. You can also sprout the pumpkin seeds. Both mean you can enjoy your own homegrown produce throughout the winter! Once you have the puree for this pumpkin soup recipe, you can also use it to make a pumpkin pie or use it to make GAPS Pancakes.

I usually eat a small bowl of pureed soup alongside a much larger bowl of another soup. It’s a great way to have a multi course meal on the GAPS Intro Diet. 

Ingredients for Pumpkin Soup:

  • 2-3 Small Pumpkins

  • 4 cups of Chicken Stock

  • ¼ of a White Onion

  • 1 inch of Fresh Ginger

  • 1 tsp Salt

  • 2 Bay Leaves

  • 1 Cinnamon Stick

Directions for Pumpkin Soup:

Pumpkins are great for your digestive system! This pumpkin soup is made with a few simple ingredients and is legal on the GAPS Diet. Find the pumpkin soup recipe and other GAPS recipes at bewellclinic.net. Recipe by Amy Mihaly, Certified GAPS Practi…

Preheat the oven to 400.

Cut each pumpkin in half. Remove the seeds and set aside to make sprouted pumpkin seeds.

Set each pumpkin open face side down on a baking sheet lined with parchment paper. Place the pumpkins in the oven.

Pumpkins are great for your digestive system! This pumpkin soup is made with a few simple ingredients and is legal on the GAPS Diet. Find the pumpkin soup recipe and other GAPS recipes at bewellclinic.net. Recipe by Amy Mihaly, Certified GAPS Practi…

Roast the pumpkins for about 45 minutes in the oven until the tops are soft.

Remove them from the oven and flip the pumpkins over so they cool faster.

Pumpkins are great for your digestive system! This pumpkin soup is made with a few simple ingredients and is legal on the GAPS Diet. Find the pumpkin soup recipe and other GAPS recipes at bewellclinic.net. Recipe by Amy Mihaly, Certified GAPS Practi…

Using a fork, carefully remove the pumpkin flesh from the skin and add to a bowl. If it’s not well cooked, it won’t remove from the skin easily.

Warm chicken stock on the stove.

Pumpkins are great for your digestive system! This pumpkin soup is made with a few simple ingredients and is legal on the GAPS Diet. Find the pumpkin soup recipe and other GAPS recipes at bewellclinic.net. Recipe by Amy Mihaly, Certified GAPS Practi…

Add 3 cups of pumpkin to the warmed stock. Immersion blend until well pureed. Pureeing the pumpkin on it’s own will allow the flavors of the other ingredients to meld better.

Pumpkins are great for your digestive system! This pumpkin soup is made with a few simple ingredients and is legal on the GAPS Diet. Find the pumpkin soup recipe and other GAPS recipes at bewellclinic.net. Recipe by Amy Mihaly, Certified GAPS Practi…

Chop onions into bite size pieces so they cook quickly. Add to the pureed mixture. 

Slice ginger and add to the pureed mixture. Add the salt and mix well.

Add bay leaves and cinnamon stick. Simmer for 20 minutes. Be sure to stir as the pumpkin and liquid will separate and the pumpkin will stick to the bottom of the pan. 

Pumpkins are great for your digestive system! This pumpkin soup is made with a few simple ingredients and is legal on the GAPS Diet. Find the pumpkin soup recipe and other GAPS recipes at bewellclinic.net. Recipe by Amy Mihaly, Certified GAPS Practi…

Remove the bay leaves and cinnamon stick from the mixture. Immersion blend everything again.

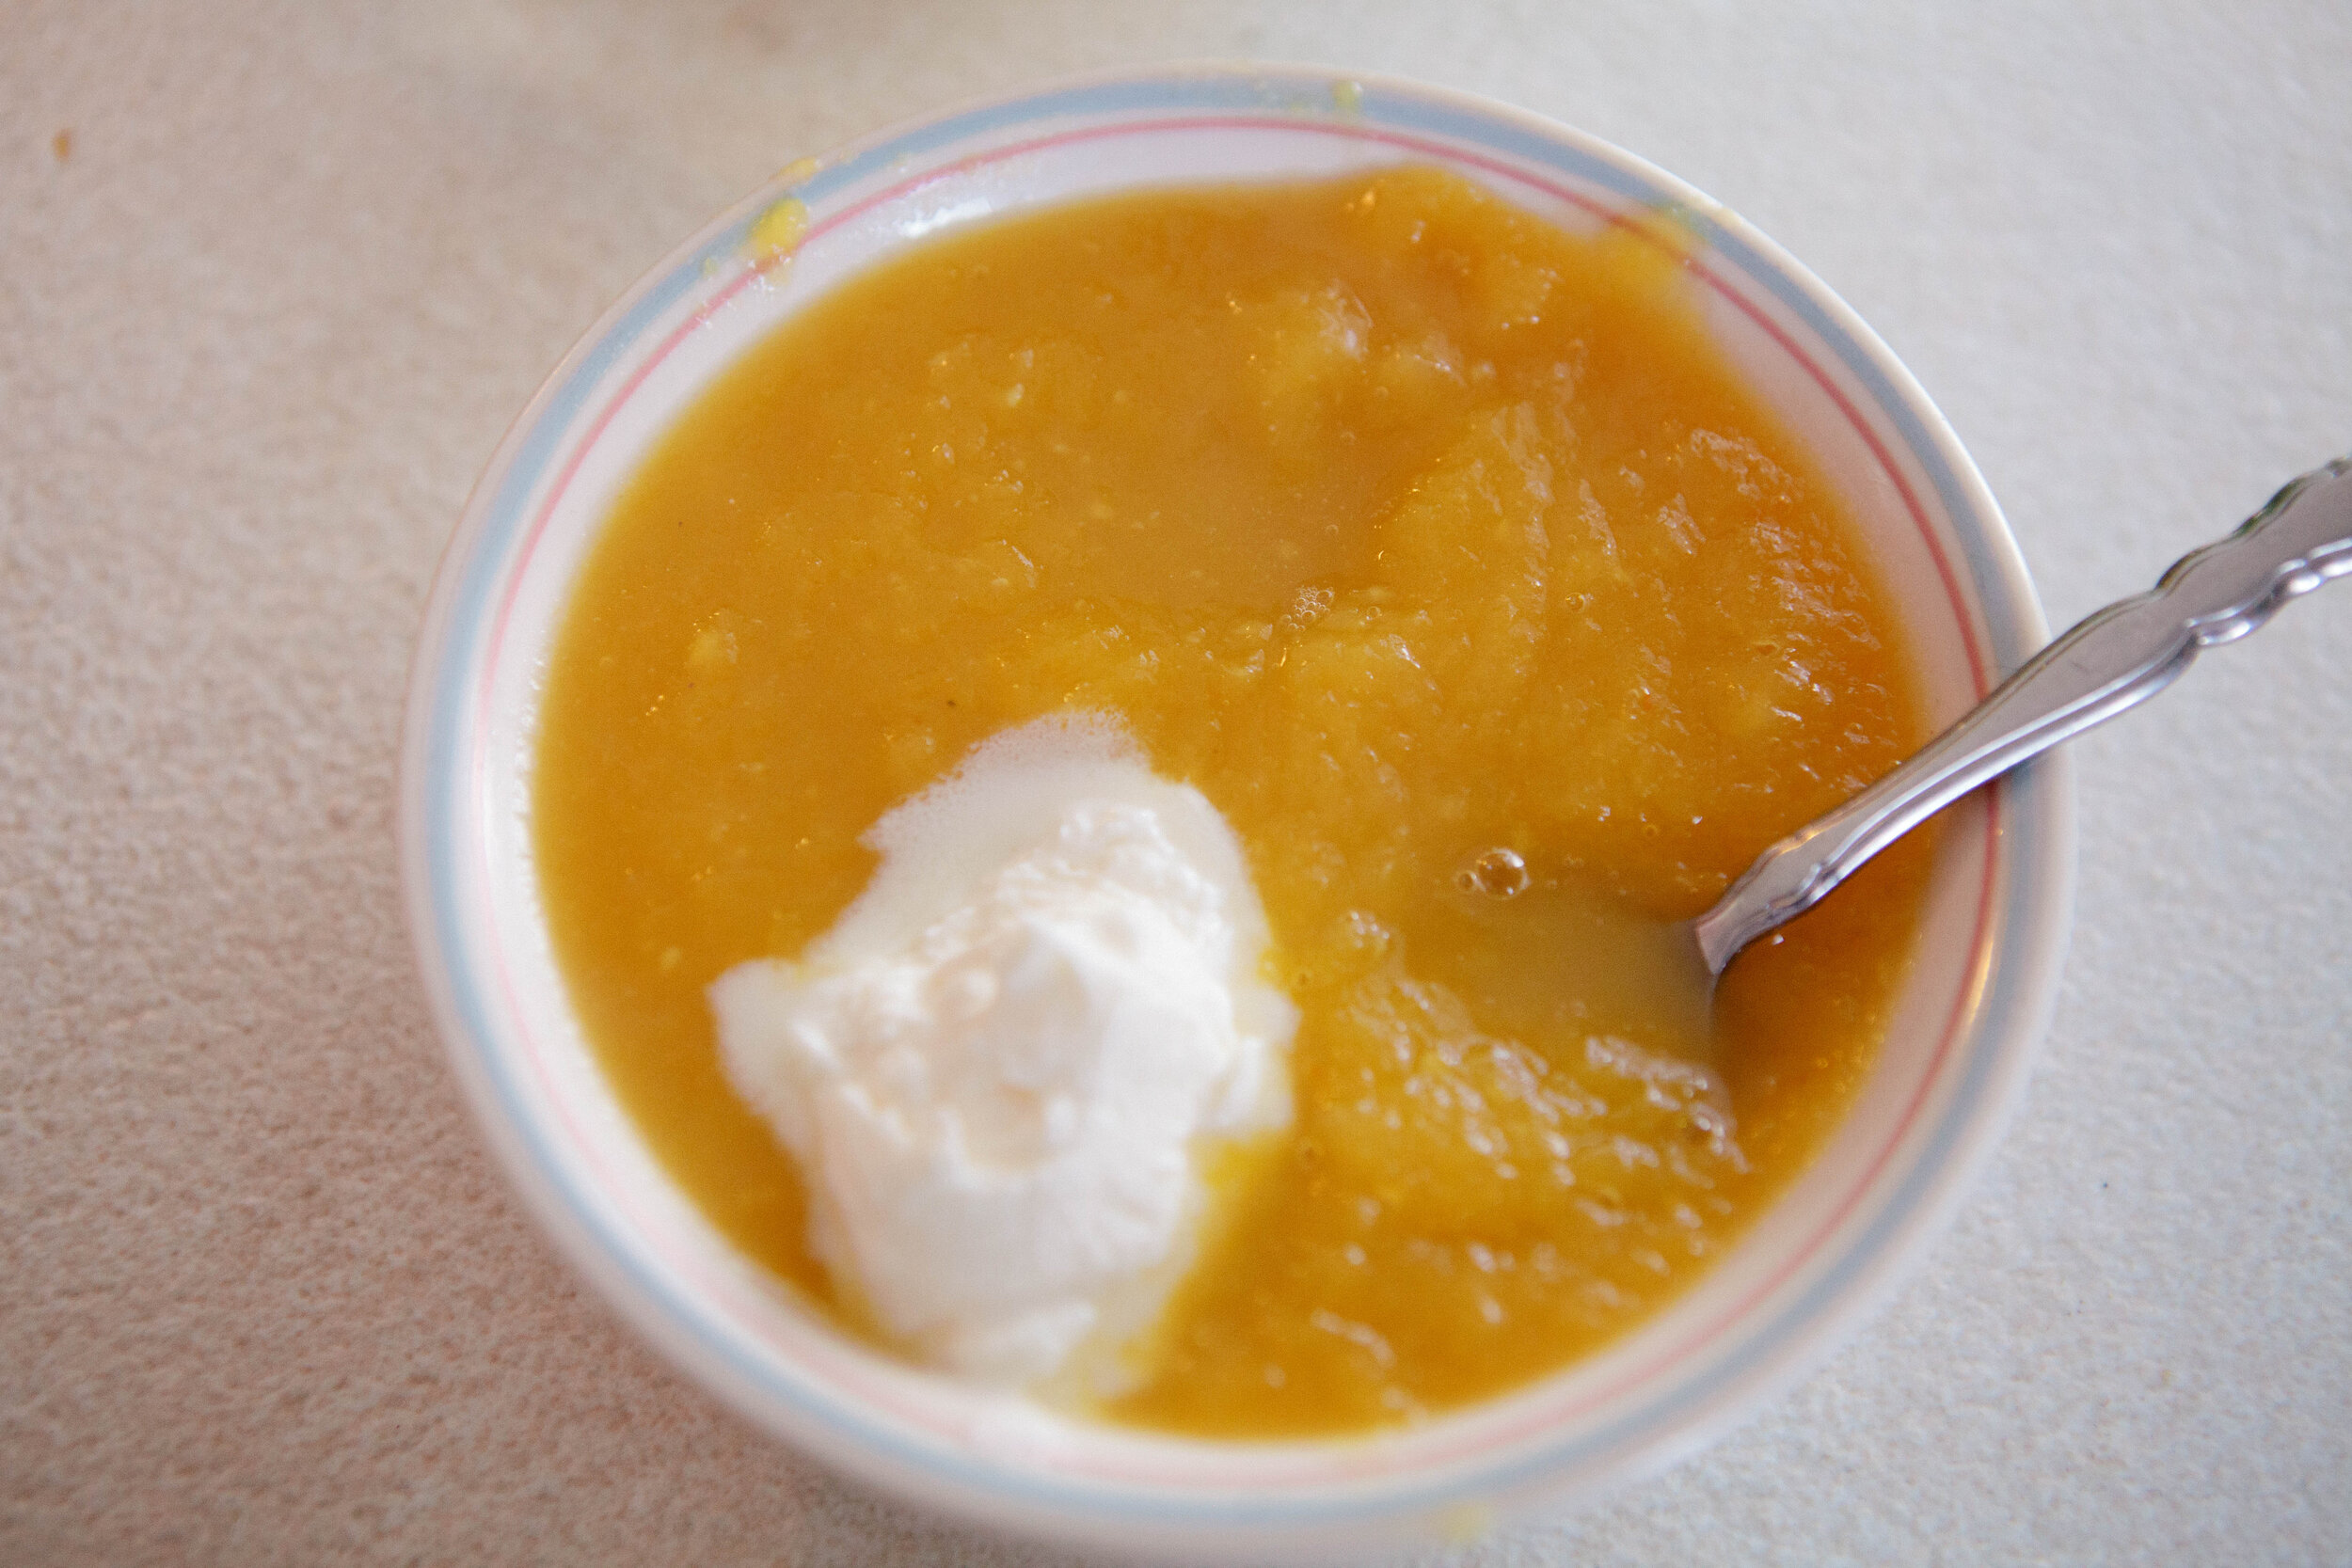
Enjoy! I topped mine with a dollop of creme fraiche but this is optional. Leave it off if you are not tolerating dairy.

Pumpkins are great for your digestive system! This pumpkin soup is made with a few simple ingredients and is legal on the GAPS Diet. Find the pumpkin soup recipe and other GAPS recipes at bewellclinic.net. Recipe by Amy Mihaly, Certified GAPS Practi…

Pumpkins are great for your digestive system! This pumpkin soup is made with a few simple ingredients and is legal on the GAPS Diet. Find the pumpkin soup recipe and other GAPS recipes at bewellclinic.net. Recipe by Amy Mihaly, Certified GAPS Practi…

GAPS Legal Pumpkin Soup

Author:
prep time: cook time: total time:

ingredients:

  • 2-3 Small Pumpkins
  • 4 cups of Chicken Stock
  • ¼ of a White Onion
  • 1 inch of Fresh Ginger
  • 1 tsp Salt
  • 2 Bay Leaves
  • 1 Cinnamon Stick

instructions:

How to cook GAPS Legal Pumpkin Soup

  1. Preheat the oven to 400.
  2. Cut each pumpkin in half. Remove the seeds and set aside to make sprouted pumpkin seeds.
  3. Set each pumpkin open face side down on a baking sheet lined with parchment paper. Place the pumpkins in the oven.
  4. Roast the pumpkins for about 45 minutes in the oven until the tops are soft.
  5. Remove them from the oven and flip the pumpkins over so they cool faster.
  6. Using a fork, carefully remove the pumpkin flesh from the skin and add to a bowl. If it’s not well cooked, it won’t remove from the skin easily.
  7. Warm chicken stock on the stove.
  8. Add 3 cups of pumpkin to the warmed stock. Immersion blend until well pureed. Pureeing the pumpkin on it’s own will allow the flavors of the other ingredients to meld better.
  9. Chop onions into bite size pieces so they cook quickly. Add to the pureed mixture.
  10. Slice ginger and add to the pureed mixture. Add the salt and mix well.
  11. Add bay leaves and cinnamon stick. Simmer for 20 minutes. Be sure to stir as the pumpkin and liquid will separate and the pumpkin will stick to the bottom of the pan.
  12. Remove the bay leaves and cinnamon stick from the mixture. Immersion blend everything again.
  13. Enjoy! I topped mine with a dollop of creme fraiche but this is optional. Leave it off if you are not tolerating dairy.
Created using The Recipes Generator

Creamy Garlic Chicken Soup

This is one of my favorite soups! It’s warm and creamy and so delicious.

This soup is easy to make in large or small batches depending on how many servings you need. A small batch requires one small chicken, about 4 lbs, one head of garlic, and one glass baking dish of vegetables. A small batch will make about 4-6 hearty servings of soup. A large batch requires a larger chicken, about 6 lbs, two heads of garlic, and two glass baking dishes of vegetables.

Keeping the garlic in their paper shells roasts the garlic while preventing them from getting burnt. Don’t worry if your paper peels a little off the garlic - it’s still ok!

This soup requires a LOT of salt. If you don’t salt this soup enough, it is very bland and boring.

Because you immersion blend the vegetables into the stock, this is a great recipe to also blend in the the joint cartilage, skin and any of the other parts of the chicken that you may be tempted to throw away. I separate the chicken into three parts usually - bones, chicken meat, and everything else.

Ingredients for Creamy Garlic Chicken Soup:

  • 1 Chicken

  • 1 Zucchini (Courgettes)

  • 1 Yellow Squash

  • ½ Large Head of Cauliflower or 1 Small Cauliflower

  • 1-2 Heads of Garlic, Cloves separated but still in their paper

  • 3-4 tbsp Lard (Learn to make your own lard here.)

  • 1 tbsp Salt

  • ½ Bunch Parsley

Directions for Creamy Garlic Chicken Soup:

Zucchini, yellow squash, cauliflower and garlic are roasted with lard and then blended together to form the base of this creamy garlic chicken soup. This soup is GAPS legal and great for Whole 30 or Paleo. It’s dairy free and gluten free but still c…

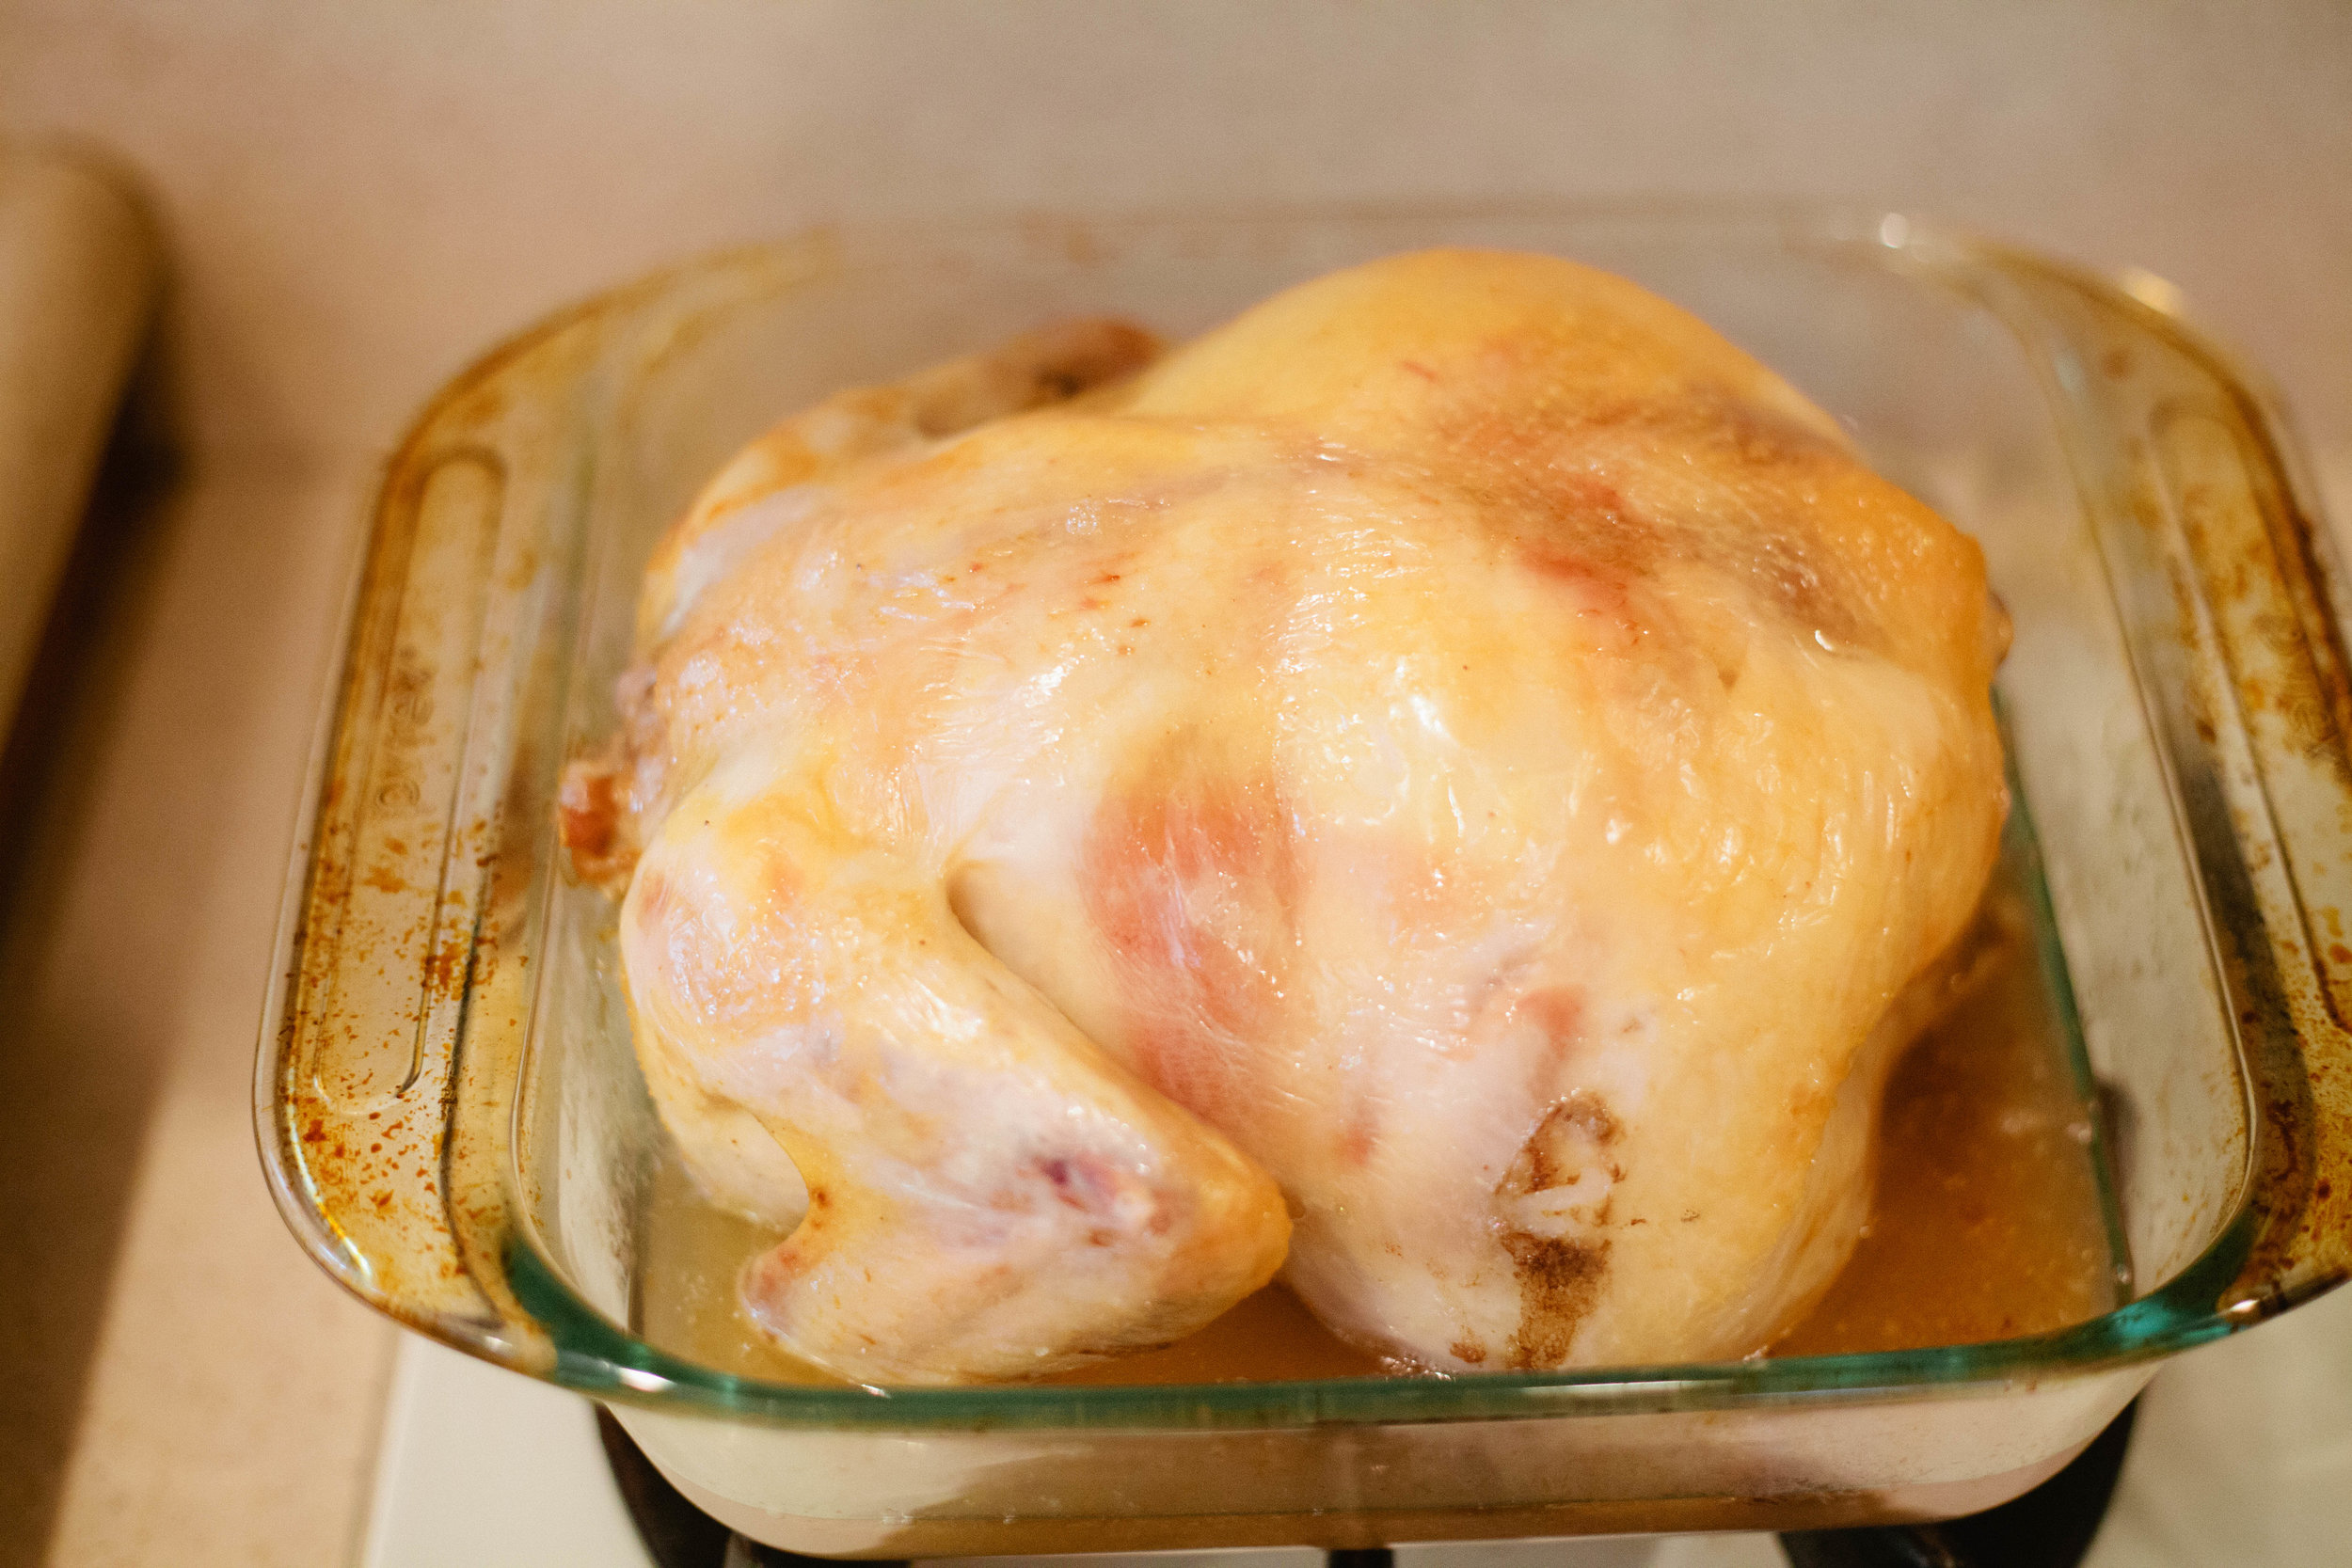
Start a chicken stock on the stove. (Find the recipe for a chicken stock here.)

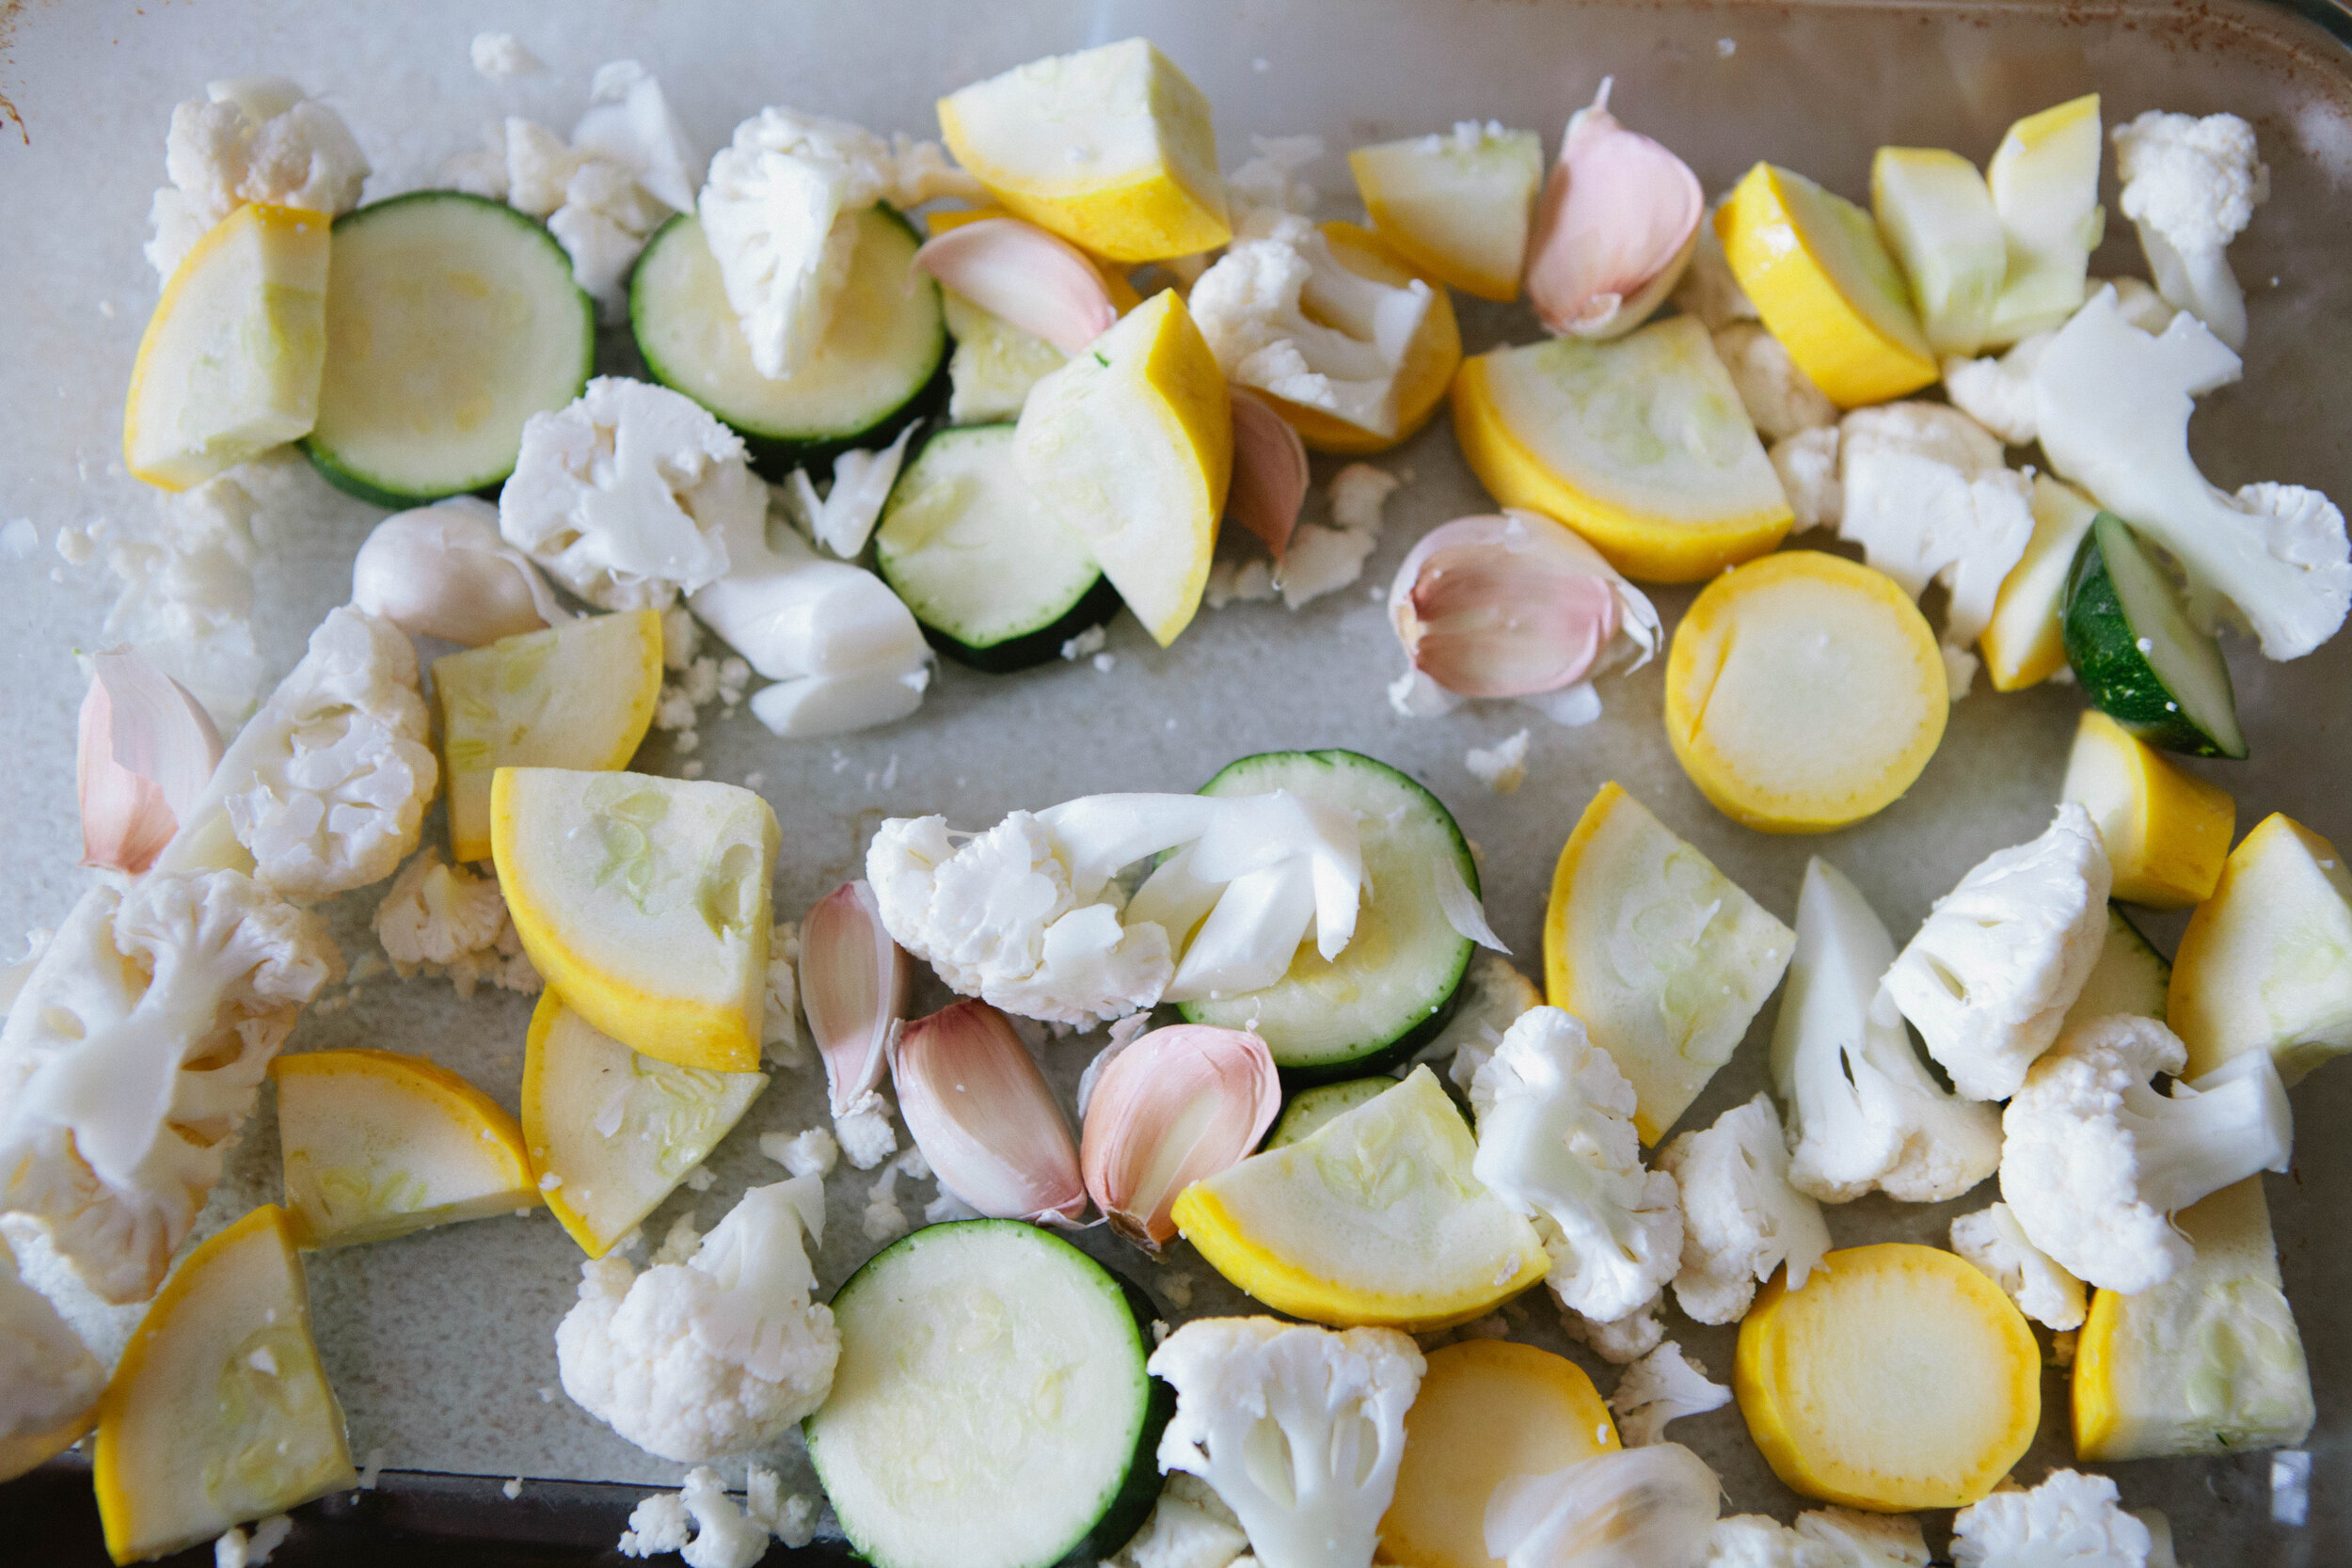
Cut the vegetables into even size pieces for even roasting. For the cauliflower, you can remove or keep however much of the fibrous material (stems), depending on how much you are tolerating.  Start the oven preheating to 400 degrees.

Roasted zucchini, cauliflower, yellow squash and garlic are the base for this soup. It’s delicious and filling while still being dairy free and gluten free. It’s a soup for the GAPS diet but is also great for Whole 30 or Paleo diets since it’s made …

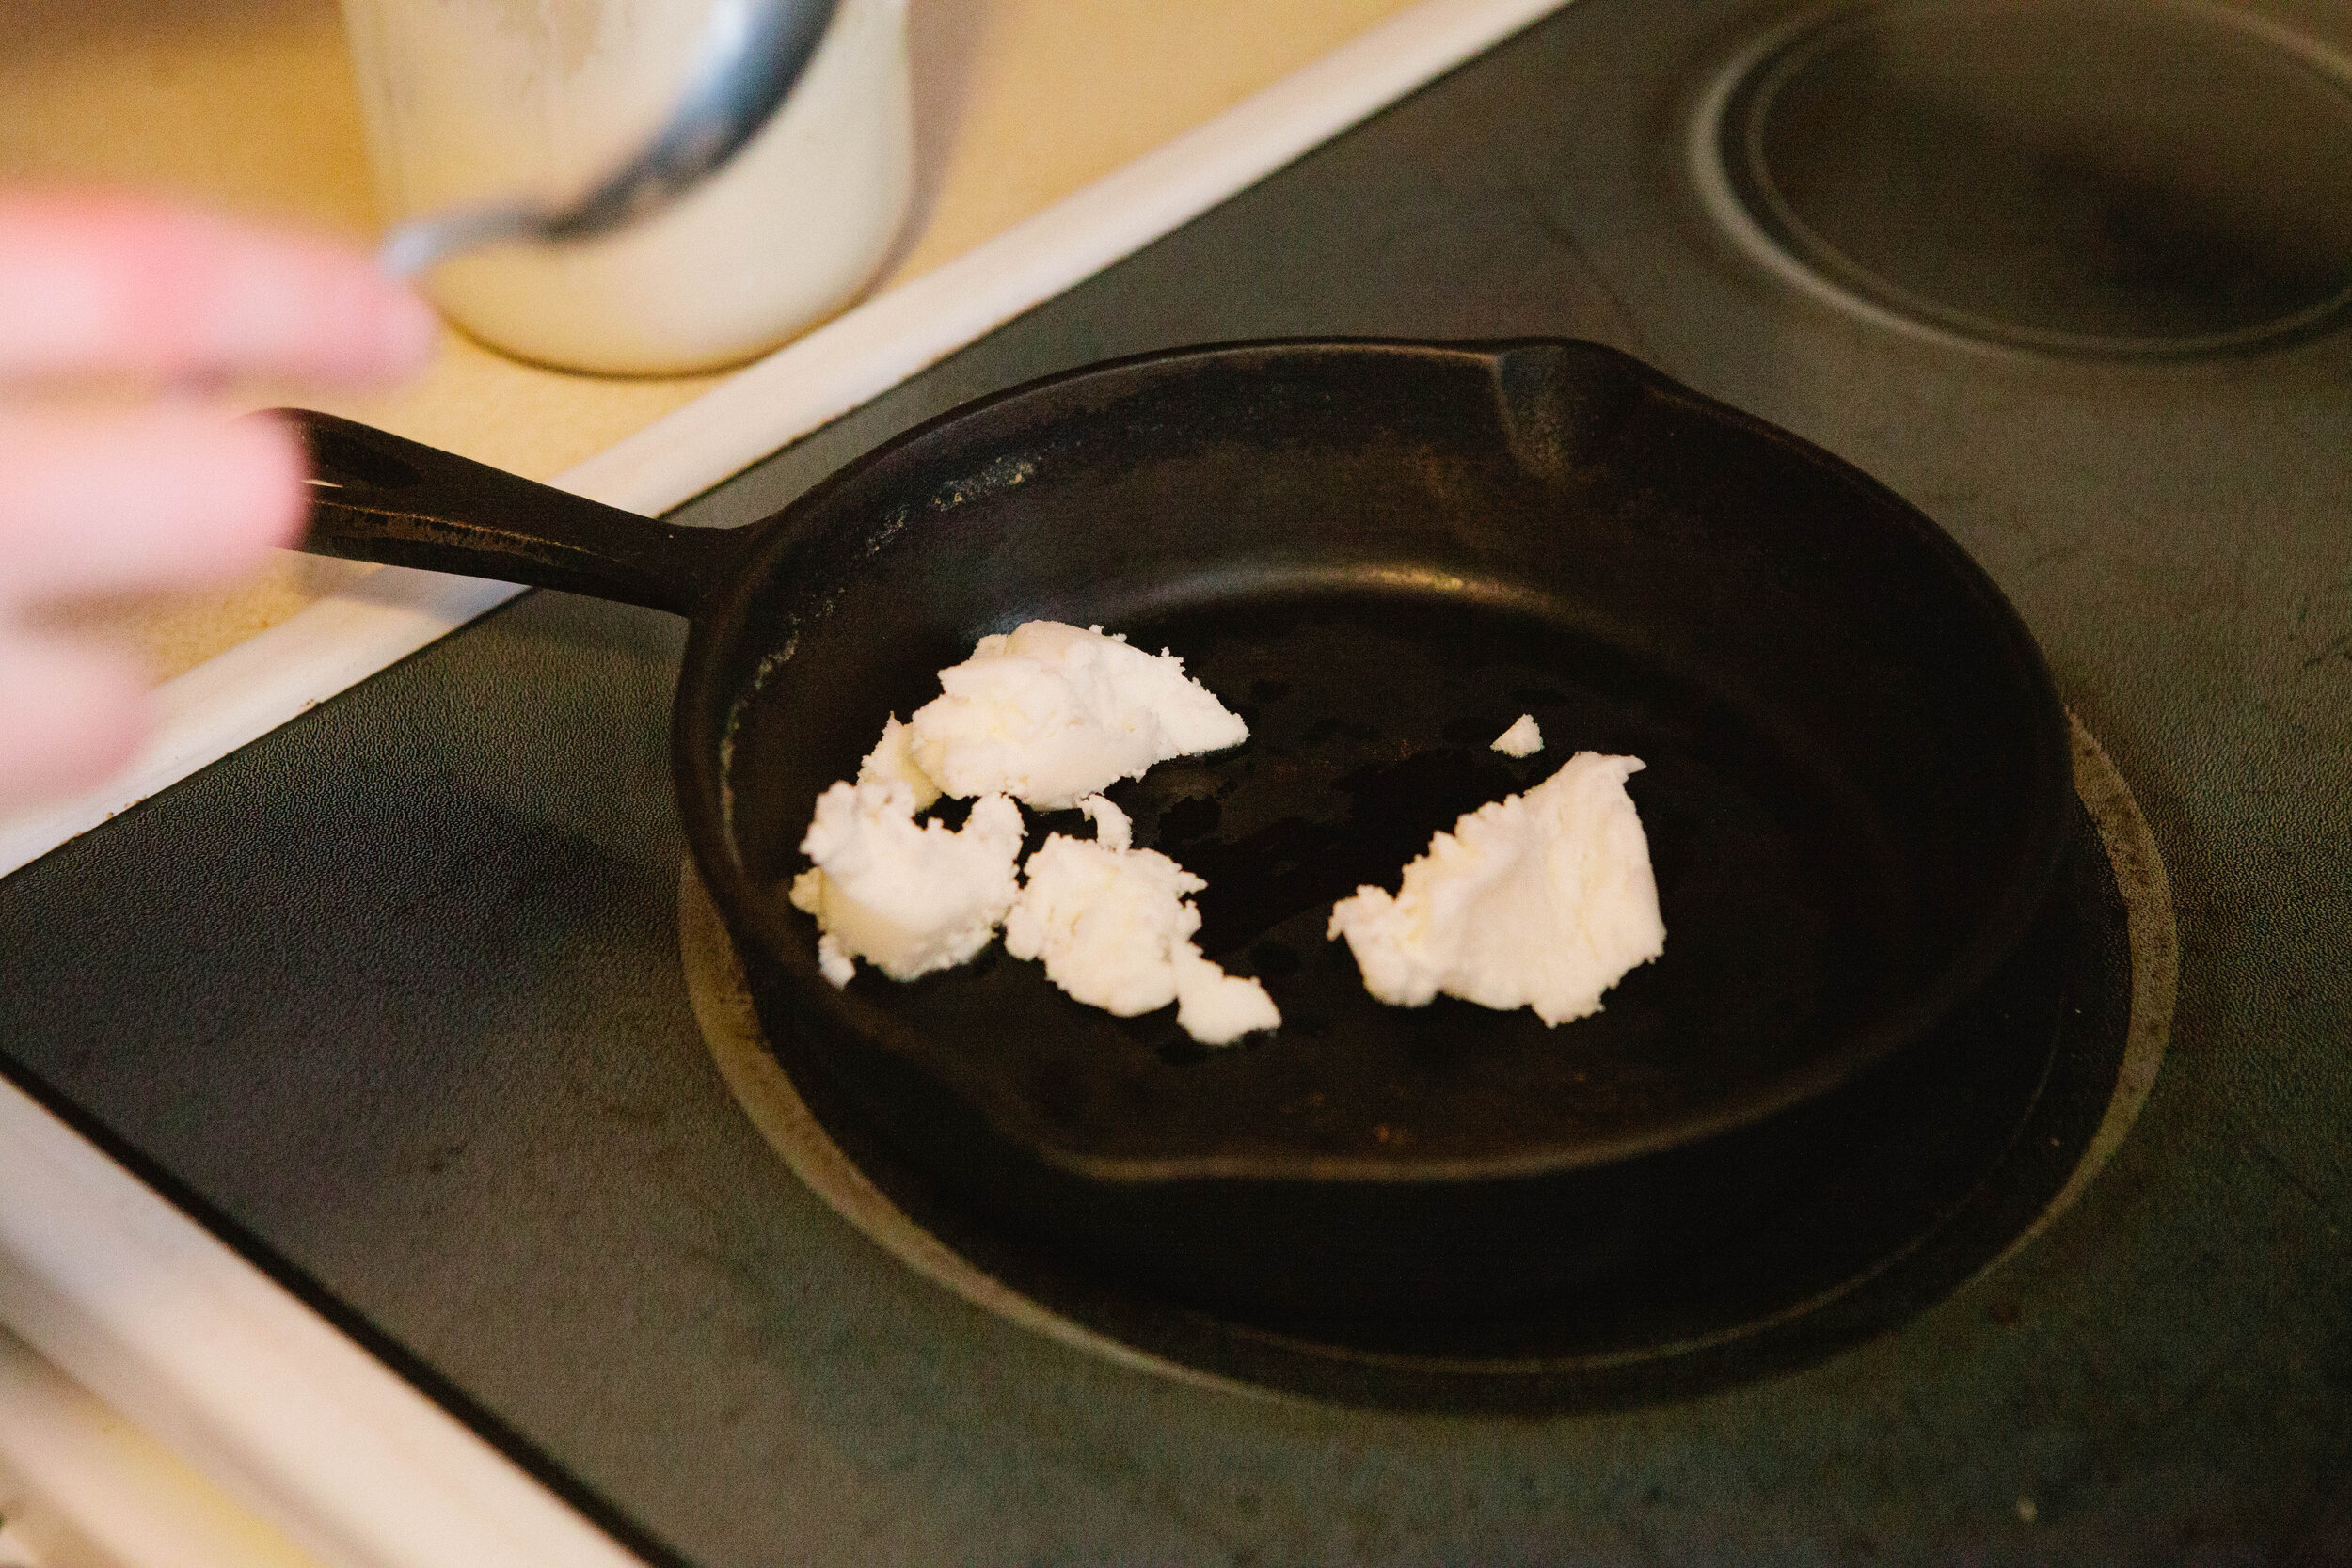
Add the squash, zucchini, cauliflower and garlic to a baking dish with the lard. Melt the lard in the oven on top of the vegetables and then stir to fully coat the vegetables with the melted lard. If you do not have enough lard to fully coat your vegetables, add more! Season with salt.

Roast the coated vegetables uncovered in the oven for about an hour. The vegetables are done when they are softened and slightly browned. Set them aside to cool. 

You can make your own chicken stock to use in this recipe for creamy garlic chicken soup. It’s a GAPS legal soup but is also great for Paleo or Whole 30 diets since it’s made with real food. It gets it’s creaminess from a medley of blended vegetable…

About ten minutes before the stock is done, add in ½ bunch of parsley for an added dose of Vitamin C and magnesium. 

Strain your stock but keep the joint meats, skin and everything else to blend into this creamy garlic chicken soup. It’s delicious, full of fat, hearty and made with real food so it’s perfect for the GAPS Diet, Whole 30, Weston A Price or Paleo. Rec…

Once the stock is done, strain the stock and set the cooked meat aside to cool. 

Once the roasted vegetables have cooled, peel the garlic paper off. Wait until the garlic is cooled - if you are impatient and peel it too early, it will burn your hands.

Add the roasted vegetables to a large pot. Add 12 cups of stock to the pot. 

This creamy garlic chicken soup uses a whole chicken. Set aside the bones and meat from your stock but blend everything else into the soup base to create a creamy soup that can’t be beat! It’s great for the GAPS Diet, Weston A Price, Whole 30 or Pal…

Once your meat is cooled, remove it from the bone. Separate the joint cartilage and skin from the meat. In the above photo, the top left is the bones, the bottom plate is the meat and the plate on the right has everything else that will be added into the stock and blended.

Roasted cauliflower, zucchini, yellow squash and garlic get blended with chicken skins to create a creamy base that keeps this creamy garlic chicken soup dairy free but still delicious! Recipe for GAPS Diet, Whole 30, Weston A Price or Paleo by Amy …

Add the skin, cartilage and other non-meat bits (no bones) to the pot. 

Immersion blend everything together until it is well blended and the vegetables are in small pieces.

Add shredded chicken to a base of roasted vegetables and blended chicken skins for a creamy, dreamy soup. Creamy Garlic Chicken Soup recipe for the GAPS Diet, Whole 30, Weston A Price or Paleo by Amy Mihaly, Certified GAPS Practitioner in Colorado.

Add the meat from your chicken into the blended stock. Add 1 tbsp of salt.

Cook for 15-20 minutes to blend the flavors.

This soup is a dream! Creamy Garlic Chicken soup is made with a blend of cauliflower, zucchini, yellow squash and garlic. It’s legal for the GAPS Diet, Whole30, Weston A Price and Paleo diets because it’s made with simple, real food. Recipe by Amy M…

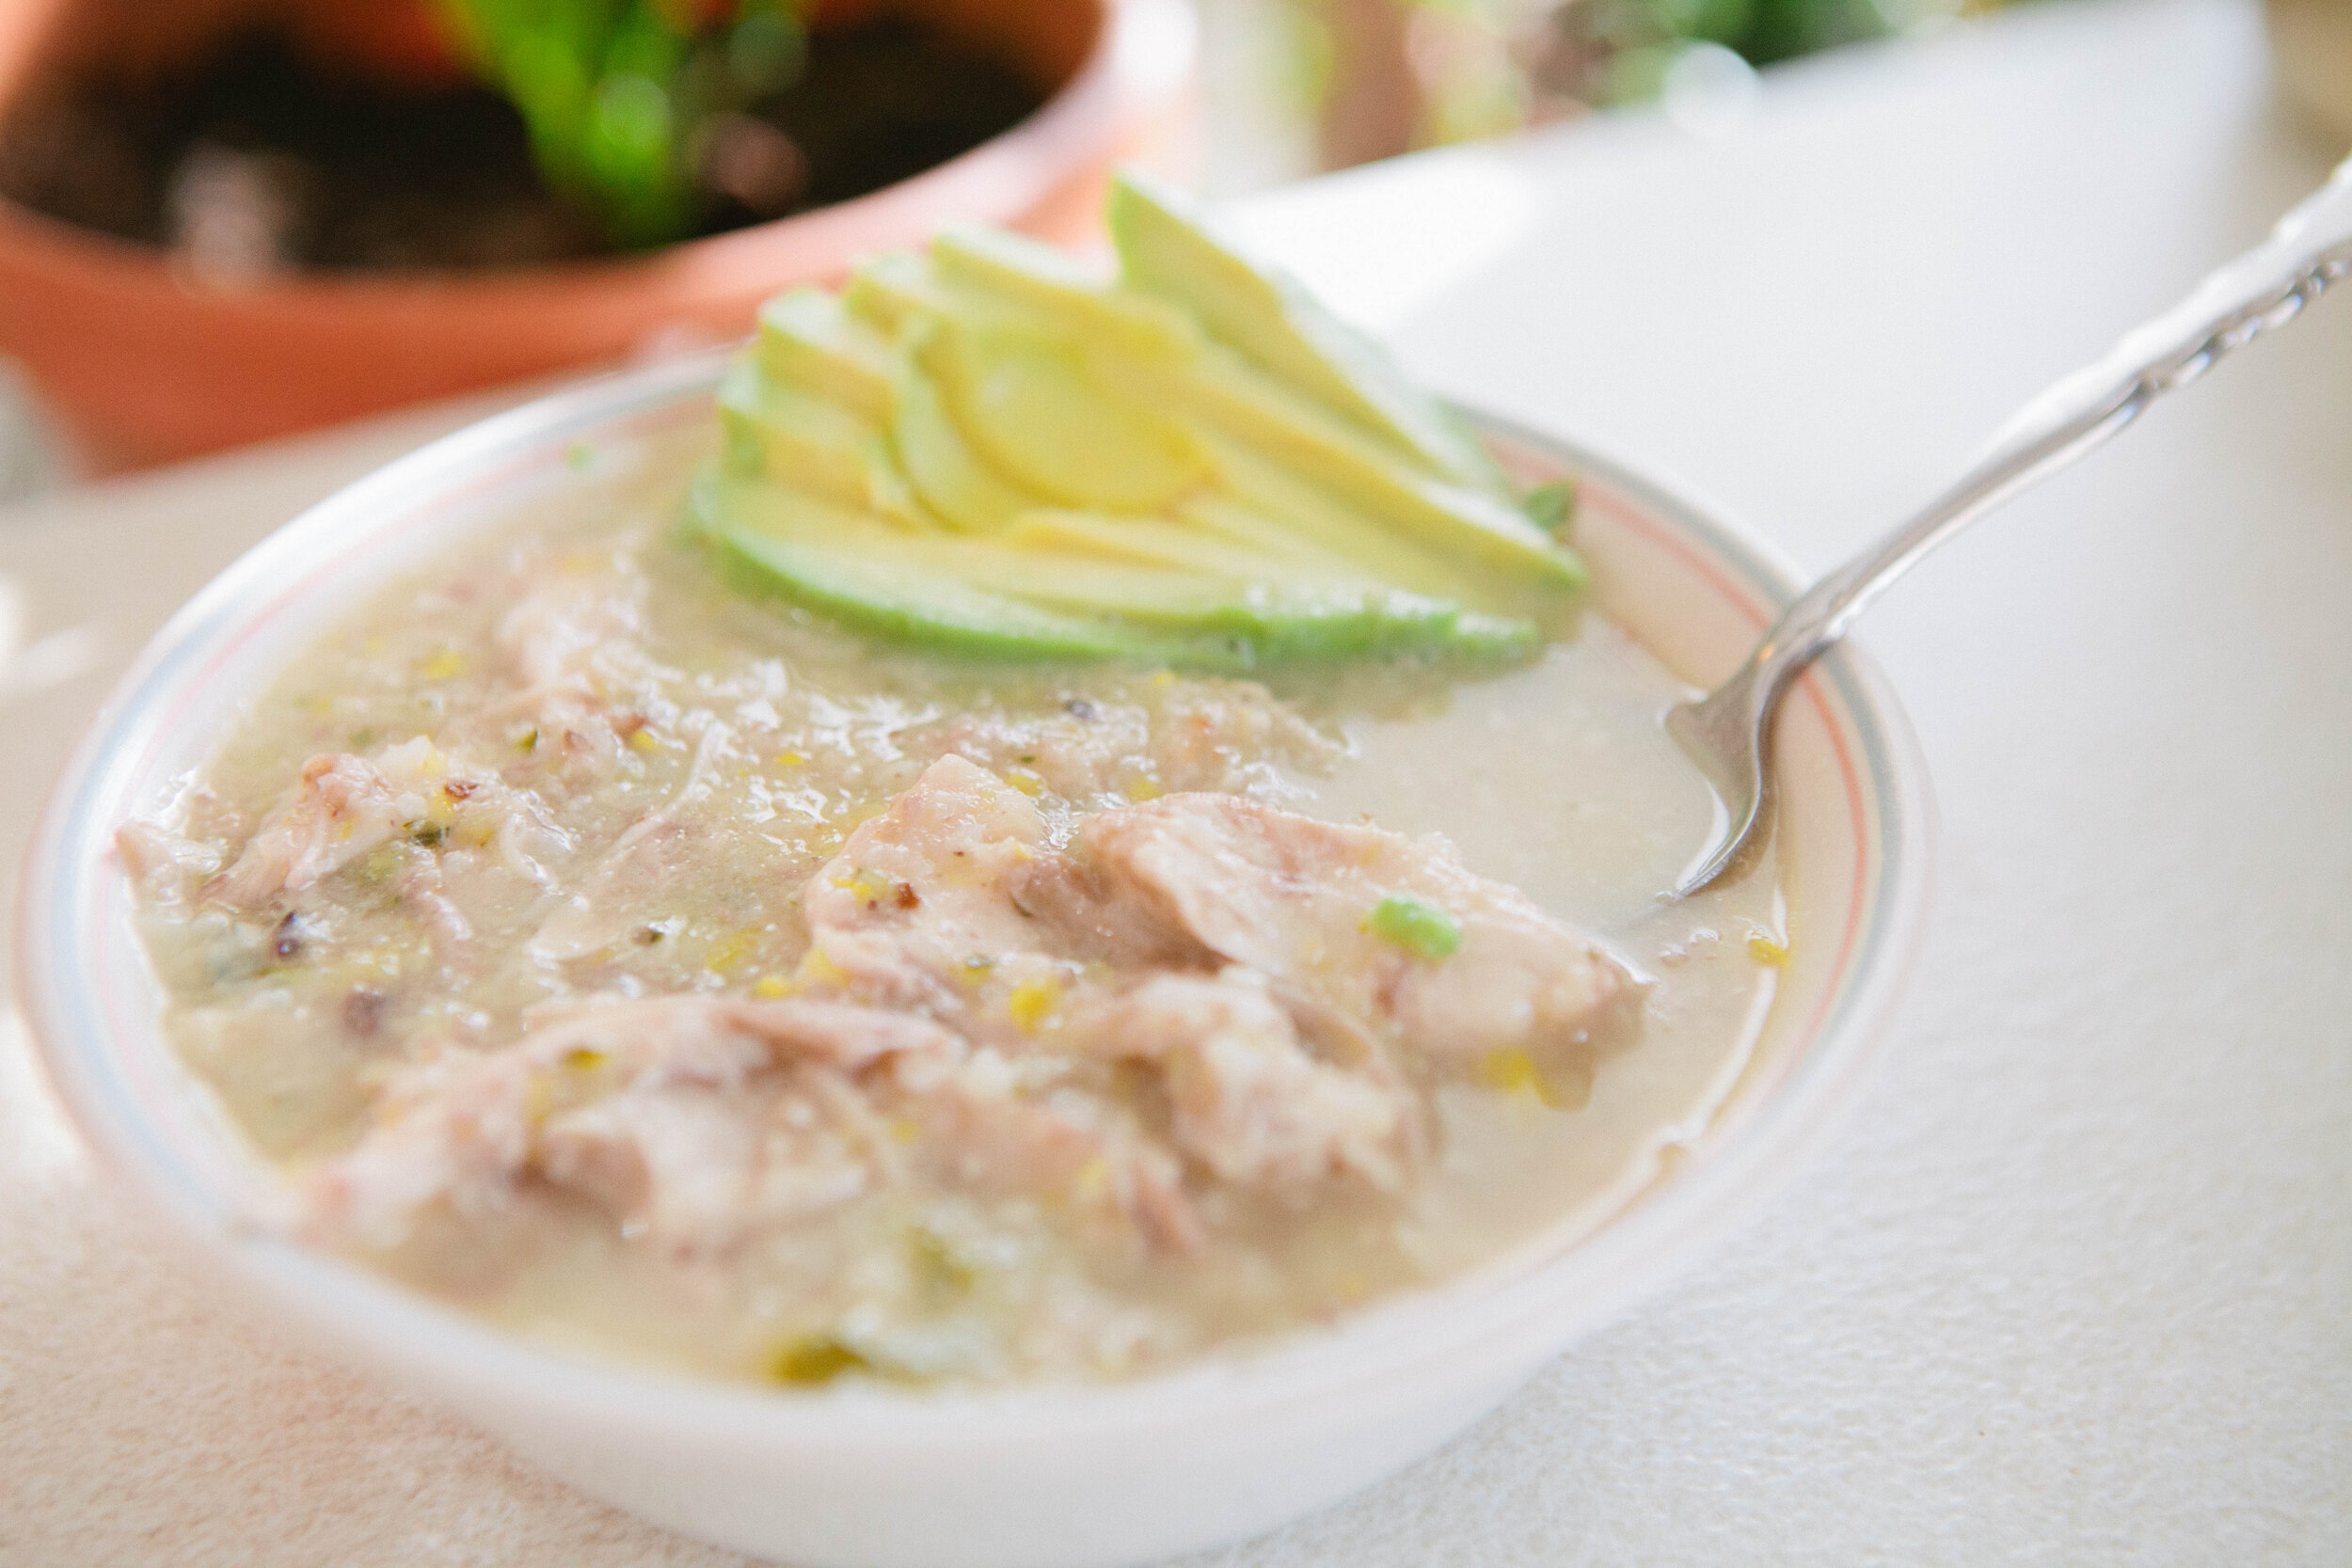
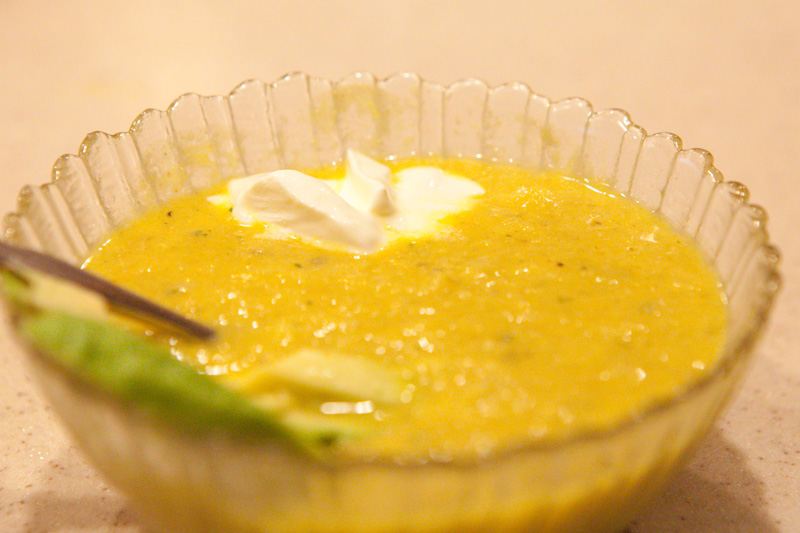
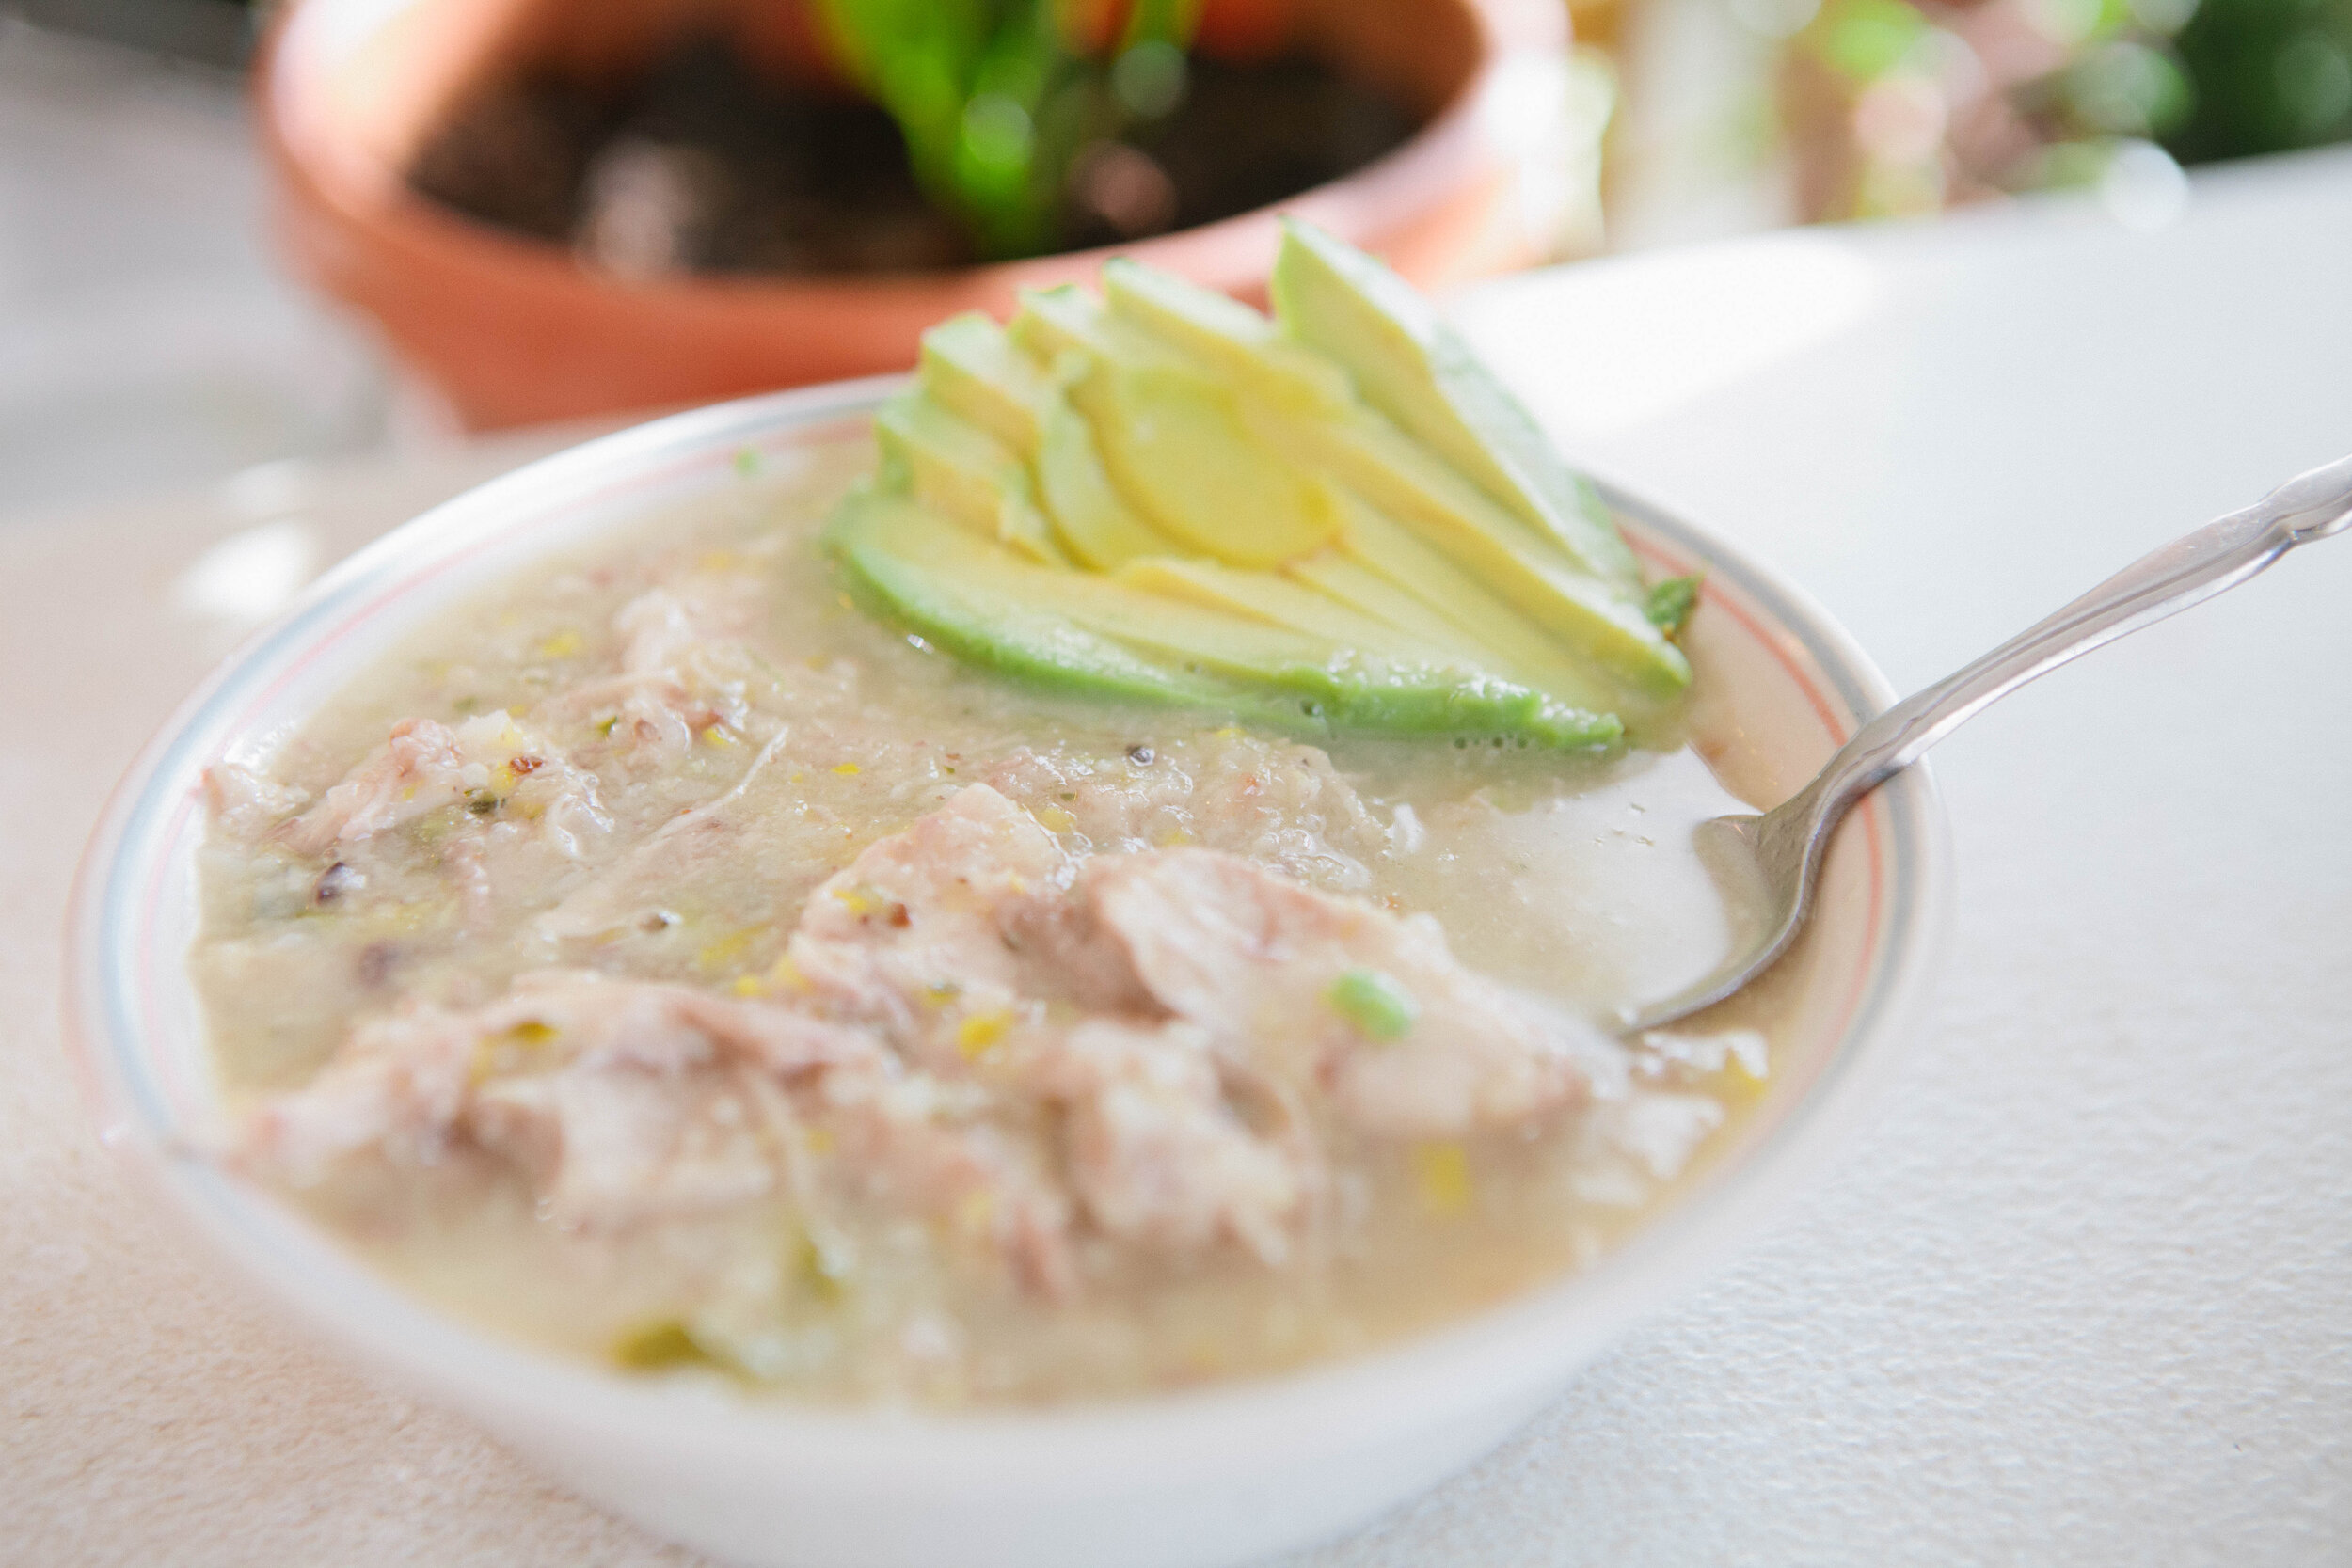
Enjoy! I topped mine with sliced avocado. However, this does make it legal on GAPS Stage 3.


Creamy Garlic Chicken Soup

Author:
prep time: cook time: total time:

ingredients:

  • 1 Chicken
  • 1 Zucchini (Courgettes)
  • 1 Yellow Squash
  • ½ Large Head of Cauliflower or 1 Small Cauliflower
  • 1-2 Heads of Garlic, Cloves separated but still in their paper
  • 3-4 tbsp Lard
  • 1 tbsp Salt
  • ½ Bunch Parsley

instructions:

How to cook Creamy Garlic Chicken Soup

  1. Start a chicken stock on the stove.
  2. Cut the vegetables into even size pieces for even roasting. For the cauliflower, you can remove or keep however much of the fibrous material (stems), depending on how much you are tolerating. Start the oven preheating to 400 degrees.
  3. Add the squash, zucchini, cauliflower and garlic to a baking dish with the lard. Melt the lard in the oven on top of the vegetables and then stir to fully coat the vegetables with the melted lard. If you do not have enough lard to fully coat your vegetables, add more! Season with salt.
  4. Roast the coated vegetables uncovered in the oven for about an hour. The vegetables are done when they are softened and slightly browned. Set them aside to cool.
  5. About ten minutes before the stock is done, add in ½ bunch of parsley for an added dose of Vitamin C and magnesium.
  6. Once the stock is done, strain the stock and set the cooked meat aside to cool.
  7. Once the roasted vegetables have cooled, peel the garlic paper off. Wait until the garlic is cooled - if you are impatient and peel it too early, it will burn your hands.
  8. Add the roasted vegetables to a large pot. Add 12 cups of stock to the pot.
  9. Once your meat is cooled, remove it from the bone. Separate the joint cartilage and skin from the meat. Add the skin, cartilage and other non-meat bits (no bones) to the pot.
  10. Immersion blend everything together until it is well blended and the vegetables are in small pieces.
  11. Add the meat from your chicken into the blended stock. Add 1 tbsp of salt.
  12. Cook for 15-20 minutes to blend the flavors.
  13. Enjoy! I topped mine with sliced avocado. However, this does make it legal on GAPS Stage 3.
Created using The Recipes Generator
This soup is a dream! Creamy Garlic Chicken soup is made with a blend of cauliflower, zucchini, yellow squash and garlic. It’s legal for the GAPS Diet, Whole30, Weston A Price and Paleo diets because it’s made with simple, real food. Recipe by Amy M…

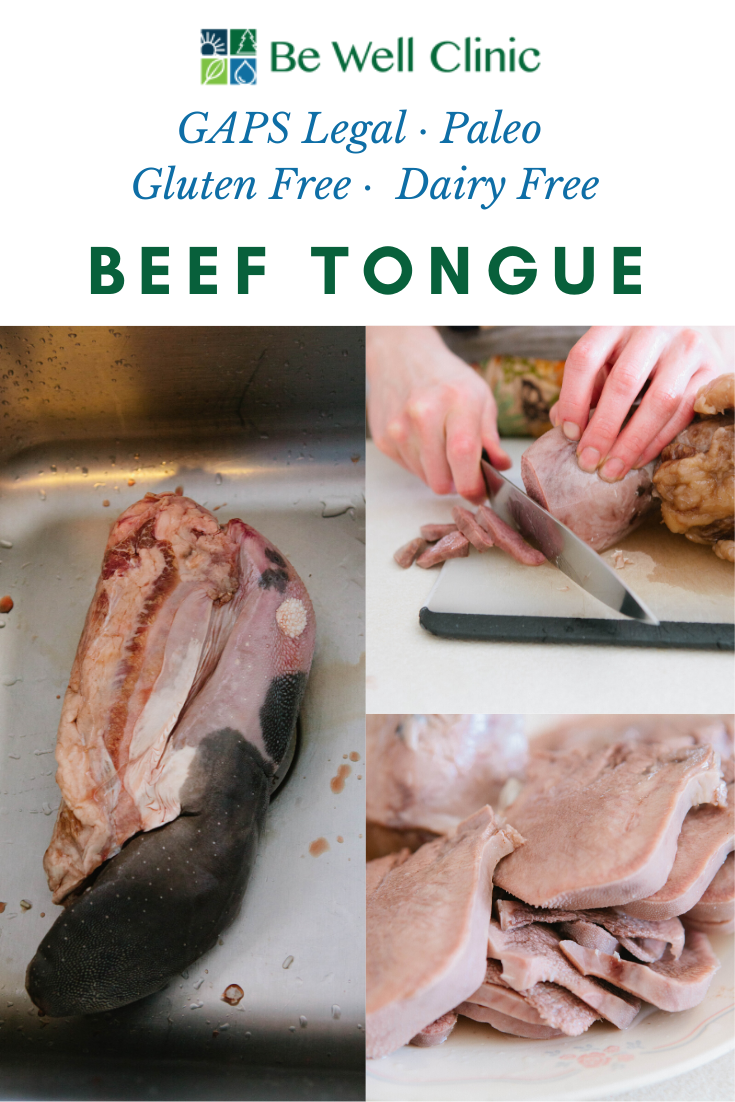
Beef Tongue Recipe

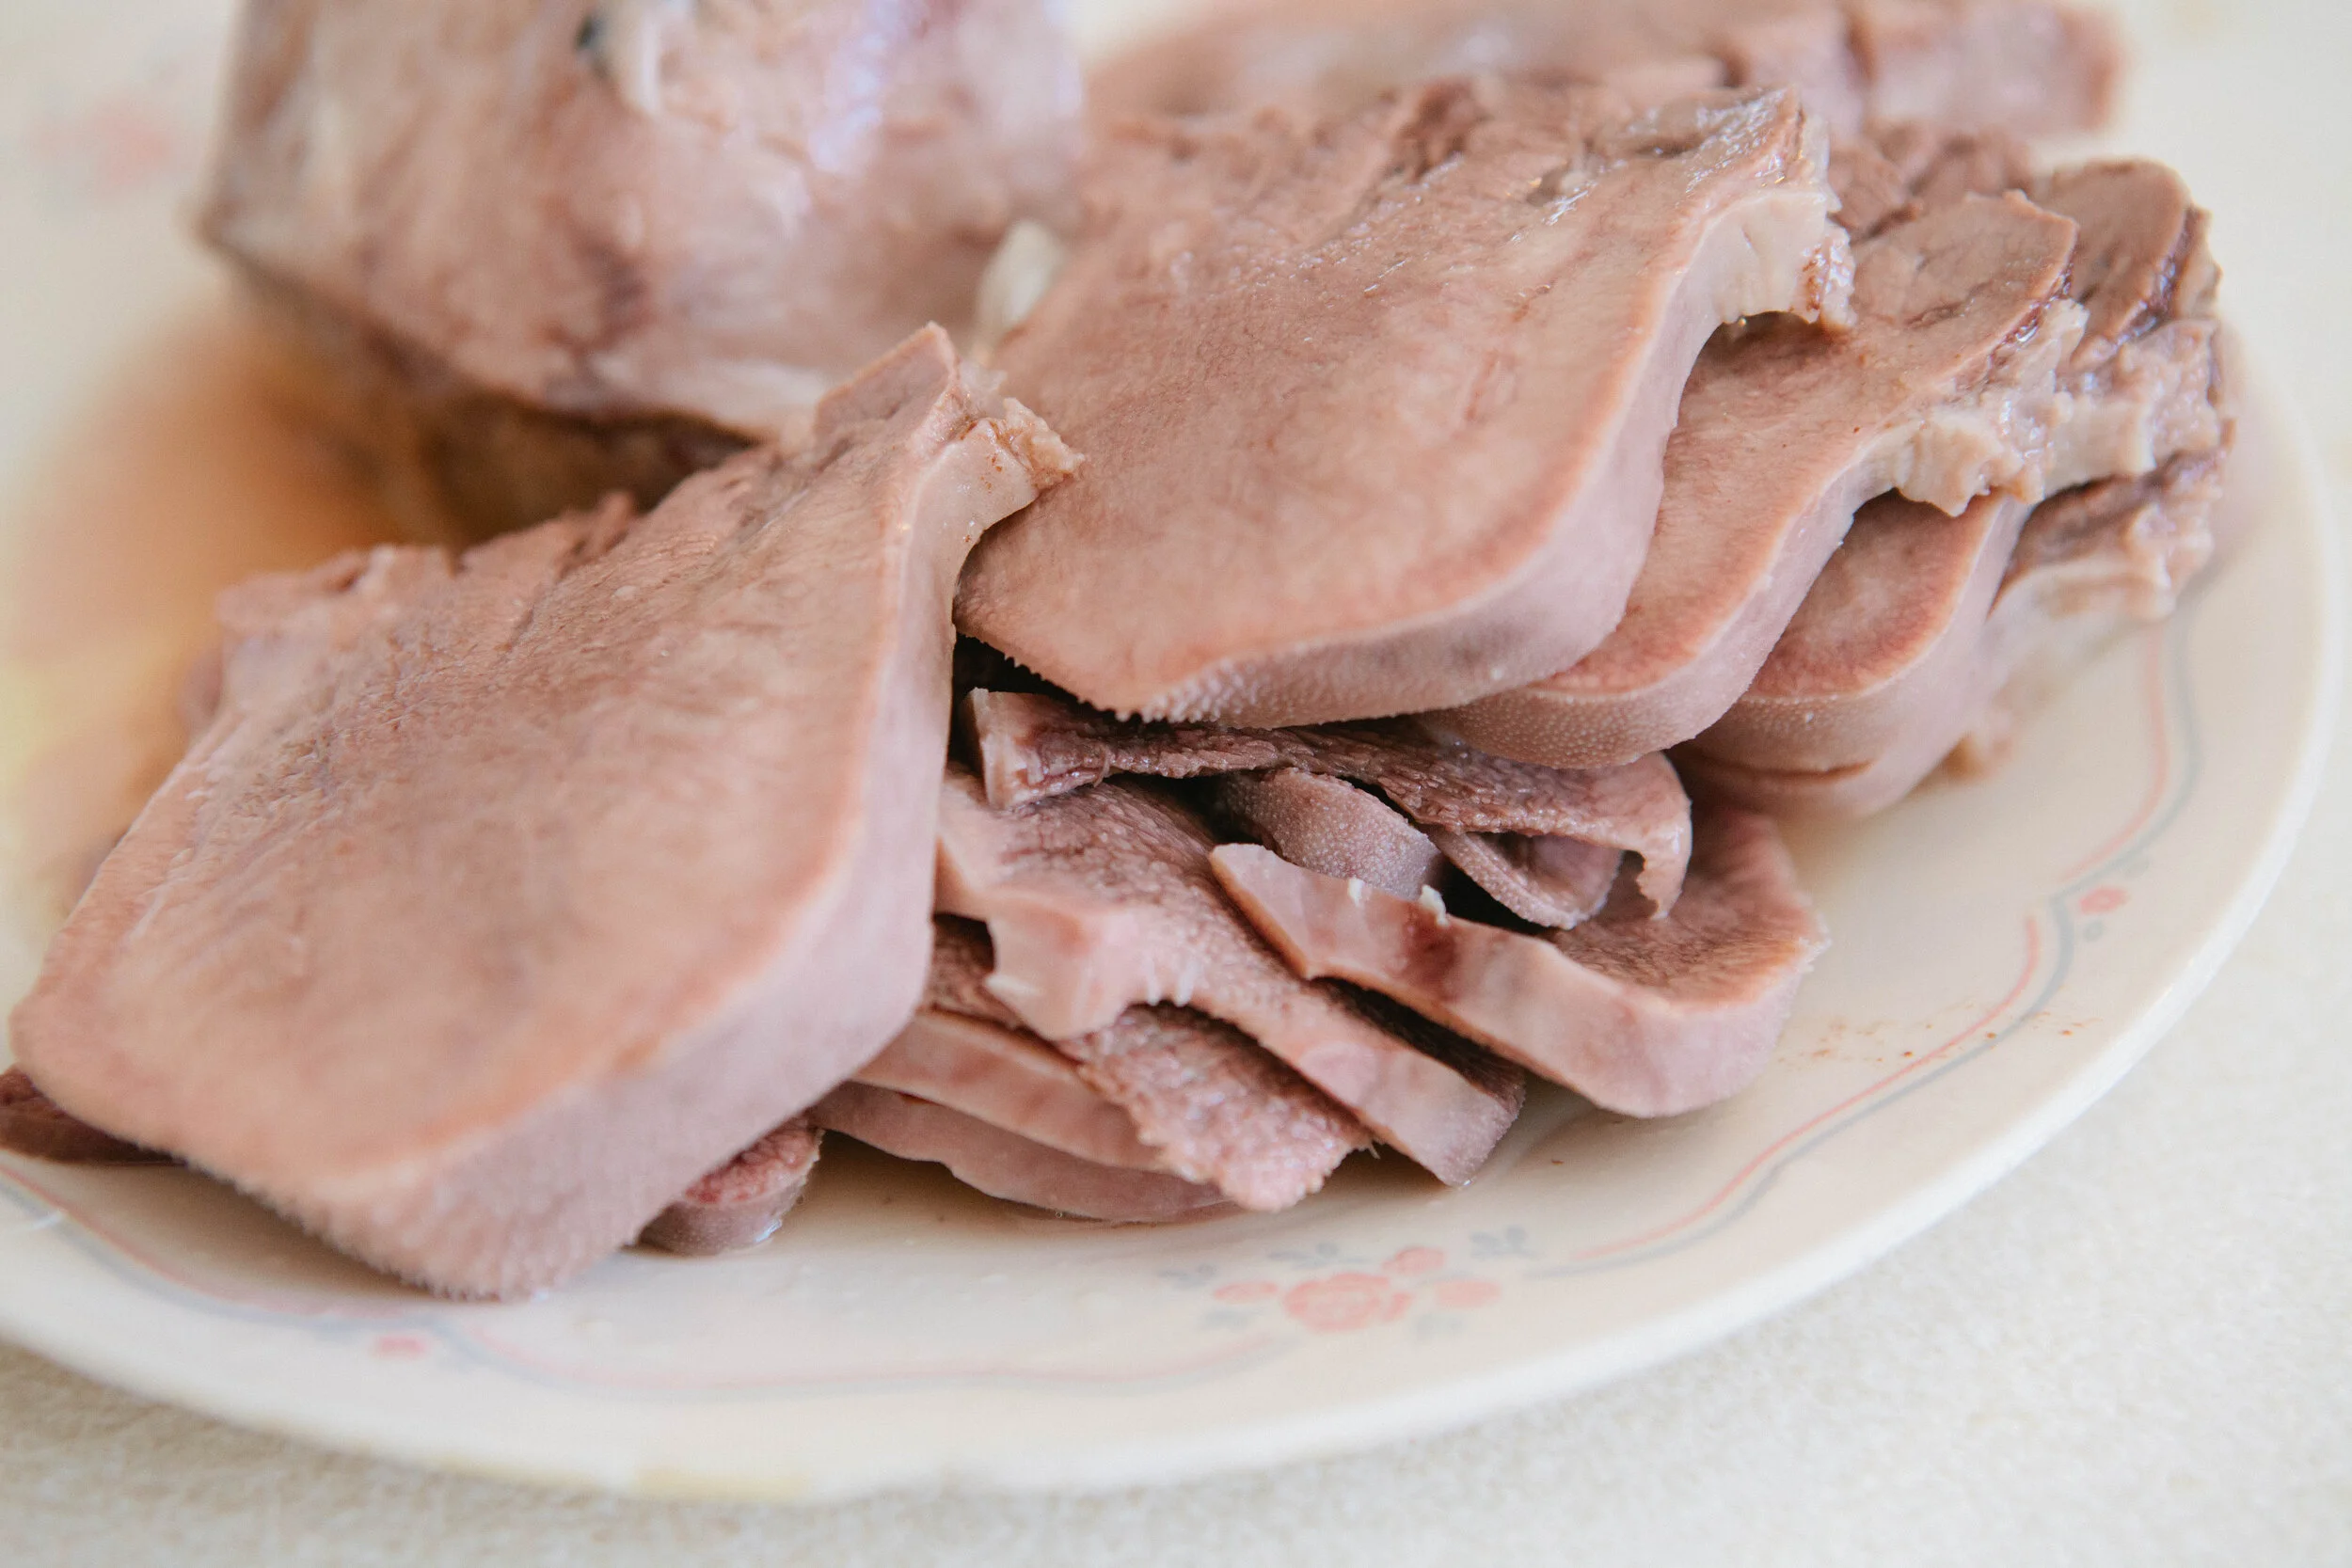
I recently got half a cow and had a beef tongue in my freezer! I wanted to use all of meat and wanted to give this recipe a try. Turns out - I love beef tongue!

Beef  tongue is a very delicious dark meat with a rich flavor because of it’s high fat content. It’s about 66% fat! It’s also a highly used muscle so it’s very tender. 

Beef tongue is very simple to prepare. I prefer to boil it, like the recipe below, but you can also put it in a slow cooker for 8 hours. Either way, the stock that you’re left with is rich and delicious. I’ve kept my beef tongue stock before and used it to make Egyptian Lentil Soup

You can also shred beef tongue to use it in tacos or slice it to use in a stir fry. Because it looks like any other cut of meat, no one will know it’s tongue! It’s not an organ meat so it doesn’t have the strong taste associated with it like livers or hearts to.

Did you recently get a full cow and you’re unsure what to do with the beef tongue? This is an easy recipe for boiled beef tongue. Beef tongue is a mild meat, like a pork tenderloin. GAPS Diet legal recipe by Amy Mihaly, Certified GAPS Practitioner i…

Ingredients for Beef Tongue:

  • 4.4 lbs of beef tongue

  • 1 ½ tbsp Salt

  • 1 tsp Peppercorns

  • 5 Cloves of Garlic, Whole

  • 4 Bay leaves

Directions for Beef Tongue:

Rinse the beef tongue thoroughly.

Did you recently get a full cow and you’re unsure what to do with the beef tongue? This is an easy recipe for boiled beef tongue. Beef tongue is a mild meat, like a pork tenderloin. GAPS Diet legal recipe by Amy Mihaly, Certified GAPS Practitioner i…

Place beef tongue in a large pot. Fill with enough water to cover the beef tongue. Gently press the beef tongue down so it is under the water.

Did you recently get a full cow and you’re unsure what to do with the beef tongue? This is an easy recipe for boiled beef tongue. Beef tongue is a mild meat, like a pork tenderloin. GAPS Diet legal recipe by Amy Mihaly, Certified GAPS Practitioner i…

Add salt, peppercorns, garlic and bay leaves to the pot. Or to prevent inadvertently taking out peppercorns with the scum, add your aromatics after you skim the scum. 

Did you recently get a full cow and you’re unsure what to do with the beef tongue? This is an easy recipe for boiled beef tongue. Beef tongue is a mild meat, like a pork tenderloin. GAPS Diet legal recipe by Amy Mihaly, Certified GAPS Practitioner i…

Bring beef tongue and water to a boil. Skim the scum off the top. 

Turn heat down to medium and cook for about two hours, until the outer skin starts to peel off . You want everything to be on a high simmer, low boil.

Did you recently get a full cow and you’re unsure what to do with the beef tongue? This is an easy recipe for boiled beef tongue. Beef tongue is a mild meat, like a pork tenderloin. GAPS Diet legal recipe by Amy Mihaly, Certified GAPS Practitioner i…

Once the outer skin can be peeled away, remove the tongue onto a plate to allow to cool. 

Strain the aromatics out of the stock and set aside to use in another recipe. (I suggest this Egyptian Lentil Soup recipe.) 

Did you recently get a full cow and you’re unsure what to do with the beef tongue? This is an easy recipe for boiled beef tongue. Beef tongue is a mild meat, like a pork tenderloin. GAPS Diet legal recipe by Amy Mihaly, Certified GAPS Practitioner i…

Once the tongue is cool, peel off the skin completely. Then chop up the meat as you would any other cut of meat!

Enjoy!


Did you recently get a full cow and you’re unsure what to do with the beef tongue? This is an easy recipe for boiled beef tongue. Beef tongue is a mild meat, like a pork tenderloin. GAPS Diet legal recipe by Amy Mihaly, Certified GAPS Practitioner i…

Beef Tongue

Author:
prep time: cook time: total time:

ingredients:

  • 4.4 lbs of beef tongue
  • 1 ½ tbsp Salt
  • 1 tsp Peppercorns
  • 5 Cloves of Garlic, Whole
  • 4 Bay leaves

instructions:

How to cook Beef Tongue

  1. Rinse the beef tongue thoroughly.
  2. Place beef tongue in a large pot. Fill with enough water to cover the beef tongue. Add salt, peppercorns, garlic and bay leaves to the pot. Or to prevent inadvertently taking out peppercorns with the scum, add your aromatics after you skim the scum.
  3. Bring beef tongue and water to a boil. Skim the scum off the top.
  4. Turn heat down to medium and cook for about two hours, until the outer skin starts to peel off . You want everything to be on a high simmer, low boil.
  5. Once the outer skin can be peeled away, remove the tongue onto a plate to allow to cool.
  6. Strain the aromatics out of the stock and set aside to use in another recipe. (I suggest thisEgyptian Lentil Soup recipe.)
  7. Once the tongue is cool, peel off the skin completely. Then chop up the meat as you would any other cut of meat!
  8. Enjoy!
Created using The Recipes Generator

How to Make Almond Butter

Ingredients for Fermented Almond Butter

  • 3 cups Almonds

  • ½ cup Whey

  • Filtered Water

  • Salt

Directions for Fermented Almond Butter

Place your almonds in filtered water with whey. Allow to soak for 24 hours.

IMG_4334.jpg

Drain the almonds in a colander and rinse with filtered water.

IMG_4505.jpg

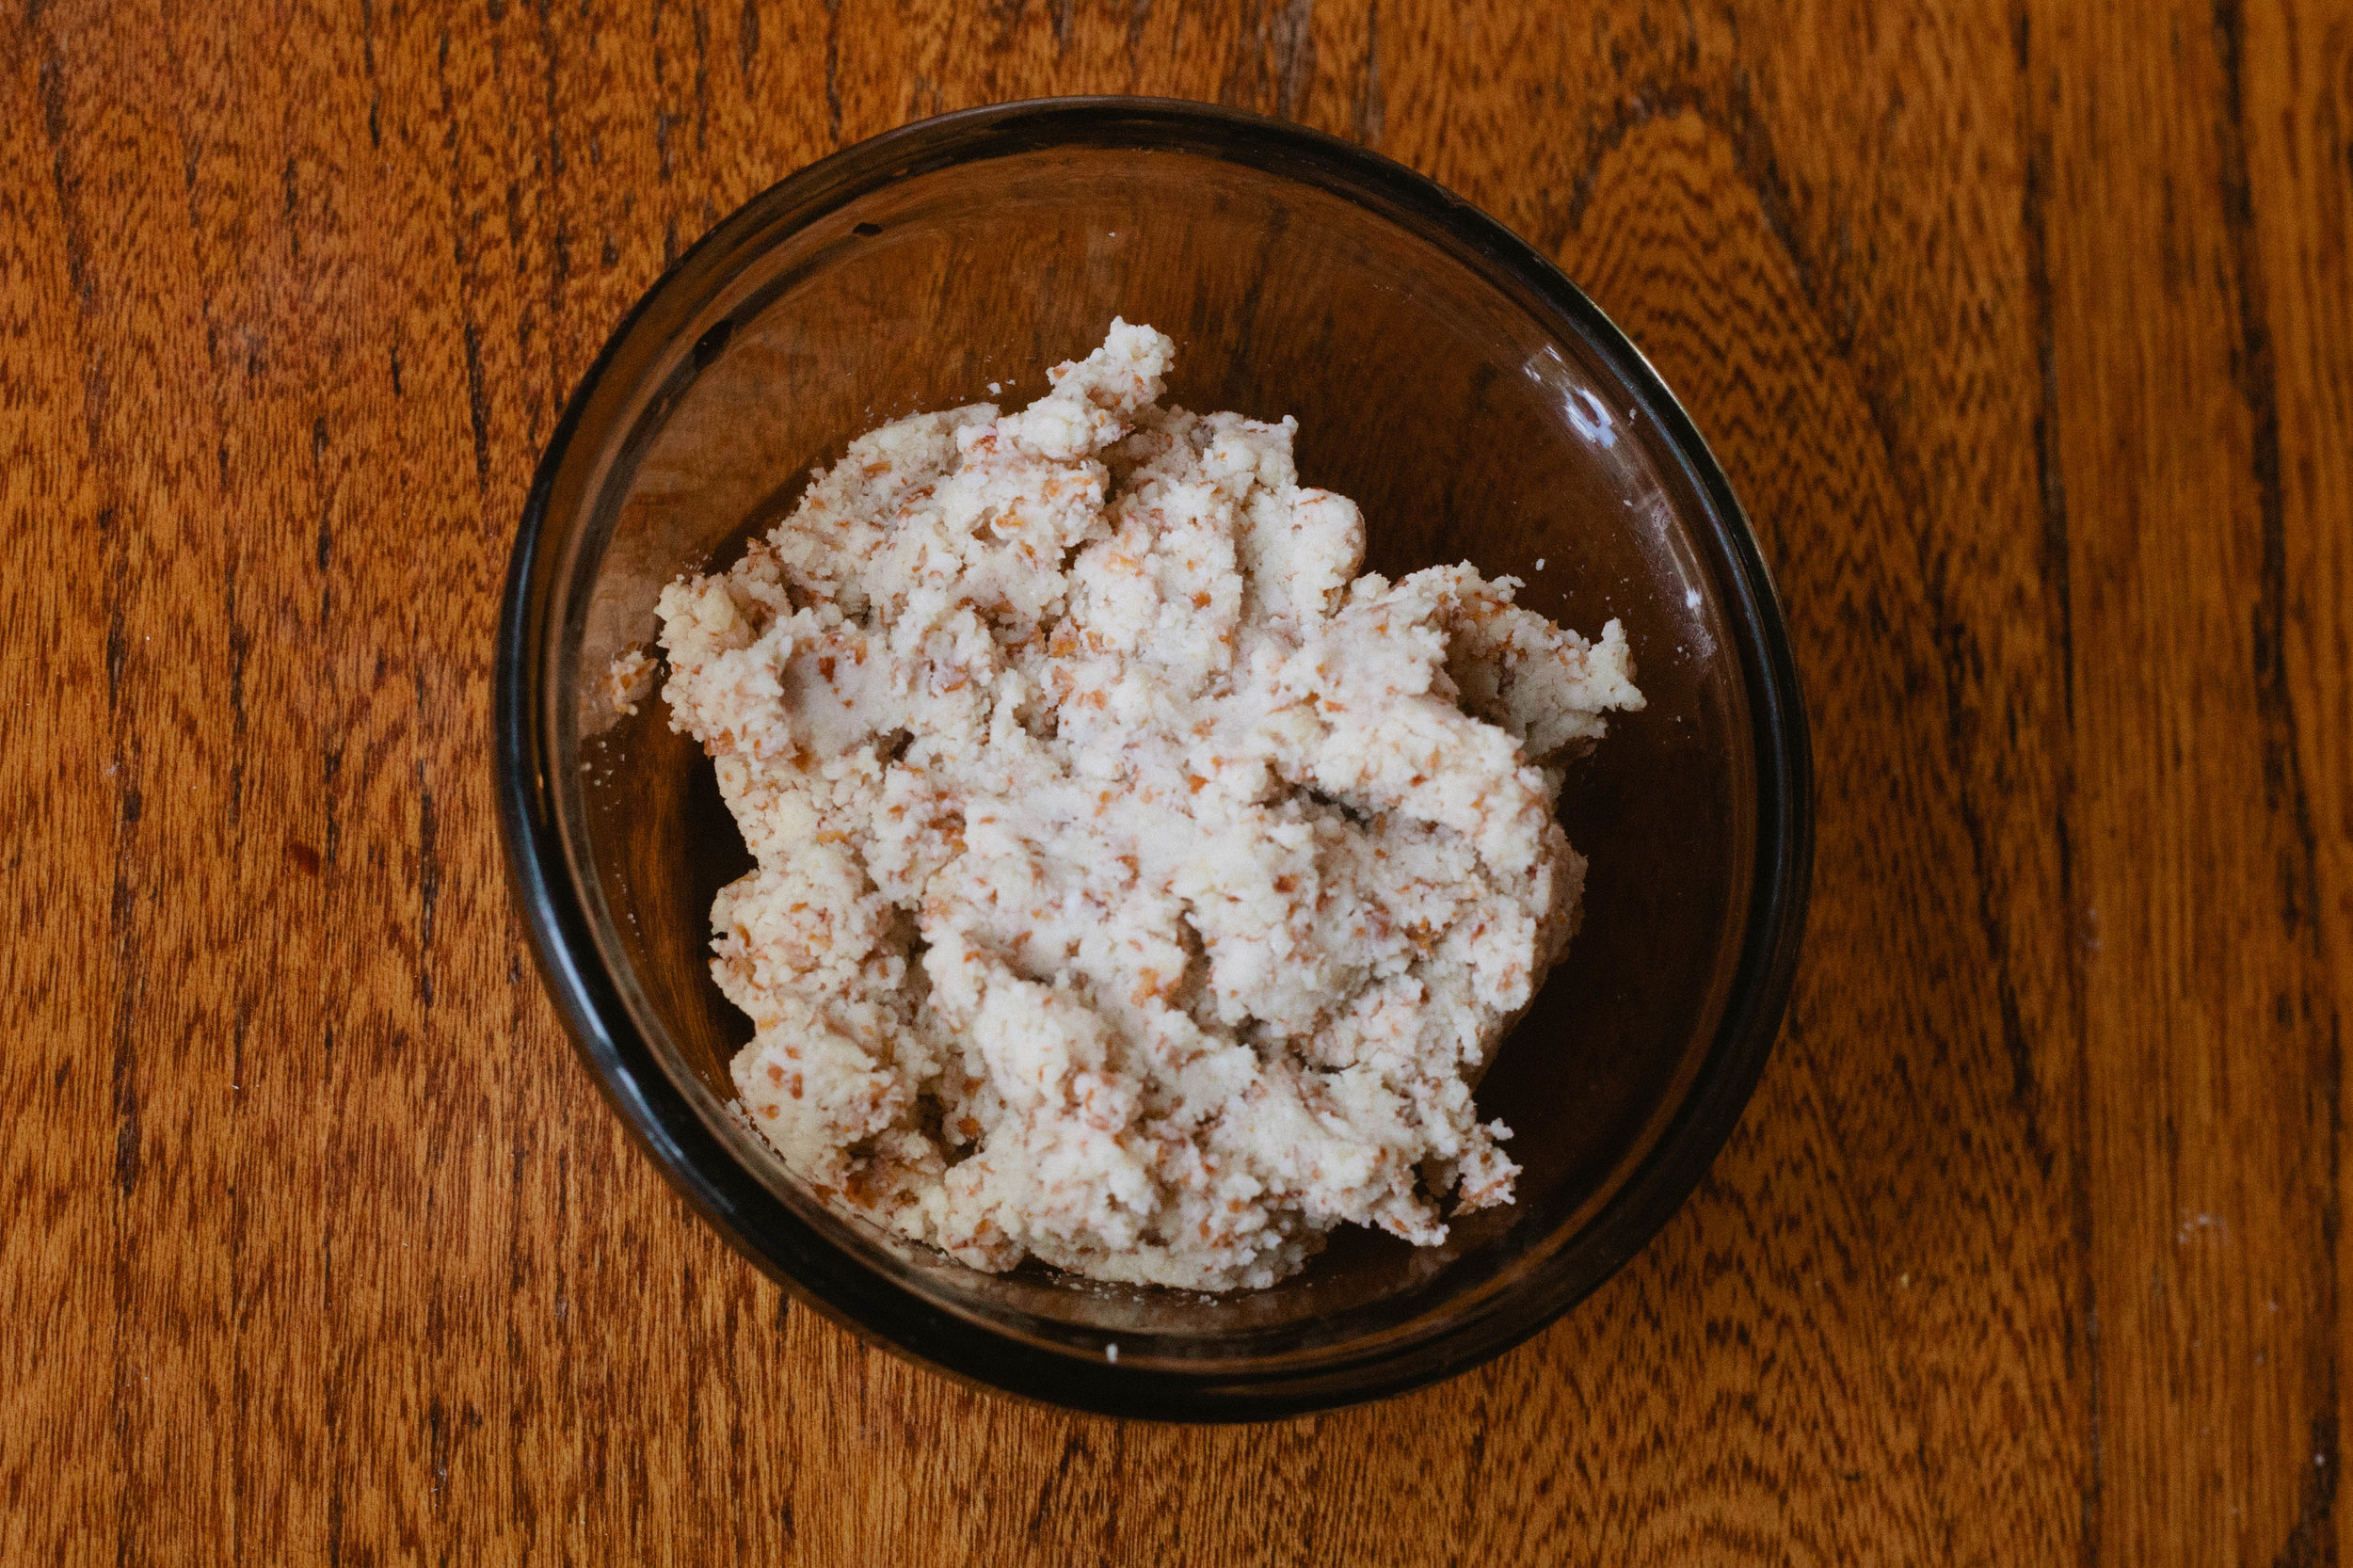
Place almonds into a food processor. Pulse them consistently until you get almond butter.

IMG_4627.jpg

Once almonds are the consistency of almond butter, add four shakes of salt. Pulse for several more seconds. Add four more shakes of salt.


Almond Butter

Author:
prep time: cook time: total time:

ingredients:

  • 3 cups Almonds
  • ½ cup Whey
  • Filtered Water
  • Salt

instructions:

How to cook Almond Butter

  1. Place your almonds in filtered water with whey. Allow to soak for 24 hours.
  2. Drain the almonds in a colander and rinse with filtered water.
  3. Place almonds into a food processor. Pulse them consistently until you get almond butter.
  4. Once almonds are the consistency of almond butter, add four shakes of salt. Pulse for several more seconds. Add four more shakes of salt.
Created using The Recipes Generator
33.png

Cast Iron Parboiled Lamb Meatballs

Meatballs are a simple way to add variety to your diet. They can also be a great way to get your kids to eat vegetables! Add finely chopped onions, zucchini, peppers, etc. in to your meatballs to add vegetables.

I’m making these meatballs with lamb burger but you can do it with any kind of burger.

If you have a lean cut, make sure you add fat! I prefer to not use a lean cut; it’s better for your health! Remember, fat is your friend.

My preferred way of making meatballs is to parboil them.

An added benefit of rolling lamb meatballs is the lovely lamb tallow on your skin! Tallow is fat and lamb tallow is the best for your skin. Your hands will be soft, moisturized, and waterproof after rolling your meatballs.

Ingredients for GAPS Friendly Lamb Meatballs

  • 1 lb ground lamb

  • Salt

Directions for GAPS Friendly Lamb Meatballs

IMG_1446.jpg

Heat ½ inch of water in a pan.

IMG_1470.jpg

Roll your lamb into inch sized balls. You can make your meatballs any size, just make sure they’re consistently sized.

IMG_1476.jpg

Add your meatballs into your pan with water.

IMG_1485.jpg

Turn your meatballs with a fork to continue to cook on all sides. Salt your meatballs generously.

As you turn them, continue to salt the meatballs.

IMG_1496.jpg

After approximately five minutes, when you think your meatballs are done, cut one open to check it if it is done.

Continue to add water, meatballs, and salt in batches until you have cooked your desired number of meatballs.

Enjoy!

IMG_1575.jpg

Cast Iron Parboiled Lamb Meatballs

Author:
prep time: cook time: total time:

ingredients:

  • 1 lb ground lamb
  • Salt

instructions:

How to cook Cast Iron Parboiled Lamb Meatballs

  1. Heat ½ inch of water in a pan.
  2. Roll your lamb into inch sized balls. You can make your meatballs any size, just make sure they’re consistently sized.
  3. Add your meatballs into your pan with water.
  4. Turn your meatballs with a fork to continue to cook on all sides. Salt your meatballs generously.
  5. As you turn them, continue to salt the meatballs.
  6. After approximately five minutes, when you think your meatballs are done, cut one open to check it if it is done.
  7. Continue to add water, meatballs, and salt in batches until you have cooked your desired number of meatballs.
  8. Enjoy!
Created using The Recipes Generator
44.png

How to Make the Perfect Hard Boiled and Soft Boiled Eggs

Egg whites are best eaten cooked. They are very detoxifying when they’re raw and when they’re raw, they require a lot of things to properly digest them. All the necessary things needed for digestion are in egg yolks so it’s important to consume the egg whites and egg yolks at the same time. Egg yolks are best eaten raw or very lightly cooked. This keeps the fragile nutrients inside egg yolks intact.

If you are having digestive issues, you should eat egg whites cooked only. After you have healed, you can consume raw egg whites.*

IMG_1622.jpg

Dr. Natasha recommends that a child eats between three and six egg yolks a day and an adult should eat six to twelve. You may consume the whites with this if you are tolerating them or simply use the yolk only.

There are multiple recipes for using egg whites only or you can feed them to your dog or cat.

*Eating uncooked or raw eggs or feeding raw eggs to your pets can pose a risk to your health.

Keeping hard boiled eggs on hand is a great and easy protein on the go! If you want to take your hard boiled eggs one step further, check out my recipe on making mayo free deviled eggs.

Directions for Hard Boiled Eggs

IMG_1620.jpg

Fill a medium saucepan with cold water.

Add eggs.

IMG_1630.jpg

Bring eggs to a boil and cook for 5-6 minutes covered.

Remove eggs from heat.

Let set for 5 minutes.

IMG_1940.jpg

Test if your egg is hard boiled by removing one from the pan and spinning it. A hard boiled egg will spin upright if the yolk is hard.

Rinse the eggs under cold water or place them in an ice bath.

IMG_1944.jpg

Tap the end of the egg and peel the shell off. Enjoy! Try these Mayo Free Deviled Eggs 2 Ways with your Hard Boiled Eggs.


I love soft boiled eggs! It makes me feel like royalty whenever I eat them. The best part of this fancy seeming dish is it’s actually very simple to make!

Directions for Soft Boiled Eggs

IMG_1503.jpg

Add filtered water to a pot. Bring water to a boil.

Once water is boiling, add eggs.

IMG_1630.jpg

Boil for 5 to 6 minutes.

Rinse under cold water or add to an ice bath.

IMG_1523.jpg

Tap one end of the egg and peel half of the egg. Scoop out the inside and enjoy!


Hard Boiled Eggs

Author:
prep time: cook time: total time:

ingredients:

  • Eggs

instructions:

How to cook Hard Boiled Eggs

  1. Fill a medium saucepan with cold water.
  2. Add eggs.
  3. Bring eggs to a boil and cook for 5-6 minutes covered.
  4. Remove eggs from heat.
  5. Let set for 5 minutes.
  6. Test if your egg is hard boiled by removing one from the pan and spinning it. A hard boiled egg will spin upright if the yolk is hard.
  7. Rinse the eggs under cold water or place them in an ice bath.
  8. Tap the end of the egg and peel the shell off. Enjoy! Try these Mayo Free Deviled Eggs 2 Ways with your Hard Boiled Eggs.
Created using The Recipes Generator
20.png

Soft Boiled Eggs

Author:
prep time: cook time: total time:

ingredients:

  • Eggs

instructions:

How to cook Soft Boiled Eggs

  1. Add filtered water to a pot. Bring water to a boil.
  2. Once water is boiling, add eggs.
  3. Boil for 5 to 6 minutes.
  4. Rinse under cold water or add to an ice bath.
  5. Tap one end of the egg and peel half of the egg. Scoop out the inside and enjoy!
Created using The Recipes Generator
19.png

How to Make Sauerkraut - DIY Sauerkraut

Fermented cabbage is very high in vitamin C which is essential for healing a leaky gut. Vitamin C is anti-inflammatory and immune boosting.

While good quality sauerkraut can be obtained in most stores now, I still prefer to make my own as I think it tastes the best. I put a lot of love and anticipation into my sauerkraut, as I don’t eat it until it has been fermenting for at least three months.

Making your own sauerkraut is very cost effective if you are eating on a budget. Not only are you making it for pennies, fermenting vegetables increases the bioavailability of nutrients, making this a ‘food hack.’

I used to cut my cabbage in a food processor but I feel that all time considered, including clean up time, it’s actually faster to cut it yourself. Plus, I like touching the cabbage myself instead of letting a machine cut it.

Sauerkraut works anaerobically, meaning it does not require oxygen. Any vegetable that is above the level of the water can grow mold or undesirable bacteria strains.

I do my sauerkraut in one quart jars because I prefer to open a smaller amount at a time. You can use any size jar that you want. An open jar in the fridge will keep for six months to a year. If kept at cooler temperatures, unopened, like in a root cellar or in the fridge, sauerkraut will keep for two or more years.

You can add whey to your cabbage to make the sauerkraut. Not using whey is called wild fermentation. It allows for different bacteria to grow than using a dairy based whey. I prefer to make my sauerkraut without whey.

With all ferments, variety is key. Using both whey and simply salt to make your ferments provides good variety in your diet.

Ingredients for Making Your Own Sauerkraut:

  • 1 Medium Cabbage

  • 2 tbsp Salt

  • Filtered Water

Directions for Making Your Own Sauerkraut:

Remove and rinse outside leaves and reserve them for the tops of your jars to keep the vegetables from coming up the level of the water.

how-to-make-your-own-sauerkraut-how-to-make-my-own-sauerkraut-diy-sauerkraut-making-sauerkraut-cabbage-recipes-what-to-do-with-too-much-cabbage-gaps-diet-fermented-foods-gaps-protocol-northern-colorado-gaps-practitioner-certified-gaps-practitioner-l…

Slice cabbage into slivers. As you slice it, keep turning it to keep yourself safe and keep your cabbage evenly sized.

how-to-make-your-own-sauerkraut-how-to-make-my-own-sauerkraut-diy-sauerkraut-making-sauerkraut-cabbage-recipes-what-to-do-with-too-much-cabbage-gaps-diet-fermented-foods-gaps-protocol-northern-colorado-gaps-practitioner-certified-gaps-practitioner-l…

Add a little bit of salt and massage with your hands for a few minutes. The salt starts breaking down the cell walls of the cabbage, which will save you from having to beat the cabbage a lot.

After you have massaged your cabbage, let it sit for 10 - 15 minutes.

how-to-make-your-own-sauerkraut-how-to-make-my-own-sauerkraut-diy-sauerkraut-making-sauerkraut-cabbage-recipes-what-to-do-with-too-much-cabbage-gaps-diet-fermented-foods-gaps-protocol-northern-colorado-gaps-practitioner-certified-gaps-practitioner-l…

Knead your cabbage again.

how-to-make-your-own-sauerkraut-how-to-make-my-own-sauerkraut-diy-sauerkraut-making-sauerkraut-cabbage-recipes-what-to-do-with-too-much-cabbage-gaps-diet-fermented-foods-gaps-protocol-northern-colorado-gaps-practitioner-certified-gaps-practitioner-l…

Once you have kneaded your cabbage to the desire texture, fill your jars. It’s best to continue kneading until you can squeeze a little bit of water from the cabbage.

Fermenting cabbage produces a decent amount of gas, Make sure to leave head room in your jars to accommodate. This means lightly packing cabbage into your jar, about ¾ full.

Add water to just under the shoulder of the jar.

Sometimes cabbage produces enough liquid while it's fermenting. If it doesn’t feel free to add more liquid.

how-to-make-your-own-sauerkraut-how-to-make-my-own-sauerkraut-diy-sauerkraut-making-sauerkraut-cabbage-recipes-what-to-do-with-too-much-cabbage-gaps-diet-fermented-foods-gaps-protocol-northern-colorado-gaps-practitioner-certified-gaps-practitioner-l…

Top your sauerkraut off with a whole cabbage leaf, packing it along the sides of the jar to keep all the vegetables below the level of the liquid.

how-to-make-your-own-sauerkraut-how-to-make-my-own-sauerkraut-diy-sauerkraut-making-sauerkraut-cabbage-recipes-what-to-do-with-too-much-cabbage-gaps-diet-fermented-foods-gaps-protocol-northern-colorado-gaps-practitioner-certified-gaps-practitioner-l…

Seal with a two piece lid.

Leave on your counter. No need to burp this ferment! This process works anaerobically, without oxygen. If your jars burp, overflow or explode, you simply packed your jar too tight with vegetables.

47.png

Eggs Poached in Stock

Eggs poached in stock  was a new food for me when I started the GAPS Diet. It quickly became one of my favorite breakfasts that I am still enjoying. Sometimes, I poach an entire egg in the stock but I often I simply poach the yolks in stock.

Poaching your eggs in stock is great on cold winter’s days. It really helps you get going and warms you right off! It’s also a great way to get in your stock for the day in the summer, as it’s often cool enough in the mornings still to enjoy a warm beverage.

Beef Stock Recipe

Chicken Stock Recipe

IMG_1260.jpg

I’ve always liked over easy eggs so I enjoy runny yolks. If you don’t like runny yolks, you can poach your eggs longer, or if you are poaching in your mug, you can break the yolk in the mug. The warmth of the soup will help to cook the yolk but very gently, which will help to leave much of the beneficial enzymes of the yolks intact.

Egg whites are best consumed cooked and egg yolks are best consumed raw. This is for ease of digestion as well as full nutrient potential.

You can use any stock of your choice to poach your eggs in. I had chicken stock on hand when making this recipe so I used that! Be sure to salt your eggs in the stock generously while cooking them and after.

Ingredients to Make Eggs Poached in Stock

  • 2 cups of Your Choice of Stock

  • 1-2 Eggs

  • Salt and pepper

Directions for Eggs Poached in Stock:

Bring two cups of stock to a boil. Add a generous shake of salt.

IMG_1269.jpg

Once stock is rapidly boiling, use a spoon to create a swirling vortex.

To the vortex, break in one to two eggs.

IMG_1284.jpg

Move them gently off the bottom, where they will settle.

IMG_1294.jpg

When your yolk gets to your desired firmness, remove the egg or pour the entire thing into a bowl or mug. This takes anywhere between 3 to 5 minutes.


GAPS Diet Stage 2 Modification: If you are on Stage 2 of the GAPS Diet, this modification will make this recipe legal.

Bring a mug’s worth of stock to a boil.

IMG_1315.jpg

Once the stock is boiling, add it to a mug.

IMG_1322.jpg

To the mug, add one to three egg yolks.

IMG_1345.jpg

I like to let them warm for a couple minutes. Then, I pop one entire egg yolk into my mouth, whole.  Others prefer to break the egg in the mug and stir it around. This only lightly cooks the egg yolk.


Eggs Poached in Stock

Author:
prep time: cook time: total time:

ingredients:

  • 2 cups of Your Choice of Stock
  • 1-2 Eggs
  • Salt and pepper

instructions:

How to cook Eggs Poached in Stock

  1. Bring two cups of stock to a boil. Add a generous shake of salt.
  2. Once stock is rapidly boiling, use a spoon to create a swirling vortex.
  3. To the vortex, break in one to two eggs.
  4. Move them gently off the bottom, where they will settle.
  5. When your yolk gets to your desired firmness, remove the egg or pour the entire thing into a bowl or mug. This takes anywhere between 3 to 5 minutes.
GAPS Diet Stage 1 Modification:
  1. If you are on Stage 1 of the GAPS Diet, this modification will make this recipe legal.
  2. Bring a mug’s worth of stock to a boil.
  3. Once the stock is boiling, add it to a mug.
  4. To the mug, add one to three egg yolks.
  5. I like to let them warm for a couple minutes. Then, I pop one entire egg yolk into my mouth, whole. Others prefer to break the egg in the mug and stir it around. This only lightly cooks the egg yolk.
Created using The Recipes Generator
18.png