GAPS

Our next GAPS program starts in January!

Our next GAPS program starts in January!

For years, Be Well Clinic has been providing support for those healing the symptoms listed above using the GAPS Nutritional Protocol. In order to support those who come to us more comprehensively, we have created this new program to include built-in features that we have found to be invaluable to our patients in the past.

This fall we piloted our new way of doing GAPS support. We have developed a new curriculum, established various means of support and worked out a few technological kinks so that we could be ready to present our new official program for supporting those going through the GAPS Nutritional Protocol in 2023!

Here are some of the features of our GAPS Program that differentiate it from other GAPS programs:

The Be Well Clinic GAPS Program

The Be Well Clinic GAPS Program

Welcome to our new, comprehensive GAPS Program designed for those who are determined to heal their minds and bodies holistically through food and professional naturopathic support. This program is based on the understanding that in order to heal your mind and body, it is necessary to address the foundations of gut health and emotional health.

Mayo Free Egg Salad

Eggs are a great non-meat protein source. While I usually recommend eating eggs yolks running to preserve the cholesterol on them, sometimes a hard boiled egg is hard to beat!

This is a recipe that could easily be doubled or tripled for a party. You can serve it spread on a romaine lettuce leaf, as shown, or you can use it as a dip for cucumber slices or carrots.. Feel free to use whatever herbs you have in the fridge and experiment to find your favorites.

This recipe is legal on GAPS Stage 3 if you omit the paprika. Otherwise, it is legal on GAPS Stage 6. The ingredient list is for 1-2 servings.

Ingredients for Mayo Free Egg Salad:

  • 4 Eggs

  • ½ cup Sour Cream or Creme Fraiche

  • 1 small stalk Celery

  • 1 large Green Onion

  • ¼ - ½  tsp Salt

  • 1 tsp Pepper

  • ½ tsp Paprika

  • Parsley

Directions for Mayo Free Egg Salad:

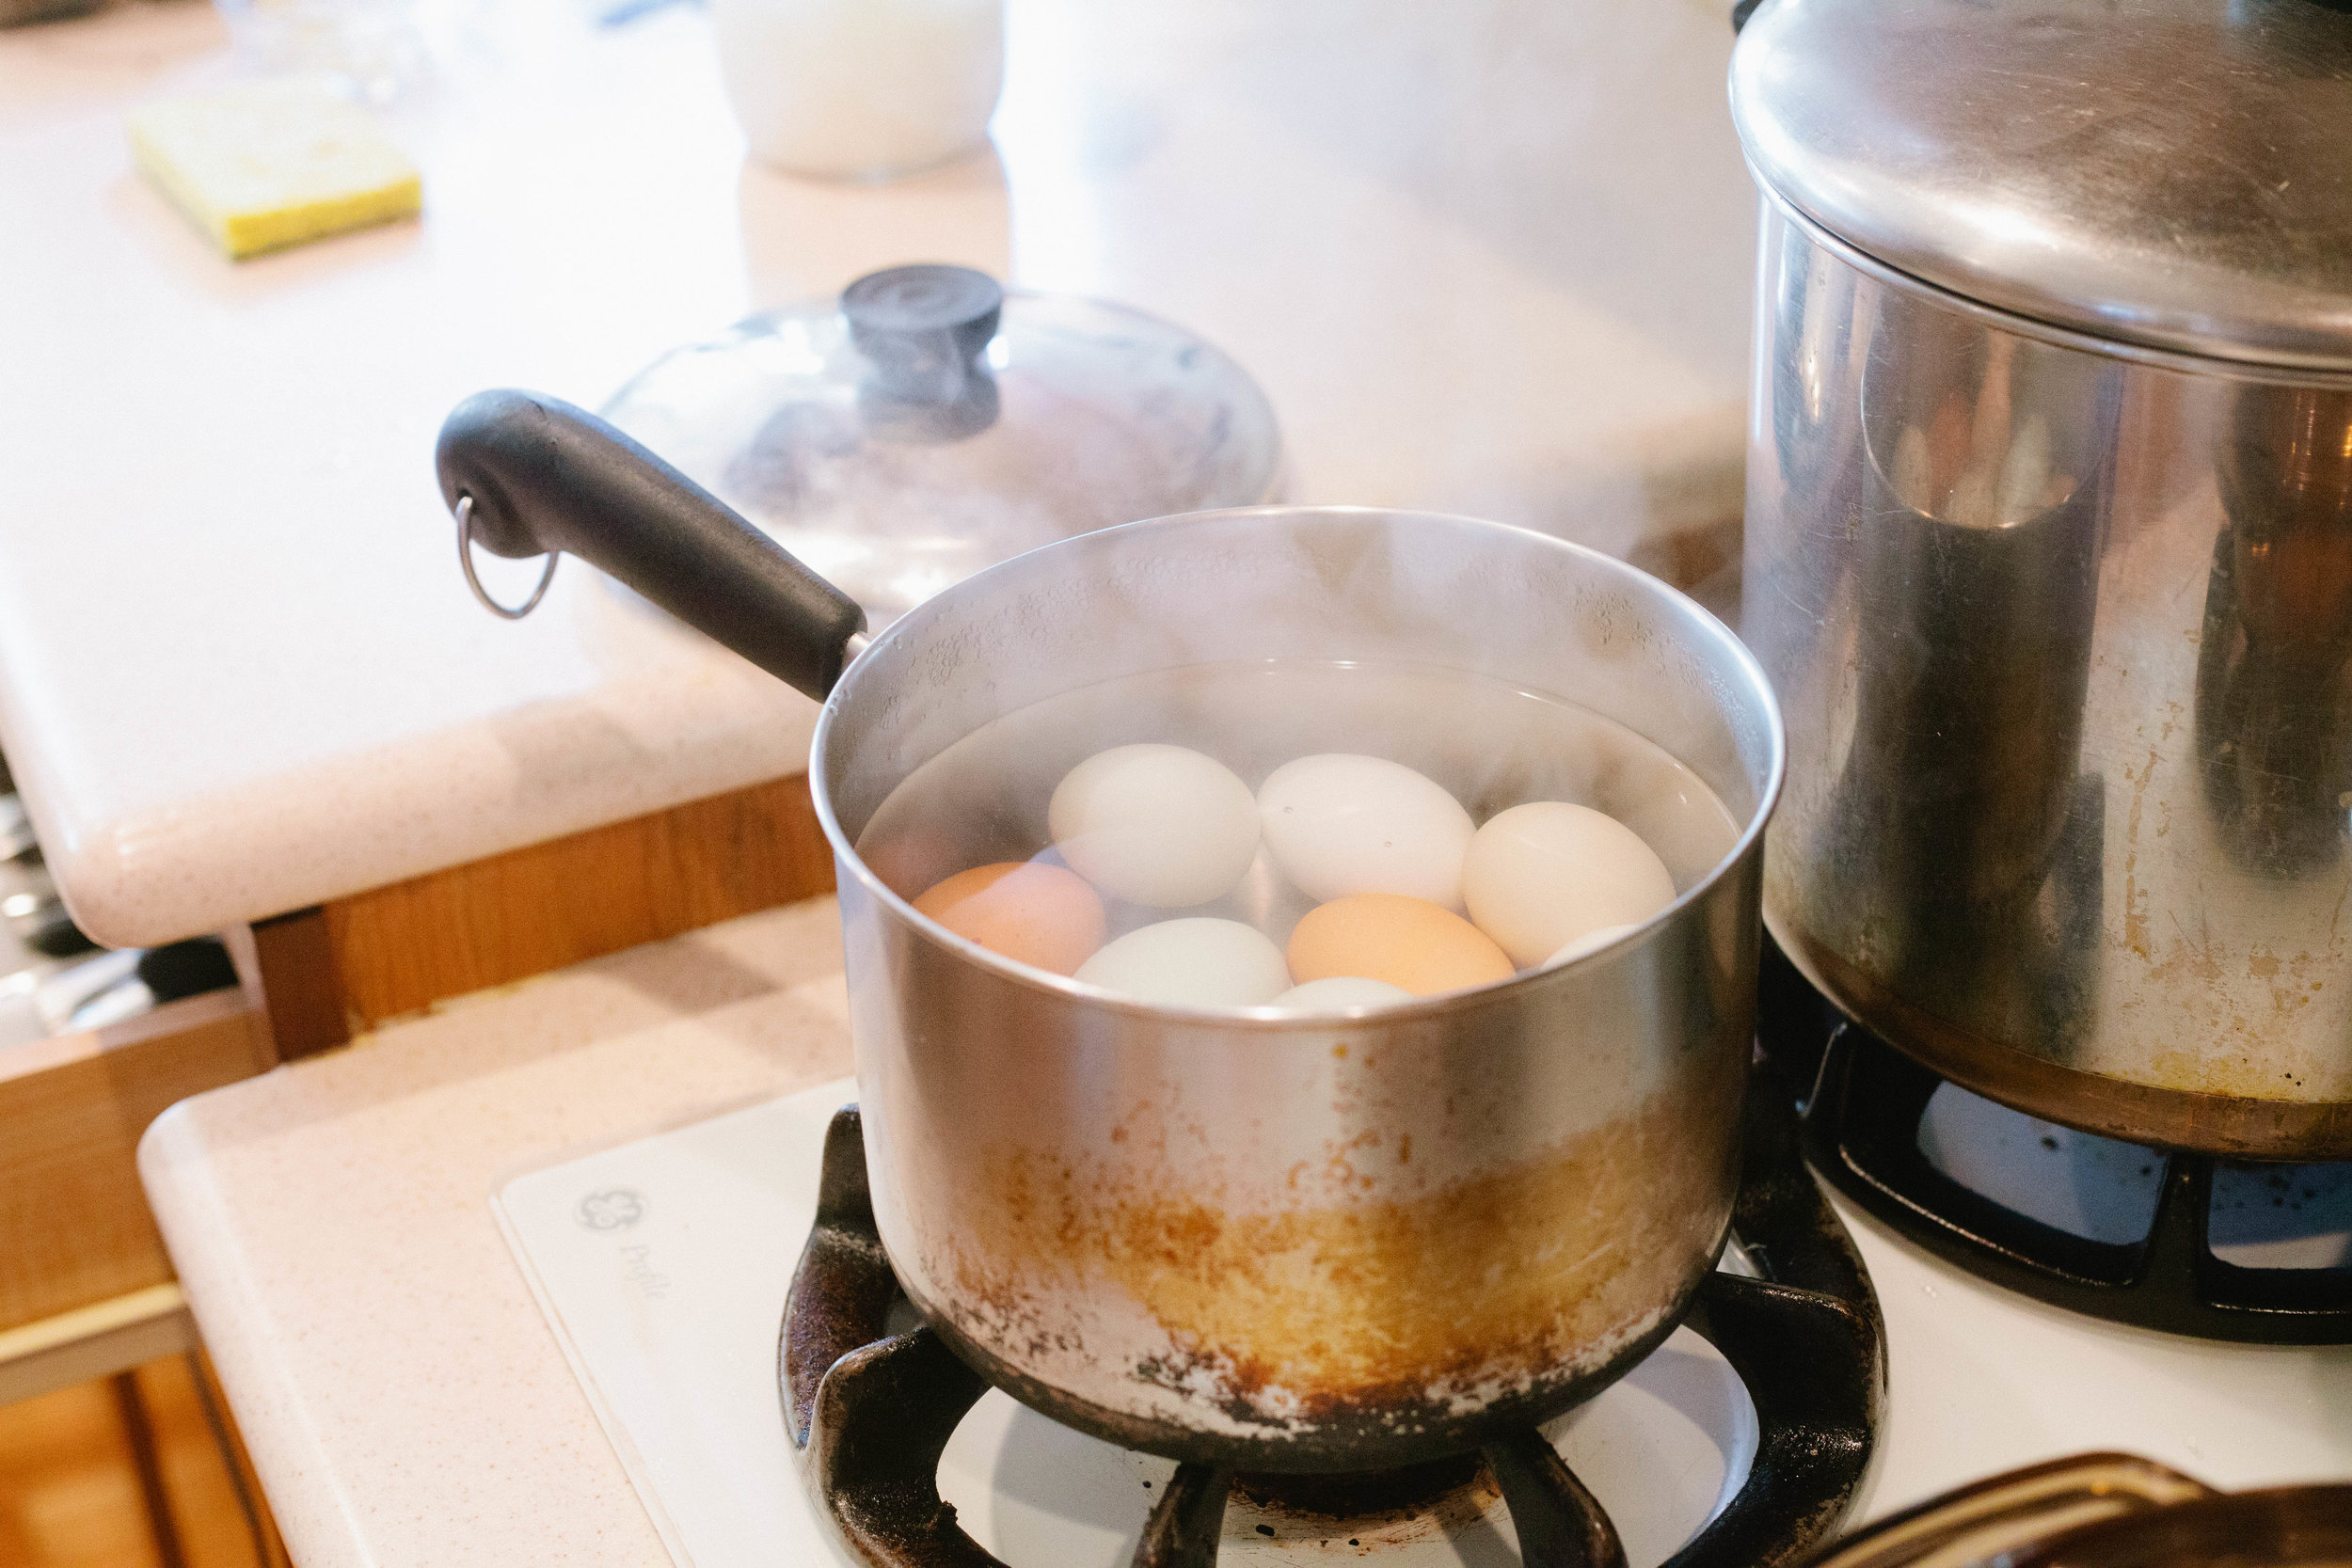
Hard boil eggs. (Recipe here)

mayo-free-egg-salad-recipe-egg-salad-on-gaps-sour-cream-egg-salad

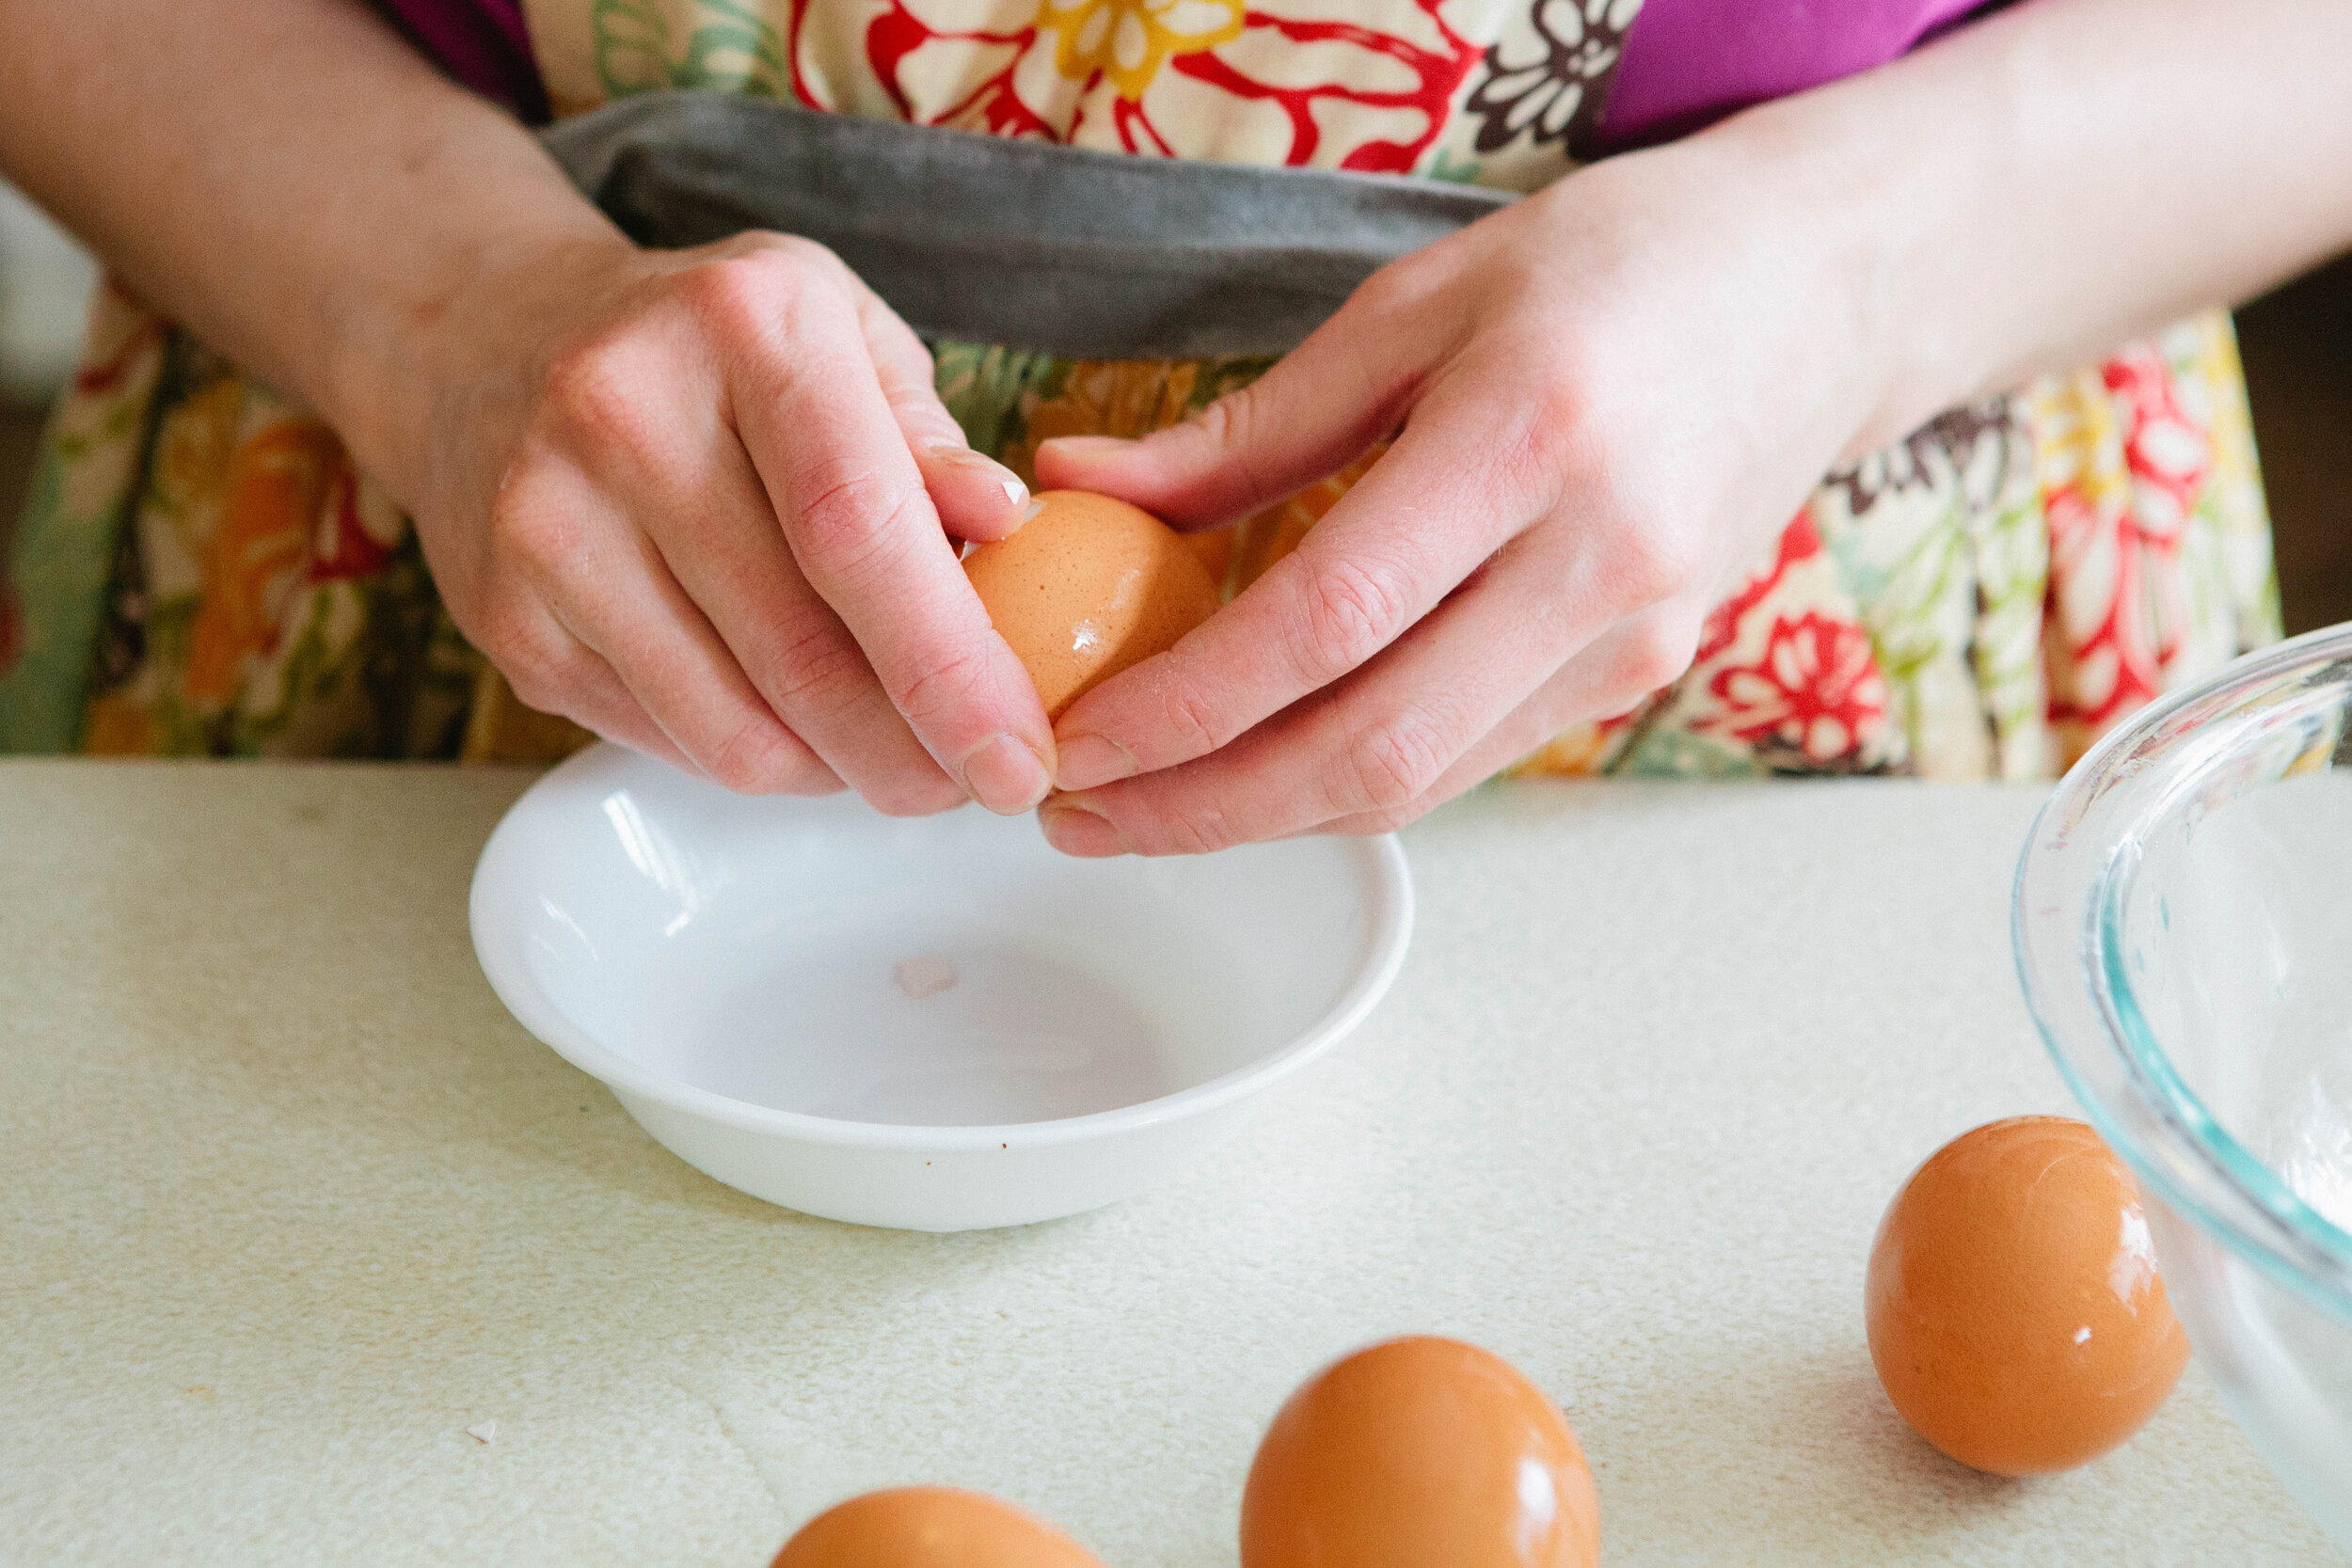
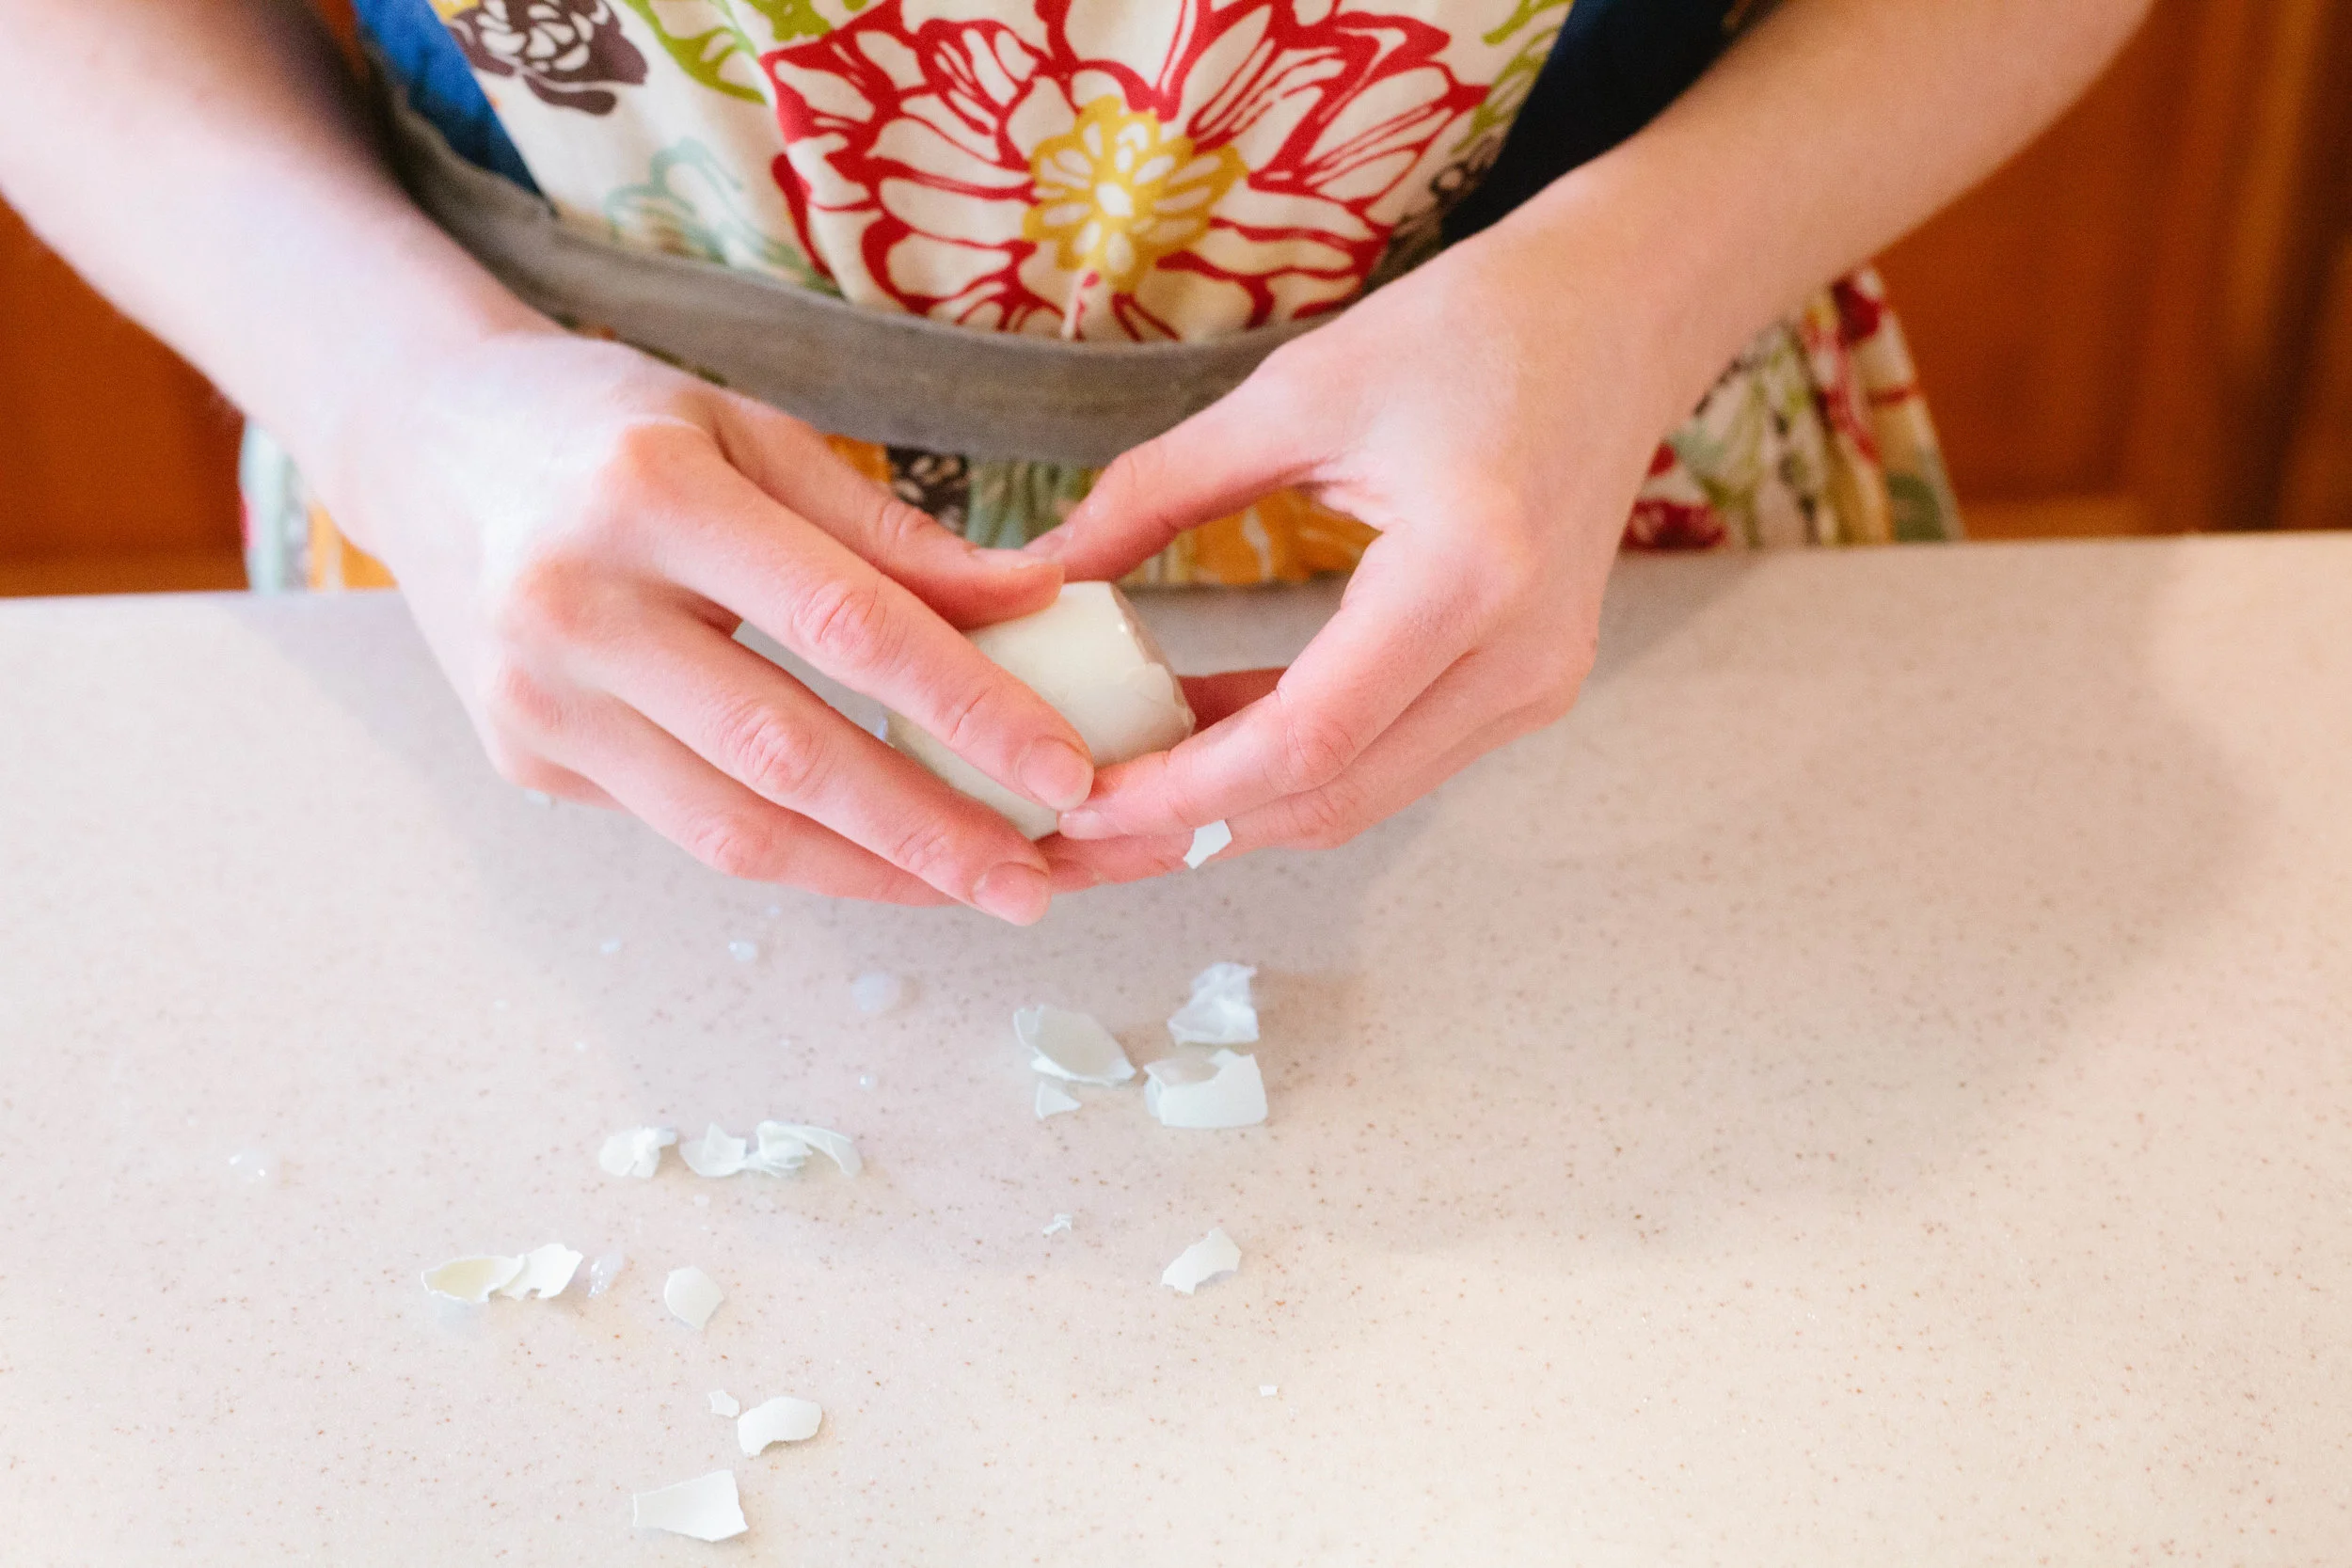
Once eggs are cooled, peel them.

mayo-free-egg-salad-recipe-egg-salad-on-gaps-sour-cream-egg-salad

Coarsely chop eggs, celery and green onion.

Add to a mixing bowl and add in pepper, salt to taste, and sour cream. 

mayo-free-egg-salad-recipe-egg-salad-on-gaps-sour-cream-egg-salad

Gently mix to coat and then sprinkle paprika over the top. Mix gently.

Serve and enjoy!

mayo-free-egg-salad-recipe-egg-salad-on-gaps-sour-cream-egg-salad

Mayo Free Egg Salad

Author:
Prep time: Cook time: Total time:

Ingredients:

  • 4 Eggs
  • ½ cup Sour Cream or Creme Fraiche
  • 1 small stalk Celery
  • 1 large Green Onion
  • ¼ - ½ tsp Salt
  • 1 tsp Pepper
  • ½ tsp Paprika
  • Parsley

Instructions:

How to cook Mayo Free Egg Salad

  1. Hard boil eggs. (Recipe here.)
  2. Once eggs are cooled, peel them.
  3. Coarsely chop eggs, celery and green onion.
  4. Add to a mixing bowl and add in pepper, salt to taste, and sour cream.
  5. Gently mix to coat and then sprinkle paprika over the top. Mix gently.
  6. Serve and enjoy!
Created using The Recipes Generator
EggSalad.png

Journey: Health and Emotions

Journey: Health and Emotions

It’s been a long time since I have written about my “thoughts on the journey” of my own healing. This is primarily because I have arrived at a pretty decent level of healing! While there are still “dusty corners” that need some attending, for the most part my day-to-day operating is what I (and others) would call healthy!

Egyptian Lentil Soup GAPS Legal Recipe

GAPS Legal Egyptian Lentil Soup

Are you getting bored with the same old flavor profile? It's easy to do, no matter what dietary guidelines you are following. Well, here is a soup to get you out of our rut!

This delicious soup is legal on Full GAPS, and have been a hit with every single one of the many people I have served it too. This is not a leftover that gets forgotten in the fridge... it has disappeared much sooner than you want it to be gone! I hope you enjoy this Egyptian lentil soup!

Egyptian Lentil Soup

Ingredients

  • 5 cups Meat Stock

  • 1 cup Dried Red Lentils, Sprouted

  • 2 cups Chopped Onions (about 1 medium onion)

  • 2 cups Chopped Cauliflower, about half a small cauliflower

  • 8 garlic cloves, peeled and left whole

  • 2 tablespoons Olive Oil or Other Fat

  • 2 tsp Ground Cumin

  • 1/2 tsp Turmeric

  • 1 tsp Salt

  • 1/3 cup Chopped Fresh Cilantro or 1 tsp Dried Cilantro

  • 3 tablespoons Fresh Lemon Juice

  • Sour Cream (optional)

  • Avocado (optional)

Directions

To sprout the red lentils, soak lentils overnight in filtered water. In the morning, rinse them with filtered water. Leave them drained with a mesh lid over the jar. Rinse every 12 hours until little tails grow, between 2 and 5 days. When they are dry, dehydrate them and store them in a jar until ready to use.

It's important to sprout the lentils for this GAPS Legal and GAPS Friendly Egyptian Lentil Soup recipe. Recipe by certified GAPS Practitioner Amy Mihaly, Be Well Clinic.

Add the lentils to the pot. After about 10-15 minutes, add cauliflower and cook for about ten minutes.

This Egyptian Lentil Soup recipe comes together easily because of the rough chop of the vegetables. Recipe by certified GAPS Practitioner Amy Mihaly, Be Well Clinic.

Roughly chop the cauliflower and onion.

Peel and crush garlic cloves. Add onions and garlic to pot.

Lower the heat and simmer 15-20 minutes or until the lentils and veggies are tender.

Take pot from stove burner and set aside for at least five minutes.

In a small saucepan, add the oil; warm over low heat until the oil is hot but not smoking.

This easy Egyptian Lentil Soup features toasted spices. It's GAPS Legal, GAPS Friendly and good for the Whole 30 and Paleo diets as well. Recipe by certified GAPS Practitioner Amy Mihaly, Be Well Clinic.

Add in the cumin, turmeric, and salt. Cook and stir constantly for 2-3 minutes or until the cumin has released its fragrance. Be careful not to scorch the spices.

Set spice mixture aside for 1 minute to cool.

Egyptian Lentil Soup is an easy GAPS Legal and GAPS Friendly recipe. Recipe by certified GAPS Practitioner Amy Mihaly, Be Well Clinic.

Stir spice mixture into the lentil mixture. Add cilantro. Stir to combine.

This Egyptian Lentil Soup recipe can be pureed to whatever consistency you'd like. It's a GAPS Friendly recipe and GAPS Legal. Recipe by certified GAPS Practitioner Amy Mihaly, Be Well Clinic.

You can puree the soup in batches in a blender or use an immersion blender. Blend to desired texture. I like to leave it a bit chunky.

Add in lemon juice, stir to combine.

Don't skip this step! The lemon really makes the soup, and if it is tasting blah and boring, you need more lemon (and probably a little more salt).

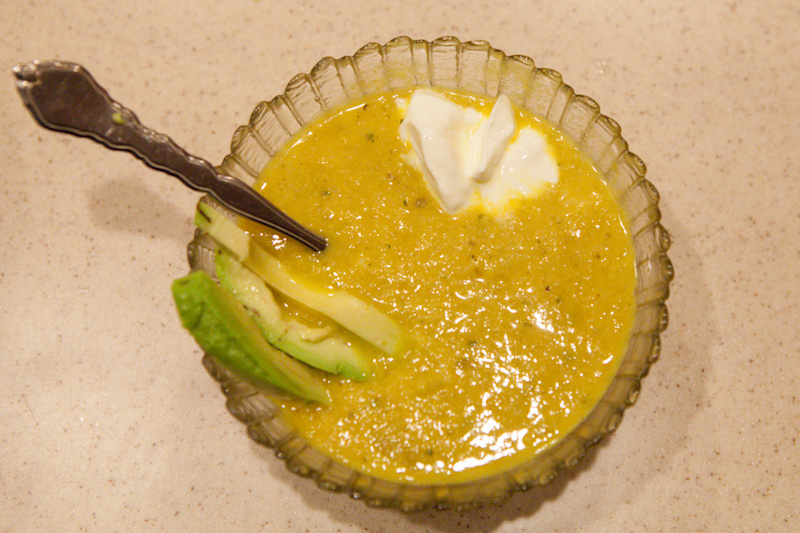
Finish your GAPS Legal Egyptian Lentil soup with a dollop of sour cream and a few slices of avocado for a healthy dose of fat. Recipe by certified GAPS Practitioner Amy Mihaly, Be Well Clinic.

Serve with a dollop of sour cream and slices of avocado. And, as always, I recommend that everyone add additional salt as needed to taste.

Note:

To make this soup go further, you can add a potato. This makes the recipe not GAPS legal and you’ll also need to add a little bit of extra stock.

Finish your GAPS Legal Egyptian Lentil soup with a dollop of sour cream and a few slices of avocado for a healthy dose of fat. Recipe by certified GAPS Practitioner Amy Mihaly, Be Well Clinic.

Egyptian Lentil Soup

Author:
prep time: cook time: total time:

ingredients:

  • 5 cups Meat Stock
  • 1 cup Dried Red Lentils, Sprouted
  • 2 cups Chopped Onions (about 1 medium onion)
  • 2 cups Chopped Cauliflower, about half a small cauliflower
  • 8 garlic cloves, peeled and left whole
  • 2 tablespoons Olive Oil or Other Fat
  • 2 tsp Ground Cumin
  • 1/2 tsp Turmeric
  • 1 tsp Salt
  • 1/3 cup Chopped Fresh Cilantro or 1 tsp Dried Cilantro
  • 3 tablespoons Fresh Lemon Juice
  • Sour Cream (optional)
  • Avocado (optional)

instructions:

How to cook Egyptian Lentil Soup

  1. To sprout the red lentils, soak lentils overnight in filtered water. In the morning, rinse them with filtered water. Leave them drained with a mesh lid over the jar. Rinse every 12 hours until little tails grow, between 2 and 5 days. When they are dry, dehydrate them and store them in a jar until ready to use.
  2. Add the lentils to the pot. After about 10-15 minutes, add cauliflower and cook for about ten minutes.
  3. Roughly chop the cauliflower and onion.
  4. Peel and crush garlic cloves. Add onions and garlic to pot.
  5. Lower the heat and simmer 15-20 minutes or until the lentils and veggies are tender.
  6. Take pot from stove burner and set aside for at least five minutes.
  7. In a small saucepan, add the oil; warm over low heat until the oil is hot but not smoking.
  8. Add in the cumin, turmeric, and salt. Cook and stir constantly for 2-3 minutes or until the cumin has released its fragrance. Be careful not to scorch the spices.
  9. Set spice mixture aside for 1 minute to cool.
  10. Stir spice mixture into the lentil mixture. Add cilantro. Stir to combine.
  11. You can puree the soup in batches in a blender or use an immersion blender. Blend to desired texture. I like to leave it a bit chunky.
  12. Add in lemon juice, stir to combine. Don't skip this step! The lemon really makes the soup, and if it is tasting blah and boring, you need more lemon (and probably a little more salt).
  13. Serve with a dollop of sour cream and slices of avocado. And, as always, I recommend that everyone add additional salt as needed to taste.
  14. Note:
  15. To make this soup go further, you can add a potato. This makes the recipe not GAPS legal and you’ll also need to add a little bit of extra stock.
Created using The Recipes Generator

Simple Easy Hollandaise Sauce Recipe

GAPS Legal Hollandaise Sauce Recipe Made with Limes

What do you do when you are bored or eggs two ways (scrambled or fried?)... make hollandaise sauce, of course!

I'm not sure how the true chefs will react to this recipe because I'm sure I don't get my hollandaise sauce as smooth as it's supposed to be, but so many of you have asked for this favorite recipe of mine that I want to share it here! I have now made this sauce dozens of times and there are a few principles I have learned about what makes this dish different than plain scrambled eggs.

#1 Don't do this in a cast-iron or your eggs will taste like iron.

#2 Lower heat makes for smoother sauce. But if you are in a hurry and don't mind lumps, more heat and less time still creates a delicious meal.

#3 The acid (lime or lemon juice) is the real key to this dish. I make my plain scrambled eggs with similar amounts of butter, but it is the lime that makes the eggs more smooth.

#4 I prefer lime over lemon because it is more mild and I feel I can add more of it without overpowering the dish. I believe this makes the hollandaise sauce easier to successfully make. After having done this many times there is a color change I look for when adding the lime juice. When I achieve this color change I know that my sauce will turn out decently smooth.

As you make this sauce, don't give up if you don't achieve your desired smoothness the first time! As with most cooking, this is an art and skill that you will get better at with practice. Enjoy your hollandaise sauce!

Simple Hollandaise Sauce

Ingredients

  • 2 eggs

  • 3 (ish) tablespoons Butter

  • ½ lime, freshly squeezed

Directions

Hollandaise-Sauce-Easy-Sauce-for-Eggs-Hollandaise-with-Limes-

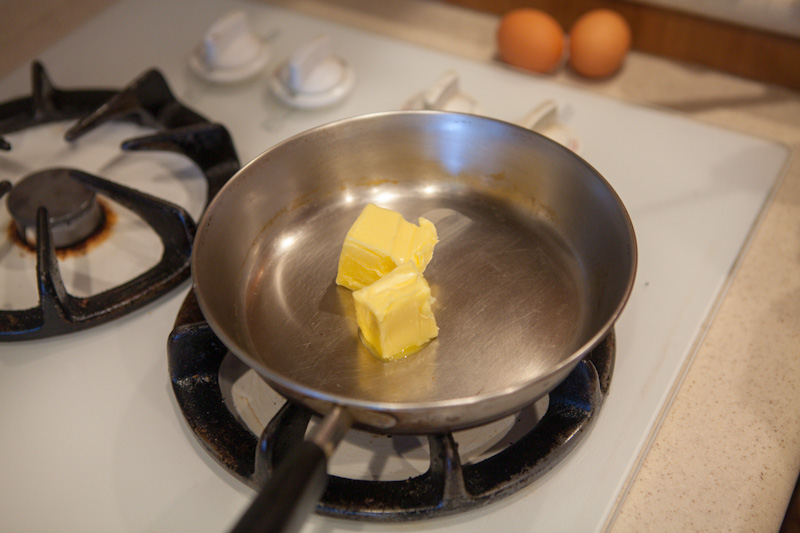
Melt butter in pan on very low heat.

Hollandaise-Sauce-Easy-Sauce-for-Eggs-Hollandaise-with-Limes

A smooth hollandaise sauce is achievable! Whisk the eggs quickly before adding to melted butter. Recipe by certified GAPS Practitioner Amy Mihaly, Be Well Clinic.

Beat two eggs in a bowl.

Hollandaise-Sauce-Easy-Sauce-for-Eggs-Hollandaise-with-Limes

Hollandaise Sauce is my most requested recipe! I eat this GAPS Legal and GAPS friendly sauce on chicken, vegetables and with eggs. It's also Whole 30 and Paleo friendly! Recipe by certified GAPS Practitioner Amy Mihaly, Be Well Clinic.

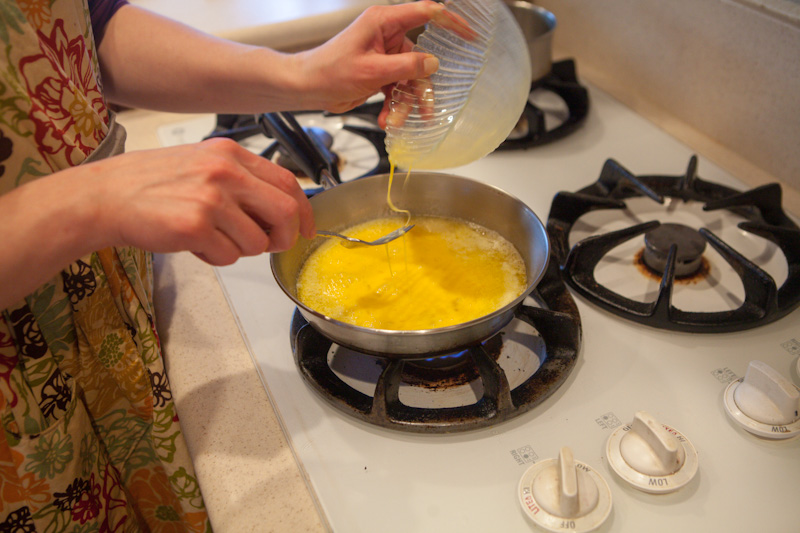
Add eggs to pan as soon as butter is melted.

Hollandaise-Sauce-Easy-Sauce-for-Eggs-Hollandaise-with-Limes

The key to making a good Hollandaise Sauce is to whisk constantly for a smooth sauce. This GAPS legal recipe couldn't be easier! Recipe by certified GAPS Practitioner Amy Mihaly, Be Well Clinic.

Mix sauce together, stirring constantly. Add lime juice. Using a whisk will get you a smoother sauce but I don’t mind a chunkier sauce.

If your eggs start to thicken, turn down your heat or add more lime juice.

Hollandaise-Sauce-Easy-Sauce-for-Eggs-Hollandaise-with-Limes

An easy simple recipe for Hollandaise Sauce with only three ingredients. This recipe is legal on the GAPS Diet, Whole 30 and Paleo. Recipe by certified GAPS Practitioner Amy Mihaly, Be Well Clinic.

The sauce is done when it holds together more and you can start to see the bottom of the pan.

Serve immediately! Serve with chicken, artichokes, vegetables.

Note:

Do not cook this is in an cast iron pan! Use a stainless steel pan with good heat protection.

HollandaiseSauce-683x1024.png

Hollandaise Sauce with Limes

Author:
prep time: cook time: total time:

ingredients:

  • 2 eggs
  • 3 (ish) tablespoons Butter
  • ½ lime, freshly squeezed

instructions:

How to cook Hollandaise Sauce with Limes

  1. Melt butter in pan on very low heat.
  2. A smooth hollandaise sauce is achievable! Whisk the eggs quickly before adding to melted butter. Recipe by certified GAPS Practitioner Amy Mihaly, Be Well Clinic.
  3. Beat two eggs in a bowl.
  4. Hollandaise Sauce is my most requested recipe! I eat this GAPS Legal and GAPS friendly sauce on chicken, vegetables and with eggs. It's also Whole 30 and Paleo friendly! Recipe by certified GAPS Practitioner Amy Mihaly, Be Well Clinic.
  5. Add eggs to pan as soon as butter is melted.
  6. The key to making a good Hollandaise Sauce is to whisk constantly for a smooth sauce. This GAPS legal recipe couldn't be easier! Recipe by certified GAPS Practitioner Amy Mihaly, Be Well Clinic.
  7. Mix sauce together, stirring constantly. Add lime juice. Using a whisk will get you a smoother sauce but I don’t mind a chunkier sauce.
  8. If your eggs start to thicken, turn down your heat or add more lime juice.
  9. An easy simple recipe for Hollandaise Sauce with only three ingredients. This recipe is legal on the GAPS Diet, Whole 30 and Paleo. Recipe by certified GAPS Practitioner Amy Mihaly, Be Well Clinic.
  10. The sauce is done when it holds together more and you can start to see the bottom of the pan.
  11. Serve immediately! Serve with chicken, artichokes, vegetables.
  12. Note:
  13. Do not cook this is in an cast iron pan! Use a stainless steel pan with good heat protection.
Created using The Recipes Generator

Swedish Gravlax Recipe

This meal is adapted from GAPS Cookbook by Dr. Natasha Campbell

This is a brined fish meal legal on GAPS stage 2. You eat little pieces, one small piece a day.

Swedish Gravlax Recipe

Ingredients for Swedish Gravlax:

  • ½ lb Fresh Wild Caught Salmon

  • Fresh Dill

  • Freshly Coarsely Ground Black Pepper

  • 4 cup Room Temperature Filtered Water

  • 1 tbsp Honey

  • 1 ½ tbsp Salt

Directions for Swedish Gravlax:

Swedish-Gravlax-Fermented-Salmon-Wild-Caught-Salmon-What-To-Do-With-Salmon-GAPS-Legal-Salmon-Recipe-GAPS-Diet-Salmon-Fish-On-GAPS-GAPS-Diet-Snack

Thinly slice the fish.

Swedish-Gravlax-Fermented-Salmon-Wild-Caught-Salmon-What-To-Do-With-Salmon-GAPS-Legal-Salmon-Recipe-GAPS-Diet-Salmon-Fish-On-GAPS-GAPS-Diet-Snack

Place fish slices into a deep tray.

Sprinkle with dill sprigs and pepper.

Swedish-Gravlax-Fermented-Salmon-Wild-Caught-Salmon-What-To-Do-With-Salmon-GAPS-Legal-Salmon-Recipe-GAPS-Diet-Salmon-Fish-On-GAPS-GAPS-Diet-Snack

Dissolve honey and salt in water to make a brine.

Pour brine over fish.

Swedish-Gravlax-Fermented-Salmon-Wild-Caught-Salmon-What-To-Do-With-Salmon-GAPS-Legal-Salmon-Recipe-GAPS-Diet-Salmon-Fish-On-GAPS-GAPS-Diet-Snack

Leave at room temperature for 1 - 1 ½ hours.

Pour the water out.

Serve on lettuce or eat alone.

Store in refrigerator and consume within two days.


Swedish Gravlax Recipe

Author:
prep time: cook time: total time:

ingredients:

  • ½ lb Fresh Wild Caught Salmon
  • Fresh Dill
  • Freshly Coarsely Ground Black Pepper
  • 4 cup Room Temperature Filtered Water
  • 1 tbsp Honey
  • 1 ½ tbsp Salt

instructions:

How to cook Swedish Gravlax Recipe

  1. Thinly slice the fish.
  2. Place fish slices into a deep tray.
  3. Sprinkle with dill sprigs and pepper.
  4. Dissolve honey and salt in water to make a brine.
  5. Pour brine over fish.
  6. Leave at room temperature for 1 - 1 ½ hours.
  7. Pour the water out.
  8. Serve on lettuce or eat alone.
  9. Store in refrigerator and consume within two days.
Created using The Recipes Generator

Chocolate Fudge Made with Coconut

GAPS Legal Chocolate Peppermint Coconut Fudge and Citrus Coconut Fudge

The GAPS Legal Fudge is a delicious holiday recipe and easy to share with family and friends! This recipe comes together quickly, besides the melting of the coconut butter and oil. I like making this recipe on a snowy day because it’s fun to chill the pans in a snowbank! It makes me feel like a pioneer.

For the citrus fudge, you can use any citrus you like. I prefer orange. You can also use all shredded coconut if you like. I prefer a little crunch in my fudge and like to add the flakes.You can make these flavors on their own and keep them separate. However, I prefer the two flavors together.

To combine the flavors, make the chocolate peppermint fudge first and put it in the freezer for 10 minutes to chill rapidly while you make the citrus fudge. Once chilled, pour the citrus fudge over the top and chill again.The fudge keeps for quite a while and doesn’t melt easily at room temperature. Even so, storing in the fridge is best.Enjoy!

Chocolate Peppermint Coconut Fudge

Ingredients for chocolate peppermint coconut fudge

  • ½ cup coconut butter

  • ½ cup coconut oil

  • ½ cup cocoa powder

  • ½ cup honey

  • 2 tsp peppermint extract or 2 drops peppermint oil

  • 1 tsp vanilla extract

  • 3/4 cup shredded coconut

  • ¼ cup coconut flakes

Directions for chocolate peppermint coconut fudge

This GAPS Legal Coconut Fudge comes in two flavors, citrus and peppermint. You can make the flavors separately but I prefer them layered together. Use coconut butter, coconut oil and coconut flakes for a delicious gluten free, dairy free and GAPS le…

Melt coconut butter on medium heat by adding water to the bottom of a pot and placing jar on top. Or add jar and water to crockpot and heat for two hours until melted.

Melt coconut oil in a separate pot. Crush coconut flakes into smaller pieces.

This GAPS Legal Coconut Fudge comes in two flavors, citrus and peppermint. You can make the flavors separately but I prefer them layered together. Use coconut butter, coconut oil and coconut flakes for a delicious gluten free, dairy free and GAPS le…

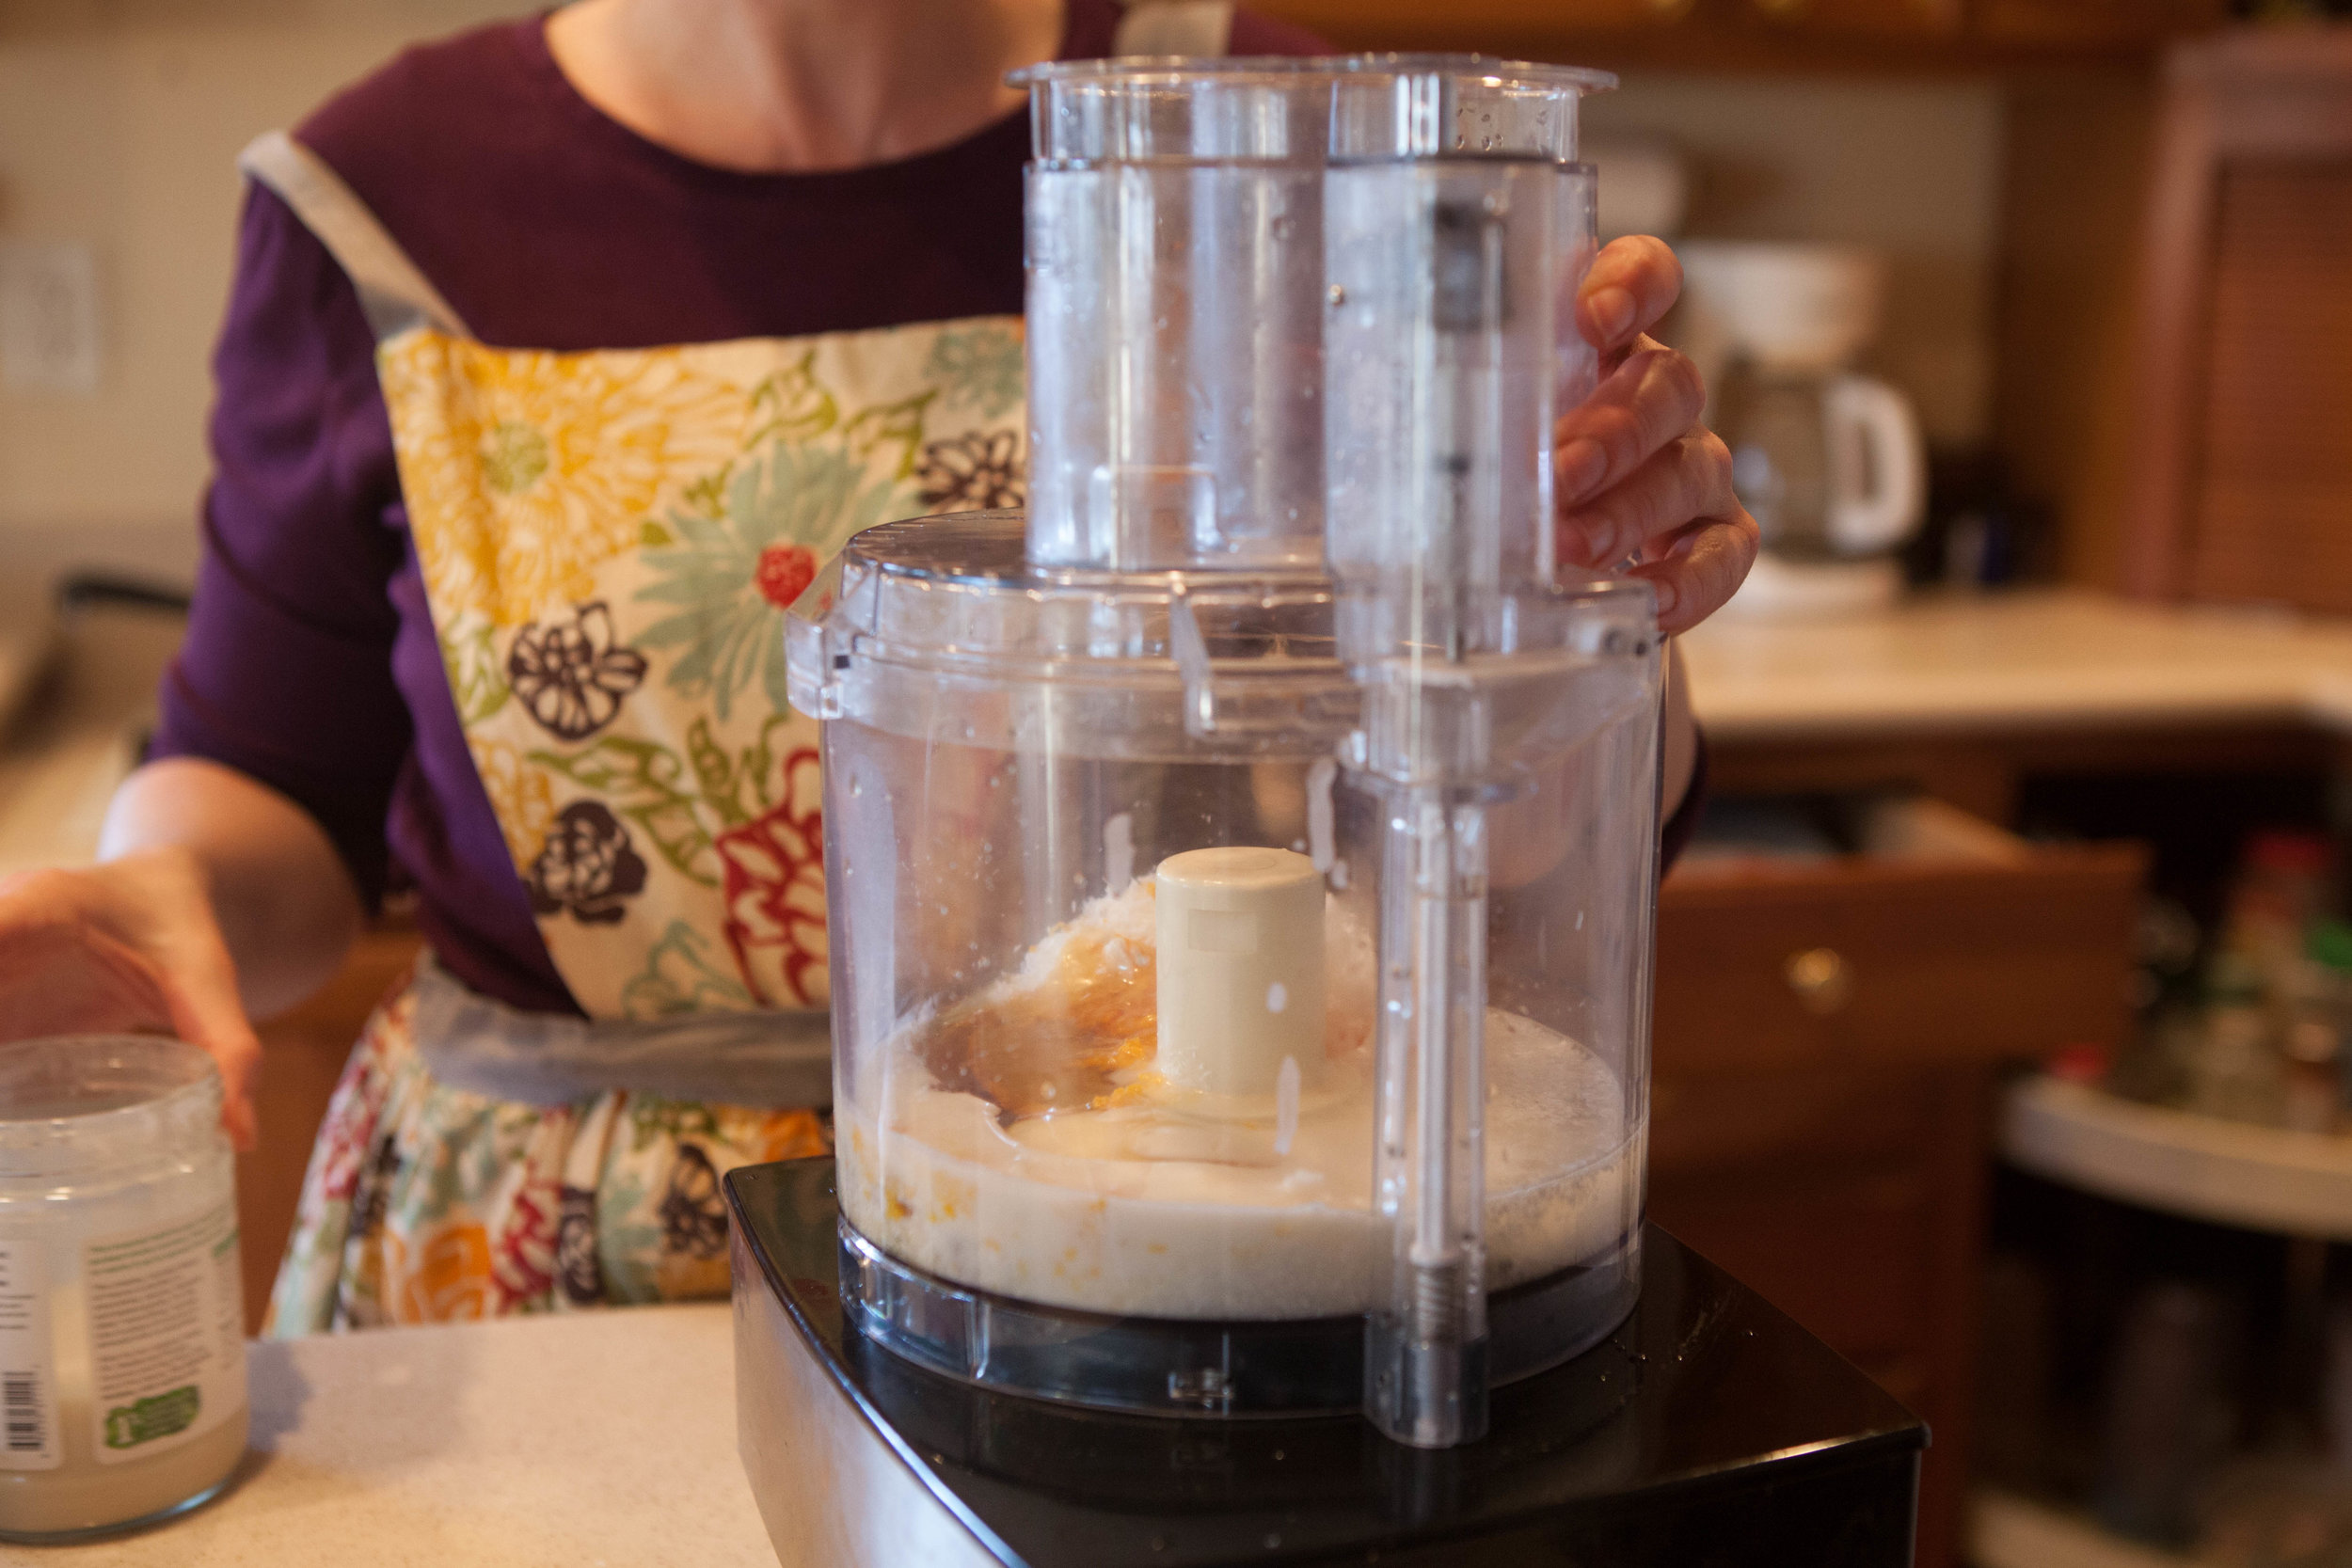
Combine coconut butter, coconut oil, cocoa powder, honey, peppermint, vanilla, shredded coconut and coconut flakes into a food processor.

This GAPS Legal Coconut Fudge comes in two flavors, citrus and peppermint. You can make the flavors separately but I prefer them layered together. Use coconut butter, coconut oil and coconut flakes for a delicious gluten free, dairy free and GAPS le…

Spread mixture into a pan.Chill for 30 minutes.

Add hot water to the sink. Float pan in mixture approx 1 minute until mixture releases from sides. Dip a knife in hot water then slice fudge into pieces.

How to Make Citrus coconut Fudge

Ingredients for citrus coconut fudge

  • ½ cup coconut butter

  • ½ cup coconut oil

  • ⅓ cup raw honey

  • 1 tbsp citrus zest

  • 2 tbs citrus juice

  • 3/4 cup shredded coconut

  • ¼ cup Coconut Flakes

Directions for citrus coconut fudge

This GAPS Legal Coconut Fudge comes in two flavors, citrus and peppermint. You can make the flavors separately but I prefer them layered together. Use coconut butter, coconut oil and coconut flakes for a delicious gluten free, dairy free and GAPS le…

Melt coconut butter on medium heat by adding water to the bottom of a pot and placing jar on top. Or add jar and water to crockpot and heat for two hours until melted. Melt coconut oil in a separate pot.

This GAPS Legal Coconut Fudge comes in two flavors, citrus and peppermint. You can make the flavors separately but I prefer them layered together. Use coconut butter, coconut oil and coconut flakes for a delicious gluten free, dairy free and GAPS le…

Combine coconut butter, coconut oil, cocoa powder, honey, peppermint, and vanilla into a food processor.

This GAPS Legal Coconut Fudge comes in two flavors, citrus and peppermint. You can make the flavors separately but I prefer them layered together. Use coconut butter, coconut oil and coconut flakes for a delicious gluten free, dairy free and GAPS le…

Spread mixture into a pan.Chill for 30 minutes.

This GAPS Legal Coconut Fudge comes in two flavors, citrus and peppermint. You can make the flavors separately but I prefer them layered together. Use coconut butter, coconut oil and coconut flakes for a delicious gluten free, dairy free and GAPS le…

Add hot water to the sink. Float pan in mixture approx 1 minute until mixture releases from sides. Dip a knife in hot water then slice fudge into pieces.


Chocolate Peppermint Fudge

Author:
prep time: cook time: total time:

ingredients:

  • ½ cup coconut butter
  • ½ cup coconut oil
  • ½ cup cocoa powder
  • ½ cup honey
  • 2 tsp peppermint extract or 2 drops peppermint oil
  • 1 tsp vanilla extract
  • 3/4 cup shredded coconut
  • ¼ cup coconut flakes

instructions:

How to cook Chocolate Peppermint Fudge

  1. Melt coconut butter on medium heat by adding water to the bottom of a pot and placing jar on top. Or add jar and water to crockpot and heat for two hours until melted.
  2. Melt coconut oil in a separate pot. Crush coconut flakes into smaller pieces.
  3. Combine coconut butter, coconut oil, cocoa powder, honey, peppermint, vanilla, shredded coconut and coconut flakes into a food processor.
  4. Spread mixture into a pan.Chill for 30 minutes.
  5. Add hot water to the sink. Float pan in mixture approx 1 minute until mixture releases from sides. Dip a knife in hot water then slice fudge into pieces.
Created using The Recipes Generator

Citrus Coconut Fudge

Author:
prep time: cook time: total time:

ingredients:

  • ½ cup coconut butter
  • ½ cup coconut oil
  • ⅓ cup raw honey
  • 1 tbsp citrus zest
  • 2 tbs citrus juice
  • 3/4 cup shredded coconut
  • ¼ cup Coconut Flakes

instructions:

How to cook Citrus Coconut Fudge

  1. Melt coconut butter on medium heat by adding water to the bottom of a pot and placing jar on top. Or add jar and water to crockpot and heat for two hours until melted. Melt coconut oil in a separate pot.
  2. Combine coconut butter, coconut oil, cocoa powder, honey, peppermint, and vanilla into a food processor.
  3. Spread mixture into a pan. Chill for 30 minutes.
  4. Add hot water to the sink. Float pan in mixture approx 1 minute until mixture releases from sides. Dip a knife in hot water then slice fudge into pieces.
Created using The Recipes Generator

Brownies Made with Dates

Dairy Free, Gluten Free, GAPS Legal Brownies Made with Dates

While these brownies are not as sweet as conventional brownies, they were deemed by some tasters on the GAPS Diet as being “Better than Brownies.” These GAPS legal brownies are dairy free, gluten free, sugar free, and egg free.

Even better, besides the 24 hour fermentation time needed for the almond flour, these brownies can be made very quickly! These brownies actually get better over time so it’s actually better to make them a day before to let the flavors meld. They would be delicious eaten alongside homemade ice cream or with homemade whipped cream and fruit.

Better Than Brownies - GAPS Legal Brownies

Ingredients for brownies made from dates

  • 2 cups of almond flour

  • 5 tablespoons Whey

  • 18 dates

  • ½ cup Filtered Water

  • 1/2 cup Coconut Oil + extra to grease the baking dish

  • ¼ cup Cacao Powder

  • ½ tsp Vanilla Extract

  • ¼ cup Cacao Nibs (optional)

  • ¼ cup Crispy Nuts (optional)

Directions for brownies made from dates

24 Hours Before:

These GAPS legal brownies were deemed as better than brownies. They are gluten free, dairy free, sugar free, egg free, and made with fermented almond flour and dates. Recipe by certified GAPS Practitioner Amy Mihaly, Be Well Clinic.

Add almond flour and cacao powder to a bowl. Use a fork to get rid of almond flour clumps.Add whey and stir to moisten.Cover and leave on counter to ferment for 24 hours.

The Next Day:

These GAPS legal brownies were deemed as better than brownies. They are gluten free, dairy free, sugar free, egg free, and made with fermented almond flour and dates. Recipe by certified GAPS Practitioner Amy Mihaly, Be Well Clinic.

Cut up 18 dates, removing the inner pit.Add ½ cup Filtered Water.

These GAPS legal brownies were deemed as better than brownies. They are gluten free, dairy free, sugar free, egg free, and made with fermented almond flour and dates. Recipe by certified GAPS Practitioner Amy Mihaly, Be Well Clinic.

Cook on low heat until dates are soft and water is absorbed, about 4-6 minutes. (think like making applesauce.) Watch closely to make sure dates don’t burn. You may need to add more water as you go depending on how dry your dates are so they’re able to fully hydrate without burning. Be sure not to add too much or it will thin the eventual date paste.

These GAPS legal brownies were deemed as better than brownies. They are gluten free, dairy free, sugar free, egg free, and made with fermented almond flour and dates. Recipe by certified GAPS Practitioner Amy Mihaly, Be Well Clinic.

When dates are soft, turn off the heat. Puree the mixture in the pot with an immersion blender or add to a blender or food processor until smooth. The smoother the date texture, the more appealing the brownies!Preheat oven to 350.Grease a baking dish or pie pan with coconut oil. Do not use a metal baking dish or the edges will burn.

These GAPS legal brownies were deemed as better than brownies. They are gluten free, dairy free, sugar free, egg free, and made with fermented almond flour and dates. Recipe by certified GAPS Practitioner Amy Mihaly, Be Well Clinic.

Combine coconut oil and dates into the almond flour mixture. If you’re using a blender, add the coconut oil to the blender and blend until smooth before adding to the flour mixture. Optionally, add cacao nibs and crispy nuts.

These GAPS legal brownies were deemed as better than brownies. They are gluten free, dairy free, sugar free, egg free, and made with fermented almond flour and dates. Recipe by certified GAPS Practitioner Amy Mihaly, Be Well Clinic.

Stir the mixture until smooth, being sure to get all the clumps out. You want the mixture to be as smooth as possible. The batter will be thick. Add batter to greased baking sheet and smooth out.

These GAPS legal brownies were deemed as better than brownies. They are gluten free, dairy free, sugar free, egg free, and made with fermented almond flour and dates. Recipe by certified GAPS Practitioner Amy Mihaly, Be Well Clinic.

Bake for 45 minutes until the knife comes out clean. Check after 30 minutes. Serve and enjoy!

Notes:

  • Instead of date paste, you can use applesauce but the brownies will not be as sweet and you will need to make your own applesauce that is thick so it creates the right consistency.

  • These brownies get better with age!

  • These are dairy free, gluten free, sugar free, egg free and legal on GAPS.


Brownies Made with Dates

Author:
prep time: cook time: total time:

ingredients:

  • 2 cups of almond flour
  • 5 tablespoons Whey
  • 18 dates
  • ½ cup Filtered Water
  • 1/2 cup Coconut Oil + extra to grease the baking dish
  • ¼ cup Cacao Powder
  • ½ tsp Vanilla Extract
  • ¼ cup Cacao Nibs (optional)
  • ¼ cup Crispy Nuts (optional)

instructions:

How to cook Brownies Made with Dates

24 Hours in Advance
  1. Add almond flour and cacao powder to a bowl. Use a fork to get rid of almond flour clumps.Add whey and stir to moisten.Cover and leave on counter to ferment for 24 hours.
The Next Day
  1. Cut up 18 dates, removing the inner pit. Add ½ cup Filtered Water.
  2. Cook on low heat until dates are soft and water is absorbed, about 4-6 minutes. (think like making applesauce.) Watch closely to make sure dates don’t burn. You may need to add more water as you go depending on how dry your dates are so they’re able to fully hydrate without burning. Be sure not to add too much or it will thin the eventual date paste.
  3. When dates are soft, turn off the heat. Puree the mixture in the pot with an immersion blender or add to a blender or food processor until smooth. The smoother the date texture, the more appealing the brownies!Preheat oven to 350.Grease a baking dish or pie pan with coconut oil. Do not use a metal baking dish or the edges will burn.
  4. Combine coconut oil and dates into the almond flour mixture. If you’re using a blender, add the coconut oil to the blender and blend until smooth before adding to the flour mixture. Optionally, add cacao nibs and crispy nuts.
  5. Stir the mixture until smooth, being sure to get all the clumps out. You want the mixture to be as smooth as possible. The batter will be thick. Add batter to greased baking sheet and smooth out.
  6. Bake for 45 minutes until the knife comes out clean. Check after 30 minutes. Serve and enjoy!
  7. Notes:
  8. Instead of date paste, you can use applesauce but the brownies will not be as sweet and you will need to make your own applesauce that is thick so it creates the right consistency.
  9. These brownies get better with age!
  10. These are dairy free, gluten free, sugar free, egg free and legal on GAPS.
Created using The Recipes Generator

Mayo Free Deviled Eggs Recipe

Mayo Free GAPS Legal Deviled Eggs 2 Ways

The story of these GAPS legal deviled eggs has a long beginning.

One of the foods I miss most? Mayonnaise. Now I know there are different mayos out there, even ones you can make yourself that are GAPS legal. But unless it tastes like the Real Mayo deliciousness that I remember, I have no interest in consuming it. I was a mayo snob long before I payed attention to what I ate!

Because I haven't found a mayo my taste buds approve of there is no mayonnaise in my refrigerator, even if it's just to make recipes like deviled eggs with. So one day when I had a hankerin' for deviled eggs I got the creative juices flowing and started experimenting with recipes. My first thought was to substitute the mayo for butter. After all, fat is the main reason deviled eggs are so good, right? A batch with butter resulted in delicious and very rich eggs, but the texture was very strange (hard), especially if refrigeration was required. Then I thought to add some sour cream to the mixture. At first I still had too much butter (50:50 ratio), but eventually found a ratio that works well—the butter adds some firmness to the "runnier" sour cream. This gives you a good base that allows you to flavor your deviled eggs as desired.

Next I wanted to come up with a dairy-free egg that my sister could enjoy. I immediately thought of using avocado as the fat. This also resulted in a delicious deviled egg, that's just a little green. I have served these eggs to many people, and as long as they know there is avocado in it, no one has had an issue with the color. And these are perfect for serving at a Dr. Seuss gathering as part of green eggs and ham! No artificial coloring required!

I have discovered that deviled egg recipes can be very familial. If these don't taste like the deviled eggs your grandma made, I encourage you to springboard off the base ingredients and modify the recipe to try and recreate your family memories. After all, that's what recipes are all about, aren't they? If you come up with something particularly delicious, we'd love if you share it with us in the comments below!

Enjoy these GAPS Legal Deviled Eggs, 2 Ways!

Dairy Free Deviled Eggs with Avocado

Ingredients for Avocado Deviled Eggs

  • 6 eggs

  • 1 medium or ½ cup Avocado

  • 1 tsp Mustard Powder

  • 1 tbsp of water

  • 1 tsp Vinegar

  • ½ tsp Honey

  • ¼ tsp Salt

  • Lemon

  • Chili Powder (optional)

  • Paprika (optional)

  • Cilantro (optional)

Directions for Avocado Deviled Eggs

Deviled-Eggs-Made-Without-Mayo-Mayo-Free-Deviled-Eggs-Deviled-Eggs-For-GAPS-Diet-Deviled-Eggs-Made-With-Sour-Cream

Fill a medium saucepan with cold water. Add eggs. Bring eggs to a boil and cook for 5-6 minutes covered.

Remove eggs from heat. Let set for 5 minutes. Test if your egg is hard boiled by removing one from the pan and spinning it. A hard boiled egg will spin upright if the yolk is hard.

Rinse the eggs under cold water or place them in an ice bath.

Deviled-Eggs-Made-Without-Mayo-Mayo-Free-Deviled-Eggs-Deviled-Eggs-For-GAPS-Diet-Deviled-Eggs-Made-With-Avocado

Peel the eggs. Peeling them while they are still a little warm will help get the shell off.

Cut the peeled eggs in half.

Deviled-Eggs-Made-Without-Mayo-Mayo-Free-Deviled-Eggs-Deviled-Eggs-For-GAPS-Diet-Deviled-Eggs-Made-With-Avocado

In a bowl, scoop out all the egg yolks. They should easily slide out with your finger.Set the egg whites onto a plate.

Crumble the egg yolks with a fork.

Deviled-Eggs-Made-Without-Mayo-Mayo-Free-Deviled-Eggs-Deviled-Eggs-For-GAPS-Diet-Deviled-Eggs-Made-With-Avocado

Mash the avocado into the egg yolks with a fork.

Add mustard powder to the egg yolk mixture.

Add water and vinegar to mixture. Mix well.

Add honey, salt and lemon. Mix well.

Deviled-Eggs-Made-Without-Mayo-Mayo-Free-Deviled-Eggs-Deviled-Eggs-For-GAPS-Diet-Deviled-Eggs-Made-With-Avocado

Fill the egg whites with a generous scoop.

Sprinkle with chili powder or paprika or top with sprigs of cilantro.

Deviled-Eggs-Made-Without-Mayo-Mayo-Free-Deviled-Eggs-Deviled-Eggs-For-GAPS-Diet-Deviled-Eggs-Made-With-Avocado

If you have leftover egg mixture, you can dip vegetables into it or smear onto scrambled eggs or crackers.

For a spicier egg, add more mustard powder!

These are legal on GAPS stage 4.


Sour Cream Deviled Eggs

Ingredients for Deviled Eggs with Sour Cream

  • 6 eggs

  • ½ c Sour Cream

  • 1 tbsp Room Temperature Butter

  • 1 - 1 ½ tsp Vinegar

  • 1 tsp Honey

  • ¼ tsp Mustard Powder

  • ⅛ tsp salt

  • Paprika (optional)

Directions for Deviled Eggs with Sour Cream

Deviled-Eggs-Made-Without-Mayo-Mayo-Free-Deviled-Eggs-Deviled-Eggs-For-GAPS-Diet-Deviled-Eggs-Made-With-Sour-Cream

Fill a medium saucepan with cold water. Add eggs. Bring eggs to a boil and cook for 5-6 minutes covered.

Remove eggs from heat. Let set for 5 minutes. Test if your egg is hard boiled by removing one from the pan and spinning it. A hard boiled egg will spin upright if the yolk is hard.

Rinse the eggs under cold water or place them in an ice bath.

Deviled-Eggs-Made-Without-Mayo-Mayo-Free-Deviled-Eggs-Deviled-Eggs-For-GAPS-Diet-Deviled-Eggs-Made-With-Sour-Cream

Peel the eggs. Peeling them while they are still a little warm will help get the shell off.

Cut the peeled eggs in half.

Deviled-Eggs-Made-Without-Mayo-Mayo-Free-Deviled-Eggs-Deviled-Eggs-For-GAPS-Diet-Deviled-Eggs-Made-With-Sour-Cream

In a bowl, scoop out all the egg yolks. They should easily slide out with your finger.

Set the egg whites onto a plate.

Crumble the egg yolks with a fork.

Deviled-Eggs-Made-Without-Mayo-Mayo-Free-Deviled-Eggs-Deviled-Eggs-For-GAPS-Diet-Deviled-Eggs-Made-With-Sour-Cream

Add the butter to the mixture and mix well.

Add the sour cream. Mix.

Add 1 tsp of the vinegar plus all the honey and salt. Mix.

Deviled-Eggs-Made-Without-Mayo-Mayo-Free-Deviled-Eggs-Deviled-Eggs-For-GAPS-Diet-Deviled-Eggs-Made-With-Sour-Cream

These are less tangy than a traditional deviled egg. To add more tang, add up to ½ tsp of vinegar.

Fill the egg whites with a generous scoop.

Sprinkle with paprika.


Mayo Free Deviled Eggs with Avocado

Author:
prep time: cook time: total time:

ingredients:

  • 6 eggs
  • 1 medium or ½ cup Avocado
  • 1 tsp Mustard Powder
  • 1 tbsp of water
  • 1 tsp Vinegar
  • ½ tsp Honey
  • ¼ tsp Salt
  • Lemon
  • Chili Powder (optional)
  • Paprika (optional)
  • Cilantro (optional

instructions:

How to cook Mayo Free Deviled Eggs with Avocado

  1. Fill a medium saucepan with cold water. Add eggs. Bring eggs to a boil and cook for 5-6 minutes covered.
  2. Remove eggs from heat. Let set for 5 minutes. Test if your egg is hard boiled by removing one from the pan and spinning it. A hard boiled egg will spin upright if the yolk is hard.
  3. Rinse the eggs under cold water or place them in an ice bath.
  4. Peel the eggs. Peeling them while they are still a little warm will help get the shell off.
  5. Cut the peeled eggs in half.
  6. In a bowl, scoop out all the egg yolks. They should easily slide out with your finger.Set the egg whites onto a plate.
  7. Crumble the egg yolks with a fork.
  8. Mash the avocado into the egg yolks with a fork.
  9. Add mustard powder to the egg yolk mixture.
  10. Add water and vinegar to mixture. Mix well.
  11. Add honey, salt and lemon. Mix well.
  12. Fill the egg whites with a generous scoop.
  13. Sprinkle with chili powder or paprika or top with sprigs of cilantro.
  14. If you have leftover egg mixture, you can dip vegetables into it or smear onto scrambled eggs or crackers.
  15. For a spicier egg, add more mustard powder!
  16. These are legal on GAPS stage 4.
Created using The Recipes Generator

Mayo Free Deviled Eggs with Sour Cream

Author:
prep time: cook time: total time:

ingredients:

  • 6 eggs
  • ½ c Sour Cream
  • 1 tbsp Room Temperature Butter
  • 1 - 1 ½ tsp Vinegar
  • 1 tsp Honey
  • ¼ tsp Mustard Powder
  • ⅛ tsp salt
  • Paprika (optional)

instructions:

How to cook Mayo Free Deviled Eggs with Sour Cream

  1. Fill a medium saucepan with cold water. Add eggs. Bring eggs to a boil and cook for 5-6 minutes covered.
  2. Remove eggs from heat. Let set for 5 minutes. Test if your egg is hard boiled by removing one from the pan and spinning it. A hard boiled egg will spin upright if the yolk is hard.
  3. Rinse the eggs under cold water or place them in an ice bath.
  4. Peel the eggs. Peeling them while they are still a little warm will help get the shell off.
  5. Cut the peeled eggs in half.
  6. In a bowl, scoop out all the egg yolks. They should easily slide out with your finger.
  7. Set the egg whites onto a plate.
  8. Crumble the egg yolks with a fork.
  9. Add the butter to the mixture and mix well.
  10. Add the sour cream. Mix.
  11. Add 1 tsp of the vinegar plus all the honey and salt. Mix.
  12. These are less tangy than a traditional deviled egg. To add more tang, add up to ½ tsp of vinegar.
  13. Fill the egg whites with a generous scoop.
  14. Sprinkle with paprika.
Created using The Recipes Generator

Honey Roasted Chicken Recipe

I've been posting some of my ol' stand by recipes, and this cinnamon-toasted honey-roasted chicken is one of the first Paleo recipes I truly enjoyed. You can tell this is an old recipe because it uses honey... something I don't usually use anymore in my baking and cooking, but I can't give it up!

Roasting a chicken is a great and simple way to make a meal. This particular roasting recipe requires a little more attention than others, as you need to baste and adjust the temperature often, but it's definitely worth it! Just make sure to set the time or you might end up with a fried-to-a-crisp chicken! Also, I recommend doing this in as small of a dish as fits your chicken. As you can see from the final pictures if the juices get too spread out they will burn! This is a larger dish than I usually use (I thought it would be pretty for the photos), and I will never use it for this recipe again! I hope you enjoy!  

Recipe Adapted from The Paleo Project by Dr. Marc Bubbs

GAPS Legal Honey Roasted Chicken Recipe Ingredients

  • 1/4 tsp ground cloves

  • 1/8 tsp ground ginger

  • 1/4 tsp ground nutmeg

  • 1/4 tsp cinnamon

  • 1 tbsp salt

  • 9 cloves of garlic

  • 2 tbsp Raw Honey

Directions for gaps legal roasted chicken with honey

IMG_1035.jpg

Preheat oven to 500 degrees.

Make your rub by mixing cloves, ginger, nutmeg, cinnamon and salt in a small bowl.

IMG_1059.jpg

Crush 5 cloves with the flat of your knife, keep 4 cloves of garlic whole.

Remove the giblets. Wash and pat dry the chicken. Make sure you dry the chicken really well so the rub will stick.

IMG_1085.jpg

Drizzle approx. 2 tbs of honey of the top of the chicken, rub both sides well.

Massage the rub on the chicken, making sure to rub both sides.

Add all garlic cloves to chicken cavity.

Cover chicken with parchment paper and aluminum foil to keep cinnamon from burning.

Roast at 500 degree for 15 min then decrease your oven to 450 for 15 minutes.

IMG_1279.jpg

Remove chicken from oven. Baste chicken with juice drippings.

Reduce oven to 425. Recover chicken and bake for approx 30 - 45  minutes until chicken reaches internal temp of 165. Uncover chicken for five more minutes then remove from oven.

IMG_1415.jpg

Let the chicken rest for 20 minutes.

Carve chicken and serve! Make sure you enjoy the skin while it’s crispy and hot!

Notes:If your chicken came with giblets, you can add them to your next batch of stock or make liver pate.

I don’t normally recommend baking with honey but for this delicious recipe I make an exception.

Save the gelatin and juices of this chicken! Once cooled, they are like candy because of the sweet honey and cinnamon.


Honey Roasted Chicken

Author:
prep time: cook time: total time:

ingredients:

  • 1/4 tsp ground cloves
  • 1/8 tsp ground ginger
  • 1/4 tsp ground nutmeg
  • 1/4 tsp cinnamon
  • 1 tbsp salt
  • 9 cloves of garlic
  • 2 tbsp Raw Honey

instructions:

How to cook Honey Roasted Chicken

  1. Preheat oven to 500 degrees.
  2. Make your rub by mixing cloves, ginger, nutmeg, cinnamon and salt in a small bowl.
  3. Crush 5 cloves with the flat of your knife, keep 4 cloves of garlic whole.
  4. Remove the giblets. Wash and pat dry the chicken. Make sure you dry the chicken really well so the rub will stick.
  5. Drizzle approx. 2 tbs of honey of the top of the chicken, rub both sides well.
  6. Massage the rub on the chicken, making sure to rub both sides.
  7. Add all garlic cloves to chicken cavity.
  8. Cover chicken with parchment paper and aluminum foil to keep cinnamon from burning.
  9. Roast at 500 degree for 15 min then decrease your oven to 450 for 15 minutes.
  10. Remove chicken from oven. Baste chicken with juice drippings.
  11. Reduce oven to 425. Recover chicken and bake for approx 30 - 45 minutes until chicken reaches internal temp of 165. Uncover chicken for five more minutes then remove from oven.
  12. Let the chicken rest for 20 minutes.
  13. Carve chicken and serve! Make sure you enjoy the skin while it’s crispy and hot!
  14. Notes:If your chicken came with giblets, you can add them to your next batch of stock or make liver pate.
  15. I don’t normally recommend baking with honey but for this delicious recipe I make an exception.
  16. Save the gelatin and juices of this chicken! Once cooled, they are like candy because of the sweet honey and cinnamon.
Created using The Recipes Generator

GAPS Legal Zucchini Pizza Bites

Recently I needed a bit of a change. I needed something exciting to eat! And I really wanted pizza. But even though I know how to make a GAPS legal pizza crust I did not want to spend the time or energy to make it. Then I came up with this brilliant idea... pizza bites... on zucchini! and what's better? They are stage 4 (and beyond) GAPS legal!

I happened to have just bought some good-quality uncured pepperoni at the store, and had some sauce in the cabinet (although if I don't happen to have that I just as easily throw a couple tomatoes in a blender and make my own sauce on the stove). I tried it, and it worked! Delicious pizza bites that really taste like pizza (with zucchini on it) and can be made to suit any taste or dietary guidelines.

Unless you can't eat zucchini, you should be able to modify this for anyone. The fat used can be anything. You could leave off the tomato sauce, or make a while sauce. You can top with anything you can tolerate. Most people can tolerate raw cheese by the time they get to full GAPS And I guarantee that even if you can't do pepperoni, there is some type of meat you can have! Part of what makes a pizza is cheese and tomato sauce, so without these you will have a little different taste, but that doesn't mean you won't have something delicious!

Ingredients for gaps friendly pizza made with zucchini:

  • Zucchini

  • 2 TBS Lard, Butter or Other Fat

  • Italian Seasonings

  • Salt & Pepper

  • Pizza Sauce (make your own or buy a sugar free version in a glass jar)

  • Mozzarella Cheese

  • Uncured Pepperoni

  • Other Pizza Toppings of Your Choice

Directions for gaps friendly pizza made with zucchini:

GAPS Legal pizza is a thing! These pizza bites are gluten free because they’re made with zucchini. Zucchini pizza bites are GAPS legal past stage four and are a great summer recipe on what to do with too much zucchini. GAPS Friendly pizza made with …

Sliced the zucchini into rounds, approx ¼ thick. Don’t slice too thin!

Add your preferred fat to a pan on medium heat. Once hot, add zucchini slices. Your zucchini should not be swimming in the fat!

GAPS Legal pizza is a thing! These pizza bites are gluten free because they’re made with zucchini. Zucchini pizza bites are GAPS legal past stage four and are a great summer recipe on what to do with too much zucchini. GAPS Friendly pizza made with …

Sprinkle zucchini slices with salt, pepper and Italian seasonings.

Grate the mozzarella cheese.

GAPS Legal pizza is a thing! These pizza bites are gluten free because they’re made with zucchini. Zucchini pizza bites are GAPS legal past stage four and are a great summer recipe on what to do with too much zucchini. GAPS Friendly pizza made with …

Once the zucchini slices are golden brown (8-10 min), flip them to the other side.

GAPS Legal pizza is a thing! These pizza bites are gluten free because they’re made with zucchini. Zucchini pizza bites are GAPS legal past stage four and are a great summer recipe on what to do with too much zucchini. GAPS Friendly pizza made with …

Spoon tomato sauce on top of each zucchini slice. Top with uncured pepperoni or other toppings of your choice and add grated mozzarella cheese. Cover for 2 - 3 minutes so the cheese melts.

GAPS Legal pizza is a thing! These pizza bites are gluten free because they’re made with zucchini. Zucchini pizza bites are GAPS legal past stage four and are a great summer recipe on what to do with too much zucchini. GAPS Friendly pizza made with …

Once the cheese is melted, your zucchini pizzas are done!

Other toppings you could try would be artichoke hearts, olives. anchovies, or cooked chicken pieces. (Think your favorite pizza toppings!) Enjoy! Careful, they are hot! Once they have cooled a little, you can cut them into fourths to be served to those with small mouths. And as any good pizza is, they are delicious cold as well!  

What are your favorite toppings? Did you find good combinations? Let us know!


Zucchini Pizza Bites

Author:
prep time: cook time: total time:

ingredients:

  • Zucchini
  • 2 TBS Lard, Butter or Other Fat
  • Italian Seasonings
  • Salt & Pepper
  • Pizza Sauce (make your own or buy a sugar free version in a glass jar)
  • Mozzarella Cheese
  • Uncured Pepperoni
  • Other Pizza Toppings of Your Choice

instructions:

How to cook Zucchini Pizza Bites

  1. Sliced the zucchini into rounds, approx ¼ thick. Don’t slice too thin!
  2. Add your preferred fat to a pan on medium heat. Once hot, add zucchini slices. Your zucchini should not be swimming in the fat!
  3. Sprinkle zucchini slices with salt, pepper and Italian seasonings.
  4. Grate the mozzarella cheese.
  5. Once the zucchini slices are golden brown (8-10 min), flip them to the other side.
  6. Spoon tomato sauce on top of each zucchini slice. Top with uncured pepperoni or other toppings of your choice and add grated mozzarella cheese. Cover for 2 - 3 minutes so the cheese melts.
  7. Once the cheese is melted, your zucchini pizzas are done!
  8. Other toppings you could try would be artichoke hearts, olives. anchovies, or cooked chicken pieces. (Think your favorite pizza toppings!) Enjoy! Careful, they are hot! Once they have cooled a little, you can cut them into fourths to be served to those with small mouths. And as any good pizza is, they are delicious cold as well!
Created using The Recipes Generator

GAPS Friendly Waffle Recipe

Recently the idea struck me to try to make a GAPS waffle. I had made many GAPS pancakes, so I thought maybe it could be done. And it turns out... it can! It was not a simple task, however.

The ratios are fairly different than a GAPS pancake... for one thing, putting in too many eggs caused it to overflow and made quite a mess. But after some trial and error I found a recipe that is delicious, and delivered consistent results (which is a big deal when cooking without flour).

I was also excited to make this a dairy-free recipe (except for the whey). Unfortunately, I can't make it nut free, the almond butter is essential! I hope you enjoy them!

GAPS Friendly Waffles

(makes about 8 waffle squares or 2 full-size waffles)

GAPs legal waffle Batter Ingredients

  • 1 cup cooked butternut squash

  • 4 TBS fermented almond butter (see note)

  • 1 TBS melted lard

  • 2 eggs

  • ¼ tsp sea salt

Additional Ingredients

  • About ¼ cup melted lard or butter to grease the waffle iron

Tools for gaps legal waffles

  • Food processor or high-powered blender

  • Waffle iron

  • Chopsticks (this is very helpful to get the waffles off in one piece)

Directions for gaps legal waffles

This recipe is quick to put together if you do a little prep work first!

Prep the Fermented Almond Butter:
At least 24 hours in advance, ferment the almond butter. Add 2 TBS whey to 1 cup almond butter. Stir. Leave at room temperature for 24 hours. This will keep in the fridge for at least 2 weeks.

Prep the Butternut Squash:
Cut the butternut squash in half and place face down on a baking sheet lined with parchment paper. Bake at 350 degrees for 35-45 min until soft. Remove the squash flesh and place in a bowl.

For the GAPS Waffles:
Combine all ingredients in a food processor and blend until very smooth and mixed.

gaps-legal-waffles-how-to-make-waffles-for-the-gaps-diet-paleo-waffles-butternut-squash-waffles-how-to-make-waffles-gaps-legal-waffle-recipe-waffles-for-the-gaps-protocol-healing-gut-waffles

I recommend pouring the mixture into a bag and using it like a pastry bag. The more quickly you can get the waffle batter on the iron and close the lid, the better it turns out!

gaps-legal-waffles-how-to-make-waffles-for-the-gaps-diet-paleo-waffles-butternut-squash-waffles-how-to-make-waffles-gaps-legal-waffle-recipe-waffles-for-the-gaps-protocol-healing-gut-waffles

When everything is ready, and the waffle iron is hot, use the pastry brush to spread fat on the upper and lower waffle irons. Do this as quickly as possible.

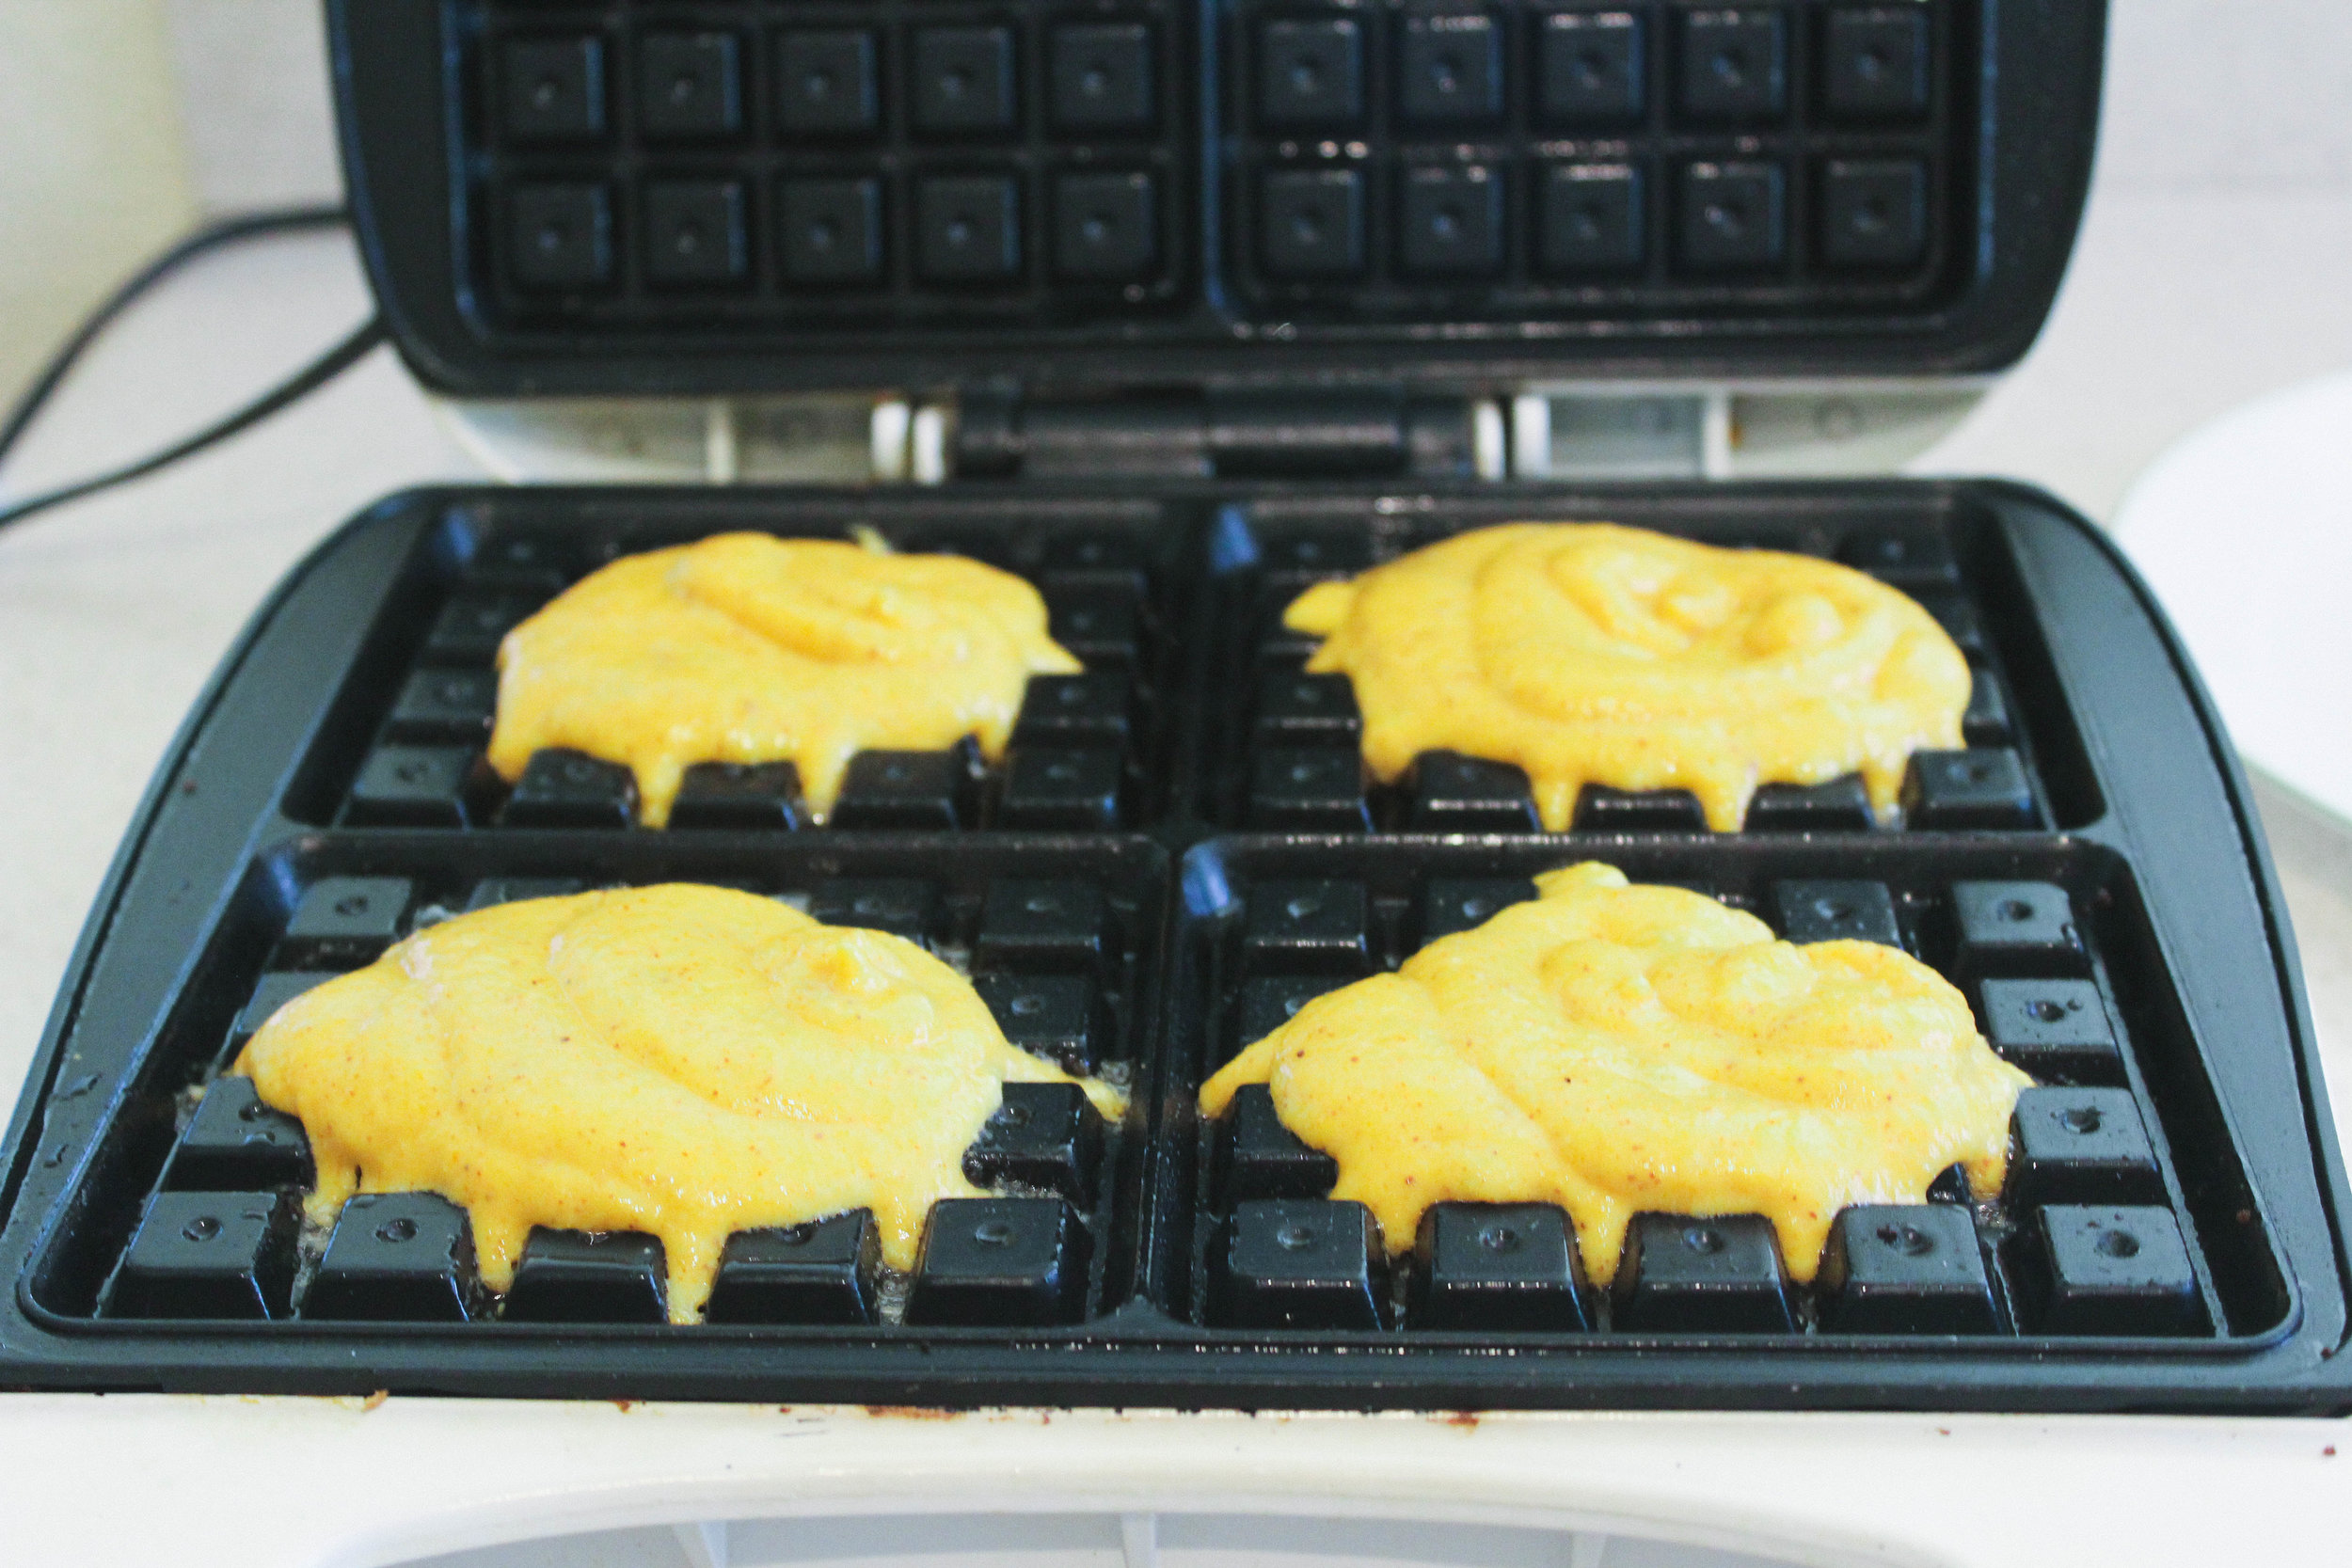
Add batter to the waffle iron, then close the lid.

gaps-legal-waffles-how-to-make-waffles-for-the-gaps-diet-paleo-waffles-butternut-squash-waffles-how-to-make-waffles-gaps-legal-waffle-recipe-waffles-for-the-gaps-protocol-healing-gut-waffles

There is a lot of moisture in this recipe, so expect a lot of steam!

Wait for the green light to go on, and then another 30 seconds or so.

Slowly open the waffle iron.

gaps-legal-waffles-how-to-make-waffles-for-the-gaps-diet-paleo-waffles-butternut-squash-waffles-how-to-make-waffles-gaps-legal-waffle-recipe-waffles-for-the-gaps-protocol-healing-gut-waffles

Remove the waffles from the iron, using the chopstick in the groves in any areas it is sticking.Top with fried eggs, honey, date syrup, berries, homemade whipped cream, or anything you want to!

gaps-legal-waffles-how-to-make-waffles-for-the-gaps-diet-paleo-waffles-butternut-squash-waffles-how-to-make-waffles-gaps-legal-waffle-recipe-waffles-for-the-gaps-protocol-healing-gut-waffles

Enjoy!


GAPS Friendly Waffle Recipe

Author:
prep time: cook time: total time:

ingredients:

Waffle Batter Ingredients
  • 1 cup cooked butternut squash
  • 4 TBS fermented almond butter (see note)
  • 1 TBS melted lard
  • 2 eggs
  • ¼ tsp sea salt
Additional Ingredients
  • About ¼ cup melted lard or butter to grease the waffle iron
Tools Needed
  • Food processor or high-powered blender
  • Waffle iron
  • Chopsticks (this is very helpful to get the waffles off in one piece)

instructions:

How to cook GAPS Friendly Waffle Recipe

  1. This recipe is quick to put together if you do a little prep work first!
  2. Prep the Fermented Almond Butter:
  3. At least 24 hours in advance, ferment the almond butter. Add 2 TBS whey to 1 cup almond butter. Stir. Leave at room temperature for 24 hours. This will keep in the fridge for at least 2 weeks.
  4. Prep the Butternut Squash:
  5. Cut the butternut squash in half and place face down on a baking sheet lined with parchment paper. Bake at 350 degrees for 35-45 min until soft. Remove the squash flesh and place in a bowl.
  6. For the GAPS Waffles:
  7. Combine all ingredients in a food processor and blend until very smooth and mixed.
  8. I recommend pouring the mixture into a bag and using it like a pastry bag. The more quickly you can get the waffle batter on the iron and close the lid, the better it turns out!
  9. When everything is ready, and the waffle iron is hot, use the pastry brush to spread fat on the upper and lower waffle irons. Do this as quickly as possible.
  10. Add batter to the waffle iron, then close the lid.
  11. There is a lot of moisture in this recipe, so expect a lot of steam!
  12. Wait for the green light to go on, and then another 30 seconds or so.
  13. Slowly open the waffle iron.
  14. Remove the waffles from the iron, using the chopstick in the groves in any areas it is sticking. Top with fried eggs, honey, date syrup, berries, homemade whipped cream, or anything you want to!
Created using The Recipes Generator

GAPS Friendly Strawberry Rhubarb Pie Recipe

Strawberry rhubarb pie has always been one of my favorites! In the past I have modified recipes to make a strawberry rhubarb dessert, but this year I decided I wanted to use my growing knowledge and skill in the kitchen and make a delicious GAPS-legal pie. My added challenges? I wanted to make it with a fermented almond crust, and use a different sweetener than honey. Finally, I wanted to have a modification that made not only GAPS legal, but dairy-free, nut-free and egg-free.

Overall, I would call the experiment a success. But to get that success I had to make more multiples of this recipe than I ever have for any previous recipe I've posted. Because of the crust. Not that my "tester" friends and family complained.

Turns out almond flour crust doesn't play nice with a wetter pie filling. Actually, the problem is that it plays too nice! It wants to combine with the filling; get up close and personal. Not what a pie crust is supposed to do. I did not fully overcome the pie-crust conundrum, but every recipe I made turned out delicious. So instead of chocking it up as a "failed recipe," I decided to share with you what I made... a good pie that happens to have a crust with boundary issues! And, of course, I will share the modified recipe for egg-free, nut-free, dairy-free strawberry rhubarb dessert. Keep reading!

Ingredients FOr Strawberry Rhubarb Pie

For the Pie Crust:

  • 2 1/2 cups almond flour

  • 1/4 cup whey (enough to moisten)

  • 1/2 cup room-temperature butter (or lard)

  • 1/2 tsp sea salt

For the Filling:

  • 3 1/2 cups rhubarb pieces

  • 2 1/2 cups sliced strawberries

  • 1/4 tsp salt

  • 1/2 cup date syrup (I use this one)

  • 2 TBS gelatin dissolved in 1/4 cup hot water

  • Optional: zest from 1/2 lemon

Directions for Strawberry Rhubarb Pie

IMG_1036.jpg

Mix almond flour and whey together. Cover and leave on the counter for 24 hours to ferment.

After 24 hours, this mixture keeps in the fridge for up to 1 week.

IMG_1054.jpg

To the fermented flour mixture, add butter or lard and sea salt. Mix well, getting all clumps out.

Then butter a pie pan well. Press the crust mixture into the pan and form a crust using your fingers.

IMG_1055.jpg

Bake at 400° for 5-8 minutes until a little dry and just turning brown.  

IMG_1019.jpg

Combine all ingredients for the filling. Let sit for 5-10 minutes until the juices increase.

IMG_1062.jpg

Add the filling to your pre-baked crust.

IMG_1136.jpg

Bake at 400° for 30-35 minutes until light brown.

Directions for Strawberry Rhubarb Dessert

A delicious nut free alternative served hot or at room temperature!

IMG_1074.jpg

Mix the filling the same, except add 2 additional TBS of gelatin and dissolve in 1/2 cup of hot water.

IMG_1081.jpg

Let the filling sit for 5-10 minutes to let the flavors mix.

Line muffin tins.

IMG_1108.jpg

Bake at 350° for 20-25 minutes until the tops are just browning.

IMG_1117.jpg

Serve warm or room temperature. These gooey treats are a bit messy, so eat with a spoon. They are delicious!  

Enjoy!


Strawberry Rhubarb Pie

Author:
prep time: cook time: total time:

ingredients:

For the Pie Crust:
  • 2 1/2 cups almond flour
  • 1/4 cup whey (enough to moisten)
  • 1/2 cup room-temperature butter (or lard)
  • 1/2 tsp sea salt
For the Filling:
  • 3 1/2 cups rhubarb pieces
  • 2 1/2 cups sliced strawberries
  • 1/4 tsp salt
  • 1/2 cup date syrup (I use this one)
  • 2 TBS gelatin dissolved in 1/4 cup hot water
  • Optional: zest from 1/2 lemon

instructions:

How to cook Strawberry Rhubarb Pie

24 Hours Before
  1. Mix almond flour and whey together. Cover and leave on the counter for 24 hours to ferment.
  2. After 24 hours, this mixture keeps in the fridge for up to 1 week.
The Next Day
  1. To the fermented flour mixture, add butter or lard and sea salt. Mix well, getting all clumps out.
  2. Then butter a pie pan well. Press the crust mixture into the pan and form a crust using your fingers.
  3. Bake at 400° for 5-8 minutes until a little dry and just turning brown.
  4. Combine all ingredients for the filling. Let sit for 5-10 minutes until the juices increase.
  5. Add the filling to your pre-baked crust.
  6. Bake at 400° for 30-35 minutes until light brown.
Created using The Recipes Generator

Strawberry Rhubarb Dessert

Author:
prep time: cook time: total time:

ingredients:

  • 3 1/2 cups rhubarb pieces
  • 2 1/2 cups sliced strawberries
  • 1/4 tsp salt
  • 1/2 cup date syrup (I use this one)
  • 2 TBS gelatin dissolved in 1/4 cup hot water
  • Optional: zest from 1/2 lemon

instructions:

How to cook Strawberry Rhubarb Dessert

  1. Mix the filling the same, except add 2 additional TBS of gelatin and dissolve in 1/2 cup of hot water.
  2. Let the filling sit for 5-10 minutes to let the flavors mix.
  3. Line muffin tins.
  4. Bake at 350° for 20-25 minutes until the tops are just browning.
  5. Serve warm or room temperature. These gooey treats are a bit messy, so eat with a spoon. They are delicious!
Created using The Recipes Generator

New Year's Resolutions: Six Habits I Recommend on a Regular Basis

New Year's Resolutions: Six Habits I Recommend on a Regular Basis

In the last post, I shared about mindsets to have (or not) that will help with successful habit change. This week I want to share about some of the habits I think are most important to consider integrating into your family. This is not an exhaustive list! These habits are simple and sound.

Buckeye Cookies

Another one of my favorite Christmas cookies are Buckeyes. These delicious cookies are traditionally peanut butter and powder sugar balls dipped in chocolate, made to look like the buckeye nut. The buckeye nut is commonly found back East, like Ohio and Michigan, where my family is originally from.

The roots for this recipe go deep in our family. Much like the Force.  

Ok, maybe not the Force (although I am excited for the new Star Wars movie that comes out this week!)

But we do make Buckeye cookies a lot. Since powdered sugar is hardly GAPS legal, I haven't had these cookies for a while either. But all that is about the change!  

Introducing Buckeye cookies, made with real food!  

These no-bake cookies are egg free, and casein and lactose free (contains whey and butter). They are also coconut free!  

Please note that while cassava flour is not technically on the GAPS-illegal list, it is still quite starchy. These cookies should be a special treat, and consumed infrequently and in small amounts. Same with cocoa powder. And, as always, observe if YOUR body is okay with this particular food at this time. Just because something is "GAPS legal" does not give you a free pass to eat it! Pay attention to what your body is telling you. But if it's telling you that these cookies are okay for you, then by all means ENJOY THEM!!!

GAPS Legal Buckeye Cookies

Makes about 48 cookies

Ingredients:

Filling:

  • 1 cup peanut butter

  • 2 cups cassava flour

  • 8 TBS whey

  • 1/2-1 cup honey

  • 8 oz butter

  • 2 tsp vanilla

Coating:

  • 1 1/2 cup cocoa butter chips

  • 1/8 cup raw honey

  • 1 TBS cocoa powder

Directions:

Prep time: Need to start this recipe 24 hours in advance, 5 minutes prep time. Then it takes about 30-45 minutes to finish on the following day.  

Filling:

IMG_0070.jpg

Twenty-four hours in advance: mix 1/2 cup peanut butter, 4 TBS whey, and 1 cup cassava flour together until everything is moist and crumbly. Try to eliminate as many clumps as possible. Leave on the countertop in a glass container with a lid. This is to give the legumes and cassava flour a chance to lacto-ferment. This makes them more digestible and increase the nutritional value. For more on why we should only eat nuts and seeds that have been properly prepared, watch my video on this.

After 24 hours, the mixture should look something like this...just a little more moist than what you started with the day before.

IMG_0087.jpg

Add to this the vanilla extract, honey and 8 oz of softened butter (it's not the end of the world if you melt it, but try not to).

I used 1 cup of honey for this recipe, and to my non-sugar eating palate they are very sweet (which is the point, I suppose)! I plan to reduce the honey by about half the next time I make this. The mixture just needs to be formed into balls.

Mix well, and smooth out as many clumps as possible. You should be able to easily for this mixture into little balls.

IMG_0085.jpg

Form the dough into 1 inch balls and place on a cookie sheet covered in parchment paper

Place the balls in the freezer to chill (about 10-15 minutes)   Next, make the coating   The most important part of making the coating is to heat things just hot enough to melt. Nothing should be cooked here! You are gently heating them up to mix. Then gradually cooling them back down again.  

IMG_0090.jpg

Using a double boiler (or as I just discovered, my glass 2 cup measuring container fits perfectly into a medium saucepan) On low heat, melt the cacao butter chips.

When they are fully melted, turn off the heat and add the honey.

Next, stir in the cocoa powder (I recommend using a whisk to mix well.) 

Finally, remove the mixture in the top half of the double boiler to the coating is allowed to start cooling   Continue whisking the coating mixture occasionally. The honey cools faster than the cocoa butter, and you need to keep them mixed.

IMG_0099.jpg

When the mixture is cool enough, remove the dough balls from the freezer. Stick a toothpick (or broken-off bamboo skewer in our case) into a ball and dip it into the coating. Depending on the temperature of the coating, you may need to dip more than once to achieve a satisfactory coating. After allowing the extra coating to drip off for a few moments, return the ball to the parchment paper.

Maintain the coating within a narow temperature margin. Keep the water from the lower part of your double-boiler ready. If your coating begins to cool too much, slip the top of the double-boiler back on top of the hot water for a minute or so to warm it back up (you probably don't need to turn on the heat). Do not let it cool too much or reheat it too quickly or too much—these can cause the chocolate to clump (this happened), and there's not going back from this. You would just need to start over making the coating.  

Traditionally the coating is darker than this recipe. I originally made a darker coating, but more cocoa powder required more honey, which seemed to throw everything off balance. I think this is part of why it clumped. Once you master the basics of temperature and consistency, you can try increasing the cocoa powder to darken the color. I will be doing that myself. In the meantime, even though this isn't as dark as traditional Buckeye cookies, the coating dries hard at room temperature. I'm calling that a win!

When they are all dipped to your satisfaction, use a toothpick to roll over the holes, filling them in.

There you have it! Rich, delicious Buckeye cookies.

Enjoy!


Buckeye Cookies

Author:
prep time: cook time: total time:

ingredients:

Filling:
  • 1 cup peanut butter
  • 2 cups cassava flour
  • 8 TBS whey
  • 1/2-1 cup honey
  • 8 oz butter
  • 2 tsp vanilla
Coating:
  • 1 1/2 cup cocoa butter chips
  • 1/8 cup raw honey
  • 1 TBS cocoa powder

instructions:

How to cook Buckeye Cookies

24 Hours in Advance:
  1. Twenty-four hours in advance: mix 1/2 cup peanut butter, 4 TBS whey, and 1 cup cassava flour together until everything is moist and crumbly. Try to eliminate as many clumps as possible. Leave on the countertop in a glass container with a lid. This is to give the legumes and cassava flour a chance to lacto-ferment. This makes them more digestible and increase the nutritional value. For more on why we should only eat nuts and seeds that have been properly prepared, watch my video onthis.
The Next Day:
  1. After 24 hours, the mixture should look something like this...just a little more moist than what you started with the day before.
  2. Add to this the vanilla extract, honey and 8 oz of softened butter (it's not the end of the world if you melt it, but try not to).
  3. I used 1 cup of honey for this recipe, and to my non-sugar eating palate they are very sweet (which is the point, I suppose)! I plan to reduce the honey by about half the next time I make this. The mixture just needs to be formed into balls.
  4. Mix well, and smooth out as many clumps as possible. You should be able to easily for this mixture into little balls.
  5. Form the dough into 1 inch balls and place on a cookie sheet covered in parchment paper
  6. Place the balls in the freezer to chill (about 10-15 minutes) Next, make the coating The most important part of making the coating is to heat things just hot enough to melt. Nothing should be cooked here! You are gently heating them up to mix. Then gradually cooling them back down again.
  7. Using a double boiler (or as I just discovered, my glass 2 cup measuring container fits perfectly into a medium saucepan) On low heat, melt the cacao butter chips.
  8. When they are fully melted, turn off the heat and add the honey.
  9. Next, stir in the cocoa powder (I recommend using a whisk to mix well.)
  10. Finally, remove the mixture in the top half of the double boiler to the coating is allowed to start cooling Continue whisking the coating mixture occasionally. The honey cools faster than the cocoa butter, and you need to keep them mixed.
  11. When the mixture is cool enough, remove the dough balls from the freezer. Stick a toothpick (or broken-off bamboo skewer in our case) into a ball and dip it into the coating. Depending on the temperature of the coating, you may need to dip more than once to achieve a satisfactory coating. After allowing the extra coating to drip off for a few moments, return the ball to the parchment paper.
  12. Maintain the coating within a narow temperature margin. Keep the water from the lower part of your double-boiler ready. If your coating begins to cool too much, slip the top of the double-boiler back on top of the hot water for a minute or so to warm it back up (you probably don't need to turn on the heat). Do not let it cool too much or reheat it too quickly or too much—these can cause the chocolate to clump (this happened), and there's not going back from this. You would just need to start over making the coating.
  13. Traditionally the coating is darker than this recipe. I originally made a darker coating, but more cocoa powder required more honey, which seemed to throw everything off balance. I think this is part of why it clumped. Once you master the basics of temperature and consistency, you can try increasing the cocoa powder to darken the color. I will be doing that myself. In the meantime, even though this isn't as dark as traditional Buckeye cookies, the coating dries hard at room temperature. I'm calling that a win!
  14. When they are all dipped to your satisfaction, use a toothpick to roll over the holes, filling them in.
  15. There you have it! Rich, delicious Buckeye cookies.
Created using The Recipes Generator