Blog — Be Well Clinic

We’re Hiring Family Nurse Practitioners and more! Click here to learn more >>

GAPS

New Year's Resolutions: How to Make Successful Habit Changes

New Year's Resolutions: How to Make Successful Habit Changes

As I'm writing this, we are almost half way through December. This time of year is about getting ready for the holidays AND the new year. As we are looking forward to the new year, most of us are thinking about new habits we want to start (or renew). But this can be tricky. You only have so much time and energy to spend on habit change, and some health trends are not actually helpful to you. I want to help you plan for this upcoming year. Let's talk about how decide what habits are right for you!

Christmas Wreath Cookies {GAPS Legal}

It's the holiday season! More specifically, it's cookie season!   I love making, giving away (and eating) Christmas cookies. But it's been a long time since I have enjoyed many of the cookies I grew up making, so this year I decided I wanted to create real-food versions of some of my favorite Christmas cookie recipes.  

First up, Christmas Wreath cookies!

  This cookie is traditionally a mix of corn flakes, marshmallows, and butter. So let's look at the ingredients...

  • The butter is already a real food!

  • Marshmallows I have made before, modified from Mommypotamus' marshmallow recipe.

So all I had to do was figure out a substitution for the corn flakes (and see if the marshmallows actually work the same as the commercial variety).   Challenge accepted!

Christmas Wreath Cookies

Makes about 36 cookies (recipe can be halved)

Ingredients

For Marshmallows

  • 2 cups honey

  • 1 cup of filtered water

  • 2 tsp vanilla

  • 1 tsp sea salt

  • 6 TBS grass-fed beef gelatin

  • 1 cup of filtered water

For Wreath Cookies

  • Marshmallow paste (above)

  • 8 ounces organic butter

  • 14 cups coconut flakes (approximately 20 ounces)

  • Red hots (my homemade recipe)

  • Natural food coloring, blue and yellow packets (I used this one)

Directions

IMG_9987.jpg

Place the coconut flakes in the oven at 200°

Toast the coconut until they are light brown—this makes the cookies crispier! When done, remove them from the oven Place in a large bowl, set aside.

IMG_9996.jpg

Melt the butter in a saucepan over low heat When melted, remove from heat and set aside   Next, make the marshmallow paste. See recipe here.

Soften the gelatin

  • Add gelatin to 1 cup hot water

  • Stir and allow to to sit, keep warm (not on stove)

While gelatin is softening... Heat honey and water in a medium saucepan (medium to high heat), stirring frequently, until it reaches the soft ball candy stage (about 235°F).

If you don't have a thermometer, you can check by dripping the heated honey into a glass of cold water. When the candy forms a ball, it is ready!

When the honey has reached the soft ball stage, remove from heat. Add the heated mixture to the softened gelatin in a large bowl. Add vanilla.

Do these steps quickly, you don't want honey mixture to cool off too much!

Whisk the mixture using an electric mixer or stand mixer for about 10 minutes.

When the mixture is thick and looks like marshmallow paste, it's done!  

If you want marshmallows, you can stop here. Put the marshmallow paste in a greased glass 9x11 dish and allow to cool and dry for a 24-36 hrs. Then cut up and serve.  

But we are not stopping here! To make traditional Christmas wreath cookies you melt the marshmallows and turn them back into paste-which is what you just created!  

Next, stir the melted butter into the mixture. It will deflate the mixture somewhat, this is normal.

Mix in the blue and yellow food coloring packets. This will turn it green (not neon green—that's an artificial color). But when it's made into wreathes it does look green—although you're going to have to take my word for it!

IMG_0006.jpg

Pour the marshmallow mixture into the bowl with the toasted coconut flakes. Mix until the flakes are coated.

Finally, form the warm mixture into wreath-shaped cookies on parchment paper.

IMG_0019.jpg

Add decorative red hots as berries (see my homemade recipe) Allow to cool.

See, I told you they look green!

All that's left is to share and enjoy these delicious treats!

Disclosure: This post contains affiliate links. Your trust is important. I only recommend products I trust. 

IMG_0021.jpg

Christmas Wreath Cookies

Author:
prep time: cook time: total time:

ingredients:

For Marshmallows
  • 2 cups honey
  • 1 cup of filtered water
  • 2 tsp vanilla
  • 1 tsp sea salt
  • 6 TBS grass-fed beef gelatin
  • 1 cup of filtered water
For Wreath Cookies
  • Marshmallow paste (above)
  • 8 ounces organic butter
  • 14 cups coconut flakes (approximately 20 ounces)
  • Red hots (my homemaderecipe)
  • Natural food coloring, blue and yellow packets (I used this one)

instructions:

How to cook Christmas Wreath Cookies

  1. Place the coconut flakes in the oven at 200°
  2. Toast the coconut until they are light brown—this makes the cookies crispier! When done, remove them from the oven Place in a large bowl, set aside.
  3. Melt the butter in a saucepan over low heat When melted, remove from heat and set aside Next, make the marshmallow paste. See recipe here.
  4. Soften the gelatin
  5. Add gelatin to 1 cup hot water
  6. Stir and allow to to sit, keep warm (not on stove)
  7. While gelatin is softening... Heat honey and water in a medium saucepan (medium to high heat), stirring frequently, until it reaches the soft ball candy stage (about 235°F).
  8. If you don't have a thermometer, you can check by dripping the heated honey into a glass of cold water. When the candy forms a ball, it is ready!
  9. When the honey has reached the soft ball stage, remove from heat. Add the heated mixture to the softened gelatin in a large bowl. Add vanilla.
  10. Do these steps quickly, you don't want honey mixture to cool off too much!
  11. Whisk the mixture using an electric mixer or stand mixer for about 10 minutes.
  12. When the mixture is thick and looks like marshmallow paste, it's done!
  13. If you want marshmallows, you can stop here. Put the marshmallow paste in a greased glass 9x11 dish and allow to cool and dry for a 24-36 hrs. Then cut up and serve.
  14. But we are not stopping here! To make traditional Christmas wreath cookies you melt the marshmallows and turn them back into paste-which is what you just created!
  15. Next, stir the melted butter into the mixture. It will deflate the mixture somewhat, this is normal.
  16. Mix in the blue and yellow food coloring packets. This will turn it green (not neon green—that's an artificial color). But when it's made into wreathes it does look green—although you're going to have to take my word for it!
  17. Pour the marshmallow mixture into the bowl with the toasted coconut flakes. Mix until the flakes are coated.
  18. Finally, form the warm mixture into wreath-shaped cookies on parchment paper.
  19. Add decorative red hots as berries (see my homemade recipe) Allow to cool.
  20. See, I told you they look green!
  21. All that's left is to share and enjoy these delicious treats!
Created using The Recipes Generator

Homemade Red Hots {GAPS Legal}

I have been getting more bold in the kitchen, and this December I decided to create alternative recipes featuring some of my favorite Christmas cookies. To enjoy.

I decided on my first cookie to make, Christmas Wreath cookies. And as I was running through my ingredients and working out substitutions I came to the decorative red hots.

And I was faced with a dilemma... could I create a red hot, or should I simply bite the bullet and just use traditional red hots. Maybe I could even find a healthy brand...

But my all-or-nothing attitude kicked in. If I was going to do this, I was going to do it right.

And that meant making red hots. From scratch. A quick search revealed that it was possible... in essence red hots are a sugar brittle flavored with spices, like cinnamon.

I knew how to make candy out of honey. This could work.

It did work. But I'll admit that when I make the Christmas Wreaths in the future I may use boughten red hots... and tell people they are just for decoration and to pick them off.  

Because making homemade red hots is a labor of love. There is no other way to put it. But being able to put healthy, three ingredient red hots on your Christmas cookies is amazing! And if you don't care if they are rounded into tiny, holly-berry decorative balls, then this is a really easy candy to make!  

GAPS Legal Homemade Red Hots / Cinnamon Hard Candy

Ingredients:

  • 1/2 cup water

  • 1 cup honey

  • 1/4-1/2 tsp cinnamon

  • 1 package natural red coloring (I used this one)

Directions:

IMG_9966.jpg

Combine the honey and water on the stovetop in a medium saucepan, stirring frequently.

You want to heat it at a temperature that is not too hot that it burns, but if it's too low it will take forever to get to temperature.

You're going to have to find your heat sweet spot. It should take between 5-10 minutes to get to soft ball stage, if it's taking longer, turn it up!

Soft ball stage occurs around 235°. If you don't have a thermometer available, you can drip some into a clear glass of cold water. It will form into a little ball upon hitting the water. For a little harder candy (I recommend this), let it go a minute or two after you hit the soft-ball stage.  

IMG_9967.jpg

After whisking thoroughly, pour the liquid onto some parchment paper to cool When it has cooled enough to touch (doesn't take very long), then use well buttered fingers to form tiny little balls

Not tolerating butter? Any fat will do—the key is to prevent sticking!

Roll those little suckers quickly... after a while the candy will get too hard to work with. You can reheat it to soften in up, but believe me, you will be ready to stop rolling balls. Better yet, recruit a friend (or two) to roll with you!

IMG_9975.jpg

Set the balls in a cold place (outside works for us right now!) When they are hard, gather them up and store them in a container in the fridge. This prevents the balls from clumping.   This candy could be made into any size (I only chose red hot size because of the Christmas wreath cookies)... or simply cooled and broken into pieces. It is a delicious treat!

Enjoy!

Disclosure: This post contains affiliate links. Your trust is important. I only recommend products I trust. 


Homemade Red Hots

Author:
prep time: cook time: total time:

ingredients:

  • 1/2 cup water
  • 1 cup honey
  • 1/4-1/2 tsp cinnamon
  • 1 package natural red coloring (I usedthis one)

instructions:

How to cook Homemade Red Hots

  1. Combine the honey and water on the stovetop in a medium saucepan, stirring frequently.
  2. You want to heat it at a temperature that is not too hot that it burns, but if it's too low it will take forever to get to temperature.
  3. You're going to have to find your heat sweet spot. It should take between 5-10 minutes to get to soft ball stage, if it's taking longer, turn it up!
  4. Soft ball stage occurs around 235°. If you don't have a thermometer available, you can drip some into a clear glass of cold water. It will form into a little ball upon hitting the water. For a little harder candy (I recommend this), let it go a minute or two after you hit the soft-ball stage.
  5. After whisking thoroughly, pour the liquid onto some parchment paper to cool When it has cooled enough to touch (doesn't take very long), then use well buttered fingers to form tiny little balls
  6. Not tolerating butter? Any fat will do—the key is to prevent sticking!
  7. Roll those little suckers quickly... after a while the candy will get too hard to work with. You can reheat it to soften in up, but believe me, you will be ready to stop rolling balls. Better yet, recruit a friend (or two) to roll with you!
  8. Set the balls in a cold place (outside works for us right now!) When they are hard, gather them up and store them in a container in the fridge. This prevents the balls from clumping. This candy could be made into any size (I only chose red hot size because of the Christmas wreath cookies)... or simply cooled and broken into pieces. It is a delicious treat!
  9. Enjoy!
Created using The Recipes Generator

Fruit Chutney for your Thanksgiving

Happy Thanksgiving!

One of the best things about November is the focus on being grateful and thankful. Everywhere you look there are posts and tweets showing gratitude. And we sure have a lot to be thankful for! Some things are so obvious we often forget to be thankful for. These are things like safe drinking water, warm houses, smart phones and electricity are so everyday for us that we forget how much we have.

Sometime this week, I encourage you to write a list of all the things you have to be thankful for. Don't feel silly including things like water, or your favorite pair of jeans. See how long you can make the list! Even if you don't feel like being thankful, I encourage you to do this exercise—gratitude changes our perception and experience of life, even if nothing is circumstantially different.

This is not to say that you don't have hard things in your life, or that you should pretend they aren't difficult. They are. Hard things are part of life and are very, very real. Remembering that there are good things in your life as well will help YOU through difficult situations.  

As you know, most of my posts (so far, at least) aren't recipes. But it's Thanksgiving! The start of holidays and delicious, rich, made-with-love food. Well this recipe is definitely delicious, rich and made-with-love!

I took the recipe out of Gut and Psychology Syndrome by Dr. Natasha Cambell-McBride. If you are following the GAPS diet this is legal on stage 5 or 6, when you are tolerating dried spices and peppercorns.

This recipe is very simple—chop and combine ingredients, simmer for a while, then store in jars. It would be a great recipe to make in a crockpot... you really could fix it and forget it! But simple doesn't mean plain. It's delicious and adds flavor to any meat you are eating. And I'm told, quite excellent with turkey!  

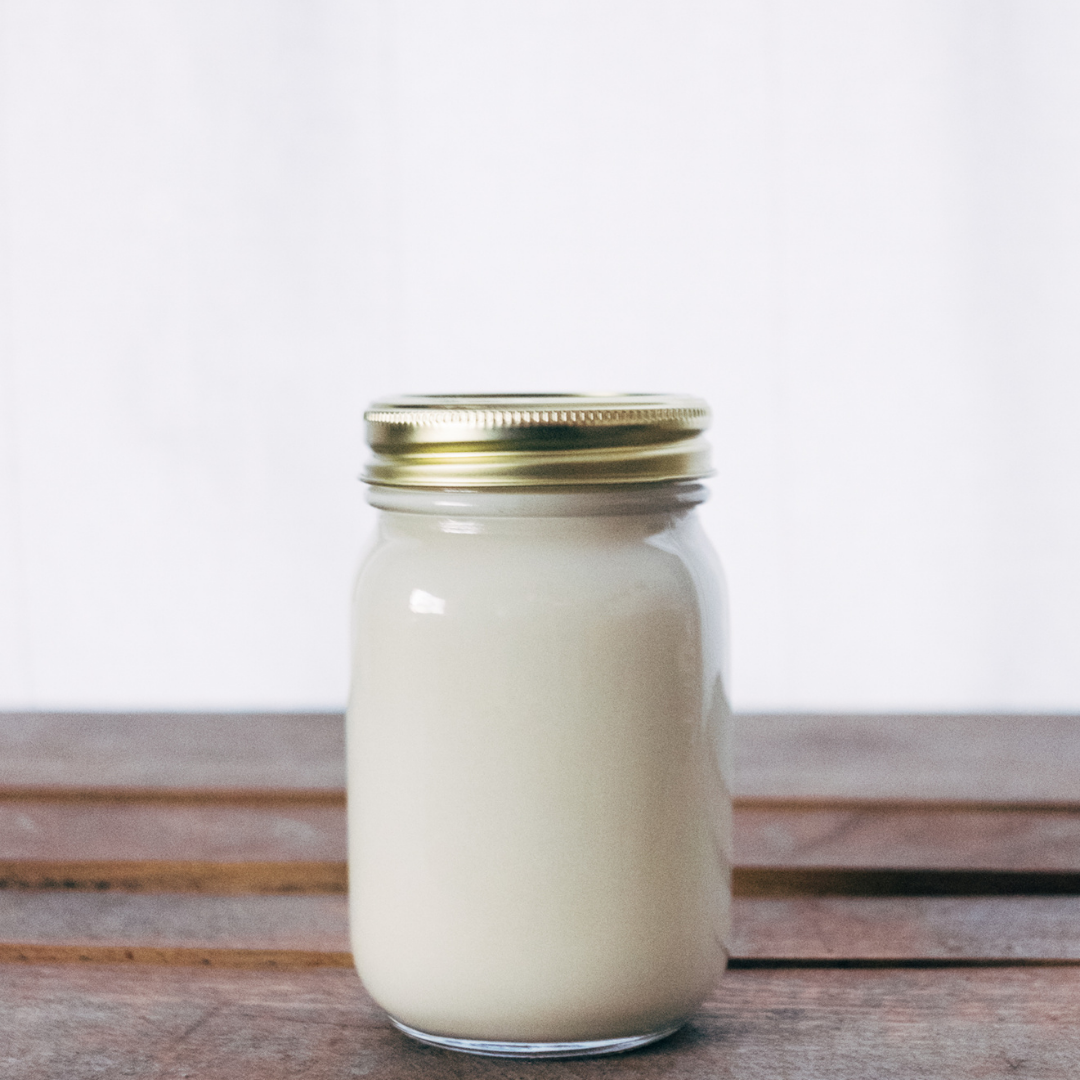
*This dairy-free, gluten-free, nut-free, sugar-free recipe would be great for gifts as well—ladle into pint jars and add a bow!

Fruit Chutney

Makes 3-4 quarts

Ingredients

  • 2 lbs dried dates (without stones, cut in half)

  • 2 lbs cooking apples (about 7 cups of pieces)

  • 1 lb plumbs (I used packaged prunes)

  • 3 medium onions (about 3 cups, finely diced)

  • 3 peppers (about 2 cups, finely diced)

  • 2 cups raw apple cider vinegar

  • 1-2 tsp whole peppercorns (freshly crushed)

  • 1-2 tsp aromatic seeds (I used cumin and dill)

  • 1 tsp cayenne pepper

  • 1-2 tsp natural salt

Directions:

Cut dates in half (and remove stones (seeds) if needed)

Slowly boil the dates in about 1 cup of water in a large pot until soft (about 10 minutes)

If you live in Colorado like me, and don't use a lid (also like me), you may need to add extra water during this process.

When the dates are soft, turn off heat and mash them with a potato masher—they don't have to be perfectly smooth, just mashed.  

While you were softening the dates, I hope you were furiously chopping! I completely underestimated the time it was going to take to chop everything I needed for this recipe. If you want the process to go smoother, I would recommend chopping everything at the beginning. Then as soon as the dates are soft you can add the rest, stir occasionally, and walk away!

The directions from Dr. Natasha are:

Add everything else to the dates and simmer 1-1/2 hours on very low heat, stirring occasionally.

If you are like me and work better with a little note of panic, then by all means, chop furiously and add things as you chop. For all you step-by-steppers like me, below are pictures to show what I added.

Sterilize the jars.

Dr. Natasha recommends doing this in an oven. I had never done this but it seemed to work great! Place cold jars in a cold oven. Heat the oven to 250°F, then leave it at that temperature for 40 minutes to sterilize the jars. Pull the jars out of the oven one-by-one as you are ready to fill them so they stay hot. Use oven mitts!

Ladle the hot chutney into the jars.

A jar funnel is a lifesaver here!

I left just a little room for air, much less than my fermenting self wanted, but no jars exploded so it must be okay!

Wipe off any chutney on the rim of the jar. Then immediately seal the jar, tightening the lid.

Again, use an oven mitt—the jars are hot!  

Place the jar on the counter, some distance between them.

It's better to not move the jars until they are cool, so place them where you will not need to move them for many hours, overnight is better.

When cool, place the jars into the refrigerator.

This is not a fermented food, so it does require refrigeration.  

Serve with meats and fish. Good cold or warm.

It's delicious! I made this for our Thanksgiving feast in a few days, but tried it out with some chicken today. I enjoyed it thoroughly! I hope you enjoy it as well!

Onward!


Fruit Chutney

Author:
prep time: cook time: total time:

ingredients:

  • 2 lbs dried dates (without stones, cut in half)
  • 2 lbs cooking apples (about 7 cups of pieces)
  • 1 lb plumbs (I used packaged prunes)
  • 3 medium onions (about 3 cups, finely diced)
  • 3 peppers (about 2 cups, finely diced)
  • 2 cups raw apple cider vinegar
  • 1-2 tsp whole peppercorns (freshly crushed)
  • 1-2 tsp aromatic seeds (I used cumin and dill)
  • 1 tsp cayenne pepper
  • 1-2 tsp natural salt

instructions:

How to cook Fruit Chutney

  1. Cut dates in half (and remove stones (seeds) if needed)
  2. Slowly boil the dates in about 1 cup of water in a large pot until soft (about 10 minutes)
  3. If you live in Colorado like me, and don't use a lid (also like me), you may need to add extra water during this process.
  4. When the dates are soft, turn off heat and mash them with a potato masher—they don't have to be perfectly smooth, just mashed.
  5. While you were softening the dates, I hope you were furiously chopping! I completely underestimated the time it was going to take to chop everything I needed for this recipe. If you want the process to go smoother, I would recommend chopping everything at the beginning. Then as soon as the dates are soft you can add the rest, stir occasionally, and walk away!
  6. The directions from Dr. Natasha are:
  7. Add everything else to the dates and simmer 1-1/2 hours on very low heat, stirring occasionally.
  8. If you are like me and work better with a little note of panic, then by all means, chop furiously and add things as you chop. For all you step-by-steppers like me, below are pictures to show what I added.
  9. Sterilize the jars.
  10. Dr. Natasha recommends doing this in an oven. I had never done this but it seemed to work great! Place cold jars in a cold oven. Heat the oven to 250°F, then leave it at that temperature for 40 minutes to sterilize the jars. Pull the jars out of the oven one-by-one as you are ready to fill them so they stay hot. Use oven mitts!
  11. Ladle the hot chutney into the jars.
  12. A jar funnel is a lifesaver here!
  13. I left just a little room for air, much less than my fermenting self wanted, but no jars exploded so it must be okay!
  14. Wipe off any chutney on the rim of the jar. Then immediately seal the jar, tightening the lid.
  15. Again, use an oven mitt—the jars are hot!
  16. Place the jar on the counter, some distance between them.
  17. It's better to not move the jars until they are cool, so place them where you will not need to move them for many hours, overnight is better.
  18. When cool, place the jars into the refrigerator.
  19. This is not a fermented food, so it does require refrigeration.
  20. Serve with meats and fish. Good cold or warm.
Created using The Recipes Generator

Fermented Garlic: A Powerful Food for Health

Fermented Garlic: A Powerful Food for Health

Heard of fermented garlic? Wondered what the health benefits of garlic are? Then this post is for you!

The Silver Lining to the Omnivore's Dilemma

The Silver Lining to the Omnivore's Dilemma

In 2006, a book was published that sought to give the reader a better understanding of where their food comes from. The Omnivore’s Dilemma by Michael Pollan followed three major tracks, or sourcing, of food. The public reaction to this book was significant and varied, and it evoked discussion from vegetarians and meat-lovers alike.

Immunity: The Best Defense is a Good Offense {Part One}

Immunity: The Best Defense is a Good Offense {Part One}

Fall is coming! I hope you have been enjoying the cooler nights (and sometimes day) like I have! The onset of cooler weather also means that cold and flu season is coming!

The Influence of Diet on Concussions

Concussions

From 2001 to 2012 the rate of concussions and traumatic brain injury (TBI) in children aged 0-19 years (as diagnosed in the emergency room) more than doubled. Males are statically more likely (almost twice) to get concussions as females, and concussions or TBIs in children under 20 years of age make up about 70% of all traumatic head injuries in America (source). I didn't quote these statistics so you will pull your child from sports, or make them wear a helmet every minute of the day, but because there is a reason for this trend, and if it is addressed, this harmful trend could be reversed.   And that reason is... you guessed it... related to diet!

Here are some factors that play into the increasing risk of concussions and TBIs:  

  • A decrease in the consumption of nutrient-dense foods and saturated animal fats.

  • An increase in consumption of processed foods and trans-fat vegetable oils.

  • A decrease in sun exposure due to a fear of skin cancer and the heavy application of sunscreen.

  • An increase in toxins, including aluminum and glyphosate.

  Let's look at each one in a little more detail...

Nutrient-dense Foods and Saturated Fat

When we began eating less red meat and animal fat, we started seeing deficiencies in nutrients important for brain health. This includes sulfur, magnesium, zinc, vitamin D, the B vitamins, and omega-3, especially DHA. That is because, in general, these are more nutrients present and/or bio-available in animal foods than in plant foods. Not only do we need all these nutrients to maintain healthy cells, but we need omega-3 fatty acids to buffer the effects of glutamate, a neurotransmitter released in response to inflammation, among other things (source).

Processed Foods and Trans-fat Oils

We have replaced many of the animal foods we used to eat with processed products. Not only are these foods low in bio-available nutrients, but they contain chemicals, dyes and preservatives, many of which are known neurotoxins. Around the same time, we also started commercializing real food, and vegetables, grains and animals began to be raised with pesticides, hormones, antibiotics and dyes. Additionally, unstable vegetable oils high in trans-fats, free radicals and unstable bonds were sold as "healthier" animal fat replacements.

Sun Exposure

It has only been in recent human history that we have worn sunscreen. For a time we believed it prevented skin cancer (this has been proved untrue). What we do now know is that sun exposure is necessary to build up sufficient levels of sulfate (the oxidized form of sulfur), which helps our brains clean and repair, as well as make hormones like melatonin, serotonin, dopamine and norepinephrine. Sun exposure also helps us make some of our daily vitamin D3 (source).

Toxin Exposure

We are exposed to significantly more toxins today then we were 50 or 100 years ago. Two toxins that have a know link to brain damage are aluminum and glyphosate. Exposure comes food, water, cookware vaccines, even the air. Both of these toxins are harmful on their own, but when they are both present there is a synergistic effect, which increases the damage done to the brain (source).

So what can you do?

You can take steps to protect your child's brain. Eating a diet high in good quality animal fats, meat, and other real food will provide their body with what it needs to keep the brain clean and functioning as designed. Avoiding processed foods, especially those containing dyes, chemicals and pesticides, decreases the brain's exposure to neurotoxins. Spending a lot of time in the sun (without sunscreen) will increase sulfate levels and allow the body to cleanse the brain and produce proper levels of hormones. And exercising caution in vaccine administration and exposure to aluminum foil and weed killers like Round-Up will help keep the levels of these harmful toxins low. Over time, a return to a traditional way of eating will decrease the amount of time your child needs to recover from a concussion or TBI, and it may even prevent them from getting one in the first place. So pass the cod liver oil and butter!

Onward!

Garden-fresh Vegetables Without the Garden

Summer is the time that vegetables shine! Many people are pulling beautiful zucchini, tomatoes, beans, peppers and greens out of their gardens. Fresh vegetables are in season, and you may find yourself desiring them more than usual. Go with it! Until the recent days of automobiles, airplanes and refrigeration, our bodies were used to getting fresh vegetables only during the short months of the growing season. Thousands of years of eating does leave an impression, and a healthy body will naturally crave more fresh fruits and vegetables in the summertime.

Side note: I have observed that people who are in a focused time of healing don't have this craving for fresh produce, and people who are needing to focus on detox can have fresh vegetable cravings year-round. That's okay, your body knows what it needs! Listen to your body's innate intelligence!

But depending on your situation, you may not have a garden, which makes fresh vegetables a little harder to come by. This is the case for me again this year. So today I thought I would share some ways to get fresh vegetables.

#1 Find a friend who gardens

Now, I am not telling you to mooch off a friend, leaving them to do all the hardwork. But many gardeners find themselves overflowing with vegetables right about now. Some of them may be happy just to see their hard work end up in a grateful stomach, while others would appreciate some help harvesting, preserving, or weeding in exchange for some produce. This is the best way to get vegetables, in my opinion. You will get to spend time in the wonderful sun, get to know your friend better, and maybe even learn a little about gardening. And nothing beats a fresh, hand-picked vegetable served up for dinner!

#2 Join a CSA

CSA stands for community supported agriculture. In a "working share," individuals come together under the leadership of the organizer and spend a set amount of time working around in a garden or farm for a share of the produce. There is usually a monetary investment as well. Most CSAs accept members only around the beginning of the year, so look for one to join for the next growing season. Some CSAs also offer a "non-working share," which allows an individual to pay only, and is a great option for those with jobs or situations that don't allow them the flexibility to work in the garden.

#3 Visit a local farmer's market

This one is an option for most people, but it can be a little tricky. Just because it's at a farmers market does not mean it was grown in a way that is different than the commercial food. That being said, there is going to be some benefit from eating local, naturally-ripened food, so don't rule it out if it's all you can get. The best way to know what you are buying is to talk to the farmers. Ask them how where they are located, and about their farm or garden. See what types of things they use for pesticides (organic food is often grown with organic pesticides), and what other farming/gardening practices they use. While it is not a guarantee, you may be able to find amazing and fresh produce, and at the same time provide support to that small local farm.

#4 Buy local produce at your grocery store

Here is Colorado, at the peak of the season, stores carry many things that are "Colorado Proud," meaning they are grown in Colorado. Not all stores label where their produce comes from, so ask your grocer which items are grown in your area, state, or in the United States. Made in the USA does not automatically make that food better, but knowledge is always power!

So there you go! Four ways to get garden-fresh produce without a garden. How about you? Where do you get your garden-fresh produce?

It's Not Always Best to be Perfect

Grass! It's a wonderful thing to lay in the grass and look up at the sky!

Until this weekend, there have only been a few tufts of grass on my property. Most of the landscaping is river rock and mulch. But there was one area of dirt that I have had my eye on for grass, and on Friday it finally happened!

With some (okay, a lot) of help from my sister, we laid patio stones (for a fire pit), pounded in metal edging, and hauled and laid 50 rolls of sod (transported in two trips in the back of my Santa Fe).

Viola! Instant lawn!

Padfoot was quite interested in the goings-on... although he preferred supervising from on top of the rolls of sod still in the back of the car (sorry, I was too dirty and tired to think about getting a picture of it, you'll have to take my word for how adorable it was) or playing in the dirt. Silly puppy didn't want to be on the grass until we were almost done.

In keeping with my desire to be as chemical/pesticide/fertilizer free as possible, I did some research about grass to find out my best option. A quick internet search revealed: There probably isn't such a thing as organic sod, or if it does exist, it would be WAY more expensive. It's possible that sod contains significantly lower amounts of chemicals than I was expecting. While dogs do eat grass, they eat little of it. It would be unlikely that a little grass eaten from a non-organic lawn would be a problem unless I regularly put chemicals on it (which I don't plan on doing). It appears to be possible to get organic grass seed (about $40 to cover 1000 square feet), but I still had questions about what they put in the seed mixes. There was not a huge price difference between any sod company, especially for the small amount of ground I needed to cover (about 500 square feet). So then I was faced with the question... do I just get sod (and take whatever chemicals may be included) or do I get seed so I can get an organic yard? The decision may seem very black and white...the only option for organic grass is seed. So you may think that of course my choice was seed. But first I had to factor in what I call "the reality of life."  

Here is my reality of life:

I am not very good at watering and there is no sprinkler system. If I did seed, the chances of needing to re-seed at least once are high. This adds more time and money. I would have to research if I needed fertilizer or other additions to make my seed grow, and then pick from the available options. It is now the middle of summer. I was planning on doing grass right when I got so sick two months ago. Now it's July. If I want to enjoy a lawn this summer, sod would be faster. My landlord sprays for weeds. He is spraying less with me here (I'm pulling weeds as much as I can), but the ground already has years of stored chemicals in it. It's not organic soil. I've never seeded, but I have laid sod. My brain can only handle so many new things to learn at one time. And learning how to raise an organic lawn didn't feel like the correct focus for me right now. If I sod, I can immediately put up and use the clothesline I bought a month ago (this truly factored in to my thought process, I love line-hung clothes, and I don't have an electric drier).  

So I decided to buy sod.

From Home Depot. I paid with a credit card. I picked it up and put it in the back of my car. You can't get any less alternative than that. But my goal is not to be alternative. My goal is to be healthy, and to make conscious choices. I really want an all-organic yard. And one day I hope I can. But right now (and in the future) I need to make the best of what I've been given. Maybe I could have succeeded in an organic grass seed lawn. Maybe. But I want to do other things with that time. Things that feel more important right now. Because taking time away from important things to do something "perfect" isn't better.  

My plan for making this grass as healthy as possible:

#1 No more chemicals!

I'm sure there have been some chemicals on this grass, but that stops now! Any "fertilizers" will be food-based (like old milk or yogurt, or the Green Pastures product below). Any weeds will be extracted by hand, providing me with sunshine and some light exercise.  

#2 Add back microbes and nutrients!

I purchased a by-product of fermented cod liver oil from Green Pastures called Liquid Fish Soil Rescue to re-vitalize my soil. I actually meant to put some in the ground right before we laid the sod but I couldn't (reality of life check: I was not strong enough to open the container, my neighbor-with-all-the-tools was gone, and I don't own a pipe wrench). So later (when I get it open) I will spread it over the top of the grass. It will be a little fishy for a day, but fish oils smell is not new to me!  

#3 Water to encourage deep roots!

It's recommended to water sod frequently at first, but to still let it become just a little dry to encourage the roots to reach down and establish. Here in Colorado we are having 90 degree days, so I'm needing to water 1-2x/day, and the grass is still getting a little dry in between waterings. Soon I will be able to water less often, and next year I should be able to water once every 2-5 days.

Today's lesson?

You don't have to do everything perfect.

Sometimes the "best choice" is outside your budget for money or time, and sometimes there are circumstances that happen outside of your control.

That's okay... it's normal. That's life. And today, life is good!

Onward!

Making New Ruts

We often get stuck in ruts. It's easiest to keep doing the same thing—once a pattern (good or bad) is established, we tend to keep doing things the same way. One of my deepest ruts is how fast I live my life. How much I try to squeeze into each day to live up to my own expectations. How hard it is for me to be okay with down-time. I have been consciously making different choices to try and get out of this rut for the last 3 years, but because it is so ingrained, it has been slow going. Of course there has been progress! I have become so much more okay with slowing down, saying no, and doing things just for fun. But a recent event has given me the opportunity for some concentrated time in the new ruts.

The event? Being sick! Sicker than I have ever been in my life. Sick and recovering for 2 weeks! Sick enough that all of my energy went just to taking care of myself.

It was hard to do. Taking care of myself is something I have only really learned to do in the last few years... when I found the GAPS protocol. It was then that I started to believe that it is important, and right, to take care of myself. And I began learning how to do it. I have been a slow learner... being busy and productive was so deeply ingrained in me that it has required a lot of purposeful energy and conscious thought to make choices that take me out of that rut.

I still considered myself a beginner at self-care. But after these two weeks I may be about to level up!

I had to let go of so many things as I allowed my body to heal. And I mean really let go. I could not catch up, make up, or push through like I usually can. I was focused on one thing: me. And that focus was obligatory, I had no real choice in the matter.

As I canceled my schedule day after day, I had to remember that my worth was unattached to my productivity or presence.

As I thought about everything on my to-do list that was not getting done, I had to remember that God is in control of growing my business.

As I gave my body the best support I could using herbs, essential oils, vitamins, and meat stock, I had to remember that healing is complex, and our bodies are amazing!

As I wondered at times if my body was strong enough to handle whatever was going on, I had to remember that it was okay to ask for help, and to receive it.

I was sick enough for long enough that I also needed time to recover. That means I couldn't jump back in a full speed once I was feeling better. I had to evaluate my important tasks, and be realistic in what I could accomplish in between naps. Part of me thinks that I will go back to how I was before. But most of me doesn't want that. Slowing down is refreshing and freeing. Tasks are so much easier when I let God carry the burden, instead of trying to bear it on my shoulders alone. I don't know if I can stay out of my old ruts, but I pray that I can. I want to keep making these new ruts deeper.

As I go, Onward!

Real Food: More Than the Sum of Its Parts

Every time I learn more about the complex interactions between the human body and different nutrients, bacteria, and dozens of other factors, I am blown away! Not sure what I mean? As an example, this was mentioned in my latest post. A seed has enough intelligence to protect itself from being digested, but then is able to release those protections when the conditions are right to grow! All while it's still a seed! And that complicated process relates only to the seed. We haven’t even begun to explore the combining of that seed with some other food, or in a different form, or after the seed grows up. Not to mention the effect stomach acid levels, digestive enzyme activity, and different gut flora have on that seed. And the list goes on and on. Therefore we see that our bodies, and the processes that happen inside them, are incredibly intricate. And it begs the question:

Are vitamins, or carb/protein ratios really what it’s all about?

Eating real food is more than eating food-shaped packages of vitamins, proteins, and fibers. Real food is dynamic, and what you get from a particular food is conditional, and depends on several factors.

Growing Conditions: The actual nutritional value of that particular piece of food depends on the conditions it was grown in, including sun exposure, water quality, and the amount of vitamins, minerals and healthy bacteria in the soil or food the animal was eating.

Preparation Methods: After it is grown, different ways of preparing food will make it more or less digestible; helpful, stressful, or even harmful to the human body.

Individual Body Status: Even if it’s prepared properly, each individual body's environment has a role in determining the amount of benefit or harm that food will have.

In fact, a food's helpfulness to an individual body is dependent on the season, metabolic needs, current hormone state, and a myriad of other factors that are going on in the body at that moment. So what's helpful to your body in the summer may be harmful in winter. Or what's beneficial to eat at noon may weigh your body down at dinnertime. Every minute your metabolic needs may be different.

This is why "eating healthy" cannot be reduced to fortifying processed foods with vitamins, or taking the "perfect" supplement mix. It is so, so much more! Now that you know all this, eating healthy may sound like an unattainable goal. And in some ways it is. Even if we are extremely in tune with our bodies, it is unlikely that we will think “I need 5.78 mcg of calcium and 4.24 mg of vitamin D at 2:57pm”… and so on. And this is my first point.

There is no magic pill or secret supplement!

Even if the advertised effects are real, it doesn’t mean that it will work for you! Your body may need something else entirely. If anyone tells you that they have the one product that will fix all your ills, run the other way! On the other hand, the innateintelligence inside our bodies does know what it needs, and how to get it. We can work on listening to what our bodies are telling us. I call this becoming an expert detective (for more, see chapter 7 of Notes From A GAPS Practitioner).

As we renew the partnership with our body, we will begin to understand its signals about what foods will best support our bodies at that moment. Dr. Natasha Campbell-McBride talks about this in a wonderful article, One Man’s Meat is Another Man’s Poison. In it she shares how important it is to listen to your body telling you what food to eat at the moment, and how much of it to eat. Becoming an expert detective does not happen overnight. It is a commitment to observe, experiment, create theories, and modify them as needed. It will get easier with time and experience, and every time you learn something, your health will benefit. And you will have taken one more step in your journey toward better health.

Onward!  

Disclosure: Contains an affiliate link, which helps support my blogging. Your trust is important to me, and I only recommend resources I trust.

Why Soak Grains? {Video}

Ever wondered about recommendations like "soaking," "sprouting," "fermenting," or "properly preparing" your nuts or grains? Ever wondered what that meant, or why it's better? I did! In fact, when I first heard about "sprouted bread," I thought it was made-up. But there are real reasons why eating properly prepared seeds is better for your body. Check out the video below to find out why.

Did that make sense?

This is just one example of why food preparation matters. And while food preparation techniques used to be passed on from generation to generation, our modern western culture has largely lost that heritage. But some do remember. And some do research. And some teach. And some write it down for us. That is the entire reason behind the cookbook, Nourishing Traditions, by Sally Fallon. Traditional ways to prepare foods in traditional recipes are recorded in this helpful resource. If we want to return to health, we need to start understanding these principles. Our health depends on it! Still have questions? Have another food preparation question? Ask it in the comments below.

Disclosure: The link in this post is an affiliate link. Links like this help support my blogging. Your trust is important to me, and I only recommend resources I trust.

Spring! And Natural Allergy Management

Spring has come to my neighborhood! Over the last week, things have been budding and growing. Green has been showing, and flowers blooming. The sounds of spring have been happening for awhile, but are now in full force—birds chirping, squirrels chattering, and children playing. I took an sunset tour around my neighborhood to enjoy the spring evening, and I want to share with you some of the pictures I took. Then keep reading for some natural ways to manage your spring allergies!

There is another way I know that spring is here… my allergies have started to flare. Since going through the GAPS diet, my allergies are mild compared to what they used to be, but they still cause minor irritation—enough that I need to address them. So today I am going to share with you what I do to manage my allergies naturally. But before we discuss management techniques, let’s review what allergies are. Allergy symptoms are a product of the immune system. And we can think of them as a signal from our body to let us know that something is going on. Basically, they signal two things:

The first is that an allergen (a protein chain that is usually referred to as an antigen) has bypassed the body’s protective mechanisms. When this happens, the body mounts a non-specific immune response (an inflammatory response) against that allergen. In this process, certain cells (called mast cells) are degranulated, and release things like histamine into the bloodstream. Histamine travels to receptor sites in the GI tract, respiratory tract and the skin. These receptors then trigger a further response to the allergen, and we see symptoms like hives, mucus production, and swelling.

The second is that our liver is unable to keep up with processing mediators (like histamine) that have been released in the inflammatory response. As we saw above, histamine triggers the symptoms we are accustomed to in an allergic reaction. Histamine is not a problem when it is being processed and removed by the liver fairly quickly. But when it continues to circulate (because the liver isn’t pulling it out fast enough) it will continue to cause unpleasant symptoms—sending you signals that your body needs some assistance.

Okay, now that we are on the same page about what allergy symptoms are, let’s talk about ways to support your body so you don't suffer from them! Again, these symptoms are signals that your body needs some help. So what can we do to help support the liver and immune system?

Feed it Fat

The immune system is a very hungry organ, and what it likes best to eat is fat! Especially the Vitamins A and D that it contains. These are both found in abundance in butter, as well as lard, fermented cod liver oil, and other animal fats. The cholesterol found in these fats also plays an important role, for it is cholesterol that helps the body repairdamage from inflammation (watch this video for more on this).

Eat Sauerkraut

There are two benefits to eating sauerkraut (or fermented cabbage any way). The first is the probiotic benefit. The root cause of allergies is a leaky gut. Bad gut flora has everything to do with this. (This is too much to discuss in this post, so if you have further questions, I recommend chapter 6 of my book Notes From a GAPS Practitioner.) So eating probiotics will help the allergy problem, both long-term and short-term. However, if you are unused to eating large amounts of sauerkraut, I recommend you work up to it slowly. The second benefit of sauerkraut is the high amount of Vitamin C available in it. Lacto-fermenting cabbage increased the bioavailability of Vitamin C by about 4 times. Our immune system also needs Vitamin C to function well. So consuming large amounts of sauerkraut is like taking Vitamin C daily (which you could take in other ways, like arceola cherry powder). I enjoy sauerkraut, and find that if I eat between 1-3 cups a day (broken up with meals, or as a snack), my allergy symptoms are fairly well managed. I generally feel that my itchy eyes and throat are calmed down within about 20 minutes of eating it.

Apply Lavender Essential Oil

This is my quick-acting go-to if my symptoms are overwhelming. Lavender is a powerful antihistamine. If I run into a situation where my allergies flare up quickly, like having a cat rub against me, or when the cottonwood trees are seeding, I pull out my lavender oil. There are several ways to use it. You can apply it topically near the area that is affected (best for skin issues) or on the bottoms of your feet (if you don’t like the smell). You can diffuse it, so you breathe it into your mucus membranes and calm the histamine response there. Or (if you have a pure and safe brand like the one I use), you can take it internally. I prefer to place a drop or two under my tongue and let it absorb sublingually. This is the quickest way to get it into the bloodstream. Lavender tastes about like it smells, but the quick relief I get far outweighs the bitter taste it leaves. I usually feel relief from my symptoms in 2-5 minutes, but for most people it may take 10-20 minutes to feel the effect.

Support Your Liver

There are ways to help the liver when it is overtaxed. First, reduce the amount of toxins you are asking the liver to process, thus adding to its workload. In the spring I am more careful about what I eat. There are some foods I have “graduated” to that can be too much for my body to handle when it also has to deal with extra histamines in my “allergy season.” In the same way, it is good to be cautious about other toxins from chemicals in the environment (or on our skin) that are overloading the body. It is also important to use other methods of detox, such as detox baths and juicing, to help remove toxins and thus reducing the workload of the liver. Finally, eating liver (consuming the animal organ that matches our struggling organ is always helpful) regularly can be helpful. If you don’t like it, you can take desiccated liver. And for a little extra support, I will sometimes take the Standard Process supplement Antronex.

Try Something New

I have not tried this yet because I just learned about it, but this season I am going to try lacto-fermenting honey! Most of us have heard that honey can help with allergies, but it turns out that lacto-fermenting the honey increases these benefits even more! I’m interested to see how it turns out, and if it helps. The honey does have to be local to have a strong effect, and I fortunately have a little honey left over from the year I tried beekeeping. If you want to learn more about it, I would recommend starting HERE.

If you have tried lacto-fermenting honey, found success with any of these natural means, or want to share other things you have found helpful with the community, then leave it in a comment below!  

Onward!

References: McCance, K. and Huether, S. (2006). Pathophysiology: The Biologic Basis for Disease in Adults and Children. Elsevier Mosby. Philadelphia, PA. Pg. 249-255. Lavender and the Nervous System. Koulivarnd, P. Ghadiri, M., Gorji, A. (September 4, 2012) Retrieved March 20, 2017 from https://www.hindawi.com/journals/ecam/2013/681304/