baking

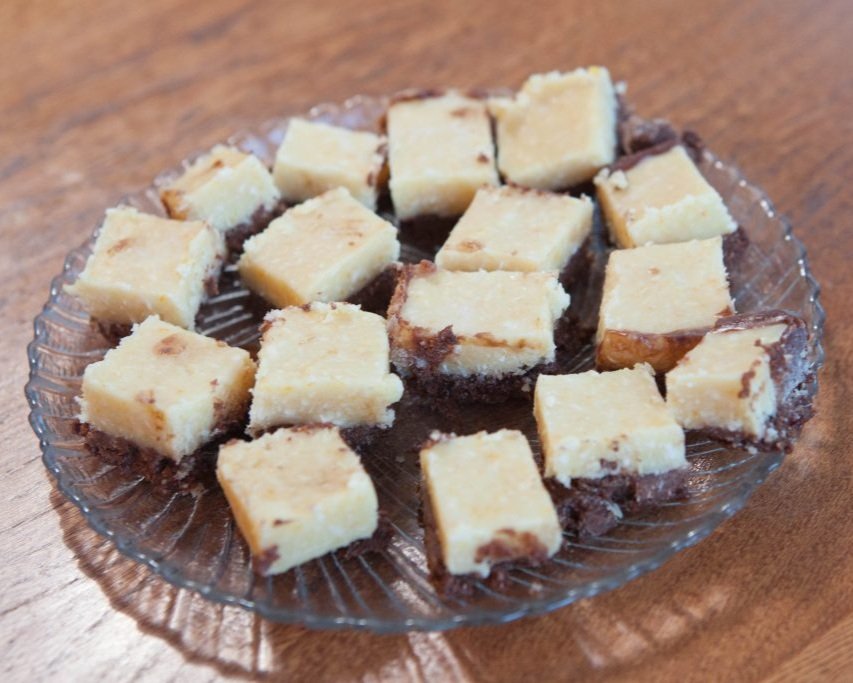
Real Food Raw Cheesecake

Cheesecake was never something I enjoyed until very recently. At first, when I was younger, I just didn’t like cheesecake. Then I was allergic to dairy for ten years. Then I started the GAPS Diet and didn’t eat sugar for years! Because of that, it never occurred to me to try to make a recipe similar to a cheesecake until my cousin, who’s very good at making cheesecake, made cheesecake with a gluten free crust and I tried some. I realized how delicious it is and how simple it is to create as a real food dessert. 

As I’ve been exploring the world of desserts, I’m realizing more and more how desserts were a way to eat a lot of animal fat and traditional recipes were very nutrient dense foods. One of the main problems of desserts is the processed sugars. Sugar can be a problem if you often eat too much of it at a sitting, especially if it is not accompanied by generous amounts of animal fat. Sugar is further a problem when processed and refined because refined sugar removes the important nutrients such as magnesium, B vitamins, and other trace nutrients that assist your body in breaking down the sugar naturally. Not only does processed sugar spike our blood sugar, we don’t have the magnesium molecules needed to safely break down the sugar and utilize it in our bodies. We can correct all of that. We can go back to using high concentrations of animal fats in our desserts and use sugars that are natural and whole. In this way, most people can enjoy desserts for special occasions once a certain amount of healing has been done in their bodies. 

From Nourishing Traditions by Sally Fallon, Measurements Adjusted for Round Pan

**The USDA warns against consuming raw dairy and egg products. Healthy animals have healthy raw milk and eggs. Source your food well. We’re not liable if you get sick.

Ingredients for Real Food Raw Cheesecake 

  • 1 1/2 cup dry Truly Raw Almonds (from Azure Farms) to make 2 cups Almond Flour

  • ¼ cup Yogurt

  • Filtered Water

  • ½ cup dates, if you do whole dates with pits, it’s about 6

  • 1 - 2 tsp butter

  • Generous ½ cup of Raw Milk

  • 2 Eggs

  • 1 Tablespoon of Gelatin

  • 14 - 16 ounces cream cheese

  • ¼ cup Honey

  • ½ tsp Vanilla

  • Salt

Directions for Real Food Raw Cheesecake

IMG_0641.jpg

Properly prepare your nuts. If you are just fermenting your almonds or almond flour, you need to start 24 hours before. If you are wanting to soak and then sprout your almonds, you need to start 2-3 days before. They can be prepared ahead of time and will keep for weeks to months if dehydrated. 

Take cream cheese out of the fridge a few hours before you are ready to prepare your cheesecake.

IMG_0657.jpg

When your nuts are properly prepared, rinse them thoroughly with filtered water. I left the brown skins on my almonds because I wanted the contrasting color to the pale cheesecake. You can definitely remove them if you’d like. Then grind your prepared nuts as finely as you can. You can use a food processor, hand food processor, blender, or VitaMix. They do not have to be dry to grind them.

You may have a little extra almond flour at this stage. Measure your almonds to get two cups.

Blend your nuts and dates together. I used an immersion blender but anything that will really pulverize them together is sufficient. 

IMG_0685.jpg

Generously butter a 9 inch round glass baking dish. Press the date almond paste into the pie crust pan to form the crust. Set aside.

IMG_0710.jpg

Add raw milk to a small saucepot. Separate egg yolks and whites. Add egg yolks to the pot with the raw milk. Mix together to break apart yolks. 

Turn the stove onto the medium low heat. Add gelatin to the milk and egg mixture. Mix together. Heat until the gelatin is just dissolved. DO NOT COOK. Gelatin is dissolved when you are able to only hold your finger in the liquid less than 3 seconds. Quickly remove from the heat.

To a large bowl, add the softened cream cheese, honey, and vanilla. Beat with an immersion blender or mixer until smooth and combined.

IMG_0725.jpg

Add in the slightly cooled milk mixture to the cream cheese mixture. Blend until completely smooth.

Place the mixture of cream cheese into the fridge.

IMG_0736.jpg

In a separate bowl with the egg whites, add a pinch of salt. Beat until stiff peaks form.

Gently fold the egg white mixture into the cream cheese mixture.

IMG_0749.jpg

Pour the mixture into the prepared pan with a crust.

Cool for several hours until hard.


RealFoodRawCheesecake.png

Real Food Raw Cheesecake

Author: Amy Mihaly, Be Well Clinic

Ingredients

  • 1 1/2 cup dry Truly Raw Almonds (from Azure Farms) to make 2 cups Almond Flour
  • ¼ cup Yogurt
  • Filtered Water
  • ½ cup dates, if you do whole dates with pits, it’s about 6
  • 2 tsp butter
  • Generous ½ cup of Raw Milk
  • 2 Eggs
  • 1 Tablespoon of Gelatin
  • 16 ounces cream cheese
  • ¼ cup Honey
  • ½ tsp Vanilla
  • Salt

Instructions

  1. Properly prepare your nuts. If you are just fermenting your almonds or almond flour, you need to start 24 hours before. If you are wanting to soak and then sprout your almonds, you need to start 2-3 days before. They can be prepared ahead of time and will keep for weeks to months if dehydrated.
  2. When your nuts are properly prepared, rinse them thoroughly with filtered water. I left the brown skins on my almonds because I wanted the contrasting color to the pale cheesecake. You can definitely remove them if you’d like. Then grind your prepared nuts as finely as you can. You can use a food processor, hand food processor, blender, or VitaMix. They do not have to be dry to grind them.
  3. You may have a little extra almond flour at this stage. Measure your almonds to get two cups.
  4. Take cream cheese out of the fridge a few hours before you are ready to prepare your cheesecake.
  5. Blend your nuts and dates together. I used an immersion blender but anything that will really pulverize them together is sufficient.
  6. Generously butter a 9 inch round glass baking dish. Press the date almond paste into the pie crust pan to form the crust. Set aside.
  7. Add raw milk to a small saucepot. Separate egg yolks and whites. Add egg yolks to the pot with the raw milk. Mix together to break apart yolks.
  8. Turn the stove onto the medium low heat. Add gelatin to the milk and egg mixture. Mix together. Heat until the gelatin is just dissolved. DO NOT COOK. Gelatin is dissolved when you are able to only hold your finger in the liquid less than 3 seconds. Quickly remove from the heat.
  9. To a large bowl, add the softened cream cheese, honey, and vanilla. Beat with an immersion blender or mixer until smooth and combined.
  10. Add in the slightly cooled milk mixture to the cream cheese mixture. Blend until completely smooth.
  11. Place the mixture of cream cheese into the fridge.
  12. In a separate bowl with the egg whites, add a pinch of salt. Beat until stiff peaks form.
  13. Gently fold the egg white mixture into the cream cheese mixture.
  14. Pour the mixture into the prepared pan with a crust.
  15. Cool for several hours until hard.
Created using The Recipes Generator

Panna Cotta

Panna cotta is Italian for “cooked cream.” I’ve never had panna cotta before but it seemed to be a good recipe to make as it is full of delicious fats and gelatin. I was not disappointed! This simple recipe turned out perfectly the first time and I will definitely be making it again!

I was gifted some goblets but you can really use any small bowl as a mold. You can also remove your panna cotta from the molds once it is set and top your panna cotta with a fruit sauce like this strawberry sauce or a rich chocolate fudge sauce. I felt that it was plenty sweet on it’s own but a sauce would take the wow factor up a notch.

I used date sugar for this recipe. I’m very excited to use this new sweetener for recipe! As far as I could tell, it’s minimally processed, just dried and pulverized dates. An additional test was to see how my body responded to it and it responded like it does to any other type of fruit sugar. I’m excited to use this as a fruit sweetener on GAPS and Full GAPS recipes!

Ingredients for Panna Cotta:

  • 1 cup raw milk

  • 2 ½ tsp gelatin

  • 2 cups cream

  • ½ cup + 1 tbsp date sugar

  • Pinch of Salt

  • 1 tsp vanilla extract

  • 1 cup sour cream

Directions for Panna Cotta:

An easy panna cotta recipe that is made with raw milk and is legal on the GAPS Diet. Panna Cotta recipe by Amy Mihaly, Certified GAPS Practitioner in Loveland, Colorado.

Place milk in a small sauce pan and sprinkle gelatin over. Let sit for 3 minutes until gelatin is soft.

Once gelatin is soft, place pan over low heat and stir until the gelatin fully dissolves. Do not boil!

An easy panna cotta recipe that is made with raw milk and is legal on the GAPS Diet. Panna Cotta recipe by Amy Mihaly, Certified GAPS Practitioner in Loveland, Colorado.

Add cream, date sugar, vanilla and salt. Stir constantly for five minutes until mixture is steaming and sugar is completely dissolved.

Remove from heat for 5 minutes.

An easy panna cotta recipe that is made with raw milk and is legal on the GAPS Diet. Panna Cotta recipe by Amy Mihaly, Certified GAPS Practitioner in Loveland, Colorado.

Place sour cream in a large measuring cup with a lip. Add the slightly cooled cream mixture & whisk constantly. Once the mixture is smoothed, pour into jars, ramekins, glasses or serving piece.


An easy panna cotta recipe that is made with raw milk and is legal on the GAPS Diet. Panna Cotta recipe by Amy Mihaly, Certified GAPS Practitioner in Loveland, Colorado.

Panna Cotta

Author: Amy Mihaly, Be Well Clinic

Ingredients

  • 1 cup raw milk
  • 2 ½ tsp gelatin
  • 2 cups cream
  • ½ cup + 1 tbsp date sugar
  • Pinch of Salt
  • 1 tsp vanilla extract
  • 1 cup sour cream

Instructions

  1. Place milk in a small sauce pan and sprinkle gelatin over. Let sit for 3 minutes until gelatin is soft.
  2. Once gelatin is soft, place pan over low heat and stir until the gelatin fully dissolves. Do not boil!
  3. Add cream, date sugar, vanilla and salt. Stir constantly for five minutes until mixture is steaming and sugar is completely dissolved.
  4. Remove from heat for 5 minutes.
  5. Place sour cream in a large measuring cup with a lip. Add the slightly cooled cream mixture & whisk constantly. Once the mixture is smoothed, pour into jars, ramekins, glasses or serving piece.
Created using The Recipes Generator

Scratching the Surface of Sourdough

I by no means consider myself a sourdough expert. But I’ve enjoyed learning about sourdough. Once you understand the basics of sourdough, you can experiment with lots of ways to prepare it. This post is just an intro into the amazing world of sourdough!

Sourdough-Starter-How-To-Start-Sourdough-Sourdough-Bread

Sourdough is a traditional way of preparing bread that’s been used for centuries. Once you understand the basics, it’s an incredibly easy process. Properly prepared, it’s the preferred way to prepare and eat wheat flour. If you’re able to tolerate it, it’s a delicious way to make bread! Sourdough isn’t GAPS Legal.

Here’s an awesome video that will help keep your starter happy.

I got my sourdough starter from a friend. If you don’t have a friend with a sourdough, you can also purchase it from Cultures for Health. 

How to Feed Sourdough:

Sourdough-Starter-How-To-Start-Sourdough-Sourdough-Bread

In the jar, add a few scoops of high quality white  (I use Central Milling Company unbleached white flour.) Mix until your sourdough has a crumbly texture.

Sourdough-Starter-How-To-Start-Sourdough-Sourdough-Bread

Add filtered water, a little bit at a time, mixing often. Add enough water so the sourdough starter resembles wet playdough.

You want to store it four feet away from any open ferments.

Once you have sourdough started, it can be added to lots of different recipes. I make it into flatbreads, crackers and of course breads. I like this one, adapted from “Baking with Sourdough” which makes a very dense bread.

Ingredients for Sourdough Bread:

  • 2 cups high quality organic white flour

  • 2 cups high quality organic whole wheat flour

  • 1 cup sourdough starter

  • 2 cups warm water

  • 2 tsp salt

  • 2 tsp sugar

  • 4 cups unbleached white flour

Sourdough-Starter-How-To-Start-Sourdough-Sourdough-Bread

Mix first 4 ingredients in a large bowl and light cover. Leave on the counter 10 - 24 hours, depending on how sour you want your bread to be.

When ready to bake bread, stir in salt and sugar. Add enough flour to make a handleable dough. Form the dough into a ball. Cover with a damp cloth and let rest for 15 to 20 minutes.

Knead the dough until it’s smooth and stiff so it will hold its shape.

Set the dough into a greased bowl, cover with a damp cloth and allow to rise again. It should double in size, about an hour. Shape into 2 long loaves and place on a cookie sheet sprinkled with corn meal. Let the loaves rise again until they have doubled, about an hour.

Brush the loaves with cold water and bake in a preheated 450 degree oven for 30 - 35 minutes until they are light brown and make a hollow noise when tapped.


SourdoughBread.png

Coconut Carrot Gluten Free Birthday Cake

IMG_9185.jpg

In celebration of my friend's birthday years ago, I made an "Amazingly Delicious Carrot Cake" (that's what the recipe was called, at least). I’ve modified the recipe a bit and I am so excited to have found such a delicious-looking recipe.

One ingredient in it that I have never even heard of *gasp, I know* is coconut butter (or coconut manna--they can be used interchangeably). This is not a more expensive version of coconut oil, as I first thought, but a coconut puree. I bought a jar (a bit pricey) at our local health food grocery store, or you can make your own.

Coconut butter is very sweet, and can be used as a little sweet snack. However, because there is more fiber, and it is much sweeter than coconut oil, if you are following GAPS, you should not introduce it until Introduction stage 6 or full GAPS. But if you can tolerate it, I would recommend trying this delicious coconut treat!

Sometimes I wonder why we even want to eat processed sugar, this cake is so rich, moist and delicious! Sadly for you, the photos cannot portray the enticing aroma I am experiencing! You will just have to try it out for yourself!

I have also made this recipe using the leftover pulp from juicing carrots. Add a little bit of additional water to keep the cake from getting too dry.

I made this as one cake in a 9x13 pan and then cut it in half and stacked to decorate it. You can also make it in two smaller pans. Just make sure you are using glass, not aluminum to bake with. Baking it as a sheet cake also means you can cut it into shapes for themed birthdays.

Ingredients for Coconut Carrot Gluten Free Birthday Cake:

For the Cake

  • 2 cups coconut manna (1 15 oz jar)

  • 9 dates

  • 1 cup carrots, about two large carrots

  • 2 tsp cinnamon

  • ½ cup raisins

  • ½ cup shredded coconut (if you have coconut flakes, just put them in a food processor for a minutes)

  • 1 tsp sea salt

  • 1 tsp vanilla extract

  • 10 organic eggs

For the Frosting

  • 2 cups cultured cream or sour cream

  • 2 tbsp honey 

  • 1 tsp vanilla extract

  • Zest of 1 Lemon

  • ½ tsp Lemon Juice

  • Pinch of sea salt

Directions for Coconut Carrot Gluten Free Birthday Cake:

IMG_8785.jpg

In a pot on the stove, start your coconut manna melting by adding the jar to water. Melt over low heat. It can take up to 30 minutes to melt depending on how big and full your jar is.

Start your dates rehydrating. Remove the pits and add the dates to a bowl that can have hot water in it (I use glass.). Add boiling water to the bowl, enough to cover the dates. Let sit for 20 minutes until dates are rehydrated

IMG_8810.jpg

Finely shred two large carrots with a food processor. 

Once dates are soft and squishy, about 20 minutes, put them in a food processor, without liquid. Slowly add more liquid as they blend until they are a smooth consistency but not too liquidy.

IMG_8804.jpg

In a large bowl, crack all the eggs. Whisk with an electric whisk or immersion blender to get the maximum amount of air into them.

Grease the baking dish with butter or the fat of your choice. If you have a butter allergy, coconut oil is acceptable.

Stir the ingredients into the bowl with eggs until they are all distributed evenly.

IMG_8880.jpg

Add the mixture to the greased baking dish.

Bake in the preheated oven for 40 minutes until the top is golden and the cake is set.

Allow to cool slightly before removing from the pan.

IMG_9123.jpg

Mix the frosting in a bowl. 

Decorate the cake as desired and enjoy!

IMG_9173.jpg

If you don’t have a tray, plate or board to decorate your cake on:

IMG_9134.jpg

Make one simply with leftover cardboard and aluminum foil.

IMG_9137.jpg

Cut your cardboard to size. Cover with aluminum foil and tape underneath so nothing slips.

Add parchment paper to the top where the cake will sit so your food is not sitting on metal.

IMG_9168.jpg

Decorate your cake!


Author:
prep time: cook time: total time:

ingredients:

For the Cake
  • 2 cups coconut manna (1 15 oz jar)
  • 9 dates
  • 1 cup carrots, about two large carrots
  • 2 tsp cinnamon
  • ½ cup raisins
  • ½ cup shredded coconut (if you have coconut flakes, just put them in a food processor for a minutes)
  • 1 tsp sea salt
  • 1 tsp vanilla extract
  • 10 organic eggs
For the Frosting
  • 2 cups cultured cream or sour cream
  • 2 tbsp honey
  • 1 tsp vanilla extract
  • Zest of 1 Lemon
  • ½ tsp Lemon Juice
  • Pinch of sea salt

instructions:

How to cook

  1. In a pot on the stove, start your coconut manna melting by adding the jar to water. Melt over low heat. It can take up to 30 minutes to melt depending on how big and full your jar is.
  2. Start your dates rehydrating. Remove the pits and add the dates to a bowl that can have hot water in it (I use glass.). Add boiling water to the bowl, enough to cover the dates. Let sit for 20 minutes until dates are rehydrated
  3. Finely shred two large carrots with a food processor.
  4. Once dates are soft and squishy, about 20 minutes, put them in a food processor, without liquid. Slowly add more liquid as they blend until they are a smooth consistency but not too liquidy.
  5. In a large bowl, crack all the eggs. Whisk with an electric whisk or immersion blender to get the maximum amount of air into them.
  6. Grease the baking dish with butter or the fat of your choice. If you have a butter allergy, coconut oil is acceptable.
  7. Stir the ingredients into the bowl with eggs until they are all distributed evenly.
  8. Add the mixture to the greased baking dish.
  9. Bake in the preheated oven for 40 minutes until the top is golden and the cake is set.
  10. Allow to cool slightly before removing from the pan.
  11. Mix the frosting in a bowl.
  12. Decorate the cake as desired and enjoy!
If you don’t have a tray, plate or board to decorate your cake on:
  1. Make one simply with leftover cardboard and aluminum foil.
  2. Cut your cardboard to size. Cover with aluminum foil and tape underneath so nothing slips.
  3. Add parchment paper to the top where the cake will sit so your food is not sitting on metal.
  4. Decorate your cake!
Created using The Recipes Generator
CoconutCarrotBirthdayCake.png

GAPS Legal Halloween Treat Round Up

Which of these treats will you make for Halloween?

Let us know in the comments below!

gluten-free-grain-free-brownies-brownie-recipe-made-with-dates-gaps-legal-brownies-gaps-diet-brownies-gaps-dessert

Gluten Free Brownies Recipe

While these brownies are not as sweet as conventional brownies, they were deemed by some tasters on the GAPS Diet as being “Better than Brownies.”

Gluten Free, Dairy Free, Egg Free

gluten-free-grain-free-brownies-brownie-recipe-made-with-dates-gaps-legal-brownies-gaps-diet-brownies-gaps-dessert

Gluten Free Almond Cookies Recipe

These treats are reminiscent of our family’s community famous chocolate chip cookies but they’re totally gluten free.

Gluten Free, Dairy Free

IMG_4243.jpg
IMG_4594.jpg

Homemade Gummy Snacks

These gummies are a good way for both children and adults to get collagen and vitamin c together! They are stage five legal on the GAPS Diet because they are cooked fruit. You can make any flavor with whatever fruit you have on hand.

Gluten Free, Dairy Free, Egg Free

GAPS Legal Banana Split

This recipe for a GAPS Legal banana split also includes making your own ice cream, hot fudge sauce, strawberry sauce, maraschino cherries and whipped cream.

Gluten Free

gluten-free-grain-free-brownies-brownie-recipe-made-with-dates-gaps-legal-brownies-gaps-diet-brownies-gaps-dessert
IMG_2202.jpg

Gluten Free Snickerdoodle Cookie Recipe

Snickerdoodles are a mixture of tart and sweet. They are another cookie I grew up making at Christmastime, and this one passed the family taste test!

Gluten Free, Dairy Free, Egg Free

GAPS Legal Russian Custard

Russian custard is a delicious desert or afternoon snack. It is rich, and just sweet enough. You can whip it up in just a few minutes, and it is easy to double or triple to feed another (or more for yourself).

Gluten Free, Dairy Free

Chocolate-Pudding1.png
gapscaramel1.png

Raw Milk Chocolate Pudding

Raw milk chocolate pudding is a great base to create Halloween friendly ‘Cups of Dirt.’

The most frequent comment about this pudding (besides “yum”, “delicious”, and “mmm…”) is that it tastes just like a chocolate pudding cup!

Gluten Free, Dairy Free, Egg Free

GAPS Legal Caramel Candy + Candy Sauce

Several years ago I discovered that the mythical candy known as caramel was actually fairly simple to make. Whether you use it as a dip for fruit (GAPS Legal candy apples!) or as a candy, it’s a great addition to your Halloween treat spread.

Gluten Free, Dairy Free, Egg Free

41.png

Almond Flour Bread with Italian Herbs

This recipe is adapted from the basic bread recipe in the GAPS Gut and Psychology Syndrome book by Dr. Natasha Campbell-McBride. It is legal on Stage Four. If you do a sweet version of this bread it is legal on Stage Five.

I really enjoy the Italian herb version of this basic bread recipe because I like strong flavors. For me, doing an almond bread that’s sweetened with fruit is not sweet enough. I prefer going with a savory bread instead that has a strong flavor.

The beginning piece of this recipe is the basic bread recipe that can be adapted into any other combination of ingredients.

You can use the herbs and combination of herbs of your choice in this recipe. I used tyme, rosemary and parsley. 

Bread is still a treat so it’s best to have one piece a day as a snack in between meals.

Ingredients for Italian Almond Bread with Herbs

  • 2 cups fermented almond flour

  • ¼ cup softened butter

  • 3 eggs

  • Herbs of your choice

  • 1 clove finely chopped garlic, fresh or fermented

Directions for Italian Almond Bread with Herbs

24 hours in advance, make your fermented almond flour or make it from almonds.

Preheat oven to 350.

IMG_4180.jpg

Combine flour and softened butter. Add eggs and mix thoroughly.

IMG_4204.jpg

Finely dice the herbs of your choice.

IMG_4210.jpg

Mix in with flour mixture. This mixture will look more moist than other bread doughs.

IMG_4268.jpg

Line a glass baking dish with parchment paper. Optionally, add fat to your parchment paper. Place mixture into baking dish. Spread evenly.

Bake for about an hour.

IMG_4451.jpg

Slice and enjoy!


Almond Flour Bread with Italian Herbs

prep time: cook time: total time:

ingredients:

  • 2 cups fermented almond flour
  • ¼ cup softened butter
  • 3 eggs
  • Herbs of your choice
  • 1 clove finely chopped garlic, fresh or fermented

instructions:

How to cook Almond Flour Bread with Italian Herbs

  1. 24 hours in advance, make your fermented almond flour or make it from almonds.
  2. Preheat oven to 350.
  3. Combine flour and softened butter. Add eggs and mix thoroughly.
  4. Finely dice the herbs of your choice.
  5. Mix in with flour mixture. This mixture will look more moist than other bread doughs.
  6. Line a glass baking dish with parchment paper. Optionally, add fat to your parchment paper. Place mixture into baking dish. Spread evenly.
  7. Bake for about an hour.
  8. Slice and enjoy!
Created using The Recipes Generator

DIY Almond Flour from Nuts

Any seed wants to be a plant. Seeds include nuts, seeds, beans, and grains. To protect itself, a seed has phytic acid and other enzyme inhibitors and anti-nutrients. These substances attack the body of the animal that ate the seed, preventing the digestion of the seed. This is why we see whole seeds in bird poop.

Manually grinding seeds into flours does nothing to negate these enzyme inhibitors and anti-nutrients. We may not necessarily see whole seeds in our stools but we don’t need to for our bodies to experience the effects of these substances. Inflammation, poor absorption of foods, and leaky gut are some of the effects on our bodies of eating seeds that are not properly prepared. To learn more about properly preparing grains, check out my video.

HOW TO PREPARE GRAINS PROPERLY

When we properly prepare our grains however, we begin the germination process, which changes the seeds chemical structure. It neutralizes the anti-nutrients and enzyme inhibitors, and the seed prepares to bring life. When we eat a seed in this state, it’s nutrients are available to us and it brings life to our bodies.  

All seeds can be prepared in three ways - soaking, sprouting or fermenting. Fermenting is by far the most simple and the most beneficial. All it requires is whey. These directions are for almond flour but you can use the same concept to any nut, seed, or grain. For specific instructions on how to do this with whole seeds, see my recipe on trail mix.

The other benefit of using fermented almond flour is that it makes a much lighter end product. The fermentation process acts somewhat like a baking soda or powder, increasing the air space as your treat bakes, making it less dense.

This is a great way to make fermented almond flour if your recipe calls for a very specific ratio of wet to dry ingredients. It’s also great for recipes that call for frying, like these onion rings!

You can also make fermented flour with almonds already made into flour. See the recipe here.

Ingredients for Making Almond Flour from Fermented Nuts

  • 3 cups Almonds

  • ½ cup Whey

  • Filtered Water

Directions for Making Almond Flour from Fermented Nuts

Place your almonds in filtered water with whey. Allow to soak for 24 hours.

IMG_4326.jpg

Drain the almonds in a colander and rinse with filtered water.

For the easiest almond flour, peel the almonds by squeezing them between your fingers until the skins pop off.

Drain the almonds well. If you don’t drain them well, your flour will be wet.

IMG_4368.jpg

Place almonds into a food processor. Pulse them consistently for about 60 seconds in one second pulses. Scrape the sides of the food processor consistently to ensure almonds are all blended to the same size.

Don’t pulse for too long or you will get almond butter!


DIY Almond Flour

Author:
prep time: cook time: total time:

ingredients:

  • 3 cups Almonds
  • ½ cup Whey
  • Filtered Water

instructions:

How to cook DIY Almond Flour

  1. Place your almonds in filtered water with whey. Allow to soak for 24 hours.
  2. Drain the almonds in a colander and rinse with filtered water.
  3. For the easiest almond flour, peel the almonds by squeezing them between your fingers until the skins pop off.
  4. Drain the almonds well. If you don’t drain them well, your flour will be wet.
  5. Place almonds into a food processor. Pulse them consistently for about 60 seconds in one second pulses. Scrape the sides of the food processor consistently to ensure almonds are all blended to the same size.
  6. Don’t pulse for too long or you will get almond butter!
Created using The Recipes Generator
32.png

How to Ferment Almond Flour

Fermenting Almond Flour for Proper Digestion

Any seed wants to be a plant. Seeds include nuts, seeds, beans, and grains. To protect itself, a seed has phytic acid and other enzyme inhibitors and anti-nutrients. These substances attack the body of the animal that ate the seed, preventing the digestion of the seed. This is why we see whole seeds in bird poop.

Manually grinding seeds into flours does nothing to negate these enzyme inhibitors and anti-nutrients. We may not necessarily see whole seeds in our stools but we don’t need to for our bodies to experience the effects of these substances. Inflammation, poor absorption of foods, and leaky gut are some of the effects on our bodies of eating seeds that are not properly prepared. To learn more about properly preparing grains, check out my video.

How to Prepare Grains Properly

When we properly prepare our grains however, we begin the germination process, which changes the seeds chemical structure. It neutralizes the anti-nutrients and enzyme inhibitors, and the seed prepares to bring life. When we eat a seed in this state, it’s nutrients are available to us and it brings life to our bodies.  

All seeds can be prepared in three ways - soaking, sprouting or fermenting. Fermenting is by far the most simple and the most beneficial. All it requires is whey. These directions are for almond flour but you can use the same concept to any nut, seed, or grain. For specific instructions on how to do this with whole seeds, see my recipe on trail mix.

The other benefit of using fermented almond flour is that it makes a much lighter end product. The fermentation process acts somewhat like a baking soda or powder, increasing the air space as your treat bakes, making it less dense.

Preparing fermented almond flour is quite easy. After letting it ferment for 24 hours, this base can be kept in the fridge for about a week. If you have a family that loves sweet treats, this is a food that you can keep on hand at all times to create a quick twenty minute cookie. Fermented almond flour is a great base for many baked goods.

Ingredients for Fermented Almond Flour:

  • 2 Cups Almond Flour

  • 1/4 Cup Whey

Directions for Fermented Almond Flour

Fermented almond flour makes for a much lighter baked good. The fermentation process acts like a baking soda, increasing air as your treat bakes. Fermenting almond flour is quite easy; it just needs to be done 24 hours before you bake. How to Fermen…

Add almond flour to a glass bowl.

Fermented almond flour makes for a much lighter baked good. The fermentation process acts like a baking soda, increasing air as your treat bakes. Fermenting almond flour is quite easy; it just needs to be done 24 hours before you bake. How to Fermen…

Pour whey over almond flour.

Fermented almond flour makes for a much lighter baked good. The fermentation process acts like a baking soda, increasing air as your treat bakes. Fermenting almond flour is quite easy; it just needs to be done 24 hours before you bake. How to Fermen…

Stir to moisten. Add additional whey if needed. Flour should be moist and crumbly but not wet.

Fermented almond flour makes for a much lighter baked good. The fermentation process acts like a baking soda, increasing air as your treat bakes. Fermenting almond flour is quite easy; it just needs to be done 24 hours before you bake. How to Fermen…

Cover and leave for 24 hours to properly ferment. During this time, your fermenting almond flour can be left with other jar ferments because it is covered.


Fermented Almond Flour

Author:
prep time: cook time: total time:

ingredients:

  • 2 Cups Almond Flour
  • 1/4 Cup Whey

instructions:

How to cook Fermented Almond Flour

  1. Add almond flour to a glass bowl.
  2. Pour whey over almond flour.
  3. Stir to moisten. Add additional whey if needed. Flour should be moist and crumbly but not wet.
  4. Cover and leave for 24 hours to properly ferment. During this time, your fermenting almond flour can be left with other jar ferments because it is covered.
Created using The Recipes Generator
15.png

Gluten Free Baking Round Up

Baking without gluten doesn't mean your end product will lack flavor. I love baking and experimenting with creating recognizable treats in a whole new real food way. The recipes gathered below are delicious and all made with real, whole food ingredients! They are all gluten free, and some are dairy and egg free as well. If you are on the GAPS Diet, doing Paleo or following the Whole 30 Diet, you can create any of these recipes!

The key to most of these recipes is fermented almond flour. Fermenting the almond flour makes it easier for your body to digest. Fermenting the flour takes 24 hours so be sure to plan in advance if you're baking of these treats!

Choose one or choose several but get to baking!

Which is your favorite gluten free baking treat?

Let us know in the comments below!

Gluten Free Brownies Recipe

While these brownies are not as sweet as conventional brownies, they were deemed by some tasters on the GAPS Diet as being “Better than Brownies.”

Gluten Free, Dairy Free, Egg Free

Gluten Free Almond Cookies Recipe

These treats are reminiscent of our family’s community famous chocolate chip cookies but they’re totally gluten free.

Gluten Free, Dairy Free

Gluten Free Strawberry Rhubarb Pie Recipe

Strawberry rhubarb pie has always been one of my favorites! This recipe has a fermented pie crust that you can use for other recipes as well!

Gluten Free, Dairy Free, Egg Free

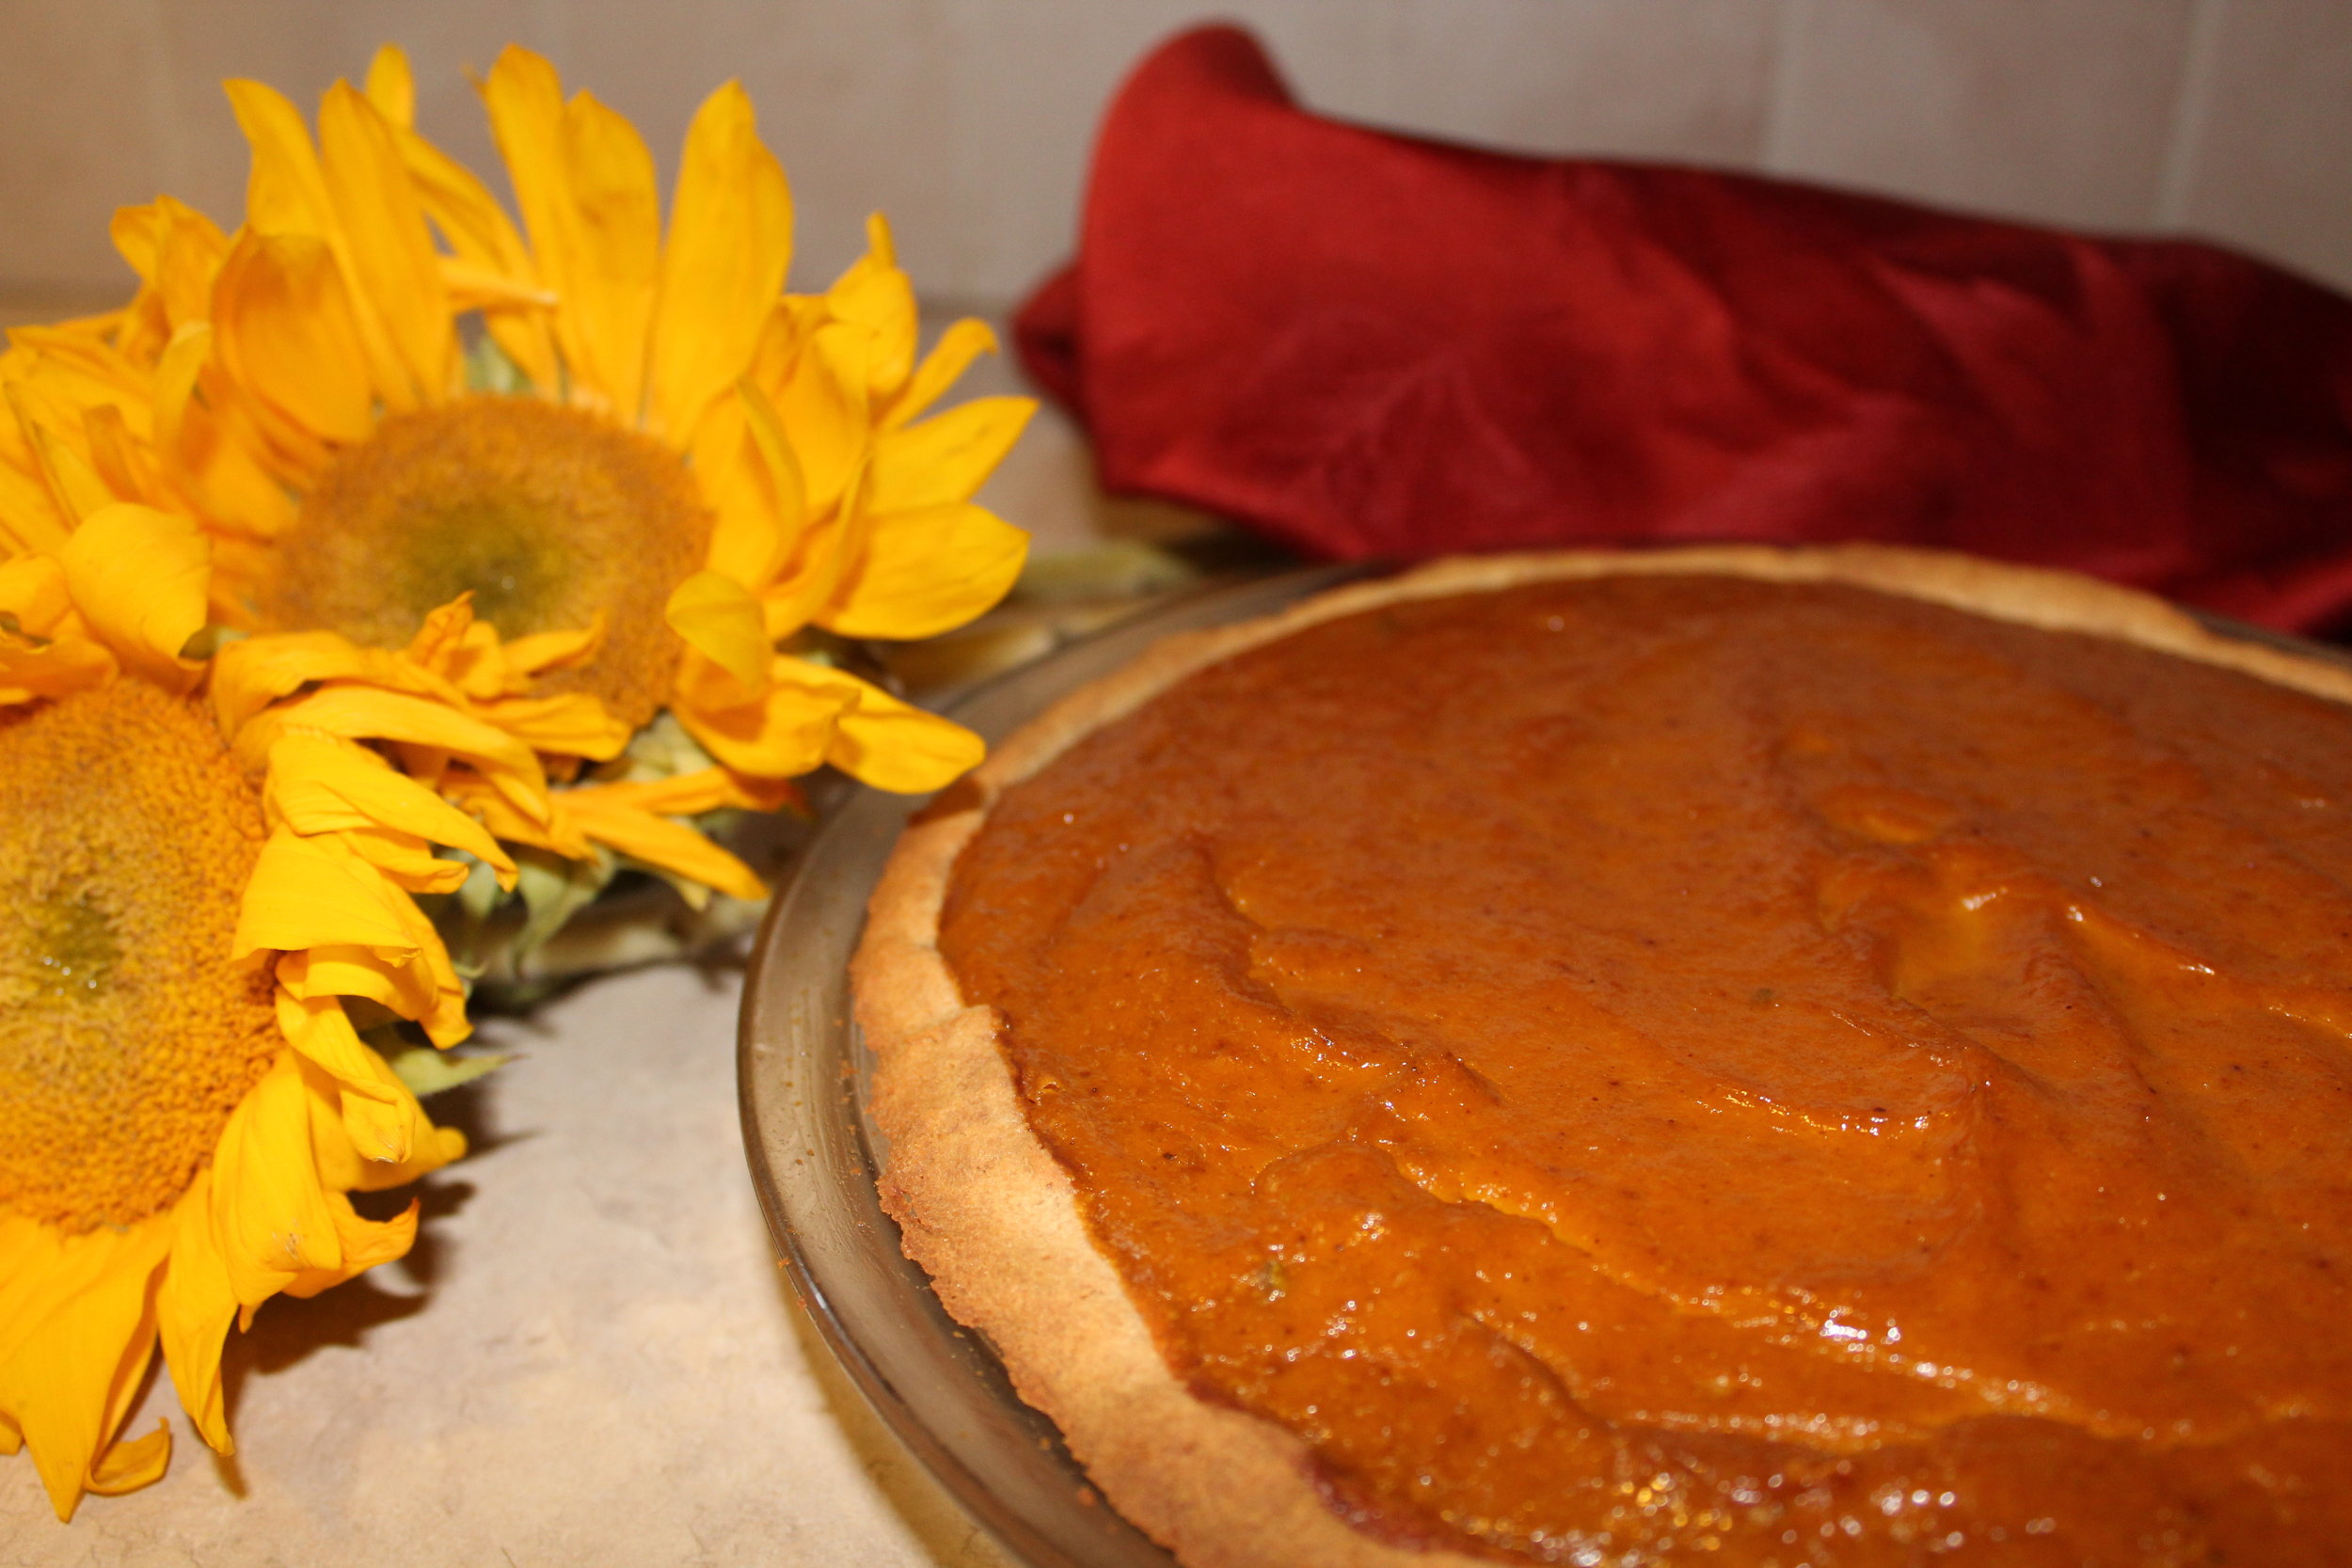
Gluten Free Pumpkin Pie Recipe

This recipe combines the fermented almond crust of Monica Corrado of Simply Being Well, and the pumpkin filling of Sally Fallon in Nourishing Traditions

Gluten Free, Dairy Free

Gluten Free Snickerdoodle Cookie Recipe

Snickerdoodles are a mixture of tart and sweet. They are another cookie I grew up making at Christmastime, and this one passed the family taste test!

Gluten Free, Dairy Free, Egg Free

Gluten Free Zucchini Bread Recipe

The key for this zucchini bread is using sour cream (you could also substitute in a full-fat yogurt) as the fat. As a cultured food, sour cream helps make the bread lighter as well.

Gluten Free

Holiday Treat Round Up

‘Tis the season for party treats.

Cookies and fudge, and brownies, Yum, yum!

Holidays can be a chaotic time, so we wanted to lessen your holiday stress by rounding up all the healthy treat recipe from our blog!

Even though these treats are healthy and full of good fat and real sweeteners, they are also delicious and can be taken with pride to any holiday gathering. But really, they also never need to leave your house 😉. You and your family can enjoy the whole batch!

There are lots to choose from! Pick a treat (or two) and get baking!

Chocolate Peppermint Coconut Fudge and Citrus Coconut Fudge

Fudge is a delicious holiday recipe and easy to share with family and friends!

Get The Recipe >>

Better Than Brownies

While these brownies are not as sweet as conventional brownies, they were deemed by some tasters on the GAPS Diet as being “Better than Brownies.”

Get The Recipe >>

Almond Cookies

These treats are reminiscent of our family's community famous chocolate chip cookies.

Get The Recipe >>

Snickerdoodle Cookies

Snickerdoodles are a mixture of tart and sweet. They are another cookie I grew up making at Christmas, and this one also passed the family taste test!

Get The Recipe >>

Buckeye Cookies

The roots for this recipe go deep in our family. These no-bake cookies are egg free, and casein and lactose free (contains whey and butter). They are also coconut free!

Get The Recipe >>

Christmas Wreath Cookies

This is my favorite cookie to bring to a cookie exchange because it's so unique.

Get The Recipe >>

Homemade Marshmallows

This simple treat is basically made up of gelatin, honey, water and optional vanilla. You can use this treat to get extra gelatin if you are needing that.

Get The Recipe >>

Pumpkin Pie

This recipe is combining the fermented almond crust of Monica Corrado of Simply Being Well, and the pumpkin filling of Sally Fallon in Nourishing Traditions

Get The Recipe >>

Decadent Hot Chocolate

Amazing, rich, thick, decadent, filling, indulging, chocolaty goodness..

Get The Recipe >>

Raw Milk Chocolate Pudding

The most frequent comment about this pudding (besides “yum”, “delicious”, and “mmm…”) is that it tastes just like a chocolate pudding cup!

Get The Recipe >>

Homemade Red Hots

I’ll admit that when I make the Christmas Wreaths in the future I may use store red hots… and tell people they are just for decoration and to pick them off. Because making homemade red hots is a labor of love. There is no other way to put it.

Get The Recipe >>

Caramel Candy and Caramel Sauce

Several years ago I discovered that the mythical candy known as caramel was actually fairly simple to make. 

Get The Recipe >>

Brownies Made with Dates

Dairy Free, Gluten Free, GAPS Legal Brownies Made with Dates

While these brownies are not as sweet as conventional brownies, they were deemed by some tasters on the GAPS Diet as being “Better than Brownies.” These GAPS legal brownies are dairy free, gluten free, sugar free, and egg free.

Even better, besides the 24 hour fermentation time needed for the almond flour, these brownies can be made very quickly! These brownies actually get better over time so it’s actually better to make them a day before to let the flavors meld. They would be delicious eaten alongside homemade ice cream or with homemade whipped cream and fruit.

Better Than Brownies - GAPS Legal Brownies

Ingredients for brownies made from dates

  • 2 cups of almond flour

  • 5 tablespoons Whey

  • 18 dates

  • ½ cup Filtered Water

  • 1/2 cup Coconut Oil + extra to grease the baking dish

  • ¼ cup Cacao Powder

  • ½ tsp Vanilla Extract

  • ¼ cup Cacao Nibs (optional)

  • ¼ cup Crispy Nuts (optional)

Directions for brownies made from dates

24 Hours Before:

These GAPS legal brownies were deemed as better than brownies. They are gluten free, dairy free, sugar free, egg free, and made with fermented almond flour and dates. Recipe by certified GAPS Practitioner Amy Mihaly, Be Well Clinic.

Add almond flour and cacao powder to a bowl. Use a fork to get rid of almond flour clumps.Add whey and stir to moisten.Cover and leave on counter to ferment for 24 hours.

The Next Day:

These GAPS legal brownies were deemed as better than brownies. They are gluten free, dairy free, sugar free, egg free, and made with fermented almond flour and dates. Recipe by certified GAPS Practitioner Amy Mihaly, Be Well Clinic.

Cut up 18 dates, removing the inner pit.Add ½ cup Filtered Water.

These GAPS legal brownies were deemed as better than brownies. They are gluten free, dairy free, sugar free, egg free, and made with fermented almond flour and dates. Recipe by certified GAPS Practitioner Amy Mihaly, Be Well Clinic.

Cook on low heat until dates are soft and water is absorbed, about 4-6 minutes. (think like making applesauce.) Watch closely to make sure dates don’t burn. You may need to add more water as you go depending on how dry your dates are so they’re able to fully hydrate without burning. Be sure not to add too much or it will thin the eventual date paste.

These GAPS legal brownies were deemed as better than brownies. They are gluten free, dairy free, sugar free, egg free, and made with fermented almond flour and dates. Recipe by certified GAPS Practitioner Amy Mihaly, Be Well Clinic.

When dates are soft, turn off the heat. Puree the mixture in the pot with an immersion blender or add to a blender or food processor until smooth. The smoother the date texture, the more appealing the brownies!Preheat oven to 350.Grease a baking dish or pie pan with coconut oil. Do not use a metal baking dish or the edges will burn.

These GAPS legal brownies were deemed as better than brownies. They are gluten free, dairy free, sugar free, egg free, and made with fermented almond flour and dates. Recipe by certified GAPS Practitioner Amy Mihaly, Be Well Clinic.

Combine coconut oil and dates into the almond flour mixture. If you’re using a blender, add the coconut oil to the blender and blend until smooth before adding to the flour mixture. Optionally, add cacao nibs and crispy nuts.

These GAPS legal brownies were deemed as better than brownies. They are gluten free, dairy free, sugar free, egg free, and made with fermented almond flour and dates. Recipe by certified GAPS Practitioner Amy Mihaly, Be Well Clinic.

Stir the mixture until smooth, being sure to get all the clumps out. You want the mixture to be as smooth as possible. The batter will be thick. Add batter to greased baking sheet and smooth out.

These GAPS legal brownies were deemed as better than brownies. They are gluten free, dairy free, sugar free, egg free, and made with fermented almond flour and dates. Recipe by certified GAPS Practitioner Amy Mihaly, Be Well Clinic.

Bake for 45 minutes until the knife comes out clean. Check after 30 minutes. Serve and enjoy!

Notes:

  • Instead of date paste, you can use applesauce but the brownies will not be as sweet and you will need to make your own applesauce that is thick so it creates the right consistency.

  • These brownies get better with age!

  • These are dairy free, gluten free, sugar free, egg free and legal on GAPS.


Brownies Made with Dates

Author:
prep time: cook time: total time:

ingredients:

  • 2 cups of almond flour
  • 5 tablespoons Whey
  • 18 dates
  • ½ cup Filtered Water
  • 1/2 cup Coconut Oil + extra to grease the baking dish
  • ¼ cup Cacao Powder
  • ½ tsp Vanilla Extract
  • ¼ cup Cacao Nibs (optional)
  • ¼ cup Crispy Nuts (optional)

instructions:

How to cook Brownies Made with Dates

24 Hours in Advance
  1. Add almond flour and cacao powder to a bowl. Use a fork to get rid of almond flour clumps.Add whey and stir to moisten.Cover and leave on counter to ferment for 24 hours.
The Next Day
  1. Cut up 18 dates, removing the inner pit. Add ½ cup Filtered Water.
  2. Cook on low heat until dates are soft and water is absorbed, about 4-6 minutes. (think like making applesauce.) Watch closely to make sure dates don’t burn. You may need to add more water as you go depending on how dry your dates are so they’re able to fully hydrate without burning. Be sure not to add too much or it will thin the eventual date paste.
  3. When dates are soft, turn off the heat. Puree the mixture in the pot with an immersion blender or add to a blender or food processor until smooth. The smoother the date texture, the more appealing the brownies!Preheat oven to 350.Grease a baking dish or pie pan with coconut oil. Do not use a metal baking dish or the edges will burn.
  4. Combine coconut oil and dates into the almond flour mixture. If you’re using a blender, add the coconut oil to the blender and blend until smooth before adding to the flour mixture. Optionally, add cacao nibs and crispy nuts.
  5. Stir the mixture until smooth, being sure to get all the clumps out. You want the mixture to be as smooth as possible. The batter will be thick. Add batter to greased baking sheet and smooth out.
  6. Bake for 45 minutes until the knife comes out clean. Check after 30 minutes. Serve and enjoy!
  7. Notes:
  8. Instead of date paste, you can use applesauce but the brownies will not be as sweet and you will need to make your own applesauce that is thick so it creates the right consistency.
  9. These brownies get better with age!
  10. These are dairy free, gluten free, sugar free, egg free and legal on GAPS.
Created using The Recipes Generator

Almond Flour Cookies with Cacao Nibs

GAPS Legal Almond Cookies

Adapted from The Paleo Plan Makes 24 Cookies GAPS Legal on Stage 4

Ingredients for gaps legal chocolate chip cookies

  • 2 cups Almond Flour

  • ¼ cup Whey

  • 2 large eggs

  • 1/3 cup Room Temperature Coconut Oil

  • 1 tsp Baking Soda

  • ½ tsp Vanilla

  • ⅛ tsp Salt

  • ¼ cup Honey (or ⅓ cup date syrup)

  • ⅛-¼ cup Raw Cacao Nibs

Directions for chocolate chip cookies on the gaps diet

gaps-legal-chocolate-chip-cookies-with-almond-flour-fermented-almond-flour-cookies-what-to-do-with-fermented-almond-flour

24 Hours in Advance

Add whey to almond flour. Stir to moisten.

Leave covered on counter for 24 hours to ferment.

gaps-legal-chocolate-chip-cookies-with-almond-flour-fermented-almond-flour-cookies-what-to-do-with-fermented-almond-flour

The Next Day

Preheat oven to 350. Add your baking sheet to the oven to preheat. These cookies bake better on a hot dish.To fermented flour, add eggs and stir.

gaps-legal-chocolate-chip-cookies-with-almond-flour-fermented-almond-flour-cookies-what-to-do-with-fermented-almond-flour

Add coconut oil to mixture. The coconut oil should be room temperature. If it is melted, you won’t have the right consistency.

Add the baking soda, vanilla, salt and honey (or date paste) to the mixture. Mix well.

gaps-legal-chocolate-chip-cookies-with-almond-flour-fermented-almond-flour-cookies-what-to-do-with-fermented-almond-flour

Add cacao nibs to dough mixture.

Remove baking sheet from oven. Line with parchment paper.

gaps-legal-chocolate-chip-cookies-with-almond-flour-fermented-almond-flour-cookies-what-to-do-with-fermented-almond-flour

Spoon approx. 1 tbsp size rounds of dough onto parchment paper.

Bake at 350 degrees for 10-15 minutes until edges are golden brown and cookies seem firm. Watch them closely after 8 minutes. They will go from raw to burnt quickly!

gaps-legal-chocolate-chip-cookies-with-almond-flour-fermented-almond-flour-cookies-what-to-do-with-fermented-almond-flour

Almond Flour Cookies with Cacao Nibs

Author:
prep time: cook time: total time:

ingredients:

  • 2 cups Almond Flour
  • ¼ cup Whey
  • 2 large eggs
  • 1/3 cup Room Temperature Coconut Oil
  • 1 tsp Baking Soda
  • ½ tsp Vanilla
  • ⅛ tsp Salt
  • ¼ cup Honey (or ⅓ cup date syrup)
  • ⅛-¼ cup Raw Cacao Nibs

instructions:

How to cook Almond Flour Cookies with Cacao Nibs

24 Hours in Advance
  1. Add whey to almond flour. Stir to moisten.
  2. Leave covered on counter for 24 hours to ferment.
The Next Day
  1. Preheat oven to 350. Add your baking sheet to the oven to preheat. These cookies bake better on a hot dish.To fermented flour, add eggs and stir.
  2. Add coconut oil to mixture. The coconut oil should be room temperature. If it is melted, you won’t have the right consistency.
  3. Add the baking soda, vanilla, salt and honey (or date paste) to the mixture. Mix well.
  4. Add cacao nibs to dough mixture.
  5. Remove baking sheet from oven. Line with parchment paper.
  6. Spoon approx. 1 tbsp size rounds of dough onto parchment paper.
  7. Bake at 350 degrees for 10-15 minutes until edges are golden brown and cookies seem firm. Watch them closely after 8 minutes. They will go from raw to burnt quickly!
Created using The Recipes Generator

GAPS Friendly Strawberry Rhubarb Pie Recipe

Strawberry rhubarb pie has always been one of my favorites! In the past I have modified recipes to make a strawberry rhubarb dessert, but this year I decided I wanted to use my growing knowledge and skill in the kitchen and make a delicious GAPS-legal pie. My added challenges? I wanted to make it with a fermented almond crust, and use a different sweetener than honey. Finally, I wanted to have a modification that made not only GAPS legal, but dairy-free, nut-free and egg-free.

Overall, I would call the experiment a success. But to get that success I had to make more multiples of this recipe than I ever have for any previous recipe I've posted. Because of the crust. Not that my "tester" friends and family complained.

Turns out almond flour crust doesn't play nice with a wetter pie filling. Actually, the problem is that it plays too nice! It wants to combine with the filling; get up close and personal. Not what a pie crust is supposed to do. I did not fully overcome the pie-crust conundrum, but every recipe I made turned out delicious. So instead of chocking it up as a "failed recipe," I decided to share with you what I made... a good pie that happens to have a crust with boundary issues! And, of course, I will share the modified recipe for egg-free, nut-free, dairy-free strawberry rhubarb dessert. Keep reading!

Ingredients FOr Strawberry Rhubarb Pie

For the Pie Crust:

  • 2 1/2 cups almond flour

  • 1/4 cup whey (enough to moisten)

  • 1/2 cup room-temperature butter (or lard)

  • 1/2 tsp sea salt

For the Filling:

  • 3 1/2 cups rhubarb pieces

  • 2 1/2 cups sliced strawberries

  • 1/4 tsp salt

  • 1/2 cup date syrup (I use this one)

  • 2 TBS gelatin dissolved in 1/4 cup hot water

  • Optional: zest from 1/2 lemon

Directions for Strawberry Rhubarb Pie

IMG_1036.jpg

Mix almond flour and whey together. Cover and leave on the counter for 24 hours to ferment.

After 24 hours, this mixture keeps in the fridge for up to 1 week.

IMG_1054.jpg

To the fermented flour mixture, add butter or lard and sea salt. Mix well, getting all clumps out.

Then butter a pie pan well. Press the crust mixture into the pan and form a crust using your fingers.

IMG_1055.jpg

Bake at 400° for 5-8 minutes until a little dry and just turning brown.  

IMG_1019.jpg

Combine all ingredients for the filling. Let sit for 5-10 minutes until the juices increase.

IMG_1062.jpg

Add the filling to your pre-baked crust.

IMG_1136.jpg

Bake at 400° for 30-35 minutes until light brown.

Directions for Strawberry Rhubarb Dessert

A delicious nut free alternative served hot or at room temperature!

IMG_1074.jpg

Mix the filling the same, except add 2 additional TBS of gelatin and dissolve in 1/2 cup of hot water.

IMG_1081.jpg

Let the filling sit for 5-10 minutes to let the flavors mix.

Line muffin tins.

IMG_1108.jpg

Bake at 350° for 20-25 minutes until the tops are just browning.

IMG_1117.jpg

Serve warm or room temperature. These gooey treats are a bit messy, so eat with a spoon. They are delicious!  

Enjoy!


Strawberry Rhubarb Pie

Author:
prep time: cook time: total time:

ingredients:

For the Pie Crust:
  • 2 1/2 cups almond flour
  • 1/4 cup whey (enough to moisten)
  • 1/2 cup room-temperature butter (or lard)
  • 1/2 tsp sea salt
For the Filling:
  • 3 1/2 cups rhubarb pieces
  • 2 1/2 cups sliced strawberries
  • 1/4 tsp salt
  • 1/2 cup date syrup (I use this one)
  • 2 TBS gelatin dissolved in 1/4 cup hot water
  • Optional: zest from 1/2 lemon

instructions:

How to cook Strawberry Rhubarb Pie

24 Hours Before
  1. Mix almond flour and whey together. Cover and leave on the counter for 24 hours to ferment.
  2. After 24 hours, this mixture keeps in the fridge for up to 1 week.
The Next Day
  1. To the fermented flour mixture, add butter or lard and sea salt. Mix well, getting all clumps out.
  2. Then butter a pie pan well. Press the crust mixture into the pan and form a crust using your fingers.
  3. Bake at 400° for 5-8 minutes until a little dry and just turning brown.
  4. Combine all ingredients for the filling. Let sit for 5-10 minutes until the juices increase.
  5. Add the filling to your pre-baked crust.
  6. Bake at 400° for 30-35 minutes until light brown.
Created using The Recipes Generator

Strawberry Rhubarb Dessert

Author:
prep time: cook time: total time:

ingredients:

  • 3 1/2 cups rhubarb pieces
  • 2 1/2 cups sliced strawberries
  • 1/4 tsp salt
  • 1/2 cup date syrup (I use this one)
  • 2 TBS gelatin dissolved in 1/4 cup hot water
  • Optional: zest from 1/2 lemon

instructions:

How to cook Strawberry Rhubarb Dessert

  1. Mix the filling the same, except add 2 additional TBS of gelatin and dissolve in 1/2 cup of hot water.
  2. Let the filling sit for 5-10 minutes to let the flavors mix.
  3. Line muffin tins.
  4. Bake at 350° for 20-25 minutes until the tops are just browning.
  5. Serve warm or room temperature. These gooey treats are a bit messy, so eat with a spoon. They are delicious!
Created using The Recipes Generator

Christmas Wreath Cookies {GAPS Legal}

It's the holiday season! More specifically, it's cookie season!   I love making, giving away (and eating) Christmas cookies. But it's been a long time since I have enjoyed many of the cookies I grew up making, so this year I decided I wanted to create real-food versions of some of my favorite Christmas cookie recipes.  

First up, Christmas Wreath cookies!

  This cookie is traditionally a mix of corn flakes, marshmallows, and butter. So let's look at the ingredients...

  • The butter is already a real food!

  • Marshmallows I have made before, modified from Mommypotamus' marshmallow recipe.

So all I had to do was figure out a substitution for the corn flakes (and see if the marshmallows actually work the same as the commercial variety).   Challenge accepted!

Christmas Wreath Cookies

Makes about 36 cookies (recipe can be halved)

Ingredients

For Marshmallows

  • 2 cups honey

  • 1 cup of filtered water

  • 2 tsp vanilla

  • 1 tsp sea salt

  • 6 TBS grass-fed beef gelatin

  • 1 cup of filtered water

For Wreath Cookies

  • Marshmallow paste (above)

  • 8 ounces organic butter

  • 14 cups coconut flakes (approximately 20 ounces)

  • Red hots (my homemade recipe)

  • Natural food coloring, blue and yellow packets (I used this one)

Directions

IMG_9987.jpg

Place the coconut flakes in the oven at 200°

Toast the coconut until they are light brown—this makes the cookies crispier! When done, remove them from the oven Place in a large bowl, set aside.

IMG_9996.jpg

Melt the butter in a saucepan over low heat When melted, remove from heat and set aside   Next, make the marshmallow paste. See recipe here.

Soften the gelatin

  • Add gelatin to 1 cup hot water

  • Stir and allow to to sit, keep warm (not on stove)

While gelatin is softening... Heat honey and water in a medium saucepan (medium to high heat), stirring frequently, until it reaches the soft ball candy stage (about 235°F).

If you don't have a thermometer, you can check by dripping the heated honey into a glass of cold water. When the candy forms a ball, it is ready!

When the honey has reached the soft ball stage, remove from heat. Add the heated mixture to the softened gelatin in a large bowl. Add vanilla.

Do these steps quickly, you don't want honey mixture to cool off too much!

Whisk the mixture using an electric mixer or stand mixer for about 10 minutes.

When the mixture is thick and looks like marshmallow paste, it's done!  

If you want marshmallows, you can stop here. Put the marshmallow paste in a greased glass 9x11 dish and allow to cool and dry for a 24-36 hrs. Then cut up and serve.  

But we are not stopping here! To make traditional Christmas wreath cookies you melt the marshmallows and turn them back into paste-which is what you just created!  

Next, stir the melted butter into the mixture. It will deflate the mixture somewhat, this is normal.

Mix in the blue and yellow food coloring packets. This will turn it green (not neon green—that's an artificial color). But when it's made into wreathes it does look green—although you're going to have to take my word for it!

IMG_0006.jpg

Pour the marshmallow mixture into the bowl with the toasted coconut flakes. Mix until the flakes are coated.

Finally, form the warm mixture into wreath-shaped cookies on parchment paper.

IMG_0019.jpg

Add decorative red hots as berries (see my homemade recipe) Allow to cool.

See, I told you they look green!

All that's left is to share and enjoy these delicious treats!

Disclosure: This post contains affiliate links. Your trust is important. I only recommend products I trust. 

IMG_0021.jpg

Christmas Wreath Cookies

Author:
prep time: cook time: total time:

ingredients:

For Marshmallows
  • 2 cups honey
  • 1 cup of filtered water
  • 2 tsp vanilla
  • 1 tsp sea salt
  • 6 TBS grass-fed beef gelatin
  • 1 cup of filtered water
For Wreath Cookies
  • Marshmallow paste (above)
  • 8 ounces organic butter
  • 14 cups coconut flakes (approximately 20 ounces)
  • Red hots (my homemaderecipe)
  • Natural food coloring, blue and yellow packets (I used this one)

instructions:

How to cook Christmas Wreath Cookies

  1. Place the coconut flakes in the oven at 200°
  2. Toast the coconut until they are light brown—this makes the cookies crispier! When done, remove them from the oven Place in a large bowl, set aside.
  3. Melt the butter in a saucepan over low heat When melted, remove from heat and set aside Next, make the marshmallow paste. See recipe here.
  4. Soften the gelatin
  5. Add gelatin to 1 cup hot water
  6. Stir and allow to to sit, keep warm (not on stove)
  7. While gelatin is softening... Heat honey and water in a medium saucepan (medium to high heat), stirring frequently, until it reaches the soft ball candy stage (about 235°F).
  8. If you don't have a thermometer, you can check by dripping the heated honey into a glass of cold water. When the candy forms a ball, it is ready!
  9. When the honey has reached the soft ball stage, remove from heat. Add the heated mixture to the softened gelatin in a large bowl. Add vanilla.
  10. Do these steps quickly, you don't want honey mixture to cool off too much!
  11. Whisk the mixture using an electric mixer or stand mixer for about 10 minutes.
  12. When the mixture is thick and looks like marshmallow paste, it's done!
  13. If you want marshmallows, you can stop here. Put the marshmallow paste in a greased glass 9x11 dish and allow to cool and dry for a 24-36 hrs. Then cut up and serve.
  14. But we are not stopping here! To make traditional Christmas wreath cookies you melt the marshmallows and turn them back into paste-which is what you just created!
  15. Next, stir the melted butter into the mixture. It will deflate the mixture somewhat, this is normal.
  16. Mix in the blue and yellow food coloring packets. This will turn it green (not neon green—that's an artificial color). But when it's made into wreathes it does look green—although you're going to have to take my word for it!
  17. Pour the marshmallow mixture into the bowl with the toasted coconut flakes. Mix until the flakes are coated.
  18. Finally, form the warm mixture into wreath-shaped cookies on parchment paper.
  19. Add decorative red hots as berries (see my homemade recipe) Allow to cool.
  20. See, I told you they look green!
  21. All that's left is to share and enjoy these delicious treats!
Created using The Recipes Generator

Homemade Red Hots {GAPS Legal}

I have been getting more bold in the kitchen, and this December I decided to create alternative recipes featuring some of my favorite Christmas cookies. To enjoy.

I decided on my first cookie to make, Christmas Wreath cookies. And as I was running through my ingredients and working out substitutions I came to the decorative red hots.

And I was faced with a dilemma... could I create a red hot, or should I simply bite the bullet and just use traditional red hots. Maybe I could even find a healthy brand...

But my all-or-nothing attitude kicked in. If I was going to do this, I was going to do it right.

And that meant making red hots. From scratch. A quick search revealed that it was possible... in essence red hots are a sugar brittle flavored with spices, like cinnamon.

I knew how to make candy out of honey. This could work.

It did work. But I'll admit that when I make the Christmas Wreaths in the future I may use boughten red hots... and tell people they are just for decoration and to pick them off.  

Because making homemade red hots is a labor of love. There is no other way to put it. But being able to put healthy, three ingredient red hots on your Christmas cookies is amazing! And if you don't care if they are rounded into tiny, holly-berry decorative balls, then this is a really easy candy to make!  

GAPS Legal Homemade Red Hots / Cinnamon Hard Candy

Ingredients:

  • 1/2 cup water

  • 1 cup honey

  • 1/4-1/2 tsp cinnamon

  • 1 package natural red coloring (I used this one)

Directions:

IMG_9966.jpg

Combine the honey and water on the stovetop in a medium saucepan, stirring frequently.

You want to heat it at a temperature that is not too hot that it burns, but if it's too low it will take forever to get to temperature.

You're going to have to find your heat sweet spot. It should take between 5-10 minutes to get to soft ball stage, if it's taking longer, turn it up!

Soft ball stage occurs around 235°. If you don't have a thermometer available, you can drip some into a clear glass of cold water. It will form into a little ball upon hitting the water. For a little harder candy (I recommend this), let it go a minute or two after you hit the soft-ball stage.  

IMG_9967.jpg

After whisking thoroughly, pour the liquid onto some parchment paper to cool When it has cooled enough to touch (doesn't take very long), then use well buttered fingers to form tiny little balls

Not tolerating butter? Any fat will do—the key is to prevent sticking!

Roll those little suckers quickly... after a while the candy will get too hard to work with. You can reheat it to soften in up, but believe me, you will be ready to stop rolling balls. Better yet, recruit a friend (or two) to roll with you!

IMG_9975.jpg

Set the balls in a cold place (outside works for us right now!) When they are hard, gather them up and store them in a container in the fridge. This prevents the balls from clumping.   This candy could be made into any size (I only chose red hot size because of the Christmas wreath cookies)... or simply cooled and broken into pieces. It is a delicious treat!

Enjoy!

Disclosure: This post contains affiliate links. Your trust is important. I only recommend products I trust. 


Homemade Red Hots

Author:
prep time: cook time: total time:

ingredients:

  • 1/2 cup water
  • 1 cup honey
  • 1/4-1/2 tsp cinnamon
  • 1 package natural red coloring (I usedthis one)

instructions:

How to cook Homemade Red Hots

  1. Combine the honey and water on the stovetop in a medium saucepan, stirring frequently.
  2. You want to heat it at a temperature that is not too hot that it burns, but if it's too low it will take forever to get to temperature.
  3. You're going to have to find your heat sweet spot. It should take between 5-10 minutes to get to soft ball stage, if it's taking longer, turn it up!
  4. Soft ball stage occurs around 235°. If you don't have a thermometer available, you can drip some into a clear glass of cold water. It will form into a little ball upon hitting the water. For a little harder candy (I recommend this), let it go a minute or two after you hit the soft-ball stage.
  5. After whisking thoroughly, pour the liquid onto some parchment paper to cool When it has cooled enough to touch (doesn't take very long), then use well buttered fingers to form tiny little balls
  6. Not tolerating butter? Any fat will do—the key is to prevent sticking!
  7. Roll those little suckers quickly... after a while the candy will get too hard to work with. You can reheat it to soften in up, but believe me, you will be ready to stop rolling balls. Better yet, recruit a friend (or two) to roll with you!
  8. Set the balls in a cold place (outside works for us right now!) When they are hard, gather them up and store them in a container in the fridge. This prevents the balls from clumping. This candy could be made into any size (I only chose red hot size because of the Christmas wreath cookies)... or simply cooled and broken into pieces. It is a delicious treat!
  9. Enjoy!
Created using The Recipes Generator

Zucchini Bread {GAPS legal}

Zucchini... if there is one harvest that defines summer, it's zucchini.

Zucchini is great because of its versatility: it can be used hot or cold, baked or fried, and in soups, salads, breads, or even as a noodle substitute.

Today I want to share with you a recipe for a zucchini bread that is legal on the full GAPS diet, WAPF diet, Paleo diet and Whole30. I want you to remember (and take hope in) the fact that I am not primarily a chef. I am just average in the kitchen. If I can make this, so can you! This recipe is very forgiving—so try it!

There are a couple keys to this recipe that need to be followed. Don't shortcut them...they are what make this recipe forgiving, and the bread yummy! The first key is also the first step: fermenting the almond flour. Have you eaten baked goods made of almond flour that are dense and dry? Fermenting the flour creates a lighter, fluffier end product. But that's not all! Fermenting is one of the three processes that can be used to make nuts more digestible.

For more about soaking, sprouting or fermenting, watch this video.

The other key is using sour cream (you could also substitute in a full-fat yogurt) for the fat. As a cultured food, sour cream helps make the bread lighter as well.

Fermented Almond Flour Zucchini Bread

Ingredients

  • 2 1/2 cups almond flour (organic preferred)

  • 1/2 cup whey (strained from yogurt or kefir)

  • 2 cups zucchini (grated and squeezed to remove the liquid)

  • 2-3 eggs (chicken or duck)

  • 1 tsp cinnamon

  • 1/4 tsp ginger

  • 1/4 tsp nutmeg

  • 1 tsp sea salt (source)

  • 1/2 cup sour cream

  • 2/3 cup date syrup (source)

Directions

24 hours (or more) before

Mix almond flour and whey together in a bow.l Cover and set on the counter for 24 hours

This fermentation, which takes place at room temperature, will change the texture of the "flour." At the end of 24 hours you will have something that resembles dough more than wet flour. This is a base that can be used for many recipes. It will keep in the fridge about a week, so many people make this ahead of time and keep it in their fridge for future use. With this step done ahead of time, you can pull it out, add ingredients, and have a fermented baked good in about an hour.

The Next Day

Preheat the oven to 350° F Grate more than 2 cups of zucchini. The zucchini is very wet, so squeeze it dry using a cloth or towel (you can see it in the picture below).

Next, measure 2 cups of the zucchini (dry, but not compressed) and mix it into the 24 hour fermented flour. Add 2-3 eggs (it depends on the size of your egg, those pictured are duck eggs, which are larger than chicken eggs).

Mix in the rest of the ingredients (sour cream, date syrup, salt and spices).

I used date paste instead of honey because cooking honey is thought to turn the honey toxic. You can also make your own date paste in a strong blender like a Vitamix.

Pour into a greased pan (I prefer lining mine with parchment paper, but this is optional).

Bake at 350° for 45-50 minutes, or until toothpick comes out clean from the middle. Wait at least 10 minutes before cutting into the bread. This allows the steam to finish the cooking progress, and will make the texture of the bread better. Add butter, and enjoy!

This post contains affiliate links. Your trust is important to me, and I only recommend products that I trust.


Fermented Almond Flour Zucchini Bread

Author:
prep time: cook time: total time:

ingredients:

  • 2 1/2 cups almond flour (organic preferred)
  • 1/2 cup whey (strained from yogurt or kefir)
  • 2 cups zucchini (grated and squeezed to remove the liquid)
  • 2-3 eggs (chicken or duck)
  • 1 tsp cinnamon
  • 1/4 tsp ginger
  • 1/4 tsp nutmeg
  • 1 tsp sea salt (source)
  • 1/2 cup sour cream
  • 2/3 cup date syrup (source)

instructions:

How to cook Fermented Almond Flour Zucchini Bread

24 hours (or more) before
  1. Mix almond flour and whey together in a bow.l Cover and set on the counter for 24 hours
  2. This fermentation, which takes place at room temperature, will change the texture of the "flour." At the end of 24 hours you will have something that resembles dough more than wet flour. This is a base that can be used for many recipes. It will keep in the fridge about a week, so many people make this ahead of time and keep it in their fridge for future use. With this step done ahead of time, you can pull it out, add ingredients, and have a fermented baked good in about an hour.
The Next Day
  1. Preheat the oven to 350° F Grate more than 2 cups of zucchini. The zucchini is very wet, so squeeze it dry using a cloth or towel (you can see it in the picture below).
  2. Next, measure 2 cups of the zucchini (dry, but not compressed) and mix it into the 24 hour fermented flour. Add 2-3 eggs (it depends on the size of your egg, those pictured are duck eggs, which are larger than chicken eggs).
  3. Mix in the rest of the ingredients (sour cream, date syrup, salt and spices).
  4. I used date paste instead of honey because cooking honey is thought to turn the honey toxic. You can also make your own date paste in a strong blender like a Vitamix.
  5. Pour into a greased pan (I prefer lining mine with parchment paper, but this is optional).
  6. Bake at 350° for 45-50 minutes, or until toothpick comes out clean from the middle. Wait at least 10 minutes before cutting into the bread. This allows the steam to finish the cooking progress, and will make the texture of the bread better. Add butter, and enjoy!
Created using The Recipes Generator