GAPS recipe

A Guide to Commercial Egg Quality

Eggs are one of the best nutrient dense foods but not all eggs are created equal! Just like choosing good meat and vegetables, it’s important to choose good, quality eggs. This topic is not discussed very often, so in this post I’d like to lay out for you some of the main character qualities to look for in a good nourishing egg.

Just like with any food, it’s best to rely on your five senses to determine a particular food’s quality. Some of this can only be done with experimentation, so I encourage you to purchase a variety of brands or eggs from local farmers and make your own observations on freshness, quality, and nutrient density.

I love that I was able to see first hand what a best quality egg looks like when I had my own chickens. They were fed small grain, organic, non-GMO, corn free soy free feed, they had constant access to outside during the day, and ran over half an acre of pasture. I understand not everyone has access to a farmer, and not everyone can have their own laying hens,so this blog post is to help you determine which eggs that are available to you are the best quality.


First, let’s talk about some confusing terms. There’s not a lot of regulation on these terms, and marketing experts often use them to promote their product, but it does not necessarily mean their eggs are of higher quality.

Color of Egg: The color of an egg is determined by the breed of chicken that lays it. No chickens are inherently better than others, so the color of your egg alone doesn’t matter in terms of nutritional content or quality.

Cage Free: This term only indicates that the chickens are not confined in a small, individual cage for 24 hours a day. Cage free does not mean the chickens have access to outside and they may be confined in crowded spaces.

Organic: This refers to the food the chicken is eating. Organic food is better than conventional food because it decreases the number of nasty pesticides and GMOs, but these chickens’ diets are likely heavy in soy and corn or anything else as long as it’s labeled organic.

Vegetarian Fed: This is not a natural diet for a chicken! A natural chicken diet consists of bugs, roadkill, grasses, grains and seeds. They are omnivores! If you limit a chicken to a vegetarian diet, you are messing with nature and your egg will not contain the full amount of nutrition it should.

Free Range: Free range indicates that chickens have to “have access to the outdoors” but it doesn’t specify the amount of space or the amount of time the chickens have to be outside. There may not even be enough room outside for each chicken so some chickens may never be outside.

Pasture Raised: Pasture Raised indicates chickens who are given enough space for all of them to be outside and are moved to fresh pasture regularly, giving them access to new bugs and grass. This is the best choice for any egg you purchase. These chickens have the best opportunity to eat the appropriate chicken diet, get sunshine, and be happy!

Omega-3: Omega-3’s are important in our diet, but an egg from a chicken fed a natural diet will have plenty of Omega-3 in it. If a company is advertising Omega-3 eggs, it is very likely they are giving supplements to ensure a certain level of Omega-3’s in their eggs. Depending on the quality of supplement, this may or may not be good for you, and again if the chicken is given access to sun and an omnivore diet, an additional supplement is unnecessary. On that note, there are different foods and supplements that can be fed to chickens to make their yolks more orange or darker yellow. This does not, of course, equal the same quality of nutrition that a pastured chicken can put in their egg.

Certified Humane: This is a label given to egg raisers who meet the requirements of the Humane Farm Animal Care. In essence, it means the birds are treated well, not starved or debeaked, but does not necessarily mean they are given access to outdoors and beak trimming is also allowed.

Grades: The grades AA, A, & B on the side of the package don’t just refer to size. They refers to the quality and freshness of the egg. “AA” is the best, according to the USDA, but we will teach you how to grade your own eggs!

New advertising measures are used constantly! If you see something new advertised on a carton of eggs, it’s a great idea to look up what qualifications, if any, are necessary to add that label to their carton.

Now that we understand some of the marketing definitions, you can purchase the best quality eggs and do some observations to determine the freshness and quality of an individual egg.

First, look at the thickness and smoothness of the egg shell. A shell that is very thin is deficient in calcium. An overly thick shell likely has an artificial amount of calcium supplementation in the chicken’s diet. A bumpy or disfigured egg shell can indicate health problems or deficiencies in the chicken.

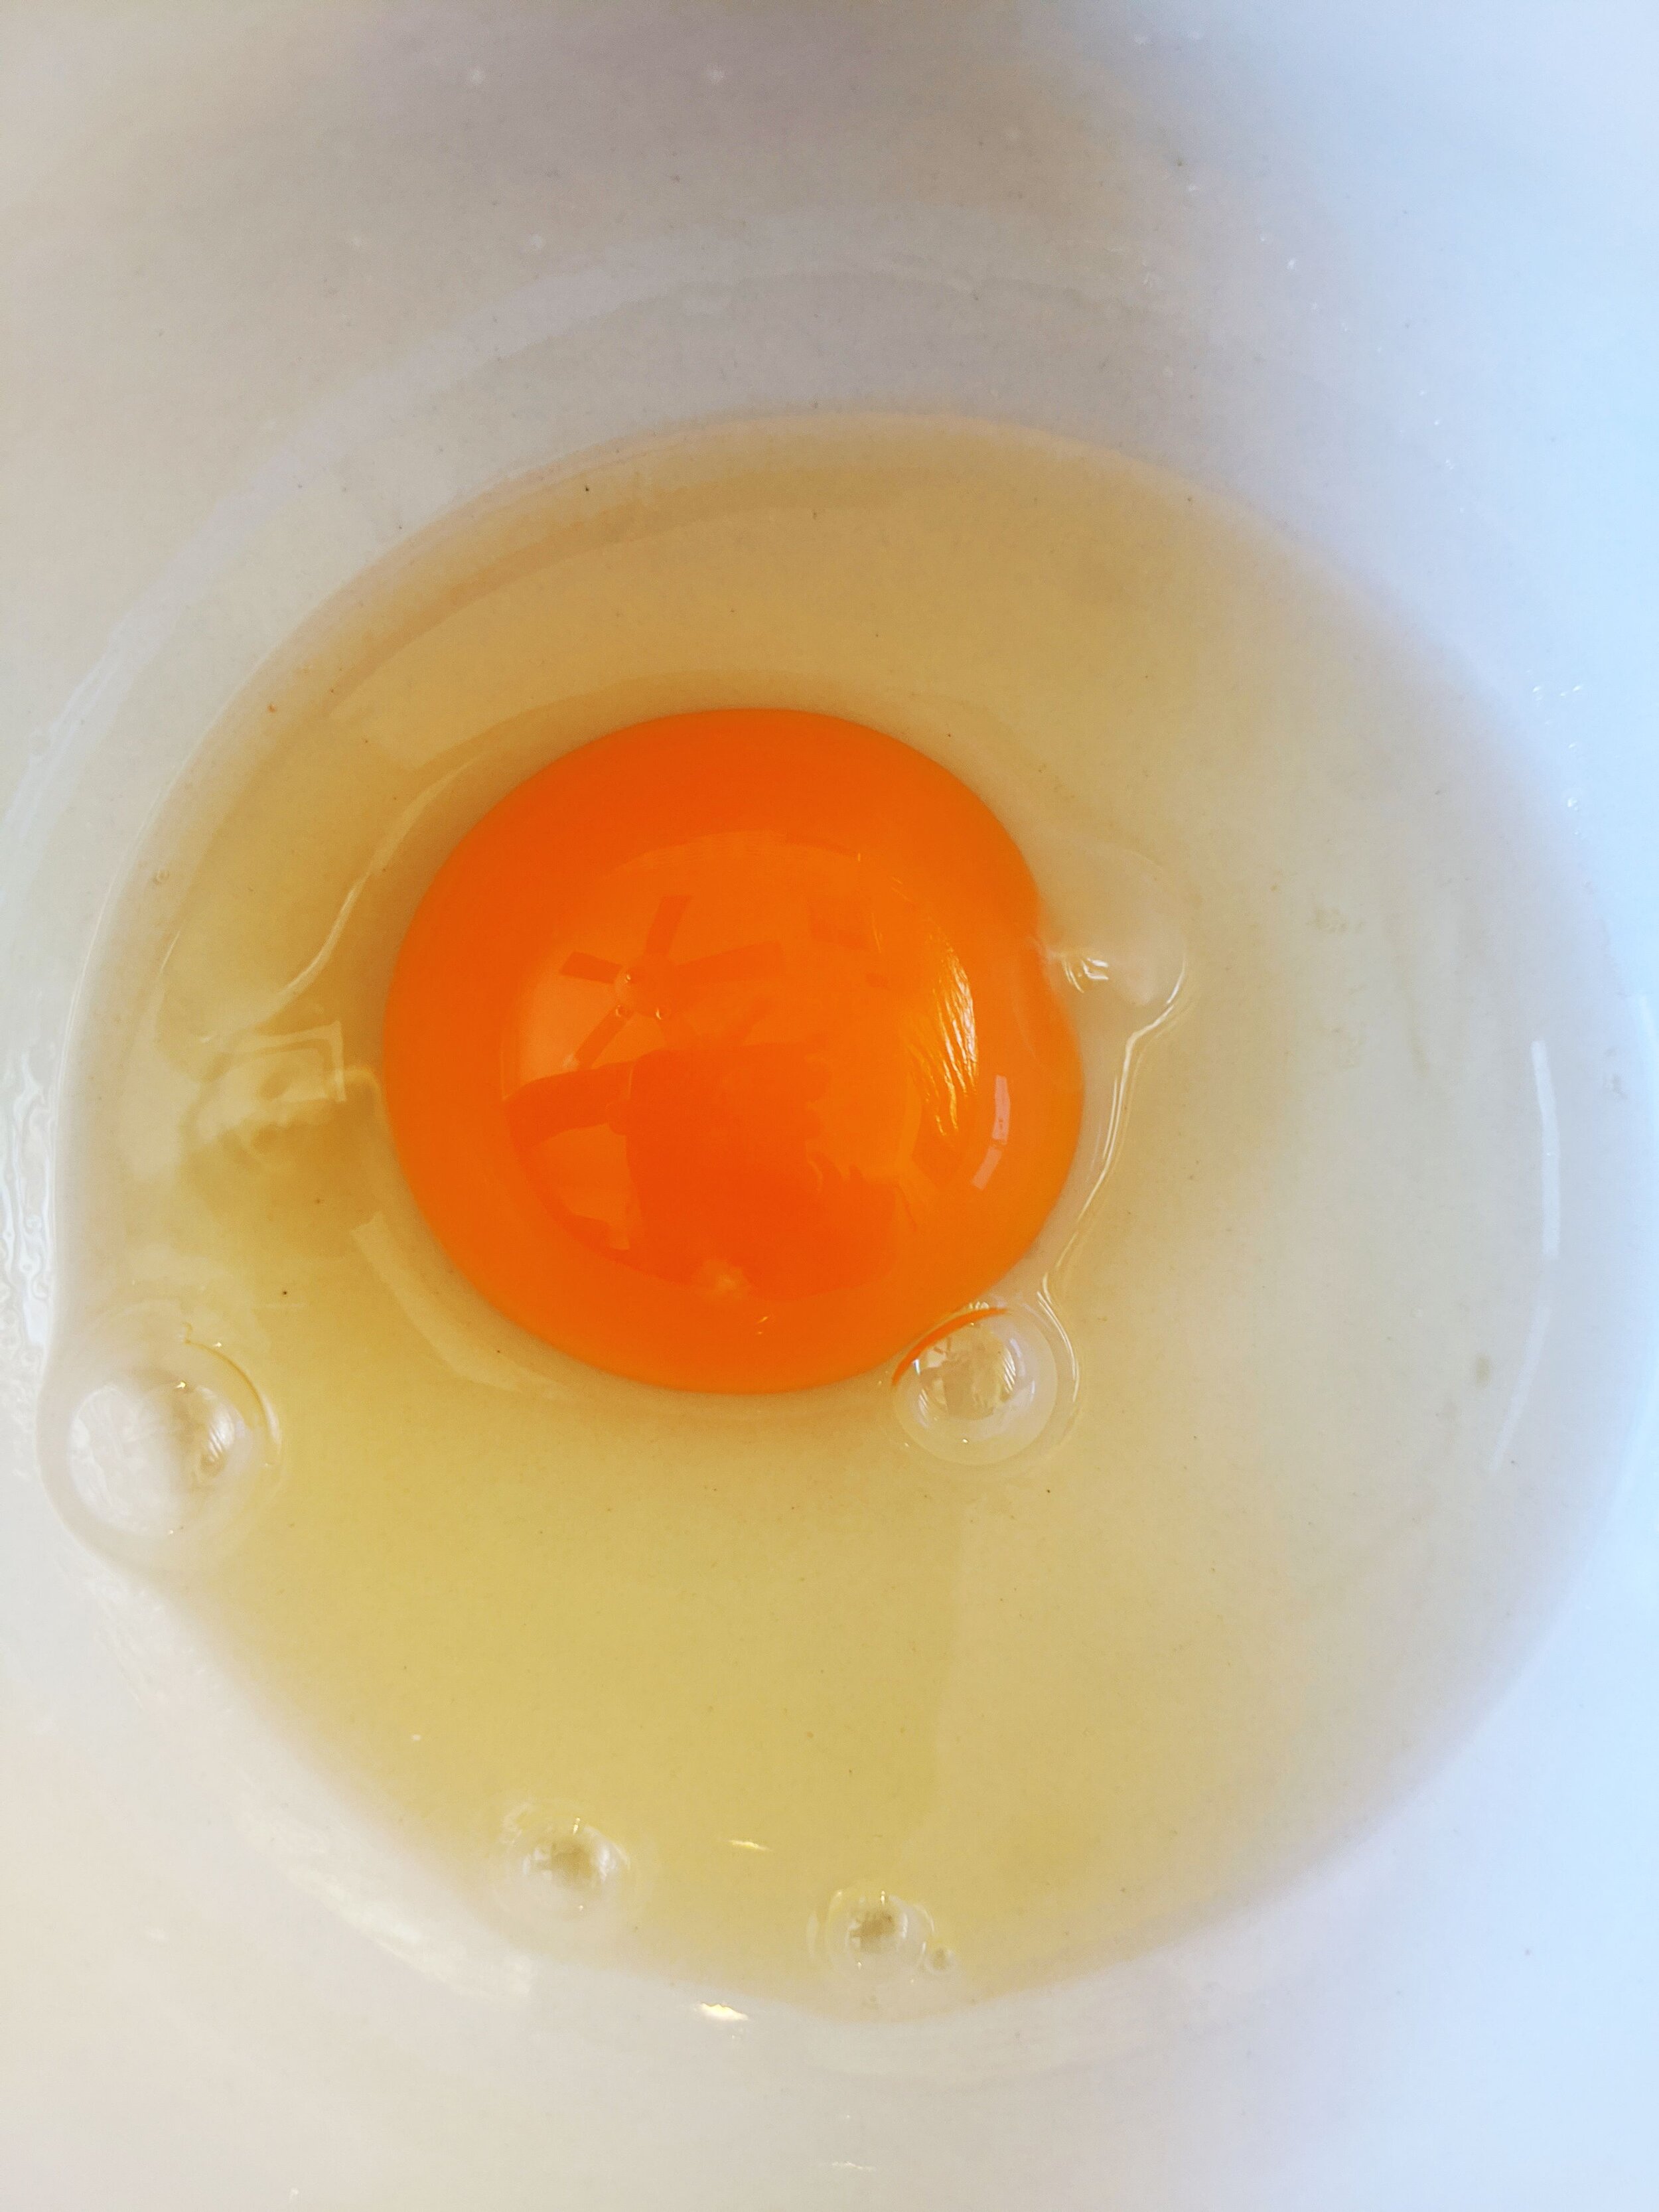
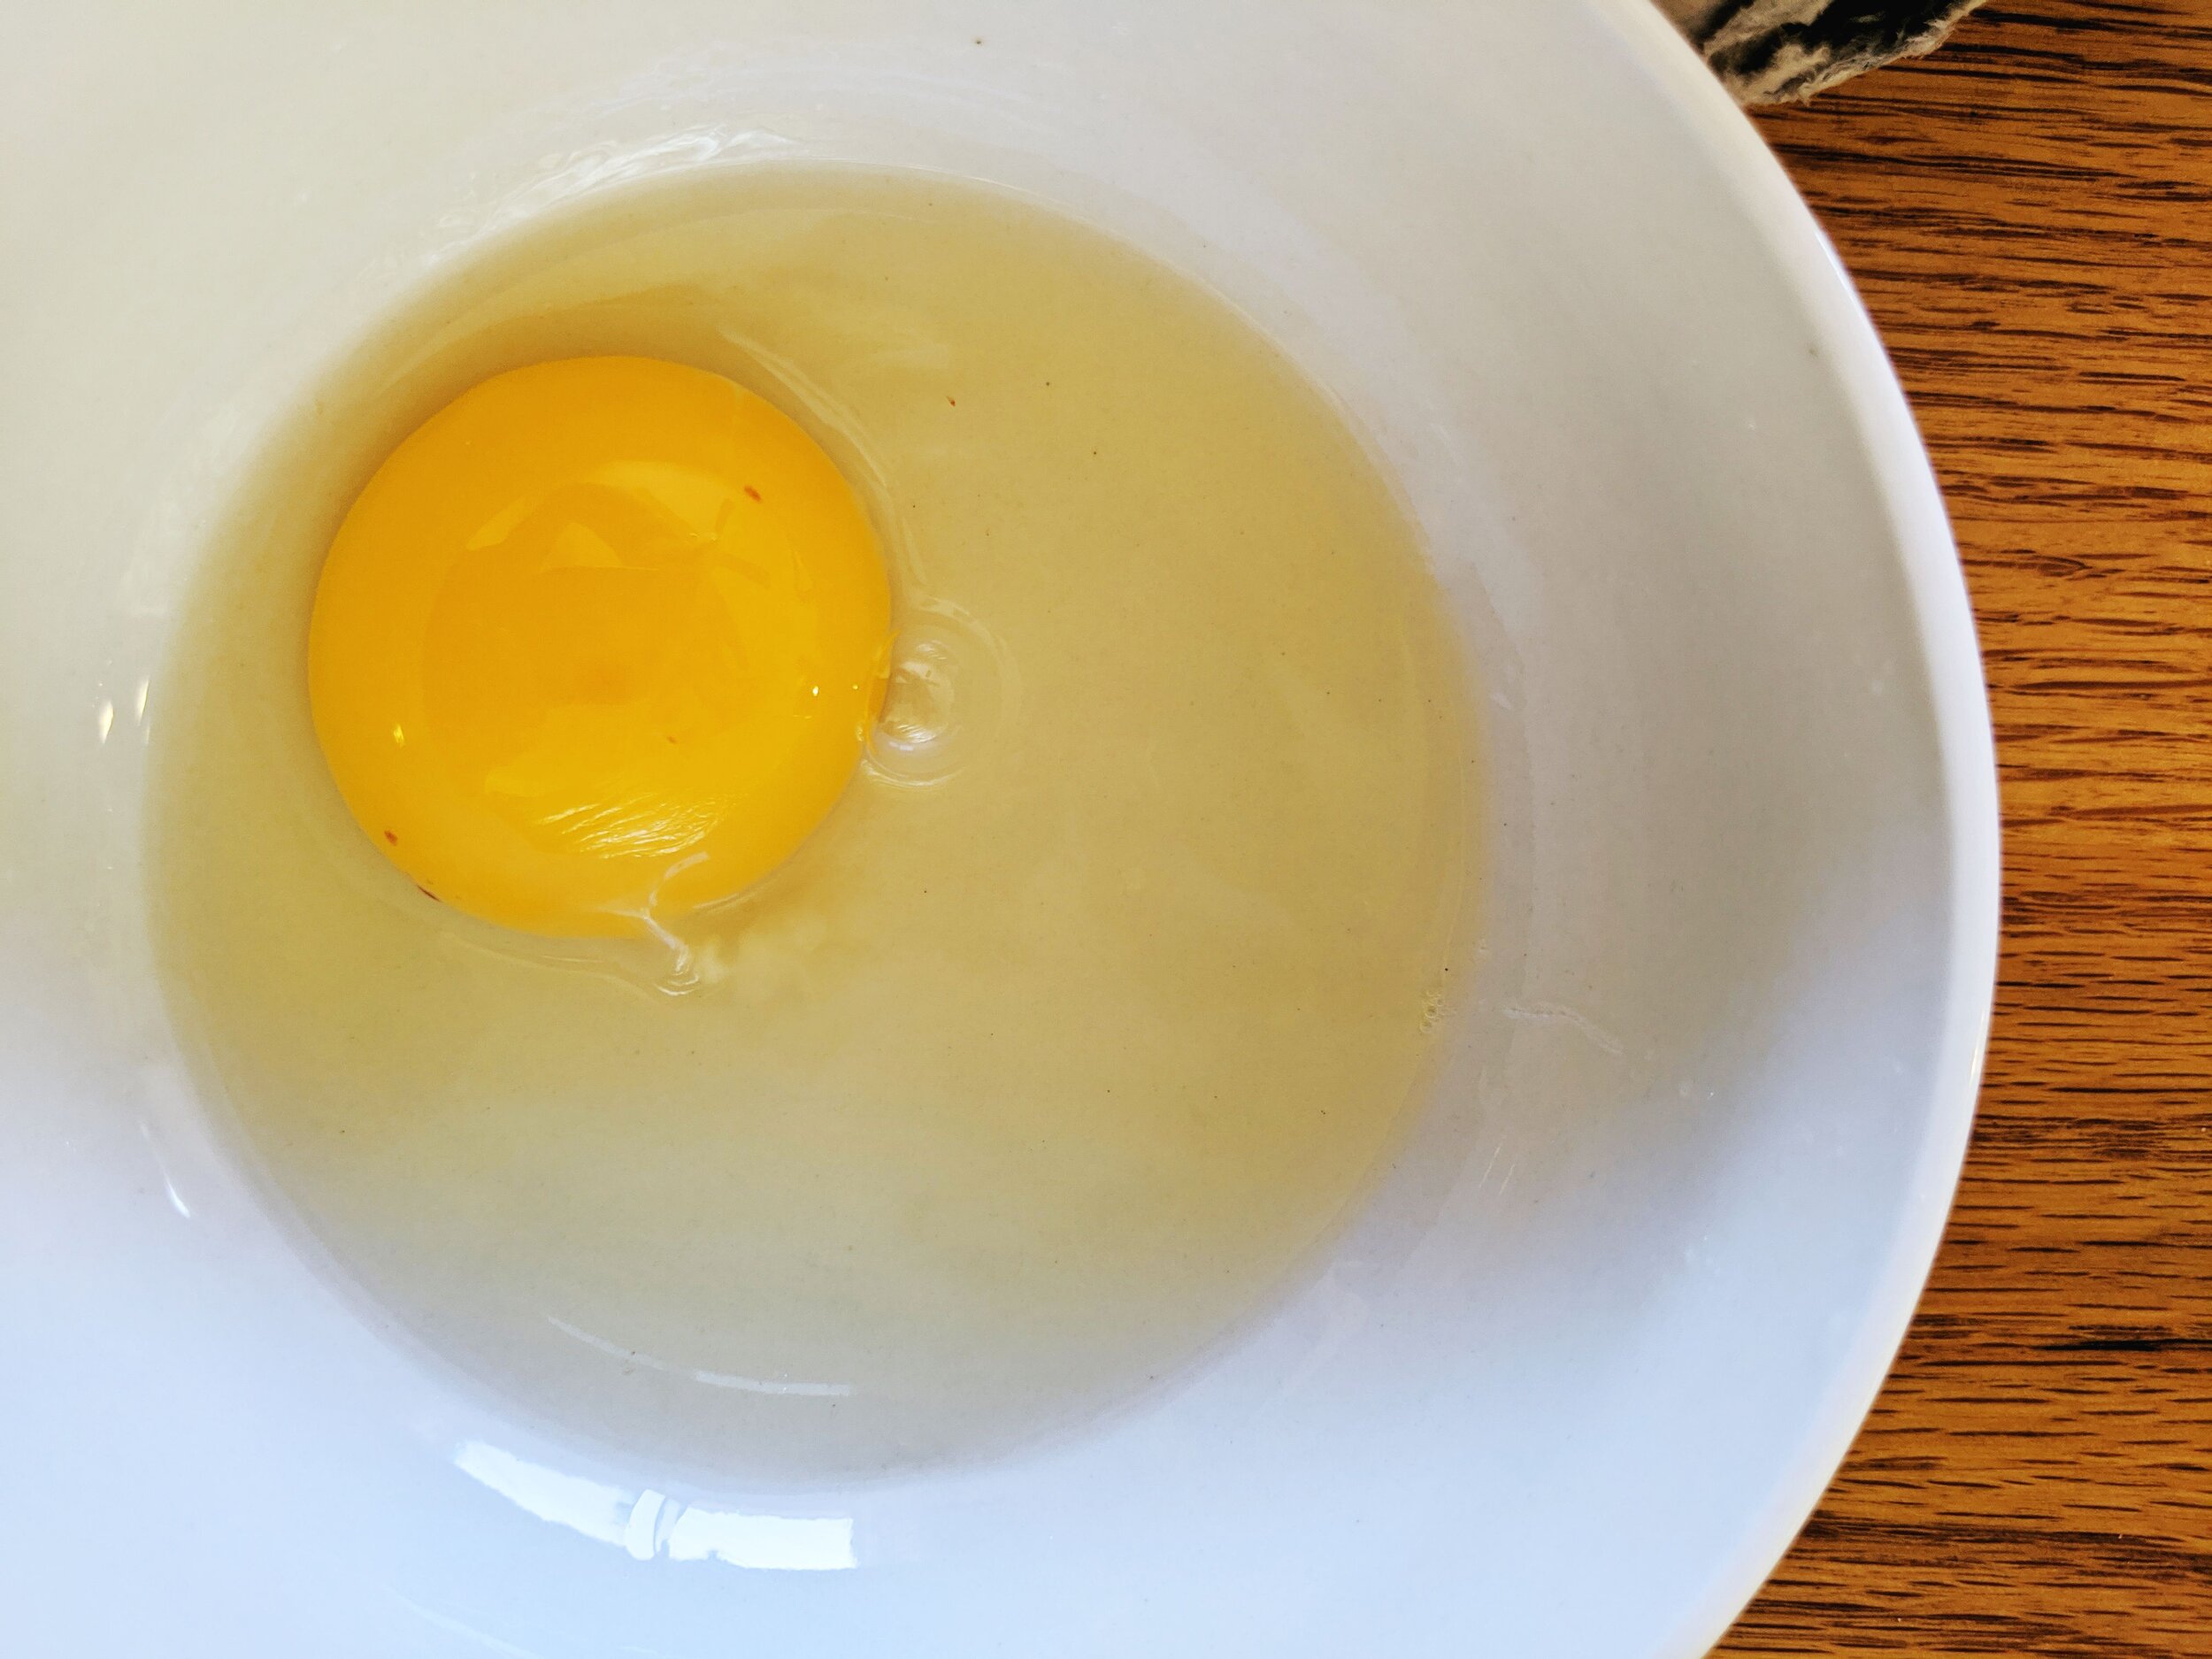
Second, we look at the color of the yolk. Chickens given access to bugs and grass lay eggs with deeper yellow to orange yolks. As a reminder, there are substances, including natural ones, that can be fed to a chicken to make their egg yolk artificially more yellow. Also keep in mind that there is less green plants and bugs in the winter, so even good quality eggs will likely have lighter yellow yolks in the winter.

Third, we look at the white of the egg. A fresh and nutrient rich white will hold together and stand together in the pan. A poor quality or old egg white will spread out over the entire area. I’ve heard that the quality of the egg white is what professional chefs use to judge the quality of an egg.

We purchased a variety of eggs from King Soopers and Natural Grocers to do these observations for this experiment. Please refer to the pictures and analysis below!

20200531_132911.jpg
20200531_132937.jpg

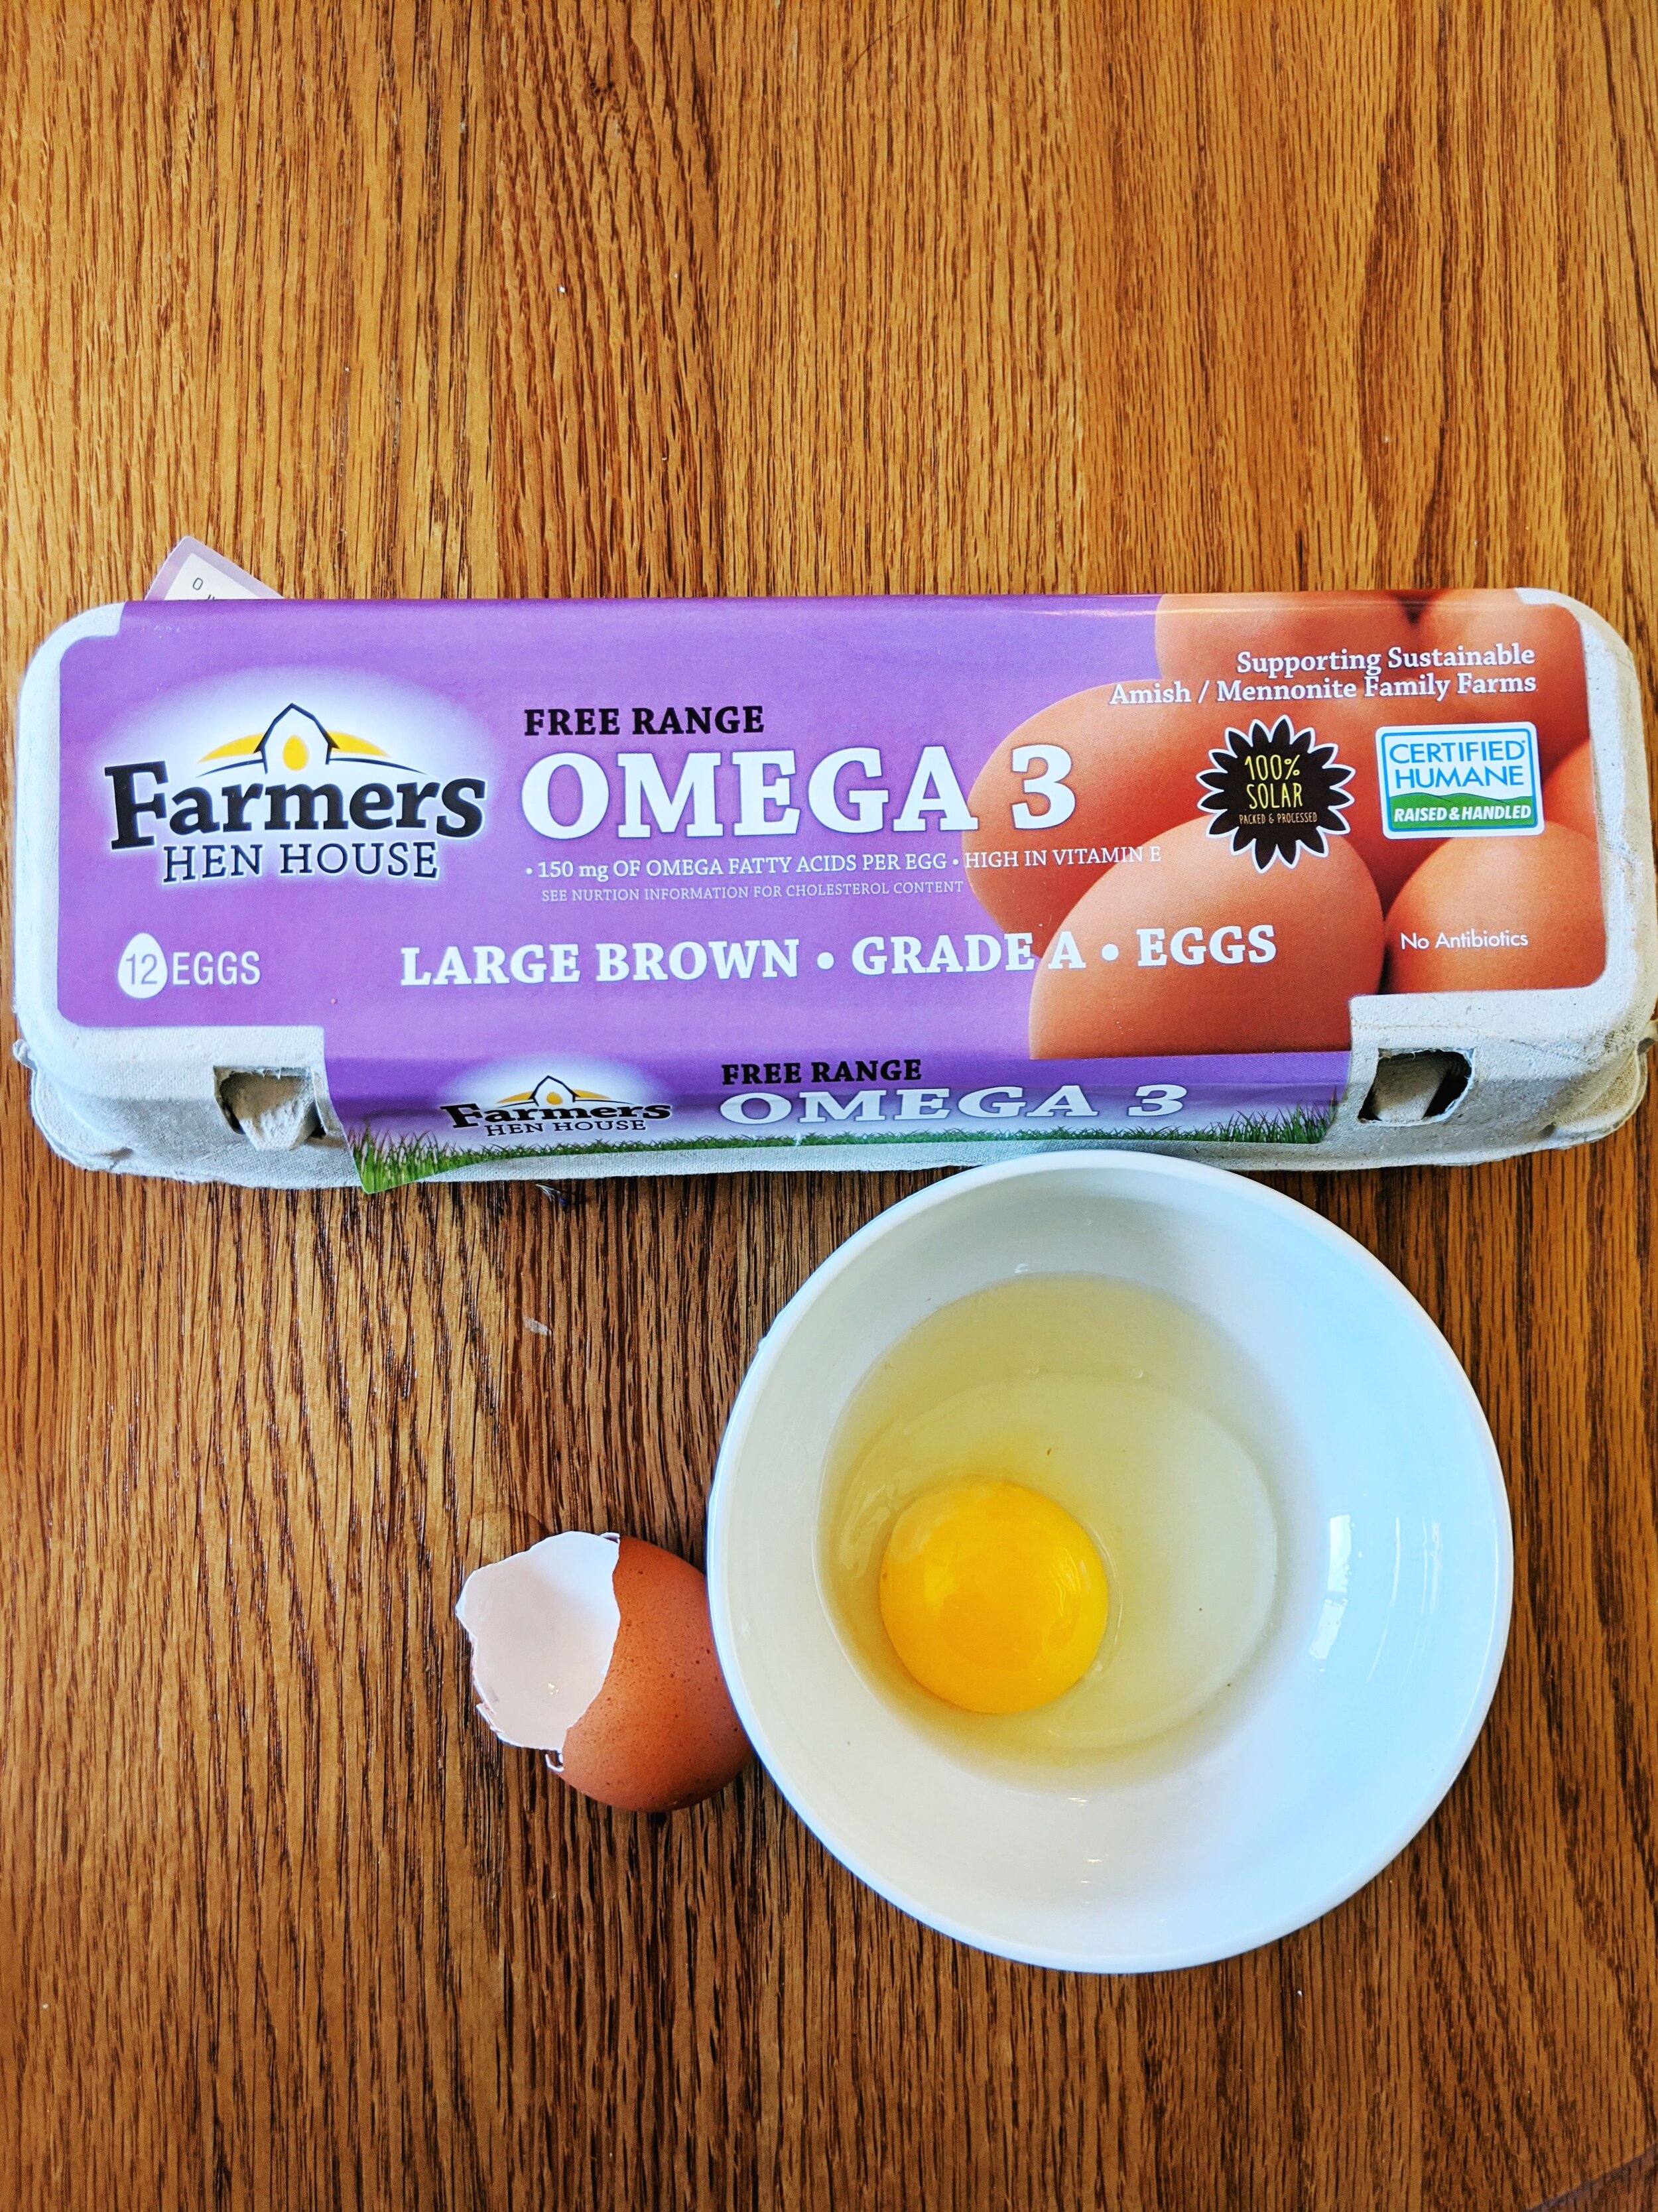
Farmer’s Hen House

This brand is my “bulk” go to egg for washing my hair.

Type of Egg: Free Range Large Brown Grade A from Natural Grocers
Price at Purchase Time:
$3.45
Labels on Carton:
Free Range
Description of Shell:
Good thickness, cracked only where hit and didn’t splinter. Fairly smooth.
Color of Yolk:
Dark yellow.
Spread of White:
Mostly holds together, with a little spread.

20200531_132810.jpg
20200531_132837.jpg

Vital Farms Pasture Raised

Type of Egg: Pasture Raised Large Brown Grade A
Price at Purchase Time:
$5.69
Labels on Carton:
Pasture Raised
Description of Shell:
Very smooth, a little thin but broke mostly clean.
Color of Yolk:
Dark, deep yellow
Spread of White:
Held tightly together

20200531_132727.jpg
20200531_132751.jpg

Happy Egg Free Range Eggs

This is the brand that I recommend as a good starting point in looking at higher quality eggs. They are a more accessible egg brand, available at both King Soopers and Natural Grocers.

Type of Egg: Happy Egg Free Range Eggs
Price at Purchase Time:
$5.99
Labels on Carton:
Free Range Pasture Raised Large Brown Grade A Eggs
Description of Shell:
Smooth but a little thin
Color of Yolk:
Very deep orange
Spread of White:
Held together a little but runnier

20200531_132552.jpg
20200531_132638.jpg

Simple Truth Cage Free Eggs

Type of Egg: Cage Free Large Brown Eggs from Simple Truth
Price at Purchase Time:
$2.99
Labels on Carton:
Cage Free Large Brown Eggs Grade AA
Description of Shell:
A little difficult to crack and slightly bumpy
Color of Yolk:
Light yellow
Spread of White:
Runny and not held together

20200531_132434.jpg
20200531_132457.jpg

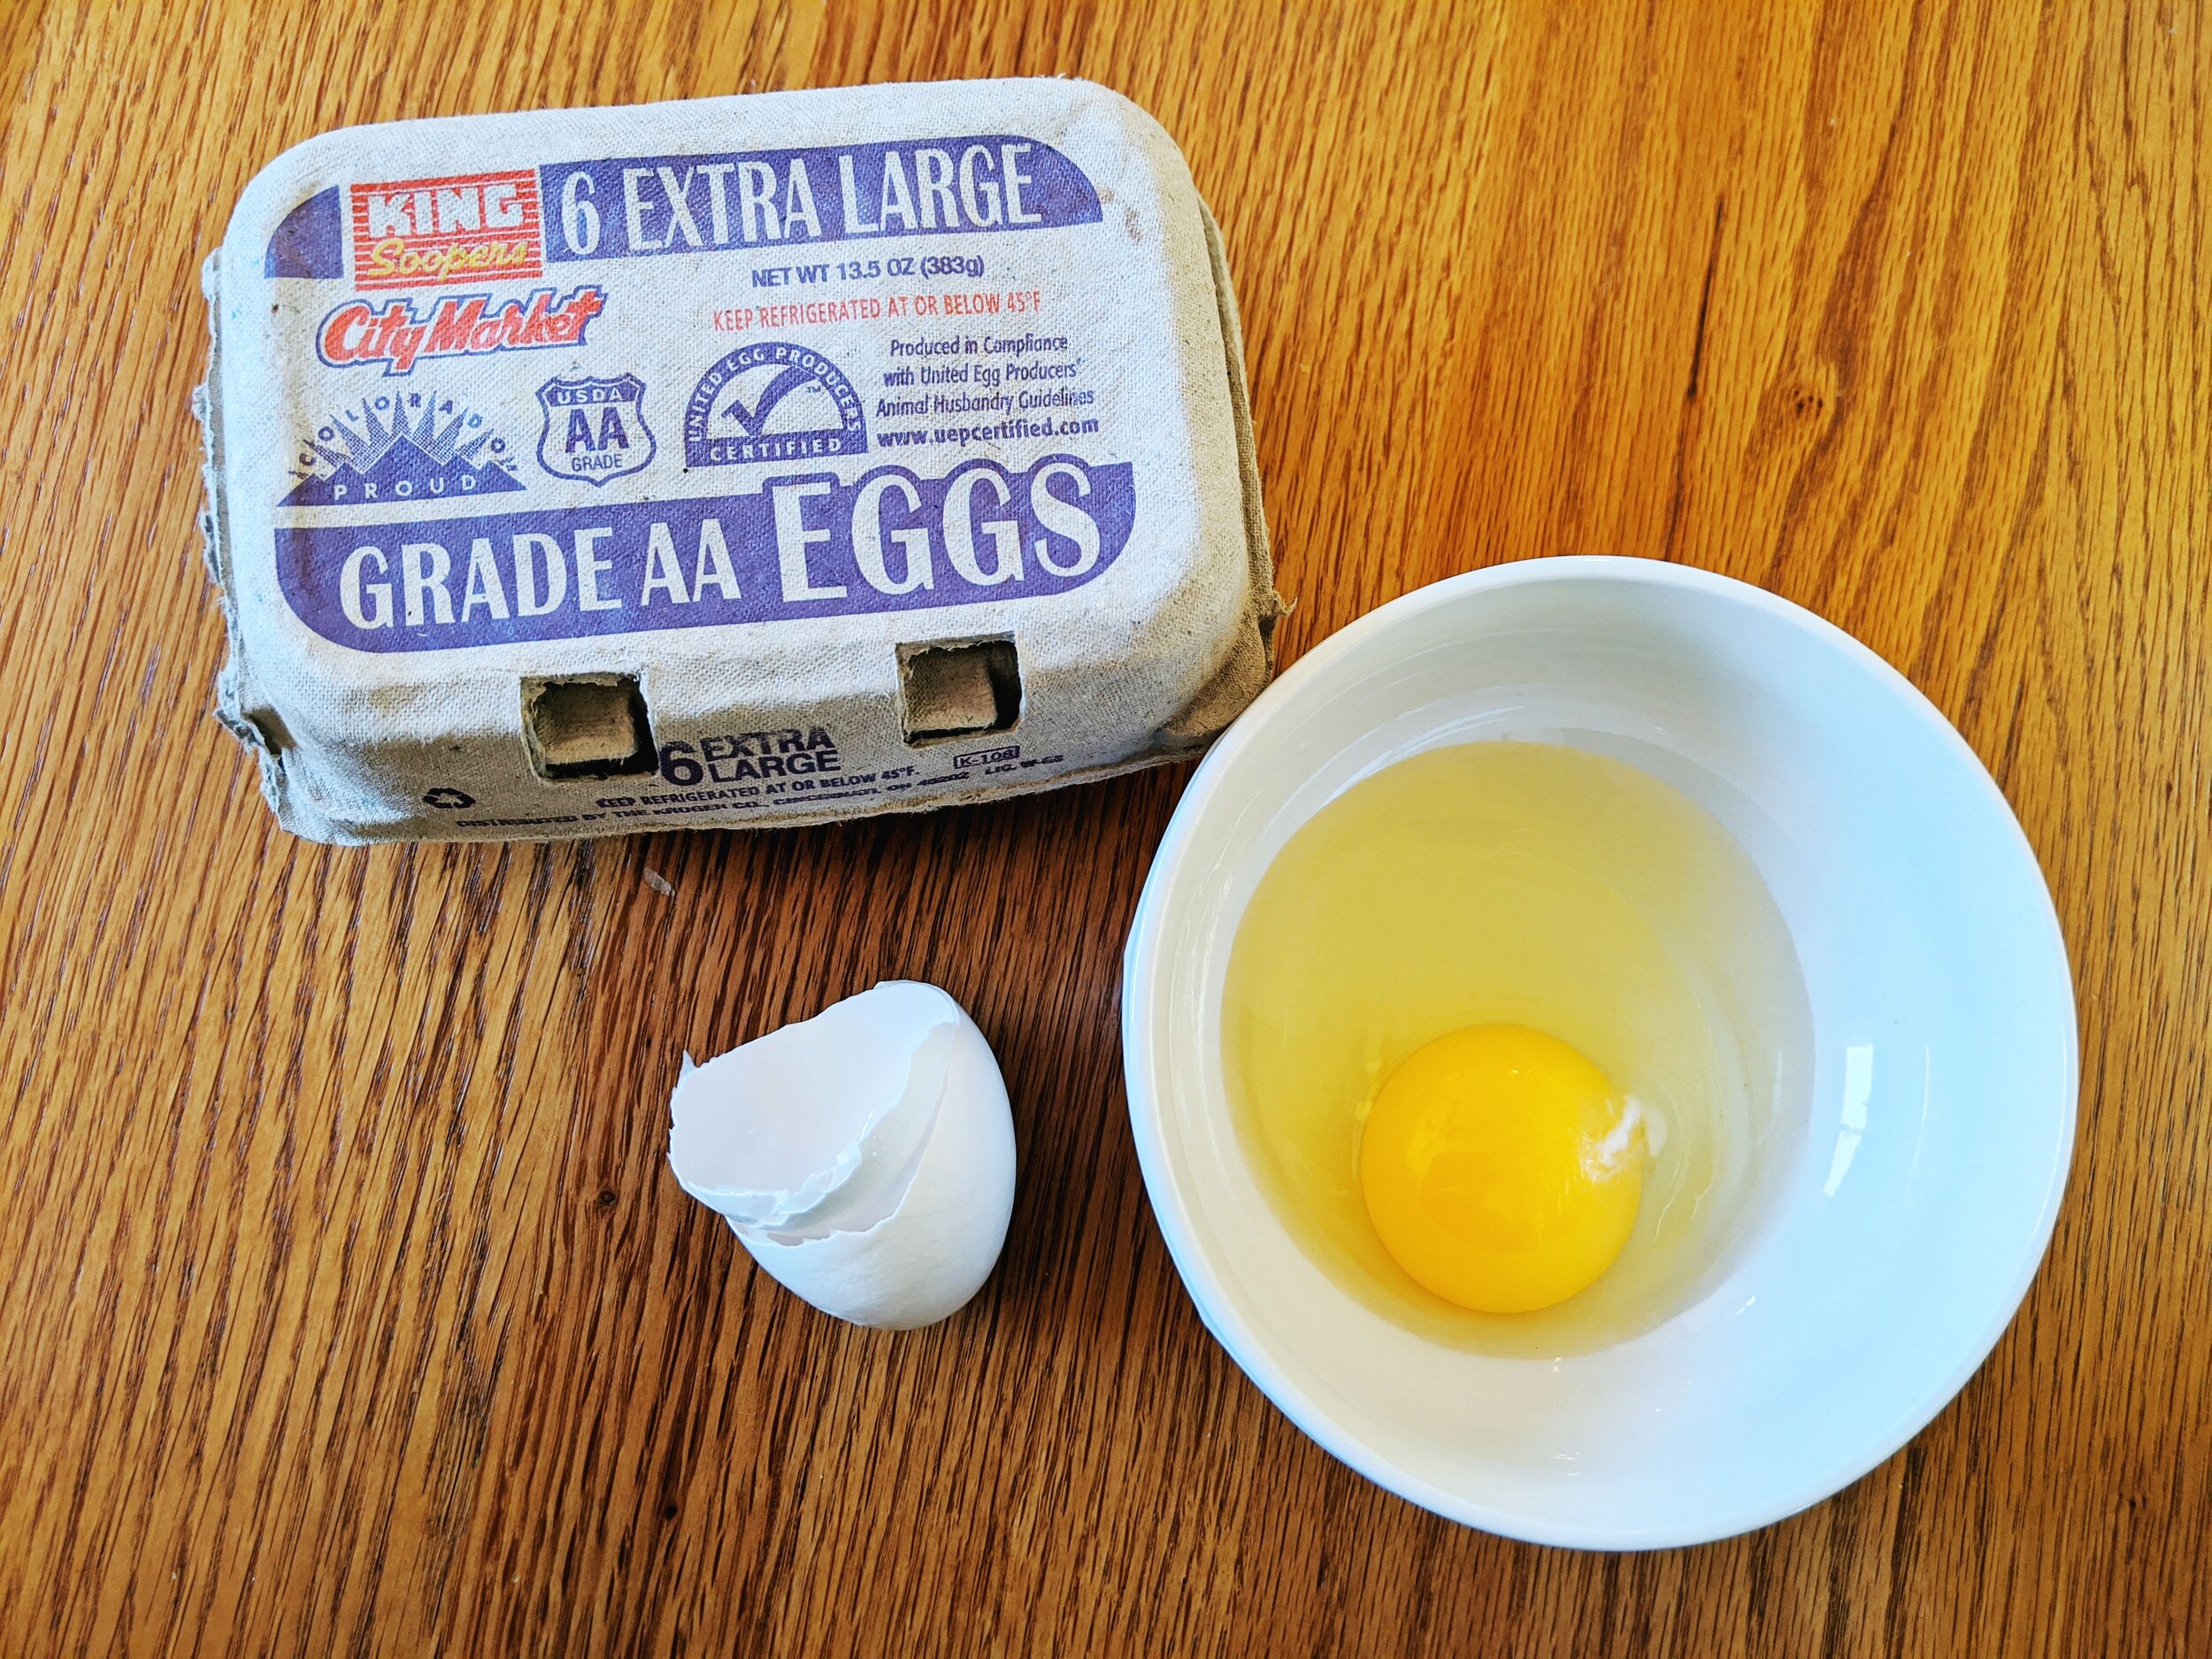
King Soopers City Market Extra Large Eggs

Type of Egg: King Soopers City Market Extra Large Grade AA Eggs
Price at Purchase Time:
$1.39
Labels on Carton:
Extra Large
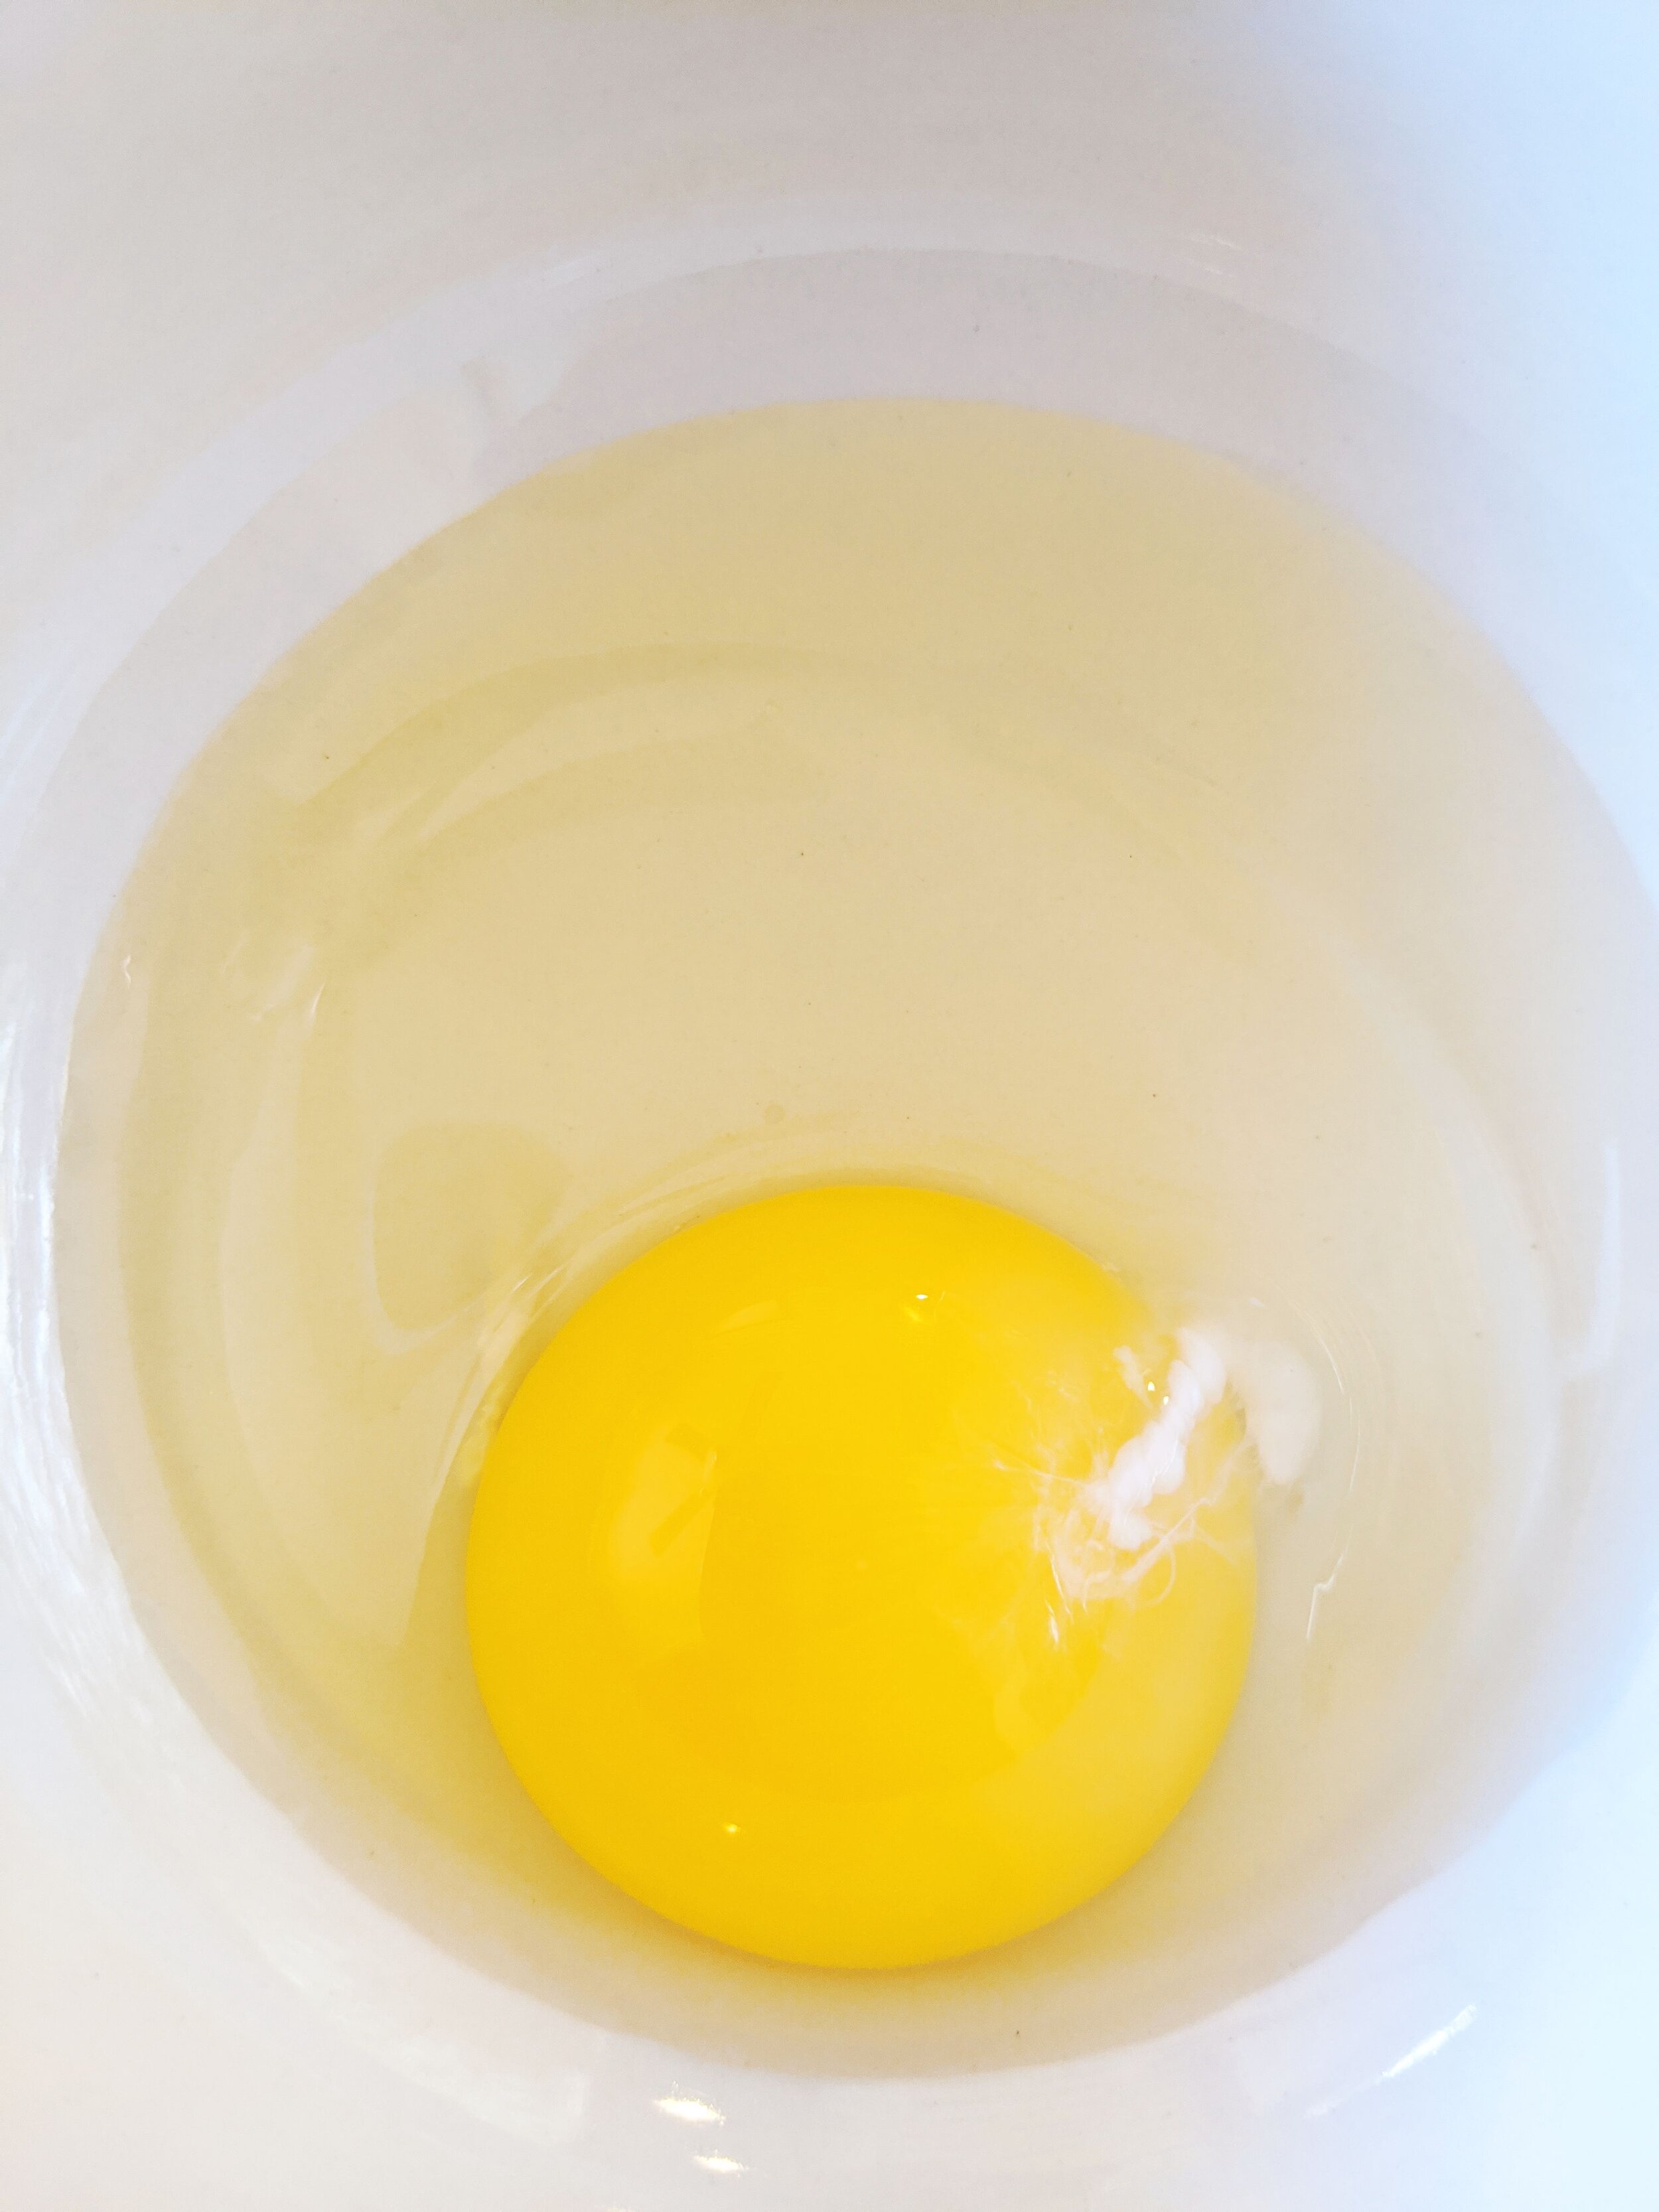
Description of Shell:
Thin and bumpy
Color of Yolk:
Light yellow
Spread of White:
Liquid, doesn’t hold together.
Taste of Egg:

20200531_132158.jpg
20200531_132221.jpg

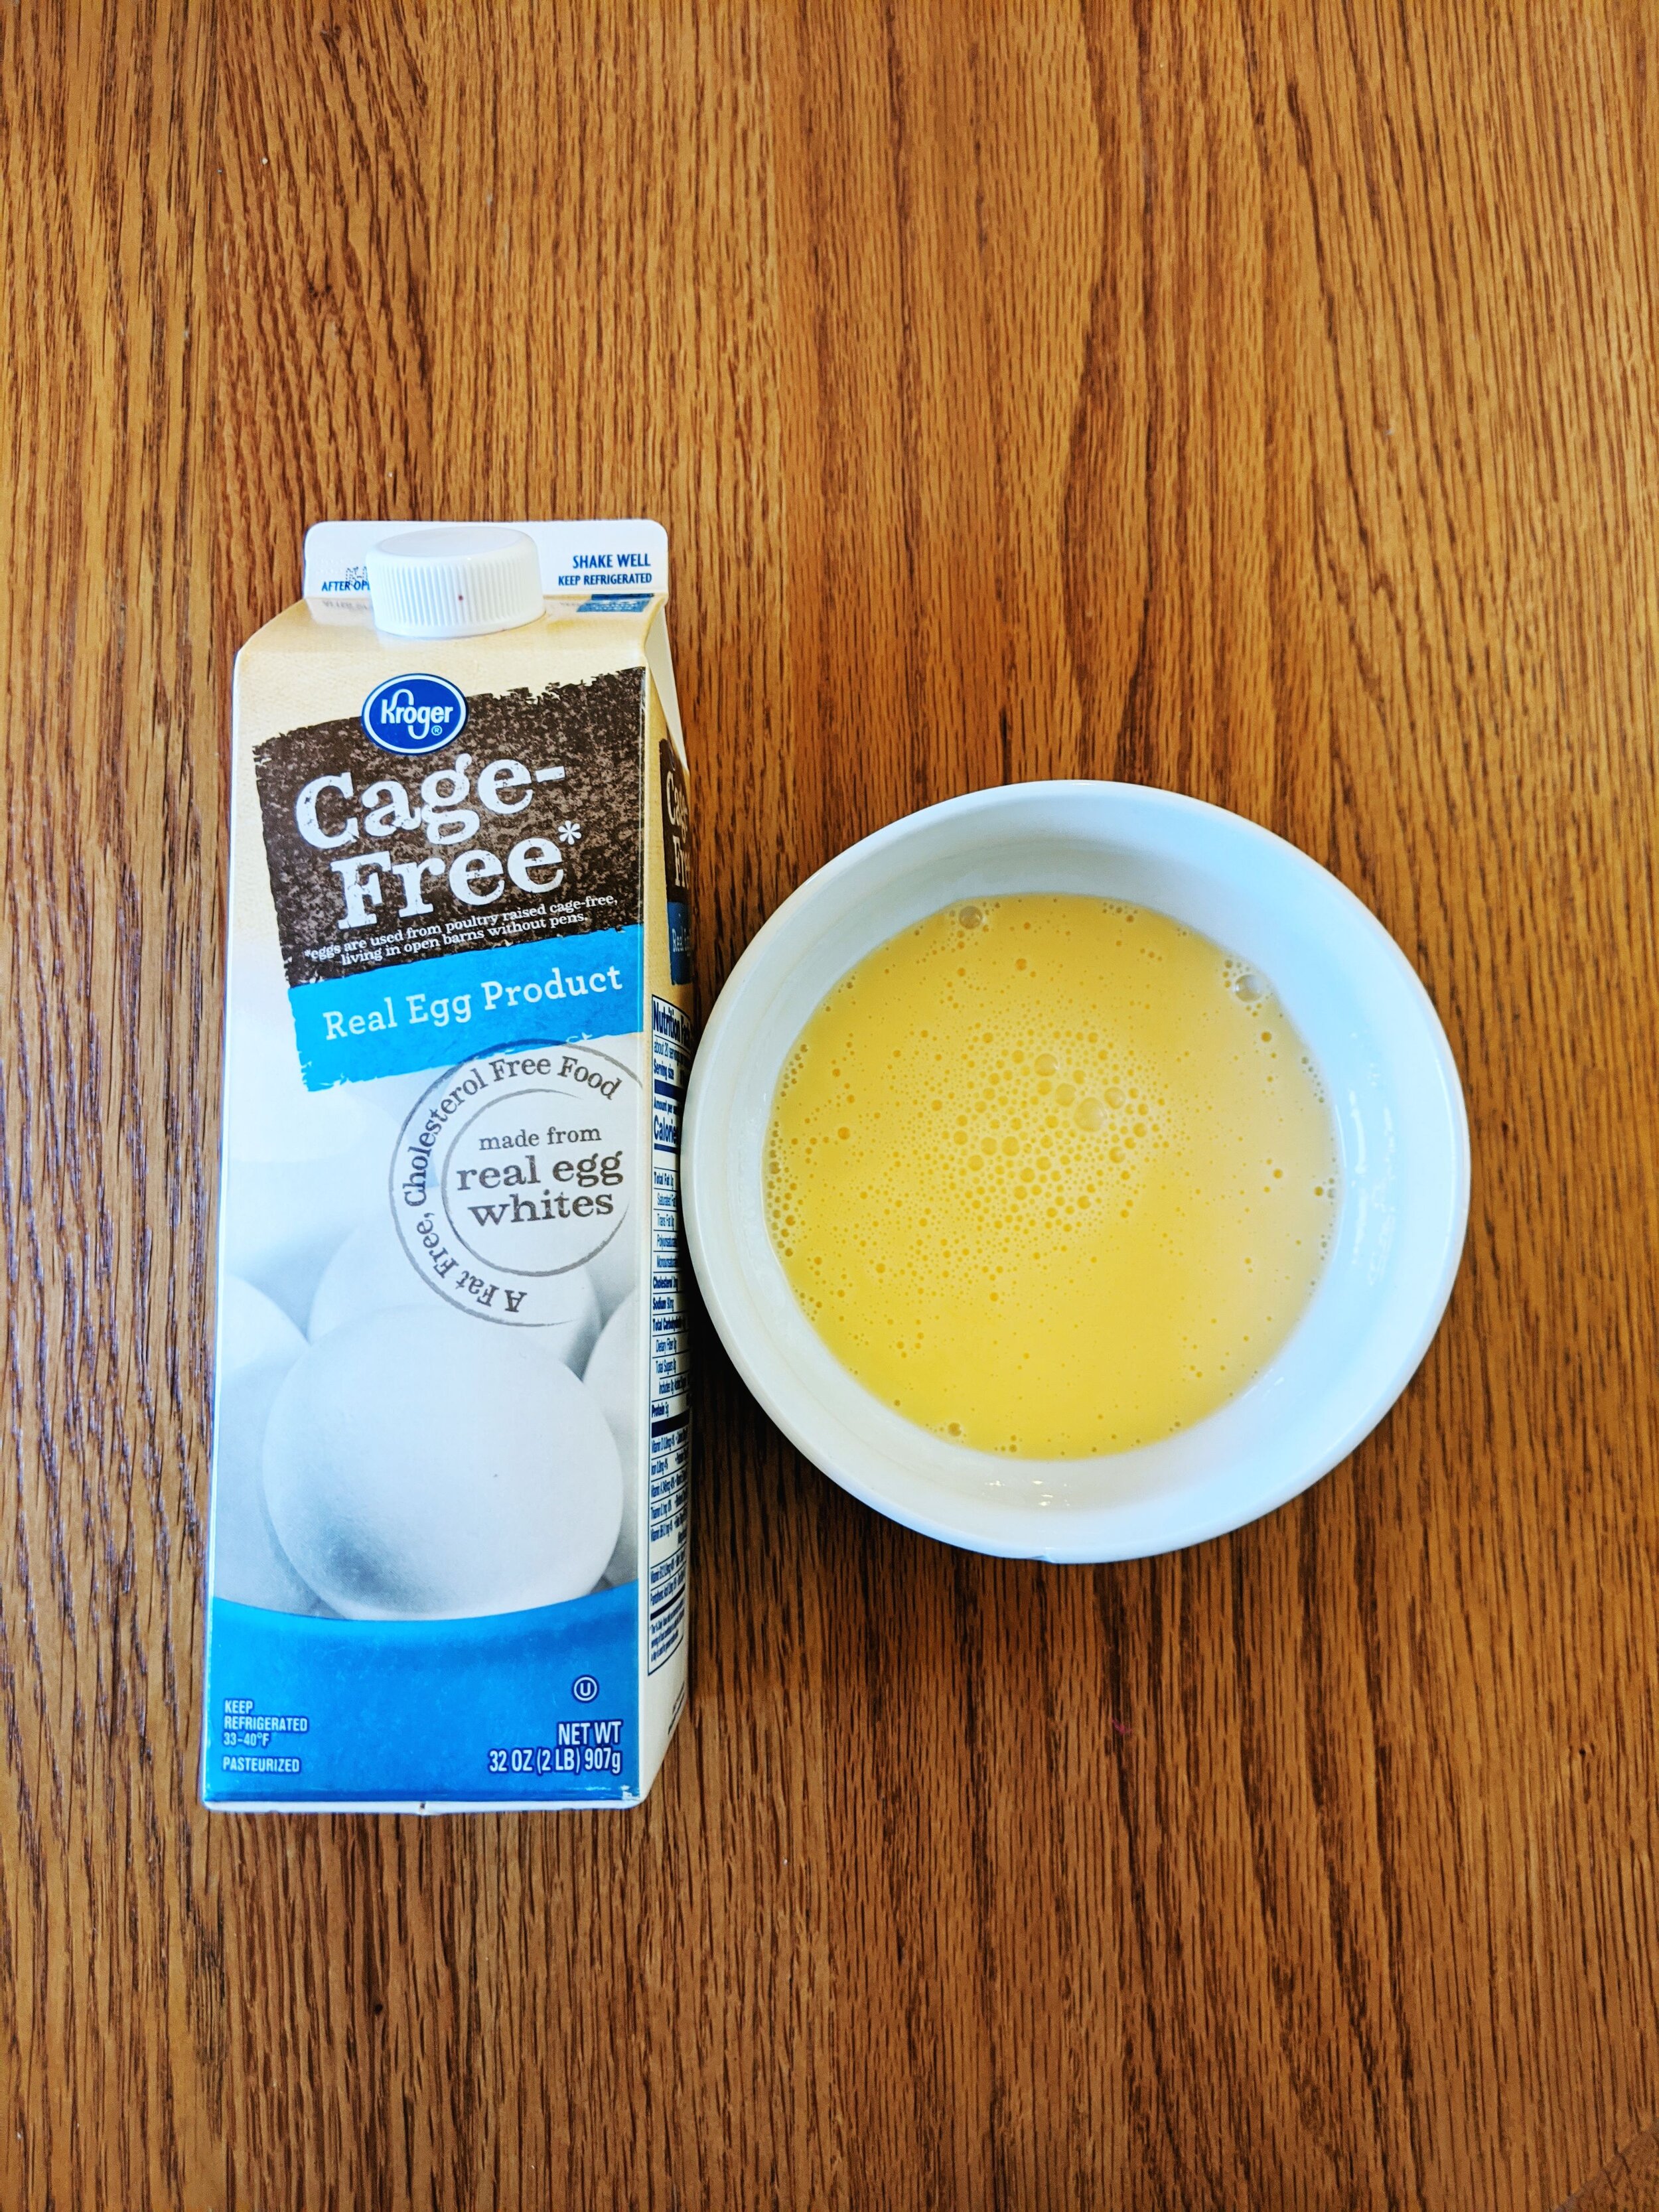
Cage Free Real Egg Product

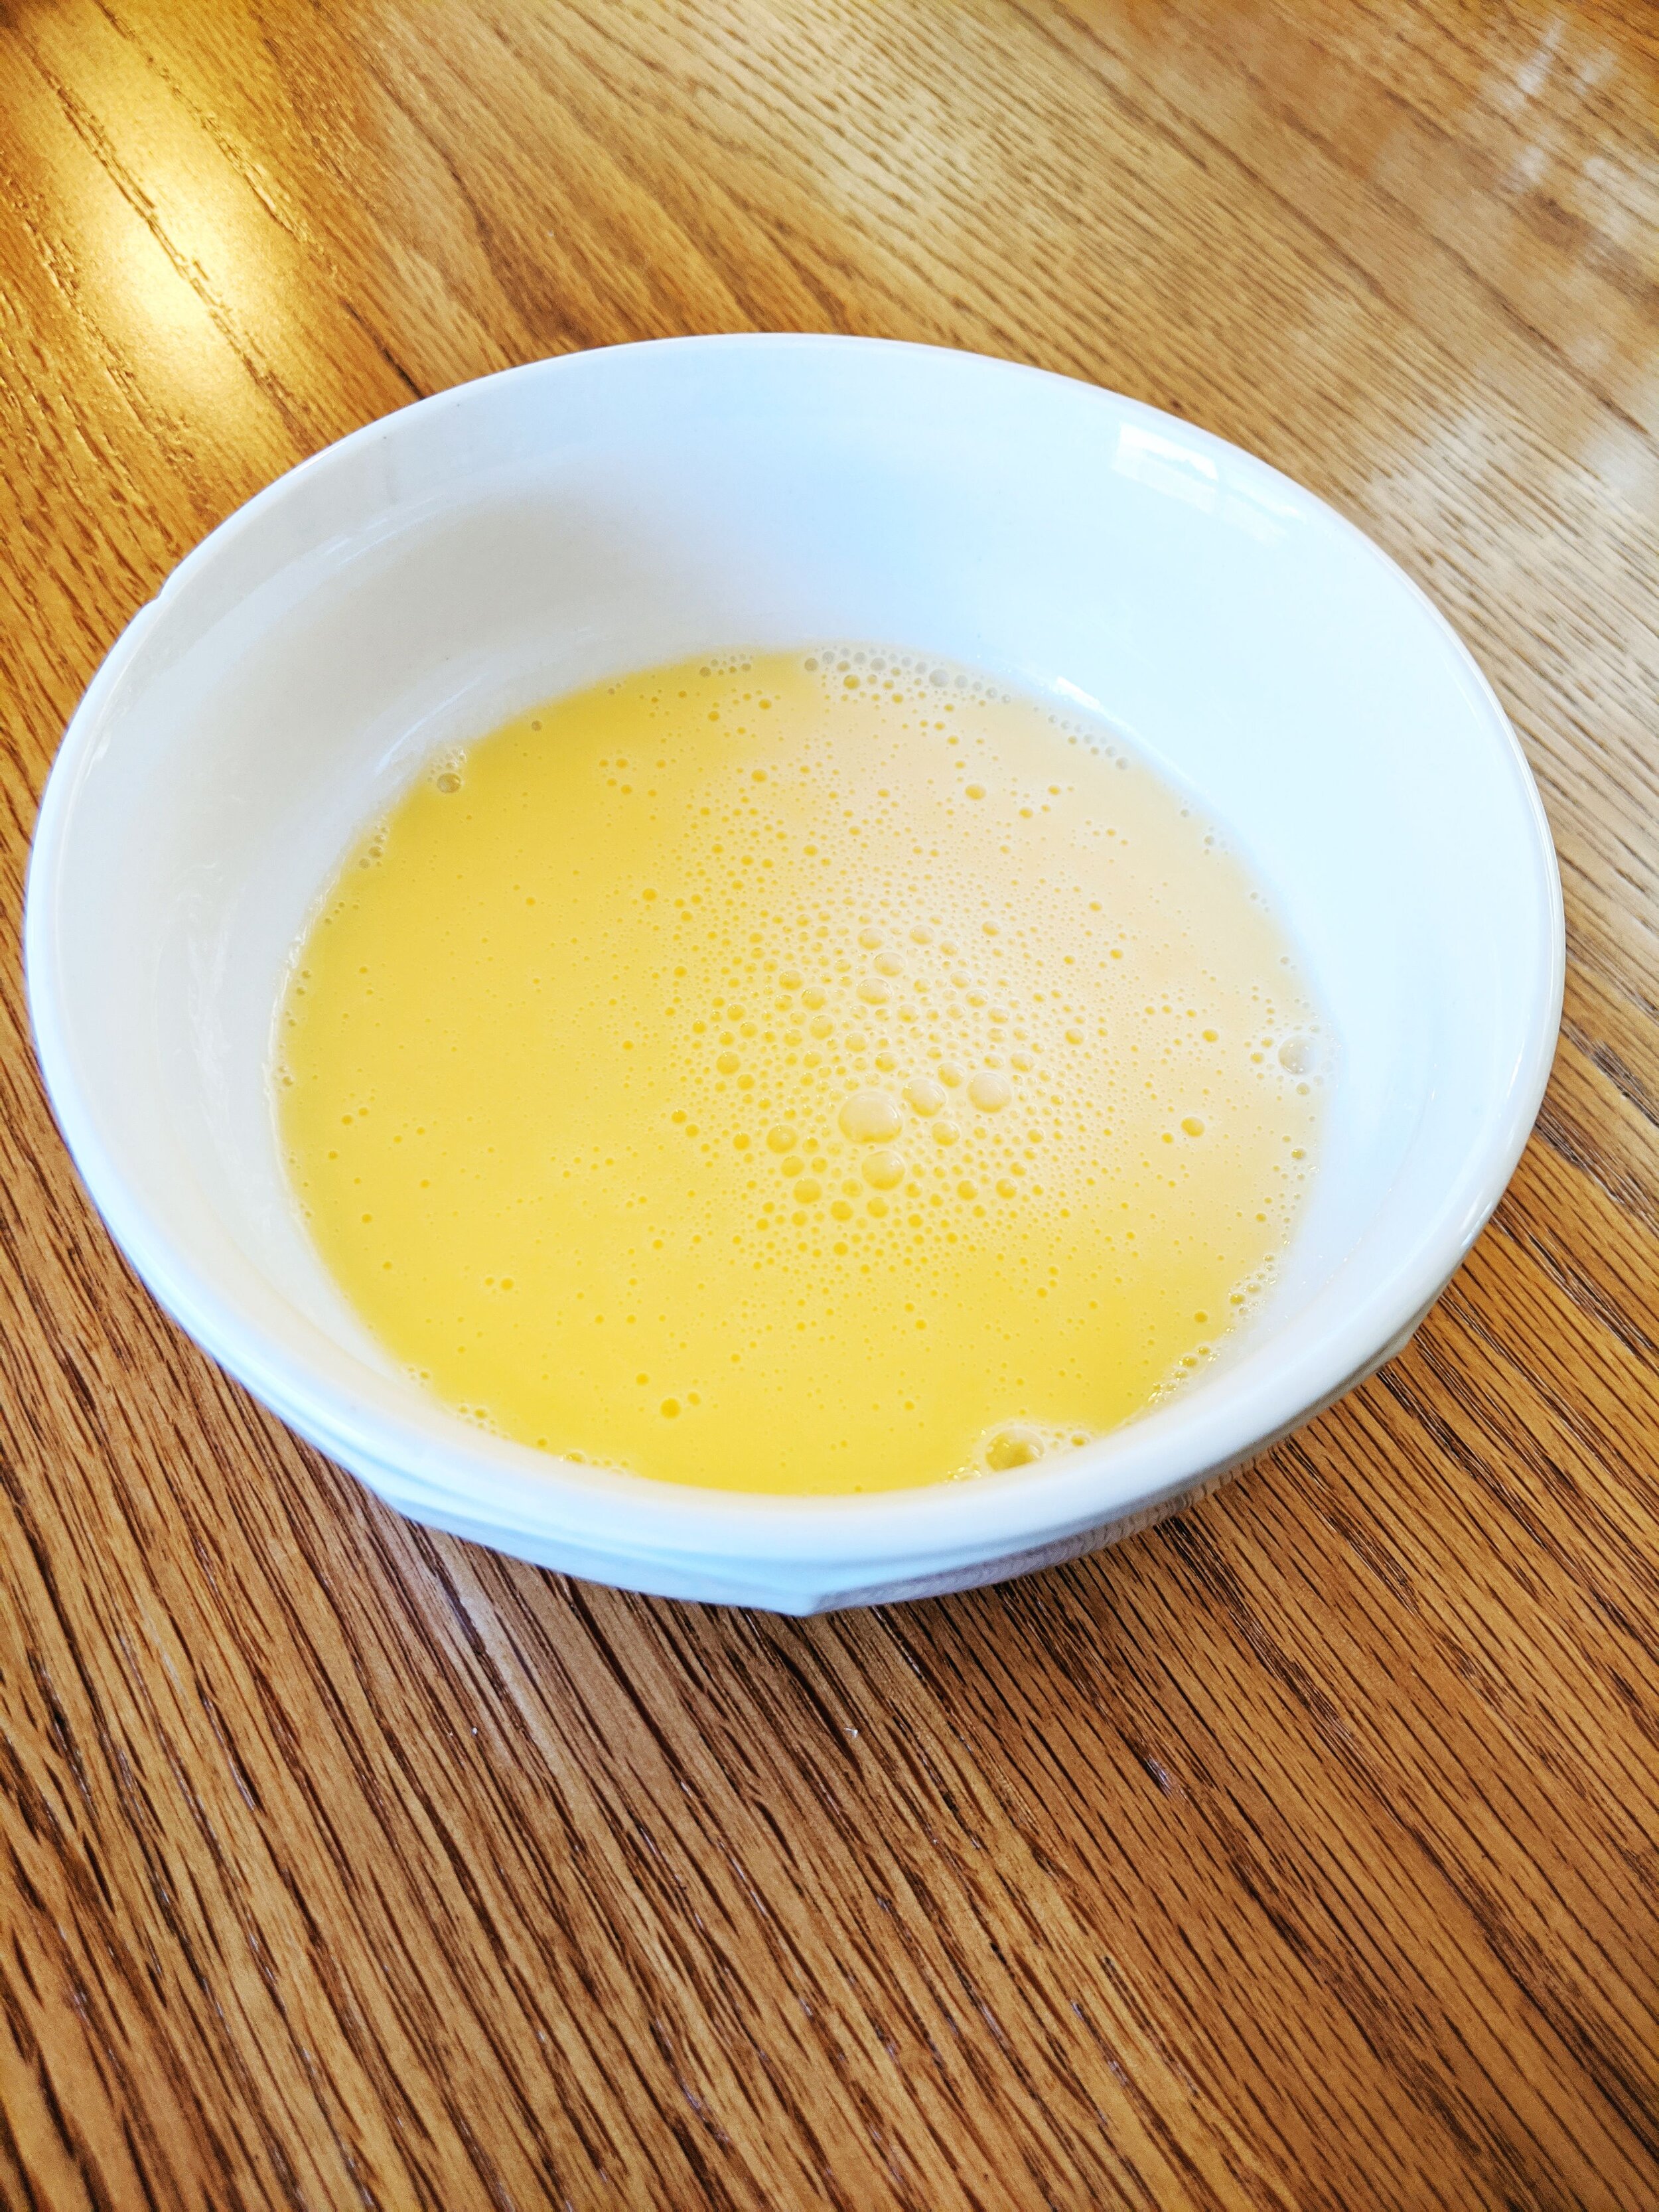
For comparison, we purchased a “real egg product.” Unlike an egg, which needs no ingredient description, this product contains 19 added ingredients, vitamins, and minerals. I think in this product they are making up for lack of egg yolk (which they omitted) which contains most of the nutritional value of an egg. Let’s do the same analysis of this product!

Type of Egg: Cage Free “Real Egg Product'“ from Kroger
Price at Purchase Time:
$4.49
Labels on Carton:
Cage Free, Made from Real Egg Whites, Cholesterol Free, Fat Free Food
Description of Shell:
Unknown, Not Present
Color of Yolk:
Unknown, Not Present
Spread of White:
Unknown

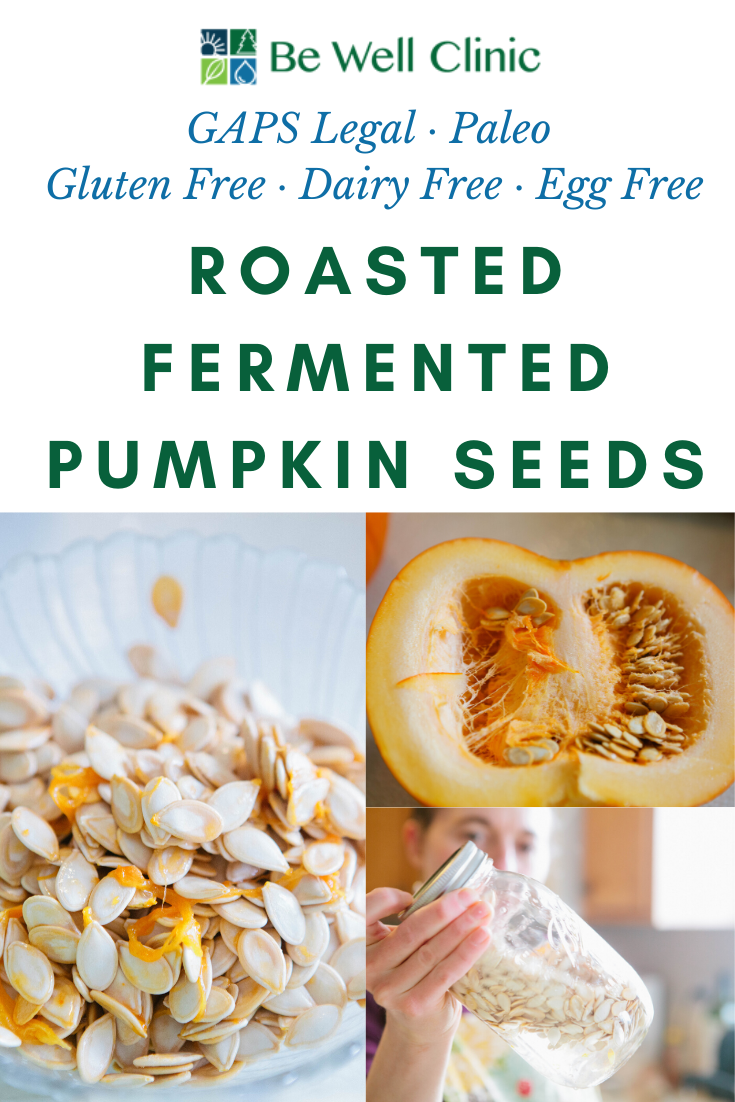
Roasted Fermented Pumpkin Seeds

Pumpkin seeds are like any seed (or bean or nut.) They should be properly prepared before consuming to neutralize the acid and make them easier to digest. Sprouting your seeds is essentially germinating. Germination changes the chemical structure of the seeds, chemically changing it from a closed off protector of the treasure inside to an open seed ready to bring nutrition.  It’s best to sprout or otherwise properly prepare your seeds to allow more nutrition to be bioavailable to you.

Pumpkin seeds also have an especially helpful quality in that they help rid your body of parasites by attacking the parasites and intestinal worms. If you suspect you have parasites or worms, consuming pumpkin seeds is a good idea. However, be sure to take it slow and don’t overdo it.

Ingredients for Fermented Pumpkin Seeds:

  • 3 small pumpkins

  • ½ tsp Real Salt

  • Water

Directions for Fermented Pumpkin Seeds:

Fermented pumpkin seeds can help your digestion by getting rid of parasites in your gut. Improve your gut health with this GAPS Diet legal recipe for fermented pumpkin seeds. Recipe by Amy Mihaly, Certified GAPS Practitioner in Colorado.

Cut the pumpkins in half.

Fermented pumpkin seeds can help your digestion by getting rid of parasites in your gut. Improve your gut health with this GAPS Diet legal recipe for fermented pumpkin seeds. Recipe by Amy Mihaly, Certified GAPS Practitioner in Colorado.

Remove the seeds from the inside and separate from the pumpkin flesh.

Fermented pumpkin seeds can help your digestion by getting rid of parasites in your gut. Improve your gut health with this GAPS Diet legal recipe for fermented pumpkin seeds. Recipe by Amy Mihaly, Certified GAPS Practitioner in Colorado.

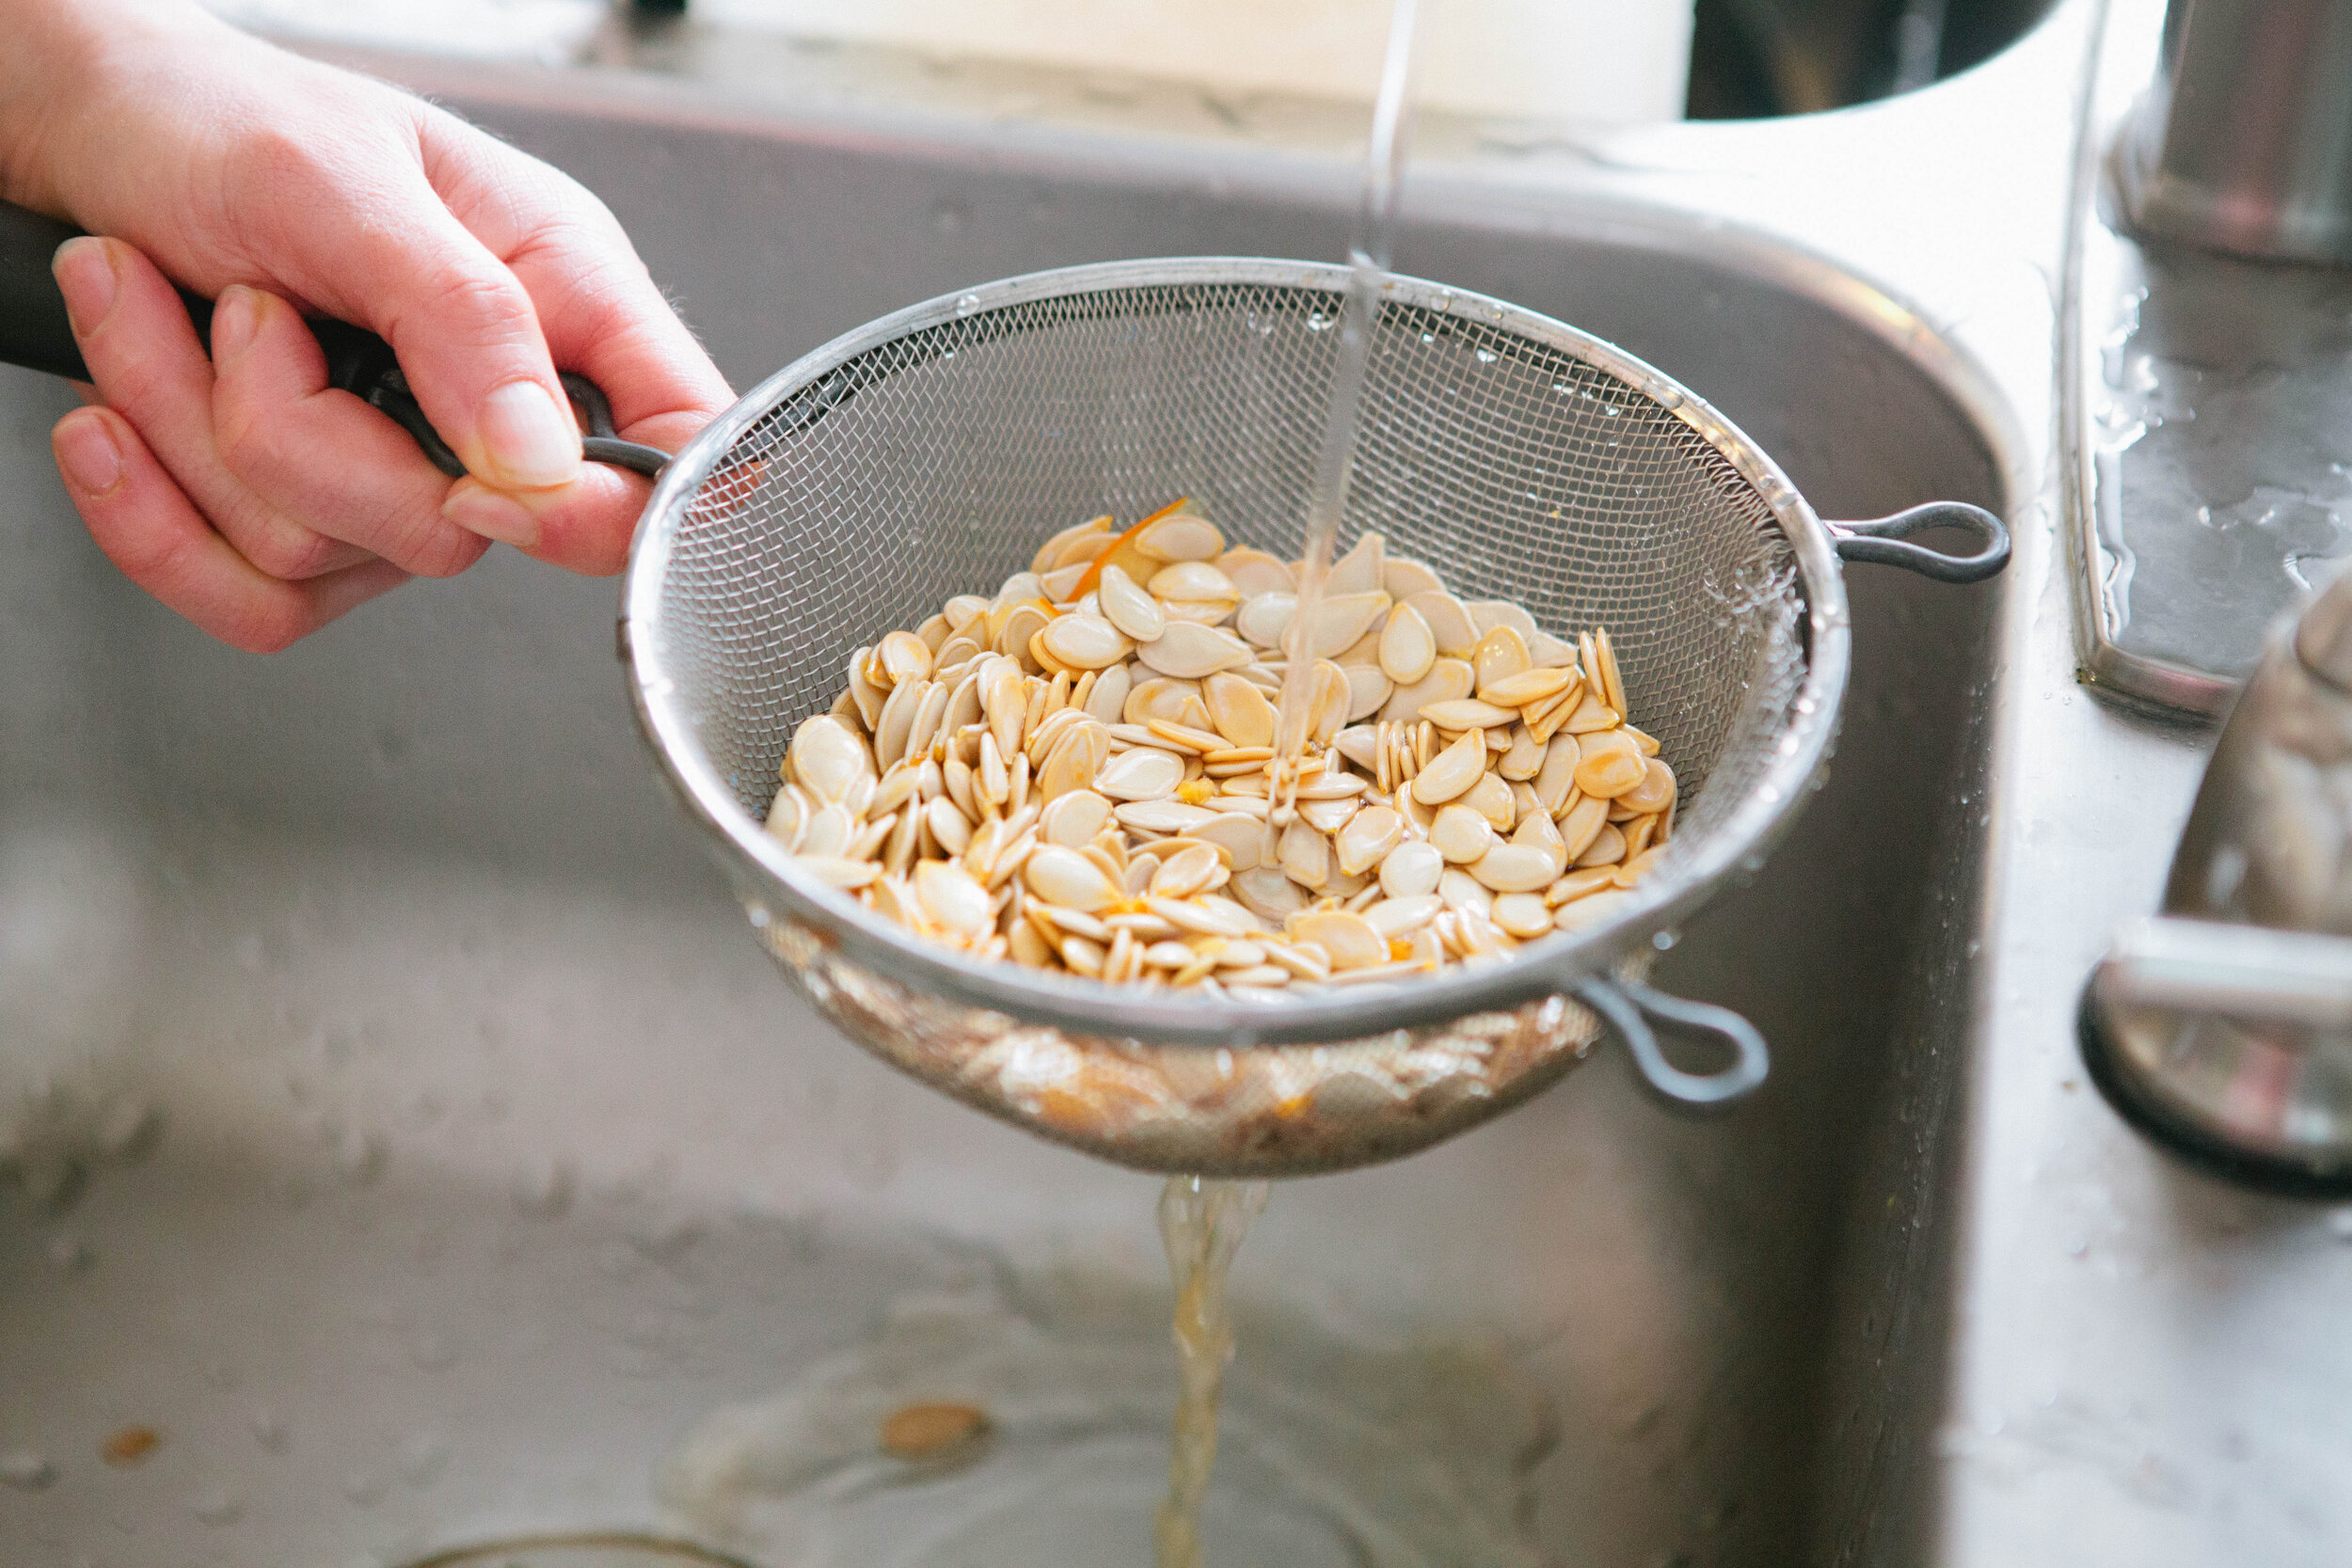
Rinse the pumpkin seeds.

Fermented pumpkin seeds can help your digestion by getting rid of parasites in your gut. Improve your gut health with this GAPS Diet legal recipe for fermented pumpkin seeds. Recipe by Amy Mihaly, Certified GAPS Practitioner in Colorado.

Add the pumpkin seeds to a jar.

Cover the seeds with water, add salt and shake. Place in a sunny location and leave to soak overnight. As long as the jar is closed tightly, these can be put up next to other ferments.

Drain and rinse in the morning. Fill with new water.

Repeat draining, rinsing and adding new water until tiny sprouts have formed.

Rinse one final time. Season with salt and roast in the oven at 250 for several hours until cooked.


Roasted Fermented Pumpkin Seeds

Author:
prep time: cook time: total time:

ingredients:

  • 3 small pumpkins
  • ½ tsp Real Salt
  • Water

instructions:

How to cook Roasted Fermented Pumpkin Seeds

  1. Cut the pumpkins in half.
  2. Remove the seeds from the inside and separate from the pumpkin flesh.
  3. Rinse the pumpkin seeds.
  4. Add the pumpkin seeds to a jar.
  5. Cover the seeds with water, add salt and shake. Place in a sunny location and leave to soak overnight. As long as the jar is closed tightly, these can be put up next to other ferments.
  6. Drain and rinse in the morning. Fill with new water.
  7. Repeat draining, rinsing and adding new water until tiny sprouts have formed.
  8. Rinse one final time. Season with salt and roast in the oven at 250 for several hours until cooked.
Created using The Recipes Generator
RoastedFermentedPumpkinSeeds.png

How to Make Your Own Dairy Free, Egg Free Sausage

I was searching for the perfect sausage recipe. I discovered I don’t like a sausage that is heavily flavored with sage. My ideal tasting sausage was Jimmy Dean’s sausage which, of course, contains MSG. 

I needed to find a recipe that would keep me from occasionally caving and eating Jimmy Dean. While watching one of my favorite YouTube shows, 18th Century Cooking, I saw their Oxford Gate sausage recipe from Martha Washington’s Book of Cookery which seemed ideal! I’ve modified it below.

This sausage is the ideal breakfast sausage. It wouldn’t work well as a sausage with marinara sauce. It’s great alongside eggs or in an omelette. If I don’t want to eat cheese, it’s also a great, easy snack on the go.

The original recipe for this called for suet, which is rendered kidney fat. The suet melts while cooking and creates a lighter patty. That’s not something I usually have on hand but this recipe works just as well without it. If you don’t mind a denser patty (think like a hamburger) than you’ll enjoy this sausage without the suet.

This is a dairy free, egg free sausage recipe which is great if you’re not currently tolerating either.

You’ll notice a spice used in this recipe is Blade Mace. Blade mace is the shell that surrounds and protects nutmeg. Mace has a sharper taste than nutmeg but if you don’t have blade mace, equal amounts of ground nutmeg can be substituted.

What will you eat alongside this sausage?

If you’re looking for a DIY sausage recipe that tastes like Jimmy Dean but is made with real ingredients, try this one! It’s GAPS Legal, good for the Whole 30 Diet and paleo. Recipe by Amy Mihaly, Certified GAPS Practitioner in Colorado.

Ingredients for How to Make Your Own Sausage:

  • 1 lb fresh ground pork

  • 1 1/2 tsp. Salt

  • ½ tsp Ground Pepper

  • ¼ tsp Blade Mace, coarsely ground

  • 1 ½ tsp Sage

  • ¼ tsp Ground Cloves

  • 2 - 3 tbsp Lard

Directions for How to Make Your Own Sausage:

If you’re looking for a DIY sausage recipe that tastes like Jimmy Dean but is made with real ingredients, try this one! It’s GAPS Legal, good for the Whole 30 Diet and paleo. Recipe by Amy Mihaly, Certified GAPS Practitioner in Colorado.

In a large bowl, mix the meat with the spices.

If you’re looking for a DIY sausage recipe that tastes like Jimmy Dean but is made with real ingredients, try this one! It’s GAPS Legal, good for the Whole 30 Diet and paleo. Recipe by Amy Mihaly, Certified GAPS Practitioner in Colorado.

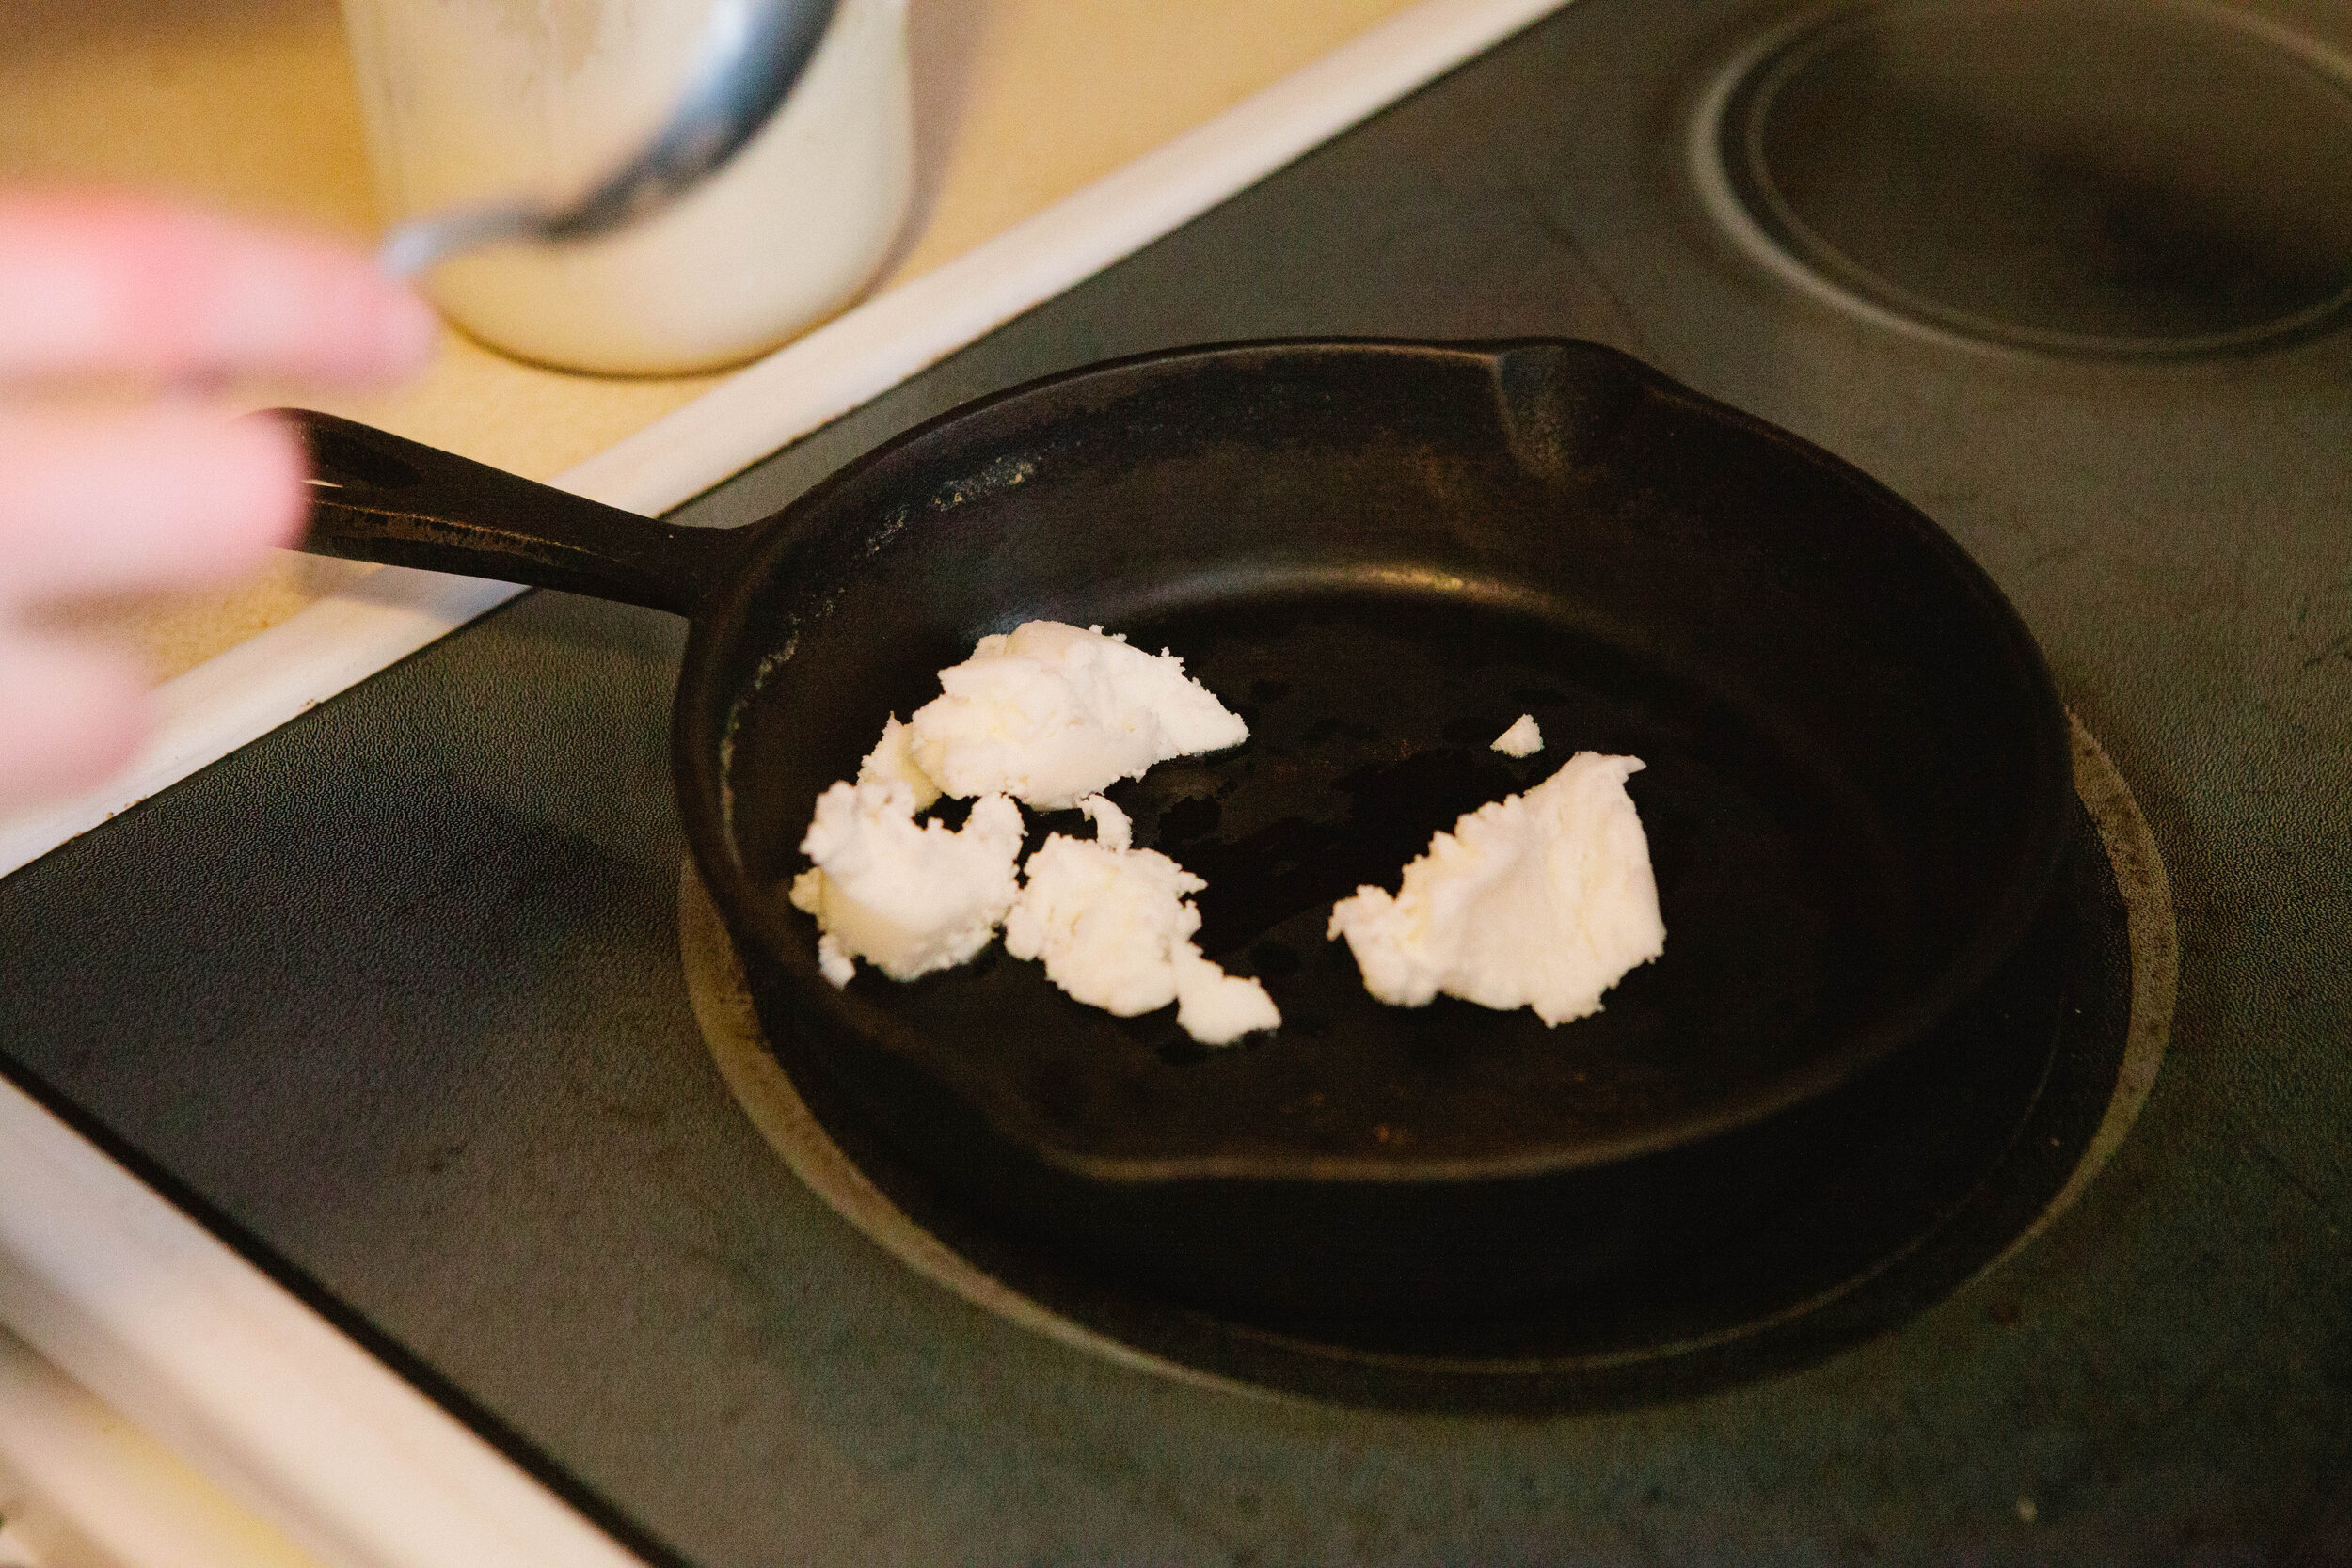
Heat a cast iron pan on low to medium heat. Add 2 - 3 tbsp of lard to the pan, enough to give yourself a good amount of cooking fat. If your pan is too hot, your sausages will burn!

If you’re looking for a DIY sausage recipe that tastes like Jimmy Dean but is made with real ingredients, try this one! It’s GAPS Legal, good for the Whole 30 Diet and paleo. Recipe by Amy Mihaly, Certified GAPS Practitioner in Colorado.

Roll sausages into finger like shapes. Add them to a pan, a small amount at a time.

These need tending! As soon as you can, move them on the bottom of the pan to prevent them from burning. Then roll them gently to cook on all sides. Because they are thicker and take longer to cook, you do need to roll them a bit to prevent them cooking too long on one side.

If you’re looking for a DIY sausage recipe that tastes like Jimmy Dean but is made with real ingredients, try this one! It’s GAPS Legal, good for the Whole 30 Diet and paleo. Recipe by Amy Mihaly, Certified GAPS Practitioner in Colorado.

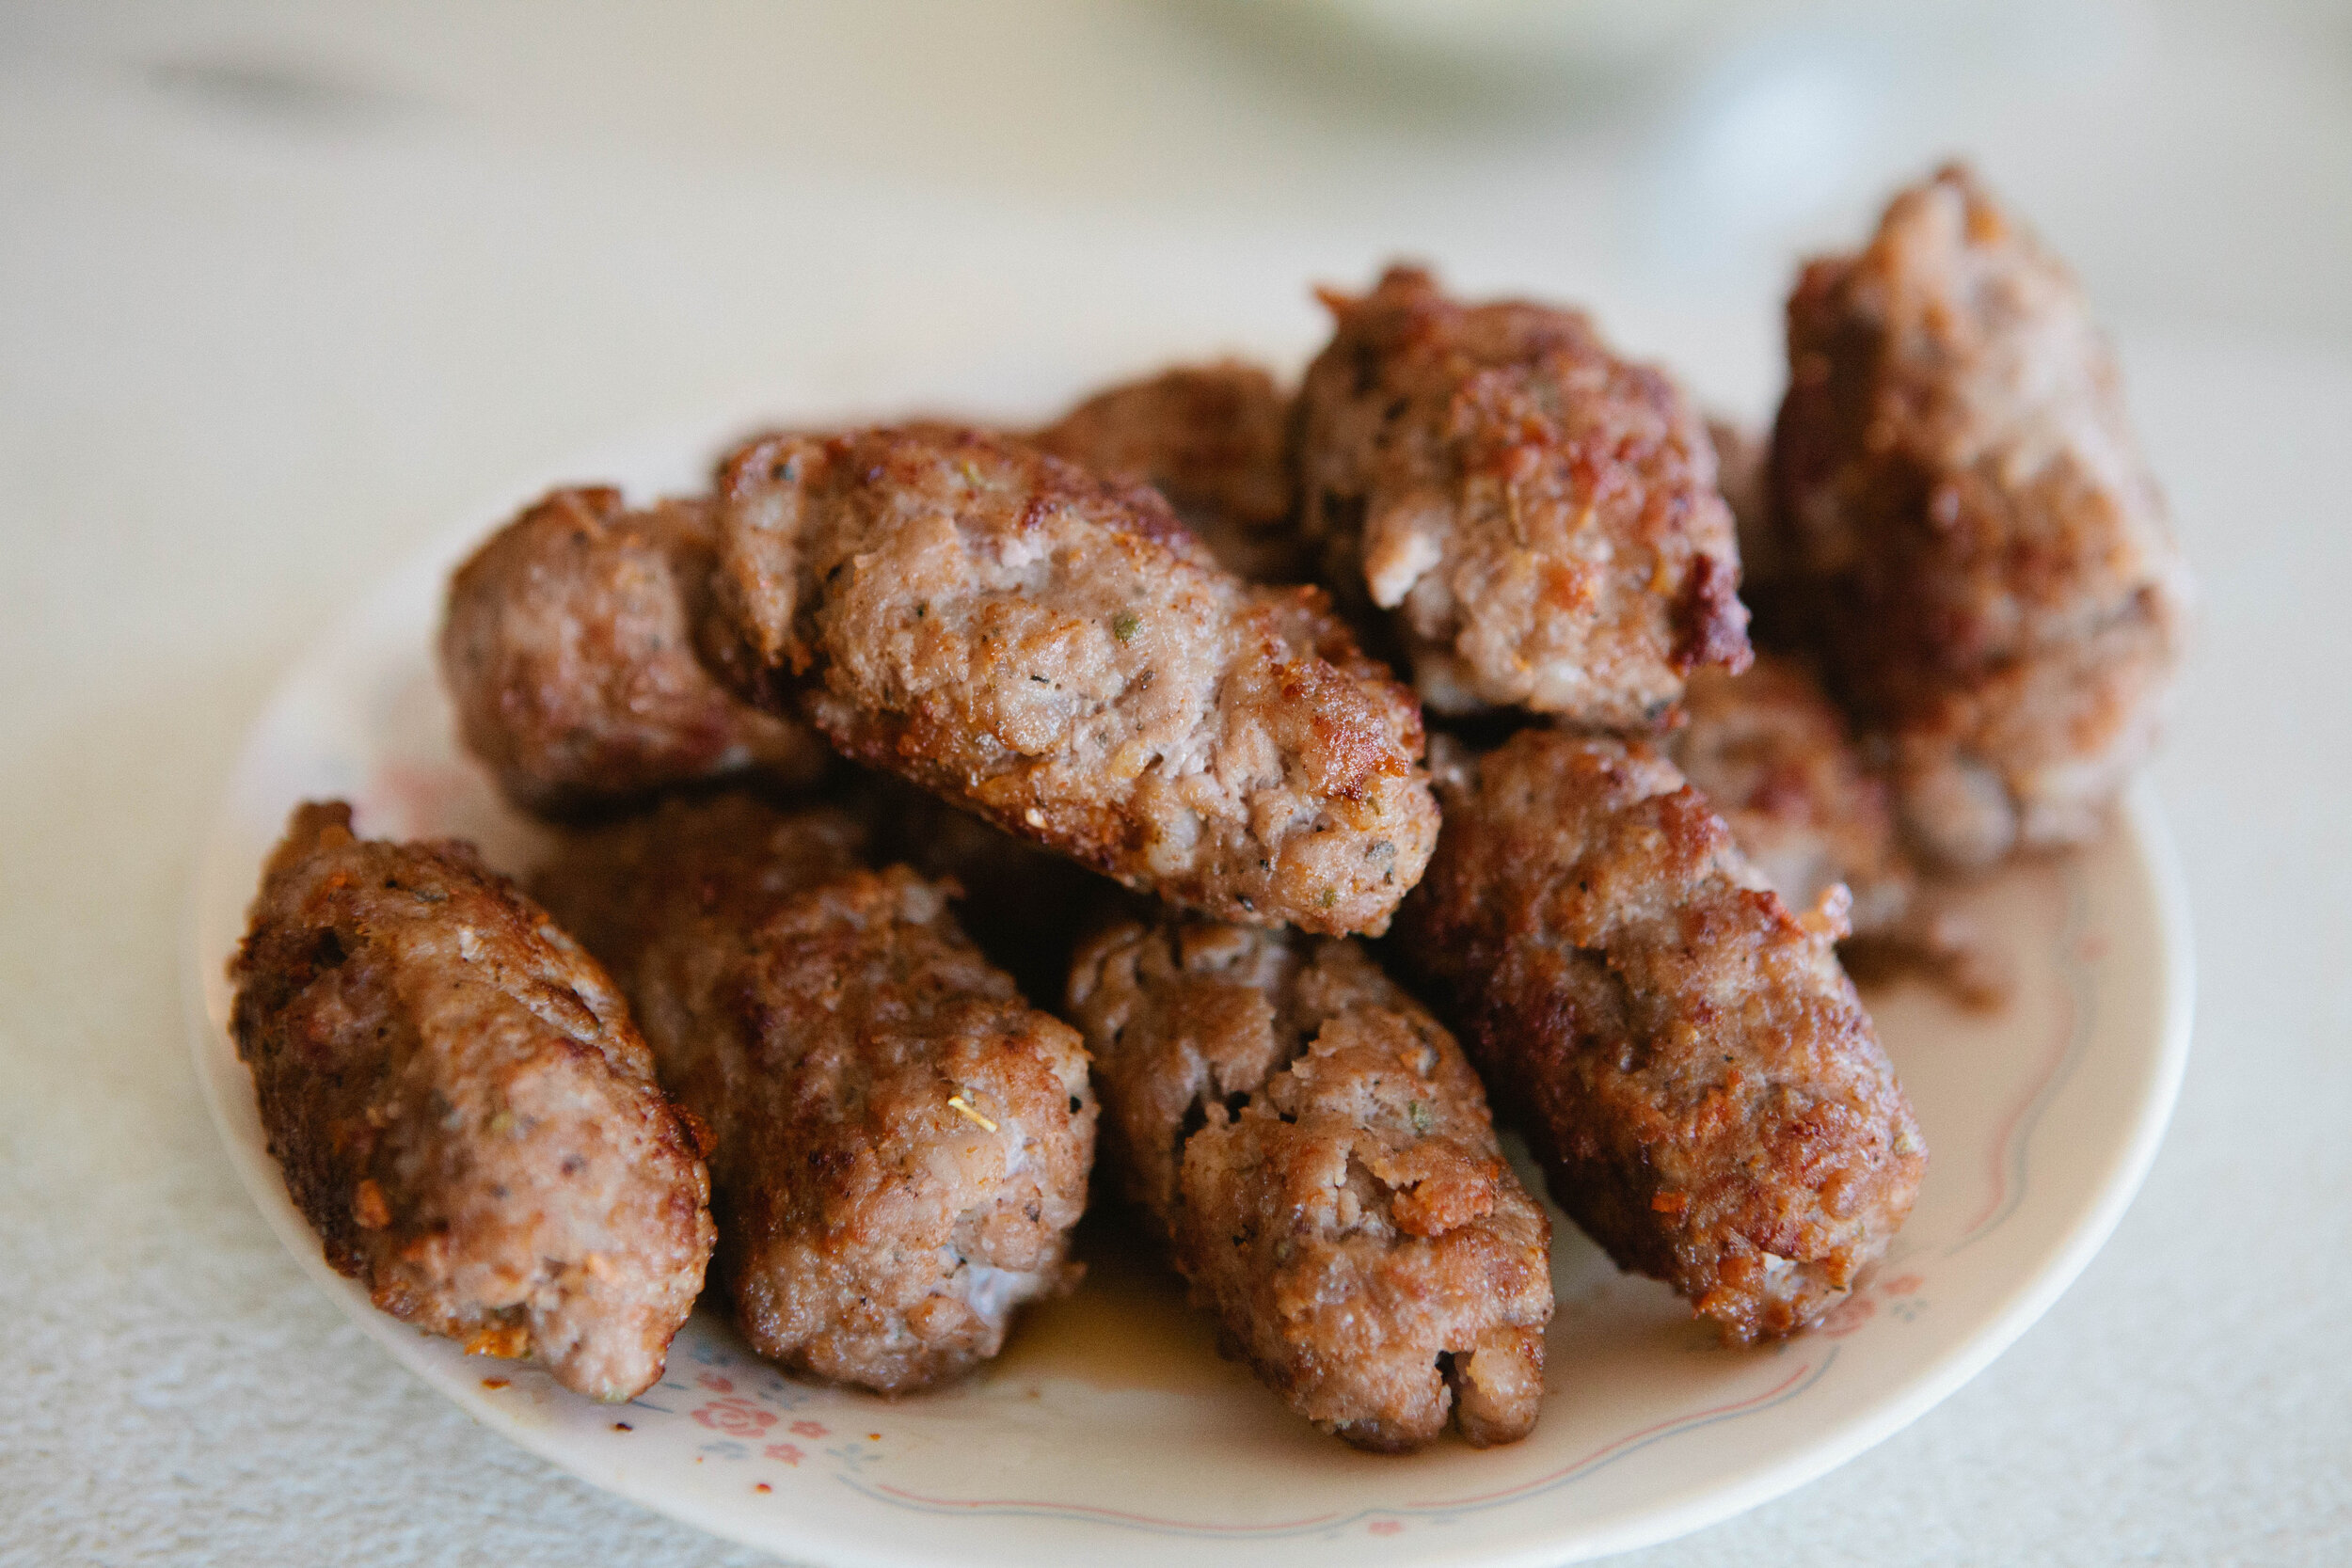
Cook the sausage for about 5-7 minutes, depending on how thick you make them. They will start to feel more solid as they cook.

Enjoy warm or cold! Cold sausage tastes more salty to me so if you plan to eat them cold, adjust your salt slightly. These also freeze extremely well, cooked or raw! I cooked and took a large batch of them with me when I went hunting and ate them for breakfast cold. 

Snacks to Eat on the GAPS Diet

I’m often asked about snacking on the GAPS Diet. Below is a selection of ‘snack’ type foods that are all GAPS friendly, including a variety of ferments.

Some of these are great to take on the go, like the sausages or trail mix. I often also bring cheese, cuts of meat and cut up vegetables as snacks on the go. Some of these GAPS friendly snacks are great to feed a crowd and would be the perfect dish to bring to a potluck, like the spinach and artichoke dip and mayo free deviled eggs. These would be enjoyed even on those not on the GAPS Diet.

As the video below shows, sometimes the simplest food is the best!


Homemade sausage is easy

Homemade sausage is easy

Homemade Sausage

Enjoy these homemade sausages warm or cold! These also freeze extremely well, cooked or raw! I cooked and took a large batch of them with me when I went hunting and ate them for breakfast cold.

Gluten Free, Dairy Free, Egg Free

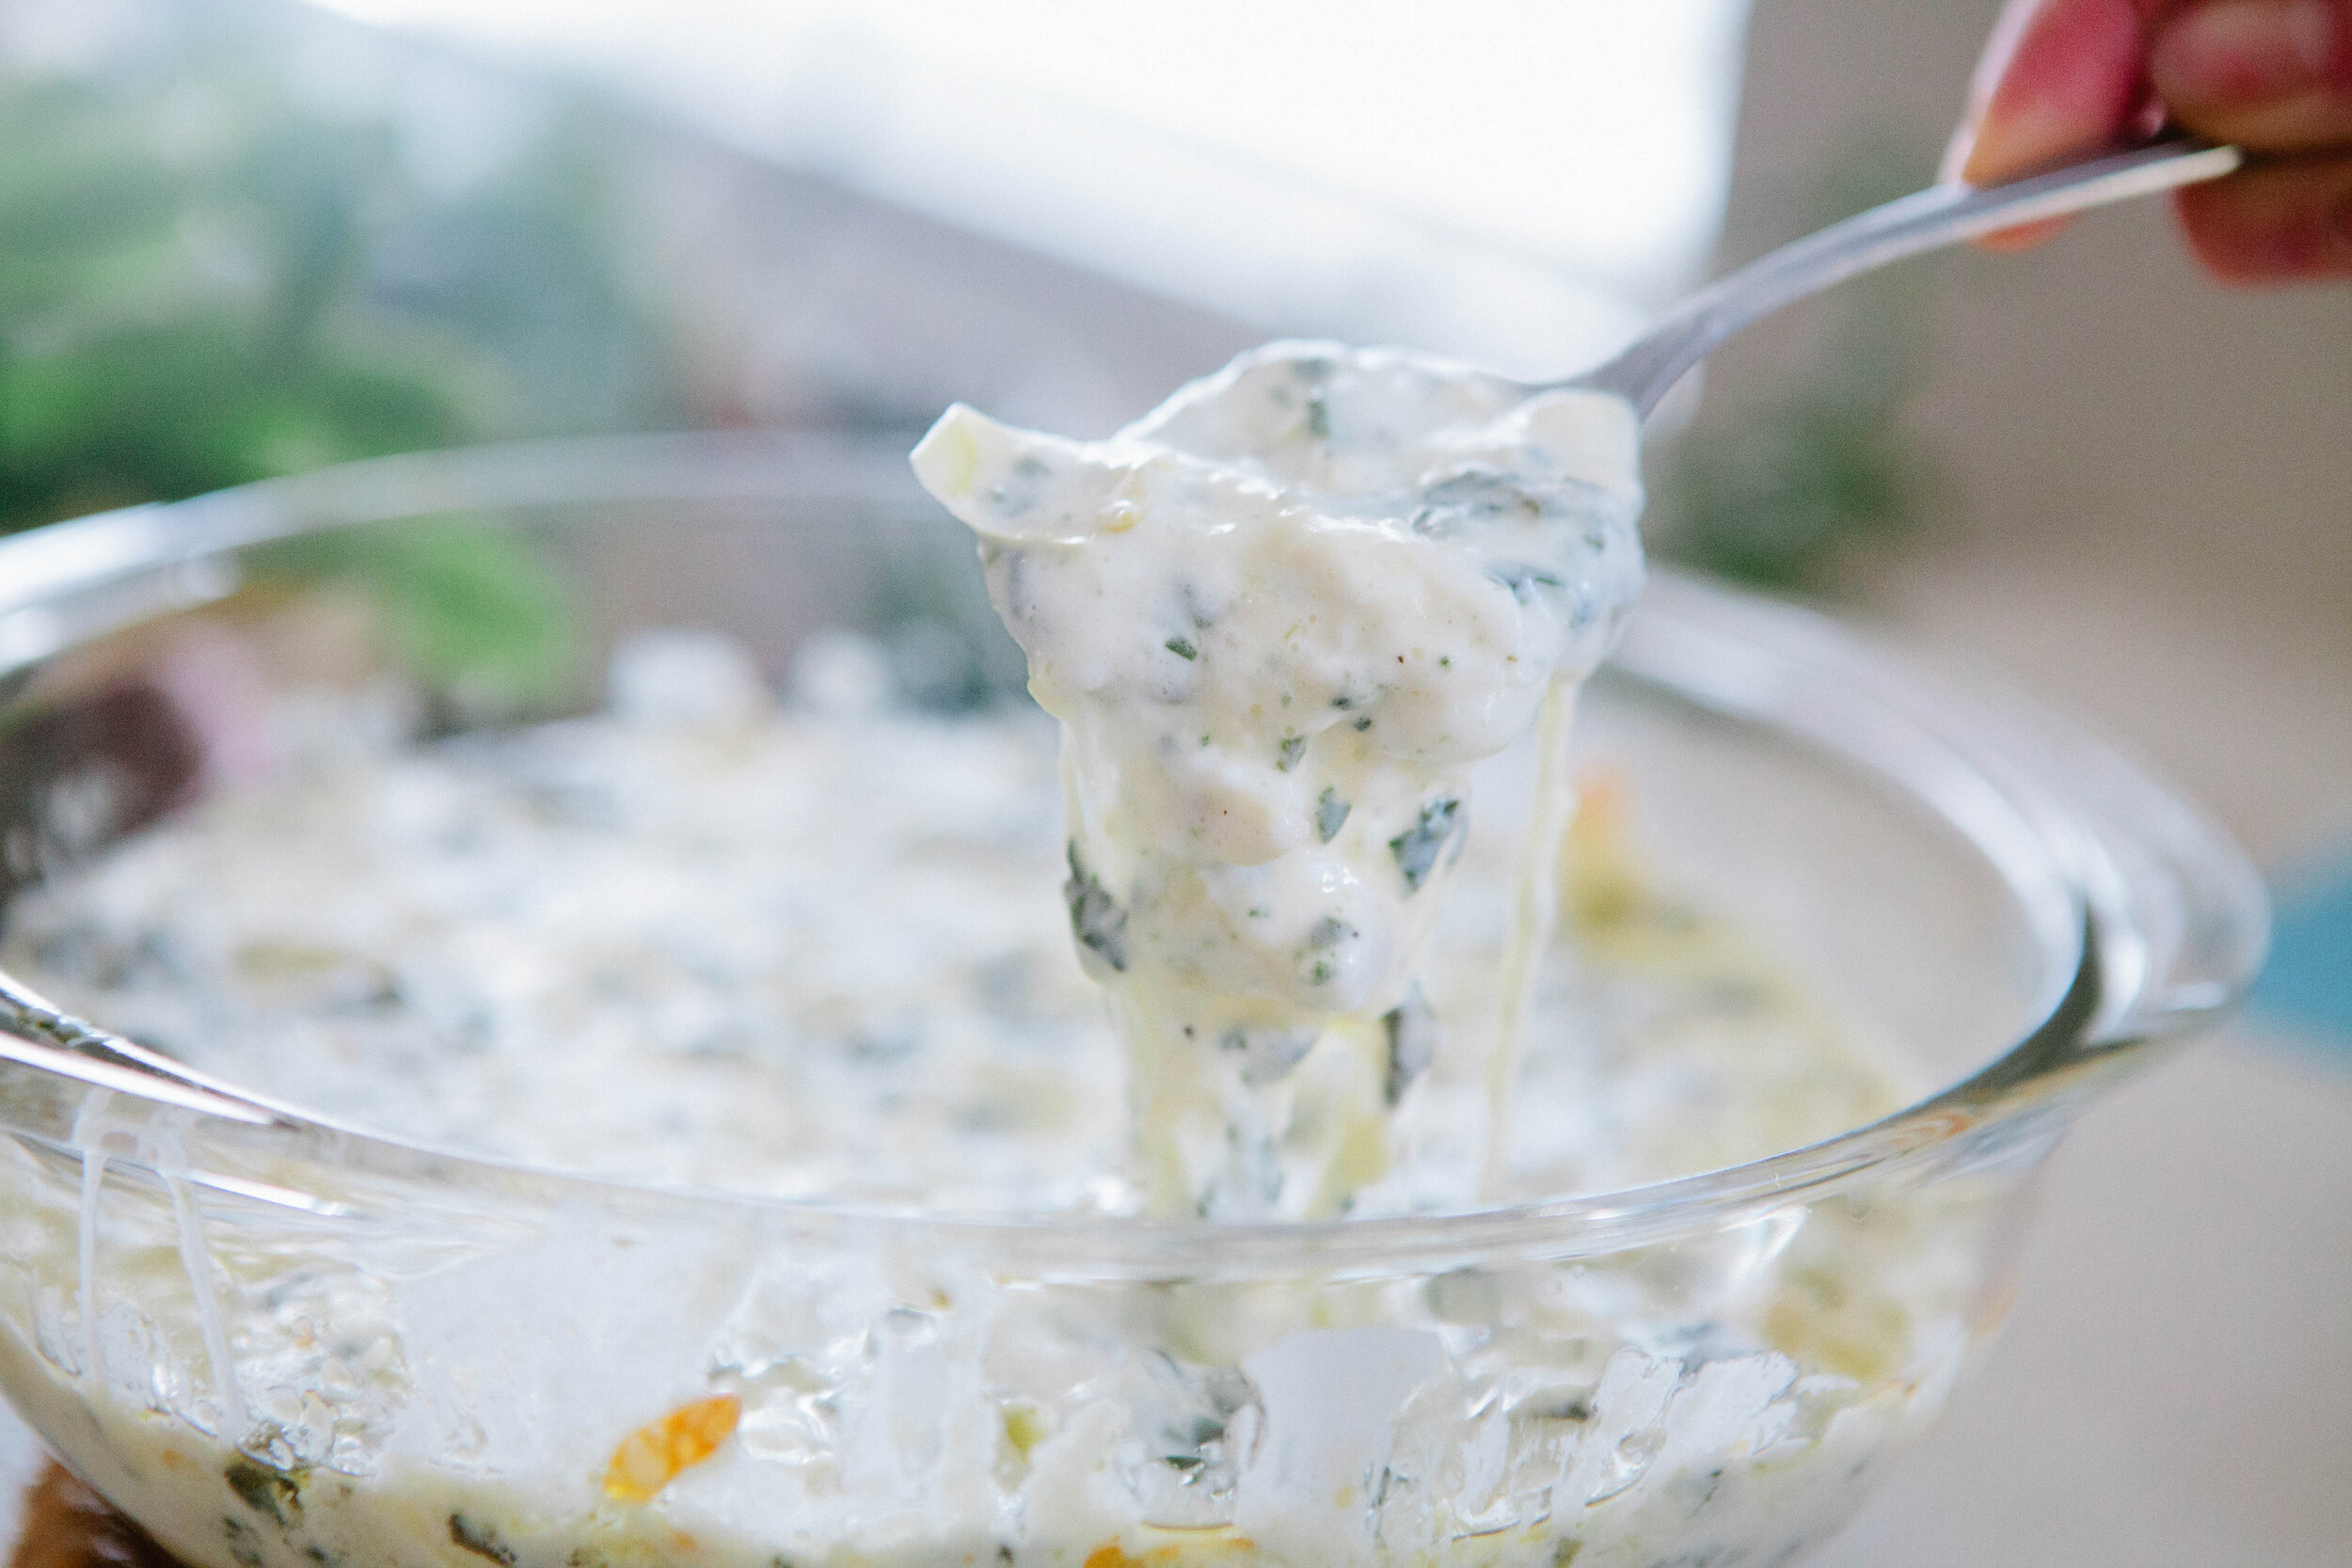
Full GAPS Spinach + Artichoke Dip

Spinach and artichoke dip - just the name conjures up images of a creamy, delicious dip. This one is made with real foods and no mayonnaise and is as delicious as a traditional spinach and artichoke dip.

Gluten Free, Egg Free

Homemade Gummy Snacks

These gummies are a good way for both children and adults to get collagen and vitamin c together! These gummies are stage five legal on the GAPS Diet because they are cooked fruit.

Gluten Free, Dairy Free, Egg Free

GAPS Legal Banana Splits

Ah, the banana split. It’s so delicious on a hot summer’s day. This one is made with all natural ingredients and real food. This recipe is GAPS Legal if you’ve been on full GAPS for about six months, and you’re tolerating raw milk, and you make it exactly as directed.

Gluten Free

GAPS Legal Onion Rings

These onion rings are my first foray into creating GAPS Legal fried foods. These onion rings use a fermented almond flour batter and are legal on the GAPS Diet at stage 4!

Gluten Free, Dairy Free, Egg Free

Mayo Free Deviled Eggs

Because I haven't found a mayo my taste buds approve of there is no mayonnaise in my refrigerator. So one day when I had a hankerin' for deviled eggs I got the creative juices flowing and started experimenting with recipes

Gluten Free, Dairy Free

Russian Custard

Russian custard is a delicious desert or afternoon snack. It is rich, and just sweet enough. You can whip it up in just a few minutes, and it is easy to double or triple to feed another (or more for yourself).

Gluten Free, Dairy Free

Swedish Gravlax

This is a brined fish meal legal on GAPS stage 2. You eat little pieces, one small piece a day.

Gluten Free, Dairy Free, Egg Free

Liver Pate

Liver pâté makes me feel like I am eating a treat when I'm really eating something healthy—very healthy and good for me! You can make pate out of any type of liver, but chicken liver is the most mild, so that is a great one to start with if you are not used to eating liver.

Gluten Free, Dairy Free, Egg Free

GAPS Pancakes

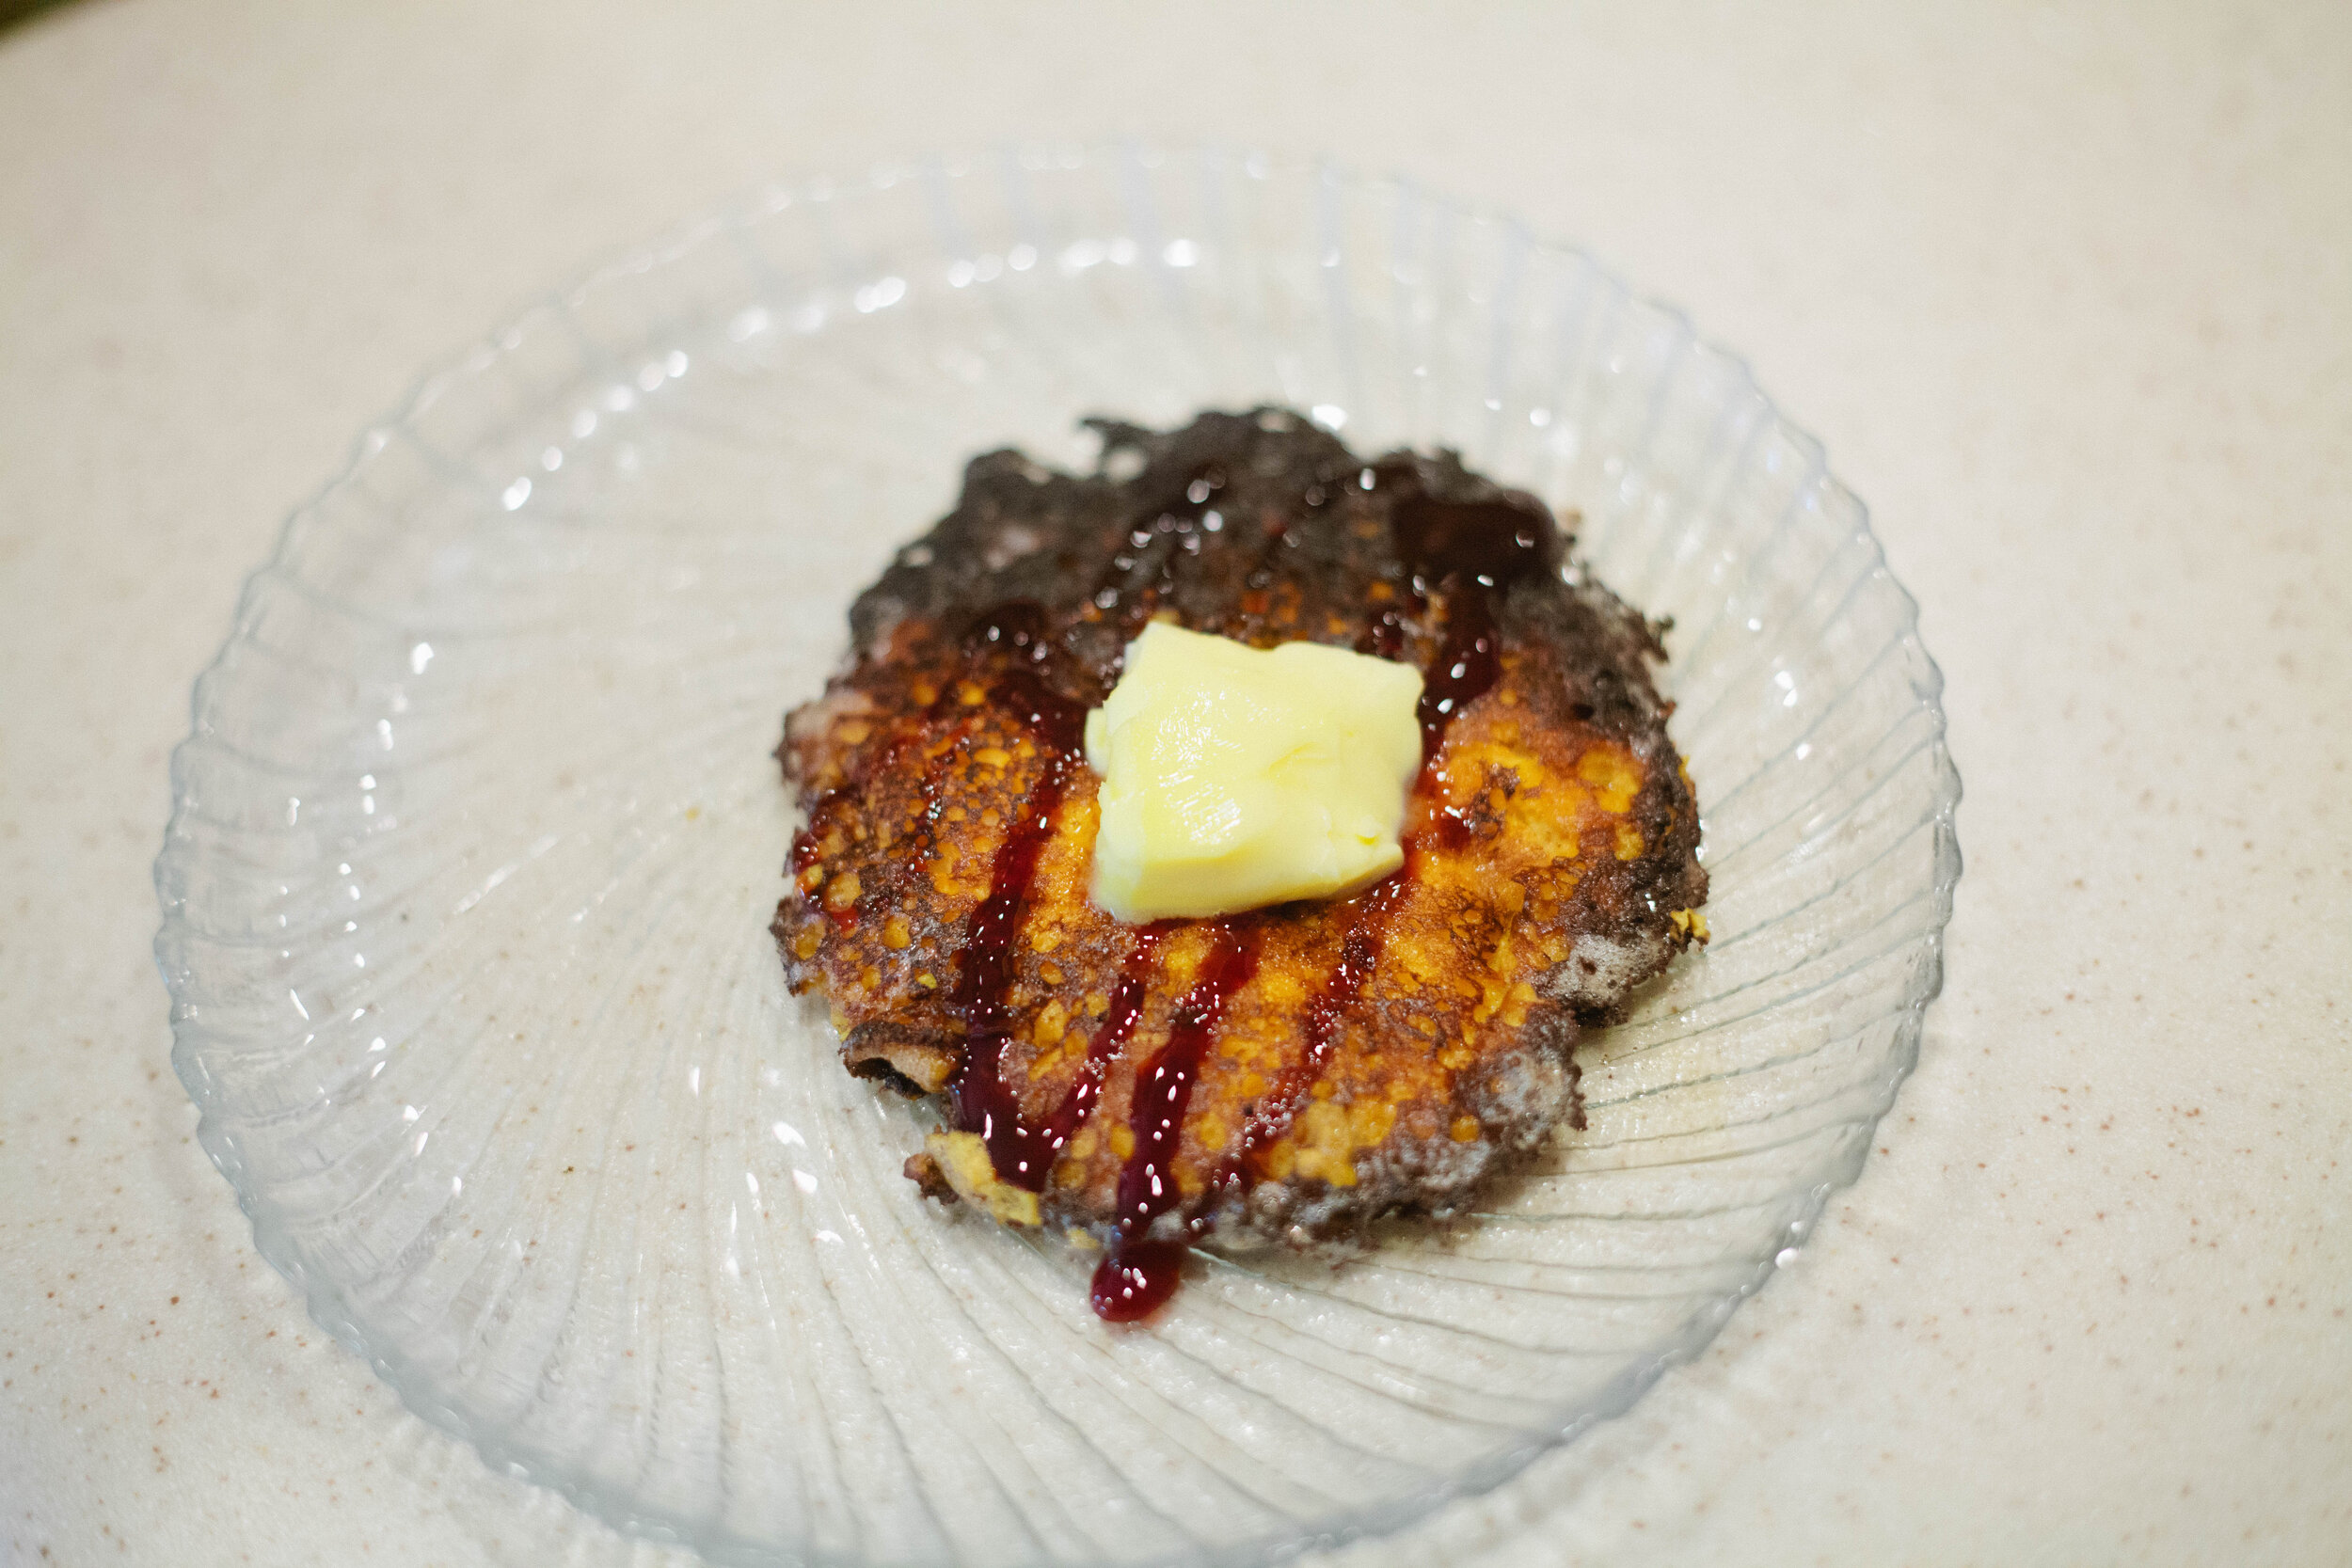
Make these pancakes with pumpkin or butternut squash. Keep as a savory pancake or for a sweeter treat, add date syrup or cinnamon to the toppings.

Gluten Free, Dairy Free, Egg Free


GAPS Legal Trail Mix

With all the hiking and camping that happens in Colorado, trail mix is almost a main food group. But commercial trail mixes contain candy, sweetened fruit, and unprepared nuts: not the superfoods they claim to be!

Gluten Free, Dairy Free, Egg Free

Fruit Chutney

If you are following the GAPS diet this is legal on stage 5 or 6, when you are tolerating dried spices and peppercorns. This recipe is very simple—chop and combine ingredients, simmer for a while, then store in jars.

Gluten Free, Dairy Free, Egg Free

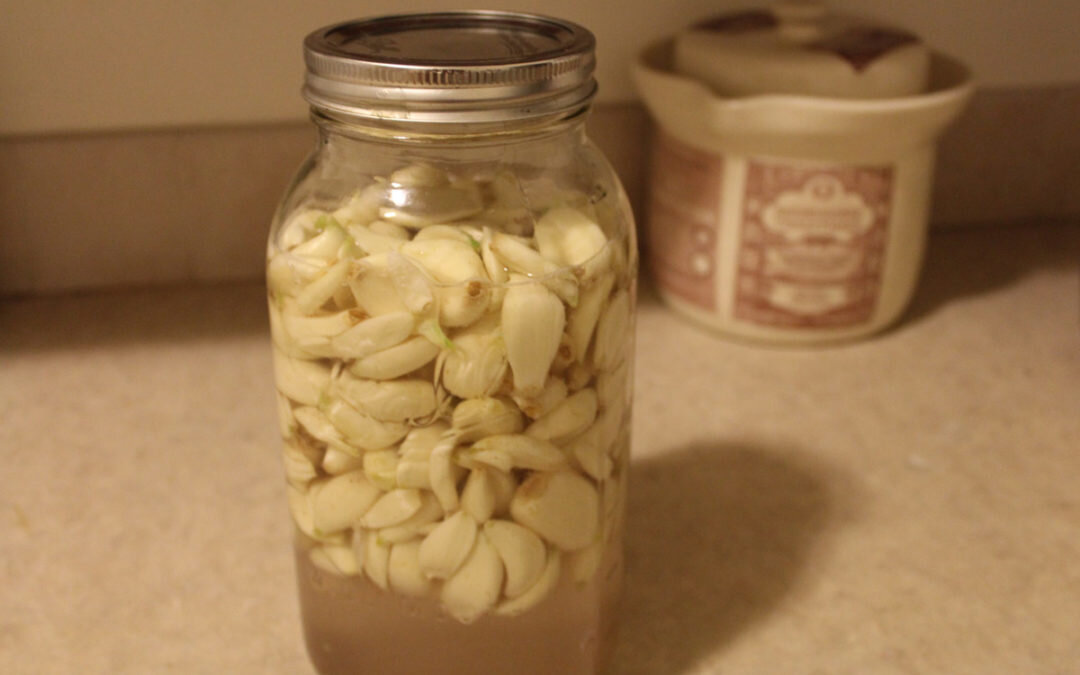
Fermented Garlic

Raw garlic, however, has many supportive health benefits. And when raw garlic is fermented, many of these increase. Fermenting garlic is very simple.

Gluten Free, Dairy Free, Egg Free

Vegetable Medley

This recipe contains five different vegetables: beets (good for liver and blood cleansing), cabbage (stimulates digestion), carrots (contain vitamin A), and cauliflower (makes it taste better, believe me), and garlic (good for immune support). It makes a very rich and flavorful liquid, which is also a wonderful probiotic drink.

Gluten Free, Dairy Free, Egg Free

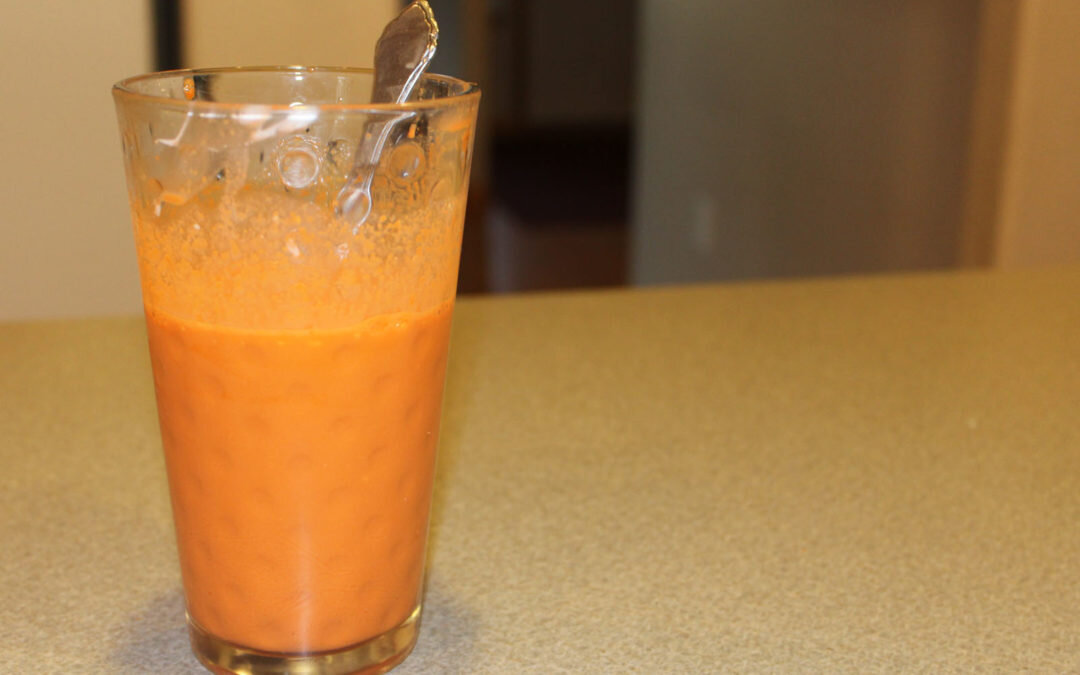
GAPS Milkshake

This delicious, satisfying and helpful beverage is a wonderful way to daily consume your freshly-pressed juices, and can even be a meal. The GAPS milkshake is mix of juice, protein, and fat.

Gluten Free, Dairy Free, Egg Free

Beet Kvass

Beet Kvass is a liver tonic. Anyone can make this simple fermented drink! It requires only a few ingredients, and only a few minutes to "put up."

Gluten Free, Dairy Free, Egg Free

Creamy Garlic Chicken Soup

This is one of my favorite soups! It’s warm and creamy and so delicious.

This soup is easy to make in large or small batches depending on how many servings you need. A small batch requires one small chicken, about 4 lbs, one head of garlic, and one glass baking dish of vegetables. A small batch will make about 4-6 hearty servings of soup. A large batch requires a larger chicken, about 6 lbs, two heads of garlic, and two glass baking dishes of vegetables.

Keeping the garlic in their paper shells roasts the garlic while preventing them from getting burnt. Don’t worry if your paper peels a little off the garlic - it’s still ok!

This soup requires a LOT of salt. If you don’t salt this soup enough, it is very bland and boring.

Because you immersion blend the vegetables into the stock, this is a great recipe to also blend in the the joint cartilage, skin and any of the other parts of the chicken that you may be tempted to throw away. I separate the chicken into three parts usually - bones, chicken meat, and everything else.

Ingredients for Creamy Garlic Chicken Soup:

  • 1 Chicken

  • 1 Zucchini (Courgettes)

  • 1 Yellow Squash

  • ½ Large Head of Cauliflower or 1 Small Cauliflower

  • 1-2 Heads of Garlic, Cloves separated but still in their paper

  • 3-4 tbsp Lard (Learn to make your own lard here.)

  • 1 tbsp Salt

  • ½ Bunch Parsley

Directions for Creamy Garlic Chicken Soup:

Zucchini, yellow squash, cauliflower and garlic are roasted with lard and then blended together to form the base of this creamy garlic chicken soup. This soup is GAPS legal and great for Whole 30 or Paleo. It’s dairy free and gluten free but still c…

Start a chicken stock on the stove. (Find the recipe for a chicken stock here.)

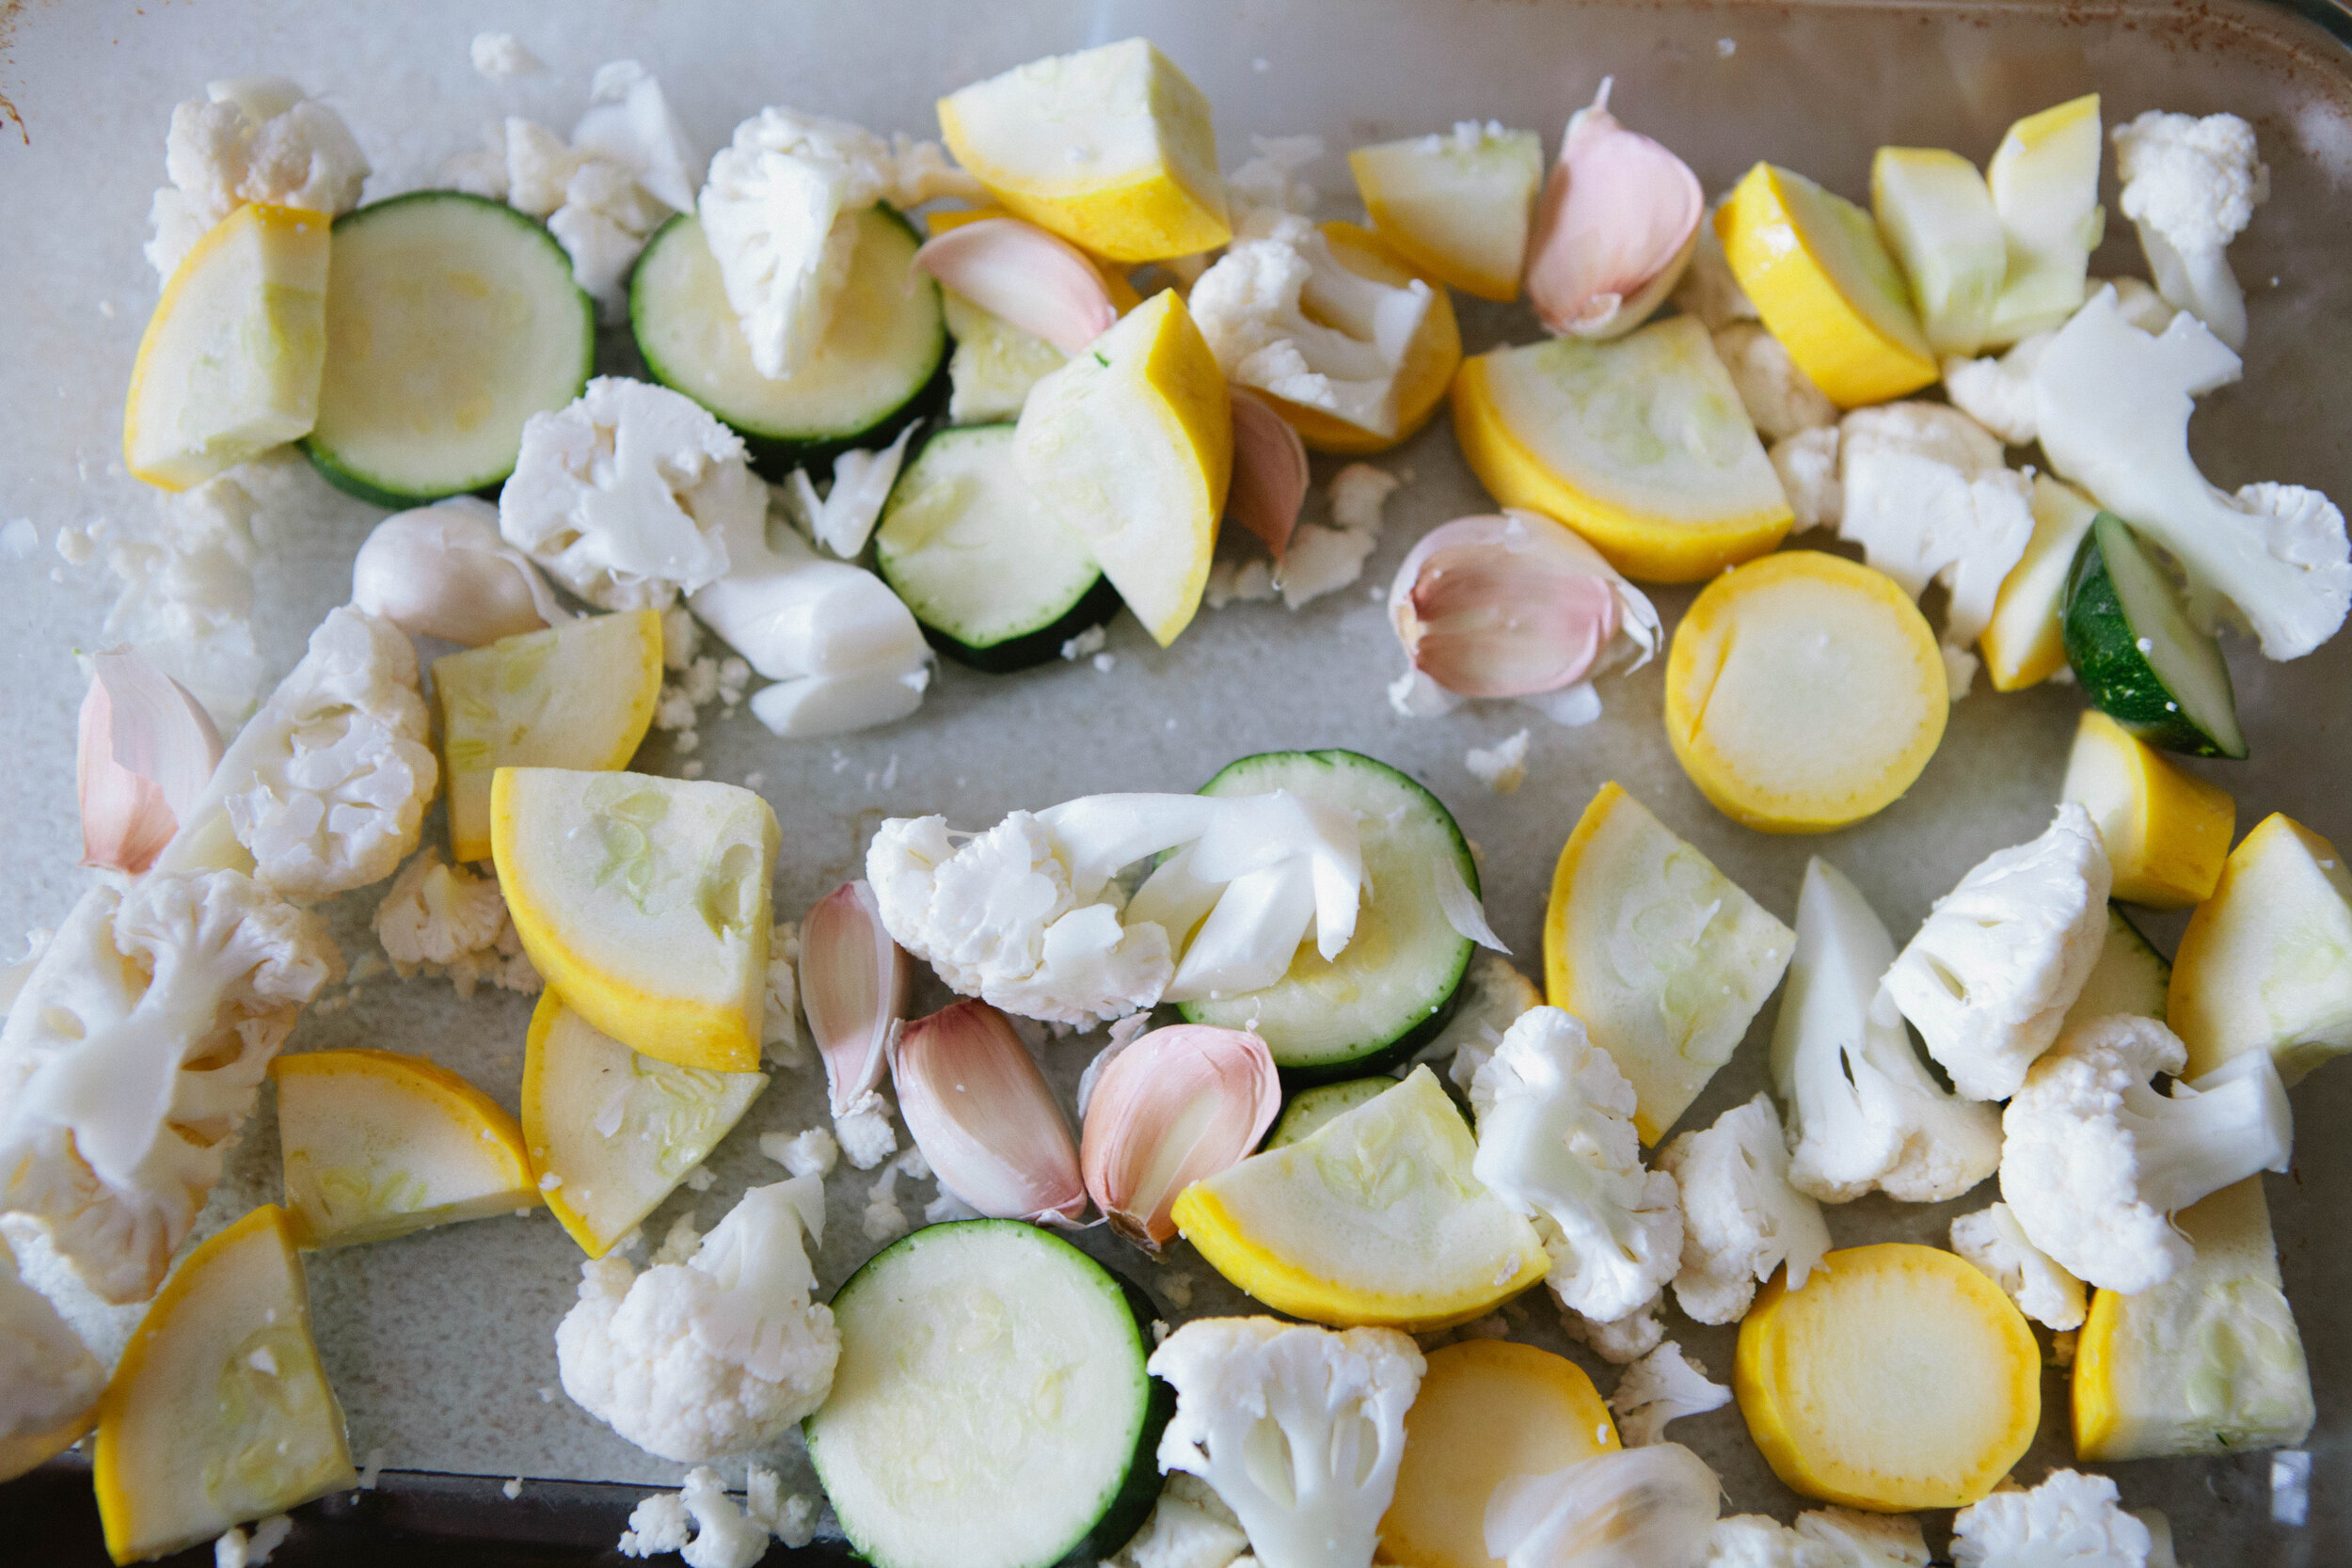
Cut the vegetables into even size pieces for even roasting. For the cauliflower, you can remove or keep however much of the fibrous material (stems), depending on how much you are tolerating.  Start the oven preheating to 400 degrees.

Roasted zucchini, cauliflower, yellow squash and garlic are the base for this soup. It’s delicious and filling while still being dairy free and gluten free. It’s a soup for the GAPS diet but is also great for Whole 30 or Paleo diets since it’s made …

Add the squash, zucchini, cauliflower and garlic to a baking dish with the lard. Melt the lard in the oven on top of the vegetables and then stir to fully coat the vegetables with the melted lard. If you do not have enough lard to fully coat your vegetables, add more! Season with salt.

Roast the coated vegetables uncovered in the oven for about an hour. The vegetables are done when they are softened and slightly browned. Set them aside to cool. 

You can make your own chicken stock to use in this recipe for creamy garlic chicken soup. It’s a GAPS legal soup but is also great for Paleo or Whole 30 diets since it’s made with real food. It gets it’s creaminess from a medley of blended vegetable…

About ten minutes before the stock is done, add in ½ bunch of parsley for an added dose of Vitamin C and magnesium. 

Strain your stock but keep the joint meats, skin and everything else to blend into this creamy garlic chicken soup. It’s delicious, full of fat, hearty and made with real food so it’s perfect for the GAPS Diet, Whole 30, Weston A Price or Paleo. Rec…

Once the stock is done, strain the stock and set the cooked meat aside to cool. 

Once the roasted vegetables have cooled, peel the garlic paper off. Wait until the garlic is cooled - if you are impatient and peel it too early, it will burn your hands.

Add the roasted vegetables to a large pot. Add 12 cups of stock to the pot. 

This creamy garlic chicken soup uses a whole chicken. Set aside the bones and meat from your stock but blend everything else into the soup base to create a creamy soup that can’t be beat! It’s great for the GAPS Diet, Weston A Price, Whole 30 or Pal…

Once your meat is cooled, remove it from the bone. Separate the joint cartilage and skin from the meat. In the above photo, the top left is the bones, the bottom plate is the meat and the plate on the right has everything else that will be added into the stock and blended.

Roasted cauliflower, zucchini, yellow squash and garlic get blended with chicken skins to create a creamy base that keeps this creamy garlic chicken soup dairy free but still delicious! Recipe for GAPS Diet, Whole 30, Weston A Price or Paleo by Amy …

Add the skin, cartilage and other non-meat bits (no bones) to the pot. 

Immersion blend everything together until it is well blended and the vegetables are in small pieces.

Add shredded chicken to a base of roasted vegetables and blended chicken skins for a creamy, dreamy soup. Creamy Garlic Chicken Soup recipe for the GAPS Diet, Whole 30, Weston A Price or Paleo by Amy Mihaly, Certified GAPS Practitioner in Colorado.

Add the meat from your chicken into the blended stock. Add 1 tbsp of salt.

Cook for 15-20 minutes to blend the flavors.

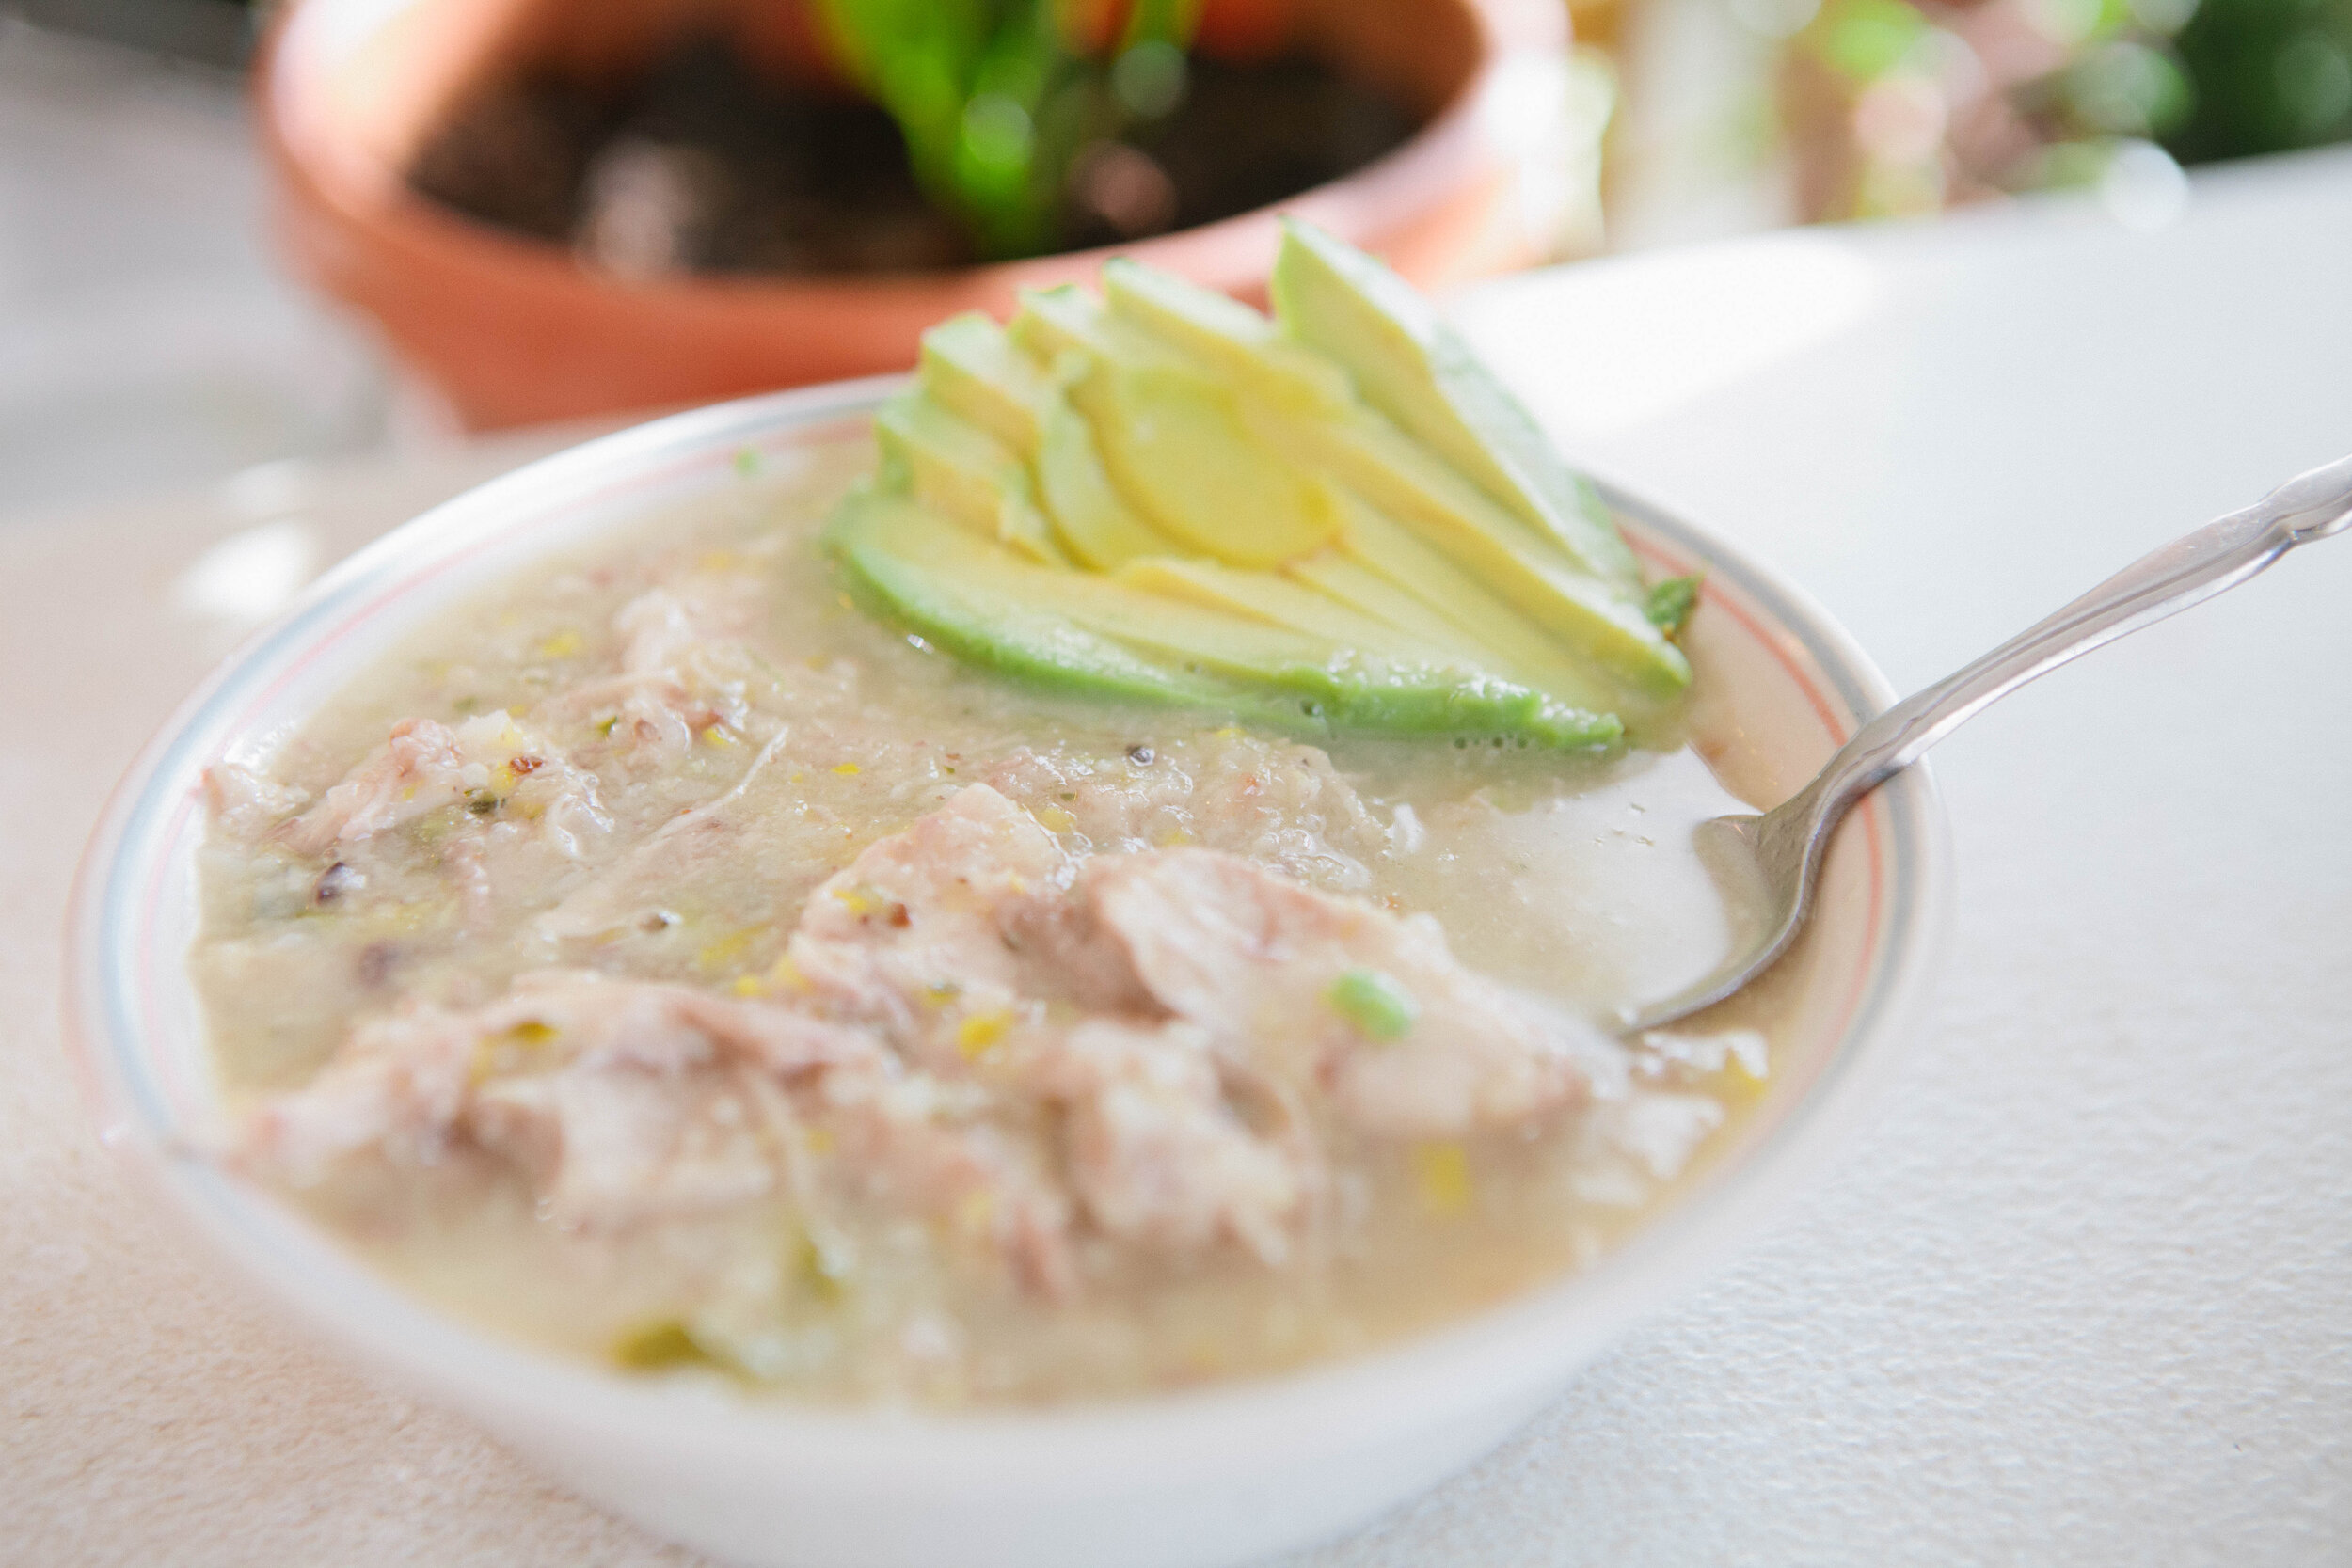
This soup is a dream! Creamy Garlic Chicken soup is made with a blend of cauliflower, zucchini, yellow squash and garlic. It’s legal for the GAPS Diet, Whole30, Weston A Price and Paleo diets because it’s made with simple, real food. Recipe by Amy M…

Enjoy! I topped mine with sliced avocado. However, this does make it legal on GAPS Stage 3.


Creamy Garlic Chicken Soup

Author:
prep time: cook time: total time:

ingredients:

  • 1 Chicken
  • 1 Zucchini (Courgettes)
  • 1 Yellow Squash
  • ½ Large Head of Cauliflower or 1 Small Cauliflower
  • 1-2 Heads of Garlic, Cloves separated but still in their paper
  • 3-4 tbsp Lard
  • 1 tbsp Salt
  • ½ Bunch Parsley

instructions:

How to cook Creamy Garlic Chicken Soup

  1. Start a chicken stock on the stove.
  2. Cut the vegetables into even size pieces for even roasting. For the cauliflower, you can remove or keep however much of the fibrous material (stems), depending on how much you are tolerating. Start the oven preheating to 400 degrees.
  3. Add the squash, zucchini, cauliflower and garlic to a baking dish with the lard. Melt the lard in the oven on top of the vegetables and then stir to fully coat the vegetables with the melted lard. If you do not have enough lard to fully coat your vegetables, add more! Season with salt.
  4. Roast the coated vegetables uncovered in the oven for about an hour. The vegetables are done when they are softened and slightly browned. Set them aside to cool.
  5. About ten minutes before the stock is done, add in ½ bunch of parsley for an added dose of Vitamin C and magnesium.
  6. Once the stock is done, strain the stock and set the cooked meat aside to cool.
  7. Once the roasted vegetables have cooled, peel the garlic paper off. Wait until the garlic is cooled - if you are impatient and peel it too early, it will burn your hands.
  8. Add the roasted vegetables to a large pot. Add 12 cups of stock to the pot.
  9. Once your meat is cooled, remove it from the bone. Separate the joint cartilage and skin from the meat. Add the skin, cartilage and other non-meat bits (no bones) to the pot.
  10. Immersion blend everything together until it is well blended and the vegetables are in small pieces.
  11. Add the meat from your chicken into the blended stock. Add 1 tbsp of salt.
  12. Cook for 15-20 minutes to blend the flavors.
  13. Enjoy! I topped mine with sliced avocado. However, this does make it legal on GAPS Stage 3.
Created using The Recipes Generator
This soup is a dream! Creamy Garlic Chicken soup is made with a blend of cauliflower, zucchini, yellow squash and garlic. It’s legal for the GAPS Diet, Whole30, Weston A Price and Paleo diets because it’s made with simple, real food. Recipe by Amy M…

Egg Free, Dairy Free Liver Meatballs

Liver is an amazing superfood! It contains lots of vitamins and minerals, including zinc, iron, B vitamins, A vitamins, and folate. In our modern world, all of our livers are well taxed because of our exposure to chemicals. Anytime we know we need to support a particular organ, one of the best ways to do that is to consume the organ meat of the organ you’re trying to support.

You can spice your meatballs with anything you want but think of strong flavors. You want to neutralize the flavor of the liver.  You can also add any additional vegetables that you know your family likes. If you add additional vegetables like zucchini, eggplant or peppers and are finding the consistency of the meatball mixture to not be very sticky, you may want to add an egg to help bind everything together. Otherwise, these meatballs are egg free and dairy free!

This is a recipe that I recommend to a lot of moms! It’s a great way to help your kids eat a little bit of liver every day, which is the best way to eat liver. This recipe makes a lot of meatballs so you can freeze them and take out a few at a time to have for lunch or dinner.

Makes 27-30 Meatballs

Ingredients for Liver Meatballs:

  • 2 lb ground beef

  • ½ lb beef liver

  • 2 carrots, about 1 cup grated

  • ⅓ large white onion, about ⅔ a cup grated

  • 6 large cloves of Garlic

  • Oregano, 1 bunch Fresh or 1 tbsp Dried

  • Basil, 1 bunch Fresh or 1 tbsp Dried

  • ¼ - ½ tsp Pepper

  • 2 tsp Salt

  • 1 tbsp lard

Directions for Liver Meatballs:

IMG_6158.jpg

For milder tasting liver, soak it in some kind of acid. Cover the liver in filtered water and then add the juice of one lemon or 1-2 tablespoons of apple cider vinegar. Leave to soak for 30 minutes. Be sure not to soak it for too long. The acid will break down the liver and start it “cooking” prematurely.

Preheat your oven to 375.

IMG_6175.jpg

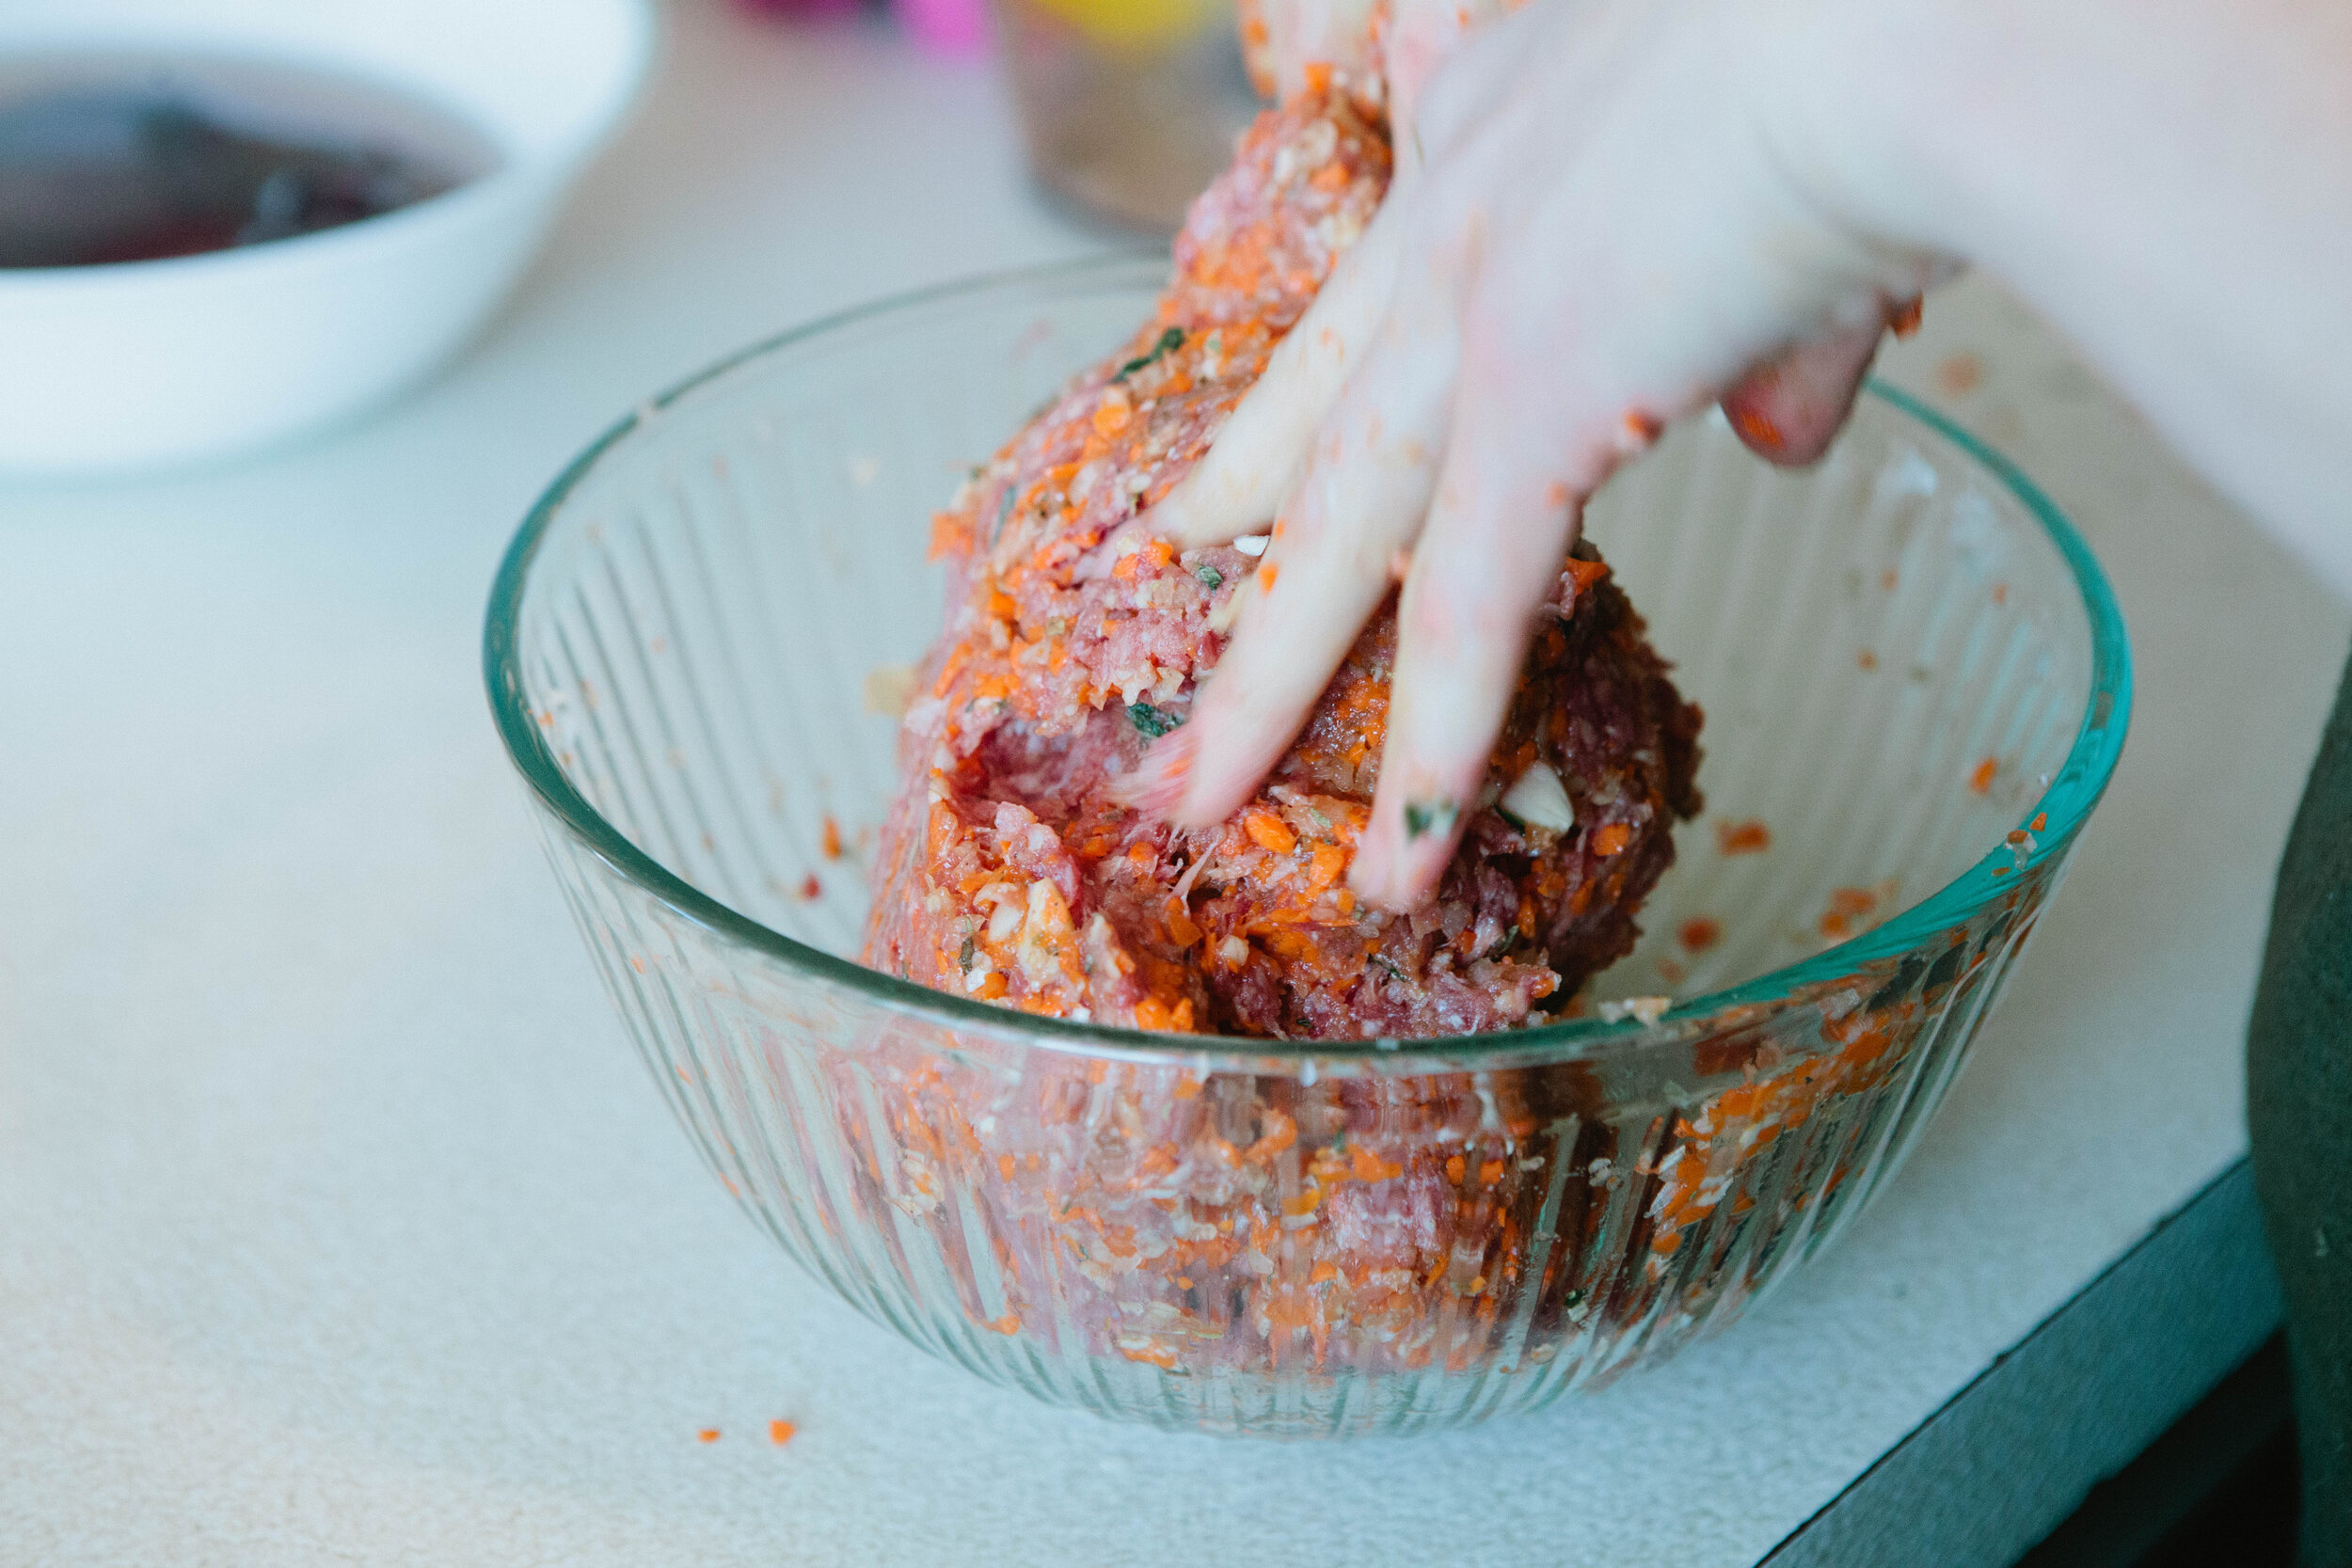
Grate your carrot, onion and garlic into very fine pieces. Add to a large bowl with ground beef. Add in oregano, basil and salt and pepper. Mix with your hands. 

IMG_6189.jpg

Place your liver into a food processor once it has soaked. Pulse until smooth. Add to the bowl with the beef, vegetables and spices and mix again.

IMG_6214.jpg

Spread lard onto the bottom of a glass oven safe casserole dish. 

IMG_6224.jpg

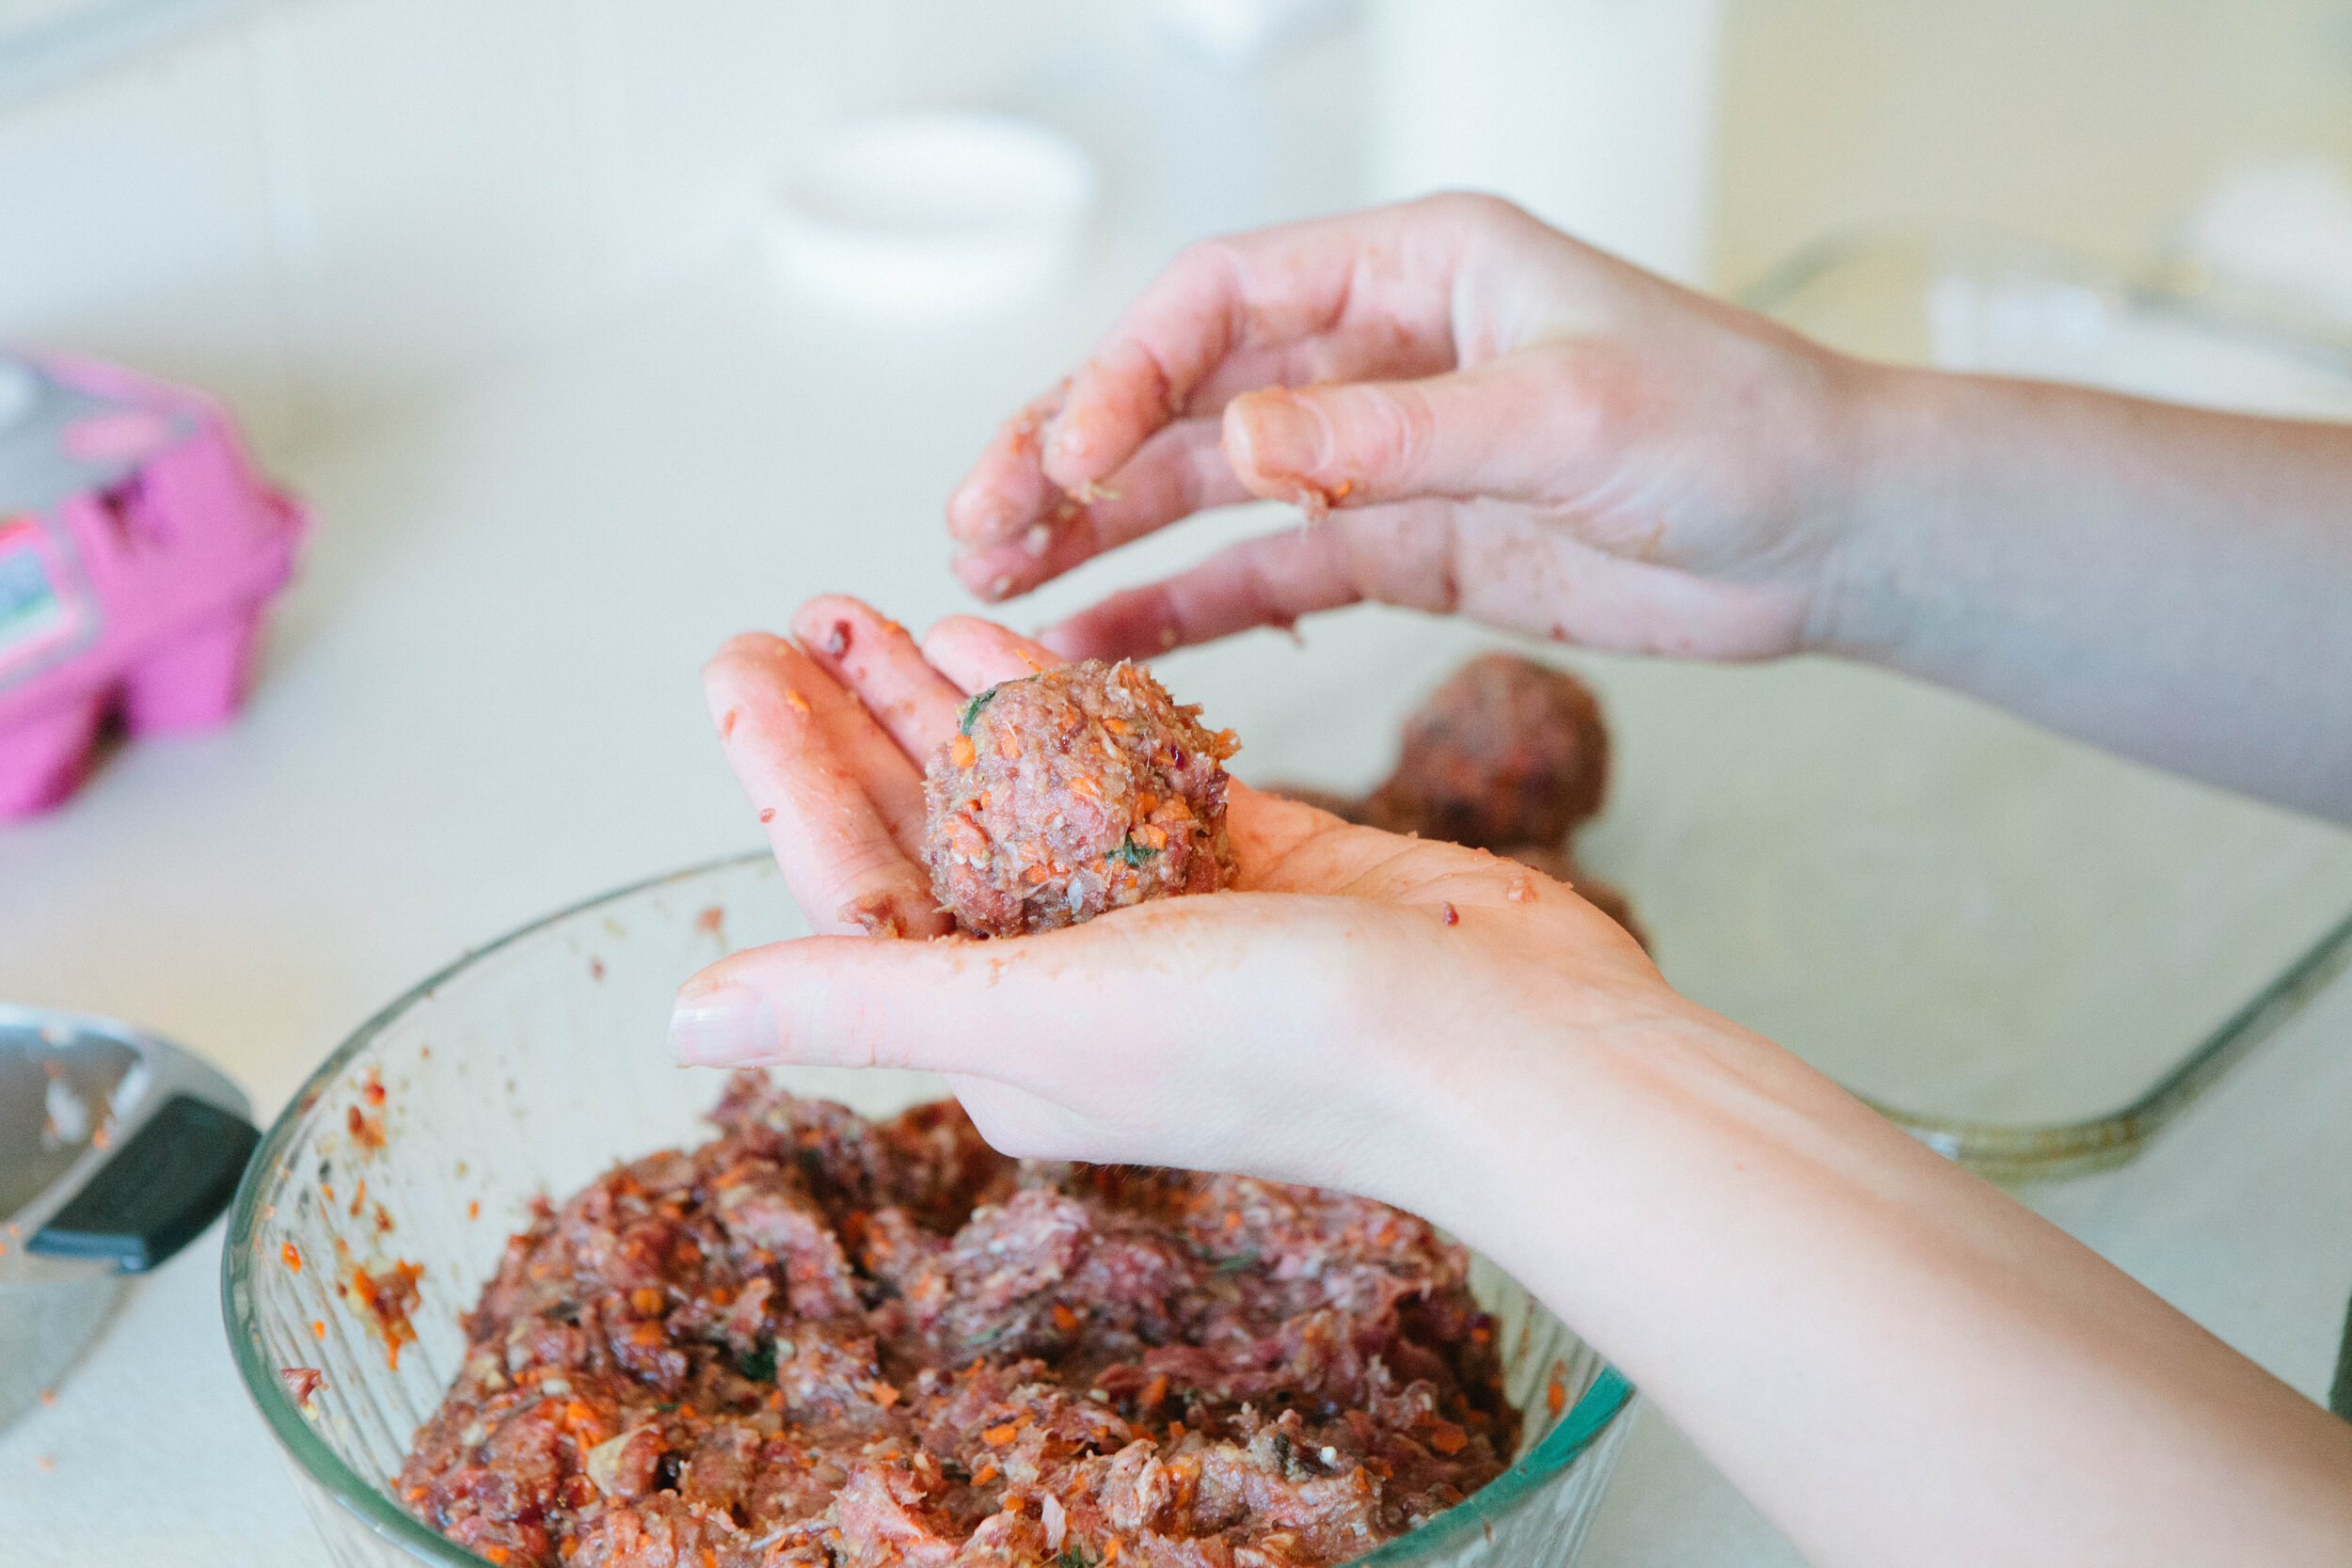
Take a small handful of meat at a time and roll into a meatball. Continue to roll meatballs until you have filled your casserole dish. Keep consistency in the size and shape of your meatballs to ensure even cooking time.

IMG_6229.jpg

Line meatballs, leaving some space between them.

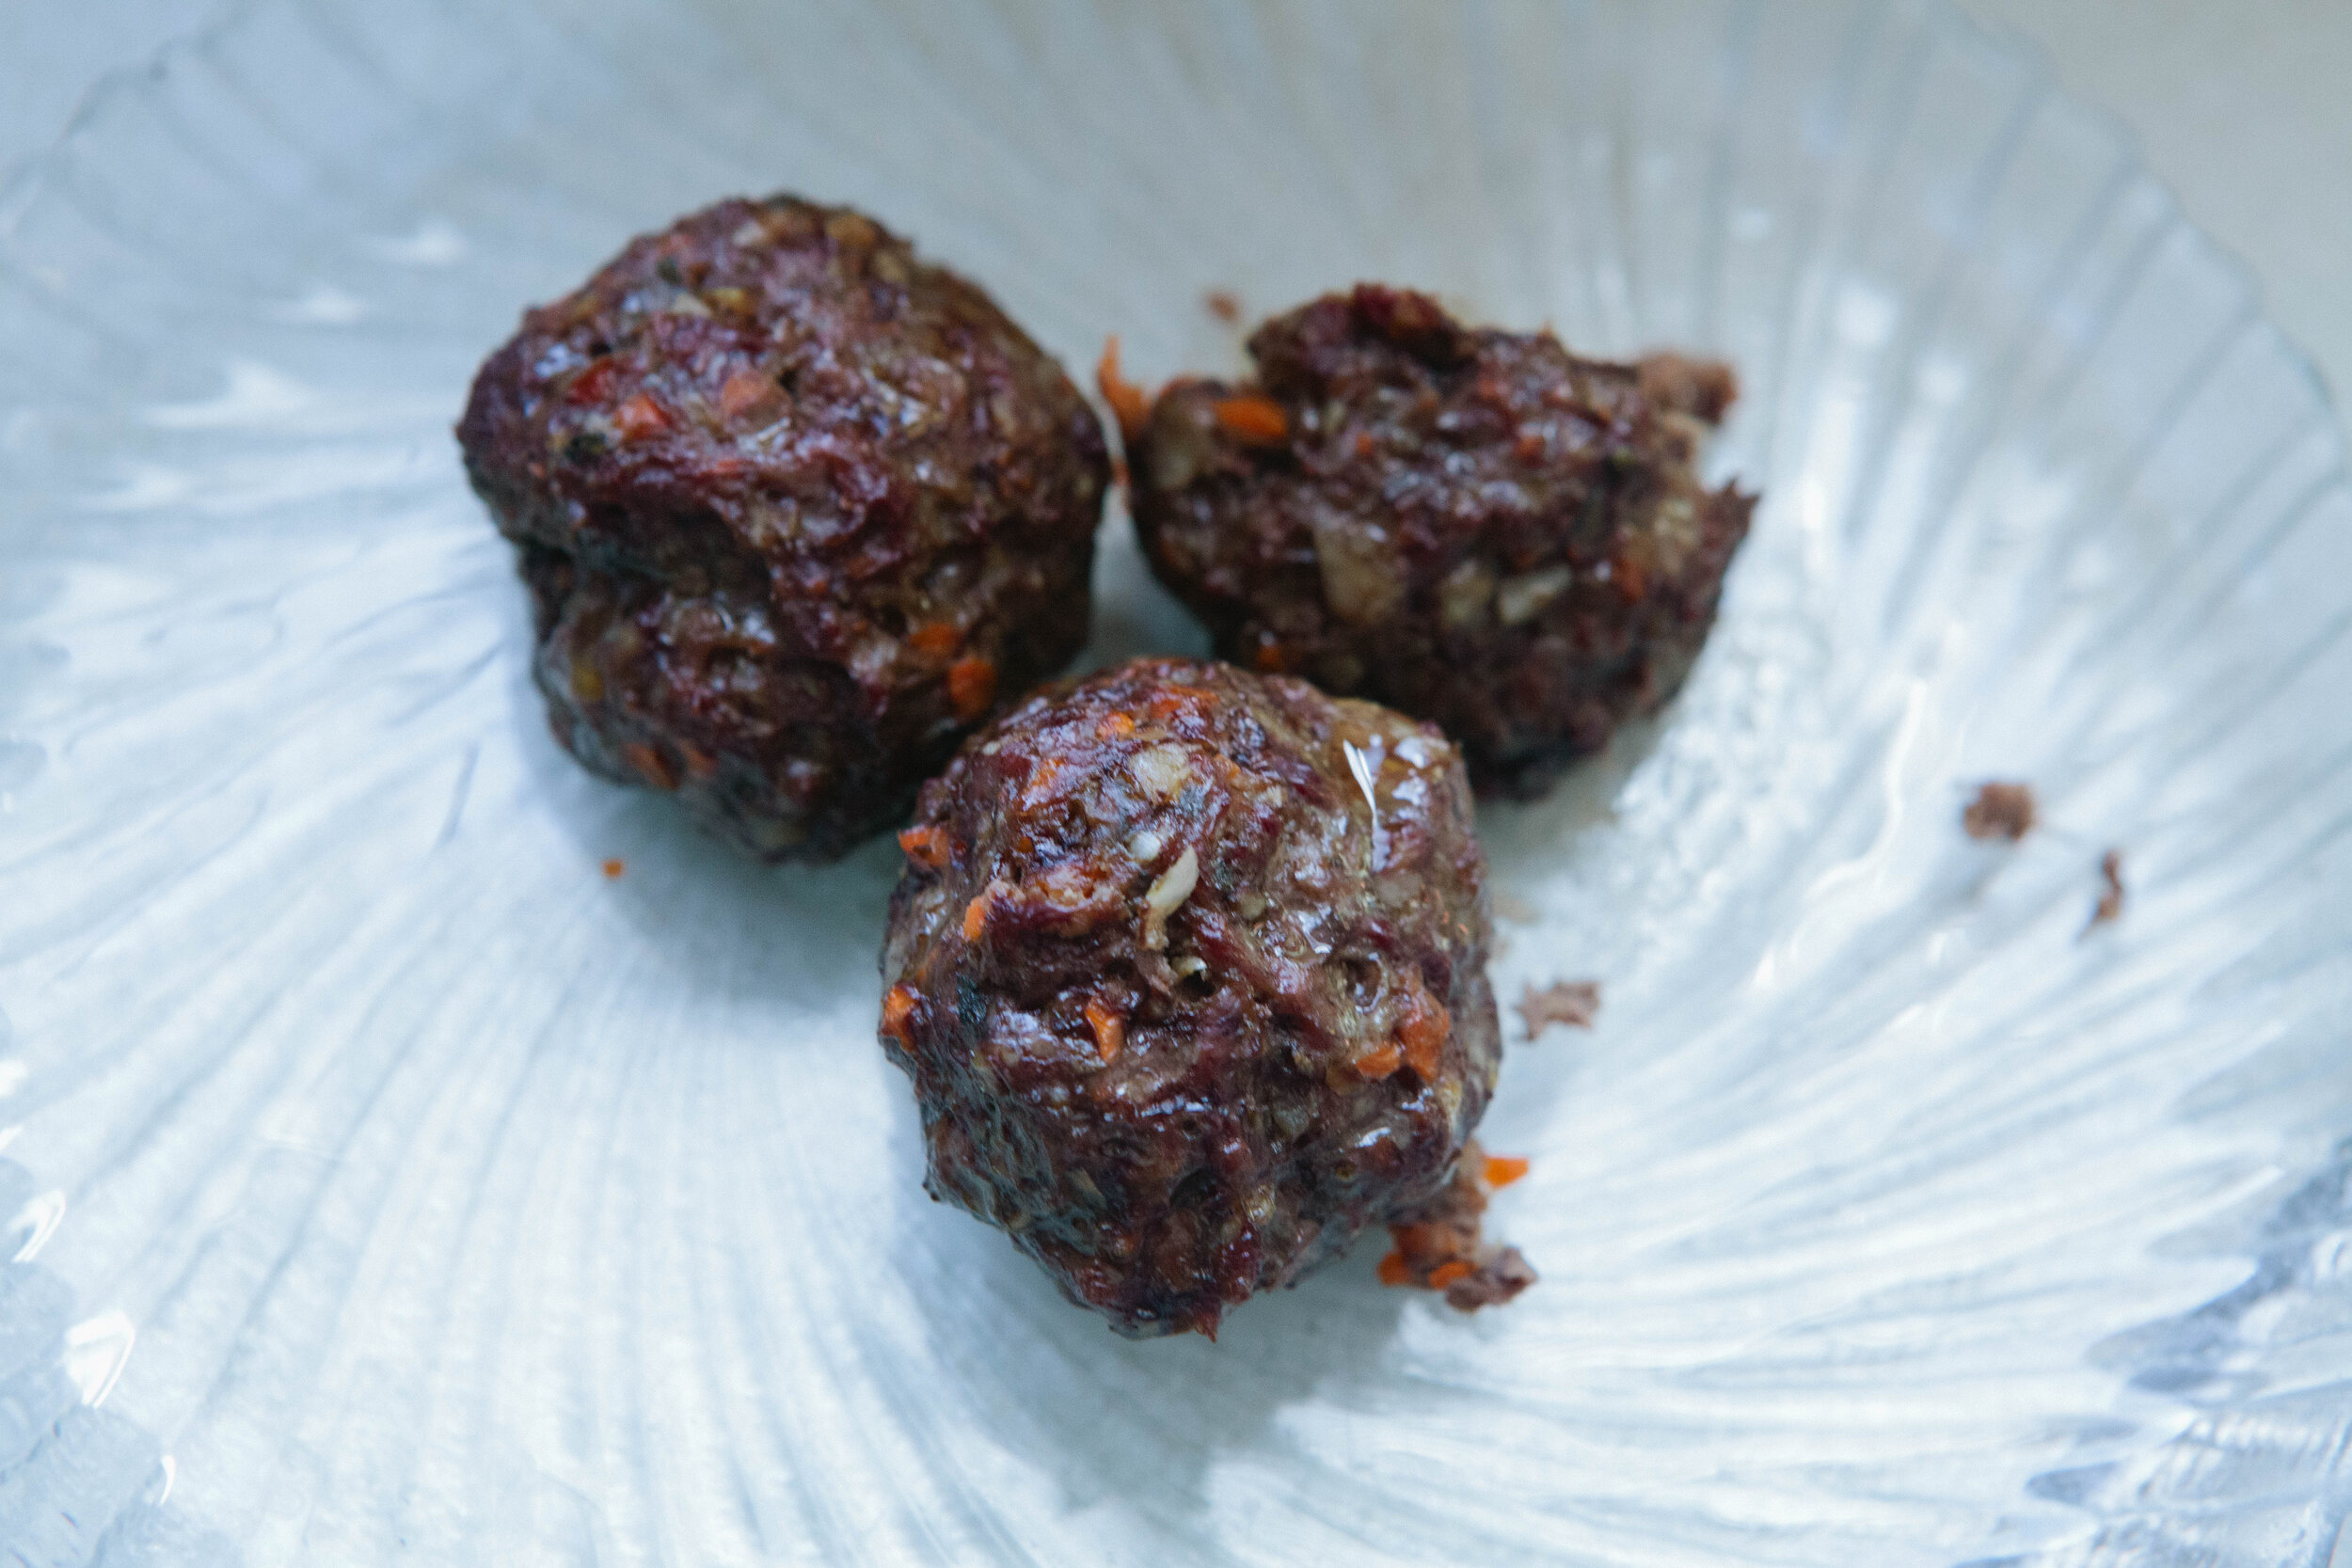
Bake for 45 minutes.

IMG_6353.jpg

Enjoy with spaghetti squash and make your own spaghetti sauce for a spaghetti night. Or enjoy with any variety of vegetables like brussels sprouts or broccoli!

Egg Free, Dairy Free Liver Meatballs

prep time: cook time: total time:

ingredients:

  • 2 lb ground beef
  • ½ lb beef liver
  • 2 carrots, about 1 cup grated
  • ⅓ large white onion, about ⅔ a cup grated
  • 6 large cloves of Garlic
  • Oregano, 1 bunch Fresh or 1 tbsp Dried
  • Basil, 1 bunch Fresh or 1 tbsp Dried
  • ¼ - ½ tsp Pepper
  • 2 tsp Salt
  • 1 tbsp lard

instructions:

How to cook Egg Free, Dairy Free Liver Meatballs

  1. For milder tasting liver, soak it in some kind of acid. Cover the liver in filtered water and then add the juice of one lemon or 1-2 tablespoons of apple cider vinegar. Leave to soak for 30 minutes. Be sure not to soak it for too long. The acid will break down the liver and start it “cooking” prematurely.
  2. Preheat your oven to 375.
  3. Grate your carrot, onion and garlic into very fine pieces. Add to a large bowl with ground beef. Add in oregano, basil and salt and pepper. Mix with your hands.
  4. Place your liver into a food processor once it has soaked. Pulse until smooth. Add to the bowl with the beef, vegetables and spices and mix again.
  5. Spread lard onto the bottom of a glass oven safe casserole dish.
  6. Take a small handful of meat at a time and roll into a meatball. Continue to roll meatballs until you have filled your casserole dish. Keep consistency in the size and shape of your meatballs to ensure even cooking time.
  7. Line meatballs, leaving some space between them.
  8. Bake for 45 minutes.
  9. Enjoy with spaghetti squash and make your own spaghetti sauce for a spaghetti night. Or enjoy with any variety of vegetables like brussels sprouts or broccoli!
Created using The Recipes Generator
42.png

Sprouted Refried Navy Beans Recipe

Beans make everything delicious! The old adage about beans isn’t true. If you’re worried about the unsightly smells and noises that beans so often bring, worry no more. The reason that beans are known for producing flatulence is because of the strong anti-nutrients present in the bean seed. Once you properly prepare these beans, the anti-nutrients are no longer present so there’s no reason for any symptoms.  When they’re properly prepared and you can tolerate them, navy beans are a good addition to your diet. If you do experience flatulence while eating the beans, it means your body is not ready for the starch and you still have work to do on your gut flora. 

Even if you are tolerating them well, remember that beans are a starch and should always be consumed alongside a generous amount of animal fat. 

These are great served with anything that has a Mexican theme with them. I like them next to eggs, like a Huervos Rancheros sort of feel.

IMG_5209.jpg

You can freeze this recipe into smaller portion sizes so that you can pull it out quickly to use as a side for a meal. I tried freezing this in muffin tins since they are about the correct proportion of a serving of beans. I lined the muffin tin with unbleached large baking cups and then scooped beans into them. I let them freeze over a weekend and then took them out of the muffin tin and placed them in a gallon bag to protect them from freezer burn. 

Makes about 12 servings

Ingredients for Sprouted Refried Beans

  • 6 cups sprouted navy beans

  • ½ onion

  • ½ jalapeno

Directions for Sprouted Refried Beans

IMG_4871.jpg

Add sprouted navy beans to a large pot.

IMG_4975.jpg

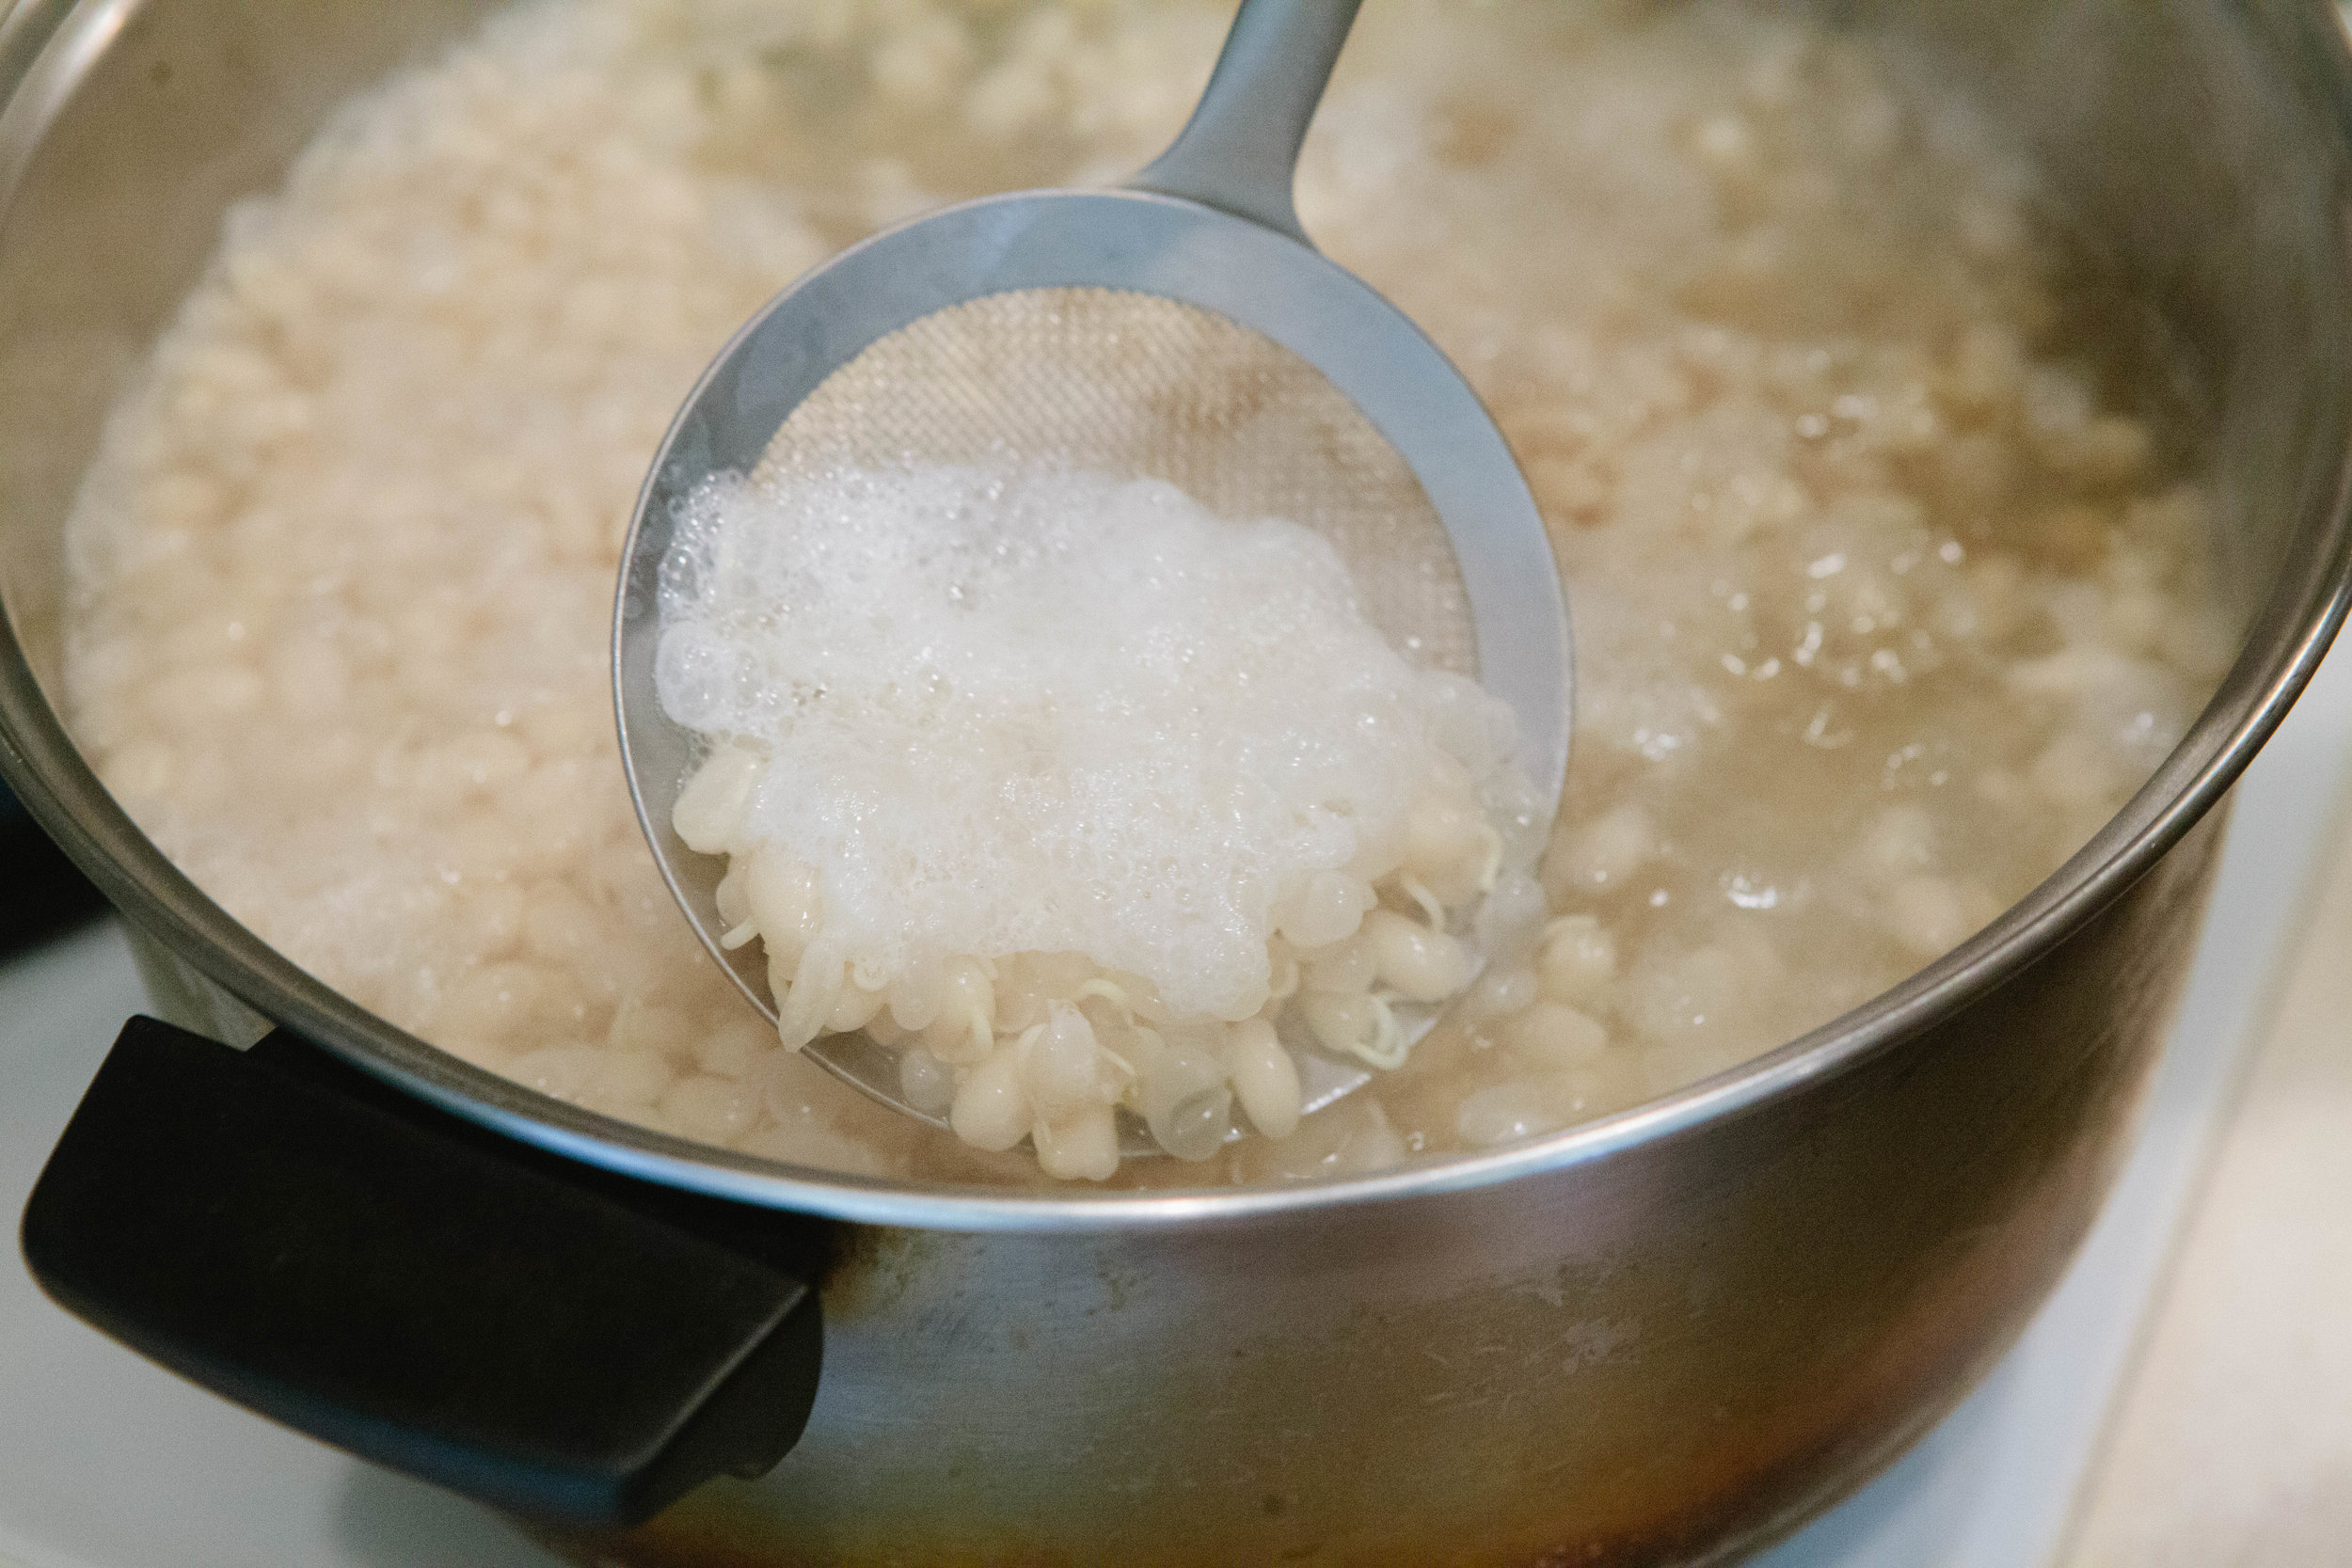
Bring to a boil and cook for about 2 hours until the beans are very soft. The beans will foam as they cook. You can skim the foam and the extra bean pods off of the top if you’d like. Just be sure not to scoop out any of your good sprouted beans!

Add onion and jalapeno into the pot once beans are soft. If too much water is gone, add a little bit into the pot so you don’t scorch the beans on the bottom of the pot. 

IMG_5126.jpg

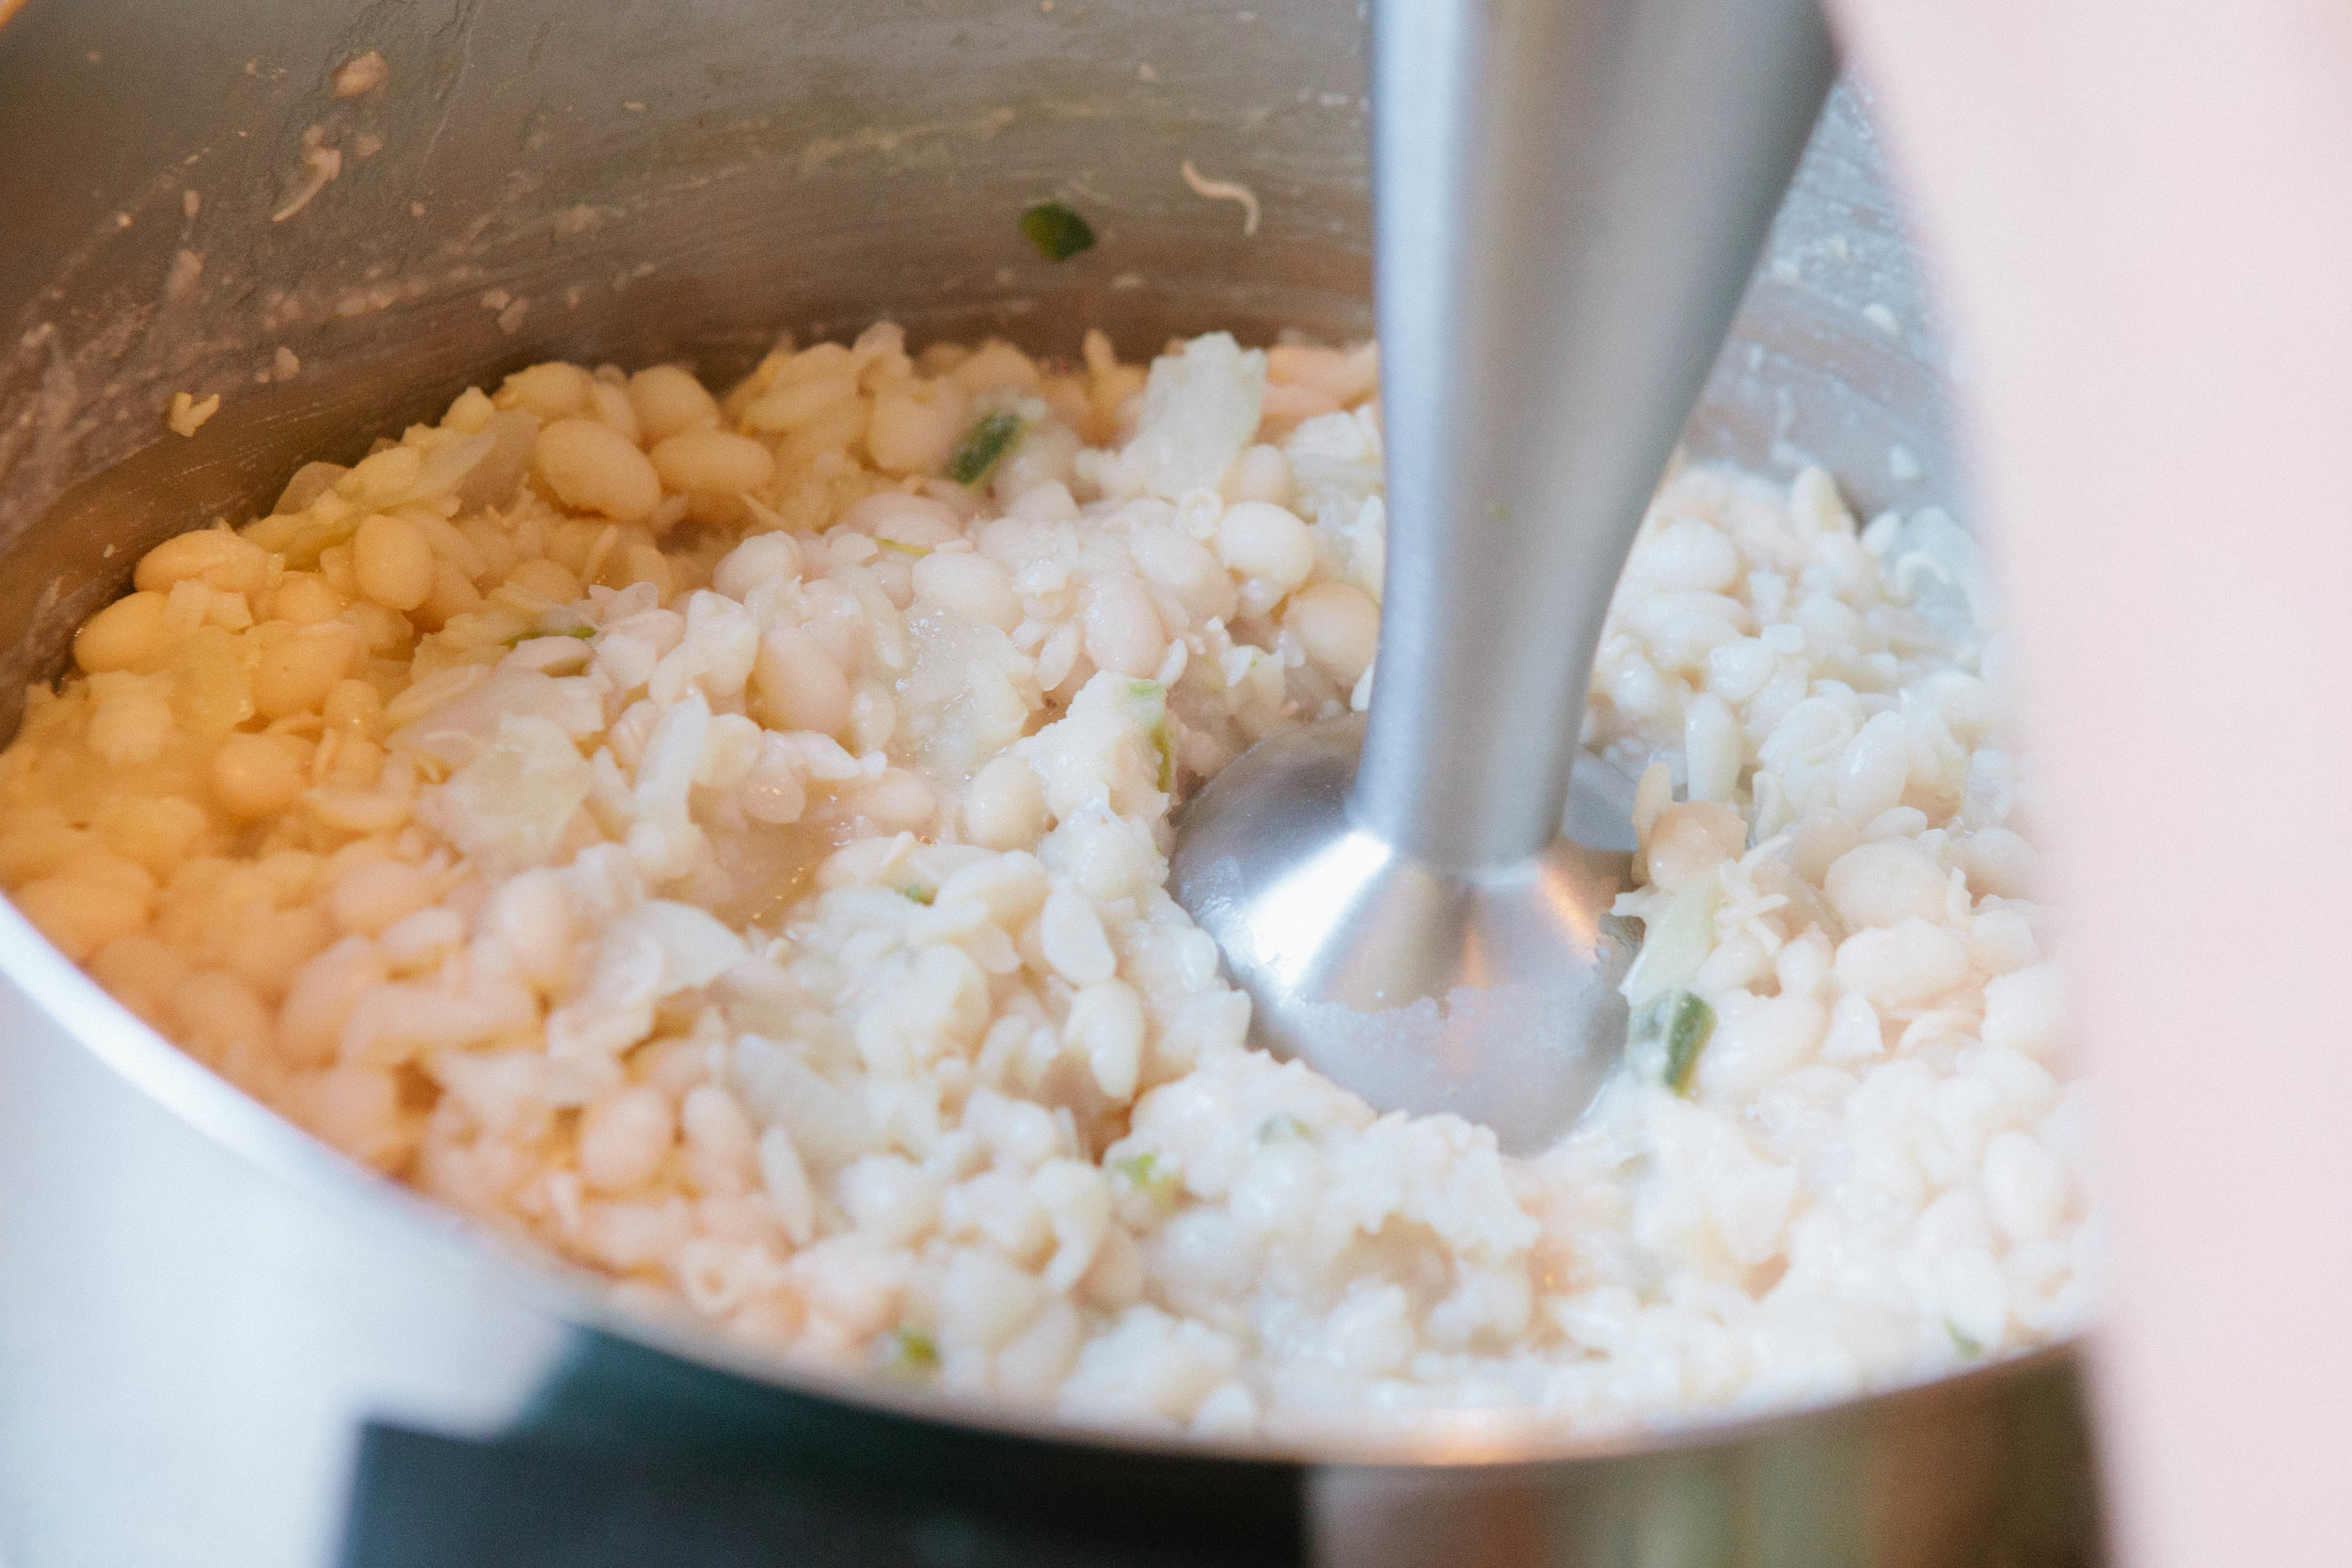
Immersion blend the beans when they are soft. They should be smoother but still have a little bit of texture to them.

Put them back on the stove. Stir frequently for five minutes over medium high heat to evaporate the liquid.

This is the basic refried bean recipe.

IMG_5173.jpg

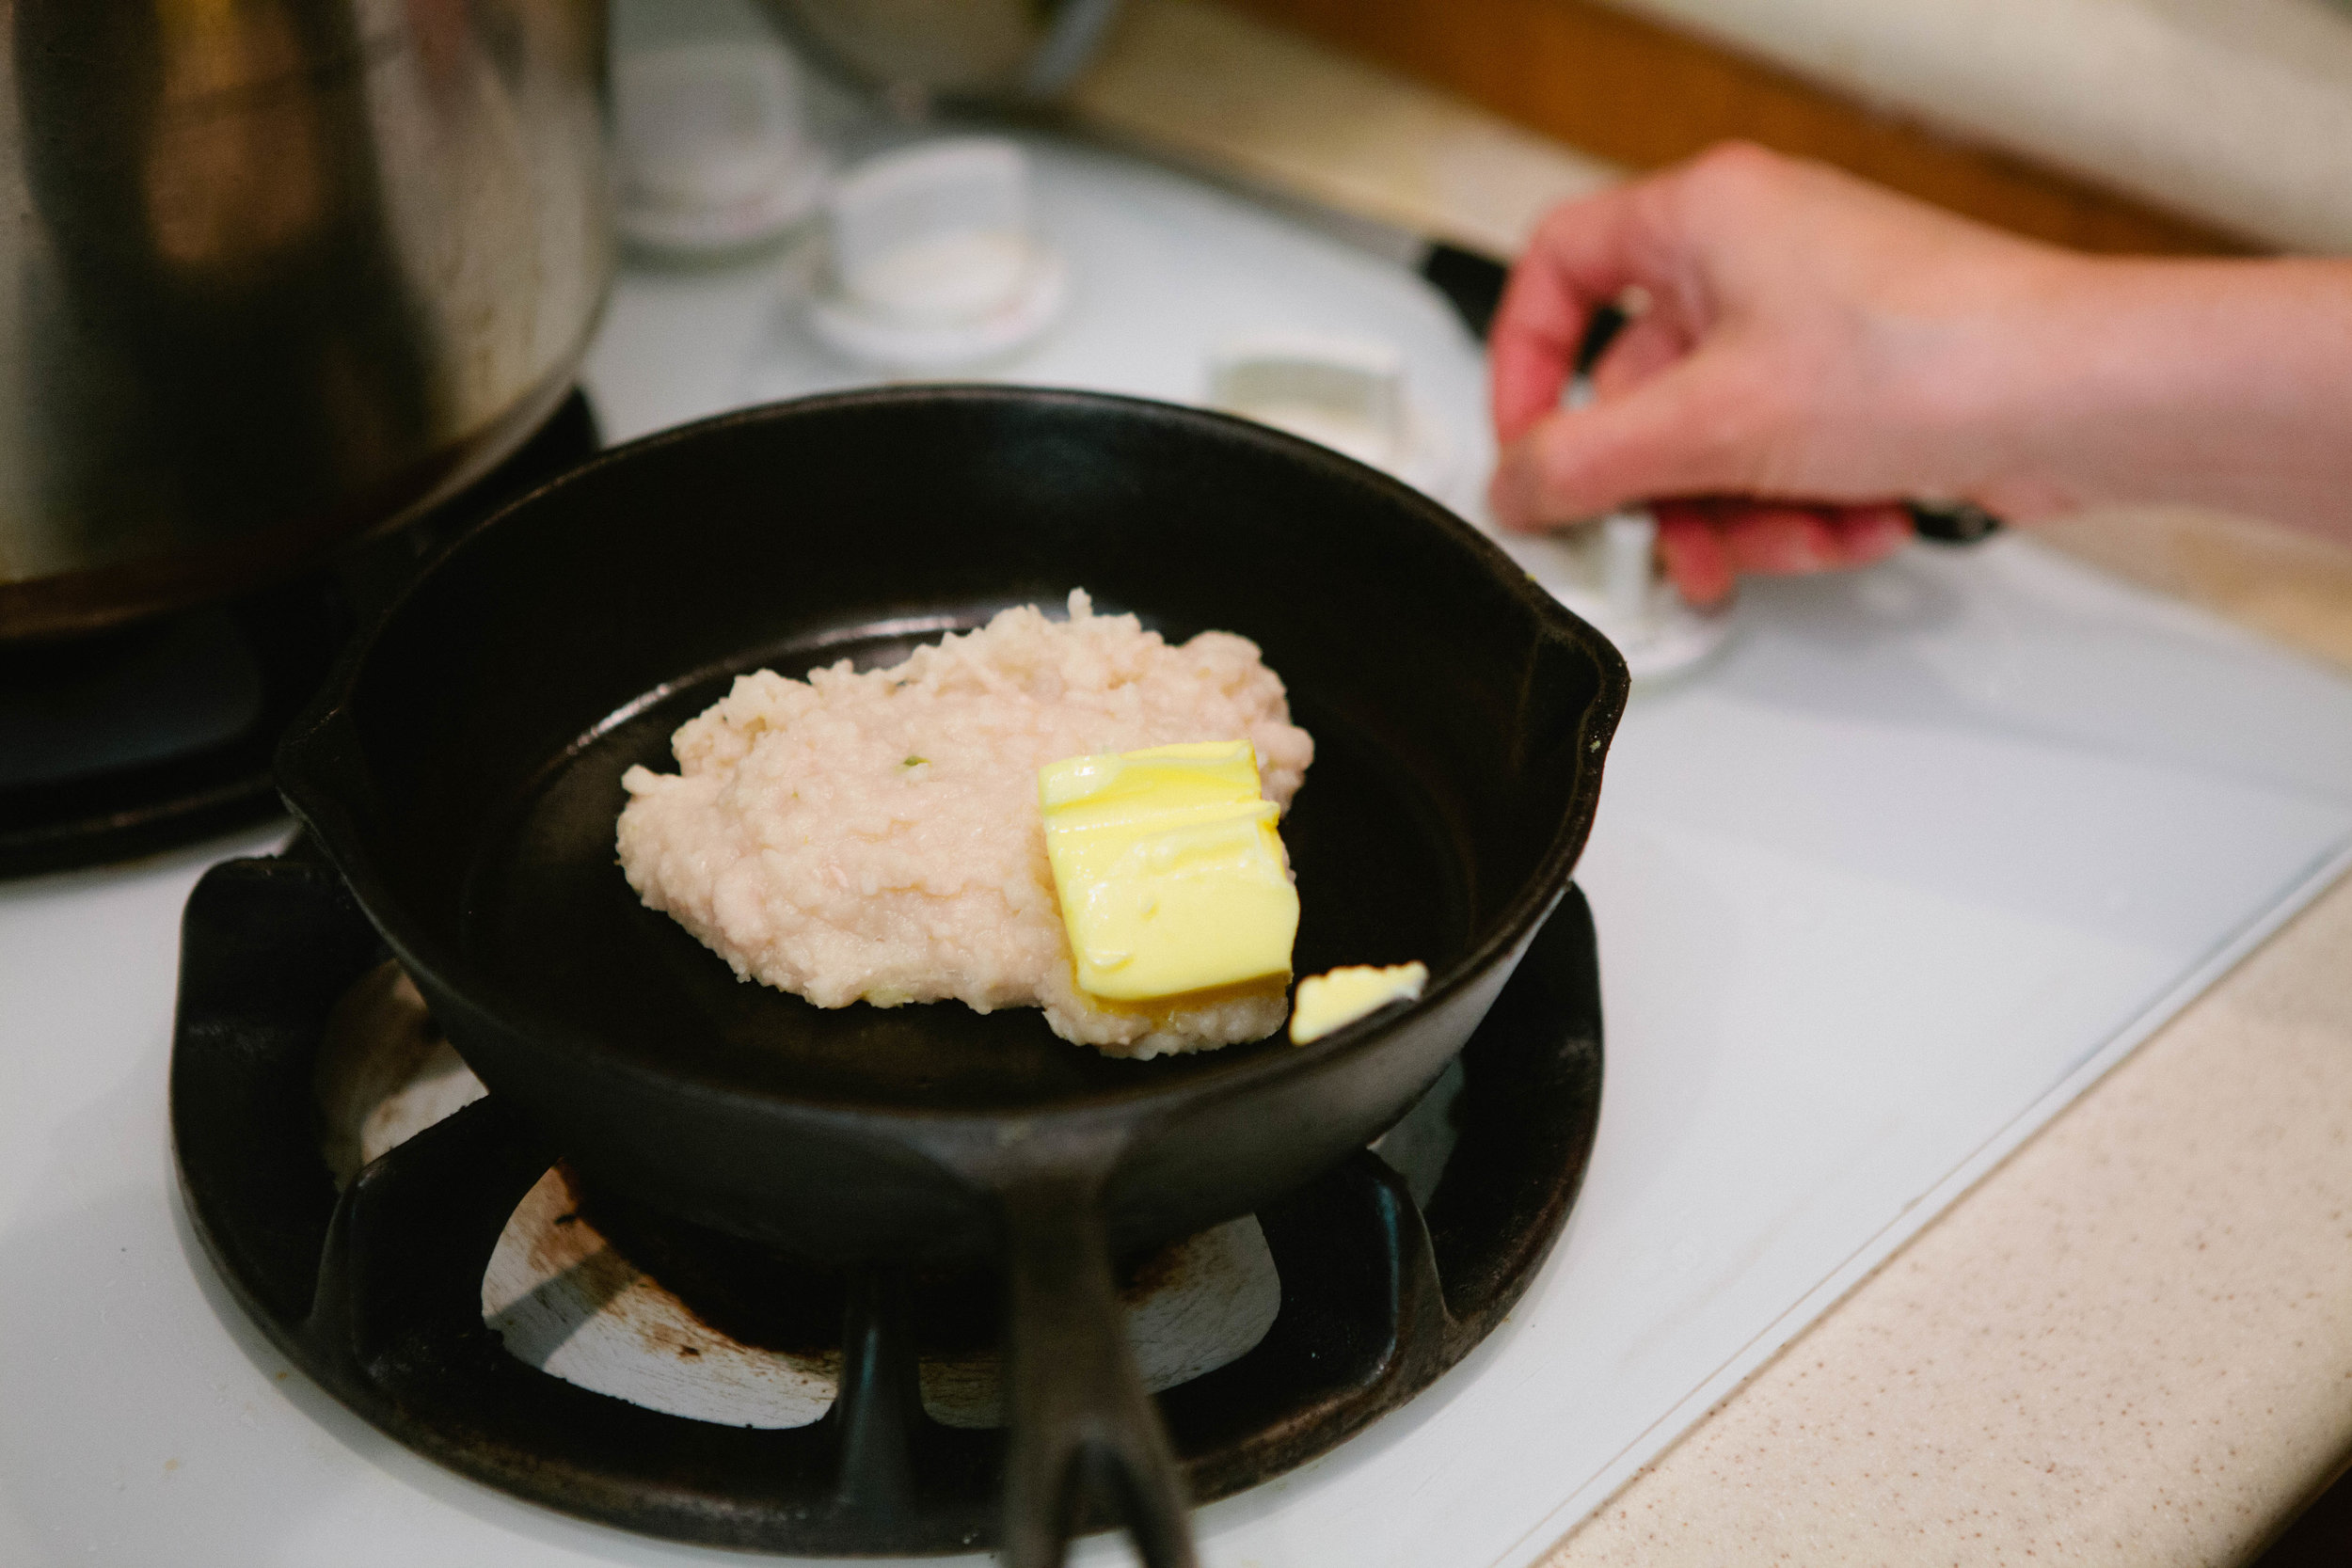
My favorite way to eat these is to add a cup of beans to a cast iron skillet. Add in a half a stick of butter. Cook together until well mixed.

IMG_5197.jpg

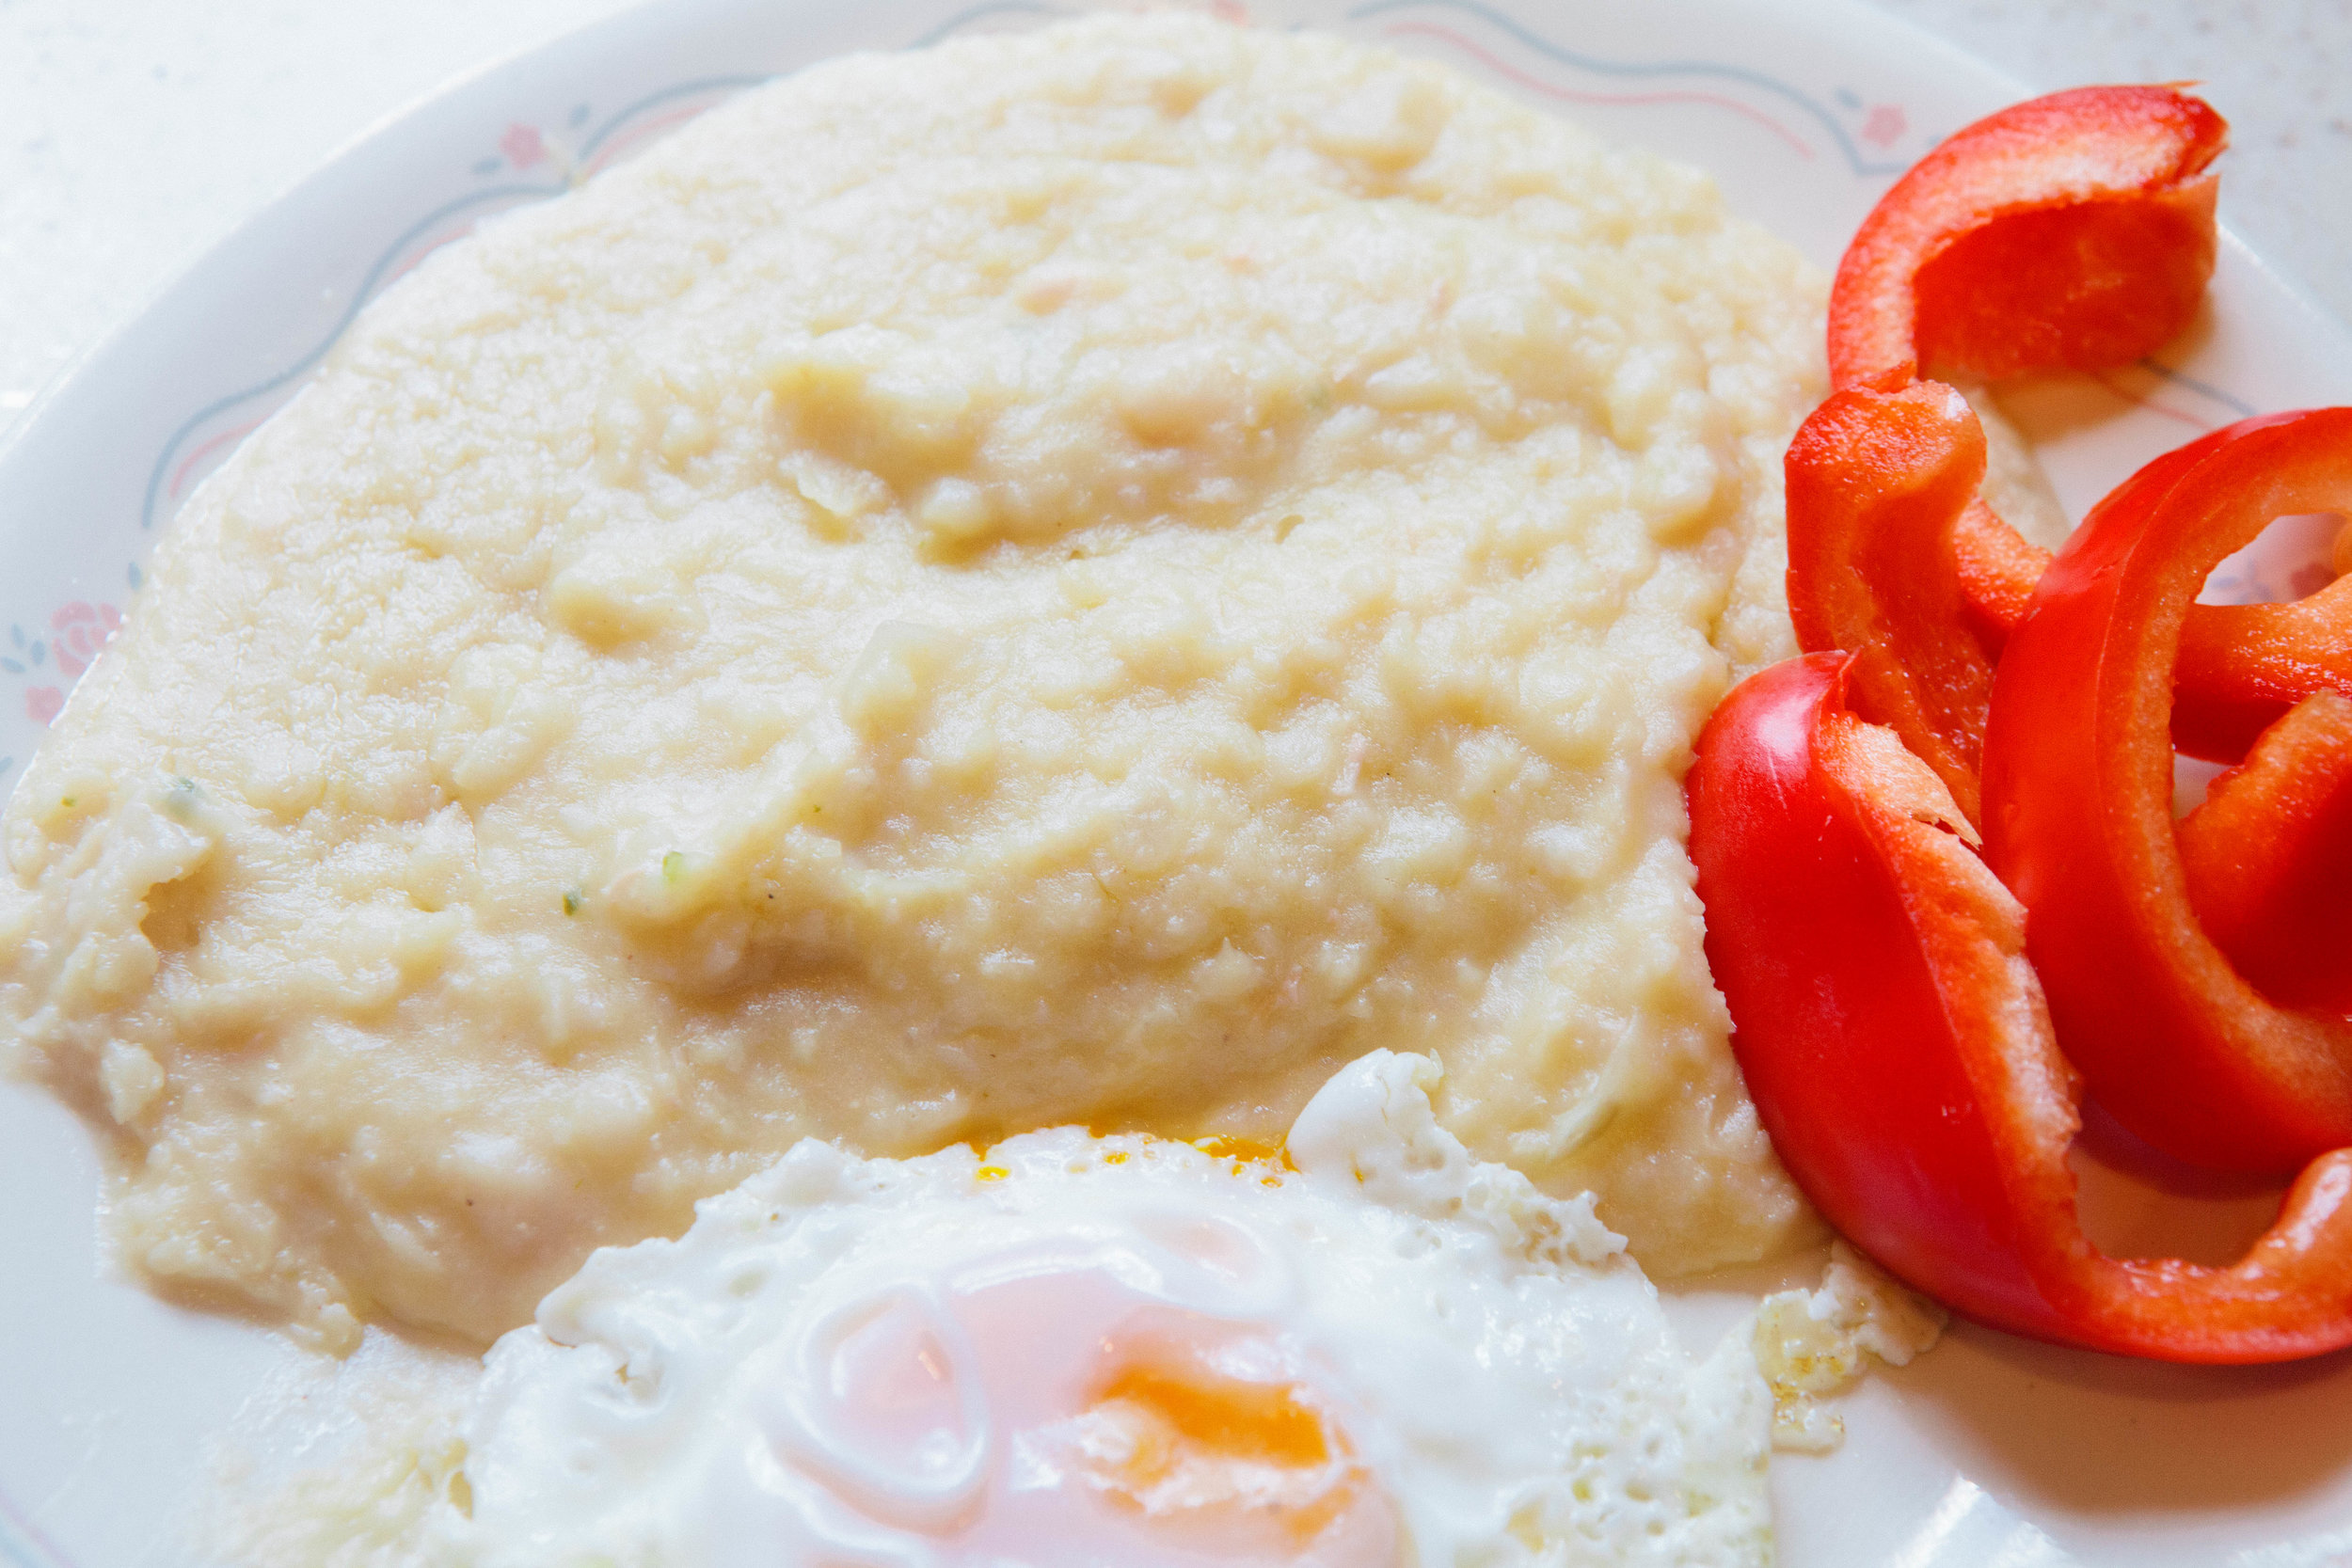
Add a fried egg and a few softened pepper pieces. 

Sprouted Refried Beans

prep time: cook time: total time:

ingredients:

  • 6 cups sprouted navy beans
  • ½ onion
  • ½ jalapeno

instructions:

How to cook Sprouted Refried Beans

  1. Add sprouted navy beans to a large pot.
  2. Bring to a boil and cook for about 2 hours until the beans are very soft. The beans will foam as they cook. You can skim the foam and the extra bean pods off of the top if you’d like. Just be sure not to scoop out any of your good sprouted beans!
  3. Add onion and jalapeno into the pot once beans are soft. If too much water is gone, add a little bit into the pot so you don’t scorch the beans on the bottom of the pot.
  4. Immersion blend the beans when they are soft. They should be smoother but still have a little bit of texture to them.
  5. Put them back on the stove. Stir frequently for five minutes over medium high heat to evaporate the liquid.
  6. This is the basic refried bean recipe.
  7. My favorite way to eat these is to add a cup of beans to a cast iron skillet. Add in a half a stick of butter. Cook together until well mixed.
  8. Add a fried egg and a few softened pepper pieces.
Created using The Recipes Generator
39.png

How to Properly Prepare Grains

IMG_5198.jpg

How to Properly Prepare White Rice on the GAPS Diet:

On the transition to the GAPS Intro diet, or at any time during the GAPS Intro diet, if you or your practitioner feel that your body is in need of some carbohydrates, this is a simple carbohydrate that many of us relate to. While it’s  not a whole grain, which generally we prefer, the husk of a whole grain can be harder to digest. White rice that’s been soaked is fairly easy to digest and fairly untroublesome for the gut.

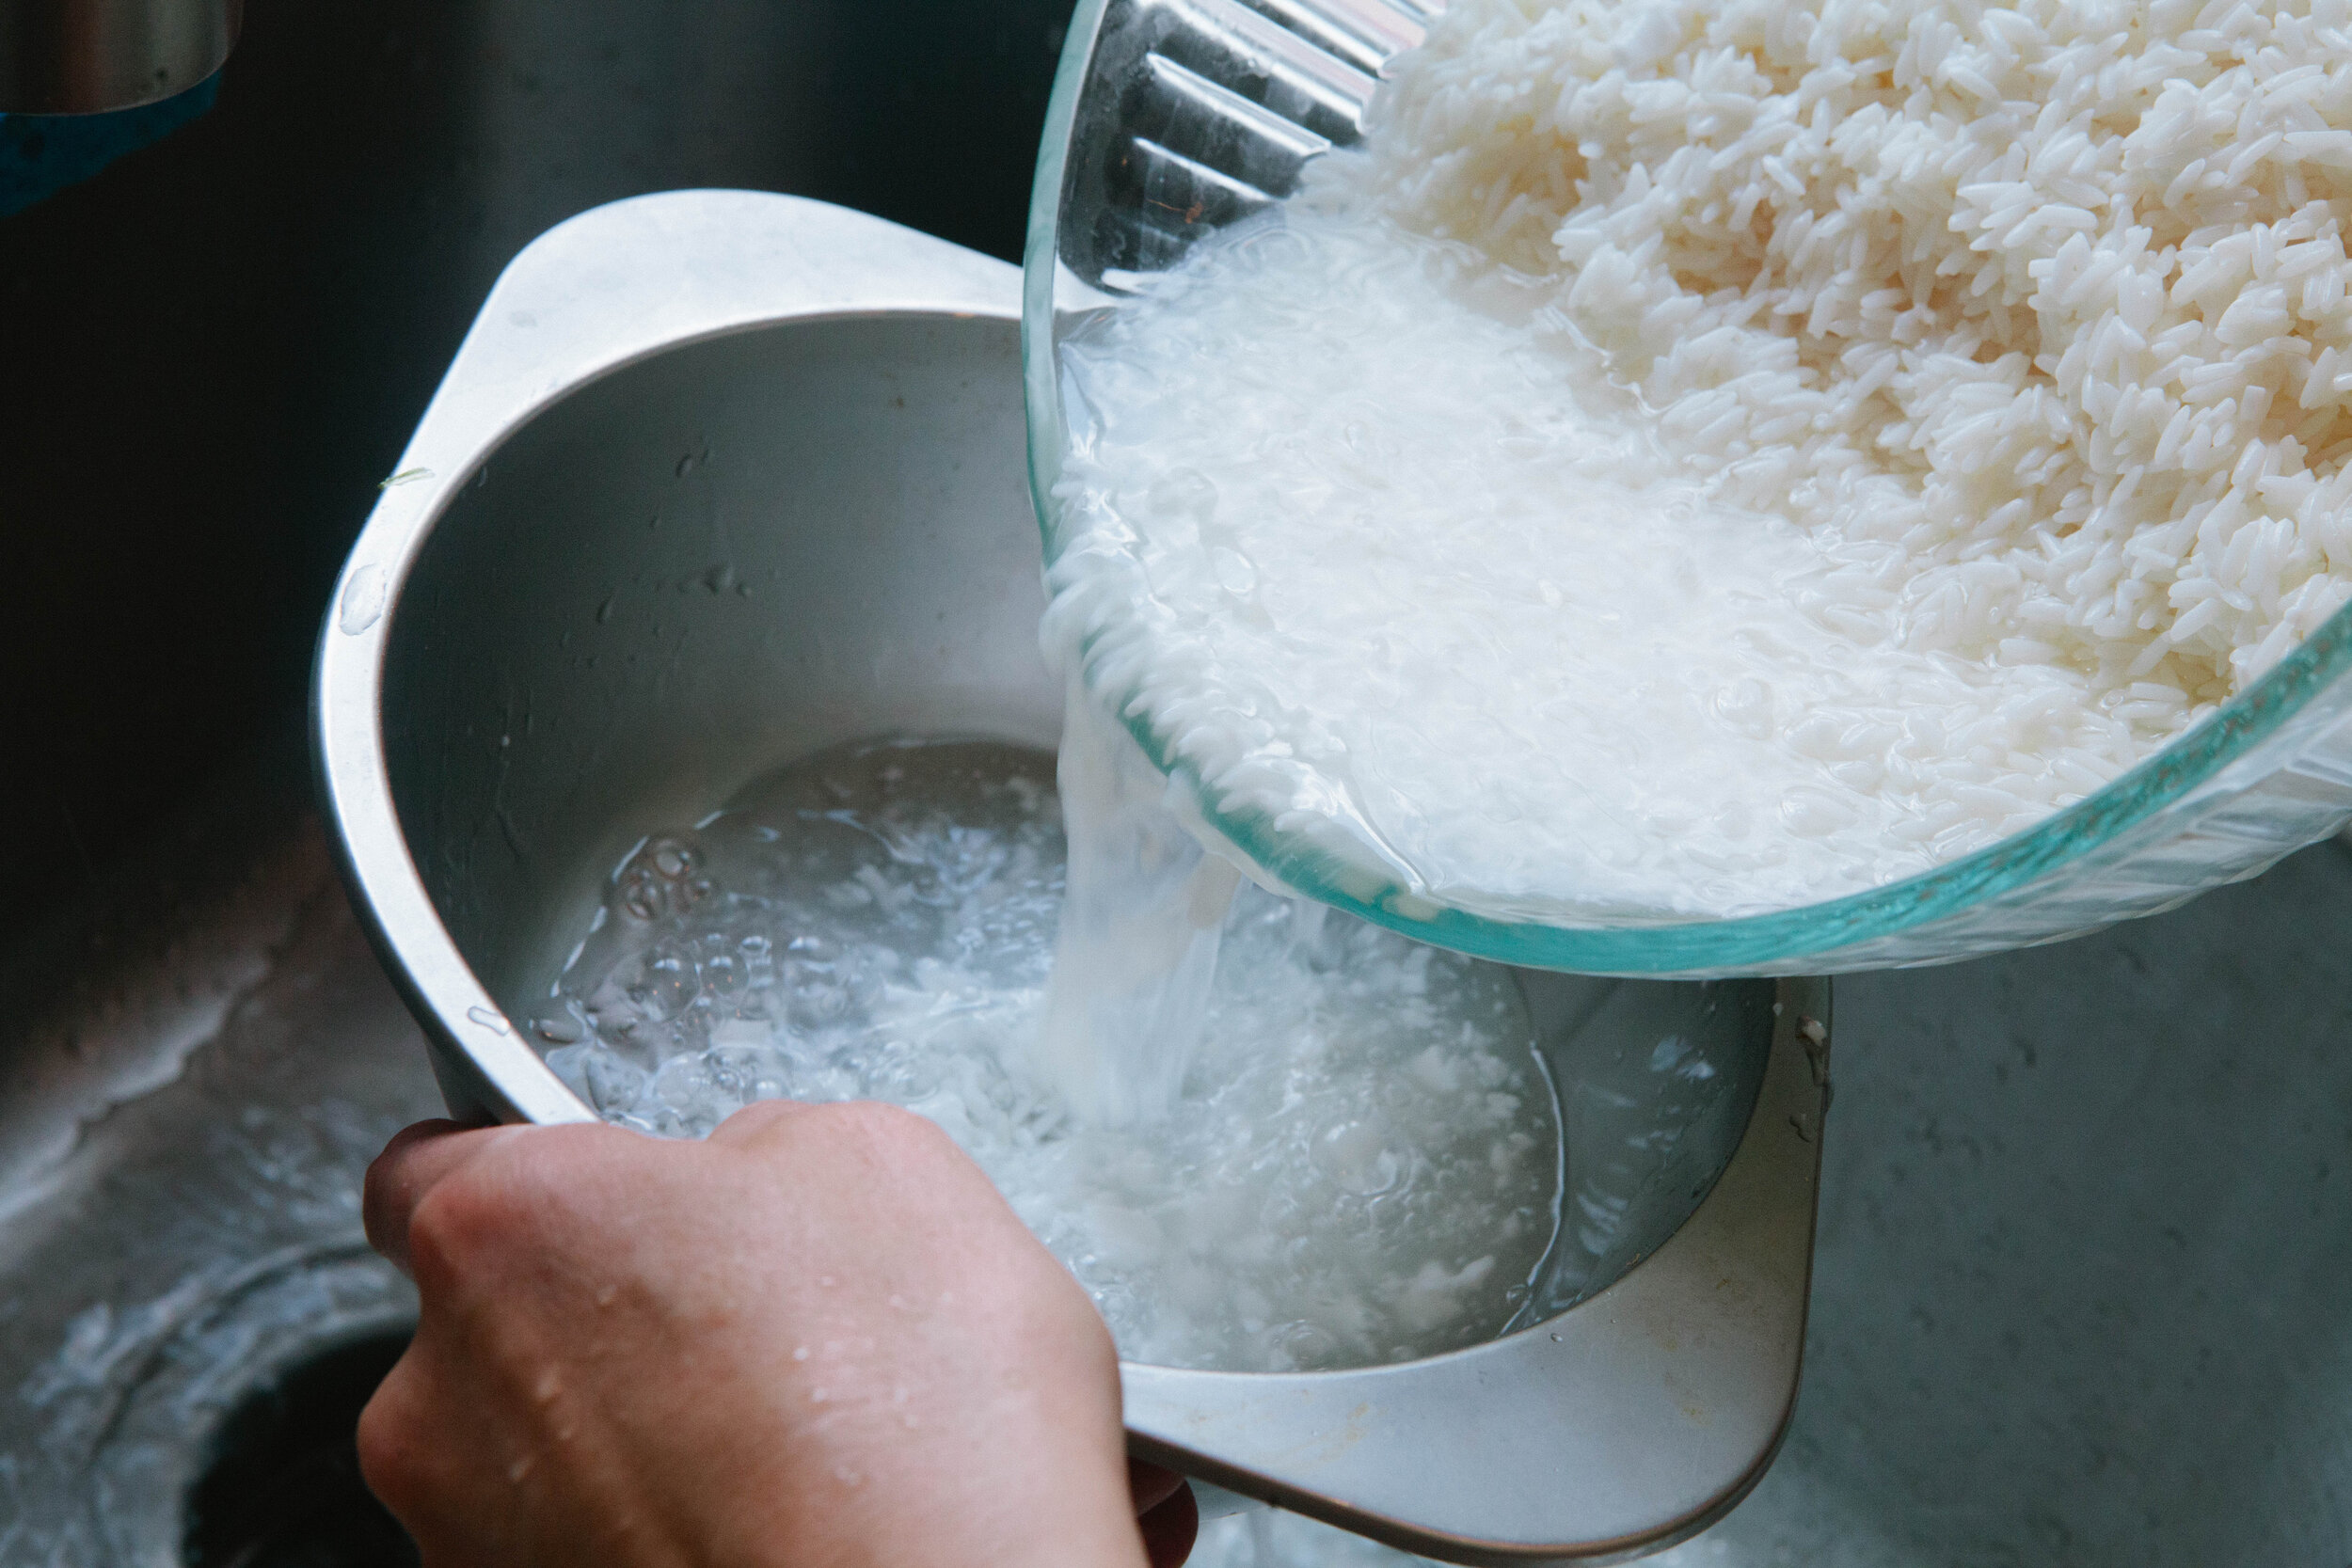
Soak your rice overnight before using it in any recipe. Place in warm filtered water with 4 tbsp of yogurt or whey. Put a lid on the bowl and place on the counter overnight.

How to Properly Prepare Quinoa on the GAPS Diet:

As a non gluten grain, quinoa is one of the first grains we can try in coming off the GAPS Diet. It is a seed so as with all other seeds it should be properly prepared. Quinoa has never been my favorite, but most of the times I have eaten it in the past were before I understood about anti-nutrients. I wonder if quinoa used to give me a stomach ache and that’s why I didn’t care for it. This quinoa can be used as an exact substitution for any other quinoa recipe, including a cold quinoa salad or a quinoa pudding. 

Soak and sprout your quinoa 24 hours in advance. To sprout the quinoa, put the quinoa in filtered water (2 cups of quinoa to 4 cups of water.) Add in 2 tbsp of yogurt or whey. Leave on the counter covered for 24 hours.

IMG_5407.jpg

How to Properly Prepare Wild Rice on the GAPS Diet:

Wild rice is not actually a grain. It’s actually the seed of a marsh growing plant. It’s pretty low in fat so it should be eaten with lots of fat. Because it falls into the seed family, wild rice can be eaten on the GAPS Diet. Of course, you should properly prepare it before eating it. I would serve it in place of white rice in many dishes, like in this fried rice recipe.

At least 7 hours before:

Rinse rice well.

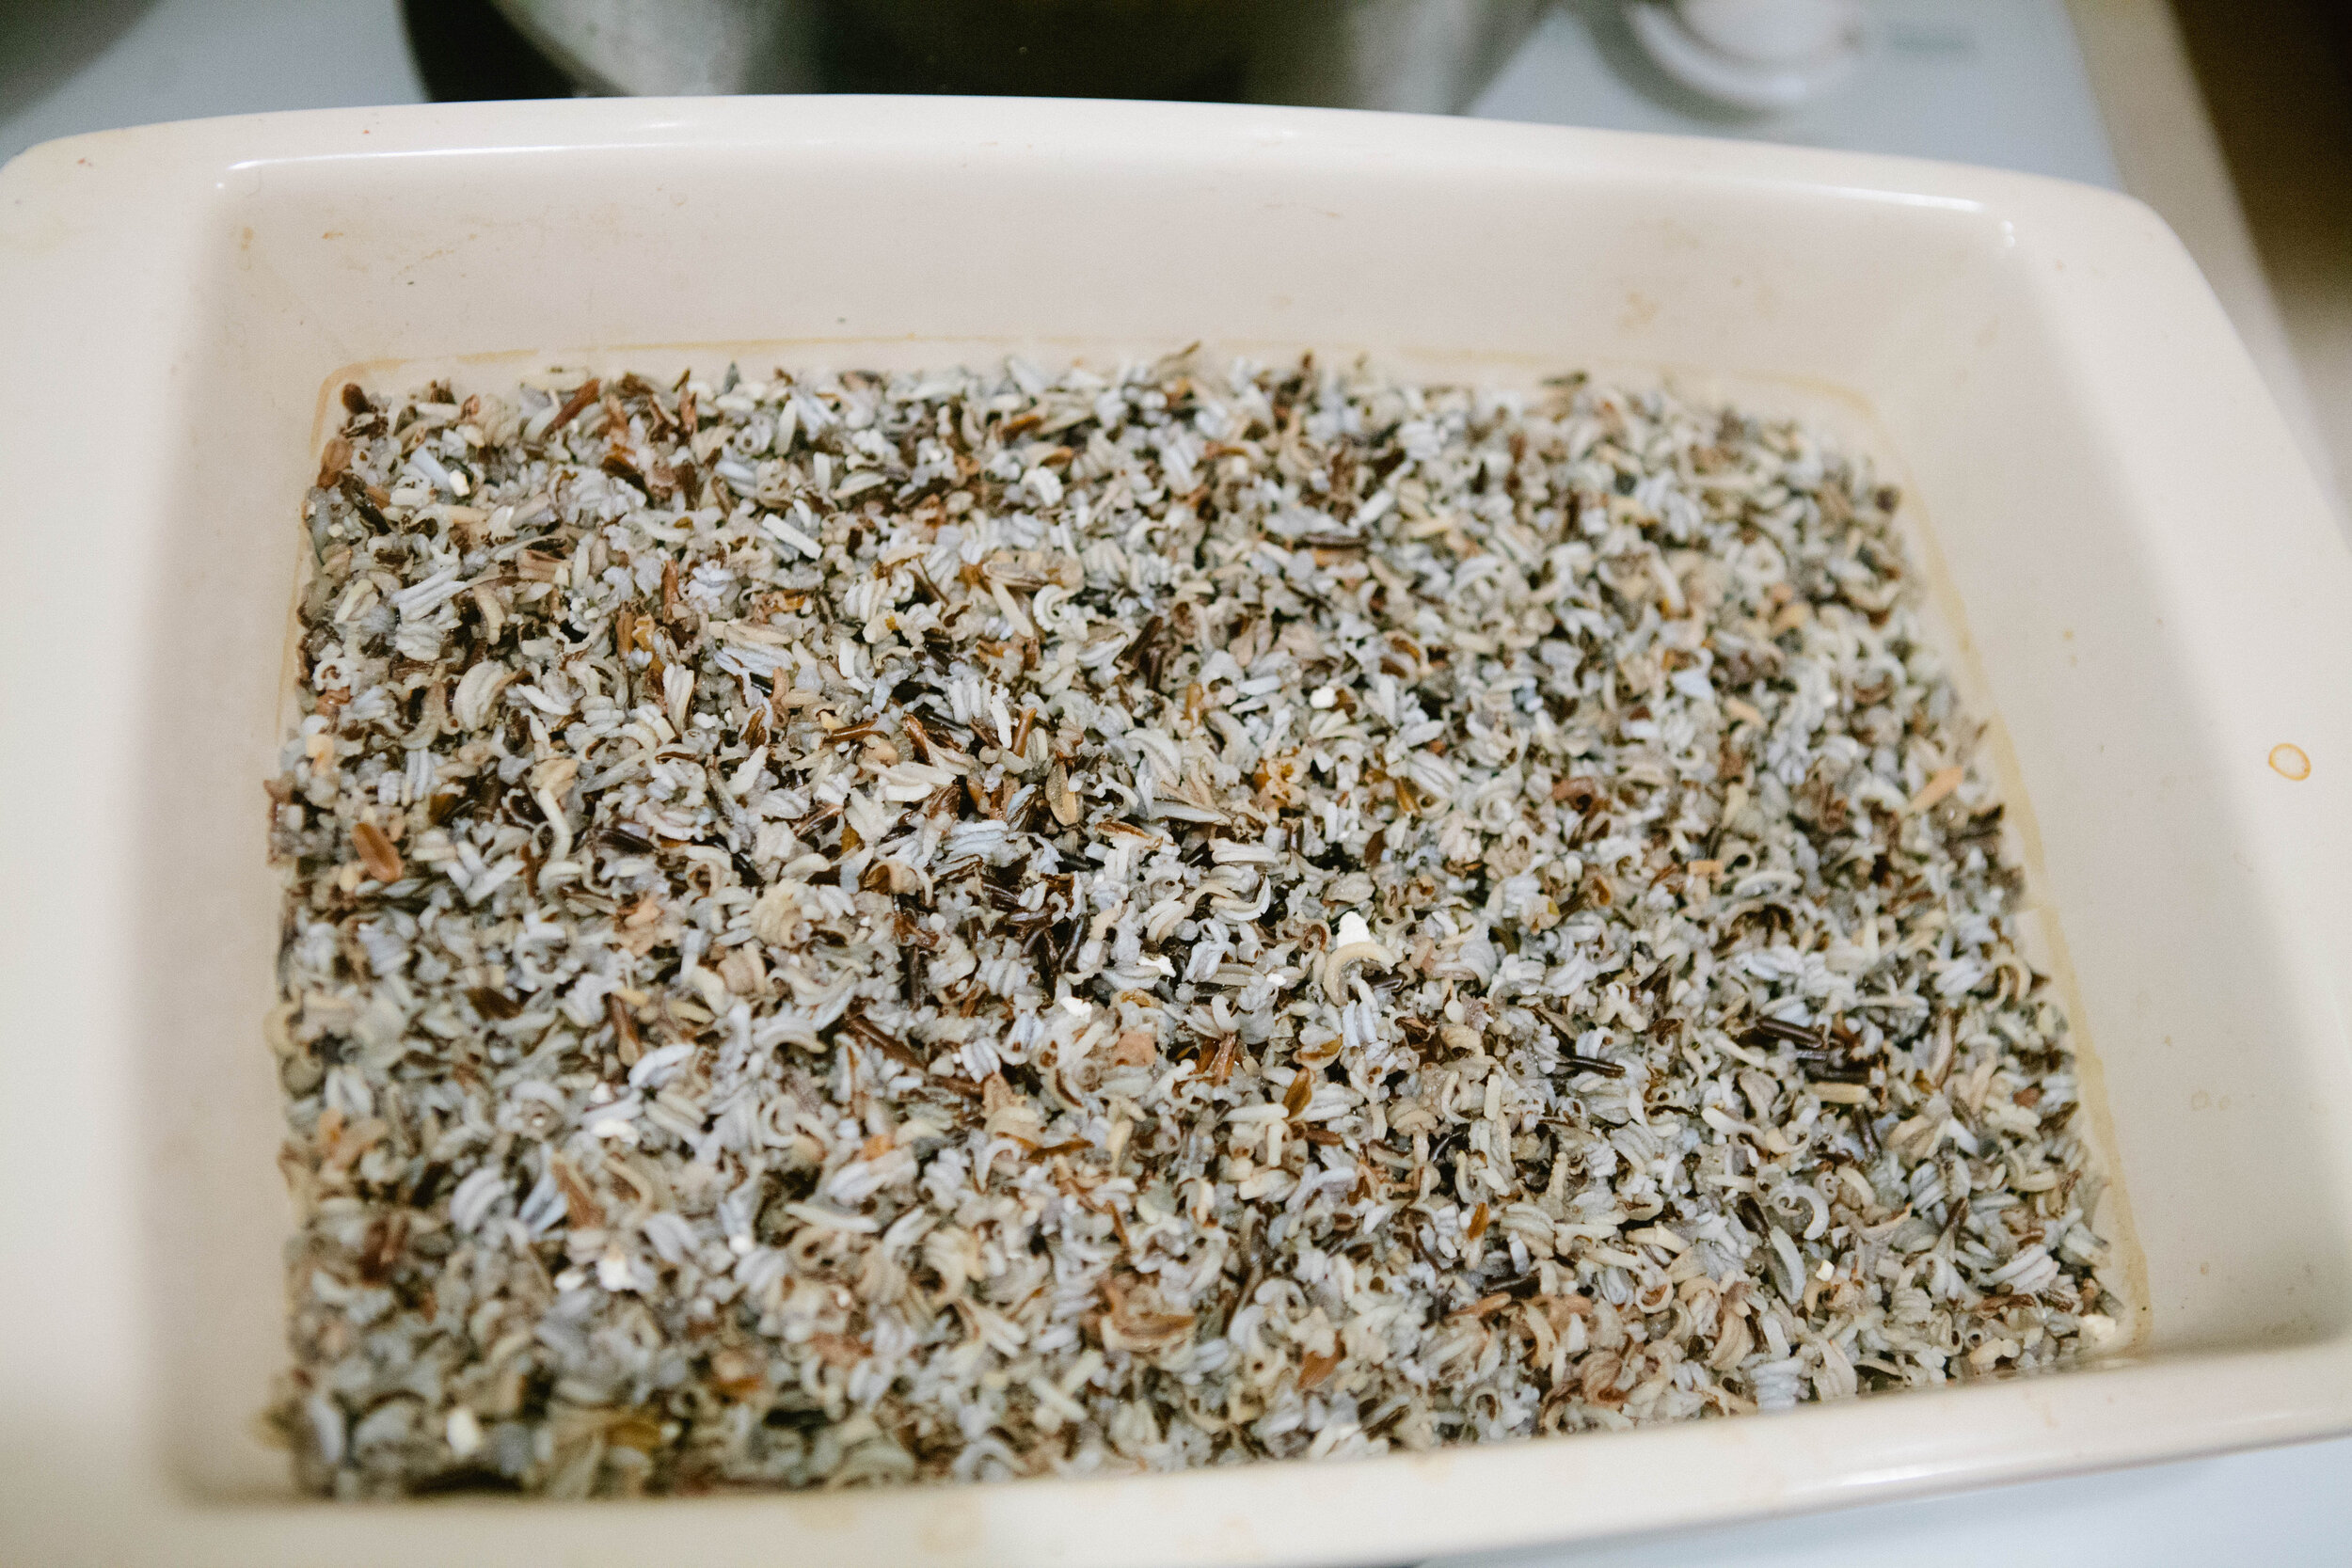
Add 1.5 cups of wild rice to 3 cups of warm filtered water. Add 2-3 tbsp of whey or yogurt to the mix. Let sit in a warm place for at least seven hours.

When You’re Ready to Cook

Add water to cover, about half a liter. Cover and place in the oven at 200 degrees. Cook for 45 minutes.


37.png

Homemade Gummy Snacks

Vitamin C and collagen work together to build healthy cells and mucus membranes, as well as healthy joints and skin. Anything with a structure needs vitamin c alongside collagen. These gummies are a good way for both children and adults to get collagen and vitamin c together! These gummies are stage five legal on the GAPS Diet because they are cooked fruit.

I got the basics proportions for this recipe from Integrative Health Coaching Services and modified it to fit my own needs. Depending on what proportions you use, the chart included on the Integrative Health Coaching Services website can help you decide how many gelatin squares to eat. If your children really love these gummies, you can decrease the amount of acerola cherry powder so that they can consume more gummy treats. These can also be great ABA technique rewards to get your child to eat the foods you want them to eat.

I recommend experimenting with adding other things like probiotic powders,and other supplements in these gummies. Just make sure you add anything live when the gummies are not too hot. Wait until the later stages when the mixture is cool enough so you don’t kill it. 

I once made a bold choice and experimented with adding desiccated liver in a quest to figure out what other supplements can be added to the mixture. I don’t think liver was the best choice. There’s nothing wrong with consuming them; they just smell and taste like liver, which isn’t the flavor profile you’d expect. 

I made strawberry gummies but you could also make any berry into a gummy. Other fruit, like apples and bananas, will not work to make gummies at home. Frozen berries are actually a great choice because they are picked ripe and frozen while in season. You could also harvest your own berries locally and freeze them yourself.
Ingredients;

  • 1 heaping cup frozen berries

  • 1/2 Cup lemon juice

  • 1/4 Cup grass fed gelatin

  • 3-4 Tbsp.. Acerola cherry powder 

  • 1 tbsp honey

Directions:

strawberry-gummies-homemade-gummy-snacks-gaps-legal-gummies-gummy-snack-made-with-gelatin-diy-gummy-bear

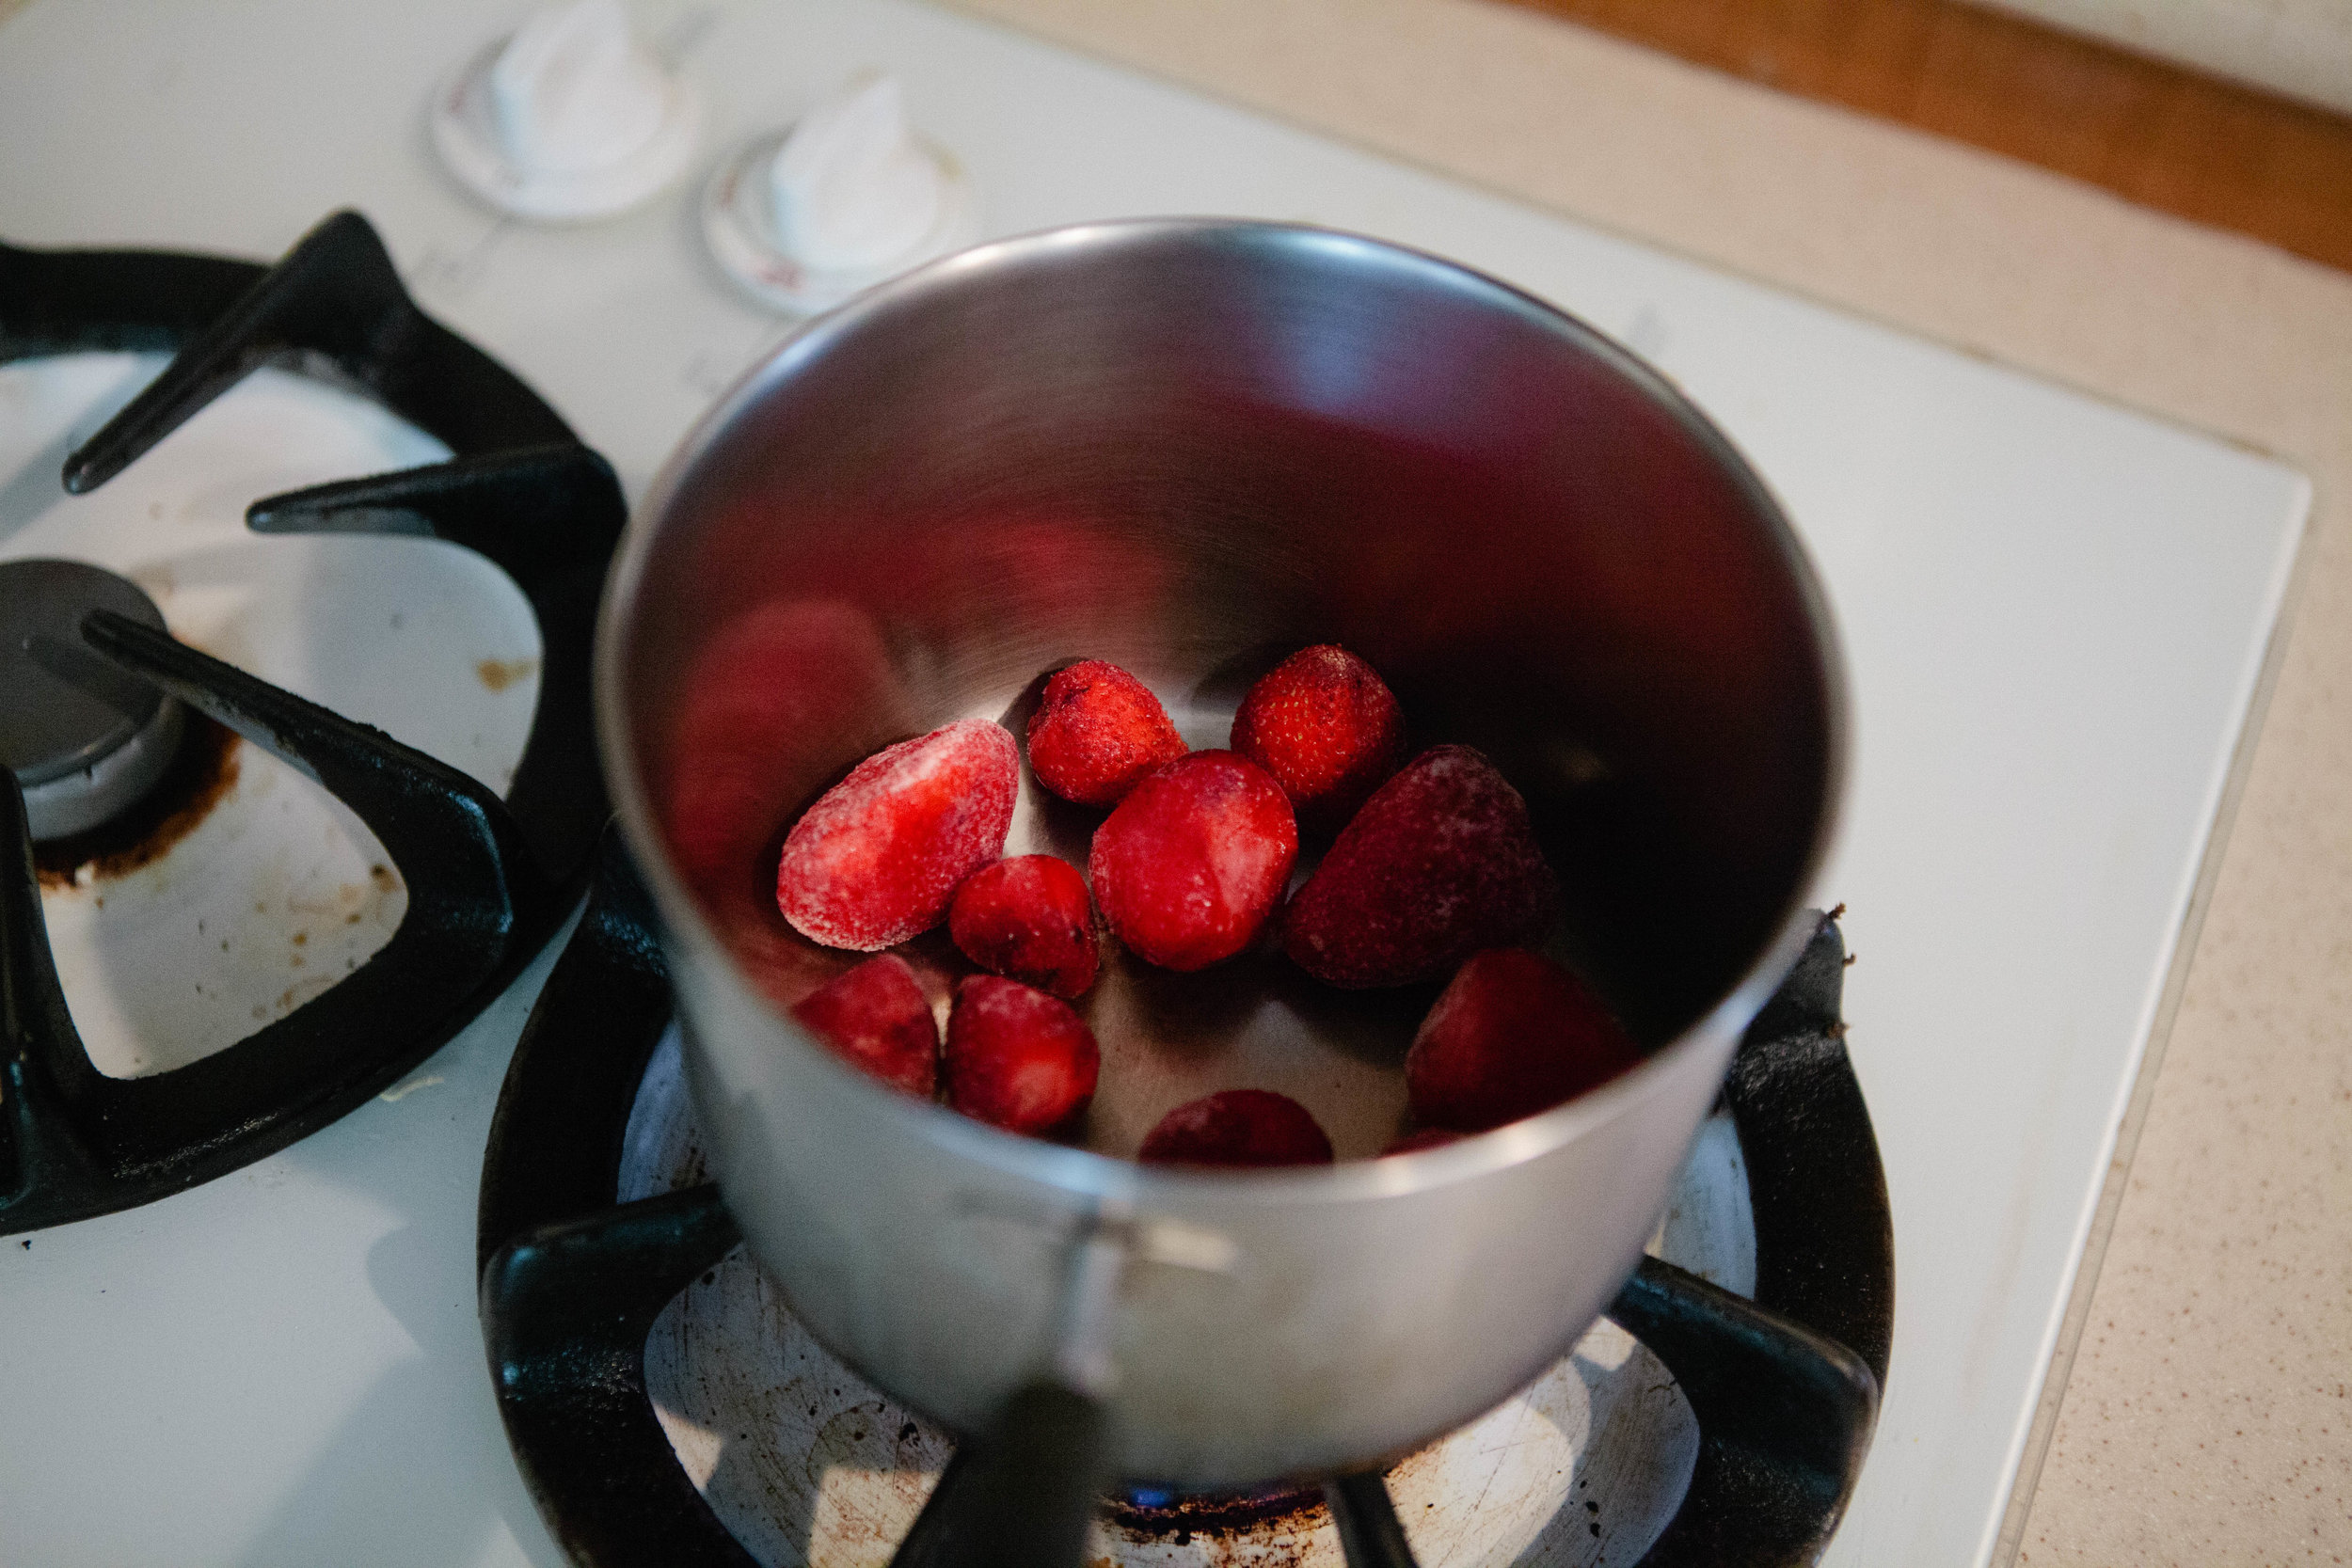
Add 1 heaping cup of frozen strawberries to a pot. Add enough water to cover the bottom. Turn the stove on to medium heat.

Help the berries break apart by stirring them with a spoon. 

When they start to get really soft, turn the stove to a low heat simmer.

strawberry-gummies-homemade-gummy-snacks-gaps-legal-gummies-gummy-snack-made-with-gelatin-diy-gummy-bear

Blend softened berries and lemon juice in a blender.

strawberry-gummies-homemade-gummy-snacks-gaps-legal-gummies-gummy-snack-made-with-gelatin-diy-gummy-bear

Once smooth, add back into pot. Add in gelatin and acerola cherry powder. Whisk well for about ten minutes until all combined.

Add honey at the end so that you are not cooking the honey.

strawberry-gummies-homemade-gummy-snacks-gaps-legal-gummies-gummy-snack-made-with-gelatin-diy-gummy-bear

Pour into a glass baking dish.

If you are adding a probiotic powder, make sure your mixture is cooled enough to where you can easily leave a finger in it before adding the powder. This will ensure you do not kill the probiotics.

strawberry-gummies-homemade-gummy-snacks-gaps-legal-gummies-gummy-snack-made-with-gelatin-diy-gummy-bear

Set in fridge to chill. Gummies should be chilled in about 40 minutes. Slice around the sides and cut into cubes to remove from glass pan.

Homemade Gummy Snacks

prep time: cook time: total time:

ingredients:

  • 1 heaping cup frozen berries
  • 1/2 Cup lemon juice
  • 1/4 Cup grass fed gelatin
  • 3-4 Tbsp.. Acerola cherry powder
  • 1 tbsp honey

instructions:

How to cook Homemade Gummy Snacks

  1. Add 1 heaping cup of frozen strawberries to a pot. Add enough water to cover the bottom. Turn the stove on to medium heat.
  2. Help the berries break apart by stirring them with a spoon.
  3. When they start to get really soft, turn the stove to a low heat simmer.
  4. Blend softened berries and lemon juice in a blender.
  5. Once smooth, add back into pot. Add in gelatin and acerola cherry powder. Whisk well for about ten minutes until all combined.
  6. Add honey at the end so that you are not cooking the honey.
  7. Pour into a glass baking dish.
  8. If you are adding a probiotic powder, make sure your mixture is cooled enough to where you can easily leave a finger in it before adding the powder. This will ensure you do not kill the probiotics.
  9. Set in fridge to chill. Gummies should be chilled in about 40 minutes. Slice around the sides and cut into cubes to remove from glass pan.
Created using The Recipes Generator
34.png

Mushroom Ketchup Recipe

I found this recipe from my new favorite show on YouTube, 18th Century Cooking. It is a GAPS Legal sauce and since many people do not tolerate tomatoes, I thought it would be a delicious option for a sauce!

I’m excited to add this sauce to many dishes!

This is Stage 1 legal on the GAPS Diet if you can tolerate the dried spices. Most can tolerate these spices unless you still have significant intestinal symptoms.

Ingredients for Mushroom Ketchup

  • 30 oz Mushrooms

  • 2 tbsp Salt

  • 4 Bay Leaves

  • 1 chopped onion

  • 1 Lemon, zested

  • 1 tbsp finely grated horseradish, fresh or prepared

  • ¼ tsp cloves

  • Pinch of Cayenne Pepper

  • ½ tsp allspice

  • ¼ - ½ cup apple cider vinegar

Directions for Mushroom Ketchup

Rub the top of the mushrooms to clean them. Do not wash your mushrooms!

Roughly chop the mushrooms and add to a large pot. Add in salt and bay leaves.

The mushrooms will begin reducing within a few minutes.

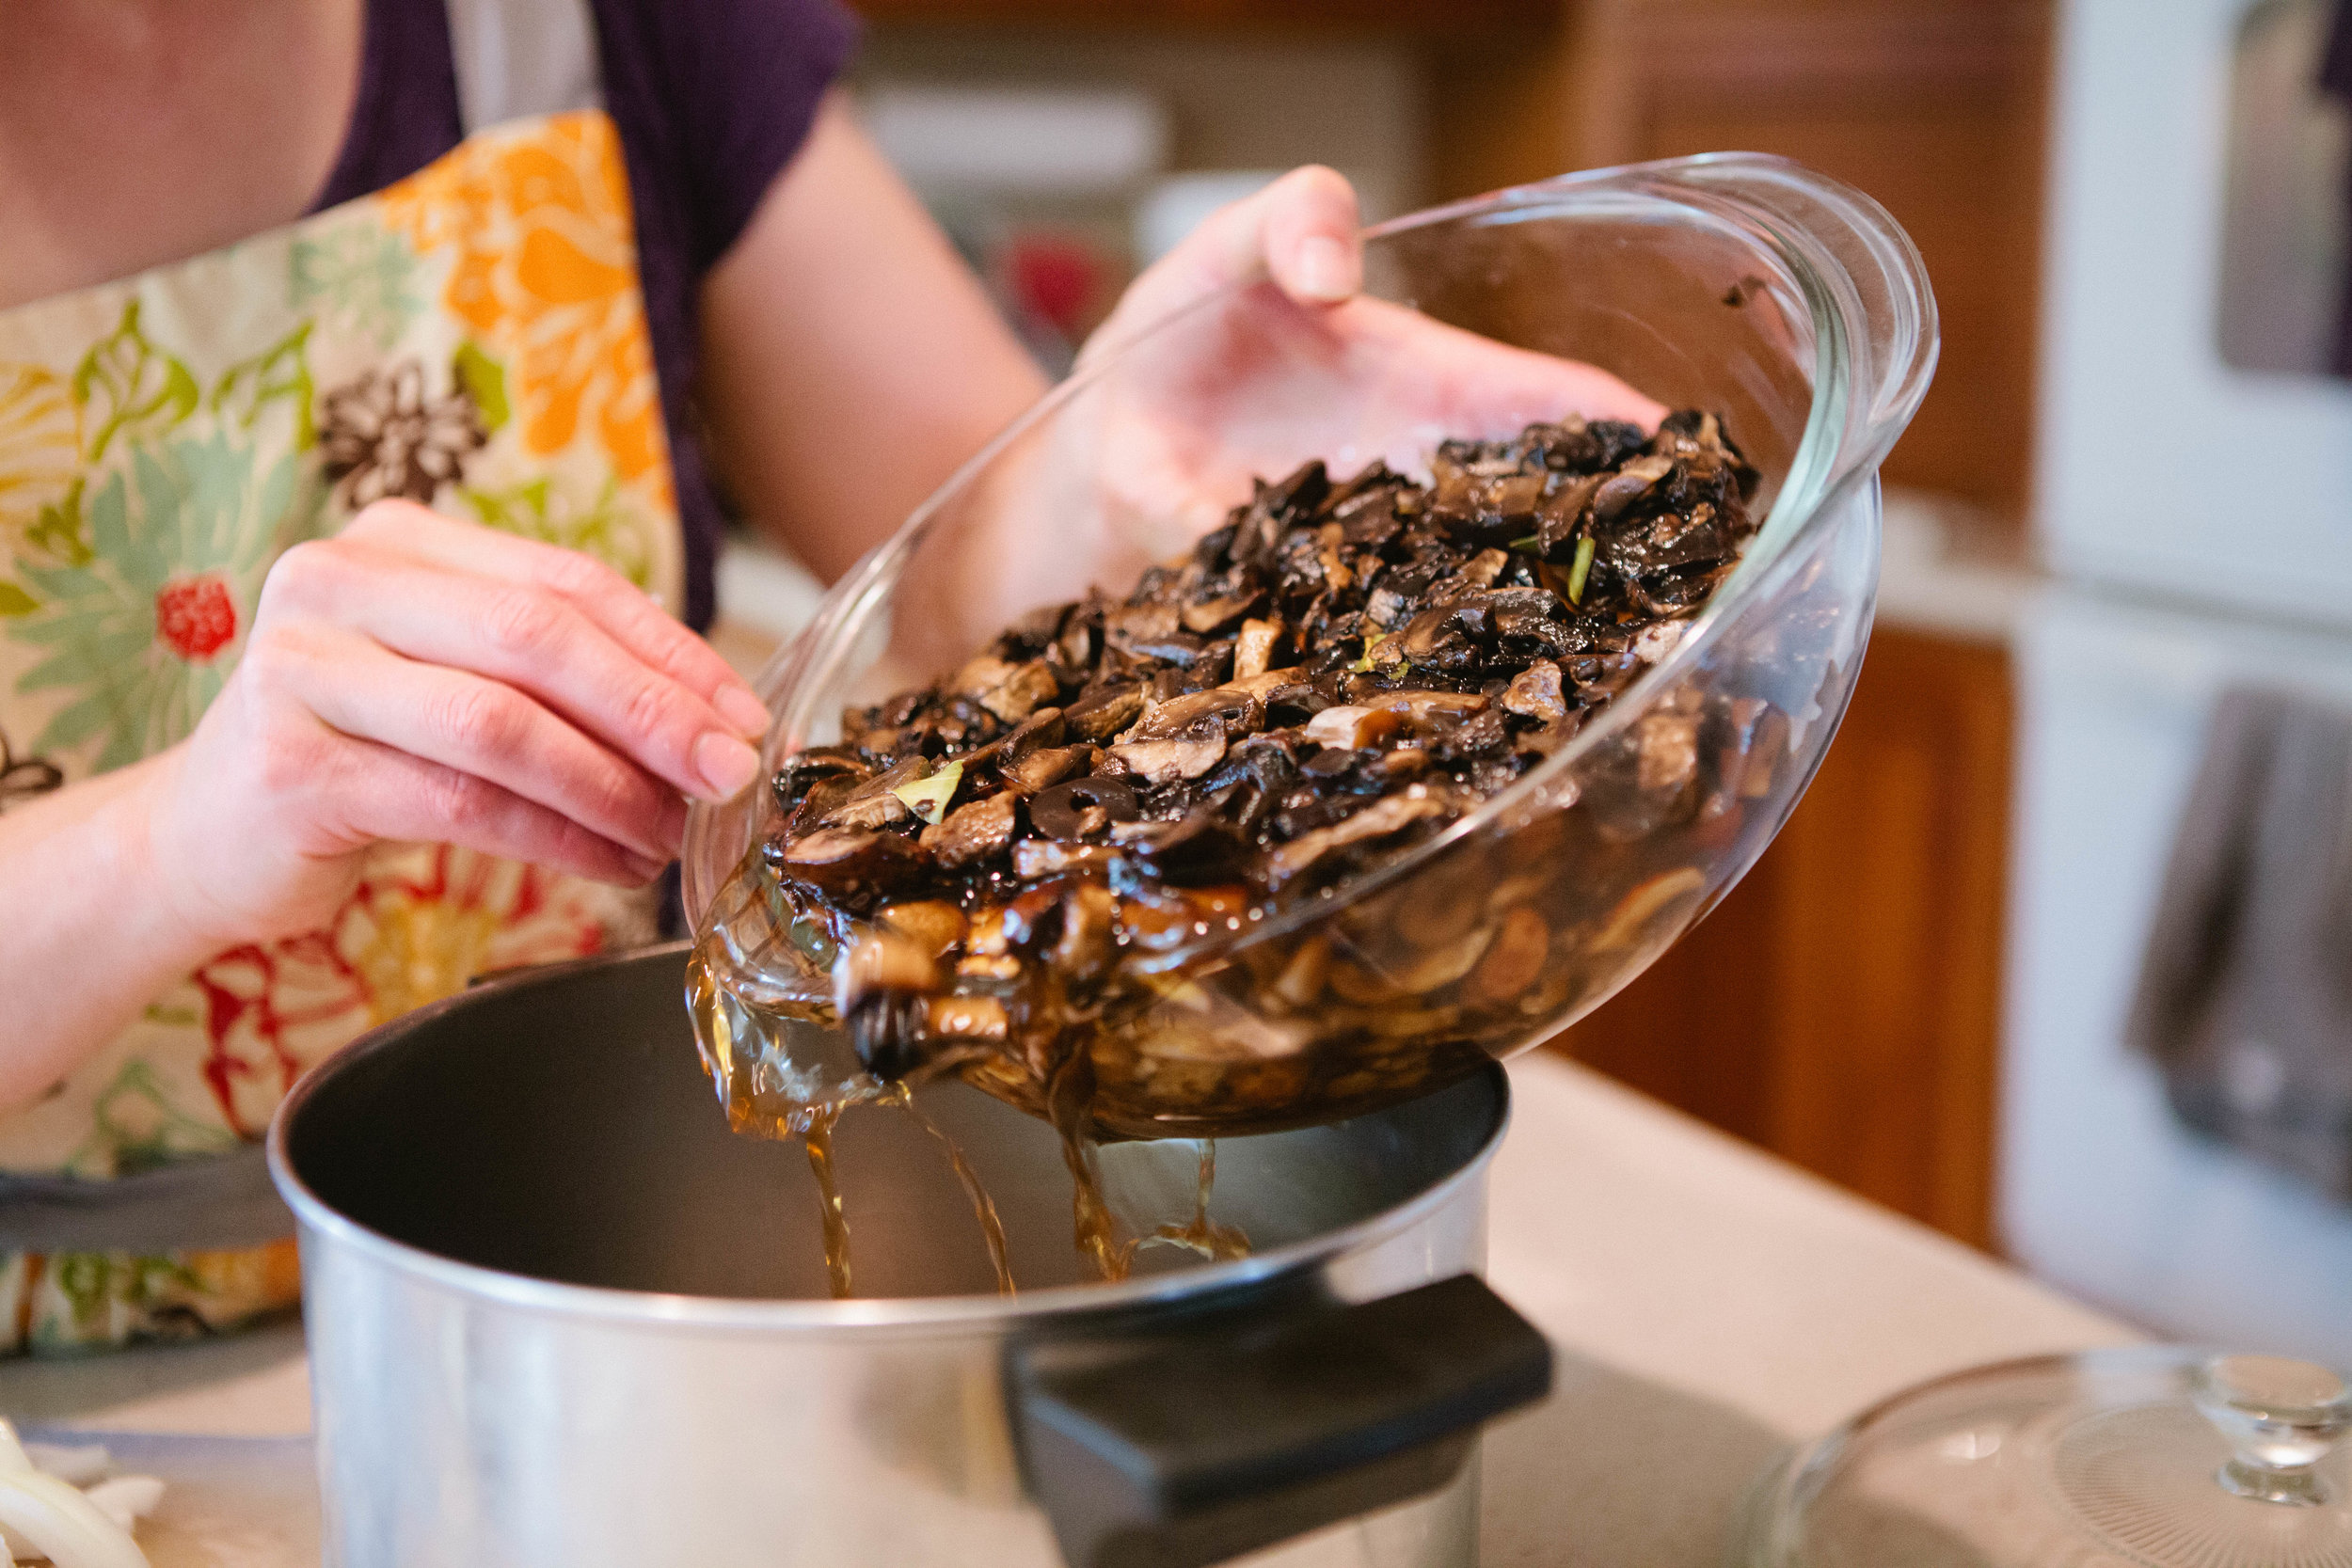
When they’ve reduced in size, add them to a glass container. Adding them to a glass container is important so they don’t take on the metal taste from the pot.

Leave the mushrooms on the counter overnight and no longer because mushrooms are a fungus.

mushroom-ketchup-recipe-18th-century-cooking-youtube-eighteenth-century-cooking-old-recipe-mushroom-sauce-ketchup-made-with-mushrooms-gaps-legal-mushroom-recipe-what-to-eat-on-gaps

The next day, add mushrooms, chopped onions, zest of 1 lemon, grated horseradish, cloves, cayenne, allspice, and apple cider vinegar to a pot.

mushroom-ketchup-recipe-18th-century-cooking-youtube-eighteenth-century-cooking-old-recipe-mushroom-sauce-ketchup-made-with-mushrooms-gaps-legal-mushroom-recipe-what-to-eat-on-gaps

Bring to a boil and then let simmer for 15 minutes.

mushroom-ketchup-recipe-18th-century-cooking-youtube-eighteenth-century-cooking-old-recipe-mushroom-sauce-ketchup-made-with-mushrooms-gaps-legal-mushroom-recipe-what-to-eat-on-gaps

Let sauce cool. Put into a cloth and squeeze to strain the sauce.

mushroom-ketchup-recipe-18th-century-cooking-youtube-eighteenth-century-cooking-old-recipe-mushroom-sauce-ketchup-made-with-mushrooms-gaps-legal-mushroom-recipe-what-to-eat-on-gaps

Save the solid pieces and dry them in a dehydrator. Once the solid pieces are dry, you can crush them and use them as a powdered flavoring or use the pieces as flavoring.

mushroom-ketchup-recipe-18th-century-cooking-youtube-eighteenth-century-cooking-old-recipe-mushroom-sauce-ketchup-made-with-mushrooms-gaps-legal-mushroom-recipe-what-to-eat-on-gaps

Pour into a glass sealable jar.

Mushroom Ketchup

prep time: cook time: total time:

ingredients:

  • 30 oz Mushrooms
  • 2 tbsp Salt
  • 4 Bay Leaves
  • 1 chopped onion
  • 1 Lemon, zested
  • 1 tbsp finely grated horseradish, fresh or prepared
  • ¼ tsp cloves
  • Pinch of Cayenne Pepper
  • ½ tsp allspice
  • ¼ - ½ cup apple cider vinegar

instructions:

How to cook Mushroom Ketchup

  1. Rub the top of the mushrooms to clean them. Do not wash your mushrooms!
  2. Roughly chop the mushrooms and add to a large pot. Add in salt and bay leaves.
  3. The mushrooms will begin reducing within a few minutes.
  4. When they’ve reduced in size, add them to a glass container. Adding them to a glass container is important so they don’t take on the metal taste from the pot.
  5. Leave the mushrooms on the counter overnight and no longer because mushrooms are a fungus.
  6. The next day, add mushrooms, chopped onions, zest of 1 lemon, grated horseradish, cloves, cayenne, allspice, and apple cider vinegar to a pot.
  7. Bring to a boil and then let simmer for 15 minutes.
  8. Let sauce cool. Put into a cloth and squeeze to strain the sauce.
  9. Save the solid pieces and dry them in a dehydrator. Once the solid pieces are dry, you can crush them and use them as a powdered flavoring or use the pieces as flavoring.
  10. Pour into a glass sealable jar.
Created using The Recipes Generator
31.png

How to Make Cabbage Tonic

Fermented cabbage is very high in vitamin C which is essential for healing a leaky gut. This cabbage tonic can be taken from the beginning of the Intro Diet of GAPS. Use this tonic daily to help change your gut flora. As with all probiotic foods, make sure you begin with only a small amount, about a tablespoon at a time, keeping an eye out for symptoms of die off. If none are present, you can continue gradually increasing your daily amount and the frequency that you consume this tonic throughout the day.

Fermented cabbage is very high in vitamin C which is essential for healing a leaky gut. This cabbage tonic can be taken from the beginning of the Intro Diet of GAPS. Use this tonic daily to help change your gut flora. As with all probiotic foods, make sure you begin with only a small amount, about a tablespoon at a time, keeping an eye out for symptoms of die off. If none are present, you can continue gradually increasing your daily amount and the frequency that you consume this tonic throughout the day.

When you do ferments, your intention and energy really does affect the taste of the ferments. If you’re stressed, it will show in the food. Do ferments at a time that you’re relaxed and enjoying being in the kitchen. If this is not your mindset, take a couple minutes to reset, thinking about how this work is bringing such amazing health and healing to your body and your family. After your mindset is set, smile and preparing your ferment!

When doing ferments, it is important to hand wash your jars. A lot of dishwashers leave a film of soap, even if you’re using a natural soap. Make sure you rinse your jar well with hot water. It’s not necessary to sterilize your jar; we’re not canning. Fermentation creates a live food that will take care of the bad bacteria.

Tidbit from Nourishing Traditions: “Add ¼ - ½ tsp cayenne pepper to 4 ounces of cabbage tonic for a gargle and sore throat remedy.

This recipe is based on the Nourishing Traditions cookbook by Sally Fallon on page 614.

Ingredients for Cabbage Tonic:

  • ¼ Organic Green Cabbage

  • 1 tsp Sea Salt

  • ¼ Cup Whey (how to make whey)

  • Filtered Water

Directions for Cabbage Tonic:

How-to-make-cabbage-tonic-directions-for-cabbage-tonic-gaps-diet-gaps-protocol-cabbage-drink-fermented-cabbage-beverage-northern-colorado-holistic-health

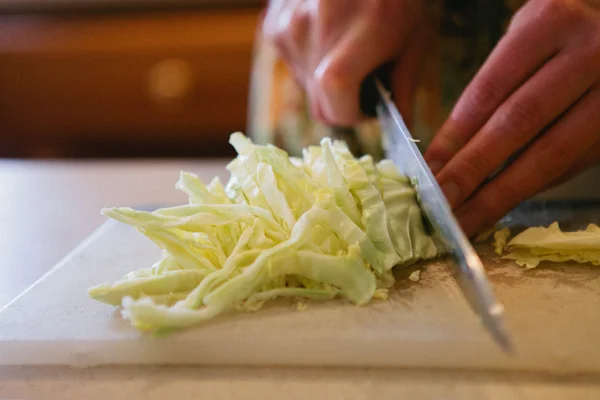
Shred cabbage finely with a knife. You want small even pieces so it ferments evenly. (Similar to cutting onions for even cooking.)

Add cabbage and salt to a bowl.

How-to-make-cabbage-tonic-directions-for-cabbage-tonic-gaps-diet-gaps-protocol-cabbage-drink-fermented-cabbage-beverage-northern-colorado-holistic-health

Using your hands, squish the cabbage for about a minute.

Let the cabbage sit for five minutes.

How-to-make-cabbage-tonic-directions-for-cabbage-tonic-gaps-diet-gaps-protocol-cabbage-drink-fermented-cabbage-beverage-northern-colorado-holistic-health

Squish the cabbage again for a minute.

Put cabbage in a 2 quart jar with whey.

How-to-make-cabbage-tonic-directions-for-cabbage-tonic-gaps-diet-gaps-protocol-cabbage-drink-fermented-cabbage-beverage-northern-colorado-holistic-health

Add enough water to fill the container.

How-to-make-cabbage-tonic-directions-for-cabbage-tonic-gaps-diet-gaps-protocol-cabbage-drink-fermented-cabbage-beverage-northern-colorado-holistic-health

Cover tightly.

Leave at room temperature for 2 days before transferring to the fridge.


Cabbage Tonic

Author:
prep time: cook time: total time:

ingredients:

  • ¼ Organic Green Cabbage
  • 1 tsp Sea Salt
  • ¼ Cup Whey
  • Filtered Water

instructions:

How to cook Cabbage Tonic

  1. Shred cabbage finely with a knife. You want small even pieces so it ferments evenly. (Similar to cutting onions for even cooking.)
  2. Add cabbage and salt to a bowl.
  3. Using your hands, squish the cabbage for about a minute.
  4. Let the cabbage sit for five minutes.
  5. Squish the cabbage again for a minute.
  6. Put cabbage in a 2 quart jar with whey.
  7. Add enough water to fill the container.
  8. Cover tightly.
  9. Leave at room temperature for 2 days before transferring to the fridge.
Created using The Recipes Generator
45.png

Egyptian Lentil Soup GAPS Legal Recipe

GAPS Legal Egyptian Lentil Soup

Are you getting bored with the same old flavor profile? It's easy to do, no matter what dietary guidelines you are following. Well, here is a soup to get you out of our rut!

This delicious soup is legal on Full GAPS, and have been a hit with every single one of the many people I have served it too. This is not a leftover that gets forgotten in the fridge... it has disappeared much sooner than you want it to be gone! I hope you enjoy this Egyptian lentil soup!

Egyptian Lentil Soup

Ingredients

  • 5 cups Meat Stock

  • 1 cup Dried Red Lentils, Sprouted

  • 2 cups Chopped Onions (about 1 medium onion)

  • 2 cups Chopped Cauliflower, about half a small cauliflower

  • 8 garlic cloves, peeled and left whole

  • 2 tablespoons Olive Oil or Other Fat

  • 2 tsp Ground Cumin

  • 1/2 tsp Turmeric

  • 1 tsp Salt

  • 1/3 cup Chopped Fresh Cilantro or 1 tsp Dried Cilantro

  • 3 tablespoons Fresh Lemon Juice

  • Sour Cream (optional)

  • Avocado (optional)

Directions

To sprout the red lentils, soak lentils overnight in filtered water. In the morning, rinse them with filtered water. Leave them drained with a mesh lid over the jar. Rinse every 12 hours until little tails grow, between 2 and 5 days. When they are dry, dehydrate them and store them in a jar until ready to use.

It's important to sprout the lentils for this GAPS Legal and GAPS Friendly Egyptian Lentil Soup recipe. Recipe by certified GAPS Practitioner Amy Mihaly, Be Well Clinic.

Add the lentils to the pot. After about 10-15 minutes, add cauliflower and cook for about ten minutes.

This Egyptian Lentil Soup recipe comes together easily because of the rough chop of the vegetables. Recipe by certified GAPS Practitioner Amy Mihaly, Be Well Clinic.

Roughly chop the cauliflower and onion.

Peel and crush garlic cloves. Add onions and garlic to pot.

Lower the heat and simmer 15-20 minutes or until the lentils and veggies are tender.

Take pot from stove burner and set aside for at least five minutes.

In a small saucepan, add the oil; warm over low heat until the oil is hot but not smoking.

This easy Egyptian Lentil Soup features toasted spices. It's GAPS Legal, GAPS Friendly and good for the Whole 30 and Paleo diets as well. Recipe by certified GAPS Practitioner Amy Mihaly, Be Well Clinic.

Add in the cumin, turmeric, and salt. Cook and stir constantly for 2-3 minutes or until the cumin has released its fragrance. Be careful not to scorch the spices.

Set spice mixture aside for 1 minute to cool.

Egyptian Lentil Soup is an easy GAPS Legal and GAPS Friendly recipe. Recipe by certified GAPS Practitioner Amy Mihaly, Be Well Clinic.

Stir spice mixture into the lentil mixture. Add cilantro. Stir to combine.

This Egyptian Lentil Soup recipe can be pureed to whatever consistency you'd like. It's a GAPS Friendly recipe and GAPS Legal. Recipe by certified GAPS Practitioner Amy Mihaly, Be Well Clinic.

You can puree the soup in batches in a blender or use an immersion blender. Blend to desired texture. I like to leave it a bit chunky.

Add in lemon juice, stir to combine.

Don't skip this step! The lemon really makes the soup, and if it is tasting blah and boring, you need more lemon (and probably a little more salt).

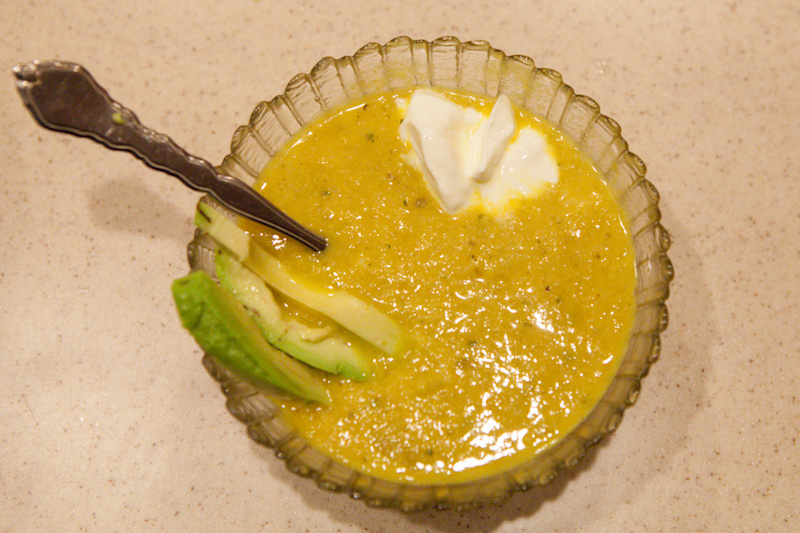
Finish your GAPS Legal Egyptian Lentil soup with a dollop of sour cream and a few slices of avocado for a healthy dose of fat. Recipe by certified GAPS Practitioner Amy Mihaly, Be Well Clinic.

Serve with a dollop of sour cream and slices of avocado. And, as always, I recommend that everyone add additional salt as needed to taste.

Note:

To make this soup go further, you can add a potato. This makes the recipe not GAPS legal and you’ll also need to add a little bit of extra stock.

Finish your GAPS Legal Egyptian Lentil soup with a dollop of sour cream and a few slices of avocado for a healthy dose of fat. Recipe by certified GAPS Practitioner Amy Mihaly, Be Well Clinic.

Egyptian Lentil Soup

Author:
prep time: cook time: total time:

ingredients:

  • 5 cups Meat Stock
  • 1 cup Dried Red Lentils, Sprouted
  • 2 cups Chopped Onions (about 1 medium onion)
  • 2 cups Chopped Cauliflower, about half a small cauliflower
  • 8 garlic cloves, peeled and left whole
  • 2 tablespoons Olive Oil or Other Fat
  • 2 tsp Ground Cumin
  • 1/2 tsp Turmeric
  • 1 tsp Salt
  • 1/3 cup Chopped Fresh Cilantro or 1 tsp Dried Cilantro
  • 3 tablespoons Fresh Lemon Juice
  • Sour Cream (optional)
  • Avocado (optional)

instructions:

How to cook Egyptian Lentil Soup

  1. To sprout the red lentils, soak lentils overnight in filtered water. In the morning, rinse them with filtered water. Leave them drained with a mesh lid over the jar. Rinse every 12 hours until little tails grow, between 2 and 5 days. When they are dry, dehydrate them and store them in a jar until ready to use.
  2. Add the lentils to the pot. After about 10-15 minutes, add cauliflower and cook for about ten minutes.
  3. Roughly chop the cauliflower and onion.
  4. Peel and crush garlic cloves. Add onions and garlic to pot.
  5. Lower the heat and simmer 15-20 minutes or until the lentils and veggies are tender.
  6. Take pot from stove burner and set aside for at least five minutes.
  7. In a small saucepan, add the oil; warm over low heat until the oil is hot but not smoking.
  8. Add in the cumin, turmeric, and salt. Cook and stir constantly for 2-3 minutes or until the cumin has released its fragrance. Be careful not to scorch the spices.
  9. Set spice mixture aside for 1 minute to cool.
  10. Stir spice mixture into the lentil mixture. Add cilantro. Stir to combine.
  11. You can puree the soup in batches in a blender or use an immersion blender. Blend to desired texture. I like to leave it a bit chunky.
  12. Add in lemon juice, stir to combine. Don't skip this step! The lemon really makes the soup, and if it is tasting blah and boring, you need more lemon (and probably a little more salt).
  13. Serve with a dollop of sour cream and slices of avocado. And, as always, I recommend that everyone add additional salt as needed to taste.
  14. Note:
  15. To make this soup go further, you can add a potato. This makes the recipe not GAPS legal and you’ll also need to add a little bit of extra stock.
Created using The Recipes Generator

Swedish Gravlax Recipe

This meal is adapted from GAPS Cookbook by Dr. Natasha Campbell

This is a brined fish meal legal on GAPS stage 2. You eat little pieces, one small piece a day.

Swedish Gravlax Recipe

Ingredients for Swedish Gravlax:

  • ½ lb Fresh Wild Caught Salmon

  • Fresh Dill

  • Freshly Coarsely Ground Black Pepper

  • 4 cup Room Temperature Filtered Water

  • 1 tbsp Honey

  • 1 ½ tbsp Salt

Directions for Swedish Gravlax:

Swedish-Gravlax-Fermented-Salmon-Wild-Caught-Salmon-What-To-Do-With-Salmon-GAPS-Legal-Salmon-Recipe-GAPS-Diet-Salmon-Fish-On-GAPS-GAPS-Diet-Snack

Thinly slice the fish.

Swedish-Gravlax-Fermented-Salmon-Wild-Caught-Salmon-What-To-Do-With-Salmon-GAPS-Legal-Salmon-Recipe-GAPS-Diet-Salmon-Fish-On-GAPS-GAPS-Diet-Snack

Place fish slices into a deep tray.

Sprinkle with dill sprigs and pepper.

Swedish-Gravlax-Fermented-Salmon-Wild-Caught-Salmon-What-To-Do-With-Salmon-GAPS-Legal-Salmon-Recipe-GAPS-Diet-Salmon-Fish-On-GAPS-GAPS-Diet-Snack

Dissolve honey and salt in water to make a brine.

Pour brine over fish.

Swedish-Gravlax-Fermented-Salmon-Wild-Caught-Salmon-What-To-Do-With-Salmon-GAPS-Legal-Salmon-Recipe-GAPS-Diet-Salmon-Fish-On-GAPS-GAPS-Diet-Snack

Leave at room temperature for 1 - 1 ½ hours.

Pour the water out.

Serve on lettuce or eat alone.

Store in refrigerator and consume within two days.


Swedish Gravlax Recipe

Author:
prep time: cook time: total time:

ingredients:

  • ½ lb Fresh Wild Caught Salmon
  • Fresh Dill
  • Freshly Coarsely Ground Black Pepper
  • 4 cup Room Temperature Filtered Water
  • 1 tbsp Honey
  • 1 ½ tbsp Salt

instructions:

How to cook Swedish Gravlax Recipe

  1. Thinly slice the fish.
  2. Place fish slices into a deep tray.
  3. Sprinkle with dill sprigs and pepper.
  4. Dissolve honey and salt in water to make a brine.
  5. Pour brine over fish.
  6. Leave at room temperature for 1 - 1 ½ hours.
  7. Pour the water out.
  8. Serve on lettuce or eat alone.
  9. Store in refrigerator and consume within two days.
Created using The Recipes Generator

Chocolate Fudge Made with Coconut

GAPS Legal Chocolate Peppermint Coconut Fudge and Citrus Coconut Fudge

The GAPS Legal Fudge is a delicious holiday recipe and easy to share with family and friends! This recipe comes together quickly, besides the melting of the coconut butter and oil. I like making this recipe on a snowy day because it’s fun to chill the pans in a snowbank! It makes me feel like a pioneer.

For the citrus fudge, you can use any citrus you like. I prefer orange. You can also use all shredded coconut if you like. I prefer a little crunch in my fudge and like to add the flakes.You can make these flavors on their own and keep them separate. However, I prefer the two flavors together.

To combine the flavors, make the chocolate peppermint fudge first and put it in the freezer for 10 minutes to chill rapidly while you make the citrus fudge. Once chilled, pour the citrus fudge over the top and chill again.The fudge keeps for quite a while and doesn’t melt easily at room temperature. Even so, storing in the fridge is best.Enjoy!

Chocolate Peppermint Coconut Fudge

Ingredients for chocolate peppermint coconut fudge

  • ½ cup coconut butter

  • ½ cup coconut oil

  • ½ cup cocoa powder

  • ½ cup honey

  • 2 tsp peppermint extract or 2 drops peppermint oil

  • 1 tsp vanilla extract

  • 3/4 cup shredded coconut

  • ¼ cup coconut flakes

Directions for chocolate peppermint coconut fudge

This GAPS Legal Coconut Fudge comes in two flavors, citrus and peppermint. You can make the flavors separately but I prefer them layered together. Use coconut butter, coconut oil and coconut flakes for a delicious gluten free, dairy free and GAPS le…

Melt coconut butter on medium heat by adding water to the bottom of a pot and placing jar on top. Or add jar and water to crockpot and heat for two hours until melted.

Melt coconut oil in a separate pot. Crush coconut flakes into smaller pieces.

This GAPS Legal Coconut Fudge comes in two flavors, citrus and peppermint. You can make the flavors separately but I prefer them layered together. Use coconut butter, coconut oil and coconut flakes for a delicious gluten free, dairy free and GAPS le…

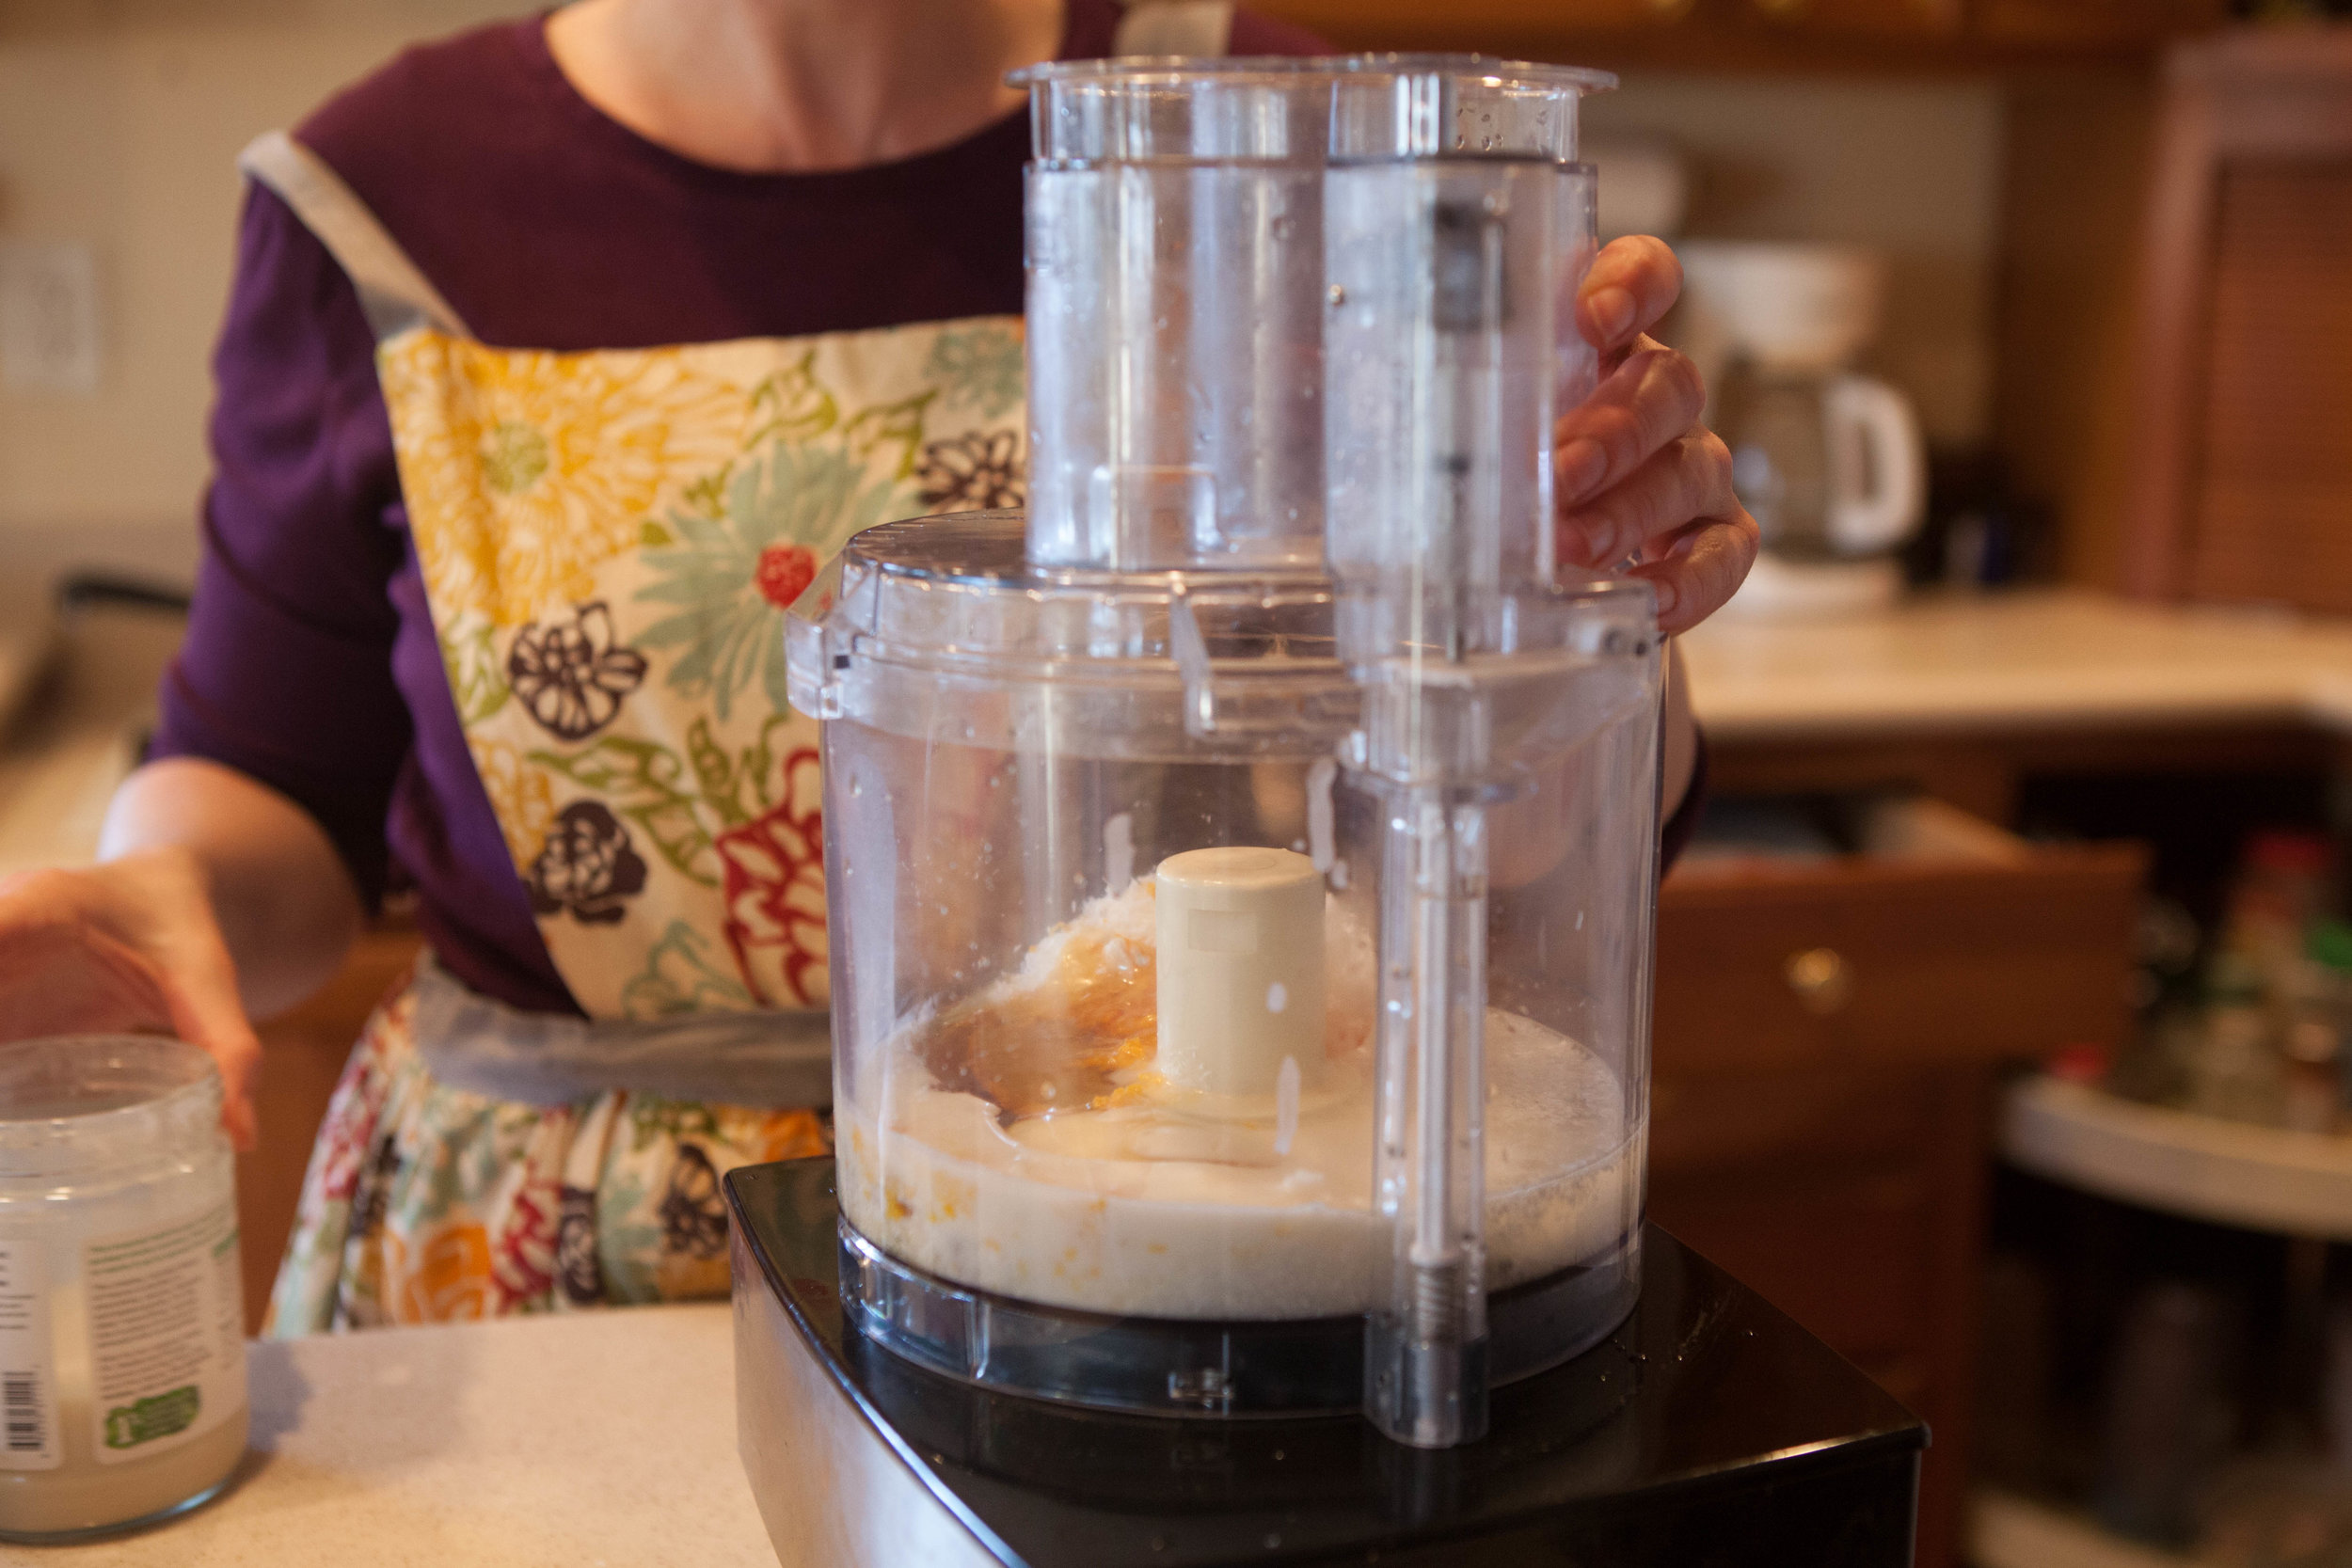
Combine coconut butter, coconut oil, cocoa powder, honey, peppermint, vanilla, shredded coconut and coconut flakes into a food processor.

This GAPS Legal Coconut Fudge comes in two flavors, citrus and peppermint. You can make the flavors separately but I prefer them layered together. Use coconut butter, coconut oil and coconut flakes for a delicious gluten free, dairy free and GAPS le…

Spread mixture into a pan.Chill for 30 minutes.

Add hot water to the sink. Float pan in mixture approx 1 minute until mixture releases from sides. Dip a knife in hot water then slice fudge into pieces.

How to Make Citrus coconut Fudge

Ingredients for citrus coconut fudge

  • ½ cup coconut butter

  • ½ cup coconut oil

  • ⅓ cup raw honey

  • 1 tbsp citrus zest

  • 2 tbs citrus juice

  • 3/4 cup shredded coconut

  • ¼ cup Coconut Flakes

Directions for citrus coconut fudge

This GAPS Legal Coconut Fudge comes in two flavors, citrus and peppermint. You can make the flavors separately but I prefer them layered together. Use coconut butter, coconut oil and coconut flakes for a delicious gluten free, dairy free and GAPS le…

Melt coconut butter on medium heat by adding water to the bottom of a pot and placing jar on top. Or add jar and water to crockpot and heat for two hours until melted. Melt coconut oil in a separate pot.

This GAPS Legal Coconut Fudge comes in two flavors, citrus and peppermint. You can make the flavors separately but I prefer them layered together. Use coconut butter, coconut oil and coconut flakes for a delicious gluten free, dairy free and GAPS le…

Combine coconut butter, coconut oil, cocoa powder, honey, peppermint, and vanilla into a food processor.

This GAPS Legal Coconut Fudge comes in two flavors, citrus and peppermint. You can make the flavors separately but I prefer them layered together. Use coconut butter, coconut oil and coconut flakes for a delicious gluten free, dairy free and GAPS le…

Spread mixture into a pan.Chill for 30 minutes.

This GAPS Legal Coconut Fudge comes in two flavors, citrus and peppermint. You can make the flavors separately but I prefer them layered together. Use coconut butter, coconut oil and coconut flakes for a delicious gluten free, dairy free and GAPS le…

Add hot water to the sink. Float pan in mixture approx 1 minute until mixture releases from sides. Dip a knife in hot water then slice fudge into pieces.


Chocolate Peppermint Fudge

Author:
prep time: cook time: total time:

ingredients:

  • ½ cup coconut butter
  • ½ cup coconut oil
  • ½ cup cocoa powder
  • ½ cup honey
  • 2 tsp peppermint extract or 2 drops peppermint oil
  • 1 tsp vanilla extract
  • 3/4 cup shredded coconut
  • ¼ cup coconut flakes

instructions:

How to cook Chocolate Peppermint Fudge

  1. Melt coconut butter on medium heat by adding water to the bottom of a pot and placing jar on top. Or add jar and water to crockpot and heat for two hours until melted.
  2. Melt coconut oil in a separate pot. Crush coconut flakes into smaller pieces.
  3. Combine coconut butter, coconut oil, cocoa powder, honey, peppermint, vanilla, shredded coconut and coconut flakes into a food processor.
  4. Spread mixture into a pan.Chill for 30 minutes.
  5. Add hot water to the sink. Float pan in mixture approx 1 minute until mixture releases from sides. Dip a knife in hot water then slice fudge into pieces.
Created using The Recipes Generator

Citrus Coconut Fudge

Author:
prep time: cook time: total time:

ingredients:

  • ½ cup coconut butter
  • ½ cup coconut oil
  • ⅓ cup raw honey
  • 1 tbsp citrus zest
  • 2 tbs citrus juice
  • 3/4 cup shredded coconut
  • ¼ cup Coconut Flakes

instructions:

How to cook Citrus Coconut Fudge

  1. Melt coconut butter on medium heat by adding water to the bottom of a pot and placing jar on top. Or add jar and water to crockpot and heat for two hours until melted. Melt coconut oil in a separate pot.
  2. Combine coconut butter, coconut oil, cocoa powder, honey, peppermint, and vanilla into a food processor.
  3. Spread mixture into a pan. Chill for 30 minutes.
  4. Add hot water to the sink. Float pan in mixture approx 1 minute until mixture releases from sides. Dip a knife in hot water then slice fudge into pieces.
Created using The Recipes Generator

Brownies Made with Dates

Dairy Free, Gluten Free, GAPS Legal Brownies Made with Dates

While these brownies are not as sweet as conventional brownies, they were deemed by some tasters on the GAPS Diet as being “Better than Brownies.” These GAPS legal brownies are dairy free, gluten free, sugar free, and egg free.

Even better, besides the 24 hour fermentation time needed for the almond flour, these brownies can be made very quickly! These brownies actually get better over time so it’s actually better to make them a day before to let the flavors meld. They would be delicious eaten alongside homemade ice cream or with homemade whipped cream and fruit.

Better Than Brownies - GAPS Legal Brownies

Ingredients for brownies made from dates

  • 2 cups of almond flour

  • 5 tablespoons Whey

  • 18 dates

  • ½ cup Filtered Water

  • 1/2 cup Coconut Oil + extra to grease the baking dish

  • ¼ cup Cacao Powder

  • ½ tsp Vanilla Extract

  • ¼ cup Cacao Nibs (optional)

  • ¼ cup Crispy Nuts (optional)

Directions for brownies made from dates

24 Hours Before:

These GAPS legal brownies were deemed as better than brownies. They are gluten free, dairy free, sugar free, egg free, and made with fermented almond flour and dates. Recipe by certified GAPS Practitioner Amy Mihaly, Be Well Clinic.

Add almond flour and cacao powder to a bowl. Use a fork to get rid of almond flour clumps.Add whey and stir to moisten.Cover and leave on counter to ferment for 24 hours.

The Next Day:

These GAPS legal brownies were deemed as better than brownies. They are gluten free, dairy free, sugar free, egg free, and made with fermented almond flour and dates. Recipe by certified GAPS Practitioner Amy Mihaly, Be Well Clinic.

Cut up 18 dates, removing the inner pit.Add ½ cup Filtered Water.

These GAPS legal brownies were deemed as better than brownies. They are gluten free, dairy free, sugar free, egg free, and made with fermented almond flour and dates. Recipe by certified GAPS Practitioner Amy Mihaly, Be Well Clinic.

Cook on low heat until dates are soft and water is absorbed, about 4-6 minutes. (think like making applesauce.) Watch closely to make sure dates don’t burn. You may need to add more water as you go depending on how dry your dates are so they’re able to fully hydrate without burning. Be sure not to add too much or it will thin the eventual date paste.

These GAPS legal brownies were deemed as better than brownies. They are gluten free, dairy free, sugar free, egg free, and made with fermented almond flour and dates. Recipe by certified GAPS Practitioner Amy Mihaly, Be Well Clinic.

When dates are soft, turn off the heat. Puree the mixture in the pot with an immersion blender or add to a blender or food processor until smooth. The smoother the date texture, the more appealing the brownies!Preheat oven to 350.Grease a baking dish or pie pan with coconut oil. Do not use a metal baking dish or the edges will burn.

These GAPS legal brownies were deemed as better than brownies. They are gluten free, dairy free, sugar free, egg free, and made with fermented almond flour and dates. Recipe by certified GAPS Practitioner Amy Mihaly, Be Well Clinic.

Combine coconut oil and dates into the almond flour mixture. If you’re using a blender, add the coconut oil to the blender and blend until smooth before adding to the flour mixture. Optionally, add cacao nibs and crispy nuts.

These GAPS legal brownies were deemed as better than brownies. They are gluten free, dairy free, sugar free, egg free, and made with fermented almond flour and dates. Recipe by certified GAPS Practitioner Amy Mihaly, Be Well Clinic.

Stir the mixture until smooth, being sure to get all the clumps out. You want the mixture to be as smooth as possible. The batter will be thick. Add batter to greased baking sheet and smooth out.

These GAPS legal brownies were deemed as better than brownies. They are gluten free, dairy free, sugar free, egg free, and made with fermented almond flour and dates. Recipe by certified GAPS Practitioner Amy Mihaly, Be Well Clinic.

Bake for 45 minutes until the knife comes out clean. Check after 30 minutes. Serve and enjoy!

Notes:

  • Instead of date paste, you can use applesauce but the brownies will not be as sweet and you will need to make your own applesauce that is thick so it creates the right consistency.

  • These brownies get better with age!

  • These are dairy free, gluten free, sugar free, egg free and legal on GAPS.


Brownies Made with Dates

Author:
prep time: cook time: total time:

ingredients:

  • 2 cups of almond flour
  • 5 tablespoons Whey
  • 18 dates
  • ½ cup Filtered Water
  • 1/2 cup Coconut Oil + extra to grease the baking dish
  • ¼ cup Cacao Powder
  • ½ tsp Vanilla Extract
  • ¼ cup Cacao Nibs (optional)
  • ¼ cup Crispy Nuts (optional)

instructions:

How to cook Brownies Made with Dates

24 Hours in Advance
  1. Add almond flour and cacao powder to a bowl. Use a fork to get rid of almond flour clumps.Add whey and stir to moisten.Cover and leave on counter to ferment for 24 hours.
The Next Day
  1. Cut up 18 dates, removing the inner pit. Add ½ cup Filtered Water.
  2. Cook on low heat until dates are soft and water is absorbed, about 4-6 minutes. (think like making applesauce.) Watch closely to make sure dates don’t burn. You may need to add more water as you go depending on how dry your dates are so they’re able to fully hydrate without burning. Be sure not to add too much or it will thin the eventual date paste.
  3. When dates are soft, turn off the heat. Puree the mixture in the pot with an immersion blender or add to a blender or food processor until smooth. The smoother the date texture, the more appealing the brownies!Preheat oven to 350.Grease a baking dish or pie pan with coconut oil. Do not use a metal baking dish or the edges will burn.
  4. Combine coconut oil and dates into the almond flour mixture. If you’re using a blender, add the coconut oil to the blender and blend until smooth before adding to the flour mixture. Optionally, add cacao nibs and crispy nuts.
  5. Stir the mixture until smooth, being sure to get all the clumps out. You want the mixture to be as smooth as possible. The batter will be thick. Add batter to greased baking sheet and smooth out.
  6. Bake for 45 minutes until the knife comes out clean. Check after 30 minutes. Serve and enjoy!
  7. Notes:
  8. Instead of date paste, you can use applesauce but the brownies will not be as sweet and you will need to make your own applesauce that is thick so it creates the right consistency.
  9. These brownies get better with age!
  10. These are dairy free, gluten free, sugar free, egg free and legal on GAPS.
Created using The Recipes Generator