GAPS legal

Snacks to Eat on the GAPS Diet

I’m often asked about snacking on the GAPS Diet. Below is a selection of ‘snack’ type foods that are all GAPS friendly, including a variety of ferments.

Some of these are great to take on the go, like the sausages or trail mix. I often also bring cheese, cuts of meat and cut up vegetables as snacks on the go. Some of these GAPS friendly snacks are great to feed a crowd and would be the perfect dish to bring to a potluck, like the spinach and artichoke dip and mayo free deviled eggs. These would be enjoyed even on those not on the GAPS Diet.

As the video below shows, sometimes the simplest food is the best!


Homemade sausage is easy

Homemade sausage is easy

Homemade Sausage

Enjoy these homemade sausages warm or cold! These also freeze extremely well, cooked or raw! I cooked and took a large batch of them with me when I went hunting and ate them for breakfast cold.

Gluten Free, Dairy Free, Egg Free

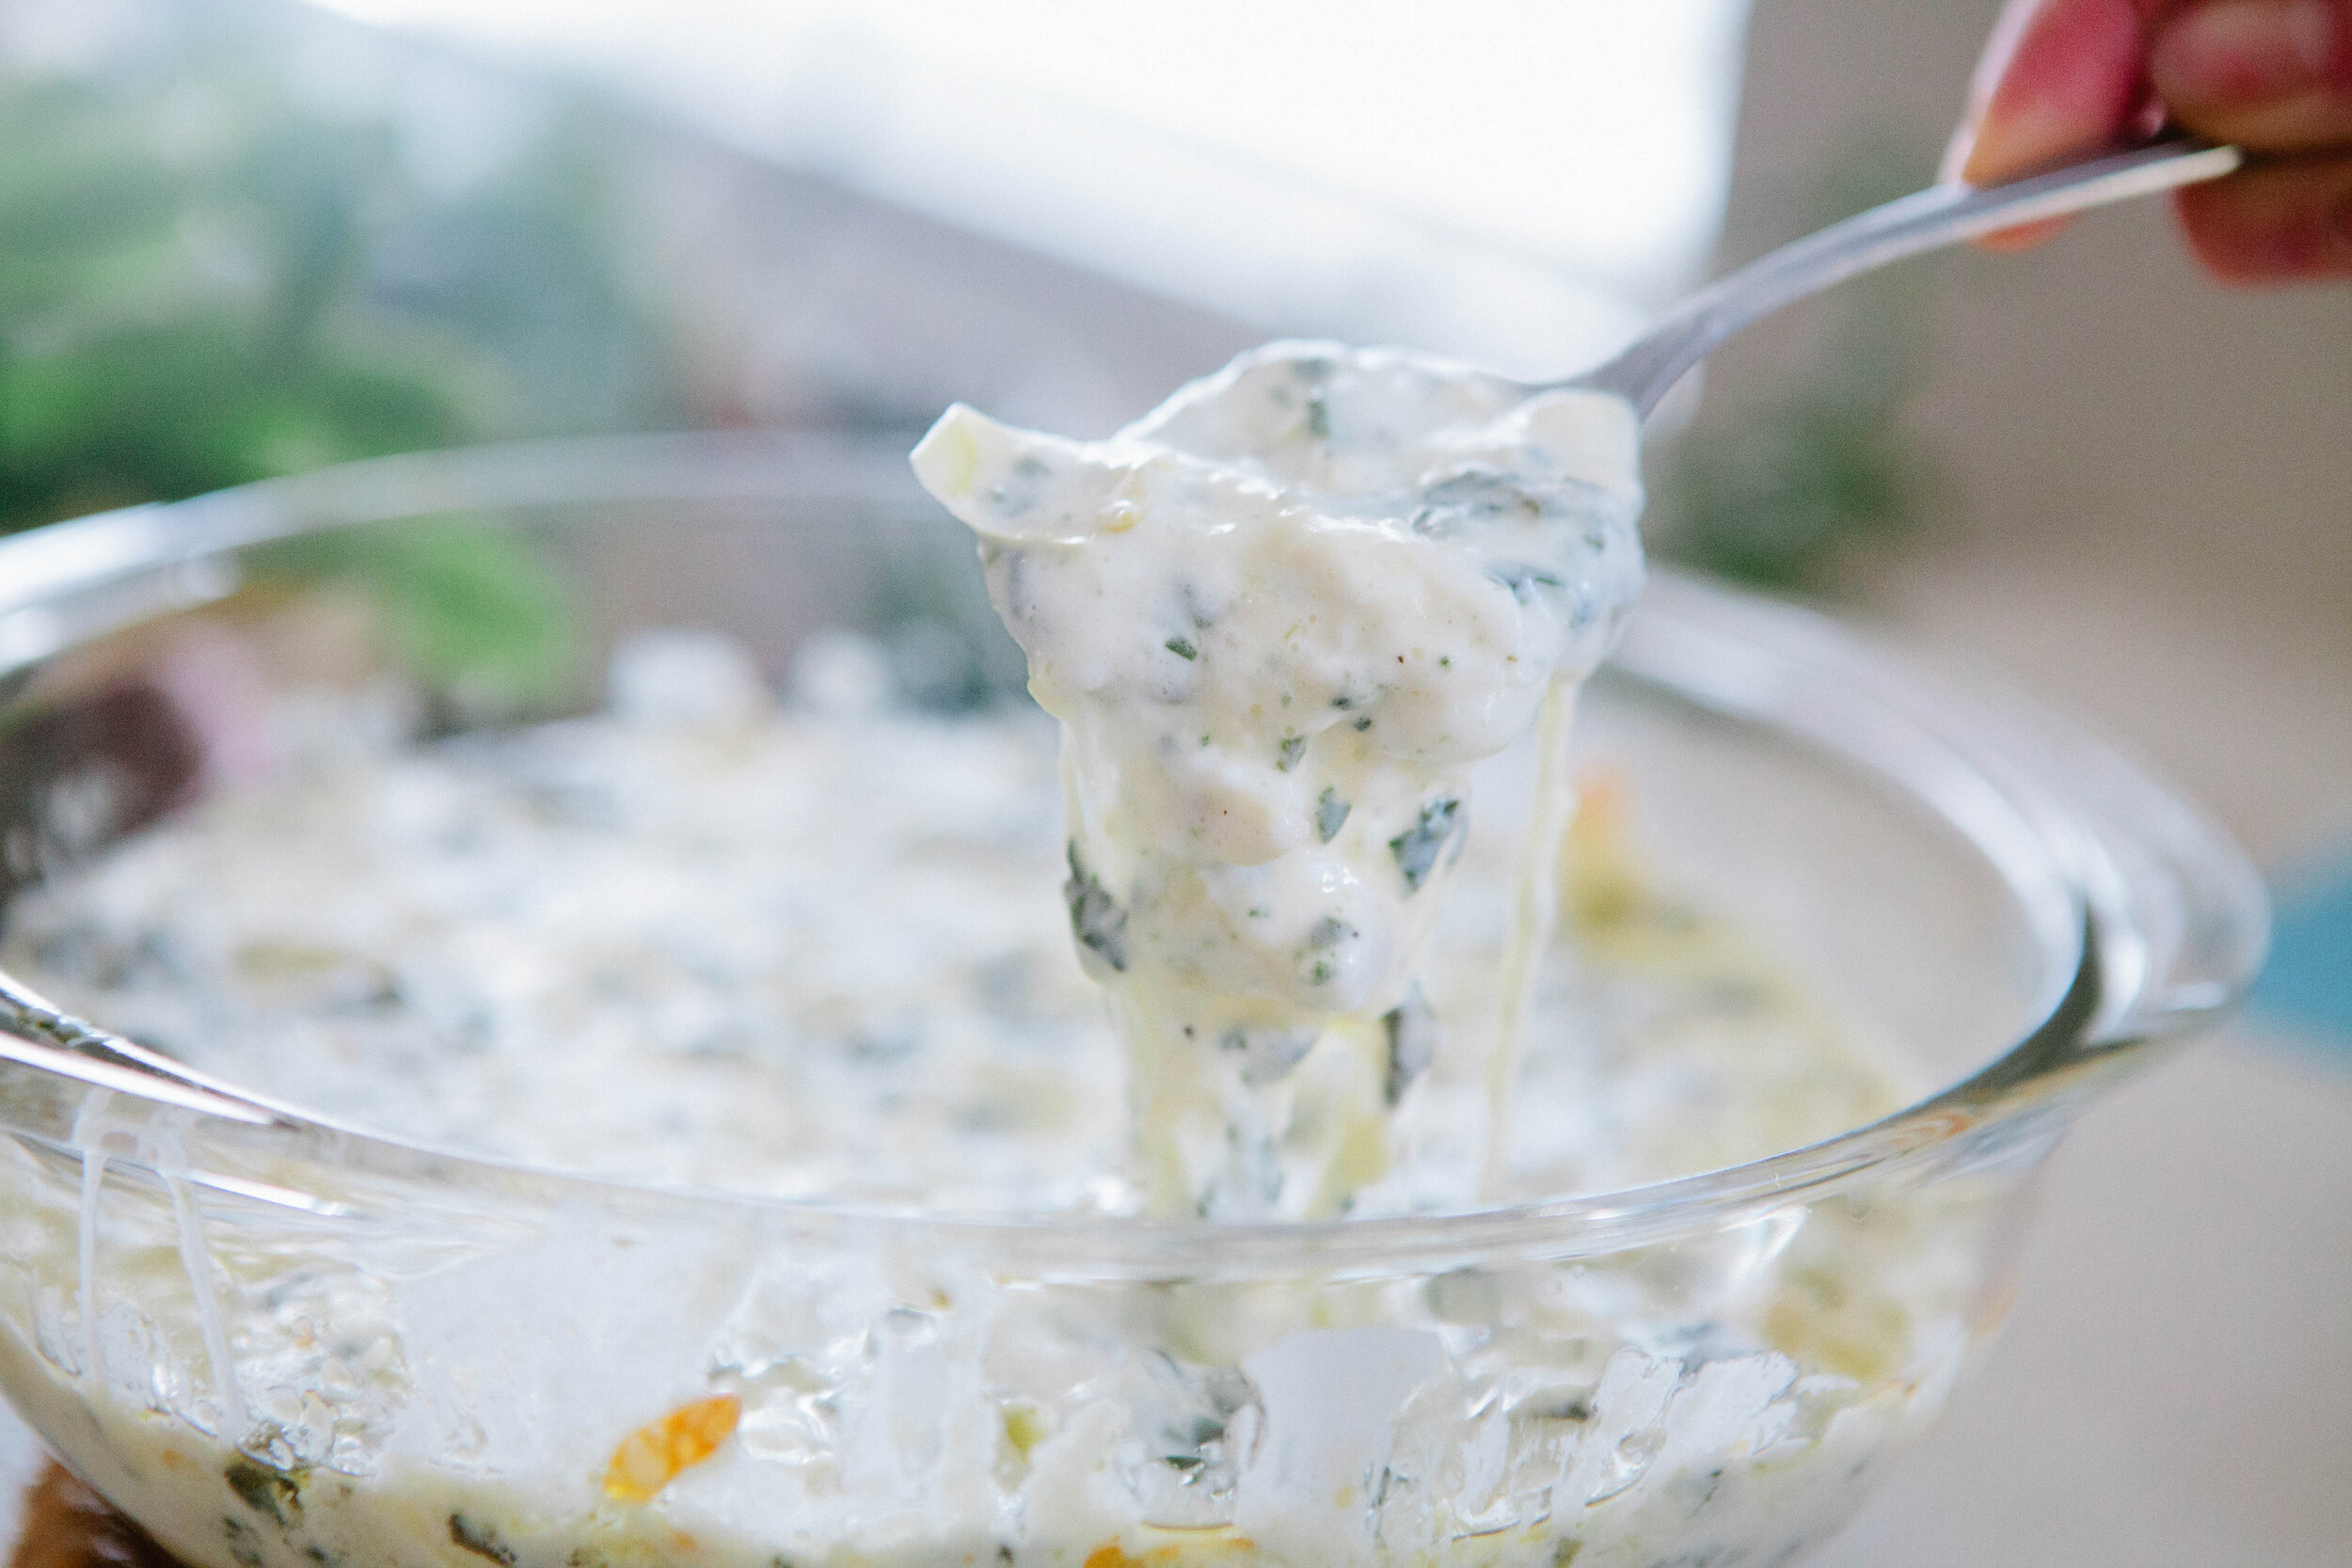
Full GAPS Spinach + Artichoke Dip

Spinach and artichoke dip - just the name conjures up images of a creamy, delicious dip. This one is made with real foods and no mayonnaise and is as delicious as a traditional spinach and artichoke dip.

Gluten Free, Egg Free

Homemade Gummy Snacks

These gummies are a good way for both children and adults to get collagen and vitamin c together! These gummies are stage five legal on the GAPS Diet because they are cooked fruit.

Gluten Free, Dairy Free, Egg Free

GAPS Legal Banana Splits

Ah, the banana split. It’s so delicious on a hot summer’s day. This one is made with all natural ingredients and real food. This recipe is GAPS Legal if you’ve been on full GAPS for about six months, and you’re tolerating raw milk, and you make it exactly as directed.

Gluten Free

GAPS Legal Onion Rings

These onion rings are my first foray into creating GAPS Legal fried foods. These onion rings use a fermented almond flour batter and are legal on the GAPS Diet at stage 4!

Gluten Free, Dairy Free, Egg Free

Mayo Free Deviled Eggs

Because I haven't found a mayo my taste buds approve of there is no mayonnaise in my refrigerator. So one day when I had a hankerin' for deviled eggs I got the creative juices flowing and started experimenting with recipes

Gluten Free, Dairy Free

Russian Custard

Russian custard is a delicious desert or afternoon snack. It is rich, and just sweet enough. You can whip it up in just a few minutes, and it is easy to double or triple to feed another (or more for yourself).

Gluten Free, Dairy Free

Swedish Gravlax

This is a brined fish meal legal on GAPS stage 2. You eat little pieces, one small piece a day.

Gluten Free, Dairy Free, Egg Free

Liver Pate

Liver pâté makes me feel like I am eating a treat when I'm really eating something healthy—very healthy and good for me! You can make pate out of any type of liver, but chicken liver is the most mild, so that is a great one to start with if you are not used to eating liver.

Gluten Free, Dairy Free, Egg Free

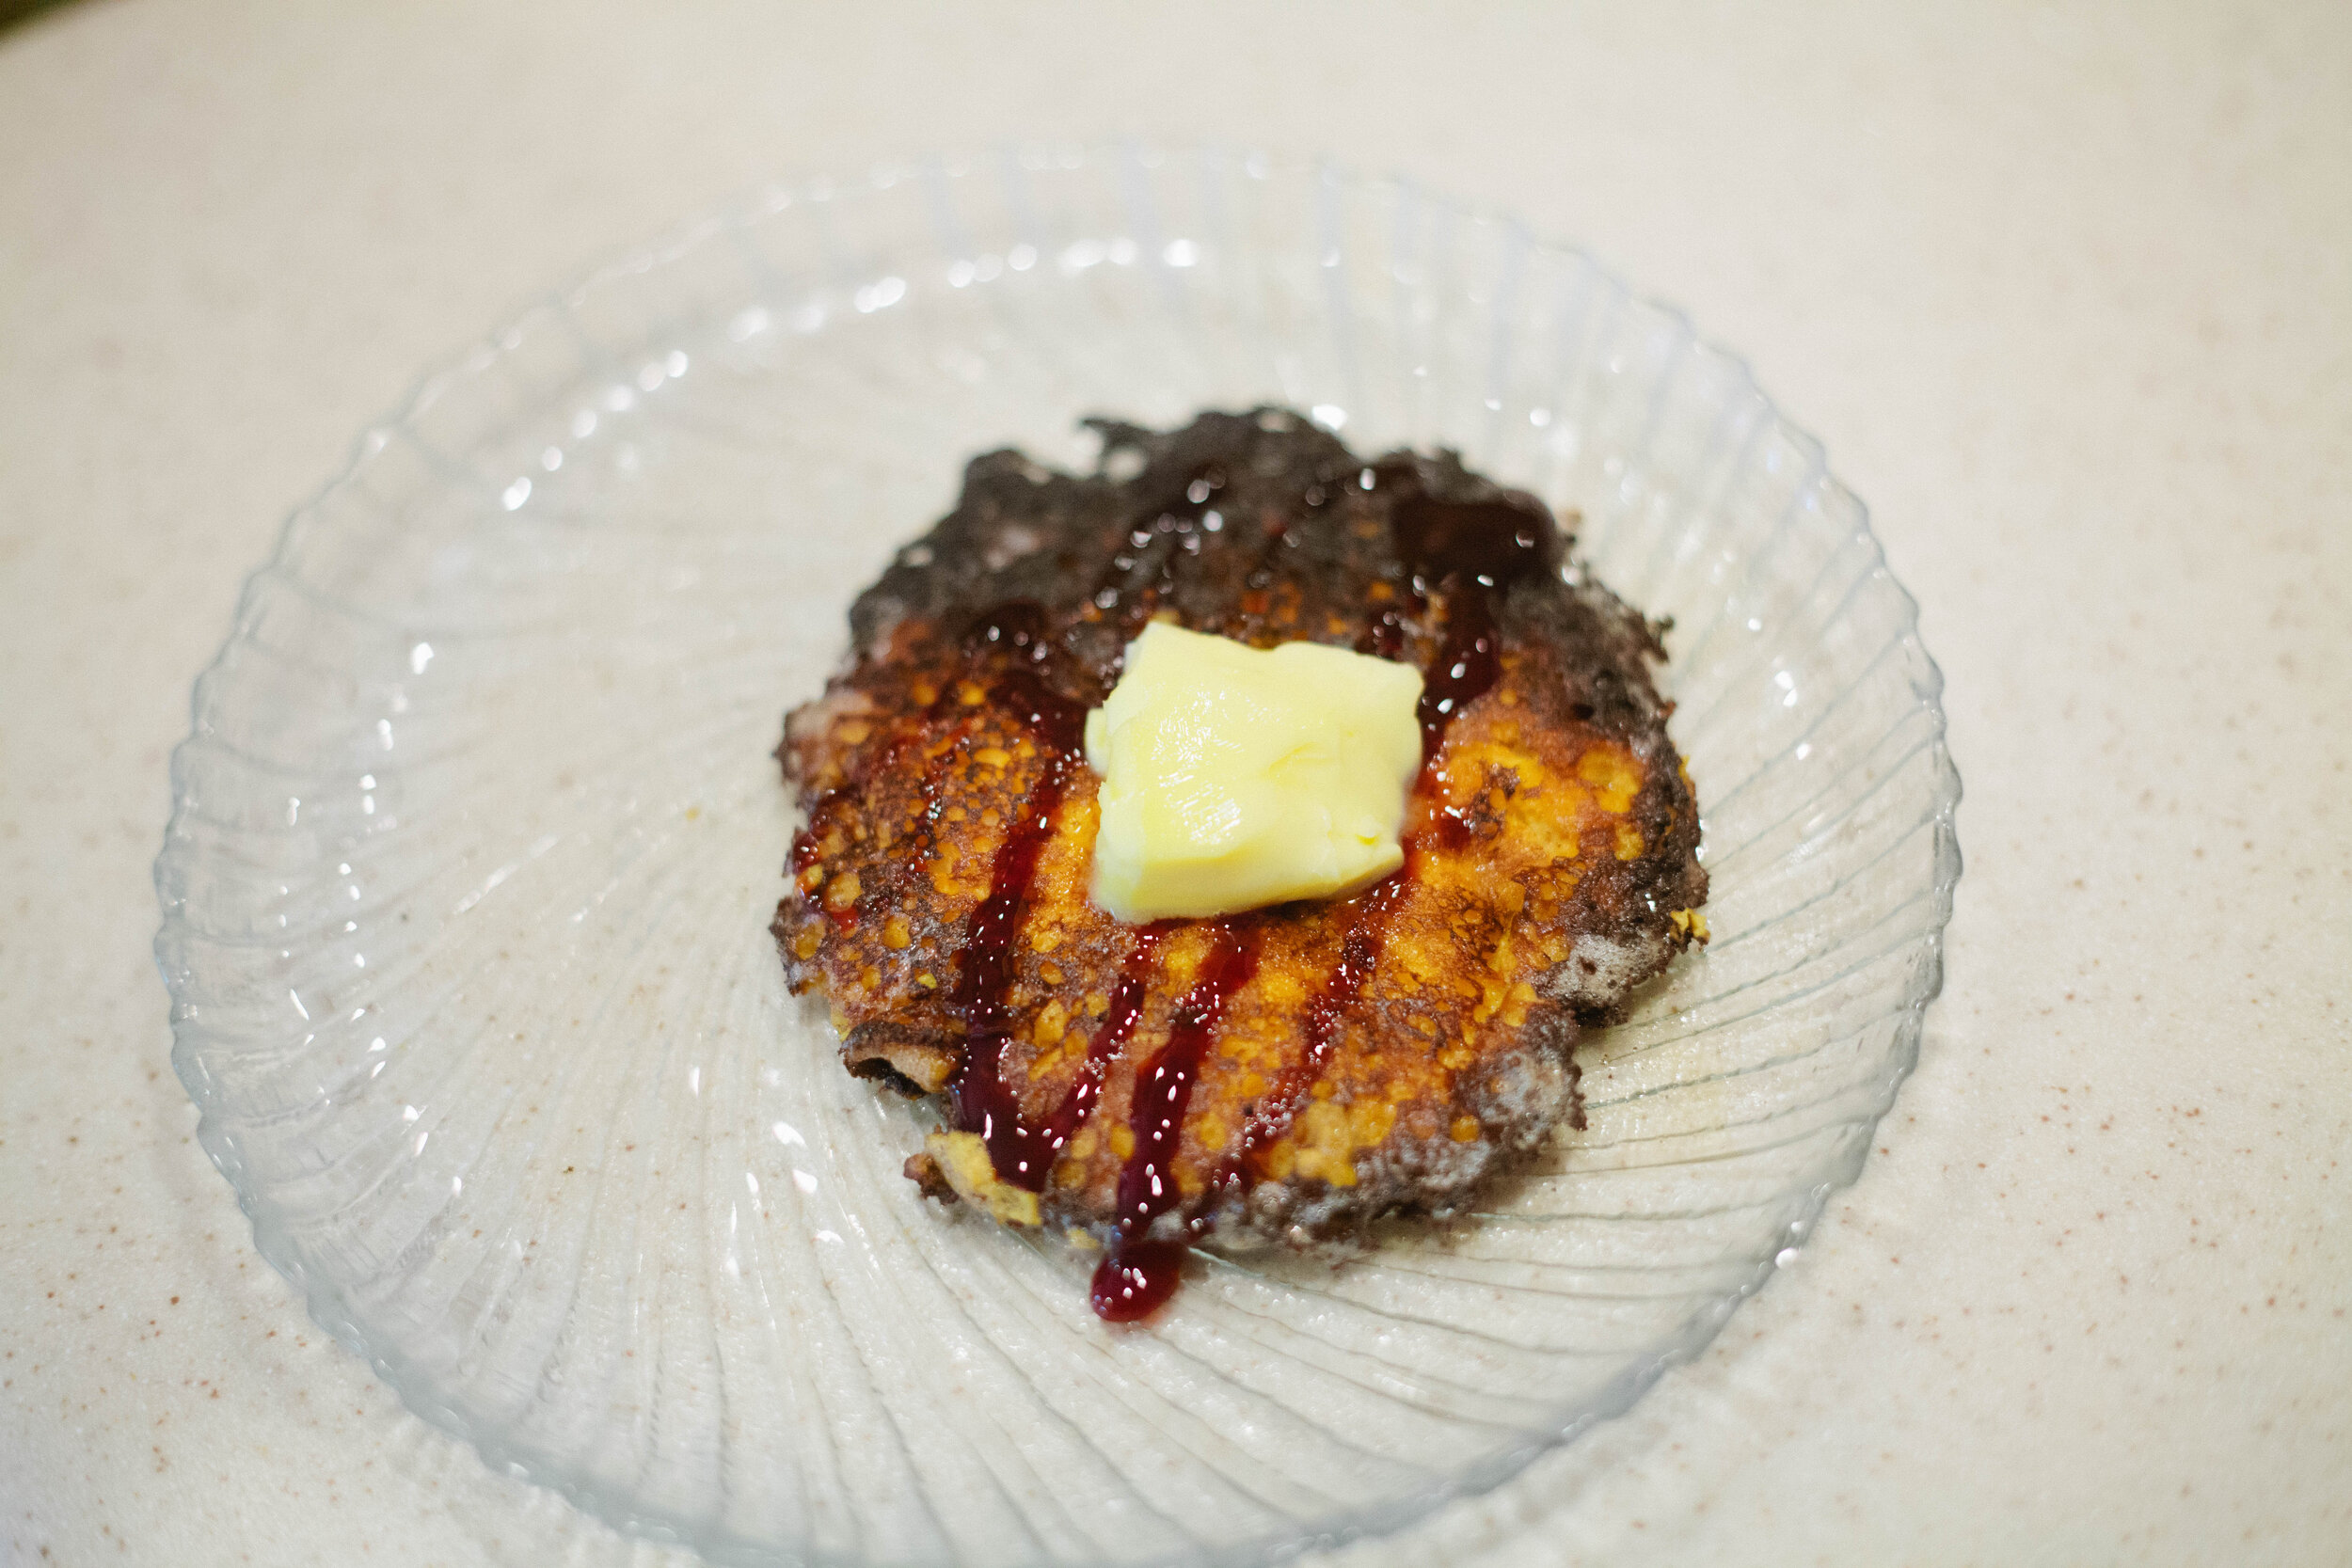
GAPS Pancakes

Make these pancakes with pumpkin or butternut squash. Keep as a savory pancake or for a sweeter treat, add date syrup or cinnamon to the toppings.

Gluten Free, Dairy Free, Egg Free


GAPS Legal Trail Mix

With all the hiking and camping that happens in Colorado, trail mix is almost a main food group. But commercial trail mixes contain candy, sweetened fruit, and unprepared nuts: not the superfoods they claim to be!

Gluten Free, Dairy Free, Egg Free

Fruit Chutney

If you are following the GAPS diet this is legal on stage 5 or 6, when you are tolerating dried spices and peppercorns. This recipe is very simple—chop and combine ingredients, simmer for a while, then store in jars.

Gluten Free, Dairy Free, Egg Free

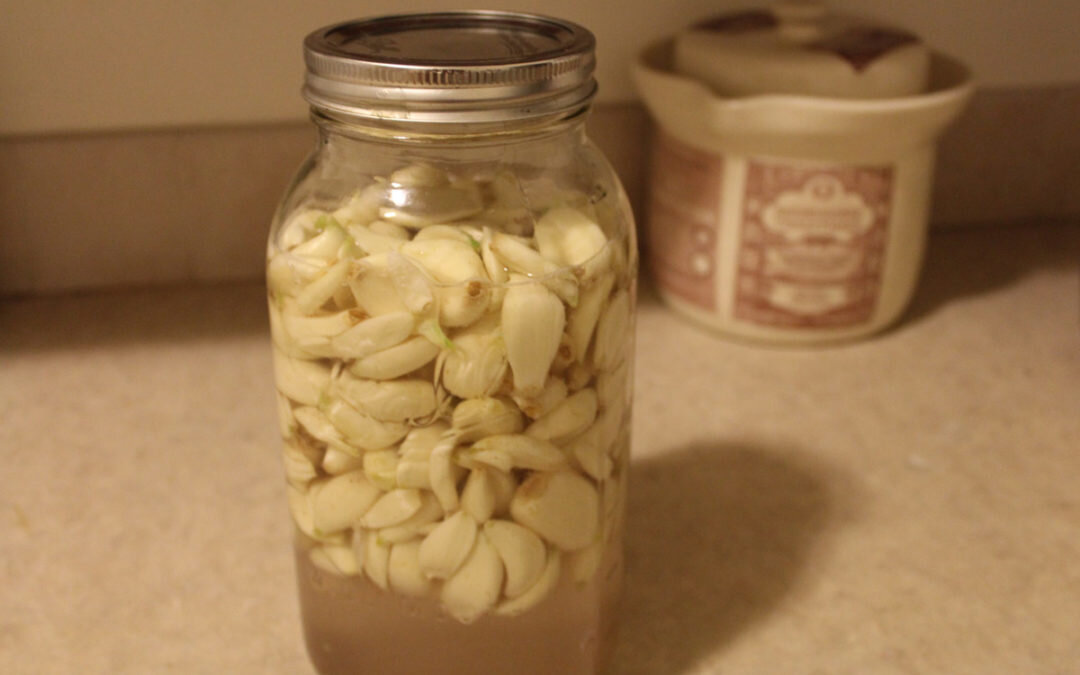
Fermented Garlic

Raw garlic, however, has many supportive health benefits. And when raw garlic is fermented, many of these increase. Fermenting garlic is very simple.

Gluten Free, Dairy Free, Egg Free

Vegetable Medley

This recipe contains five different vegetables: beets (good for liver and blood cleansing), cabbage (stimulates digestion), carrots (contain vitamin A), and cauliflower (makes it taste better, believe me), and garlic (good for immune support). It makes a very rich and flavorful liquid, which is also a wonderful probiotic drink.

Gluten Free, Dairy Free, Egg Free

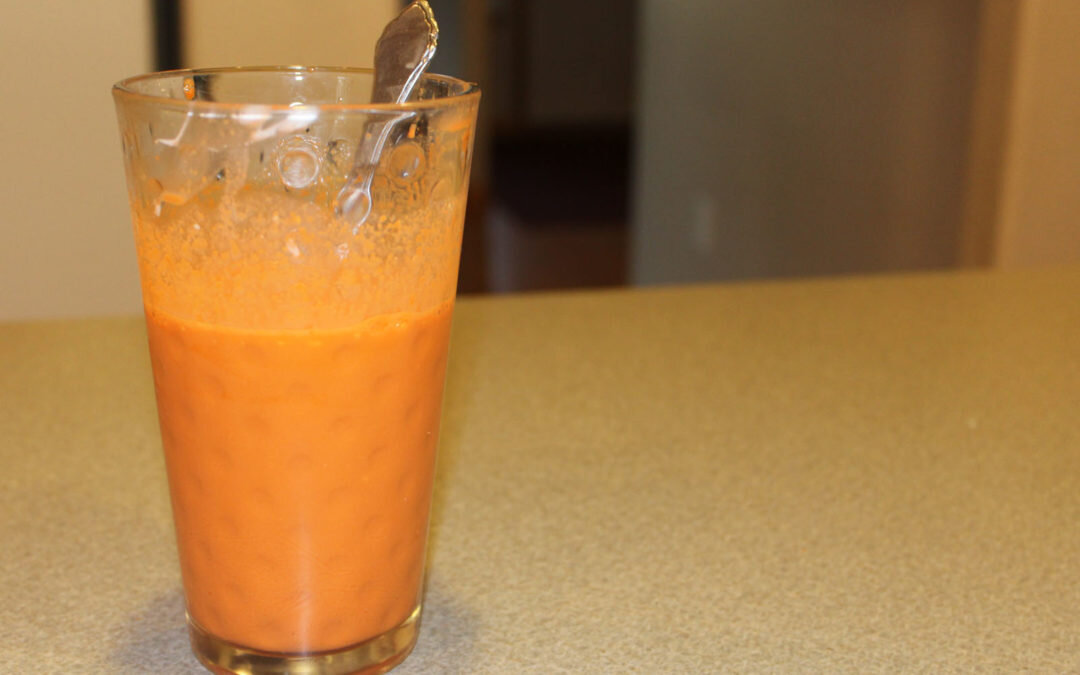
GAPS Milkshake

This delicious, satisfying and helpful beverage is a wonderful way to daily consume your freshly-pressed juices, and can even be a meal. The GAPS milkshake is mix of juice, protein, and fat.

Gluten Free, Dairy Free, Egg Free

Beet Kvass

Beet Kvass is a liver tonic. Anyone can make this simple fermented drink! It requires only a few ingredients, and only a few minutes to "put up."

Gluten Free, Dairy Free, Egg Free

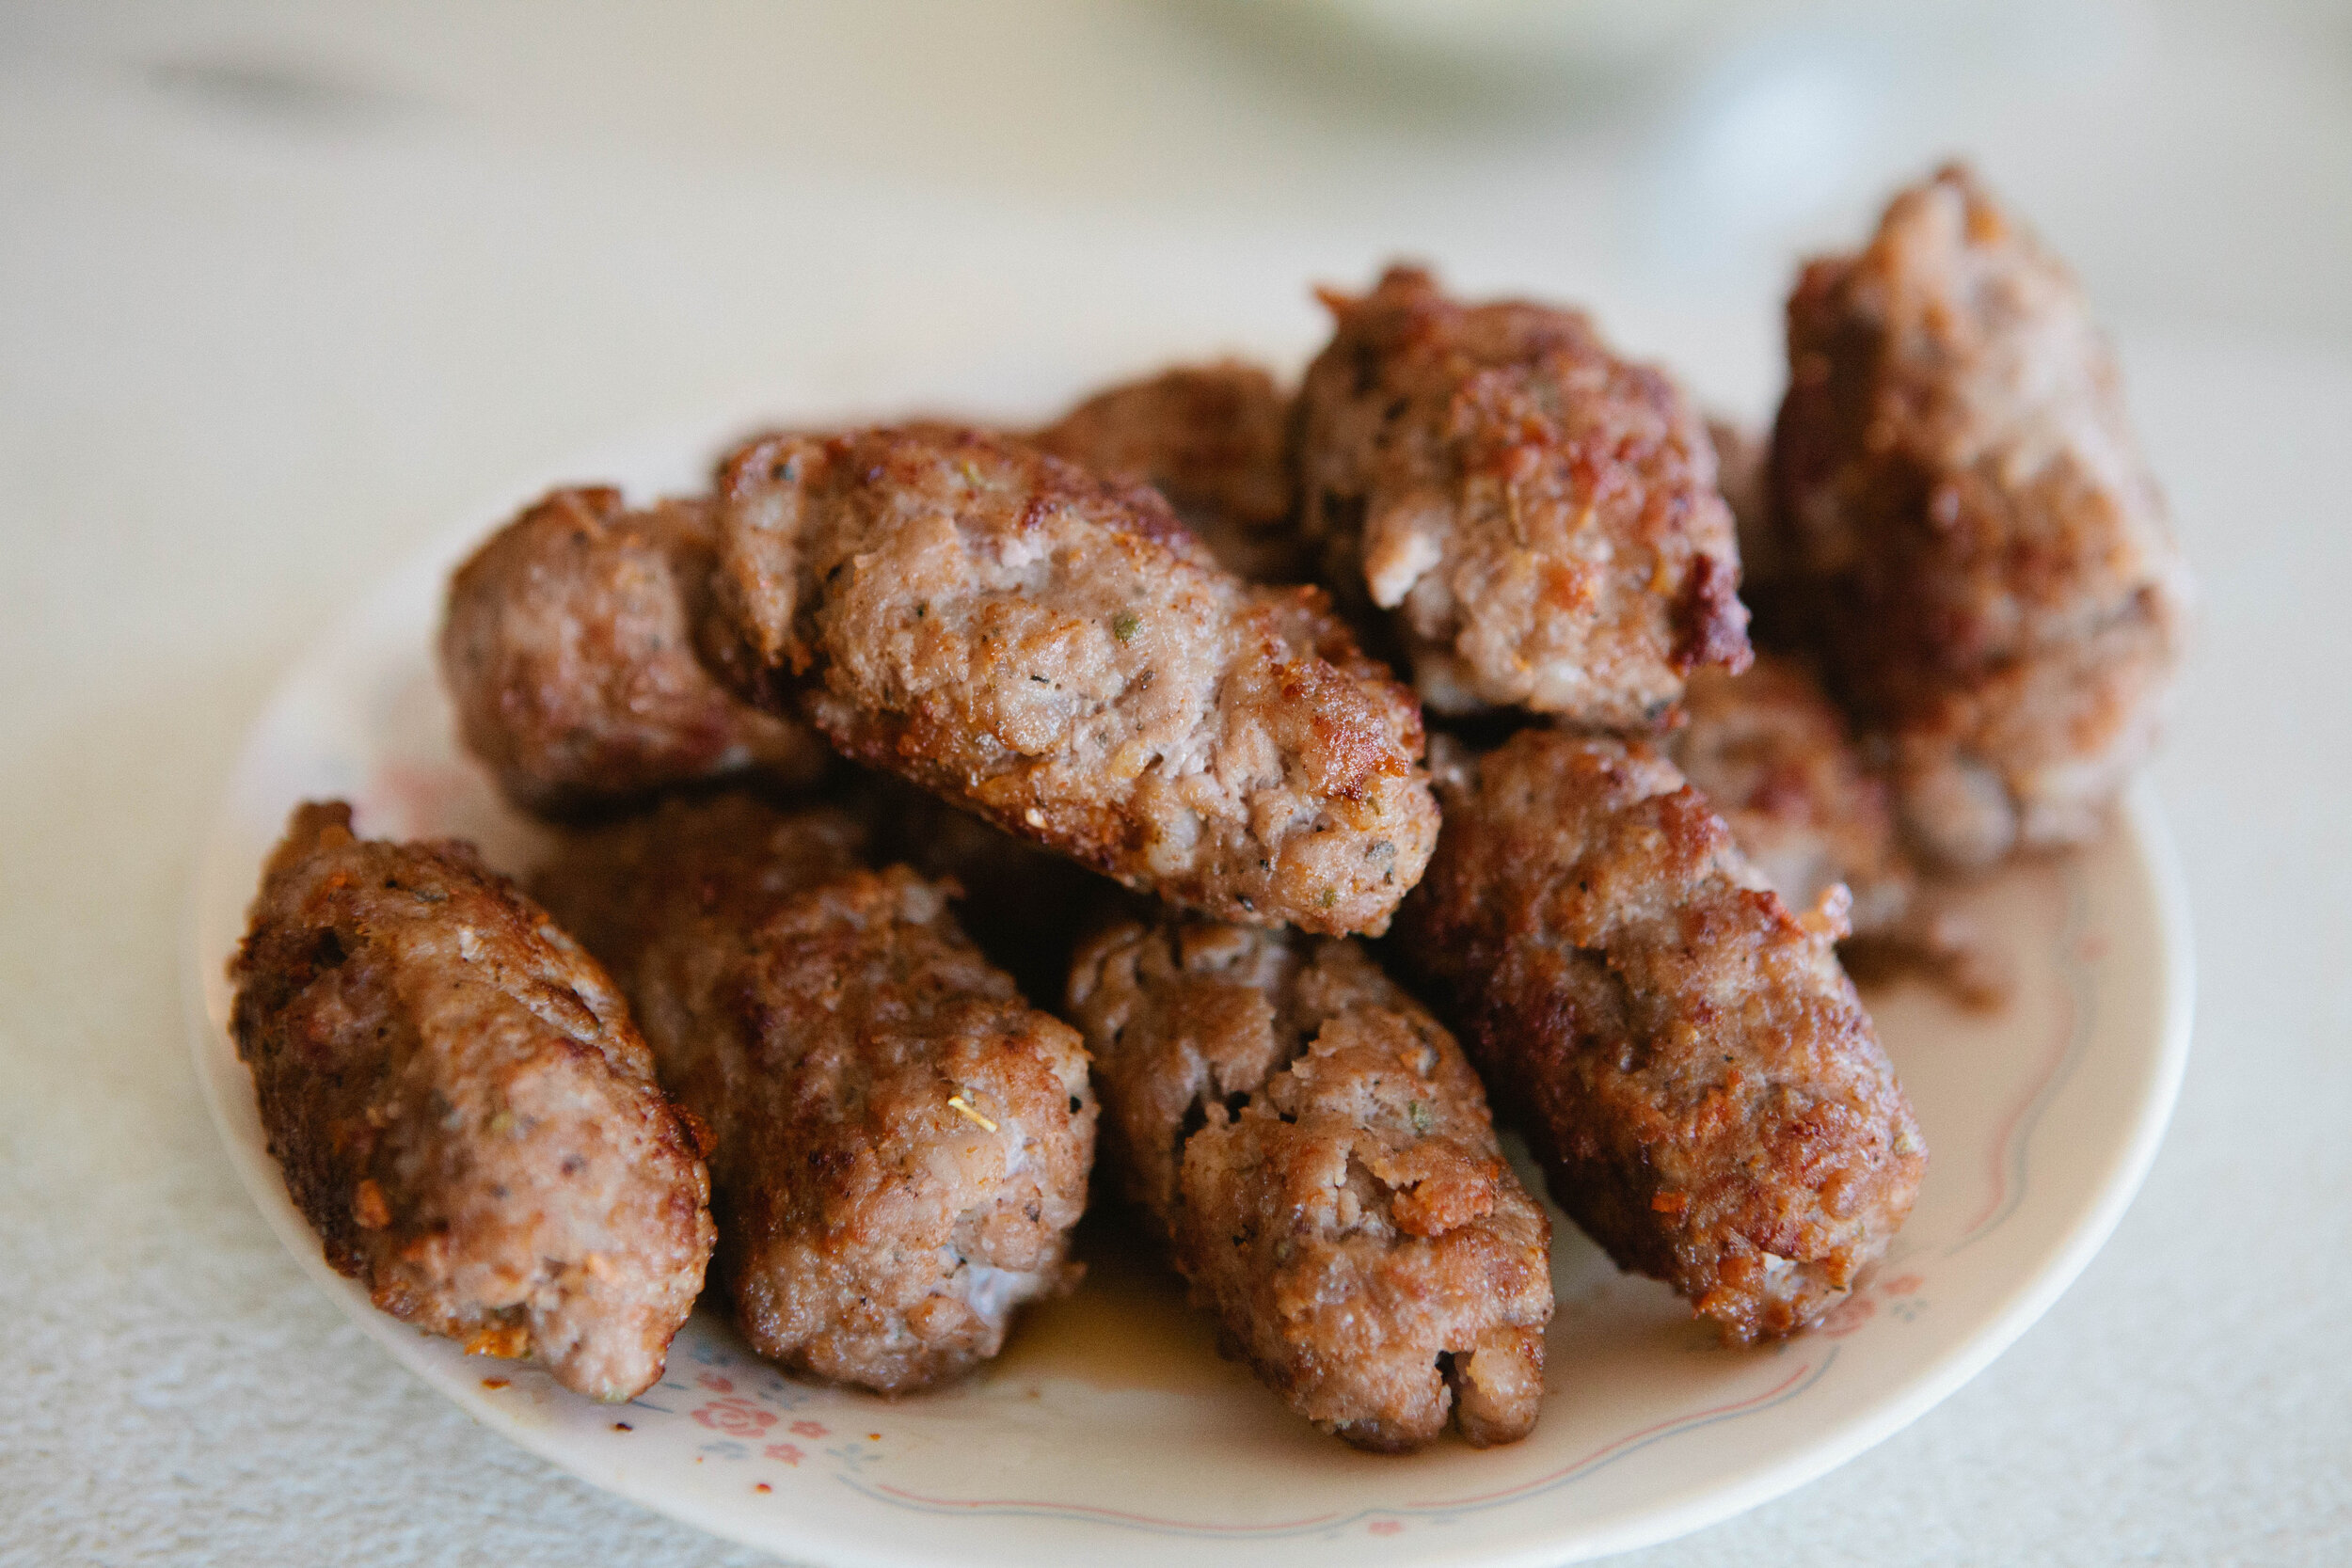
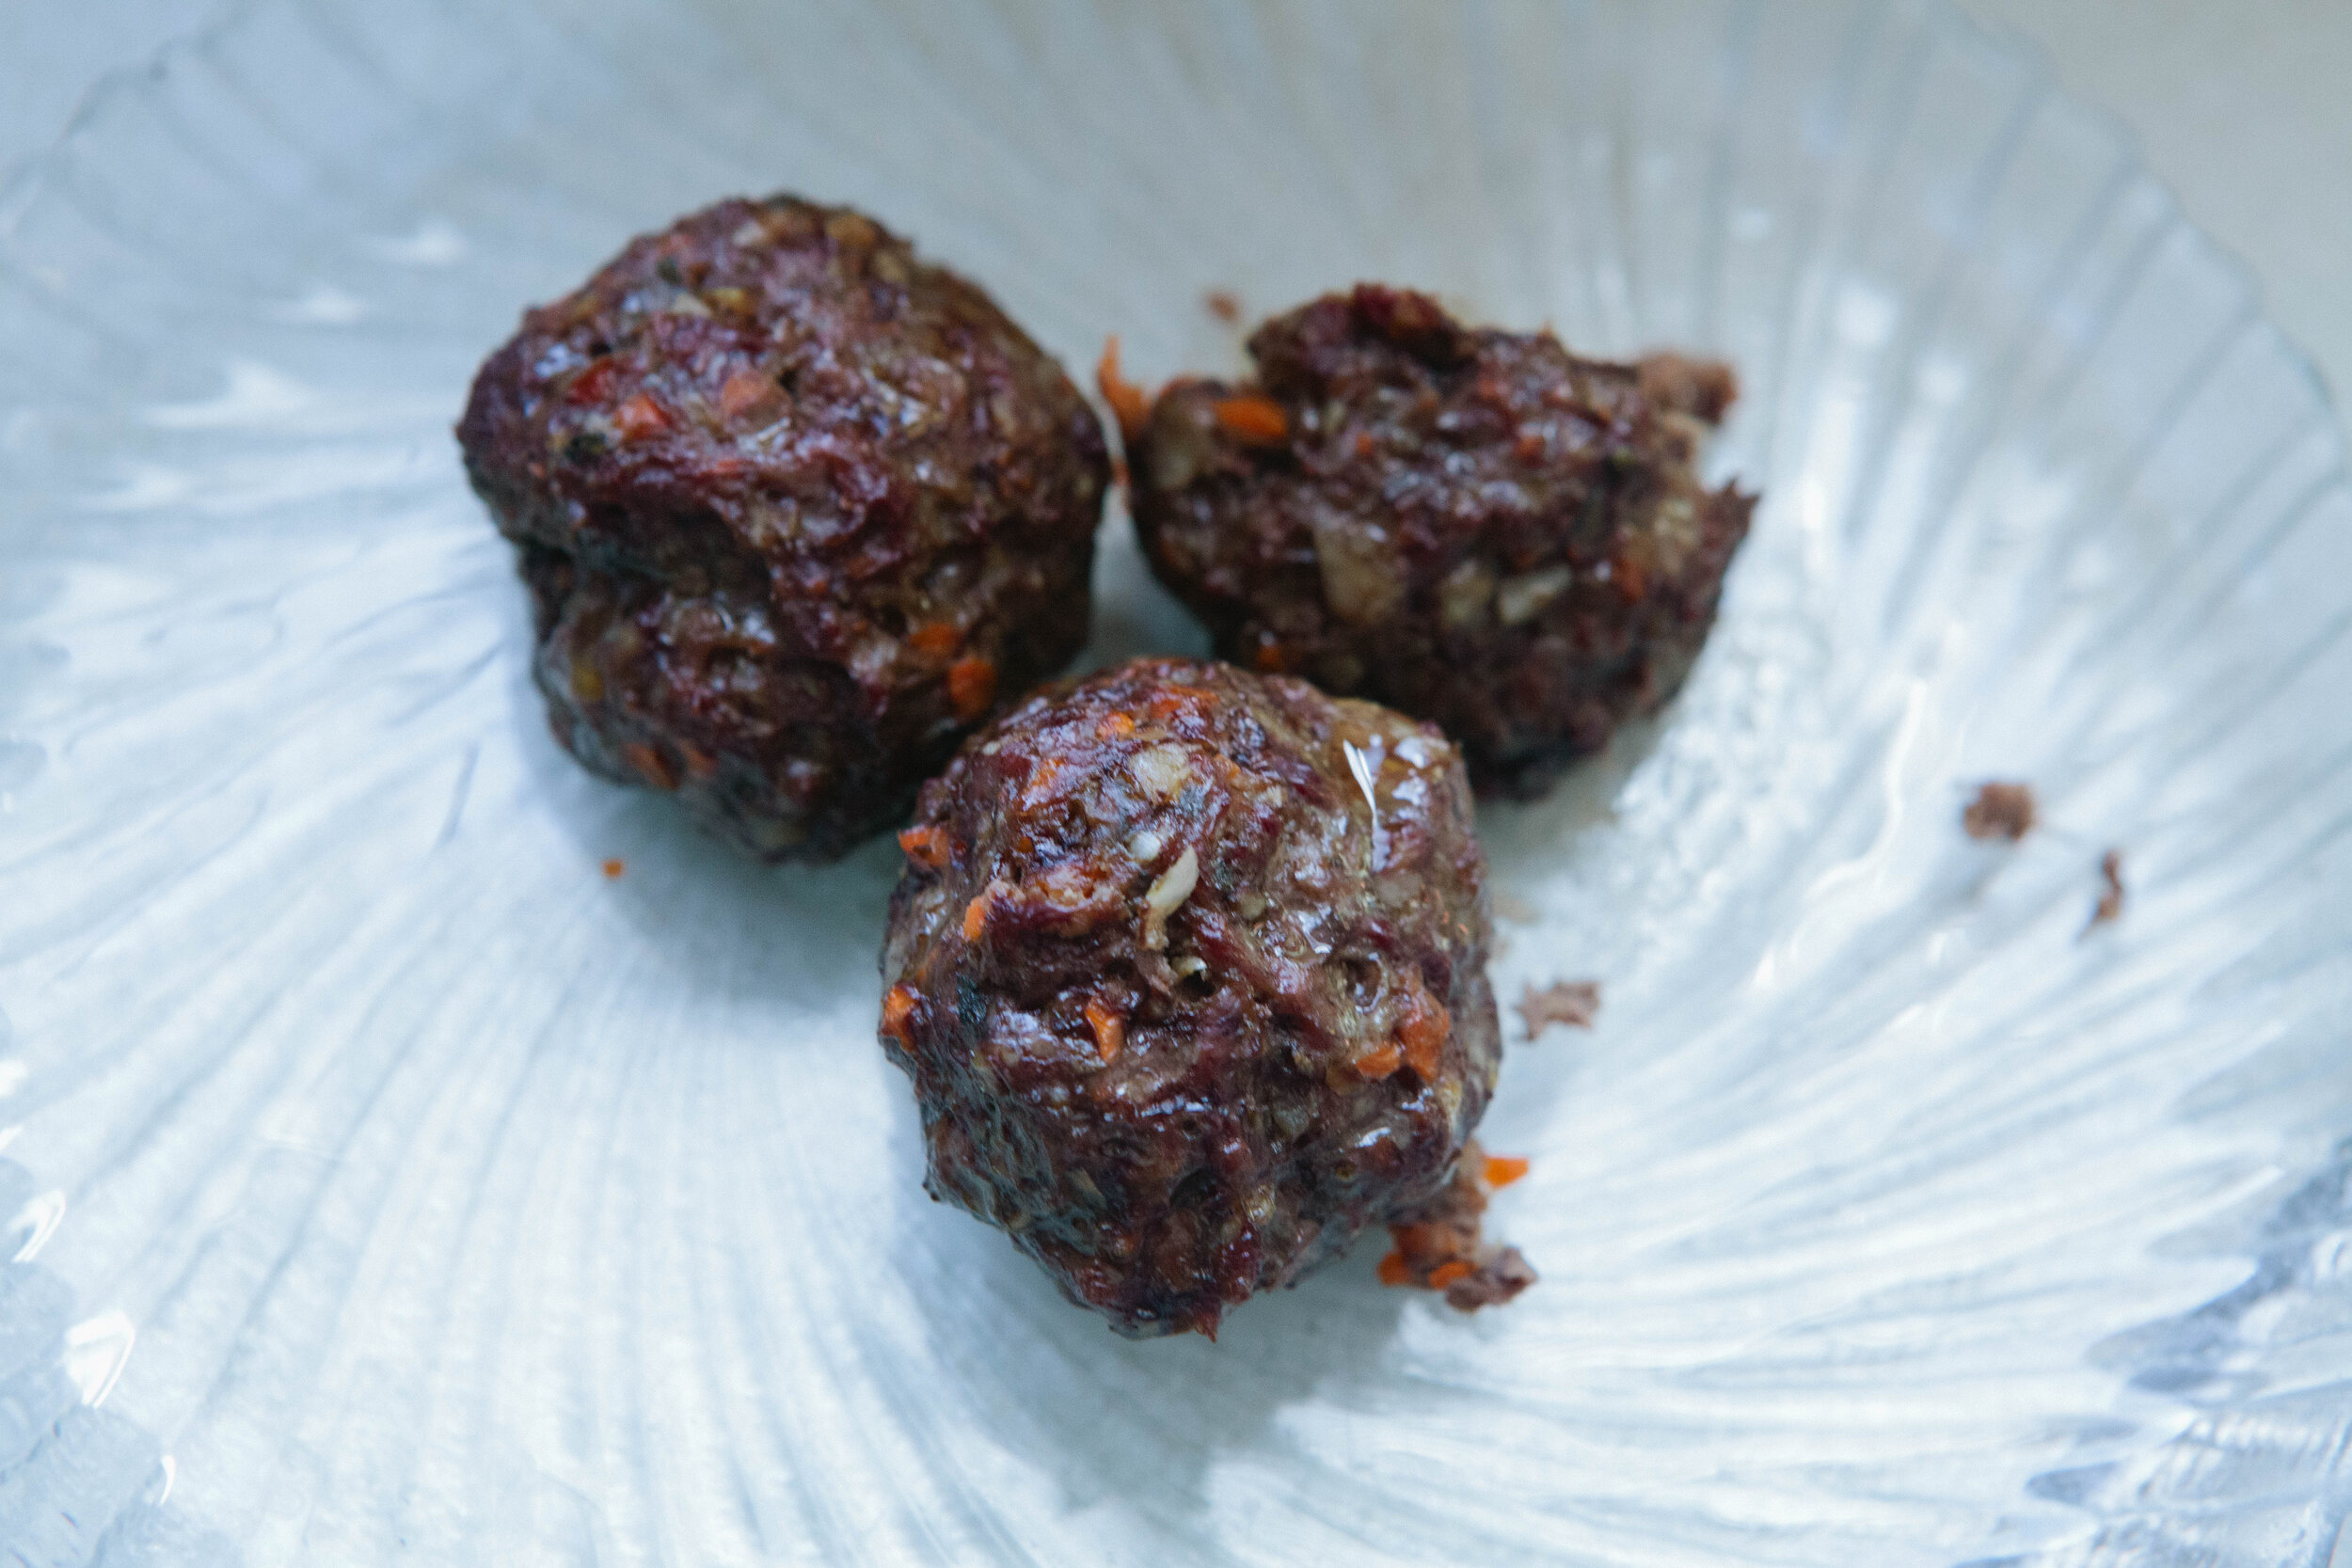
Egg Free, Dairy Free Liver Meatballs

Liver is an amazing superfood! It contains lots of vitamins and minerals, including zinc, iron, B vitamins, A vitamins, and folate. In our modern world, all of our livers are well taxed because of our exposure to chemicals. Anytime we know we need to support a particular organ, one of the best ways to do that is to consume the organ meat of the organ you’re trying to support.

You can spice your meatballs with anything you want but think of strong flavors. You want to neutralize the flavor of the liver.  You can also add any additional vegetables that you know your family likes. If you add additional vegetables like zucchini, eggplant or peppers and are finding the consistency of the meatball mixture to not be very sticky, you may want to add an egg to help bind everything together. Otherwise, these meatballs are egg free and dairy free!

This is a recipe that I recommend to a lot of moms! It’s a great way to help your kids eat a little bit of liver every day, which is the best way to eat liver. This recipe makes a lot of meatballs so you can freeze them and take out a few at a time to have for lunch or dinner.

Makes 27-30 Meatballs

Ingredients for Liver Meatballs:

  • 2 lb ground beef

  • ½ lb beef liver

  • 2 carrots, about 1 cup grated

  • ⅓ large white onion, about ⅔ a cup grated

  • 6 large cloves of Garlic

  • Oregano, 1 bunch Fresh or 1 tbsp Dried

  • Basil, 1 bunch Fresh or 1 tbsp Dried

  • ¼ - ½ tsp Pepper

  • 2 tsp Salt

  • 1 tbsp lard

Directions for Liver Meatballs:

IMG_6158.jpg

For milder tasting liver, soak it in some kind of acid. Cover the liver in filtered water and then add the juice of one lemon or 1-2 tablespoons of apple cider vinegar. Leave to soak for 30 minutes. Be sure not to soak it for too long. The acid will break down the liver and start it “cooking” prematurely.

Preheat your oven to 375.

IMG_6175.jpg

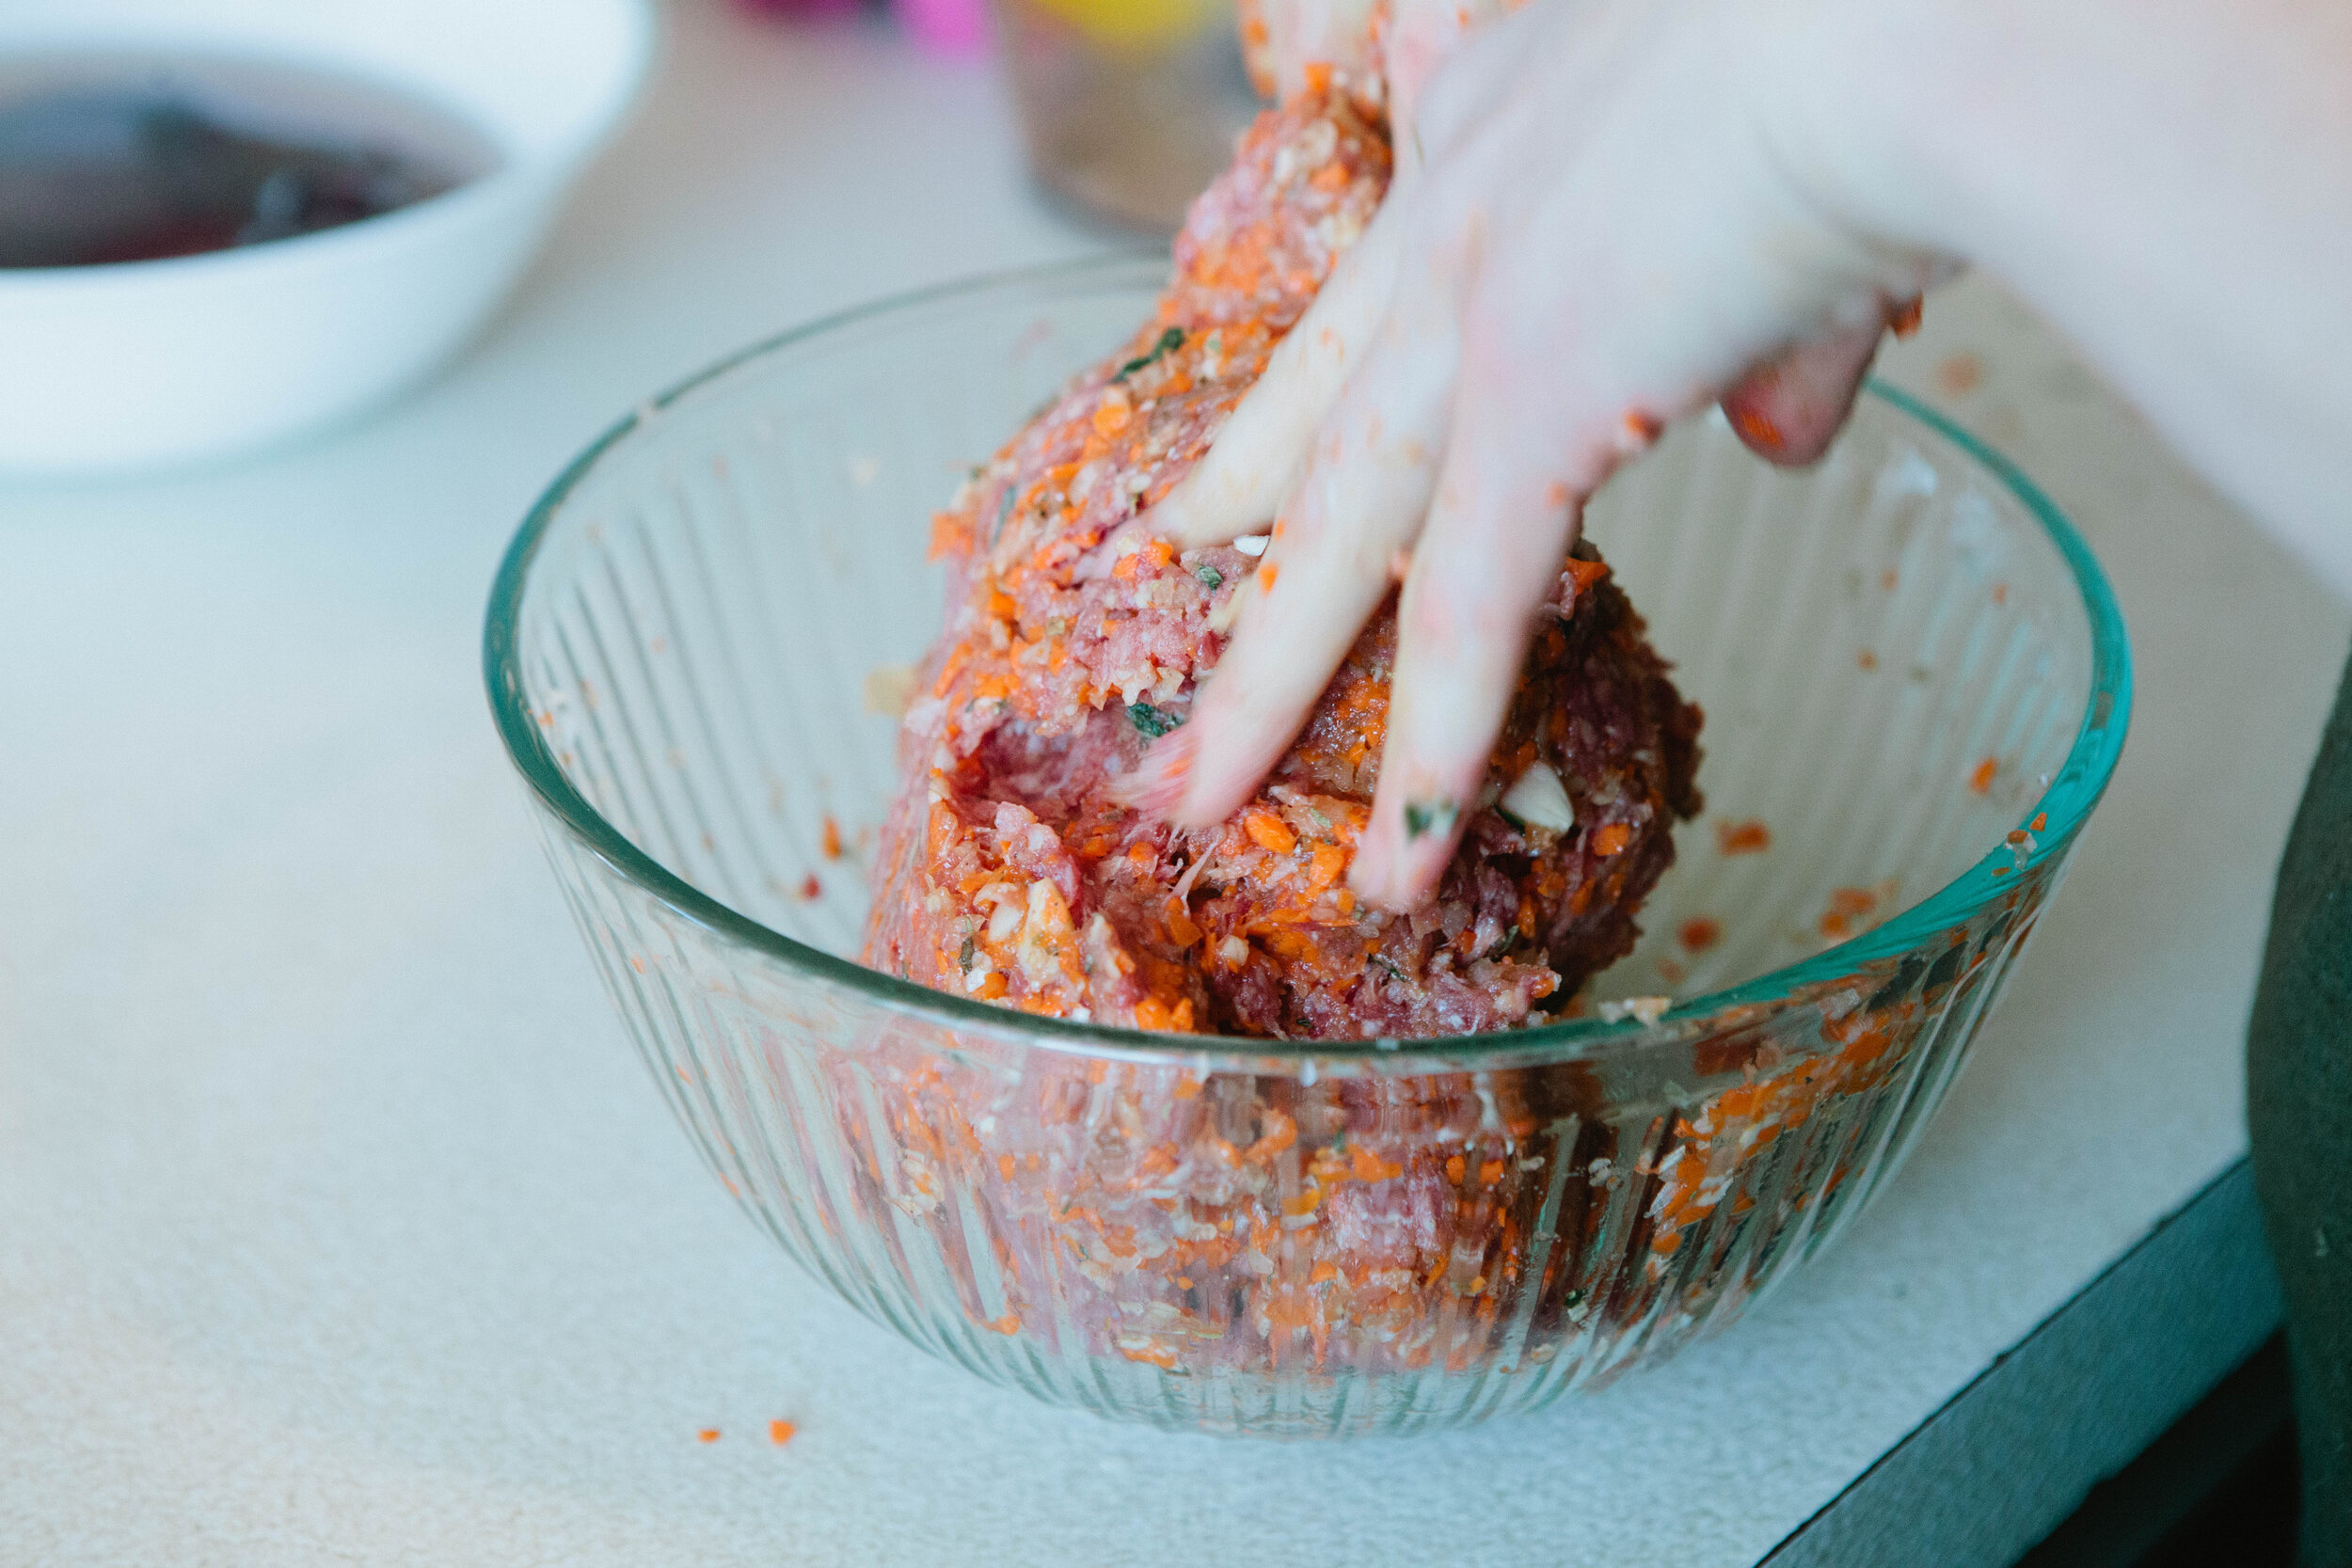
Grate your carrot, onion and garlic into very fine pieces. Add to a large bowl with ground beef. Add in oregano, basil and salt and pepper. Mix with your hands. 

IMG_6189.jpg

Place your liver into a food processor once it has soaked. Pulse until smooth. Add to the bowl with the beef, vegetables and spices and mix again.

IMG_6214.jpg

Spread lard onto the bottom of a glass oven safe casserole dish. 

IMG_6224.jpg

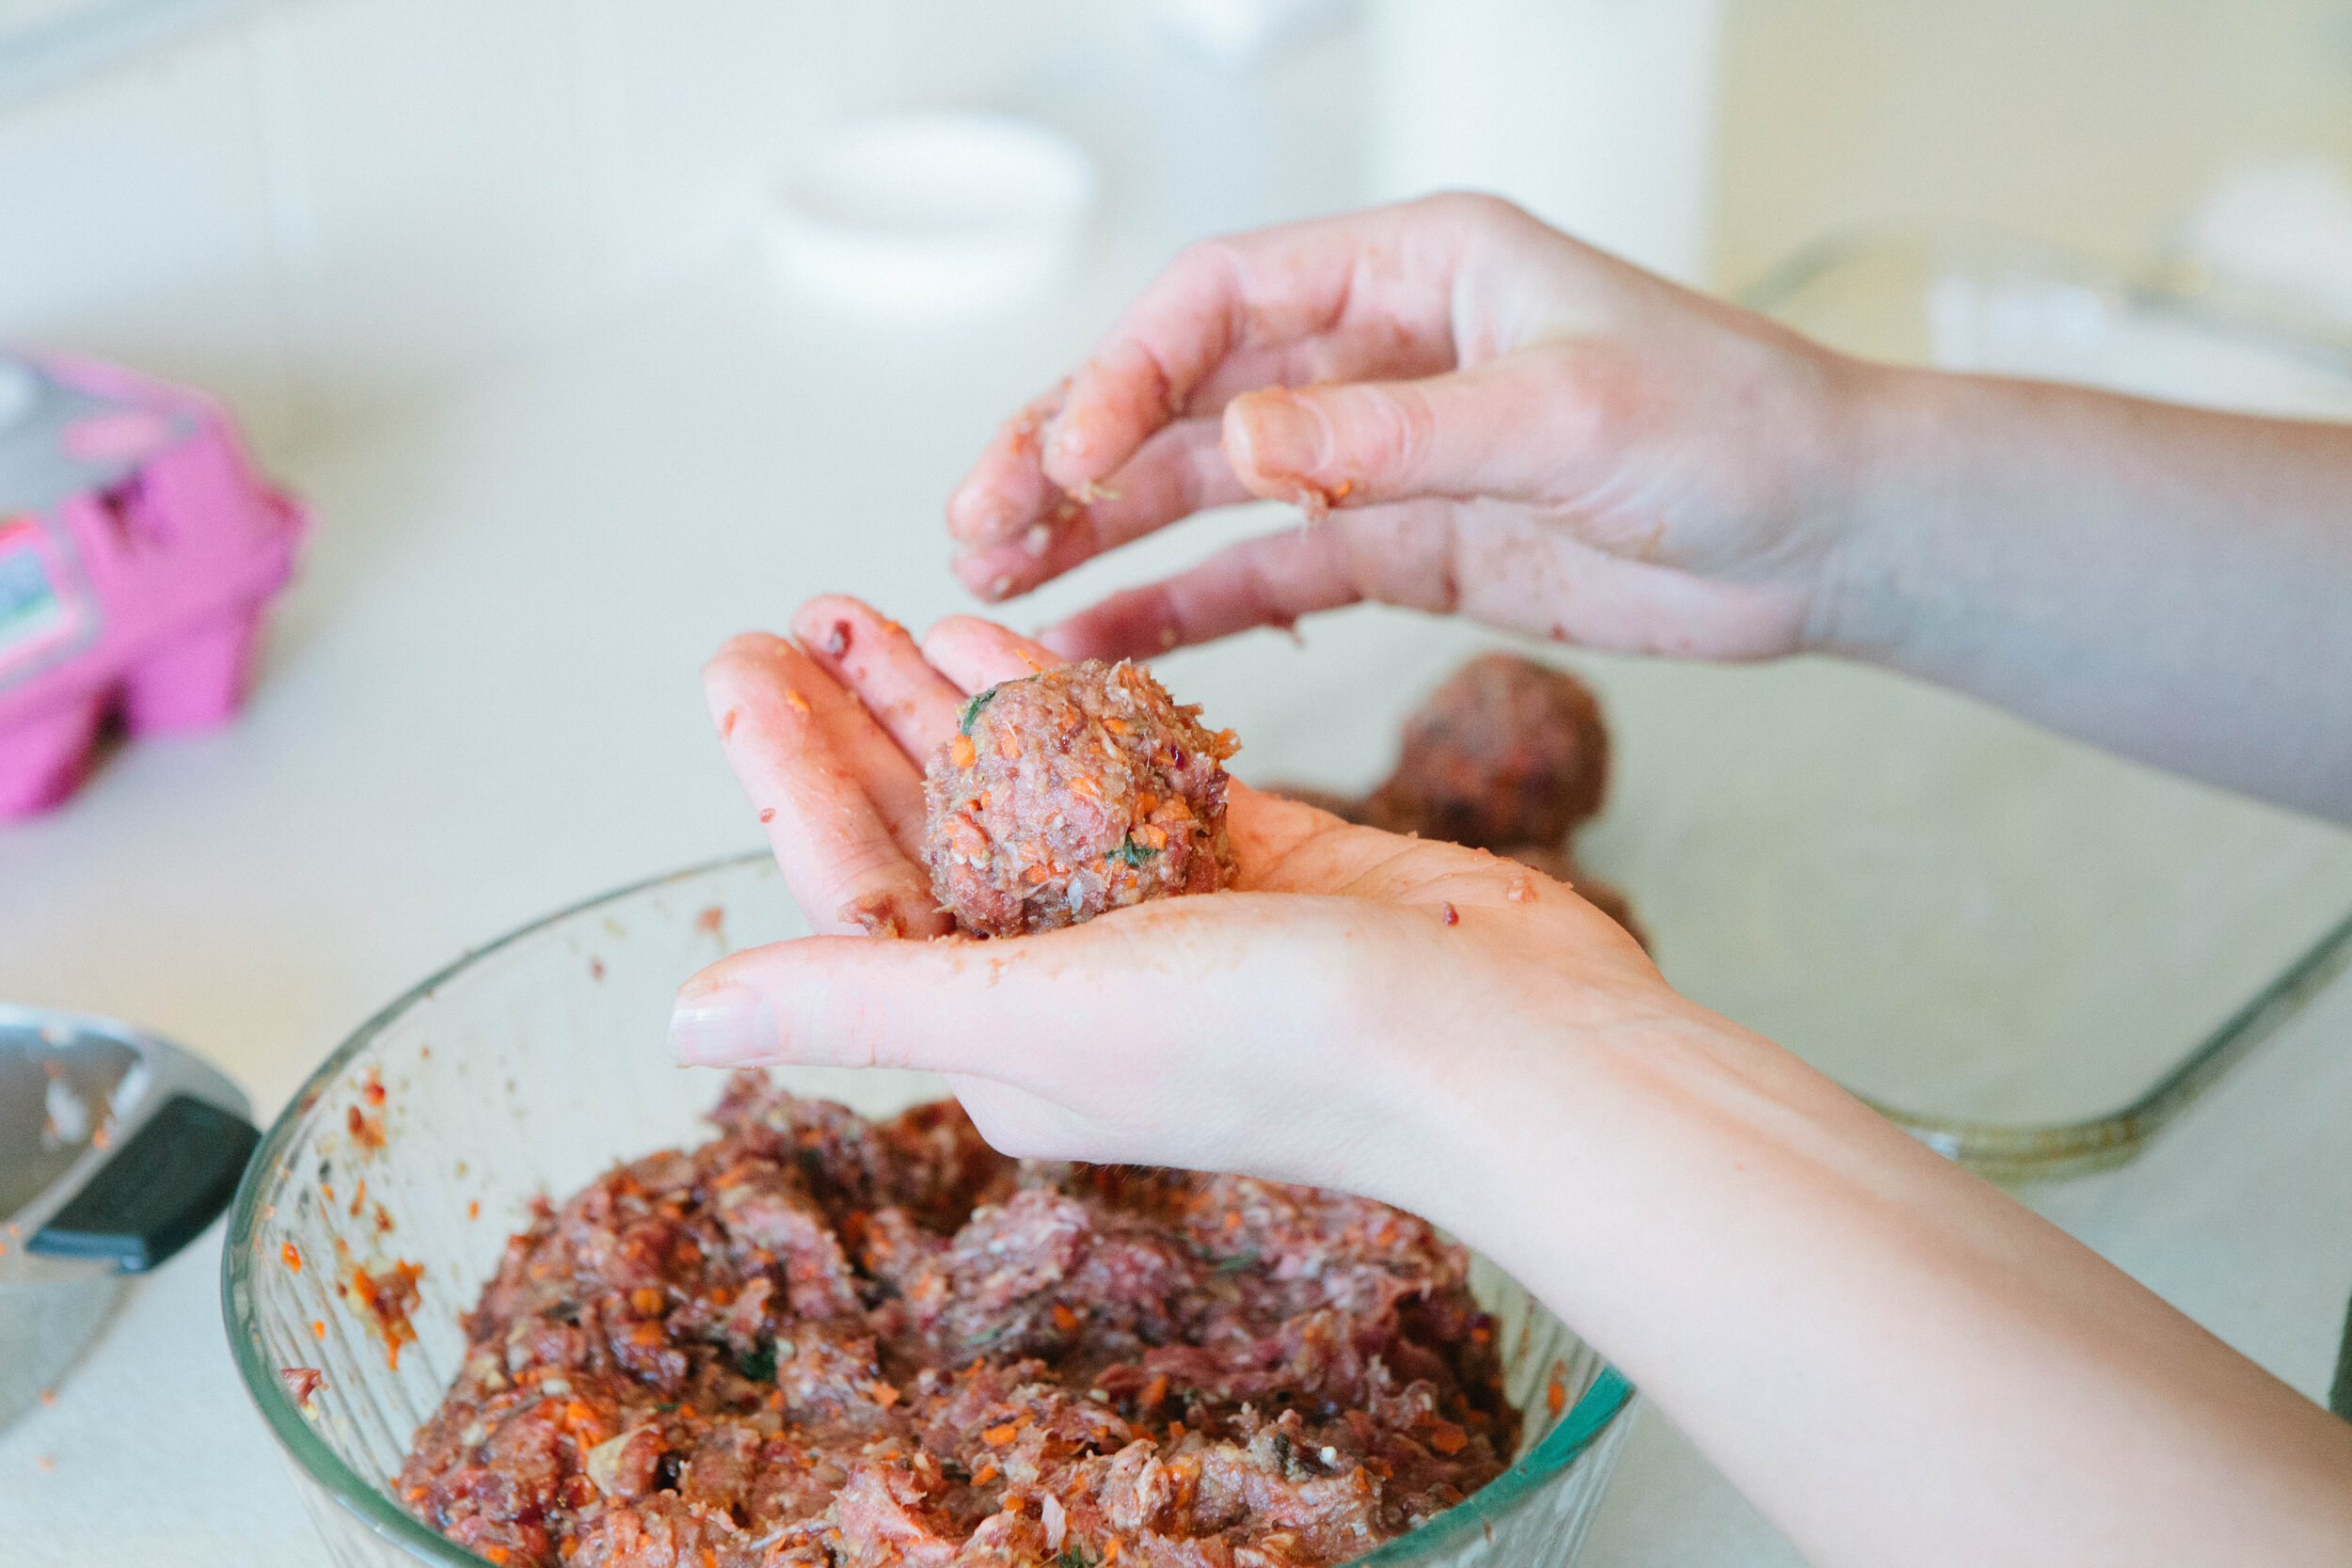
Take a small handful of meat at a time and roll into a meatball. Continue to roll meatballs until you have filled your casserole dish. Keep consistency in the size and shape of your meatballs to ensure even cooking time.

IMG_6229.jpg

Line meatballs, leaving some space between them.

Bake for 45 minutes.

IMG_6353.jpg

Enjoy with spaghetti squash and make your own spaghetti sauce for a spaghetti night. Or enjoy with any variety of vegetables like brussels sprouts or broccoli!

Egg Free, Dairy Free Liver Meatballs

prep time: cook time: total time:

ingredients:

  • 2 lb ground beef
  • ½ lb beef liver
  • 2 carrots, about 1 cup grated
  • ⅓ large white onion, about ⅔ a cup grated
  • 6 large cloves of Garlic
  • Oregano, 1 bunch Fresh or 1 tbsp Dried
  • Basil, 1 bunch Fresh or 1 tbsp Dried
  • ¼ - ½ tsp Pepper
  • 2 tsp Salt
  • 1 tbsp lard

instructions:

How to cook Egg Free, Dairy Free Liver Meatballs
  1. For milder tasting liver, soak it in some kind of acid. Cover the liver in filtered water and then add the juice of one lemon or 1-2 tablespoons of apple cider vinegar. Leave to soak for 30 minutes. Be sure not to soak it for too long. The acid will break down the liver and start it “cooking” prematurely.
  2. Preheat your oven to 375.
  3. Grate your carrot, onion and garlic into very fine pieces. Add to a large bowl with ground beef. Add in oregano, basil and salt and pepper. Mix with your hands.
  4. Place your liver into a food processor once it has soaked. Pulse until smooth. Add to the bowl with the beef, vegetables and spices and mix again.
  5. Spread lard onto the bottom of a glass oven safe casserole dish.
  6. Take a small handful of meat at a time and roll into a meatball. Continue to roll meatballs until you have filled your casserole dish. Keep consistency in the size and shape of your meatballs to ensure even cooking time.
  7. Line meatballs, leaving some space between them.
  8. Bake for 45 minutes.
  9. Enjoy with spaghetti squash and make your own spaghetti sauce for a spaghetti night. Or enjoy with any variety of vegetables like brussels sprouts or broccoli!
Created using The Recipes Generator
42.png

Homemade Gummy Snacks

Vitamin C and collagen work together to build healthy cells and mucus membranes, as well as healthy joints and skin. Anything with a structure needs vitamin c alongside collagen. These gummies are a good way for both children and adults to get collagen and vitamin c together! These gummies are stage five legal on the GAPS Diet because they are cooked fruit.

I got the basics proportions for this recipe from Integrative Health Coaching Services and modified it to fit my own needs. Depending on what proportions you use, the chart included on the Integrative Health Coaching Services website can help you decide how many gelatin squares to eat. If your children really love these gummies, you can decrease the amount of acerola cherry powder so that they can consume more gummy treats. These can also be great ABA technique rewards to get your child to eat the foods you want them to eat.

I recommend experimenting with adding other things like probiotic powders,and other supplements in these gummies. Just make sure you add anything live when the gummies are not too hot. Wait until the later stages when the mixture is cool enough so you don’t kill it. 

I once made a bold choice and experimented with adding desiccated liver in a quest to figure out what other supplements can be added to the mixture. I don’t think liver was the best choice. There’s nothing wrong with consuming them; they just smell and taste like liver, which isn’t the flavor profile you’d expect. 

I made strawberry gummies but you could also make any berry into a gummy. Other fruit, like apples and bananas, will not work to make gummies at home. Frozen berries are actually a great choice because they are picked ripe and frozen while in season. You could also harvest your own berries locally and freeze them yourself.

Ingredients;

  • 1 heaping cup frozen berries

  • 1/2 Cup lemon juice

  • 1/4 Cup grass fed gelatin

  • 3-4 Tbsp.. Acerola cherry powder 

  • 1 tbsp honey

Directions:

strawberry-gummies-homemade-gummy-snacks-gaps-legal-gummies-gummy-snack-made-with-gelatin-diy-gummy-bear

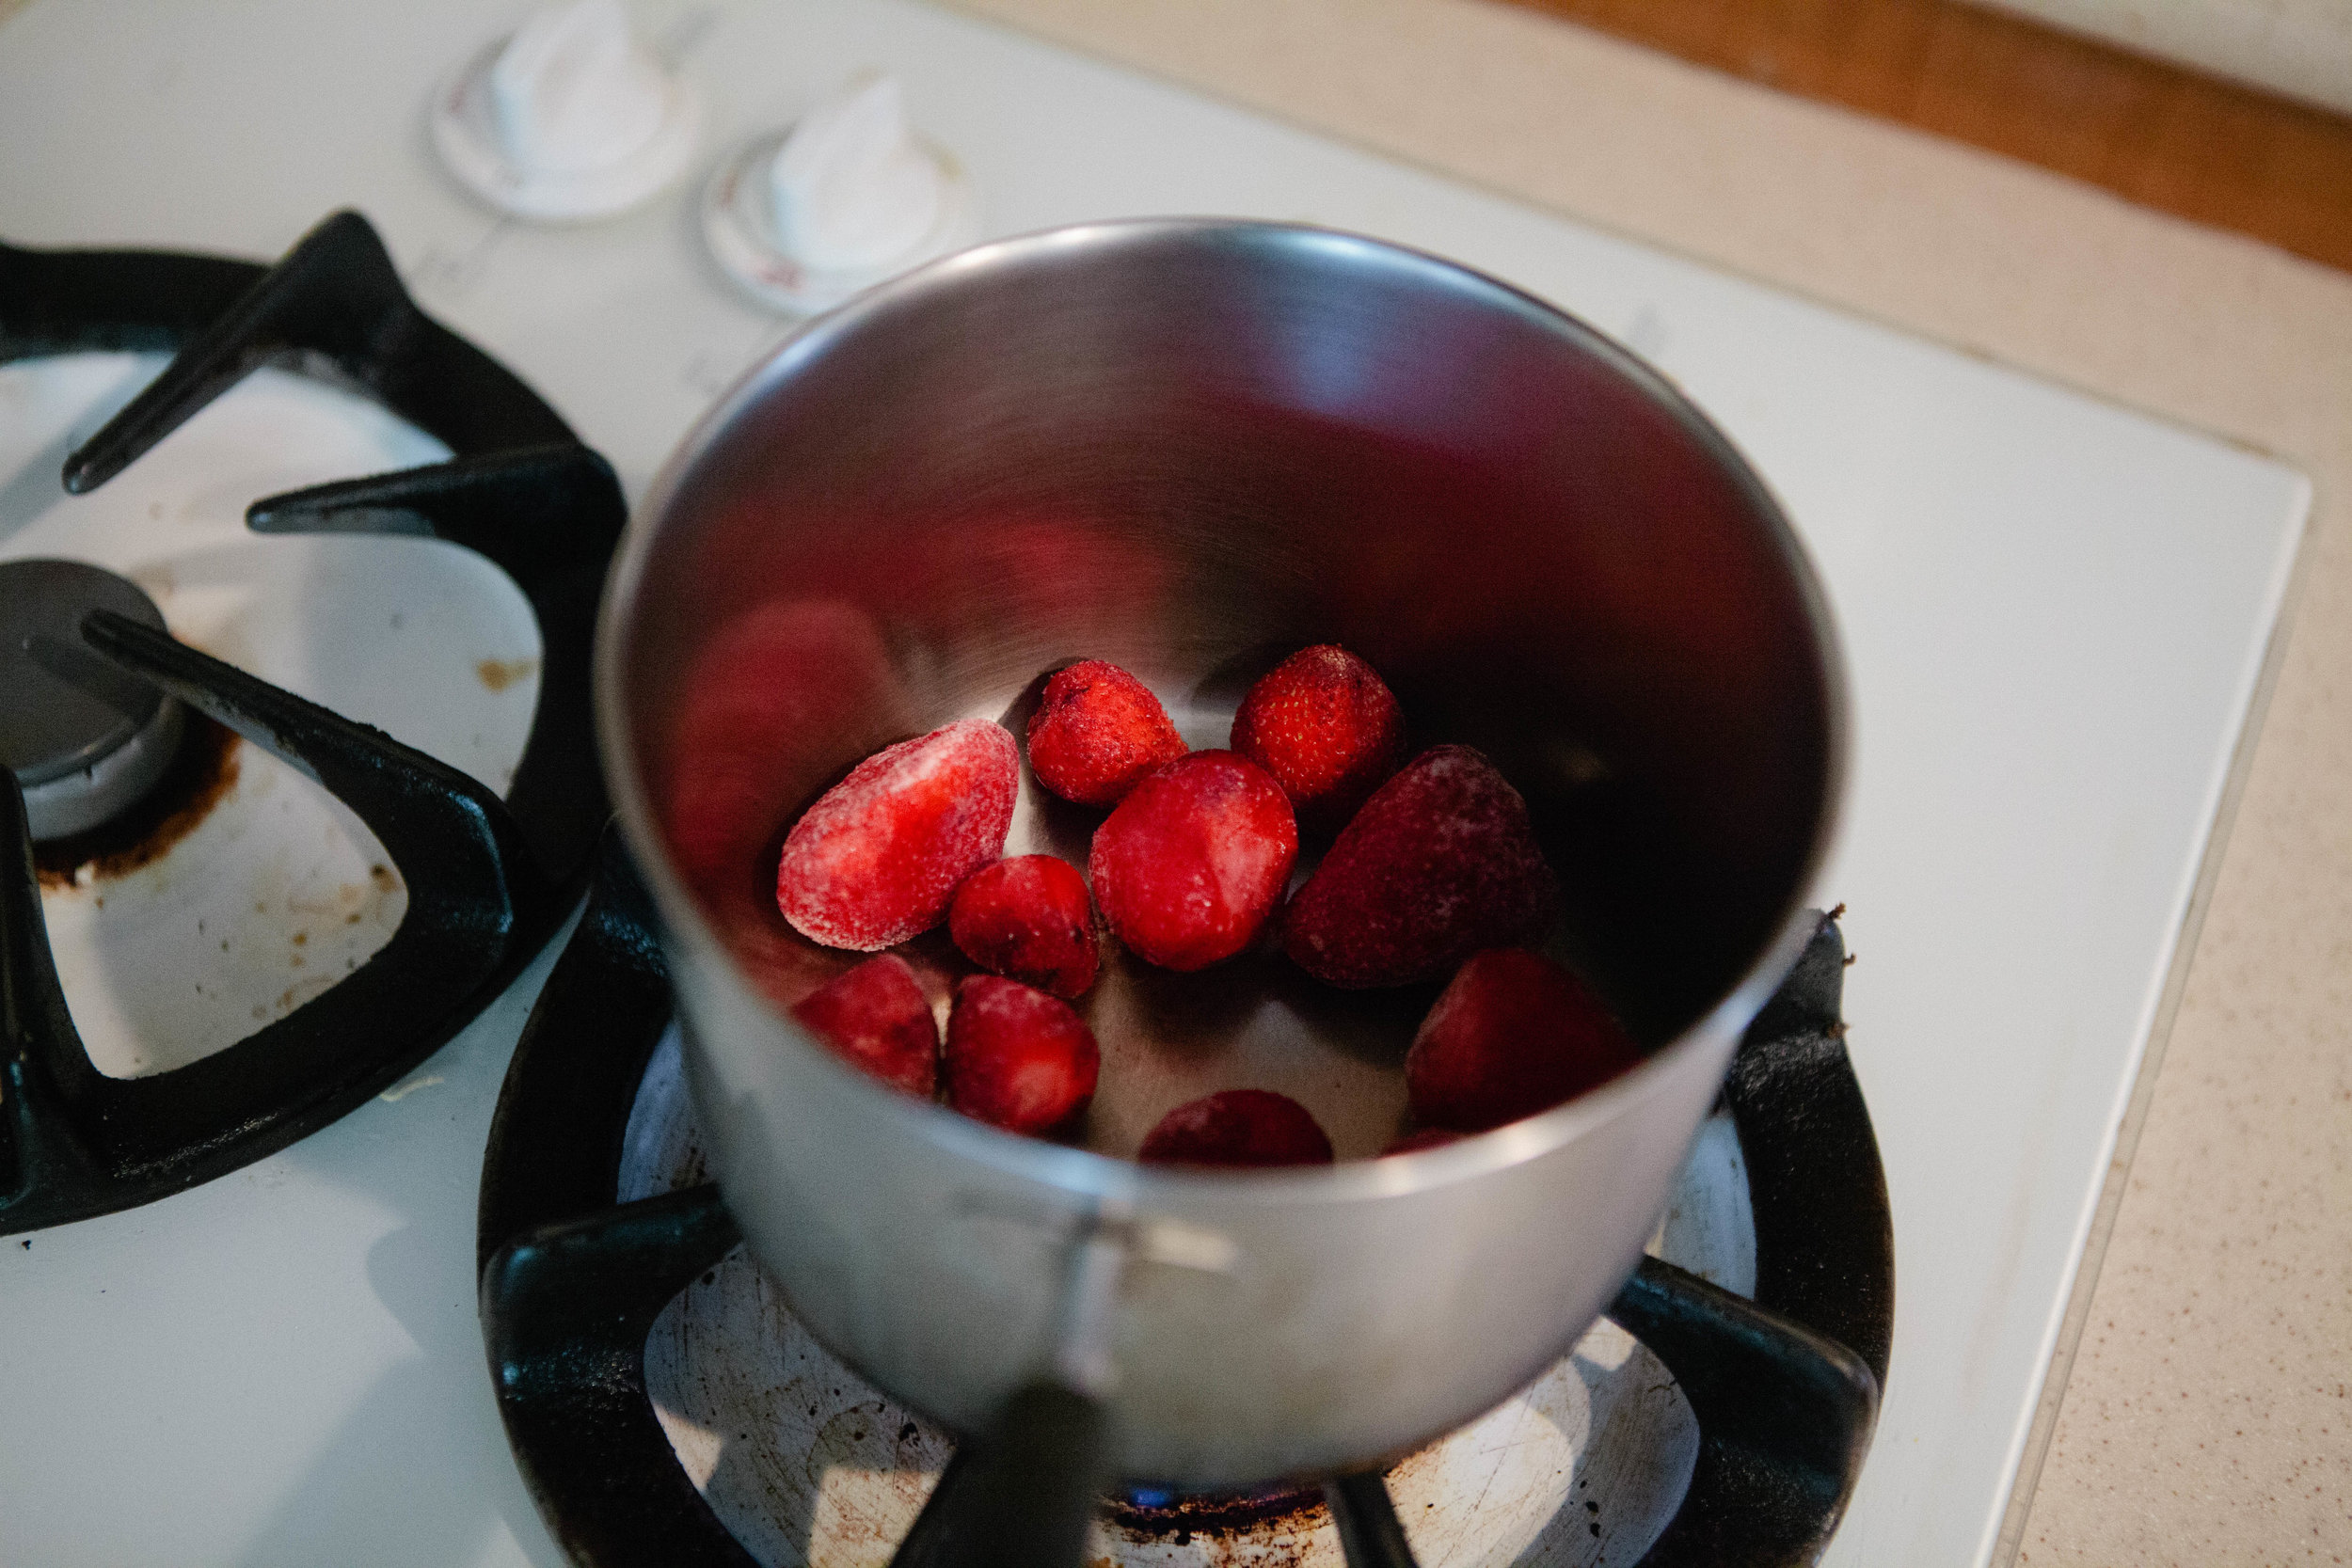
Add 1 heaping cup of frozen strawberries to a pot. Add enough water to cover the bottom. Turn the stove on to medium heat.

Help the berries break apart by stirring them with a spoon. 

When they start to get really soft, turn the stove to a low heat simmer.

strawberry-gummies-homemade-gummy-snacks-gaps-legal-gummies-gummy-snack-made-with-gelatin-diy-gummy-bear

Blend softened berries and lemon juice in a blender.

strawberry-gummies-homemade-gummy-snacks-gaps-legal-gummies-gummy-snack-made-with-gelatin-diy-gummy-bear

Once smooth, add back into pot. Add in gelatin and acerola cherry powder. Whisk well for about ten minutes until all combined.

Add honey at the end so that you are not cooking the honey.

strawberry-gummies-homemade-gummy-snacks-gaps-legal-gummies-gummy-snack-made-with-gelatin-diy-gummy-bear

Pour into a glass baking dish.

If you are adding a probiotic powder, make sure your mixture is cooled enough to where you can easily leave a finger in it before adding the powder. This will ensure you do not kill the probiotics.

strawberry-gummies-homemade-gummy-snacks-gaps-legal-gummies-gummy-snack-made-with-gelatin-diy-gummy-bear

Set in fridge to chill. Gummies should be chilled in about 40 minutes. Slice around the sides and cut into cubes to remove from glass pan.

Homemade Gummy Snacks

prep time: cook time: total time:

ingredients:

  • 1 heaping cup frozen berries
  • 1/2 Cup lemon juice
  • 1/4 Cup grass fed gelatin
  • 3-4 Tbsp.. Acerola cherry powder
  • 1 tbsp honey

instructions:

How to cook Homemade Gummy Snacks

  1. Add 1 heaping cup of frozen strawberries to a pot. Add enough water to cover the bottom. Turn the stove on to medium heat.
  2. Help the berries break apart by stirring them with a spoon.
  3. When they start to get really soft, turn the stove to a low heat simmer.
  4. Blend softened berries and lemon juice in a blender.
  5. Once smooth, add back into pot. Add in gelatin and acerola cherry powder. Whisk well for about ten minutes until all combined.
  6. Add honey at the end so that you are not cooking the honey.
  7. Pour into a glass baking dish.
  8. If you are adding a probiotic powder, make sure your mixture is cooled enough to where you can easily leave a finger in it before adding the powder. This will ensure you do not kill the probiotics.
  9. Set in fridge to chill. Gummies should be chilled in about 40 minutes. Slice around the sides and cut into cubes to remove from glass pan.
Created using The Recipes Generator
34.png

Ways to Eat Eggs on the GAPS Diet

Dr. Natasha recommends that a child eats between three and six egg yolks a day and an adult should eat six to twelve. You may consume the whites with this if you are tolerating them or simply use the yolk only.

Egg whites are best eaten cooked. They are very detoxifying when they’re raw and when they’re raw, they require a lot of things to properly digest them. All the necessary things needed for digestion are in egg yolks so it’s important to consume the egg whites and egg yolks at the same time. Egg yolks are best eaten raw or very lightly cooked. This keeps the fragile nutrients inside egg yolks intact.

If you are having digestive issues, you should eat egg whites cooked only. After you have healed, you can consume raw egg whites.*

*Eating uncooked or raw eggs or feeding raw eggs to your pets can pose a risk to your health.

IMG_1345.jpg
Scrambled-Eggs-How-To-Make-Scrambled-Eggs-Eggs-on-the-GAPS-Diet-GAPS-Protocol-Best-Scrambled-Eggs-Ever.jpeg

How to Poach an Egg in Meat Stock

How to Make the Best Scrambled Eggs

download.jpeg
how-to-make-an-omelette-best-way-to-make-an-omelette-huge-omelette-gaps-legal-eggs-gaps-legal-omelette-gaps-friendly-breakfast-gaps-friendly-omelette-gaps-diet-gaps-protocol-cert.jpeg

How to Make a Soft or Hard Boiled Egg

How to Make the Best Omelette

IMG_2202.jpg
Hollandaise-Sauce-Easy-Sauce-for-Eggs-Hollandaise-with-Limes.jpeg

How to Make Russian Custard

How to Make Hollandaise Sauce

How to Make Mayo Free Deviled Eggs Two Ways


Simple Easy Hollandaise Sauce Recipe

GAPS Legal Hollandaise Sauce Recipe Made with Limes

What do you do when you are bored or eggs two ways (scrambled or fried?)... make hollandaise sauce, of course!

I'm not sure how the true chefs will react to this recipe because I'm sure I don't get my hollandaise sauce as smooth as it's supposed to be, but so many of you have asked for this favorite recipe of mine that I want to share it here! I have now made this sauce dozens of times and there are a few principles I have learned about what makes this dish different than plain scrambled eggs.

#1 Don't do this in a cast-iron or your eggs will taste like iron.

#2 Lower heat makes for smoother sauce. But if you are in a hurry and don't mind lumps, more heat and less time still creates a delicious meal.

#3 The acid (lime or lemon juice) is the real key to this dish. I make my plain scrambled eggs with similar amounts of butter, but it is the lime that makes the eggs more smooth.

#4 I prefer lime over lemon because it is more mild and I feel I can add more of it without overpowering the dish. I believe this makes the hollandaise sauce easier to successfully make. After having done this many times there is a color change I look for when adding the lime juice. When I achieve this color change I know that my sauce will turn out decently smooth.

As you make this sauce, don't give up if you don't achieve your desired smoothness the first time! As with most cooking, this is an art and skill that you will get better at with practice. Enjoy your hollandaise sauce!

Simple Hollandaise Sauce

Ingredients

  • 2 eggs

  • 3 (ish) tablespoons Butter

  • ½ lime, freshly squeezed

Directions

Hollandaise-Sauce-Easy-Sauce-for-Eggs-Hollandaise-with-Limes-

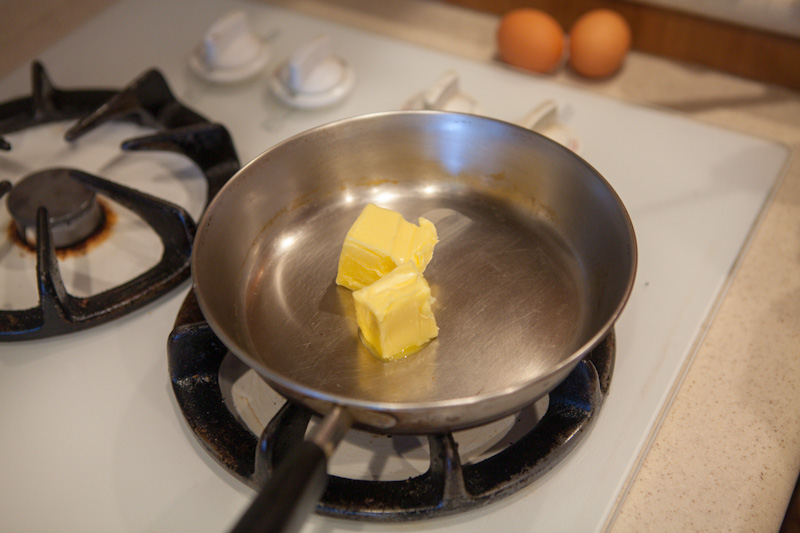
Melt butter in pan on very low heat.

Hollandaise-Sauce-Easy-Sauce-for-Eggs-Hollandaise-with-Limes

A smooth hollandaise sauce is achievable! Whisk the eggs quickly before adding to melted butter. Recipe by certified GAPS Practitioner Amy Mihaly, Be Well Clinic.

Beat two eggs in a bowl.

Hollandaise-Sauce-Easy-Sauce-for-Eggs-Hollandaise-with-Limes

Hollandaise Sauce is my most requested recipe! I eat this GAPS Legal and GAPS friendly sauce on chicken, vegetables and with eggs. It's also Whole 30 and Paleo friendly! Recipe by certified GAPS Practitioner Amy Mihaly, Be Well Clinic.

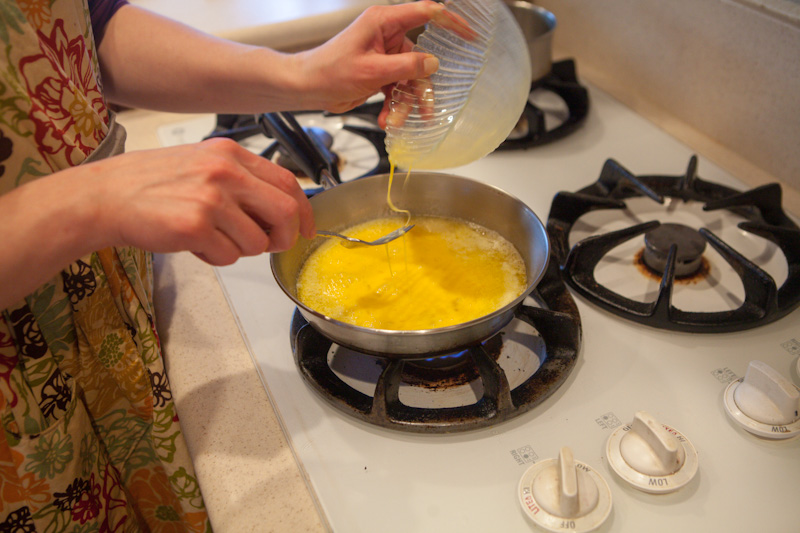
Add eggs to pan as soon as butter is melted.

Hollandaise-Sauce-Easy-Sauce-for-Eggs-Hollandaise-with-Limes

The key to making a good Hollandaise Sauce is to whisk constantly for a smooth sauce. This GAPS legal recipe couldn't be easier! Recipe by certified GAPS Practitioner Amy Mihaly, Be Well Clinic.

Mix sauce together, stirring constantly. Add lime juice. Using a whisk will get you a smoother sauce but I don’t mind a chunkier sauce.

If your eggs start to thicken, turn down your heat or add more lime juice.

Hollandaise-Sauce-Easy-Sauce-for-Eggs-Hollandaise-with-Limes

An easy simple recipe for Hollandaise Sauce with only three ingredients. This recipe is legal on the GAPS Diet, Whole 30 and Paleo. Recipe by certified GAPS Practitioner Amy Mihaly, Be Well Clinic.

The sauce is done when it holds together more and you can start to see the bottom of the pan.

Serve immediately! Serve with chicken, artichokes, vegetables.

Note:

Do not cook this is in an cast iron pan! Use a stainless steel pan with good heat protection.

HollandaiseSauce-683x1024.png

Hollandaise Sauce with Limes

Author:
prep time: cook time: total time:

ingredients:

  • 2 eggs
  • 3 (ish) tablespoons Butter
  • ½ lime, freshly squeezed

instructions:

How to cook Hollandaise Sauce with Limes

  1. Melt butter in pan on very low heat.
  2. A smooth hollandaise sauce is achievable! Whisk the eggs quickly before adding to melted butter. Recipe by certified GAPS Practitioner Amy Mihaly, Be Well Clinic.
  3. Beat two eggs in a bowl.
  4. Hollandaise Sauce is my most requested recipe! I eat this GAPS Legal and GAPS friendly sauce on chicken, vegetables and with eggs. It's also Whole 30 and Paleo friendly! Recipe by certified GAPS Practitioner Amy Mihaly, Be Well Clinic.
  5. Add eggs to pan as soon as butter is melted.
  6. The key to making a good Hollandaise Sauce is to whisk constantly for a smooth sauce. This GAPS legal recipe couldn't be easier! Recipe by certified GAPS Practitioner Amy Mihaly, Be Well Clinic.
  7. Mix sauce together, stirring constantly. Add lime juice. Using a whisk will get you a smoother sauce but I don’t mind a chunkier sauce.
  8. If your eggs start to thicken, turn down your heat or add more lime juice.
  9. An easy simple recipe for Hollandaise Sauce with only three ingredients. This recipe is legal on the GAPS Diet, Whole 30 and Paleo. Recipe by certified GAPS Practitioner Amy Mihaly, Be Well Clinic.
  10. The sauce is done when it holds together more and you can start to see the bottom of the pan.
  11. Serve immediately! Serve with chicken, artichokes, vegetables.
  12. Note:
  13. Do not cook this is in an cast iron pan! Use a stainless steel pan with good heat protection.
Created using The Recipes Generator

Swedish Gravlax Recipe

This meal is adapted from GAPS Cookbook by Dr. Natasha Campbell

This is a brined fish meal legal on GAPS stage 2. You eat little pieces, one small piece a day.

Swedish Gravlax Recipe

Ingredients for Swedish Gravlax:

  • ½ lb Fresh Wild Caught Salmon

  • Fresh Dill

  • Freshly Coarsely Ground Black Pepper

  • 4 cup Room Temperature Filtered Water

  • 1 tbsp Honey

  • 1 ½ tbsp Salt

Directions for Swedish Gravlax:

Swedish-Gravlax-Fermented-Salmon-Wild-Caught-Salmon-What-To-Do-With-Salmon-GAPS-Legal-Salmon-Recipe-GAPS-Diet-Salmon-Fish-On-GAPS-GAPS-Diet-Snack

Thinly slice the fish.

Swedish-Gravlax-Fermented-Salmon-Wild-Caught-Salmon-What-To-Do-With-Salmon-GAPS-Legal-Salmon-Recipe-GAPS-Diet-Salmon-Fish-On-GAPS-GAPS-Diet-Snack

Place fish slices into a deep tray.

Sprinkle with dill sprigs and pepper.

Swedish-Gravlax-Fermented-Salmon-Wild-Caught-Salmon-What-To-Do-With-Salmon-GAPS-Legal-Salmon-Recipe-GAPS-Diet-Salmon-Fish-On-GAPS-GAPS-Diet-Snack

Dissolve honey and salt in water to make a brine.

Pour brine over fish.

Swedish-Gravlax-Fermented-Salmon-Wild-Caught-Salmon-What-To-Do-With-Salmon-GAPS-Legal-Salmon-Recipe-GAPS-Diet-Salmon-Fish-On-GAPS-GAPS-Diet-Snack

Leave at room temperature for 1 - 1 ½ hours.

Pour the water out.

Serve on lettuce or eat alone.

Store in refrigerator and consume within two days.


Swedish Gravlax Recipe

Author:
prep time: cook time: total time:

ingredients:

  • ½ lb Fresh Wild Caught Salmon
  • Fresh Dill
  • Freshly Coarsely Ground Black Pepper
  • 4 cup Room Temperature Filtered Water
  • 1 tbsp Honey
  • 1 ½ tbsp Salt

instructions:

How to cook Swedish Gravlax Recipe

  1. Thinly slice the fish.
  2. Place fish slices into a deep tray.
  3. Sprinkle with dill sprigs and pepper.
  4. Dissolve honey and salt in water to make a brine.
  5. Pour brine over fish.
  6. Leave at room temperature for 1 - 1 ½ hours.
  7. Pour the water out.
  8. Serve on lettuce or eat alone.
  9. Store in refrigerator and consume within two days.
Created using The Recipes Generator

Chocolate Fudge Made with Coconut

GAPS Legal Chocolate Peppermint Coconut Fudge and Citrus Coconut Fudge

The GAPS Legal Fudge is a delicious holiday recipe and easy to share with family and friends! This recipe comes together quickly, besides the melting of the coconut butter and oil. I like making this recipe on a snowy day because it’s fun to chill the pans in a snowbank! It makes me feel like a pioneer.

For the citrus fudge, you can use any citrus you like. I prefer orange. You can also use all shredded coconut if you like. I prefer a little crunch in my fudge and like to add the flakes.You can make these flavors on their own and keep them separate. However, I prefer the two flavors together.

To combine the flavors, make the chocolate peppermint fudge first and put it in the freezer for 10 minutes to chill rapidly while you make the citrus fudge. Once chilled, pour the citrus fudge over the top and chill again.The fudge keeps for quite a while and doesn’t melt easily at room temperature. Even so, storing in the fridge is best.Enjoy!

Chocolate Peppermint Coconut Fudge

Ingredients for chocolate peppermint coconut fudge

  • ½ cup coconut butter

  • ½ cup coconut oil

  • ½ cup cocoa powder

  • ½ cup honey

  • 2 tsp peppermint extract or 2 drops peppermint oil

  • 1 tsp vanilla extract

  • 3/4 cup shredded coconut

  • ¼ cup coconut flakes

Directions for chocolate peppermint coconut fudge

This GAPS Legal Coconut Fudge comes in two flavors, citrus and peppermint. You can make the flavors separately but I prefer them layered together. Use coconut butter, coconut oil and coconut flakes for a delicious gluten free, dairy free and GAPS le…

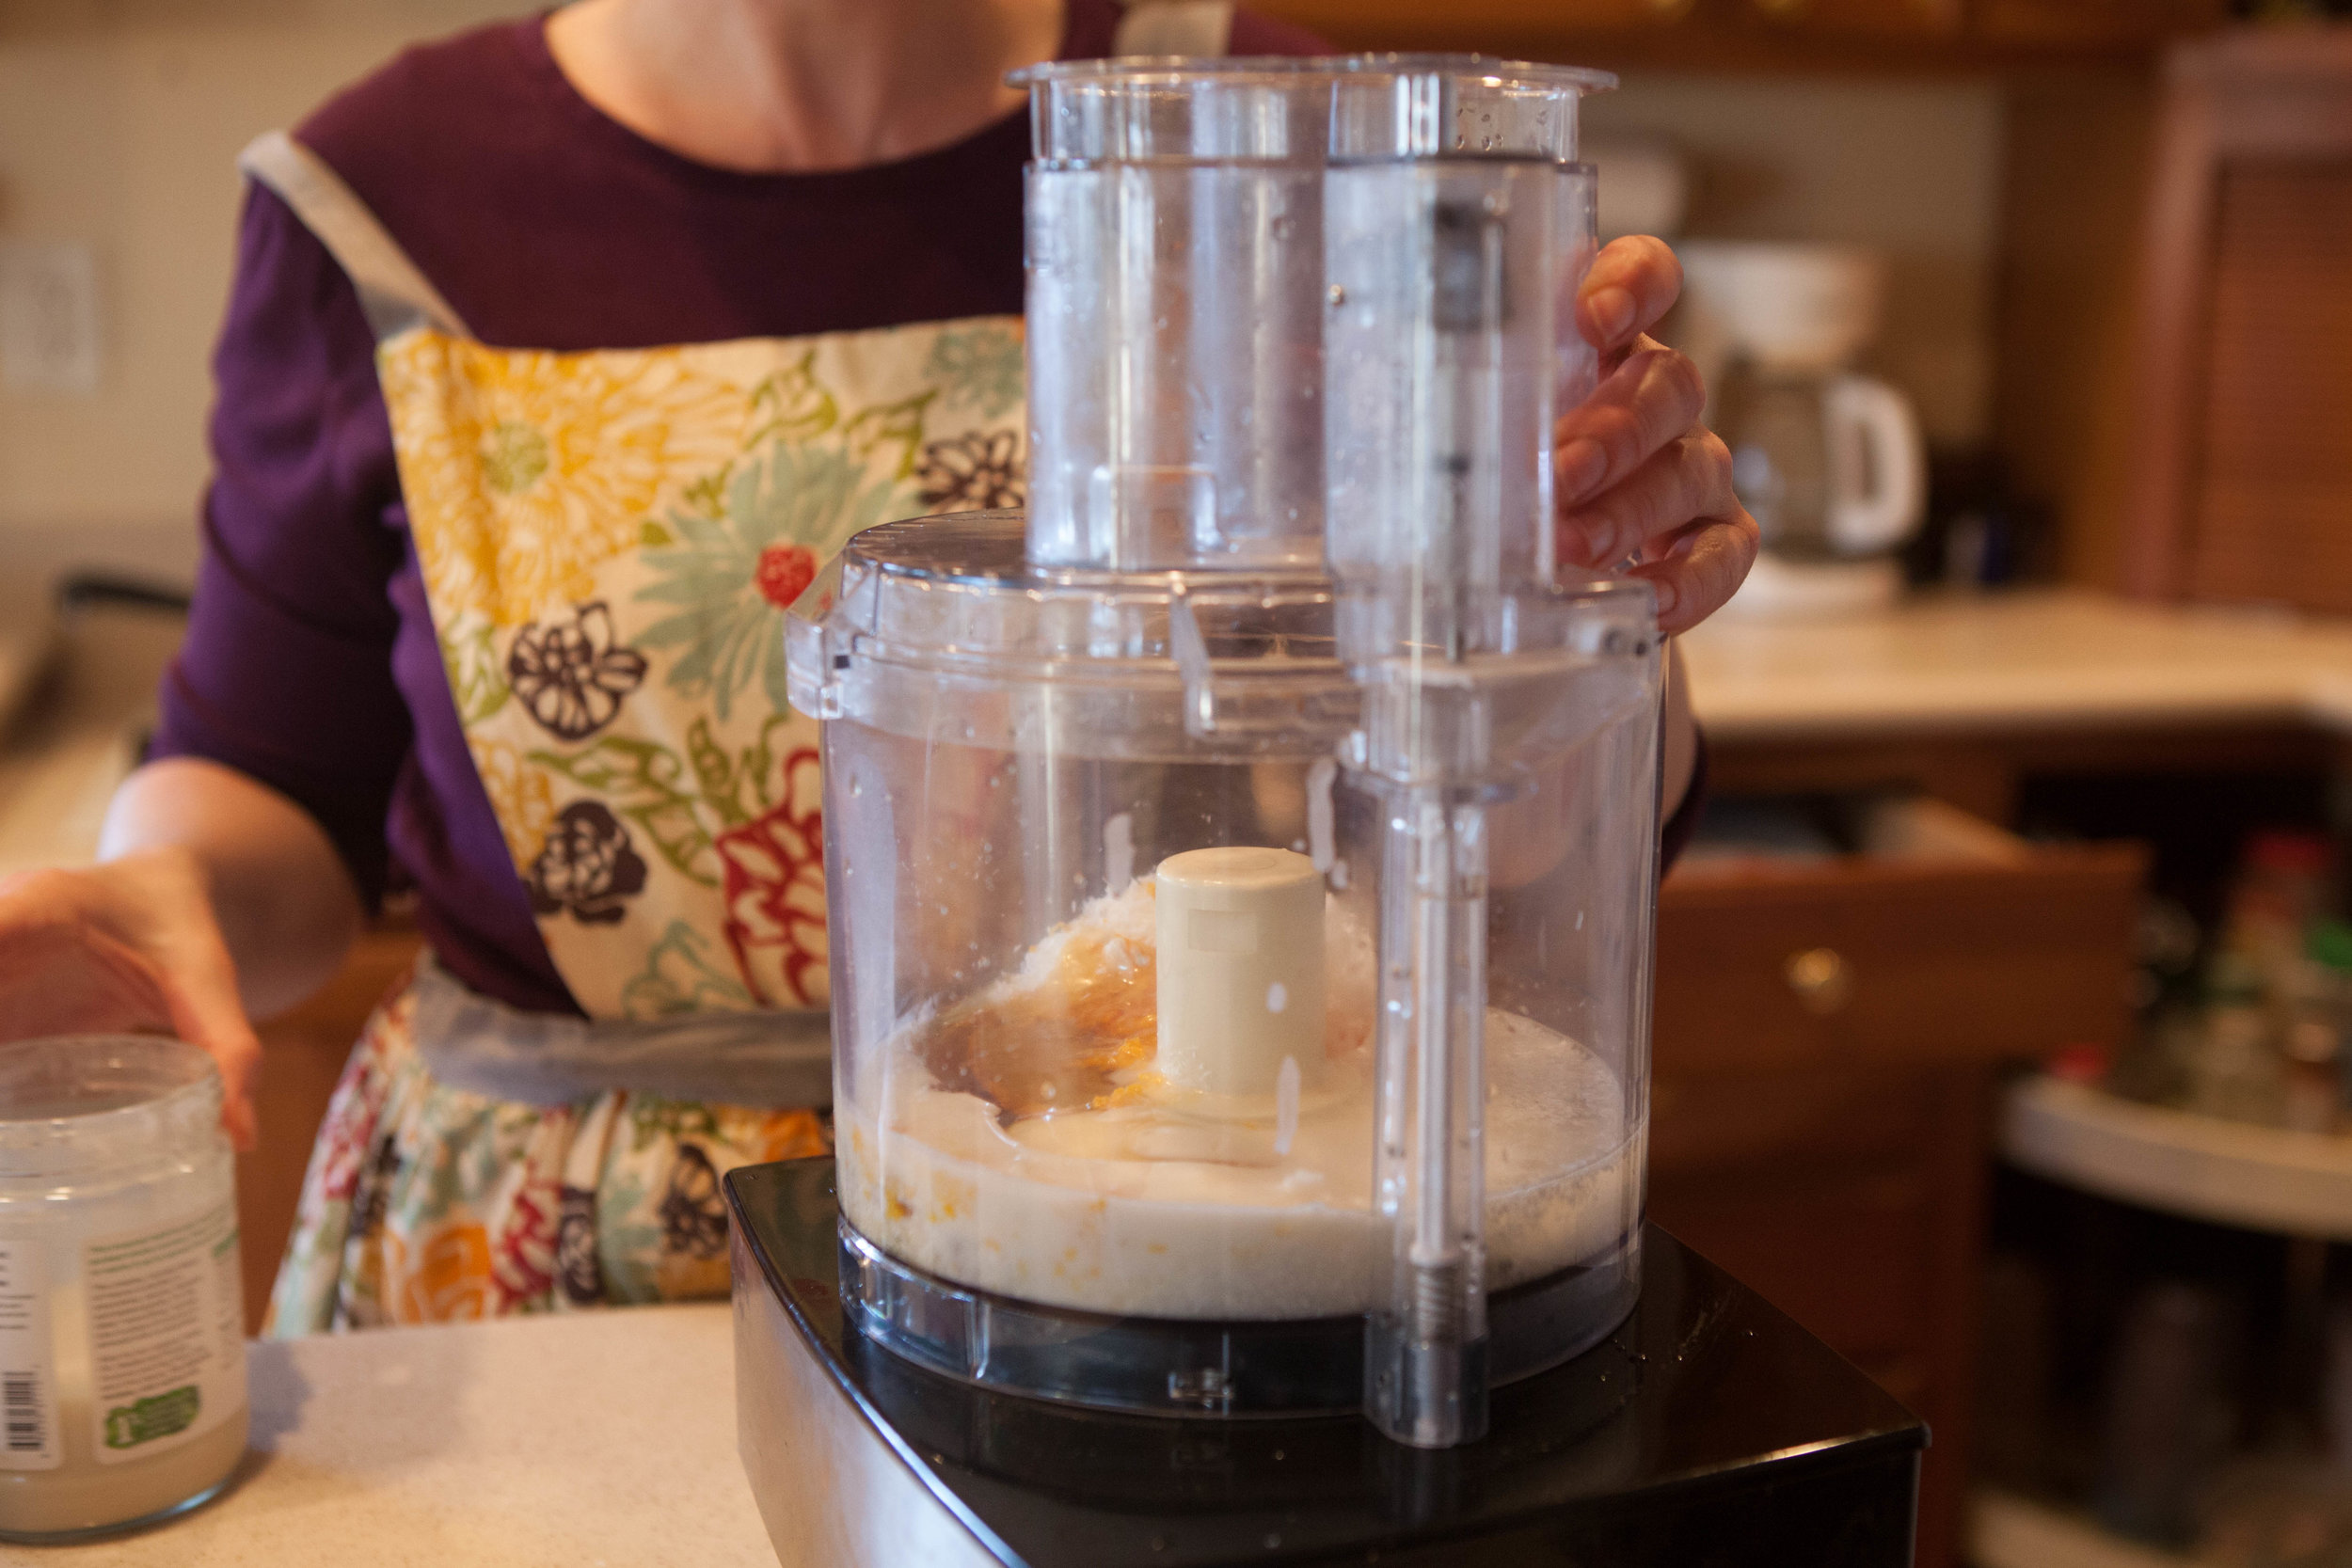
Melt coconut butter on medium heat by adding water to the bottom of a pot and placing jar on top. Or add jar and water to crockpot and heat for two hours until melted.

Melt coconut oil in a separate pot. Crush coconut flakes into smaller pieces.

This GAPS Legal Coconut Fudge comes in two flavors, citrus and peppermint. You can make the flavors separately but I prefer them layered together. Use coconut butter, coconut oil and coconut flakes for a delicious gluten free, dairy free and GAPS le…

Combine coconut butter, coconut oil, cocoa powder, honey, peppermint, vanilla, shredded coconut and coconut flakes into a food processor.

This GAPS Legal Coconut Fudge comes in two flavors, citrus and peppermint. You can make the flavors separately but I prefer them layered together. Use coconut butter, coconut oil and coconut flakes for a delicious gluten free, dairy free and GAPS le…

Spread mixture into a pan.Chill for 30 minutes.

Add hot water to the sink. Float pan in mixture approx 1 minute until mixture releases from sides. Dip a knife in hot water then slice fudge into pieces.

How to Make Citrus coconut Fudge

Ingredients for citrus coconut fudge

  • ½ cup coconut butter

  • ½ cup coconut oil

  • ⅓ cup raw honey

  • 1 tbsp citrus zest

  • 2 tbs citrus juice

  • 3/4 cup shredded coconut

  • ¼ cup Coconut Flakes

Directions for citrus coconut fudge

This GAPS Legal Coconut Fudge comes in two flavors, citrus and peppermint. You can make the flavors separately but I prefer them layered together. Use coconut butter, coconut oil and coconut flakes for a delicious gluten free, dairy free and GAPS le…

Melt coconut butter on medium heat by adding water to the bottom of a pot and placing jar on top. Or add jar and water to crockpot and heat for two hours until melted. Melt coconut oil in a separate pot.

This GAPS Legal Coconut Fudge comes in two flavors, citrus and peppermint. You can make the flavors separately but I prefer them layered together. Use coconut butter, coconut oil and coconut flakes for a delicious gluten free, dairy free and GAPS le…

Combine coconut butter, coconut oil, cocoa powder, honey, peppermint, and vanilla into a food processor.

This GAPS Legal Coconut Fudge comes in two flavors, citrus and peppermint. You can make the flavors separately but I prefer them layered together. Use coconut butter, coconut oil and coconut flakes for a delicious gluten free, dairy free and GAPS le…

Spread mixture into a pan.Chill for 30 minutes.

This GAPS Legal Coconut Fudge comes in two flavors, citrus and peppermint. You can make the flavors separately but I prefer them layered together. Use coconut butter, coconut oil and coconut flakes for a delicious gluten free, dairy free and GAPS le…

Add hot water to the sink. Float pan in mixture approx 1 minute until mixture releases from sides. Dip a knife in hot water then slice fudge into pieces.


Chocolate Peppermint Fudge

Author:
prep time: cook time: total time:

ingredients:

  • ½ cup coconut butter
  • ½ cup coconut oil
  • ½ cup cocoa powder
  • ½ cup honey
  • 2 tsp peppermint extract or 2 drops peppermint oil
  • 1 tsp vanilla extract
  • 3/4 cup shredded coconut
  • ¼ cup coconut flakes

instructions:

How to cook Chocolate Peppermint Fudge

  1. Melt coconut butter on medium heat by adding water to the bottom of a pot and placing jar on top. Or add jar and water to crockpot and heat for two hours until melted.
  2. Melt coconut oil in a separate pot. Crush coconut flakes into smaller pieces.
  3. Combine coconut butter, coconut oil, cocoa powder, honey, peppermint, vanilla, shredded coconut and coconut flakes into a food processor.
  4. Spread mixture into a pan.Chill for 30 minutes.
  5. Add hot water to the sink. Float pan in mixture approx 1 minute until mixture releases from sides. Dip a knife in hot water then slice fudge into pieces.
Created using The Recipes Generator

Citrus Coconut Fudge

Author:
prep time: cook time: total time:

ingredients:

  • ½ cup coconut butter
  • ½ cup coconut oil
  • ⅓ cup raw honey
  • 1 tbsp citrus zest
  • 2 tbs citrus juice
  • 3/4 cup shredded coconut
  • ¼ cup Coconut Flakes

instructions:

How to cook Citrus Coconut Fudge

  1. Melt coconut butter on medium heat by adding water to the bottom of a pot and placing jar on top. Or add jar and water to crockpot and heat for two hours until melted. Melt coconut oil in a separate pot.
  2. Combine coconut butter, coconut oil, cocoa powder, honey, peppermint, and vanilla into a food processor.
  3. Spread mixture into a pan. Chill for 30 minutes.
  4. Add hot water to the sink. Float pan in mixture approx 1 minute until mixture releases from sides. Dip a knife in hot water then slice fudge into pieces.
Created using The Recipes Generator

Almond Flour Cookies with Cacao Nibs

GAPS Legal Almond Cookies

Adapted from The Paleo Plan Makes 24 Cookies GAPS Legal on Stage 4

Ingredients for gaps legal chocolate chip cookies

  • 2 cups Almond Flour

  • ¼ cup Whey

  • 2 large eggs

  • 1/3 cup Room Temperature Coconut Oil

  • 1 tsp Baking Soda

  • ½ tsp Vanilla

  • ⅛ tsp Salt

  • ¼ cup Honey (or ⅓ cup date syrup)

  • ⅛-¼ cup Raw Cacao Nibs

Directions for chocolate chip cookies on the gaps diet

gaps-legal-chocolate-chip-cookies-with-almond-flour-fermented-almond-flour-cookies-what-to-do-with-fermented-almond-flour

24 Hours in Advance

Add whey to almond flour. Stir to moisten.

Leave covered on counter for 24 hours to ferment.

gaps-legal-chocolate-chip-cookies-with-almond-flour-fermented-almond-flour-cookies-what-to-do-with-fermented-almond-flour

The Next Day

Preheat oven to 350. Add your baking sheet to the oven to preheat. These cookies bake better on a hot dish.To fermented flour, add eggs and stir.

gaps-legal-chocolate-chip-cookies-with-almond-flour-fermented-almond-flour-cookies-what-to-do-with-fermented-almond-flour

Add coconut oil to mixture. The coconut oil should be room temperature. If it is melted, you won’t have the right consistency.

Add the baking soda, vanilla, salt and honey (or date paste) to the mixture. Mix well.

gaps-legal-chocolate-chip-cookies-with-almond-flour-fermented-almond-flour-cookies-what-to-do-with-fermented-almond-flour

Add cacao nibs to dough mixture.

Remove baking sheet from oven. Line with parchment paper.

gaps-legal-chocolate-chip-cookies-with-almond-flour-fermented-almond-flour-cookies-what-to-do-with-fermented-almond-flour

Spoon approx. 1 tbsp size rounds of dough onto parchment paper.

Bake at 350 degrees for 10-15 minutes until edges are golden brown and cookies seem firm. Watch them closely after 8 minutes. They will go from raw to burnt quickly!

gaps-legal-chocolate-chip-cookies-with-almond-flour-fermented-almond-flour-cookies-what-to-do-with-fermented-almond-flour

Almond Flour Cookies with Cacao Nibs

Author:
prep time: cook time: total time:

ingredients:

  • 2 cups Almond Flour
  • ¼ cup Whey
  • 2 large eggs
  • 1/3 cup Room Temperature Coconut Oil
  • 1 tsp Baking Soda
  • ½ tsp Vanilla
  • ⅛ tsp Salt
  • ¼ cup Honey (or ⅓ cup date syrup)
  • ⅛-¼ cup Raw Cacao Nibs

instructions:

How to cook Almond Flour Cookies with Cacao Nibs

24 Hours in Advance
  1. Add whey to almond flour. Stir to moisten.
  2. Leave covered on counter for 24 hours to ferment.
The Next Day
  1. Preheat oven to 350. Add your baking sheet to the oven to preheat. These cookies bake better on a hot dish.To fermented flour, add eggs and stir.
  2. Add coconut oil to mixture. The coconut oil should be room temperature. If it is melted, you won’t have the right consistency.
  3. Add the baking soda, vanilla, salt and honey (or date paste) to the mixture. Mix well.
  4. Add cacao nibs to dough mixture.
  5. Remove baking sheet from oven. Line with parchment paper.
  6. Spoon approx. 1 tbsp size rounds of dough onto parchment paper.
  7. Bake at 350 degrees for 10-15 minutes until edges are golden brown and cookies seem firm. Watch them closely after 8 minutes. They will go from raw to burnt quickly!
Created using The Recipes Generator

Mayo Free Deviled Eggs Recipe

Mayo Free GAPS Legal Deviled Eggs 2 Ways

The story of these GAPS legal deviled eggs has a long beginning.

One of the foods I miss most? Mayonnaise. Now I know there are different mayos out there, even ones you can make yourself that are GAPS legal. But unless it tastes like the Real Mayo deliciousness that I remember, I have no interest in consuming it. I was a mayo snob long before I payed attention to what I ate!

Because I haven't found a mayo my taste buds approve of there is no mayonnaise in my refrigerator, even if it's just to make recipes like deviled eggs with. So one day when I had a hankerin' for deviled eggs I got the creative juices flowing and started experimenting with recipes. My first thought was to substitute the mayo for butter. After all, fat is the main reason deviled eggs are so good, right? A batch with butter resulted in delicious and very rich eggs, but the texture was very strange (hard), especially if refrigeration was required. Then I thought to add some sour cream to the mixture. At first I still had too much butter (50:50 ratio), but eventually found a ratio that works well—the butter adds some firmness to the "runnier" sour cream. This gives you a good base that allows you to flavor your deviled eggs as desired.

Next I wanted to come up with a dairy-free egg that my sister could enjoy. I immediately thought of using avocado as the fat. This also resulted in a delicious deviled egg, that's just a little green. I have served these eggs to many people, and as long as they know there is avocado in it, no one has had an issue with the color. And these are perfect for serving at a Dr. Seuss gathering as part of green eggs and ham! No artificial coloring required!

I have discovered that deviled egg recipes can be very familial. If these don't taste like the deviled eggs your grandma made, I encourage you to springboard off the base ingredients and modify the recipe to try and recreate your family memories. After all, that's what recipes are all about, aren't they? If you come up with something particularly delicious, we'd love if you share it with us in the comments below!

Enjoy these GAPS Legal Deviled Eggs, 2 Ways!

Dairy Free Deviled Eggs with Avocado

Ingredients for Avocado Deviled Eggs

  • 6 eggs

  • 1 medium or ½ cup Avocado

  • 1 tsp Mustard Powder

  • 1 tbsp of water

  • 1 tsp Vinegar

  • ½ tsp Honey

  • ¼ tsp Salt

  • Lemon

  • Chili Powder (optional)

  • Paprika (optional)

  • Cilantro (optional)

Directions for Avocado Deviled Eggs

Deviled-Eggs-Made-Without-Mayo-Mayo-Free-Deviled-Eggs-Deviled-Eggs-For-GAPS-Diet-Deviled-Eggs-Made-With-Sour-Cream

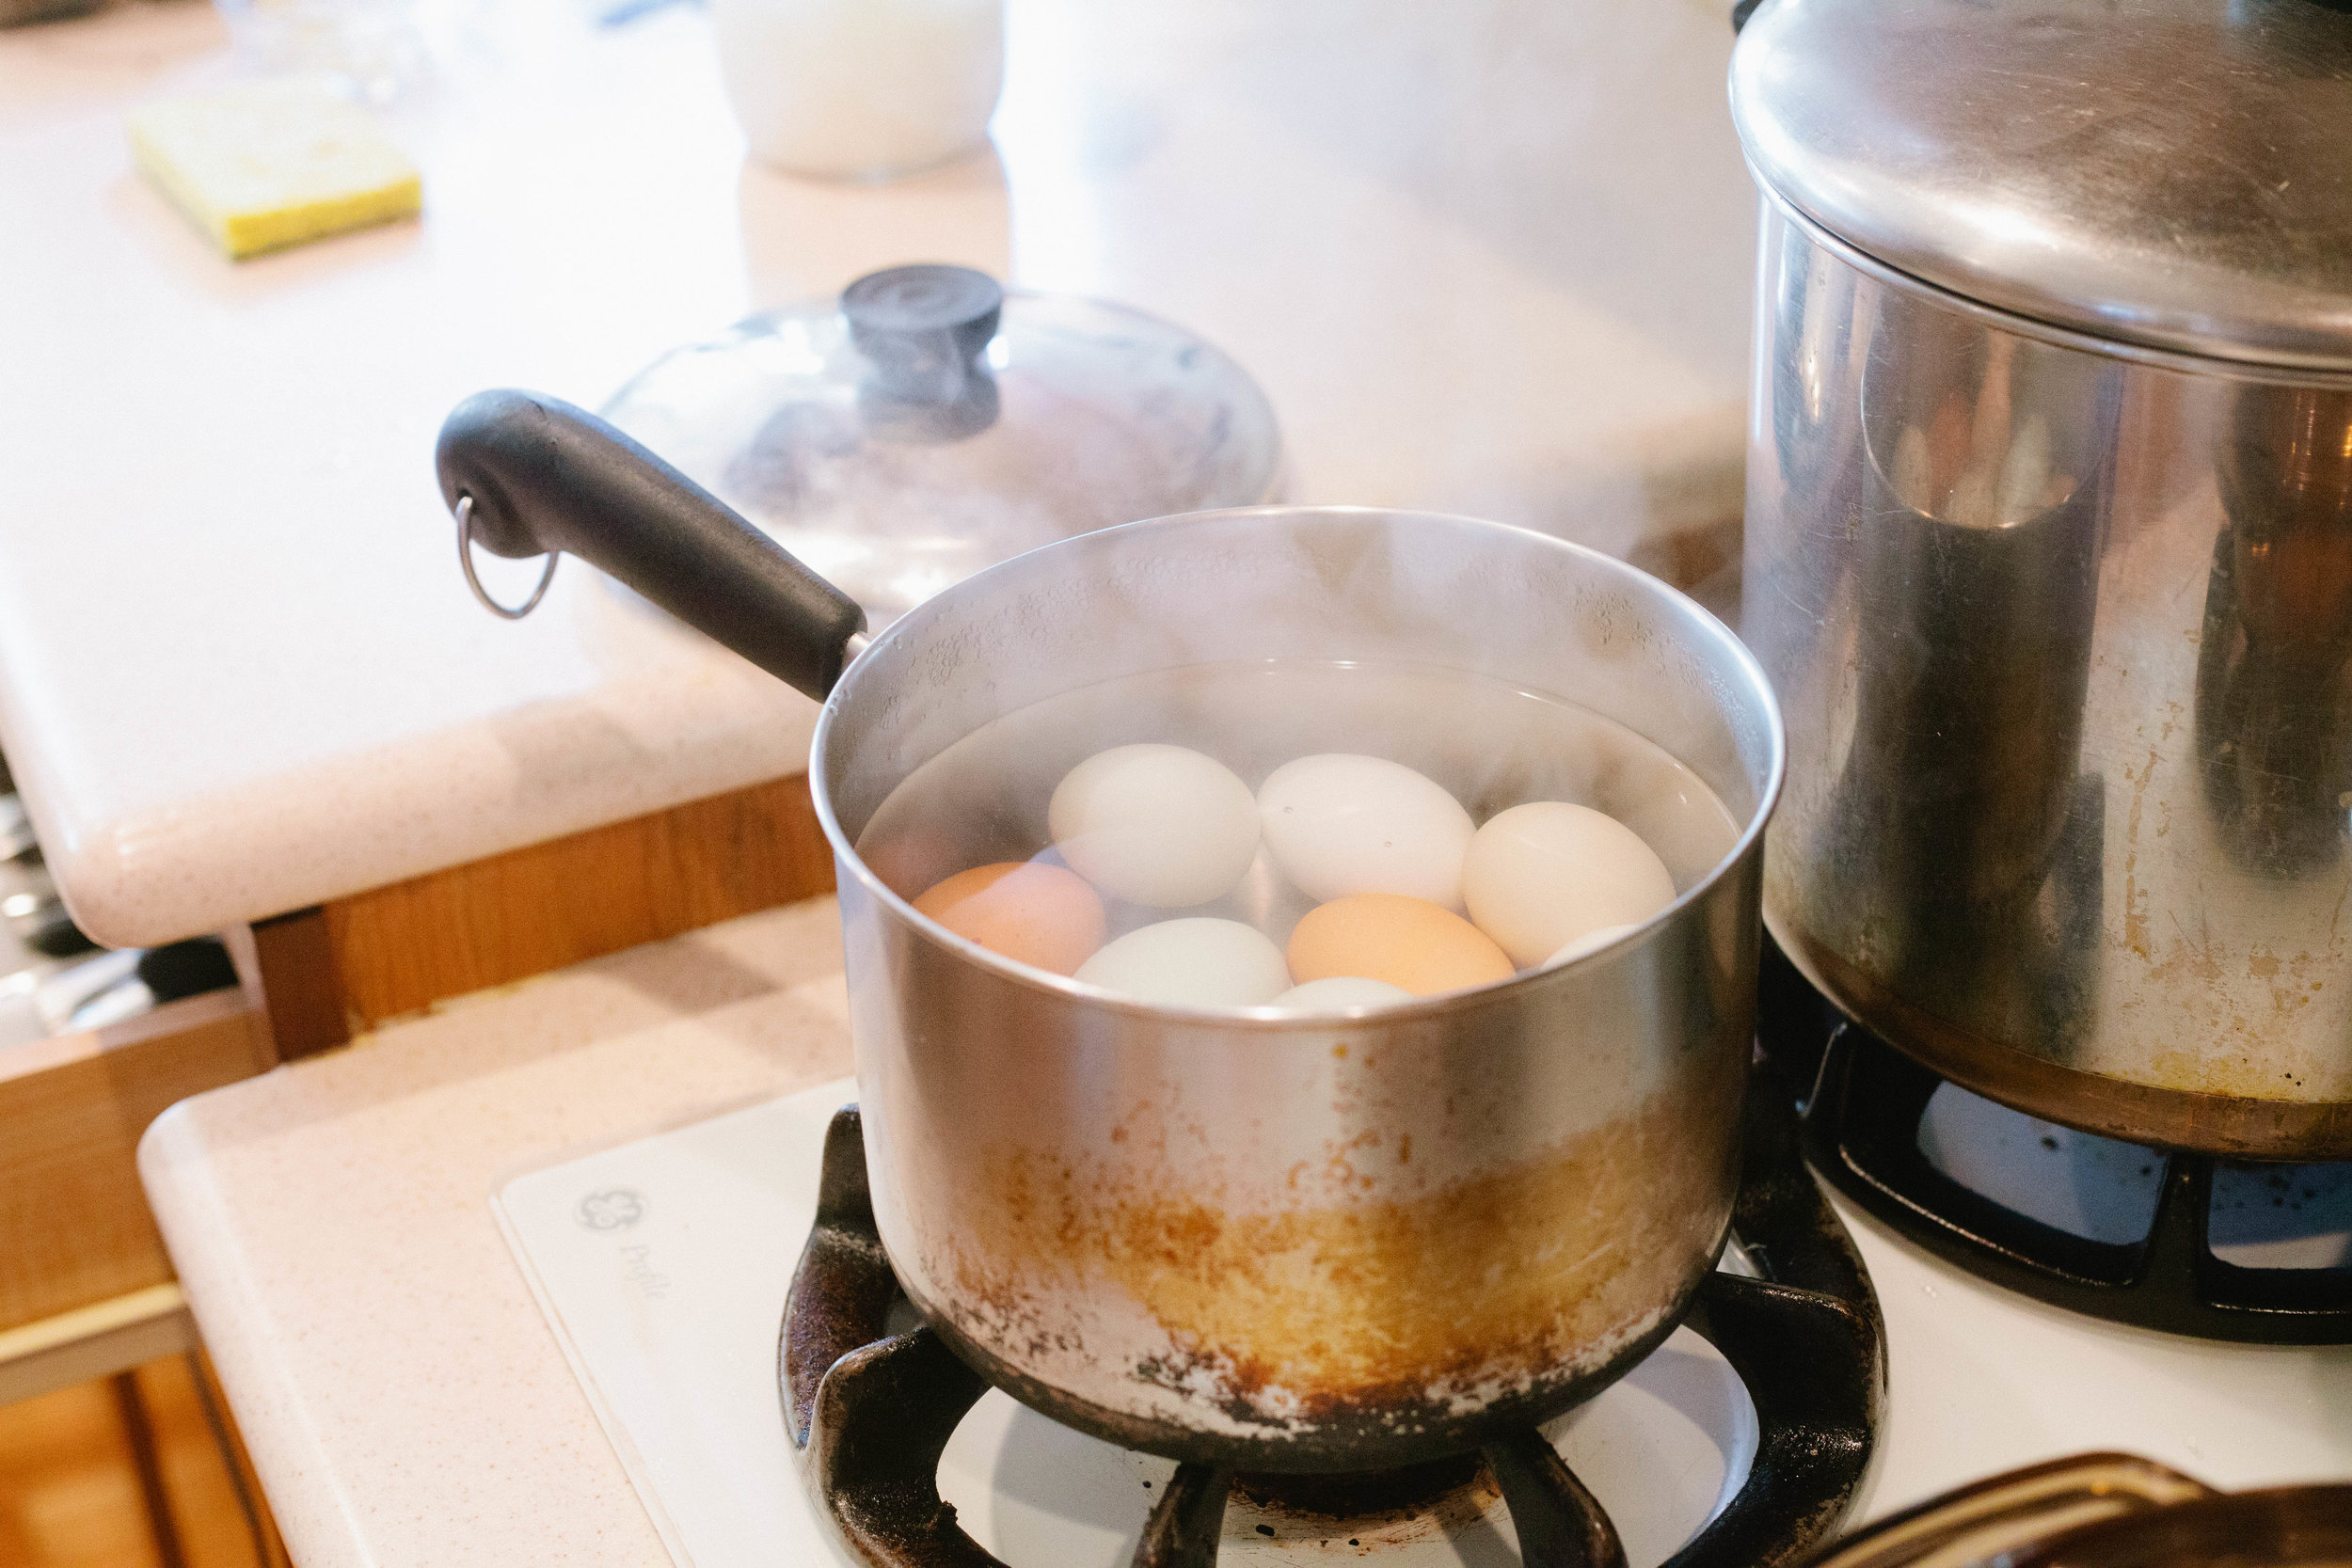
Fill a medium saucepan with cold water. Add eggs. Bring eggs to a boil and cook for 5-6 minutes covered.

Remove eggs from heat. Let set for 5 minutes. Test if your egg is hard boiled by removing one from the pan and spinning it. A hard boiled egg will spin upright if the yolk is hard.

Rinse the eggs under cold water or place them in an ice bath.

Deviled-Eggs-Made-Without-Mayo-Mayo-Free-Deviled-Eggs-Deviled-Eggs-For-GAPS-Diet-Deviled-Eggs-Made-With-Avocado

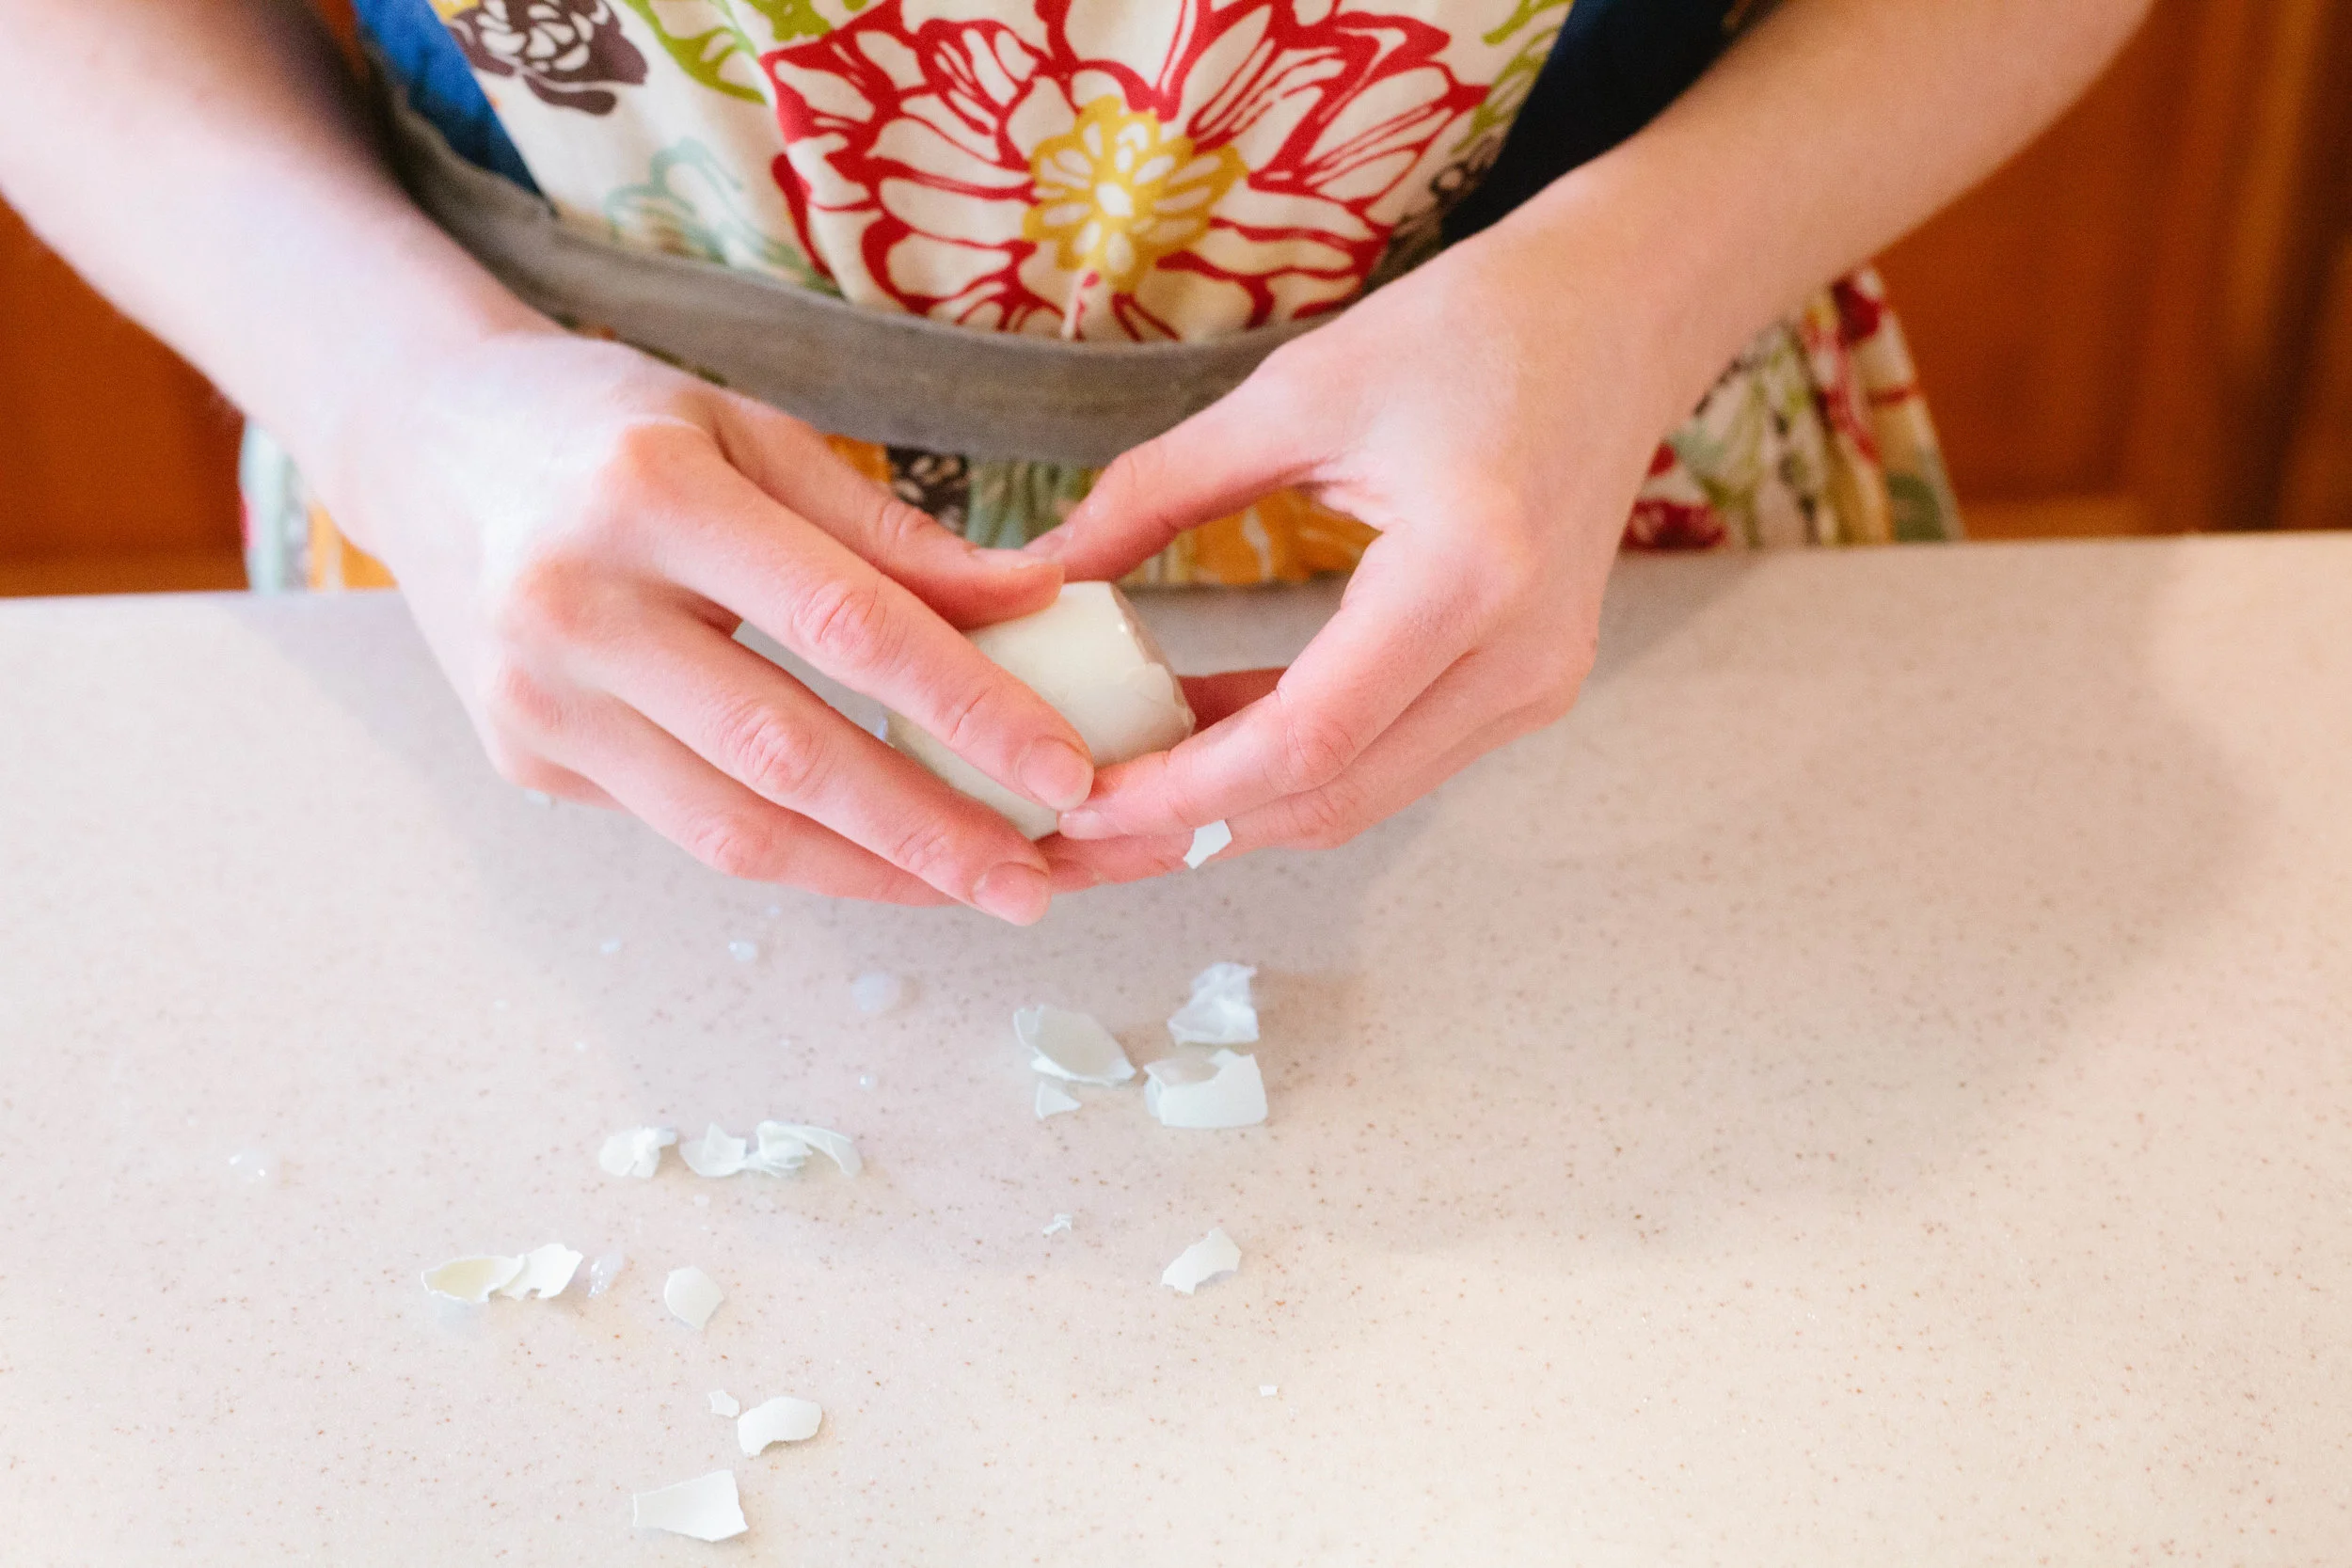
Peel the eggs. Peeling them while they are still a little warm will help get the shell off.

Cut the peeled eggs in half.

Deviled-Eggs-Made-Without-Mayo-Mayo-Free-Deviled-Eggs-Deviled-Eggs-For-GAPS-Diet-Deviled-Eggs-Made-With-Avocado

In a bowl, scoop out all the egg yolks. They should easily slide out with your finger.Set the egg whites onto a plate.

Crumble the egg yolks with a fork.

Deviled-Eggs-Made-Without-Mayo-Mayo-Free-Deviled-Eggs-Deviled-Eggs-For-GAPS-Diet-Deviled-Eggs-Made-With-Avocado

Mash the avocado into the egg yolks with a fork.

Add mustard powder to the egg yolk mixture.

Add water and vinegar to mixture. Mix well.

Add honey, salt and lemon. Mix well.

Deviled-Eggs-Made-Without-Mayo-Mayo-Free-Deviled-Eggs-Deviled-Eggs-For-GAPS-Diet-Deviled-Eggs-Made-With-Avocado

Fill the egg whites with a generous scoop.

Sprinkle with chili powder or paprika or top with sprigs of cilantro.

Deviled-Eggs-Made-Without-Mayo-Mayo-Free-Deviled-Eggs-Deviled-Eggs-For-GAPS-Diet-Deviled-Eggs-Made-With-Avocado

If you have leftover egg mixture, you can dip vegetables into it or smear onto scrambled eggs or crackers.

For a spicier egg, add more mustard powder!

These are legal on GAPS stage 4.


Sour Cream Deviled Eggs

Ingredients for Deviled Eggs with Sour Cream

  • 6 eggs

  • ½ c Sour Cream

  • 1 tbsp Room Temperature Butter

  • 1 - 1 ½ tsp Vinegar

  • 1 tsp Honey

  • ¼ tsp Mustard Powder

  • ⅛ tsp salt

  • Paprika (optional)

Directions for Deviled Eggs with Sour Cream

Deviled-Eggs-Made-Without-Mayo-Mayo-Free-Deviled-Eggs-Deviled-Eggs-For-GAPS-Diet-Deviled-Eggs-Made-With-Sour-Cream

Fill a medium saucepan with cold water. Add eggs. Bring eggs to a boil and cook for 5-6 minutes covered.

Remove eggs from heat. Let set for 5 minutes. Test if your egg is hard boiled by removing one from the pan and spinning it. A hard boiled egg will spin upright if the yolk is hard.

Rinse the eggs under cold water or place them in an ice bath.

Deviled-Eggs-Made-Without-Mayo-Mayo-Free-Deviled-Eggs-Deviled-Eggs-For-GAPS-Diet-Deviled-Eggs-Made-With-Sour-Cream

Peel the eggs. Peeling them while they are still a little warm will help get the shell off.

Cut the peeled eggs in half.

Deviled-Eggs-Made-Without-Mayo-Mayo-Free-Deviled-Eggs-Deviled-Eggs-For-GAPS-Diet-Deviled-Eggs-Made-With-Sour-Cream

In a bowl, scoop out all the egg yolks. They should easily slide out with your finger.

Set the egg whites onto a plate.

Crumble the egg yolks with a fork.

Deviled-Eggs-Made-Without-Mayo-Mayo-Free-Deviled-Eggs-Deviled-Eggs-For-GAPS-Diet-Deviled-Eggs-Made-With-Sour-Cream

Add the butter to the mixture and mix well.

Add the sour cream. Mix.

Add 1 tsp of the vinegar plus all the honey and salt. Mix.

Deviled-Eggs-Made-Without-Mayo-Mayo-Free-Deviled-Eggs-Deviled-Eggs-For-GAPS-Diet-Deviled-Eggs-Made-With-Sour-Cream

These are less tangy than a traditional deviled egg. To add more tang, add up to ½ tsp of vinegar.

Fill the egg whites with a generous scoop.

Sprinkle with paprika.


Mayo Free Deviled Eggs with Avocado

Author:
prep time: cook time: total time:

ingredients:

  • 6 eggs
  • 1 medium or ½ cup Avocado
  • 1 tsp Mustard Powder
  • 1 tbsp of water
  • 1 tsp Vinegar
  • ½ tsp Honey
  • ¼ tsp Salt
  • Lemon
  • Chili Powder (optional)
  • Paprika (optional)
  • Cilantro (optional

instructions:

How to cook Mayo Free Deviled Eggs with Avocado

  1. Fill a medium saucepan with cold water. Add eggs. Bring eggs to a boil and cook for 5-6 minutes covered.
  2. Remove eggs from heat. Let set for 5 minutes. Test if your egg is hard boiled by removing one from the pan and spinning it. A hard boiled egg will spin upright if the yolk is hard.
  3. Rinse the eggs under cold water or place them in an ice bath.
  4. Peel the eggs. Peeling them while they are still a little warm will help get the shell off.
  5. Cut the peeled eggs in half.
  6. In a bowl, scoop out all the egg yolks. They should easily slide out with your finger.Set the egg whites onto a plate.
  7. Crumble the egg yolks with a fork.
  8. Mash the avocado into the egg yolks with a fork.
  9. Add mustard powder to the egg yolk mixture.
  10. Add water and vinegar to mixture. Mix well.
  11. Add honey, salt and lemon. Mix well.
  12. Fill the egg whites with a generous scoop.
  13. Sprinkle with chili powder or paprika or top with sprigs of cilantro.
  14. If you have leftover egg mixture, you can dip vegetables into it or smear onto scrambled eggs or crackers.
  15. For a spicier egg, add more mustard powder!
  16. These are legal on GAPS stage 4.
Created using The Recipes Generator

Mayo Free Deviled Eggs with Sour Cream

Author:
prep time: cook time: total time:

ingredients:

  • 6 eggs
  • ½ c Sour Cream
  • 1 tbsp Room Temperature Butter
  • 1 - 1 ½ tsp Vinegar
  • 1 tsp Honey
  • ¼ tsp Mustard Powder
  • ⅛ tsp salt
  • Paprika (optional)

instructions:

How to cook Mayo Free Deviled Eggs with Sour Cream

  1. Fill a medium saucepan with cold water. Add eggs. Bring eggs to a boil and cook for 5-6 minutes covered.
  2. Remove eggs from heat. Let set for 5 minutes. Test if your egg is hard boiled by removing one from the pan and spinning it. A hard boiled egg will spin upright if the yolk is hard.
  3. Rinse the eggs under cold water or place them in an ice bath.
  4. Peel the eggs. Peeling them while they are still a little warm will help get the shell off.
  5. Cut the peeled eggs in half.
  6. In a bowl, scoop out all the egg yolks. They should easily slide out with your finger.
  7. Set the egg whites onto a plate.
  8. Crumble the egg yolks with a fork.
  9. Add the butter to the mixture and mix well.
  10. Add the sour cream. Mix.
  11. Add 1 tsp of the vinegar plus all the honey and salt. Mix.
  12. These are less tangy than a traditional deviled egg. To add more tang, add up to ½ tsp of vinegar.
  13. Fill the egg whites with a generous scoop.
  14. Sprinkle with paprika.
Created using The Recipes Generator

Honey Roasted Chicken Recipe

I've been posting some of my ol' stand by recipes, and this cinnamon-toasted honey-roasted chicken is one of the first Paleo recipes I truly enjoyed. You can tell this is an old recipe because it uses honey... something I don't usually use anymore in my baking and cooking, but I can't give it up!

Roasting a chicken is a great and simple way to make a meal. This particular roasting recipe requires a little more attention than others, as you need to baste and adjust the temperature often, but it's definitely worth it! Just make sure to set the time or you might end up with a fried-to-a-crisp chicken! Also, I recommend doing this in as small of a dish as fits your chicken. As you can see from the final pictures if the juices get too spread out they will burn! This is a larger dish than I usually use (I thought it would be pretty for the photos), and I will never use it for this recipe again! I hope you enjoy!  

Recipe Adapted from The Paleo Project by Dr. Marc Bubbs

GAPS Legal Honey Roasted Chicken Recipe Ingredients

  • 1/4 tsp ground cloves

  • 1/8 tsp ground ginger

  • 1/4 tsp ground nutmeg

  • 1/4 tsp cinnamon

  • 1 tbsp salt

  • 9 cloves of garlic

  • 2 tbsp Raw Honey

Directions for gaps legal roasted chicken with honey

IMG_1035.jpg

Preheat oven to 500 degrees.

Make your rub by mixing cloves, ginger, nutmeg, cinnamon and salt in a small bowl.

IMG_1059.jpg

Crush 5 cloves with the flat of your knife, keep 4 cloves of garlic whole.

Remove the giblets. Wash and pat dry the chicken. Make sure you dry the chicken really well so the rub will stick.

IMG_1085.jpg

Drizzle approx. 2 tbs of honey of the top of the chicken, rub both sides well.

Massage the rub on the chicken, making sure to rub both sides.

Add all garlic cloves to chicken cavity.

Cover chicken with parchment paper and aluminum foil to keep cinnamon from burning.

Roast at 500 degree for 15 min then decrease your oven to 450 for 15 minutes.

IMG_1279.jpg

Remove chicken from oven. Baste chicken with juice drippings.

Reduce oven to 425. Recover chicken and bake for approx 30 - 45  minutes until chicken reaches internal temp of 165. Uncover chicken for five more minutes then remove from oven.

IMG_1415.jpg

Let the chicken rest for 20 minutes.

Carve chicken and serve! Make sure you enjoy the skin while it’s crispy and hot!

Notes:If your chicken came with giblets, you can add them to your next batch of stock or make liver pate.

I don’t normally recommend baking with honey but for this delicious recipe I make an exception.

Save the gelatin and juices of this chicken! Once cooled, they are like candy because of the sweet honey and cinnamon.


Honey Roasted Chicken

Author:
prep time: cook time: total time:

ingredients:

  • 1/4 tsp ground cloves
  • 1/8 tsp ground ginger
  • 1/4 tsp ground nutmeg
  • 1/4 tsp cinnamon
  • 1 tbsp salt
  • 9 cloves of garlic
  • 2 tbsp Raw Honey

instructions:

How to cook Honey Roasted Chicken

  1. Preheat oven to 500 degrees.
  2. Make your rub by mixing cloves, ginger, nutmeg, cinnamon and salt in a small bowl.
  3. Crush 5 cloves with the flat of your knife, keep 4 cloves of garlic whole.
  4. Remove the giblets. Wash and pat dry the chicken. Make sure you dry the chicken really well so the rub will stick.
  5. Drizzle approx. 2 tbs of honey of the top of the chicken, rub both sides well.
  6. Massage the rub on the chicken, making sure to rub both sides.
  7. Add all garlic cloves to chicken cavity.
  8. Cover chicken with parchment paper and aluminum foil to keep cinnamon from burning.
  9. Roast at 500 degree for 15 min then decrease your oven to 450 for 15 minutes.
  10. Remove chicken from oven. Baste chicken with juice drippings.
  11. Reduce oven to 425. Recover chicken and bake for approx 30 - 45 minutes until chicken reaches internal temp of 165. Uncover chicken for five more minutes then remove from oven.
  12. Let the chicken rest for 20 minutes.
  13. Carve chicken and serve! Make sure you enjoy the skin while it’s crispy and hot!
  14. Notes:If your chicken came with giblets, you can add them to your next batch of stock or make liver pate.
  15. I don’t normally recommend baking with honey but for this delicious recipe I make an exception.
  16. Save the gelatin and juices of this chicken! Once cooled, they are like candy because of the sweet honey and cinnamon.
Created using The Recipes Generator

GAPS Legal Zucchini Pizza Bites

Recently I needed a bit of a change. I needed something exciting to eat! And I really wanted pizza. But even though I know how to make a GAPS legal pizza crust I did not want to spend the time or energy to make it. Then I came up with this brilliant idea... pizza bites... on zucchini! and what's better? They are stage 4 (and beyond) GAPS legal!

I happened to have just bought some good-quality uncured pepperoni at the store, and had some sauce in the cabinet (although if I don't happen to have that I just as easily throw a couple tomatoes in a blender and make my own sauce on the stove). I tried it, and it worked! Delicious pizza bites that really taste like pizza (with zucchini on it) and can be made to suit any taste or dietary guidelines.

Unless you can't eat zucchini, you should be able to modify this for anyone. The fat used can be anything. You could leave off the tomato sauce, or make a while sauce. You can top with anything you can tolerate. Most people can tolerate raw cheese by the time they get to full GAPS And I guarantee that even if you can't do pepperoni, there is some type of meat you can have! Part of what makes a pizza is cheese and tomato sauce, so without these you will have a little different taste, but that doesn't mean you won't have something delicious!

Ingredients for gaps friendly pizza made with zucchini:

  • Zucchini

  • 2 TBS Lard, Butter or Other Fat

  • Italian Seasonings

  • Salt & Pepper

  • Pizza Sauce (make your own or buy a sugar free version in a glass jar)

  • Mozzarella Cheese

  • Uncured Pepperoni

  • Other Pizza Toppings of Your Choice

Directions for gaps friendly pizza made with zucchini:

GAPS Legal pizza is a thing! These pizza bites are gluten free because they’re made with zucchini. Zucchini pizza bites are GAPS legal past stage four and are a great summer recipe on what to do with too much zucchini. GAPS Friendly pizza made with …

Sliced the zucchini into rounds, approx ¼ thick. Don’t slice too thin!

Add your preferred fat to a pan on medium heat. Once hot, add zucchini slices. Your zucchini should not be swimming in the fat!

GAPS Legal pizza is a thing! These pizza bites are gluten free because they’re made with zucchini. Zucchini pizza bites are GAPS legal past stage four and are a great summer recipe on what to do with too much zucchini. GAPS Friendly pizza made with …

Sprinkle zucchini slices with salt, pepper and Italian seasonings.

Grate the mozzarella cheese.

GAPS Legal pizza is a thing! These pizza bites are gluten free because they’re made with zucchini. Zucchini pizza bites are GAPS legal past stage four and are a great summer recipe on what to do with too much zucchini. GAPS Friendly pizza made with …

Once the zucchini slices are golden brown (8-10 min), flip them to the other side.

GAPS Legal pizza is a thing! These pizza bites are gluten free because they’re made with zucchini. Zucchini pizza bites are GAPS legal past stage four and are a great summer recipe on what to do with too much zucchini. GAPS Friendly pizza made with …

Spoon tomato sauce on top of each zucchini slice. Top with uncured pepperoni or other toppings of your choice and add grated mozzarella cheese. Cover for 2 - 3 minutes so the cheese melts.

GAPS Legal pizza is a thing! These pizza bites are gluten free because they’re made with zucchini. Zucchini pizza bites are GAPS legal past stage four and are a great summer recipe on what to do with too much zucchini. GAPS Friendly pizza made with …

Once the cheese is melted, your zucchini pizzas are done!

Other toppings you could try would be artichoke hearts, olives. anchovies, or cooked chicken pieces. (Think your favorite pizza toppings!) Enjoy! Careful, they are hot! Once they have cooled a little, you can cut them into fourths to be served to those with small mouths. And as any good pizza is, they are delicious cold as well!  

What are your favorite toppings? Did you find good combinations? Let us know!


Zucchini Pizza Bites

Author:
prep time: cook time: total time:

ingredients:

  • Zucchini
  • 2 TBS Lard, Butter or Other Fat
  • Italian Seasonings
  • Salt & Pepper
  • Pizza Sauce (make your own or buy a sugar free version in a glass jar)
  • Mozzarella Cheese
  • Uncured Pepperoni
  • Other Pizza Toppings of Your Choice

instructions:

How to cook Zucchini Pizza Bites

  1. Sliced the zucchini into rounds, approx ¼ thick. Don’t slice too thin!
  2. Add your preferred fat to a pan on medium heat. Once hot, add zucchini slices. Your zucchini should not be swimming in the fat!
  3. Sprinkle zucchini slices with salt, pepper and Italian seasonings.
  4. Grate the mozzarella cheese.
  5. Once the zucchini slices are golden brown (8-10 min), flip them to the other side.
  6. Spoon tomato sauce on top of each zucchini slice. Top with uncured pepperoni or other toppings of your choice and add grated mozzarella cheese. Cover for 2 - 3 minutes so the cheese melts.
  7. Once the cheese is melted, your zucchini pizzas are done!
  8. Other toppings you could try would be artichoke hearts, olives. anchovies, or cooked chicken pieces. (Think your favorite pizza toppings!) Enjoy! Careful, they are hot! Once they have cooled a little, you can cut them into fourths to be served to those with small mouths. And as any good pizza is, they are delicious cold as well!
Created using The Recipes Generator

GAPS Friendly Strawberry Rhubarb Pie Recipe

Strawberry rhubarb pie has always been one of my favorites! In the past I have modified recipes to make a strawberry rhubarb dessert, but this year I decided I wanted to use my growing knowledge and skill in the kitchen and make a delicious GAPS-legal pie. My added challenges? I wanted to make it with a fermented almond crust, and use a different sweetener than honey. Finally, I wanted to have a modification that made not only GAPS legal, but dairy-free, nut-free and egg-free.

Overall, I would call the experiment a success. But to get that success I had to make more multiples of this recipe than I ever have for any previous recipe I've posted. Because of the crust. Not that my "tester" friends and family complained.

Turns out almond flour crust doesn't play nice with a wetter pie filling. Actually, the problem is that it plays too nice! It wants to combine with the filling; get up close and personal. Not what a pie crust is supposed to do. I did not fully overcome the pie-crust conundrum, but every recipe I made turned out delicious. So instead of chocking it up as a "failed recipe," I decided to share with you what I made... a good pie that happens to have a crust with boundary issues! And, of course, I will share the modified recipe for egg-free, nut-free, dairy-free strawberry rhubarb dessert. Keep reading!

Ingredients FOr Strawberry Rhubarb Pie

For the Pie Crust:

  • 2 1/2 cups almond flour

  • 1/4 cup whey (enough to moisten)

  • 1/2 cup room-temperature butter (or lard)

  • 1/2 tsp sea salt

For the Filling:

  • 3 1/2 cups rhubarb pieces

  • 2 1/2 cups sliced strawberries

  • 1/4 tsp salt

  • 1/2 cup date syrup (I use this one)

  • 2 TBS gelatin dissolved in 1/4 cup hot water

  • Optional: zest from 1/2 lemon

Directions for Strawberry Rhubarb Pie

IMG_1036.jpg

Mix almond flour and whey together. Cover and leave on the counter for 24 hours to ferment.

After 24 hours, this mixture keeps in the fridge for up to 1 week.

IMG_1054.jpg

To the fermented flour mixture, add butter or lard and sea salt. Mix well, getting all clumps out.

Then butter a pie pan well. Press the crust mixture into the pan and form a crust using your fingers.

IMG_1055.jpg

Bake at 400° for 5-8 minutes until a little dry and just turning brown.  

IMG_1019.jpg

Combine all ingredients for the filling. Let sit for 5-10 minutes until the juices increase.

IMG_1062.jpg

Add the filling to your pre-baked crust.

IMG_1136.jpg

Bake at 400° for 30-35 minutes until light brown.

Directions for Strawberry Rhubarb Dessert

A delicious nut free alternative served hot or at room temperature!

IMG_1074.jpg

Mix the filling the same, except add 2 additional TBS of gelatin and dissolve in 1/2 cup of hot water.

IMG_1081.jpg

Let the filling sit for 5-10 minutes to let the flavors mix.

Line muffin tins.

IMG_1108.jpg

Bake at 350° for 20-25 minutes until the tops are just browning.

IMG_1117.jpg

Serve warm or room temperature. These gooey treats are a bit messy, so eat with a spoon. They are delicious!  

Enjoy!


Strawberry Rhubarb Pie

Author:
prep time: cook time: total time:

ingredients:

For the Pie Crust:
  • 2 1/2 cups almond flour
  • 1/4 cup whey (enough to moisten)
  • 1/2 cup room-temperature butter (or lard)
  • 1/2 tsp sea salt
For the Filling:
  • 3 1/2 cups rhubarb pieces
  • 2 1/2 cups sliced strawberries
  • 1/4 tsp salt
  • 1/2 cup date syrup (I use this one)
  • 2 TBS gelatin dissolved in 1/4 cup hot water
  • Optional: zest from 1/2 lemon

instructions:

How to cook Strawberry Rhubarb Pie

24 Hours Before
  1. Mix almond flour and whey together. Cover and leave on the counter for 24 hours to ferment.
  2. After 24 hours, this mixture keeps in the fridge for up to 1 week.
The Next Day
  1. To the fermented flour mixture, add butter or lard and sea salt. Mix well, getting all clumps out.
  2. Then butter a pie pan well. Press the crust mixture into the pan and form a crust using your fingers.
  3. Bake at 400° for 5-8 minutes until a little dry and just turning brown.
  4. Combine all ingredients for the filling. Let sit for 5-10 minutes until the juices increase.
  5. Add the filling to your pre-baked crust.
  6. Bake at 400° for 30-35 minutes until light brown.
Created using The Recipes Generator

Strawberry Rhubarb Dessert

Author:
prep time: cook time: total time:

ingredients:

  • 3 1/2 cups rhubarb pieces
  • 2 1/2 cups sliced strawberries
  • 1/4 tsp salt
  • 1/2 cup date syrup (I use this one)
  • 2 TBS gelatin dissolved in 1/4 cup hot water
  • Optional: zest from 1/2 lemon

instructions:

How to cook Strawberry Rhubarb Dessert

  1. Mix the filling the same, except add 2 additional TBS of gelatin and dissolve in 1/2 cup of hot water.
  2. Let the filling sit for 5-10 minutes to let the flavors mix.
  3. Line muffin tins.
  4. Bake at 350° for 20-25 minutes until the tops are just browning.
  5. Serve warm or room temperature. These gooey treats are a bit messy, so eat with a spoon. They are delicious!
Created using The Recipes Generator

Christmas Wreath Cookies {GAPS Legal}

It's the holiday season! More specifically, it's cookie season!   I love making, giving away (and eating) Christmas cookies. But it's been a long time since I have enjoyed many of the cookies I grew up making, so this year I decided I wanted to create real-food versions of some of my favorite Christmas cookie recipes.  

First up, Christmas Wreath cookies!

  This cookie is traditionally a mix of corn flakes, marshmallows, and butter. So let's look at the ingredients...

  • The butter is already a real food!

  • Marshmallows I have made before, modified from Mommypotamus' marshmallow recipe.

So all I had to do was figure out a substitution for the corn flakes (and see if the marshmallows actually work the same as the commercial variety).   Challenge accepted!

Christmas Wreath Cookies

Makes about 36 cookies (recipe can be halved)

Ingredients

For Marshmallows

  • 2 cups honey

  • 1 cup of filtered water

  • 2 tsp vanilla

  • 1 tsp sea salt

  • 6 TBS grass-fed beef gelatin

  • 1 cup of filtered water

For Wreath Cookies

  • Marshmallow paste (above)

  • 8 ounces organic butter

  • 14 cups coconut flakes (approximately 20 ounces)

  • Red hots (my homemade recipe)

  • Natural food coloring, blue and yellow packets (I used this one)

Directions

IMG_9987.jpg

Place the coconut flakes in the oven at 200°

Toast the coconut until they are light brown—this makes the cookies crispier! When done, remove them from the oven Place in a large bowl, set aside.

IMG_9996.jpg

Melt the butter in a saucepan over low heat When melted, remove from heat and set aside   Next, make the marshmallow paste. See recipe here.

Soften the gelatin

  • Add gelatin to 1 cup hot water

  • Stir and allow to to sit, keep warm (not on stove)

While gelatin is softening... Heat honey and water in a medium saucepan (medium to high heat), stirring frequently, until it reaches the soft ball candy stage (about 235°F).

If you don't have a thermometer, you can check by dripping the heated honey into a glass of cold water. When the candy forms a ball, it is ready!

When the honey has reached the soft ball stage, remove from heat. Add the heated mixture to the softened gelatin in a large bowl. Add vanilla.

Do these steps quickly, you don't want honey mixture to cool off too much!

Whisk the mixture using an electric mixer or stand mixer for about 10 minutes.

When the mixture is thick and looks like marshmallow paste, it's done!  

If you want marshmallows, you can stop here. Put the marshmallow paste in a greased glass 9x11 dish and allow to cool and dry for a 24-36 hrs. Then cut up and serve.  

But we are not stopping here! To make traditional Christmas wreath cookies you melt the marshmallows and turn them back into paste-which is what you just created!  

Next, stir the melted butter into the mixture. It will deflate the mixture somewhat, this is normal.

Mix in the blue and yellow food coloring packets. This will turn it green (not neon green—that's an artificial color). But when it's made into wreathes it does look green—although you're going to have to take my word for it!

IMG_0006.jpg

Pour the marshmallow mixture into the bowl with the toasted coconut flakes. Mix until the flakes are coated.

Finally, form the warm mixture into wreath-shaped cookies on parchment paper.

IMG_0019.jpg

Add decorative red hots as berries (see my homemade recipe) Allow to cool.

See, I told you they look green!

All that's left is to share and enjoy these delicious treats!

Disclosure: This post contains affiliate links. Your trust is important. I only recommend products I trust. 

IMG_0021.jpg

Christmas Wreath Cookies

Author:
prep time: cook time: total time:

ingredients:

For Marshmallows
  • 2 cups honey
  • 1 cup of filtered water
  • 2 tsp vanilla
  • 1 tsp sea salt
  • 6 TBS grass-fed beef gelatin
  • 1 cup of filtered water
For Wreath Cookies
  • Marshmallow paste (above)
  • 8 ounces organic butter
  • 14 cups coconut flakes (approximately 20 ounces)
  • Red hots (my homemaderecipe)
  • Natural food coloring, blue and yellow packets (I used this one)

instructions:

How to cook Christmas Wreath Cookies

  1. Place the coconut flakes in the oven at 200°
  2. Toast the coconut until they are light brown—this makes the cookies crispier! When done, remove them from the oven Place in a large bowl, set aside.
  3. Melt the butter in a saucepan over low heat When melted, remove from heat and set aside Next, make the marshmallow paste. See recipe here.
  4. Soften the gelatin
  5. Add gelatin to 1 cup hot water
  6. Stir and allow to to sit, keep warm (not on stove)
  7. While gelatin is softening... Heat honey and water in a medium saucepan (medium to high heat), stirring frequently, until it reaches the soft ball candy stage (about 235°F).
  8. If you don't have a thermometer, you can check by dripping the heated honey into a glass of cold water. When the candy forms a ball, it is ready!
  9. When the honey has reached the soft ball stage, remove from heat. Add the heated mixture to the softened gelatin in a large bowl. Add vanilla.
  10. Do these steps quickly, you don't want honey mixture to cool off too much!
  11. Whisk the mixture using an electric mixer or stand mixer for about 10 minutes.
  12. When the mixture is thick and looks like marshmallow paste, it's done!
  13. If you want marshmallows, you can stop here. Put the marshmallow paste in a greased glass 9x11 dish and allow to cool and dry for a 24-36 hrs. Then cut up and serve.
  14. But we are not stopping here! To make traditional Christmas wreath cookies you melt the marshmallows and turn them back into paste-which is what you just created!
  15. Next, stir the melted butter into the mixture. It will deflate the mixture somewhat, this is normal.
  16. Mix in the blue and yellow food coloring packets. This will turn it green (not neon green—that's an artificial color). But when it's made into wreathes it does look green—although you're going to have to take my word for it!
  17. Pour the marshmallow mixture into the bowl with the toasted coconut flakes. Mix until the flakes are coated.
  18. Finally, form the warm mixture into wreath-shaped cookies on parchment paper.
  19. Add decorative red hots as berries (see my homemade recipe) Allow to cool.
  20. See, I told you they look green!
  21. All that's left is to share and enjoy these delicious treats!
Created using The Recipes Generator

Raw Milk Chocolate Pudding

Some days don't you just miss pudding cups? I know I do.

Now you can make your own! The most frequent comment about this pudding (besides "yum", "delicious", and "mmm...") is that it tastes just like a chocolate pudding cup! This simple recipe is a wonderful treat for you and your family, and because it's made of real food ingredients it can be enjoyed without guilt.

Of course this, like all sweet items, should be enjoyed in moderation and not as a meal replacement. And if you are following a healing protocol, you will need to wait until significant gut healing has occurred before enjoying this.

A note for those on the GAPS diet: While this is technically (advanced) full GAPS legal, not everyone is able to tolerate raw milk, cream or cocoa. Listen to your body and only eat this when it is a good choice for you.

Enjoy this video, then scroll down for the recipe. We hope you enjoy it!

Raw Milk Chocolate Pudding

Recipe by Erin Goodin

Warm on stovetop (medium heat)

Heat to 95°F to activate the gelatin, then remove from heat

In a blender, combine

  • 2 cups raw milk

  • 1/2 cup raw honey

  • 3 egg yolks

  • 1/4 cup cocoa powder

  • heated mixture

  • 1 tsp vanilla extract

Blend until combined

Pour into desired container(s)

Chill for 12-24 hrs in the fridge

Whipped Cream Topping

  • 2 cups cream

  • 2 TBS honey

Whip until stiff, then use to top the pudding

Enjoy!

Affiliate disclosure: There are affiliate links contained in the post. The small commission I receive helps to keep this blog going. I do not recommend products that I do not trust.


Raw Milk Chocolate Pudding

Author:
prep time: cook time: total time:

ingredients:

Raw Milk Chocolate Pudding
Whipped Topping
  • 2 cups cream
  • 2 TBS honey

instructions:

How to cook Raw Milk Chocolate Pudding

  1. Warm on stovetop (medium heat): 1 cup raw milk, 1 TBS gelatin (brand I recommend), 1/2 tsp sea salt (brands I recommend),  1 TBS butter.
  2. Heat to 95°F to activate the gelatin, then remove from heat
  3. In a blender, combine: 2 cups raw milk, 1/2 cup raw honey, 3 egg yolks, 1/4 cup cocoa powder, heated mixture, 1 tsp vanilla extract.
  4. Blend until combined
  5. Pour into desired container(s)
  6. Chill for 12-24 hrs in the fridge
  7. Whipped Cream Topping: 2 cups cream,  2 TBS honey.
  8. Whip until stiff, then use to top the pudding
  9. Enjoy!

NOTES:

Recipe by Erin Goodin
Created using The Recipes Generator

Just two months...

Waiting in my inbox this week was a wonderful surprise!

At my training I had heard rumors, we had initiated discussions, and all of us knew that this would be a great idea... if only someone would do the work. Well, someone has! Coming September 16th, 2014...

The Heal Your Gut Cookbook by Hilary Boynton and Mary Brackett, with foreword by Dr. Natasha Campbell-McBride

This looks like an awesome book! It was created by 2 GAPS parents, and contains over 200 recipes you can use to heal your body--all GAPS legal! Sorting through the myriad of recipes (even GAPS specific recipes) is a challenge for anyone on this diet, including me. I cannot wait for this book to get published so I can get my hands on a copy and start cooking! Although I know it will not do the work for me, it will make the preparing to prepare time shorter. It will also make it easier to answer the "What are we having for dinner" question. And it comes with pictures! Did I mention that? This is almost a must for me when I am purchasing a cookbook. These are available to me on September 1st, and I will be purchasing several. Reserve your copy by contacting me today. You can check out more at http://www.chelseagreen.com/downloads/HealYourGut_PR.pdf  

*I did not receive any compensation for advertising this product