vegetables

Cream of Vegetable Soup

I have two purposes for posting this cream of vegetable soup. Number one if you have recipes that call for cream of vegetable soup, you no longer have to use a canned cream of vegetable soup (similar to this cream of mushroom soup) Number two at different times in our healing journey, our body would like more vegetables so this is a way to get a rich and thick soup that contains meat’s amino acids without having to digest meat pieces. 

The goal of this soup is rich flavor. Be liberal in your vegetables and herbal seasonings. You can use other vegetables if you have them! 

Ingredients for Homemade Cream of Vegetable Soup:

  • ¼ cup of Butter

  • 1 Medium White Onion

  • Garlic

  • 3-4 Carrots

  • 1 Large Turnip or Zucchini

  • 2 Stalks of Celery

  • 1 tsp Salt

  • 1 Handful, about 20 sprigs, Parsley

  • 8 Peppercorns

  • 4 cups Stock (whatever you have on hand. I had beef but you can use chicken or vegetable although you won’t get the healing properties of animal amino acids)

  • 16 oz. Sour Cream

Directions for Cream of Vegetable Soup:

IMG_8388.jpg

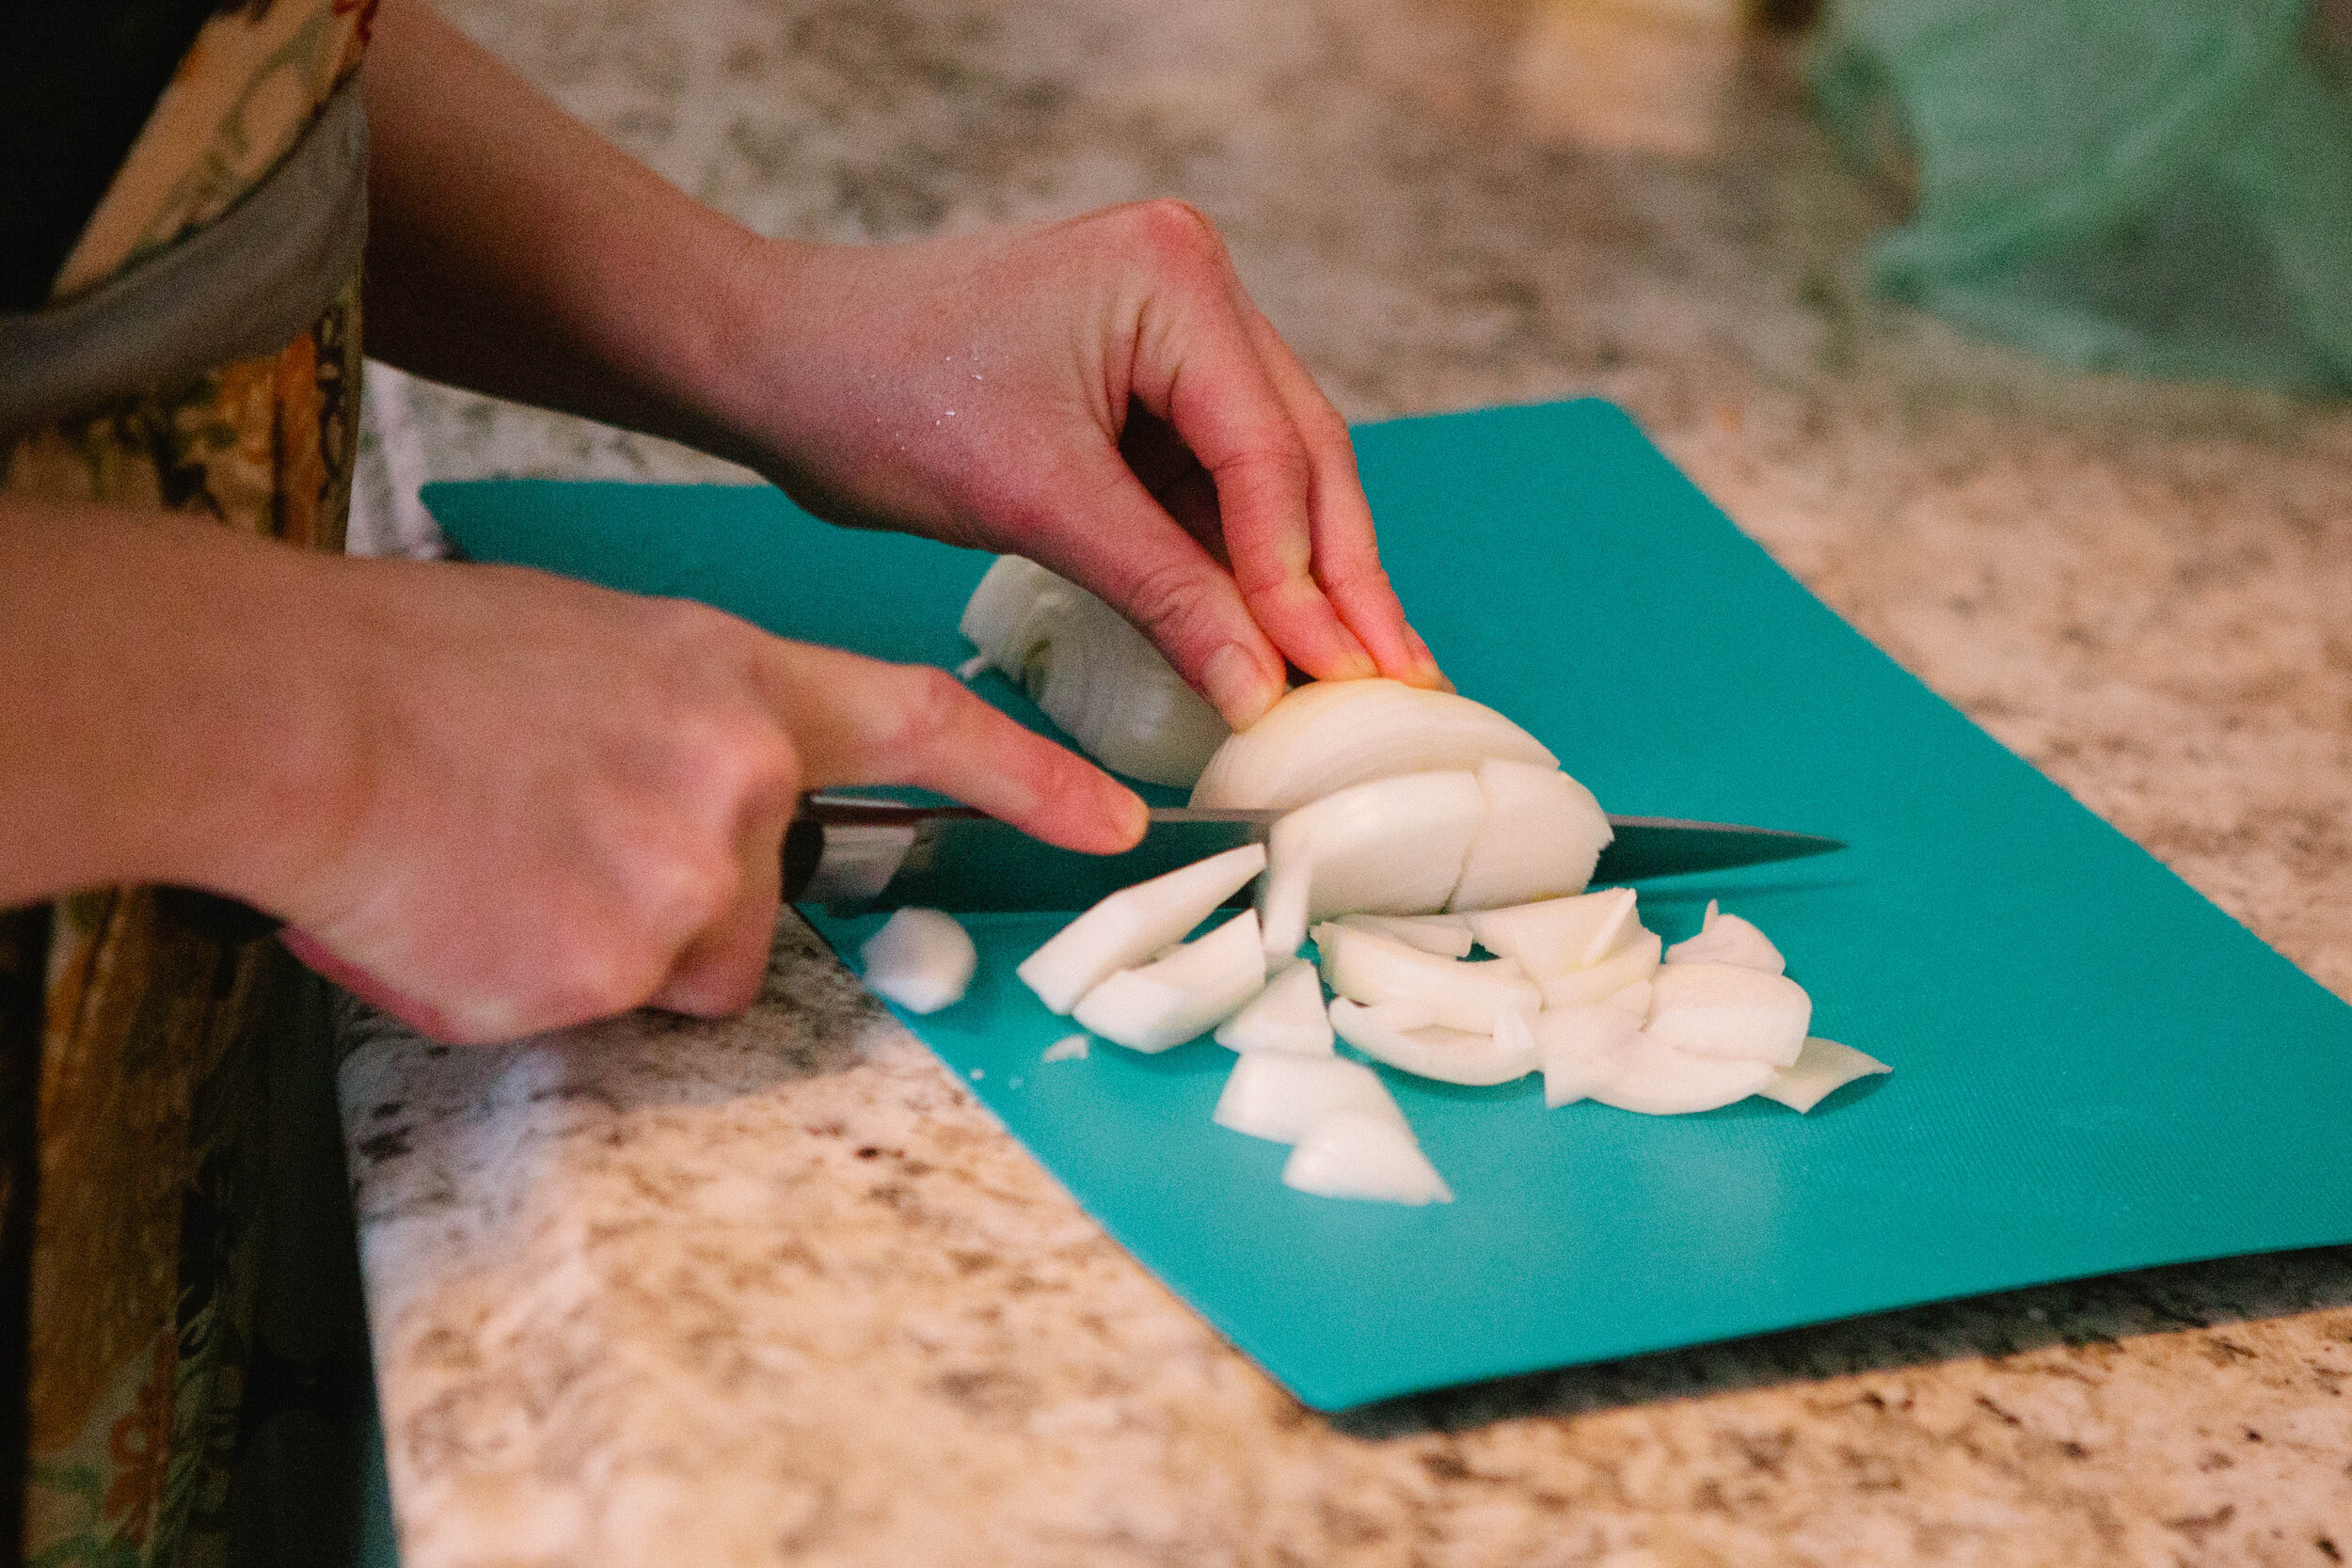
In a large stock pot, melt butter. Cut the onion in half and slice it. Add to the melted butter.

Cube the turnip, and slice the carrots and celery. Add to the stock pot. Roughly chop the parsley, and add to the pot with the salt and peppercorns. Mix.

IMG_8427.jpg

Add in the stock and allow to simmer on low for about 40 - 60 minutes, until the vegetables are soft.

Immersion blend your soup or place it in a blender until it is completely smooth and free of chunks. 

IMG_8543.jpg

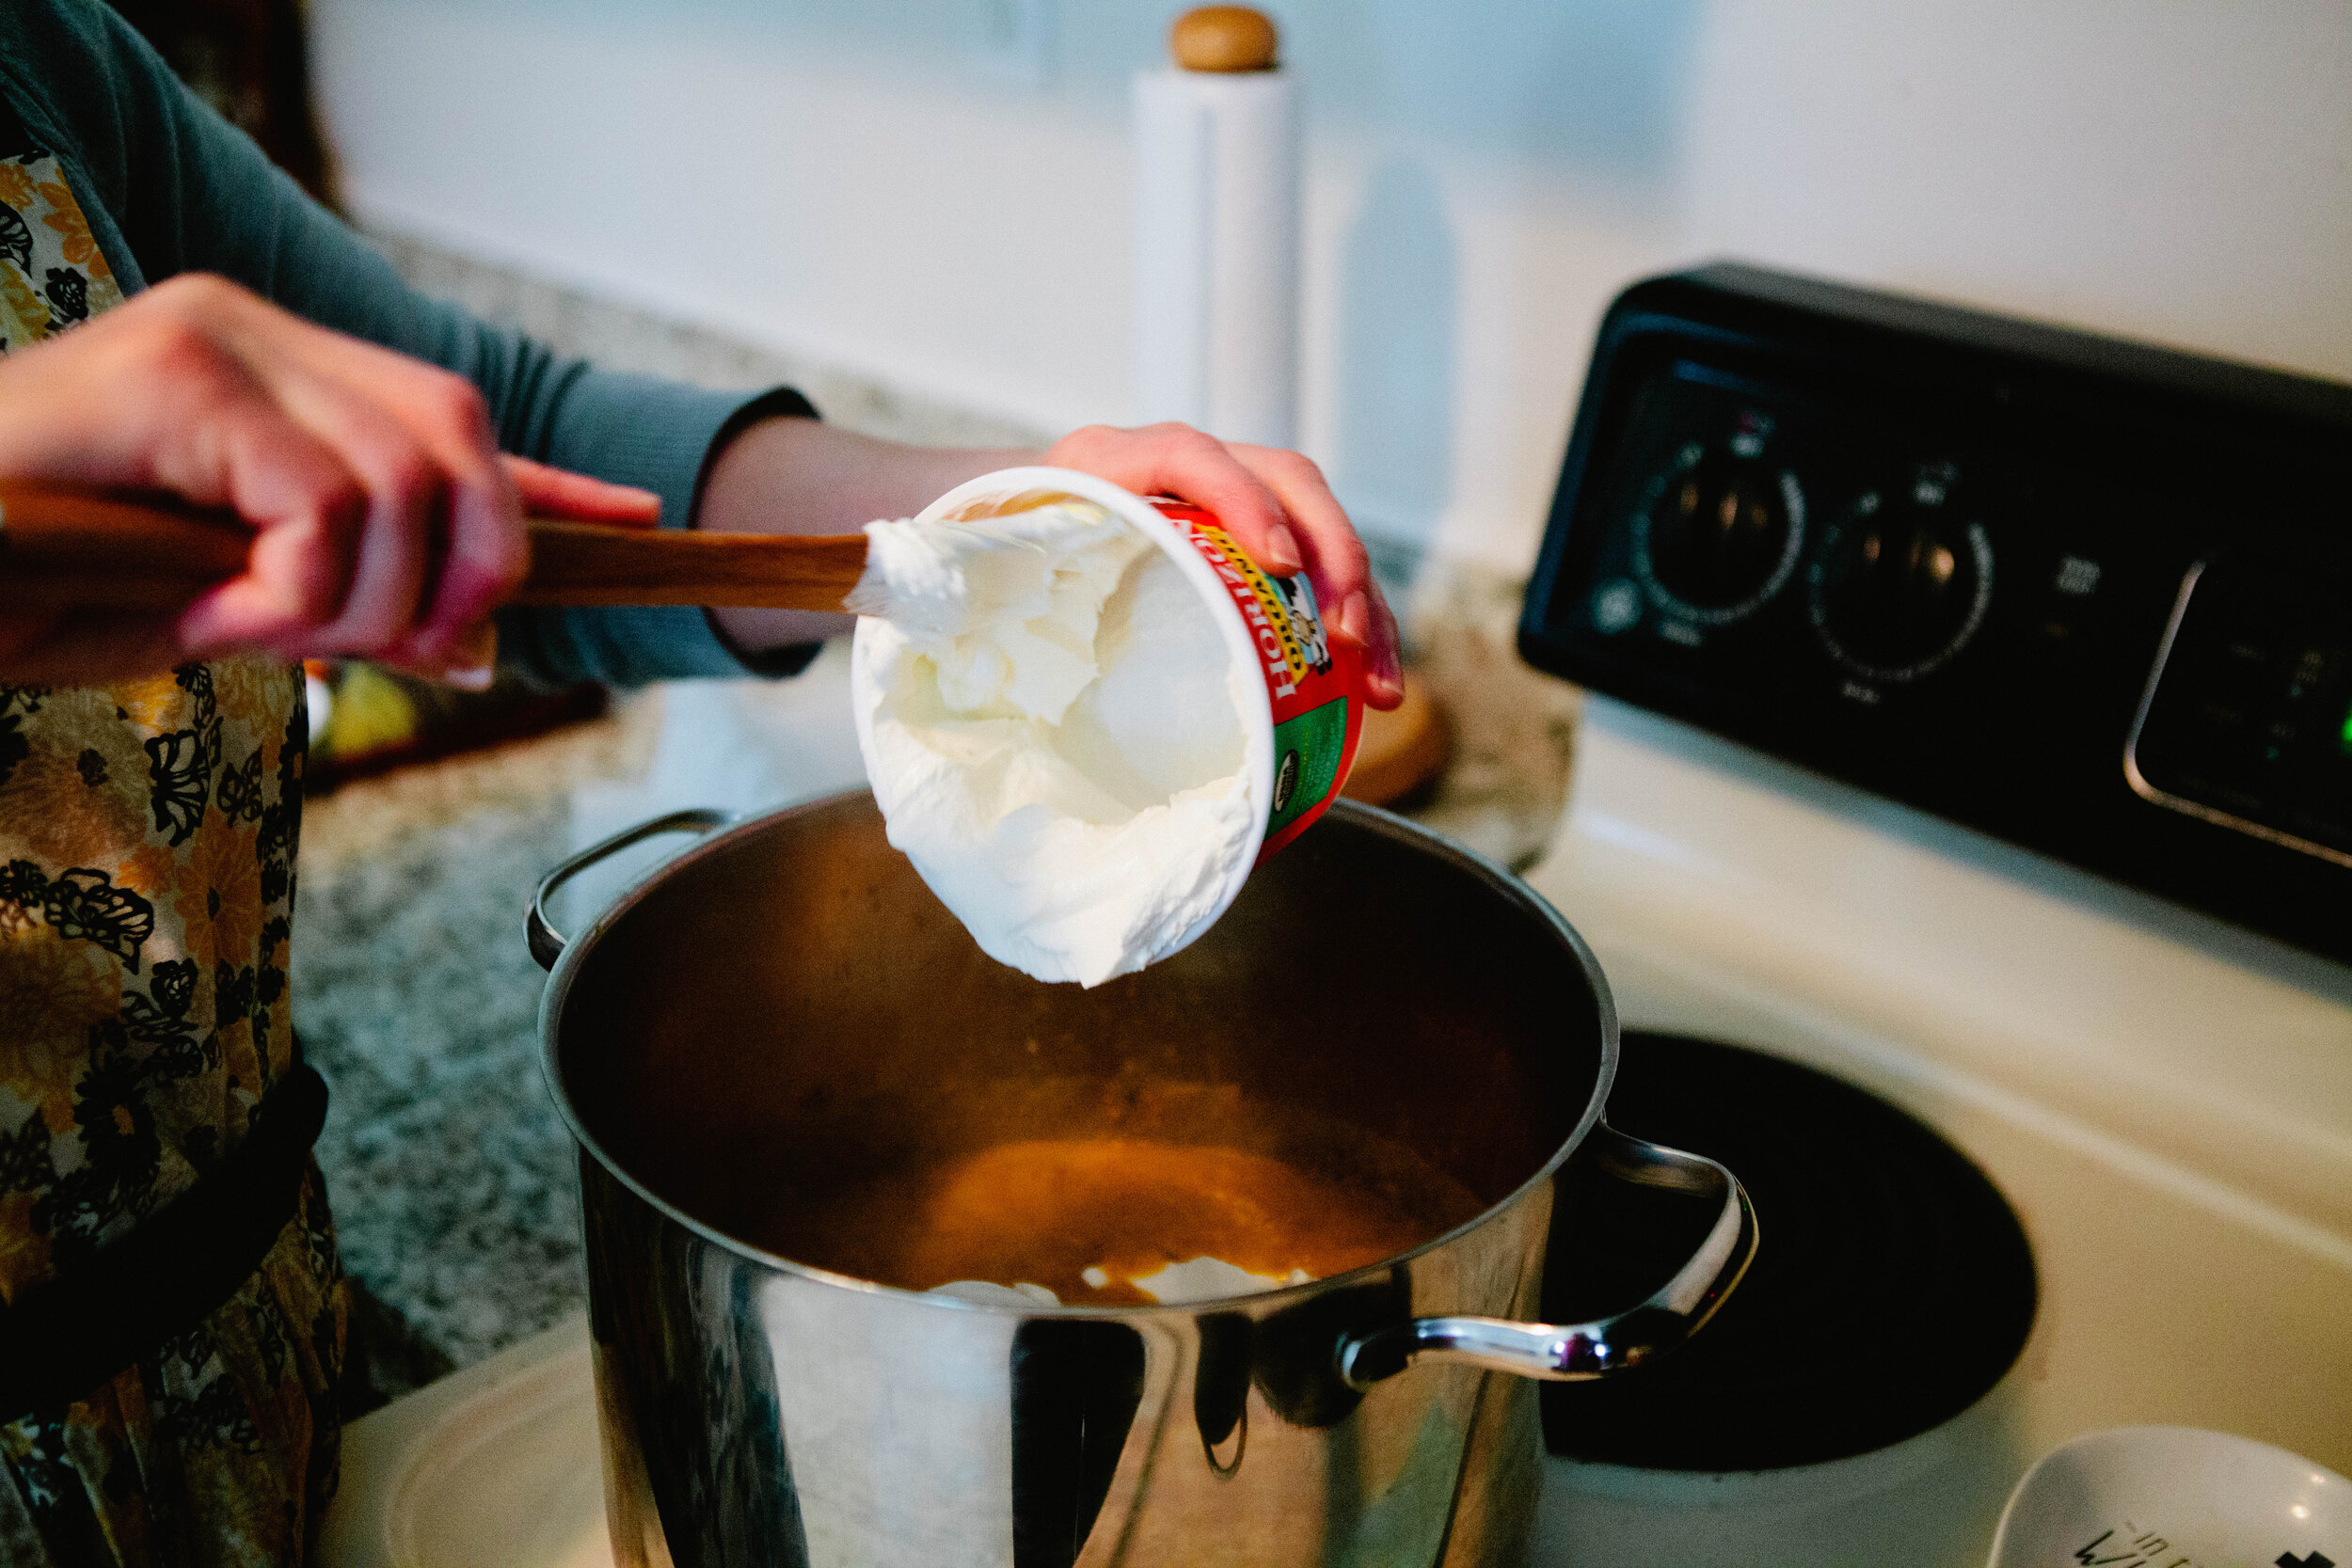
Add in sour cream. Stir to combine and melt the sour cream.

Enjoy!


HowtoMakeHomemadeCreamofVegetableSoupGAPSDietSoupsRecipe.png

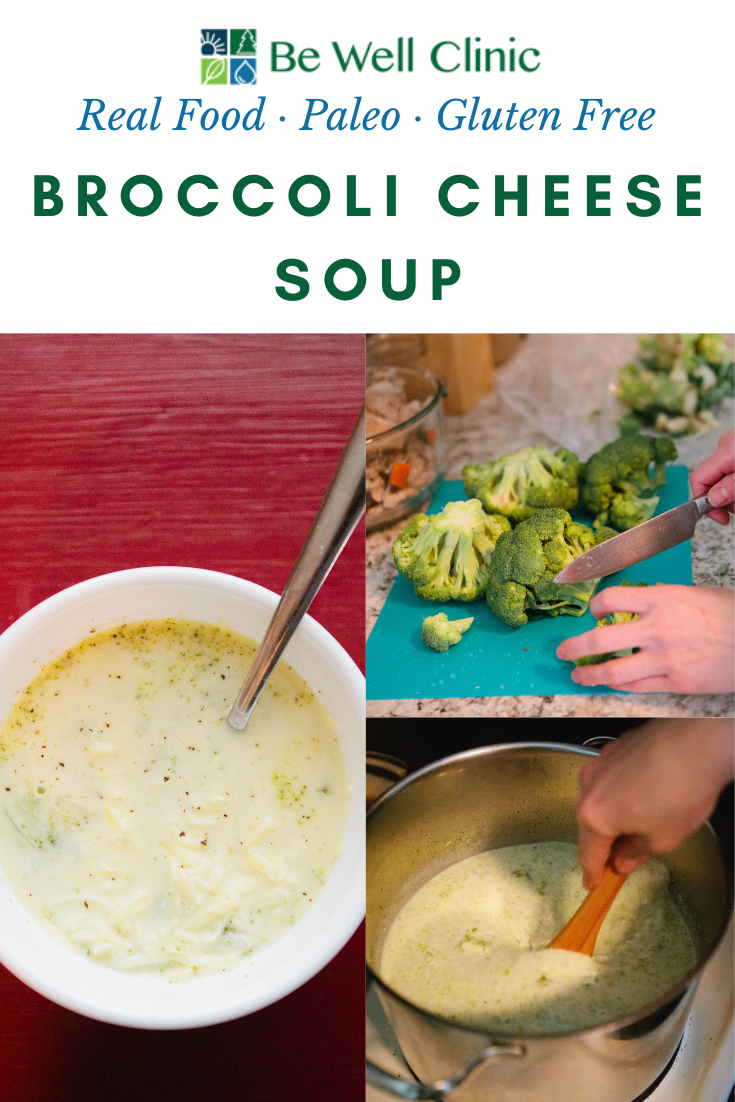
Broccoli Cheese Soup

My mom used to make a version of broccoli cheese soup which I enjoyed until I started reacting to dairy. This recipe is definitely not something that can be made dairy free. If you are able to enjoy dairy, I recommend it. It’s made from nutrient dense foods, primarily butter, cheese, broccoli and stock, which will result in a filling nutrient dense soup perfect for cold winter months! If you cannot yet enjoy dairy, I highly recommend following the GAPS Diet so you can eat this soup. 

Ingredients:

  • 7 cups Chicken Stock

  • ½ Stick/ 4 tbsp Butter

  • 1 Medium Onion

  • 6 Cloves of Garlic

  • 1 - 2 tsp of Salt, to taste

  • 6 cups of Broccoli Florets, about 3 heads

  • 4 oz White Cheddar Cheese, Freshly Grated

  • 1 1/2 cups (12 oz) Cream

Directions:

IMG_7459.jpg

Add the butter to a large pot.  Turn the heat to medium / medium low. Allow the butter to melt. Roughly chop the onion and add to the pot.

Stir the onion to coat thoroughly with butter. Allow the onion to cook for about five minutes, turning down if the heat is too much. Do not allow the onions to caramelize. 

Add the garlic to the pot when the onions are soft. After a few minutes, add in the stock. Stir in the salt, to taste.

IMG_7732.jpg

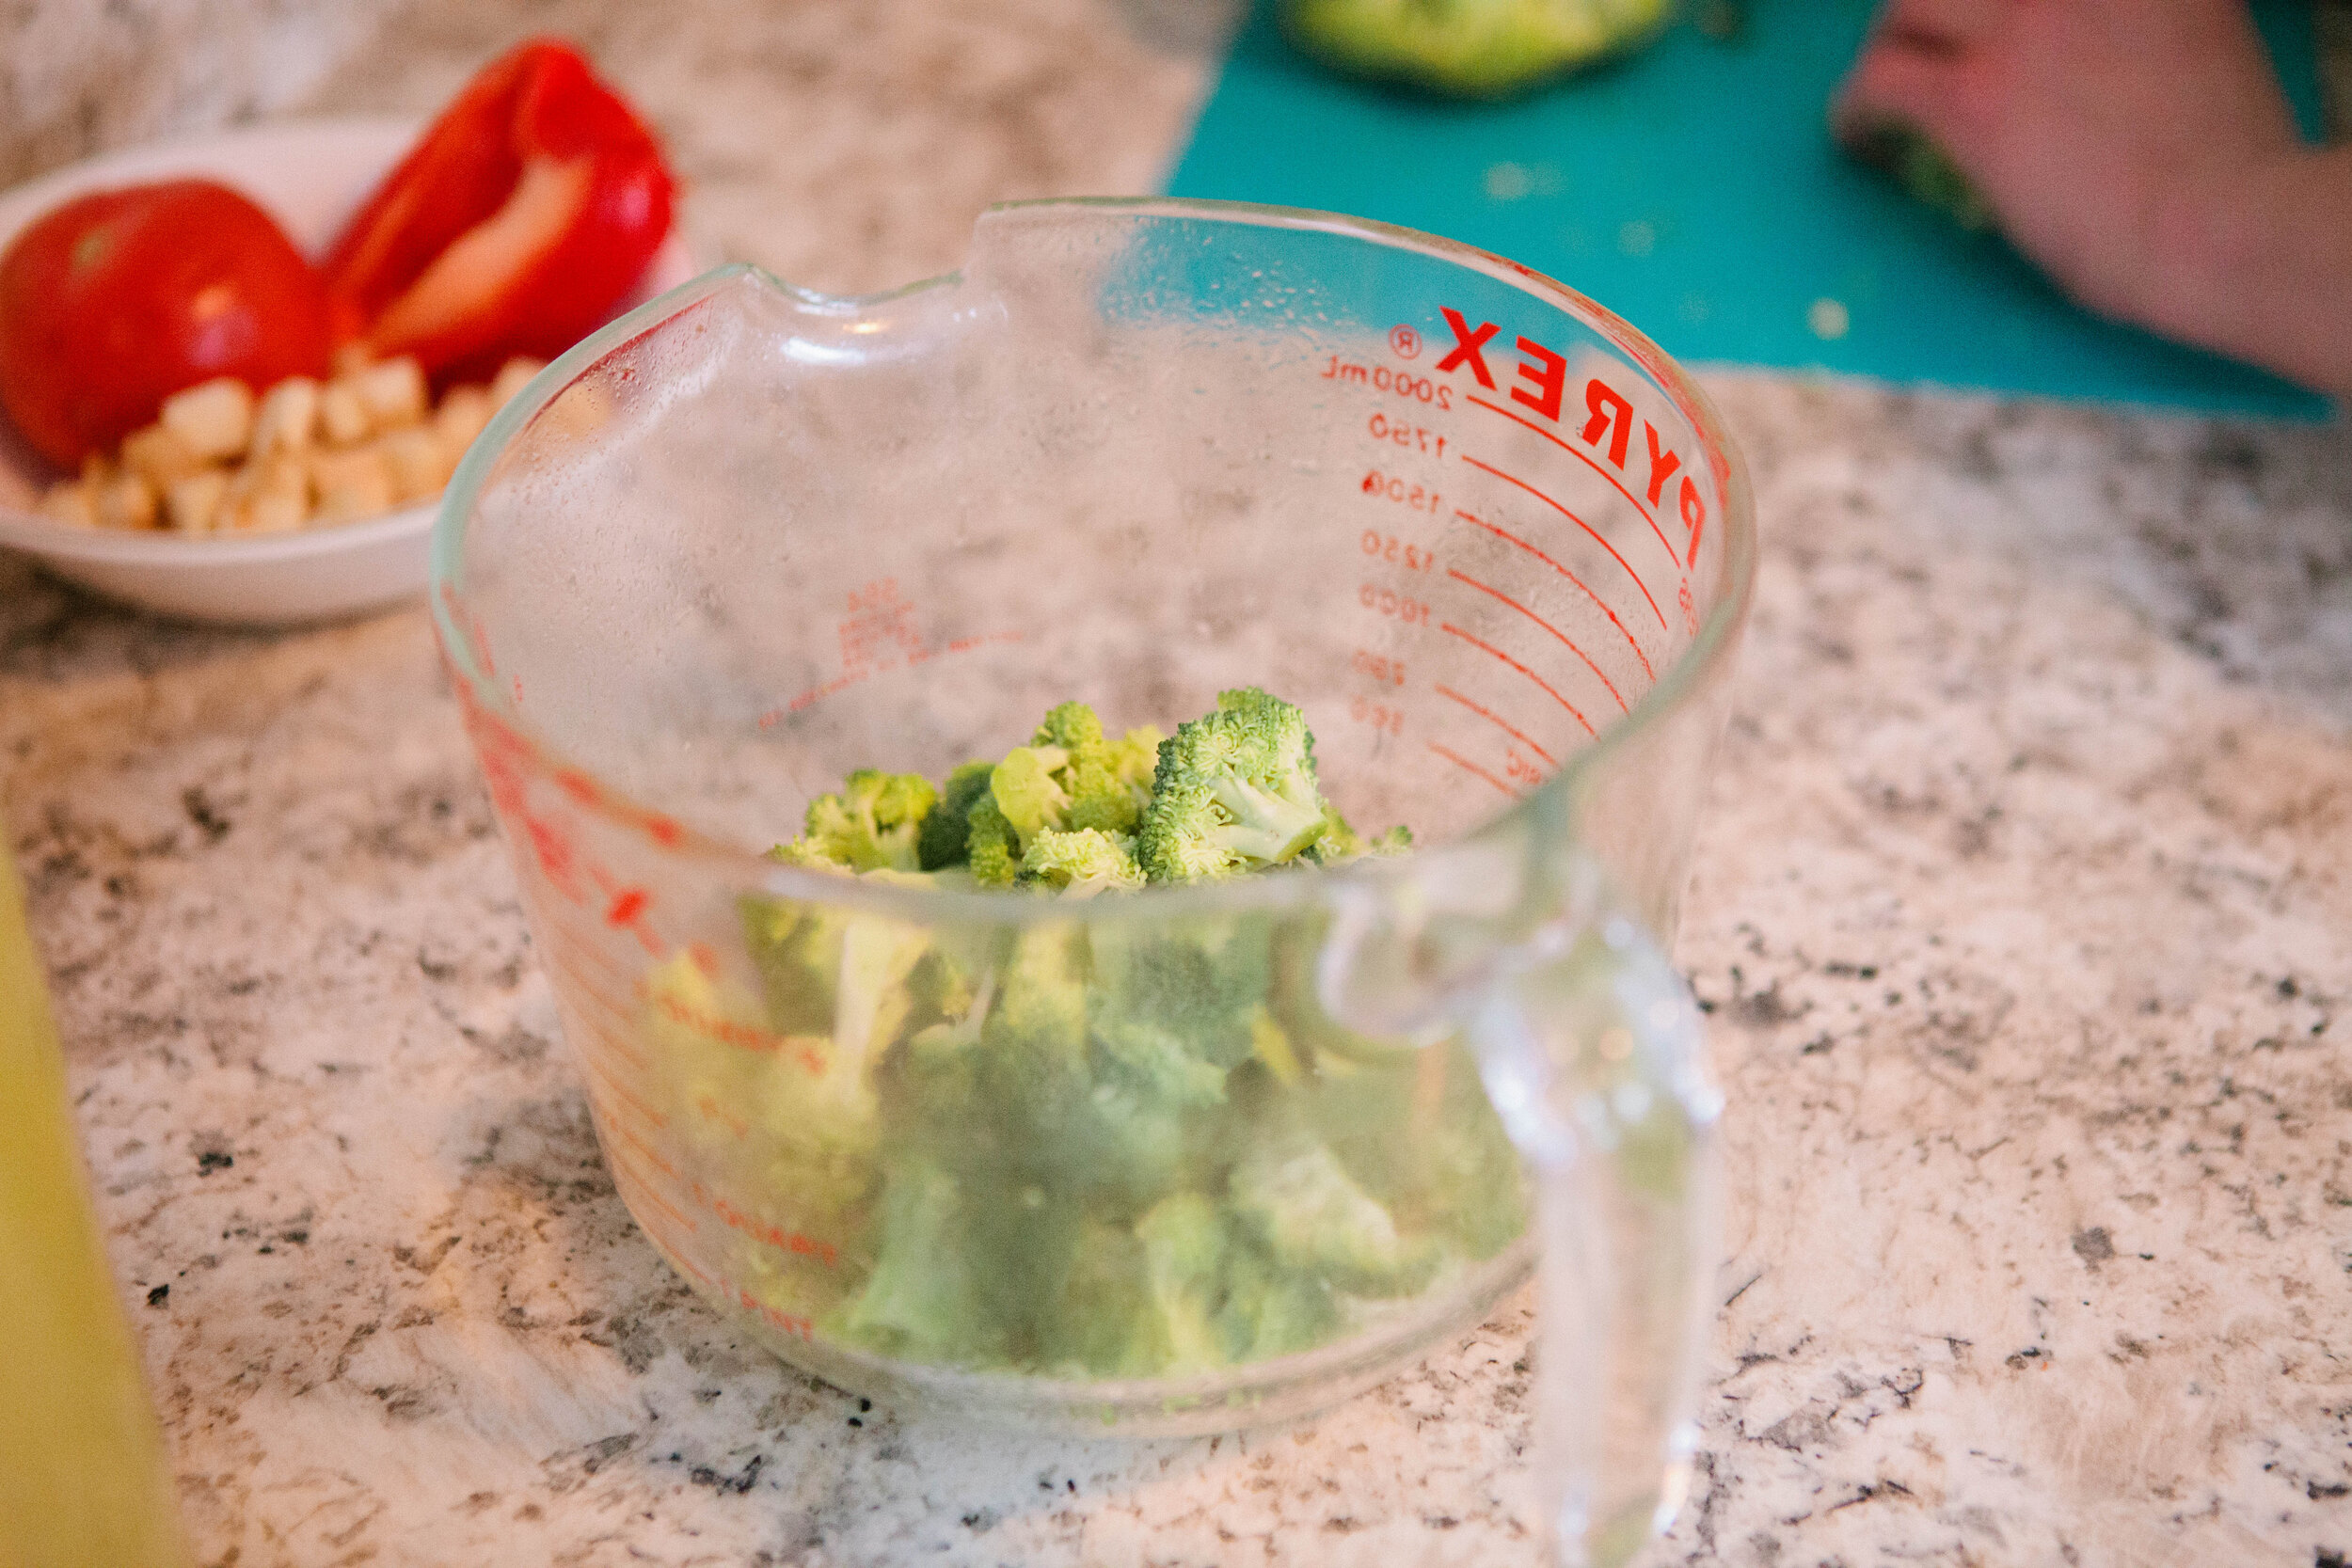
Roughly chop the broccoli. If you do not plan to blend your soup, chop it into small pieces.

Add the broccoli to the pot and stir. Turn up the heat to medium high. When the mixture reaches a boil, adjust heat to keep the mixture at a rolling simmer.

IMG_7760.jpg

When broccoli is soft, add mixture to a blender or immersion blend it and remove it from the heat.

IMG_7786.jpg

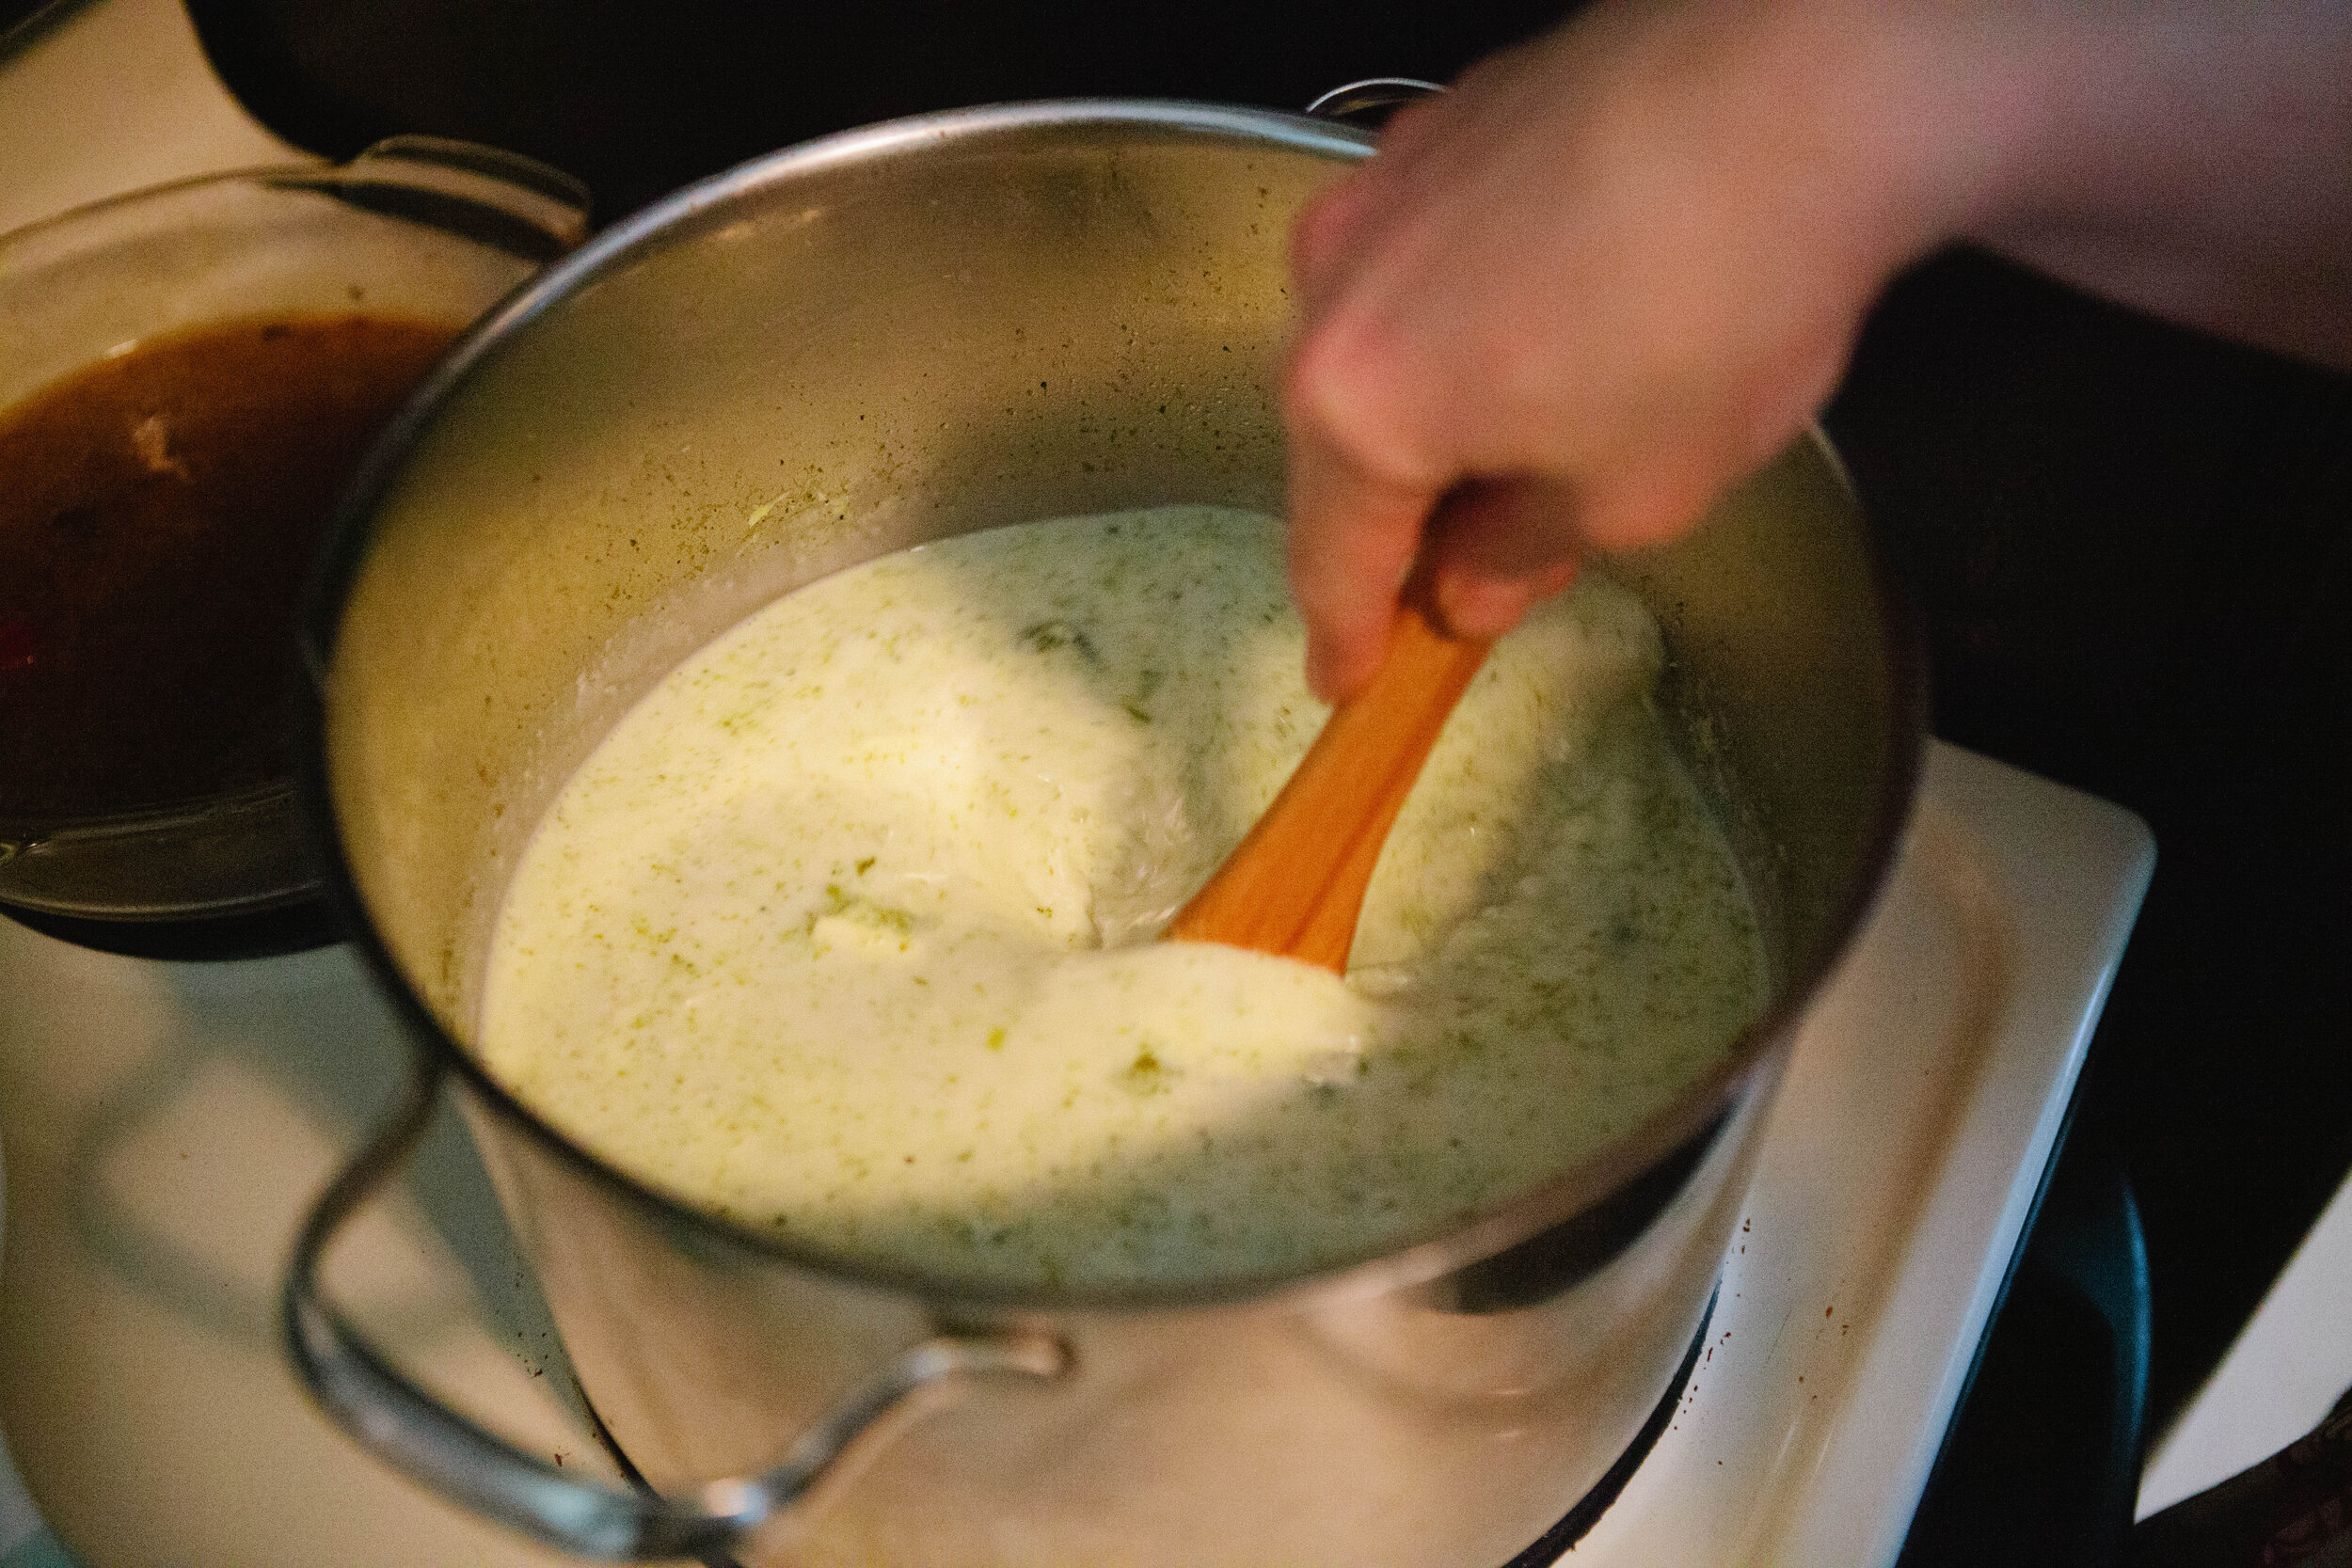
Grate the cheese. Add in the cream and cheese to the broccoli mixture and stir until combined and cheese is melted.

Serve with more fresh grated cheese on top. Salt to taste - if you made stock without salt, you will likely need lots of salt!

Enjoy!


BroccoliCheeseSoupRealFoodRecipe.png

Broccoli Cheese Soup

Author: Amy Mihaly, Be Well Clinic

Ingredients

  • 7 cups Chicken Stock
  • ½ Stick/ 4 tbsp Butter
  • 1 Medium Onion
  • 6 Cloves of Garlic
  • 2 tsp of Salt, to taste
  • 6 cups of Broccoli Florets, about 3 heads
  • 4 oz White Cheddar Cheese, Freshly Grated
  • 1 1/2 cups (12 oz) Cream

Instructions

  1. Add the butter to a large pot. Turn the heat to medium / medium low. Allow the butter to melt. Roughly chop the onion and add to the pot.
  2. Stir the onion to coat thoroughly with butter. Allow the onion to cook for about five minutes, turning down if the heat is too much. Do not allow the onions to caramelize.
  3. Add the garlic to the pot when the onions are soft. After a few minutes, add in the stock. Stir in the salt, to taste.
  4. Roughly chop the broccoli. If you do not plan to blend your soup, chop it into small pieces.
  5. Add the broccoli to the pot and stir. Turn up the heat to medium high. When the mixture reaches a boil, adjust heat to keep the mixture at a rolling simmer.
  6. When broccoli is soft, add mixture to a blender or immersion blend it and remove it from the heat.
  7. Grate the cheese. Add in the cream and cheese to the broccoli mixture and stir until combined and cheese is melted.
  8. Serve with more fresh grated cheese on top. Salt to taste - if you made stock without salt, you will likely need lots of salt!
  9. Enjoy!
Warm Roasted Vegetable Salad

I am always shocked at how delicious roasted vegetables are, and wonder why I don’t do it more often! It does take a little bit of forethought and prep as it takes approximately 40 minutes to roast vegetables. But it’s well worth the effort whenever you remember to roast.

Although not what you would typically think of as a salad, this vegetable medley is a perfect salad for cozy winter days. 

It’s a great way to use any vegetables that you need to use up or have leftover pieces of. You can also roast them using any type of fat that you have on hand. I generally prefer using lard because I prefer the taste of lard better. I used tallow to make this recipe because that’s what I had on hand.

Ingredients for Roasted Vegetable Salad:

  • 1 Delicata Squash

  • 4-6 Carrots

  • 1 Beets

  • ½ Onion

  • 1 Head of Garlic Cloves, in Papers (you will remove the papers after baking and before serving)

  • ¼ - ½ cup of Fat Tallow or Lard

  • Homemade Salad Dressing

Directions for Roasted Vegetable Salad:

IMG_7810.jpg

Preheat the oven to 400. Slice the delicata squash and remove the seeds. There is no need to peel your squash. Dice into cubes.

Cut your other vegetables into similarly sized pieces for even cooking. . Remember if you choose to add beets, you will have a distinctly beet flavor no matter what other vegetables you add to your salad. But beets are great for the gallbladder and the liver and should be consumed regularly.

IMG_7815.jpg

Add the garlic cloves in their paper to the pan. This prevents them from burning. Add fat of choice to the top of the pan.

Place the pan into the oven. After about 15 minutes, stir the melted fat and vegetables. Add more fat if your vegetables do not appear to be moistened enough. 

Continue to cook for another 30-40 minutes until vegetables are soft.

IMG_7941.jpg

When vegetables are soft, take them out of the oven. Toss them with salad dressing.

Serve & enjoy!


WarmRoastedVegetableSalad.png

Warm Roasted Vegetable Salad

Author: Amy Mihaly, Be Well Clinic

Ingredients

  • 1 Delicata Squash
  • 6 Carrots
  • 1 Beets
  • ½ Onion
  • 1 Head of Garlic Cloves, in Paper
  • ¼ - ½ cup of Fat Tallow or Lard
  • Homemade Salad Dressing

Instructions

  1. Preheat the oven to 400. Slice the delicata squash and remove the seeds. There is no need to peel your squash. Dice into cubes.
  2. Cut your other vegetables into similarly sized pieces for even cooking. . Remember if you choose to add beets, you will have a distinctly beet flavor no matter what other vegetables you add to your salad. But beets are great for the gallbladder and the liver and should be consumed regularly.
  3. Add the garlic cloves in their paper to the pan. Add fat of choice to the top of the pan.
  4. Place the pan into the oven. After about 15 minutes, stir the melted fat and vegetables. Add more fat if your vegetables do not appear moistened.
  5. Continue to cook for another 30-40 minutes until vegetables are soft.
  6. When vegetables are soft, take them out of the oven. Toss them with salad dressing.
  7. Serve & enjoy!

Kid Friendly Rainbow Ferment

One of the best ways to get kids excited about eating real food is to make it fun! You can do this by making the preparation or cooking process fun, giving it a fun name, or making the presentation fun, like eating “Ants on a Log”.

When giving fermented food to your children, it’s best to consider what vegetables they already like and in what forms. For example, if your child really likes coleslaw, then sauerkraut will likely be a favorite but if they like carrot sticks, ginger carrots will probably go over well.

IMG_2506.jpg

Feel free to discuss and replace any of these vegetables with vegetables of similar color that your family likes better. You should be able to make this fun and interactive ferment a family favorite.

Some of my favorite salts for ferments are baja gold and Redman’s real salt. 

Ingredients for Rainbow Ferment:

  • Red Beets

  • Carrots

  • Yellow Pepper

  • Broccoli

  • Purple Cabbage

  • Baja Salt

  • Water

Directions for Rainbow Ferment:

IMG_2496.jpg

Fill a quart mason jar most of the way with cold filtered water. Remember filtered water is very important here otherwise you will kill your ferment.

Add 3 tbsp of salt. Stir to dissolve completely.

IMG_2520.jpg

Cut the vegetables into bite size pieces and layer them in the jar in rainbow color order. Try not to overfill the jar. The vegetables should not come any taller than the shoulder of the jar. A jar that is too full is more likely to leak and make a mess in your kitchen.

IMG_2552.jpg

When you get to the cabbage, set aside one full small leaf. Fill the jar with the brine up to the shoulder. Add the cabbage leaf to the top to hold all the vegetables under the level of the water.

Wipe off the top of the jar & add a lid and band. Close to finger tightness.

Leave on the counter for 5-7 days. Then move to cold storage.


RecipeforKidFriendlyRainbowFerment.png

Kid Friendly Rainbow Ferment

Author: Amy Mihaly, Be Well Clinic

Ingredients

  • Red Beets
  • Carrots
  • Yellow Pepper
  • Broccoli
  • Purple Cabbage
  • Baja Salt
  • Water

Instructions

  1. Fill a quart mason jar most of the way with cold filtered water. Remember filtered water is very important here otherwise you will kill your ferment.
  2. Add 3 tbsp of salt. Stir to dissolve completely.
  3. Cut the vegetables into bite size pieces and layer them in the jar in rainbow color order. Try not to overfill the jar. The vegetables should not come any taller than the shoulder of the jar. A jar that is too full is more likely to leak and make a mess in your kitchen.
  4. When you get to the cabbage, set aside one full small leaf. Fill the jar with the brine up to the shoulder. Add the cabbage leaf to the top to hold all the vegetables under the level of the water.
  5. Wipe off the top of the jar & add a lid and band. Close to finger tightness.
  6. Leave on the counter for 5-7 days. Then move to cold storage.
Created using The Recipes Generator

Butternut Squash French Fries

Butternut squash french fries are a labor of love. They are totally worth it but you may forget that during making them. The most time consuming part is cutting up the squash into french fry pieces. If you have the patience to do this, you will get rich, filling, crispy fries that are truly a great replacement for potatoes. 

When you’re purchasing your squash, try to find one with a long neck and more neck than gourd bottom. A medium size butternut squash makes enough fries for 2-4 people to enjoy a generous portion. If you need to make more, you can easily follow the same recipe with multiple squashes.

Often, when I make these fries for myself, I use only the neck of the squash due to the ease of cutting it into fry shaped pieces and will use the body of the squash to make a soup with small meatballs or squash pancakes. 

Based on Dr. Natasha Campbell-McBride’s new recommendations on butternut squash, it’s recommended to wait until you are on Full GAPS to make this recipe.

Ingredients for Butternut Squash:

  • Butternut Squash

  • 1-2 tbsp Tallow or Lard

  • 1 tsp Salt

  • Additional seasonings as desired

Directions for Butternut Squash:

IMG_1593.jpg

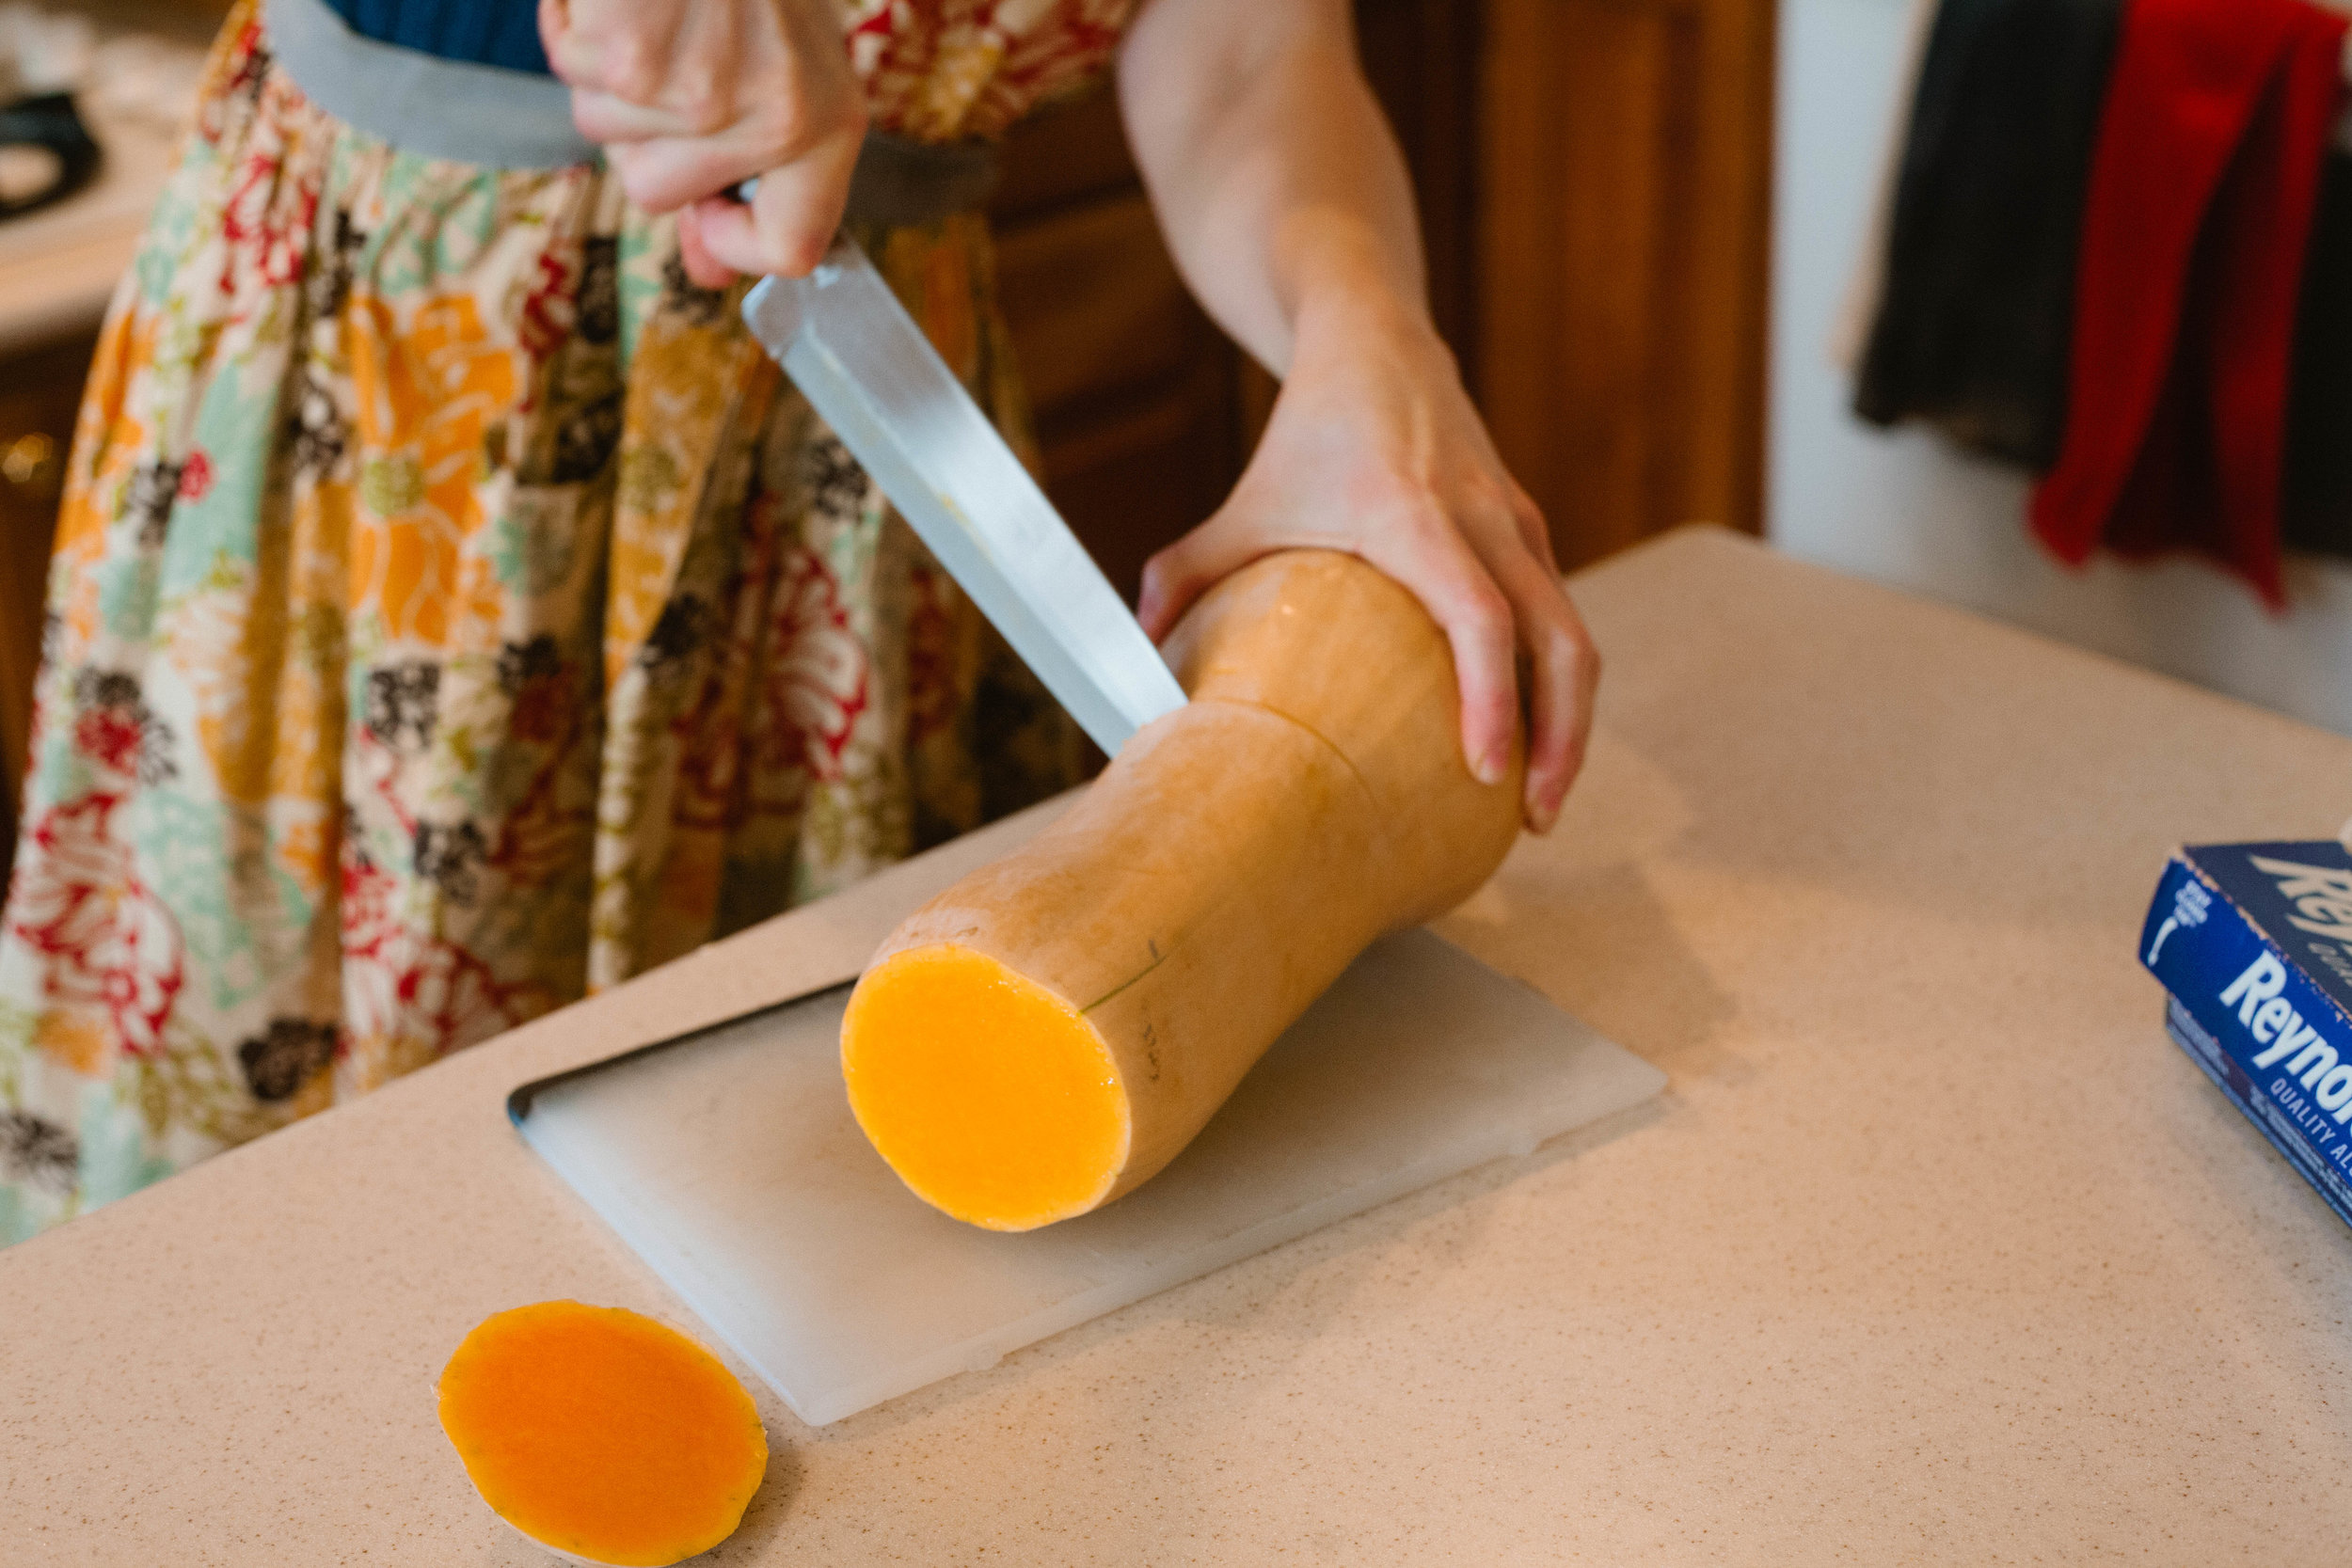
Cut the butternut squash at the base of the neck. Remove the skin of the butternut squash using the sharpest knife you can find, leaving as much of the meat on as you can.

Determine the size you want your french fries to be and cut the squash in half. Scrap out the squash innards.

IMG_1605.jpg

Slice your squash into long, thin slices resembling a french fry.

IMG_1700.jpg

Preheat oven to 400. Add 1-2 tbsp of tallow or lard to the fries, enough to coat them. Shake salt over the top.

Bake for approximately 30 minutes at 400. Stir every ten minutes. Then broil them for 5 minutes until crisp.

Salt them again immediately after they come out of the oven. Enjoy!
IMG_1779.jpg

Alternate Preparation:

Fill a large pot with filtered water. Bring to a boil on the stove.

Add the fry pieces to the pot of boiling water. Boil for 3-5 minutes. Preheat oven to 400.

Drain the water from the fries and remove from heat.

Add 1-2 tbsp of tallow or lard to the fries, enough to coat them. 

Lay them out onto a baking sheet covered with parchment paper.

Bake for approximately 40 minutes at 400. Then broil them for 5 minutes until crisp.


ButternutSquashFrenchFries.png

Butternut Squash French Fries

Author: The Be Well Clinic
Prep time: Cook time: Total time:

Ingredients:

  • Butternut Squash
  • 1-2 tbsp Tallow or Lard
  • 1 tsp Salt
  • Additional seasonings as desired

Instructions:

  1. Fill a large pot with filtered water. Bring to a boil on the stove.
  2. Cut the butternut squash at the base of the neck. Remove the skin of the butternut squash using the sharpest knife you can find, leaving as much of the meat on as you can.
  3. Determine the size you want your french fries to be and cut the squash in half. Scrap out the squash innards.
  4. Slice your squash into long, thin slices resembling a french fry.
  5. Preheat oven to 400. Add 1-2 tbsp of tallow or lard to the fries, enough to coat them. Shake salt over the top.
  6. Lay them out onto a baking sheet covered with parchment paper.
  7. Bake for approximately 30 minutes at 400. Stir every ten minutes. Then broil them for 5 minutes until crisp.
  8. Salt them again immediately after they come out of the oven. Enjoy!
Created using The Recipes Generator

Real Dairy Recipes

On GAPS we don't avoid dairy forever, but we do culture it to make it more digestible. Even if you are not following the GAPS diet, you may find your body likes dairy better when it's cultured. Check out these recipes for ideas and directions on culturing and enjoying your dairy products.

How to culture dairy

Making Whey

Whey is the other protein in milk aside from casein. It’s only present after milk products have been cultured and it’s a live food. This liquid is teeming with good lactic acid producing bacteria (LABs.) Whey is a basic to keep on hand because it can be used to ferment flours, seeds, nuts, vegetables, or as a starter to culture other dairy.

Making Your Own Kefir

Kefir is a fermented drink made from kefir grains. It’s a bit like a very thin yogurt and has great health benefits!

The great news is, like many fermented drinks, kefir is very easy to make on your own!


Milk Recipes

Decadent Hot Chocolate

This hot chocolate is amazing. Rich, thick, decadent, filling, indulging, chocolaty goodness. 

It even passed the skeptical, hot chocolate-loving teenage boy test.  

Which is a big deal.   And it's a nutrient-dense food!  

Raw Milk Chocolate Pudding

Some days don't you just miss pudding cups? I know I do. Now you can make your own! The most frequent comment about this pudding (besides "yum", "delicious", and "mmm...") is that it tastes just like a chocolate pudding cup!


Milk Ice Cream

I discovered this delicious ice cream years and years ago from an old ice cream maker recipe book. This is really making a custard base which makes it thick and creamy and allows you to not have to add so many filler ingredients. You can make it with cream or whole milk.


Cheese Recipes

Twice Baked Cauliflower

Stop whatever dinner plans you have and go buy a cauliflower! This recipe is the best side dish I have ever had... and I don't even really like cauliflower that much!

Every time I think about it I involuntarily smile and say "yum" to myself (or out loud).

It may be the butter. Or the cheese…

Spinach & Artichoke Dip

Spinach and artichoke dip - just the name conjures up images of a creamy, delicious dip. This one is made with real foods and no mayonnaise and is as delicious as a traditional spinach and artichoke dip. Spinach and artichoke dip gets a bad rap but this recipe is actually a great source of fat!


Sour cream or creme fraiche

Mayo Free Deviled Eggs

One of the foods I miss most? Mayonnaise. Now I know there are different mayos out there, even ones you can make yourself that are GAPS legal. But unless it tastes like the Real Mayo deliciousness that I remember, I have no interest in consuming it. I was a mayo snob long before I payed attention to what I ate!

Mayo Free Egg Salad

Eggs are a great non-meat protein source. While I usually recommend eating eggs yolks running to preserve the cholesterol on them, sometimes a hard boiled egg is hard to beat! I substitute mayo for sour cream in this recipe and it has even more flavor. It’s delicious!


Make Your Own Ranch Dressing

Ranch dressing is typically used as a dip and you can definitely dip any number of cut vegetables into this mixture. However, you could also use this delicious blend as an added flavoring for lots of dishes!


How to Prepare Vegetables

Vegetables are SO versatile. There’s endless ways to season them and eat them. They can be fermented, roasted, fried, or eaten raw. Plants like fruits and vegetables cleanse our bodies. They help our bodies to process and remove the toxins that we are exposed to on a daily basis from the environment around us, even if we do our best to avoid toxins. We mostly benefit from the fiber, antioxidants, enzymes, and other detoxifying substances.

Summer is the time that vegetables shine! Many people are pulling beautiful zucchini, tomatoes, beans, peppers and greens out of their gardens. Fresh vegetables are in season, and you may find yourself desiring them more than usual. Go with it!

Below are a few recipes for how to use the vegetables that you grow in your gardens. If you need help sourcing vegetables without having a garden, check out this blog. To learn about vegetable quality, this blog can help.

Fermented Vegetables

Vegetable Medley

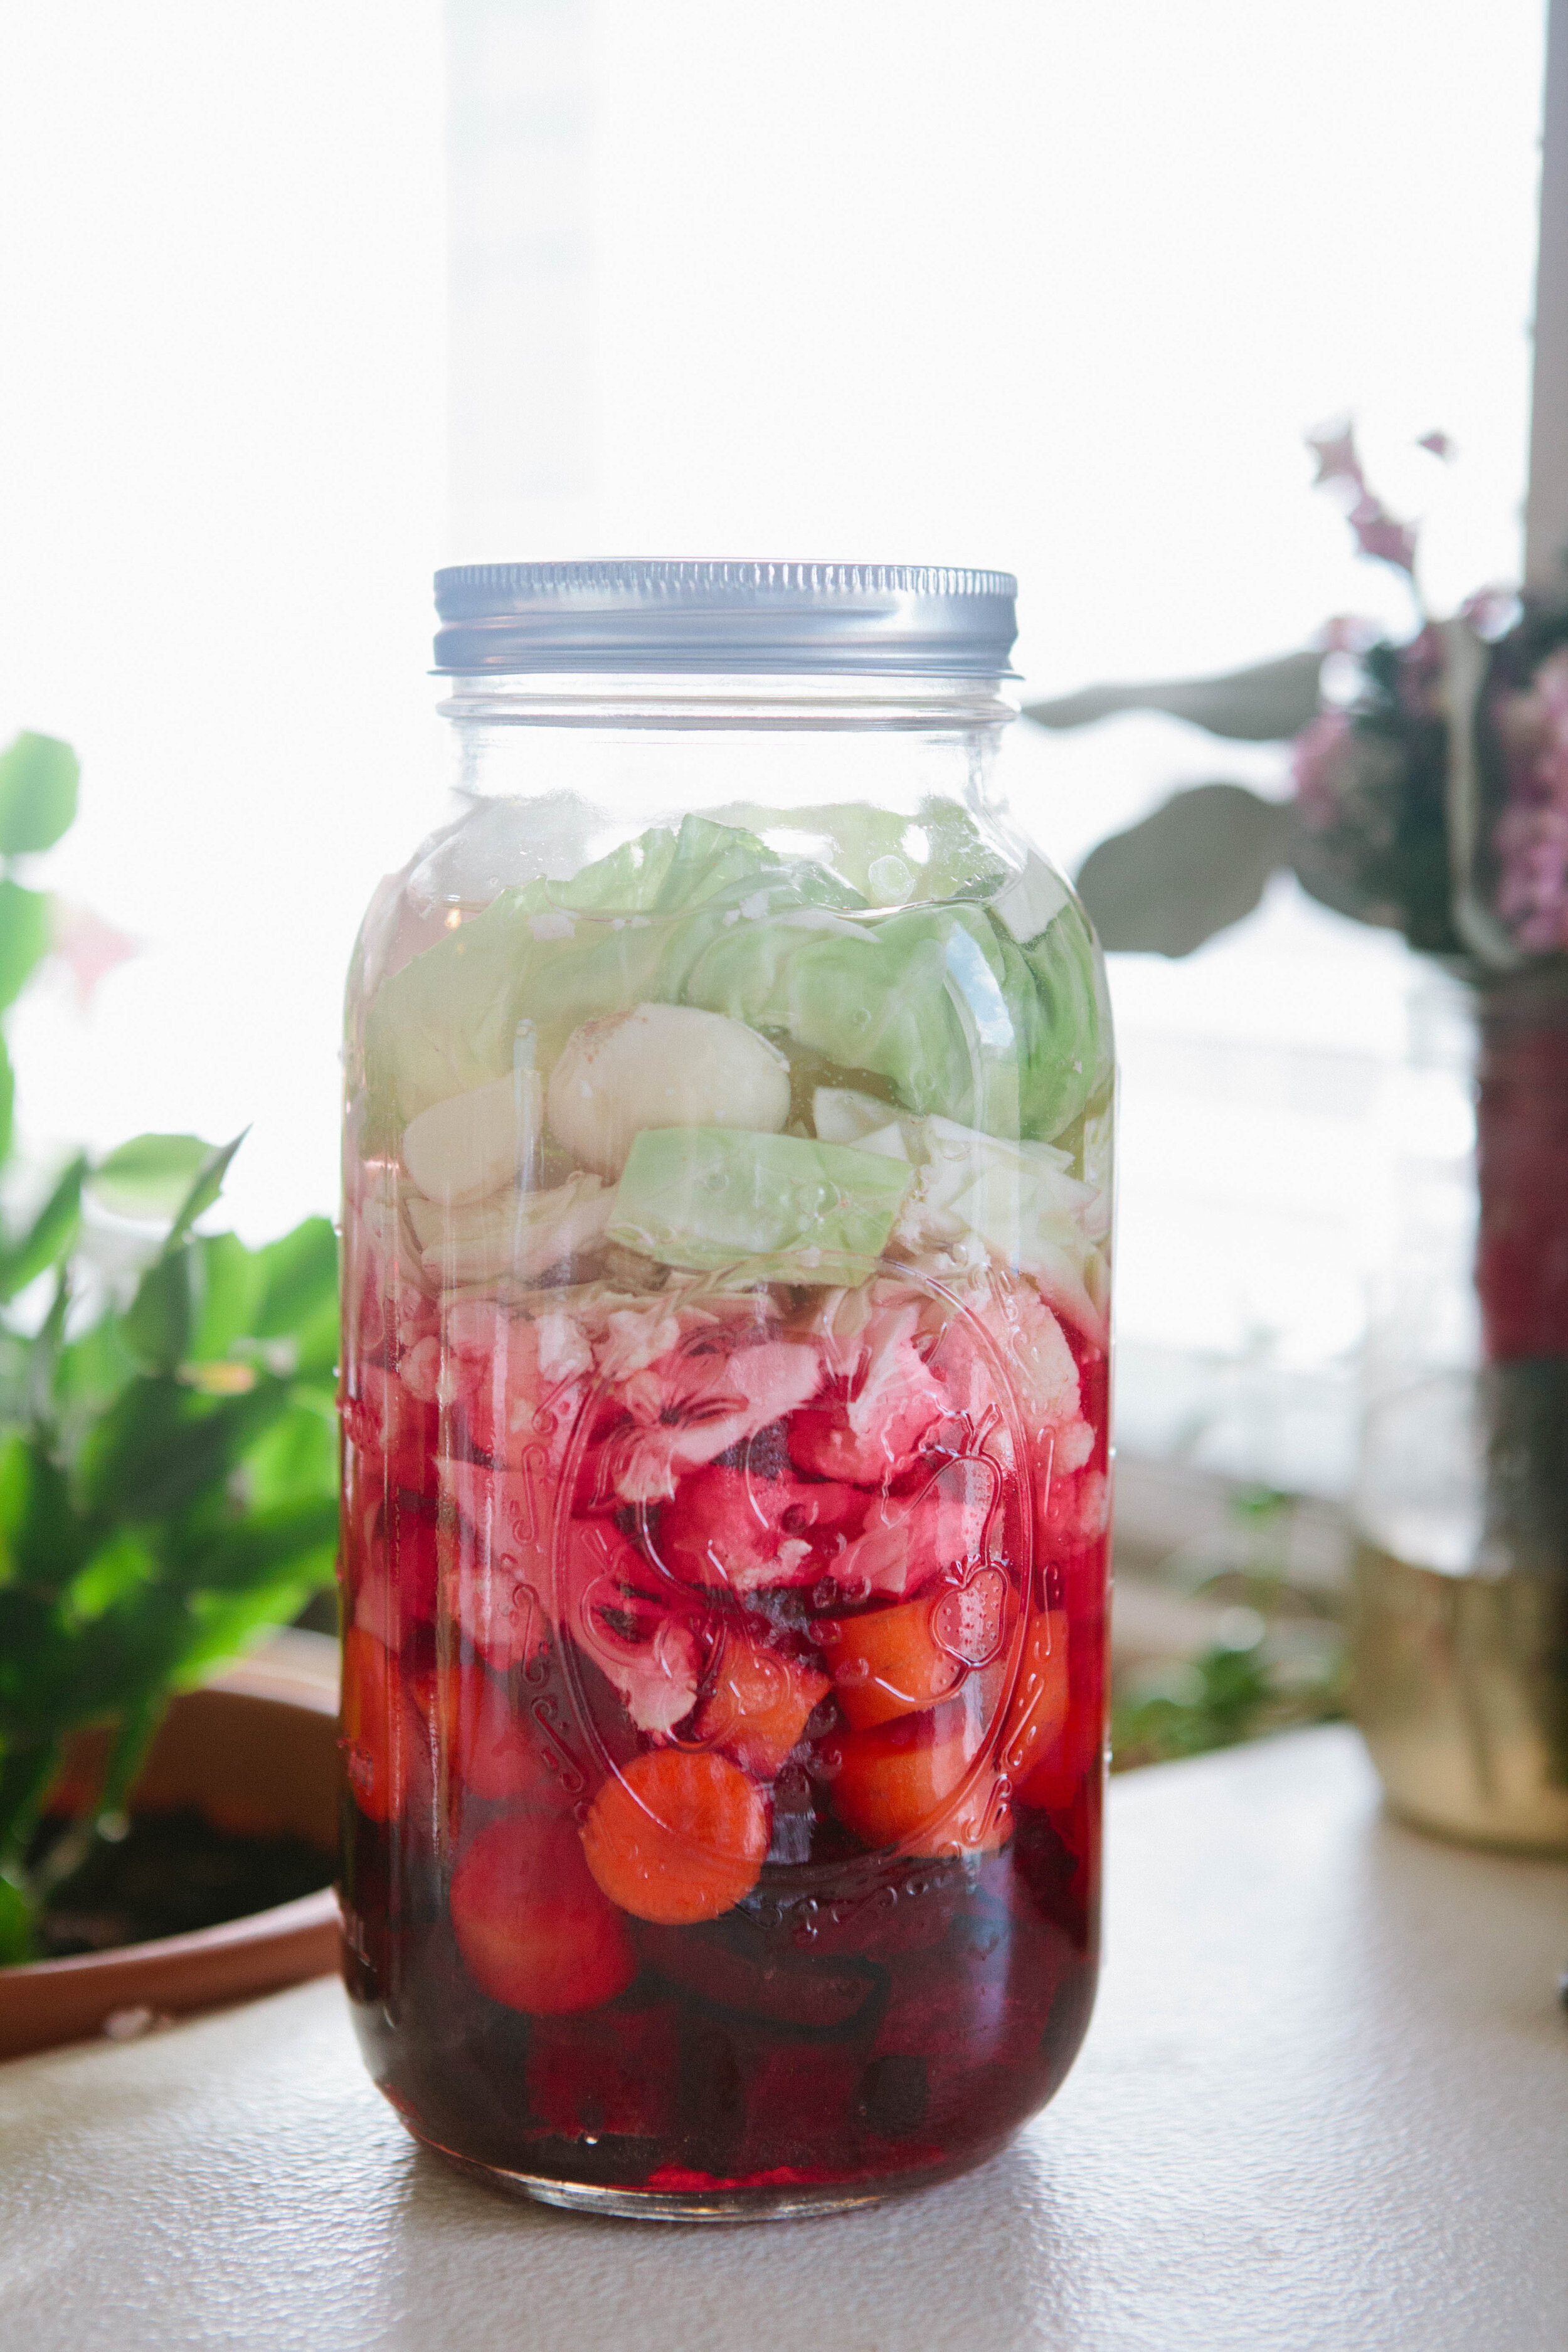
This recipe contains five different vegetables: beets (good for liver and blood cleansing), cabbage (stimulates digestion), carrots (contain vitamin A), and cauliflower (makes it taste better, believe me), and garlic (good for immune support). It makes a very rich and flavorful liquid, which is also a wonderful probiotic drink.

Gluten Free, Dairy Free, Egg Free

Simple Roasted Beets

Not only are beets high in many vitamins and minerals, including vitamin C, beets have been shown to lower blood pressure, detoxify the body (especially by cleansing the blood and the liver), fight inflammation, boost stamina in workouts, and more!

Gluten Free, Dairy Free, Egg Free

Beet Kvass

Beet Kvass is a liver tonic. Anyone can make this simple fermented drink! It requires only a few ingredients, and only a few minutes to "put up."

Want to learn how? Good!

Gluten Free, Dairy Free, Egg Free

Sauerkraut

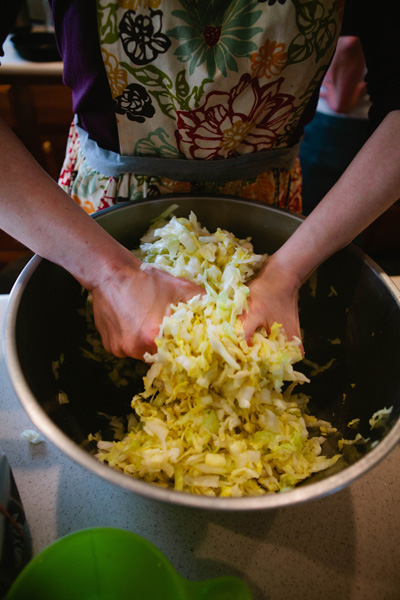
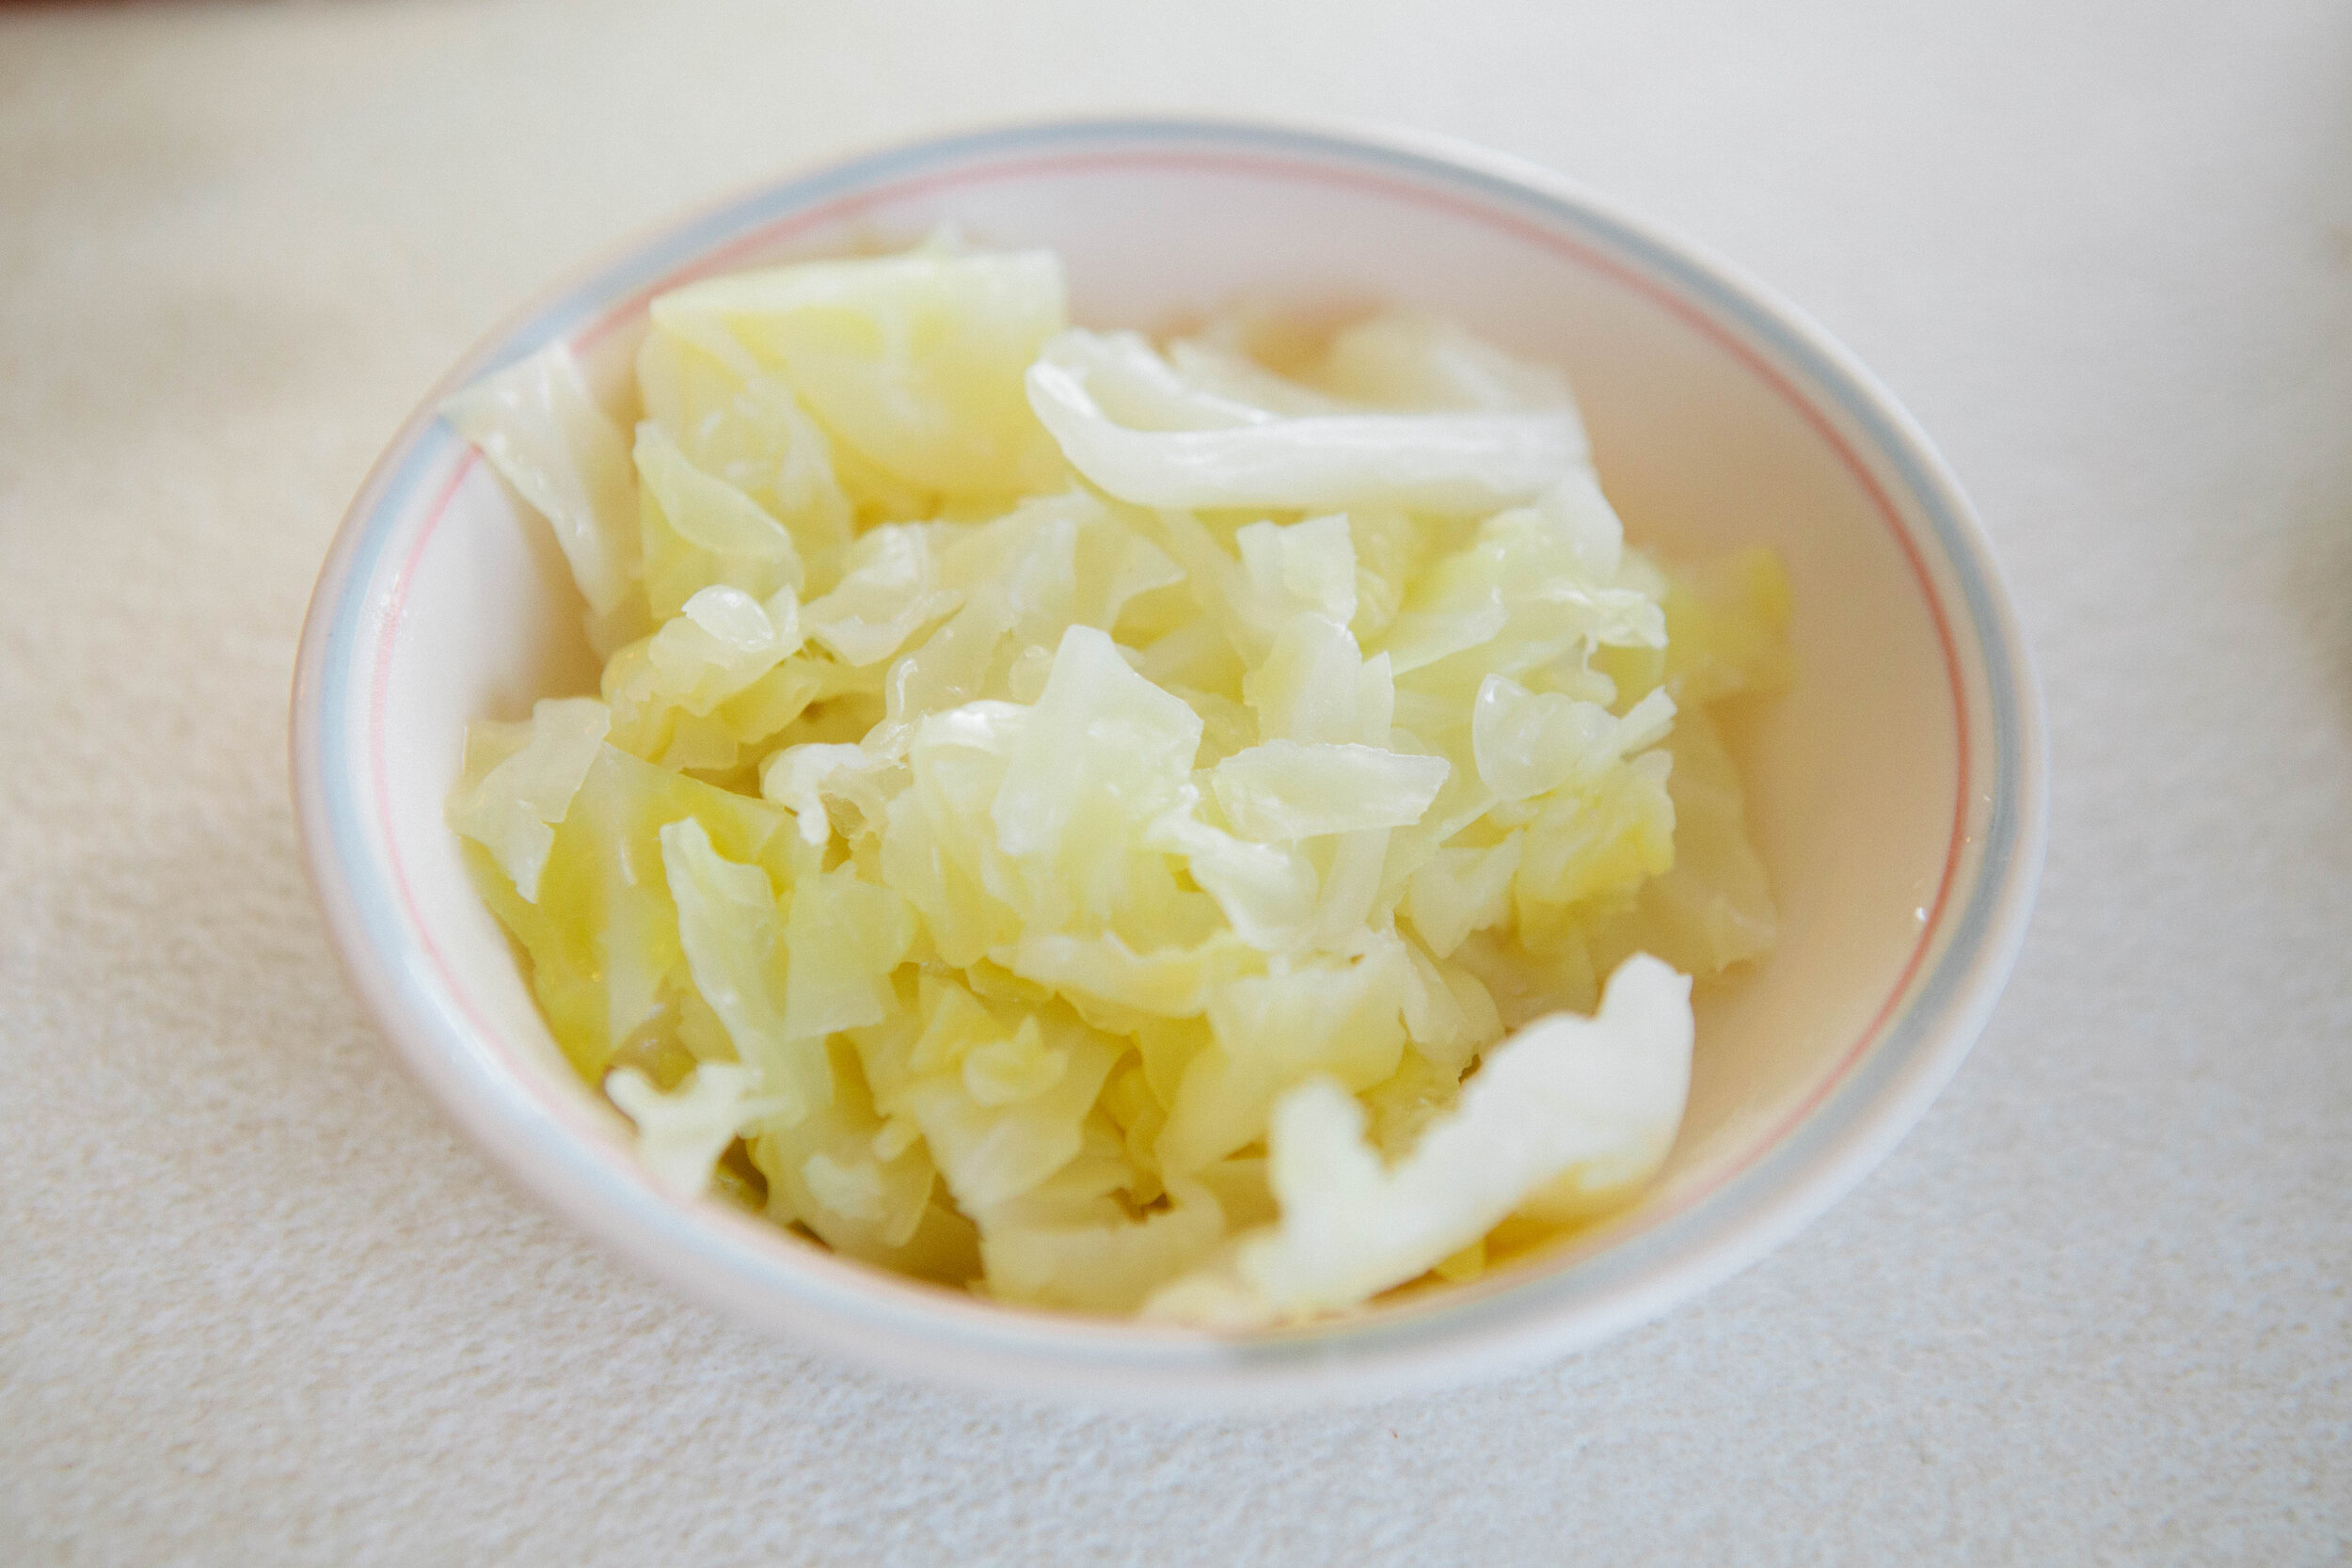
While good quality sauerkraut can be obtained in most stores now, I still prefer to make my own as I think it tastes the best. I put a lot of love and anticipation into my sauerkraut, as I don’t eat it until it has been fermenting for at least three months.

Gluten Free, Dairy Free, Egg Free


Cabbage Tonic

This cabbage tonic can be taken from the beginning of the Intro Diet of GAPS. Use this tonic daily to help change your gut flora.

Gluten Free, Dairy Free, Egg Free


Vegetables in Soups


Cabbage Soup

I love this cabbage soup. Maybe it’s because of my German roots. Try cutting your cabbage into long strips to resemble noodles for pasta loving children. 

Gluten Free, Dairy Free, Egg Free


Raw Vegetables

Carrot Raisin Dessert

This is a quick and easy recipe to whip up. It’s a GAPS Legal dish but is sure to be a crowd pleaser even for those who aren’t on GAPS.

While technically a salad, this is a very sweet dish. I recommend consuming it at the end of a meal as a treat.

Gluten Free, Dairy Free

GAPS Milkshake

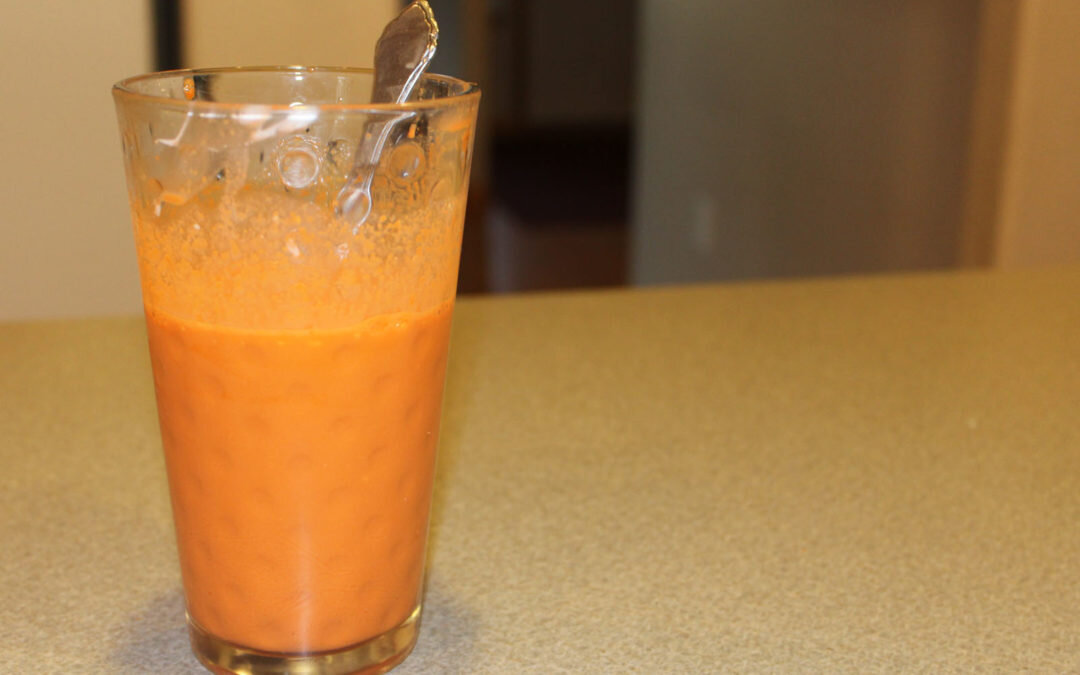
This recipe is a simple, but powerful one! It is called the GAPS™ milkshake, and it packs a powerful punch! This delicious, satisfying and helpful beverage is a wonderful way to daily consume your freshly-pressed juices, and can even be a meal.

Gluten Free, Dairy Free

Cooked Vegetables

Zucchini Pizza Bites

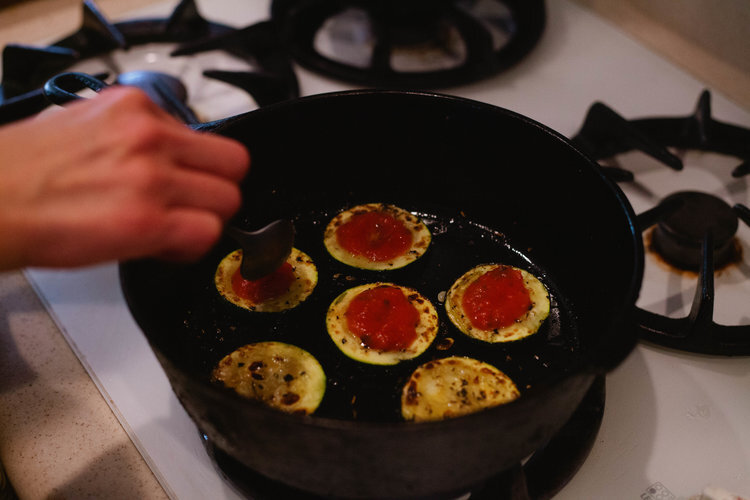
Recently I needed a bit of a change. I needed something exciting to eat! And I really wanted pizza. But even though I know how to make a GAPS legal pizza crust I did not want to spend the time or energy to make it. Then I came up with this brilliant idea... pizza bites... on zucchini!

Gluten Free, Dairy Free, Egg Free

Steamed Broccoli

My main reason for eating broccoli is to use it as a vehicle for butter. Need I say more?

Broccoli itself does have some amazing nutritional content on its own, separate from carrying butter. It's high in both soluble and insoluble fiber, potassium, and the vitamins B6, C and A.

Gluten Free, Dairy Free

Spinach & Artichoke Dip

This Chicken Tortilla Soup recipe is a result of me expanding my horizons in genres of food that I cook and eat! It wasn't too spicy, and it's different than plain meat stock that you typically eat on Stage 1. There were tons of suggestions about different ways to make it, so it's also easy to switch up to match your tastes.

Gluten Free, Dairy Free, Egg Free

Wilted Salad

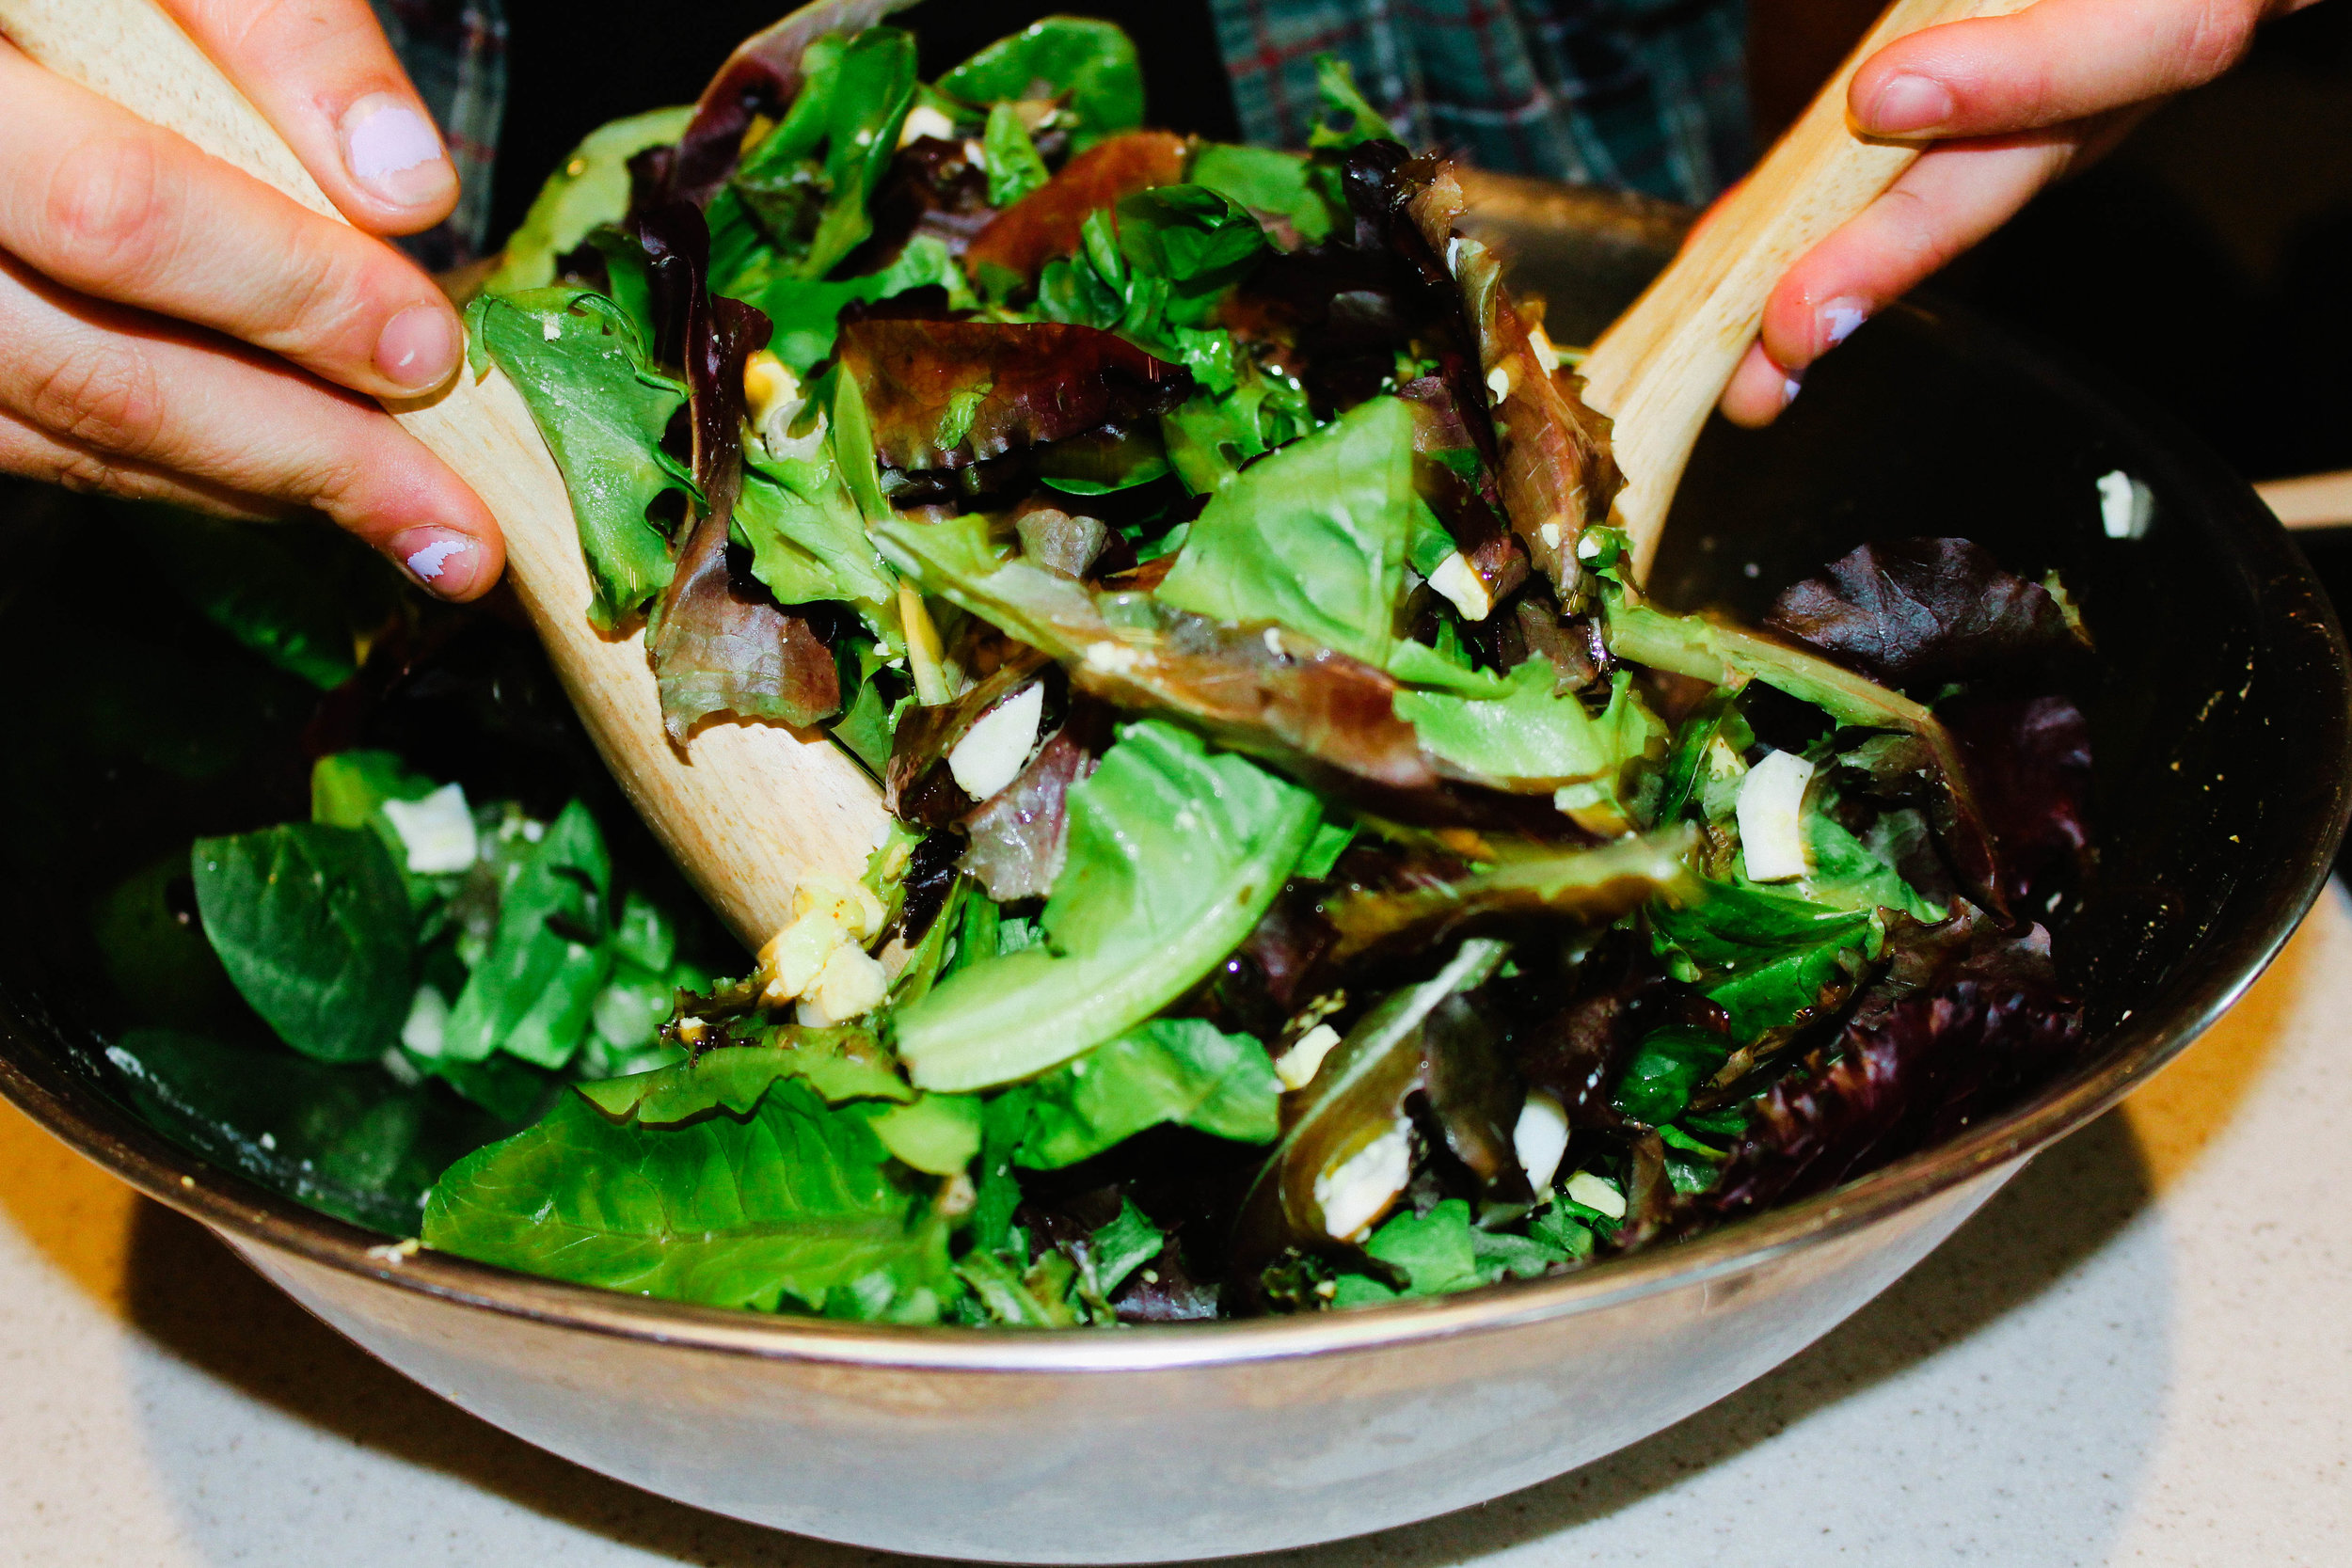
Wilted lettuce salad is an amazing recipe that will make the salad go quicker than you ever thought possible! It was a family favorite when I was growing up, and continues to be so today. It combines just about everything I think is amazing and delicious!

Gluten Free, Dairy Free, Egg Free

Cast Iron Brussels Sprouts

I know most people don’t care for brussels sprouts. I’ve never shared their view. I think it’s probably because my grandma drowned brussels sprouts in butter when she cooked them. Back in the day, we used to talk about how unhealthy this was but now I know better.

Gluten Free, Dairy Free, Egg Free

Twice Baked Cauliflower

Stop whatever dinner plans you have and go buy a cauliflower! This recipe is the best side dish I have ever had... and I don't even really like cauliflower that much!

Gluten Free, Dairy Free, Egg Free

4 Ingredient Pico de Gallo

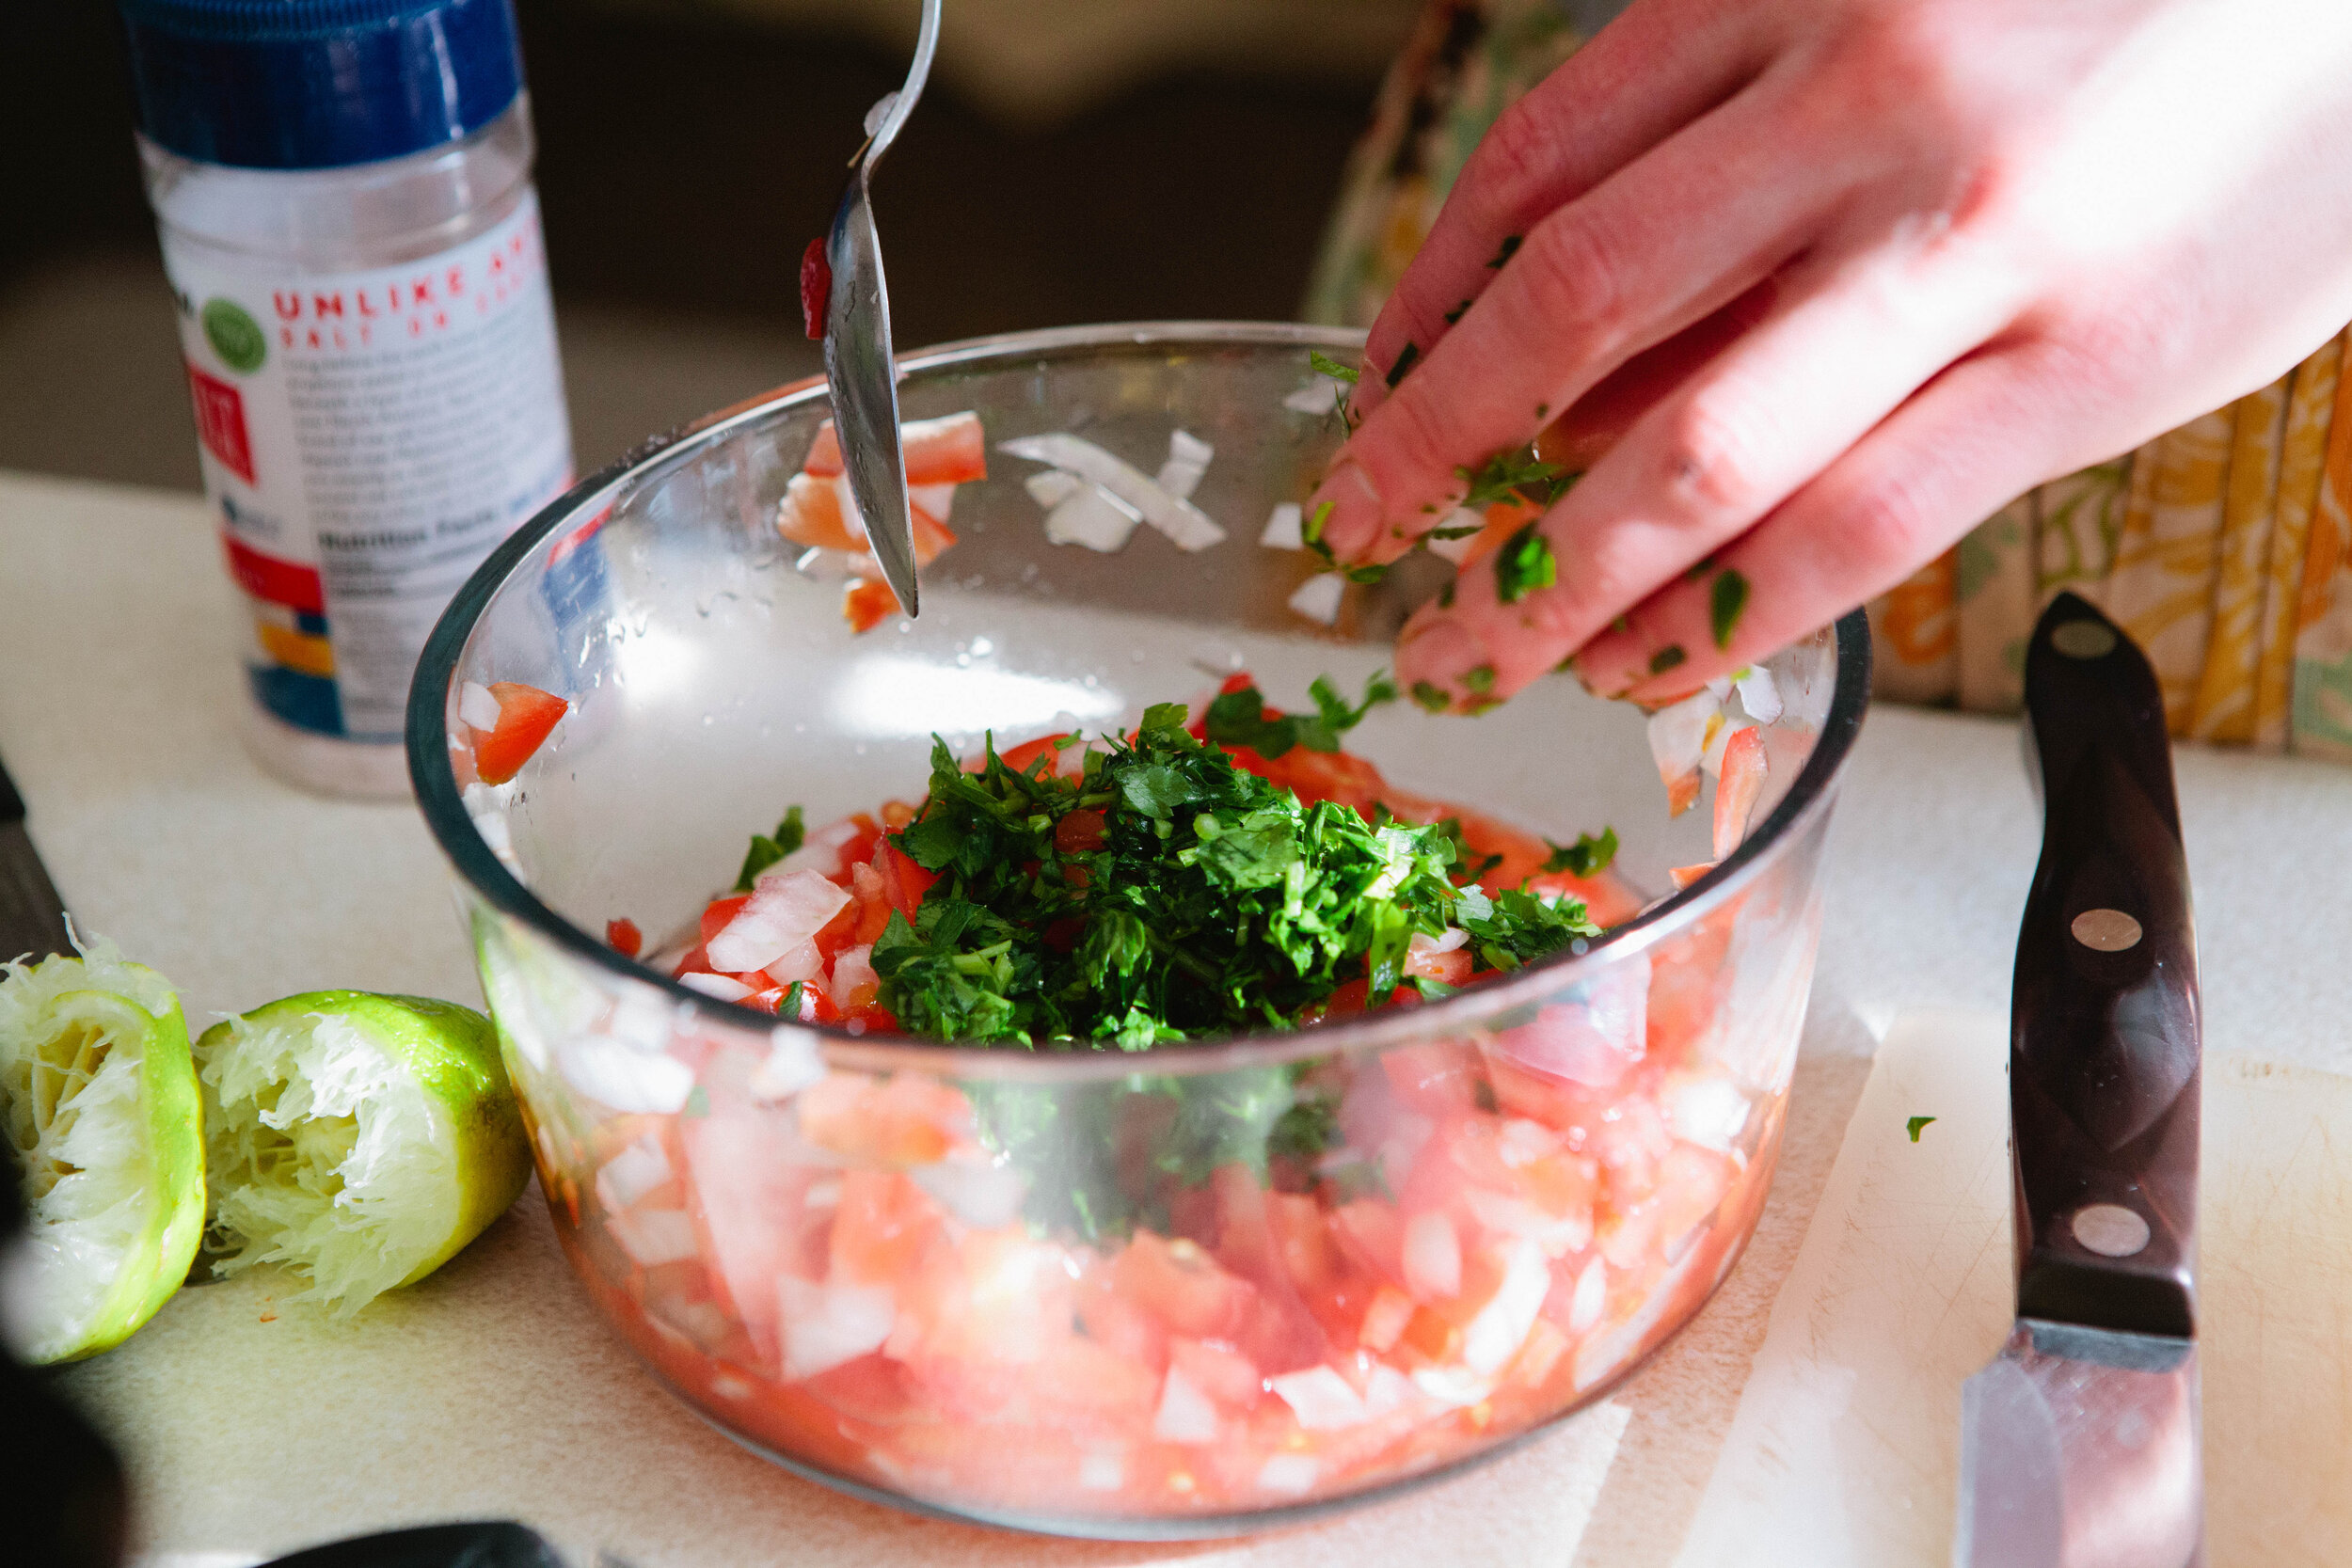
 I used to dislike pico because of the cilantro in it. But I’ve come a long way! I love this simple recipe, it is a delicious and fresh addition to your table. It’s best made at least a few hours beforehand so the flavors have a chance to blend! Feel free to adjust to your taste, and I hope you enjoy it!

Ingredients for Pico de Gallo:

  • 3 ripe tomatoes

  • ⅓ of a White or Yellow Onion

  • 1-2 Limes

  • 2 tbsp Cilantro

Directions for Pico de Gallo:

IMG_9070.jpg

Finely chop tomatoes and onions.

IMG_9221.jpg

Add to a bowl. Add the juice of 1 - 2 limes, depending on how juicy they are.

Add a few shakes of salt to taste.

IMG_9235.jpg

Finely mince cilantro and add to the bowl.

IMG_9237.jpg

Stir everything together to let the flavors meld. 

Enjoy!

picodegallo.png

4 Ingredient Pico de Gallo

Author:
Prep time: Cook time: Total time:

Ingredients:

  • 3 ripe tomatoes
  • ⅓ of a White or Yellow Onion
  • 1-2 Limes
  • 2 tbsp Cilantro

Instructions:

How to cook 4 Ingredient Pico de Gallo

  1. Finely chop tomatoes and onions.
  2. Add to a bowl. Add the juice of 1 - 2 limes, depending on how juicy they are.
  3. Add a few shakes of salt to taste.
  4. Stir everything together to let the flavors meld.
  5. Enjoy!
Created using The Recipes Generator

GAPS Carrot Raisin Dessert Salad

This is a quick and easy recipe to whip up. It’s a GAPS Legal dish but is sure to be a crowd pleaser even for those who aren’t on GAPS.

While technically a salad, this is a very sweet dish. I recommend consuming it at the end of a meal as a treat. The amount of honey you add will depend on your own personal tastes and how sweet your carrots are.

This feeds approximately 4 people. It’s also great to bring to parties and something that’s so easy and quick to prepare. It’s also dairy free!

Ingredients for Carrot Raisin Dessert Salad:

  • 3-4 large carrots

  • ½ cup Raisins

  • 1- 2 tbsp Honey

Directions for Carrot Raisin Dessert Salad:

gaps-legal-carrot-salad-dessert-salad-dessert-on-gaps-sweet-food-on-gaps-gaps-party-dishes-gaps-diet-recipes

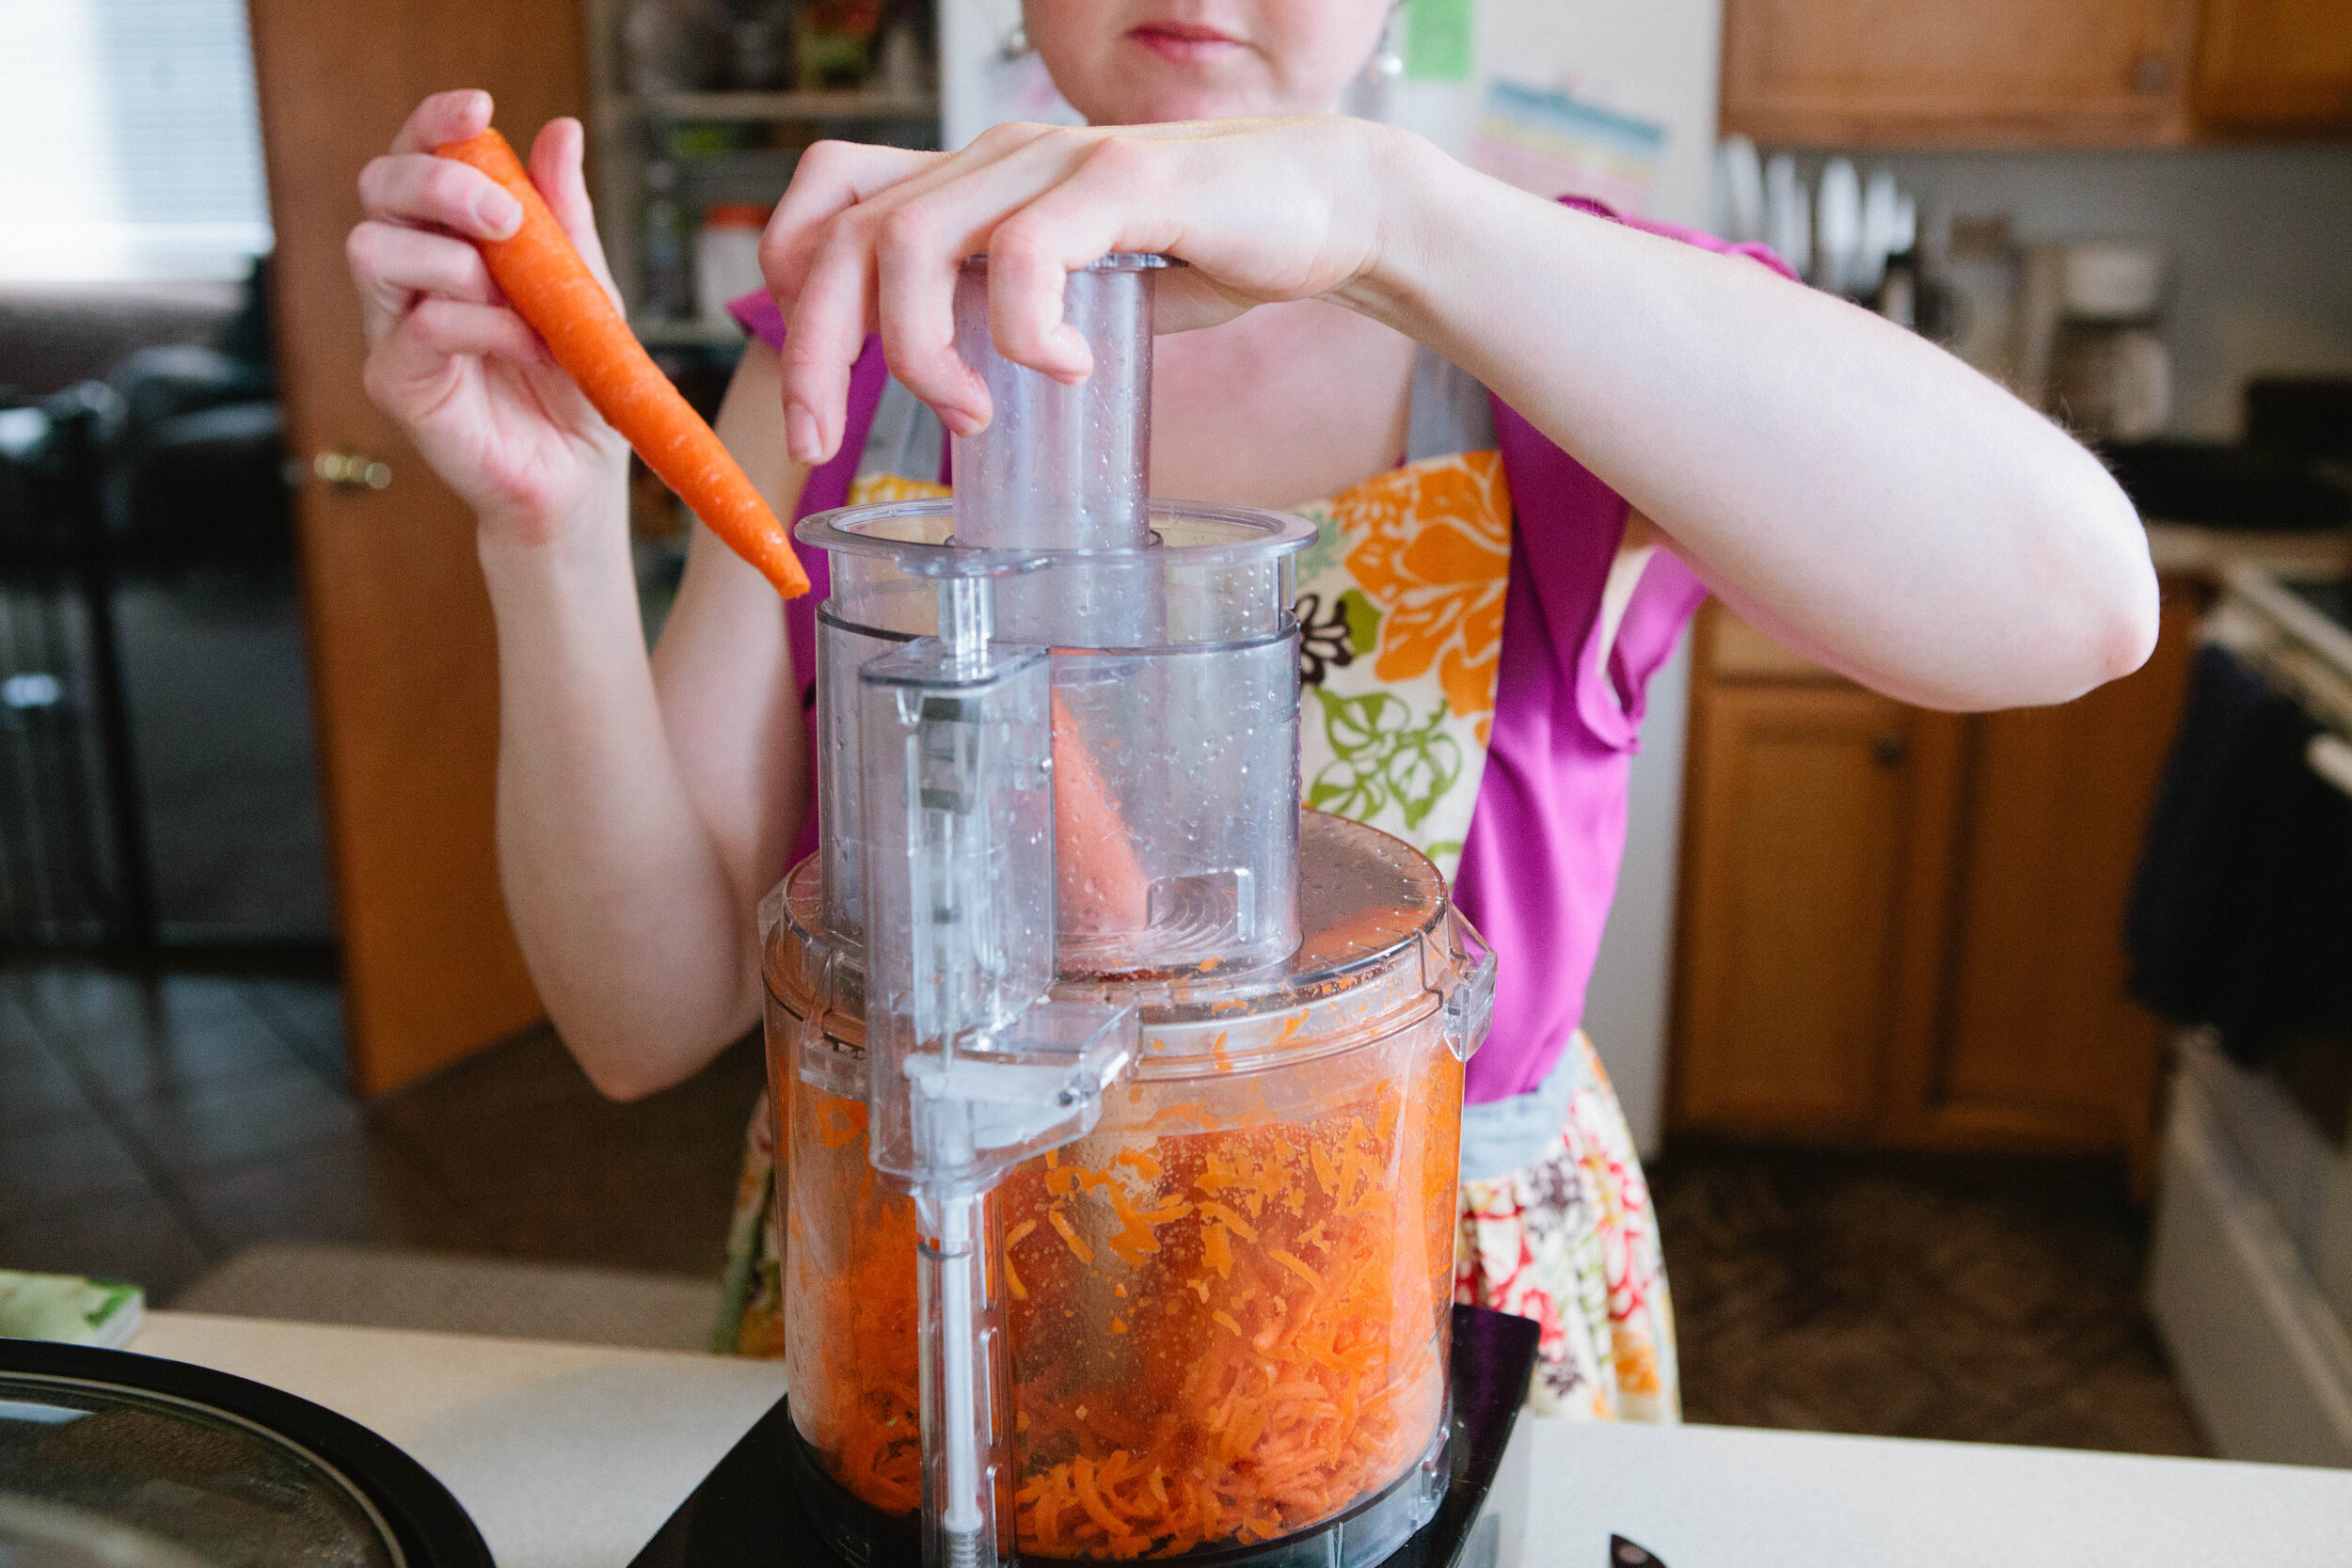
Finely shred carrots in a food processor.

gaps-legal-carrot-salad-dessert-salad-dessert-on-gaps-sweet-food-on-gaps-gaps-party-dishes-gaps-diet-recipes

Add carrots and raisins to a bowl.

gaps-legal-carrot-salad-dessert-salad-dessert-on-gaps-sweet-food-on-gaps-gaps-party-dishes-gaps-diet-recipes

Add in 1-2 tbsp of honey, depending on how sweet you want it to be. Toss to coat carrots well with honey.

Serve and enjoy!


GapsLegalCarrotRaisinSaladDessert.png

GAPS Carrot Raisin Dessert Salad

Author:
Prep time: Cook time: Total time:

Ingredients:

  • 3-4 large carrots
  • ½ cup Raisins
  • 1- 2 tbsp Honey

Instructions:

How to cook GAPS Carrot Raisin Dessert Salad

  1. Finely shred carrots in a food processor.
  2. Add carrots and raisins to a bowl.
  3. Add in 1-2 tbsp of honey, depending on how sweet you want it to be. Toss to coat carrots well with honey.
  4. Serve and enjoy!
Created using The Recipes Generator

Steamed Broccoli Recipe

GAPS Legal Broccoli Recipe

My main reason for eating broccoli is to use it as a vehicle for butter.

Need I say more?

Broccoli itself does have some amazing nutritional content on its own, separate from carrying butter. It's high in both soluble and insoluble fiber, potassium, and the vitamins B6, C and A.

What exactly is broccoli? Broccoli is a cruciferous vegetable like cabbage, kale, turnips, cauliflower, and brussel sprouts. It is a wonderful vegetable to eat regularly. Some people avoid broccoli because they experience gas. But if broccoli makes you gassy, your gut flora is unbalanced! You can (and should) address your gut flora, then you can enjoy broccoli again without fear!
I don’t use the stems of the broccoli, which are very fibrous, in this recipe. If you want, you can use them in a soup or fry them up with butter and garlic (which is delicious.) But if you’re early in your healing on the GAPS Intro diet, toss or compost the stems. They are too fibrous for you to eat!

This is a great and simple side dish to serve with any main dish. But whatever you serve it with, the key here is to remember to enjoy your butter!

Ingredients for Steamed Broccoli:

  • 2- 3 Small Broccoli Crowns

  • Water

  • Butter for serving.

Directions for Steamed Broccoli:

I eat broccoli purely as a vehicle for butter. Serve this quick steamed broccoli recipe alongside any meat of your choice for a great GAPS Legal meal. Steamed Broccoli Recipe by Northern Colorado Certified GAPS Practitioner Amy Mihaly.

Insert steamer into a medium size pot. Add a few inches of filtered water to a pot.

I eat broccoli purely as a vehicle for butter. Serve this quick steamed broccoli recipe alongside any meat of your choice for a great GAPS Legal meal. Steamed Broccoli Recipe by Northern Colorado Certified GAPS Practitioner Amy Mihaly.

Rinse broccoli well with filtered water.

I eat broccoli purely as a vehicle for butter. Serve this quick steamed broccoli recipe alongside any meat of your choice for a great GAPS Legal meal. Steamed Broccoli Recipe by Northern Colorado Certified GAPS Practitioner Amy Mihaly.

Cut off stems. Discard if you are on the GAPS Intro diet. Otherwise, set aside for another recipe.

Break broccoli florets apart at the base.

I eat broccoli purely as a vehicle for butter. Serve this quick steamed broccoli recipe alongside any meat of your choice for a great GAPS Legal meal. Steamed Broccoli Recipe by Northern Colorado Certified GAPS Practitioner Amy Mihaly.

Add florets to the steamer and cover with a lid.

Steam for 15-20 minutes until fork tender, meaning a fork easily slides in and out. If you’re on GAPS Intro, be extra sure it’s fully cooked.

Make sure you don’t run out of water on the bottom of the pan or you will scorch the bottom. To check for water, you can tip the pan without opening it and feel if there is still water shifting. If you are unsure, check! You don't want to run out of water or you could ruin your pan.

I eat broccoli purely as a vehicle for butter. Serve this quick steamed broccoli recipe alongside any meat of your choice for a great GAPS Legal meal. Steamed Broccoli Recipe by Northern Colorado Certified GAPS Practitioner Amy Mihaly.

Serve as a side alongside meat of your choice. I prefer steak; it just seems to be better that way! Top with plenty of butter! You want to eat about a teaspoon of butter with each piece. I cut a slice to eat with each piece. Enjoy!


Steamed Broccoli Recipe

Author:
prep time: cook time: total time:

ingredients:

  • 2- 3 Small Broccoli Crowns
  • Water
  • Butter for serving

instructions:

How to cook Steamed Broccoli Recipe

  1. Insert steamer into a medium size pot. Add a few inches of filtered water to a pot.
  2. Rinse broccoli well with filtered water.
  3. Cut off stems. Discard if you are on the GAPS Intro diet. Otherwise, set aside for another recipe.
  4. Break broccoli florets apart at the base.
  5. Add florets to the steamer and cover with a lid.
  6. Steam for 15-20 minutes until fork tender, meaning a fork easily slides in and out. If you’re on GAPS Intro, be extra sure it’s fully cooked.
  7. Make sure you don’t run out of water on the bottom of the pan or you will scorch the bottom. To check for water, you can tip the pan without opening it and feel if there is still water shifting. If you are unsure, check! You don't want to run out of water or you could ruin your pan.
  8. Serve as a side alongside meat of your choice. I prefer steak; it just seems to be better that way! Top with plenty of butter! You want to eat about a teaspoon of butter with each piece. I cut a slice to eat with each piece. Enjoy!
Created using The Recipes Generator
13.png

Cast Iron Roasted Brussels Sprouts

I know most people don’t care for brussels sprouts. I’ve never shared their view. I think it’s probably because my grandma drowned brussels sprouts in butter when she cooked them. Back in the day, we used to talk about how unhealthy this was but now I know better. Not only does fat provide a delicious taste, it actually makes it easier for your body to use the nutrition in your food.

Even if you have never liked brussels sprouts before, please give them one more try with this recipe. I don’t even like brussels sprouts all ways! For example, I’ve never liked them in soup. If eating brussels sprouts makes you very gassy, it means your gut flora is imbalanced.

Having enough salt on the brussels sprouts helps to break up the cell walls which allows them to cook faster and better. Salt allows them to cook more evenly which makes them more delicious. Make sure you add salt after you plate them as well! If they’re not delicious, you haven’t added enough salt to them.

I also cook the brussels sprouts on a low to medium heat to start with. The goal is to cook the brussels sprouts thoroughly before crisping them. If your heat is too high, you’ll brown them before they are cooked all the way which will result in a questionably edible food. The brown bits are my favorite part so I make sure there are a LOT of them! If you’re on the GAPS Intro Diet, you’ll want to brown sparingly as the browned bits are harder to digest.

Ingredients for Cast Iron Roasted Brussels Sprouts

  • 16 oz brussel sprouts

  • 5 tbsp of Butter or another fat.

Directions for Cast Iron Roasted Brussels Sprouts

Brussels-Sprouts-Recipe-Brussel-Sprout-Cooking-How-To-Make-Brussel-Sprouts-How-To-Cook-Brussels-Sprouts-Roasted-Cast-Iron-Pan-Roasting-Crispy-Brussel-Sprouts-GAPS-Diet-Vegetables-What-To-Eat-On-GAPS

Wash and rinse brussels sprouts.

Brussels-Sprouts-Recipe-Brussel-Sprout-Cooking-How-To-Make-Brussel-Sprouts-How-To-Cook-Brussels-Sprouts-Roasted-Cast-Iron-Pan-Roasting-Crispy-Brussel-Sprouts-GAPS-Diet-Vegetables-What-To-Eat-On-GAPS

Heat a cast iron pan over medium heat. Add in butter to melt.

Brussels-Sprouts-Recipe-Brussel-Sprout-Cooking-How-To-Make-Brussel-Sprouts-How-To-Cook-Brussels-Sprouts-Roasted-Cast-Iron-Pan-Roasting-Crispy-Brussel-Sprouts-GAPS-Diet-Vegetables-What-To-Eat-On-GAPS

Trim brussels sprouts by cutting off the ends and cutting them in half. You want them to be similarly sized pieces so they cook evenly.

If you have an extremely large brussels sprout, consider cutting it in fourths to keep all pieces approximately the same size.

Brussels-Sprouts-Recipe-Brussel-Sprout-Cooking-How-To-Make-Brussel-Sprouts-How-To-Cook-Brussels-Sprouts-Roasted-Cast-Iron-Pan-Roasting-Crispy-Brussel-Sprouts-GAPS-Diet-Vegetables-What-To-Eat-On-GAPS

Add brussels sprouts to the pan. I add in a handful at a time as I’m cutting but you could add all of them at once.

You might need to add your brussels sprouts in batches to the pan depending on how many brussels sprouts you have and the size of your pan. You want them to be in one layer on the bottom of the pan. It’s important not to crowd the pan to allow for even cooking.

Stir to coat with butter or other fat. Add about five shakes of salt.

Slowly cook on a low-medium heat for 8 to 10 minutes, stirring occasionally.

Brussels-Sprouts-Recipe-Brussel-Sprout-Cooking-How-To-Make-Brussel-Sprouts-How-To-Cook-Brussels-Sprouts-Roasted-Cast-Iron-Pan-Roasting-Crispy-Brussel-Sprouts-GAPS-Diet-Vegetables-What-To-Eat-On-GAPS

Once your brussels sprouts are soft but not mushy, turn the heat up higher to brown them. Cook for another 3-5 minutes. Stir frequently on the higher heat to ensure even browning. If your brussels sprouts are larger, they may take longer to cook.

Once your brussels sprouts have browned, transfer to a plate. Add salt to taste. Serve immediately for best taste!

Brussels-Sprouts-Recipe-Brussel-Sprout-Cooking-How-To-Make-Brussel-Sprouts-How-To-Cook-Brussels-Sprouts-Roasted-Cast-Iron-Pan-Roasting-Crispy-Brussel-Sprouts-GAPS-Diet-Vegetables-What-To-Eat-On-GAPS

Cast Iron Roasted Brussels Sprouts

Author:
prep time: cook time: total time:

ingredients:

  • 16 oz brussel sprouts
  • 5 tbsp of Butter or another fat

instructions:

How to cook Cast Iron Roasted Brussels Sprouts

  1. Wash and rinse brussels sprouts.
  2. Heat a cast iron pan over medium heat. Add in butter to melt.
  3. Trim brussels sprouts by cutting off the ends and cutting them in half. You want them to be similarly sized pieces so they cook evenly.
  4. If you have an extremely large brussels sprout, consider cutting it in fourths to keep all pieces approximately the same size.
  5. Add brussels sprouts to the pan. I add in a handful at a time as I’m cutting but you could add all of them at once.
  6. You might need to add your brussels sprouts in batches to the pan depending on how many brussels sprouts you have and the size of your pan. You want them to be in one layer on the bottom of the pan. It’s important not to crowd the pan to allow for even cooking.
  7. Stir to coat with butter or other fat. Add about five shakes of salt.
  8. Slowly cook on a low-medium heat for 8 to 10 minutes, stirring occasionally.
  9. Once your brussels sprouts are soft but not mushy, turn the heat up higher to brown them. Cook for another 3-5 minutes. Stir frequently on the higher heat to ensure even browning. If your brussels sprouts are larger, they may take longer to cook.
  10. Once your brussels sprouts have browned, transfer to a plate. Add salt to taste. Serve immediately for best taste!
Created using The Recipes Generator
Brussels-Sprouts-Recipe-Brussel-Sprout-Cooking-How-To-Make-Brussel-Sprouts-How-To-Cook-Brussels-Sprouts-Roasted-Cast-Iron-Pan-Roasting-Crispy-Brussel-Sprouts-GAPS-Diet-Vegetables-What-To-Eat-On-GAPS

Roasted Sweet Potatoes or Butternut Squash with Homemade Marshmallows

Roasted Sweet Potatoes with Marshmallows

Ingredients for Roasted Sweet Potatoes with Marshmallows

  • 2 Sweet Potatoes

  • 1 stick of butter or 1/2 cup lard

  • 1/8 tsp Cinnamon

  • 1/2 tsp Fresh Ginger

  • 1/4 tsp Salt

  • GAPS Marshmallows

Directions for Roasted Sweet Potatoes with Marshmallows

roasted-sweet-potatoes-how-to-make-sweet-potatoes-on-gaps-gaps-diet-thanksgiving-meals-holiday-meals-on-the-gaps-diet-what-do-i-eat-on-gaps

Preheat oven to 350°Rinse and peel potatoes.Slice potatoes into 1 in to 1.5 in rounds. The key is to cut the potatoes into similar thickness so that they will cook evenly.

Place the potato rounds snugly into a baking dish.

roasted-sweet-potatoes-how-to-make-sweet-potatoes-on-gaps-gaps-diet-thanksgiving-meals-holiday-meals-on-the-gaps-diet-what-do-i-eat-on-gaps

Peel a 1/2 in. piece of ginger. Finely mince the ginger.

roasted-sweet-potatoes-how-to-make-sweet-potatoes-on-gaps-gaps-diet-thanksgiving-meals-holiday-meals-on-the-gaps-diet-what-do-i-eat-on-gaps

In a small saucepan, melt  ½ cup of fat on low heat.

Once melted, add cinnamon, ginger, and salt. You may need more salt if you’re using a fat other than salted butter.

Stir to combine.

roasted-sweet-potatoes-how-to-make-sweet-potatoes-on-gaps-gaps-diet-thanksgiving-meals-holiday-meals-on-the-gaps-diet-what-do-i-eat-on-gaps

Once combined, pour the mixture over your potatoes.

Flip potatoes to evenly coat with butter mixture.

Cover with aluminum foil. Add parchment paper if the aluminum foil will touch your food.

roasted-sweet-potatoes-how-to-make-sweet-potatoes-on-gaps-gaps-diet-thanksgiving-meals-holiday-meals-on-the-gaps-diet-what-do-i-eat-on-gaps

Roast for 60 minutes or until fork tender.

Remove from oven and top with marshmallows (GAPS legal recipe here). If you’ve made marshmallows ahead of time, you can add the hardened squares. Or you can make the marshmallows while you wait for the sweet potatoes to cook and add a tablespoon dollup of marshmallow paste onto the top of the sweet potatoes. Since the potatoes are warm and these are not commercial marshmallows, they will run.

Serve warm!

Roasted Butternut Squash with Marshmallows

Ingredients for Roasted Butternut Squash with Marshmallows

  • 4 cups Cubed Butternut Squash

  • 1 stick of butter or 1/2 cup lard

  • 1/8 tsp Cinnamon

  • 1/2 tsp Fresh Ginger

  • 1/4 tsp Salt

  • GAPS Marshmallows

Directions for Roasted Butternut Squash with Marshmallows

roasted-butternut-squash-with-marshmellows-how-to-make-butternut-squash-with-marshmallows-on-gaps-gaps-diet-thanksgiving-meals-holiday-meals-on-the-gaps-diet-what-do-i-eat-on-gaps

Preheat oven to 350°

Cut and peel the squash. I’ve found it’s easier to cut the squash into two pieces for easier peeling by slicing at the bottom of the neck of the squash. Serrated knives can also make peeling the squash a little easier. The bottom of the squash has more seeds and is more difficult to cut.

IMG_17roasted-butternut-squash-with-marshmellows-how-to-make-butternut-squash-with-marshmallows-on-gaps-gaps-diet-thanksgiving-meals-holiday-meals-on-the-gaps-diet-what-do-i-eat-on-gaps91.jpg

Cut the squash into cubes. It’s best to keep the cubes of the squash roughly the same size for easy roasting.

IMG_1758.jpg

Peel a 1/2 in. piece of ginger. Finely mince the ginger.In a small saucepan, melt ½ cup of fat on low heat.

Once the fat has melted, add cinnamon, nutmeg, ginger, and salt to the pan and mix. You may need more salt if you’re using a fat other than salted butter.

Pour the melted butter mixture over the cubed squash. Stir to coat.Cover pan with a lid or aluminum foil. If foil will touch your food, cover with parchment paper first.

roasted-butternut-squash-with-marshmellows-how-to-make-butternut-squash-with-marshmallows-on-gaps-gaps-diet-thanksgiving-meals-holiday-meals-on-the-gaps-diet-what-do-i-eat-on-gaps

Roast for 45 minutes or until fork tender.

Remove from oven and top with marshmallows (GAPS legal recipe here). If you’ve made marshmallows ahead of time, you can add the hardened squares. Or you can make the marshmallows while you wait for the squash to cook and add dollups over the top.Since the butternut squash is warm and these are not commercial marshmallows, they will run and melt over the top.

Serve warm!


ROASTED SWEET POTATOES WITH MARSHMALLOWS

Author: Amy Mihaly, Be Well Clinic

Ingredients

  • 2 Sweet Potatoes
  • 1 stick of butter or 1/2 cup lard
  • 1/8 tsp Cinnamon
  • 1/2 tsp Fresh Ginger
  • 1/4 tsp Salt
  • GAPS Marshmallows

Instructions

  1. Preheat oven to 350°
  2. Rinse and peel potatoes.
  3. Slice potatoes into 1 in to 1.5 in rounds. The key is to cut the potatoes into similar thickness so that they will cook evenly.
  4. Place the potato rounds snugly into a baking dish.
  5. Peel a 1/2 in. piece of ginger. Finely mince the ginger.
  6. In a small saucepan, melt ½ cup of fat on low heat.
  7. Once melted, add cinnamon, ginger, and salt. You may need more salt if you’re using a fat other than salted butter.
  8. Stir to combine.
  9. Once combined, pour the mixture over your potatoes.
  10. Flip potatoes to evenly coat with butter mixture.
  11. Cover with aluminum foil. Add parchment paper if the aluminum foil will touch your food.
  12. Roast for 60 minutes or until fork tender.
  13. Remove from oven and top with marshmallows (GAPS legal recipe here). If you’ve made marshmallows ahead of time, you can add the hardened squares. Or you can make the marshmallows while you wait for the sweet potatoes to cook and add a tablespoon dollop of marshmallow paste onto the top of the sweet potatoes. Since the potatoes are warm and these are not commercial marshmallows, they will run.
  14. Serve warm!

ROASTED BUTTERNUT SQUASH WITH MARSHMALLOWS

Author: Amy Mihaly, Be Well Clinic

Ingredients

  • 4 cups Cubed Butternut Squash
  • 1 stick of butter or 1/2 cup lard
  • 1/8 tsp Cinnamon
  • 1/2 tsp Fresh Ginger
  • 1/4 tsp Salt
  • GAPS Marshmallows

Instructions

  1. Preheat oven to 350°
  2. Cut and peel the squash. I’ve found it’s easier to cut the squash into two pieces for easier peeling by slicing at the bottom of the neck of the squash. Serrated knives can also make peeling the squash a little easier. The bottom of the squash has more seeds and is more difficult to cut.
  3. Cut the squash into cubes. It’s best to keep the cubes of the squash roughly the same size for easy roasting.
  4. Peel a 1/2 in. piece of ginger. Finely mince the ginger.In a small saucepan, melt ½ cup of fat on low heat.
  5. Once the fat has melted, add cinnamon, nutmeg, ginger, and salt to the pan and mix. You may need more salt if you’re using a fat other than salted butter.
  6. Pour the melted butter mixture over the cubed squash. Stir to coat.Cover pan with a lid or aluminum foil. If foil will touch your food, cover with parchment paper first.
  7. Roast for 45 minutes or until fork tender.
  8. Remove from oven and top with marshmallows (GAPS legal recipe here). If you’ve made marshmallows ahead of time, you can add the hardened squares. Or you can make the marshmallows while you wait for the squash to cook and add dollups over the top.Since the butternut squash is warm and these are not commercial marshmallows, they will run and melt over the top.
  9. Serve warm!

Twice Baked Cauliflower with Cheese Recipe

GAPS Legal Twice Baked Cauliflower "Mashed Potato" with Cheese Recipe

Stop whatever dinner plans you have and go buy a cauliflower! This recipe is the best side dish I have ever had... and I don't even really like cauliflower that much!

Every time I think about it I involuntarily smile and say "yum" to myself (or out loud).

It may be the butter.

Truly, this is a scrumptious recipe. And you can make it dairy-free by using lard (or ghee) and omitting the cheese. It's still delicious that way.

You can make this recipe as a side for a larger party, or make a batch for just yourself to re-heat as leftovers (but not in a microwave... see this post about reheating without a microwave). This recipe is just as good (if not slightly better) when reheated.

In these pictures I used a deeper dish. This works great but the cheese-to-potatoes ratio is sometimes a bit thin, so if you have a choice I would recommend using a dish that is more shallow. Or you can always added some extra grated cheese to each serving immediately after serving, or when reheating.

This dish goes great with poultry (Thanksgiving is coming!), but also pairs with steak.

I hope you enjoy it as much as I do!

Twice Baked Cauliflower "Mashed Potatoes"

This recipe can easily be halved!

Ingredients for Twice Baked Cauliflower

  • 14 cups of Cauliflower (for me, this was 1 large and 1 medium cauliflower)

  • 1 cup of Butter or Lard

  • 1 tsp of Salt

  • 5 oz Cheddar Cheese (If you are the GAPS Diet, omit the cheese until you are on Full GAPS.)

Directions for Twice Baked Cauliflower

twice-baked-cauliflower-recipe-riced-cauliflower-gaps-legal-cauliflower-recipe-what-to-eat-on-the-gaps-diet-gaps-protocol-how-to-eat-on-gaps-gaps-diet-recipe

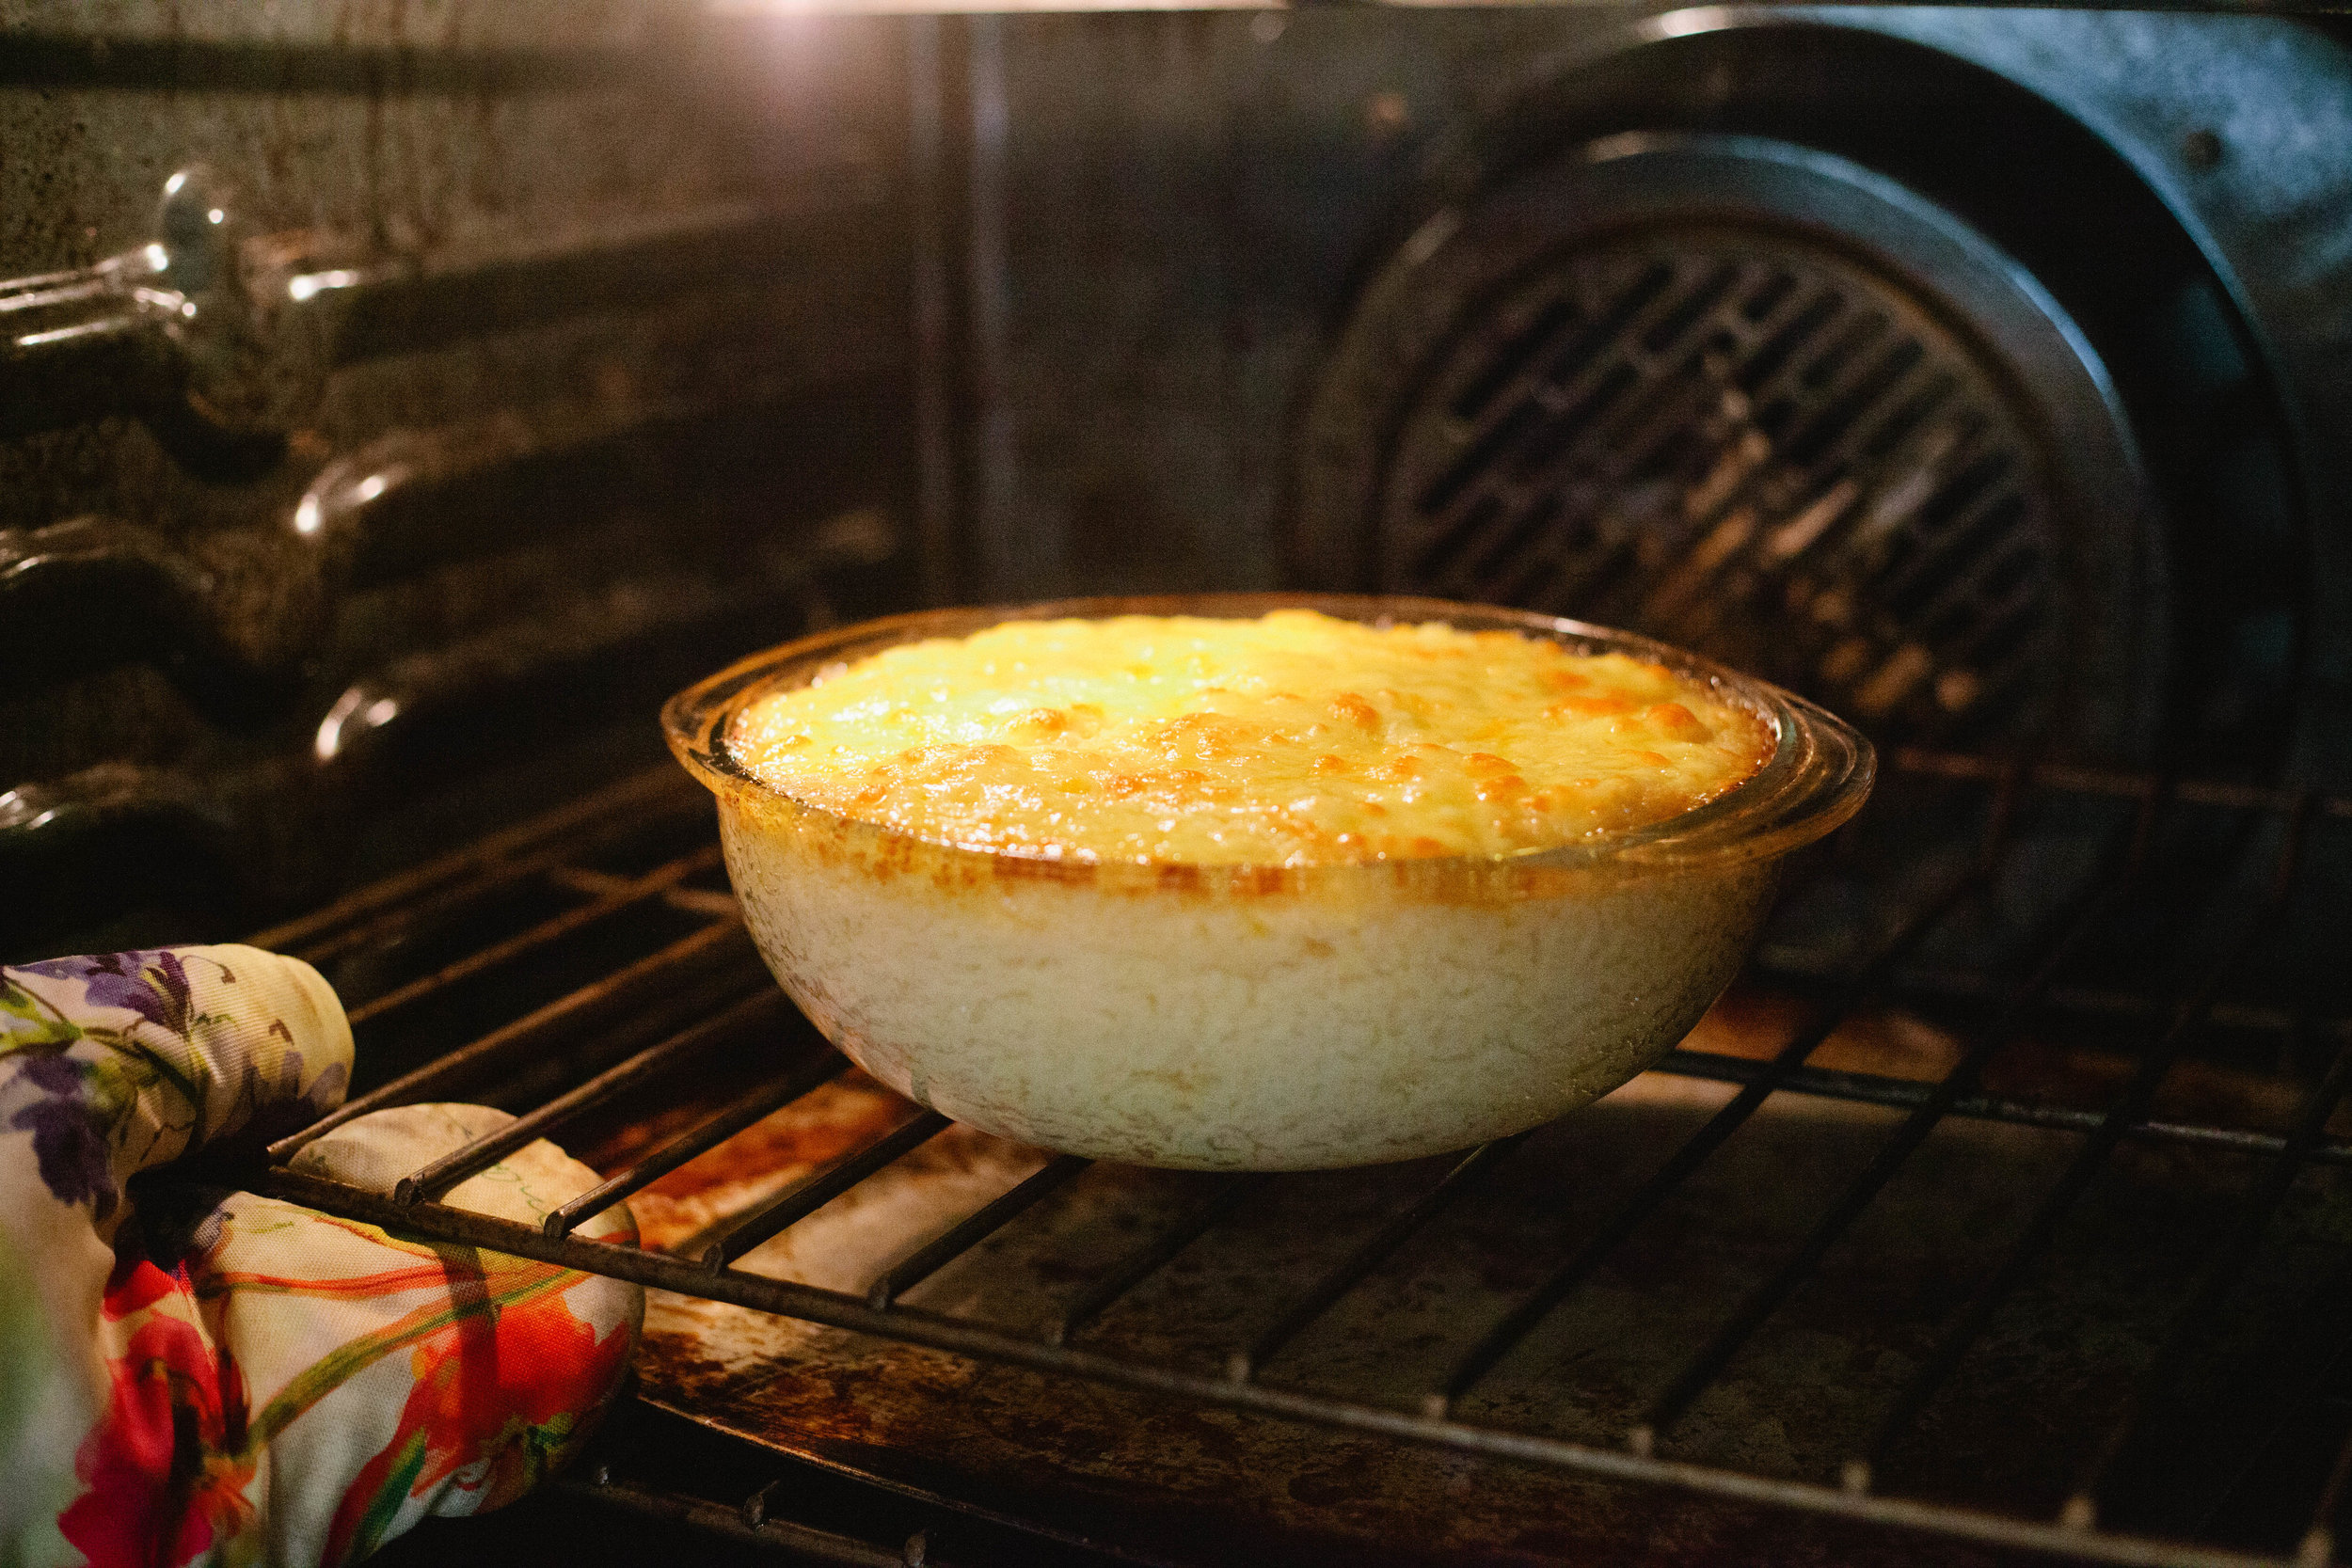
Preheat your oven to 350. In a large pot, add about 1 cup of water. Place a steam basket in the bottom.

Cut cauliflower into cubes for quick steaming. You can also steam the head whole if you need to.

Remove the stem of the cauliflower. It’s too fibrous to eat. Once you’re past the stem of the cauliflower, you can also break the florets off instead of cutting them.

Steam the cauliflower for 15 minutes. Check every 5 minutes to make sure you have enough water and aren’t burning the bottom of your pan. The cauliflower only needs to be soft enough to go in a food processor because they’ll be baked again.

twice-baked-cauliflower-recipe-riced-cauliflower-gaps-legal-cauliflower-recipe-what-to-eat-on-the-gaps-diet-gaps-protocol-how-to-eat-on-gaps-gaps-diet-recipe

Working in batches, add cauliflower to food processor and process until smooth or riced.

Add riced cauliflower to a baking safe dish, with a lid if you have one.

Add your butter or lard to top of the cauliflower and stir.

twice-baked-cauliflower-recipe-riced-cauliflower-gaps-legal-cauliflower-recipe-what-to-eat-on-the-gaps-diet-gaps-protocol-how-to-eat-on-gaps-gaps-diet-recipe

Smooth out the top of the cauliflower.

Put in the oven covered at 350 degrees for 40-50 minutes and bubbling.

twice-baked-cauliflower-recipe-riced-cauliflower-gaps-legal-cauliflower-recipe-what-to-eat-on-the-gaps-diet-gaps-protocol-how-to-eat-on-gaps-gaps-diet-recipe

Slice or grate your cheese while you wait.

After 40-50 minutes, when the cauliflower is bubbling, remove from the oven. Immediately add cheese to the top.

twice-baked-cauliflower-recipe-riced-cauliflower-gaps-legal-cauliflower-recipe-what-to-eat-on-the-gaps-diet-gaps-protocol-how-to-eat-on-gaps-gaps-diet-recipe

Bake uncovered for 5-10 additional minutes to melt and slightly brown the cheese. Enjoy!


Twice Baked Cauliflower with Cheese

Author:
prep time: cook time: total time:

ingredients:

  • 14 cups of Cauliflower (for me, this was 1 large and 1 medium cauliflower)
  • 1 cup of Butter or Lard
  • 1 tsp of Salt
  • 5 oz Cheddar Cheese

instructions:

How to cook Twice Baked Cauliflower with Cheese

  1. Preheat your oven to 350. In a large pot, add about 1 cup of water. Place a steam basket in the bottom.
  2. Cut cauliflower into cubes for quick steaming. You can also steam the head whole if you need to.
  3. Remove the stem of the cauliflower. It’s too fibrous to eat. Once you’re past the stem of the cauliflower, you can also break the florets off instead of cutting them.
  4. Steam the cauliflower for 15 minutes. Check every 5 minutes to make sure you have enough water and aren’t burning the bottom of your pan. The cauliflower only needs to be soft enough to go in a food processor because they’ll be baked again.
  5. Working in batches, add cauliflower to food processor and process until smooth or riced.
  6. Add riced cauliflower to a baking safe dish, with a lid if you have one.
  7. Add your butter or lard to top of the cauliflower and stir.
  8. Smooth out the top of the cauliflower.
  9. Put in the oven covered at 350 degrees for 40-50 minutes and bubbling.
  10. Slice or grate your cheese while you wait.
  11. After 40-50 minutes, when the cauliflower is bubbling, remove from the oven. Immediately add cheese to the top.
  12. Bake uncovered for 5-10 additional minutes to melt and slightly brown the cheese. Enjoy!
Created using The Recipes Generator

GAPS Legal Zucchini Pizza Bites

Recently I needed a bit of a change. I needed something exciting to eat! And I really wanted pizza. But even though I know how to make a GAPS legal pizza crust I did not want to spend the time or energy to make it. Then I came up with this brilliant idea... pizza bites... on zucchini! and what's better? They are stage 4 (and beyond) GAPS legal!

I happened to have just bought some good-quality uncured pepperoni at the store, and had some sauce in the cabinet (although if I don't happen to have that I just as easily throw a couple tomatoes in a blender and make my own sauce on the stove). I tried it, and it worked! Delicious pizza bites that really taste like pizza (with zucchini on it) and can be made to suit any taste or dietary guidelines.

Unless you can't eat zucchini, you should be able to modify this for anyone. The fat used can be anything. You could leave off the tomato sauce, or make a while sauce. You can top with anything you can tolerate. Most people can tolerate raw cheese by the time they get to full GAPS And I guarantee that even if you can't do pepperoni, there is some type of meat you can have! Part of what makes a pizza is cheese and tomato sauce, so without these you will have a little different taste, but that doesn't mean you won't have something delicious!

Ingredients for gaps friendly pizza made with zucchini:

  • Zucchini

  • 2 TBS Lard, Butter or Other Fat

  • Italian Seasonings

  • Salt & Pepper

  • Pizza Sauce (make your own or buy a sugar free version in a glass jar)

  • Mozzarella Cheese

  • Uncured Pepperoni

  • Other Pizza Toppings of Your Choice

Directions for gaps friendly pizza made with zucchini:

GAPS Legal pizza is a thing! These pizza bites are gluten free because they’re made with zucchini. Zucchini pizza bites are GAPS legal past stage four and are a great summer recipe on what to do with too much zucchini. GAPS Friendly pizza made with …

Sliced the zucchini into rounds, approx ¼ thick. Don’t slice too thin!

Add your preferred fat to a pan on medium heat. Once hot, add zucchini slices. Your zucchini should not be swimming in the fat!

GAPS Legal pizza is a thing! These pizza bites are gluten free because they’re made with zucchini. Zucchini pizza bites are GAPS legal past stage four and are a great summer recipe on what to do with too much zucchini. GAPS Friendly pizza made with …

Sprinkle zucchini slices with salt, pepper and Italian seasonings.

Grate the mozzarella cheese.

GAPS Legal pizza is a thing! These pizza bites are gluten free because they’re made with zucchini. Zucchini pizza bites are GAPS legal past stage four and are a great summer recipe on what to do with too much zucchini. GAPS Friendly pizza made with …

Once the zucchini slices are golden brown (8-10 min), flip them to the other side.

GAPS Legal pizza is a thing! These pizza bites are gluten free because they’re made with zucchini. Zucchini pizza bites are GAPS legal past stage four and are a great summer recipe on what to do with too much zucchini. GAPS Friendly pizza made with …

Spoon tomato sauce on top of each zucchini slice. Top with uncured pepperoni or other toppings of your choice and add grated mozzarella cheese. Cover for 2 - 3 minutes so the cheese melts.

GAPS Legal pizza is a thing! These pizza bites are gluten free because they’re made with zucchini. Zucchini pizza bites are GAPS legal past stage four and are a great summer recipe on what to do with too much zucchini. GAPS Friendly pizza made with …

Once the cheese is melted, your zucchini pizzas are done!

Other toppings you could try would be artichoke hearts, olives. anchovies, or cooked chicken pieces. (Think your favorite pizza toppings!) Enjoy! Careful, they are hot! Once they have cooled a little, you can cut them into fourths to be served to those with small mouths. And as any good pizza is, they are delicious cold as well!  

What are your favorite toppings? Did you find good combinations? Let us know!


Zucchini Pizza Bites

Author:
prep time: cook time: total time:

ingredients:

  • Zucchini
  • 2 TBS Lard, Butter or Other Fat
  • Italian Seasonings
  • Salt & Pepper
  • Pizza Sauce (make your own or buy a sugar free version in a glass jar)
  • Mozzarella Cheese
  • Uncured Pepperoni
  • Other Pizza Toppings of Your Choice

instructions:

How to cook Zucchini Pizza Bites

  1. Sliced the zucchini into rounds, approx ¼ thick. Don’t slice too thin!
  2. Add your preferred fat to a pan on medium heat. Once hot, add zucchini slices. Your zucchini should not be swimming in the fat!
  3. Sprinkle zucchini slices with salt, pepper and Italian seasonings.
  4. Grate the mozzarella cheese.
  5. Once the zucchini slices are golden brown (8-10 min), flip them to the other side.
  6. Spoon tomato sauce on top of each zucchini slice. Top with uncured pepperoni or other toppings of your choice and add grated mozzarella cheese. Cover for 2 - 3 minutes so the cheese melts.
  7. Once the cheese is melted, your zucchini pizzas are done!
  8. Other toppings you could try would be artichoke hearts, olives. anchovies, or cooked chicken pieces. (Think your favorite pizza toppings!) Enjoy! Careful, they are hot! Once they have cooled a little, you can cut them into fourths to be served to those with small mouths. And as any good pizza is, they are delicious cold as well!
Created using The Recipes Generator

GAPS Friendly Wilted Salad Recipe

Wilted lettuce salad is an amazing recipe that will make the salad go quicker than you ever thought possible! It was a family favorite when I was growing up, and continues to be so today. It combines just about everything I think is amazing and delicious! This wilted lettuce salad recipe is easy to make and is GAPS legal on stage 5 (and beyond). I hope you enjoy this treat, and feel free to make it every day!

GAPS Friendly Wilted Salad Ingredients

  • 2-3 heads of soft leaf (like red or green lettuce, not iceburg or romaine)

  • 4-6 slices bacon

  • 2 hard boiled eggs

  • 1 bunch of green onions

  • Almond slices, soaked or sliced preferred (optional)

  • 2-3 TBS raw apple cider vinegar

  • 2 TBS raw honey

Directions for wilted salad

Simple-Wilted-Salad-Salad-Greens-Whole-30-Paleo-Wilted-Salad-Gaps-Diet-Protocol-How-To-Eat-Salad-On-Gaps

Tear the cleaned and dried lettuce in bowl.

Fry the bacon until it’s crispy. While the bacon fries, slice the green onions and eggs and add to the lettuce.

Simple-Wilted-Salad-Salad-Greens-Whole-30-Paleo-Wilted-Salad-Gaps-Diet-Protocol-How-To-Eat-Salad-On-Gaps

When the bacon is done, turn off the heat, remove the bacon and cut into pieces. Add the bacon to the salad mixture.

Simple-Wilted-Salad-Salad-Greens-Whole-30-Paleo-Wilted-Salad-Gaps-Diet-Protocol-How-To-Eat-Salad-On-Gaps

Carefully add honey and apple cider vinegar to the bacon grease, watching for splatter!

Simple-Wilted-Salad-Salad-Greens-Whole-30-Paleo-Wilted-Salad-Gaps-Diet-Protocol-How-To-Eat-Salad-On-Gaps

Stir, then add mixture on top of lettuce.

Simple-Wilted-Salad-Salad-Greens-Whole-30-Paleo-Wilted-Salad-Gaps-Diet-Protocol-How-To-Eat-Salad-On-Gaps

Mix well.

Add almond slices.

Serve immediately!

Simple-Wilted-Salad-Salad-Greens-Whole-30-Paleo-Wilted-Salad-Gaps-Diet-Protocol-How-To-Eat-Salad-On-Gaps

Watch it disappear!


Wilted Salad Greens

Author:
prep time: cook time: total time:

ingredients:

  • 2-3 heads of soft leaf (like red or green lettuce, not iceburg or romaine)
  • 4-6 slices bacon
  • 2 hard boiled eggs
  • 1 bunch of green onions
  • Almond slices, soaked or sliced preferred (optional)
  • 2-3 TBS raw apple cider vinegar
  • 2 TBS raw honey

instructions:

How to cook Wilted Salad Greens

  1. Tear the cleaned and dried lettuce in bowl.
  2. Fry the bacon until it’s crispy. While the bacon fries, slice the green onions and eggs and add to the lettuce.
  3. When the bacon is done, turn off the heat, remove the bacon and cut into pieces. Add the bacon to the salad mixture.
  4. Carefully add honey and apple cider vinegar to the bacon grease, watching for splatter!
  5. Stir, then add mixture on top of lettuce.
  6. Mix well.
  7. Add almond slices.
  8. Serve immediately!
  9. Watch it disappear!
Created using The Recipes Generator

New Year's Resolutions: Six Habits I Recommend on a Regular Basis

New Year's Resolutions: Six Habits I Recommend on a Regular Basis

In the last post, I shared about mindsets to have (or not) that will help with successful habit change. This week I want to share about some of the habits I think are most important to consider integrating into your family. This is not an exhaustive list! These habits are simple and sound.

Fermented Garlic: A Powerful Food for Health

Fermented Garlic: A Powerful Food for Health

Heard of fermented garlic? Wondered what the health benefits of garlic are? Then this post is for you!

The Silver Lining to the Omnivore's Dilemma

The Silver Lining to the Omnivore's Dilemma

In 2006, a book was published that sought to give the reader a better understanding of where their food comes from. The Omnivore’s Dilemma by Michael Pollan followed three major tracks, or sourcing, of food. The public reaction to this book was significant and varied, and it evoked discussion from vegetarians and meat-lovers alike.