snacks

Liver Jalapeno Poppers

Recently I put up a recipe about bacon wrapped liver pieces, a suggestion from a patient of mine. They turned out amazing! As I was eating them, I thought “a little cream cheese would be nice with these '' which then led me to thinking of jalapeno poppers.

Thus began the quest to find the perfect ratio of liver in a jalapeno popper that would go unnoticed by the general public. My idea was to put a small sliver of liver inside each jalapeno, filling them with cream cheese and wrapping them in bacon. 

Store bought cream cheese is not technically GAPS Legal. If you are following the GAPS Protocol, you could instead substitute a yogurt cheese, which is made by dripping the whey from the yogurt. 

For the bacon, you have multiple options. You can cure your own bacon (see directions here) or if tolerating, you can purchase a commercially available bacon following these guidelines. It’s best if the pigs were not fed antibiotics or hormones and uncured bacon, depending on the ingredients, can also be considered Full GAPS Legal. Curing agents include high nitrates which can be irritating to your body and detrimental to your healing journey. Also to legally be called a curing brine, it must contain a certain ratio of salt and sugar thus any bacon that is labeled cured will contain some amount of sugar, which is not GAPS Legal. Uncured bacon may avoid these issues but be sure to read your labels. 

If possible, wear gloves when you are cutting your jalapenos. If you don’t have gloves, coat your hands in fat to avoid having the oils seep into your skin. If you have burning on your skin from the jalapenos, fill a cup with 50% apple cider vinegar and 50% filtered water to dilute it. Place your fingers in the cup for 5 to 10 minutes until the sting goes away. 

While you may not be able to pass these off at a party, hopefully this is a treat your real food eating family can enjoy.

Ingredients for Liver Jalapeno Poppers:

  • 10 Jalapenos

  • 12 oz. Bacon

  • 3 Chicken Livers (this is the mildest liver, you can use other liver if you have it)

  • 6 - 8 oz Cream Cheese or Yogurt Cheese

Directions for Liver Jalapeno Poppers:

IMG_8441.jpg

Put on your gloves OR coat your hands in oil. If at any point you start to feel heat, add more oil!

IMG_8448.jpg

Rinse your jalapenos in filtered water. Slice in half longways and remove the pith and seeds. Optionally, rinse the jalapenos again in filtered water to remove any leftover seeds. Dry with a paper towel.

Preheat your oven to 400 degrees.

Cut the bacon in half. Put the cream cheese on another plate so you don’t cross contaminate any remaining cream cheese from your package with blood from the livers. Allow the cream cheese to warm slightly so it is pliable but not soft.

IMG_8475.jpg

Rinse the livers in filtered water. Cut into long slices.

IMG_8482.jpg

Assemble the poppers by placing a piece of bacon on a cutting board or plate. Add one half of the jalapeno on top. Place long strips of liver inside the jalapeno. Take a chunk of cream cheese and squish it to make a log. Place on top of the liver pieces. Wrap the bacon around the livers.

Place in a glass baking dish. No other fat is needed. If you have extra livers and bacon when you are done assembling your jalapenos, I suggest making bacon wrapped livers.

Bake at 400 degrees for 30-40 minutes until bacon is crispy.

Enjoy!


LiverJalapenoPoppers.png

Bacon Wrapped Livers

I’m always searching for new ways and additional recipes to recommend for eating livers. Liver is an important superfood because the nutrients in liver are very important to our health. It’s recommended to consume liver on a regular basis. However, many people do not enjoy eating liver in the previous ways they have had it prepared.

This is a basic recipe but you can experiment in adding other things to your stuffing mixture like onions, cheese, cream cheese, carrots, etc.

IMG_7590.jpg

Ingredients for Bacon Wrapped Liver:

  • ½ lb. Bacon, 1 piece per liver bite

  • ½ lb. Liver, I’m using chicken

Directions for Bacon Wrapped Liver

IMG_7567.jpg

Pre-heat oven to 400. Rinse your livers and pat to dry. Slice livers into chunks, approximately two bite size. Cut bacon strips in half.

IMG_7572.jpg

Fold bacon around livers. Place seam side down in a deep sided baking dish.

IMG_7593.jpg

Cover with parchment paper and aluminum foil. Do not allow foil to touch your food.

Place in oven covered for 15 minutes.

Uncover and cook for 10 minutes.

Serve and enjoy!


BaconWrappedLiver.png

Bacon Wrapped Livers

Author: Amy Mihaly, Be Well Clinic

Ingredients

  • ½ lb. Bacon, 1 piece per liver bite
  • ½ lb. Liver, I’m using chicken

Instructions

  1. Pre-heat oven to 400. Rinse your livers and pat to dry. Slice livers into chunks, approximately two bite size. Cut bacon strips in half.
  2. Fold bacon around livers. Place seam side down in a deep sided baking dish.
  3. Cover with parchment paper and aluminum foil. Do not allow foil to touch your food.
  4. Place in oven covered for 15 minutes.
  5. Uncover and cook for 10 minutes.
  6. Serve and enjoy!

Simple Applesauce

I love apples! I think they’re one of the easiest things to preserve. If you are trying to eat in season and preserve your own food, apples are a great way to start! (Check out our other recipes using apples!)

My dad’s love language is making food for people. Although he usually made plenty of delicious applesauce, he often gave so much of it away that it didn’t last long in our house. 

IMG_0380.jpg

Because my corer and peeler didn’t peel my apples very well, I removed the skins from my apples manually. This is important if you are just starting on apples on GAPS Stage 5. After you know you can tolerate apple skins, you can skip the peeling step if you want to.

When I process large amounts of apples, I always think about making apple cider vinegar! Save your peels and cores (but not any rotting or bruised parts) to make your own apple cider vinegar.

You can make applesauce in large batches or small ones. For most of the year, I make applesauce batches with just two or three apples. If you make a very large batch of applesauce, it is easy to can preserve it in a water bath or freeze it to enjoy later. 

You can use any kind of apple to make applesauce, or even a mixture of apple varieties. It’s a great use for slightly wrinkly apples, which is why I often do 1 or 2 at a time. 

IMG_0470.jpg

Apples should be eaten with plenty of animal fat. Butter is my favorite but lard or ghee are ok choices as well. Apples contain a lot of sugar so the fat helps keep your blood sugar from spiking and, as we talked about in The One About Fat, fat soluble vitamins help us absorb other nutrients. 

Ingredients for Applesauce:

  • Apples: Peeled and Cored or just Peeled and Sliced

  • Filtered Water

  • Butter

Directions for Applesauce:

IMG_0386.jpg

Rinse your apples and cut and slice them.

Cut your apples into fairly similarly sized pieces so they cook down evenly.

Add a tiny bit of filtered water, 1-3 tbsp, to the bottom of a pot so the apples don’t burn as you are waiting for them to soften.

IMG_0427.jpg

Add apples to the pot and set on a stove on medium low heat.

Stir the apples every few minutes as they cook so they do not burn. 

IMG_0460.jpg

When your apples are soft, mash them with a fork or potato masher. If they are not covered, you may need to add a little bit more water. 

I prefer my apple sauce to be chunky but you can put it through a blender, food processor or masher to smooth it. 

IMG_0467.jpg

Serve it warm or cold, fresh or freeze it for later! To freeze it, cool your applesauce completely. I use BPA free plastic bags. If I have a lot to freeze, I measure it out in 1-2 cup increments.

When you eat it, be sure to add lots of butter!


SimpleGAPSLegalAppleSauce.png

Simple Apple Sauce

Author: The Be Well Clinic

Ingredients

  • Apples: Peeled and Cored or just Peeled and Sliced
  • Filtered Water
  • Butter

Instructions

  1. Rinse your apples and cut and slice them.
  2. Cut your apples into fairly similarly sized pieces so they cook down evenly.
  3. Add a tiny bit of filtered water, 1-3 tbsp, to the bottom of a pot so the apples don’t burn as you are waiting for them to soften.
  4. Add apples to the pot and set on a stove on medium low heat.
  5. Stir the apples every few minutes as they cook so they do not burn.
  6. When your apples are soft, mash them with a fork or potato masher. If they are not covered, you may need to add a little bit more water.
  7. I prefer my apple sauce to be chunky but you can put it through a blender, food processor or masher to smooth it.
  8. Serve it warm or cold, fresh or freeze it for later! To freeze it, cool your applesauce completely. I use BPA free plastic bags. If I have a lot to freeze, I measure it out in 1-2 cup increments.
Created using The Recipes Generator

Real Food Onion Dip

Onion dip used to be my favorite party dip. For a long time, I have not eaten it because commercially prepared dips are full of chemicals. However, like with many foods that are now available commercially, these used to be available made from scratch. This is my attempt at making a real food onion dip.

Making delicious dips is not just about good food although pleasure in food is important and should never be underestimated. But when we make dips from real food ingredients we are also adding nutrition to our bodies with every bite. I love that the foods I used to eat that I thought weren’t best for my body are now foods I can make purposefully and joyfully knowing that each bite will bring nutrients to my body. It’s taken me many years to get where I am and I still have far to go but I want to encourage you to keep pursuing learning how to make real nutritious food for yourself and your family. You will never regret it!

Ingredients for Onion Dip:

2 Small or 1 Medium Onions

2 tbsp Butter

4-5 Cloves of Garlic

¼ tsp Salt + more for seasoning onions

8 oz Sour Cream

2 tsp Mushroom Ketchup

1 tsp Apple Cider Vinegar

Directions for Onion Dip:

IMG_8272.jpg

Finely chop onions. Like really tiny. Add to a frying pan with butter and stir to evenly coat. Season with salt.

IMG_8279.jpg

Cook the onions until they are caramelized. Peel the garlic cloves and finely chop. Add to the pan and stir.

Watch your onions, stirring every 5-10 minutes to keep them from burning. They should take around 20-30 minutes to fully caramelize.

Once the onions have caramelized, turn off the heat so they cool slightly.

IMG_8298.jpg

In a bowl, add sour cream, slightly cooled onions, mushroom ketchup, apple cider vinegar and the ¼ tsp of salt. Stir to combine.

Allow the mixture to sit at room temperature for a few hours for the flavors to blend.

Dip carrot sticks, cheese sticks or quesadillas. Enjoy!


HowtoMakeRealFoodOnionDip.png

Real Food Onion Dip

Author: The Be Well Clinic
Prep time: Cook time: Total time:

Ingredients:

  • 2 Small or 1 Medium Onions
  • 2 tbsp Butter
  • 4-5 Cloves of Garlic
  • ¼ tsp Salt + more for seasoning onions
  • 8 oz Sour Cream
  • 2 tsp Mushroom Ketchup
  • 1 tsp Apple Cider Vinegar

Instructions:

  1. Finely chop onions. Like really tiny. Add to a frying pan with butter and stir to evenly coat. Season with salt.
  2. Cook the onions until they are caramelized. Peel the garlic cloves and finely chop. Add to the pan and stir.
  3. Watch your onions, stirring every 5-10 minutes to keep them from burning. They should take around 20-30 minutes to fully caramelize.
  4. Once the onions have caramelized, turn off the heat so they cool slightly.
  5. In a bowl, add sour cream, slightly cooled onions, mushroom ketchup, apple cider vinegar and the ¼ tsp of salt. Stir to combine.
  6. Allow the mixture to sit at room temperature for a few hours for the flavors to blend.
  7. Dip carrot sticks, cheese sticks or quesadillas.
Created using The Recipes Generator

Gummy Worms

For a birthday celebration or other special occasion, gummy worms can be a great treat! This recipe is full GAPS legal and although it should be consumed infrequently, it’s a sweet treat you can offer your kids with no guilt. 

These gummy worms are easy to make in any flavor or flavor combination you or your kids like. The ratio of fruit to gelatin is pretty forgiving. Just shoot for approximately two cups of fruit. You want to keep the ratio of gelatin to water the same. 

While I don’t normally recommend using silicone, there’s not really a different option to make gummy worms that are shaped like well worms. The molds I used are oven safe but I still try to avoid as much contact between something warm and plastic. I also purchased silicone trays that were trying. They are FDA approved for safety; not all the trays I found had the same certifications. Make sure you wash them before you use them!

Ingredients for Gummy Worms:

  • 2 heaping cups of fruit

  • ⅔ cup filtered water + more for the bottom of your pot

  • 2 tbsp of gelatin 

  • 2 tbsp of honey

Directions for Gummy Worms:

IMG_1652.jpg

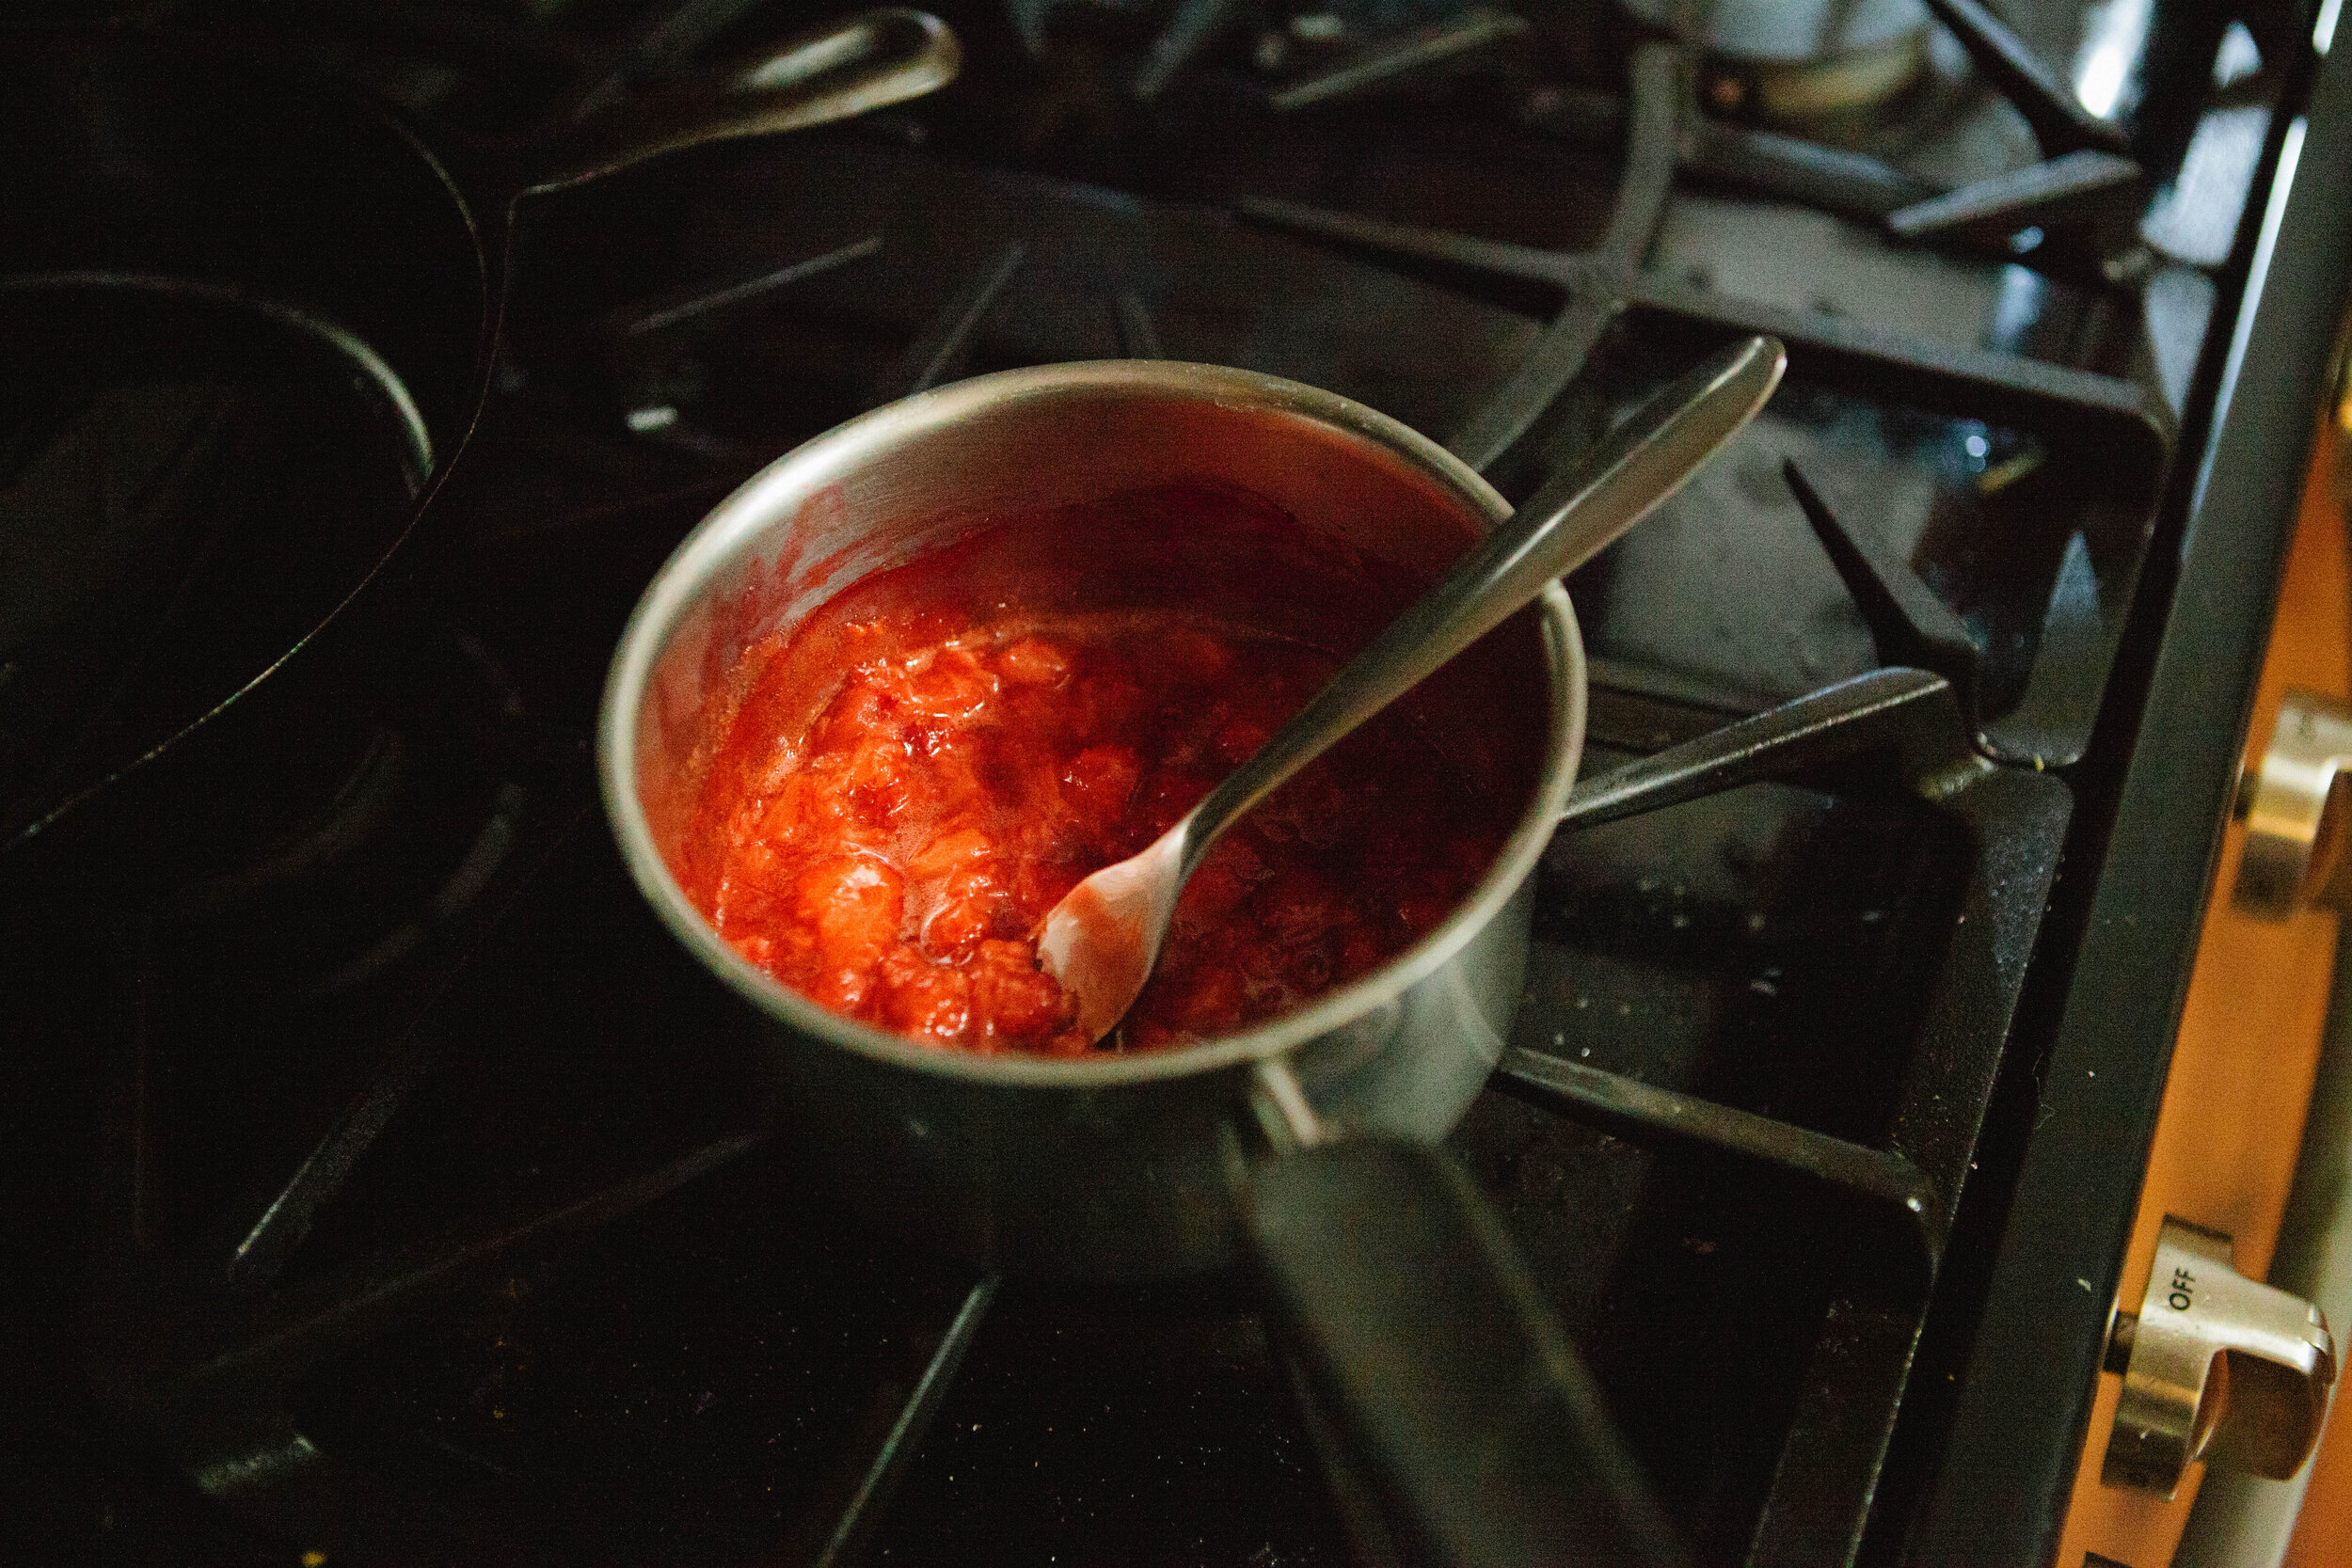
Add heaping cups of fruit to a small sauce pan. Add a little water on the bottom to keep them from burning. Turn the stove to medium heat. Simmer until the berries are very soft and mashable.

Warm ⅔ cup of water in another small sauce pan. When warmed at least to 90 degrees, add in gelatin and whisk for several minutes to mix completely. Cooler water will cause your gelatin to clump. The mixture needs to be “blood temperature.” 

IMG_1660.jpg

Add the fruit mixture to a food processor with the gelatin mixture. Blend until smooth.

Allow to cool and settle slightly. When cooled slightly, add the honey. It’s important not to add the honey to the mixture when it’s too hot or it will cook it. Optionally, strain the mixture through a small mesh strainer to catch any chunks. 

IMG_1681.jpg

Using a spoon, dropper, or turkey baster, fill your gummy molds until the mixture is to the top.

Set the mixture into the fridge to cool OR fill a tray with ice and water and set the mixture on top. 

IMG_1846.jpg

Chill for approximately one to two hours. Remove from the molds. I found it easiest to use a spoon to remove them.

Enjoy!


Howtomakerealfoodgummyworms.png

Gummy Worms

Author: The Be Well Clinic
Prep time: Cook time: Total time:

Ingredients:

  • 2 heaping cups of fruit
  • ⅔ cup filtered water + more for the bottom of your pot
  • 2 tbsp of gelatin
  • 2 tbsp of honey

Instructions:

  1. Add heaping cups of fruit to a small sauce pan. Add a little water on the bottom to keep them from burning. Turn the stove to medium heat. Simmer until the berries are very soft and mashable.
  2. Warm ⅔ cup of water in another small sauce pan. When warmed at least to 90 degrees, add in gelatin and whisk for several minutes to mix completely. Cooler water will cause your gelatin to clump. The mixture needs to be “blood temperature.”
  3. Add the fruit mixture to a food processor with the gelatin mixture. Blend until smooth.
  4. All to cool and settle slightly. When cooled slightly, add the honey. It’s important not to add the honey to the mixture when it’s too hot or it will cook it. Optionally, strain the mixture through a small mesh strainer to catch any chunks.
  5. Using a spoon, dropper, or turkey baster, fill your gummy molds until the mixture is to the top.
  6. Set the mixture into the fridge to cool OR fill a tray with ice and water and set the mixture on top.
  7. Chill for approximately one to two hours. Remove from the molds. I found it easiest to use a spoon to remove them.
  8. Enjoy!
Created using The Recipes Generator

4 Ingredient Pico de Gallo

 I used to dislike pico because of the cilantro in it. But I’ve come a long way! I love this simple recipe, it is a delicious and fresh addition to your table. It’s best made at least a few hours beforehand so the flavors have a chance to blend! Feel free to adjust to your taste, and I hope you enjoy it!

Ingredients for Pico de Gallo:

  • 3 ripe tomatoes

  • ⅓ of a White or Yellow Onion

  • 1-2 Limes

  • 2 tbsp Cilantro

Directions for Pico de Gallo:

IMG_9070.jpg

Finely chop tomatoes and onions.

IMG_9221.jpg

Add to a bowl. Add the juice of 1 - 2 limes, depending on how juicy they are.

Add a few shakes of salt to taste.

IMG_9235.jpg

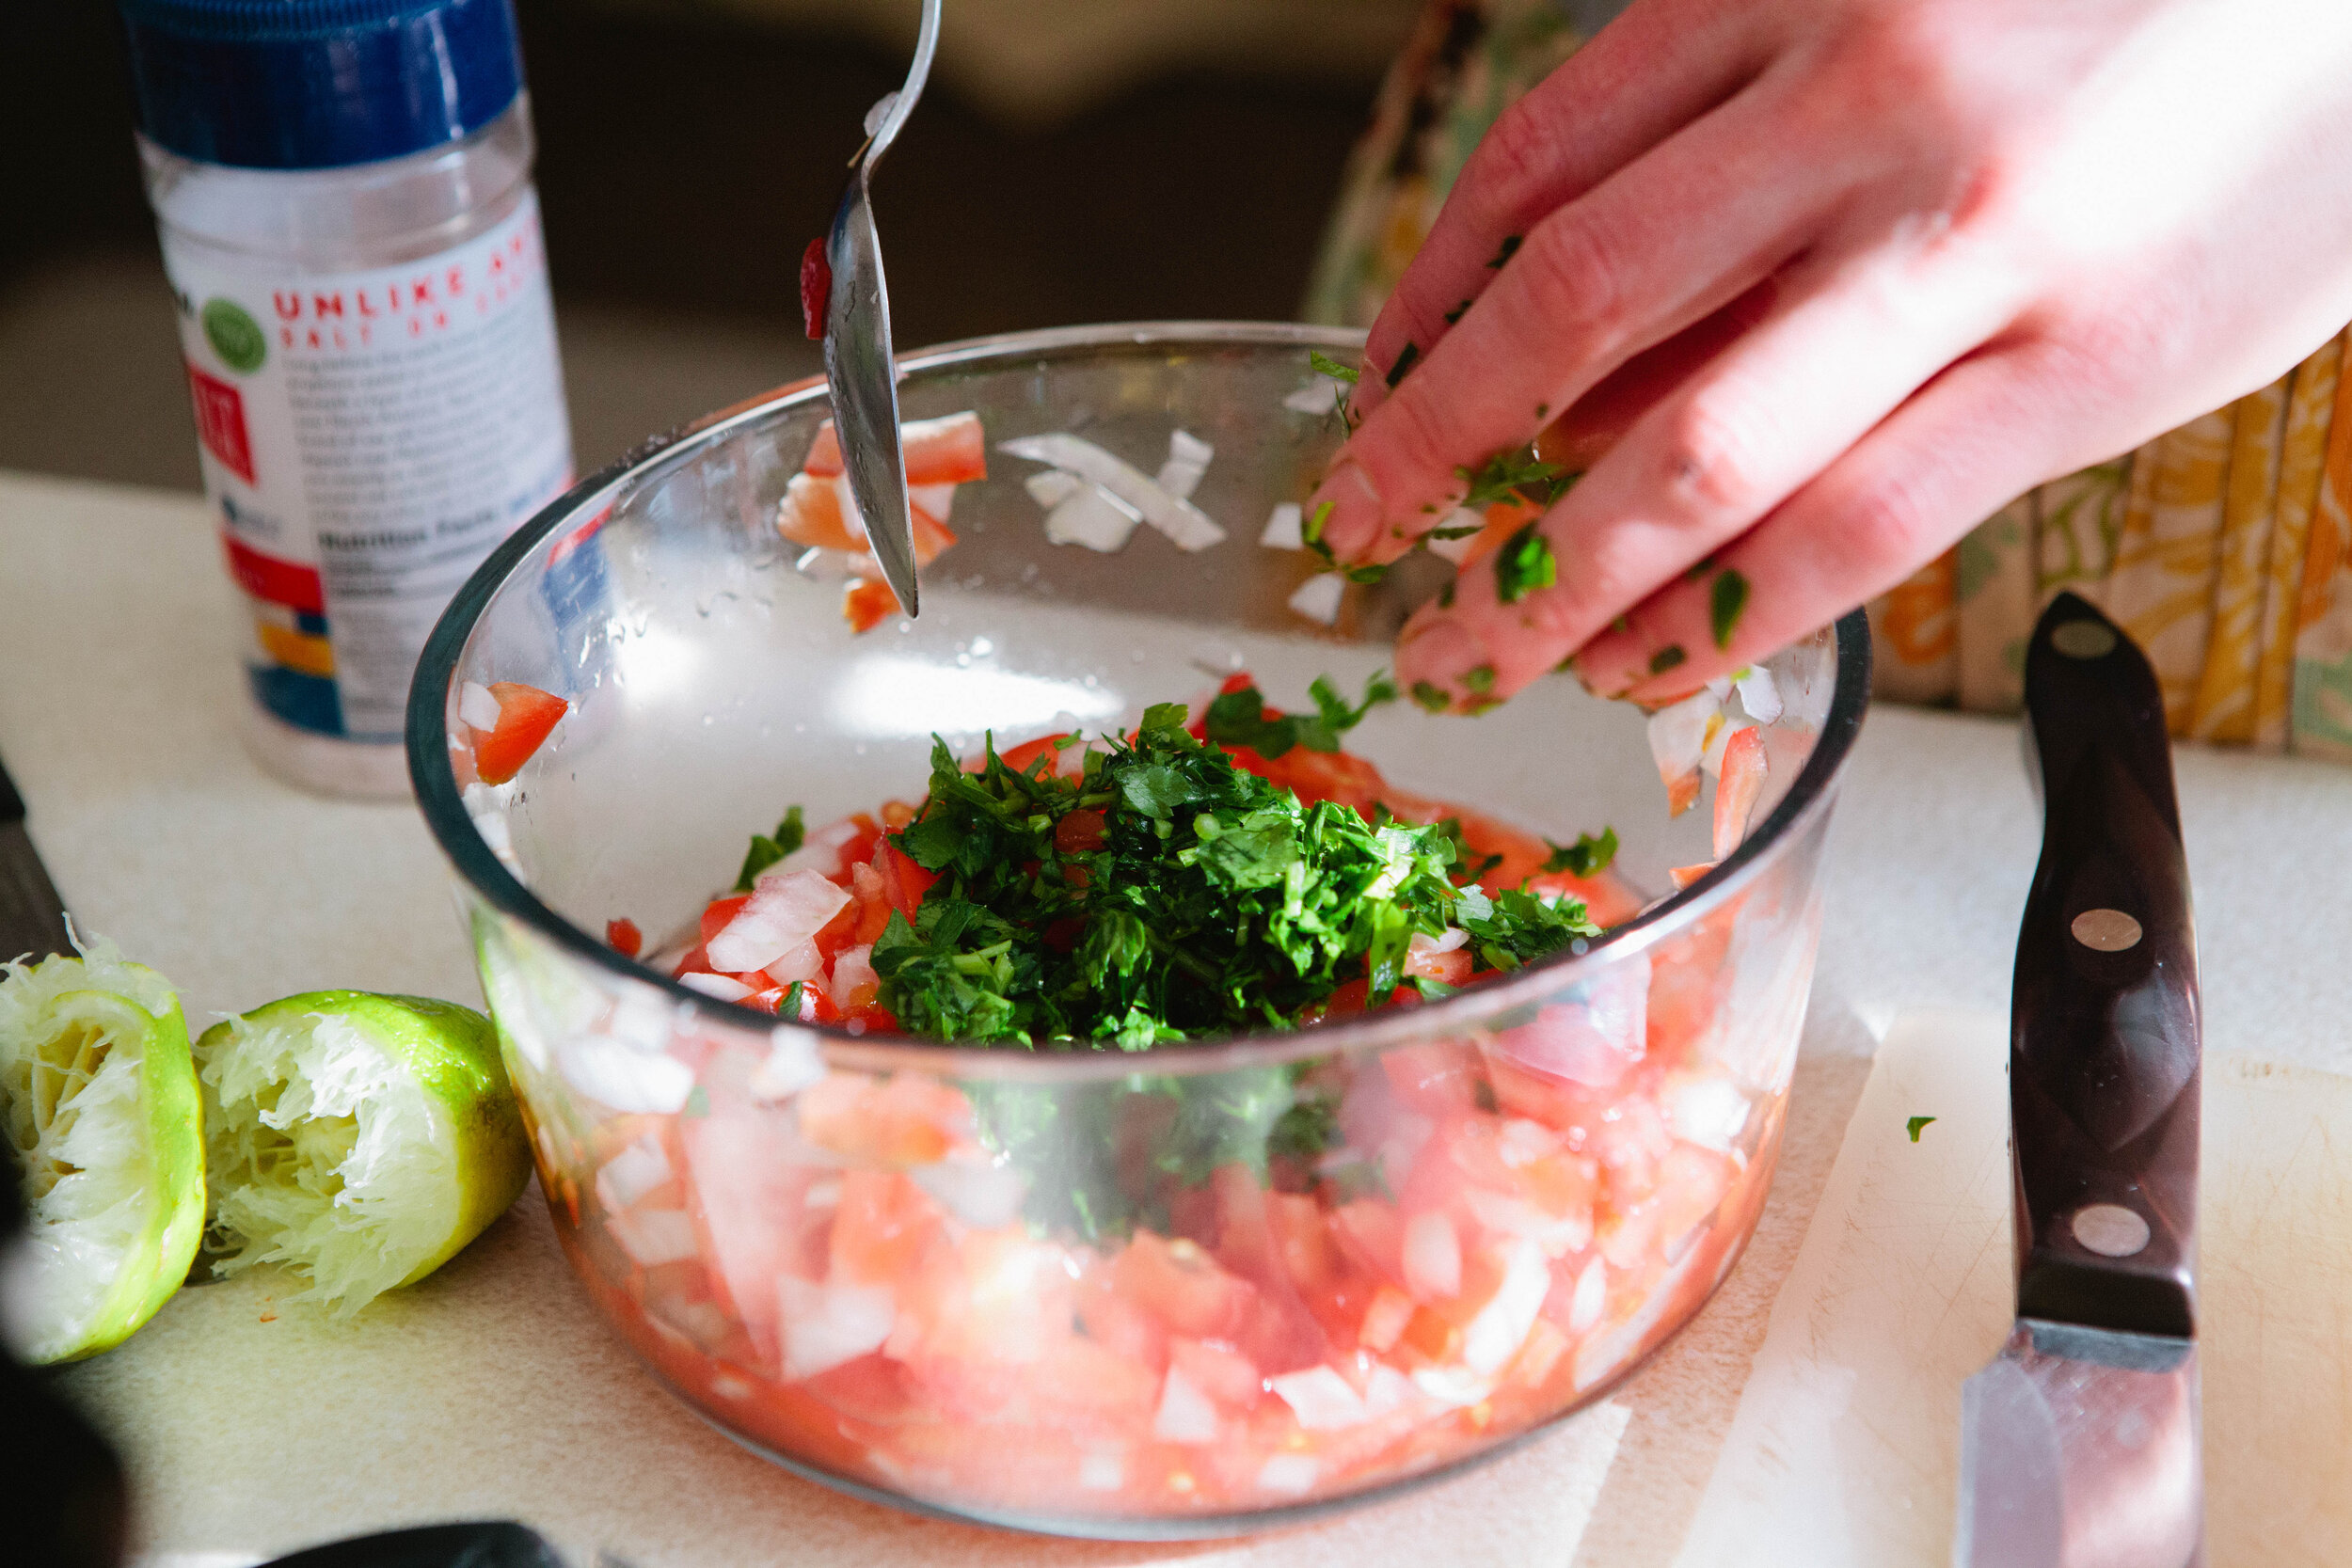
Finely mince cilantro and add to the bowl.

IMG_9237.jpg

Stir everything together to let the flavors meld. 

Enjoy!

picodegallo.png

4 Ingredient Pico de Gallo

Author:
Prep time: Cook time: Total time:

Ingredients:

  • 3 ripe tomatoes
  • ⅓ of a White or Yellow Onion
  • 1-2 Limes
  • 2 tbsp Cilantro

Instructions:

How to cook 4 Ingredient Pico de Gallo

  1. Finely chop tomatoes and onions.
  2. Add to a bowl. Add the juice of 1 - 2 limes, depending on how juicy they are.
  3. Add a few shakes of salt to taste.
  4. Stir everything together to let the flavors meld.
  5. Enjoy!
Created using The Recipes Generator

Mayo Free Egg Salad

Eggs are a great non-meat protein source. While I usually recommend eating eggs yolks running to preserve the cholesterol on them, sometimes a hard boiled egg is hard to beat!

This is a recipe that could easily be doubled or tripled for a party. You can serve it spread on a romaine lettuce leaf, as shown, or you can use it as a dip for cucumber slices or carrots.. Feel free to use whatever herbs you have in the fridge and experiment to find your favorites.

This recipe is legal on GAPS Stage 3 if you omit the paprika. Otherwise, it is legal on GAPS Stage 6. The ingredient list is for 1-2 servings.

Ingredients for Mayo Free Egg Salad:

  • 4 Eggs

  • ½ cup Sour Cream or Creme Fraiche

  • 1 small stalk Celery

  • 1 large Green Onion

  • ¼ - ½  tsp Salt

  • 1 tsp Pepper

  • ½ tsp Paprika

  • Parsley

Directions for Mayo Free Egg Salad:

Hard boil eggs. (Recipe here)

mayo-free-egg-salad-recipe-egg-salad-on-gaps-sour-cream-egg-salad

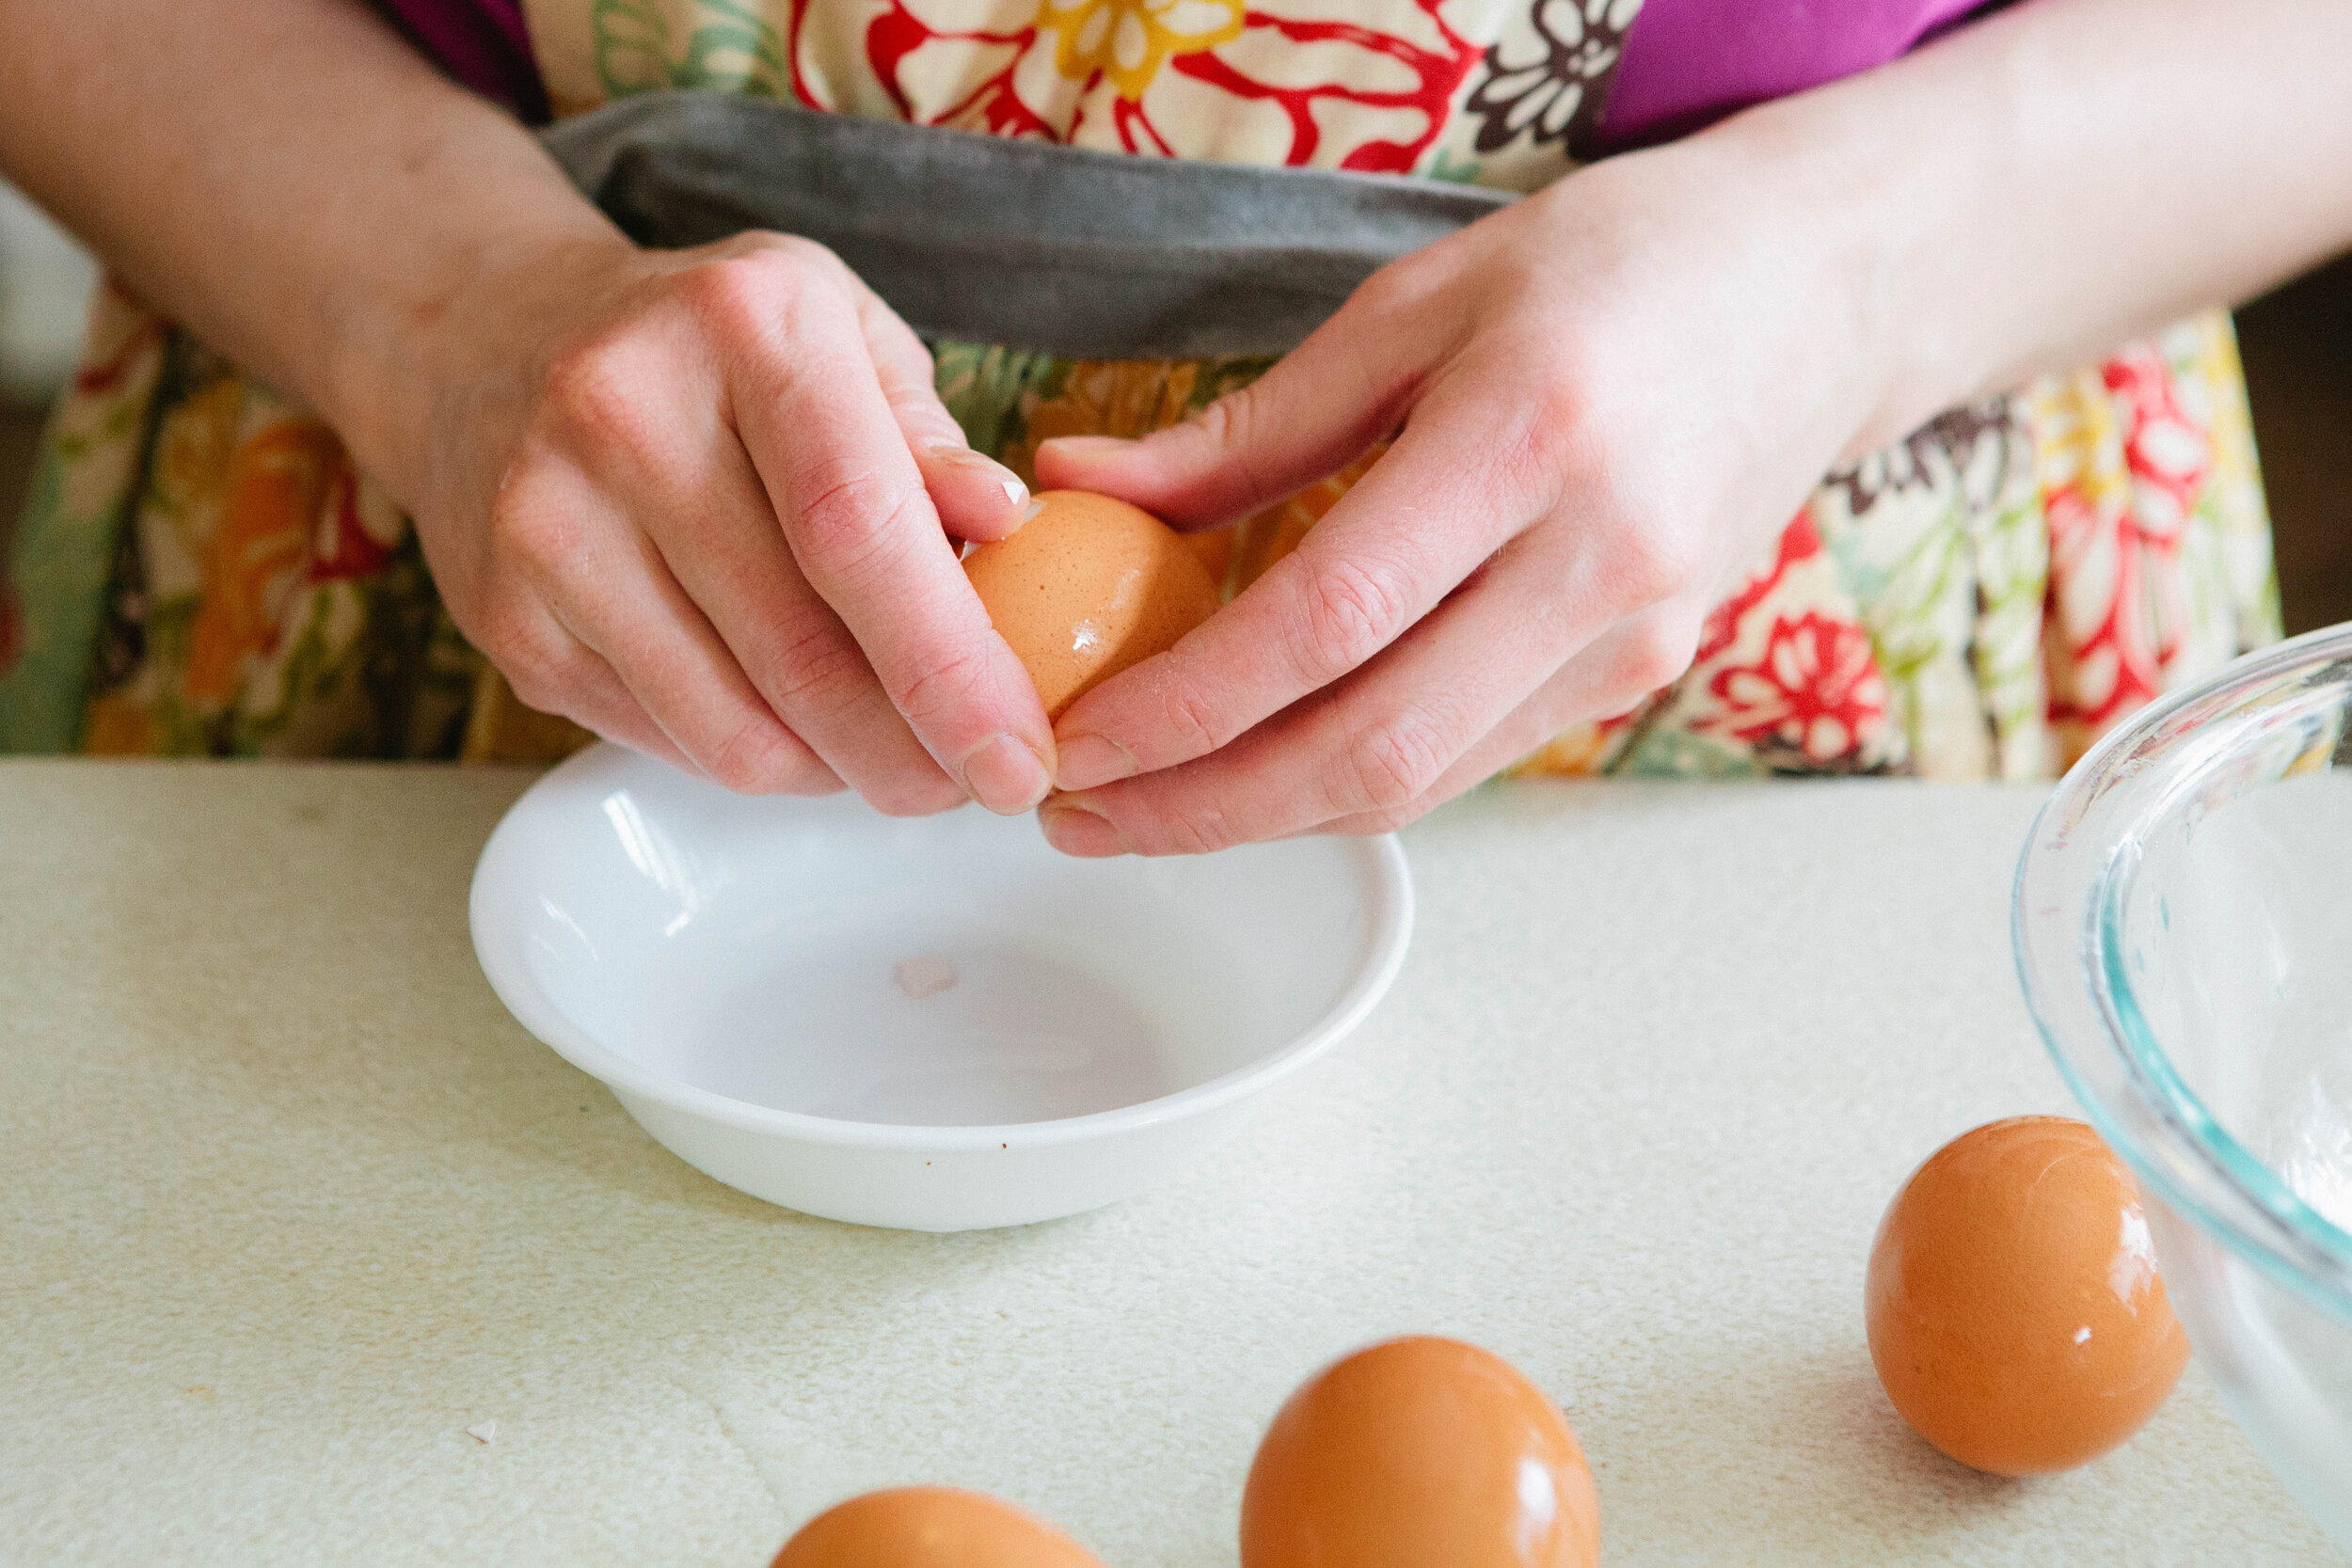
Once eggs are cooled, peel them.

mayo-free-egg-salad-recipe-egg-salad-on-gaps-sour-cream-egg-salad

Coarsely chop eggs, celery and green onion.

Add to a mixing bowl and add in pepper, salt to taste, and sour cream. 

mayo-free-egg-salad-recipe-egg-salad-on-gaps-sour-cream-egg-salad

Gently mix to coat and then sprinkle paprika over the top. Mix gently.

Serve and enjoy!

mayo-free-egg-salad-recipe-egg-salad-on-gaps-sour-cream-egg-salad

Mayo Free Egg Salad

Author:
Prep time: Cook time: Total time:

Ingredients:

  • 4 Eggs
  • ½ cup Sour Cream or Creme Fraiche
  • 1 small stalk Celery
  • 1 large Green Onion
  • ¼ - ½ tsp Salt
  • 1 tsp Pepper
  • ½ tsp Paprika
  • Parsley

Instructions:

How to cook Mayo Free Egg Salad

  1. Hard boil eggs. (Recipe here.)
  2. Once eggs are cooled, peel them.
  3. Coarsely chop eggs, celery and green onion.
  4. Add to a mixing bowl and add in pepper, salt to taste, and sour cream.
  5. Gently mix to coat and then sprinkle paprika over the top. Mix gently.
  6. Serve and enjoy!
Created using The Recipes Generator
EggSalad.png

Guacamole

I learned to make this guacamole recipe when I was in Guatemala. It reminds me of my time there and that’s why I like it so much! I have very fond memories of my time in Guatemala.

Avocados are legal on GAPS stage 3 as is salt. However, if you add citrus juice to your guacamole, it’s not legal until stage 6. 

You know the meme about avocados taking forever to ripen and then suddenly going to mush? I have found that organic avocados tend to stay riper a little longer without going mushy quickly or having brown spots soon after they ripen. 

Enjoy this guacamole with any type of cut up vegetables. I also like it on top of eggs, like an omelette. Pressing it tightly into a container and adding a pit to the top will help it to not turn brown. Off the GAPS diet, enjoy with your canola, soybean and safflower free corn chips! Coconut chips are the best option to buy in stores. 

Ingredients for Guacamole:

  • 3 ripe avocados

  • 1 tbsp Finely Minced Onions or Onion Powder

  • 2 cloves of Garlic

  • 1 tsp Salt

  • Juice of 1 Lime, about 1 tbsp.

Directions for Guacamole:

IMG_7780.jpg

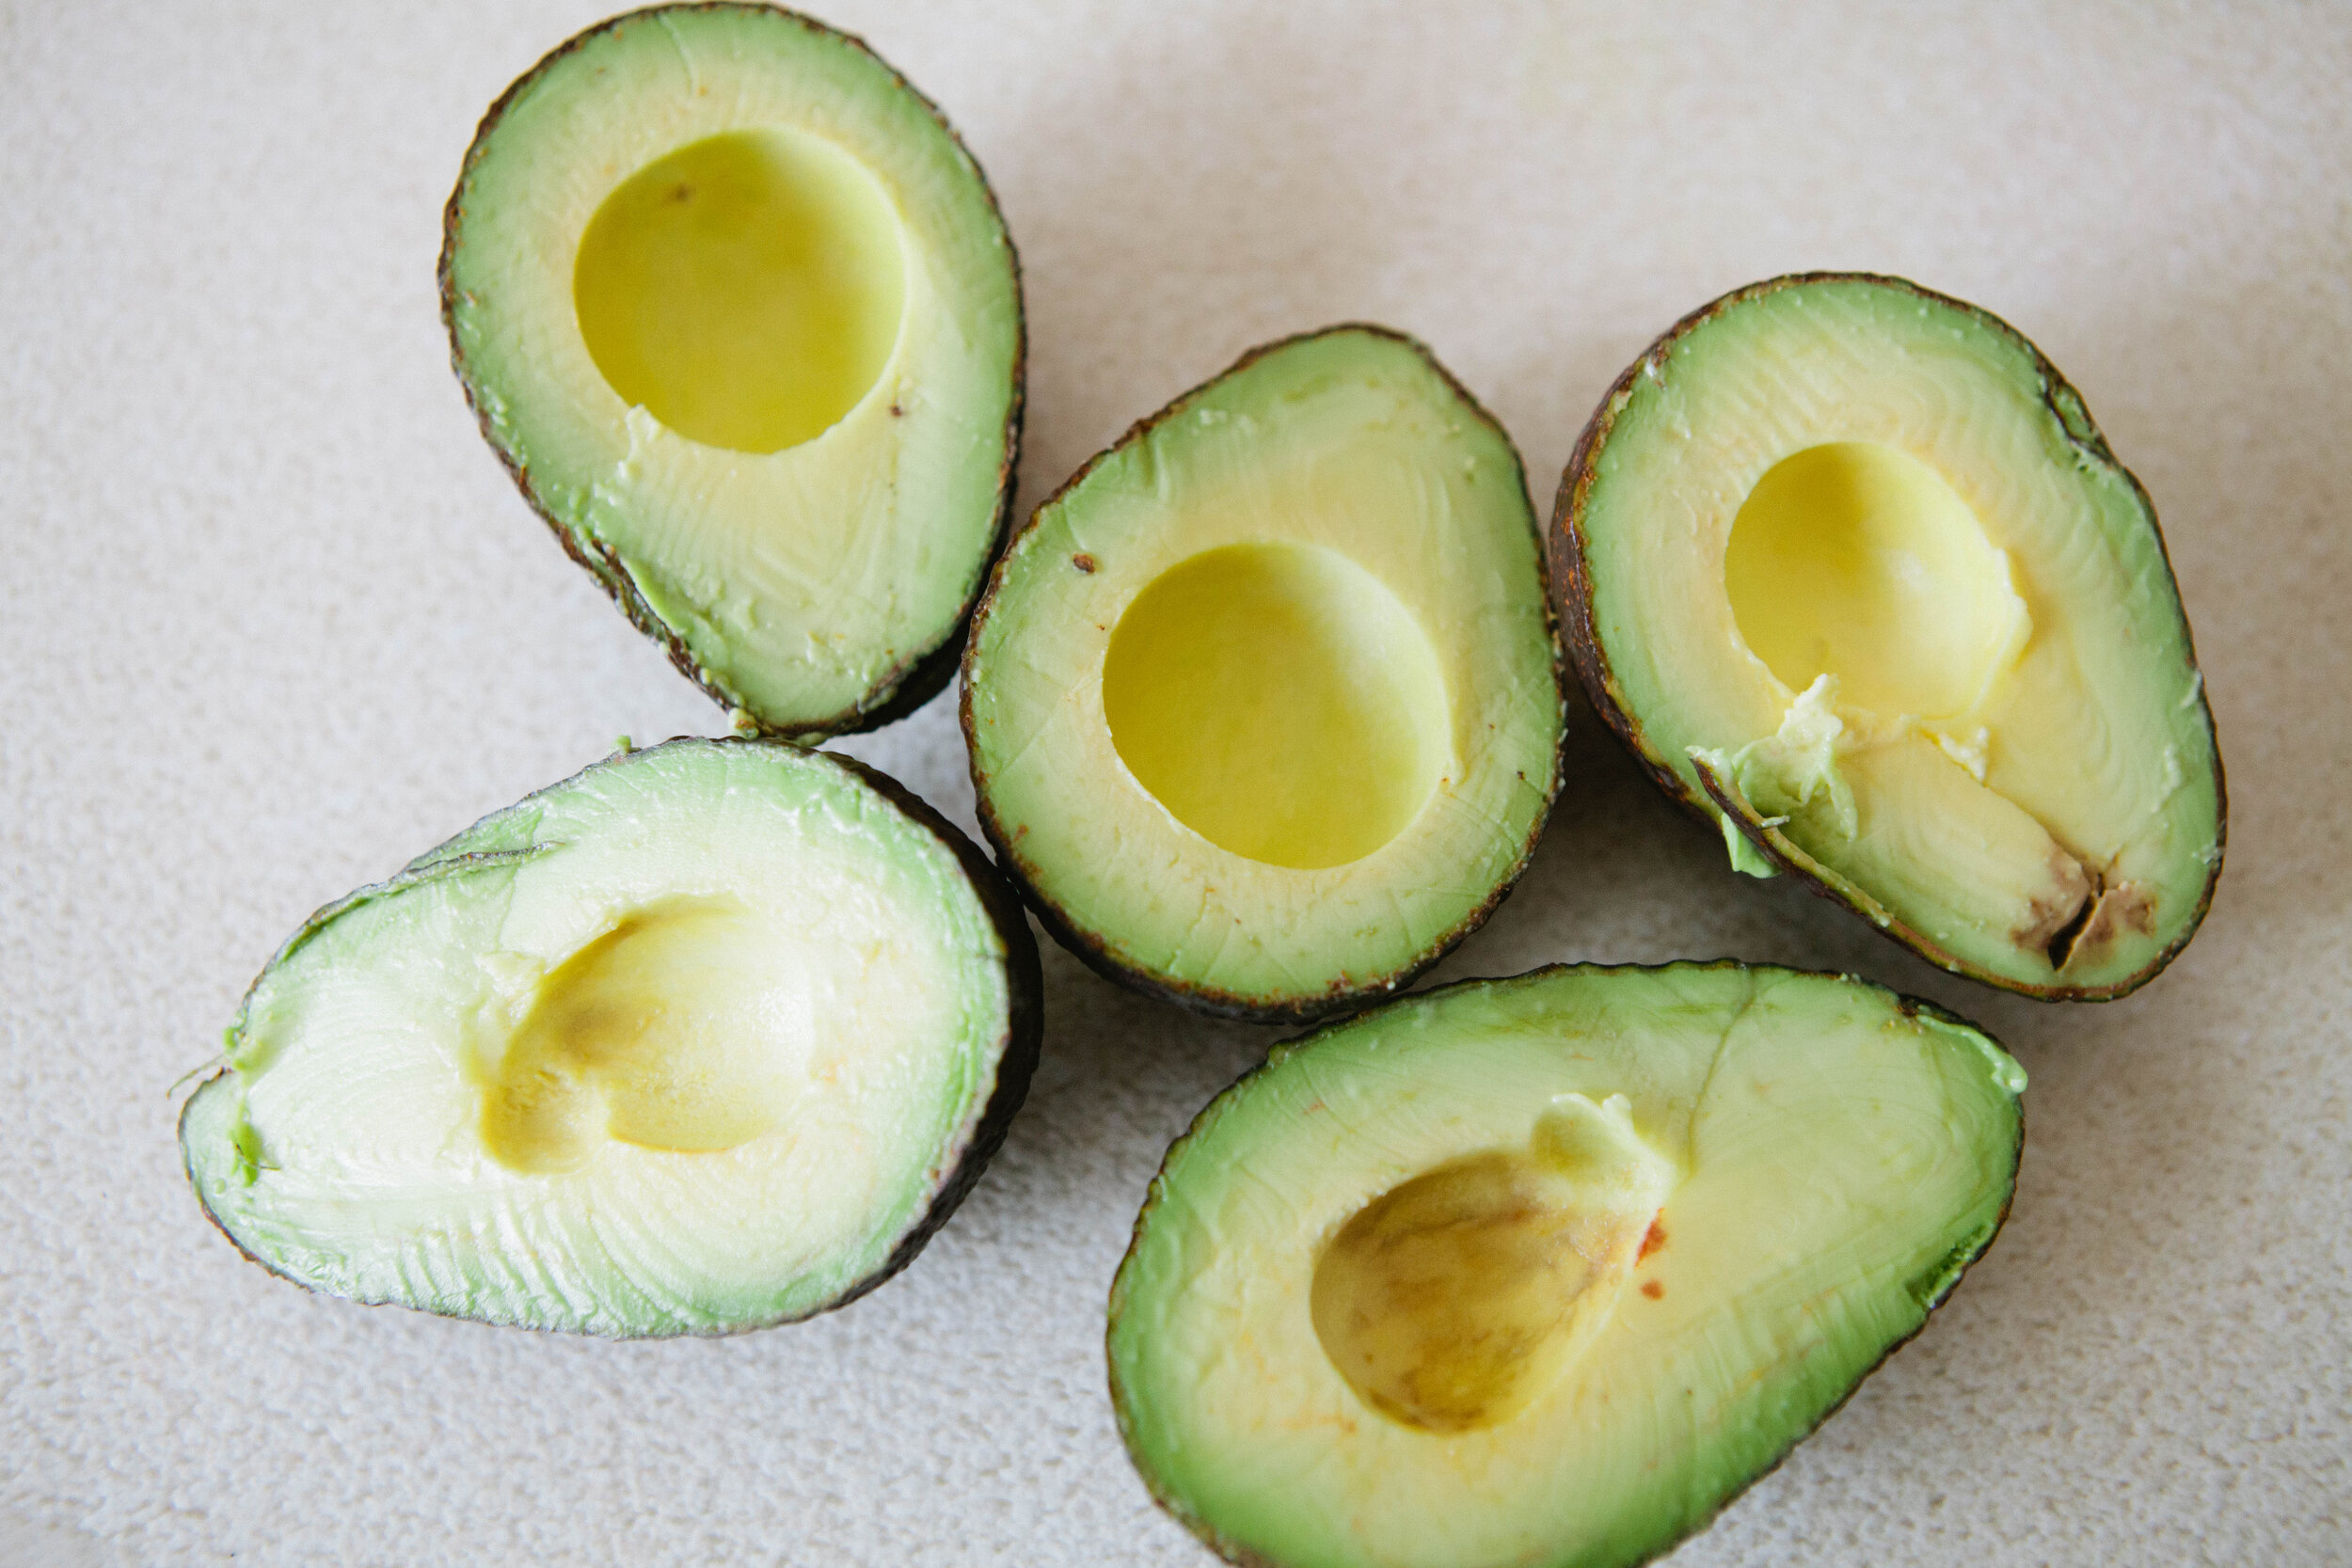
Cut avocados in half and remove the pits. Using a spoon, scoop the avocados into a bowl. 

Finely mince onion and add to the bowl. Or add onion powder.

Finely chop garlic cloves and add to the bowl.

IMG_7818.jpg

Cut lime into wedges and add juice to a bowl. Add salt.

Mix well and enjoy!


Guacamole

Author:
prep time: cook time: total time:

ingredients:

  • 3 ripe avocados
  • 1 tbsp Finely Minced Onions or Onion Powder
  • 2 cloves of Garlic
  • 1 tsp Salt
  • Juice of 1 Lime, about 1 tbsp.

instructions:

How to cook Guacamole

  1. Cut avocados in half and remove the pits. Using a spoon, scoop the avocados into a bowl.
  2. Finely mince onion and add to the bowl. Or add onion powder.
  3. Finely chop garlic cloves and add to the bowl.
  4. Cut lime into wedges and add juice to a bowl. Add salt.
  5. Mix well and enjoy!
Created using The Recipes Generator
Guacamole.png

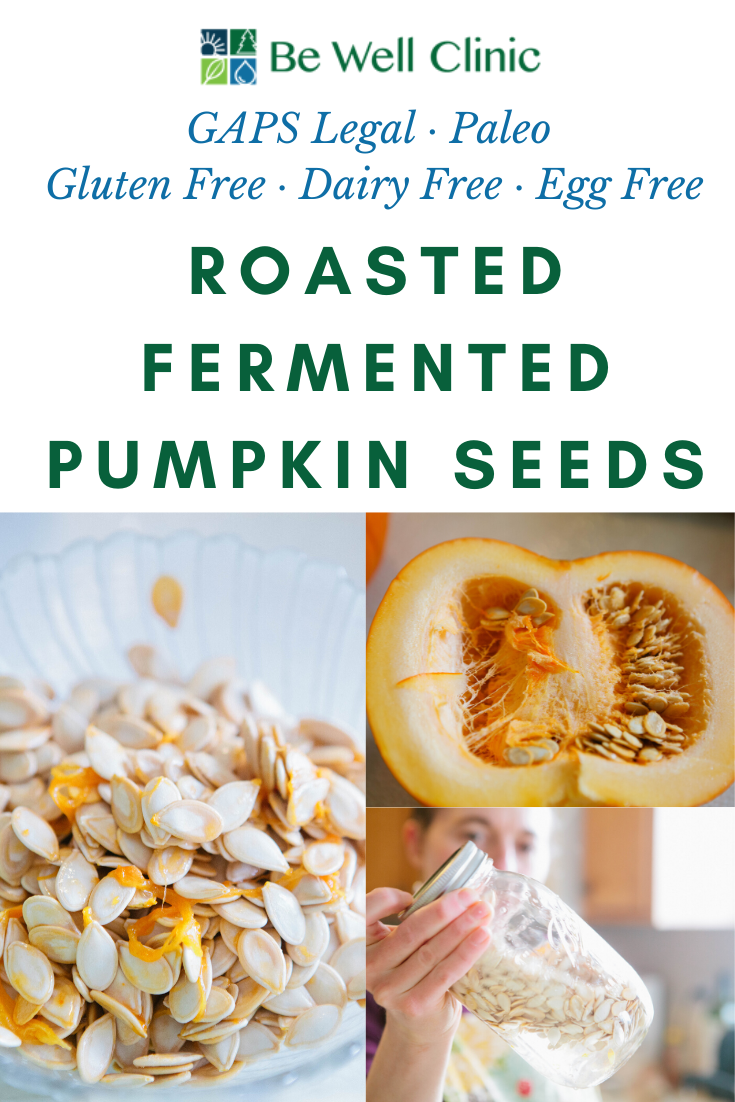
Roasted Fermented Pumpkin Seeds

Pumpkin seeds are like any seed (or bean or nut.) They should be properly prepared before consuming to neutralize the acid and make them easier to digest. Sprouting your seeds is essentially germinating. Germination changes the chemical structure of the seeds, chemically changing it from a closed off protector of the treasure inside to an open seed ready to bring nutrition.  It’s best to sprout or otherwise properly prepare your seeds to allow more nutrition to be bioavailable to you.

Pumpkin seeds also have an especially helpful quality in that they help rid your body of parasites by attacking the parasites and intestinal worms. If you suspect you have parasites or worms, consuming pumpkin seeds is a good idea. However, be sure to take it slow and don’t overdo it.

Ingredients for Fermented Pumpkin Seeds:

  • 3 small pumpkins

  • ½ tsp Real Salt

  • Water

Directions for Fermented Pumpkin Seeds:

Fermented pumpkin seeds can help your digestion by getting rid of parasites in your gut. Improve your gut health with this GAPS Diet legal recipe for fermented pumpkin seeds. Recipe by Amy Mihaly, Certified GAPS Practitioner in Colorado.

Cut the pumpkins in half.

Fermented pumpkin seeds can help your digestion by getting rid of parasites in your gut. Improve your gut health with this GAPS Diet legal recipe for fermented pumpkin seeds. Recipe by Amy Mihaly, Certified GAPS Practitioner in Colorado.

Remove the seeds from the inside and separate from the pumpkin flesh.

Fermented pumpkin seeds can help your digestion by getting rid of parasites in your gut. Improve your gut health with this GAPS Diet legal recipe for fermented pumpkin seeds. Recipe by Amy Mihaly, Certified GAPS Practitioner in Colorado.

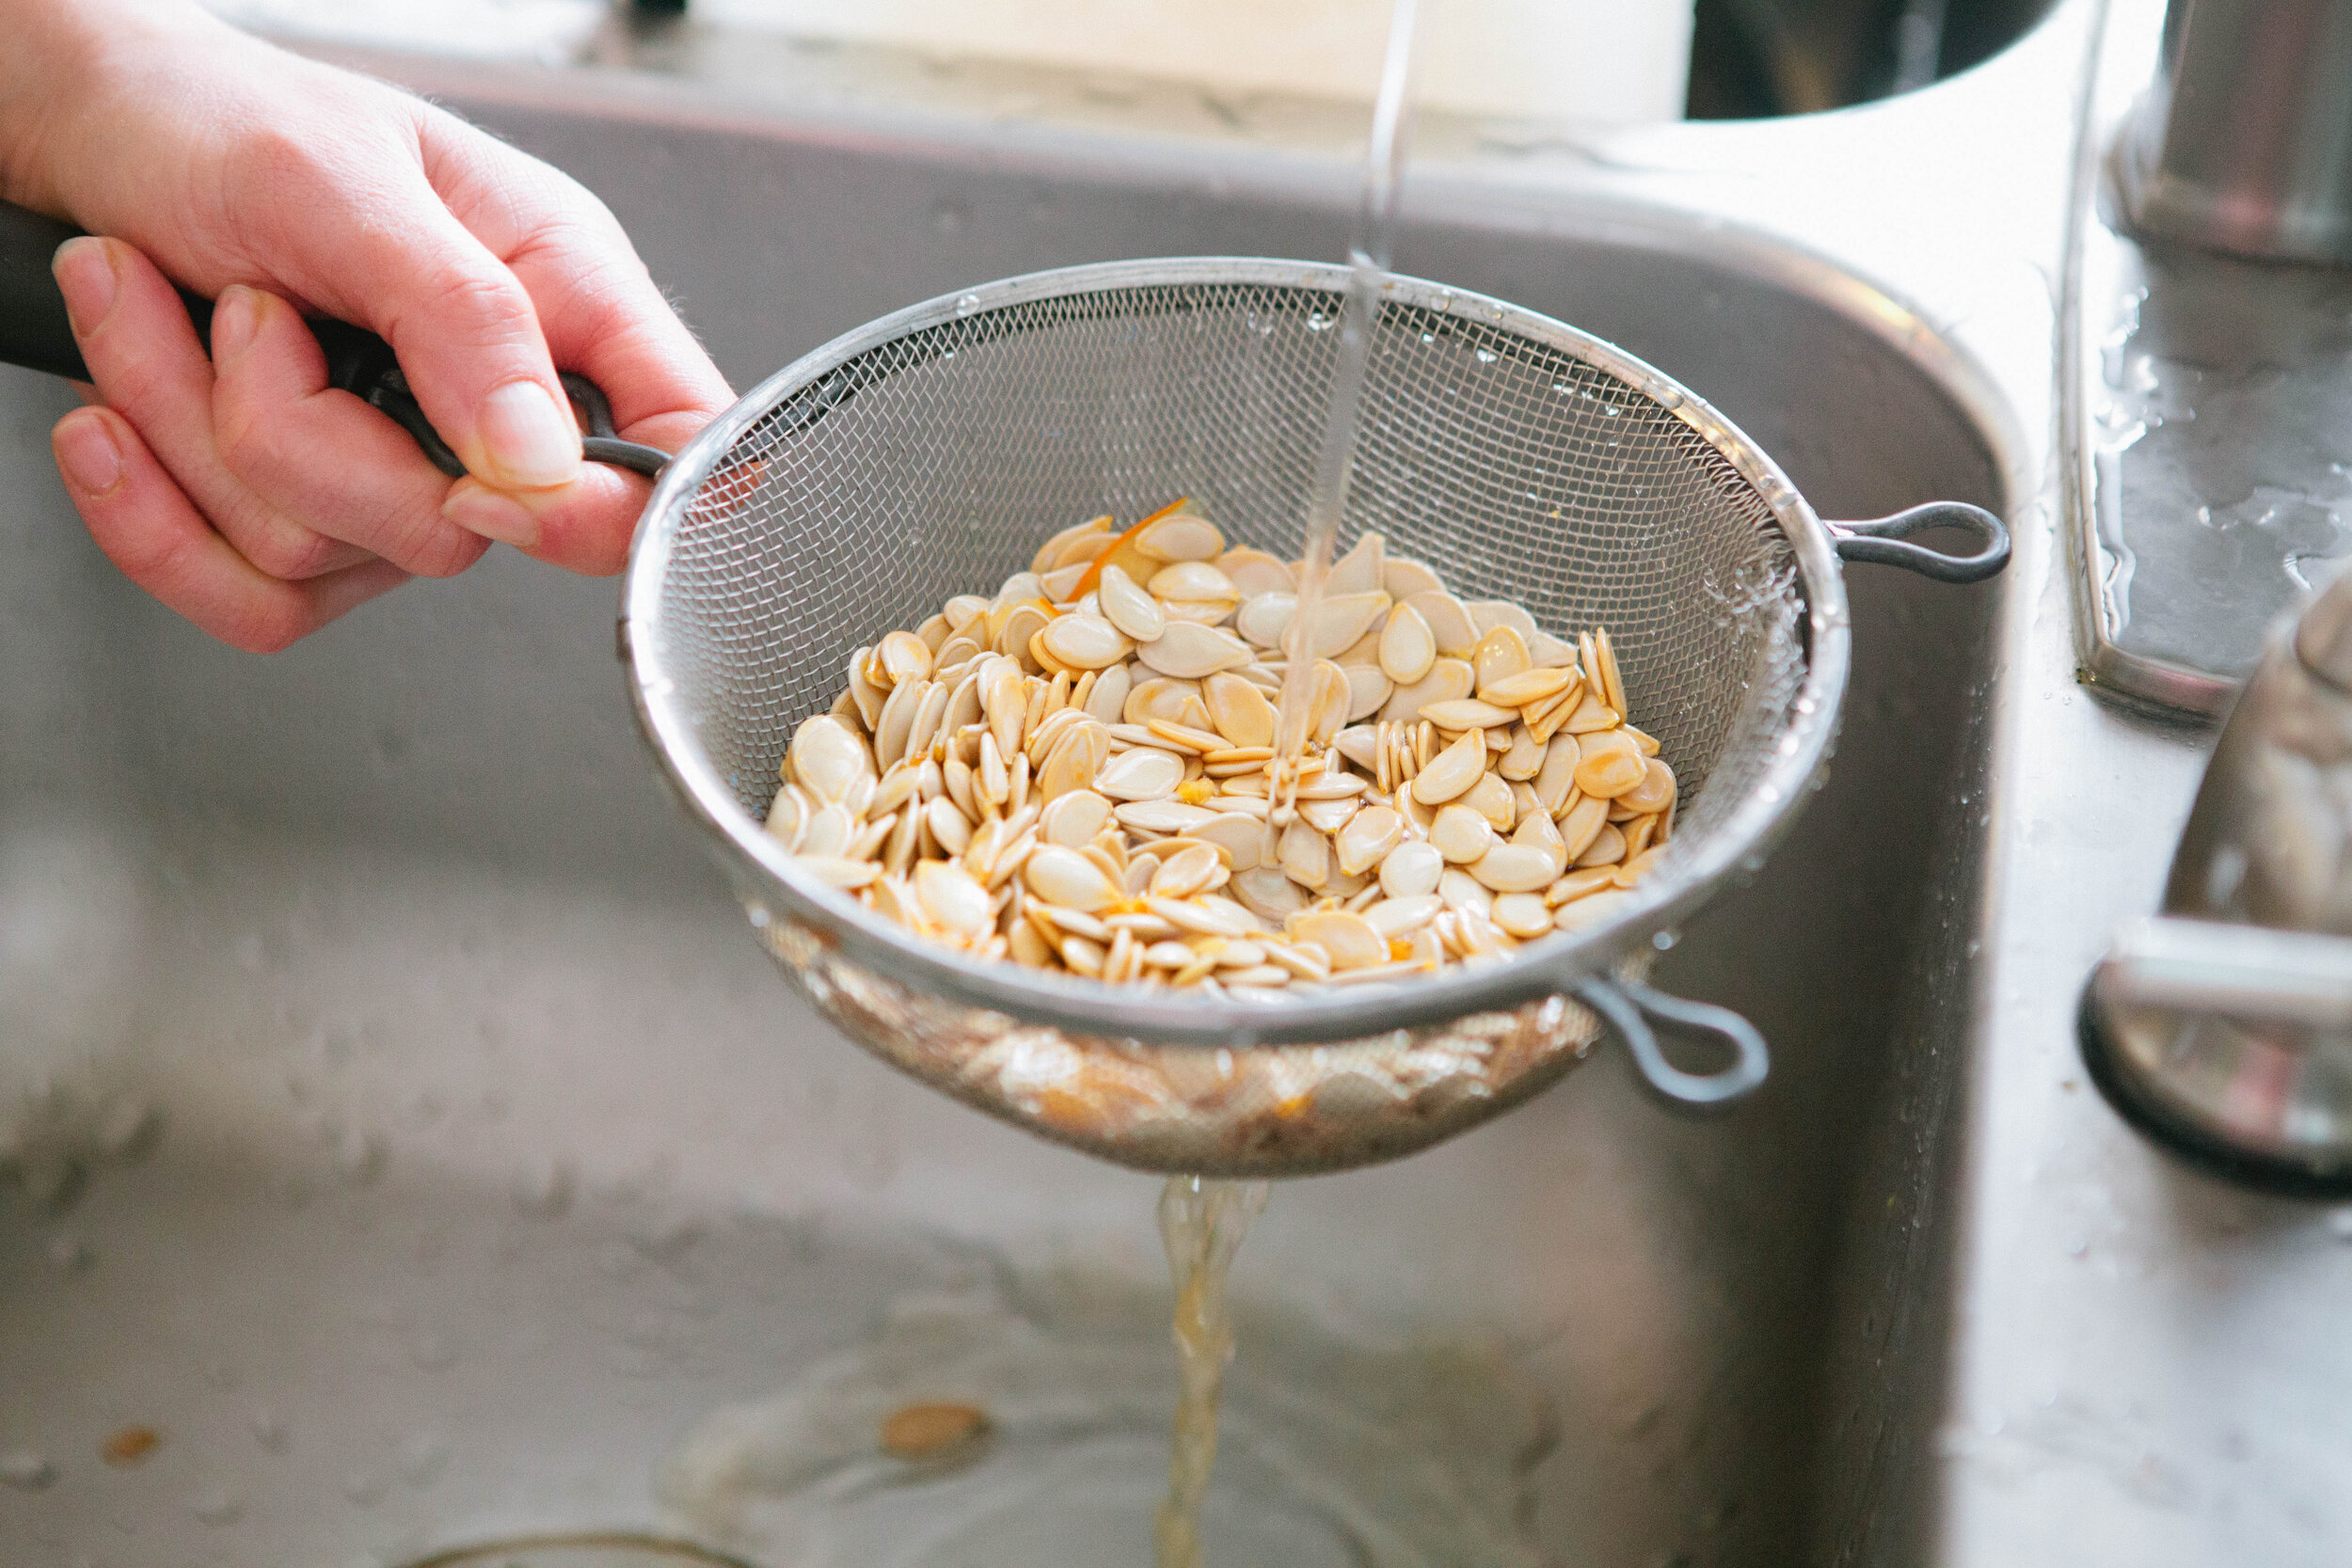
Rinse the pumpkin seeds.

Fermented pumpkin seeds can help your digestion by getting rid of parasites in your gut. Improve your gut health with this GAPS Diet legal recipe for fermented pumpkin seeds. Recipe by Amy Mihaly, Certified GAPS Practitioner in Colorado.

Add the pumpkin seeds to a jar.

Cover the seeds with water, add salt and shake. Place in a sunny location and leave to soak overnight. As long as the jar is closed tightly, these can be put up next to other ferments.

Drain and rinse in the morning. Fill with new water.

Repeat draining, rinsing and adding new water until tiny sprouts have formed.

Rinse one final time. Season with salt and roast in the oven at 250 for several hours until cooked.


Roasted Fermented Pumpkin Seeds

Author:
prep time: cook time: total time:

ingredients:

  • 3 small pumpkins
  • ½ tsp Real Salt
  • Water

instructions:

How to cook Roasted Fermented Pumpkin Seeds

  1. Cut the pumpkins in half.
  2. Remove the seeds from the inside and separate from the pumpkin flesh.
  3. Rinse the pumpkin seeds.
  4. Add the pumpkin seeds to a jar.
  5. Cover the seeds with water, add salt and shake. Place in a sunny location and leave to soak overnight. As long as the jar is closed tightly, these can be put up next to other ferments.
  6. Drain and rinse in the morning. Fill with new water.
  7. Repeat draining, rinsing and adding new water until tiny sprouts have formed.
  8. Rinse one final time. Season with salt and roast in the oven at 250 for several hours until cooked.
Created using The Recipes Generator
RoastedFermentedPumpkinSeeds.png

Egg Free, Dairy Free Liver Meatballs

Liver is an amazing superfood! It contains lots of vitamins and minerals, including zinc, iron, B vitamins, A vitamins, and folate. In our modern world, all of our livers are well taxed because of our exposure to chemicals. Anytime we know we need to support a particular organ, one of the best ways to do that is to consume the organ meat of the organ you’re trying to support.

You can spice your meatballs with anything you want but think of strong flavors. You want to neutralize the flavor of the liver.  You can also add any additional vegetables that you know your family likes. If you add additional vegetables like zucchini, eggplant or peppers and are finding the consistency of the meatball mixture to not be very sticky, you may want to add an egg to help bind everything together. Otherwise, these meatballs are egg free and dairy free!

This is a recipe that I recommend to a lot of moms! It’s a great way to help your kids eat a little bit of liver every day, which is the best way to eat liver. This recipe makes a lot of meatballs so you can freeze them and take out a few at a time to have for lunch or dinner.

Makes 27-30 Meatballs

Ingredients for Liver Meatballs:

  • 2 lb ground beef

  • ½ lb beef liver

  • 2 carrots, about 1 cup grated

  • ⅓ large white onion, about ⅔ a cup grated

  • 6 large cloves of Garlic

  • Oregano, 1 bunch Fresh or 1 tbsp Dried

  • Basil, 1 bunch Fresh or 1 tbsp Dried

  • ¼ - ½ tsp Pepper

  • 2 tsp Salt

  • 1 tbsp lard

Directions for Liver Meatballs:

IMG_6158.jpg

For milder tasting liver, soak it in some kind of acid. Cover the liver in filtered water and then add the juice of one lemon or 1-2 tablespoons of apple cider vinegar. Leave to soak for 30 minutes. Be sure not to soak it for too long. The acid will break down the liver and start it “cooking” prematurely.

Preheat your oven to 375.

IMG_6175.jpg

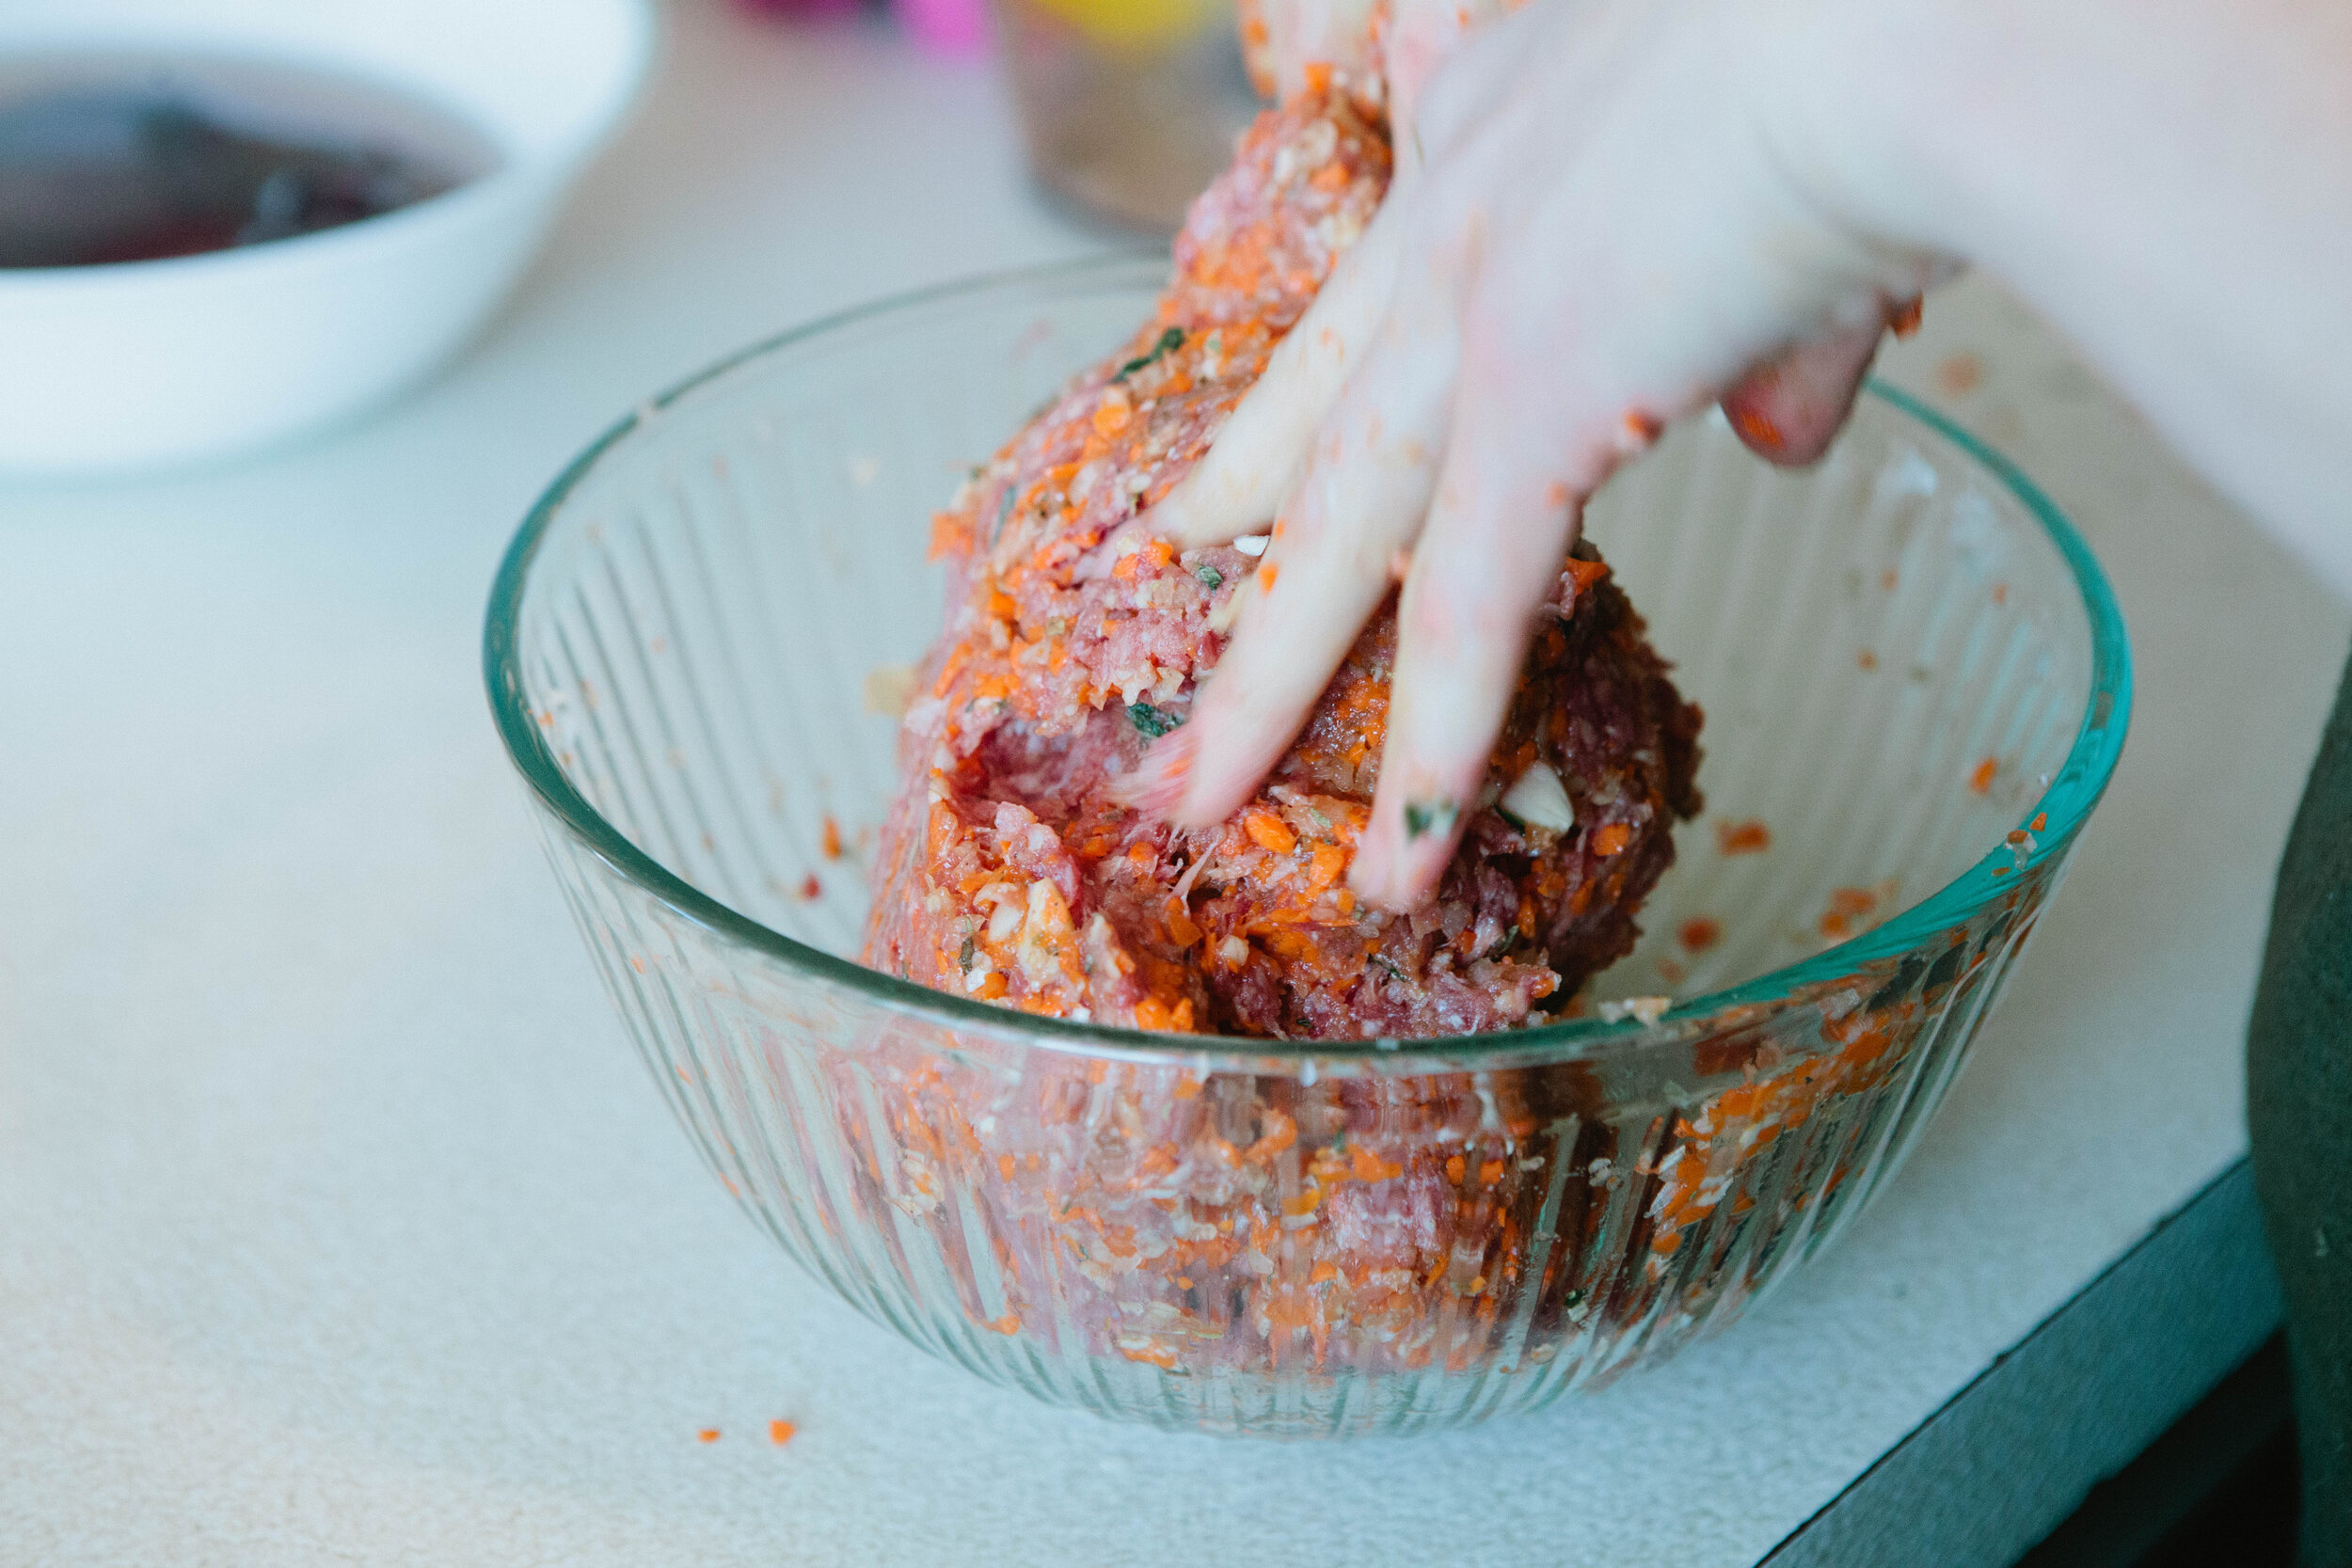
Grate your carrot, onion and garlic into very fine pieces. Add to a large bowl with ground beef. Add in oregano, basil and salt and pepper. Mix with your hands. 

IMG_6189.jpg

Place your liver into a food processor once it has soaked. Pulse until smooth. Add to the bowl with the beef, vegetables and spices and mix again.

IMG_6214.jpg

Spread lard onto the bottom of a glass oven safe casserole dish. 

IMG_6224.jpg

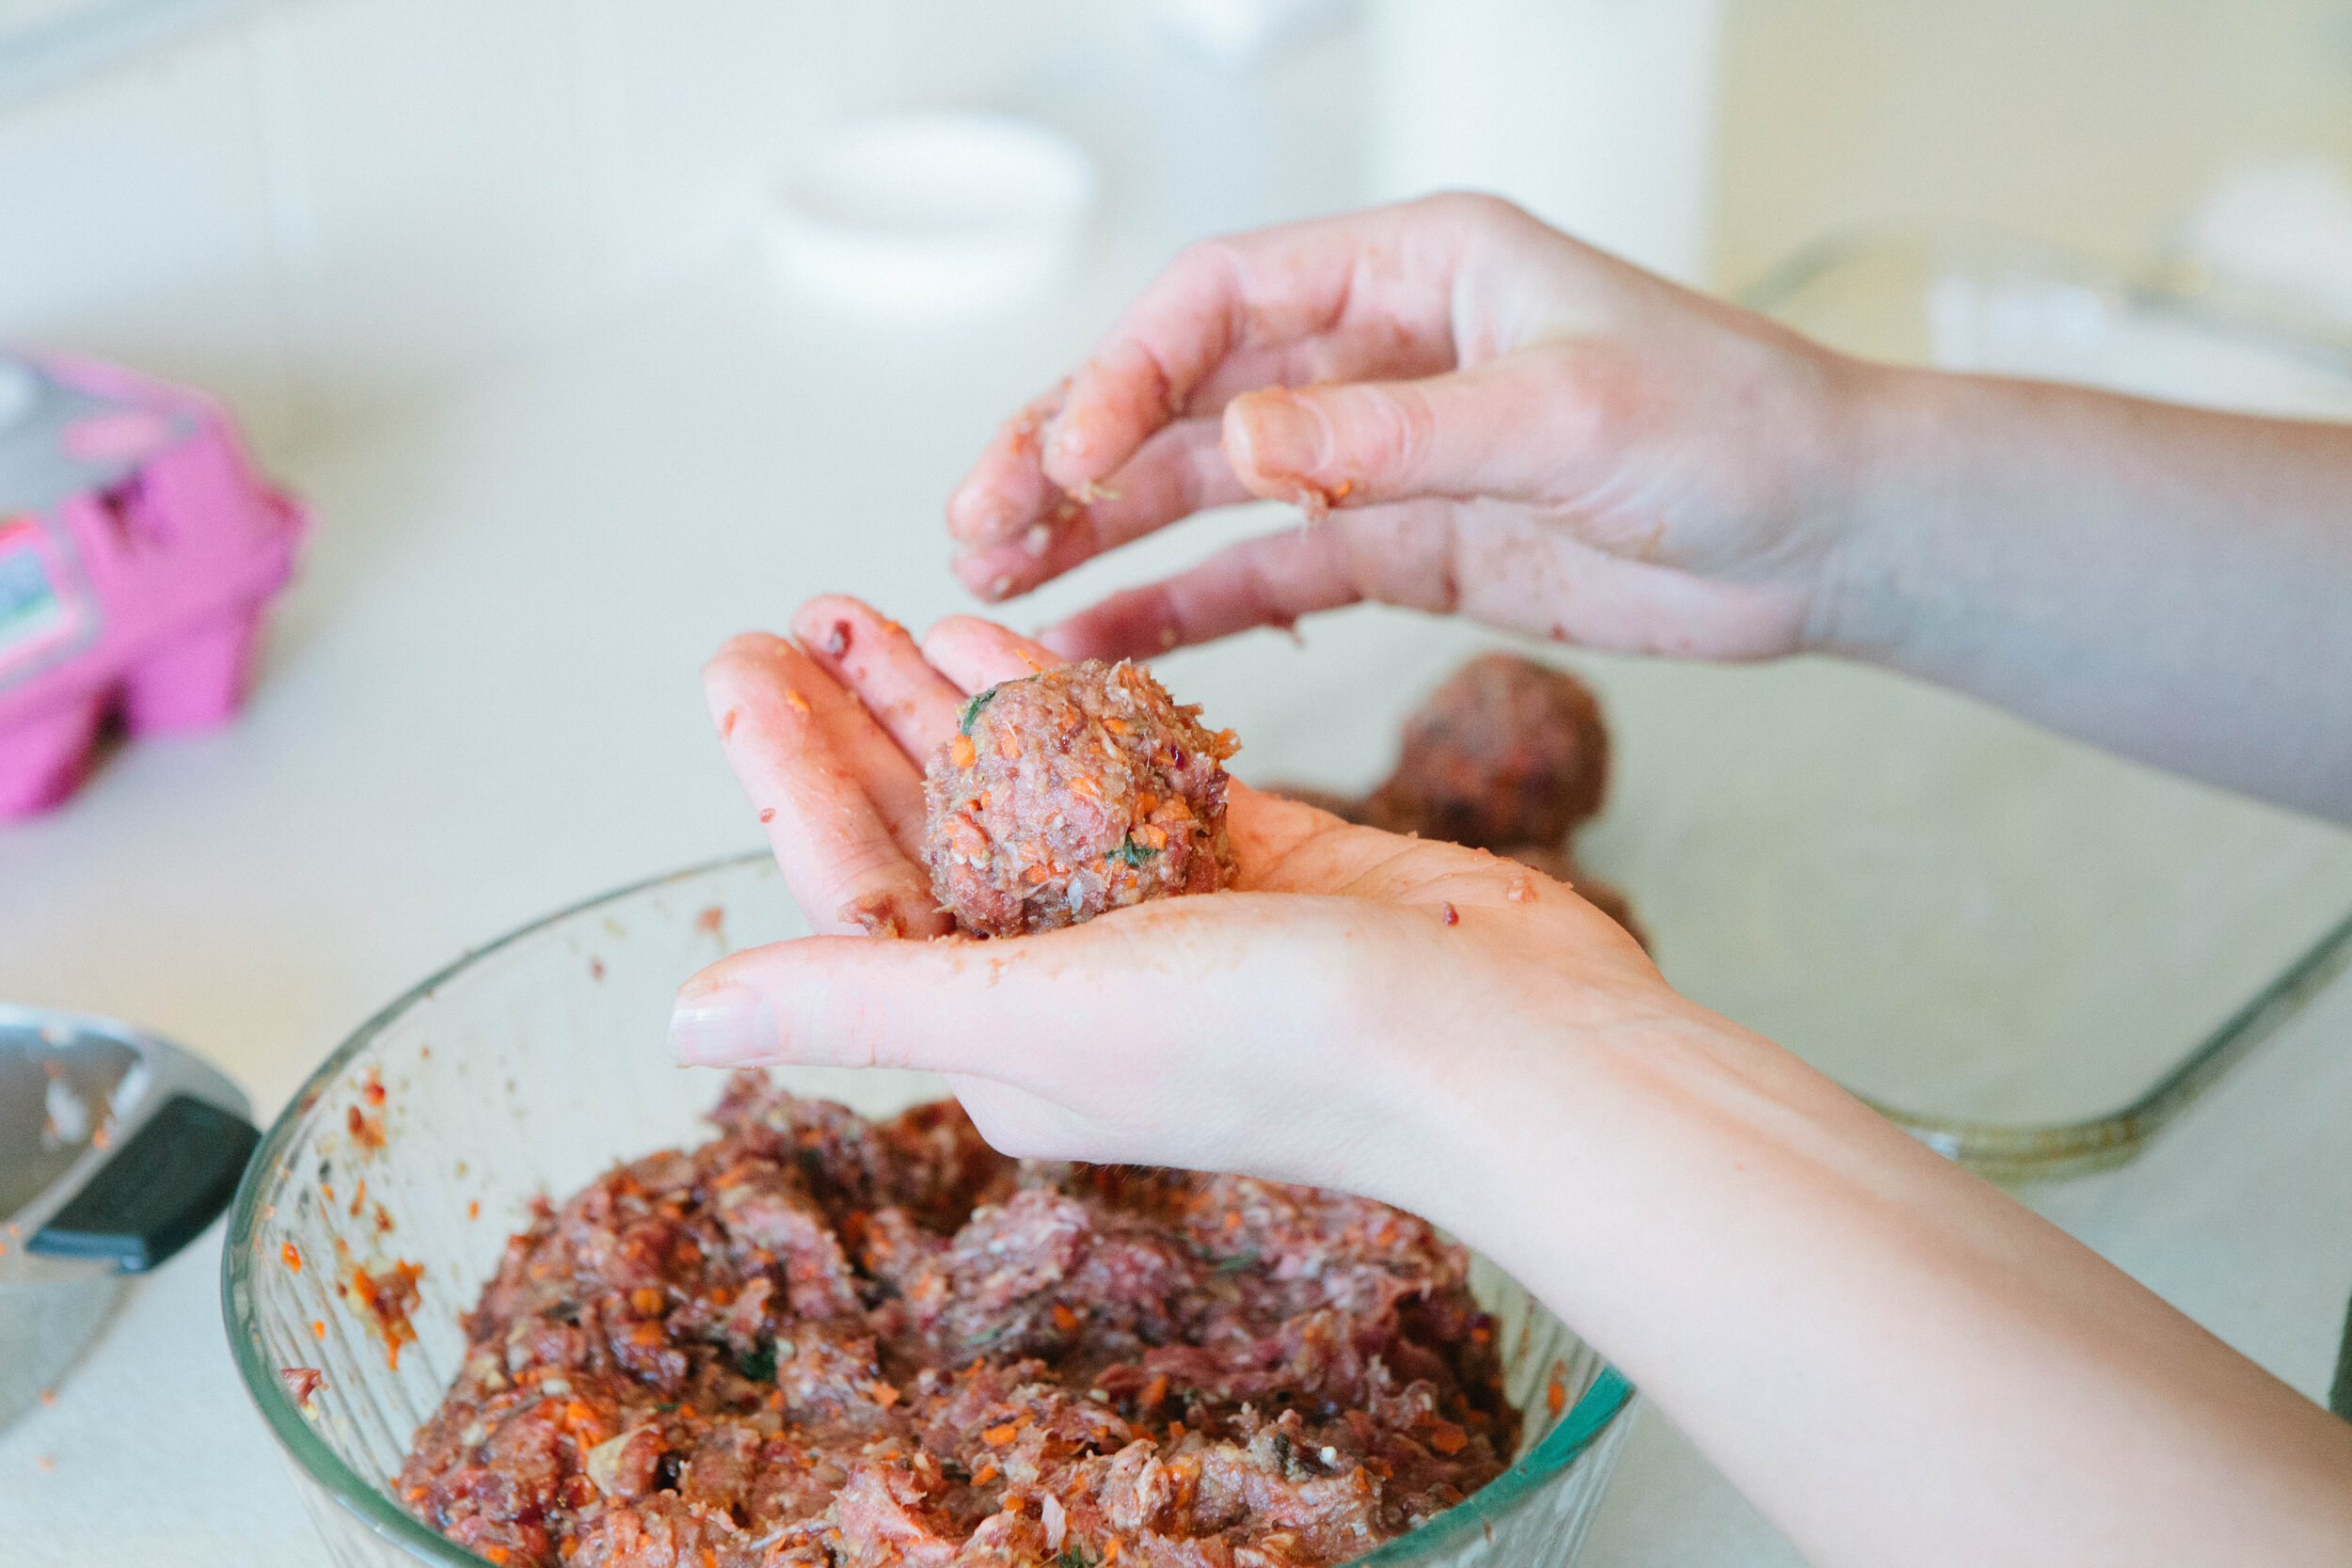
Take a small handful of meat at a time and roll into a meatball. Continue to roll meatballs until you have filled your casserole dish. Keep consistency in the size and shape of your meatballs to ensure even cooking time.

IMG_6229.jpg

Line meatballs, leaving some space between them.

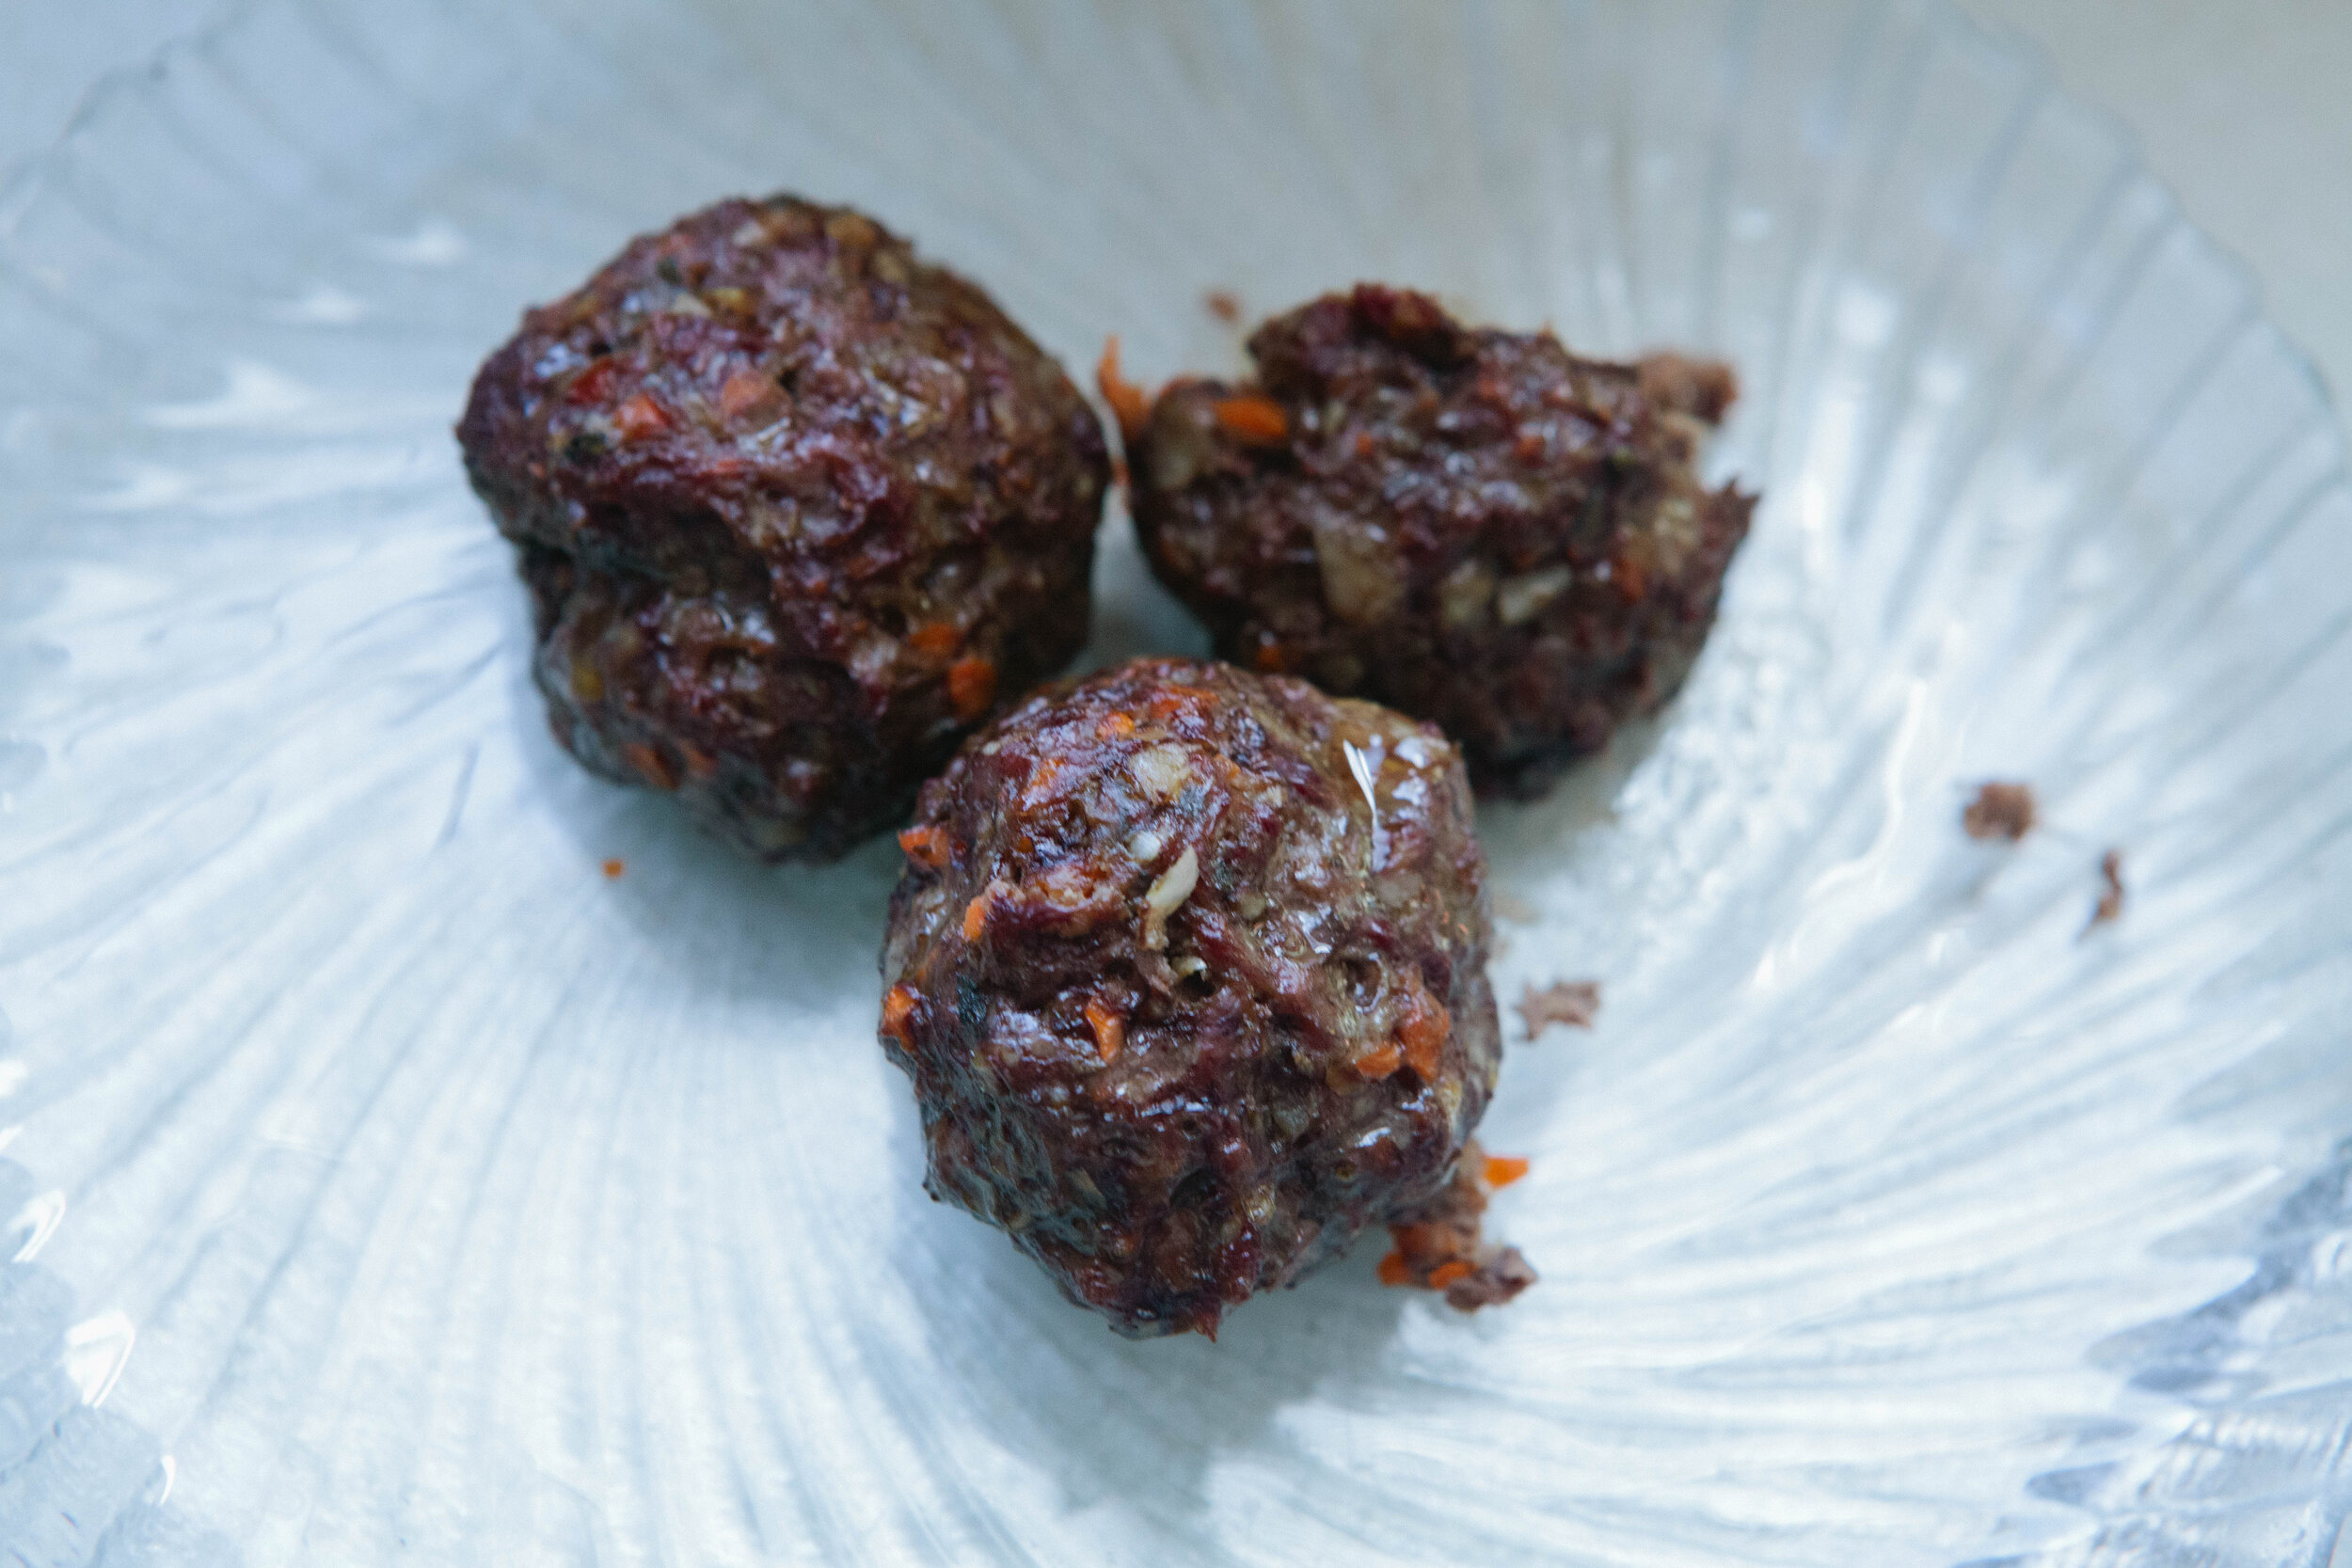
Bake for 45 minutes.

IMG_6353.jpg

Enjoy with spaghetti squash and make your own spaghetti sauce for a spaghetti night. Or enjoy with any variety of vegetables like brussels sprouts or broccoli!

Egg Free, Dairy Free Liver Meatballs

prep time: cook time: total time:

ingredients:

  • 2 lb ground beef
  • ½ lb beef liver
  • 2 carrots, about 1 cup grated
  • ⅓ large white onion, about ⅔ a cup grated
  • 6 large cloves of Garlic
  • Oregano, 1 bunch Fresh or 1 tbsp Dried
  • Basil, 1 bunch Fresh or 1 tbsp Dried
  • ¼ - ½ tsp Pepper
  • 2 tsp Salt
  • 1 tbsp lard

instructions:

How to cook Egg Free, Dairy Free Liver Meatballs

  1. For milder tasting liver, soak it in some kind of acid. Cover the liver in filtered water and then add the juice of one lemon or 1-2 tablespoons of apple cider vinegar. Leave to soak for 30 minutes. Be sure not to soak it for too long. The acid will break down the liver and start it “cooking” prematurely.
  2. Preheat your oven to 375.
  3. Grate your carrot, onion and garlic into very fine pieces. Add to a large bowl with ground beef. Add in oregano, basil and salt and pepper. Mix with your hands.
  4. Place your liver into a food processor once it has soaked. Pulse until smooth. Add to the bowl with the beef, vegetables and spices and mix again.
  5. Spread lard onto the bottom of a glass oven safe casserole dish.
  6. Take a small handful of meat at a time and roll into a meatball. Continue to roll meatballs until you have filled your casserole dish. Keep consistency in the size and shape of your meatballs to ensure even cooking time.
  7. Line meatballs, leaving some space between them.
  8. Bake for 45 minutes.
  9. Enjoy with spaghetti squash and make your own spaghetti sauce for a spaghetti night. Or enjoy with any variety of vegetables like brussels sprouts or broccoli!
Created using The Recipes Generator
42.png

Almond Flour Bread with Italian Herbs

This recipe is adapted from the basic bread recipe in the GAPS Gut and Psychology Syndrome book by Dr. Natasha Campbell-McBride. It is legal on Stage Four. If you do a sweet version of this bread it is legal on Stage Five.

I really enjoy the Italian herb version of this basic bread recipe because I like strong flavors. For me, doing an almond bread that’s sweetened with fruit is not sweet enough. I prefer going with a savory bread instead that has a strong flavor.

The beginning piece of this recipe is the basic bread recipe that can be adapted into any other combination of ingredients.

You can use the herbs and combination of herbs of your choice in this recipe. I used tyme, rosemary and parsley. 

Bread is still a treat so it’s best to have one piece a day as a snack in between meals.

Ingredients for Italian Almond Bread with Herbs

  • 2 cups fermented almond flour

  • ¼ cup softened butter

  • 3 eggs

  • Herbs of your choice

  • 1 clove finely chopped garlic, fresh or fermented

Directions for Italian Almond Bread with Herbs

24 hours in advance, make your fermented almond flour or make it from almonds.

Preheat oven to 350.

IMG_4180.jpg

Combine flour and softened butter. Add eggs and mix thoroughly.

IMG_4204.jpg

Finely dice the herbs of your choice.

IMG_4210.jpg

Mix in with flour mixture. This mixture will look more moist than other bread doughs.

IMG_4268.jpg

Line a glass baking dish with parchment paper. Optionally, add fat to your parchment paper. Place mixture into baking dish. Spread evenly.

Bake for about an hour.

IMG_4451.jpg

Slice and enjoy!


Almond Flour Bread with Italian Herbs

prep time: cook time: total time:

ingredients:

  • 2 cups fermented almond flour
  • ¼ cup softened butter
  • 3 eggs
  • Herbs of your choice
  • 1 clove finely chopped garlic, fresh or fermented

instructions:

How to cook Almond Flour Bread with Italian Herbs

  1. 24 hours in advance, make your fermented almond flour or make it from almonds.
  2. Preheat oven to 350.
  3. Combine flour and softened butter. Add eggs and mix thoroughly.
  4. Finely dice the herbs of your choice.
  5. Mix in with flour mixture. This mixture will look more moist than other bread doughs.
  6. Line a glass baking dish with parchment paper. Optionally, add fat to your parchment paper. Place mixture into baking dish. Spread evenly.
  7. Bake for about an hour.
  8. Slice and enjoy!
Created using The Recipes Generator

How to Make Almond Butter

Ingredients for Fermented Almond Butter

  • 3 cups Almonds

  • ½ cup Whey

  • Filtered Water

  • Salt

Directions for Fermented Almond Butter

Place your almonds in filtered water with whey. Allow to soak for 24 hours.

IMG_4334.jpg

Drain the almonds in a colander and rinse with filtered water.

IMG_4505.jpg

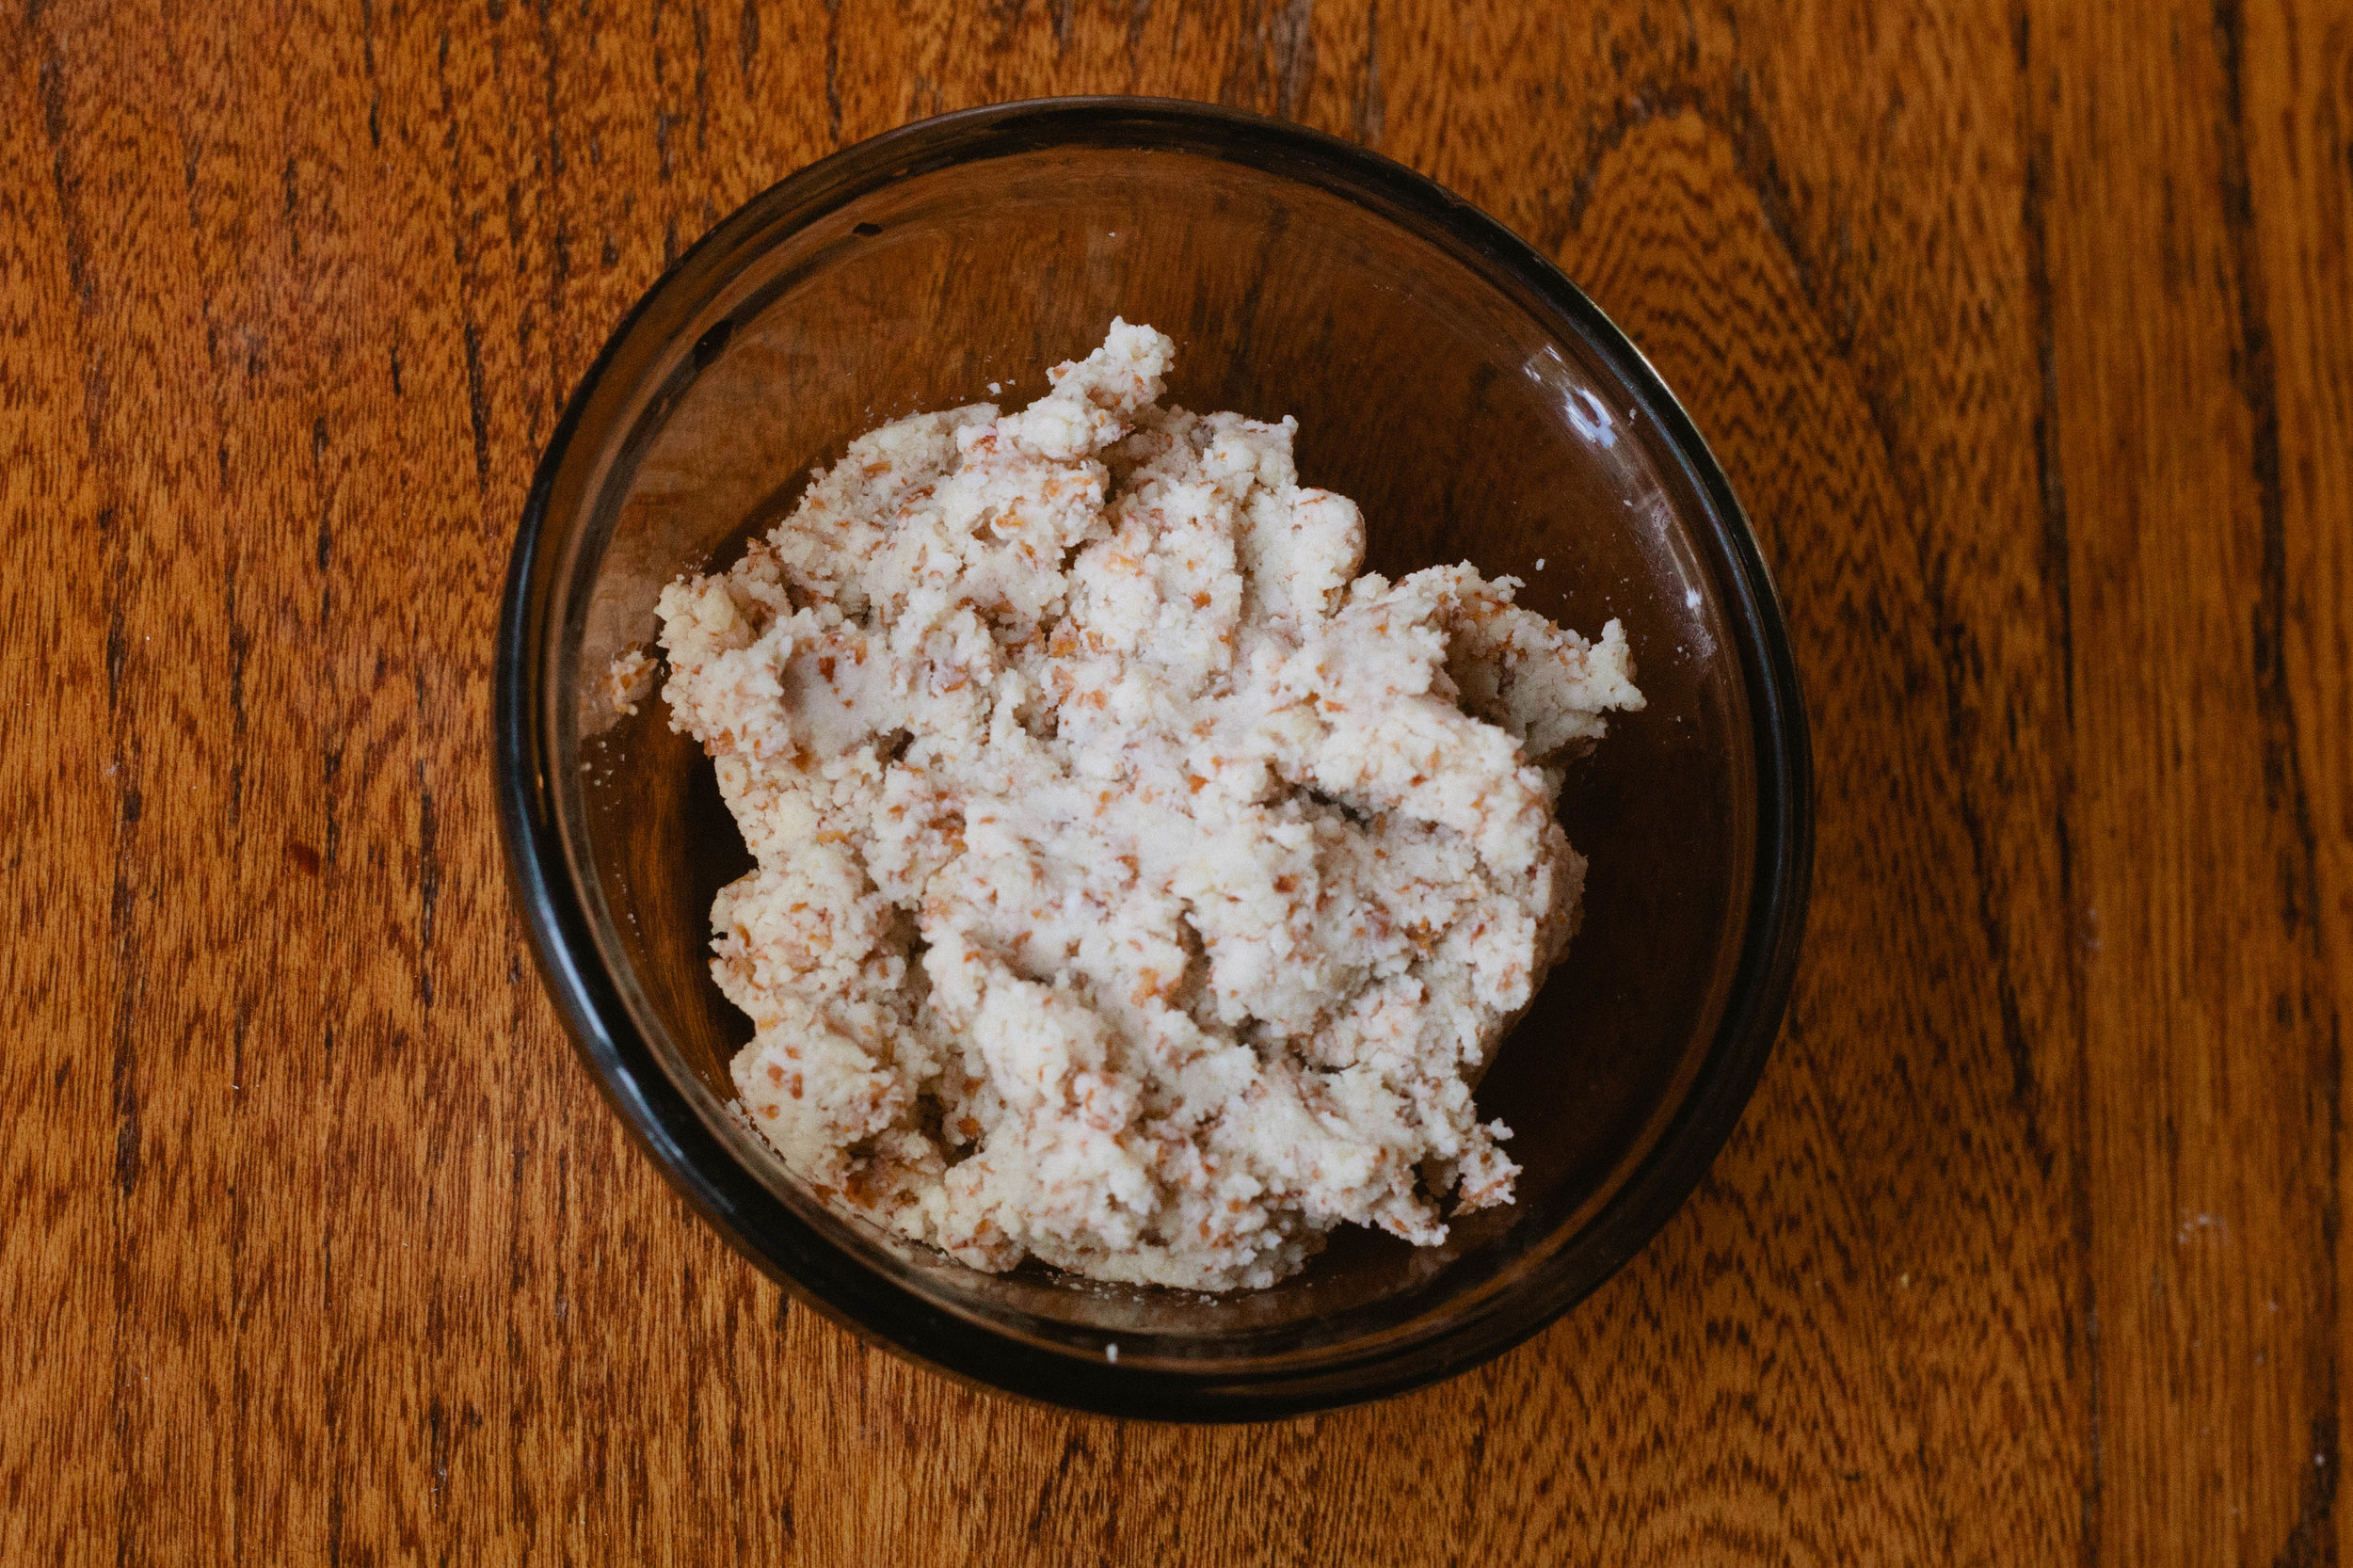
Place almonds into a food processor. Pulse them consistently until you get almond butter.

IMG_4627.jpg

Once almonds are the consistency of almond butter, add four shakes of salt. Pulse for several more seconds. Add four more shakes of salt.


Almond Butter

Author:
prep time: cook time: total time:

ingredients:

  • 3 cups Almonds
  • ½ cup Whey
  • Filtered Water
  • Salt

instructions:

How to cook Almond Butter

  1. Place your almonds in filtered water with whey. Allow to soak for 24 hours.
  2. Drain the almonds in a colander and rinse with filtered water.
  3. Place almonds into a food processor. Pulse them consistently until you get almond butter.
  4. Once almonds are the consistency of almond butter, add four shakes of salt. Pulse for several more seconds. Add four more shakes of salt.
Created using The Recipes Generator
33.png

Mushroom Ketchup Recipe

I found this recipe from my new favorite show on YouTube, 18th Century Cooking. It is a GAPS Legal sauce and since many people do not tolerate tomatoes, I thought it would be a delicious option for a sauce!

I’m excited to add this sauce to many dishes!

This is Stage 1 legal on the GAPS Diet if you can tolerate the dried spices. Most can tolerate these spices unless you still have significant intestinal symptoms.

Ingredients for Mushroom Ketchup

  • 30 oz Mushrooms

  • 2 tbsp Salt

  • 4 Bay Leaves

  • 1 chopped onion

  • 1 Lemon, zested

  • 1 tbsp finely grated horseradish, fresh or prepared

  • ¼ tsp cloves

  • Pinch of Cayenne Pepper

  • ½ tsp allspice

  • ¼ - ½ cup apple cider vinegar

Directions for Mushroom Ketchup

Rub the top of the mushrooms to clean them. Do not wash your mushrooms!

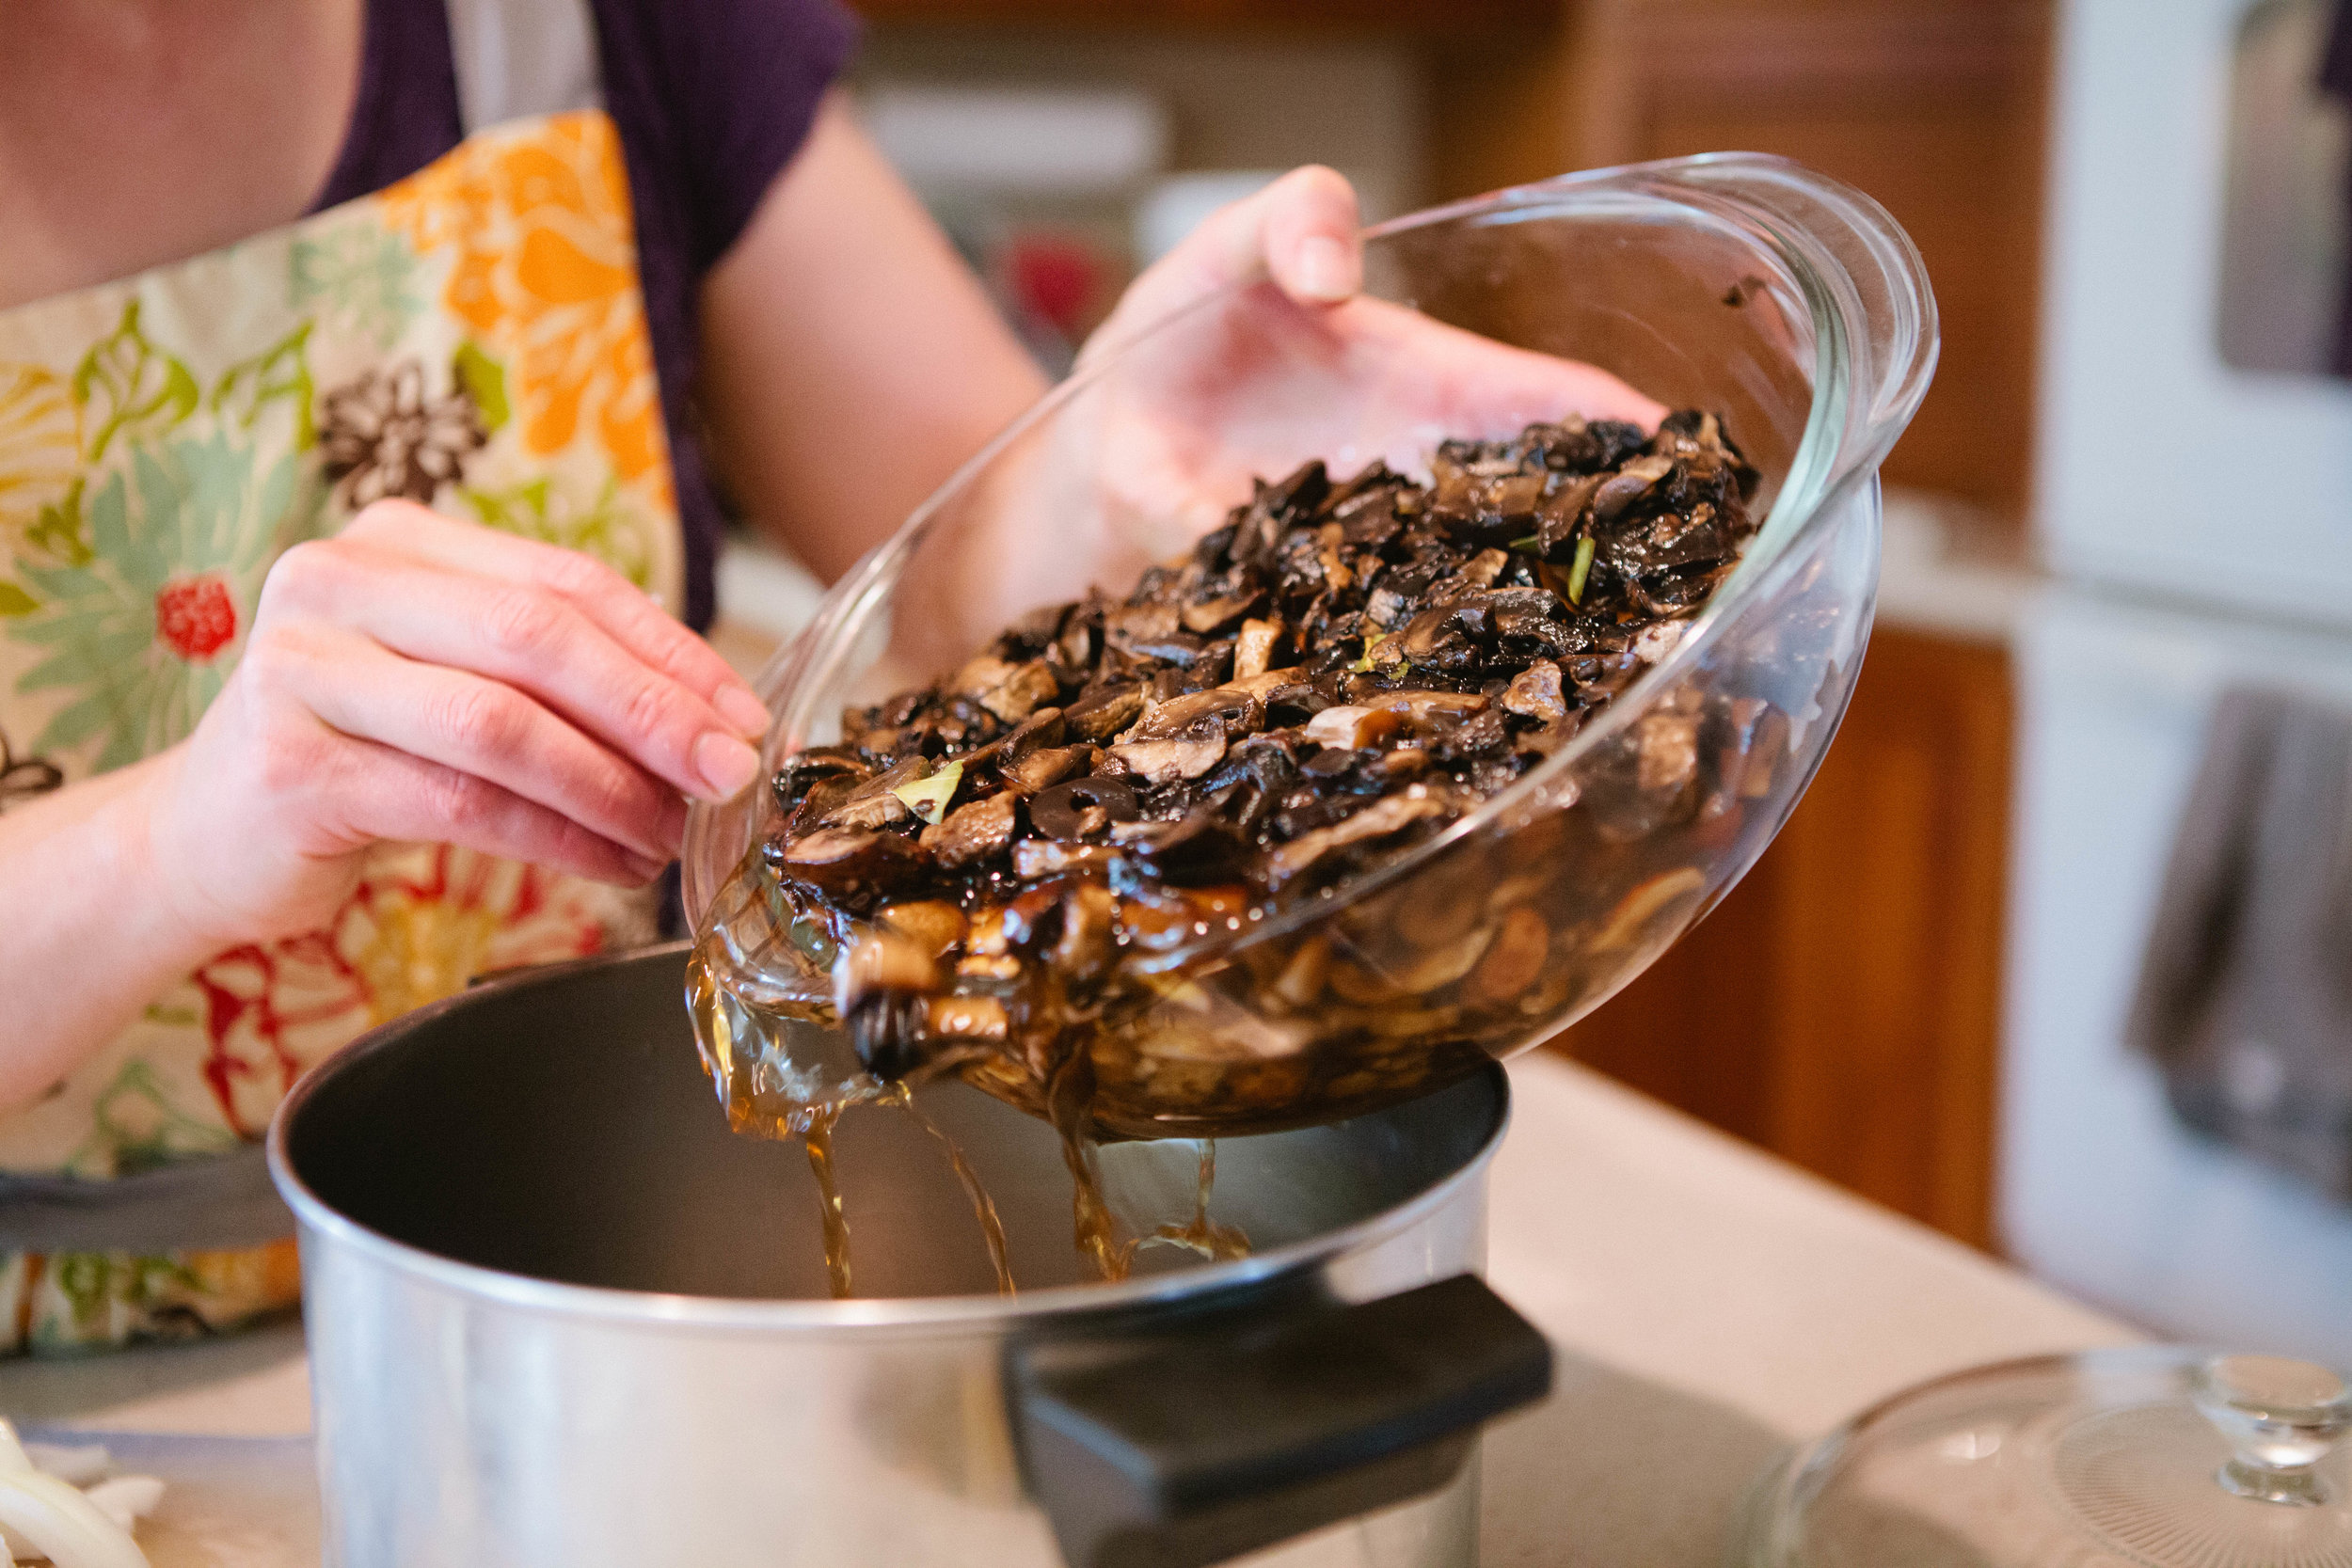
Roughly chop the mushrooms and add to a large pot. Add in salt and bay leaves.

The mushrooms will begin reducing within a few minutes.

When they’ve reduced in size, add them to a glass container. Adding them to a glass container is important so they don’t take on the metal taste from the pot.

Leave the mushrooms on the counter overnight and no longer because mushrooms are a fungus.

mushroom-ketchup-recipe-18th-century-cooking-youtube-eighteenth-century-cooking-old-recipe-mushroom-sauce-ketchup-made-with-mushrooms-gaps-legal-mushroom-recipe-what-to-eat-on-gaps

The next day, add mushrooms, chopped onions, zest of 1 lemon, grated horseradish, cloves, cayenne, allspice, and apple cider vinegar to a pot.

mushroom-ketchup-recipe-18th-century-cooking-youtube-eighteenth-century-cooking-old-recipe-mushroom-sauce-ketchup-made-with-mushrooms-gaps-legal-mushroom-recipe-what-to-eat-on-gaps

Bring to a boil and then let simmer for 15 minutes.

mushroom-ketchup-recipe-18th-century-cooking-youtube-eighteenth-century-cooking-old-recipe-mushroom-sauce-ketchup-made-with-mushrooms-gaps-legal-mushroom-recipe-what-to-eat-on-gaps

Let sauce cool. Put into a cloth and squeeze to strain the sauce.

mushroom-ketchup-recipe-18th-century-cooking-youtube-eighteenth-century-cooking-old-recipe-mushroom-sauce-ketchup-made-with-mushrooms-gaps-legal-mushroom-recipe-what-to-eat-on-gaps

Save the solid pieces and dry them in a dehydrator. Once the solid pieces are dry, you can crush them and use them as a powdered flavoring or use the pieces as flavoring.

mushroom-ketchup-recipe-18th-century-cooking-youtube-eighteenth-century-cooking-old-recipe-mushroom-sauce-ketchup-made-with-mushrooms-gaps-legal-mushroom-recipe-what-to-eat-on-gaps

Pour into a glass sealable jar.

Mushroom Ketchup

prep time: cook time: total time:

ingredients:

  • 30 oz Mushrooms
  • 2 tbsp Salt
  • 4 Bay Leaves
  • 1 chopped onion
  • 1 Lemon, zested
  • 1 tbsp finely grated horseradish, fresh or prepared
  • ¼ tsp cloves
  • Pinch of Cayenne Pepper
  • ½ tsp allspice
  • ¼ - ½ cup apple cider vinegar

instructions:

How to cook Mushroom Ketchup

  1. Rub the top of the mushrooms to clean them. Do not wash your mushrooms!
  2. Roughly chop the mushrooms and add to a large pot. Add in salt and bay leaves.
  3. The mushrooms will begin reducing within a few minutes.
  4. When they’ve reduced in size, add them to a glass container. Adding them to a glass container is important so they don’t take on the metal taste from the pot.
  5. Leave the mushrooms on the counter overnight and no longer because mushrooms are a fungus.
  6. The next day, add mushrooms, chopped onions, zest of 1 lemon, grated horseradish, cloves, cayenne, allspice, and apple cider vinegar to a pot.
  7. Bring to a boil and then let simmer for 15 minutes.
  8. Let sauce cool. Put into a cloth and squeeze to strain the sauce.
  9. Save the solid pieces and dry them in a dehydrator. Once the solid pieces are dry, you can crush them and use them as a powdered flavoring or use the pieces as flavoring.
  10. Pour into a glass sealable jar.
Created using The Recipes Generator
31.png

Gluten Free GAPS Legal Onion Rings

As I’ve been healing and able to eat a larger variety of food, my taste buds have been seeking new and exciting tastes and I’ve found myself wanting to experiment more with cooking. These onion rings are my first foray into creating GAPS Legal fried foods.

My curiosity in figuring out if I could create fried food that was GAPS Legal was spurred by my new favorite YouTube channel, 18th Century Cooking by John Townsend. This sent my mind spinning on if I could create GAPS legal fried foods.

gaps-legal-gluten-free-onion-rings-onion-ring-made-with-almond-flour-fermented-flour-onion-rings-gaps-diet-gaps-protocol

These onion rings are legal on the GAPS Diet at stage 4! You can reserve the fat you use for frying to use again, as long as you don’t burn your fat.

Feel free to add additional flavors to the batter as you’d like!

Ingredients for Onion Rings:

  • Onions

  • 1 cup Fermented Almond Flour (see recipe)

  • 3 Eggs

  • 1 pint Lard (see recipe or store bought Fat Works)

  • 1 tsp Salt

  • Pepper


Directions for Onion Rings:

Heat lard in a pan on low heat. Be mindful of your fat because if it heats too fast, it will burn and you will have to throw it out and start over.

gaps-legal-gluten-free-onion-rings-onion-ring-made-with-almond-flour-fermented-flour-onion-rings-gaps-diet-gaps-protocol

Scramble three eggs in a shallow bowl with salt and pepper. Add in almond flour.

gaps-legal-gluten-free-onion-rings-onion-ring-made-with-almond-flour-fermented-flour-onion-rings-gaps-diet-gaps-protocol

Slice onion into thick rounds. Separate them into individual layers.

gaps-legal-gluten-free-onion-rings-onion-ring-made-with-almond-flour-fermented-flour-onion-rings-gaps-diet-gaps-protocol

Working directly next to the pan with lard, dunk your onion rounds piece by piece in the batter. Then place directly into the lard.

gaps-legal-gluten-free-onion-rings-onion-ring-made-with-almond-flour-fermented-flour-onion-rings-gaps-diet-gaps-protocol

Cook, turning as needed until they are golden brown in color.

gaps-legal-gluten-free-onion-rings-onion-ring-made-with-almond-flour-fermented-flour-onion-rings-gaps-diet-gaps-protocol

Remove onions when they are golden brown. Drain off excess oil or the onion rings will get mushy.

If the onion rings are not salty enough, salt them to taste.

Enjoy!


gaps-legal-gluten-free-onion-rings-onion-ring-made-with-almond-flour-fermented-flour-onion-rings-gaps-diet-gaps-protocol

Gluten Free GAPS Legal Onion Rings

Author:
prep time: cook time: total time:

ingredients:

  • Onions
  • 1 cup Fermented Almond Flour (see recipe for properly prepared almond flour)
  • 3 Eggs
  • 1 pint Lard (see recipe or store bought Fat Works)
  • 1 tsp Salt
  • Pepper

instructions:

How to cook Gluten Free GAPS Legal Onion Rings

  1. Heat lard in a pan on low heat. Be mindful of your fat because if it heats too fast, it will burn and you will have to throw it out and start over.
  2. Scramble three eggs in a shallow bowl with salt and pepper. Add in almond flour.
  3. Slice onion into thick rounds. Separate them into individual layers.
  4. Working directly next to the pan with lard, dunk your onion rounds piece by piece in the batter. Then place directly into the lard.
  5. Cook, turning as needed until they are golden brown in color.
  6. Remove onions when they are golden brown. Drain off excess oil or the onion rings will get mushy.
  7. If the onion rings are not salty enough, salt them to taste.
  8. Enjoy!
Created using The Recipes Generator
24.png

How to Make the Perfect Hard Boiled and Soft Boiled Eggs

Egg whites are best eaten cooked. They are very detoxifying when they’re raw and when they’re raw, they require a lot of things to properly digest them. All the necessary things needed for digestion are in egg yolks so it’s important to consume the egg whites and egg yolks at the same time. Egg yolks are best eaten raw or very lightly cooked. This keeps the fragile nutrients inside egg yolks intact.

If you are having digestive issues, you should eat egg whites cooked only. After you have healed, you can consume raw egg whites.*

IMG_1622.jpg

Dr. Natasha recommends that a child eats between three and six egg yolks a day and an adult should eat six to twelve. You may consume the whites with this if you are tolerating them or simply use the yolk only.

There are multiple recipes for using egg whites only or you can feed them to your dog or cat.

*Eating uncooked or raw eggs or feeding raw eggs to your pets can pose a risk to your health.

Keeping hard boiled eggs on hand is a great and easy protein on the go! If you want to take your hard boiled eggs one step further, check out my recipe on making mayo free deviled eggs.

Directions for Hard Boiled Eggs

IMG_1620.jpg

Fill a medium saucepan with cold water.

Add eggs.

IMG_1630.jpg

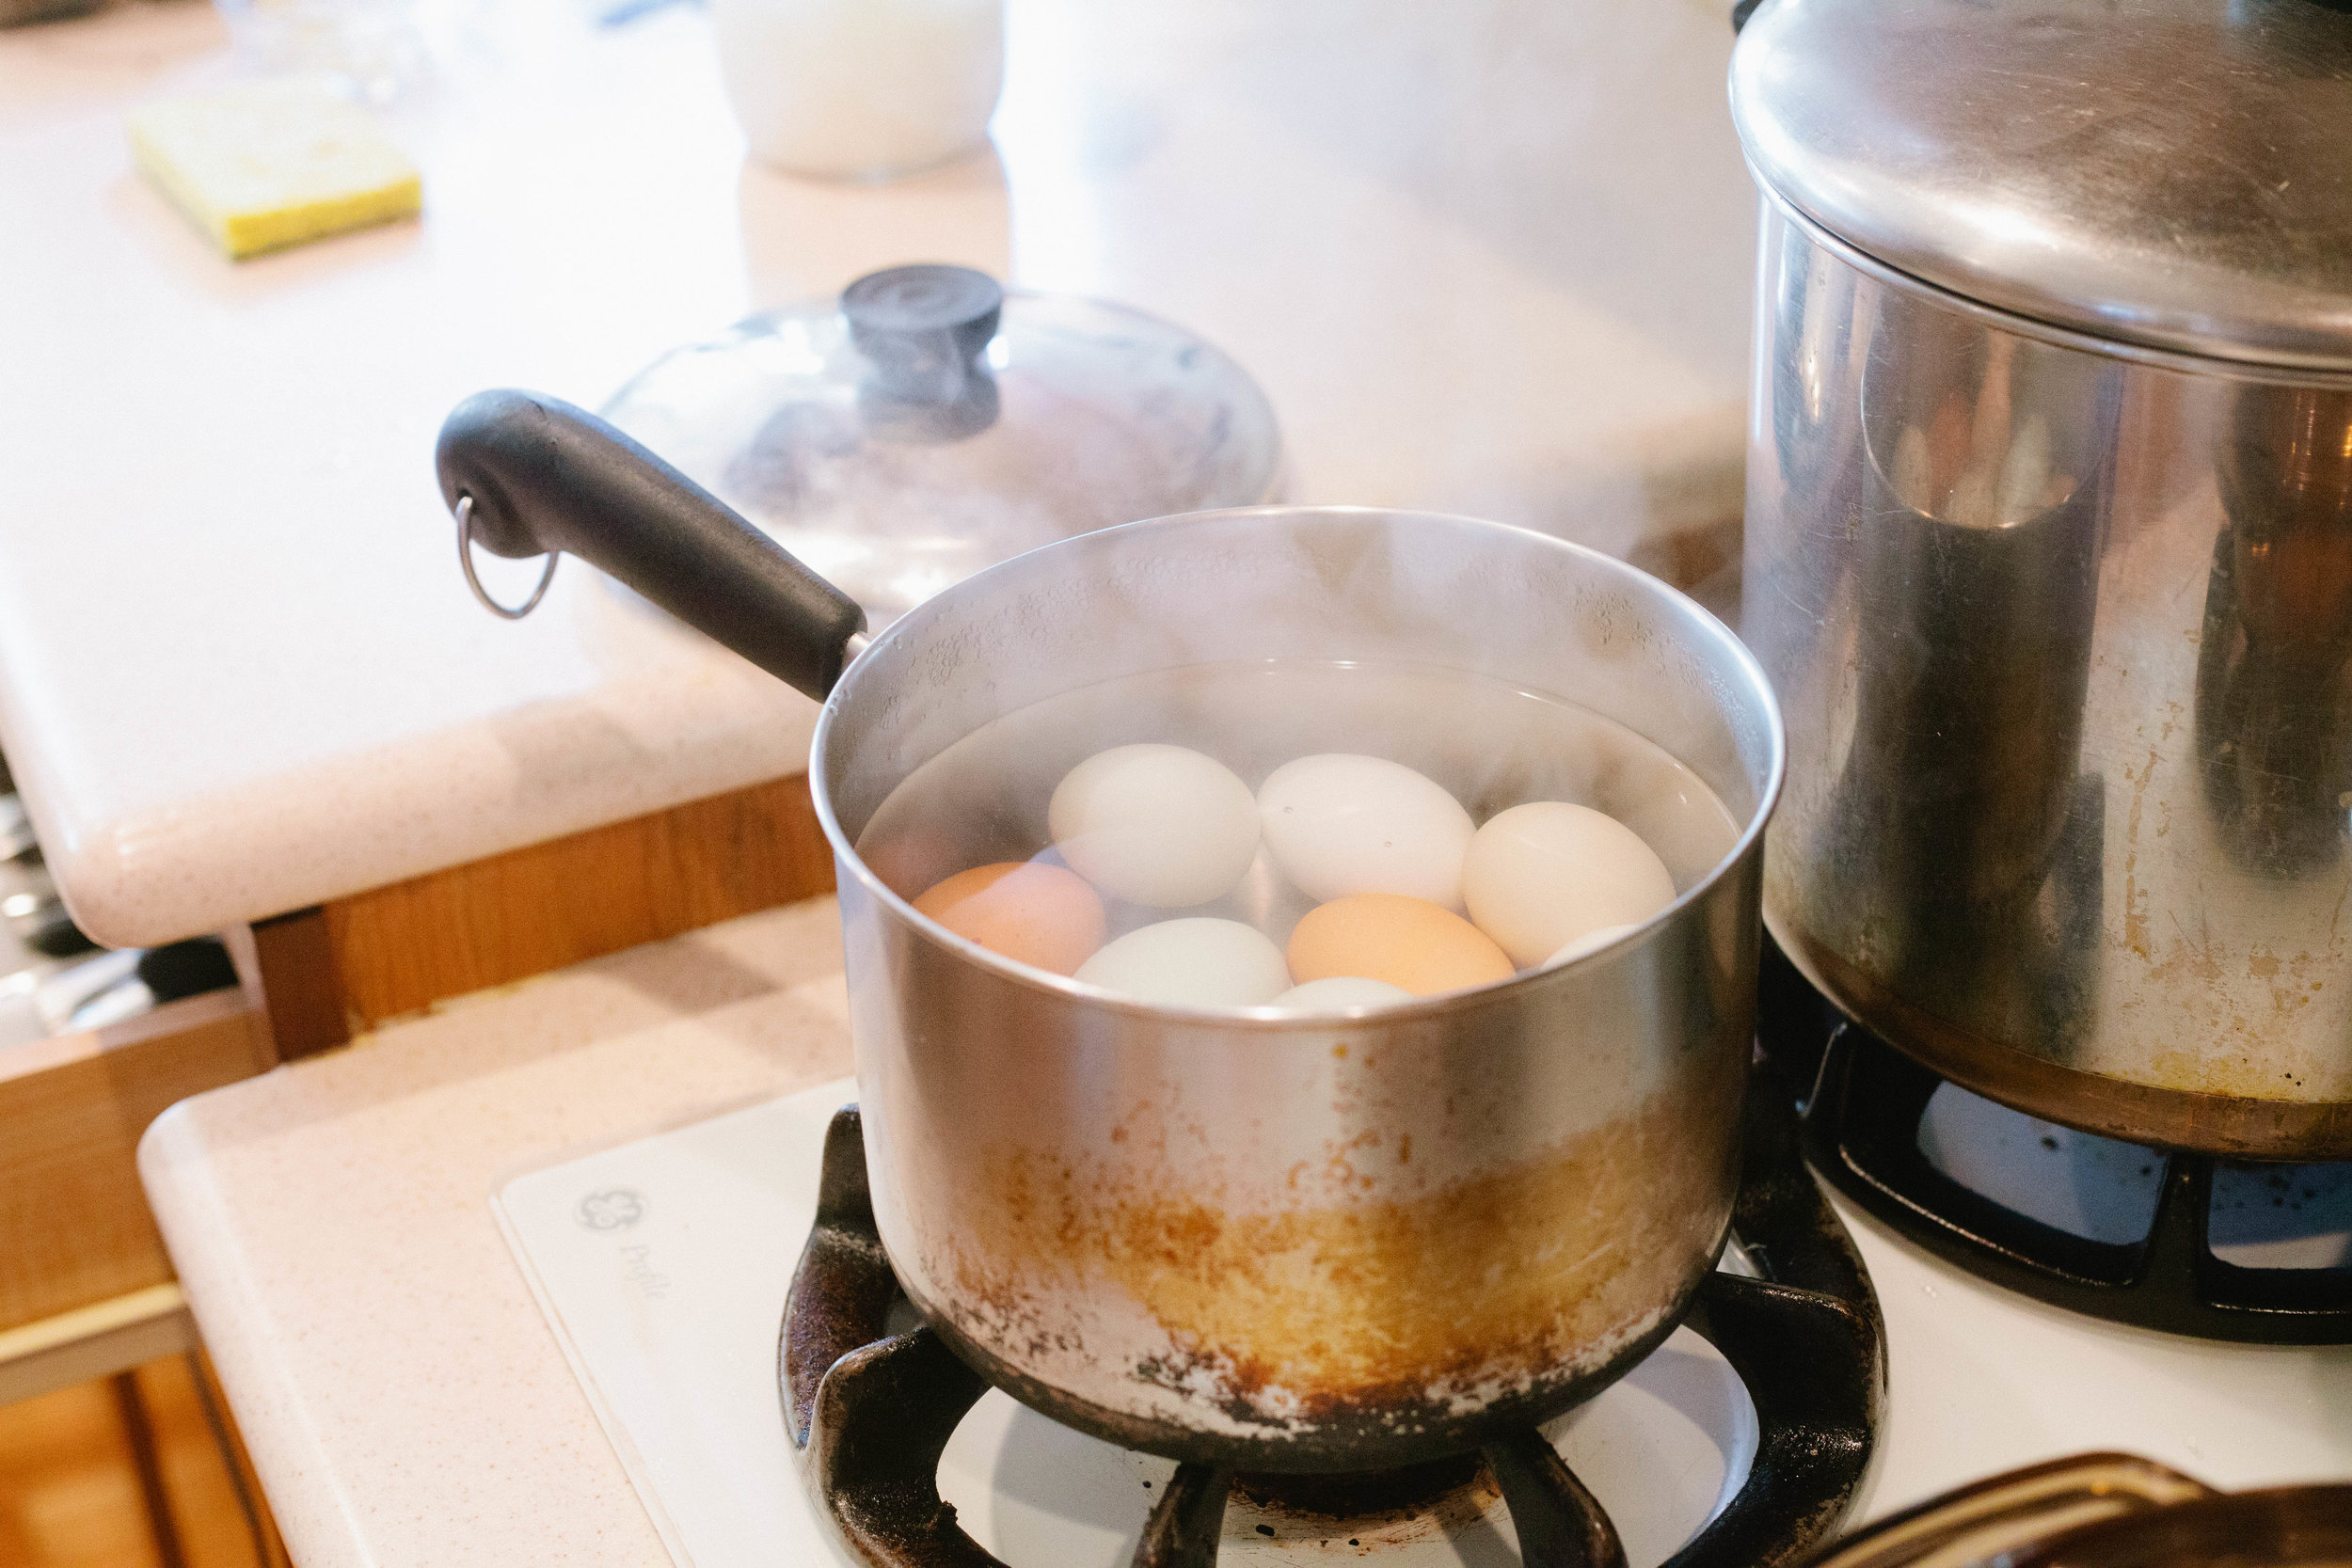
Bring eggs to a boil and cook for 5-6 minutes covered.

Remove eggs from heat.

Let set for 5 minutes.

IMG_1940.jpg

Test if your egg is hard boiled by removing one from the pan and spinning it. A hard boiled egg will spin upright if the yolk is hard.

Rinse the eggs under cold water or place them in an ice bath.

IMG_1944.jpg

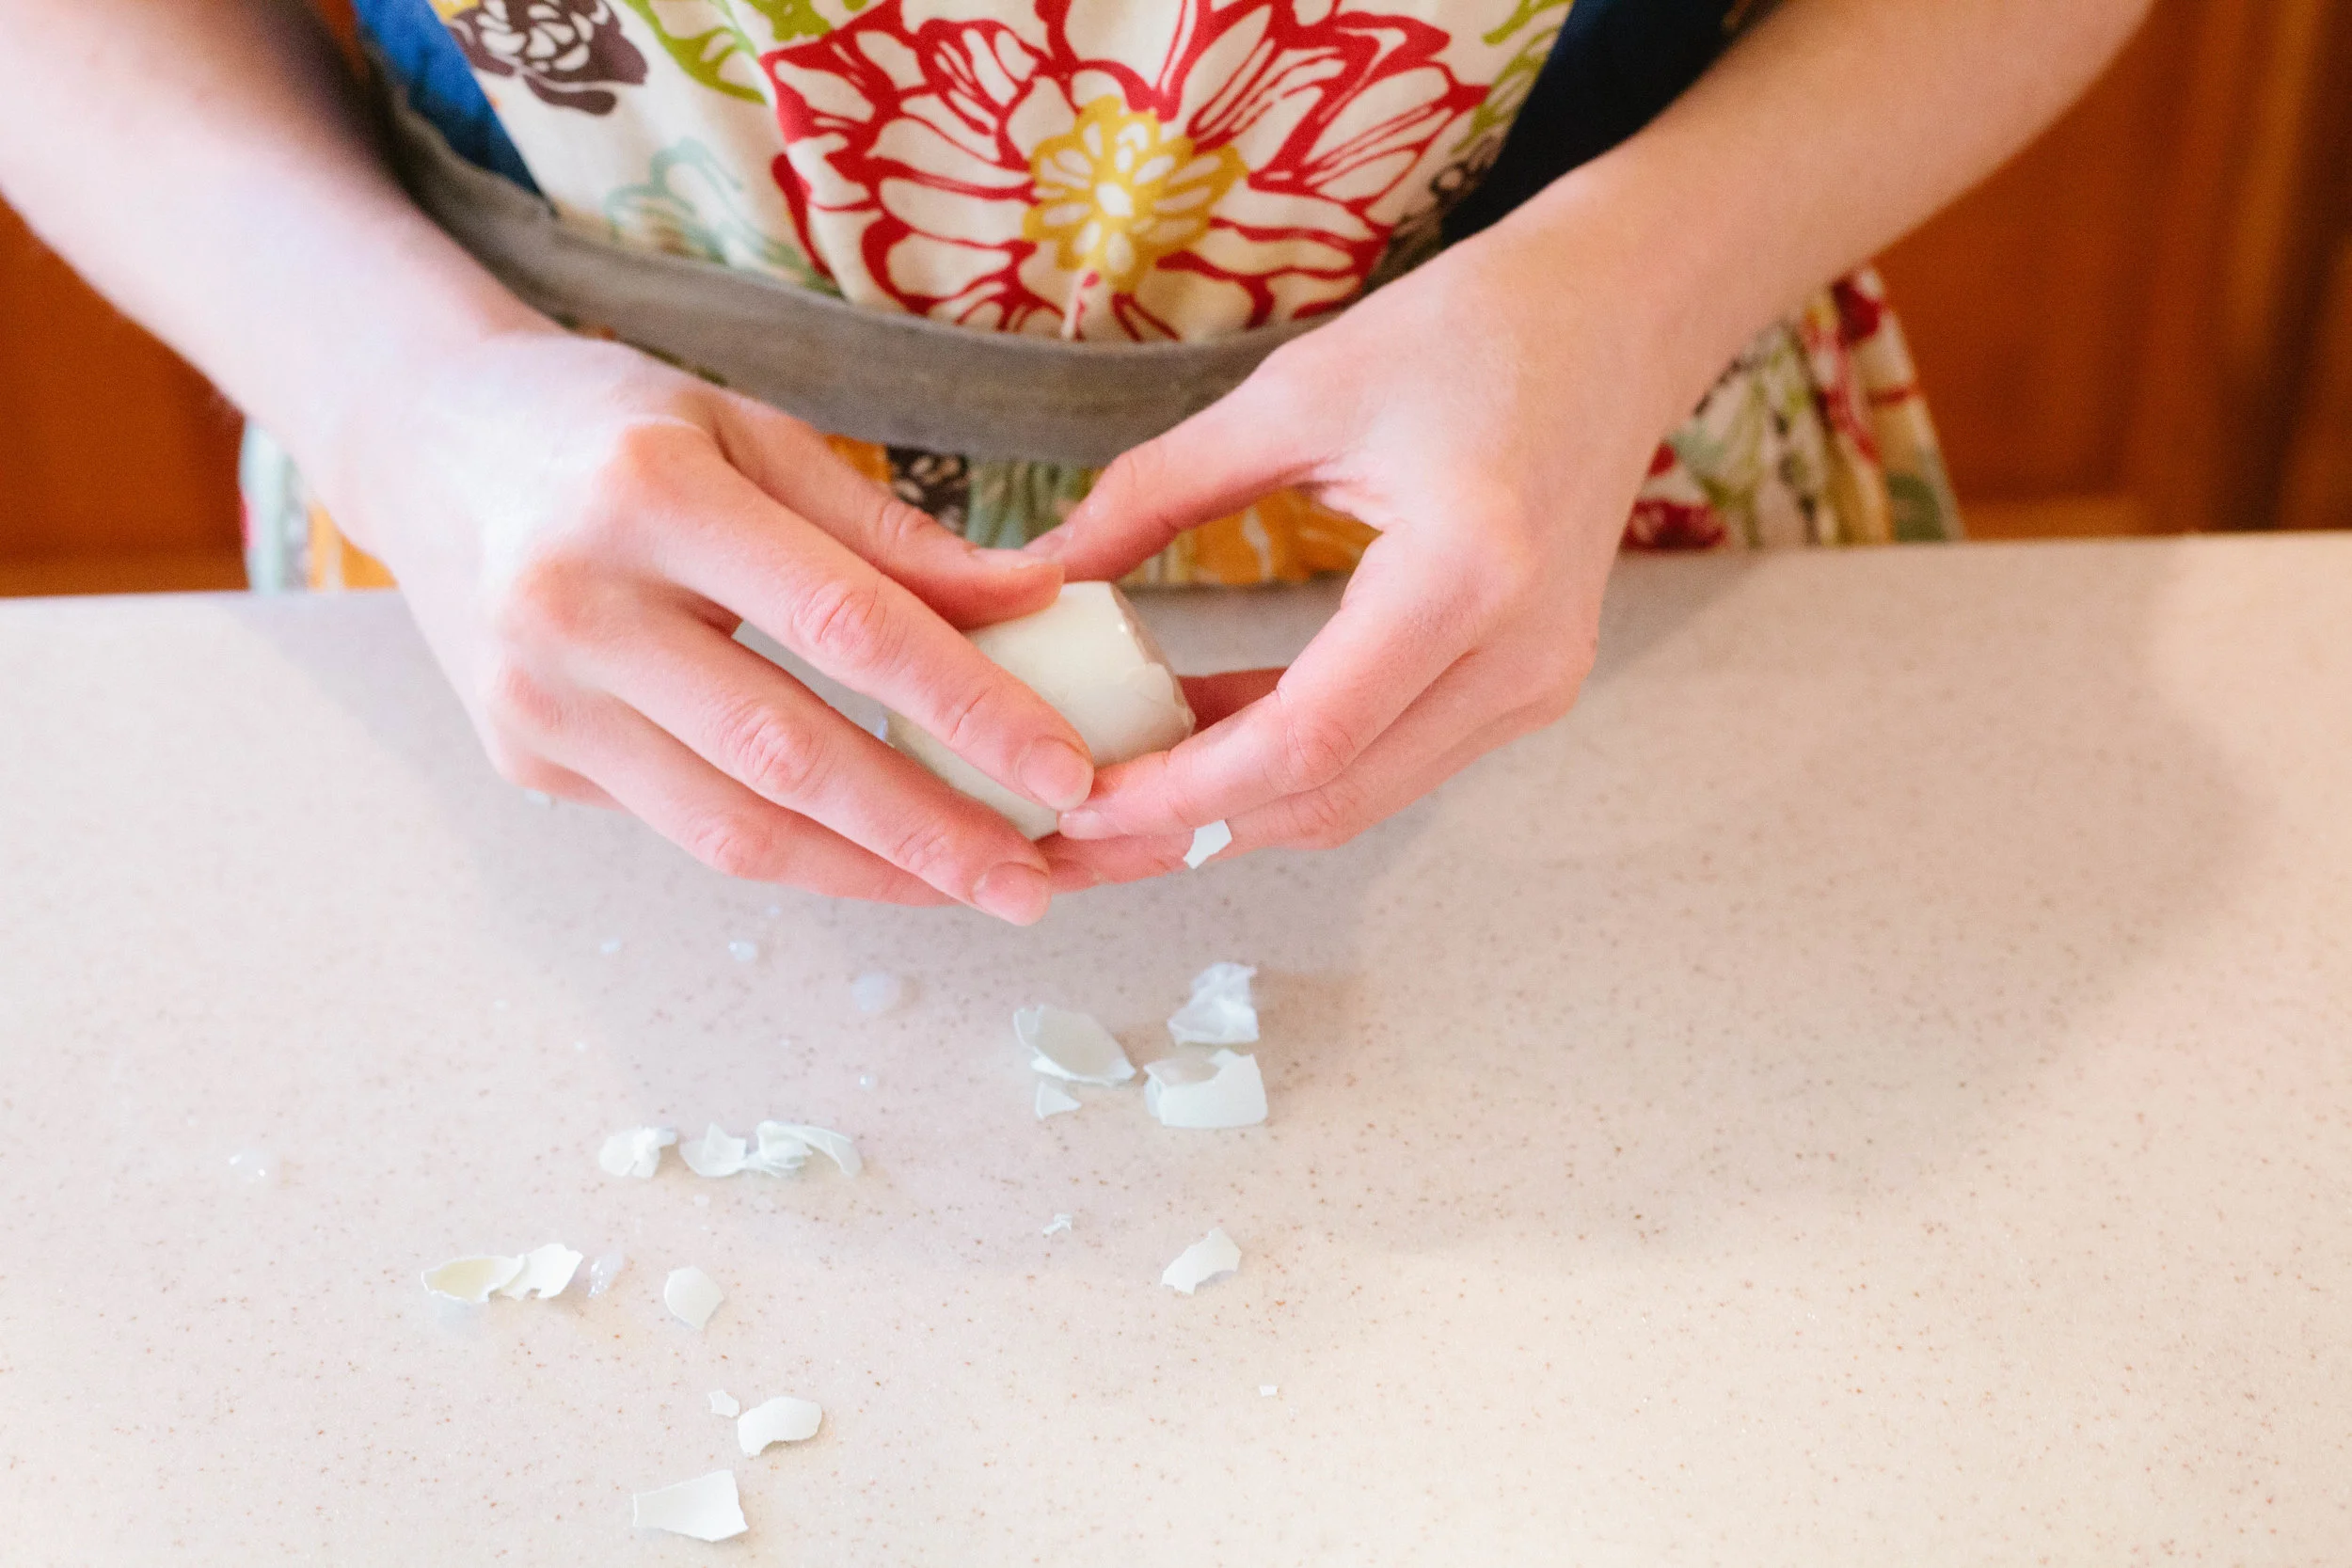
Tap the end of the egg and peel the shell off. Enjoy! Try these Mayo Free Deviled Eggs 2 Ways with your Hard Boiled Eggs.

I love soft boiled eggs! It makes me feel like royalty whenever I eat them. The best part of this fancy seeming dish is it’s actually very simple to make!

Directions for Soft Boiled Eggs

IMG_1503.jpg

Add filtered water to a pot. Bring water to a boil.

Once water is boiling, add eggs.

IMG_1630.jpg

Boil for 5 to 6 minutes.

Rinse under cold water or add to an ice bath.

IMG_1523.jpg

Tap one end of the egg and peel half of the egg. Scoop out the inside and enjoy!


Hard Boiled Eggs

Author:
prep time: cook time: total time:

ingredients:

  • Eggs

instructions:

How to cook Hard Boiled Eggs

  1. Fill a medium saucepan with cold water.
  2. Add eggs.
  3. Bring eggs to a boil and cook for 5-6 minutes covered.
  4. Remove eggs from heat.
  5. Let set for 5 minutes.
  6. Test if your egg is hard boiled by removing one from the pan and spinning it. A hard boiled egg will spin upright if the yolk is hard.
  7. Rinse the eggs under cold water or place them in an ice bath.
  8. Tap the end of the egg and peel the shell off. Enjoy! Try these Mayo Free Deviled Eggs 2 Ways with your Hard Boiled Eggs.
Created using The Recipes Generator
20.png

Soft Boiled Eggs

Author:
prep time: cook time: total time:

ingredients:

  • Eggs

instructions:

How to cook Soft Boiled Eggs

  1. Add filtered water to a pot. Bring water to a boil.
  2. Once water is boiling, add eggs.
  3. Boil for 5 to 6 minutes.
  4. Rinse under cold water or add to an ice bath.
  5. Tap one end of the egg and peel half of the egg. Scoop out the inside and enjoy!
Created using The Recipes Generator
19.png

Mayo Free Deviled Eggs Recipe

Mayo Free GAPS Legal Deviled Eggs 2 Ways

The story of these GAPS legal deviled eggs has a long beginning.

One of the foods I miss most? Mayonnaise. Now I know there are different mayos out there, even ones you can make yourself that are GAPS legal. But unless it tastes like the Real Mayo deliciousness that I remember, I have no interest in consuming it. I was a mayo snob long before I payed attention to what I ate!

Because I haven't found a mayo my taste buds approve of there is no mayonnaise in my refrigerator, even if it's just to make recipes like deviled eggs with. So one day when I had a hankerin' for deviled eggs I got the creative juices flowing and started experimenting with recipes. My first thought was to substitute the mayo for butter. After all, fat is the main reason deviled eggs are so good, right? A batch with butter resulted in delicious and very rich eggs, but the texture was very strange (hard), especially if refrigeration was required. Then I thought to add some sour cream to the mixture. At first I still had too much butter (50:50 ratio), but eventually found a ratio that works well—the butter adds some firmness to the "runnier" sour cream. This gives you a good base that allows you to flavor your deviled eggs as desired.

Next I wanted to come up with a dairy-free egg that my sister could enjoy. I immediately thought of using avocado as the fat. This also resulted in a delicious deviled egg, that's just a little green. I have served these eggs to many people, and as long as they know there is avocado in it, no one has had an issue with the color. And these are perfect for serving at a Dr. Seuss gathering as part of green eggs and ham! No artificial coloring required!

I have discovered that deviled egg recipes can be very familial. If these don't taste like the deviled eggs your grandma made, I encourage you to springboard off the base ingredients and modify the recipe to try and recreate your family memories. After all, that's what recipes are all about, aren't they? If you come up with something particularly delicious, we'd love if you share it with us in the comments below!

Enjoy these GAPS Legal Deviled Eggs, 2 Ways!

Dairy Free Deviled Eggs with Avocado

Ingredients for Avocado Deviled Eggs

  • 6 eggs

  • 1 medium or ½ cup Avocado

  • 1 tsp Mustard Powder

  • 1 tbsp of water

  • 1 tsp Vinegar

  • ½ tsp Honey

  • ¼ tsp Salt

  • Lemon

  • Chili Powder (optional)

  • Paprika (optional)

  • Cilantro (optional)

Directions for Avocado Deviled Eggs

Deviled-Eggs-Made-Without-Mayo-Mayo-Free-Deviled-Eggs-Deviled-Eggs-For-GAPS-Diet-Deviled-Eggs-Made-With-Sour-Cream

Fill a medium saucepan with cold water. Add eggs. Bring eggs to a boil and cook for 5-6 minutes covered.

Remove eggs from heat. Let set for 5 minutes. Test if your egg is hard boiled by removing one from the pan and spinning it. A hard boiled egg will spin upright if the yolk is hard.

Rinse the eggs under cold water or place them in an ice bath.

Deviled-Eggs-Made-Without-Mayo-Mayo-Free-Deviled-Eggs-Deviled-Eggs-For-GAPS-Diet-Deviled-Eggs-Made-With-Avocado

Peel the eggs. Peeling them while they are still a little warm will help get the shell off.

Cut the peeled eggs in half.

Deviled-Eggs-Made-Without-Mayo-Mayo-Free-Deviled-Eggs-Deviled-Eggs-For-GAPS-Diet-Deviled-Eggs-Made-With-Avocado

In a bowl, scoop out all the egg yolks. They should easily slide out with your finger.Set the egg whites onto a plate.

Crumble the egg yolks with a fork.

Deviled-Eggs-Made-Without-Mayo-Mayo-Free-Deviled-Eggs-Deviled-Eggs-For-GAPS-Diet-Deviled-Eggs-Made-With-Avocado

Mash the avocado into the egg yolks with a fork.

Add mustard powder to the egg yolk mixture.

Add water and vinegar to mixture. Mix well.

Add honey, salt and lemon. Mix well.

Deviled-Eggs-Made-Without-Mayo-Mayo-Free-Deviled-Eggs-Deviled-Eggs-For-GAPS-Diet-Deviled-Eggs-Made-With-Avocado

Fill the egg whites with a generous scoop.

Sprinkle with chili powder or paprika or top with sprigs of cilantro.

Deviled-Eggs-Made-Without-Mayo-Mayo-Free-Deviled-Eggs-Deviled-Eggs-For-GAPS-Diet-Deviled-Eggs-Made-With-Avocado

If you have leftover egg mixture, you can dip vegetables into it or smear onto scrambled eggs or crackers.

For a spicier egg, add more mustard powder!

These are legal on GAPS stage 4.


Sour Cream Deviled Eggs

Ingredients for Deviled Eggs with Sour Cream

  • 6 eggs

  • ½ c Sour Cream

  • 1 tbsp Room Temperature Butter

  • 1 - 1 ½ tsp Vinegar

  • 1 tsp Honey

  • ¼ tsp Mustard Powder

  • ⅛ tsp salt

  • Paprika (optional)

Directions for Deviled Eggs with Sour Cream

Deviled-Eggs-Made-Without-Mayo-Mayo-Free-Deviled-Eggs-Deviled-Eggs-For-GAPS-Diet-Deviled-Eggs-Made-With-Sour-Cream

Fill a medium saucepan with cold water. Add eggs. Bring eggs to a boil and cook for 5-6 minutes covered.

Remove eggs from heat. Let set for 5 minutes. Test if your egg is hard boiled by removing one from the pan and spinning it. A hard boiled egg will spin upright if the yolk is hard.

Rinse the eggs under cold water or place them in an ice bath.

Deviled-Eggs-Made-Without-Mayo-Mayo-Free-Deviled-Eggs-Deviled-Eggs-For-GAPS-Diet-Deviled-Eggs-Made-With-Sour-Cream

Peel the eggs. Peeling them while they are still a little warm will help get the shell off.

Cut the peeled eggs in half.

Deviled-Eggs-Made-Without-Mayo-Mayo-Free-Deviled-Eggs-Deviled-Eggs-For-GAPS-Diet-Deviled-Eggs-Made-With-Sour-Cream

In a bowl, scoop out all the egg yolks. They should easily slide out with your finger.

Set the egg whites onto a plate.

Crumble the egg yolks with a fork.

Deviled-Eggs-Made-Without-Mayo-Mayo-Free-Deviled-Eggs-Deviled-Eggs-For-GAPS-Diet-Deviled-Eggs-Made-With-Sour-Cream

Add the butter to the mixture and mix well.

Add the sour cream. Mix.

Add 1 tsp of the vinegar plus all the honey and salt. Mix.

Deviled-Eggs-Made-Without-Mayo-Mayo-Free-Deviled-Eggs-Deviled-Eggs-For-GAPS-Diet-Deviled-Eggs-Made-With-Sour-Cream

These are less tangy than a traditional deviled egg. To add more tang, add up to ½ tsp of vinegar.

Fill the egg whites with a generous scoop.

Sprinkle with paprika.


Mayo Free Deviled Eggs with Avocado

Author:
prep time: cook time: total time:

ingredients:

  • 6 eggs
  • 1 medium or ½ cup Avocado
  • 1 tsp Mustard Powder
  • 1 tbsp of water
  • 1 tsp Vinegar
  • ½ tsp Honey
  • ¼ tsp Salt
  • Lemon
  • Chili Powder (optional)
  • Paprika (optional)
  • Cilantro (optional

instructions:

How to cook Mayo Free Deviled Eggs with Avocado

  1. Fill a medium saucepan with cold water. Add eggs. Bring eggs to a boil and cook for 5-6 minutes covered.
  2. Remove eggs from heat. Let set for 5 minutes. Test if your egg is hard boiled by removing one from the pan and spinning it. A hard boiled egg will spin upright if the yolk is hard.
  3. Rinse the eggs under cold water or place them in an ice bath.
  4. Peel the eggs. Peeling them while they are still a little warm will help get the shell off.
  5. Cut the peeled eggs in half.
  6. In a bowl, scoop out all the egg yolks. They should easily slide out with your finger.Set the egg whites onto a plate.
  7. Crumble the egg yolks with a fork.
  8. Mash the avocado into the egg yolks with a fork.
  9. Add mustard powder to the egg yolk mixture.
  10. Add water and vinegar to mixture. Mix well.
  11. Add honey, salt and lemon. Mix well.
  12. Fill the egg whites with a generous scoop.
  13. Sprinkle with chili powder or paprika or top with sprigs of cilantro.
  14. If you have leftover egg mixture, you can dip vegetables into it or smear onto scrambled eggs or crackers.
  15. For a spicier egg, add more mustard powder!
  16. These are legal on GAPS stage 4.
Created using The Recipes Generator

Mayo Free Deviled Eggs with Sour Cream

Author:
prep time: cook time: total time:

ingredients:

  • 6 eggs
  • ½ c Sour Cream
  • 1 tbsp Room Temperature Butter
  • 1 - 1 ½ tsp Vinegar
  • 1 tsp Honey
  • ¼ tsp Mustard Powder
  • ⅛ tsp salt
  • Paprika (optional)

instructions:

How to cook Mayo Free Deviled Eggs with Sour Cream

  1. Fill a medium saucepan with cold water. Add eggs. Bring eggs to a boil and cook for 5-6 minutes covered.
  2. Remove eggs from heat. Let set for 5 minutes. Test if your egg is hard boiled by removing one from the pan and spinning it. A hard boiled egg will spin upright if the yolk is hard.
  3. Rinse the eggs under cold water or place them in an ice bath.
  4. Peel the eggs. Peeling them while they are still a little warm will help get the shell off.
  5. Cut the peeled eggs in half.
  6. In a bowl, scoop out all the egg yolks. They should easily slide out with your finger.
  7. Set the egg whites onto a plate.
  8. Crumble the egg yolks with a fork.
  9. Add the butter to the mixture and mix well.
  10. Add the sour cream. Mix.
  11. Add 1 tsp of the vinegar plus all the honey and salt. Mix.
  12. These are less tangy than a traditional deviled egg. To add more tang, add up to ½ tsp of vinegar.
  13. Fill the egg whites with a generous scoop.
  14. Sprinkle with paprika.
Created using The Recipes Generator

GAPS Legal Zucchini Pizza Bites

Recently I needed a bit of a change. I needed something exciting to eat! And I really wanted pizza. But even though I know how to make a GAPS legal pizza crust I did not want to spend the time or energy to make it. Then I came up with this brilliant idea... pizza bites... on zucchini! and what's better? They are stage 4 (and beyond) GAPS legal!

I happened to have just bought some good-quality uncured pepperoni at the store, and had some sauce in the cabinet (although if I don't happen to have that I just as easily throw a couple tomatoes in a blender and make my own sauce on the stove). I tried it, and it worked! Delicious pizza bites that really taste like pizza (with zucchini on it) and can be made to suit any taste or dietary guidelines.

Unless you can't eat zucchini, you should be able to modify this for anyone. The fat used can be anything. You could leave off the tomato sauce, or make a while sauce. You can top with anything you can tolerate. Most people can tolerate raw cheese by the time they get to full GAPS And I guarantee that even if you can't do pepperoni, there is some type of meat you can have! Part of what makes a pizza is cheese and tomato sauce, so without these you will have a little different taste, but that doesn't mean you won't have something delicious!

Ingredients for gaps friendly pizza made with zucchini:

  • Zucchini

  • 2 TBS Lard, Butter or Other Fat

  • Italian Seasonings

  • Salt & Pepper

  • Pizza Sauce (make your own or buy a sugar free version in a glass jar)

  • Mozzarella Cheese

  • Uncured Pepperoni

  • Other Pizza Toppings of Your Choice

Directions for gaps friendly pizza made with zucchini:

GAPS Legal pizza is a thing! These pizza bites are gluten free because they’re made with zucchini. Zucchini pizza bites are GAPS legal past stage four and are a great summer recipe on what to do with too much zucchini. GAPS Friendly pizza made with …

Sliced the zucchini into rounds, approx ¼ thick. Don’t slice too thin!

Add your preferred fat to a pan on medium heat. Once hot, add zucchini slices. Your zucchini should not be swimming in the fat!

GAPS Legal pizza is a thing! These pizza bites are gluten free because they’re made with zucchini. Zucchini pizza bites are GAPS legal past stage four and are a great summer recipe on what to do with too much zucchini. GAPS Friendly pizza made with …

Sprinkle zucchini slices with salt, pepper and Italian seasonings.

Grate the mozzarella cheese.

GAPS Legal pizza is a thing! These pizza bites are gluten free because they’re made with zucchini. Zucchini pizza bites are GAPS legal past stage four and are a great summer recipe on what to do with too much zucchini. GAPS Friendly pizza made with …

Once the zucchini slices are golden brown (8-10 min), flip them to the other side.

GAPS Legal pizza is a thing! These pizza bites are gluten free because they’re made with zucchini. Zucchini pizza bites are GAPS legal past stage four and are a great summer recipe on what to do with too much zucchini. GAPS Friendly pizza made with …

Spoon tomato sauce on top of each zucchini slice. Top with uncured pepperoni or other toppings of your choice and add grated mozzarella cheese. Cover for 2 - 3 minutes so the cheese melts.

GAPS Legal pizza is a thing! These pizza bites are gluten free because they’re made with zucchini. Zucchini pizza bites are GAPS legal past stage four and are a great summer recipe on what to do with too much zucchini. GAPS Friendly pizza made with …

Once the cheese is melted, your zucchini pizzas are done!

Other toppings you could try would be artichoke hearts, olives. anchovies, or cooked chicken pieces. (Think your favorite pizza toppings!) Enjoy! Careful, they are hot! Once they have cooled a little, you can cut them into fourths to be served to those with small mouths. And as any good pizza is, they are delicious cold as well!  
What are your favorite toppings? Did you find good combinations? Let us know!


Zucchini Pizza Bites

Author:
prep time: cook time: total time:

ingredients:

  • Zucchini
  • 2 TBS Lard, Butter or Other Fat
  • Italian Seasonings
  • Salt & Pepper
  • Pizza Sauce (make your own or buy a sugar free version in a glass jar)
  • Mozzarella Cheese
  • Uncured Pepperoni
  • Other Pizza Toppings of Your Choice

instructions:

How to cook Zucchini Pizza Bites

  1. Sliced the zucchini into rounds, approx ¼ thick. Don’t slice too thin!
  2. Add your preferred fat to a pan on medium heat. Once hot, add zucchini slices. Your zucchini should not be swimming in the fat!
  3. Sprinkle zucchini slices with salt, pepper and Italian seasonings.
  4. Grate the mozzarella cheese.
  5. Once the zucchini slices are golden brown (8-10 min), flip them to the other side.
  6. Spoon tomato sauce on top of each zucchini slice. Top with uncured pepperoni or other toppings of your choice and add grated mozzarella cheese. Cover for 2 - 3 minutes so the cheese melts.
  7. Once the cheese is melted, your zucchini pizzas are done!
  8. Other toppings you could try would be artichoke hearts, olives. anchovies, or cooked chicken pieces. (Think your favorite pizza toppings!) Enjoy! Careful, they are hot! Once they have cooled a little, you can cut them into fourths to be served to those with small mouths. And as any good pizza is, they are delicious cold as well!
Created using The Recipes Generator

GAPS Legal Trail Mix Recipe

With all the hiking and camping that happens in Colorado, trail mix is almost a main food group. But commercial trail mixes contain candy, sweetened fruit, and unprepared nuts: not the superfoods they claim to be! This can be problematic if you are following a dietary protocol... you can't buy GAPS legal trail mix very easily! Fortunately, trail mix is fairly easy to make, and when you make your own, you can ensure the preparation (and ingredients) are exactly what you want! Below is a recipe for trail mix. Please explore beyond my ideas! You may figure out the next winning combination. If you do, make sure you share it with us in the comments! Enjoy!

GAPS Friendly Trail Mix Ingredients

  • Homemade or Store Bought Yogurt for the Whey

  • Salt

  • Filtered Water

  • Nuts of Your Choice, such as Almonds, Cashews and Walnuts

  • Seeds of Your Choice, such as Pumpkin Seeds

  • Dried Fruit of Your Choice. I used Raisins and Dried Pineapple.

  • Carob Chips or Chocolate Chips (if you can tolerate them in your diet or on your GAPS Stage)

A Note About Nuts and Seeds: Be sure to buy raw and organic nuts (not roasted and salted), except raw cashews. Raw cashews cannot be purchased; they're poisonous!

Directions for making your own trail mix

DIY-Trail-Mix-Properly-Prepared-Grains-GAPS-Trail-Mix-GAPS-GORP-GAPS-Diet-Snack-What-to-eat-on-the-gaps-diet

Using homemade or store bought yogurt, strain out whey. Rinse the nuts and seeds that you want to use through cold water.

DIY-Trail-Mix-Properly-Prepared-Grains-GAPS-Trail-Mix-GAPS-GORP-GAPS-Diet-Snack-What-to-eat-on-the-gaps-diet

Fill jars and bowls with filtered water. Keeping each kind of nut and seed in it's own separate bowl, add 1/4 cup whey to each jar and bowl.

DIY-Trail-Mix-Properly-Prepared-Grains-GAPS-Trail-Mix-GAPS-GORP-GAPS-Diet-Snack-What-to-eat-on-the-gaps-diet

Let nuts and seeds soak and ferment. Most nuts and seeds need 24 hours for proper fermentation. Cashews and pumpkin seeds take only 8 though!

DIY-Trail-Mix-Properly-Prepared-Grains-GAPS-Trail-Mix-GAPS-GORP-GAPS-Diet-Snack-What-to-eat-on-the-gaps-diet

After 24 hours, take the nuts out and set them either on dehydrator trays or on baking sheets lined with parchment paper. Let them dry until they become crispy, preferably keeping them under 110° to keep the enzymes live.

DIY-Trail-Mix-Properly-Prepared-Grains-GAPS-Trail-Mix-GAPS-GORP-GAPS-Diet-Snack-What-to-eat-on-the-gaps-diet

Mix any amount of crispy nuts with dried fruit. I used dried pineapples and raisins but you can use any dried fruit that you like and are tolerating! You can also add chocolate or carob chips to your mixture, if you can tolerate them.

DIY-Trail-Mix-Properly-Prepared-Grains-GAPS-Trail-Mix-GAPS-GORP-GAPS-Diet-Snack-What-to-eat-on-the-gaps-diet

Store your trail mix in small baggies for a portable trail snack!


GAPS Legal Trail Mix

Author:
prep time: cook time: total time:

ingredients:

  • Homemade or Store Bought Yogurt for the Whey
  • Salt
  • Filtered Water
  • Nuts of Your Choice, such as Almonds, Cashews and Walnuts
  • Seeds of Your Choice, such as Pumpkin Seeds
  • Dried Fruit of Your Choice. I used Raisins and Dried Pineapple.
  • Carob Chips or Chocolate Chips (if you can tolerate them in your diet or on your GAPS Stage)

instructions:

How to cook GAPS Legal Trail Mix

  1. Using homemade or store bought yogurt, strain out whey. Rinse the nuts and seeds that you want to use through cold water.
  2. Fill jars and bowls with filtered water. Keeping each kind of nut and seed in it's own separate bowl, add 1/4 cup whey to each jar and bowl.
  3. Let nuts and seeds soak and ferment. Most nuts and seeds need 24 hours for proper fermentation. Cashews and pumpkin seeds take only 8 though!
  4. After 24 hours, take the nuts out and set them either on dehydrator trays or on baking sheets lined with parchment paper. Let them dry until they become crispy, preferably keeping them under 110° to keep the enzymes live.
  5. Mix any amount of crispy nuts with dried fruit. I used dried pineapples and raisins but you can use any dried fruit that you like and are tolerating! You can also add chocolate or carob chips to your mixture, if you can tolerate them.
  6. Store your trail mix in small baggies for a portable trail snack!
Created using The Recipes Generator

GAPS Friendly Marshmallow Recipe

What if I told you that you could have a treat that is GAPS legal AND is good for you??? The GAPS marshmallow does just that. This simple treat is basically made up of gelatin, honey, water and optional vanilla. You can use this treat to get extra gelatin if you are needing that. Just reduce the amount of honey*. And they are simple to make!

GAPS Friendly MARSHMALLOWS Ingredients

  • 2 cups honey

  • 1 cup of filtered water

  • 2 tsp vanilla (optional)

  • 1/2 tsp sea salt

  • 6 TBS grass-fed beef gelatin

  • 1 cup of filtered water

Directions for making your own marshmallows

IMG_1823.jpg

Soften the Gelatin by adding gelatin to 1 cup of hot water. Stir and allow to sit. Keep it warm but not on the stove.

While gelatin is softening… Heat honey and water in a medium saucepan (medium to high heat), stirring frequently, until it reaches the soft ball candy stage (about 235°F).

IMG_1854.jpg

If you don’t have a thermometer, you can check by dripping the heated honey into a glass of cold water. When the candy forms a ball, it is ready!

When the honey has reached the soft ball stage, remove from heat.

Add the heated honey mixture to the softened gelatin in a large bowl.

Add vanilla (optional)

Do these steps quickly, you don’t want honey mixture to cool off too much!

IMG_1927.jpg

Whisk the mixture using an electric mixer or stand mixer for about 10 minutes. When the mixture is thick and looks like marshmallow paste, it’s done!

IMG_1987.jpg

Put the marshmallow paste in a greased and parchment paper-lined glass 9x11 dish and allow to cool and dry for 24-36 hrs. Then cut up and serve.

These marshmallows won't have exactly the same consistency (and won't roast over the fire quite the same) as store-bought marshmallows, but you can roast them for things like s'mores, and they are delicious! You can also use them to top roasted sweet potatoes or butternut squash or to top your homemade ice cream for a sundae or banana split.

Enjoy!

*As a general rule I don't like to heat honey, as some research has shown that heating it can turn the honey toxic. On the other hand, these marshmallows are a whole lot better than commercially available marshmallows, so I think as a treat they are great! I still recommend using raw honey for these recipes, you will be heating it much less than most non-raw honey is heated.


Homemade Marshmallows

Author:
prep time: cook time: total time:

ingredients:

  • 2 cups honey
  • 1 cup of filtered water
  • 2 tsp vanilla (optional)
  • 1/2 tsp sea salt
  • 6 TBS grass-fed beef gelatin
  • 1 cup of filtered water

instructions:

How to cook Homemade Marshmallows

  1. Soften the Gelatin by adding gelatin to 1 cup of hot water. Stir and allow to sit. Keep it warm but not on the stove.
  2. While gelatin is softening… Heat honey and water in a medium saucepan (medium to high heat), stirring frequently, until it reaches the soft ball candy stage (about 235°F).
  3. If you don’t have a thermometer, you can check by dripping the heated honey into a glass of cold water. When the candy forms a ball, it is ready!
  4. When the honey has reached the soft ball stage, remove from heat.
  5. Add the heated honey mixture to the softened gelatin in a large bowl.
  6. Add vanilla (optional)
  7. Do these steps quickly, you don’t want honey mixture to cool off too much!
  8. Whisk the mixture using an electric mixer or stand mixer for about 10 minutes. When the mixture is thick and looks like marshmallow paste, it’s done!
  9. Put the marshmallow paste in a greased and parchment paper-lined glass 9x11 dish and allow to cool and dry for 24-36 hrs. Then cut up and serve.
  10. These marshmallows won't have exactly the same consistency (and won't roast over the fire quite the same) as store-bought marshmallows, but you can roast them for things like s'mores, and they are delicious! You can also use them to top roasted sweet potatoes or butternut squash or to top your homemade ice cream for a sundae or banana split.
Created using The Recipes Generator