dinner

Preparing and Cooking Sweetbreads

GAPS LEGAL stage 4 and up

I am on a quest to get more organ meats into my diet. Organ meats have been lost to our culture but they are so important to having a healthy body, healthy pregnancy and healthy children. There has been a stigma for literally hundreds of years in western cultures that organ meats are eaten only by those who can’t afford the pricier cuts of meat or are “forced” to eat the entirety of their animals and therefore should generally be avoided. In countries where that stigma doesn’t exist, organ meats are prized for their nutritional value and are the most desired cuts of meat. Because organ meats are so dense nutritionally, I encourage you to join me in finding recipes to regularly bring organ meats to your family’s table as well

I’ve done lots of liver recipes so far and now I’m branching out to other organ meats. Try liver in liver pate, liver meatballs, bacon wrapped liver, jalapeno liver poppers, and simple liver shots.


Sweetbread is the thymus gland of an animal, traditionally a young calf. They do not have a strong flavor like other organ meats, making them a great “gateway” organ meat. The thymus gland is involved in the immune regulation systems. It’s primarily connected to lymph tissue and it plays in a role in adaptive immunity, which is immunity where the body learns, grows, and retains information from alien (outside of the body) microbes. 

There were quite a few butchers who sold sweetbread online. Some of those were organically raised but I was happy to find sweetbreads from a person I trust at Fields of Athenry Farm.  

This recipe is based on Nourishing Traditions.

Ingredients for Preparation:

  • 1 lb Sweetbread

  • Filtered Water

  • 6 tbsp Apple Cider Vinegar

  • 1 tsp Salt


Directions for Preparing Sweetbreads:

Rinse your sweetbread with filtered water.

Add to a large bowl and cover with filtered water. Add 2 tbsp of apple cider vinegar.

Allow to sit for 2 hours, changing the water once or twice and adding new vinegar.
Rinse after 2 hours. Put in a sauce pan and cover with filtered water. Add 1 tsp salt.

Parboil for 15 minutes. Remove from liquid. The liquid can be reused if you are doing more than one sweetbread.

Cool and then remove all loose skin, tissue, fat, and membranes. 

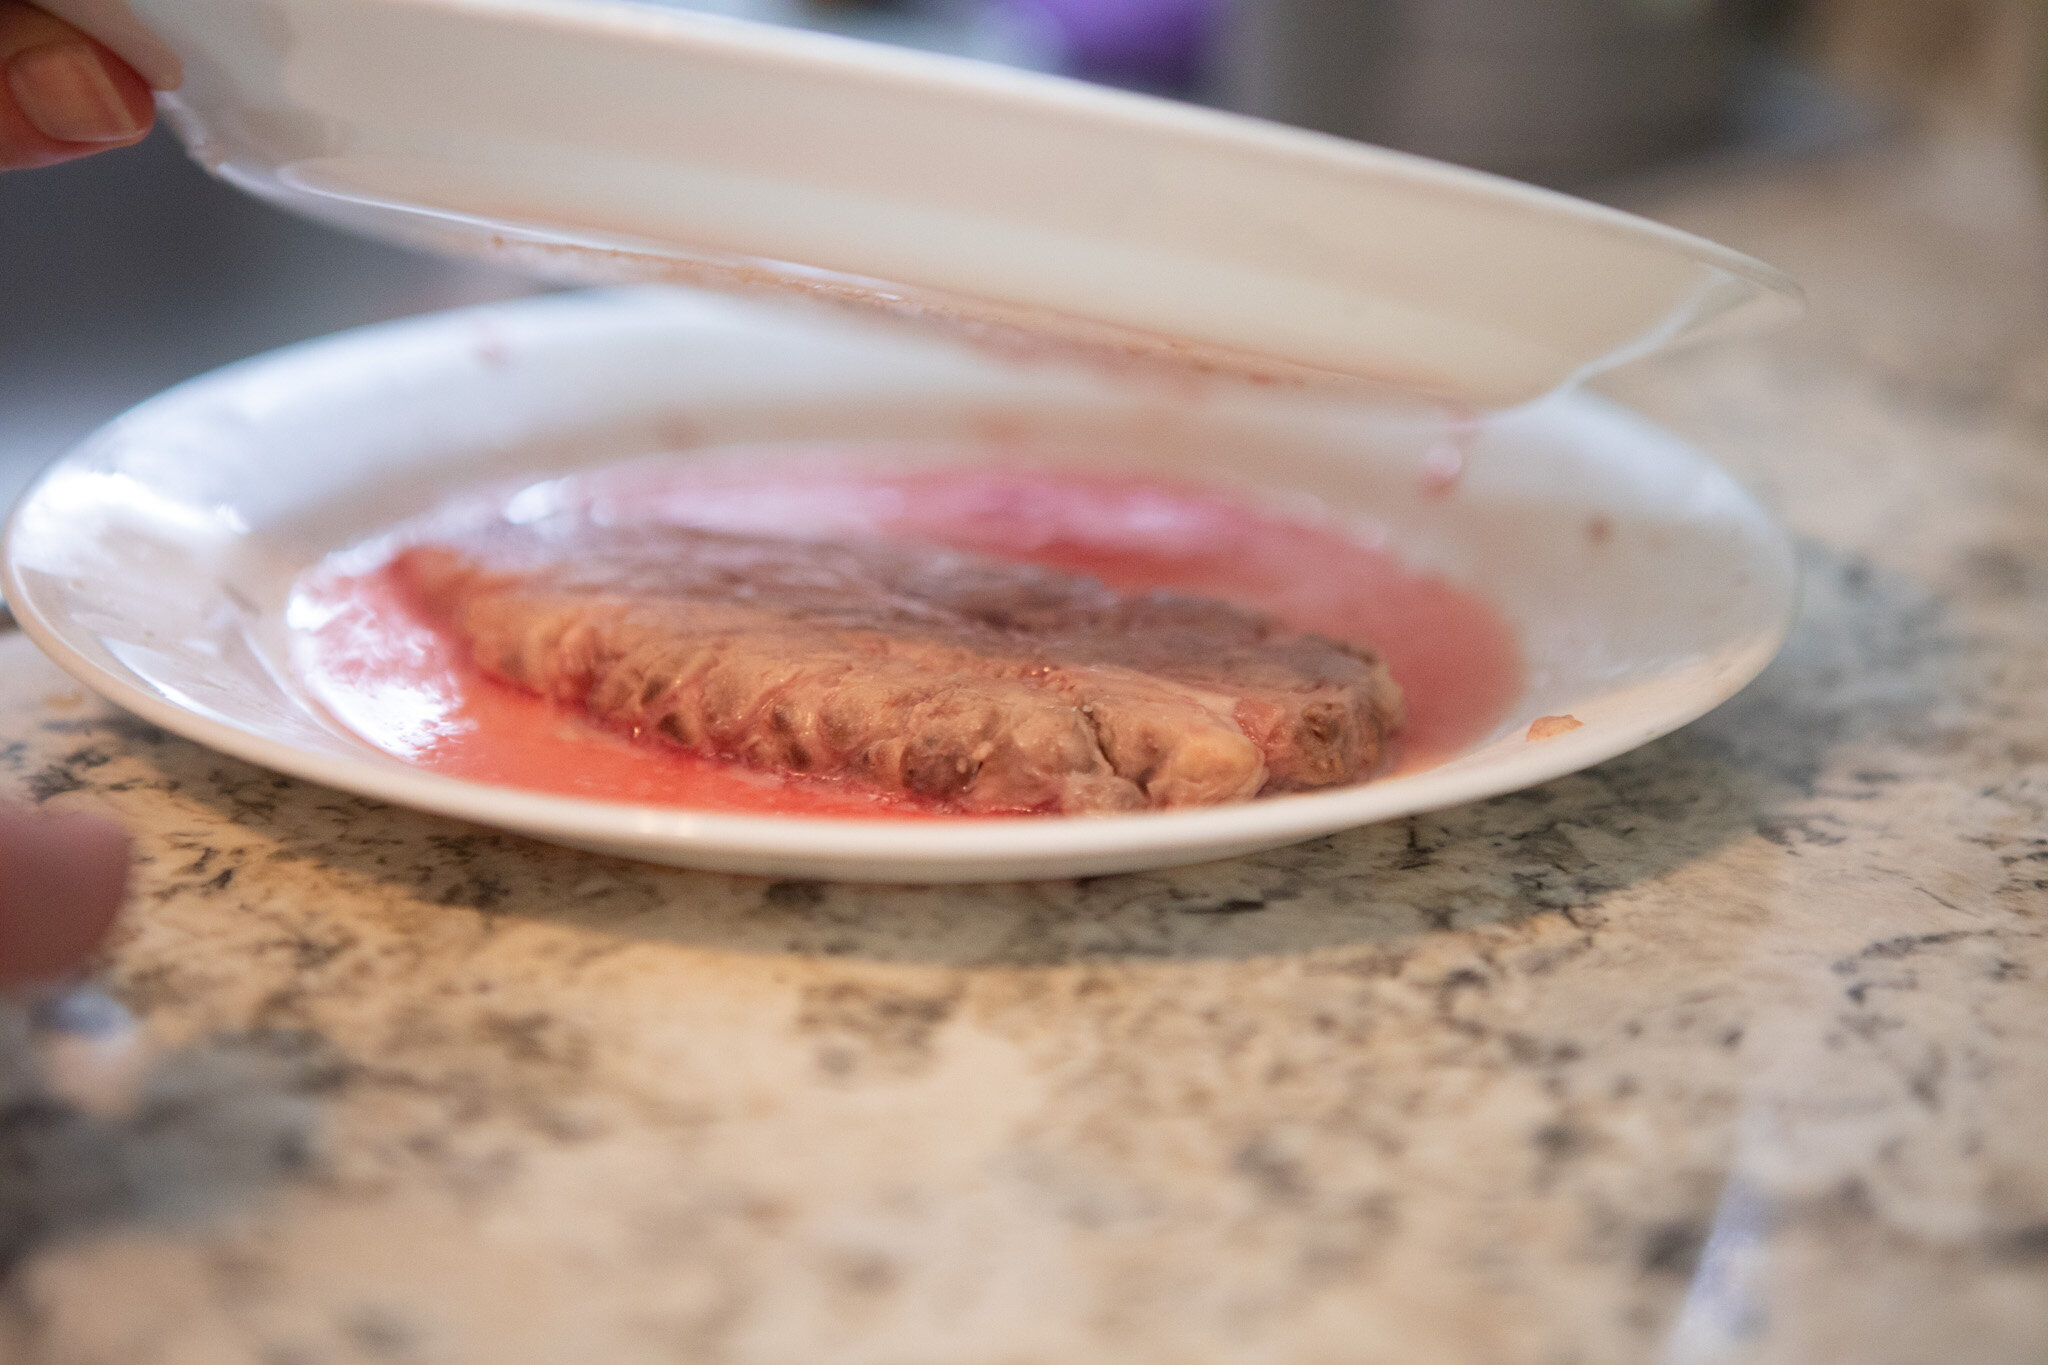
Put between unbleached parchment paper. Place a weighted plate or cookie sheet on top and keep in the fridge overnight.

7L9A2723.jpg

Cooking Sweetbread:

Multiple different recipes that you can find in the nourishing traditions cookbook and other sources of how to cook your sweetbread once it's been prepared. The most popular way to eat sweetbreads is breaded. If you are able to tolerate breading, and want to use a traditional flour, I would recommend using einkorn flour, I get mine from Jovial.

The recipe I am preparing here today is a non-floured preparation. Modification on Sally Fallon’s sweetbread with pearl onions. I always have yellow onions on-hand, so that is what I use for this recipe. Pearl onions add a lot of flavor, so they would add a lot to this dish. Next time I remember to buy pearl onions, I will try the recipe with them. The taste is unique, although not too unlike other meats. Not as strong as liver or kidney meats. I enjoy these simply fried without the breading, and serve them alongside either a main dish a portion of scrambled eggs or over top of caramelized onions. The thymus glad is an immune organ, so eating this on top of caramelized onion will give a good boost to the immune system. The thymus gland regulates a lot of functions in the immune system, and as a general principle it is good to eat the organ of the organ that is struggling. It makes sense to consume the thymus gland which would give you the vitamins, minerals and other co-factors contained in that organ and needed for that organ as well as the photomorphogenic information and support contained in the DNA of the thymus cells. 

Ingredients for Cooking Sweetbreads:

  • 1 pair of prepared sweetbreads

  • ½ stick butter

  • 1 lbs yellow onions, peeled, sliced and sauteed in butter

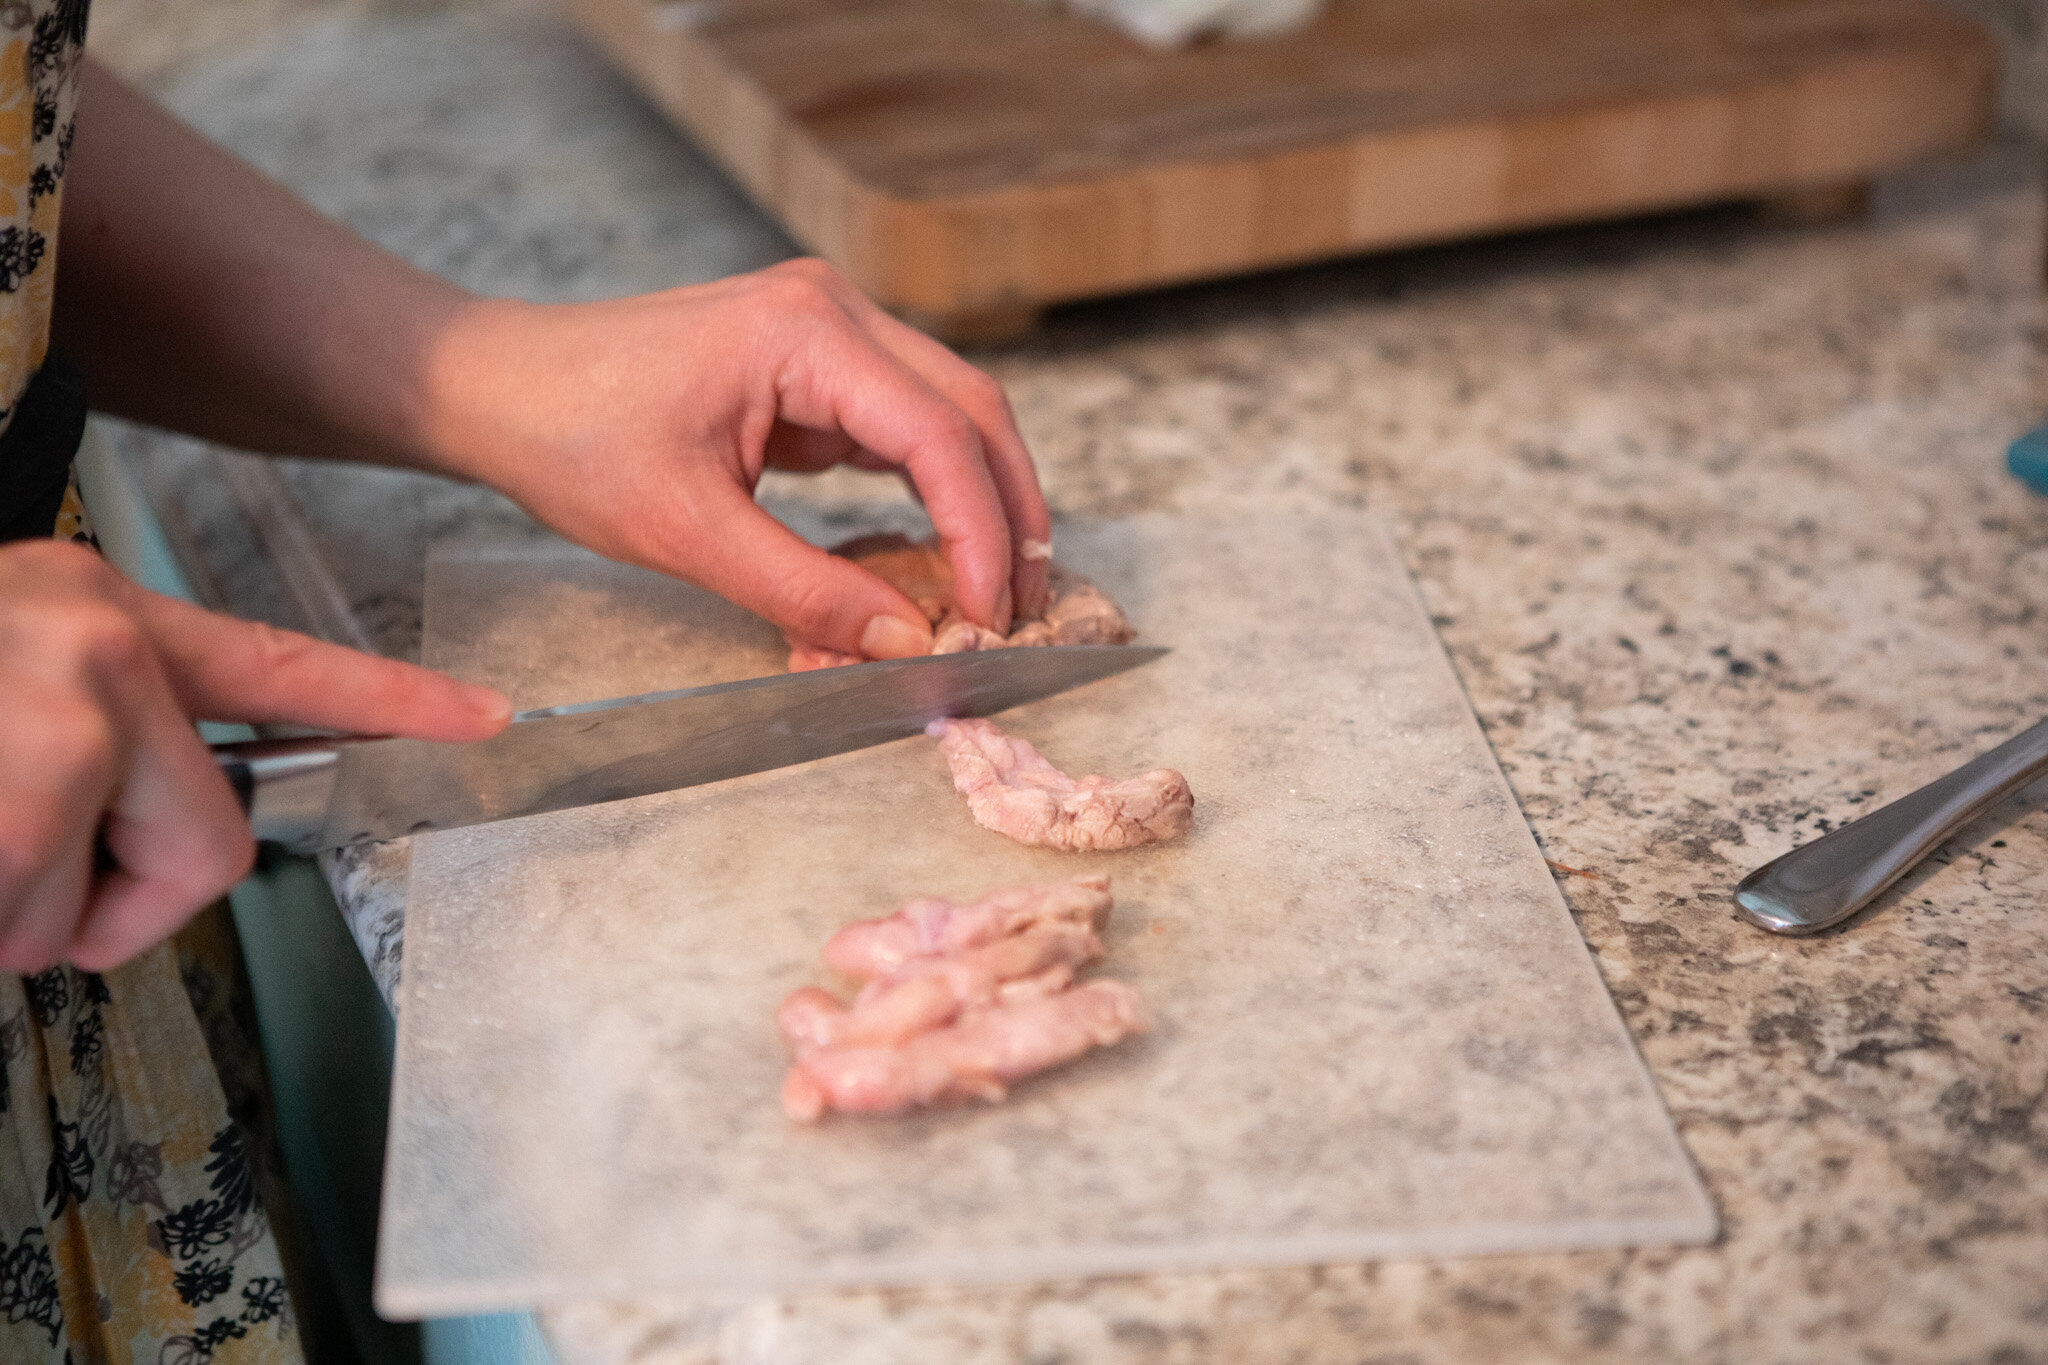
7L9A2734.jpg

Slicing on the bias (which is diagonal to the grain). Fry the sweetbreads in butter on a stovetop and top with caramelized onions.

7L9A2771.jpg
Copy of Be Well Clinic Pinterest Blog Graphics - 4 (3).png

Preparing and Cooking Sweetbreads

Author: Amy Mihaly, Be Well Clinic
Sweetbread is the thymus gland of an animal, traditionally a young calf. They do not have a strong flavor like other organ meats, making them a great “gateway” organ meat. The thymus gland is involved in the immune regulation systems. It’s primarily connected to lymph tissue and it plays in a role in adaptive immunity, which is immunity where the body learns, grows, and retains information from alien (outside of the body) microbes.

Ingredients

Ingredients for Preparation:
  • 1 lb Sweetbreads
  • Filtered Water
  • 6 tbsp Apple Cider Vinegar
  • 1 tsp Salt
Ingredients for Sweetbreads:
  • 1 pair of prepared sweetbreads
  • ½ stick butter
  • 1 lbs yellow onions, peeled, sliced and sautéed in butter

Instructions

Preparation:
  1. Rinse your sweetbread with filtered water.
  2. Add to a large bowl and cover with filtered water. Add 2 tbsp of apple cider vinegar.
  3. Allow to sit for 2 hours, changing the water once or twice and adding new vinegar.
  4. Rinse after 2 hours. Put in a sauce pan and cover with filtered water. Add 1 tsp salt.
  5. Paraboil for 15 minutes. Remove from liquid. The liquid can be reused if you are doing more than one sweetbread.
  6. Cool and then remove all loose skin, tissue, fat, and membranes.
  7. Put between unbleached parchment paper. Place a weighted plate or cookie sheet on top and keep in the fridge overnight.
Cooking:
  1. Slice your sweetbreads on the bias (which is diagonal to the grain). 
  2. Then, fry the sweetbreads in butter on a stovetop and top with caramelized onions.
Created using The Recipes Generator

Beef and Sauerkraut Soup

While you may be tempted to throw all the ingredients together, the taste is incredibly different when you follow the recipe step-by-step. I knew this experientially, but finally came fully onboard after reading many of my old recipe books and realizing how many recipes contain essentially the same ingredients but tasted completely different because of the preparation order. The difference between a good recipe and a great recipe is taking the time to prepare things in a specific order.

While this is a delicious soup for anyone, it can be very healing for anyone with a short term or long term illness. Each ingredient in this soup contains its own nourishing and healing properties. Onions are high in sulfur, read more here. Sauerkraut is predigested cabbage, link to recipe. Stock is high in easily accessible amino acids and meat contains proteins, minerals, fiber and other vitamins. Make sure to salt to taste using a good quality sea salt, adding minerals to complete this healing food. It also naturally contains copious amounts of animal fat which your body will use to heal and repair your cells as well as feed the immune system. The probiotics in the sauerkraut will be killed in the cooking process however, you still will get the benefits of predigested cabbage. There is also some evidence that even killed bacterial bodies from fermented foods has an immune benefit to your body. The lamb stock I used in the soup made for a delicious flavor. But all my taste senses were focused on the sauerkraut. Which brought a richness and layered complexity.


Ingredients for Beef and Sauerkraut Soup:

  • Chuck Roast

  • ½ Stick Butter

  • Chopped Onions

  • Salt

  • 6 Cups Meat Stock (beef or lamb)

  • Sauerkraut

Directions for Beef and Sauerkraut Soup

Cube by slicing perpendicular to the grain into half inch slices, then cubing from there. In this recipe, I use a chuck roast, but any cut of meat would be fine. You could also start with stew meat, but be sure to cube it down to bite-sized pieces. Stew meat is often very expensive cuts of meat that did not end up in a pretty cut, so I recommend purchasing and using stew meat to get quality, affordable meat. I often purchase stew meat to get tender cuts at affordable prices.

Slicing chuck roast

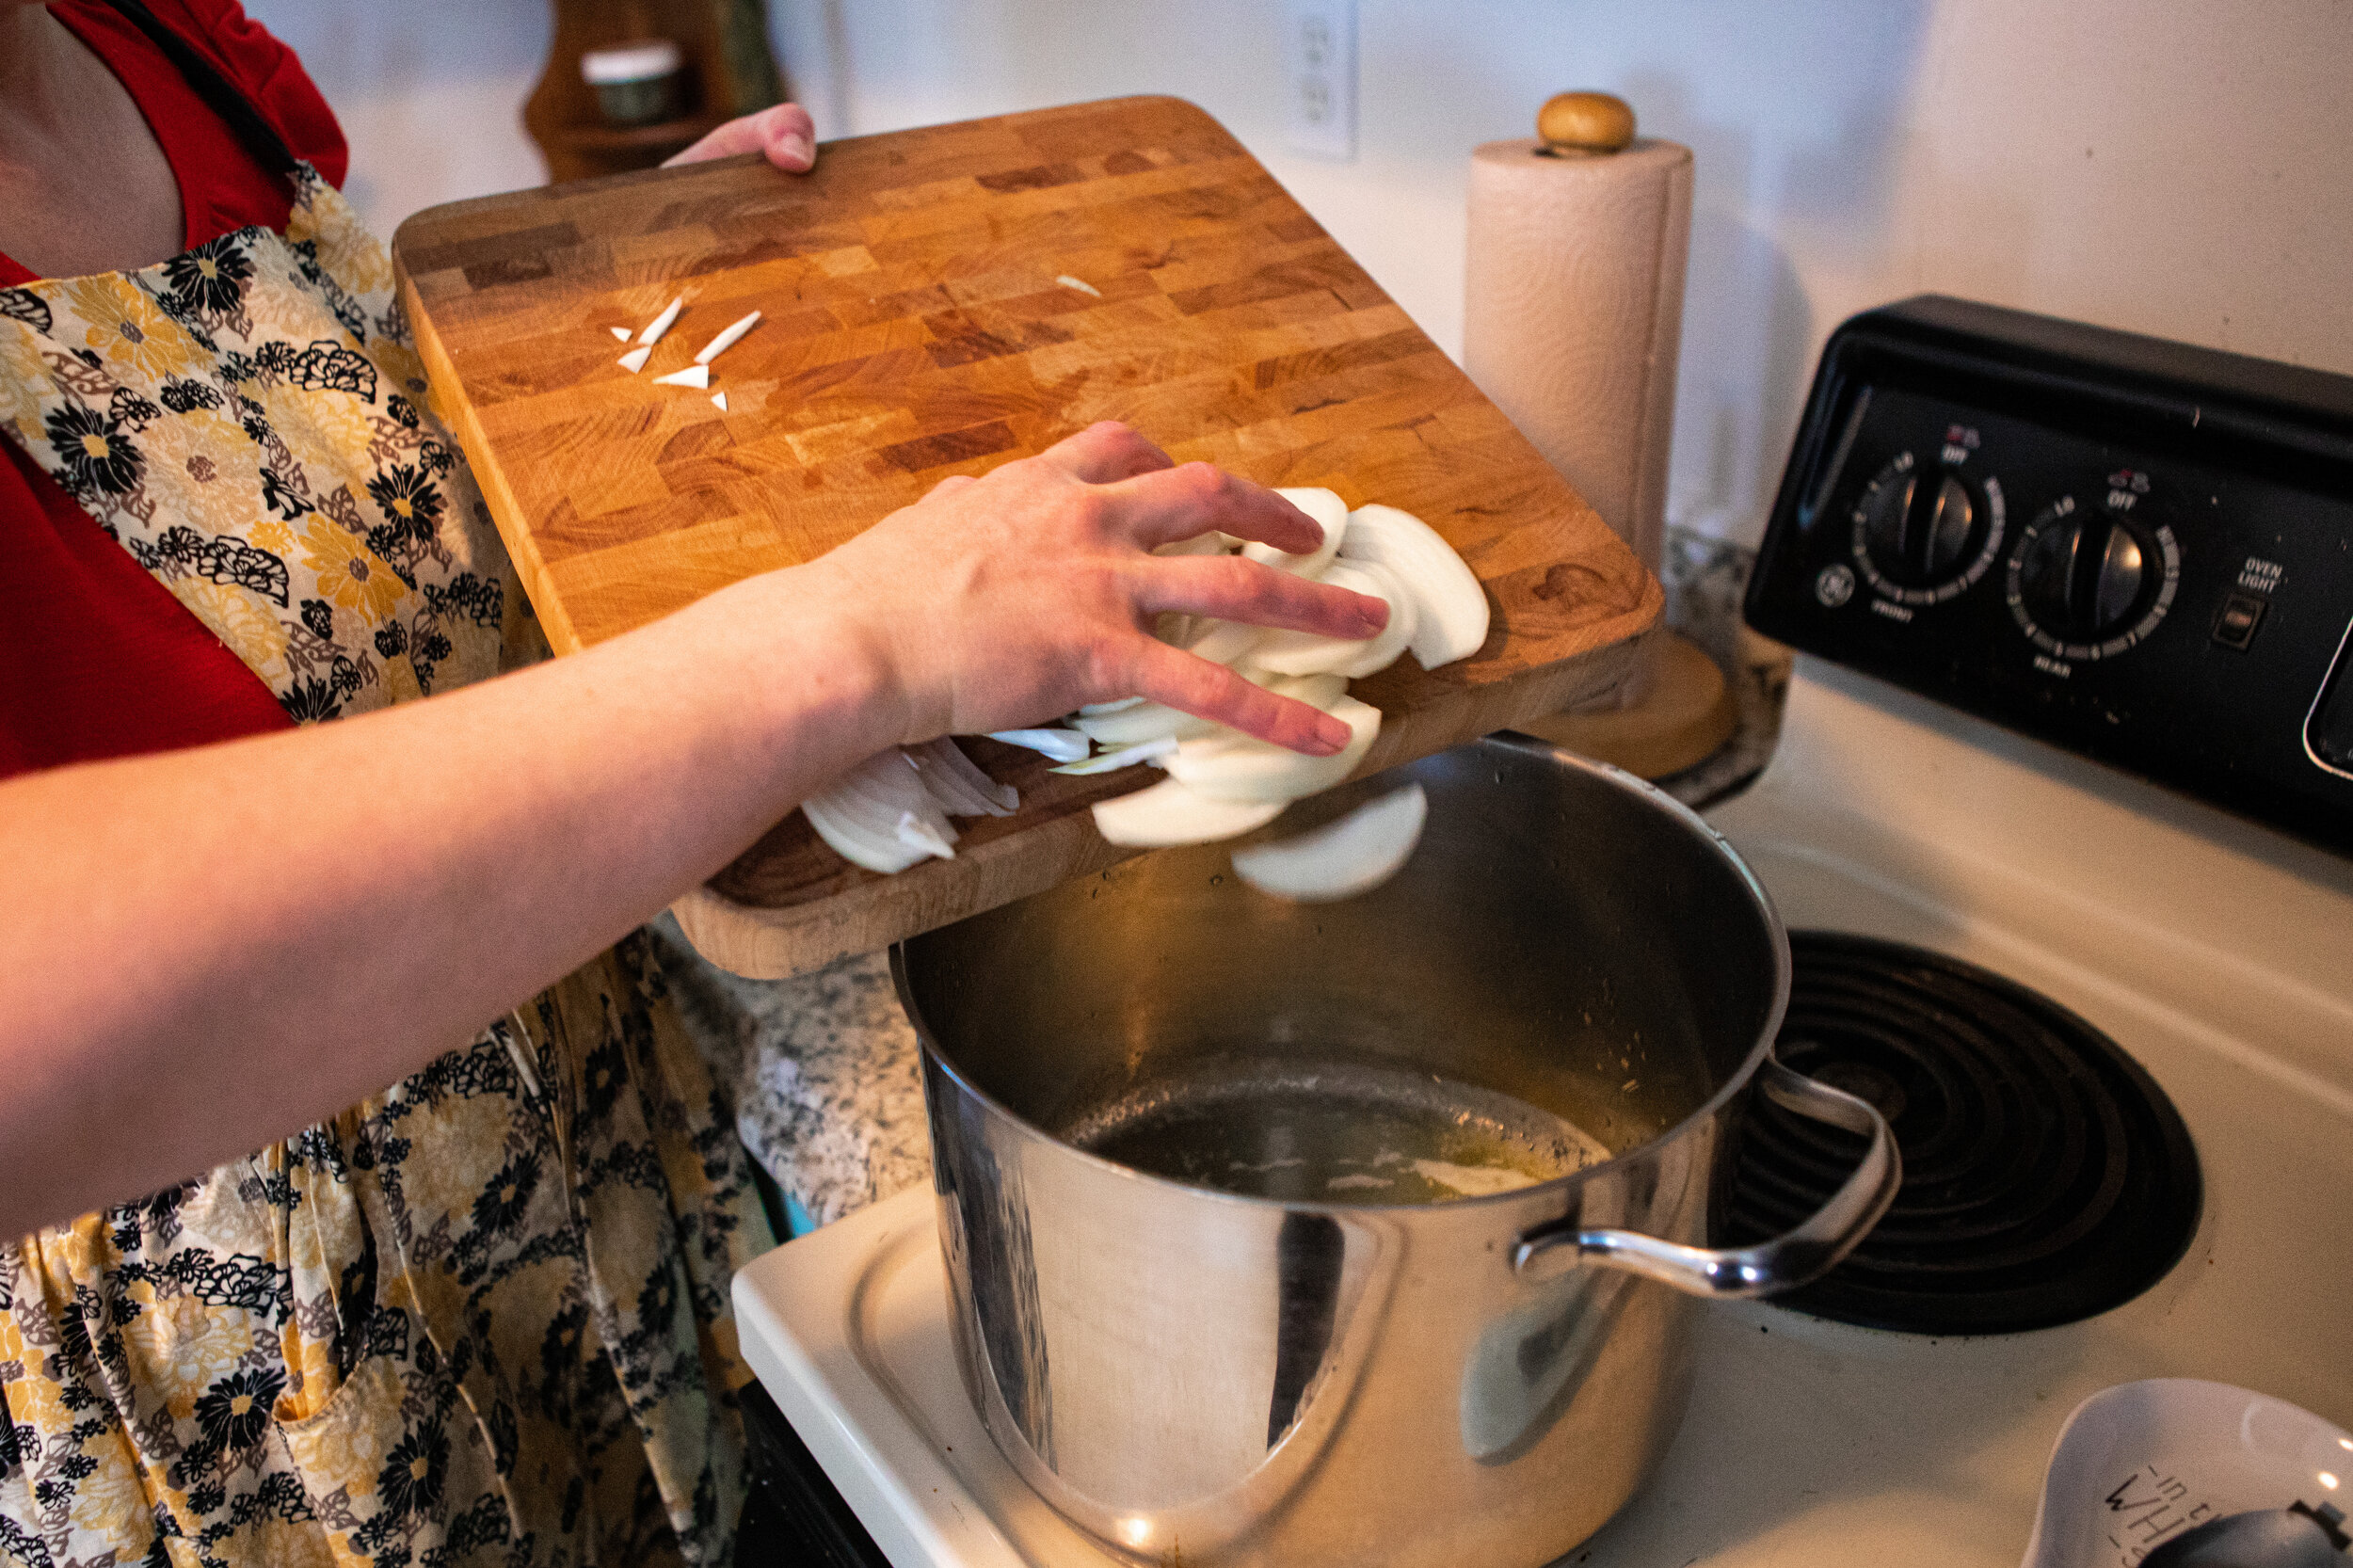
Melt ½ stick butter, add chopped onions, salt and cook 5-6 minutes until the onions begin to soften.

adding onions to stock pot

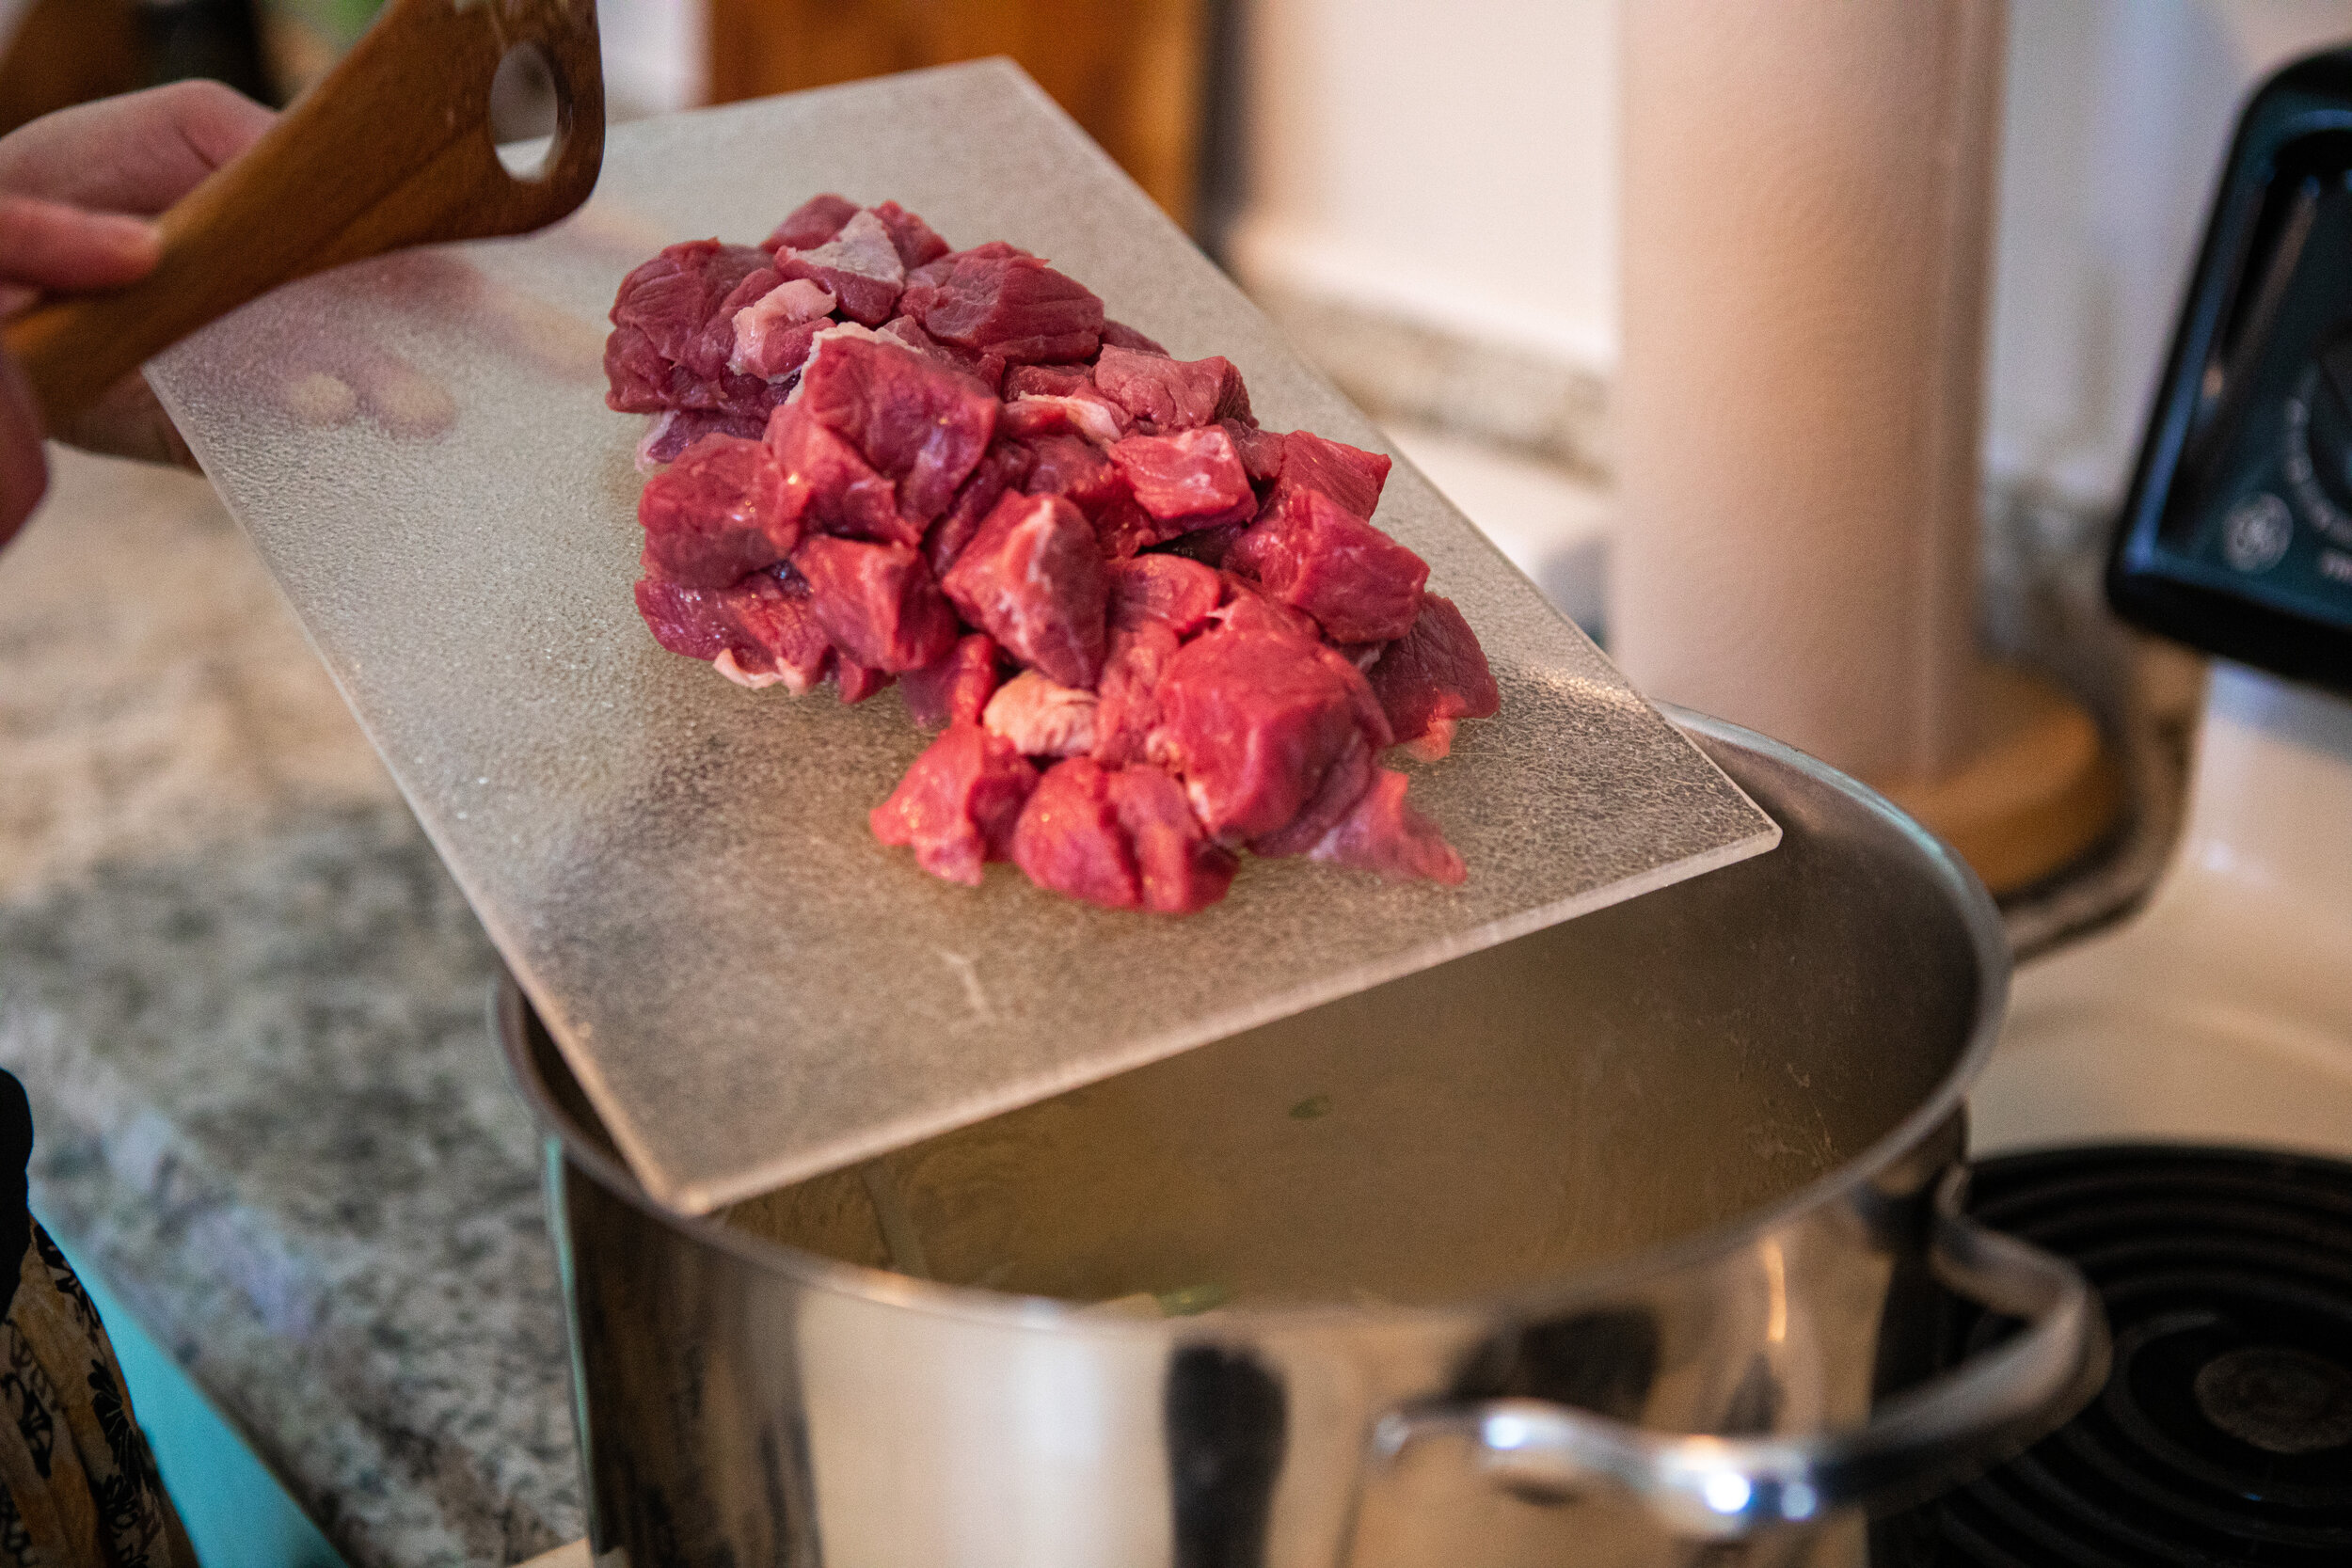
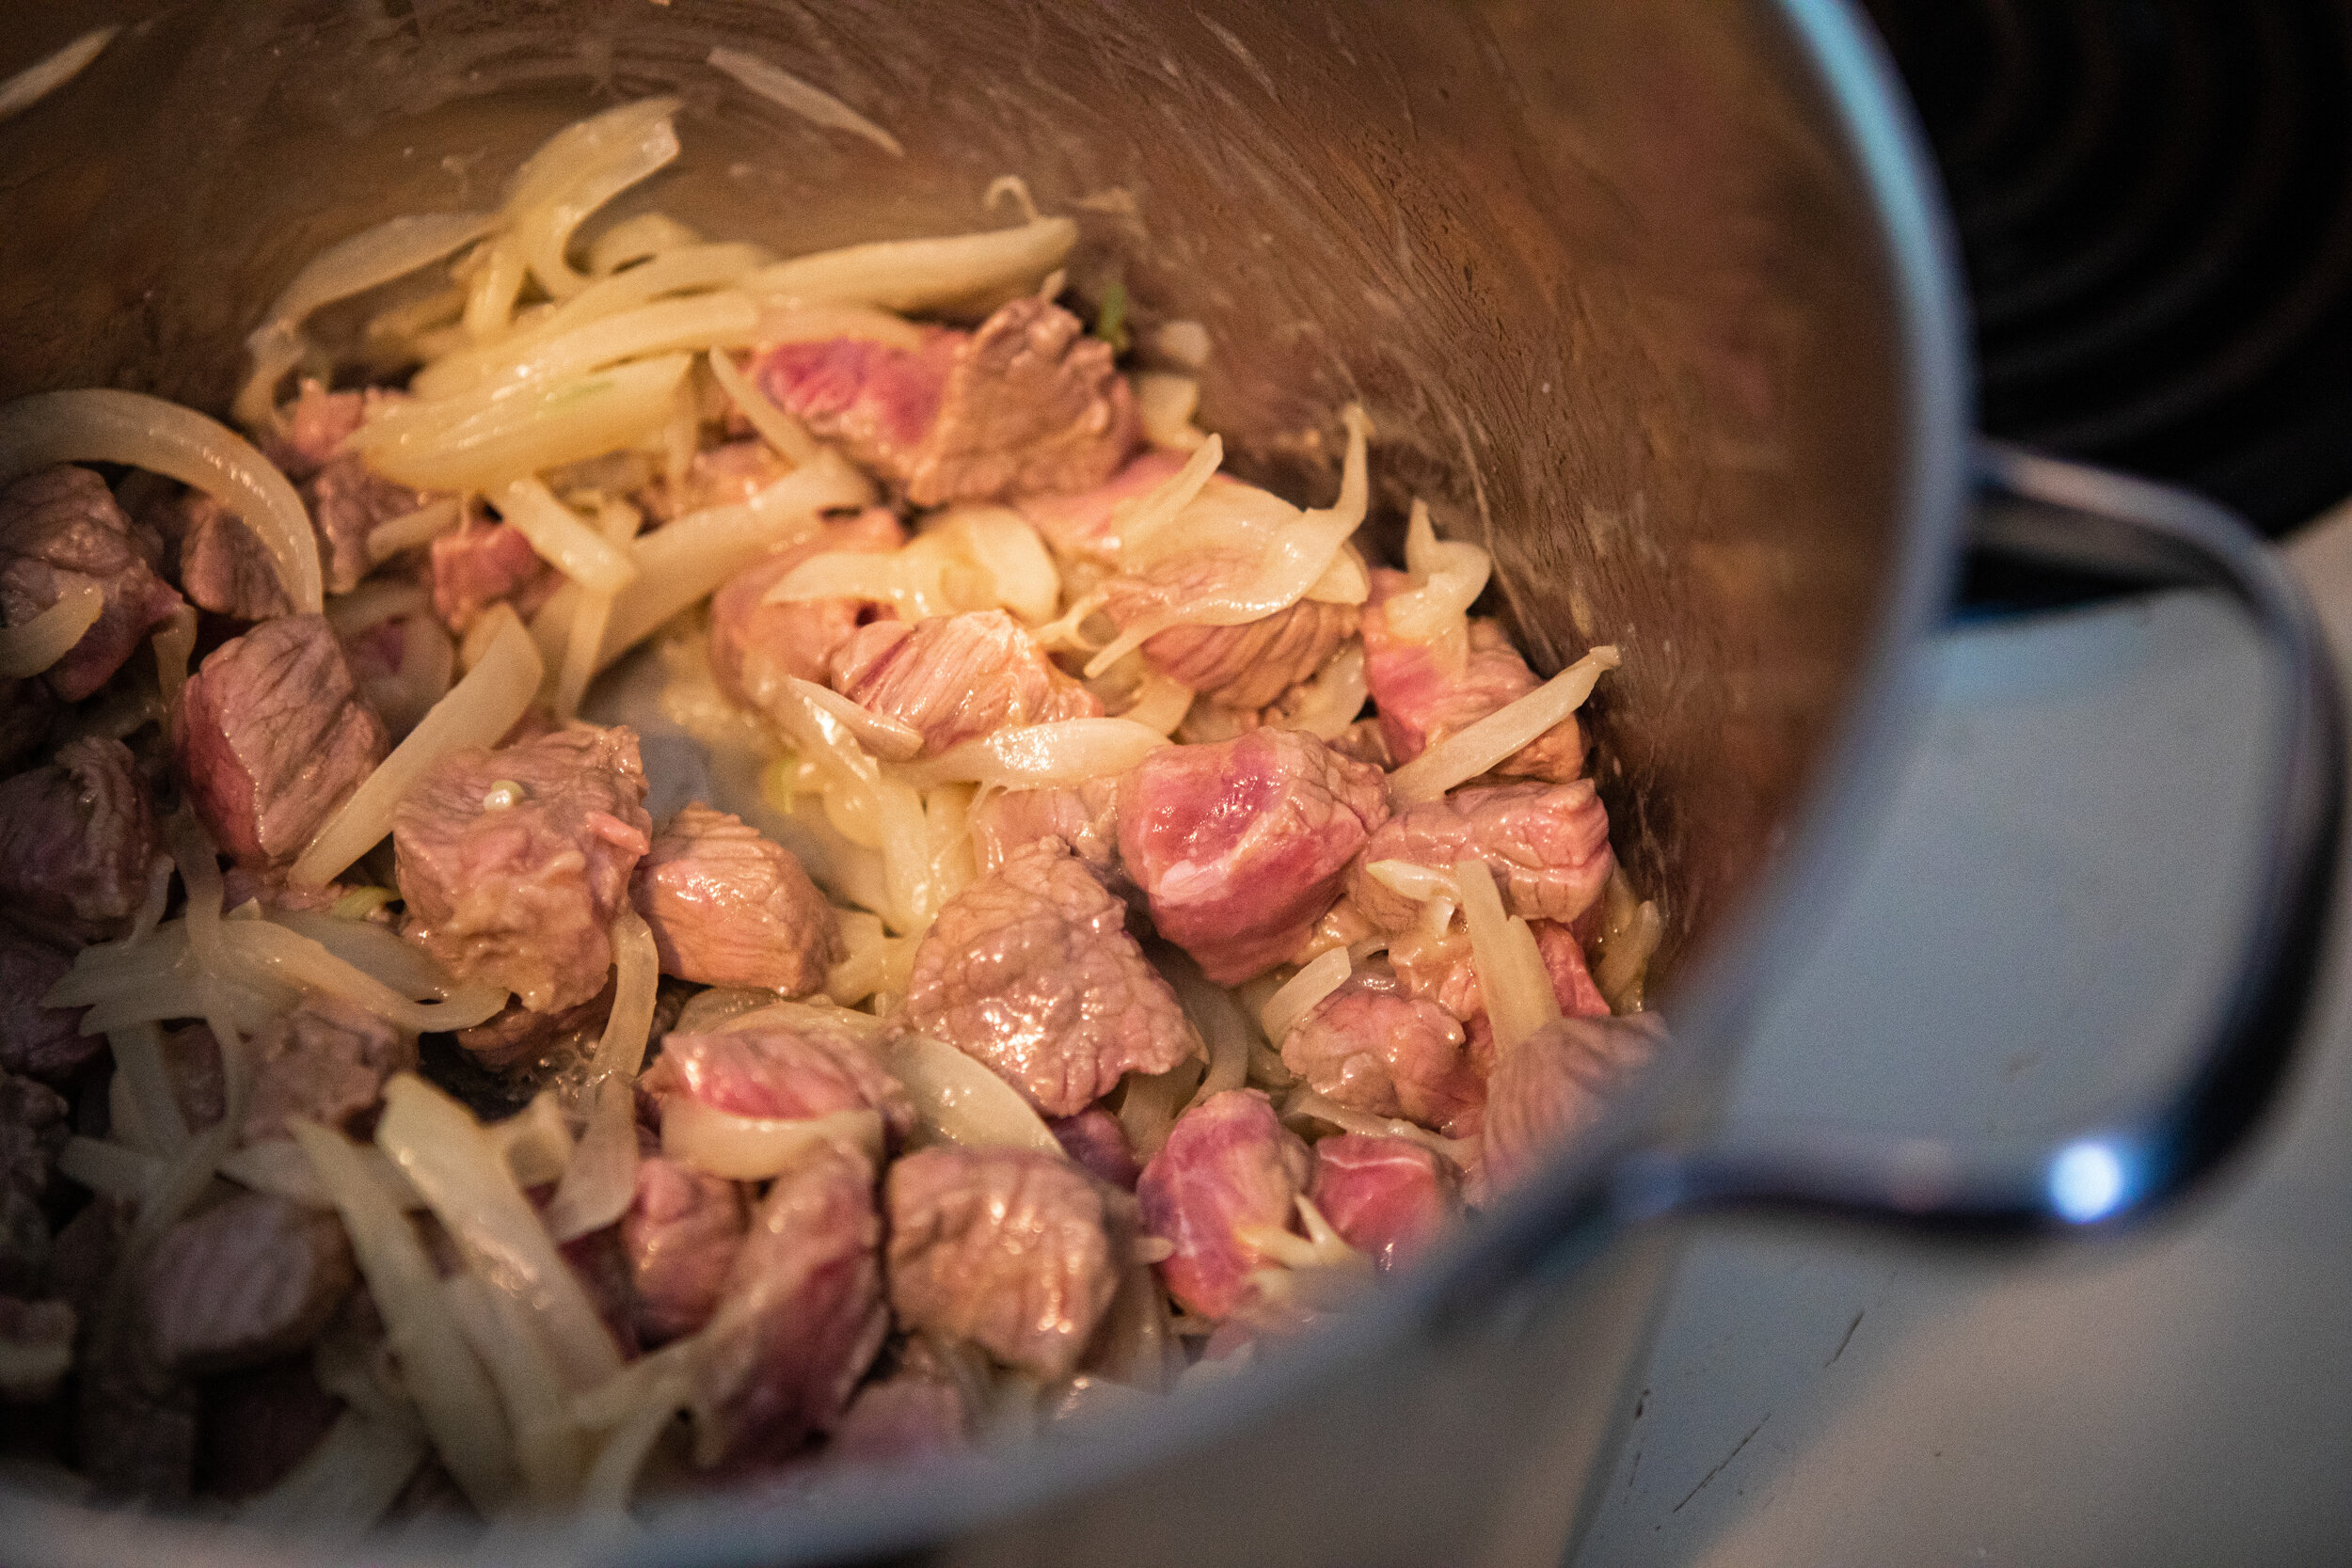
When the onions are becoming soft, add beef and brown the outside of the meat cubes to trap the flavors. Sauté for 5-7 minutes to brown the outside of the cubes to trap the flavor and moisture inside. Medium High Heat.

adding beef to soup

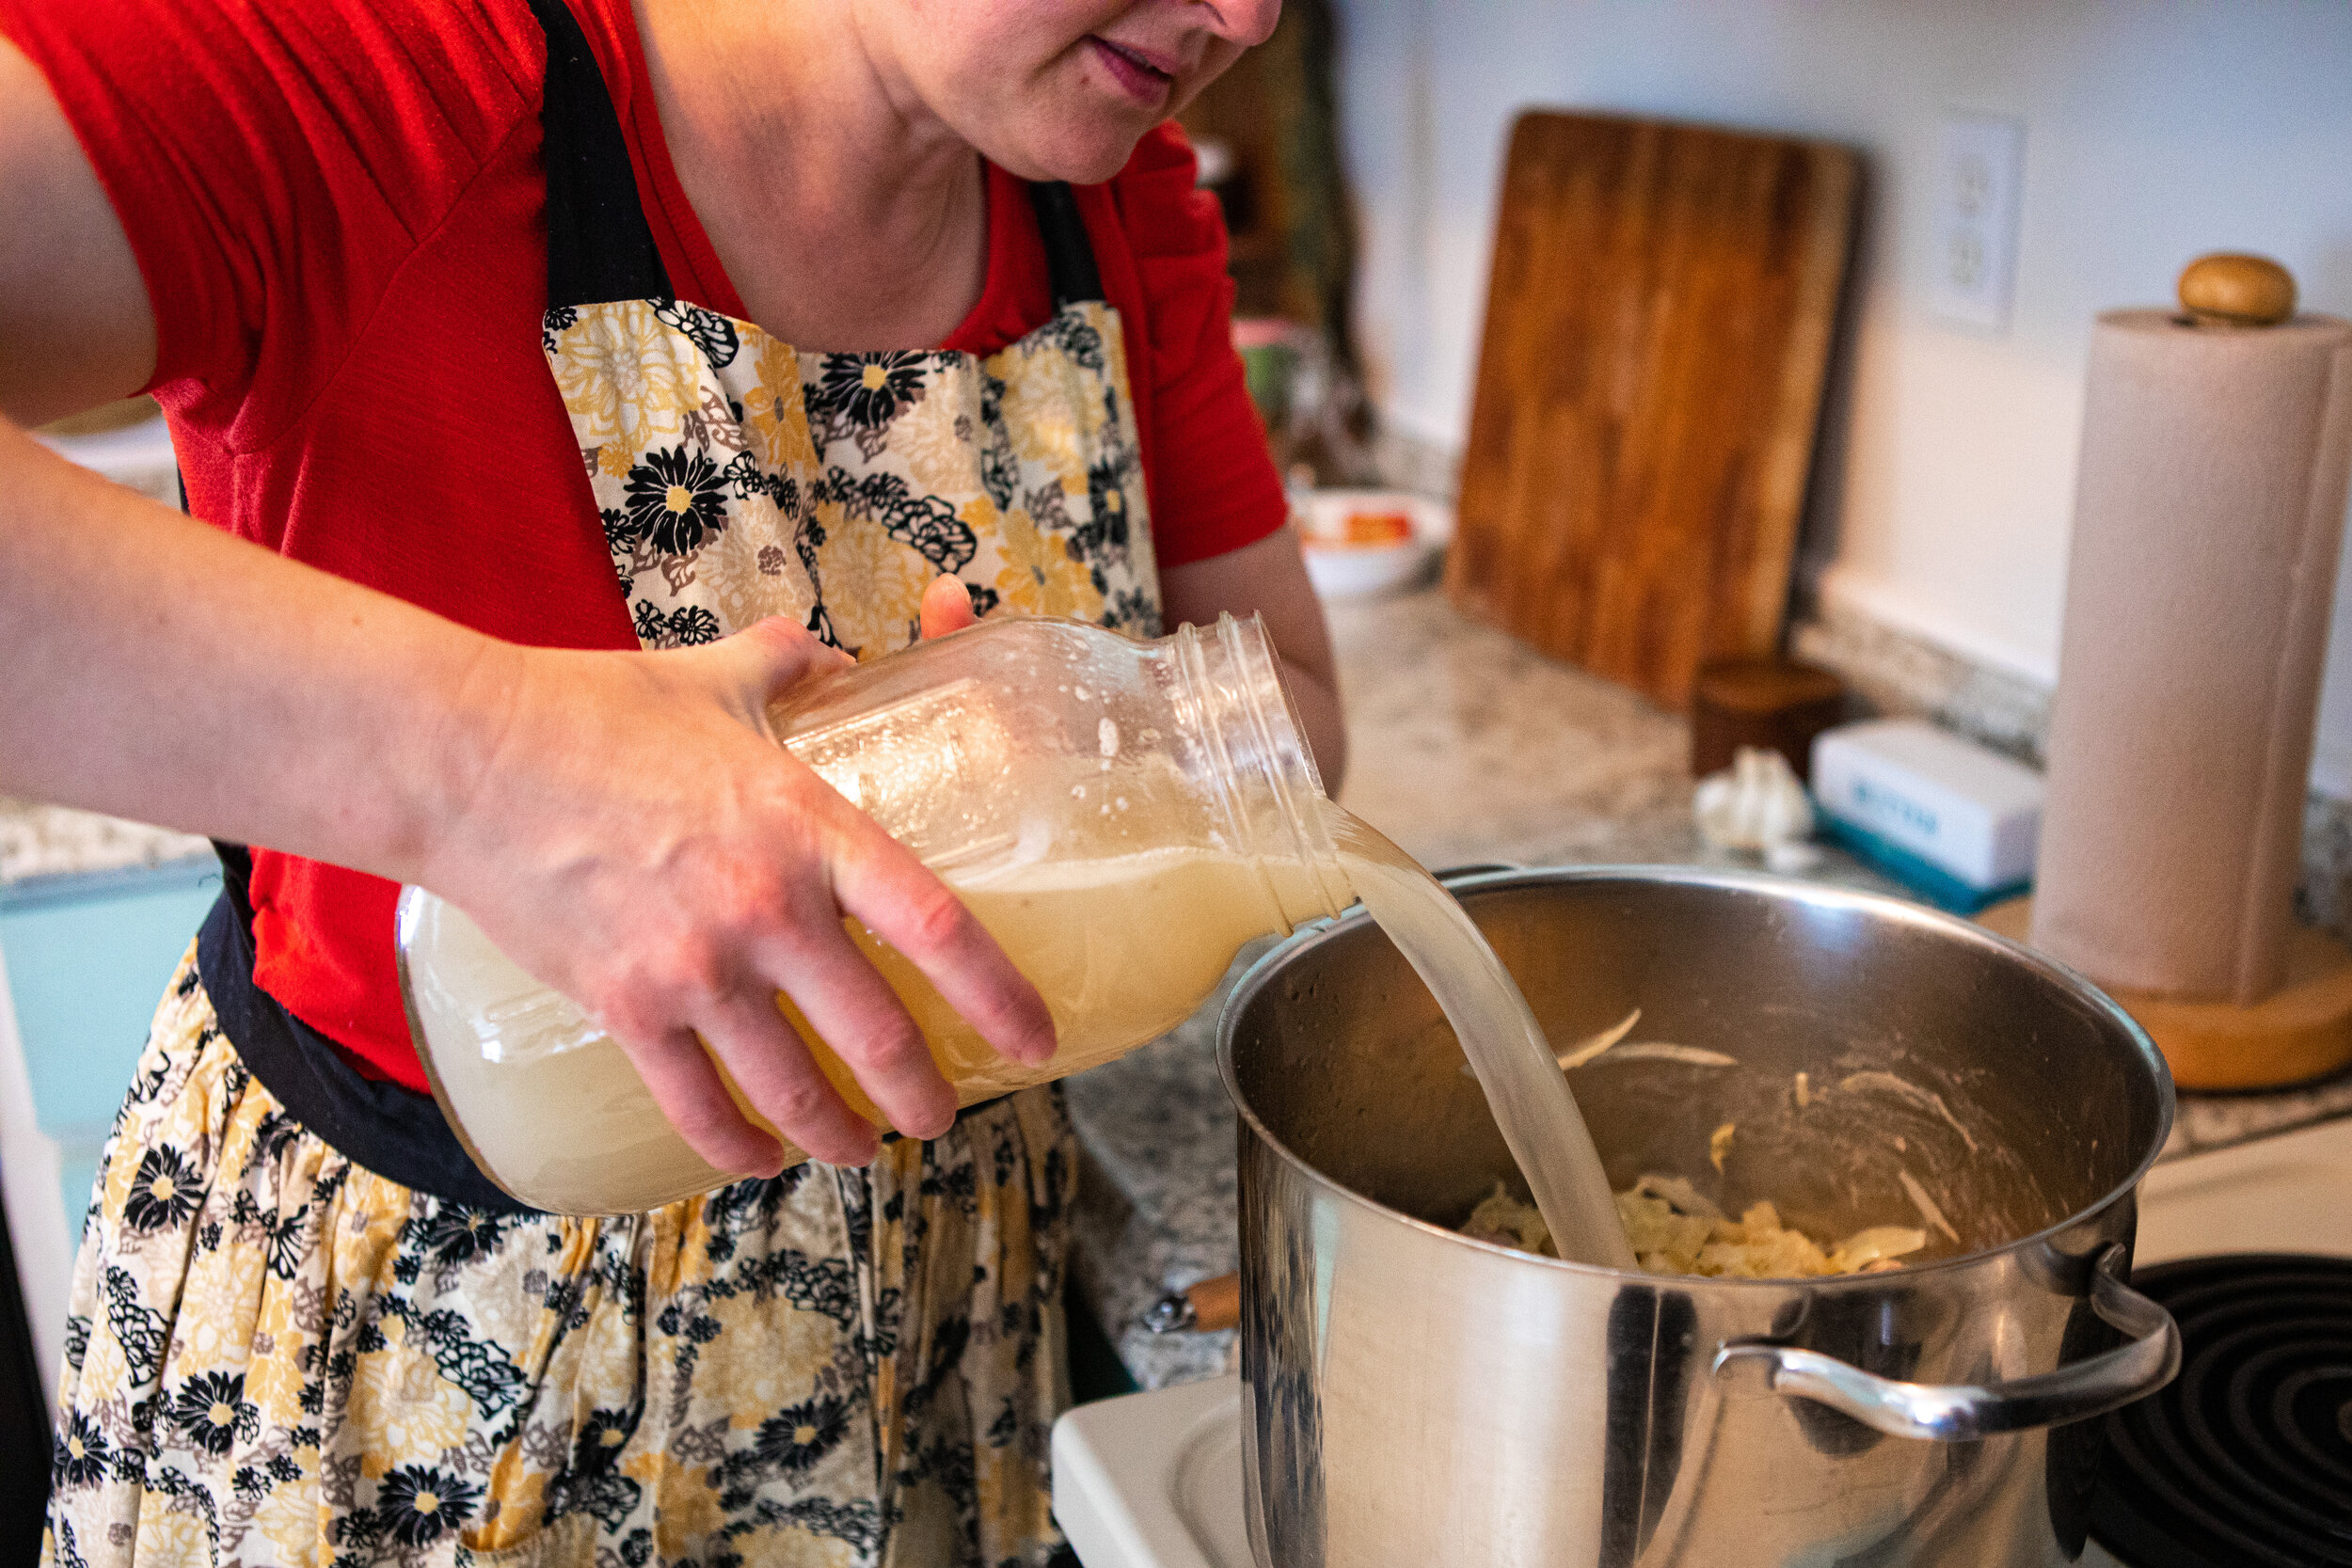
Drain the sauerkraut and set aside the juice. When most sides are brown-ish, add drained sauerkraut and stock. Turn down heat, cover and simmer for 30 minutes, salt to taste.

This recipe is not as boring as it looks, it is actually complex and rich. Feel free to add more sauerkraut and enjoy!!


Copy of Be Well Clinic Pinterest Blog Graphics - 4 (2).png

Beef and Sauerkraut Soup

Yield: 2-4
Author: Amy Mihaly, Be Well Clinic

Ingredients

  • Chuck Roast
  • ½ Stick Butter
  • Chopped Onions
  • Salt
  • 6 Cups Meat Stock (beef or lamb)
  • Sauerkraut

Instructions

  1. Cube by slicing perpendicular to the grain into half inch slices, then cubing from there. In this recipe I use a chuck roast, but any cut of meat would be fine. You could also start with stew meat, but be sure to cube it down to bite-sized pieces. Stew meat is often very expensive cuts of meat that did not end up in a pretty cut, so I recommend purchasing and using stew meat to get quality, affordable meat. I often purchase stew meat to get tender cuts at affordable prices.
  2. Melt ½ stick butter, add chopped onions, salt and cook 5-6 minutes until the onions begin to soften. 
  3. When the onions are becoming soft, add beef and brown the outside of the meat cubes to trap the flavors. Sauté for 5-7 minutes on medium high heat to brown the outside of the cubes and trap the flavor and moisture inside.
  4. Drain the sauerkraut and set aside the juice. When most sides are brown-ish, add drained sauerkraut and stock. Turn down heat, cover and simmer for 30 minutes, salt to taste.
  5. Add the sauerkraut juice and enjoy!!
Created using The Recipes Generator

Liver and Onions

Liver and onions are what most people think of when they think about eating liver. It seems that for decades this was the most popular modality of eating liver. Probably because it could be cooked up and served as a meal in contrast to things like liver pate which is a side to another main course.

If you are an older adult, liver and onions may be why you think you dislike liver. If that’s the case, we encourage you to try again. There is a good chance that the person cooking this dish overcooked the liver.

Liver and onions is traditionally made with cow’s liver. If you choose to use cow’s liver I recommend reading our blog on read our blog on “calming the flavor of beef liver”, before cooking, you do not necessarily need to use this preparation for more mild tasting livers such as chicken, and domesticated fowl.

Ingredients for Liver and Onions

  • 2/3 Lbs Liver

  • 1 Yellow Onion

  • Butter

  • Salt

Directions for Liver and Onions

Cut the liver into slices, making sure to cut off any membrane pieces that are some people's major objection to eating liver.

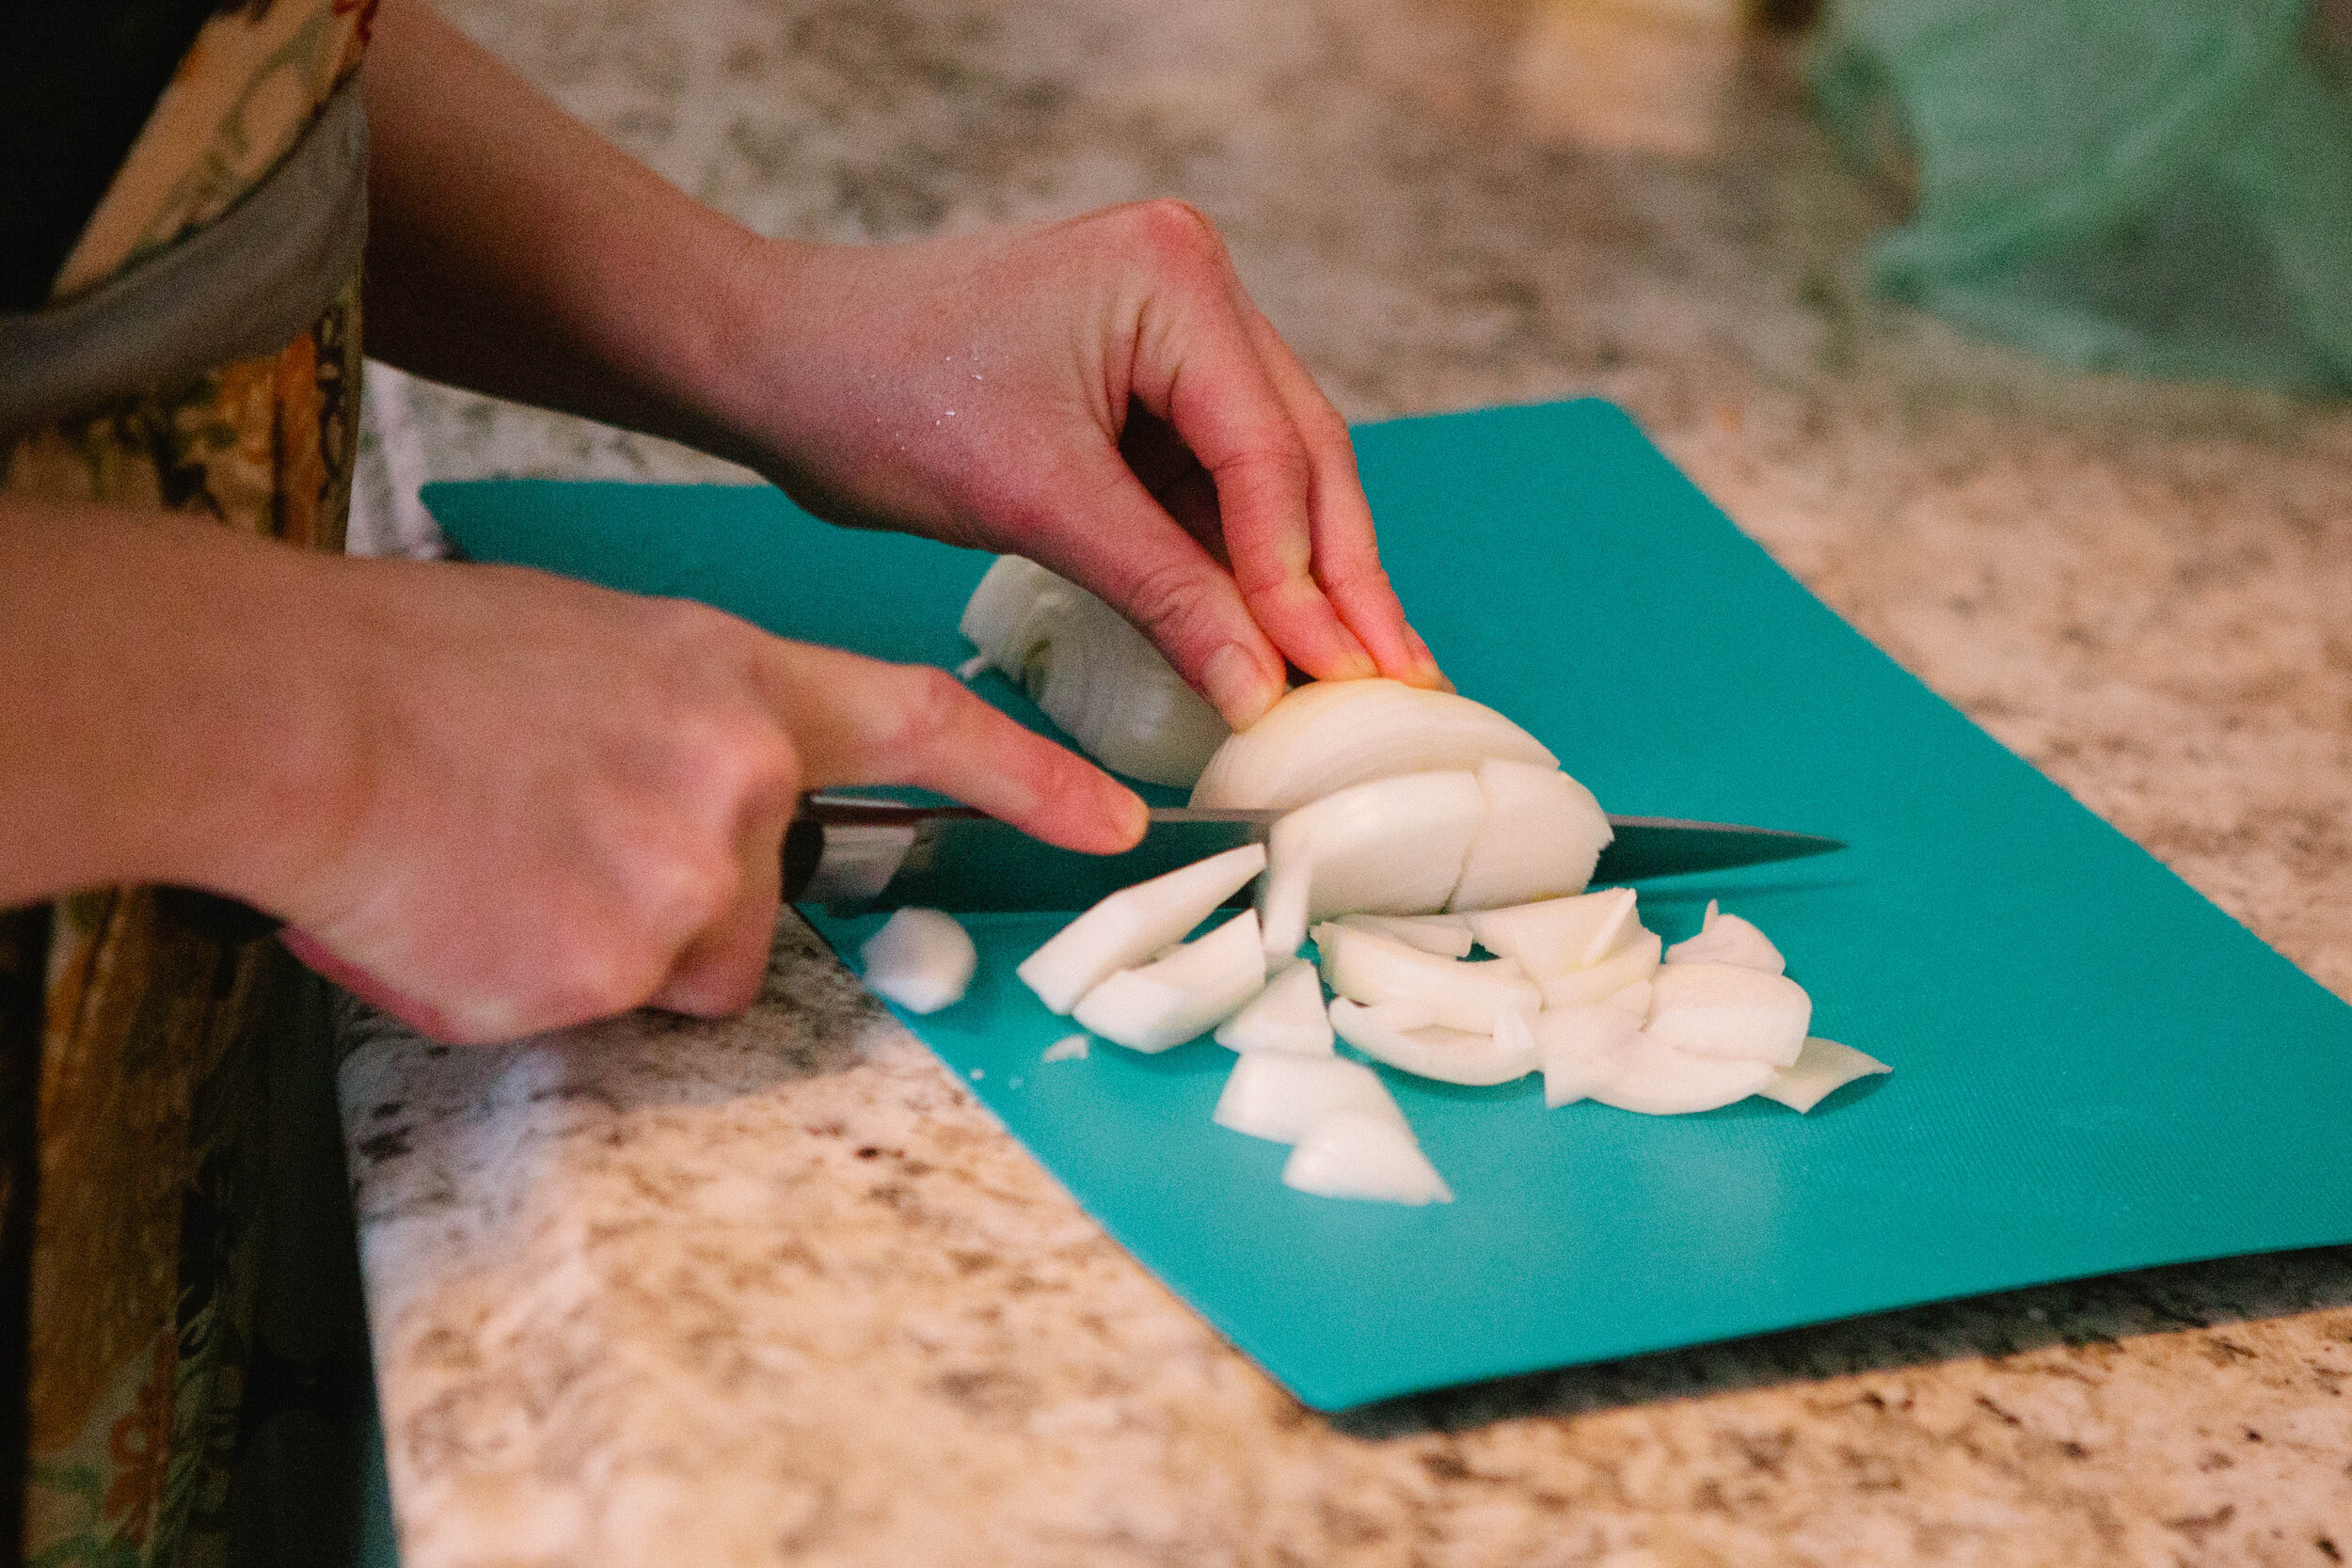
Add butter to your cast iron pan and turn the heat on low to melt the butter. While the butter is melting, slice onions and add the onions to the pan. Cook over low until your onions start to soften. The key to liver and onions is the timing. You want to add the liver when the onions only need to cook for 2-3 minutes.

Onions.jpg

Once the onions are softish, add salt to the onions. Add sliced liver to the pan and add salt to the liver as well. Turn your heat to medium-high just before adding the livers, and sauté until you have reached the desired doneness. A liver is cooked perfectly when it is still pink in the middle but not bloody.
To cover the liver flavor, you could also experiment with spices. Try adding your favorite spice and see what you think.

7L9A2806.jpg

Liver is important for us to be eating everyday, but it can be difficult to prepare daily. Is this is the way you like liver, consider making a large batch and freezing so you can defrost and enjoy some everyday.

Do you actually love liver and onions? If so, tell us your tips and tricks!!


Liver and Onions

Author: Amy Mihaly, Be Well Clinic
Liver and onions are what most people think of when they think about eating liver. It seems that for decades this was the most popular modality of eating liver. Probably because it could be cooked up and served as a meal in contrast to things like liver pate which is a side to another main course.

Ingredients

  • 2/3 Lbs Liver
  • 1 Yellow Onion
  • Butter
  • Salt

Instructions

  1. Cut the liver into slices, making sure to cut off any membrane pieces.
  2. Add butter to your cast iron pan and turn the heat on low to melt the butter.
  3. Cut the onion into slices, and add the onions to the pan with melted butter.
  4. Cook over low until your onions start to soften.
  5. Once the onions are softish, add salt to the onions.
  6. Add sliced liver to the pan and add salt to the liver as well.
  7. Turn your heat to medium-high just before adding the livers, and sauté until you have reached the desired doneness.
  8. A liver is cooked perfectly when it is still pink in the middle but not bloody.
  9. To cover the liver flavor, you could also experiment with spices. Try adding your favorite spice and see what you think.
Created using The Recipes Generator

Game Meat Stuffed Bell Peppers

This recipe falls into that category of simple but rich in flavor and possibilities. It’s really up to you to make this dish something that you and your family will enjoy! My favorite part of these growing up was the minced peppers inside the peppers so don’t skip this part!

Anytime you eat game meat, you need to pay good attention to adding extra animal fat. I ground my elk burger with lamb fat to make it pretty fatty. This is a good start but I’m also going to add lots of other fat to the vegetable mixture as I cook it.

This is a great recipe to use up vegetables that are in your fridge. Some good staples are onion, garlic, celery, carrots, zucchini, etc. If you do zucchini, cauliflower, or eggplant, remember they are very moist vegetables and you should drain those vegetables after frying to help mitigate the moisture level.

It’s also a great recipe to get organ meats into your diet. I added liver to this one but you can add others if you’d like. I used beef liver because I like saving my chicken livers for recipes that need more mild flavors.

Ingredients for Game Meat Stuffed Bell Peppers

  • 2 lbs Ground Elk Burger

  • 7 -9 Red, Yellow, or Orange Peppers

  • 4 tbsp butter

  • 1 Whole Onion

  • 2 Carrots

  • 6-8 Cloves Garlic

  • 3-4 Sprigs of Thyme

  • 2 Sprigs Oregano

  • 1 sprig Rosemary

  • 2+ tsp Salt

  • Freshly Ground Pepper

  • 1/2 lb Beef Liver

Directions for Game Meat Stuffed Bell Peppers

Finely mince your vegetables that are not peppers. Feel free to use your food processor if you want to, particularly if you have children that can spot vegetables they are under the illusion of not liking! You want approximately a 1:1 ratio of carrots to onions. 

Preheat oven to 350.

Add butter to a cast iron pan and turn to medium heat. Add carrots and onions (or other hard vegetables) to the pan.

IMG_1020.jpg

Cut the tops off your peppers, leaving a nice boat to be later filled by your meat and vegetables, and then finely mince the tops. Stand the peppers upright in a glass baking dish.

IMG_1078.jpg

Let vegetables cook, adding additional vegetables based on how long they will take to cook. Add salt when you add each vegetable and add additional butter if your vegetables soak it in. After about 10 minutes, add in the minced peppers.

After an additional 5 minutes, add in minced garlic, and stir to cook.

When vegetables are soft, remove from heat.

IMG_1085.jpg

Finely chop or blend liver. The finer you chop it the less likely it will be noticed.

Add the liver to the ground meat and mix with your hands.

Add in the slightly cooled but still warm cooked vegetables. Mix the meat and vegetables well.

IMG_1113.jpg

Using a spoon or your hands, pack the meat and vegetable mixture tightly into the peppers. You can pack them pretty tight and full because the mixture will shrink as they cook.

Add the peppers to the oven. Bake for 45 minutes until meat is the correct temperature.


GameMeatStuffedBellPeppers.png

Game Meat Stuffed Bell Peppers

Author: Amy Mihaly, Be Well Clinic

Ingredients

  • 2 lbs Ground Elk Burger
  • 9 Red, Yellow, or Orange Peppers
  • 4 tbsp butter
  • 1 Whole Onion
  • 2 Carrots
  • 8 Cloves Garlic
  • 4 Sprigs of Thyme
  • 2 Sprigs Oregano
  • 1 sprig Rosemary
  • 2+ tsp Salt
  • Freshly Ground Pepper
  • 1/2 lb Beef Liver

Instructions

  1. Finely mince your vegetables that are not peppers. Feel free to use your food processor if you want to, particularly if you have children that can spot vegetables they are under the illusion of not liking! You want approximately a 1:1 ratio of carrots to onions.
  2. Preheat oven to 350.
  3. Add butter to a cast iron pan and turn to medium heat. Add carrots and onions (or other hard vegetables) to the pan.
  4. Cut the tops off your peppers, leaving a nice boat to be later filled by your meat and vegetables, and then finely mince the tops. Stand the peppers upright in a glass baking dish.
  5. Let vegetables cook, adding additional vegetables based on how long they will take to cook. Add salt when you add each vegetable and add additional butter if your vegetables soak it in. After about 10 minutes, add in the minced peppers.
  6. After an additional 5 minutes, add in minced garlic, and stir to cook.
  7. When vegetables are soft, remove from heat.
  8. Finely chop or blend liver. The finer you chop it the less likely it will be noticed.
  9. Add the liver to the ground meat and mix with your hands.
  10. Add in the slightly cooled but still warm cooked vegetables. Mix the meat and vegetables well.
  11. Using a spoon or your hands, pack the meat and vegetable mixture tightly into the peppers. You can pack them pretty tight and full because the mixture will shrink as they cook.
  12. Add the peppers to the oven. Bake for 45 minutes until meat is the correct temperature.
Created using The Recipes Generator

15 Minute Beef and Broccoli Stir Fry

This was a recipe my mom made a lot and I love the combination of beef and broccoli together. 

IMG_8620.jpg

Soy sauce is often added to beef and broccoli because it’s an asian dish. Soy is not the superfood it’s touted to be! When long fermented, soy adds a great flavor to your food. BUT if it is not properly prepared, it can have significant detrimental effects to your health, mostly related to estrogen dominance symptoms in both men and women. These symptoms include things like moodiness, weight gain, breast development in men, heavy periods in women, and water retention.  Luckily, commercially available long fermented soy sauce is now available at many grocery stores! Be sure the soy sauce you buy is long fermented.

You can serve this on it’s own or add on top of properly prepared wild rice.

Serves 3-4

Ingredients for Beef and Broccoli Stir Fry

  • 3-4 stalks of Broccoli (approximately 3-4 cups of cut broccoli)

  • 1 lb Beef: Any cut will work, you want a cut that’s more tender. Loin roast cut was what I had on hand.

  • 3 tbsp Tallow or Lard

  • 1 tbsp Soy Sauce

  • Salt

Directions for Beef and Broccoli Stir Fry

IMG_8514.jpg

Rinse broccoli. Trim off the stalks and any fibrous pieces, since these will not cook completely in 15 minutes. Cut broccoli into similarly sized pieces for even cooking.

IMG_8643.jpg

Slice beef against the grain into long pieces. Don’t skimp on the cut! A tough cut of beef will make this a less enjoyable dish.

Melt tallow or lard in a pan. Heat to high and add broccoli pieces quickly.

Reduce heat to medium and stir broccoli. Cover with a lid for additional steaming. Allow broccoli to cook for about 8 minutes until soft.

IMG_8653.jpg

Add sliced beef to the pan. Sprinkle additional soy sauce over the beef. Cover again.

Stir every 2 minutes to ensure even cooking.

When beef is just cooked, remove from heat and allow to rest slightly. Salt to taste so you don’t add too much soy sauce. I added about six shakes of salt to the entire dish.

Serve on it’s own, or on top of properly prepared wild rice. Serve alongside soy sauce on the table.

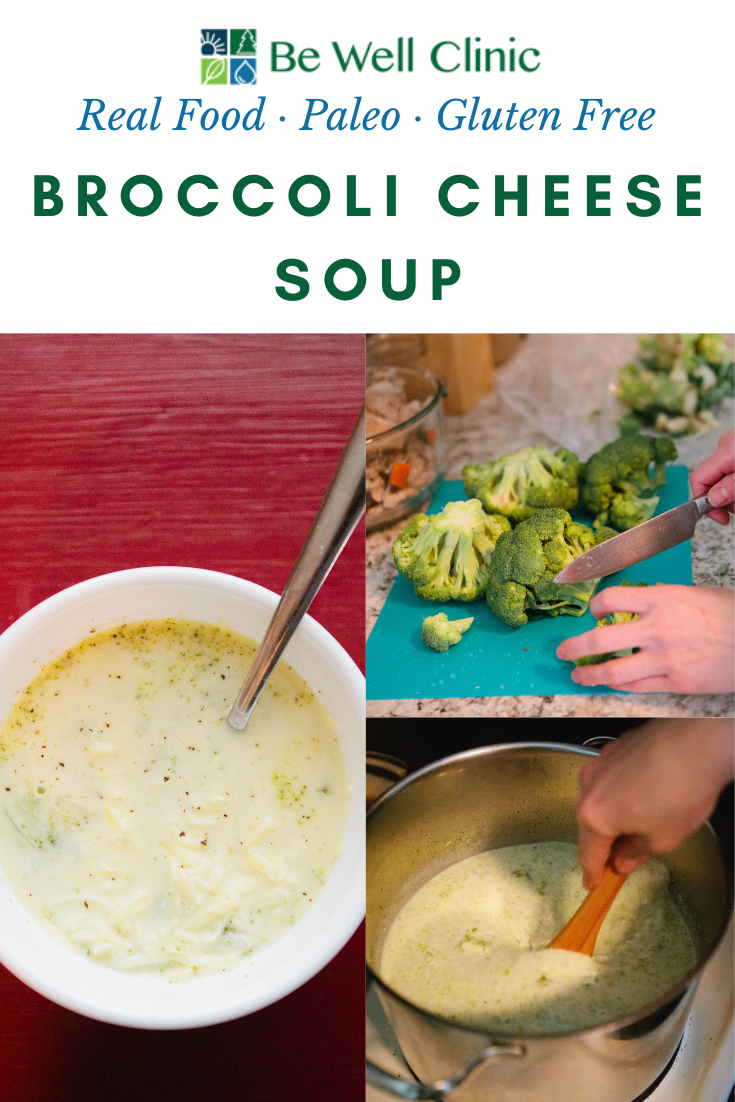
Broccoli Cheese Soup

My mom used to make a version of broccoli cheese soup which I enjoyed until I started reacting to dairy. This recipe is definitely not something that can be made dairy free. If you are able to enjoy dairy, I recommend it. It’s made from nutrient dense foods, primarily butter, cheese, broccoli and stock, which will result in a filling nutrient dense soup perfect for cold winter months! If you cannot yet enjoy dairy, I highly recommend following the GAPS Diet so you can eat this soup. 

Ingredients:

  • 7 cups Chicken Stock

  • ½ Stick/ 4 tbsp Butter

  • 1 Medium Onion

  • 6 Cloves of Garlic

  • 1 - 2 tsp of Salt, to taste

  • 6 cups of Broccoli Florets, about 3 heads

  • 4 oz White Cheddar Cheese, Freshly Grated

  • 1 1/2 cups (12 oz) Cream

Directions:

IMG_7459.jpg

Add the butter to a large pot.  Turn the heat to medium / medium low. Allow the butter to melt. Roughly chop the onion and add to the pot.

Stir the onion to coat thoroughly with butter. Allow the onion to cook for about five minutes, turning down if the heat is too much. Do not allow the onions to caramelize. 

Add the garlic to the pot when the onions are soft. After a few minutes, add in the stock. Stir in the salt, to taste.

IMG_7732.jpg

Roughly chop the broccoli. If you do not plan to blend your soup, chop it into small pieces.

Add the broccoli to the pot and stir. Turn up the heat to medium high. When the mixture reaches a boil, adjust heat to keep the mixture at a rolling simmer.

IMG_7760.jpg

When broccoli is soft, add mixture to a blender or immersion blend it and remove it from the heat.

IMG_7786.jpg

Grate the cheese. Add in the cream and cheese to the broccoli mixture and stir until combined and cheese is melted.

Serve with more fresh grated cheese on top. Salt to taste - if you made stock without salt, you will likely need lots of salt!

Enjoy!


BroccoliCheeseSoupRealFoodRecipe.png

Broccoli Cheese Soup

Author: Amy Mihaly, Be Well Clinic

Ingredients

  • 7 cups Chicken Stock
  • ½ Stick/ 4 tbsp Butter
  • 1 Medium Onion
  • 6 Cloves of Garlic
  • 2 tsp of Salt, to taste
  • 6 cups of Broccoli Florets, about 3 heads
  • 4 oz White Cheddar Cheese, Freshly Grated
  • 1 1/2 cups (12 oz) Cream

Instructions

  1. Add the butter to a large pot. Turn the heat to medium / medium low. Allow the butter to melt. Roughly chop the onion and add to the pot.
  2. Stir the onion to coat thoroughly with butter. Allow the onion to cook for about five minutes, turning down if the heat is too much. Do not allow the onions to caramelize.
  3. Add the garlic to the pot when the onions are soft. After a few minutes, add in the stock. Stir in the salt, to taste.
  4. Roughly chop the broccoli. If you do not plan to blend your soup, chop it into small pieces.
  5. Add the broccoli to the pot and stir. Turn up the heat to medium high. When the mixture reaches a boil, adjust heat to keep the mixture at a rolling simmer.
  6. When broccoli is soft, add mixture to a blender or immersion blend it and remove it from the heat.
  7. Grate the cheese. Add in the cream and cheese to the broccoli mixture and stir until combined and cheese is melted.
  8. Serve with more fresh grated cheese on top. Salt to taste - if you made stock without salt, you will likely need lots of salt!
  9. Enjoy!

Beef Stroganoff

Beef Stroganoff is one of my mom’s favorite go-to meals.  The creamy richness is so filling and comforting, especially on a cold night. It was one of my favorite dinners! It was quite sad during the period of time when I was reacting to dairy and could not eat it. Now that I’ve healed by doing the GAPS Protocol, I love this delicious meal made with real ingredients!

If you don’t have beef, you can substitute any red meat in this dish. In fact, the strong flavor of this dish will hide any potential gamey flavor from venison or elk. To make this dish even faster, you can simply cut up your meat, add 8 oz of this real food cream of mushroom soup and a cup of stock, simmer and then add more sour cream at the end for added richness. You can also add extra mushrooms and onions if you love them.

We used to eat beef stroganoff with the traditional egg noodles. I’ve found however that I very much enjoy it over properly prepared rice. You could also do it over riced cauliflower, zoodles or your favorite alternative noodle. 

This is legal on Full GAPS because of the cream. If you substitute only sour cream instead, it is legal on GAPS Stage 4. 

Ingredients for Beef Stroganoff:

  • 1 lbs Beef Rump Roast

  • 1 lb Fresh Mushrooms (4-5 cups sliced)

  • ½ onion

  • 3 cloves Garlic Cloves

  • 4 tbsp Butter 

  • 1 cup Meat Stock

  • 4 -6 Sprigs of Fresh Thyme 

  • 1 ½ tbsp Beef Gelatin Powder

  • 1 cup Cream or Milk

  • 2 tbsp Cooking Sherry

  • 1 cup Sour Cream

Directions for Beef Stroganoff:

Beef Stroganoff is an easy 15 minute GAPS friendly meal that is gluten free and thickened with gelatin. Recipe by Amy Mihaly, Be Well Clinic.

To a pot, add 4 tbsp of butter. Heat over medium heat.

Roughly chop mushrooms, onion and garlic.

Slice the meat against the grain into long, thin strips. 

Add onion to pan. Cook for several minutes on medium heat.

Beef Stroganoff is an easy 15 minute GAPS friendly meal that is gluten free and thickened with gelatin. Recipe by Amy Mihaly, Be Well Clinic.

Add mushrooms and garlic to pan and cook. Add a bit of stock to the pan to keep things from burning, approximately 2 tbsp, and help soften the mushrooms. Turn the heat off and allow to sit.

Add ½ cup of stock to a small pot. Warm on the stove. When warmed to ‘blood temperature” add beef gelatin powder. You know it’s hot enough when you can stick your finger in but not leave it in. Stir constantly to activate the gelatin powder.

Add the gelatin mixture to the pot of mushrooms and onions and turn the heat back up to medium.

Beef Stroganoff is an easy 15 minute GAPS friendly meal that is gluten free and thickened with gelatin. Recipe by Amy Mihaly, Be Well Clinic.

Add cream to mixture; stir. Turn heat up to medium high. Allow mixture to reduce for ten minutes. 

Add sliced beef and sherry to mixture. Add salt and pepper. Stir to coat and cover. Let simmer for 3-4 minutes. Your goal is to have the middle of the beef still slightly pink. Check and stir.

Beef Stroganoff is an easy 15 minute GAPS friendly meal that is gluten free and thickened with gelatin. Recipe by Amy Mihaly, Be Well Clinic.

Remove from heat and add in the sour cream.

Stir until sour cream is dissolved. Enjoy!

Beef Stroganoff is an easy 15 minute GAPS friendly meal that is gluten free and thickened with gelatin. Recipe by Amy Mihaly, Be Well Clinic.

Beef Stroganoff is an easy 15 minute GAPS friendly meal that is gluten free and thickened with gelatin. Recipe by Amy Mihaly, Be Well Clinic.

Beef Stroganoff

Author: The Be Well Clinic

Ingredients

  • 1 lbs Beef Rump Roast
  • 1 lb Fresh Mushrooms (4-5 cups sliced)
  • ½ onion
  • 3 cloves Garlic Cloves
  • 4 tbsp Butter
  • 1 cup Meat Stock
  • 6 Sprigs of Fresh Thyme
  • 1 ½ tbsp Beef Gelatin Powder
  • 1 cup Cream or Milk
  • 2 tbsp Cooking Sherry
  • 1 cup Sour Cream

Instructions

  1. To a pot, add 4 tbsp of butter. Heat over medium heat.
  2. Roughly chop mushrooms, onion and garlic.
  3. Slice the meat against the grain into long, thin strips.
  4. Add onion to pan. Cook for several minutes on medium heat.
  5. Add mushrooms and garlic to pan and cook. Add a bit of stock to the pan to keep things from burning, approximately 2 tbsp, and help soften the mushrooms. Turn the heat off and allow to sit.
  6. Add ½ cup of stock to a small pot. Warm on the stove. When warmed to ‘blood temperature” add beef gelatin powder. You know it’s hot enough when you can stick your finger in but not leave it in. Stir constantly to activate the gelatin powder.
  7. Add the gelatin mixture to the pot of mushrooms and onions and turn the heat back up to medium.
  8. Add cream to mixture; stir. Turn heat up to medium high. Allow mixture to reduce for ten minutes.
  9. Add sliced beef and sherry to mixture. Add salt and pepper. Stir to coat and cover. Let simmer for 3-4 minutes. Your goal is to have the middle of the beef still slightly pink. Check and stir.
  10. Remove from heat and add in the sour cream.
  11. Stir until sour cream is dissolved. Enjoy!
Created using The Recipes Generator

The Best Roasted Wild Turkey

People either love or hate turkey. I don’t mind turkey although I definitely love recipes that make turkey more moist - and fatty!

Modern turkeys are bred for high amounts of muscle meat which is actually the least nutritious meat. In fact, eating meat too high in lean protein can lead to starvation symptoms because you need fat soluble vitamins, especially Vitamin A, to utilize proteins in your body. I’m excited to try this turkey, which is a ___ breed, because I’m hopeful it will give more proper ratios. It also likely will be needing special cooking care to keep it tender and that special care is usually adding plenty of fat.

If you need this to be dairy free, you could substitute a different fat than butter but butter just makes everything better.

IMG_2226.jpg

A note about the fat on your bird: properly fed birds (like turkey & chicken) will have yellow colored fat! 

Ingredients:

  • 1 Wild Turkey (Mine was 8 lb. 13 oz.)

  • ½ Stick of Kerrygold Butter

  • Wild Rice Stuffing

Directions:

IMG_2232.jpg

Preheat oven to 400.

Remove the giblets from your turkey & set aside.

Rinse turkey inside and out. Pat dry.

IMG_2248.jpg

Coat turkey well with butter and place in a glass baking dish, breast side down. Cover with parchment paper and foil.

Place in the oven for 45-50 minutes. 

Decrease the oven temperature to 325 and bake for 2 ½ to 3 hours.

IMG_2623.jpg

Remove the bird from the oven. Uncover and turn so the large opening of the cavity is face up. Add wild rice stuffing to the cavity of the bird.

Press the stuffing firmly into the cavity so it does not fall out. Turn the bird back over so it is again breast side down.

Cook for another 40 minutes with the cover on.  Remove the cover and cook for an additional 15 minutes to further brown the skin.

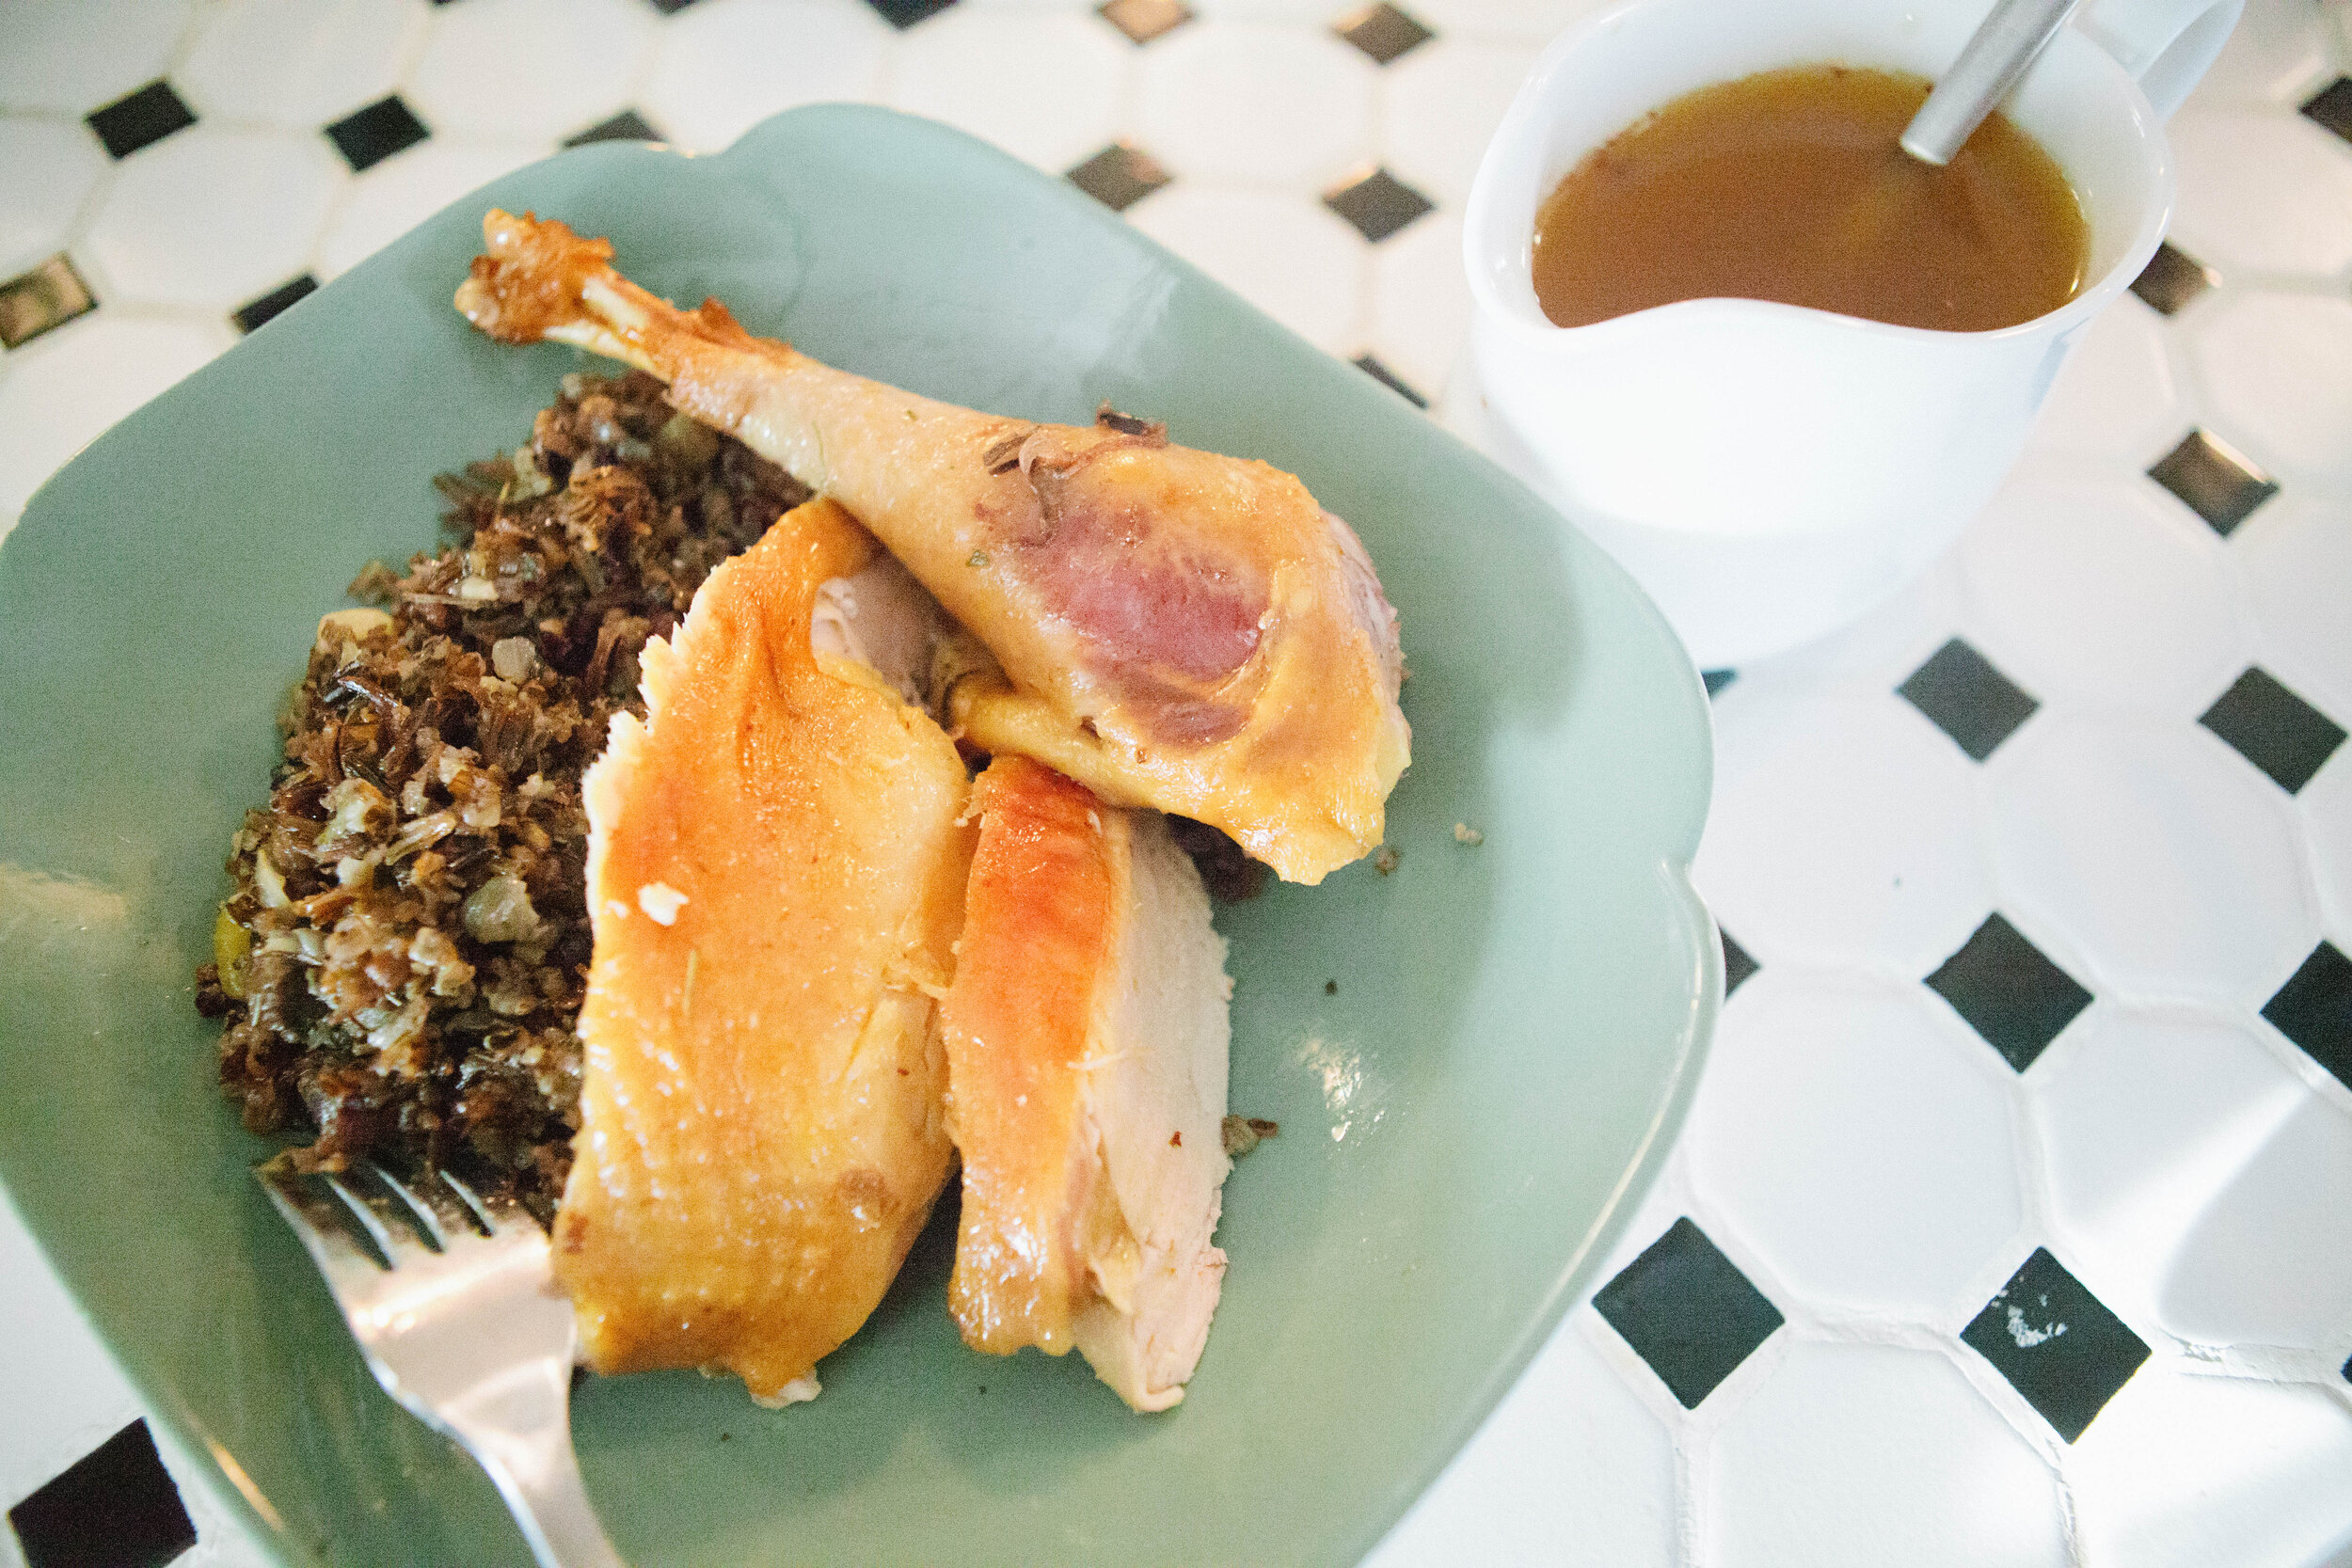
Carve and enjoy!

You can also pour off the gravy to enjoy with your bird.

IMG_2908.jpg

HowtoMakeWildTurkey.png

Roasted Wild Turkey

Author: The Be Well Clinic

Ingredients

  • 1 Wild Turkey (Mine was 8 lb. 13 oz.)
  • ½ Stick of Kerrygold Butter
  • Wild Rice Stuffing

Instructions

  1. Preheat oven to 400.
  2. Remove the giblets from your turkey & set aside.
  3. Rinse turkey inside and out. Pat dry.
  4. Coat turkey well with butter and place in a glass baking dish, breast side down. Cover with parchment paper and foil.
  5. Place in the oven for 45-50 minutes.
  6. Decrease the oven temperature to 325 and bake for 2 ½ to 3 hours.
  7. Remove the bird from the oven. Uncover and turn so the large opening of the cavity is face up. Add wild rice stuffing to the cavity of the bird.
  8. Press the stuffing firmly into the cavity so it does not fall out. Turn the bird back over so it is again breast side down.
  9. Cook for another 40 minutes with the cover on. Remove the cover and cook for an additional 15 minutes to further brown the skin.
  10. Carve and enjoy!
  11. You can also pour off the liquid to enjoy as a gravy.
Created using The Recipes Generator

15 Minute Meal: Stirfry

Stir fry is a very versatile dish because you can make it out of practically anything and flavor it any way that you want. Certain vegetables do tend to pair with certain flavor profiles so if you’re at a loss of what flavors to use, let your vegetables be your guide.

In my brain, there are two types of stir fry. There is an Asian stir fry that uses soy sauce and a “fresh” stir fry that is merely sauteed vegetables and herbs. While most people may think of stir fry as primarily Asian, my preference most of the time is a “fresh” soy sauceless stir fry. 

To make stir fry, simply use any vegetables that you have in the fridge; even ones that are starting to wilt! This is a great way to use up vegetables. Cut them into pieces. Determine the order you will add them to the pan depending on how long they will take to cook i.e. carrots and onions will go in first because they take much longer to cook than tomatoes or greens. 

This is also an excellent recipe to practice listening to your body. You can use the vegetable mixture that your body has been interested in, even if they don’t fit another recipe. You can make it as a small, single serving of only the vegetables that you are interested in. For example, for this particular stir fry, I used only the vegetables that I was craving at that time. I had thought about adding onions as well but they didn’t sound very good to me when it came time to cook so I simply didn’t use them!

As you are adding vegetables, keep an eye on the amount of fat in your pan. Some vegetables, such as eggplant or zucchini, will soak up a lot of the fat and you may need to add more as you go. Additionally to get a delicious flavor throughout, add a little salt and herbs each time you add a new vegetable.

You can easily add a cut of meat to the pan, such as thinly sliced chicken or beef strips, for an easy one pot dish or you can serve the stir fry as a side alongside a steak or other meat dish. 

Ingredients for Stirfry:

For today’s stir fry I will be using:

  • Zucchini

  • Carrots

  • Bok Choy

  • Brussel Sprouts

  • Celery

  • Peppers

  • Oregano

  • Thyme

  • Rosemary

You will also need the fat of your choice.

Directions for Stirfry:

IMG_0769.jpg

Cut all your vegetables. I like to keep my vegetables relatively the same size, especially by thickness. I find I much more enjoy spears in stir fry than rounds. Have all your vegetables ready to go before you start cooking your stir fry. Once you start cooking, it will go too fast to be chopping while you are cooking.

To a cast iron pan, add 2-3 tbsp of the fat of your choice. Today I am using tallow. When the fat is simmering in your pan, add your first vegetable.

Continue to add vegetables in the order that it takes for them to be done. Keep an eye on your fat and add more as needed. 

Add salt to each vegetable type as you add it. An easy way to do this is to add it to the top of the pan and then salt it as you would as if it was on the table; then stir in to the other vegetables.

Remember that each vegetable will continue to cook as you continue to add other vegetables. It takes practice to know how long to cook vegetables to your desired softness so keep cooking and don’t get discouraged!

Go as bold or as simple with flavors as you want. 

Enjoy!


15MinuteMealStirfry.png

15 Minute Meals: Stirfry

Author: The Be Well Clinic

Ingredients

  • For today’s stir fry I will be using:
  • Zucchini
  • Carrots
  • Bok Choy
  • Brussel Sprouts
  • Celery
  • Peppers
  • Oregano
  • Thyme
  • Rosemary
  • You will also need the fat of your choice.

Instructions

  1. Cut all your vegetables. I like to keep my vegetables relatively the same size, especially by thickness. I find I much more enjoy spears in stir fry than rounds. Have all your vegetables ready to go before you start cooking your stir fry. Once you start cooking, it will go too fast to be chopping while you are cooking.
  2. To a cast iron pan, add 2-3 tbsp of the fat of your choice. Today I am using tallow. When the fat is simmering in your pan, add your first vegetable.
  3. Continue to add vegetables in the order that it takes for them to be done. Keep an eye on your fat and add more as needed.
  4. Add salt to each vegetable type as you add it. An easy way to do this is to add it to the top of the pan and then salt it as you would as if it was on the table; then stir in to the other vegetables.
  5. Remember that each vegetable will continue to cook as you continue to add other vegetables. It takes practice to know how long to cook vegetables to your desired softness so keep cooking and don’t get discouraged!
  6. Go as bold or as simple with flavors as you want.
  7. Enjoy!

Notes:


Created using The Recipes Generator

Chicken Paprikash

I’m ¼ Hungarian. I actually don’t know a lot about Hungarian culture because my family did such a great job assimilating to American culture. However, the one thing that did survive is a lot of traditional Hungarian dishes. Chicken Paprikash is one of my favorites and I’m excited to have a gluten free version of this recipe. 

Speaking of my grandparents and cooking, my grandfather was an engineer and always got upset at my grandmother for not measuring out her spices. One day she took the spice she had measured in her hand and put it in a measuring spoon. It measured exactly what it was supposed to be. After that, he didn’t comment about her measuring anymore. 

The type of paprika you use matters. You absolutely must use Hungrian paprika with this recipe. Otherwise it won’t taste right! Other paprikas are much more sweet and Hungarian paprika is more spicy. Using other paprika will give it a different taste profile which I’m not convinced would be any good. 

Ingredients for Chicken Paprikash:

  • 2 Chicken Breasts

  • 3 tbsp Butter

  • 1 Onion

  • 4 cloves of Garlic

  • 2 cups Stock 

  • 1 ½ tbsp Beef Gelatin Powder

  • 1 tsp Tallow 

  • 1 tbsp Hungarian Paprika

  • ½ tsp Salt

Directions for Chicken Paprikash:

IMG_0716.jpg

To a large pan, add butter and allow to warm.

Salt and pepper both sides of the chicken breasts. When pan is hot, add chicken and brown both sides. 

IMG_0719.jpg

Cut onion in half and slice. Peel garlic and roughly chop.  Remove the chicken from the pan. Add the onions to the pan and cook. Scrap any browned chicken bits off the bottom of the pan onto the onions. Add garlic to pan.
Add stock to the pan with the onions and warm thoroughly. Once it has reached blood temperature, add in beef gelatin powder and stir to mix.

IMG_0743.jpg

While the gelatin is activating, toast the paprika. Add tallow to a small pot and turn to medium heat. Once hot, add the paprika and toast until the paprika smells fragrant. 

When the paprika is fragrant, add to the pan with the onions

Deglaze the paprika pan with some of the stock mixture to make sure you get all the paprika out. Add salt. Stir for a few minutes and allow to reduce so that it thickens.

IMG_0793.jpg

Add the chicken back in and settle it into the paprika mixture. Cook chicken for 15-30 minutes depending on how thick your chicken is until a thermometer reads 170.

Serve over gluten free noodles, rice, or cauliflower mashed potatoes.

IMG_0811.jpg

GlutenFreeGAPSLegalChickenPaprikash.png

Chicken Paprikash

Author: The Be Well Clinic

Ingredients

  • 2 Chicken Breasts
  • 3 tbsp Butter
  • 1 Onion
  • 4 cloves of Garlic
  • 2 cups Stock
  • 1 ½ tbsp Beef Gelatin Powder
  • 1 tsp Tallow
  • 1 tbsp Hungarian Paprika
  • ½ tsp Salt

Instructions

  1. To a large pan, add butter and allow to warm.
  2. Salt and pepper both sides of the chicken breasts. When pan is hot, add chicken and brown both sides.
  3. Cut onion in half and slice.Peel garlic and roughly chop. Remove the chicken from the pan. Add the onions to the pan and cook. Scrap any browned chicken bits off the bottom of the pan onto the onions. Add garlic to pan.
  4. Add stock to the pan with the onions and warm thoroughly. Once it has reached blood temperature, add in beef gelatin powder and stir to mix.
  5. While the gelatin is activating, toast the paprika. Add tallow to a small pot and turn to medium heat. Once hot, add the paprika and toast until the paprika smells fragrant.
  6. When the paprika is fragrant, add to the pan with the onions
  7. Deglaze the paprika pan with some of the stock mixture to make sure you get all the paprika out. Add salt. Stir for a few minutes and allow to reduce so that it thickens.
  8. Add the chicken back in and settle it into the paprika mixture. Cook chicken for 15-30 minutes depending on how thick your chicken is until a thermometer reads 170.
  9. Serve over gluten free noodles, rice, or cauliflower mashed potatoes.
Created using The Recipes Generator

Mayo Free Egg Salad

Eggs are a great non-meat protein source. While I usually recommend eating eggs yolks running to preserve the cholesterol on them, sometimes a hard boiled egg is hard to beat!

This is a recipe that could easily be doubled or tripled for a party. You can serve it spread on a romaine lettuce leaf, as shown, or you can use it as a dip for cucumber slices or carrots.. Feel free to use whatever herbs you have in the fridge and experiment to find your favorites.

This recipe is legal on GAPS Stage 3 if you omit the paprika. Otherwise, it is legal on GAPS Stage 6. The ingredient list is for 1-2 servings.

Ingredients for Mayo Free Egg Salad:

  • 4 Eggs

  • ½ cup Sour Cream or Creme Fraiche

  • 1 small stalk Celery

  • 1 large Green Onion

  • ¼ - ½  tsp Salt

  • 1 tsp Pepper

  • ½ tsp Paprika

  • Parsley

Directions for Mayo Free Egg Salad:

Hard boil eggs. (Recipe here)

mayo-free-egg-salad-recipe-egg-salad-on-gaps-sour-cream-egg-salad

Once eggs are cooled, peel them.

mayo-free-egg-salad-recipe-egg-salad-on-gaps-sour-cream-egg-salad

Coarsely chop eggs, celery and green onion.

Add to a mixing bowl and add in pepper, salt to taste, and sour cream. 

mayo-free-egg-salad-recipe-egg-salad-on-gaps-sour-cream-egg-salad

Gently mix to coat and then sprinkle paprika over the top. Mix gently.

Serve and enjoy!

mayo-free-egg-salad-recipe-egg-salad-on-gaps-sour-cream-egg-salad

Mayo Free Egg Salad

Author:
Prep time: Cook time: Total time:

Ingredients:

  • 4 Eggs
  • ½ cup Sour Cream or Creme Fraiche
  • 1 small stalk Celery
  • 1 large Green Onion
  • ¼ - ½ tsp Salt
  • 1 tsp Pepper
  • ½ tsp Paprika
  • Parsley

Instructions:

How to cook Mayo Free Egg Salad

  1. Hard boil eggs. (Recipe here.)
  2. Once eggs are cooled, peel them.
  3. Coarsely chop eggs, celery and green onion.
  4. Add to a mixing bowl and add in pepper, salt to taste, and sour cream.
  5. Gently mix to coat and then sprinkle paprika over the top. Mix gently.
  6. Serve and enjoy!
Created using The Recipes Generator
EggSalad.png

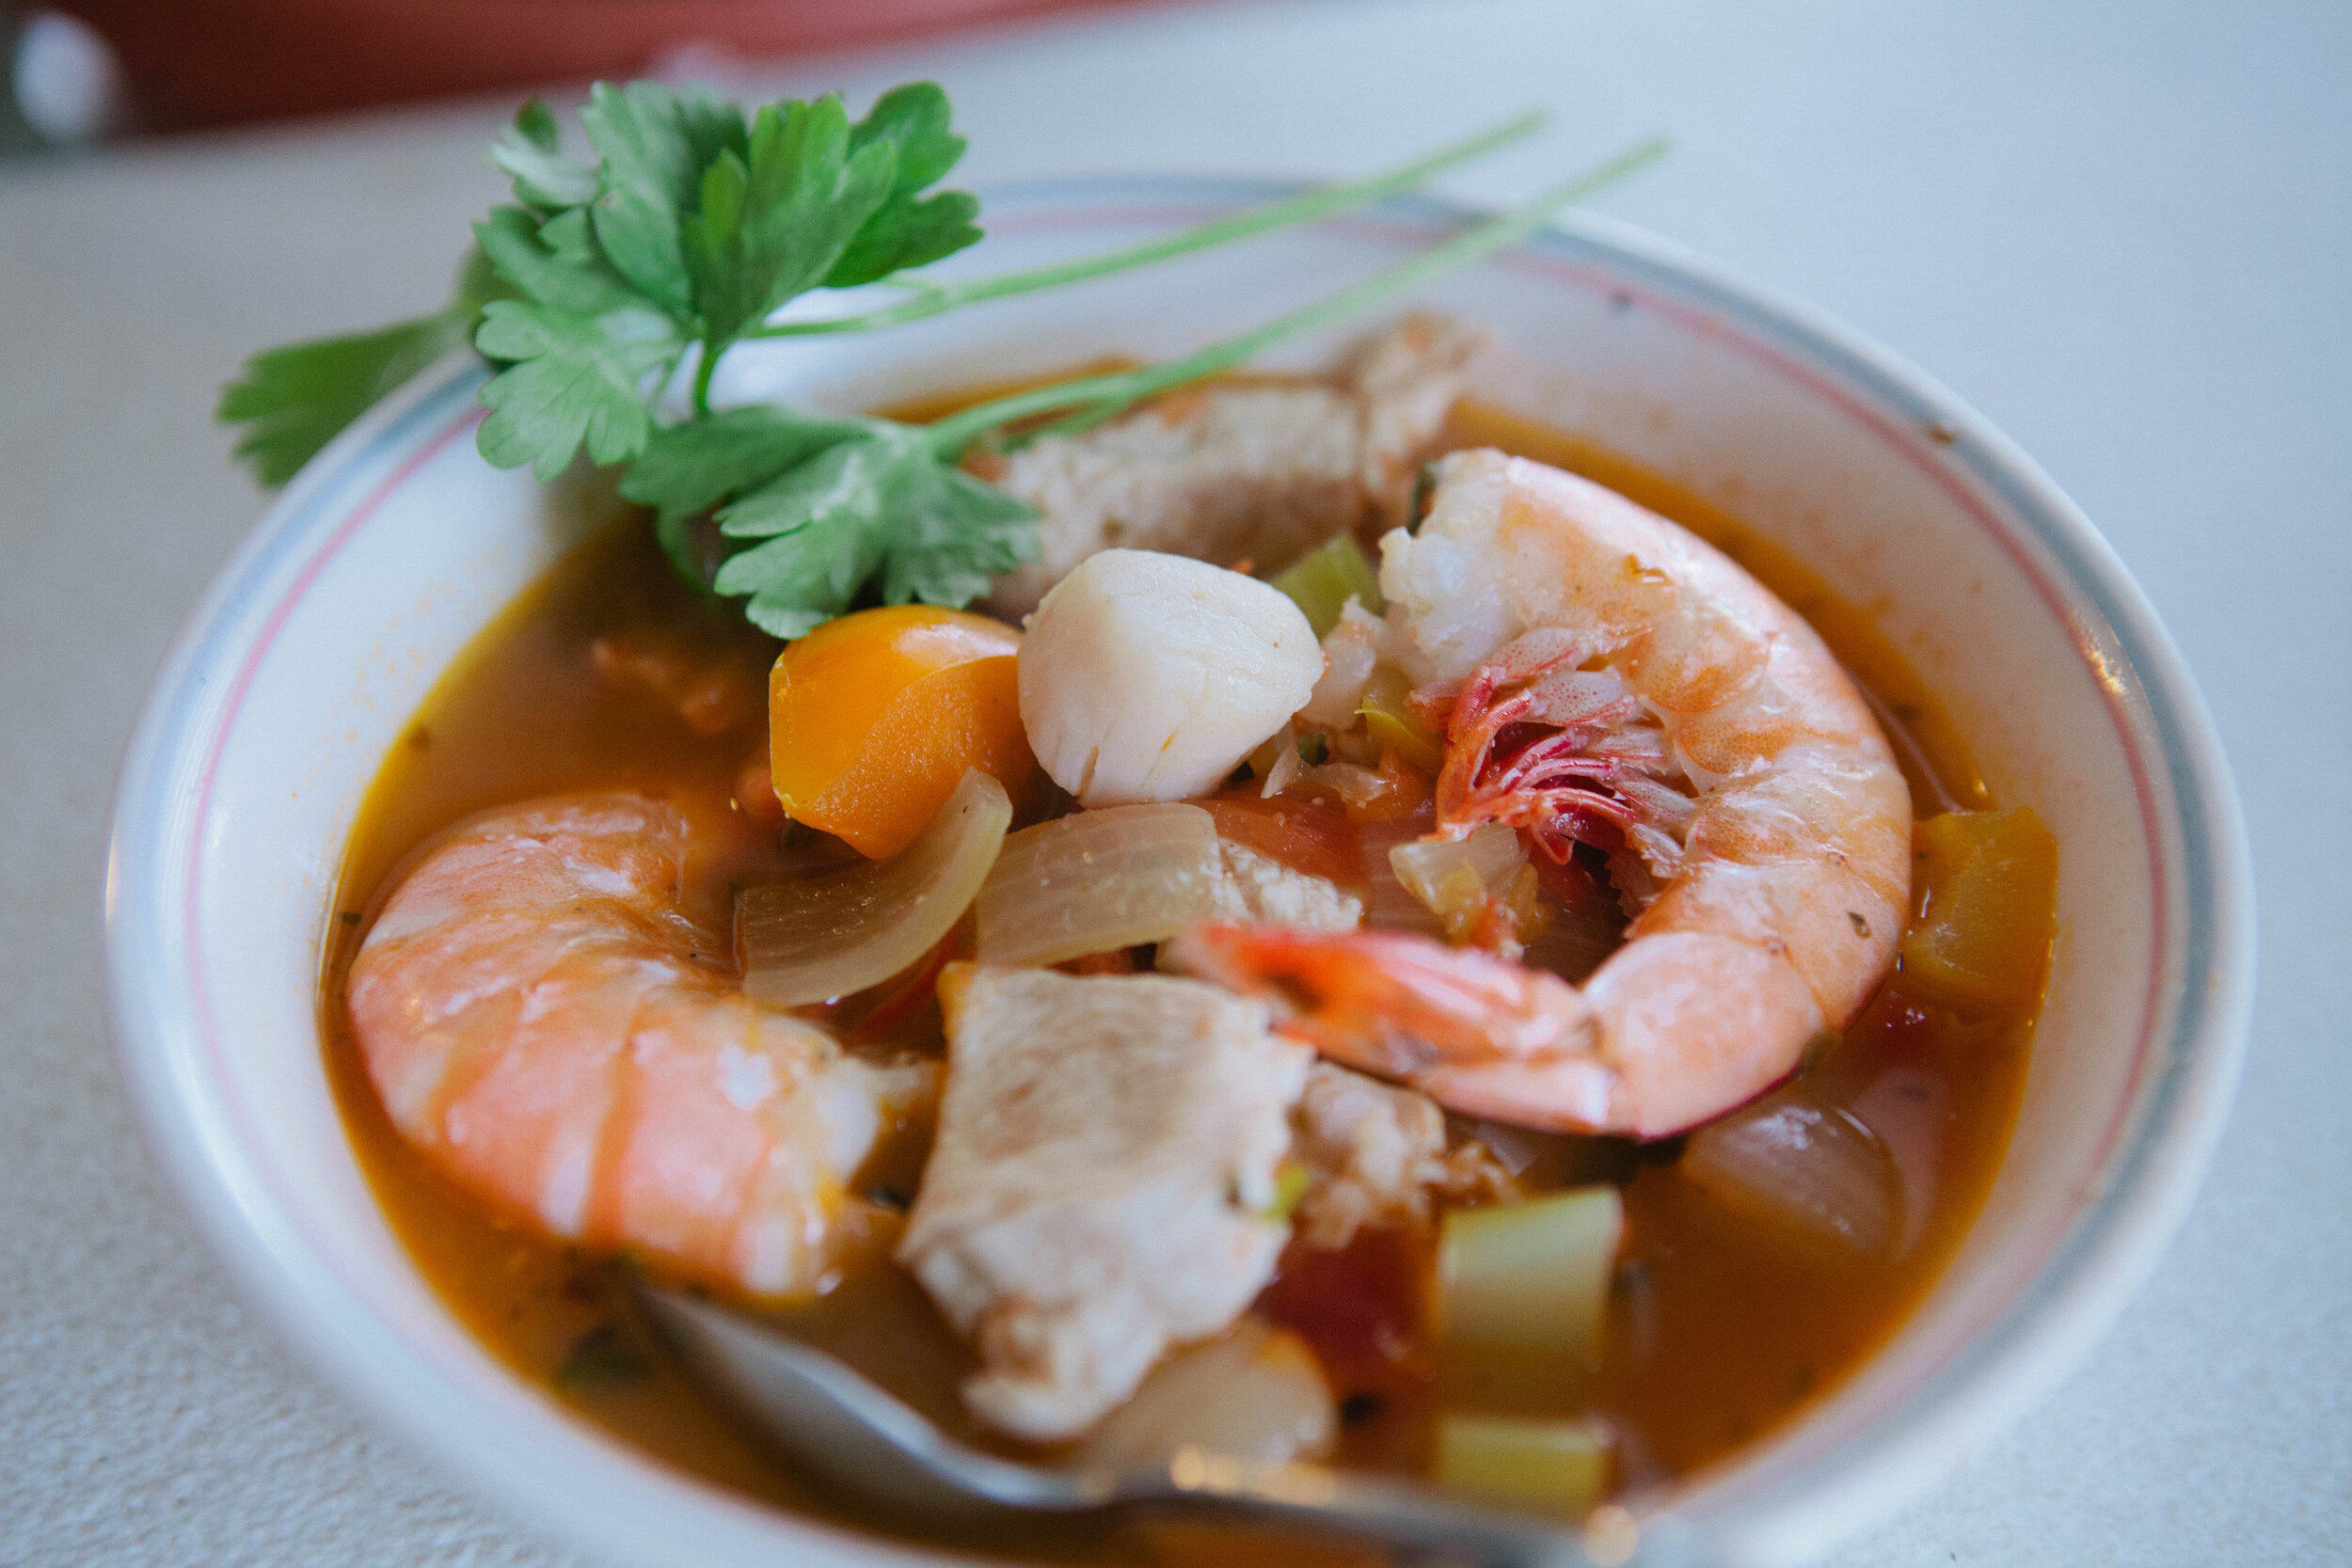
Easy Jambalaya

I know from personal experience that eating soups for most or all meals can become routine and unappealing. So I have been looking for soup recipes with unique tastes or flavor profiles to shake things up. 

I’ve never really had traditionally made jambalaya so I’m not sure how well this stacks up but it is delicious! It’s legal on Stage 4 of the GAPS Diet as long as you are tolerating nightshades (tomatoes and peppers.)

jambalaya-how-to-make-jambalya-on-the-gaps-diet-eating-seafood-on-gaps-how-to-eat-seafood-on-gaps-what-to-eat-on-gaps-diet-soups-for-gaps-easy-jambalaya-recipe

One of the most important ways to replenish a malnourished body is to eat a variety of nutrients that come from a variety of sources. Depending on where you live (i.e. a landlocked state like Colorado) seafood may not be a class of food you commonly partake in. When you purchase seafood, it should always be wild caught and sourced from a location that is not off the coast of China. When seafood is fresh, it tastes very mild. As it ages, it will become more and more “fishy.” Flash frozen seafood is often the best because was preserved in the freshest state possible.

Jambalaya is traditionally served over rice. While rice isn’t GAPS Legal, if it is something you are tolerating or eating currently, I have a blog post on how to properly prepare rice here. If you are on full GAPS, wild rice is legal and you can learn how to properly prepare wild rice here. I think it’s delicious to eat this jambalaya on it’s own and don’t miss the rice.

Ingredients for Jambalaya:

  • 3 tbsp Lard

  • 7 cups of Stock

  • 2 Chicken Breasts, cubed

  • 1 lb. Scallops

  • 10 oz. Salmon

  • 2 lb Jumbo Shrimp

  • 9-10 Medium Tomatoes

  • 3 Stalks of Celery

  • ½ Large Onion

  • 2 Bell Pepper

  • 2 ½ tbsp Salt

  • 1 tbsp Paprika

  • 1 tbsp Cayenne Pepper

  • 1 tbsp Freshly Ground Pepper

  • 1 tbsp Dried Oregano

  • ⅛ cup parsley

Directions for How to Prepare Jambalaya:

jambalaya-how-to-make-jambalya-on-the-gaps-diet-eating-seafood-on-gaps-how-to-eat-seafood-on-gaps-what-to-eat-on-gaps-diet-soups-for-gaps-easy-jambalaya-recipe

In a large stock pot, add 2 tbsp of lard and heat on medium high heat. Add chicken once it’s heated and stir to cook in lard. 

In a bowl, combine the spices. Roughly chop the parsley.

Generously coat the chicken with a few shakes of the spice mixture.

Remove the chicken pieces from the pan while leaving the juices in the pot.

Roughly chop the tomatoes. Add them to the pot. Add 1 - 2 tsp of the spice mixture. Simmer for about 10 - 15 minutes until soft. Stir constantly to prevent sticking. Immersion blend them tomatoes slightly. You still want a few chunks in.

jambalaya-how-to-make-jambalya-on-the-gaps-diet-eating-seafood-on-gaps-how-to-eat-seafood-on-gaps-what-to-eat-on-gaps-diet-soups-for-gaps-easy-jambalaya-recipe

Pour the stock into the pot with the tomatoes. Add in chopped parsley.

Chop celery into small half moons. Add the celery to the pot with the tomato and stock mixture.

Chop the onions into bite size pieces. Cut the bell pepper into chunks. 

jambalaya-how-to-make-jambalya-on-the-gaps-diet-eating-seafood-on-gaps-how-to-eat-seafood-on-gaps-what-to-eat-on-gaps-diet-soups-for-gaps-easy-jambalaya-recipe

In a cast iron skillet, heat 1 tbsp of lard. When it’s melted, add the onions and bell peppers to fry. Sprinkle with 1 - 2 tsp of seasoning mixture.

Mince the garlic. Add to the pan with the onions and bell peppers. Cook for about a minute.

Add the chicken back into the tomato mixture pot. 

jambalaya-how-to-make-jambalya-on-the-gaps-diet-eating-seafood-on-gaps-how-to-eat-seafood-on-gaps-what-to-eat-on-gaps-diet-soups-for-gaps-easy-jambalaya-recipe

If necessary, remove the skin from the salmon. Cube the salmon into chunks. Add the salmon to the onion and bell pepper mixture.

jambalaya-how-to-make-jambalya-on-the-gaps-diet-eating-seafood-on-gaps-how-to-eat-seafood-on-gaps-what-to-eat-on-gaps-diet-soups-for-gaps-easy-jambalaya-recipe

Rinse the scallops with filtered water. Add the scallops to the onion and bell pepper mixture. Sprinkle the remaining seasoning mixture over the top of the scallops and stir. Let cook for a few minutes.

Rinse the jumbo shrimp. Add them directly to the pot of the tomato mixture.

jambalaya-how-to-make-jambalya-on-the-gaps-diet-eating-seafood-on-gaps-how-to-eat-seafood-on-gaps-what-to-eat-on-gaps-diet-soups-for-gaps-easy-jambalaya-recipe

After a few minutes, add the scallops, salmon, onions, and bell pepper mixture to the large stock pot with the tomatoes.

Simmer everything for about 15 to 20 minutes to allow the seafood to cook and the flavors to meld. Be careful to not overcook your seafood.

Enjoy!

jambalaya-how-to-make-jambalya-on-the-gaps-diet-eating-seafood-on-gaps-how-to-eat-seafood-on-gaps-what-to-eat-on-gaps-diet-soups-for-gaps-easy-jambalaya-recipe

EasyGAPSJambalaya.png

Easy Jambalaya

Author:
Prep time: Cook time: Total time:

Ingredients:

  • 3 tbsp Lard
  • 7 cups of Stock
  • 2 Chicken Breasts, cubed
  • 1 lb. Scallops
  • 10 oz. Salmon
  • 2 lb Jumbo Shrimp
  • 9-10 Medium Tomatoes
  • 3 Stalks of Celery
  • ½ Large Onion
  • 2 Bell Pepper
  • 2 ½ tbsp Salt
  • 1 tbsp Paprika
  • 1 tbsp Cayenne Pepper
  • 1 tbsp Freshly Ground Pepper
  • 1 tbsp Dried Oregano
  • ⅛ cup parsley

Instructions:

How to cook Easy Jambalaya

  1. In a large stock pot, add 2 tbsp of lard and heat on medium high heat. Add chicken once it’s heated and stir to cook in lard.
  2. In a bowl, combine the spices. Roughly chop the parsley.
  3. Generously coat the chicken with a few shakes of the spice mixture.
  4. Remove the chicken pieces from the pan while leaving the juices in the pot.
  5. Roughly chop the tomatoes. Add them to the pot. Add 1 - 2 tsp of the spice mixture. Simmer for about 10 - 15 minutes until soft. Stir constantly to prevent sticking. Immersion blend them tomatoes slightly. You still want a few chunks in.
  6. Pour the stock into the pot with the tomatoes. Add in chopped parsley.
  7. Cop celery into small half moons. Add the celery to the pot with the tomato and stock mixture.
  8. Chop the onions into bite size pieces. Cut the bell pepper into chunks.
  9. In a cast iron skillet, heat 1 tbsp of lard. When it’s melted, add the onions and bell peppers to fry. Sprinkle with 1 - 2 tsp of seasoning mixture.
  10. Mince the garlic. Add to the pan with the onions and bell peppers. Cook for about a minute.
  11. Add the chicken back into the tomato mixture pot.
  12. If necessary, remove the skin from the salmon. Cube the salmon into chunks. Add the salmon to the onion and bell pepper mixture.
  13. Rinse the scallops with filtered water. Add the scallops to the onion and bell pepper mixture. Sprinkle the remaining seasoning mixture over the top of the scallops and stir. Let cook for a few minutes.
  14. Rinse the jumbo shrimp. Add them directly to the pot of the tomato mixture.
  15. After a few minutes, add the scallops, salmon, onions, and bell pepper mixture to the large stock pot with the tomatoes.
  16. Simmer everything for about 15 to 20 minutes to allow the seafood to cook and the flavors to meld. Be careful to not overcook your seafood.
  17. Enjoy!
Created using The Recipes Generator

What to do with Chicken on the GAPS Diet

Chicken is such a versatile and easy to meat to cook! It’s a mild meat so it can be easily adapted to many different recipes and flavors.

Purchase the highest quality meat you can afford! For me, this means buying chickens directly from farmers whenever possible. If I buy a chicken from a store, I buy organic and antibiotic free. And make sure you get the organs whenever possible! If you have the space, time and allowance from your city, consider raising your own chickens. I loved raising chickens, both for the fresh eggs and the delicious meat. I knew exactly where my food was coming from - and everything that had gone into it!

To help your budget, make sure you’re using as much of your chicken as possible. Chicken feet and gizzards can be added to stocks. The skin and joint cartilage can be blended in a stock. Liver can be made into pate. And the chicken heart is my favorite treat!

Below are some of my favorite recipes for chicken!

Chicken Stock

Meat stock can be made into a soup or simply drunk on its own as a hot beverage with a meal. You can also poach a couple eggs in your stock for a rich breakfast. Stock can also be used to cook rice or other soaked grains to increase their digestibility and nutritional content. In short, this should be considered a staple to have in your kitchen at all times, either in the fridge or the freezer.

Gluten Free, Dairy Free, Egg Free

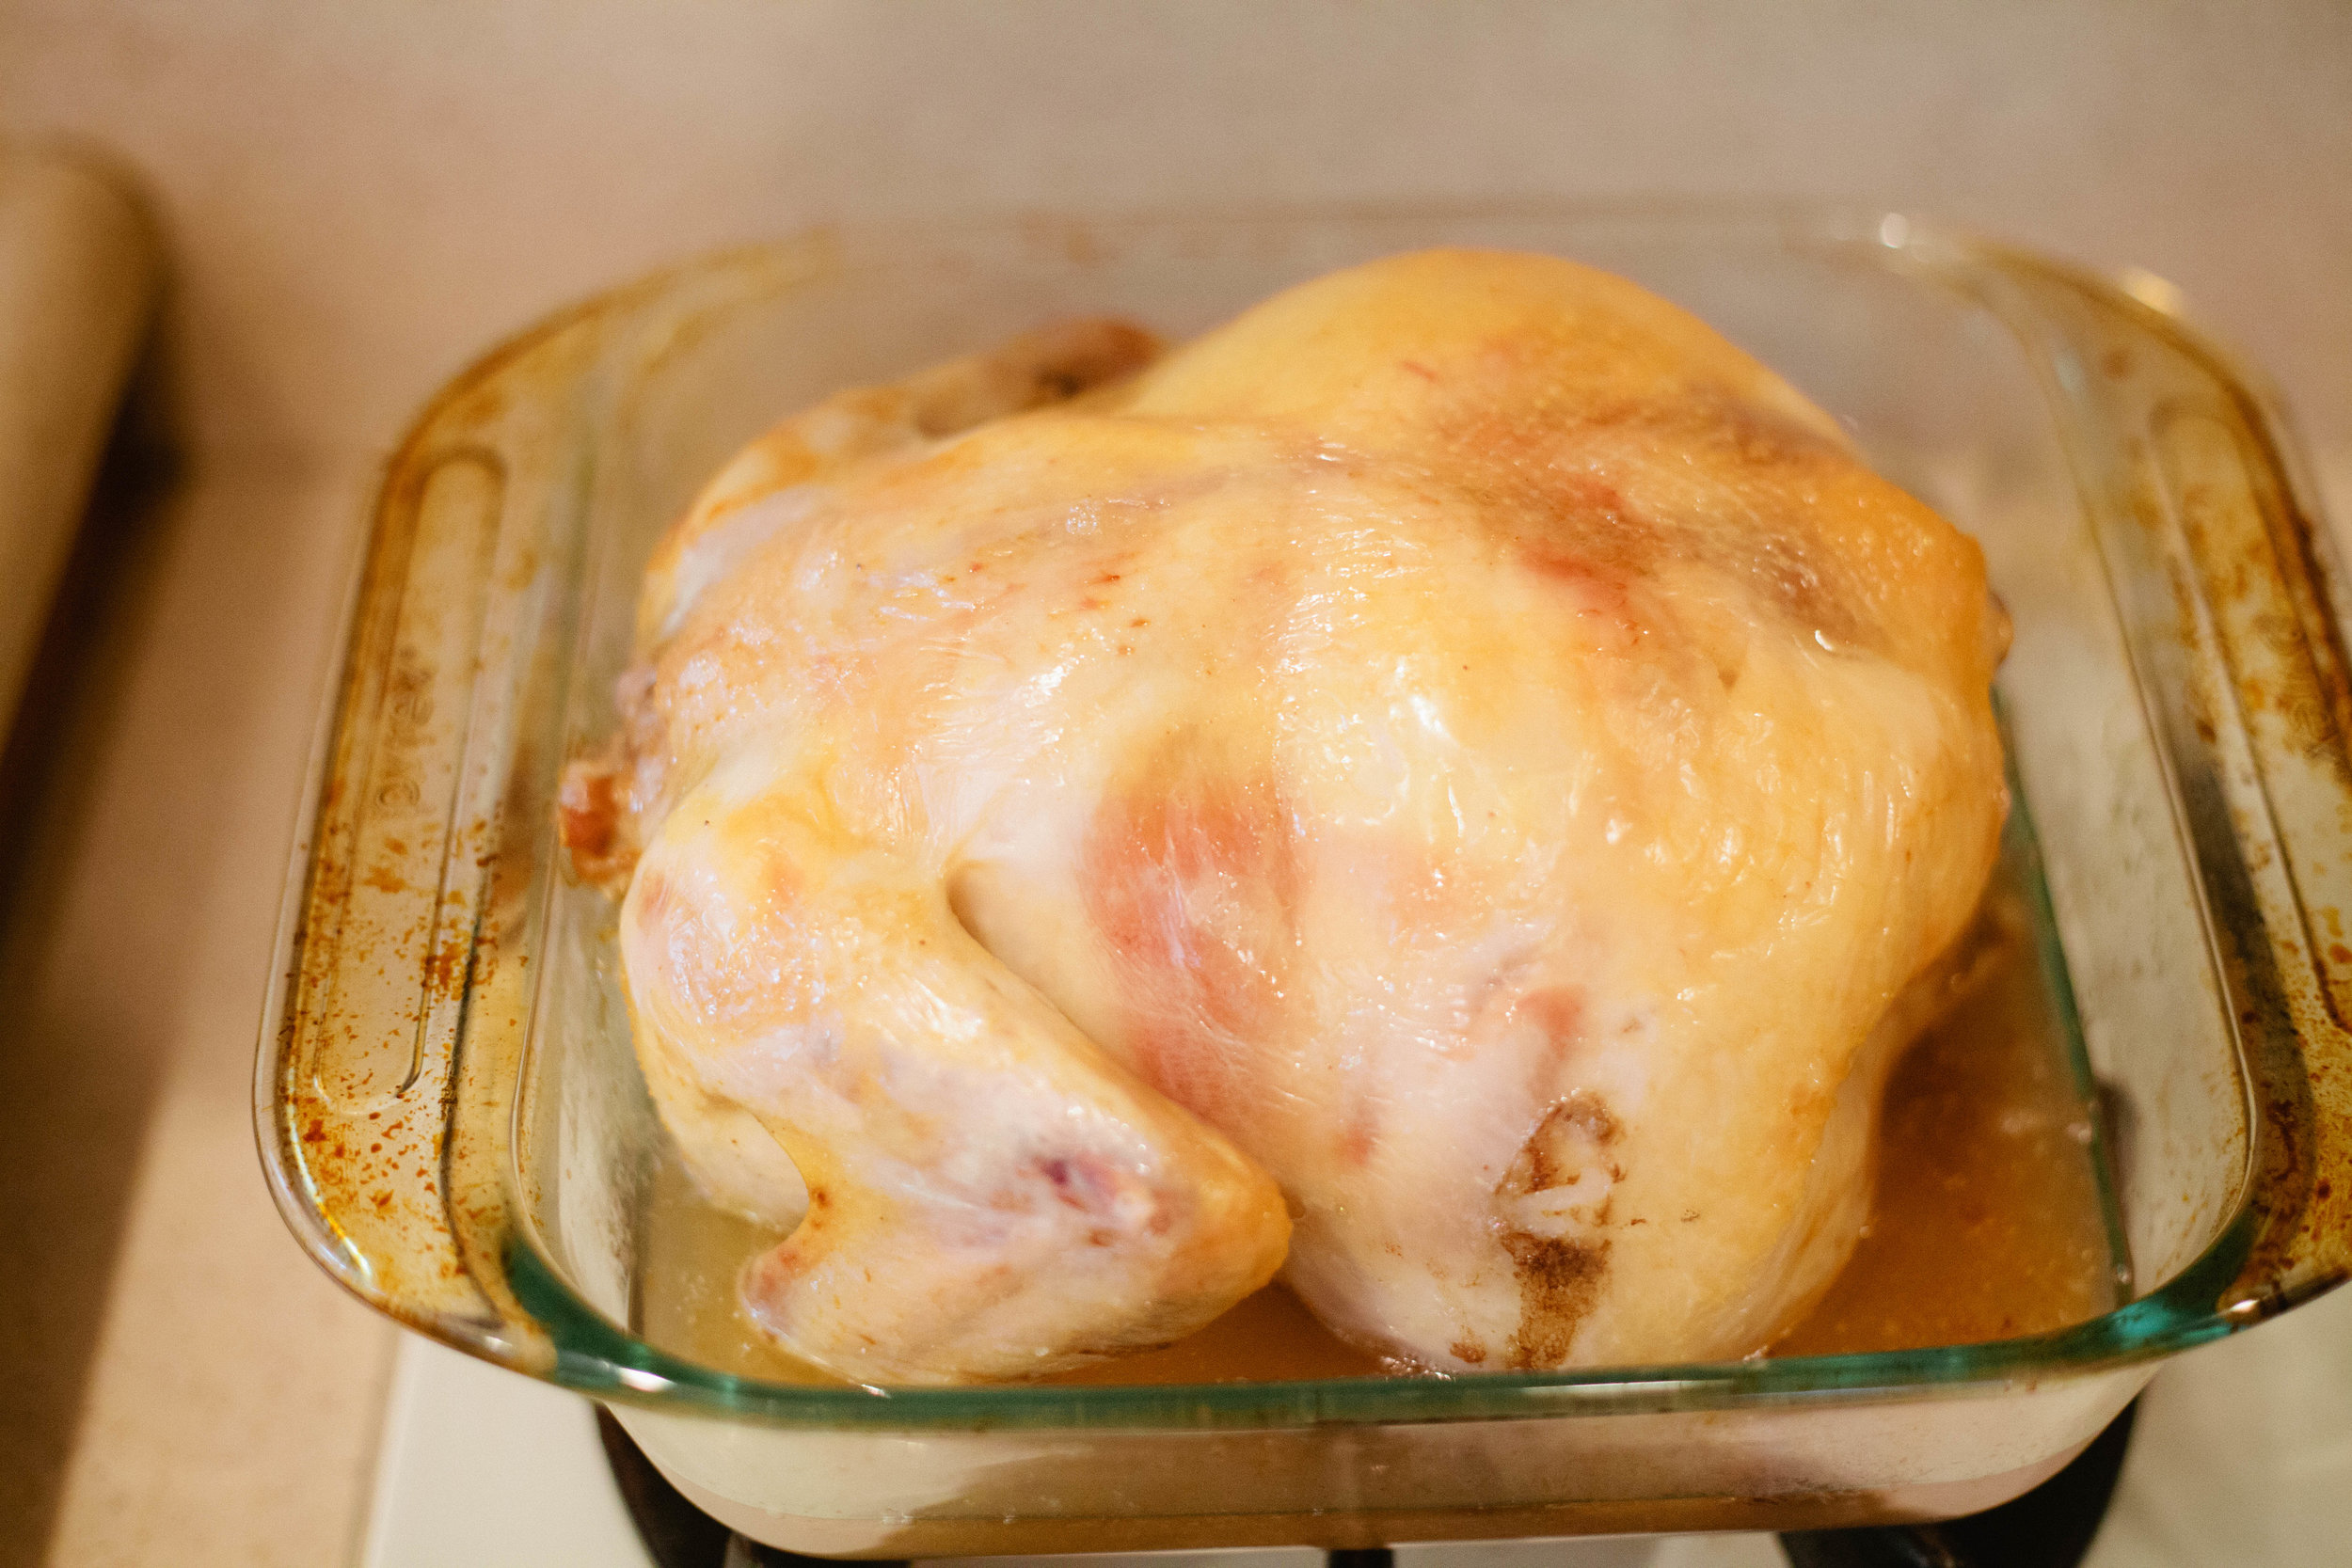
Whole Roasted Chicken with Salt

This is a very simple recipe that makes a whole, juicy roasted chicken. It takes just two simple ingredients and is a very hands off recipe.

Gluten Free, Dairy Free, Egg Free

Honey Roasted Chicken

Roasting a chicken is a great and simple way to make a meal. This particular roasting recipe requires a little more attention than others, as you need to baste and adjust the temperature often, but it's definitely worth it!

Gluten Free, Dairy Free, Egg Free

Chicken Tortilla Soup

This is a good GAPS soup because of all of the sour cream. It wasn't too spicy, and it's different than plain meat stock that you typically eat on Stage 1. There are many different ways to make it, so it's also easy to switch up to match your tastes.

Gluten Free, Dairy Free, Egg Free

Creamy Garlic Chicken Soup

Because you immersion blend the vegetables into the stock, this is a great recipe to also blend in the the joint cartilage, skin and any of the other parts of the chicken that you may be tempted to throw away. I separate the chicken into three parts usually - bones, chicken meat, and everything else.

Gluten Free, Dairy Free, Egg Free

Creamy Chicken Pot Pie Soup

The key to this soup being reminiscent of a pot pie is to cut the vegetables into bite size pieces and make a consistency that’s more like a stew than a soup. Included in this recipe are a few tricks to thicken the soup so it more closely resembles the gravy that we associate with chicken pot pie.

Gluten Free, Dairy Free, Egg Free

A Simple Cabbage Soup Recipe

I love this cabbage soup. Maybe it’s because of my German roots. 

Cabbage is good for stimulating hydrochloric acid production in your stomach. This is an important first step of food digestion. If your stomach pH is greater than 3 (meaning less acidic) the enzymes that we use to digest protein don’t even get turned on! This means your body won’t give the signal to digest the protein and the proteins that you eat won’t get digested. Cabbage is also very high in Vitamin C. The Vitamin C concentration is much higher in sauerkraut, however eating cabbage in any form is a great way to get important nutrients into your body. Cabbage also contains high amounts of Vitamin K. Vitamin K is a fat soluble vitamin that helps with inflammation.

Try cutting your cabbage into long strips to resemble noodles for pasta loving children. 

I recommend pairing this soup with our meatballs. You can drop balls of raw meat in to cook in the stock and the pairing would be legal on GAPS Stage 1. If you’re on more advanced stages (or not following the GAPS Diet) you can drop frozen pre-cooked meatballs into the soup or serve the meatballs on the side.

Ingredients:

  • 1 Cabbage

  • 1 stalk of Celery

  • 5 cloves of Garlic

  • 6 cups Stock (I used pork as a nod to my German roots but you can also use chicken or beef)

  • 2 tsp salt

Directions:

Bring stock to a boil in a large pot.

Chop up cabbage into bite size pieces. Slice the celery into half moons. Remove the garlic wrappings and cut in half.

Cabbage soup is very simple! It takes just a few simple ingredients but it’s a very filling and nutritious soup. It’s GAPS legal so try it today! Recipe by Amy Mihaly, Certified GAPS Practitioner in Colorado.

Add the cabbage, celery and garlic into the stock. Add salt to the pot to help draw out the moisture in the cabbage.

Simmer on medium heat for 30 to 45 minutes until the cabbage is soft.

Enjoy!

Cabbage soup is very simple! It takes just a few simple ingredients but it’s a very filling and nutritious soup. It’s GAPS legal so try it today! Recipe by Amy Mihaly, Certified GAPS Practitioner in Colorado.

Cabbage soup is very simple! It takes just a few simple ingredients but it’s a very filling and nutritious soup. It’s GAPS legal so try it today! Recipe by Amy Mihaly, Certified GAPS Practitioner in Colorado.

Cabbage Soup

Author:
prep time: cook time: total time:

ingredients:

  • 1 Cabbage
  • 1 stalk of Celery
  • 5 cloves of Garlic
  • 6 cups Stock (I used pork as a nod to my German roots but you can also use chicken or beef)
  • 2 tsp salt

instructions:

How to cook Cabbage Soup

  1. Bring stock to a boil in a large pot.
  2. Chop up cabbage into bite size pieces. Slice the celery into half moons. Remove the garlic wrappings and cut in half.
  3. Add the cabbage, celery and garlic into the stock. Add salt to the pot to help draw out the moisture in the cabbage.
  4. Simmer on medium heat for 30 to 45 minutes until the cabbage is soft.
  5. Enjoy!
Created using The Recipes Generator

Beef Tongue Recipe

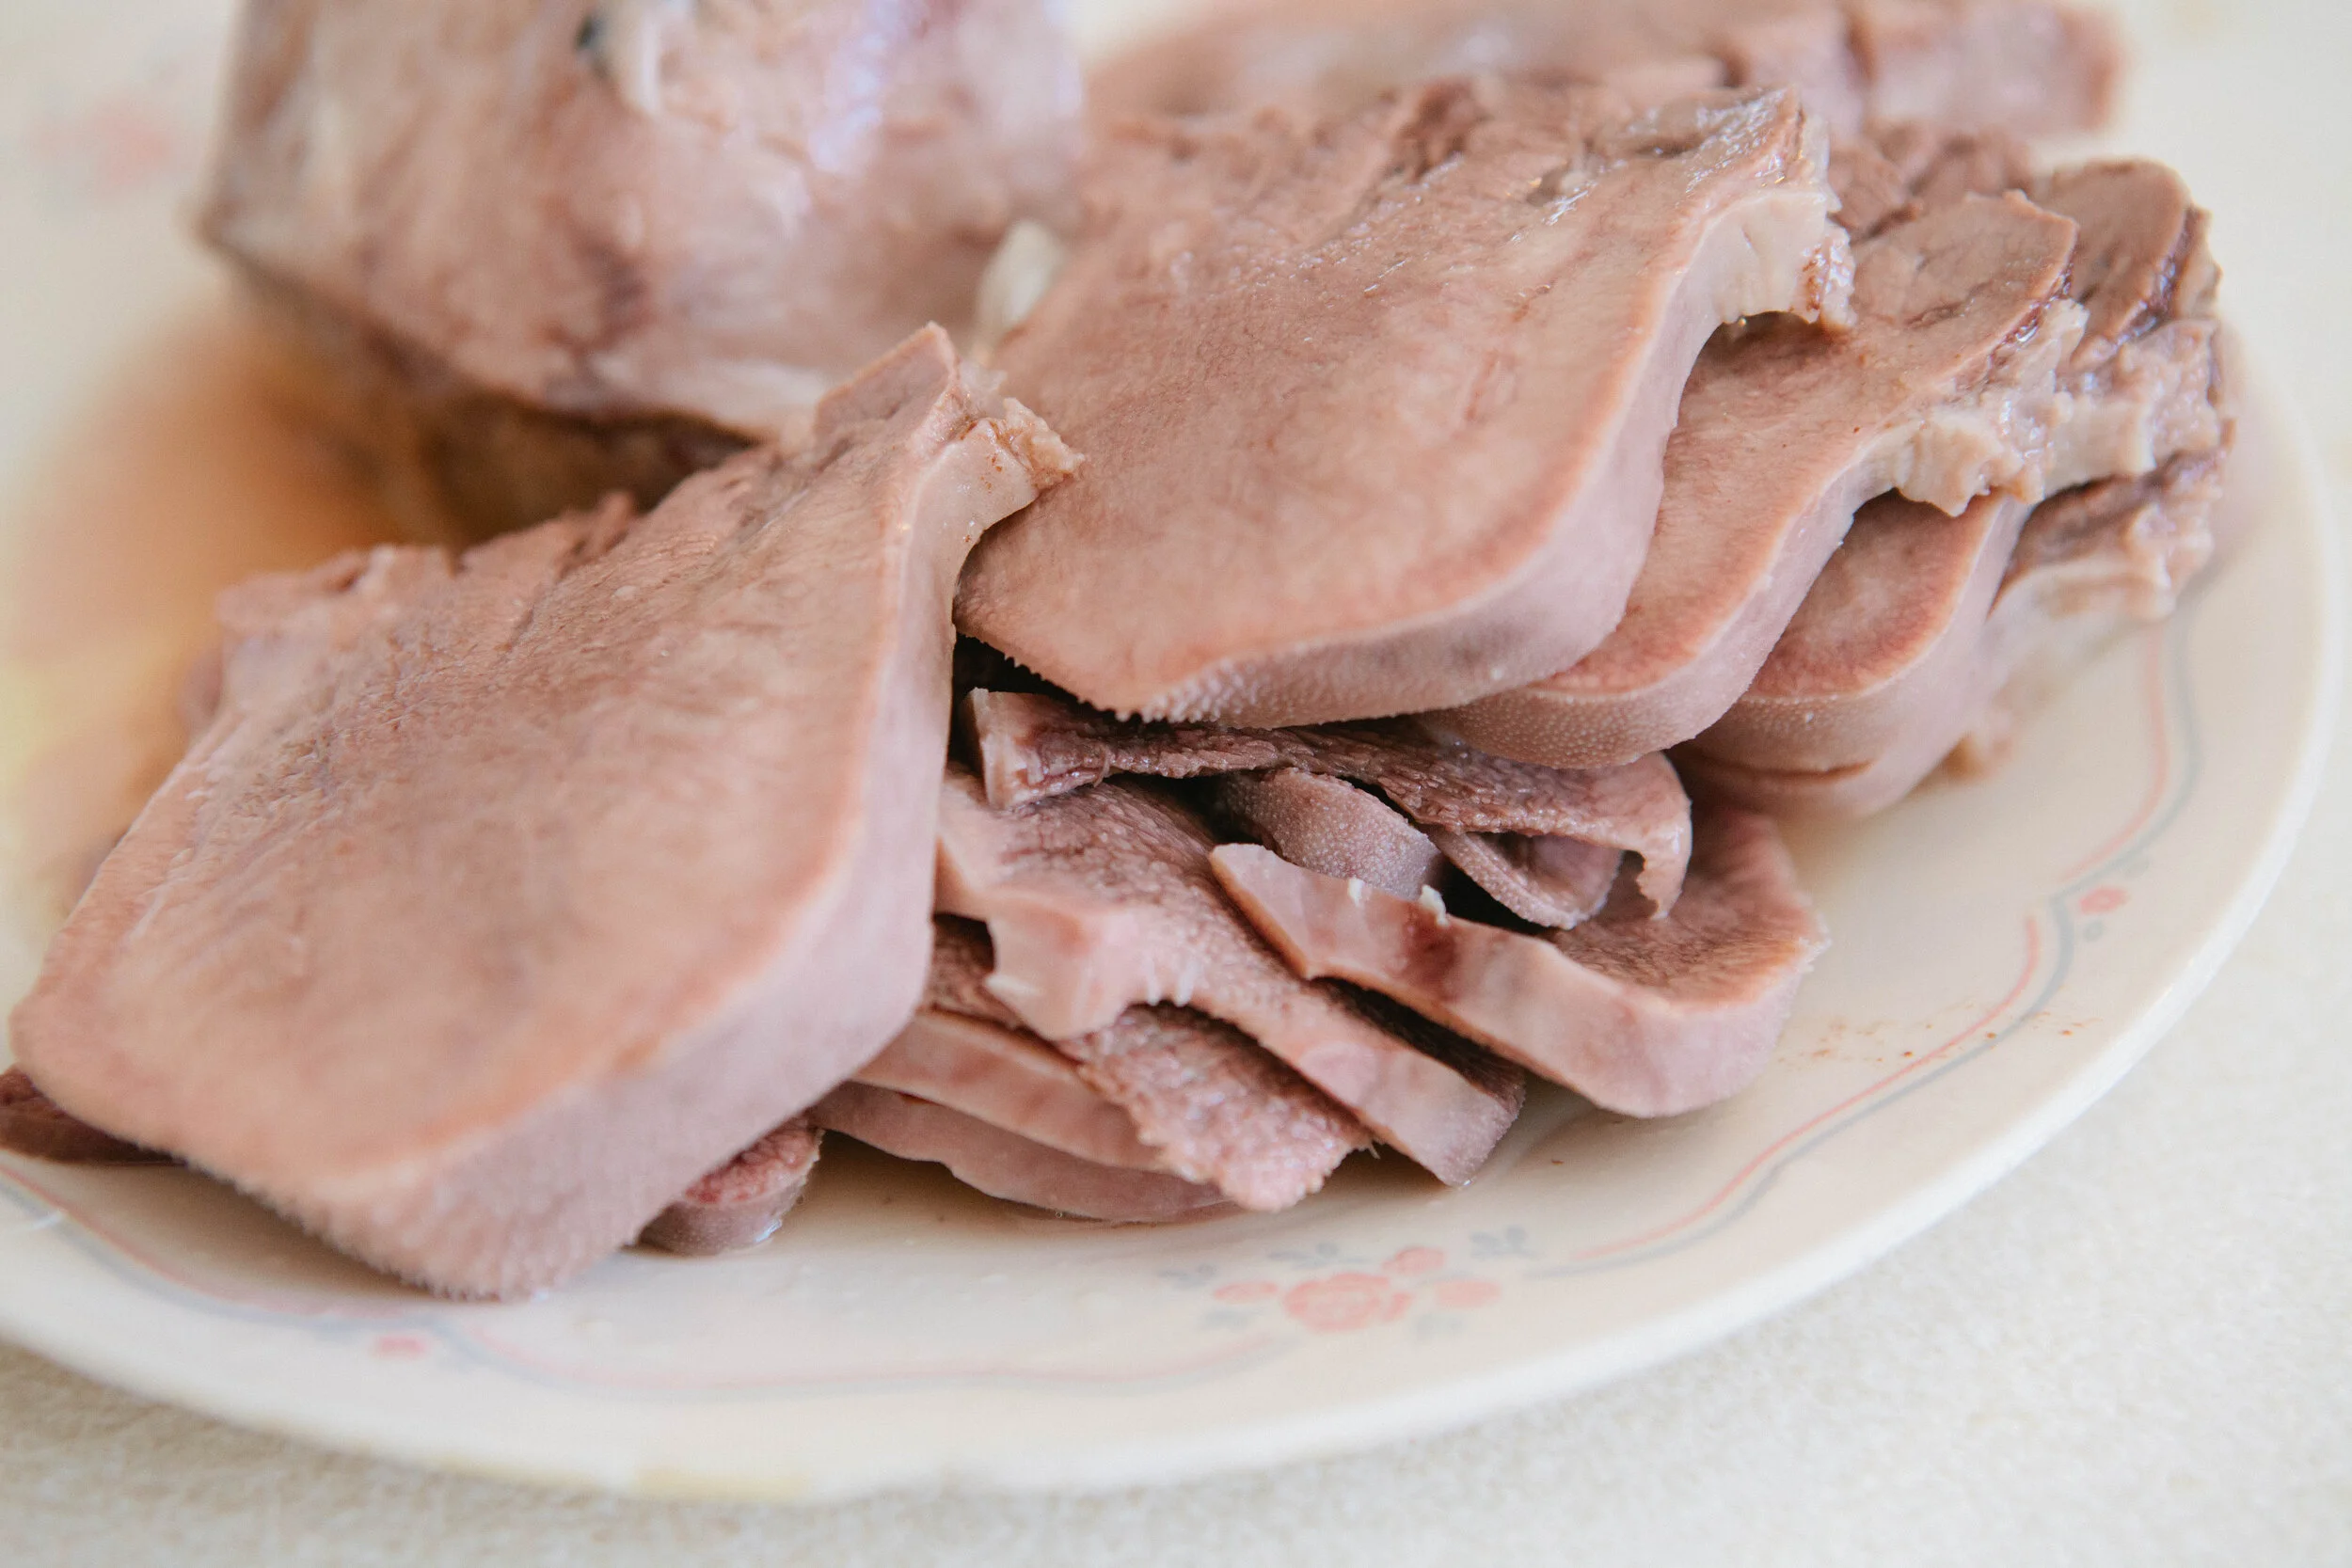
I recently got half a cow and had a beef tongue in my freezer! I wanted to use all of meat and wanted to give this recipe a try. Turns out - I love beef tongue!

Beef  tongue is a very delicious dark meat with a rich flavor because of it’s high fat content. It’s about 66% fat! It’s also a highly used muscle so it’s very tender. 

Beef tongue is very simple to prepare. I prefer to boil it, like the recipe below, but you can also put it in a slow cooker for 8 hours. Either way, the stock that you’re left with is rich and delicious. I’ve kept my beef tongue stock before and used it to make Egyptian Lentil Soup

You can also shred beef tongue to use it in tacos or slice it to use in a stir fry. Because it looks like any other cut of meat, no one will know it’s tongue! It’s not an organ meat so it doesn’t have the strong taste associated with it like livers or hearts to.

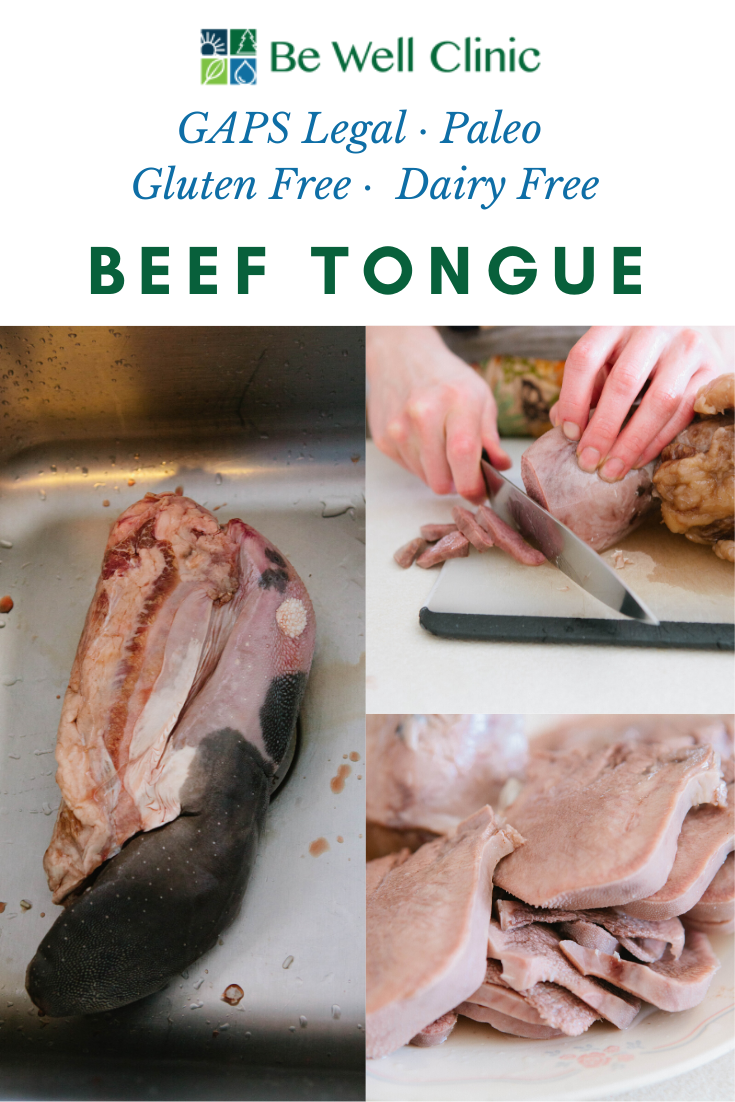
Did you recently get a full cow and you’re unsure what to do with the beef tongue? This is an easy recipe for boiled beef tongue. Beef tongue is a mild meat, like a pork tenderloin. GAPS Diet legal recipe by Amy Mihaly, Certified GAPS Practitioner i…

Ingredients for Beef Tongue:

  • 4.4 lbs of beef tongue

  • 1 ½ tbsp Salt

  • 1 tsp Peppercorns

  • 5 Cloves of Garlic, Whole

  • 4 Bay leaves

Directions for Beef Tongue:

Rinse the beef tongue thoroughly.

Did you recently get a full cow and you’re unsure what to do with the beef tongue? This is an easy recipe for boiled beef tongue. Beef tongue is a mild meat, like a pork tenderloin. GAPS Diet legal recipe by Amy Mihaly, Certified GAPS Practitioner i…

Place beef tongue in a large pot. Fill with enough water to cover the beef tongue. Gently press the beef tongue down so it is under the water.

Did you recently get a full cow and you’re unsure what to do with the beef tongue? This is an easy recipe for boiled beef tongue. Beef tongue is a mild meat, like a pork tenderloin. GAPS Diet legal recipe by Amy Mihaly, Certified GAPS Practitioner i…

Add salt, peppercorns, garlic and bay leaves to the pot. Or to prevent inadvertently taking out peppercorns with the scum, add your aromatics after you skim the scum. 

Did you recently get a full cow and you’re unsure what to do with the beef tongue? This is an easy recipe for boiled beef tongue. Beef tongue is a mild meat, like a pork tenderloin. GAPS Diet legal recipe by Amy Mihaly, Certified GAPS Practitioner i…

Bring beef tongue and water to a boil. Skim the scum off the top. 

Turn heat down to medium and cook for about two hours, until the outer skin starts to peel off . You want everything to be on a high simmer, low boil.

Did you recently get a full cow and you’re unsure what to do with the beef tongue? This is an easy recipe for boiled beef tongue. Beef tongue is a mild meat, like a pork tenderloin. GAPS Diet legal recipe by Amy Mihaly, Certified GAPS Practitioner i…

Once the outer skin can be peeled away, remove the tongue onto a plate to allow to cool. 

Strain the aromatics out of the stock and set aside to use in another recipe. (I suggest this Egyptian Lentil Soup recipe.) 

Did you recently get a full cow and you’re unsure what to do with the beef tongue? This is an easy recipe for boiled beef tongue. Beef tongue is a mild meat, like a pork tenderloin. GAPS Diet legal recipe by Amy Mihaly, Certified GAPS Practitioner i…

Once the tongue is cool, peel off the skin completely. Then chop up the meat as you would any other cut of meat!

Enjoy!


Did you recently get a full cow and you’re unsure what to do with the beef tongue? This is an easy recipe for boiled beef tongue. Beef tongue is a mild meat, like a pork tenderloin. GAPS Diet legal recipe by Amy Mihaly, Certified GAPS Practitioner i…

Beef Tongue

Author:
prep time: cook time: total time:

ingredients:

  • 4.4 lbs of beef tongue
  • 1 ½ tbsp Salt
  • 1 tsp Peppercorns
  • 5 Cloves of Garlic, Whole
  • 4 Bay leaves

instructions:

How to cook Beef Tongue

  1. Rinse the beef tongue thoroughly.
  2. Place beef tongue in a large pot. Fill with enough water to cover the beef tongue. Add salt, peppercorns, garlic and bay leaves to the pot. Or to prevent inadvertently taking out peppercorns with the scum, add your aromatics after you skim the scum.
  3. Bring beef tongue and water to a boil. Skim the scum off the top.
  4. Turn heat down to medium and cook for about two hours, until the outer skin starts to peel off . You want everything to be on a high simmer, low boil.
  5. Once the outer skin can be peeled away, remove the tongue onto a plate to allow to cool.
  6. Strain the aromatics out of the stock and set aside to use in another recipe. (I suggest thisEgyptian Lentil Soup recipe.)
  7. Once the tongue is cool, peel off the skin completely. Then chop up the meat as you would any other cut of meat!
  8. Enjoy!
Created using The Recipes Generator

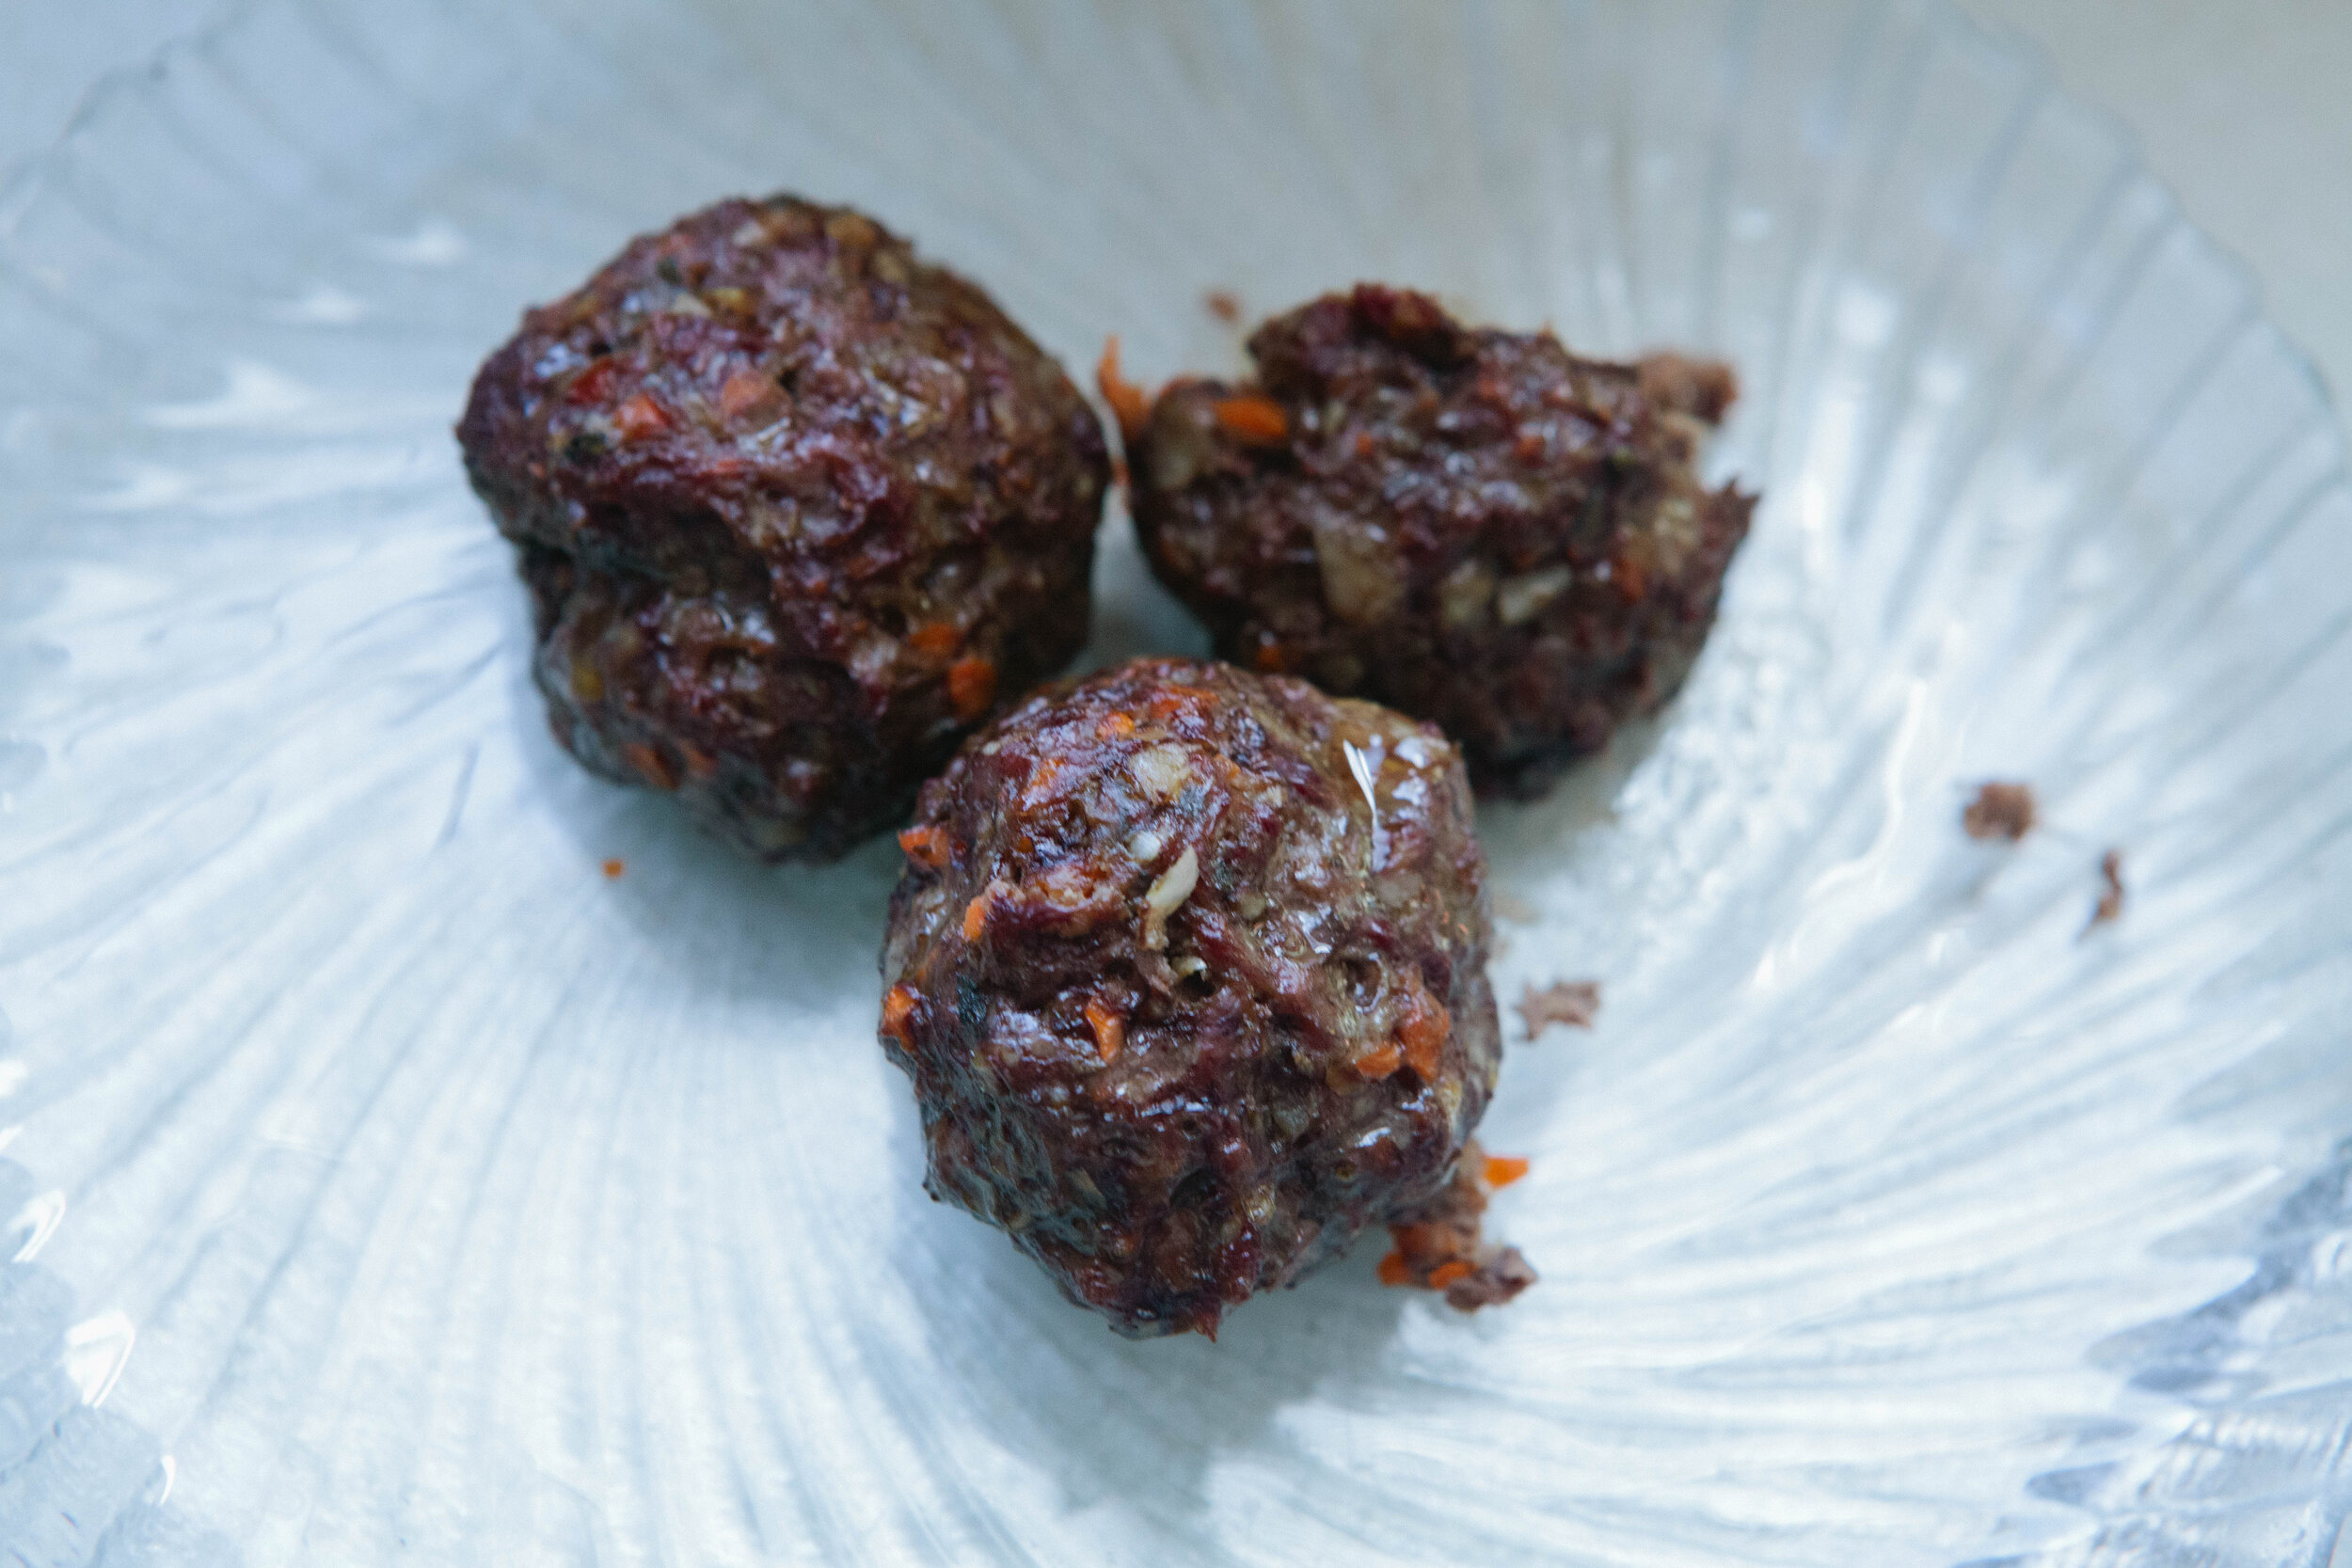
Egg Free, Dairy Free Liver Meatballs

Liver is an amazing superfood! It contains lots of vitamins and minerals, including zinc, iron, B vitamins, A vitamins, and folate. In our modern world, all of our livers are well taxed because of our exposure to chemicals. Anytime we know we need to support a particular organ, one of the best ways to do that is to consume the organ meat of the organ you’re trying to support.

You can spice your meatballs with anything you want but think of strong flavors. You want to neutralize the flavor of the liver.  You can also add any additional vegetables that you know your family likes. If you add additional vegetables like zucchini, eggplant or peppers and are finding the consistency of the meatball mixture to not be very sticky, you may want to add an egg to help bind everything together. Otherwise, these meatballs are egg free and dairy free!

This is a recipe that I recommend to a lot of moms! It’s a great way to help your kids eat a little bit of liver every day, which is the best way to eat liver. This recipe makes a lot of meatballs so you can freeze them and take out a few at a time to have for lunch or dinner.

Makes 27-30 Meatballs

Ingredients for Liver Meatballs:

  • 2 lb ground beef

  • ½ lb beef liver

  • 2 carrots, about 1 cup grated

  • ⅓ large white onion, about ⅔ a cup grated

  • 6 large cloves of Garlic

  • Oregano, 1 bunch Fresh or 1 tbsp Dried

  • Basil, 1 bunch Fresh or 1 tbsp Dried

  • ¼ - ½ tsp Pepper

  • 2 tsp Salt

  • 1 tbsp lard

Directions for Liver Meatballs:

IMG_6158.jpg

For milder tasting liver, soak it in some kind of acid. Cover the liver in filtered water and then add the juice of one lemon or 1-2 tablespoons of apple cider vinegar. Leave to soak for 30 minutes. Be sure not to soak it for too long. The acid will break down the liver and start it “cooking” prematurely.

Preheat your oven to 375.

IMG_6175.jpg

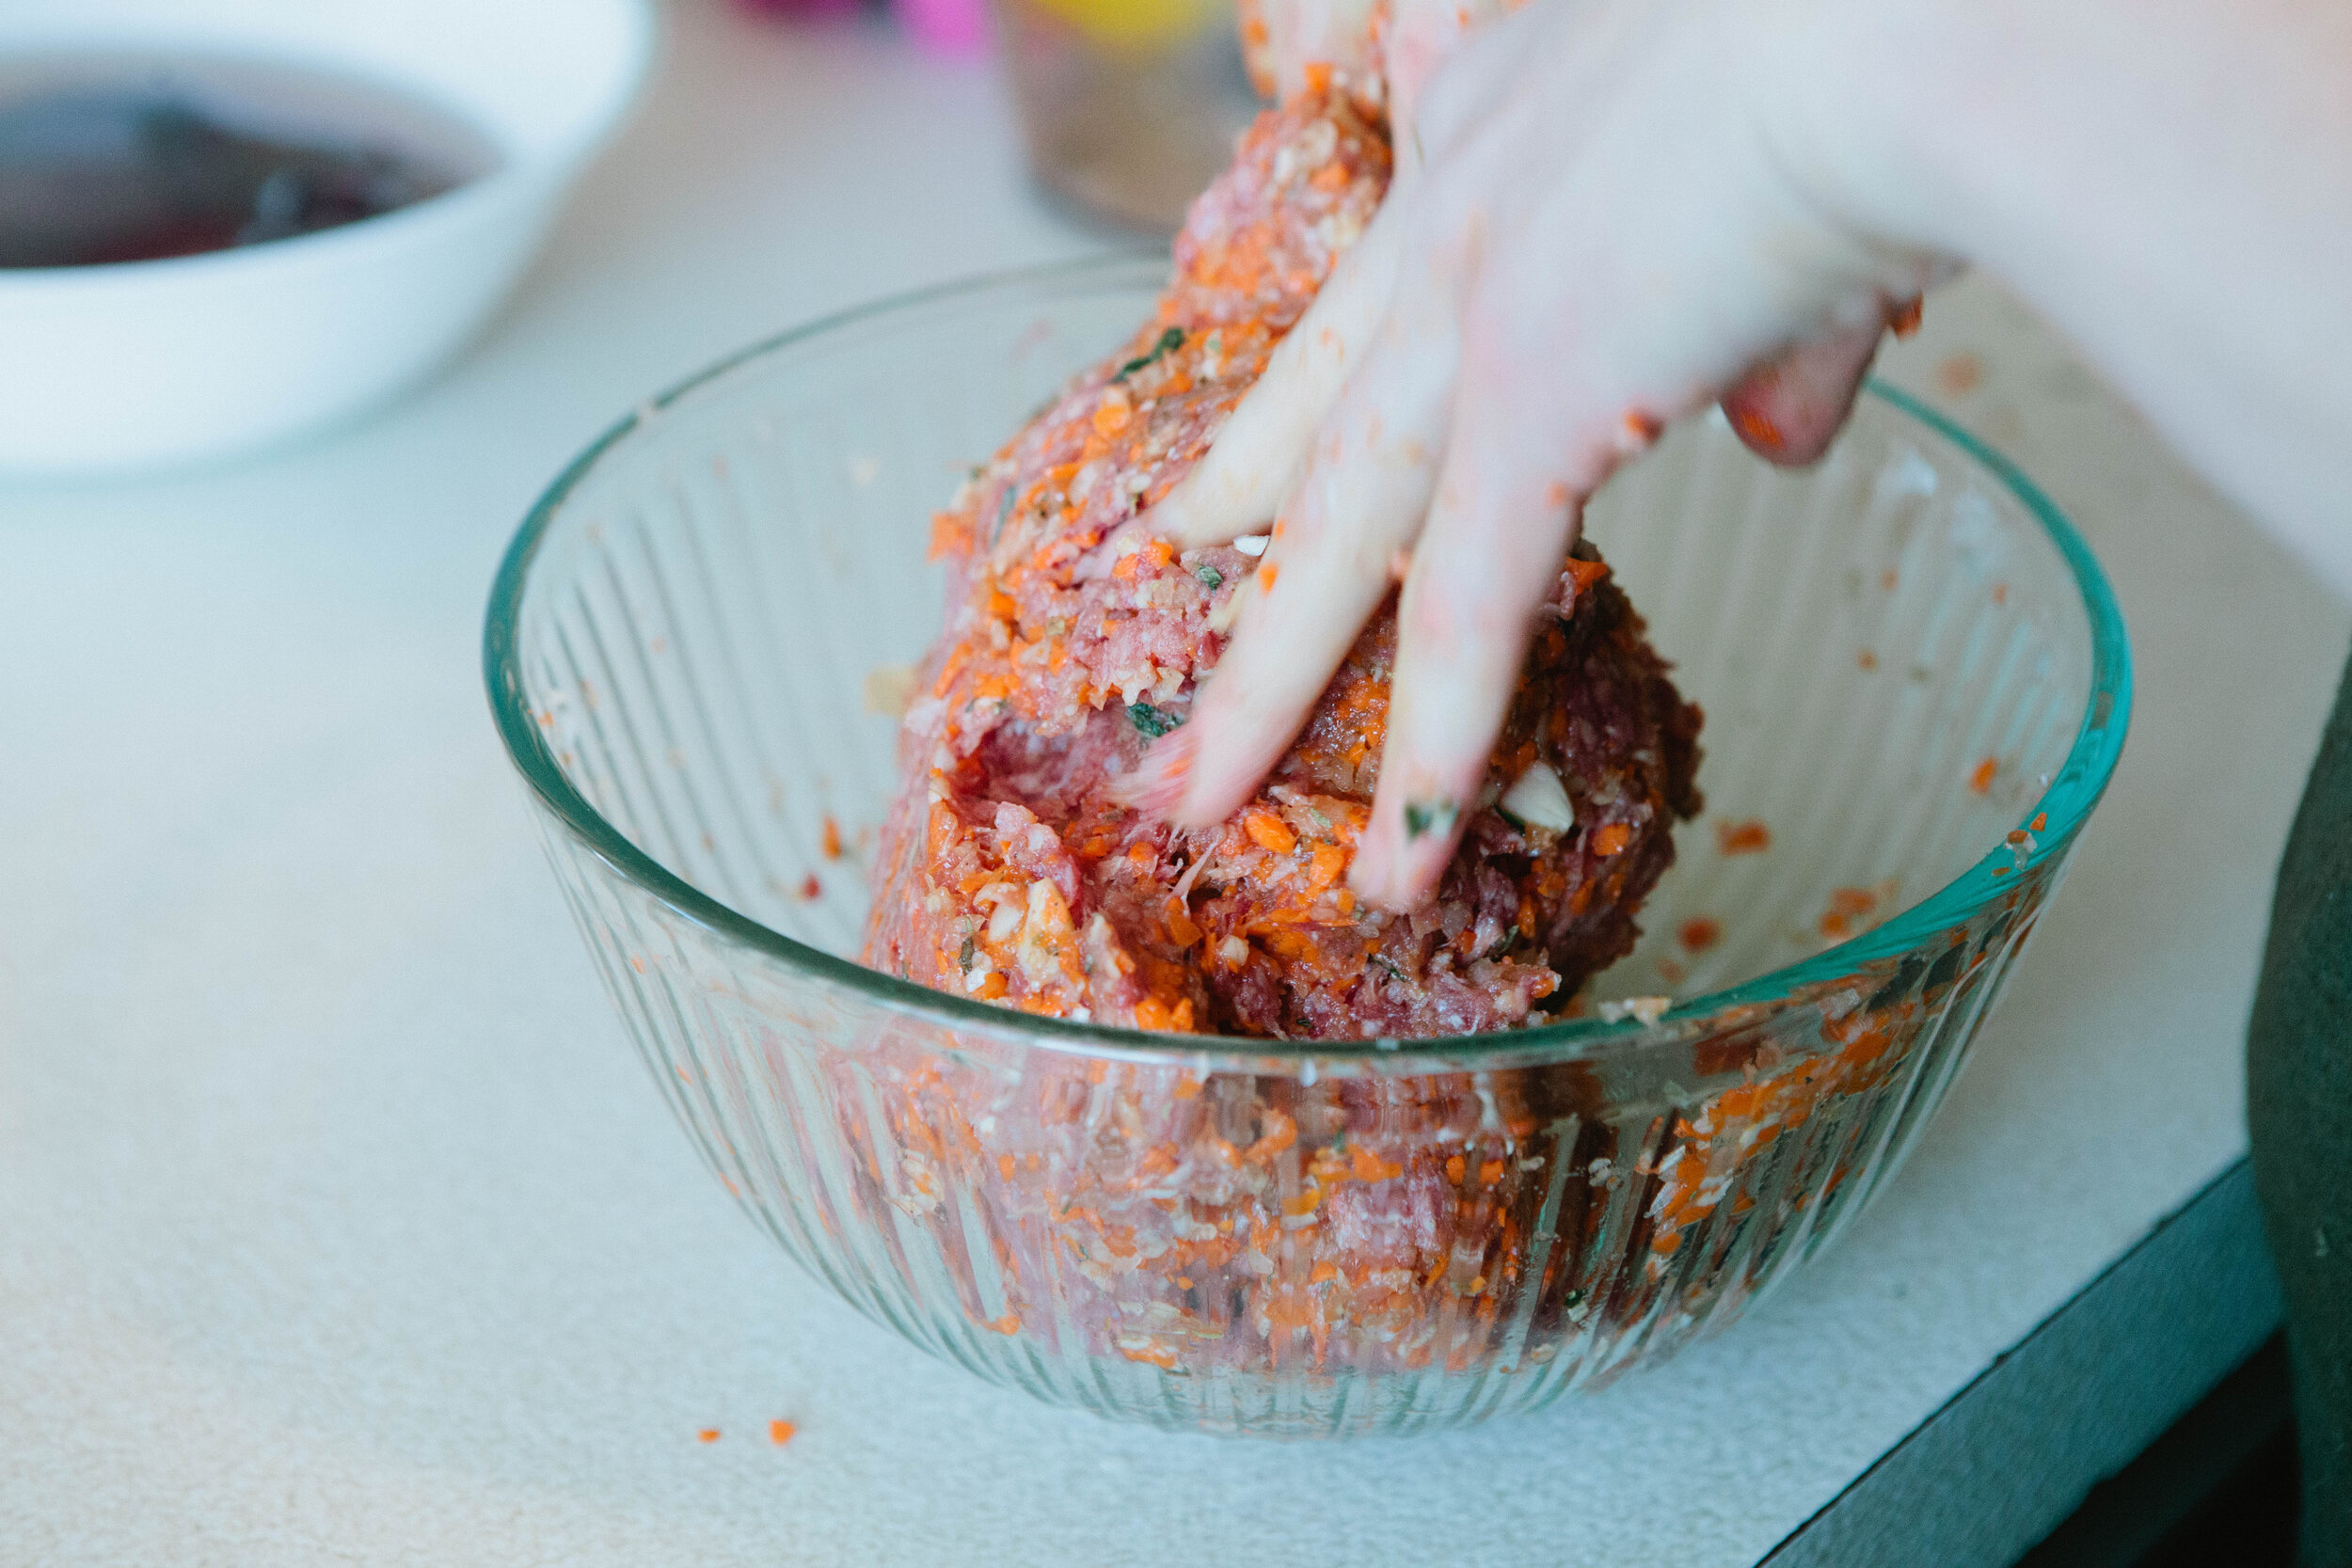
Grate your carrot, onion and garlic into very fine pieces. Add to a large bowl with ground beef. Add in oregano, basil and salt and pepper. Mix with your hands. 

IMG_6189.jpg

Place your liver into a food processor once it has soaked. Pulse until smooth. Add to the bowl with the beef, vegetables and spices and mix again.

IMG_6214.jpg

Spread lard onto the bottom of a glass oven safe casserole dish. 

IMG_6224.jpg

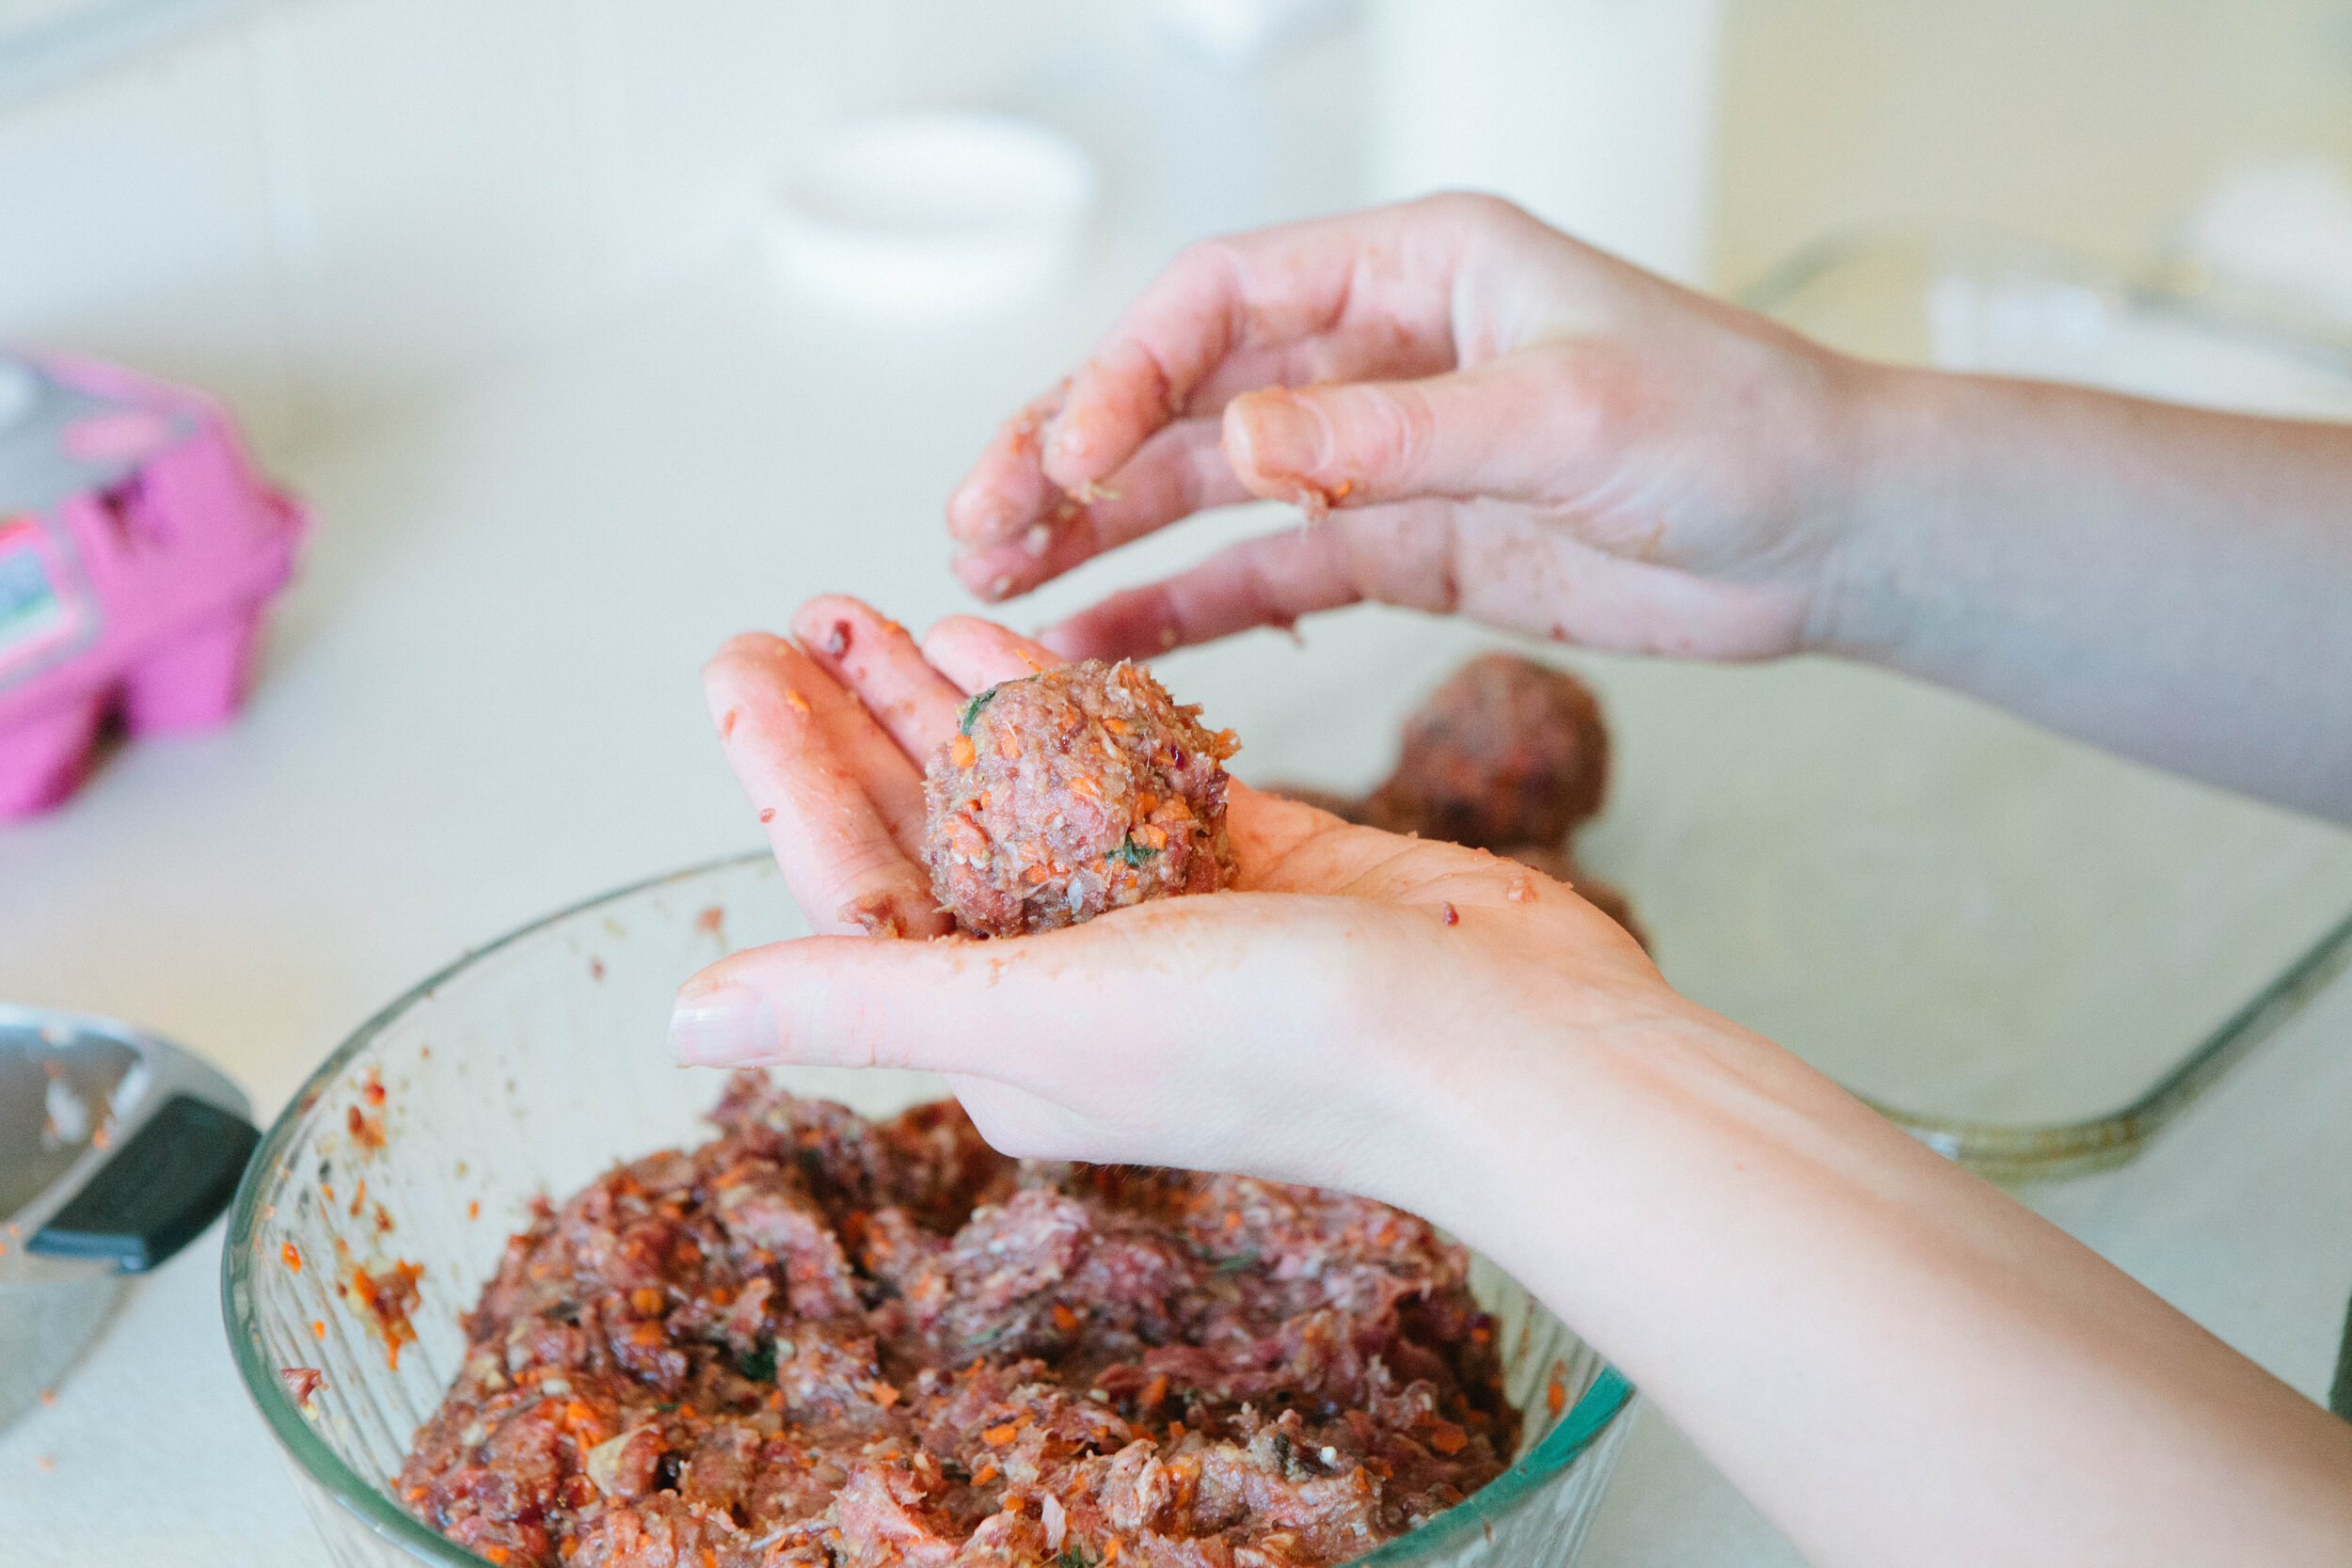
Take a small handful of meat at a time and roll into a meatball. Continue to roll meatballs until you have filled your casserole dish. Keep consistency in the size and shape of your meatballs to ensure even cooking time.

IMG_6229.jpg

Line meatballs, leaving some space between them.

Bake for 45 minutes.

IMG_6353.jpg

Enjoy with spaghetti squash and make your own spaghetti sauce for a spaghetti night. Or enjoy with any variety of vegetables like brussels sprouts or broccoli!

Egg Free, Dairy Free Liver Meatballs

prep time: cook time: total time:

ingredients:

  • 2 lb ground beef
  • ½ lb beef liver
  • 2 carrots, about 1 cup grated
  • ⅓ large white onion, about ⅔ a cup grated
  • 6 large cloves of Garlic
  • Oregano, 1 bunch Fresh or 1 tbsp Dried
  • Basil, 1 bunch Fresh or 1 tbsp Dried
  • ¼ - ½ tsp Pepper
  • 2 tsp Salt
  • 1 tbsp lard

instructions:

How to cook Egg Free, Dairy Free Liver Meatballs

  1. For milder tasting liver, soak it in some kind of acid. Cover the liver in filtered water and then add the juice of one lemon or 1-2 tablespoons of apple cider vinegar. Leave to soak for 30 minutes. Be sure not to soak it for too long. The acid will break down the liver and start it “cooking” prematurely.
  2. Preheat your oven to 375.
  3. Grate your carrot, onion and garlic into very fine pieces. Add to a large bowl with ground beef. Add in oregano, basil and salt and pepper. Mix with your hands.
  4. Place your liver into a food processor once it has soaked. Pulse until smooth. Add to the bowl with the beef, vegetables and spices and mix again.
  5. Spread lard onto the bottom of a glass oven safe casserole dish.
  6. Take a small handful of meat at a time and roll into a meatball. Continue to roll meatballs until you have filled your casserole dish. Keep consistency in the size and shape of your meatballs to ensure even cooking time.
  7. Line meatballs, leaving some space between them.
  8. Bake for 45 minutes.
  9. Enjoy with spaghetti squash and make your own spaghetti sauce for a spaghetti night. Or enjoy with any variety of vegetables like brussels sprouts or broccoli!
Created using The Recipes Generator
42.png

GAPS Legal Chicken Pot Pie Soup

I have fond memories of chicken pot pie growing up. I recently learned it’s one of my mom’s favorite foods, which is probably why we enjoyed it often. She at times would make her own but we would usually have the individual frozen pot pies. 

The key to this soup being reminiscent of a pot pie is to cut the vegetables into bite size pieces and make a consistency that’s more like a stew than a soup. Included in this recipe are a few tricks to thicken the soup so it more closely resembles the gravy that we associate with chicken pot pie.

In case you aren’t already convinced by the title, here are a couple other reasons you should try this recipe:

  1. Soup is easy to make in a large batch making it great to feed a crowd or to freeze for later.

  2. You just might find some distant childhood memories while eating it.

  3. The vegetables in pot pie can vary so you can use up what you have on hand.

  4. With a specific flavor profile, it can help expand your soup repertoire. 

Ingredients for GAPS Legal Chicken Pot Pie Soup

  • 1 Whole Chicken

  • 8 Whole Carrots

  • 4 Celery Stalks

  • 1 Yellow Onion

  • 10 oz. Frozen Peas

  • 2 sprig of Tarragon

  • 2 sprig of Basil

Directions for GAPS Legal Chicken Pot Pie Soup

IMG_4915.jpg

Prepare your stock first. Cut up the entire chicken (See how to break down a chicken here.) Set breast meat aside. Add the rest of a chicken to a large stock pot filled with filtered water. Bring to a boil.

Cube chicken breasts, keeping meat around the same size.

Cut up 3 carrots, 2 celery stalks and ½ onions. 
IMG_5021.jpg

Once chicken is brought to a boil, skim off any scum. Add in the aromatics: carrots, celery, onions, tarragon and basil.

Boil for an hour and half until chicken is done.

IMG_5108.jpg

Once chicken is done, remove the chicken pieces from the stock pot. Set aside to cool. Keep the remaining yummy stock on the stove.

IMG_5122.jpg

Once chicken has cooled, remove the chicken meat from the bones. Remove all the meat, joints and connective tissue from the bones. It’s all good stuff! Set the skin aside. The skin will be blended into the stock. Add the bones back to the stock.

Continue to simmer the stock for another 30 - 45 minutes.

IMG_5002.jpg

Chop up remaining carrots, celery and onion. Roughly chop the cooked chicken into bite sized pieces.

Strain the stock. Add 8 cups of stock to a seperate pot. Add in the chicken skin and any organ meats. Blend the skin into the stock with an immersion blender.

Add in chopped carrots, celery, and onion. Cook for 20 minutes.

IMG_5271.jpg

When carrots are soft, add in chopped chicken pieces and the frozen peas. Add fresh tarragon and basil. Add additional salt and a few turns of a pepper grinder.

Cook for twenty minutes, until peas are warmed.

Serve warm!

For added creaminess, I recommend adding sour cream, cultured cream, ghee, butter, or heavy whipping cream, whichever you are tolerating. Make sure to add any probiotic foods into your bowl after serving so as not to kill the live microbes.

GAPS Legal Chicken Pot Pie Soup

prep time: cook time: total time:

ingredients:

  • 1 Whole Chicken
  • 8 Whole Carrots
  • 4 Celery Stalks
  • 1 Yellow Onion
  • 10 oz. Frozen Peas
  • 2 sprig of Tarragon
  • 2 sprig of Basil

instructions:

How to cook GAPS Legal Chicken Pot Pie Soup

  1. Prepare your stock first. Cut up the entire chicken (See how to break down a chicken here.) Set breast meat aside. Add the rest of a chicken to a large stock pot filled with filtered water. Bring to a boil.
  2. Cube chicken breasts, keeping meat around the same size.
  3. Cut up 3 carrots, 2 celery stalks and ½ onions.
  4. Once chicken is brought to a boil, skim off any scum. Add in the aromatics: carrots, celery, onions, tarragon and basil.
  5. Boil for an hour and half until chicken is done.
  6. Once chicken is done, remove the chicken pieces from the stock pot. Set aside to cool. Keep the remaining yummy stock on the stove.
  7. Once chicken has cooled, remove the chicken meat from the bones. Remove all the meat, joints and connective tissue from the bones. It’s all good stuff! Set the skin aside. The skin will be blended into the stock. Add the bones back to the stock.
  8. Continue to simmer the stock for another 30 - 45 minutes.
  9. Chop up remaining carrots, celery and onion. Roughly chop the cooked chicken into bite sized pieces.
  10. Strain the stock. Add 8 cups of stock to a seperate pot. Add in the chicken skin and any organ meats. Blend the skin into the stock with an immersion blender.
  11. Add in chopped carrots, celery, and onion. Cook for 20 minutes.
  12. When carrots are soft, add in chopped chicken pieces and the frozen peas. Add fresh tarragon and basil. Add additional salt and a few turns of a pepper grinder.
  13. Cook for twenty minutes, until peas are warmed.
  14. Serve warm!
  15. For added creaminess, I recommend adding sour cream, cultured cream, ghee, butter, or heavy whipping cream, whichever you are tolerating. Make sure to add any probiotic foods into your bowl after serving so as not to kill the live microbes.
Created using The Recipes Generator
36.png

Cast Iron Parboiled Lamb Meatballs

Meatballs are a simple way to add variety to your diet. They can also be a great way to get your kids to eat vegetables! Add finely chopped onions, zucchini, peppers, etc. in to your meatballs to add vegetables.

I’m making these meatballs with lamb burger but you can do it with any kind of burger.

If you have a lean cut, make sure you add fat! I prefer to not use a lean cut; it’s better for your health! Remember, fat is your friend.

My preferred way of making meatballs is to parboil them.

An added benefit of rolling lamb meatballs is the lovely lamb tallow on your skin! Tallow is fat and lamb tallow is the best for your skin. Your hands will be soft, moisturized, and waterproof after rolling your meatballs.

Ingredients for GAPS Friendly Lamb Meatballs

  • 1 lb ground lamb

  • Salt

Directions for GAPS Friendly Lamb Meatballs

IMG_1446.jpg

Heat ½ inch of water in a pan.

IMG_1470.jpg

Roll your lamb into inch sized balls. You can make your meatballs any size, just make sure they’re consistently sized.

IMG_1476.jpg

Add your meatballs into your pan with water.

IMG_1485.jpg

Turn your meatballs with a fork to continue to cook on all sides. Salt your meatballs generously.

As you turn them, continue to salt the meatballs.

IMG_1496.jpg

After approximately five minutes, when you think your meatballs are done, cut one open to check it if it is done.

Continue to add water, meatballs, and salt in batches until you have cooked your desired number of meatballs.

Enjoy!

IMG_1575.jpg

Cast Iron Parboiled Lamb Meatballs

Author:
prep time: cook time: total time:

ingredients:

  • 1 lb ground lamb
  • Salt

instructions:

How to cook Cast Iron Parboiled Lamb Meatballs

  1. Heat ½ inch of water in a pan.
  2. Roll your lamb into inch sized balls. You can make your meatballs any size, just make sure they’re consistently sized.
  3. Add your meatballs into your pan with water.
  4. Turn your meatballs with a fork to continue to cook on all sides. Salt your meatballs generously.
  5. As you turn them, continue to salt the meatballs.
  6. After approximately five minutes, when you think your meatballs are done, cut one open to check it if it is done.
  7. Continue to add water, meatballs, and salt in batches until you have cooked your desired number of meatballs.
  8. Enjoy!
Created using The Recipes Generator
44.png

How to Make Your Own Spaghetti Sauce

I’ve always liked spaghetti and spaghetti sauce but when I started making my own spaghetti sauce, I realized I liked my own sauce best of all! I love making my own spaghetti sauce because I get to be in charge of the flavor, texture, and strength. Plus, I know everything that’s in it! I did try making my own tomato paste once but it was way too much work! I’m glad to have other options for tomato paste and sauce.

If you want a really smooth sauce, I recommend using tomato paste. If you don’t mind it with a little texture or you have an immersion blender, you can make it with crushed tomatoes. Using crushed tomatoes to make your sauce is preferable because there is less processing involved. Whole, raw tomatoes can also be used. Simply cut them into chunks, put them into a pot with water, and simmer slightly. You can remove the seeds but if you don’t mind them, that’s one less step and less work!

After the tomatoes have cooked for a period of time and are soft, you can puree them with an immersion blender or stand blender. After the tomatoes are pureed, simmer on low heat and begin adding your spices.

I also love tomato sauce because as long as you are tolerating tomatoes, you can eat this on the introduction diet of GAPS, as early as stage four. If you are on the introduction diet, make sure you are adding fresh herbs. When using fresh herbs, you will need to use larger amounts and plan to simmer your sauce for a longer period of time. A long simmer simply makes your sauce more delicious.

For a quicker spaghetti sauce, use crushed glass can tomatoes, like the ones pictured below. Begin cooking them and, when warm and soft, immersion blend them or add them to a stand blender. If you want the sauce less chunky, you can blend before you add your herbs and spices.

IMG_1347.jpg

If using tomato puree or tomato paste, you will need to reconstitute it with water. A small amount of paste can go a long way! Start with adding equal parts water and paste. Continue adding water if needed until you get to your desired consistency. Make sure you do not use tin canned paste, especially if it’s lined with plastic coating. I recommend only using glass canned items from a company you know and trust.

If you have any fermented garlic, add a tablespoon or so of the liquid at the very end of your cooking. This will send your sauce over the top.

Traditional spaghetti sauce recipes have sugar in them. If you are transitioning your family from a sugary diet, you could consider adding a little bit of honey into the mixture. However, it is best to not add a sweetener if you can avoid it.

This spaghetti sauce recipe can be used for a lovely spaghetti night, or you can use it to make zucchini pizzas!

Once you have your tomato base, read below to find out how to finish your sauce.

Ingredients to Make Your Own Tomato Sauce

  • 18 oz. crushed tomatoes

  • 2 Bay Leaves

  • 1 tbsp lard

  • ⅓ cup minced onion

  • 3-5 cloves of garlic

  • 2 tsp Dried Oregano

  • 1 tsp Dried Sage

  • 2 tsp Dried Thyme

  • 1 tsp Salt

Directions to Make Your Own Spaghetti Sauce

This recipe uses crushed tomatoes. You can also use tomato paste or whole tomatoes. (See above for directions on using tomato paste or whole tomatoes to make your sauce.)

Add one 18 oz. of crushed tomatoes into a pot. Add a bit of water to the jar, swirl, and add to the pot. Immersion blend the tomatoes at this stage if you like texture in your sauce.

IMG_1407.jpg

Add two whole bay leaves into tomatoes on the sauce.

Warm your lard in a cast iron skillet. Finely chop your onions and garlic. Add onions to your skillet first. Mince your garlic. Add garlic.

IMG_1417.jpg

When onions and garlic are softened, add them in with the tomatoes. If you would like a completely smooth sauce, you can immersion blend the sauce at this stage.

Add your dried herbs into the mixture and stir together.

Add water as you need it if your sauce is too thick. As it simmers it will reduce so to start, you want a soupy consistency for better mixing. If you add too much water at any point, you’ll simply need to simmer your sauce longer.

IMG_1445.jpg

Simmer for at least twenty minutes. The longer you simmer your sauce, the better it will be.

Store any leftover sauce in the jar that your tomatoes came in. I leave the bay leaves in so the sauce continues to be flavored. It will keep for about a week in the fridge.

Use your spaghetti sauce to top roasted spaghetti squash or to make zucchini pizza bites!

IMG_1567.jpg

Spaghetti Squash

Author:
prep time: cook time: total time:

ingredients:

  • 18 oz. crushed tomatoes
  • 2 Bay Leaves
  • 1 tbsp lard
  • ⅓ cup minced onion
  • 3-5 cloves of garlic
  • 2 tsp Dried Oregano
  • 1 tsp Dried Sage
  • 2 tsp Dried Thyme
  • 1 tsp Salt

instructions:

How to cook Spaghetti Squash

  1. This recipe uses crushed tomatoes. You can also use tomato paste or whole tomatoes. (See above for directions on using tomato paste or whole tomatoes to make your sauce.)
  2. Add one 18 oz. of crushed tomatoes into a pot. Add a bit of water to the jar, swirl, and add to the pot. Immersion blend the tomatoes at this stage if you like texture in your sauce.
  3. Add two whole bay leaves into tomatoes on the sauce.
  4. Warm your lard in a cast iron skillet. Finely chop your onions and garlic. Add onions to your skillet first. Mince your garlic. Add garlic.
  5. When onions and garlic are softened, add them in with the tomatoes. If you would like a completely smooth sauce, you can immersion blend the sauce at this stage. 
  6. Add your dried herbs into the mixture and stir together.
  7. Add water as you need it if your sauce is too thick. As it simmers it will reduce so to start, you want a soupy consistency for better mixing. If you add too much water at any point, you’ll simply need to simmer your sauce longer.
  8. Simmer for at least twenty minutes. The longer you simmer your sauce, the better it will be.
  9. Store any leftover sauce in the jar that your tomatoes came in. I leave the bay leaves in so the sauce continues to be flavored. It will keep for about a week in the fridge.
  10. Use your spaghetti sauce to top roasted spaghetti squash or to make zucchini pizza bites!
Created using The Recipes Generator
23.png

Chicken Tortilla Soup Recipe

GAPS Legal Chicken Tortilla Soup Recipe

This Chicken Tortilla Soup recipe is a result of me expanding my horizons in genres of food that I cook and eat! This recipe is the first success in hopefully a line of new soups that branch out beyond what I normally make.

I made this recipe for a GAPS Group meeting. The group members thought it was really yummy, and it's a good GAPS soup because of all of the sour cream. It wasn't too spicy, and it's different than plain meat stock that you typically eat on Stage 1. There were tons of suggestions about different ways to make it, so it's also easy to switch up to match your tastes.

I don’t normally make a pepper rich soup but this chicken tortilla soup will keep you warm when it’s cold out, making it a great soup for winter. I don’t normally like spicy food and until fairly recently I have not been able to tolerate much spice. A trip to Nepal a couple years ago taught me that, no matter what it felt like, my mouth was not, in fact, melting off my face. Since that discovery, I have been able to expand my tolerance of spicier foods and enjoying the flavor palette that comes along with them. I have found that I tolerate Asian spices better but do enjoy the Central and South American spice palettes as well.

It’s best for our bodies to eat some kind of ferments alongside every meal. This helps with digestion, aids in removing toxins and keeps our gut flora balanced. My recommended ferments to pair with this chicken tortilla soup would be the Latin American sauerkraut Cortido, fermented peppers, or plain sauerkraut.

Ingredients for Chicken Tortilla Soup:

  • 15 cups chicken stock

  • 4-6 tbsp Lard

  • 1 Medium Onion

  • 6-8 Garlic Cloves

  • 1 Red Bell Pepper

  • 1 Green Bell Pepper

  • Variety of Hot Peppers: I used a third of a Poblano, 2 Jalapenos,1 Serrano Pepper

  • 1 lb boneless skinless chicken breasts

  • Optional: additional 2 cups deboned chicken

  • 1 tsp Salt

  • 4-6 Sprigs Fresh Oregano

  • Fresh Cilantro

  • Sour Cream

  • Avocado (Omit until GAPS Stage 3)

  • Lime (Omit until GAPS Stage 4)

Directions for Chicken Tortilla Soup:

In a large cast iron pan over medium heat, soften lard. Boil chicken stock in a large stock pot.

This chicken tortilla soup recipe is GAPS Legal, GAPS Friendly, Paleo, Whole 30, Keto and a Real Food recipe. You can make it with many variations to make it dairy free as well. It's a little spicy because of the peppers but has the right amount of …

Thinly slice onions. De-seed and pith the peppers. Cut peppers into cubes.

Add onions to pan once lard is melted and pan is hot. Stir to coat in lard.

This chicken tortilla soup recipe is GAPS Legal, GAPS Friendly, Paleo, Whole 30, Keto and a Real Food recipe. You can make it with many variations to make it dairy free as well. It's a little spicy because of the peppers but has the right amount of …

Add green and red bell peppers to cast iron 2 - 3 minutes later.

This chicken tortilla soup recipe is GAPS Legal, GAPS Friendly, Paleo, Whole 30, Keto and a Real Food recipe. You can make it with many variations to make it dairy free as well. It's a little spicy because of the peppers but has the right amount of …

De-seed your various hot peppers. The amount and types you use depends on how spicy you want the end dish to be. I am pretty mild in terms of heat tolerance so the peppers I used are a mild to moderate heat. Slice them thinly and then cube into smaller chunks.

Add your peppers to the cast iron skillet and stir to combine. Add oregano to pan with peppers.

Dice garlic and add to cast iron pan.

This chicken tortilla soup recipe is GAPS Legal, GAPS Friendly, Paleo, Whole 30, Keto and a Real Food recipe. You can make it with many variations to make it dairy free as well. It's a little spicy because of the peppers but has the right amount of …

Cut chicken breasts into small strips. Add to cast iron pan.

Add salt to chicken and pepper mixture. Stir to combine. Cook until pink is nearly gone from meat. Meat does not need to be fully cooked.

This chicken tortilla soup recipe is GAPS Legal, GAPS Friendly, Paleo, Whole 30, Keto and a Real Food recipe. You can make it with many variations to make it dairy free as well. It's a little spicy because of the peppers but has the right amount of …

Add mixture to boiling meat stock. Add in any additional deboned chicken you have on hand.

Rinse cilantro. It is usually very sandy. Roughly chop cilantro,saving some to garnish the top of your bowls. You’ll want about a handful. Add to stock pot.

This chicken tortilla soup recipe is GAPS Legal, GAPS Friendly, Paleo, Whole 30, Keto and a Real Food recipe. You can make it with many variations to make it dairy free as well. It's a little spicy because of the peppers but has the right amount of …

Simmer for 15 - 30 minutes to blend the flavors.

This soup needs salt! You can add it during simmering or (my preferred method) allow each person to add salt to their bowl.

This chicken tortilla soup recipe is GAPS Legal, GAPS Friendly, Paleo, Whole 30, Keto and a Real Food recipe. You can make it with many variations to make it dairy free as well. It's a little spicy because of the peppers but has the right amount of …

Serve your chicken tortilla soup with plenty of sour cream and lime juice. Top with avocado slices and fresh cilantro. Enjoy!

GAPS-Legal-Chicken-Tortilla-Soup-Paleo-Friendly-Whole-30-Recipe-683x1024.png

Chicken Tortilla Soup

Author:
prep time: cook time: total time:

ingredients:

  • 15 cups chicken stock
  • 4-6 tbsp Lard
  • 1 Medium Onion
  • 6-8 Garlic Cloves
  • 1 Red Bell Pepper
  • 1 Green Bell Pepper
  • Variety of Hot Peppers: I used a third of a Poblano, 2 Jalapenos,1 Serrano Pepper
  • 1 lb boneless skinless chicken breasts
  • Optional: additional 2 cups deboned chicken
  • 1 tsp Salt
  • 4-6 Sprigs Fresh Oregano
  • Fresh Cilantro
  • Sour Cream
  • Avocado
  • Lime

instructions:

How to cook Chicken Tortilla Soup

  1. In a large cast iron pan over medium heat, soften lard. Boil chicken stock in a large stock pot.
  2. Thinly slice onions. De-seed and pith the peppers. Cut peppers into cubes.
  3. Add onions to pan once lard is melted and pan is hot. Stir to coat in lard.
  4. Add green and red bell peppers to cast iron 2 - 3 minutes later.
  5. De-seed your various hot peppers. The amount and types you use depends on how spicy you want the end dish to be. I am pretty mild in terms of heat tolerance so the peppers I used are a mild to moderate heat. Slice them thinly and then cube into smaller chunks.
  6. Add your peppers to the cast iron skillet and stir to combine. Add oregano to pan with peppers.
  7. Dice garlic and add to cast iron pan.
  8. Cut chicken breasts into small strips. Add to cast iron pan.
  9. Add salt to chicken and pepper mixture. Stir to combine. Cook until pink is nearly gone from meat. Meat does not need to be fully cooked.
  10. Add mixture to boiling meat stock. Add in any additional deboned chicken you have on hand.
  11. Rinse cilantro. It is usually very sandy. Roughly chop cilantro,saving some to garnish the top of your bowls. You’ll want about a handful. Add to stock pot.
  12. Simmer for 15 - 30 minutes to blend the flavors.
  13. This soup needs salt! You can add it during simmering or (my preferred method) allow each person to add salt to their bowl.
  14. Serve your chicken tortilla soup with plenty of sour cream and lime juice. Top with avocado slices and fresh cilantro. Enjoy!
Created using The Recipes Generator