full gaps

Gluten Free Noodle Alternatives

Years ago, it was quite unheard of to have a noodle alternative. But recently, allergies to gluten have allowed many traditional flour noodle alternatives to appear.

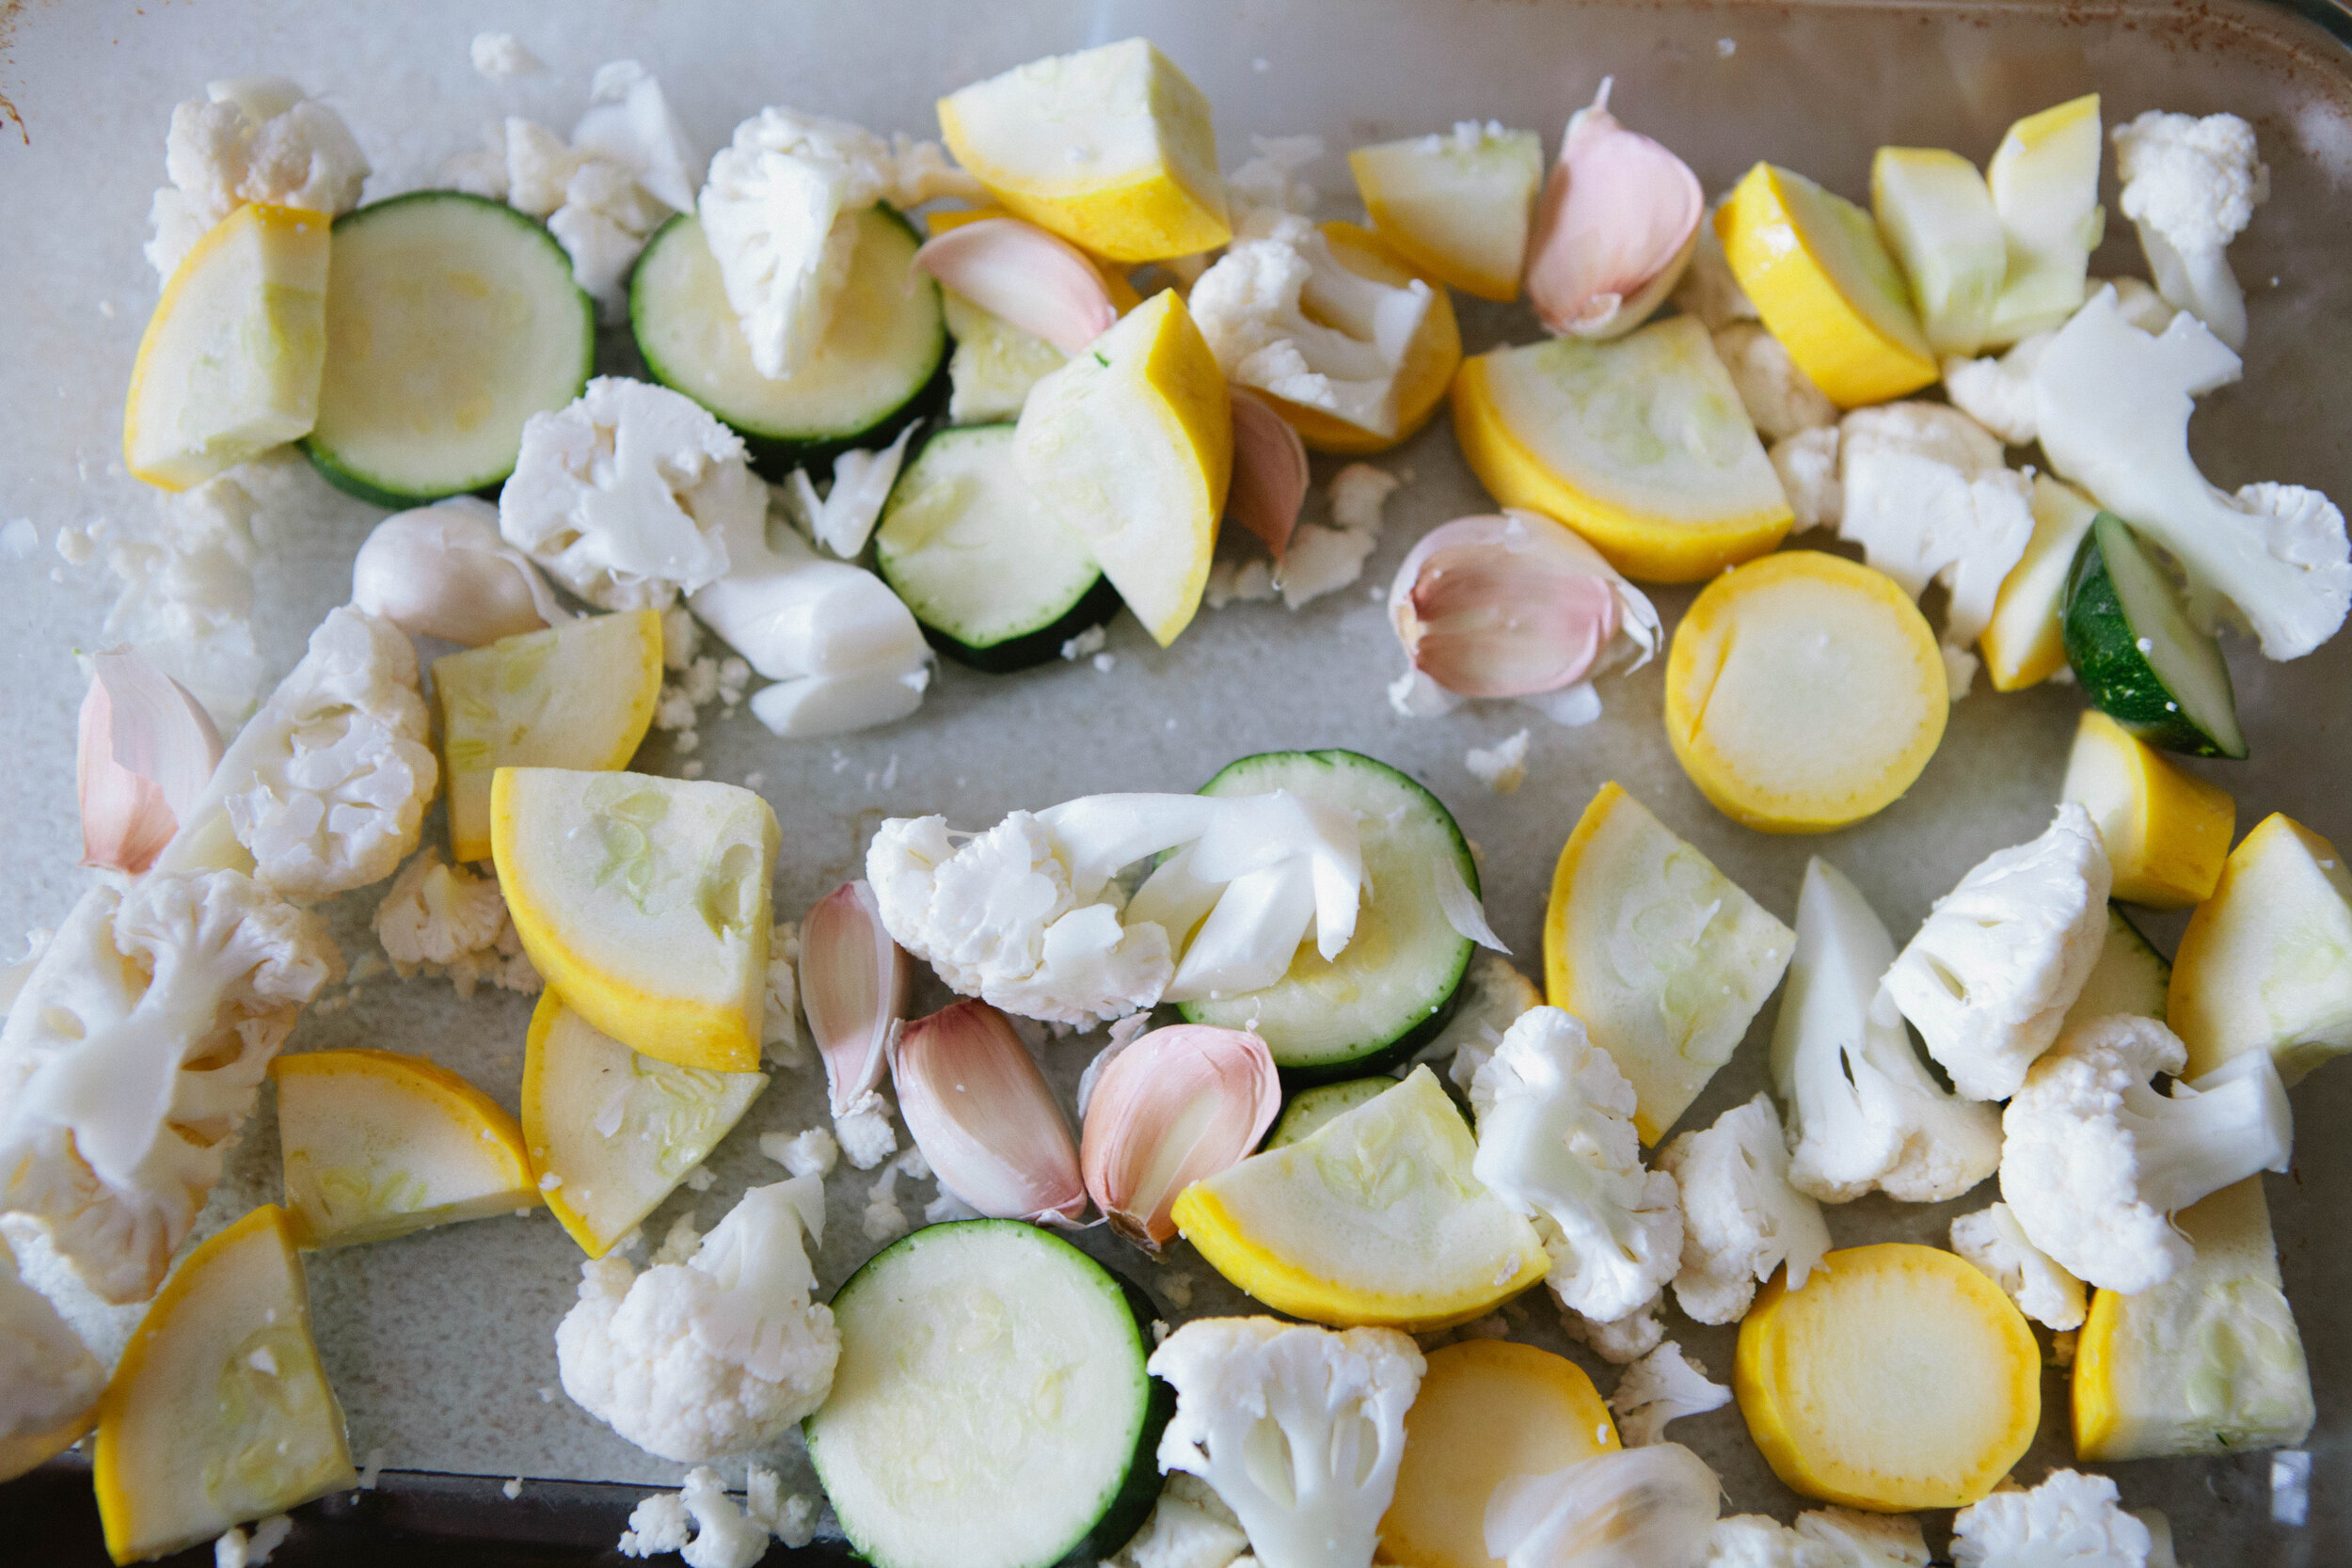
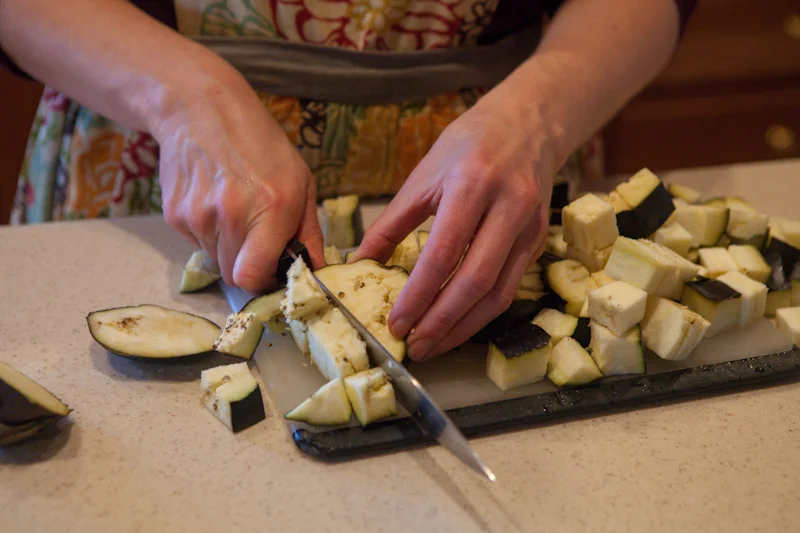
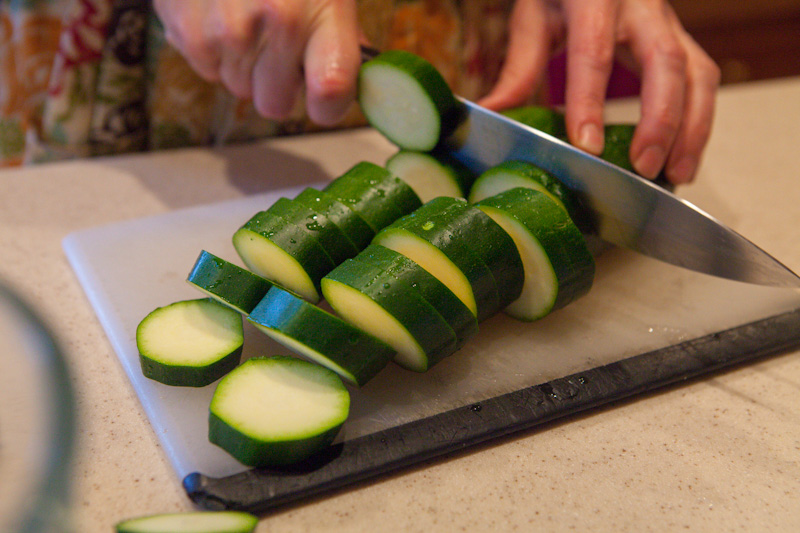
Large flat noodles can be replaced by cabbage, zucchini or yellow squash slices, or eggplant. Rice can be replaced by cauliflower. Long, skinny noodles can be replaced by zucchini or yellow squash zoodles or spaghetti squash.

Below you’ll find recipes to make two of my go-to noodle alternatives. If I want the convenience of something out of a box or a more traditional noodle for things like pasta salad, then I look for a minimally processed, minimal ingredient alternative noodle such as lentils, rice flour, seaweed, etc.

How to Make Zucchini Noodles

You can use a zoodler to make noodles out of your zucchini. I use a simple vegetable peeler! You will need one small zucchini per adult.

Wash your zucchini. Cut the ends off the zucchini.

IMG_0924.jpg

Using a vegetable peeler, peel the zucchini down to the seeds, turning as you go. Depending on the angle you hold the vegetable peeler, you’ll get different size noodles. Do not peel the middle core with seeds. You can chop the core later or compost it. If you are the beginning stages of GAPS and sensitive to having a lot of seeds, you should dispose of the core piece.

IMG_0947.jpg

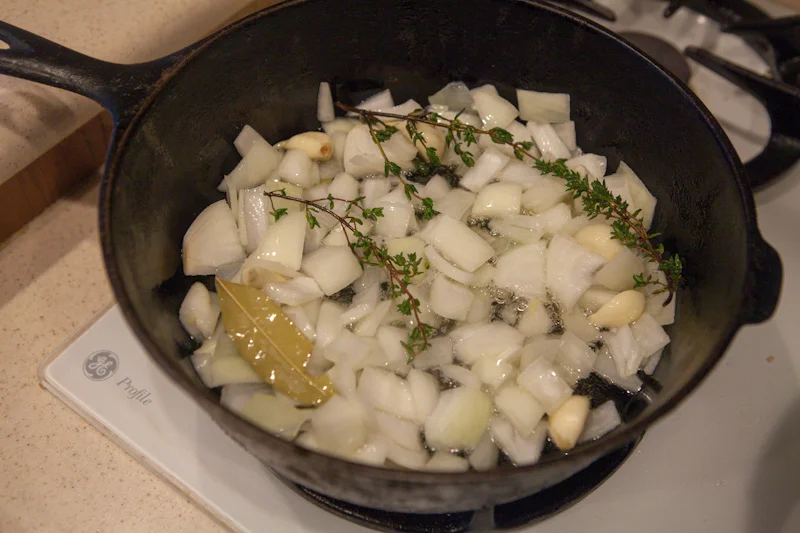
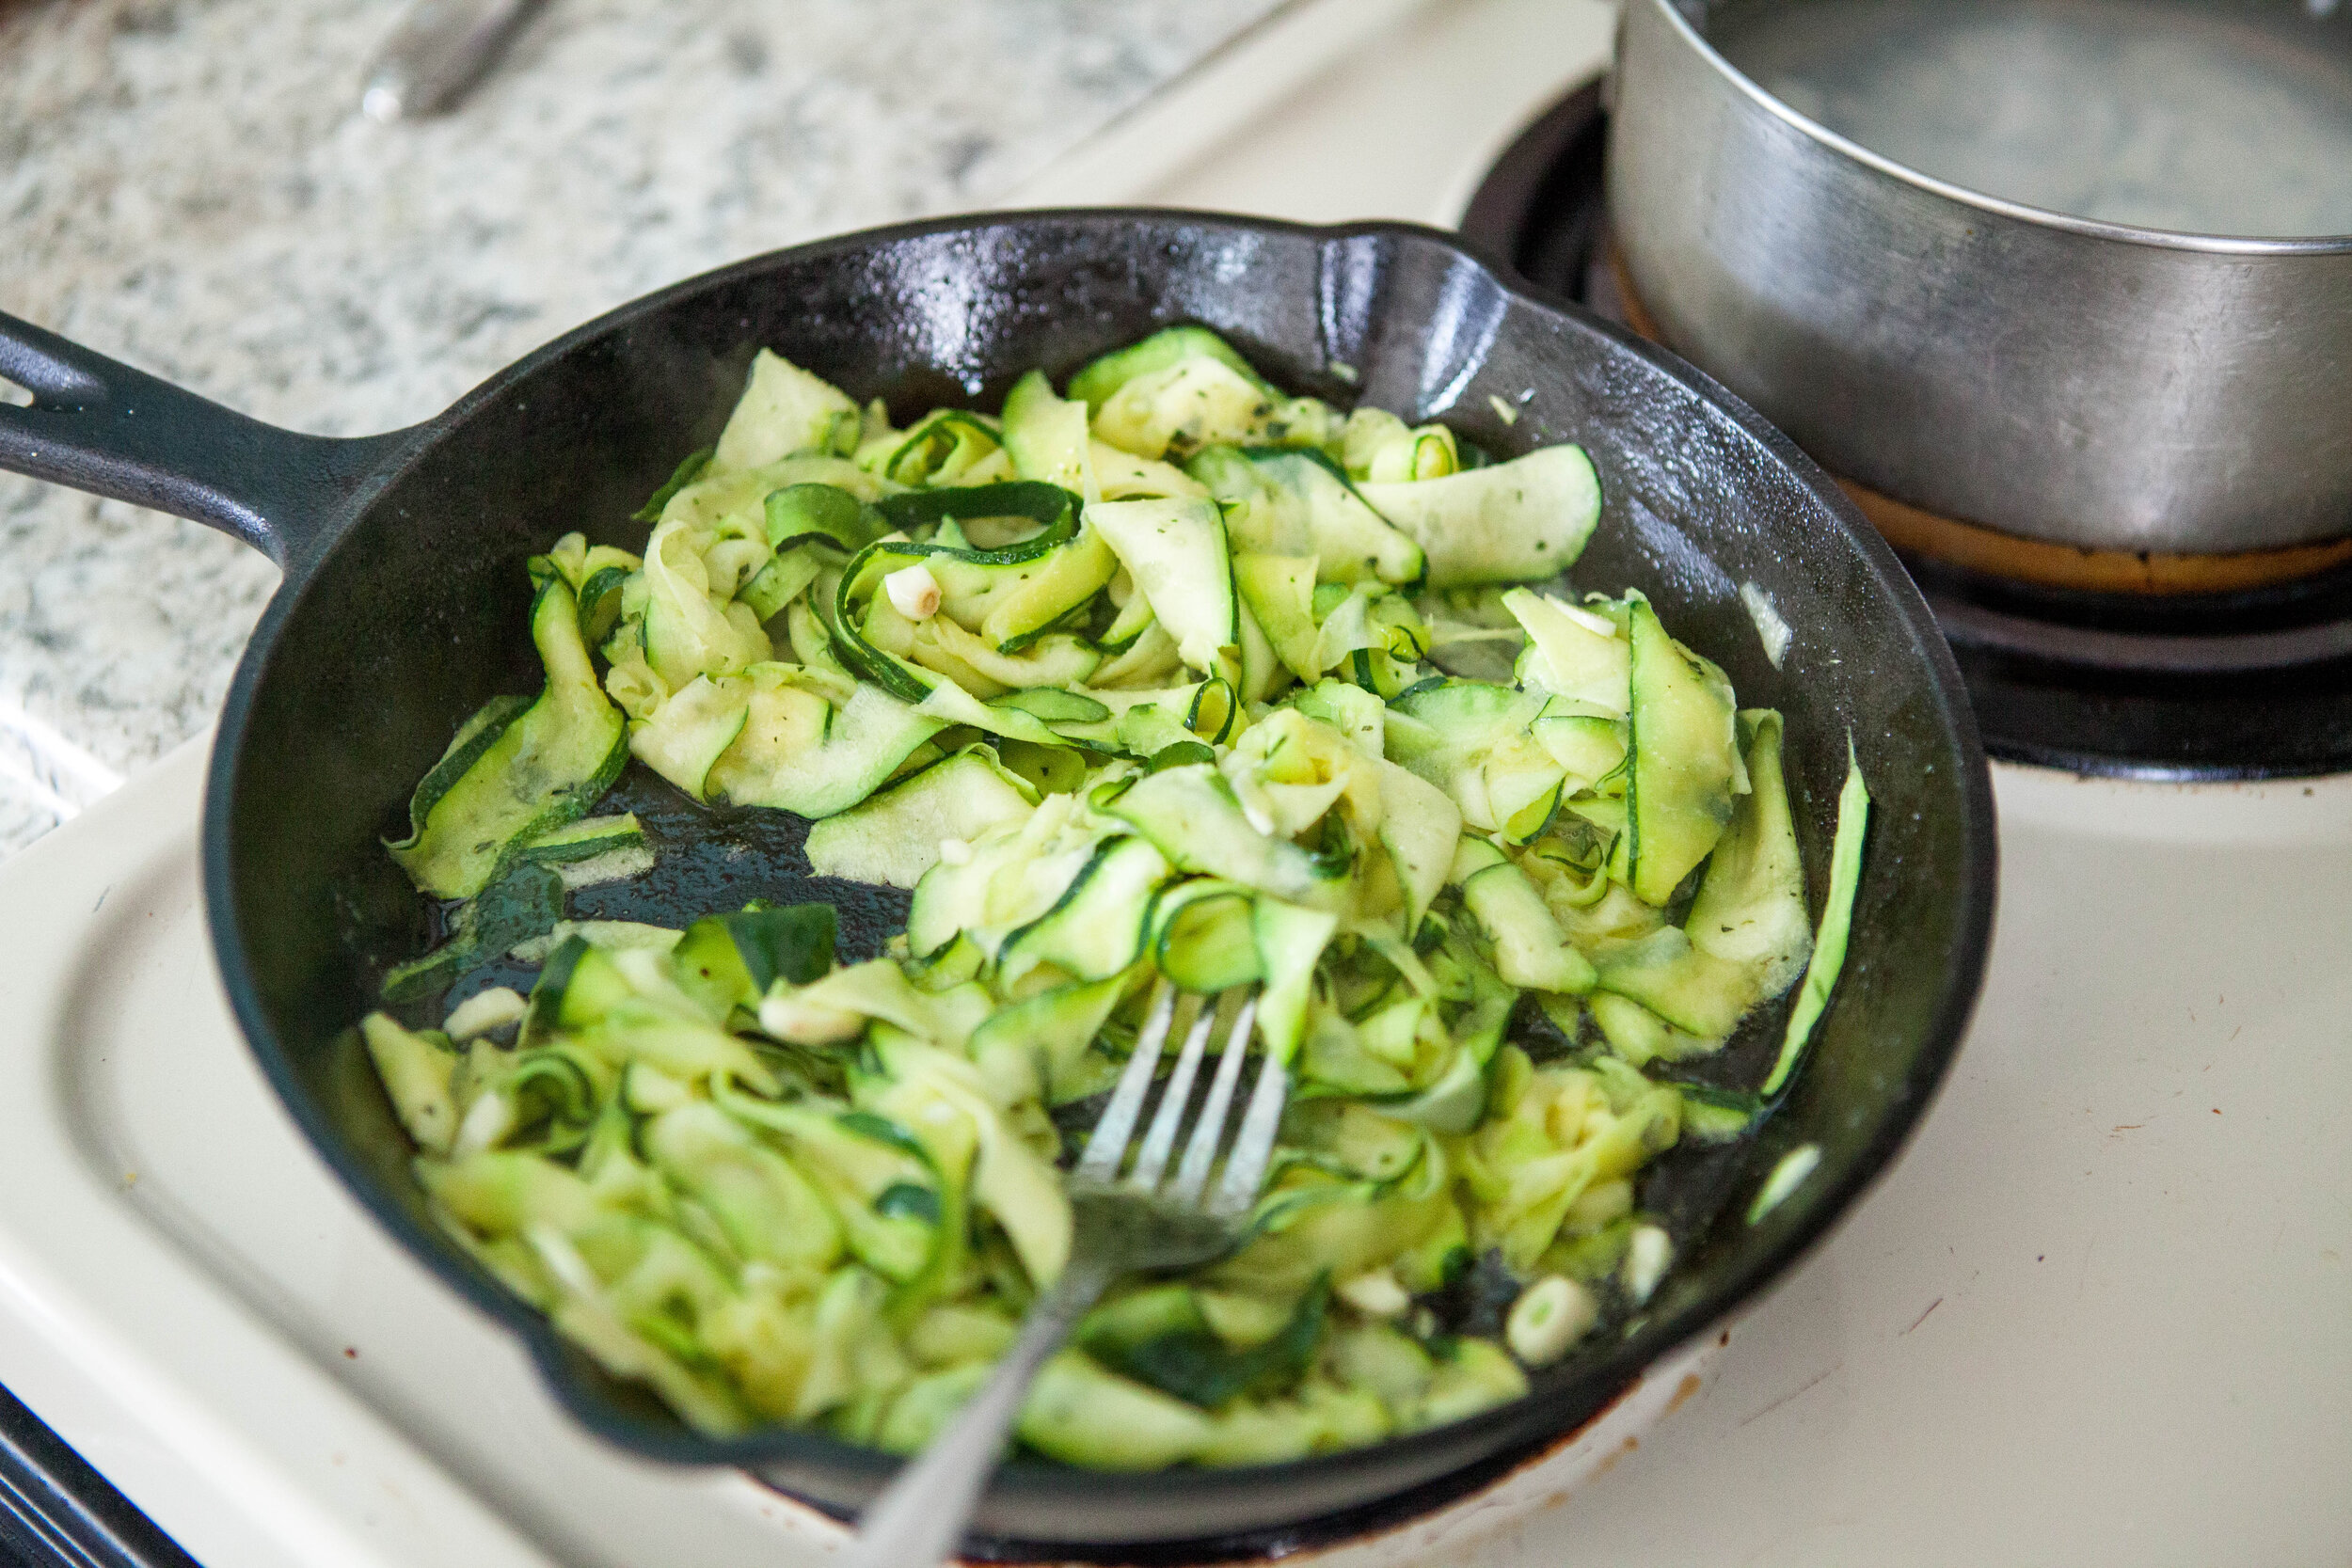
To a cast iron pan, add 2 tbsp of butter and 1 tbsp of avocado oil. Add the zucchini noodles and use your hands to quickly toss them in the butter and oil before they get too hot.

Sautee the zoodles. This means stir them and then let them sit - don’t continually stir!

After the noodles have cooked for 2-3 minutes, add a few pinches of salt. Adding the salt too early will cause the zucchini to sweat too much and get too wet. As it cooks, add more salt to taste. 

IMG_0960.jpg

After a few more minutes, add your herbs and spices. On early stages of GAPS, you would do fresh herbs. Later stages, you can use dried herbs. I usually do oregano, thyme, sage, garlic, and onion.

Then - enjoy!

How to Make Spaghetti Squash

Preheat oven to 400.

Slice spaghetti squash in half lengthwise.

IMG_1249.jpg

Remove seeds and strings in center. You can compost the seeds but you might get lots of volunteer spaghetti squash seedlings. (Which is not necessarily a bad thing.)

Roast in the oven for 35 minutes to an hour. It depends on the size of your squash. I like my squash to be very soft and well cooked. This is also important for the GAPS Diet to have well cooked vegetables.

IMG_1538.jpg

Check your squash after 35 minutes to see if they are softened and squishy. They should not be mush, but should feel much softer.

When they are soft, remove them from the oven. If you need your squash to cool faster, you can flip them over. I prefer to keep them with the middle side down so they continue while they cool.

Check your spaghetti squash with a fork to see if it is done. If not, cook for a while longer.

IMG_1544.jpg

Once the spaghetti squash is cooked, remove the insides of the squash by scraping a fork along the insides.

Mayo Free Egg Salad

Eggs are a great non-meat protein source. While I usually recommend eating eggs yolks running to preserve the cholesterol on them, sometimes a hard boiled egg is hard to beat!

This is a recipe that could easily be doubled or tripled for a party. You can serve it spread on a romaine lettuce leaf, as shown, or you can use it as a dip for cucumber slices or carrots.. Feel free to use whatever herbs you have in the fridge and experiment to find your favorites.

This recipe is legal on GAPS Stage 3 if you omit the paprika. Otherwise, it is legal on GAPS Stage 6. The ingredient list is for 1-2 servings.

Ingredients for Mayo Free Egg Salad:

  • 4 Eggs

  • ½ cup Sour Cream or Creme Fraiche

  • 1 small stalk Celery

  • 1 large Green Onion

  • ¼ - ½  tsp Salt

  • 1 tsp Pepper

  • ½ tsp Paprika

  • Parsley

Directions for Mayo Free Egg Salad:

Hard boil eggs. (Recipe here)

mayo-free-egg-salad-recipe-egg-salad-on-gaps-sour-cream-egg-salad

Once eggs are cooled, peel them.

mayo-free-egg-salad-recipe-egg-salad-on-gaps-sour-cream-egg-salad

Coarsely chop eggs, celery and green onion.

Add to a mixing bowl and add in pepper, salt to taste, and sour cream. 

mayo-free-egg-salad-recipe-egg-salad-on-gaps-sour-cream-egg-salad

Gently mix to coat and then sprinkle paprika over the top. Mix gently.

Serve and enjoy!

mayo-free-egg-salad-recipe-egg-salad-on-gaps-sour-cream-egg-salad

Mayo Free Egg Salad

Author:
Prep time: Cook time: Total time:

Ingredients:

  • 4 Eggs
  • ½ cup Sour Cream or Creme Fraiche
  • 1 small stalk Celery
  • 1 large Green Onion
  • ¼ - ½ tsp Salt
  • 1 tsp Pepper
  • ½ tsp Paprika
  • Parsley

Instructions:

How to cook Mayo Free Egg Salad

  1. Hard boil eggs. (Recipe here.)
  2. Once eggs are cooled, peel them.
  3. Coarsely chop eggs, celery and green onion.
  4. Add to a mixing bowl and add in pepper, salt to taste, and sour cream.
  5. Gently mix to coat and then sprinkle paprika over the top. Mix gently.
  6. Serve and enjoy!
Created using The Recipes Generator
EggSalad.png

What to do with Chicken on the GAPS Diet

Chicken is such a versatile and easy to meat to cook! It’s a mild meat so it can be easily adapted to many different recipes and flavors.

Purchase the highest quality meat you can afford! For me, this means buying chickens directly from farmers whenever possible. If I buy a chicken from a store, I buy organic and antibiotic free. And make sure you get the organs whenever possible! If you have the space, time and allowance from your city, consider raising your own chickens. I loved raising chickens, both for the fresh eggs and the delicious meat. I knew exactly where my food was coming from - and everything that had gone into it!

To help your budget, make sure you’re using as much of your chicken as possible. Chicken feet and gizzards can be added to stocks. The skin and joint cartilage can be blended in a stock. Liver can be made into pate. And the chicken heart is my favorite treat!

Below are some of my favorite recipes for chicken!

Chicken Stock

Meat stock can be made into a soup or simply drunk on its own as a hot beverage with a meal. You can also poach a couple eggs in your stock for a rich breakfast. Stock can also be used to cook rice or other soaked grains to increase their digestibility and nutritional content. In short, this should be considered a staple to have in your kitchen at all times, either in the fridge or the freezer.

Gluten Free, Dairy Free, Egg Free

Whole Roasted Chicken with Salt

This is a very simple recipe that makes a whole, juicy roasted chicken. It takes just two simple ingredients and is a very hands off recipe.

Gluten Free, Dairy Free, Egg Free

Honey Roasted Chicken

Roasting a chicken is a great and simple way to make a meal. This particular roasting recipe requires a little more attention than others, as you need to baste and adjust the temperature often, but it's definitely worth it!

Gluten Free, Dairy Free, Egg Free

Chicken Tortilla Soup

This is a good GAPS soup because of all of the sour cream. It wasn't too spicy, and it's different than plain meat stock that you typically eat on Stage 1. There are many different ways to make it, so it's also easy to switch up to match your tastes.

Gluten Free, Dairy Free, Egg Free

Creamy Garlic Chicken Soup

Because you immersion blend the vegetables into the stock, this is a great recipe to also blend in the the joint cartilage, skin and any of the other parts of the chicken that you may be tempted to throw away. I separate the chicken into three parts usually - bones, chicken meat, and everything else.

Gluten Free, Dairy Free, Egg Free

Creamy Chicken Pot Pie Soup

The key to this soup being reminiscent of a pot pie is to cut the vegetables into bite size pieces and make a consistency that’s more like a stew than a soup. Included in this recipe are a few tricks to thicken the soup so it more closely resembles the gravy that we associate with chicken pot pie.

Gluten Free, Dairy Free, Egg Free

Coconut Carrot Gluten Free Birthday Cake

IMG_9185.jpg

In celebration of my friend's birthday years ago, I made an "Amazingly Delicious Carrot Cake" (that's what the recipe was called, at least). I’ve modified the recipe a bit and I am so excited to have found such a delicious-looking recipe.

One ingredient in it that I have never even heard of *gasp, I know* is coconut butter (or coconut manna--they can be used interchangeably). This is not a more expensive version of coconut oil, as I first thought, but a coconut puree. I bought a jar (a bit pricey) at our local health food grocery store, or you can make your own.

Coconut butter is very sweet, and can be used as a little sweet snack. However, because there is more fiber, and it is much sweeter than coconut oil, if you are following GAPS, you should not introduce it until Introduction stage 6 or full GAPS. But if you can tolerate it, I would recommend trying this delicious coconut treat!

Sometimes I wonder why we even want to eat processed sugar, this cake is so rich, moist and delicious! Sadly for you, the photos cannot portray the enticing aroma I am experiencing! You will just have to try it out for yourself!

I have also made this recipe using the leftover pulp from juicing carrots. Add a little bit of additional water to keep the cake from getting too dry.

I made this as one cake in a 9x13 pan and then cut it in half and stacked to decorate it. You can also make it in two smaller pans. Just make sure you are using glass, not aluminum to bake with. Baking it as a sheet cake also means you can cut it into shapes for themed birthdays.

Ingredients for Coconut Carrot Gluten Free Birthday Cake:

For the Cake

  • 2 cups coconut manna (1 15 oz jar)

  • 9 dates

  • 1 cup carrots, about two large carrots

  • 2 tsp cinnamon

  • ½ cup raisins

  • ½ cup shredded coconut (if you have coconut flakes, just put them in a food processor for a minutes)

  • 1 tsp sea salt

  • 1 tsp vanilla extract

  • 10 organic eggs

For the Frosting

  • 2 cups cultured cream or sour cream

  • 2 tbsp honey 

  • 1 tsp vanilla extract

  • Zest of 1 Lemon

  • ½ tsp Lemon Juice

  • Pinch of sea salt

Directions for Coconut Carrot Gluten Free Birthday Cake:

IMG_8785.jpg

In a pot on the stove, start your coconut manna melting by adding the jar to water. Melt over low heat. It can take up to 30 minutes to melt depending on how big and full your jar is.

Start your dates rehydrating. Remove the pits and add the dates to a bowl that can have hot water in it (I use glass.). Add boiling water to the bowl, enough to cover the dates. Let sit for 20 minutes until dates are rehydrated

IMG_8810.jpg

Finely shred two large carrots with a food processor. 

Once dates are soft and squishy, about 20 minutes, put them in a food processor, without liquid. Slowly add more liquid as they blend until they are a smooth consistency but not too liquidy.

IMG_8804.jpg

In a large bowl, crack all the eggs. Whisk with an electric whisk or immersion blender to get the maximum amount of air into them.

Grease the baking dish with butter or the fat of your choice. If you have a butter allergy, coconut oil is acceptable.

Stir the ingredients into the bowl with eggs until they are all distributed evenly.

IMG_8880.jpg

Add the mixture to the greased baking dish.

Bake in the preheated oven for 40 minutes until the top is golden and the cake is set.

Allow to cool slightly before removing from the pan.

IMG_9123.jpg

Mix the frosting in a bowl. 

Decorate the cake as desired and enjoy!

IMG_9173.jpg

If you don’t have a tray, plate or board to decorate your cake on:

IMG_9134.jpg

Make one simply with leftover cardboard and aluminum foil.

IMG_9137.jpg

Cut your cardboard to size. Cover with aluminum foil and tape underneath so nothing slips.

Add parchment paper to the top where the cake will sit so your food is not sitting on metal.

IMG_9168.jpg

Decorate your cake!


Author:
prep time: cook time: total time:

ingredients:

For the Cake
  • 2 cups coconut manna (1 15 oz jar)
  • 9 dates
  • 1 cup carrots, about two large carrots
  • 2 tsp cinnamon
  • ½ cup raisins
  • ½ cup shredded coconut (if you have coconut flakes, just put them in a food processor for a minutes)
  • 1 tsp sea salt
  • 1 tsp vanilla extract
  • 10 organic eggs
For the Frosting
  • 2 cups cultured cream or sour cream
  • 2 tbsp honey
  • 1 tsp vanilla extract
  • Zest of 1 Lemon
  • ½ tsp Lemon Juice
  • Pinch of sea salt

instructions:

How to cook

  1. In a pot on the stove, start your coconut manna melting by adding the jar to water. Melt over low heat. It can take up to 30 minutes to melt depending on how big and full your jar is.
  2. Start your dates rehydrating. Remove the pits and add the dates to a bowl that can have hot water in it (I use glass.). Add boiling water to the bowl, enough to cover the dates. Let sit for 20 minutes until dates are rehydrated
  3. Finely shred two large carrots with a food processor.
  4. Once dates are soft and squishy, about 20 minutes, put them in a food processor, without liquid. Slowly add more liquid as they blend until they are a smooth consistency but not too liquidy.
  5. In a large bowl, crack all the eggs. Whisk with an electric whisk or immersion blender to get the maximum amount of air into them.
  6. Grease the baking dish with butter or the fat of your choice. If you have a butter allergy, coconut oil is acceptable.
  7. Stir the ingredients into the bowl with eggs until they are all distributed evenly.
  8. Add the mixture to the greased baking dish.
  9. Bake in the preheated oven for 40 minutes until the top is golden and the cake is set.
  10. Allow to cool slightly before removing from the pan.
  11. Mix the frosting in a bowl.
  12. Decorate the cake as desired and enjoy!
If you don’t have a tray, plate or board to decorate your cake on:
  1. Make one simply with leftover cardboard and aluminum foil.
  2. Cut your cardboard to size. Cover with aluminum foil and tape underneath so nothing slips.
  3. Add parchment paper to the top where the cake will sit so your food is not sitting on metal.
  4. Decorate your cake!
Created using The Recipes Generator
CoconutCarrotBirthdayCake.png

A Simple Cabbage Soup Recipe

I love this cabbage soup. Maybe it’s because of my German roots. 

Cabbage is good for stimulating hydrochloric acid production in your stomach. This is an important first step of food digestion. If your stomach pH is greater than 3 (meaning less acidic) the enzymes that we use to digest protein don’t even get turned on! This means your body won’t give the signal to digest the protein and the proteins that you eat won’t get digested. Cabbage is also very high in Vitamin C. The Vitamin C concentration is much higher in sauerkraut, however eating cabbage in any form is a great way to get important nutrients into your body. Cabbage also contains high amounts of Vitamin K. Vitamin K is a fat soluble vitamin that helps with inflammation.

Try cutting your cabbage into long strips to resemble noodles for pasta loving children. 

I recommend pairing this soup with our meatballs. You can drop balls of raw meat in to cook in the stock and the pairing would be legal on GAPS Stage 1. If you’re on more advanced stages (or not following the GAPS Diet) you can drop frozen pre-cooked meatballs into the soup or serve the meatballs on the side.

Ingredients:

  • 1 Cabbage

  • 1 stalk of Celery

  • 5 cloves of Garlic

  • 6 cups Stock (I used pork as a nod to my German roots but you can also use chicken or beef)

  • 2 tsp salt

Directions:

Bring stock to a boil in a large pot.

Chop up cabbage into bite size pieces. Slice the celery into half moons. Remove the garlic wrappings and cut in half.

Cabbage soup is very simple! It takes just a few simple ingredients but it’s a very filling and nutritious soup. It’s GAPS legal so try it today! Recipe by Amy Mihaly, Certified GAPS Practitioner in Colorado.

Add the cabbage, celery and garlic into the stock. Add salt to the pot to help draw out the moisture in the cabbage.

Simmer on medium heat for 30 to 45 minutes until the cabbage is soft.

Enjoy!

Cabbage soup is very simple! It takes just a few simple ingredients but it’s a very filling and nutritious soup. It’s GAPS legal so try it today! Recipe by Amy Mihaly, Certified GAPS Practitioner in Colorado.

Cabbage soup is very simple! It takes just a few simple ingredients but it’s a very filling and nutritious soup. It’s GAPS legal so try it today! Recipe by Amy Mihaly, Certified GAPS Practitioner in Colorado.

Cabbage Soup

Author:
prep time: cook time: total time:

ingredients:

  • 1 Cabbage
  • 1 stalk of Celery
  • 5 cloves of Garlic
  • 6 cups Stock (I used pork as a nod to my German roots but you can also use chicken or beef)
  • 2 tsp salt

instructions:

How to cook Cabbage Soup

  1. Bring stock to a boil in a large pot.
  2. Chop up cabbage into bite size pieces. Slice the celery into half moons. Remove the garlic wrappings and cut in half.
  3. Add the cabbage, celery and garlic into the stock. Add salt to the pot to help draw out the moisture in the cabbage.
  4. Simmer on medium heat for 30 to 45 minutes until the cabbage is soft.
  5. Enjoy!
Created using The Recipes Generator

GAPS Legal Pumpkin Soup

Pumpkin is a winter squash but it contains less sugar than most winter squashes, making it ideal for the GAPS Introduction Diet. Pumpkins are also very easily grown so if you’re a beginner gardener looking for an easy first crop or if you only have a small amount of growing space available. 

While other winter squashes like butternut squash can be tolerated by people on the GAPS Introduction Diet, it’s best to do pumpkin because it’s milder and with less sugar.

Pumpkin puree is very easy to freeze in individual portions. You can also sprout the pumpkin seeds. Both mean you can enjoy your own homegrown produce throughout the winter! Once you have the puree for this pumpkin soup recipe, you can also use it to make a pumpkin pie or use it to make GAPS Pancakes.

I usually eat a small bowl of pureed soup alongside a much larger bowl of another soup. It’s a great way to have a multi course meal on the GAPS Intro Diet. 

Ingredients for Pumpkin Soup:

  • 2-3 Small Pumpkins

  • 4 cups of Chicken Stock

  • ¼ of a White Onion

  • 1 inch of Fresh Ginger

  • 1 tsp Salt

  • 2 Bay Leaves

  • 1 Cinnamon Stick

Directions for Pumpkin Soup:

Pumpkins are great for your digestive system! This pumpkin soup is made with a few simple ingredients and is legal on the GAPS Diet. Find the pumpkin soup recipe and other GAPS recipes at bewellclinic.net. Recipe by Amy Mihaly, Certified GAPS Practi…

Preheat the oven to 400.

Cut each pumpkin in half. Remove the seeds and set aside to make sprouted pumpkin seeds.

Set each pumpkin open face side down on a baking sheet lined with parchment paper. Place the pumpkins in the oven.

Pumpkins are great for your digestive system! This pumpkin soup is made with a few simple ingredients and is legal on the GAPS Diet. Find the pumpkin soup recipe and other GAPS recipes at bewellclinic.net. Recipe by Amy Mihaly, Certified GAPS Practi…

Roast the pumpkins for about 45 minutes in the oven until the tops are soft.

Remove them from the oven and flip the pumpkins over so they cool faster.

Pumpkins are great for your digestive system! This pumpkin soup is made with a few simple ingredients and is legal on the GAPS Diet. Find the pumpkin soup recipe and other GAPS recipes at bewellclinic.net. Recipe by Amy Mihaly, Certified GAPS Practi…

Using a fork, carefully remove the pumpkin flesh from the skin and add to a bowl. If it’s not well cooked, it won’t remove from the skin easily.

Warm chicken stock on the stove.

Pumpkins are great for your digestive system! This pumpkin soup is made with a few simple ingredients and is legal on the GAPS Diet. Find the pumpkin soup recipe and other GAPS recipes at bewellclinic.net. Recipe by Amy Mihaly, Certified GAPS Practi…

Add 3 cups of pumpkin to the warmed stock. Immersion blend until well pureed. Pureeing the pumpkin on it’s own will allow the flavors of the other ingredients to meld better.

Pumpkins are great for your digestive system! This pumpkin soup is made with a few simple ingredients and is legal on the GAPS Diet. Find the pumpkin soup recipe and other GAPS recipes at bewellclinic.net. Recipe by Amy Mihaly, Certified GAPS Practi…

Chop onions into bite size pieces so they cook quickly. Add to the pureed mixture. 

Slice ginger and add to the pureed mixture. Add the salt and mix well.

Add bay leaves and cinnamon stick. Simmer for 20 minutes. Be sure to stir as the pumpkin and liquid will separate and the pumpkin will stick to the bottom of the pan. 

Pumpkins are great for your digestive system! This pumpkin soup is made with a few simple ingredients and is legal on the GAPS Diet. Find the pumpkin soup recipe and other GAPS recipes at bewellclinic.net. Recipe by Amy Mihaly, Certified GAPS Practi…

Remove the bay leaves and cinnamon stick from the mixture. Immersion blend everything again.

Enjoy! I topped mine with a dollop of creme fraiche but this is optional. Leave it off if you are not tolerating dairy.

Pumpkins are great for your digestive system! This pumpkin soup is made with a few simple ingredients and is legal on the GAPS Diet. Find the pumpkin soup recipe and other GAPS recipes at bewellclinic.net. Recipe by Amy Mihaly, Certified GAPS Practi…

Pumpkins are great for your digestive system! This pumpkin soup is made with a few simple ingredients and is legal on the GAPS Diet. Find the pumpkin soup recipe and other GAPS recipes at bewellclinic.net. Recipe by Amy Mihaly, Certified GAPS Practi…

GAPS Legal Pumpkin Soup

Author:
prep time: cook time: total time:

ingredients:

  • 2-3 Small Pumpkins
  • 4 cups of Chicken Stock
  • ¼ of a White Onion
  • 1 inch of Fresh Ginger
  • 1 tsp Salt
  • 2 Bay Leaves
  • 1 Cinnamon Stick

instructions:

How to cook GAPS Legal Pumpkin Soup

  1. Preheat the oven to 400.
  2. Cut each pumpkin in half. Remove the seeds and set aside to make sprouted pumpkin seeds.
  3. Set each pumpkin open face side down on a baking sheet lined with parchment paper. Place the pumpkins in the oven.
  4. Roast the pumpkins for about 45 minutes in the oven until the tops are soft.
  5. Remove them from the oven and flip the pumpkins over so they cool faster.
  6. Using a fork, carefully remove the pumpkin flesh from the skin and add to a bowl. If it’s not well cooked, it won’t remove from the skin easily.
  7. Warm chicken stock on the stove.
  8. Add 3 cups of pumpkin to the warmed stock. Immersion blend until well pureed. Pureeing the pumpkin on it’s own will allow the flavors of the other ingredients to meld better.
  9. Chop onions into bite size pieces so they cook quickly. Add to the pureed mixture.
  10. Slice ginger and add to the pureed mixture. Add the salt and mix well.
  11. Add bay leaves and cinnamon stick. Simmer for 20 minutes. Be sure to stir as the pumpkin and liquid will separate and the pumpkin will stick to the bottom of the pan.
  12. Remove the bay leaves and cinnamon stick from the mixture. Immersion blend everything again.
  13. Enjoy! I topped mine with a dollop of creme fraiche but this is optional. Leave it off if you are not tolerating dairy.
Created using The Recipes Generator

Roasted Fermented Pumpkin Seeds

Pumpkin seeds are like any seed (or bean or nut.) They should be properly prepared before consuming to neutralize the acid and make them easier to digest. Sprouting your seeds is essentially germinating. Germination changes the chemical structure of the seeds, chemically changing it from a closed off protector of the treasure inside to an open seed ready to bring nutrition.  It’s best to sprout or otherwise properly prepare your seeds to allow more nutrition to be bioavailable to you.

Pumpkin seeds also have an especially helpful quality in that they help rid your body of parasites by attacking the parasites and intestinal worms. If you suspect you have parasites or worms, consuming pumpkin seeds is a good idea. However, be sure to take it slow and don’t overdo it.

Ingredients for Fermented Pumpkin Seeds:

  • 3 small pumpkins

  • ½ tsp Real Salt

  • Water

Directions for Fermented Pumpkin Seeds:

Fermented pumpkin seeds can help your digestion by getting rid of parasites in your gut. Improve your gut health with this GAPS Diet legal recipe for fermented pumpkin seeds. Recipe by Amy Mihaly, Certified GAPS Practitioner in Colorado.

Cut the pumpkins in half.

Fermented pumpkin seeds can help your digestion by getting rid of parasites in your gut. Improve your gut health with this GAPS Diet legal recipe for fermented pumpkin seeds. Recipe by Amy Mihaly, Certified GAPS Practitioner in Colorado.

Remove the seeds from the inside and separate from the pumpkin flesh.

Fermented pumpkin seeds can help your digestion by getting rid of parasites in your gut. Improve your gut health with this GAPS Diet legal recipe for fermented pumpkin seeds. Recipe by Amy Mihaly, Certified GAPS Practitioner in Colorado.

Rinse the pumpkin seeds.

Fermented pumpkin seeds can help your digestion by getting rid of parasites in your gut. Improve your gut health with this GAPS Diet legal recipe for fermented pumpkin seeds. Recipe by Amy Mihaly, Certified GAPS Practitioner in Colorado.

Add the pumpkin seeds to a jar.

Cover the seeds with water, add salt and shake. Place in a sunny location and leave to soak overnight. As long as the jar is closed tightly, these can be put up next to other ferments.

Drain and rinse in the morning. Fill with new water.

Repeat draining, rinsing and adding new water until tiny sprouts have formed.

Rinse one final time. Season with salt and roast in the oven at 250 for several hours until cooked.


Roasted Fermented Pumpkin Seeds

Author:
prep time: cook time: total time:

ingredients:

  • 3 small pumpkins
  • ½ tsp Real Salt
  • Water

instructions:

How to cook Roasted Fermented Pumpkin Seeds

  1. Cut the pumpkins in half.
  2. Remove the seeds from the inside and separate from the pumpkin flesh.
  3. Rinse the pumpkin seeds.
  4. Add the pumpkin seeds to a jar.
  5. Cover the seeds with water, add salt and shake. Place in a sunny location and leave to soak overnight. As long as the jar is closed tightly, these can be put up next to other ferments.
  6. Drain and rinse in the morning. Fill with new water.
  7. Repeat draining, rinsing and adding new water until tiny sprouts have formed.
  8. Rinse one final time. Season with salt and roast in the oven at 250 for several hours until cooked.
Created using The Recipes Generator
RoastedFermentedPumpkinSeeds.png

Creamy Garlic Chicken Soup

This is one of my favorite soups! It’s warm and creamy and so delicious.

This soup is easy to make in large or small batches depending on how many servings you need. A small batch requires one small chicken, about 4 lbs, one head of garlic, and one glass baking dish of vegetables. A small batch will make about 4-6 hearty servings of soup. A large batch requires a larger chicken, about 6 lbs, two heads of garlic, and two glass baking dishes of vegetables.

Keeping the garlic in their paper shells roasts the garlic while preventing them from getting burnt. Don’t worry if your paper peels a little off the garlic - it’s still ok!

This soup requires a LOT of salt. If you don’t salt this soup enough, it is very bland and boring.

Because you immersion blend the vegetables into the stock, this is a great recipe to also blend in the the joint cartilage, skin and any of the other parts of the chicken that you may be tempted to throw away. I separate the chicken into three parts usually - bones, chicken meat, and everything else.

Ingredients for Creamy Garlic Chicken Soup:

  • 1 Chicken

  • 1 Zucchini (Courgettes)

  • 1 Yellow Squash

  • ½ Large Head of Cauliflower or 1 Small Cauliflower

  • 1-2 Heads of Garlic, Cloves separated but still in their paper

  • 3-4 tbsp Lard (Learn to make your own lard here.)

  • 1 tbsp Salt

  • ½ Bunch Parsley

Directions for Creamy Garlic Chicken Soup:

Zucchini, yellow squash, cauliflower and garlic are roasted with lard and then blended together to form the base of this creamy garlic chicken soup. This soup is GAPS legal and great for Whole 30 or Paleo. It’s dairy free and gluten free but still c…

Start a chicken stock on the stove. (Find the recipe for a chicken stock here.)

Cut the vegetables into even size pieces for even roasting. For the cauliflower, you can remove or keep however much of the fibrous material (stems), depending on how much you are tolerating.  Start the oven preheating to 400 degrees.

Roasted zucchini, cauliflower, yellow squash and garlic are the base for this soup. It’s delicious and filling while still being dairy free and gluten free. It’s a soup for the GAPS diet but is also great for Whole 30 or Paleo diets since it’s made …

Add the squash, zucchini, cauliflower and garlic to a baking dish with the lard. Melt the lard in the oven on top of the vegetables and then stir to fully coat the vegetables with the melted lard. If you do not have enough lard to fully coat your vegetables, add more! Season with salt.

Roast the coated vegetables uncovered in the oven for about an hour. The vegetables are done when they are softened and slightly browned. Set them aside to cool. 

You can make your own chicken stock to use in this recipe for creamy garlic chicken soup. It’s a GAPS legal soup but is also great for Paleo or Whole 30 diets since it’s made with real food. It gets it’s creaminess from a medley of blended vegetable…

About ten minutes before the stock is done, add in ½ bunch of parsley for an added dose of Vitamin C and magnesium. 

Strain your stock but keep the joint meats, skin and everything else to blend into this creamy garlic chicken soup. It’s delicious, full of fat, hearty and made with real food so it’s perfect for the GAPS Diet, Whole 30, Weston A Price or Paleo. Rec…

Once the stock is done, strain the stock and set the cooked meat aside to cool. 

Once the roasted vegetables have cooled, peel the garlic paper off. Wait until the garlic is cooled - if you are impatient and peel it too early, it will burn your hands.

Add the roasted vegetables to a large pot. Add 12 cups of stock to the pot. 

This creamy garlic chicken soup uses a whole chicken. Set aside the bones and meat from your stock but blend everything else into the soup base to create a creamy soup that can’t be beat! It’s great for the GAPS Diet, Weston A Price, Whole 30 or Pal…

Once your meat is cooled, remove it from the bone. Separate the joint cartilage and skin from the meat. In the above photo, the top left is the bones, the bottom plate is the meat and the plate on the right has everything else that will be added into the stock and blended.

Roasted cauliflower, zucchini, yellow squash and garlic get blended with chicken skins to create a creamy base that keeps this creamy garlic chicken soup dairy free but still delicious! Recipe for GAPS Diet, Whole 30, Weston A Price or Paleo by Amy …

Add the skin, cartilage and other non-meat bits (no bones) to the pot. 

Immersion blend everything together until it is well blended and the vegetables are in small pieces.

Add shredded chicken to a base of roasted vegetables and blended chicken skins for a creamy, dreamy soup. Creamy Garlic Chicken Soup recipe for the GAPS Diet, Whole 30, Weston A Price or Paleo by Amy Mihaly, Certified GAPS Practitioner in Colorado.

Add the meat from your chicken into the blended stock. Add 1 tbsp of salt.

Cook for 15-20 minutes to blend the flavors.

This soup is a dream! Creamy Garlic Chicken soup is made with a blend of cauliflower, zucchini, yellow squash and garlic. It’s legal for the GAPS Diet, Whole30, Weston A Price and Paleo diets because it’s made with simple, real food. Recipe by Amy M…

Enjoy! I topped mine with sliced avocado. However, this does make it legal on GAPS Stage 3.


Creamy Garlic Chicken Soup

Author:
prep time: cook time: total time:

ingredients:

  • 1 Chicken
  • 1 Zucchini (Courgettes)
  • 1 Yellow Squash
  • ½ Large Head of Cauliflower or 1 Small Cauliflower
  • 1-2 Heads of Garlic, Cloves separated but still in their paper
  • 3-4 tbsp Lard
  • 1 tbsp Salt
  • ½ Bunch Parsley

instructions:

How to cook Creamy Garlic Chicken Soup

  1. Start a chicken stock on the stove.
  2. Cut the vegetables into even size pieces for even roasting. For the cauliflower, you can remove or keep however much of the fibrous material (stems), depending on how much you are tolerating. Start the oven preheating to 400 degrees.
  3. Add the squash, zucchini, cauliflower and garlic to a baking dish with the lard. Melt the lard in the oven on top of the vegetables and then stir to fully coat the vegetables with the melted lard. If you do not have enough lard to fully coat your vegetables, add more! Season with salt.
  4. Roast the coated vegetables uncovered in the oven for about an hour. The vegetables are done when they are softened and slightly browned. Set them aside to cool.
  5. About ten minutes before the stock is done, add in ½ bunch of parsley for an added dose of Vitamin C and magnesium.
  6. Once the stock is done, strain the stock and set the cooked meat aside to cool.
  7. Once the roasted vegetables have cooled, peel the garlic paper off. Wait until the garlic is cooled - if you are impatient and peel it too early, it will burn your hands.
  8. Add the roasted vegetables to a large pot. Add 12 cups of stock to the pot.
  9. Once your meat is cooled, remove it from the bone. Separate the joint cartilage and skin from the meat. Add the skin, cartilage and other non-meat bits (no bones) to the pot.
  10. Immersion blend everything together until it is well blended and the vegetables are in small pieces.
  11. Add the meat from your chicken into the blended stock. Add 1 tbsp of salt.
  12. Cook for 15-20 minutes to blend the flavors.
  13. Enjoy! I topped mine with sliced avocado. However, this does make it legal on GAPS Stage 3.
Created using The Recipes Generator
This soup is a dream! Creamy Garlic Chicken soup is made with a blend of cauliflower, zucchini, yellow squash and garlic. It’s legal for the GAPS Diet, Whole30, Weston A Price and Paleo diets because it’s made with simple, real food. Recipe by Amy M…

Beef Tongue Recipe

I recently got half a cow and had a beef tongue in my freezer! I wanted to use all of meat and wanted to give this recipe a try. Turns out - I love beef tongue!

Beef  tongue is a very delicious dark meat with a rich flavor because of it’s high fat content. It’s about 66% fat! It’s also a highly used muscle so it’s very tender. 

Beef tongue is very simple to prepare. I prefer to boil it, like the recipe below, but you can also put it in a slow cooker for 8 hours. Either way, the stock that you’re left with is rich and delicious. I’ve kept my beef tongue stock before and used it to make Egyptian Lentil Soup

You can also shred beef tongue to use it in tacos or slice it to use in a stir fry. Because it looks like any other cut of meat, no one will know it’s tongue! It’s not an organ meat so it doesn’t have the strong taste associated with it like livers or hearts to.

Did you recently get a full cow and you’re unsure what to do with the beef tongue? This is an easy recipe for boiled beef tongue. Beef tongue is a mild meat, like a pork tenderloin. GAPS Diet legal recipe by Amy Mihaly, Certified GAPS Practitioner i…

Ingredients for Beef Tongue:

  • 4.4 lbs of beef tongue

  • 1 ½ tbsp Salt

  • 1 tsp Peppercorns

  • 5 Cloves of Garlic, Whole

  • 4 Bay leaves

Directions for Beef Tongue:

Rinse the beef tongue thoroughly.

Did you recently get a full cow and you’re unsure what to do with the beef tongue? This is an easy recipe for boiled beef tongue. Beef tongue is a mild meat, like a pork tenderloin. GAPS Diet legal recipe by Amy Mihaly, Certified GAPS Practitioner i…

Place beef tongue in a large pot. Fill with enough water to cover the beef tongue. Gently press the beef tongue down so it is under the water.

Did you recently get a full cow and you’re unsure what to do with the beef tongue? This is an easy recipe for boiled beef tongue. Beef tongue is a mild meat, like a pork tenderloin. GAPS Diet legal recipe by Amy Mihaly, Certified GAPS Practitioner i…

Add salt, peppercorns, garlic and bay leaves to the pot. Or to prevent inadvertently taking out peppercorns with the scum, add your aromatics after you skim the scum. 

Did you recently get a full cow and you’re unsure what to do with the beef tongue? This is an easy recipe for boiled beef tongue. Beef tongue is a mild meat, like a pork tenderloin. GAPS Diet legal recipe by Amy Mihaly, Certified GAPS Practitioner i…

Bring beef tongue and water to a boil. Skim the scum off the top. 

Turn heat down to medium and cook for about two hours, until the outer skin starts to peel off . You want everything to be on a high simmer, low boil.

Did you recently get a full cow and you’re unsure what to do with the beef tongue? This is an easy recipe for boiled beef tongue. Beef tongue is a mild meat, like a pork tenderloin. GAPS Diet legal recipe by Amy Mihaly, Certified GAPS Practitioner i…

Once the outer skin can be peeled away, remove the tongue onto a plate to allow to cool. 

Strain the aromatics out of the stock and set aside to use in another recipe. (I suggest this Egyptian Lentil Soup recipe.) 

Did you recently get a full cow and you’re unsure what to do with the beef tongue? This is an easy recipe for boiled beef tongue. Beef tongue is a mild meat, like a pork tenderloin. GAPS Diet legal recipe by Amy Mihaly, Certified GAPS Practitioner i…

Once the tongue is cool, peel off the skin completely. Then chop up the meat as you would any other cut of meat!

Enjoy!


Did you recently get a full cow and you’re unsure what to do with the beef tongue? This is an easy recipe for boiled beef tongue. Beef tongue is a mild meat, like a pork tenderloin. GAPS Diet legal recipe by Amy Mihaly, Certified GAPS Practitioner i…

Beef Tongue

Author:
prep time: cook time: total time:

ingredients:

  • 4.4 lbs of beef tongue
  • 1 ½ tbsp Salt
  • 1 tsp Peppercorns
  • 5 Cloves of Garlic, Whole
  • 4 Bay leaves

instructions:

How to cook Beef Tongue

  1. Rinse the beef tongue thoroughly.
  2. Place beef tongue in a large pot. Fill with enough water to cover the beef tongue. Add salt, peppercorns, garlic and bay leaves to the pot. Or to prevent inadvertently taking out peppercorns with the scum, add your aromatics after you skim the scum.
  3. Bring beef tongue and water to a boil. Skim the scum off the top.
  4. Turn heat down to medium and cook for about two hours, until the outer skin starts to peel off . You want everything to be on a high simmer, low boil.
  5. Once the outer skin can be peeled away, remove the tongue onto a plate to allow to cool.
  6. Strain the aromatics out of the stock and set aside to use in another recipe. (I suggest thisEgyptian Lentil Soup recipe.)
  7. Once the tongue is cool, peel off the skin completely. Then chop up the meat as you would any other cut of meat!
  8. Enjoy!
Created using The Recipes Generator

Sprouted Refried Navy Beans Recipe

Beans make everything delicious! The old adage about beans isn’t true. If you’re worried about the unsightly smells and noises that beans so often bring, worry no more. The reason that beans are known for producing flatulence is because of the strong anti-nutrients present in the bean seed. Once you properly prepare these beans, the anti-nutrients are no longer present so there’s no reason for any symptoms.  When they’re properly prepared and you can tolerate them, navy beans are a good addition to your diet. If you do experience flatulence while eating the beans, it means your body is not ready for the starch and you still have work to do on your gut flora. 

Even if you are tolerating them well, remember that beans are a starch and should always be consumed alongside a generous amount of animal fat. 

These are great served with anything that has a Mexican theme with them. I like them next to eggs, like a Huervos Rancheros sort of feel.

IMG_5209.jpg

You can freeze this recipe into smaller portion sizes so that you can pull it out quickly to use as a side for a meal. I tried freezing this in muffin tins since they are about the correct proportion of a serving of beans. I lined the muffin tin with unbleached large baking cups and then scooped beans into them. I let them freeze over a weekend and then took them out of the muffin tin and placed them in a gallon bag to protect them from freezer burn. 

Makes about 12 servings

Ingredients for Sprouted Refried Beans

  • 6 cups sprouted navy beans

  • ½ onion

  • ½ jalapeno

Directions for Sprouted Refried Beans

IMG_4871.jpg

Add sprouted navy beans to a large pot.

IMG_4975.jpg

Bring to a boil and cook for about 2 hours until the beans are very soft. The beans will foam as they cook. You can skim the foam and the extra bean pods off of the top if you’d like. Just be sure not to scoop out any of your good sprouted beans!

Add onion and jalapeno into the pot once beans are soft. If too much water is gone, add a little bit into the pot so you don’t scorch the beans on the bottom of the pot. 

IMG_5126.jpg

Immersion blend the beans when they are soft. They should be smoother but still have a little bit of texture to them.

Put them back on the stove. Stir frequently for five minutes over medium high heat to evaporate the liquid.

This is the basic refried bean recipe.

IMG_5173.jpg

My favorite way to eat these is to add a cup of beans to a cast iron skillet. Add in a half a stick of butter. Cook together until well mixed.

IMG_5197.jpg

Add a fried egg and a few softened pepper pieces. 

Sprouted Refried Beans

prep time: cook time: total time:

ingredients:

  • 6 cups sprouted navy beans
  • ½ onion
  • ½ jalapeno

instructions:

How to cook Sprouted Refried Beans

  1. Add sprouted navy beans to a large pot.
  2. Bring to a boil and cook for about 2 hours until the beans are very soft. The beans will foam as they cook. You can skim the foam and the extra bean pods off of the top if you’d like. Just be sure not to scoop out any of your good sprouted beans!
  3. Add onion and jalapeno into the pot once beans are soft. If too much water is gone, add a little bit into the pot so you don’t scorch the beans on the bottom of the pot.
  4. Immersion blend the beans when they are soft. They should be smoother but still have a little bit of texture to them.
  5. Put them back on the stove. Stir frequently for five minutes over medium high heat to evaporate the liquid.
  6. This is the basic refried bean recipe.
  7. My favorite way to eat these is to add a cup of beans to a cast iron skillet. Add in a half a stick of butter. Cook together until well mixed.
  8. Add a fried egg and a few softened pepper pieces.
Created using The Recipes Generator
39.png

GAPS Legal Chicken Pot Pie Soup

I have fond memories of chicken pot pie growing up. I recently learned it’s one of my mom’s favorite foods, which is probably why we enjoyed it often. She at times would make her own but we would usually have the individual frozen pot pies. 

The key to this soup being reminiscent of a pot pie is to cut the vegetables into bite size pieces and make a consistency that’s more like a stew than a soup. Included in this recipe are a few tricks to thicken the soup so it more closely resembles the gravy that we associate with chicken pot pie.

In case you aren’t already convinced by the title, here are a couple other reasons you should try this recipe:

  1. Soup is easy to make in a large batch making it great to feed a crowd or to freeze for later.

  2. You just might find some distant childhood memories while eating it.

  3. The vegetables in pot pie can vary so you can use up what you have on hand.

  4. With a specific flavor profile, it can help expand your soup repertoire. 

Ingredients for GAPS Legal Chicken Pot Pie Soup

  • 1 Whole Chicken

  • 8 Whole Carrots

  • 4 Celery Stalks

  • 1 Yellow Onion

  • 10 oz. Frozen Peas

  • 2 sprig of Tarragon

  • 2 sprig of Basil

Directions for GAPS Legal Chicken Pot Pie Soup

IMG_4915.jpg

Prepare your stock first. Cut up the entire chicken (See how to break down a chicken here.) Set breast meat aside. Add the rest of a chicken to a large stock pot filled with filtered water. Bring to a boil.

Cube chicken breasts, keeping meat around the same size.

Cut up 3 carrots, 2 celery stalks and ½ onions. 

IMG_5021.jpg

Once chicken is brought to a boil, skim off any scum. Add in the aromatics: carrots, celery, onions, tarragon and basil.

Boil for an hour and half until chicken is done.

IMG_5108.jpg

Once chicken is done, remove the chicken pieces from the stock pot. Set aside to cool. Keep the remaining yummy stock on the stove.

IMG_5122.jpg

Once chicken has cooled, remove the chicken meat from the bones. Remove all the meat, joints and connective tissue from the bones. It’s all good stuff! Set the skin aside. The skin will be blended into the stock. Add the bones back to the stock.

Continue to simmer the stock for another 30 - 45 minutes.

IMG_5002.jpg

Chop up remaining carrots, celery and onion. Roughly chop the cooked chicken into bite sized pieces.

Strain the stock. Add 8 cups of stock to a seperate pot. Add in the chicken skin and any organ meats. Blend the skin into the stock with an immersion blender.

Add in chopped carrots, celery, and onion. Cook for 20 minutes.

IMG_5271.jpg

When carrots are soft, add in chopped chicken pieces and the frozen peas. Add fresh tarragon and basil. Add additional salt and a few turns of a pepper grinder.

Cook for twenty minutes, until peas are warmed.

Serve warm!

For added creaminess, I recommend adding sour cream, cultured cream, ghee, butter, or heavy whipping cream, whichever you are tolerating. Make sure to add any probiotic foods into your bowl after serving so as not to kill the live microbes.

GAPS Legal Chicken Pot Pie Soup

prep time: cook time: total time:

ingredients:

  • 1 Whole Chicken
  • 8 Whole Carrots
  • 4 Celery Stalks
  • 1 Yellow Onion
  • 10 oz. Frozen Peas
  • 2 sprig of Tarragon
  • 2 sprig of Basil

instructions:

How to cook GAPS Legal Chicken Pot Pie Soup

  1. Prepare your stock first. Cut up the entire chicken (See how to break down a chicken here.) Set breast meat aside. Add the rest of a chicken to a large stock pot filled with filtered water. Bring to a boil.
  2. Cube chicken breasts, keeping meat around the same size.
  3. Cut up 3 carrots, 2 celery stalks and ½ onions.
  4. Once chicken is brought to a boil, skim off any scum. Add in the aromatics: carrots, celery, onions, tarragon and basil.
  5. Boil for an hour and half until chicken is done.
  6. Once chicken is done, remove the chicken pieces from the stock pot. Set aside to cool. Keep the remaining yummy stock on the stove.
  7. Once chicken has cooled, remove the chicken meat from the bones. Remove all the meat, joints and connective tissue from the bones. It’s all good stuff! Set the skin aside. The skin will be blended into the stock. Add the bones back to the stock.
  8. Continue to simmer the stock for another 30 - 45 minutes.
  9. Chop up remaining carrots, celery and onion. Roughly chop the cooked chicken into bite sized pieces.
  10. Strain the stock. Add 8 cups of stock to a seperate pot. Add in the chicken skin and any organ meats. Blend the skin into the stock with an immersion blender.
  11. Add in chopped carrots, celery, and onion. Cook for 20 minutes.
  12. When carrots are soft, add in chopped chicken pieces and the frozen peas. Add fresh tarragon and basil. Add additional salt and a few turns of a pepper grinder.
  13. Cook for twenty minutes, until peas are warmed.
  14. Serve warm!
  15. For added creaminess, I recommend adding sour cream, cultured cream, ghee, butter, or heavy whipping cream, whichever you are tolerating. Make sure to add any probiotic foods into your bowl after serving so as not to kill the live microbes.
Created using The Recipes Generator
36.png

DIY Almond Flour from Nuts

Any seed wants to be a plant. Seeds include nuts, seeds, beans, and grains. To protect itself, a seed has phytic acid and other enzyme inhibitors and anti-nutrients. These substances attack the body of the animal that ate the seed, preventing the digestion of the seed. This is why we see whole seeds in bird poop.

Manually grinding seeds into flours does nothing to negate these enzyme inhibitors and anti-nutrients. We may not necessarily see whole seeds in our stools but we don’t need to for our bodies to experience the effects of these substances. Inflammation, poor absorption of foods, and leaky gut are some of the effects on our bodies of eating seeds that are not properly prepared. To learn more about properly preparing grains, check out my video.

HOW TO PREPARE GRAINS PROPERLY

When we properly prepare our grains however, we begin the germination process, which changes the seeds chemical structure. It neutralizes the anti-nutrients and enzyme inhibitors, and the seed prepares to bring life. When we eat a seed in this state, it’s nutrients are available to us and it brings life to our bodies.  

All seeds can be prepared in three ways - soaking, sprouting or fermenting. Fermenting is by far the most simple and the most beneficial. All it requires is whey. These directions are for almond flour but you can use the same concept to any nut, seed, or grain. For specific instructions on how to do this with whole seeds, see my recipe on trail mix.

The other benefit of using fermented almond flour is that it makes a much lighter end product. The fermentation process acts somewhat like a baking soda or powder, increasing the air space as your treat bakes, making it less dense.

This is a great way to make fermented almond flour if your recipe calls for a very specific ratio of wet to dry ingredients. It’s also great for recipes that call for frying, like these onion rings!

You can also make fermented flour with almonds already made into flour. See the recipe here.

Ingredients for Making Almond Flour from Fermented Nuts

  • 3 cups Almonds

  • ½ cup Whey

  • Filtered Water

Directions for Making Almond Flour from Fermented Nuts

Place your almonds in filtered water with whey. Allow to soak for 24 hours.

IMG_4326.jpg

Drain the almonds in a colander and rinse with filtered water.

For the easiest almond flour, peel the almonds by squeezing them between your fingers until the skins pop off.

Drain the almonds well. If you don’t drain them well, your flour will be wet.

IMG_4368.jpg

Place almonds into a food processor. Pulse them consistently for about 60 seconds in one second pulses. Scrape the sides of the food processor consistently to ensure almonds are all blended to the same size.

Don’t pulse for too long or you will get almond butter!


DIY Almond Flour

Author:
prep time: cook time: total time:

ingredients:

  • 3 cups Almonds
  • ½ cup Whey
  • Filtered Water

instructions:

How to cook DIY Almond Flour

  1. Place your almonds in filtered water with whey. Allow to soak for 24 hours.
  2. Drain the almonds in a colander and rinse with filtered water.
  3. For the easiest almond flour, peel the almonds by squeezing them between your fingers until the skins pop off.
  4. Drain the almonds well. If you don’t drain them well, your flour will be wet.
  5. Place almonds into a food processor. Pulse them consistently for about 60 seconds in one second pulses. Scrape the sides of the food processor consistently to ensure almonds are all blended to the same size.
  6. Don’t pulse for too long or you will get almond butter!
Created using The Recipes Generator
32.png

Homemade Salad Dressing

I have recently been learning the importance of essential fatty acids from plants (EFAs.) These should be incorporated in every day diets. If you’re on GAPS, these are introduced on Introduction Stage 4.

When making real food, quality matters! This is especially true of cold pressed plant oils. For that reason, I recommend getting and using a high quality olive oil is very important. I am lucky to have a local shop, Rocky Mountain Olive Oil Company, that sources their oils from small family farms around the world who know the importance of good quality oils. You can even taste test the different oils so you know exactly what you’re getting.  Before I discovered the shop, I had no idea that olive oils can taste so differently from each other. If you’re not in Northern Colorado, try to find a olive oil store near you. There are even a few high quality olive oils available online, including Jovial and Olea. If none of these are an option for you, get an organic olive oil from your local health food store.

This is a simple base salad dressing but once you understand the ratios, the possibilities are endless! This recipe is a triple batch but the basic ratio is 3 tbsp oil and 2 tbsp of vinegar. For a cream based dressing, add sour cream. Find a salad dressing that your family loves but don’t forget to mix it up from time to time. Variety is key!

Add this dressing cold to any salad that makes sense. Never heat any olive oil or other plant pressed oils because heat will oxidize the molecules of the oil, creating rancidity and changing it from the health food that it is.

Letting this dressing meld overnight is important. The dressing becomes more flavorful and delicious as it sets longer.

Ingredients for Homemade Salad Dressing:

  • 9 tbsp Olive Oil

  • 8 tbsp Vinegar

  • 1 tbsp Honey

  • 4 Cloves Freshly Chopped Garlic

  • Freshly Chopped Herbs of Your Choice (I used 3 sprigs thyme and 1 sprig of rosemary.)

Directions for Homemade Salad Dressing

homemade-salad-dressing-recipe-how-to-make-home-made-salad-dressing-diy-salad-dressing-whole-food-salad-dressing-whole-30-gaps-diet-gaps-protocol-paleo-salad-dressing

Mince garlic finely.

Strip the thyme from the stem.

homemade-salad-dressing-recipe-how-to-make-home-made-salad-dressing-diy-salad-dressing-whole-food-salad-dressing-whole-30-gaps-diet-gaps-protocol-paleo-salad-dressing

Add olive oil, vinegar and honey to jar. 

homemade-salad-dressing-recipe-how-to-make-home-made-salad-dressing-diy-salad-dressing-whole-food-salad-dressing-whole-30-gaps-diet-gaps-protocol-paleo-salad-dressing

Add garlic, thyme and rosemary or other herbs.

homemade-salad-dressing-recipe-how-to-make-home-made-salad-dressing-diy-salad-dressing-whole-food-salad-dressing-whole-30-gaps-diet-gaps-protocol-paleo-salad-dressing

Shake to mix.

Store at room temperature. 

Homemade Salad Dressing

prep time: cook time: total time:

ingredients:

  • 9 tbsp Olive Oil
  • 8 tbsp Vinegar
  • 1 tbsp Honey
  • 4 Cloves Freshly Chopped Garlic
  • Freshly Chopped Herbs of Your Choice (I used 3 sprigs thyme and 1 sprig of rosemary.)

instructions:

How to cook Homemade Salad Dressing

  1. Mince garlic finely.
  2. Strip the thyme from the stem.
  3. Add olive oil, vinegar and honey to jar.
  4. Add garlic, thyme and rosemary or other herbs.
  5. Shake to mix.
  6. Store at room temperature.
Created using The Recipes Generator
30.png

Chocolate Fudge Sauce

Ingredients for Chocolate Fudge Sauce

  • 1 ¼  cup cocoa powder

  • 1 cup honey

  • ½ cup Cocoa Butter

  • ½ tsp salt

  • ¾ cup water

Directions for Chocolate Fudge Sauce

IMG_4527.jpg

In a small pot, combine cocoa powder, honey, salt, and water. Mix together. Add in cocoa butter.

IMG_4541.jpg

Bring to a boil. Simmer for five minutes until sauce thickens. Stir constantly to ensure no lumps.

IMG_4623.jpg

Let sauce cool slightly and serve immediately over ice cream!


Chocolate Fudge Sauce

Author:
prep time: cook time: total time:

ingredients:

Ingredients for Chocolate Fudge Sauce
  • 1 ¼ cup cocoa powder
  • 1 cup honey
  • ½ cup Cocoa Butter
  • ½ tsp salt
  • ¾ cup water

instructions:

How to cook Chocolate Fudge Sauce

Directions for Chocolate Fudge Sauce
  1. In a small pot, combine cocoa powder, honey, salt, and water. Mix together. Add in cocoa butter.
  2. Bring to a boil. Simmer for five minutes until sauce thickens. Stir constantly to ensure no lumps.
  3. Let sauce cool slightly and serve immediately over ice cream!
Created using The Recipes Generator
28.png

Cast Iron Parboiled Lamb Meatballs

Meatballs are a simple way to add variety to your diet. They can also be a great way to get your kids to eat vegetables! Add finely chopped onions, zucchini, peppers, etc. in to your meatballs to add vegetables.

I’m making these meatballs with lamb burger but you can do it with any kind of burger.

If you have a lean cut, make sure you add fat! I prefer to not use a lean cut; it’s better for your health! Remember, fat is your friend.

My preferred way of making meatballs is to parboil them.

An added benefit of rolling lamb meatballs is the lovely lamb tallow on your skin! Tallow is fat and lamb tallow is the best for your skin. Your hands will be soft, moisturized, and waterproof after rolling your meatballs.

Ingredients for GAPS Friendly Lamb Meatballs

  • 1 lb ground lamb

  • Salt

Directions for GAPS Friendly Lamb Meatballs

IMG_1446.jpg

Heat ½ inch of water in a pan.

IMG_1470.jpg

Roll your lamb into inch sized balls. You can make your meatballs any size, just make sure they’re consistently sized.

IMG_1476.jpg

Add your meatballs into your pan with water.

IMG_1485.jpg

Turn your meatballs with a fork to continue to cook on all sides. Salt your meatballs generously.

As you turn them, continue to salt the meatballs.

IMG_1496.jpg

After approximately five minutes, when you think your meatballs are done, cut one open to check it if it is done.

Continue to add water, meatballs, and salt in batches until you have cooked your desired number of meatballs.

Enjoy!

IMG_1575.jpg

Cast Iron Parboiled Lamb Meatballs

Author:
prep time: cook time: total time:

ingredients:

  • 1 lb ground lamb
  • Salt

instructions:

How to cook Cast Iron Parboiled Lamb Meatballs

  1. Heat ½ inch of water in a pan.
  2. Roll your lamb into inch sized balls. You can make your meatballs any size, just make sure they’re consistently sized.
  3. Add your meatballs into your pan with water.
  4. Turn your meatballs with a fork to continue to cook on all sides. Salt your meatballs generously.
  5. As you turn them, continue to salt the meatballs.
  6. After approximately five minutes, when you think your meatballs are done, cut one open to check it if it is done.
  7. Continue to add water, meatballs, and salt in batches until you have cooked your desired number of meatballs.
  8. Enjoy!
Created using The Recipes Generator
44.png

How to Make Your Own Spaghetti Sauce

I’ve always liked spaghetti and spaghetti sauce but when I started making my own spaghetti sauce, I realized I liked my own sauce best of all! I love making my own spaghetti sauce because I get to be in charge of the flavor, texture, and strength. Plus, I know everything that’s in it! I did try making my own tomato paste once but it was way too much work! I’m glad to have other options for tomato paste and sauce.

If you want a really smooth sauce, I recommend using tomato paste. If you don’t mind it with a little texture or you have an immersion blender, you can make it with crushed tomatoes. Using crushed tomatoes to make your sauce is preferable because there is less processing involved. Whole, raw tomatoes can also be used. Simply cut them into chunks, put them into a pot with water, and simmer slightly. You can remove the seeds but if you don’t mind them, that’s one less step and less work!

After the tomatoes have cooked for a period of time and are soft, you can puree them with an immersion blender or stand blender. After the tomatoes are pureed, simmer on low heat and begin adding your spices.

I also love tomato sauce because as long as you are tolerating tomatoes, you can eat this on the introduction diet of GAPS, as early as stage four. If you are on the introduction diet, make sure you are adding fresh herbs. When using fresh herbs, you will need to use larger amounts and plan to simmer your sauce for a longer period of time. A long simmer simply makes your sauce more delicious.

For a quicker spaghetti sauce, use crushed glass can tomatoes, like the ones pictured below. Begin cooking them and, when warm and soft, immersion blend them or add them to a stand blender. If you want the sauce less chunky, you can blend before you add your herbs and spices.

IMG_1347.jpg

If using tomato puree or tomato paste, you will need to reconstitute it with water. A small amount of paste can go a long way! Start with adding equal parts water and paste. Continue adding water if needed until you get to your desired consistency. Make sure you do not use tin canned paste, especially if it’s lined with plastic coating. I recommend only using glass canned items from a company you know and trust.

If you have any fermented garlic, add a tablespoon or so of the liquid at the very end of your cooking. This will send your sauce over the top.

Traditional spaghetti sauce recipes have sugar in them. If you are transitioning your family from a sugary diet, you could consider adding a little bit of honey into the mixture. However, it is best to not add a sweetener if you can avoid it.

This spaghetti sauce recipe can be used for a lovely spaghetti night, or you can use it to make zucchini pizzas!

Once you have your tomato base, read below to find out how to finish your sauce.

Ingredients to Make Your Own Tomato Sauce

  • 18 oz. crushed tomatoes

  • 2 Bay Leaves

  • 1 tbsp lard

  • ⅓ cup minced onion

  • 3-5 cloves of garlic

  • 2 tsp Dried Oregano

  • 1 tsp Dried Sage

  • 2 tsp Dried Thyme

  • 1 tsp Salt

Directions to Make Your Own Spaghetti Sauce

This recipe uses crushed tomatoes. You can also use tomato paste or whole tomatoes. (See above for directions on using tomato paste or whole tomatoes to make your sauce.)

Add one 18 oz. of crushed tomatoes into a pot. Add a bit of water to the jar, swirl, and add to the pot. Immersion blend the tomatoes at this stage if you like texture in your sauce.

IMG_1407.jpg

Add two whole bay leaves into tomatoes on the sauce.

Warm your lard in a cast iron skillet. Finely chop your onions and garlic. Add onions to your skillet first. Mince your garlic. Add garlic.

IMG_1417.jpg

When onions and garlic are softened, add them in with the tomatoes. If you would like a completely smooth sauce, you can immersion blend the sauce at this stage.

Add your dried herbs into the mixture and stir together.

Add water as you need it if your sauce is too thick. As it simmers it will reduce so to start, you want a soupy consistency for better mixing. If you add too much water at any point, you’ll simply need to simmer your sauce longer.

IMG_1445.jpg

Simmer for at least twenty minutes. The longer you simmer your sauce, the better it will be.

Store any leftover sauce in the jar that your tomatoes came in. I leave the bay leaves in so the sauce continues to be flavored. It will keep for about a week in the fridge.

Use your spaghetti sauce to top roasted spaghetti squash or to make zucchini pizza bites!

IMG_1567.jpg

Spaghetti Squash

Author:
prep time: cook time: total time:

ingredients:

  • 18 oz. crushed tomatoes
  • 2 Bay Leaves
  • 1 tbsp lard
  • ⅓ cup minced onion
  • 3-5 cloves of garlic
  • 2 tsp Dried Oregano
  • 1 tsp Dried Sage
  • 2 tsp Dried Thyme
  • 1 tsp Salt

instructions:

How to cook Spaghetti Squash

  1. This recipe uses crushed tomatoes. You can also use tomato paste or whole tomatoes. (See above for directions on using tomato paste or whole tomatoes to make your sauce.)
  2. Add one 18 oz. of crushed tomatoes into a pot. Add a bit of water to the jar, swirl, and add to the pot. Immersion blend the tomatoes at this stage if you like texture in your sauce.
  3. Add two whole bay leaves into tomatoes on the sauce.
  4. Warm your lard in a cast iron skillet. Finely chop your onions and garlic. Add onions to your skillet first. Mince your garlic. Add garlic.
  5. When onions and garlic are softened, add them in with the tomatoes. If you would like a completely smooth sauce, you can immersion blend the sauce at this stage. 
  6. Add your dried herbs into the mixture and stir together.
  7. Add water as you need it if your sauce is too thick. As it simmers it will reduce so to start, you want a soupy consistency for better mixing. If you add too much water at any point, you’ll simply need to simmer your sauce longer.
  8. Simmer for at least twenty minutes. The longer you simmer your sauce, the better it will be.
  9. Store any leftover sauce in the jar that your tomatoes came in. I leave the bay leaves in so the sauce continues to be flavored. It will keep for about a week in the fridge.
  10. Use your spaghetti sauce to top roasted spaghetti squash or to make zucchini pizza bites!
Created using The Recipes Generator
23.png

How to Make the Best Omelette

I have fond memories of omelettes!  I lived in Guatemala doing mission work for four months when I was 18. During my time there, we took a trip and stayed at a nice hotel. We had a gourmet breakfast with omelettes, complete with the freshest vegetables and fresh eggs. The skill of the chefs was amazing to watch.  It was some of the best food I had ever eaten! Whenever I make omelettes at home now, I think fondly back on that memory. Making an omelette in a cast iron pan is very different from what I experienced in that restaurant but it’s still a delicious and filling meal any time of the day.

You can use the suggested vegetables or any that you have on hand. Making an omelette in the morning is a great way to use up any vegetables that you have leftover from dinner the night before. In general, eggs, peppers, tomatoes, and spinach make great omelettes.

You can also had ham, bacon, or pieces of chicken into your omelette if you’d like. I prefer the simplicity of just vegetables in mine. Cheese is another great ingredient to add to an omelette. If you are cooking in a cast iron pan, which I recommend, wait to add your cheese until your omelette is ready to be folded. The heat of the omelette will melt the cheese and you won't have gooey strings of cheese in your cast iron.

Cooking your omelette can go quick so pre-slicing all the vegetables you want to use before you start heating the fat or cooking the eggs is important for timing! If you wash any of your vegetables, make sure you dry them completely before adding them to your omelette.

This recipe makes 1 very large omelette that can easily be split between two people. It's an especially great recipe if you're preparing food for multiple family members at a time, especially little ones! It's a one pan solution that will feed many.

Easy Omelette Breakfast on GAPS

Ingredients for a GAPS Friendly Omelette

  • 1 tbsp Lard or butter

  • 3 Eggs

  • 1 ½ tbsp Water

  • ¼ Red Bell Pepper

  • ¼ Green Bell Pepper

  • ¼ Onion

  • 1 Small Tomato

  • 1 Handful of Spinach

Directions for a GAPS Friendly Omelette

how-to-make-an-omelette-best-way-to-make-an-omelette-huge-omelette-gaps-legal-eggs-gaps-legal-omelette-gaps-friendly-breakfast-gaps-friendly-omelette-gaps-diet-gaps-protocol-certified-gaps-practitioner-northern-colorado-holistic-healthcare-amy-mihaly

Chop all vegetables you will add to your meal before you start heating your pan. Try to keep pieces as uniform as possible so they cook quickly.

how-to-make-an-omelette-best-way-to-make-an-omelette-huge-omelette-gaps-legal-eggs-gaps-legal-omelette-gaps-friendly-breakfast-gaps-friendly-omelette-gaps-diet-gaps-protocol-certified-gaps-practitioner-northern-colorado-holistic-healthcare-amy-mihaly

Heat your fat in a pan.

how-to-make-an-omelette-best-way-to-make-an-omelette-huge-omelette-gaps-legal-eggs-gaps-legal-omelette-gaps-friendly-breakfast-gaps-friendly-omelette-gaps-diet-gaps-protocol-certified-gaps-practitioner-northern-colorado-holistic-healthcare-amy-mihaly

Add spinach to pan and saute until soft.

how-to-make-an-omelette-best-way-to-make-an-omelette-huge-omelette-gaps-legal-eggs-gaps-legal-omelette-gaps-friendly-breakfast-gaps-friendly-omelette-gaps-diet-gaps-protocol-certified-gaps-practitioner-northern-colorado-holistic-healthcare-amy-mihaly

Meanwhile, crack three eggs into a dish. Scramble the eggs quickly with a fork.

how-to-make-an-omelette-best-way-to-make-an-omelette-huge-omelette-gaps-legal-eggs-gaps-legal-omelette-gaps-friendly-breakfast-gaps-friendly-omelette-gaps-diet-gaps-protocol-certified-gaps-practitioner-northern-colorado-holistic-healthcare-amy-mihaly

Add all other vegetables except tomatoes. Add a few shakes of salt and cook for five minutes.

When your vegetables are soft, add the tomatoes.

how-to-make-an-omelette-best-way-to-make-an-omelette-huge-omelette-gaps-legal-eggs-gaps-legal-omelette-gaps-friendly-breakfast-gaps-friendly-omelette-gaps-diet-gaps-protocol-certified-gaps-practitioner-northern-colorado-holistic-healthcare-amy-mihaly

After five minutes, add the eggs. Stir to incorporate the vegetables. Try to leave a little fat on the bottom of the pan, which can be difficult.

how-to-make-an-omelette-best-way-to-make-an-omelette-huge-omelette-gaps-legal-eggs-gaps-legal-omelette-gaps-friendly-breakfast-gaps-friendly-omelette-gaps-diet-gaps-protocol-certified-gaps-practitioner-northern-colorado-holistic-healthcare-amy-mihaly

Once your eggs are incorporated, turn the stove to low heat and place a cover over the top of the eggs.

how-to-make-an-omelette-best-way-to-make-an-omelette-huge-omelette-gaps-legal-eggs-gaps-legal-omelette-gaps-friendly-breakfast-gaps-friendly-omelette-gaps-diet-gaps-protocol-certified-gaps-practitioner-northern-colorado-holistic-healthcare-amy-mihaly

As your eggs start to harden, help them pull away from the sides of the pan by loosening them with a fork. This helps release some fat which will make it easier to remove the omelette from the pan once it is done.

how-to-make-an-omelette-best-way-to-make-an-omelette-huge-omelette-gaps-legal-eggs-gaps-legal-omelette-gaps-friendly-breakfast-gaps-friendly-omelette-gaps-diet-gaps-protocol-certified-gaps-practitioner-northern-colorado-holistic-healthcare-amy-mihaly

When eggs are set, transfer to a plate and fold over. Help loosen the omelette from the pan with a fork.

how-to-make-an-omelette-best-way-to-make-an-omelette-huge-omelette-gaps-legal-eggs-gaps-legal-omelette-gaps-friendly-breakfast-gaps-friendly-omelette-gaps-diet-gaps-protocol-certified-gaps-practitioner-northern-colorado-holistic-healthcare-amy-mihaly

Top with what you’d like! I like sour cream on my omelettes but you could add salsa or avocado.


Omelette

Author:
prep time: cook time: total time:

ingredients:

  • 1 tbsp Lard or butter
  • 3 Eggs
  • 1 ½ tbsp Water
  • ¼ Red Bell Pepper
  • ¼ Green Bell Pepper
  • ¼ Onion
  • 1 Small Tomato
  • 1 Handful of Spinach

instructions:

How to cook Omelette

  1. Chop all vegetables you will add to your meal before you start heating your pan. Try to keep pieces as uniform as possible so they cook quickly.
  2. Heat your fat in a pan.
  3. Add spinach to pan and saute until soft.
  4. Meanwhile, crack three eggs into a dish. Scramble the eggs quickly with a fork.
  5. Add all other vegetables except tomatoes. Add a few shakes of salt and cook for five minutes.
  6. When your vegetables are soft, add the tomatoes.
  7. After five minutes, add the eggs. Stir to incorporate the vegetables. Try to leave a little fat on the bottom of the pan, which can be difficult.
  8. Once your eggs are incorporated, turn the stove to low heat and place a cover over the top of the eggs.
  9. As your eggs start to harden, help them pull away from the sides of the pan by loosening them with a fork. This helps release some fat which will make it easier to remove the omelette from the pan once it is done.
  10. When eggs are set, transfer to a plate and fold over. Help loosen the omelette from the pan with a fork.
  11. Top with what you’d like! I like sour cream on my omelettes but you could add salsa or avocado.
Created using The Recipes Generator
21.png

Making Whey

Easy Do-It-Yourself Whey from Yogurt

Whey is the other protein in milk aside from casein. It’s only present after milk products have been cultured and it’s a live food. This liquid is teeming with good lactic acid producing bacteria (LABs.) Whey is a basic to keep on hand because it can be used to ferment flours, seeds, nuts, vegetables, or as a starter to culture other dairy.

I use homemade yogurt to make my whey but you can use store bought yogurt to make your own whey. Make sure you get a full fat, grass fed yogurt that only contains milk and cultures. It’s ok if it’s pasteurized as the culturing process adds life back to this food! Greek yogurt will not work to make whey as there is very little whey naturally in that strain of yogurt. If you are sensitive to lactose or casein, you should leave your store bought yogurt out on the counter, unopened, for an additional 12 - 24 hours to finish culturing the yogurt before you strain the whey. (Essentially making it lactose free.)

If you strain your yogurt for a long time, it becomes almost like a cream cheese substance. It’s great to add fresh herbs to and make a dip!

To speed along the straining time, stir your yogurt well before adding it to the cloth.

It is easy to make your own whey using yogurt, either homemade yogurt or store bought yogurt. Whey is used for many things like fermentation. DIY recipe on how to make whey by Northern Colorado Holistic Healthcare Provider and Certified GAPS Practit…

I really like using the villi life culture from the Heirloom Yogurt Starter pack at Cultures for Health. Not only is it a mesophilic culture, meaning it cultures at room temperature instead of at 110 degrees like most yogurts, but it is a runnier yogurt and produces a lot of whey for my baking and fermenting needs.

I enjoy to the runniness of the ville life culture. If you don’t, simply separate some of the whey out of each batch for a thicker end product.

It is easy to make your own whey using yogurt, either homemade yogurt or store bought yogurt. Whey is used for many things like fermentation. DIY recipe on how to make whey by Northern Colorado Holistic Healthcare Provider and Certified GAPS Practit…

The cloth I used is the single fold diaper cloth, you can purchase it at Walmart or find something similar at Cultures for Health.

It’s best to use a plastic funnel because metal can be damaging to the good bacteria inside the whey.

Whey keeps in the fridge for about six months if you’ve successfully removed most of the milk solids and strained well.

Ingredients for DIY Whey

  • 3 Cups Homemade Yogurt

Directions for DIY Whey

It is easy to make your own whey using yogurt, either homemade yogurt or store bought yogurt. Whey is used for many things like fermentation. DIY recipe on how to make whey by Northern Colorado Holistic Healthcare Provider and Certified GAPS Practit…

Set a plastic strainer inside a large measuring cup or bowl.

It is easy to make your own whey using yogurt, either homemade yogurt or store bought yogurt. Whey is used for many things like fermentation. DIY recipe on how to make whey by Northern Colorado Holistic Healthcare Provider and Certified GAPS Practit…

Fold the cloth four times and set inside the strainer.

It is easy to make your own whey using yogurt, either homemade yogurt or store bought yogurt. Whey is used for many things like fermentation. DIY recipe on how to make whey by Northern Colorado Holistic Healthcare Provider and Certified GAPS Practit…

Pour your yogurt into the cloth.

It is easy to make your own whey using yogurt, either homemade yogurt or store bought yogurt. Whey is used for many things like fermentation. DIY recipe on how to make whey by Northern Colorado Holistic Healthcare Provider and Certified GAPS Practit…

Gather the edges of your cloth and secure with a rubber band.

Leave to sit and strain for as long as desired.

If you want to simply thicken your yogurt, leaving it for only ten minutes is fine. If you’d like to strain all the whey out to make a cream cheese, you can leave it for much longer. I often leave mine out overnight.

It is easy to make your own whey using yogurt, either homemade yogurt or store bought yogurt. Whey is used for many things like fermentation. DIY recipe on how to make whey by Northern Colorado Holistic Healthcare Provider and Certified GAPS Practit…

Once you have strained enough whey out, pour it into a clean glass jar.

Rinse your cloth well in hot water. Don’t use soap! Hang to dry.

Use your whey to ferment flours, seeds, nuts, or vegetables, or as a starter to culture other dairy. What will you use your whey for?


How to Make Whey

Author:
prep time: cook time: total time:

ingredients:

  • 3 Cups Homemade Yogurt

instructions:

How to cook How to Make Whey

  1. Set a plastic strainer inside a large measuring cup or bowl.
  2. Fold the cloth four times and set inside the strainer.
  3. Pour your yogurt into the cloth.
  4. Gather the edges of your cloth and secure with a rubber band.
  5. Leave to sit and strain for as long as desired.
  6. If you want to simply thicken your yogurt, leaving it for only ten minutes is fine. If you’d like to strain all the whey out to make a cream cheese, you can leave it for much longer. I often leave mine out overnight.
  7. Once you have strained enough whey out, pour it into a clean glass jar.
  8. Rinse your cloth well in hot water. Don’t use soap! Hang to dry.
  9. Use your whey to ferment flours, seeds, nuts, or vegetables, or as a starter to culture other dairy. What will you use your whey for?
Created using The Recipes Generator
14.png

10 Ways to Consume Meat Stock

Meat stock is one of the pillars of a healthy gut diet. While bone broth is getting a lot of press lately, I don’t recommend it for most people. (Learn more about why I recommend meat stock over bone broth here.) Meat stock really gets a gold medal as a great nutrient dense food that can boost your immunity, help with healing allergies, and is easy to digest, especially for those with a leaky gut. Even better, meat stock is meant to be a meal all on it’s own! You can make meat stock with any meat, though I think chicken meat stock is the easiest beginner stock.

Consuming meat stock is a habit I encourage my clients to do throughout the day because of it’s great health benefits. There are many ways to consume meat stock and some creative ways so that you don’t get bored with consuming meat stock frequently. Here’s a few of my favorites!

Vary Your Meat Stock Recipe

Try adding different spices and herbs to your meat stock recipe when you cook it. This will change the taste to keep it interesting. You can also vary the vegetables and aromatics that you add - or add no aromatics like onions and your dogs can consume your meat stock as well!

Consuming meat stock is an important part of the GAPS Diet but having it the same over and over can grow tiring. Here are ten unique and creative ways to consume meat stock whether you're on the GAPS Diet or not. Northern Colorado Holistic healthcar…

Have It Warm

Heated stock is a great warming beverage, especially on cool winter mornings. Keeping heated stock in a mug next to you will allow you to drink it alongside your morning meal.

If you’re on the go, keep your heated stock in a thermos so it stays warm throughout the day. Then you can sip on it just like a tea or coffee.

Eat It Cold

Drinking cold stock is very refreshing on a hot summer day!

If your stock gets a good gel at the top, you can simply pop the gel off the top of your stock and eat it cold like a meat jelly.

Use Meat Stock as a Base

Meat stock makes an excellent base for different soups and other recipes. I’ve been partial to this chicken tortilla soup recipe recently but you can make it into any variety of soup that sounds delicious.

Add an Egg (or Two)

You can poach eggs in warm stock for a delicious breakfast. Use the stock as a replacement for the water that you would normally poach eggs in.

Or, break and stir a few egg yolks only into warm stock. This will create a cheesy tasting drink that is delicious.

Consume Meat Stock on the Go

Traveling can bring up a whole host of stressors and traveling on the GAPS Diet means paying closer attention to your food. Since meat stock is one of the pillars of the GAPS Diet, it’s important to factor it into your travel plans. There’s a few different ways to consume meat stock on the go, from dehydrating it to making it when you get there.

What are your favorite ways to consume meat stock? If you have other ideas, share them in the comments below!

Easy Real Food Ratatouille Recipe

GAPS Legal Ratatouille Recipe

I am very excited to share this recipe with you, and honored to give credit to Shaye at The Elliot Homestead for the original recipe (which I adapted with few changes). I highly encourage you to check out her webpage. She has amazing and delicious home-grown food recipes, and I have never tried anything of hers that I didn't like!

This recipe is a warm and filling side, and can even function as a meal on days your body is wanting very little meat. The lard creates a stoutness to this recipe that fills you up without making it feel like a heavy meal. Remember, we need fat-soluble vitamins to help us absorb the nutrients from vegetables, even after we cook them (check out more about this in The One About Fat blog I wrote a while back).

In addition to being a lighter meal at times, I have found this recipe to be a wonderful support food when I am stressed, cold or tired and need a little more in the way of carbohydrates and fat. Because that's pretty much what this is!

I hope you enjoy this recipe as much (and as many times) as I do!

Onward!

A few cooking tips before we get started:

  1. Use fat and salt liberally and with each new vegetable addition. Each vegetable needs some salt all on it's own to make it delicious, and if you are running low on fat, add some more!!!

  2. As Shaye taught me, cooking each vegetable separately is what makes all the difference in this dish. This recipe does take time to prepare, but is well worth the effort.

  3. To best manage your time you can either pre-cut all the vegetables (even the night before) so all have to do is remove, add, stir and wait for time to pass in cooking. You can then do other tasks around the kitchen while your vegetables cook. OR you can focus all your time on this dish (as the instructions are below). Chop the next vegetable while the previous one is cooking. This fills your time almost perfectly until the next one, but you will be working solid on this dish that entire time—don't plan to do other things while this dish is cooking. I much prefer this way, I can give full attention to the dish, which I think often makes food taste better!

  4. Make a large batch! I make this for me and it lasts a couple days before I eat it all. Days of happiness.

Ingredients

  • 1 eggplant

  • 2-3 zucchini (depending on size)

  • 1 medium yellow onion

  • 6 organic tomatoes

  • 6-8 whole garlic cloves

  • 2 large sprigs Thyme

  • 3 Bay leaves

  • Lard or tallow (can use avocado oil, but lard is best!)

Directions

Ratatouille is an easy dish to prepare because you chop and cook the onions, squash, and eggplant, garlic, and tomatoes in layers. This is a GAPS Legal, Whole 30, Paleo friendly recipe that can be made all year long. Recipe by certified GAPS Practit…

Roughly chop onion and dice the eggplant.

Heat enough fat in a large, deep cast iron skillet to coat the bottom of the pan, about half a cup. Warm on low heat.

Ratatouille is an easy dish to prepare because you chop and cook the onions, squash, and eggplant, garlic, and tomatoes in layers. This is a GAPS Legal, Whole 30, Paleo friendly recipe that can be made all year long. Recipe by certified GAPS Practit…

Add onion and garlic to skillet. Add thyme sprigs in whole and bay leaves. Cook on medium heat until the onions are soft.

Remove garlic, bay leaves, and thyme, setting aside. Using a slotted spoon, remove the onions, reserving as much oil as possible in the pan. Add onions to a dish with a lid. Cover and set aside.

Add eggplant, a good pinch of salt, and the garlic, bay leaves and thyme back to the skillet. You will also need to add another 1-2 more tablespoons of fat, since the eggplant soaks it up. Cook on low-medium heat until soft. If you need to move the process along, you can add a little water and cover to help the eggplant steam. Steam the eggplant for 8 minutes, then uncover and sauté on medium heat to finish it up.

Ratatouille is an easy dish to prepare because you chop and cook the onions, squash, and eggplant, garlic, and tomatoes in layers. This is a GAPS Legal, Whole 30, Paleo friendly recipe that can be made all year long. Recipe by certified GAPS Practit…

While the eggplant is cooking, slice the zucchini. I recommend that you cut into quarters to cook faster (I forgot to for the picture!)

When the eggplant is soft, remove garlic, bay leaves, and thyme, setting aside. Using a slotted spoon, remove the eggplant, reserving as much oil as possible in the pan. Add the eggplant to the same dish with a lid as the onions.

Add an extra tablespoon of oil to the pan. Add zucchini to skillet, along with the garlic, bay leaves and thyme sprigs.

Cook zucchini with lid on until soft, stirring occasionally.

Ratatouille is an easy dish to prepare because you chop and cook the onions, squash, and eggplant, garlic, and tomatoes in layers. This is a GAPS Legal, Whole 30, Paleo friendly recipe that can be made all year long. Recipe by certified GAPS Practit…

Add tomatoes to skillet and cook just a couple minutes, until they are almost soft.

Add onion and eggplant back to pan. Mix and allow everything to cook together for a couple minutes, melding the flavors.

This is great served hot or cold. The flavors meld with time, making leftovers even better, if that's possible!

Ratatouille is an easy dish to prepare because you chop and cook the onions, squash, and eggplant, garlic, and tomatoes in layers. This is a GAPS Legal, Whole 30, Paleo friendly recipe that can be made all year long. Recipe by certified GAPS Practit…

Ratatouille

Author:
prep time: cook time: total time:

ingredients:

  • 1 eggplant
  • 2-3 zucchini (depending on size)
  • 1 medium yellow onion
  • 6 organic tomatoes
  • 6-8 whole garlic cloves
  • 2 large sprigs Thyme
  • 3 Bay leaves
  • Lard or tallow (can use avocado oil, but lard is best!)

instructions:

How to cook Ratatouille

  1. Roughly chop onion and dice the eggplant.
  2. Heat enough fat in a large, deep cast iron skillet to coat the bottom of the pan, about half a cup. Warm on low heat.
  3. Add onion and garlic to skillet. Add thyme sprigs in whole and bay leaves. Cook on medium heat until the onions are soft.
  4. Remove garlic, bay leaves, and thyme, setting aside. Using a slotted spoon, remove the onions, reserving as much oil as possible in the pan. Add onions to a dish with a lid. Cover and set aside.
  5. Add eggplant, a good pinch of salt, and the garlic, bay leaves and thyme back to the skillet. You will also need to add another 1-2 more tablespoons of fat, since the eggplant soaks it up. Cook on low-medium heat until soft. If you need to move the process along, you can add a little water and cover to help the eggplant steam. Steam the eggplant for 8 minutes, then uncover and sauté on medium heat to finish it up.
  6. While the eggplant is cooking, slice the zucchini. I recommend that you cut into quarters to cook faster (I forgot to for the picture!)
  7. When the eggplant is soft, remove garlic, bay leaves, and thyme, setting aside. Using a slotted spoon, remove the eggplant, reserving as much oil as possible in the pan. Add the eggplant to the same dish with a lid as the onions.
  8. Add an extra tablespoon of oil to the pan. Add zucchini to skillet, along with the garlic, bay leaves and thyme sprigs.
  9. Cook zucchini with lid on until soft, stirring occasionally.
  10. Add tomatoes to skillet and cook just a couple minutes, until they are almost soft.
  11. Add onion and eggplant back to pan. Mix and allow everything to cook together for a couple minutes, melding the flavors.
  12. This is great served hot or cold. The flavors meld with time, making leftovers even better, if that's possible!
Created using The Recipes Generator