certified GAPS practitioner

Egyptian Lentil Soup GAPS Legal Recipe

GAPS Legal Egyptian Lentil Soup

Are you getting bored with the same old flavor profile? It's easy to do, no matter what dietary guidelines you are following. Well, here is a soup to get you out of our rut!

This delicious soup is legal on Full GAPS, and have been a hit with every single one of the many people I have served it too. This is not a leftover that gets forgotten in the fridge... it has disappeared much sooner than you want it to be gone! I hope you enjoy this Egyptian lentil soup!

Egyptian Lentil Soup

Ingredients

  • 5 cups Meat Stock

  • 1 cup Dried Red Lentils, Sprouted

  • 2 cups Chopped Onions (about 1 medium onion)

  • 2 cups Chopped Cauliflower, about half a small cauliflower

  • 8 garlic cloves, peeled and left whole

  • 2 tablespoons Olive Oil or Other Fat

  • 2 tsp Ground Cumin

  • 1/2 tsp Turmeric

  • 1 tsp Salt

  • 1/3 cup Chopped Fresh Cilantro or 1 tsp Dried Cilantro

  • 3 tablespoons Fresh Lemon Juice

  • Sour Cream (optional)

  • Avocado (optional)

Directions

To sprout the red lentils, soak lentils overnight in filtered water. In the morning, rinse them with filtered water. Leave them drained with a mesh lid over the jar. Rinse every 12 hours until little tails grow, between 2 and 5 days. When they are dry, dehydrate them and store them in a jar until ready to use.

It's important to sprout the lentils for this GAPS Legal and GAPS Friendly Egyptian Lentil Soup recipe. Recipe by certified GAPS Practitioner Amy Mihaly, Be Well Clinic.

Add the lentils to the pot. After about 10-15 minutes, add cauliflower and cook for about ten minutes.

This Egyptian Lentil Soup recipe comes together easily because of the rough chop of the vegetables. Recipe by certified GAPS Practitioner Amy Mihaly, Be Well Clinic.

Roughly chop the cauliflower and onion.

Peel and crush garlic cloves. Add onions and garlic to pot.

Lower the heat and simmer 15-20 minutes or until the lentils and veggies are tender.

Take pot from stove burner and set aside for at least five minutes.

In a small saucepan, add the oil; warm over low heat until the oil is hot but not smoking.

This easy Egyptian Lentil Soup features toasted spices. It's GAPS Legal, GAPS Friendly and good for the Whole 30 and Paleo diets as well. Recipe by certified GAPS Practitioner Amy Mihaly, Be Well Clinic.

Add in the cumin, turmeric, and salt. Cook and stir constantly for 2-3 minutes or until the cumin has released its fragrance. Be careful not to scorch the spices.

Set spice mixture aside for 1 minute to cool.

Egyptian Lentil Soup is an easy GAPS Legal and GAPS Friendly recipe. Recipe by certified GAPS Practitioner Amy Mihaly, Be Well Clinic.

Stir spice mixture into the lentil mixture. Add cilantro. Stir to combine.

This Egyptian Lentil Soup recipe can be pureed to whatever consistency you'd like. It's a GAPS Friendly recipe and GAPS Legal. Recipe by certified GAPS Practitioner Amy Mihaly, Be Well Clinic.

You can puree the soup in batches in a blender or use an immersion blender. Blend to desired texture. I like to leave it a bit chunky.

Add in lemon juice, stir to combine.

Don't skip this step! The lemon really makes the soup, and if it is tasting blah and boring, you need more lemon (and probably a little more salt).

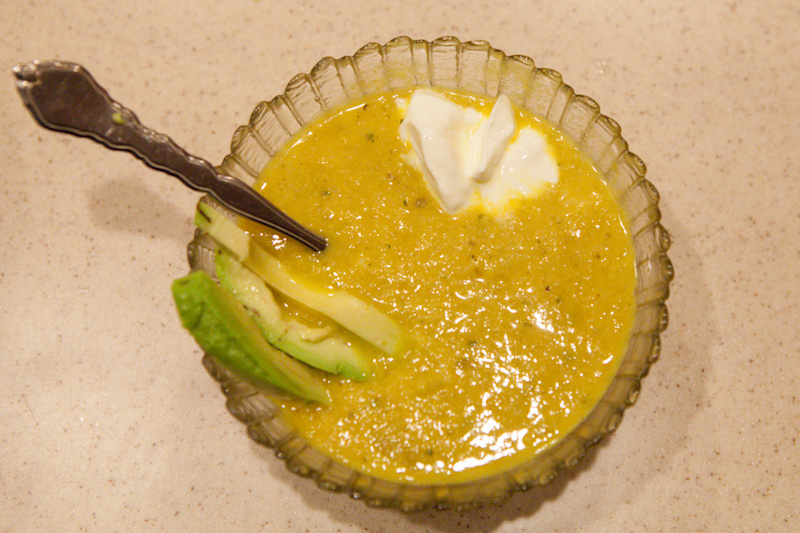
Finish your GAPS Legal Egyptian Lentil soup with a dollop of sour cream and a few slices of avocado for a healthy dose of fat. Recipe by certified GAPS Practitioner Amy Mihaly, Be Well Clinic.

Serve with a dollop of sour cream and slices of avocado. And, as always, I recommend that everyone add additional salt as needed to taste.

Note:

To make this soup go further, you can add a potato. This makes the recipe not GAPS legal and you’ll also need to add a little bit of extra stock.

Finish your GAPS Legal Egyptian Lentil soup with a dollop of sour cream and a few slices of avocado for a healthy dose of fat. Recipe by certified GAPS Practitioner Amy Mihaly, Be Well Clinic.

Egyptian Lentil Soup

Author:
prep time: cook time: total time:

ingredients:

  • 5 cups Meat Stock
  • 1 cup Dried Red Lentils, Sprouted
  • 2 cups Chopped Onions (about 1 medium onion)
  • 2 cups Chopped Cauliflower, about half a small cauliflower
  • 8 garlic cloves, peeled and left whole
  • 2 tablespoons Olive Oil or Other Fat
  • 2 tsp Ground Cumin
  • 1/2 tsp Turmeric
  • 1 tsp Salt
  • 1/3 cup Chopped Fresh Cilantro or 1 tsp Dried Cilantro
  • 3 tablespoons Fresh Lemon Juice
  • Sour Cream (optional)
  • Avocado (optional)

instructions:

How to cook Egyptian Lentil Soup

  1. To sprout the red lentils, soak lentils overnight in filtered water. In the morning, rinse them with filtered water. Leave them drained with a mesh lid over the jar. Rinse every 12 hours until little tails grow, between 2 and 5 days. When they are dry, dehydrate them and store them in a jar until ready to use.
  2. Add the lentils to the pot. After about 10-15 minutes, add cauliflower and cook for about ten minutes.
  3. Roughly chop the cauliflower and onion.
  4. Peel and crush garlic cloves. Add onions and garlic to pot.
  5. Lower the heat and simmer 15-20 minutes or until the lentils and veggies are tender.
  6. Take pot from stove burner and set aside for at least five minutes.
  7. In a small saucepan, add the oil; warm over low heat until the oil is hot but not smoking.
  8. Add in the cumin, turmeric, and salt. Cook and stir constantly for 2-3 minutes or until the cumin has released its fragrance. Be careful not to scorch the spices.
  9. Set spice mixture aside for 1 minute to cool.
  10. Stir spice mixture into the lentil mixture. Add cilantro. Stir to combine.
  11. You can puree the soup in batches in a blender or use an immersion blender. Blend to desired texture. I like to leave it a bit chunky.
  12. Add in lemon juice, stir to combine. Don't skip this step! The lemon really makes the soup, and if it is tasting blah and boring, you need more lemon (and probably a little more salt).
  13. Serve with a dollop of sour cream and slices of avocado. And, as always, I recommend that everyone add additional salt as needed to taste.
  14. Note:
  15. To make this soup go further, you can add a potato. This makes the recipe not GAPS legal and you’ll also need to add a little bit of extra stock.
Created using The Recipes Generator

Swedish Gravlax Recipe

This meal is adapted from GAPS Cookbook by Dr. Natasha Campbell

This is a brined fish meal legal on GAPS stage 2. You eat little pieces, one small piece a day.

Swedish Gravlax Recipe

Ingredients for Swedish Gravlax:

  • ½ lb Fresh Wild Caught Salmon

  • Fresh Dill

  • Freshly Coarsely Ground Black Pepper

  • 4 cup Room Temperature Filtered Water

  • 1 tbsp Honey

  • 1 ½ tbsp Salt

Directions for Swedish Gravlax:

Swedish-Gravlax-Fermented-Salmon-Wild-Caught-Salmon-What-To-Do-With-Salmon-GAPS-Legal-Salmon-Recipe-GAPS-Diet-Salmon-Fish-On-GAPS-GAPS-Diet-Snack

Thinly slice the fish.

Swedish-Gravlax-Fermented-Salmon-Wild-Caught-Salmon-What-To-Do-With-Salmon-GAPS-Legal-Salmon-Recipe-GAPS-Diet-Salmon-Fish-On-GAPS-GAPS-Diet-Snack

Place fish slices into a deep tray.

Sprinkle with dill sprigs and pepper.

Swedish-Gravlax-Fermented-Salmon-Wild-Caught-Salmon-What-To-Do-With-Salmon-GAPS-Legal-Salmon-Recipe-GAPS-Diet-Salmon-Fish-On-GAPS-GAPS-Diet-Snack

Dissolve honey and salt in water to make a brine.

Pour brine over fish.

Swedish-Gravlax-Fermented-Salmon-Wild-Caught-Salmon-What-To-Do-With-Salmon-GAPS-Legal-Salmon-Recipe-GAPS-Diet-Salmon-Fish-On-GAPS-GAPS-Diet-Snack

Leave at room temperature for 1 - 1 ½ hours.

Pour the water out.

Serve on lettuce or eat alone.

Store in refrigerator and consume within two days.


Swedish Gravlax Recipe

Author:
prep time: cook time: total time:

ingredients:

  • ½ lb Fresh Wild Caught Salmon
  • Fresh Dill
  • Freshly Coarsely Ground Black Pepper
  • 4 cup Room Temperature Filtered Water
  • 1 tbsp Honey
  • 1 ½ tbsp Salt

instructions:

How to cook Swedish Gravlax Recipe

  1. Thinly slice the fish.
  2. Place fish slices into a deep tray.
  3. Sprinkle with dill sprigs and pepper.
  4. Dissolve honey and salt in water to make a brine.
  5. Pour brine over fish.
  6. Leave at room temperature for 1 - 1 ½ hours.
  7. Pour the water out.
  8. Serve on lettuce or eat alone.
  9. Store in refrigerator and consume within two days.
Created using The Recipes Generator

Chocolate Fudge Made with Coconut

GAPS Legal Chocolate Peppermint Coconut Fudge and Citrus Coconut Fudge

The GAPS Legal Fudge is a delicious holiday recipe and easy to share with family and friends! This recipe comes together quickly, besides the melting of the coconut butter and oil. I like making this recipe on a snowy day because it’s fun to chill the pans in a snowbank! It makes me feel like a pioneer.

For the citrus fudge, you can use any citrus you like. I prefer orange. You can also use all shredded coconut if you like. I prefer a little crunch in my fudge and like to add the flakes.You can make these flavors on their own and keep them separate. However, I prefer the two flavors together.

To combine the flavors, make the chocolate peppermint fudge first and put it in the freezer for 10 minutes to chill rapidly while you make the citrus fudge. Once chilled, pour the citrus fudge over the top and chill again.The fudge keeps for quite a while and doesn’t melt easily at room temperature. Even so, storing in the fridge is best.Enjoy!

Chocolate Peppermint Coconut Fudge

Ingredients for chocolate peppermint coconut fudge

  • ½ cup coconut butter

  • ½ cup coconut oil

  • ½ cup cocoa powder

  • ½ cup honey

  • 2 tsp peppermint extract or 2 drops peppermint oil

  • 1 tsp vanilla extract

  • 3/4 cup shredded coconut

  • ¼ cup coconut flakes

Directions for chocolate peppermint coconut fudge

This GAPS Legal Coconut Fudge comes in two flavors, citrus and peppermint. You can make the flavors separately but I prefer them layered together. Use coconut butter, coconut oil and coconut flakes for a delicious gluten free, dairy free and GAPS le…

Melt coconut butter on medium heat by adding water to the bottom of a pot and placing jar on top. Or add jar and water to crockpot and heat for two hours until melted.

Melt coconut oil in a separate pot. Crush coconut flakes into smaller pieces.

This GAPS Legal Coconut Fudge comes in two flavors, citrus and peppermint. You can make the flavors separately but I prefer them layered together. Use coconut butter, coconut oil and coconut flakes for a delicious gluten free, dairy free and GAPS le…

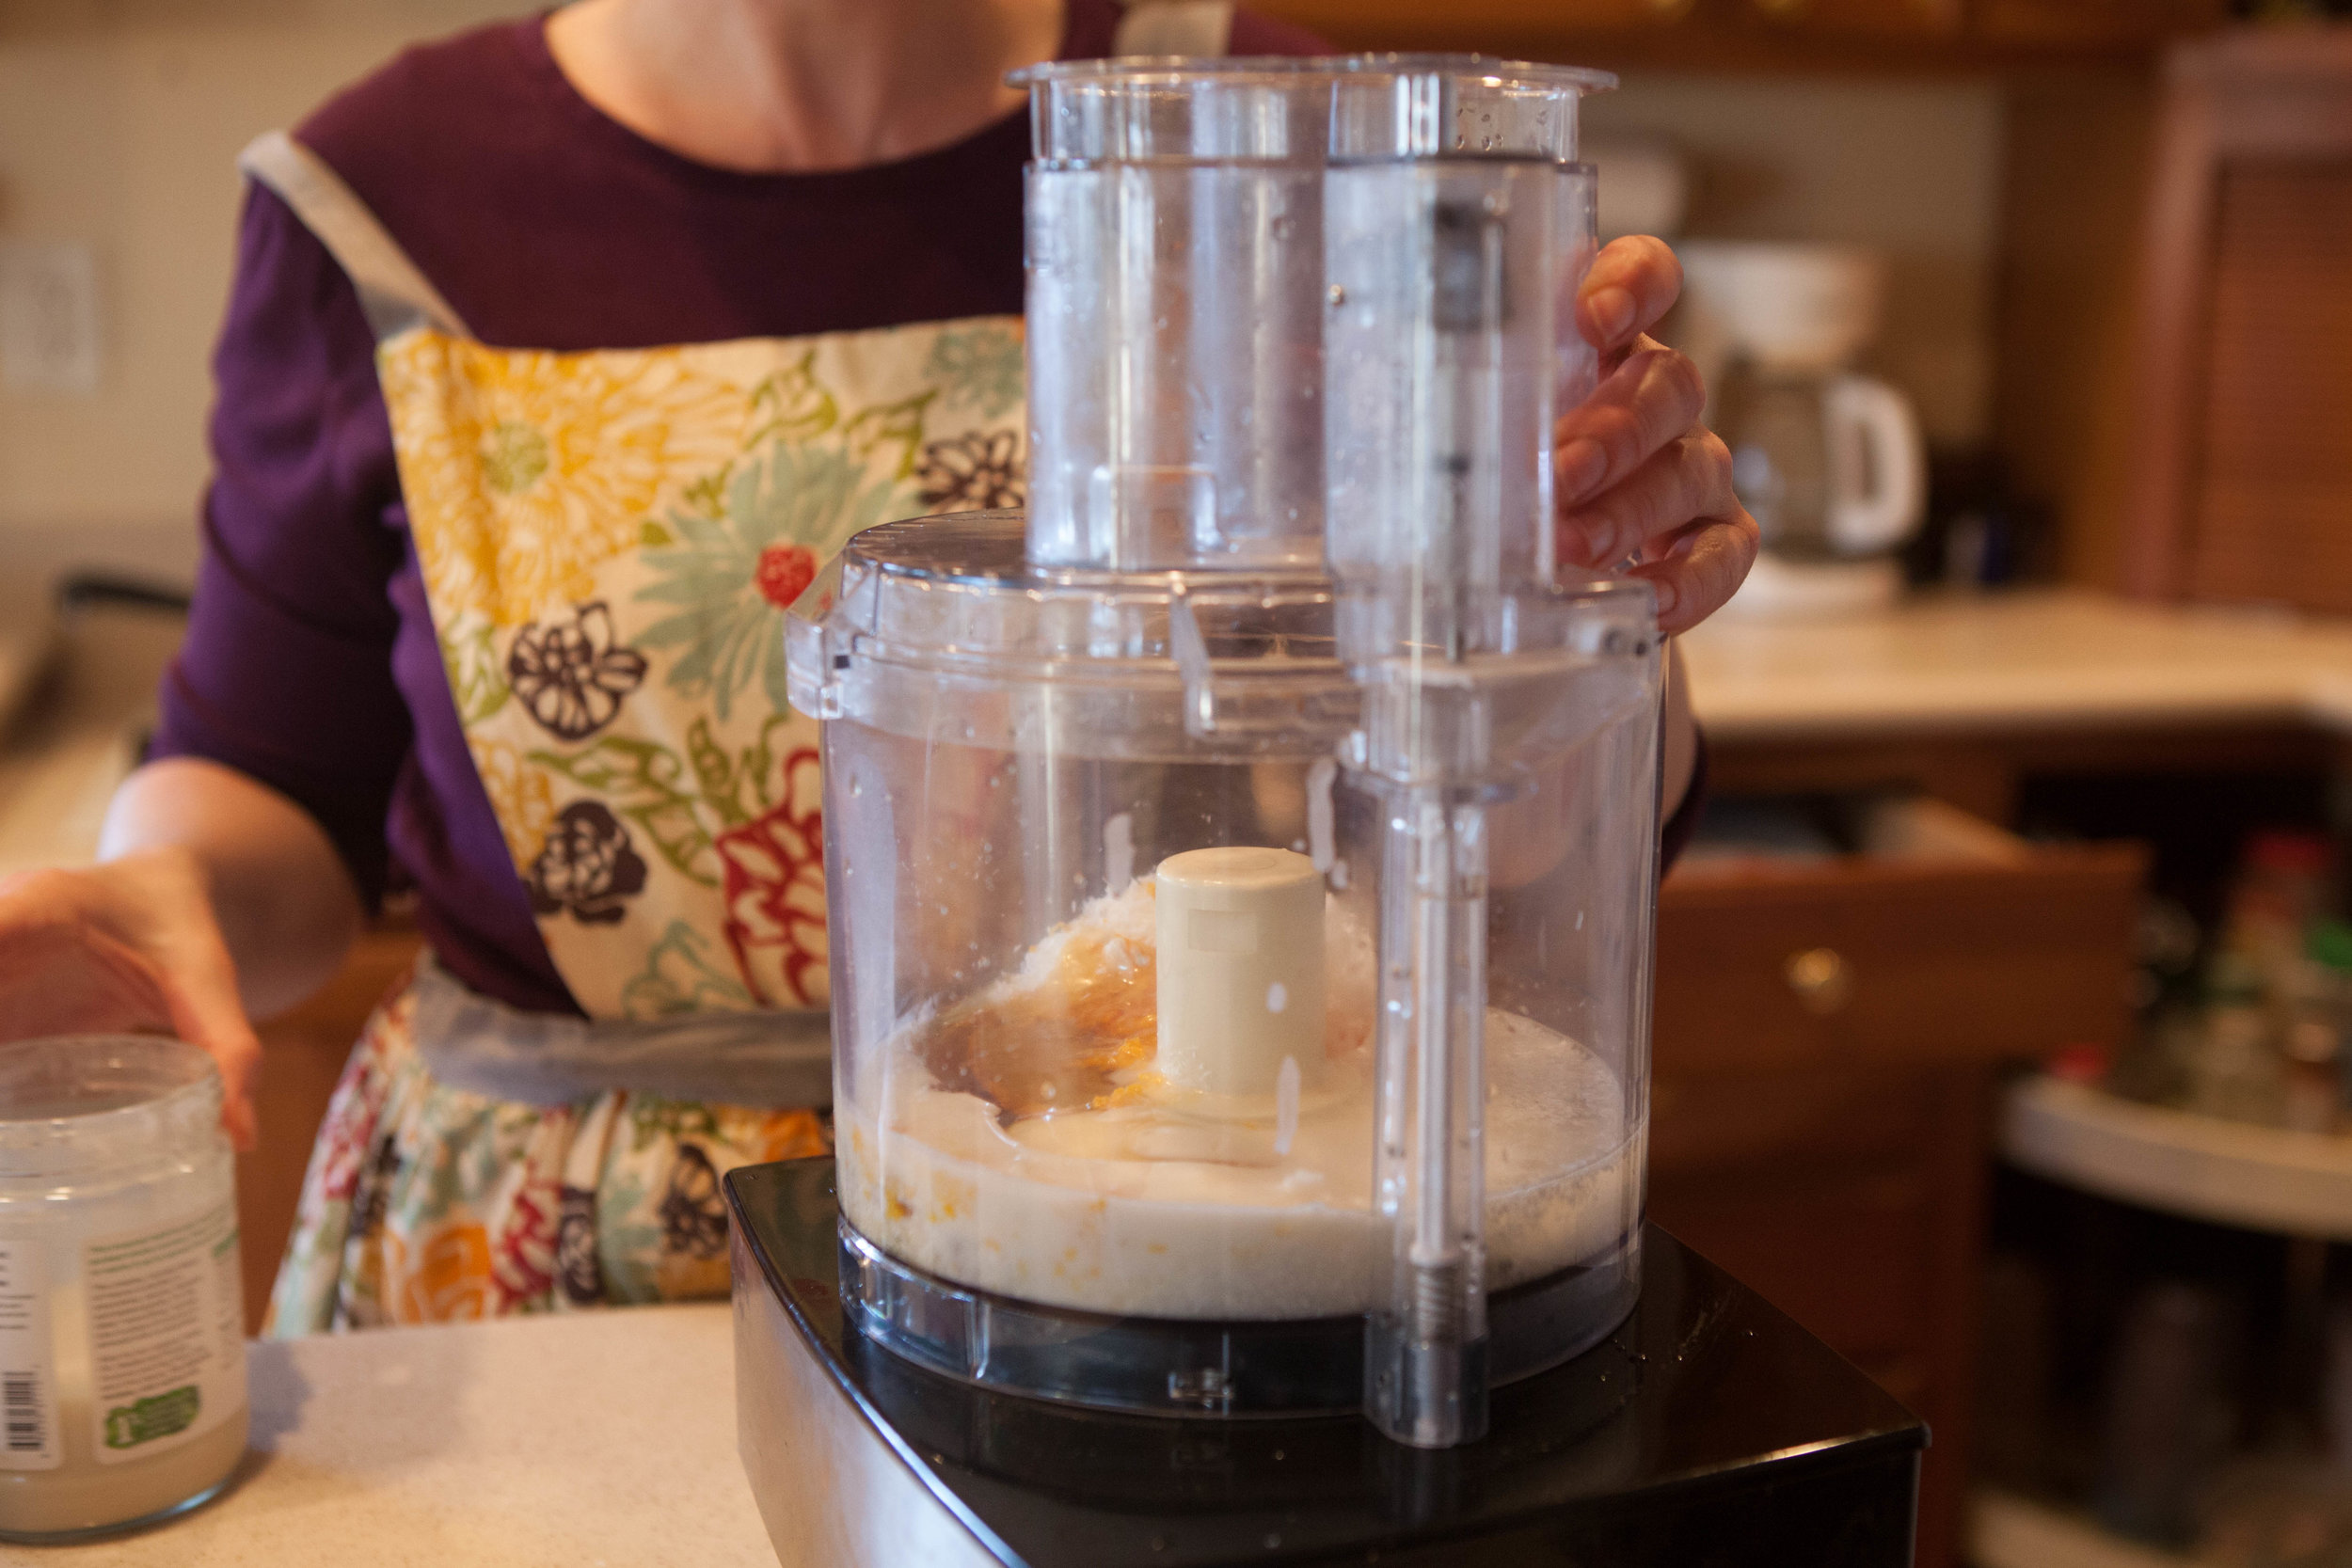
Combine coconut butter, coconut oil, cocoa powder, honey, peppermint, vanilla, shredded coconut and coconut flakes into a food processor.

This GAPS Legal Coconut Fudge comes in two flavors, citrus and peppermint. You can make the flavors separately but I prefer them layered together. Use coconut butter, coconut oil and coconut flakes for a delicious gluten free, dairy free and GAPS le…

Spread mixture into a pan.Chill for 30 minutes.

Add hot water to the sink. Float pan in mixture approx 1 minute until mixture releases from sides. Dip a knife in hot water then slice fudge into pieces.

How to Make Citrus coconut Fudge

Ingredients for citrus coconut fudge

  • ½ cup coconut butter

  • ½ cup coconut oil

  • ⅓ cup raw honey

  • 1 tbsp citrus zest

  • 2 tbs citrus juice

  • 3/4 cup shredded coconut

  • ¼ cup Coconut Flakes

Directions for citrus coconut fudge

This GAPS Legal Coconut Fudge comes in two flavors, citrus and peppermint. You can make the flavors separately but I prefer them layered together. Use coconut butter, coconut oil and coconut flakes for a delicious gluten free, dairy free and GAPS le…

Melt coconut butter on medium heat by adding water to the bottom of a pot and placing jar on top. Or add jar and water to crockpot and heat for two hours until melted. Melt coconut oil in a separate pot.

This GAPS Legal Coconut Fudge comes in two flavors, citrus and peppermint. You can make the flavors separately but I prefer them layered together. Use coconut butter, coconut oil and coconut flakes for a delicious gluten free, dairy free and GAPS le…

Combine coconut butter, coconut oil, cocoa powder, honey, peppermint, and vanilla into a food processor.

This GAPS Legal Coconut Fudge comes in two flavors, citrus and peppermint. You can make the flavors separately but I prefer them layered together. Use coconut butter, coconut oil and coconut flakes for a delicious gluten free, dairy free and GAPS le…

Spread mixture into a pan.Chill for 30 minutes.

This GAPS Legal Coconut Fudge comes in two flavors, citrus and peppermint. You can make the flavors separately but I prefer them layered together. Use coconut butter, coconut oil and coconut flakes for a delicious gluten free, dairy free and GAPS le…

Add hot water to the sink. Float pan in mixture approx 1 minute until mixture releases from sides. Dip a knife in hot water then slice fudge into pieces.


Chocolate Peppermint Fudge

Author:
prep time: cook time: total time:

ingredients:

  • ½ cup coconut butter
  • ½ cup coconut oil
  • ½ cup cocoa powder
  • ½ cup honey
  • 2 tsp peppermint extract or 2 drops peppermint oil
  • 1 tsp vanilla extract
  • 3/4 cup shredded coconut
  • ¼ cup coconut flakes

instructions:

How to cook Chocolate Peppermint Fudge

  1. Melt coconut butter on medium heat by adding water to the bottom of a pot and placing jar on top. Or add jar and water to crockpot and heat for two hours until melted.
  2. Melt coconut oil in a separate pot. Crush coconut flakes into smaller pieces.
  3. Combine coconut butter, coconut oil, cocoa powder, honey, peppermint, vanilla, shredded coconut and coconut flakes into a food processor.
  4. Spread mixture into a pan.Chill for 30 minutes.
  5. Add hot water to the sink. Float pan in mixture approx 1 minute until mixture releases from sides. Dip a knife in hot water then slice fudge into pieces.
Created using The Recipes Generator

Citrus Coconut Fudge

Author:
prep time: cook time: total time:

ingredients:

  • ½ cup coconut butter
  • ½ cup coconut oil
  • ⅓ cup raw honey
  • 1 tbsp citrus zest
  • 2 tbs citrus juice
  • 3/4 cup shredded coconut
  • ¼ cup Coconut Flakes

instructions:

How to cook Citrus Coconut Fudge

  1. Melt coconut butter on medium heat by adding water to the bottom of a pot and placing jar on top. Or add jar and water to crockpot and heat for two hours until melted. Melt coconut oil in a separate pot.
  2. Combine coconut butter, coconut oil, cocoa powder, honey, peppermint, and vanilla into a food processor.
  3. Spread mixture into a pan. Chill for 30 minutes.
  4. Add hot water to the sink. Float pan in mixture approx 1 minute until mixture releases from sides. Dip a knife in hot water then slice fudge into pieces.
Created using The Recipes Generator

Brownies Made with Dates

Dairy Free, Gluten Free, GAPS Legal Brownies Made with Dates

While these brownies are not as sweet as conventional brownies, they were deemed by some tasters on the GAPS Diet as being “Better than Brownies.” These GAPS legal brownies are dairy free, gluten free, sugar free, and egg free.

Even better, besides the 24 hour fermentation time needed for the almond flour, these brownies can be made very quickly! These brownies actually get better over time so it’s actually better to make them a day before to let the flavors meld. They would be delicious eaten alongside homemade ice cream or with homemade whipped cream and fruit.

Better Than Brownies - GAPS Legal Brownies

Ingredients for brownies made from dates

  • 2 cups of almond flour

  • 5 tablespoons Whey

  • 18 dates

  • ½ cup Filtered Water

  • 1/2 cup Coconut Oil + extra to grease the baking dish

  • ¼ cup Cacao Powder

  • ½ tsp Vanilla Extract

  • ¼ cup Cacao Nibs (optional)

  • ¼ cup Crispy Nuts (optional)

Directions for brownies made from dates

24 Hours Before:

These GAPS legal brownies were deemed as better than brownies. They are gluten free, dairy free, sugar free, egg free, and made with fermented almond flour and dates. Recipe by certified GAPS Practitioner Amy Mihaly, Be Well Clinic.

Add almond flour and cacao powder to a bowl. Use a fork to get rid of almond flour clumps.Add whey and stir to moisten.Cover and leave on counter to ferment for 24 hours.

The Next Day:

These GAPS legal brownies were deemed as better than brownies. They are gluten free, dairy free, sugar free, egg free, and made with fermented almond flour and dates. Recipe by certified GAPS Practitioner Amy Mihaly, Be Well Clinic.

Cut up 18 dates, removing the inner pit.Add ½ cup Filtered Water.

These GAPS legal brownies were deemed as better than brownies. They are gluten free, dairy free, sugar free, egg free, and made with fermented almond flour and dates. Recipe by certified GAPS Practitioner Amy Mihaly, Be Well Clinic.

Cook on low heat until dates are soft and water is absorbed, about 4-6 minutes. (think like making applesauce.) Watch closely to make sure dates don’t burn. You may need to add more water as you go depending on how dry your dates are so they’re able to fully hydrate without burning. Be sure not to add too much or it will thin the eventual date paste.

These GAPS legal brownies were deemed as better than brownies. They are gluten free, dairy free, sugar free, egg free, and made with fermented almond flour and dates. Recipe by certified GAPS Practitioner Amy Mihaly, Be Well Clinic.

When dates are soft, turn off the heat. Puree the mixture in the pot with an immersion blender or add to a blender or food processor until smooth. The smoother the date texture, the more appealing the brownies!Preheat oven to 350.Grease a baking dish or pie pan with coconut oil. Do not use a metal baking dish or the edges will burn.

These GAPS legal brownies were deemed as better than brownies. They are gluten free, dairy free, sugar free, egg free, and made with fermented almond flour and dates. Recipe by certified GAPS Practitioner Amy Mihaly, Be Well Clinic.

Combine coconut oil and dates into the almond flour mixture. If you’re using a blender, add the coconut oil to the blender and blend until smooth before adding to the flour mixture. Optionally, add cacao nibs and crispy nuts.

These GAPS legal brownies were deemed as better than brownies. They are gluten free, dairy free, sugar free, egg free, and made with fermented almond flour and dates. Recipe by certified GAPS Practitioner Amy Mihaly, Be Well Clinic.

Stir the mixture until smooth, being sure to get all the clumps out. You want the mixture to be as smooth as possible. The batter will be thick. Add batter to greased baking sheet and smooth out.

These GAPS legal brownies were deemed as better than brownies. They are gluten free, dairy free, sugar free, egg free, and made with fermented almond flour and dates. Recipe by certified GAPS Practitioner Amy Mihaly, Be Well Clinic.

Bake for 45 minutes until the knife comes out clean. Check after 30 minutes. Serve and enjoy!

Notes:

  • Instead of date paste, you can use applesauce but the brownies will not be as sweet and you will need to make your own applesauce that is thick so it creates the right consistency.

  • These brownies get better with age!

  • These are dairy free, gluten free, sugar free, egg free and legal on GAPS.


Brownies Made with Dates

Author:
prep time: cook time: total time:

ingredients:

  • 2 cups of almond flour
  • 5 tablespoons Whey
  • 18 dates
  • ½ cup Filtered Water
  • 1/2 cup Coconut Oil + extra to grease the baking dish
  • ¼ cup Cacao Powder
  • ½ tsp Vanilla Extract
  • ¼ cup Cacao Nibs (optional)
  • ¼ cup Crispy Nuts (optional)

instructions:

How to cook Brownies Made with Dates

24 Hours in Advance
  1. Add almond flour and cacao powder to a bowl. Use a fork to get rid of almond flour clumps.Add whey and stir to moisten.Cover and leave on counter to ferment for 24 hours.
The Next Day
  1. Cut up 18 dates, removing the inner pit. Add ½ cup Filtered Water.
  2. Cook on low heat until dates are soft and water is absorbed, about 4-6 minutes. (think like making applesauce.) Watch closely to make sure dates don’t burn. You may need to add more water as you go depending on how dry your dates are so they’re able to fully hydrate without burning. Be sure not to add too much or it will thin the eventual date paste.
  3. When dates are soft, turn off the heat. Puree the mixture in the pot with an immersion blender or add to a blender or food processor until smooth. The smoother the date texture, the more appealing the brownies!Preheat oven to 350.Grease a baking dish or pie pan with coconut oil. Do not use a metal baking dish or the edges will burn.
  4. Combine coconut oil and dates into the almond flour mixture. If you’re using a blender, add the coconut oil to the blender and blend until smooth before adding to the flour mixture. Optionally, add cacao nibs and crispy nuts.
  5. Stir the mixture until smooth, being sure to get all the clumps out. You want the mixture to be as smooth as possible. The batter will be thick. Add batter to greased baking sheet and smooth out.
  6. Bake for 45 minutes until the knife comes out clean. Check after 30 minutes. Serve and enjoy!
  7. Notes:
  8. Instead of date paste, you can use applesauce but the brownies will not be as sweet and you will need to make your own applesauce that is thick so it creates the right consistency.
  9. These brownies get better with age!
  10. These are dairy free, gluten free, sugar free, egg free and legal on GAPS.
Created using The Recipes Generator

Honey Roasted Chicken Recipe

I've been posting some of my ol' stand by recipes, and this cinnamon-toasted honey-roasted chicken is one of the first Paleo recipes I truly enjoyed. You can tell this is an old recipe because it uses honey... something I don't usually use anymore in my baking and cooking, but I can't give it up!

Roasting a chicken is a great and simple way to make a meal. This particular roasting recipe requires a little more attention than others, as you need to baste and adjust the temperature often, but it's definitely worth it! Just make sure to set the time or you might end up with a fried-to-a-crisp chicken! Also, I recommend doing this in as small of a dish as fits your chicken. As you can see from the final pictures if the juices get too spread out they will burn! This is a larger dish than I usually use (I thought it would be pretty for the photos), and I will never use it for this recipe again! I hope you enjoy!  

Recipe Adapted from The Paleo Project by Dr. Marc Bubbs

GAPS Legal Honey Roasted Chicken Recipe Ingredients

  • 1/4 tsp ground cloves

  • 1/8 tsp ground ginger

  • 1/4 tsp ground nutmeg

  • 1/4 tsp cinnamon

  • 1 tbsp salt

  • 9 cloves of garlic

  • 2 tbsp Raw Honey

Directions for gaps legal roasted chicken with honey

IMG_1035.jpg

Preheat oven to 500 degrees.

Make your rub by mixing cloves, ginger, nutmeg, cinnamon and salt in a small bowl.

IMG_1059.jpg

Crush 5 cloves with the flat of your knife, keep 4 cloves of garlic whole.

Remove the giblets. Wash and pat dry the chicken. Make sure you dry the chicken really well so the rub will stick.

IMG_1085.jpg

Drizzle approx. 2 tbs of honey of the top of the chicken, rub both sides well.

Massage the rub on the chicken, making sure to rub both sides.

Add all garlic cloves to chicken cavity.

Cover chicken with parchment paper and aluminum foil to keep cinnamon from burning.

Roast at 500 degree for 15 min then decrease your oven to 450 for 15 minutes.

IMG_1279.jpg

Remove chicken from oven. Baste chicken with juice drippings.

Reduce oven to 425. Recover chicken and bake for approx 30 - 45  minutes until chicken reaches internal temp of 165. Uncover chicken for five more minutes then remove from oven.

IMG_1415.jpg

Let the chicken rest for 20 minutes.

Carve chicken and serve! Make sure you enjoy the skin while it’s crispy and hot!

Notes:If your chicken came with giblets, you can add them to your next batch of stock or make liver pate.

I don’t normally recommend baking with honey but for this delicious recipe I make an exception.

Save the gelatin and juices of this chicken! Once cooled, they are like candy because of the sweet honey and cinnamon.


Honey Roasted Chicken

Author:
prep time: cook time: total time:

ingredients:

  • 1/4 tsp ground cloves
  • 1/8 tsp ground ginger
  • 1/4 tsp ground nutmeg
  • 1/4 tsp cinnamon
  • 1 tbsp salt
  • 9 cloves of garlic
  • 2 tbsp Raw Honey

instructions:

How to cook Honey Roasted Chicken

  1. Preheat oven to 500 degrees.
  2. Make your rub by mixing cloves, ginger, nutmeg, cinnamon and salt in a small bowl.
  3. Crush 5 cloves with the flat of your knife, keep 4 cloves of garlic whole.
  4. Remove the giblets. Wash and pat dry the chicken. Make sure you dry the chicken really well so the rub will stick.
  5. Drizzle approx. 2 tbs of honey of the top of the chicken, rub both sides well.
  6. Massage the rub on the chicken, making sure to rub both sides.
  7. Add all garlic cloves to chicken cavity.
  8. Cover chicken with parchment paper and aluminum foil to keep cinnamon from burning.
  9. Roast at 500 degree for 15 min then decrease your oven to 450 for 15 minutes.
  10. Remove chicken from oven. Baste chicken with juice drippings.
  11. Reduce oven to 425. Recover chicken and bake for approx 30 - 45 minutes until chicken reaches internal temp of 165. Uncover chicken for five more minutes then remove from oven.
  12. Let the chicken rest for 20 minutes.
  13. Carve chicken and serve! Make sure you enjoy the skin while it’s crispy and hot!
  14. Notes:If your chicken came with giblets, you can add them to your next batch of stock or make liver pate.
  15. I don’t normally recommend baking with honey but for this delicious recipe I make an exception.
  16. Save the gelatin and juices of this chicken! Once cooled, they are like candy because of the sweet honey and cinnamon.
Created using The Recipes Generator

GAPS Friendly Marshmallow Recipe

What if I told you that you could have a treat that is GAPS legal AND is good for you??? The GAPS marshmallow does just that. This simple treat is basically made up of gelatin, honey, water and optional vanilla. You can use this treat to get extra gelatin if you are needing that. Just reduce the amount of honey*. And they are simple to make!

GAPS Friendly MARSHMALLOWS Ingredients

  • 2 cups honey

  • 1 cup of filtered water

  • 2 tsp vanilla (optional)

  • 1/2 tsp sea salt

  • 6 TBS grass-fed beef gelatin

  • 1 cup of filtered water

Directions for making your own marshmallows

IMG_1823.jpg

Soften the Gelatin by adding gelatin to 1 cup of hot water. Stir and allow to sit. Keep it warm but not on the stove.

While gelatin is softening… Heat honey and water in a medium saucepan (medium to high heat), stirring frequently, until it reaches the soft ball candy stage (about 235°F).

IMG_1854.jpg

If you don’t have a thermometer, you can check by dripping the heated honey into a glass of cold water. When the candy forms a ball, it is ready!

When the honey has reached the soft ball stage, remove from heat.

Add the heated honey mixture to the softened gelatin in a large bowl.

Add vanilla (optional)

Do these steps quickly, you don’t want honey mixture to cool off too much!

IMG_1927.jpg

Whisk the mixture using an electric mixer or stand mixer for about 10 minutes. When the mixture is thick and looks like marshmallow paste, it’s done!

IMG_1987.jpg

Put the marshmallow paste in a greased and parchment paper-lined glass 9x11 dish and allow to cool and dry for 24-36 hrs. Then cut up and serve.

These marshmallows won't have exactly the same consistency (and won't roast over the fire quite the same) as store-bought marshmallows, but you can roast them for things like s'mores, and they are delicious! You can also use them to top roasted sweet potatoes or butternut squash or to top your homemade ice cream for a sundae or banana split.

Enjoy!

*As a general rule I don't like to heat honey, as some research has shown that heating it can turn the honey toxic. On the other hand, these marshmallows are a whole lot better than commercially available marshmallows, so I think as a treat they are great! I still recommend using raw honey for these recipes, you will be heating it much less than most non-raw honey is heated.


Homemade Marshmallows

Author:
prep time: cook time: total time:

ingredients:

  • 2 cups honey
  • 1 cup of filtered water
  • 2 tsp vanilla (optional)
  • 1/2 tsp sea salt
  • 6 TBS grass-fed beef gelatin
  • 1 cup of filtered water

instructions:

How to cook Homemade Marshmallows

  1. Soften the Gelatin by adding gelatin to 1 cup of hot water. Stir and allow to sit. Keep it warm but not on the stove.
  2. While gelatin is softening… Heat honey and water in a medium saucepan (medium to high heat), stirring frequently, until it reaches the soft ball candy stage (about 235°F).
  3. If you don’t have a thermometer, you can check by dripping the heated honey into a glass of cold water. When the candy forms a ball, it is ready!
  4. When the honey has reached the soft ball stage, remove from heat.
  5. Add the heated honey mixture to the softened gelatin in a large bowl.
  6. Add vanilla (optional)
  7. Do these steps quickly, you don’t want honey mixture to cool off too much!
  8. Whisk the mixture using an electric mixer or stand mixer for about 10 minutes. When the mixture is thick and looks like marshmallow paste, it’s done!
  9. Put the marshmallow paste in a greased and parchment paper-lined glass 9x11 dish and allow to cool and dry for 24-36 hrs. Then cut up and serve.
  10. These marshmallows won't have exactly the same consistency (and won't roast over the fire quite the same) as store-bought marshmallows, but you can roast them for things like s'mores, and they are delicious! You can also use them to top roasted sweet potatoes or butternut squash or to top your homemade ice cream for a sundae or banana split.
Created using The Recipes Generator

The Lost Art of Reheating Food without a Microwave

Microwaves, advertised to be "the greatest cooking discovery since fire," can be found in almost every American home.

And I recommend that you never use one!

There are many reasons why microwaves should be avoided (read:  remove them from your house), including lost nutrition, creation of free radicals and carcinogens, and radiation leakage. These effects are well documented in studies. If you are interested in researching this more, try starting with this article and it's references. But today we are not going to debate the safety of microwaves, but bring back the lost art of reheating food without a microwave.

When I first decided to ditch my microwave I had to experiment with reheating food. Before that moment I don't think I had ever reheated food outside of a microwave. I had a lot to learn. But that was years ago, and reheating food without a microwave is second-nature to me now... I don't have to think about it.

Today I want to share with you what I've learned, so you too can practice this lost art. Choosing which reheat method to use depends on several factors, but in reality, there is more than one way to reheat a dish!

With practice you will be choosing your reheating option without thinking about it.

Basic reheating options are:

  • Stove-top (pan)

  • Stove-top (skillet)

  • Oven

  • Toaster oven

  • Slow cooker

The method that you choose depends on what you want to reheat, how much time you have, what options you have available, and how hot your house is already (this is a real consideration for me in the summertime because I do not have central air). Again, with time you will figure out which methods work for you. There are no wrong answers—just ones that work better than others.  

Use these guidelines to get started:

  • Keep the heat low: high heat = greater risk of dry, burnt food

  • Cover the food to retain moisture

  • Use a steamer basket to reheat vegetables or pasta

  • Add a little water or fat if your food is dry

  • Reheat your food in animal fat (bonus: this adds to the nutrition)

  • For larger amounts a slow, covered reheat in the oven is efficient

  • Use a toaster oven or oven to make food crispy

  • When bringing food to a party in a slow cooker, heat before leaving

  • Reheat in a slow cooker using the medium or high (not warm) setting

  • Place glass jars of frozen soup in water and bring to a boil together

Tips for cleaning and caring for your cookware:

  • Soak glass and metal cookware to save on scrubbing time

  • If food is stuck in the pot or pan, add a couple of inches of water to it and bring to a boil; allow to boil for a few minutes then wash the dish in hot running water (be careful not to burn yourself!)

  • Avoid putting cold water on a hot glass or cast-iron dish

  • Wash pots and pans (including cast-iron) immediately using hot water

Special care for cast-iron:

  • Do not use soap

  • Dry immediately after washing (may use the stovetop)

  • Always renew the fat "seasoning" on the cast-iron after every rinse

I hope this has given you the courage to begin reheating your food without a microwave. It is not difficult, it is simply a habit change. You can do it!  

If you're unsure of how to reheat something, ask in the comments below!

The Root Cause of Asthma {Video}

Asthma

It is currently one of the most common diseases in the civilized world. But did you know that despite all of our medical advances, the occurrence, as well as complications and deaths related to asthma have skyrocketed? Asthma is more common than it used to be, and it's also more severe. Since 1980, the death rates for asthma have increased by more than 50% [1] In fact, asthma deaths were considered rare in the early 1900's [2]. So what changed?  

There were three major changes:

First, our world became more toxic. The effects of industrialization had taken its toll on our air, water and food. Additionally, we began to manufacture food-like substances to replace real food. These food-like substances are full of chemicals and preservatives, which had an unknown effect on the human body.  

Second, we replaced saturated animal fats with hydrogenated vegetable oils and trans-fatty acids. This was a double whammy on our lungs. We removed the substance it relied most heavily on to function properly (saturated fat) and gave it a replacement fat full of toxins and unknown substances that it now had to deal with.  

Third, medications like bronchodilators and other inhalers were invented. This forces the airways open against the body's desire to close off an area to allow for lung repair. Before medication were invented, asthma rarely caused death and was generally considered a benign condition.   To find out more about the root cause of asthma, and how the body works, check out my new video below!  

References: [1] http://www.asthmamd.org/asthma-statistics/ [2] http://www.atsjournals.org/doi/full/10.1164/rccm.200402-185OE