Blog — Be Well Clinic

We’re Hiring Family Nurse Practitioners and more! Click here to learn more >>

Amy Mihaly

2021 Clinic Visions

2021 Clinic Visions

2020 brought so many opportunities for growth! For many reasons, people became more interested in learning about their bodies and nutrition and began to take an active role in their own health - which is AWESOME! 2020 also brought a lot of growth for our clinic. Our mission has always been to help you be empowered in understanding your body and working with your body on a journey of health. Because we grew so much, we needed to change a few things.

Recipes to Take Camping

Camping is one of my favorite activities. Being in nature is great for our bodies. If you have trouble sleeping, spending time camping can help reset your circadian rhythm.

Whether I’m headed out for the night or taking a multiple day hunting trip, I always bring real, delicious food to keep my body going.

Trail Mix

Commercial trail mixes contain candy, sweetened fruit, and unprepared nuts: not the superfoods they claim to be! This can be problematic if you are following a dietary protocol... you can't buy GAPS legal trail mix very easily! Fortunately, trail mix is fairly easy to make, and when you make your own, you can ensure the preparation (and ingredients) are exactly what you want!

GAPS Legal Chili

For a long time, I didn’t want to take the time to properly prepare the navy beans needed for this recipe. This homemade chili was well worth the effort because of how delicious it was - and how many meals it made!

Sprouted Refried Navy Beans

These are great served with anything that has a Mexican theme with them. I like them next to eggs, like a Huervos Rancheros sort of feel.

Egg Free, Dairy Free Sausage

This sausage is the ideal breakfast sausage. It wouldn’t work well as a sausage with marinara sauce. It’s great alongside eggs or in an omelette. If I don’t want to eat cheese, it’s also a great, easy snack on the go.

Mayo Free Egg Salad

Eggs are a great non-meat protein source. While I usually recommend eating eggs yolks running to preserve the cholesterol on them, sometimes a hard boiled egg is hard to beat!

Crock Pot Pork Shoulder

This pork is a crowd favorite that I often bring to potlucks. It can be added to anything, including a sandwich or salad.  It also freezes well so you can make it into individual portions.

Beef Sliders

This meal is very versatile! It’s a quick, easy, and mobile protein. You can make sliders as simple as plain ground beef boiled in water or you can add spices to the ground beef mixture before cooking depending on what you are tolerating.

Baked Beans

This recipe also uses real ingredients for a full flavor baked bean! Unlike traditional baked beans, there’s no processed sugars. These beans are not GAPS legal because of the molasses and maple syrup. They are however gluten and dairy free.

Cured Pork Belly Bacon

Pork belly is a great meat because it is so high in fat! That’s why we enjoy bacon so much. Unfortunately most conventional bacons are cured with chemicals, natural and unnatural, some of which are not GAPS Legal - or good for us! If you have access to pork belly, this is a great way to enjoy this fatty cut of meat while on the GAPS Diet.

Real Food Onion Dip

Making delicious dips is not just about good food although pleasure in food is important and should never be underestimated. But when we make dips from real food ingredients we are also adding nutrition to our bodies with every bite. I love that the foods I used to eat that I thought weren’t best for my body are now foods I can make purposefully and joyfully knowing that each bite will bring nutrients to my body.

Italian Casserole

Italian Casserole is a very versatile dish that can be made with virtually any cut of meat that you might have on hand and any seasonal vegetables you have on hand. In fact, this is the ideal seasonal eating dish because it’s so versatile! 

Cream of Mushroom Soup

I like, like many others, grew up eating casseroles made with processed, commercially available cream of mushroom or cream of chicken soup and wanted to replicate the taste with real food ingredients. This soup can be used as a substitute for any commercially made cream of mushroom soup. I’m excited for the possibilities!

Real Dairy Recipes

On GAPS we don't avoid dairy forever, but we do culture it to make it more digestible. Even if you are not following the GAPS diet, you may find your body likes dairy better when it's cultured. Check out these recipes for ideas and directions on culturing and enjoying your dairy products.

How to culture dairy

Making Whey

Whey is the other protein in milk aside from casein. It’s only present after milk products have been cultured and it’s a live food. This liquid is teeming with good lactic acid producing bacteria (LABs.) Whey is a basic to keep on hand because it can be used to ferment flours, seeds, nuts, vegetables, or as a starter to culture other dairy.

Making Your Own Kefir

Kefir is a fermented drink made from kefir grains. It’s a bit like a very thin yogurt and has great health benefits!

The great news is, like many fermented drinks, kefir is very easy to make on your own!


Milk Recipes

Decadent Hot Chocolate

This hot chocolate is amazing. Rich, thick, decadent, filling, indulging, chocolaty goodness. 

It even passed the skeptical, hot chocolate-loving teenage boy test.  

Which is a big deal.   And it's a nutrient-dense food!  

Raw Milk Chocolate Pudding

Some days don't you just miss pudding cups? I know I do. Now you can make your own! The most frequent comment about this pudding (besides "yum", "delicious", and "mmm...") is that it tastes just like a chocolate pudding cup!


Milk Ice Cream

I discovered this delicious ice cream years and years ago from an old ice cream maker recipe book. This is really making a custard base which makes it thick and creamy and allows you to not have to add so many filler ingredients. You can make it with cream or whole milk.


Cheese Recipes

Twice Baked Cauliflower

Stop whatever dinner plans you have and go buy a cauliflower! This recipe is the best side dish I have ever had... and I don't even really like cauliflower that much!

Every time I think about it I involuntarily smile and say "yum" to myself (or out loud).

It may be the butter. Or the cheese…

Spinach & Artichoke Dip

Spinach and artichoke dip - just the name conjures up images of a creamy, delicious dip. This one is made with real foods and no mayonnaise and is as delicious as a traditional spinach and artichoke dip. Spinach and artichoke dip gets a bad rap but this recipe is actually a great source of fat!


Sour cream or creme fraiche

Mayo Free Deviled Eggs

One of the foods I miss most? Mayonnaise. Now I know there are different mayos out there, even ones you can make yourself that are GAPS legal. But unless it tastes like the Real Mayo deliciousness that I remember, I have no interest in consuming it. I was a mayo snob long before I payed attention to what I ate!

Mayo Free Egg Salad

Eggs are a great non-meat protein source. While I usually recommend eating eggs yolks running to preserve the cholesterol on them, sometimes a hard boiled egg is hard to beat! I substitute mayo for sour cream in this recipe and it has even more flavor. It’s delicious!


Make Your Own Ranch Dressing

Ranch dressing is typically used as a dip and you can definitely dip any number of cut vegetables into this mixture. However, you could also use this delicious blend as an added flavoring for lots of dishes!


Book Recommendations on Vaccine Research

Book Recommendations on Vaccine Research

Books that include the statistics of disease prevention and what affects vaccinations had or did not have on reducing deaths from infectious disease. Including supporting historical charts from government agencies as well as discussion of the history of many diseases.

Book Recommendations on Natural Pet Care

Book Recommendations on Natural Pet Care

Many of us have pets, and we want the best for them! Pets do best on good, nourishing foods, and in an environment where you are supporting them. Support could look like understanding and responding to their cues, or feeding them well. It can also look like engaging with them to train and to play, which will also lower their anxiety and let them know you are in charge, so they can enjoy life!

Book Recommendations on EMFs and Grounding

Book Recommendations on EMFs and Grounding

Our bodies are electromagnetic. Many electrical communications happen within our bodies, and we also interact with our environment. We will be exposed to both positive and negative influences to our electromagnetic system. It’s important to know what EMF influences you should avoid, and how to take steps to rebalance our own system.

Book Recommendations on Raising Healthy Children

Book Recommendations on Raising Healthy Children

It is more difficult than ever to raise a health child these days. But our bodies are so amazing! Feeding good and nourishing food, supporting the microbiome, treating illnesses naturally, and avoiding as many toxins as possible are some ways you can support your child’s body, allowing it to grow as strong as healthy as possible! Here are my top recommendations on raising healthy children.

My Thoughts on COVID-19

My Thoughts on COVID-19

Ever since we first heard about coronavirus, I have been asked my opinion about what it is, how to stay well, and many other specific and general questions. I don’t mind… I love teaching! And various questions would prompt me to look into angles and subjects I would not have otherwise studied. And I have been promising you this article for a couple weeks now… well at least an article!

Why You Can’t Raise a Healthy Child on the Standard American Diet

Why You Can’t Raise a Healthy Child on the Standard American Diet

This past week I once again looked a mother in the eyes as she wondered what she was doing wrong, why her child has this persistent issue or symptom that won’t go away no matter what she has tried! It breaks my heart! Mothers have enough voices in this culture lying to them, telling them they are bad moms; and now here comes seemingly more proof that they have failed!

Journey: Health and Emotions

Journey: Health and Emotions

It’s been a long time since I have written about my “thoughts on the journey” of my own healing. This is primarily because I have arrived at a pretty decent level of healing! While there are still “dusty corners” that need some attending, for the most part my day-to-day operating is what I (and others) would call healthy!

GAPS Legal Halloween Treat Round Up

Which of these treats will you make for Halloween?

Let us know in the comments below!

gluten-free-grain-free-brownies-brownie-recipe-made-with-dates-gaps-legal-brownies-gaps-diet-brownies-gaps-dessert

Gluten Free Brownies Recipe

While these brownies are not as sweet as conventional brownies, they were deemed by some tasters on the GAPS Diet as being “Better than Brownies.”

Gluten Free, Dairy Free, Egg Free

gluten-free-grain-free-brownies-brownie-recipe-made-with-dates-gaps-legal-brownies-gaps-diet-brownies-gaps-dessert

Gluten Free Almond Cookies Recipe

These treats are reminiscent of our family’s community famous chocolate chip cookies but they’re totally gluten free.

Gluten Free, Dairy Free

IMG_4243.jpg
IMG_4594.jpg

Homemade Gummy Snacks

These gummies are a good way for both children and adults to get collagen and vitamin c together! They are stage five legal on the GAPS Diet because they are cooked fruit. You can make any flavor with whatever fruit you have on hand.

Gluten Free, Dairy Free, Egg Free

GAPS Legal Banana Split

This recipe for a GAPS Legal banana split also includes making your own ice cream, hot fudge sauce, strawberry sauce, maraschino cherries and whipped cream.

Gluten Free

gluten-free-grain-free-brownies-brownie-recipe-made-with-dates-gaps-legal-brownies-gaps-diet-brownies-gaps-dessert
IMG_2202.jpg

Gluten Free Snickerdoodle Cookie Recipe

Snickerdoodles are a mixture of tart and sweet. They are another cookie I grew up making at Christmastime, and this one passed the family taste test!

Gluten Free, Dairy Free, Egg Free

GAPS Legal Russian Custard

Russian custard is a delicious desert or afternoon snack. It is rich, and just sweet enough. You can whip it up in just a few minutes, and it is easy to double or triple to feed another (or more for yourself).

Gluten Free, Dairy Free

Chocolate-Pudding1.png
gapscaramel1.png

Raw Milk Chocolate Pudding

Raw milk chocolate pudding is a great base to create Halloween friendly ‘Cups of Dirt.’

The most frequent comment about this pudding (besides “yum”, “delicious”, and “mmm…”) is that it tastes just like a chocolate pudding cup!

Gluten Free, Dairy Free, Egg Free

GAPS Legal Caramel Candy + Candy Sauce

Several years ago I discovered that the mythical candy known as caramel was actually fairly simple to make. Whether you use it as a dip for fruit (GAPS Legal candy apples!) or as a candy, it’s a great addition to your Halloween treat spread.

Gluten Free, Dairy Free, Egg Free

41.png

Almond Flour Bread with Italian Herbs

This recipe is adapted from the basic bread recipe in the GAPS Gut and Psychology Syndrome book by Dr. Natasha Campbell-McBride. It is legal on Stage Four. If you do a sweet version of this bread it is legal on Stage Five.

I really enjoy the Italian herb version of this basic bread recipe because I like strong flavors. For me, doing an almond bread that’s sweetened with fruit is not sweet enough. I prefer going with a savory bread instead that has a strong flavor.

The beginning piece of this recipe is the basic bread recipe that can be adapted into any other combination of ingredients.

You can use the herbs and combination of herbs of your choice in this recipe. I used tyme, rosemary and parsley. 

Bread is still a treat so it’s best to have one piece a day as a snack in between meals.

Ingredients for Italian Almond Bread with Herbs

  • 2 cups fermented almond flour

  • ¼ cup softened butter

  • 3 eggs

  • Herbs of your choice

  • 1 clove finely chopped garlic, fresh or fermented

Directions for Italian Almond Bread with Herbs

24 hours in advance, make your fermented almond flour or make it from almonds.

Preheat oven to 350.

IMG_4180.jpg

Combine flour and softened butter. Add eggs and mix thoroughly.

IMG_4204.jpg

Finely dice the herbs of your choice.

IMG_4210.jpg

Mix in with flour mixture. This mixture will look more moist than other bread doughs.

IMG_4268.jpg

Line a glass baking dish with parchment paper. Optionally, add fat to your parchment paper. Place mixture into baking dish. Spread evenly.

Bake for about an hour.

IMG_4451.jpg

Slice and enjoy!


Almond Flour Bread with Italian Herbs

prep time: cook time: total time:

ingredients:

  • 2 cups fermented almond flour
  • ¼ cup softened butter
  • 3 eggs
  • Herbs of your choice
  • 1 clove finely chopped garlic, fresh or fermented

instructions:

How to cook Almond Flour Bread with Italian Herbs

  1. 24 hours in advance, make your fermented almond flour or make it from almonds.
  2. Preheat oven to 350.
  3. Combine flour and softened butter. Add eggs and mix thoroughly.
  4. Finely dice the herbs of your choice.
  5. Mix in with flour mixture. This mixture will look more moist than other bread doughs.
  6. Line a glass baking dish with parchment paper. Optionally, add fat to your parchment paper. Place mixture into baking dish. Spread evenly.
  7. Bake for about an hour.
  8. Slice and enjoy!
Created using The Recipes Generator

Cast Iron Parboiled Lamb Meatballs

Meatballs are a simple way to add variety to your diet. They can also be a great way to get your kids to eat vegetables! Add finely chopped onions, zucchini, peppers, etc. in to your meatballs to add vegetables.

I’m making these meatballs with lamb burger but you can do it with any kind of burger.

If you have a lean cut, make sure you add fat! I prefer to not use a lean cut; it’s better for your health! Remember, fat is your friend.

My preferred way of making meatballs is to parboil them.

An added benefit of rolling lamb meatballs is the lovely lamb tallow on your skin! Tallow is fat and lamb tallow is the best for your skin. Your hands will be soft, moisturized, and waterproof after rolling your meatballs.

Ingredients for GAPS Friendly Lamb Meatballs

  • 1 lb ground lamb

  • Salt

Directions for GAPS Friendly Lamb Meatballs

IMG_1446.jpg

Heat ½ inch of water in a pan.

IMG_1470.jpg

Roll your lamb into inch sized balls. You can make your meatballs any size, just make sure they’re consistently sized.

IMG_1476.jpg

Add your meatballs into your pan with water.

IMG_1485.jpg

Turn your meatballs with a fork to continue to cook on all sides. Salt your meatballs generously.

As you turn them, continue to salt the meatballs.

IMG_1496.jpg

After approximately five minutes, when you think your meatballs are done, cut one open to check it if it is done.

Continue to add water, meatballs, and salt in batches until you have cooked your desired number of meatballs.

Enjoy!

IMG_1575.jpg

Cast Iron Parboiled Lamb Meatballs

Author:
prep time: cook time: total time:

ingredients:

  • 1 lb ground lamb
  • Salt

instructions:

How to cook Cast Iron Parboiled Lamb Meatballs

  1. Heat ½ inch of water in a pan.
  2. Roll your lamb into inch sized balls. You can make your meatballs any size, just make sure they’re consistently sized.
  3. Add your meatballs into your pan with water.
  4. Turn your meatballs with a fork to continue to cook on all sides. Salt your meatballs generously.
  5. As you turn them, continue to salt the meatballs.
  6. After approximately five minutes, when you think your meatballs are done, cut one open to check it if it is done.
  7. Continue to add water, meatballs, and salt in batches until you have cooked your desired number of meatballs.
  8. Enjoy!
Created using The Recipes Generator
44.png

Roasted Spaghetti Squash for Spaghetti Night

Roasted spaghetti squash has long been a favorite of mine, even before I started the GAPS Diet. Spaghetti squash is unique to others in the squash family because of its texture. It’s meaty insides look more like long strands of spaghetti and it has a less pureed texture than acorn squash or zucchini. This makes spaghetti squash  a great pasta alternative and so easy to prepare. All you need to do is cut it open, clean it out, slice it and forget it (for 45-60 min).

Spaghetti squash is GAPS Legal! However, Dr. Natasha has recently recommended that spaghetti squash not be consumed until Full GAPS. It was previously allowed beginning on Stage 1 in soups, and Stage Four fried or baked. But because it is so fibrous and carb-dense it is often not well tolerated until Full GAPS.

You can use the spaghetti squash as a spaghetti alternative for white or red sauce. I also like to refry it and warm the spaghetti squash up in butter with lots of sauce (this is a great comfort food to support my body when it’s stressed.)

Ingredients for Roasted Spaghetti Squash

  • Spaghetti Squash

Directions for Roasted Spaghetti Squash

Preheat oven to 400.

Spaghetti-Squash-Recipe-How-To-Make-Spaghetti-Squash-How-To-Roast-Spaghetti-Squash-How-To-Cook-Spaghetti-Squash-GAPS-Diet-Spaghetti-Squash-GAPS-Protocol-Certified-GAPS-Practitioner-Healthy-Spaghetti-Night-Holistic-Healthcare-Loveland-Colorado

Slice spaghetti squash in half lengthwise.

Spaghetti-Squash-Recipe-How-To-Make-Spaghetti-Squash-How-To-Roast-Spaghetti-Squash-How-To-Cook-Spaghetti-Squash-GAPS-Diet-Spaghetti-Squash-GAPS-Protocol-Certified-GAPS-Practitioner-Healthy-Spaghetti-Night-Holistic-Healthcare-Loveland-Colorado

Remove seeds and strings in center. You can compost the seeds but you might get lots of volunteer spaghetti squash seedlings. (Which is not necessarily a bad thing.)

Spaghetti-Squash-Recipe-How-To-Make-Spaghetti-Squash-How-To-Roast-Spaghetti-Squash-How-To-Cook-Spaghetti-Squash-GAPS-Diet-Spaghetti-Squash-GAPS-Protocol-Certified-GAPS-Practitioner-Healthy-Spaghetti-Night-Holistic-Healthcare-Loveland-Colorado

Roast in the oven for 35 minutes to an hour. It depends on the size of your squash. I like my squash to be very soft and well cooked. This is also important for the GAPS Diet to have well cooked vegetables.

Check your squash after 35 minutes to see if they are softened and squishy. They should not be mush, but should feel much softer.

Spaghetti-Squash-Recipe-How-To-Make-Spaghetti-Squash-How-To-Roast-Spaghetti-Squash-How-To-Cook-Spaghetti-Squash-GAPS-Diet-Spaghetti-Squash-GAPS-Protocol-Certified-GAPS-Practitioner-Healthy-Spaghetti-Night-Holistic-Healthcare-Loveland-Colorado

When they are soft, remove them from the oven. If you need your squash to cool faster, you can flip them over. I prefer to keep them with the middle side down so they continue while they cool.

Check your spaghetti squash with a fork to see if it is done. If not, cook for a while longer.

Spaghetti-Squash-Recipe-How-To-Make-Spaghetti-Squash-How-To-Roast-Spaghetti-Squash-How-To-Cook-Spaghetti-Squash-GAPS-Diet-Spaghetti-Squash-GAPS-Protocol-Certified-GAPS-Practitioner-Healthy-Spaghetti-Night-Holistic-Healthcare-Loveland-Colorado

Once the spaghetti squash is cooked, remove the insides of the squash by scraping a fork along the insides.


Roasted Spaghetti Squash

Author:
prep time: cook time: total time:

ingredients:

  • 1 Spaghetti Squash

instructions:

How to cook Roasted Spaghetti Squash

  1. Preheat oven to 400.
  2. Slice spaghetti squash in half lengthwise.
  3. Remove seeds and strings in center. You can compost the seeds but you might get lots of volunteer spaghetti squash seedlings. (Which is not necessarily a bad thing.)
  4. Roast in the oven for 35 minutes to an hour. It depends on the size of your squash. I like my squash to be very soft and well cooked. This is also important for the GAPS Diet to have well cooked vegetables.
  5. Check your squash after 35 minutes to see if they are softened and squishy. They should not be mush, but should feel much softer.
  6. When they are soft, remove them from the oven. If you need your squash to cool faster, you can flip them over. I prefer to keep them with the middle side down so they continue while they cool.
  7. Check your spaghetti squash with a fork to see if it is done. If not, cook for a while longer.
  8. Once the spaghetti squash is cooked, remove the insides of the squash by scraping a fork along the insides.
Created using The Recipes Generator
22.png

How to Properly Caramelize Onions

Caramelized onions are an amazing supporting food because they are high in vitamin C, calcium, and quercetin. It’s especially helpful for sore throats but is an excellent food to eat anytime you are starting to feel under the weather! (Check out more of my helpful tips for caring for yourself when you’re sick here.)

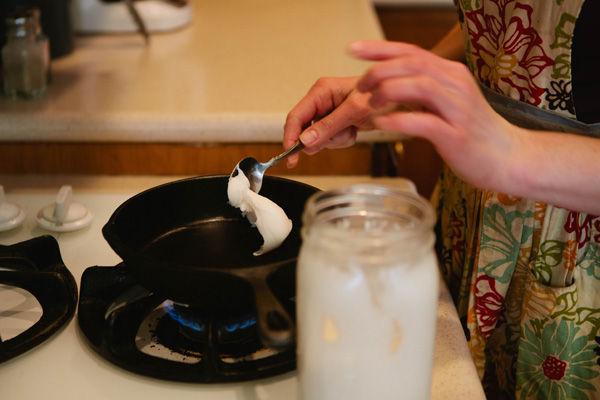
I recommend a whole onion per person because the onions will reduce in size. You want to use a lot of animal fat with this recipe! I like both butter or lard, so whatever you happen to have on hand is ok. The fat is also great for you while you’re sick. Make sure you add enough salt for the added minerals, which is also very important when you’re ill.

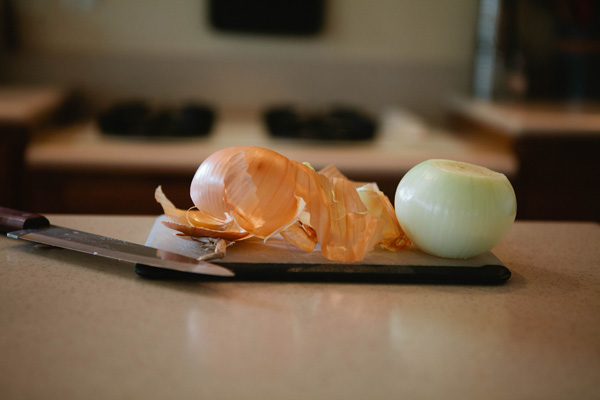
White or yellow onions work for this recipe. I prefer the yellow onions and often have them on hand so that is what I usually use.

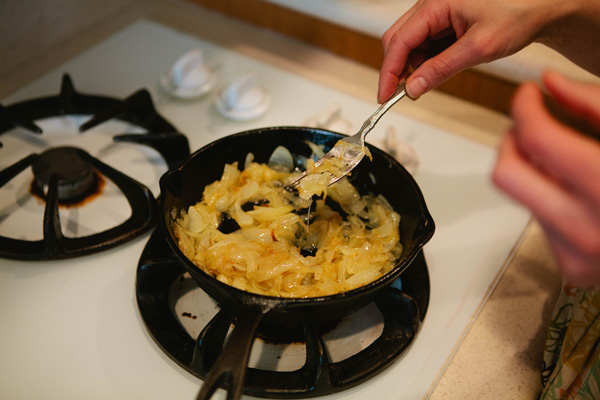
For great caramelized onions, make sure your heat is on low. This is a food that is best with patience - and burnt with impatience. Allow 20 - 30 minutes of cooking time to get really good caramelized onions. You can cook multiple onions at a time as long as you are using a large enough pan. If your entire family is sick, you can make a batch for everyone in about the same amount of time as cooking just one.

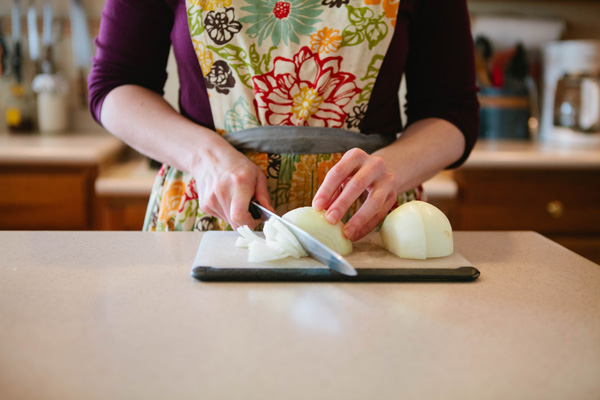
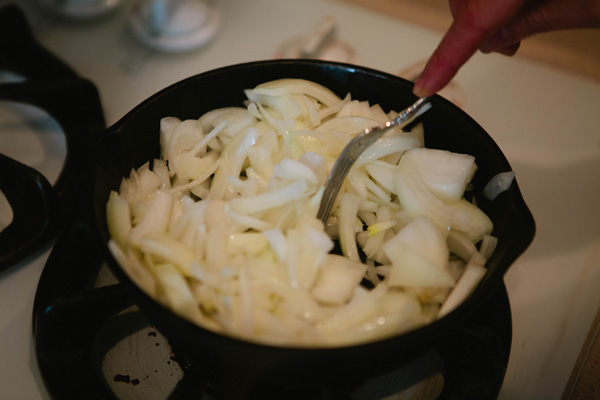
When slicing your onions, you want to slice them in short slices. Don’t give into the temptation of dicing your onions! Even if it seems they will cook faster, you’ll most likely end up with a burnt or mushy dish.

Make sure you don’t crowd your pan of onions or they won’t properly caramelize. Above is the maximum amount of onions I would put in one pan.

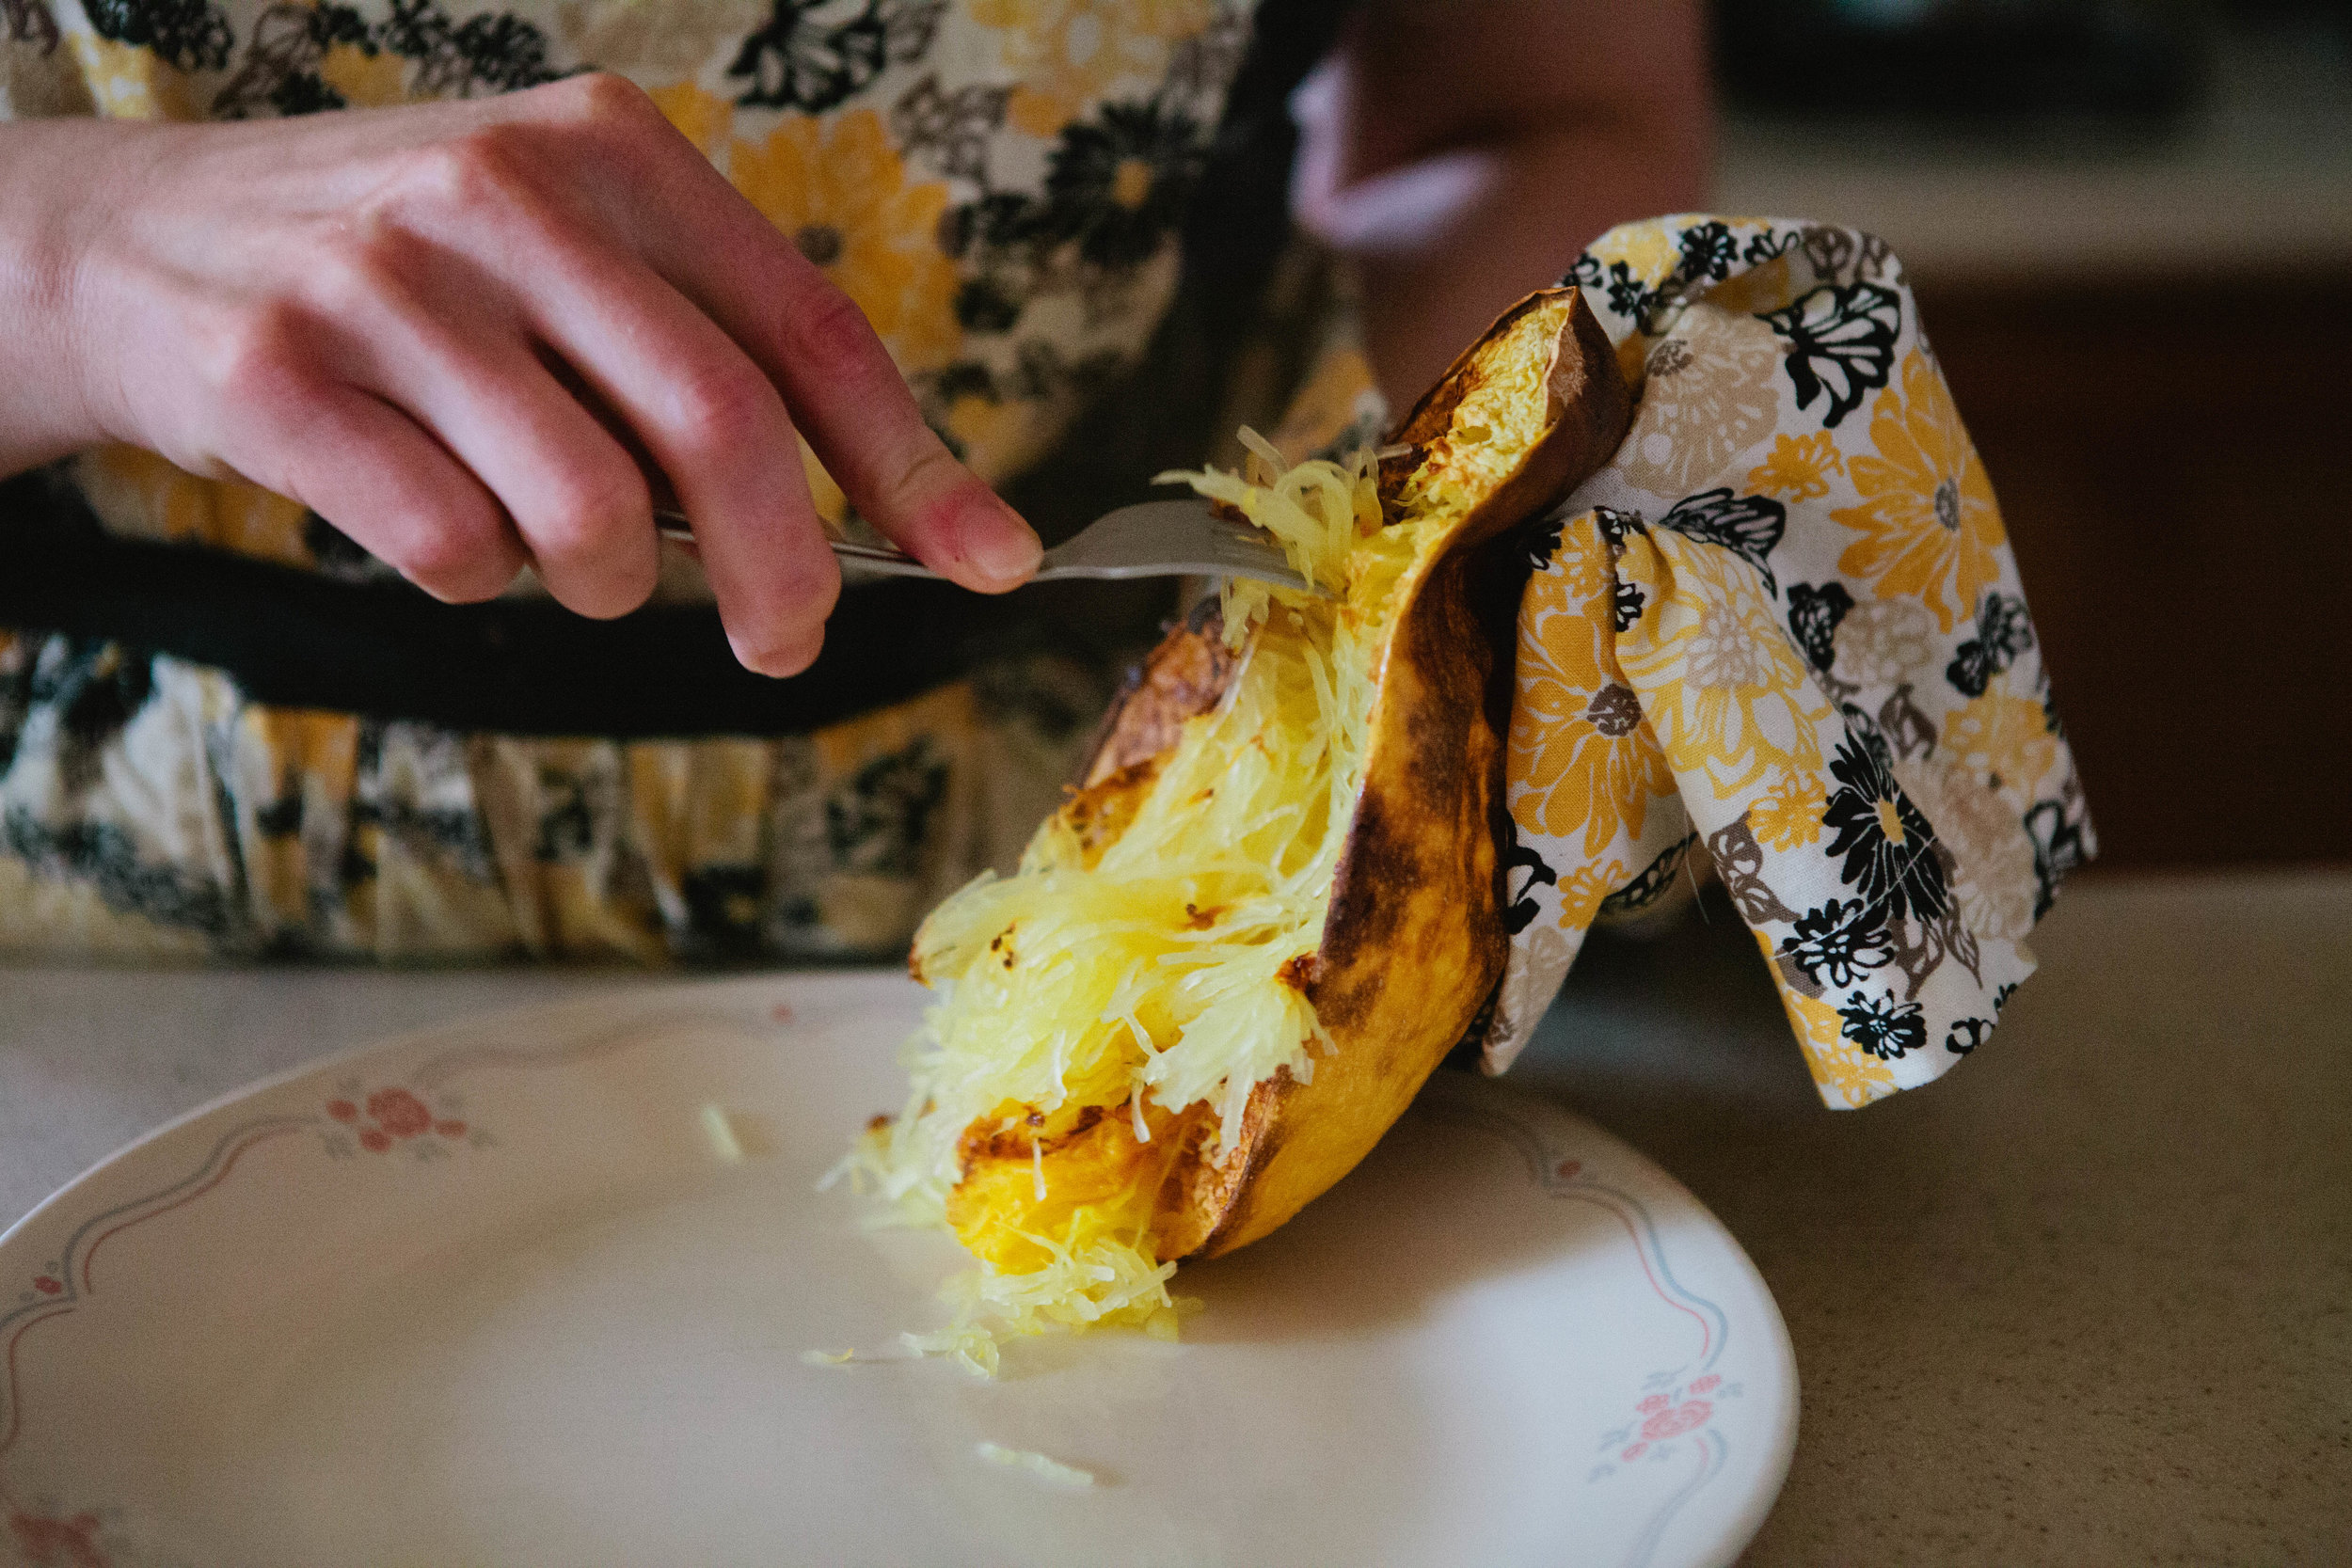
Caramelized onions should be sweet! They shouldn’t really taste like onions at all when they’re finished! As they cook, take a taster. If it still tastes like onions, keep stirring.

Dr Natasha recommends topping a caramelized onion with a little olive oil and a couple fried eggs. (Again fried in plenty of fat.) This is a very filling meal that’s amazing when you’re sick.

However, you don’t need to be sick to enjoy this nourishing food! It can be very soothing when you’ve had a long day and are needing a comfort food.

Ingredients for Caramelized Onions:

  • 2-3 Tbsp Fat of Your Choice Per Onion

  • Onion (1 Per Person)

  • Salt (The amount of salt will vary if you’re using salted butter or unsalted lard.)

Directions for Caramelized Onions:

how-to-properly-caramelize-onions-how-to-make-caramelized-onions-onions-when-sick-what-to-eat-while-sick-gaps-diet-gaps-protocol-holistic-health-northern-colorado

Slice the ends of your onion and peel. Put the peels and “extras” into a bag for use in stock later.

Cut the onion in half. Then cut into half again.

how-to-properly-caramelize-onions-how-to-make-caramelized-onions-onions-when-sick-what-to-eat-while-sick-gaps-diet-gaps-protocol-holistic-health-northern-colorado

Slice the onion so long strips form.

how-to-properly-caramelize-onions-how-to-make-caramelized-onions-onions-when-sick-what-to-eat-while-sick-gaps-diet-gaps-protocol-holistic-health-northern-colorado

Start your pan heating on medium high and add the fat of your choice. Heating your pan before your onion is sliced will result in a pan that is too hot.

how-to-properly-caramelize-onions-how-to-make-caramelized-onions-onions-when-sick-what-to-eat-while-sick-gaps-diet-gaps-protocol-holistic-health-northern-colorado

Add your onions to the pan. Stir to coat in the fat.

how-to-properly-caramelize-onions-how-to-make-caramelized-onions-onions-when-sick-what-to-eat-while-sick-gaps-diet-gaps-protocol-holistic-health-northern-colorado

Cook onions over medium heat, stirring every few minutes.

When they are nearing translucency (about 25 ish minutes) add a little salt if you are not using salted butter. Even if you are using salted butter, adding a little extra salt will help them break down.

Make sure everyone salts their onions to taste once the onions are on their plates!

how-to-properly-caramelize-onions-how-to-make-caramelized-onions-onions-when-sick-what-to-eat-while-sick-gaps-diet-gaps-protocol-holistic-health-northern-colorado

Your onions are done when they are golden brown. Enjoy them on their own or as part of a larger meal.


Caramelized Onions

Author:
prep time: cook time: total time:

ingredients:

  • 2-3 Tbsp Fat of Your Choice Per Onion
  • Onion (1 Per Person)
  • Salt (The amount of salt will vary if you’re using salted butter or unsalted lard.)

instructions:

How to cook Caramelized Onions

  1. Slice the ends of your onion and peel. Put the peels and “extras” into a bag for use in stock later.
  2. Cut the onion in half. Then cut into half again.
  3. Slice the onion so long strips form.
  4. Start your pan heating on medium high and add the fat of your choice. Heating your pan before your onion is sliced will result in a pan that is too hot.
  5. Add your onions to the pan. Stir to coat in the fat.
  6. Cook onions over medium heat, stirring every few minutes.
  7. When they are nearing translucency (about 25 ish minutes) add a little salt if you are not using salted butter. Even if you are using salted butter, adding a little extra salt will help them break down.
  8. Make sure everyone salts their onions to taste once the onions are on their plates!
  9. Your onions are done when they are golden brown. Enjoy them on their own or as part of a larger meal.
Created using The Recipes Generator
46.png

Making Whey

Easy Do-It-Yourself Whey from Yogurt

Whey is the other protein in milk aside from casein. It’s only present after milk products have been cultured and it’s a live food. This liquid is teeming with good lactic acid producing bacteria (LABs.) Whey is a basic to keep on hand because it can be used to ferment flours, seeds, nuts, vegetables, or as a starter to culture other dairy.

I use homemade yogurt to make my whey but you can use store bought yogurt to make your own whey. Make sure you get a full fat, grass fed yogurt that only contains milk and cultures. It’s ok if it’s pasteurized as the culturing process adds life back to this food! Greek yogurt will not work to make whey as there is very little whey naturally in that strain of yogurt. If you are sensitive to lactose or casein, you should leave your store bought yogurt out on the counter, unopened, for an additional 12 - 24 hours to finish culturing the yogurt before you strain the whey. (Essentially making it lactose free.)

If you strain your yogurt for a long time, it becomes almost like a cream cheese substance. It’s great to add fresh herbs to and make a dip!

To speed along the straining time, stir your yogurt well before adding it to the cloth.

It is easy to make your own whey using yogurt, either homemade yogurt or store bought yogurt. Whey is used for many things like fermentation. DIY recipe on how to make whey by Northern Colorado Holistic Healthcare Provider and Certified GAPS Practit…

I really like using the villi life culture from the Heirloom Yogurt Starter pack at Cultures for Health. Not only is it a mesophilic culture, meaning it cultures at room temperature instead of at 110 degrees like most yogurts, but it is a runnier yogurt and produces a lot of whey for my baking and fermenting needs.

I enjoy to the runniness of the ville life culture. If you don’t, simply separate some of the whey out of each batch for a thicker end product.

It is easy to make your own whey using yogurt, either homemade yogurt or store bought yogurt. Whey is used for many things like fermentation. DIY recipe on how to make whey by Northern Colorado Holistic Healthcare Provider and Certified GAPS Practit…

The cloth I used is the single fold diaper cloth, you can purchase it at Walmart or find something similar at Cultures for Health.

It’s best to use a plastic funnel because metal can be damaging to the good bacteria inside the whey.

Whey keeps in the fridge for about six months if you’ve successfully removed most of the milk solids and strained well.

Ingredients for DIY Whey

  • 3 Cups Homemade Yogurt

Directions for DIY Whey

It is easy to make your own whey using yogurt, either homemade yogurt or store bought yogurt. Whey is used for many things like fermentation. DIY recipe on how to make whey by Northern Colorado Holistic Healthcare Provider and Certified GAPS Practit…

Set a plastic strainer inside a large measuring cup or bowl.

It is easy to make your own whey using yogurt, either homemade yogurt or store bought yogurt. Whey is used for many things like fermentation. DIY recipe on how to make whey by Northern Colorado Holistic Healthcare Provider and Certified GAPS Practit…

Fold the cloth four times and set inside the strainer.

It is easy to make your own whey using yogurt, either homemade yogurt or store bought yogurt. Whey is used for many things like fermentation. DIY recipe on how to make whey by Northern Colorado Holistic Healthcare Provider and Certified GAPS Practit…

Pour your yogurt into the cloth.

It is easy to make your own whey using yogurt, either homemade yogurt or store bought yogurt. Whey is used for many things like fermentation. DIY recipe on how to make whey by Northern Colorado Holistic Healthcare Provider and Certified GAPS Practit…

Gather the edges of your cloth and secure with a rubber band.

Leave to sit and strain for as long as desired.

If you want to simply thicken your yogurt, leaving it for only ten minutes is fine. If you’d like to strain all the whey out to make a cream cheese, you can leave it for much longer. I often leave mine out overnight.

It is easy to make your own whey using yogurt, either homemade yogurt or store bought yogurt. Whey is used for many things like fermentation. DIY recipe on how to make whey by Northern Colorado Holistic Healthcare Provider and Certified GAPS Practit…

Once you have strained enough whey out, pour it into a clean glass jar.

Rinse your cloth well in hot water. Don’t use soap! Hang to dry.

Use your whey to ferment flours, seeds, nuts, or vegetables, or as a starter to culture other dairy. What will you use your whey for?


How to Make Whey

Author:
prep time: cook time: total time:

ingredients:

  • 3 Cups Homemade Yogurt

instructions:

How to cook How to Make Whey

  1. Set a plastic strainer inside a large measuring cup or bowl.
  2. Fold the cloth four times and set inside the strainer.
  3. Pour your yogurt into the cloth.
  4. Gather the edges of your cloth and secure with a rubber band.
  5. Leave to sit and strain for as long as desired.
  6. If you want to simply thicken your yogurt, leaving it for only ten minutes is fine. If you’d like to strain all the whey out to make a cream cheese, you can leave it for much longer. I often leave mine out overnight.
  7. Once you have strained enough whey out, pour it into a clean glass jar.
  8. Rinse your cloth well in hot water. Don’t use soap! Hang to dry.
  9. Use your whey to ferment flours, seeds, nuts, or vegetables, or as a starter to culture other dairy. What will you use your whey for?
Created using The Recipes Generator
14.png

The Goals of A Nutritional Counseling Appointment with Be Well Clinic

A Nutritional Counseling Appointment with us can help with general nutritional advice wherever you are in life or we can offer specialized advice and help with healing a leaky gut, exploring the root cause of your health symptoms, individualized GAPS diet advice from a certified GAPS Practitioner, or with individualized family wellness plans.

When you come into our clinic in Loveland, Colorado, for your appointment, you may notice that it feels a little different than normal doctor’s offices. We’re not concerned with just getting you in and out of the office quickly. Our holistic healthcare practice is about more than identifying what’s wrong on the surface and giving you the quickest and easiest solution.

Our holistic health services in Northern Colorado might look a little different than your average doctor’s visit. We truly care about you! We are holistic health and nutrition providers and certified GAPS Practitioners in Loveland, Colorado.

We believe that you know your body best! Your intuition, innate body knowledge, and experience with living your own journey is a key tool in helping find the root cause of your health problems. You are an immeasurably valuable member of your healthcare team! The first part of your nutritional counseling appointment will be spent as an in-depth discussion about your health journey. During this discussion, we'll go over your past health history and any major positive or negative events in your health timeline. Using what we know about the body, we try to identify and explain what is going on. We work to help you make connections with what's happening in your body.

Once we’ve identified the root causes of your health problems, we work together to create a plan to make your health improvements at a pace and in a lifestyle that you’re comfortable with. The goal of an appointment is to get you on the path to wellness! It does no one any good to create a plan that you know you doesn’t work for your life or your family.  Together, we’ll find the right Goldilocks plan for you - not too complicated, not too simple, not too fast, and not too slow.

Our holistic health services in Northern Colorado might look a little different than your average doctor’s visit. We truly care about you! We are holistic health and nutrition providers and certified GAPS Practitioners in Loveland, Colorado.

Just because we’ve created the right plan for you at your nutritional counseling appointment doesn’t mean we’re done working together! We want to create a long lasting, on-going relationship with our patients to fully support them on their path to wellness. A journey of health is a lifelong journey, not something that’s cured in a thirty minute visit. We believe it’s essential that you have the follow-up care you need to feel fully supported by not smothered. This is your journey and you should be free to take it as it ebbs and flows. But you should also know that you’re not alone in this! Everyone needs support sometimes and asking for help or advice is encouraged. We offer flexible follow up options, like follow up in-person meetings, or even phone and Skype calls to make sure you get just what you need. At different times, you might find yourself needing different things and find that you might need more or less support than you did before. That’s ok! We’ll tailor our support options to make sure that you’re never smothered or lost, but find just the right amount of support as part of our on-going relationship.

Be Well Clinic is a cash clinic, and does not accept any insurance, including Medicaid or Medicare. You can pay using your HSA or flex spending card, as well as cash, check or charge. Payment is due at the time of service.

A Nutritional Counseling Appointment is your opportunity to create a plan that works for you. Schedule your natural, holistic nutritional appointment by clicking the appointment button to the left, by clicking here, or by calling 970-218-8273.

Why You Should Dilute Essential Oils

If you are an essential oil user, you may have heard that diluting hot oils, like oregano, that you want to use topically or diluting the oils you put on your child’s skin is recommended. However, I've recently learned that diluting all essential oils is beneficial. I only recommend using therapeutic oils, especially if you are putting them in or on your body. If you want to apply oils to your skin, I recommend using a carrier oil to dilute them and increase their effectiveness.

Watch the short video below on how to dilute essential oils, or read on for more in depth help diluting your essential oils.

Does diluting essential oils reduce their effectiveness?

It may seem that if you dilute the essential oils you are using, you may also be reducing their effectiveness. However, diluting oils may actually increase their effectiveness.

First, diluting the essential oils you apply topically will decrease the amount that evaporates into the air. This means that more of the beneficial oil will stay on your skin and be able to bring support to your body.

Your skin is the largest organ of your body. It's made of several layers that help to protect your internal body. The outermost layer of your skin is called the epidermis. This is the part of your skin that provides a waterproof barrier and is tough for solutions, like essential oils, to permeate. Diluting your essential oils before you apply them to your skin actually drives the oil solution into your epidermis layer, easier and deeper. This means the oil reaches your internal body quicker and you are able to see the benefits faster.

If you have sensitive skin issues, diluting your essential oils before applying them is additionally beneficial. Diluting will help lower the risk of you experiencing skin irritation.

These emotion oils are part of the Touch Line from doTerra. All of the oils in this doTerra line are prediluted to the correct ratios for quick application. You can order the Touch Line for yourself here.

These emotion oils are part of the Touch Line from doTerra. All of the oils in this doTerra line are prediluted to the correct ratios for quick application. You can order the Touch Line for yourself here.

How do I dilute an essential oil?

To dilute an essential oil before you apply it to your skin, you use what are called carrier oils. Carrier oils include avocado oil, olive oil, jojoba oil, grapeseed oil, or coconut oil (especially fractionated coconut oil.) In selecting the ideal carrier oil for you, you want to always make sure that it is 100 percent pure. Each oil has a different scent and even texture so selecting your carrier oil could be researched or just be a personal preference.

The following ratios of dilution come from doTerra, my preferred brand of essential oils.

For one teaspoon of carrier oil add:

  • 1 drop essential oil for a 1% ratio

  • 2 drops for 2%

  • 5 drops for 5%

One tablespoon of carrier oil:

  • 3 drops essential oil for 1%

  • 6 drops for 2%

  • 15 drops for 5%

One fluid ounce of carrier oil:

  • 6 drops essential oil for 1%

  • 12 drops for 2%

  • 30 drops for 5%

What do you think? Will you try diluting your essential oils next time?

If you want more information on essential oils, I share more here!

Steamed Broccoli Recipe

GAPS Legal Broccoli Recipe

My main reason for eating broccoli is to use it as a vehicle for butter.

Need I say more?

Broccoli itself does have some amazing nutritional content on its own, separate from carrying butter. It's high in both soluble and insoluble fiber, potassium, and the vitamins B6, C and A.

What exactly is broccoli? Broccoli is a cruciferous vegetable like cabbage, kale, turnips, cauliflower, and brussel sprouts. It is a wonderful vegetable to eat regularly. Some people avoid broccoli because they experience gas. But if broccoli makes you gassy, your gut flora is unbalanced! You can (and should) address your gut flora, then you can enjoy broccoli again without fear!

I don’t use the stems of the broccoli, which are very fibrous, in this recipe. If you want, you can use them in a soup or fry them up with butter and garlic (which is delicious.) But if you’re early in your healing on the GAPS Intro diet, toss or compost the stems. They are too fibrous for you to eat!

This is a great and simple side dish to serve with any main dish. But whatever you serve it with, the key here is to remember to enjoy your butter!

Ingredients for Steamed Broccoli:

  • 2- 3 Small Broccoli Crowns

  • Water

  • Butter for serving.

Directions for Steamed Broccoli:

I eat broccoli purely as a vehicle for butter. Serve this quick steamed broccoli recipe alongside any meat of your choice for a great GAPS Legal meal. Steamed Broccoli Recipe by Northern Colorado Certified GAPS Practitioner Amy Mihaly.

Insert steamer into a medium size pot. Add a few inches of filtered water to a pot.

I eat broccoli purely as a vehicle for butter. Serve this quick steamed broccoli recipe alongside any meat of your choice for a great GAPS Legal meal. Steamed Broccoli Recipe by Northern Colorado Certified GAPS Practitioner Amy Mihaly.

Rinse broccoli well with filtered water.

I eat broccoli purely as a vehicle for butter. Serve this quick steamed broccoli recipe alongside any meat of your choice for a great GAPS Legal meal. Steamed Broccoli Recipe by Northern Colorado Certified GAPS Practitioner Amy Mihaly.

Cut off stems. Discard if you are on the GAPS Intro diet. Otherwise, set aside for another recipe.

Break broccoli florets apart at the base.

I eat broccoli purely as a vehicle for butter. Serve this quick steamed broccoli recipe alongside any meat of your choice for a great GAPS Legal meal. Steamed Broccoli Recipe by Northern Colorado Certified GAPS Practitioner Amy Mihaly.

Add florets to the steamer and cover with a lid.

Steam for 15-20 minutes until fork tender, meaning a fork easily slides in and out. If you’re on GAPS Intro, be extra sure it’s fully cooked.

Make sure you don’t run out of water on the bottom of the pan or you will scorch the bottom. To check for water, you can tip the pan without opening it and feel if there is still water shifting. If you are unsure, check! You don't want to run out of water or you could ruin your pan.

I eat broccoli purely as a vehicle for butter. Serve this quick steamed broccoli recipe alongside any meat of your choice for a great GAPS Legal meal. Steamed Broccoli Recipe by Northern Colorado Certified GAPS Practitioner Amy Mihaly.

Serve as a side alongside meat of your choice. I prefer steak; it just seems to be better that way! Top with plenty of butter! You want to eat about a teaspoon of butter with each piece. I cut a slice to eat with each piece. Enjoy!


Steamed Broccoli Recipe

Author:
prep time: cook time: total time:

ingredients:

  • 2- 3 Small Broccoli Crowns
  • Water
  • Butter for serving

instructions:

How to cook Steamed Broccoli Recipe

  1. Insert steamer into a medium size pot. Add a few inches of filtered water to a pot.
  2. Rinse broccoli well with filtered water.
  3. Cut off stems. Discard if you are on the GAPS Intro diet. Otherwise, set aside for another recipe.
  4. Break broccoli florets apart at the base.
  5. Add florets to the steamer and cover with a lid.
  6. Steam for 15-20 minutes until fork tender, meaning a fork easily slides in and out. If you’re on GAPS Intro, be extra sure it’s fully cooked.
  7. Make sure you don’t run out of water on the bottom of the pan or you will scorch the bottom. To check for water, you can tip the pan without opening it and feel if there is still water shifting. If you are unsure, check! You don't want to run out of water or you could ruin your pan.
  8. Serve as a side alongside meat of your choice. I prefer steak; it just seems to be better that way! Top with plenty of butter! You want to eat about a teaspoon of butter with each piece. I cut a slice to eat with each piece. Enjoy!
Created using The Recipes Generator
13.png