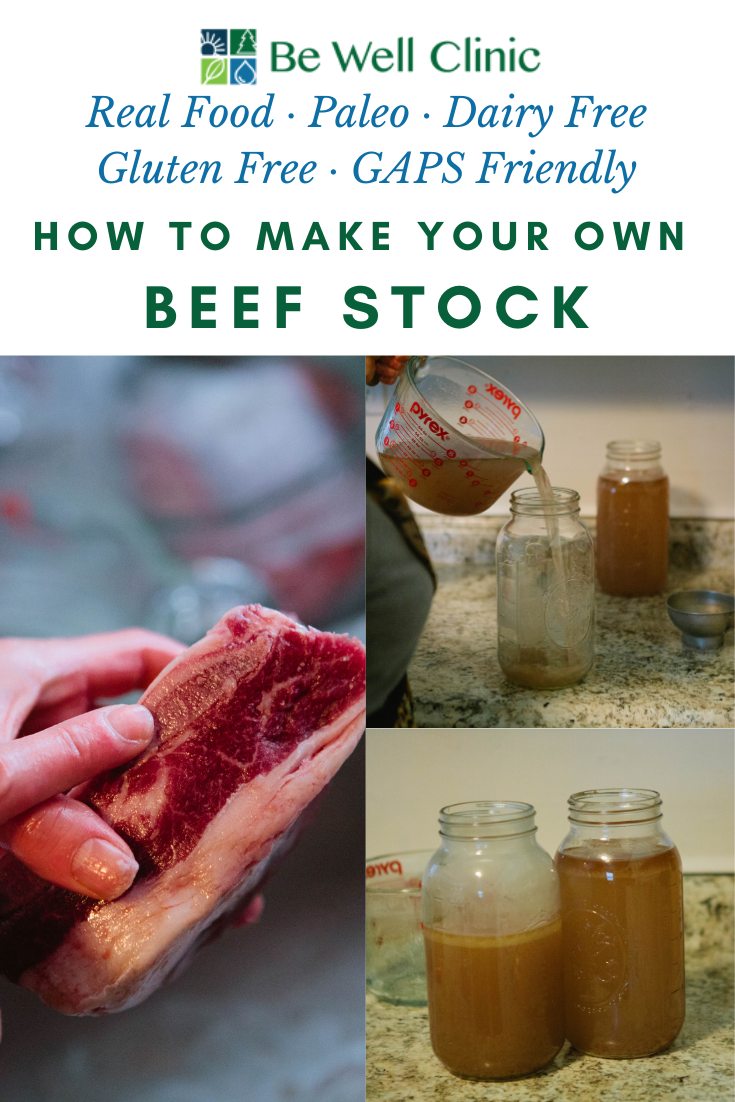
How to Make Beef Stock

We use a lot of chicken stock around here but that doesn’t mean it’s superior to other kinds of stock. We’ve recently been working on adding soup recipes that are especially delicious with beef stock.

IMG_8558.jpg

Whatever meat you use, remember it should be 80% meat and 20% bone with a joint. Depending on your cut, you might need to add additional meat to fulfill these ratios.

Meat stock is a pillar in healing a leaky gut but this rich food is beneficial to anyone. It provides large amounts of the immune system’s favorite foods, is very easy to digest, and is a great base to modify for other healing and nutritious recipes.  

Meat stock is meant to be a meal in itself. It’s short cooking time allows the meat to remain edible while still enriching stock with easy to absorb nutrients. This is the perfect thing to eat anytime you are feeling ill or stressed or “can’t get filled up” hungry. These are some of the reasons meat stock is such an important part of the healing process of the GAPS Diet. Any time you are consuming meat stock on a regular basis, your body will be receiving the healing benefit.

Meat stock can be made into a soup or simply drunk on its own as a hot beverage with a meal. You can also poach a couple eggs in your stock for a rich breakfast. Stock can also be used to cook rice or other soaked grains to increase their digestibility and nutritional content. In short, this should be considered a staple to have in your kitchen at all times, either in the fridge or the freezer.

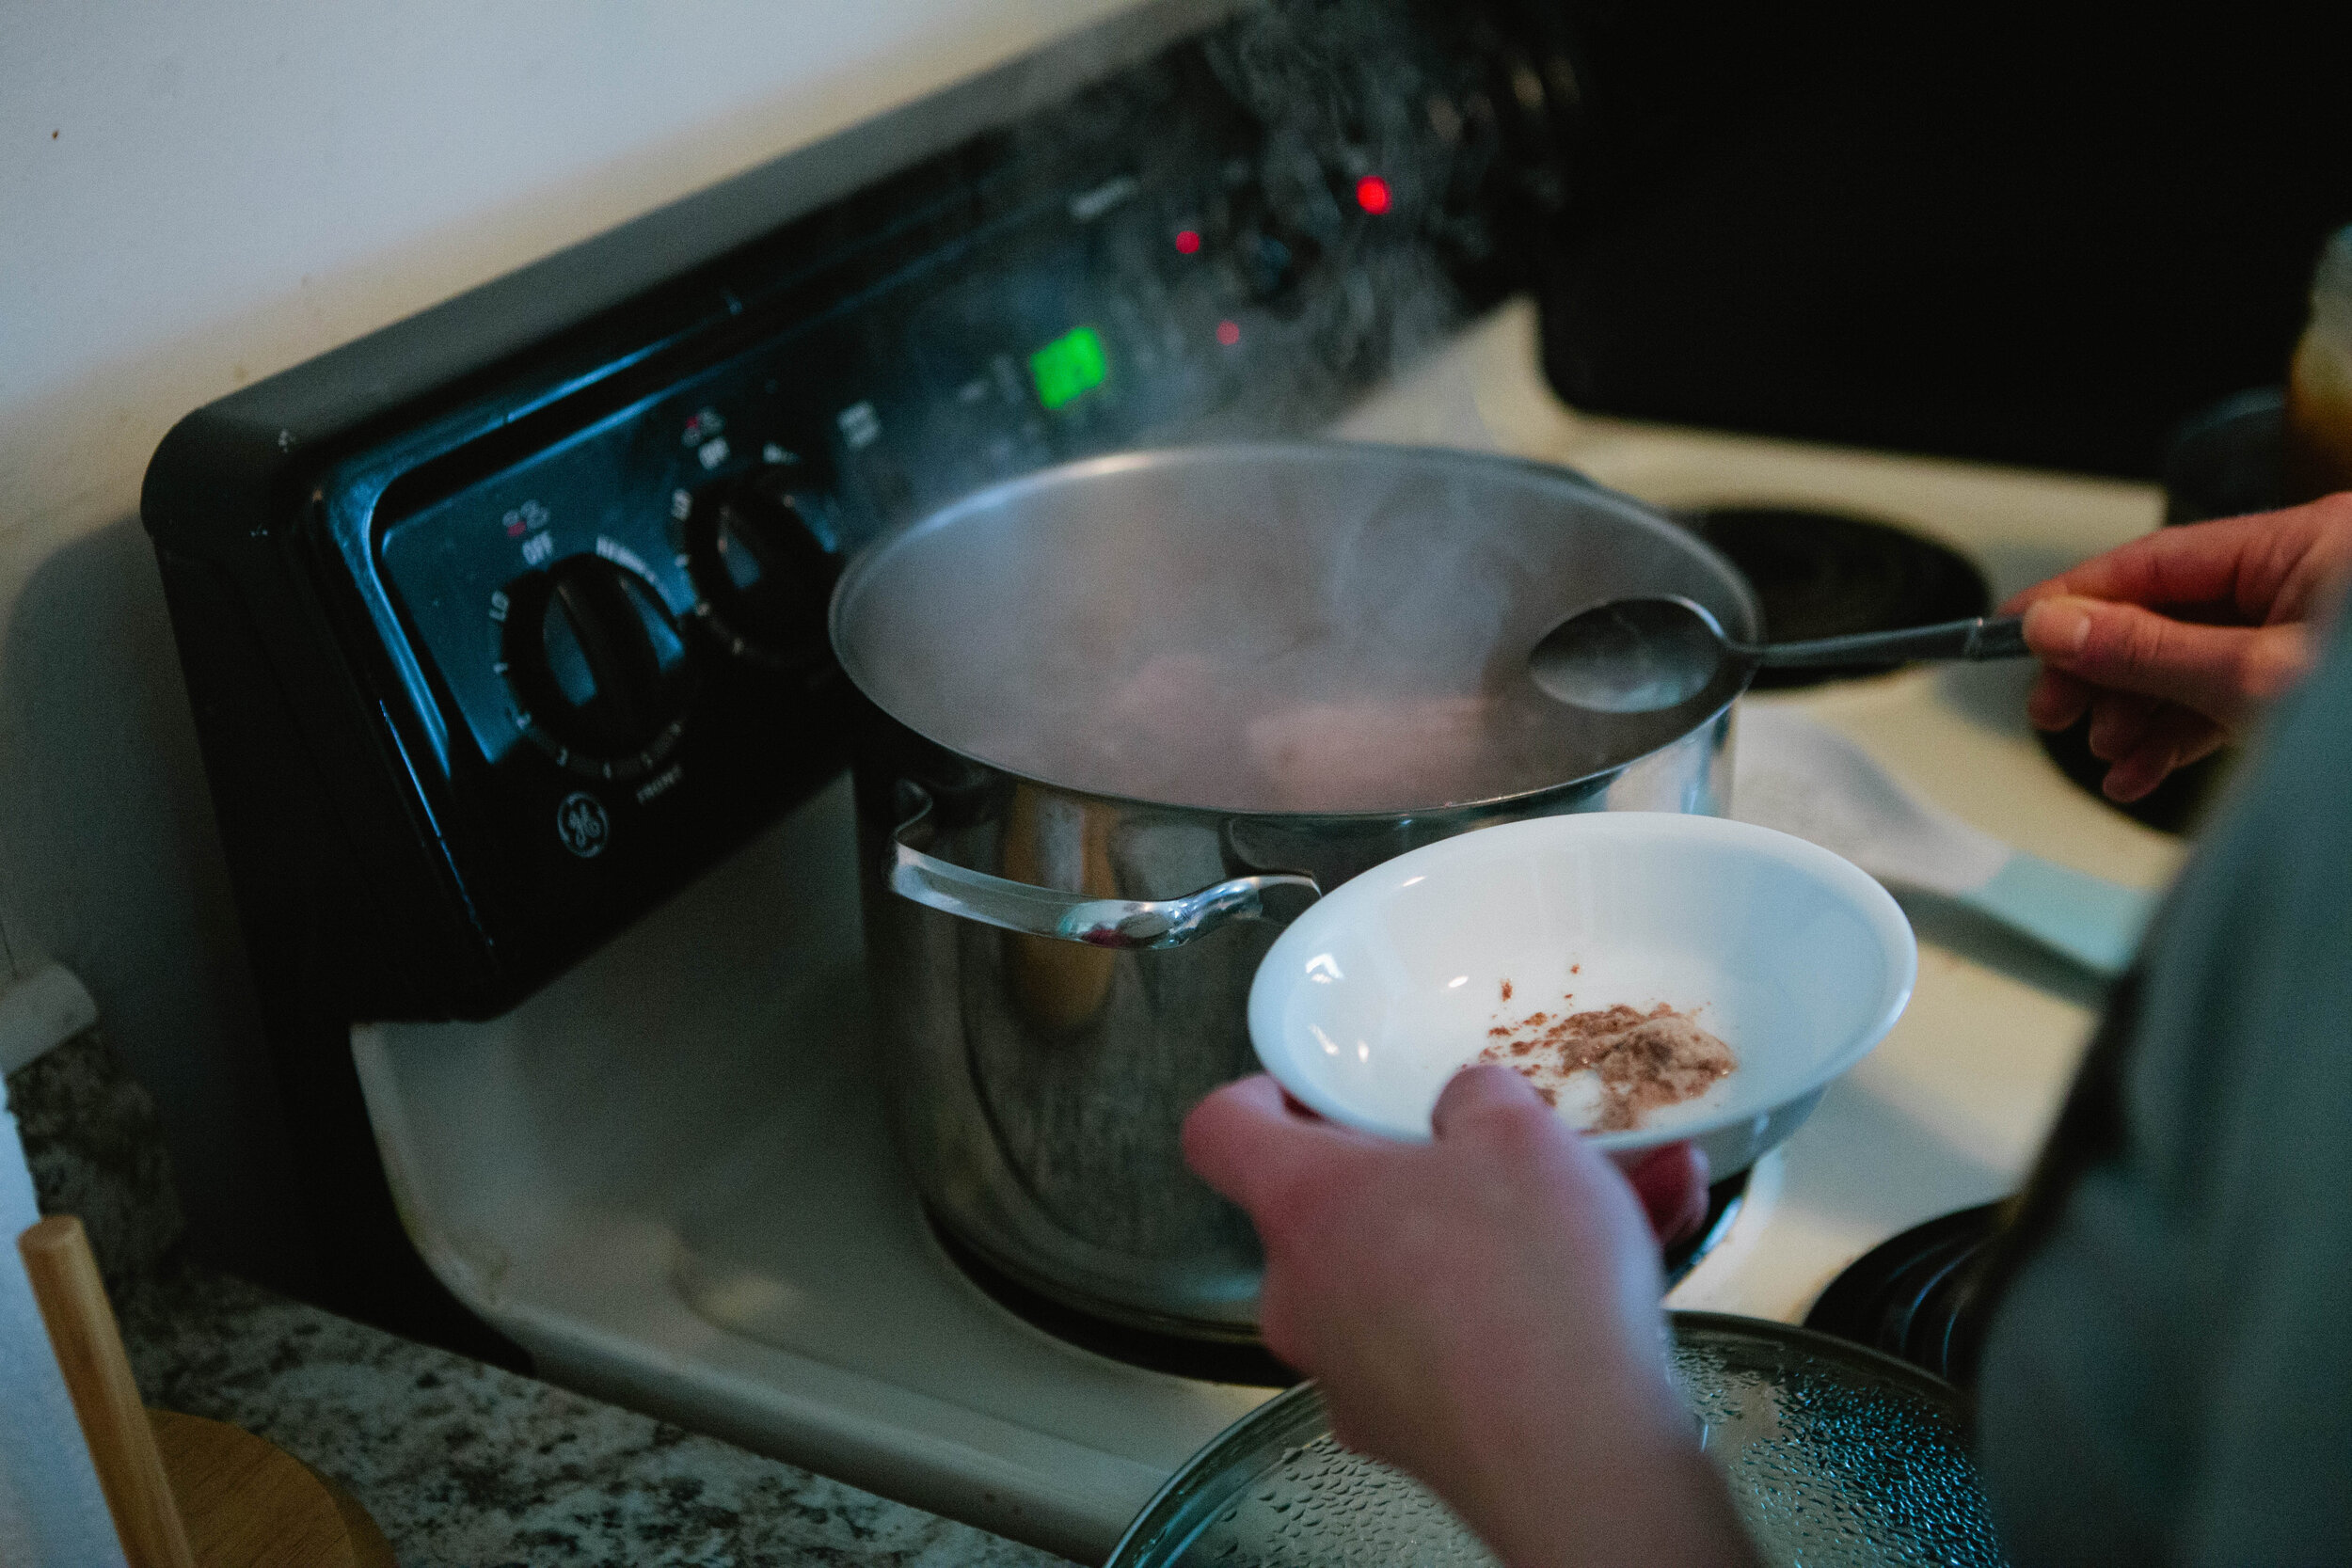
There are a variety of ways you can skim the scum off the top of your stock. I usually use a slotted spoon but you can also use a mesh scum skimmer, a slotted spoon, a small strainer, or a large soup spoon.

Skimming the scum off the top is where you can tell the quality of your meat. If your meat is poor quality, had a lot of hormones or was poorly processed, you’ll get scum that’s heavy, grey and unappetizing. If you have a good quality meat, you will have a small amount of light almost white colored scum that appears as a lighter foam. This is also where you can tell if your meat has gone bad at this point.

You can store your stock in the fridge or the freezer, depending on how quickly you’ll consume the batch.

A NOTE ABOUT MEAT STOCK AND THE GAPS INTRO DIET:

When Dr. Natasha Campbell talks about meat in stage 1, she’s referring to eating primarily the gelatinous meats like skin, joints and connective tissue. When meat is added on Stage 2, she means the muscle eats, the only thing we Americans consider to be meat. Eating a lot of muscle meat can be constipating so if this is your issue, be sure to eat every last bit of the skin and joints.

Ingredients for Beef Stock:

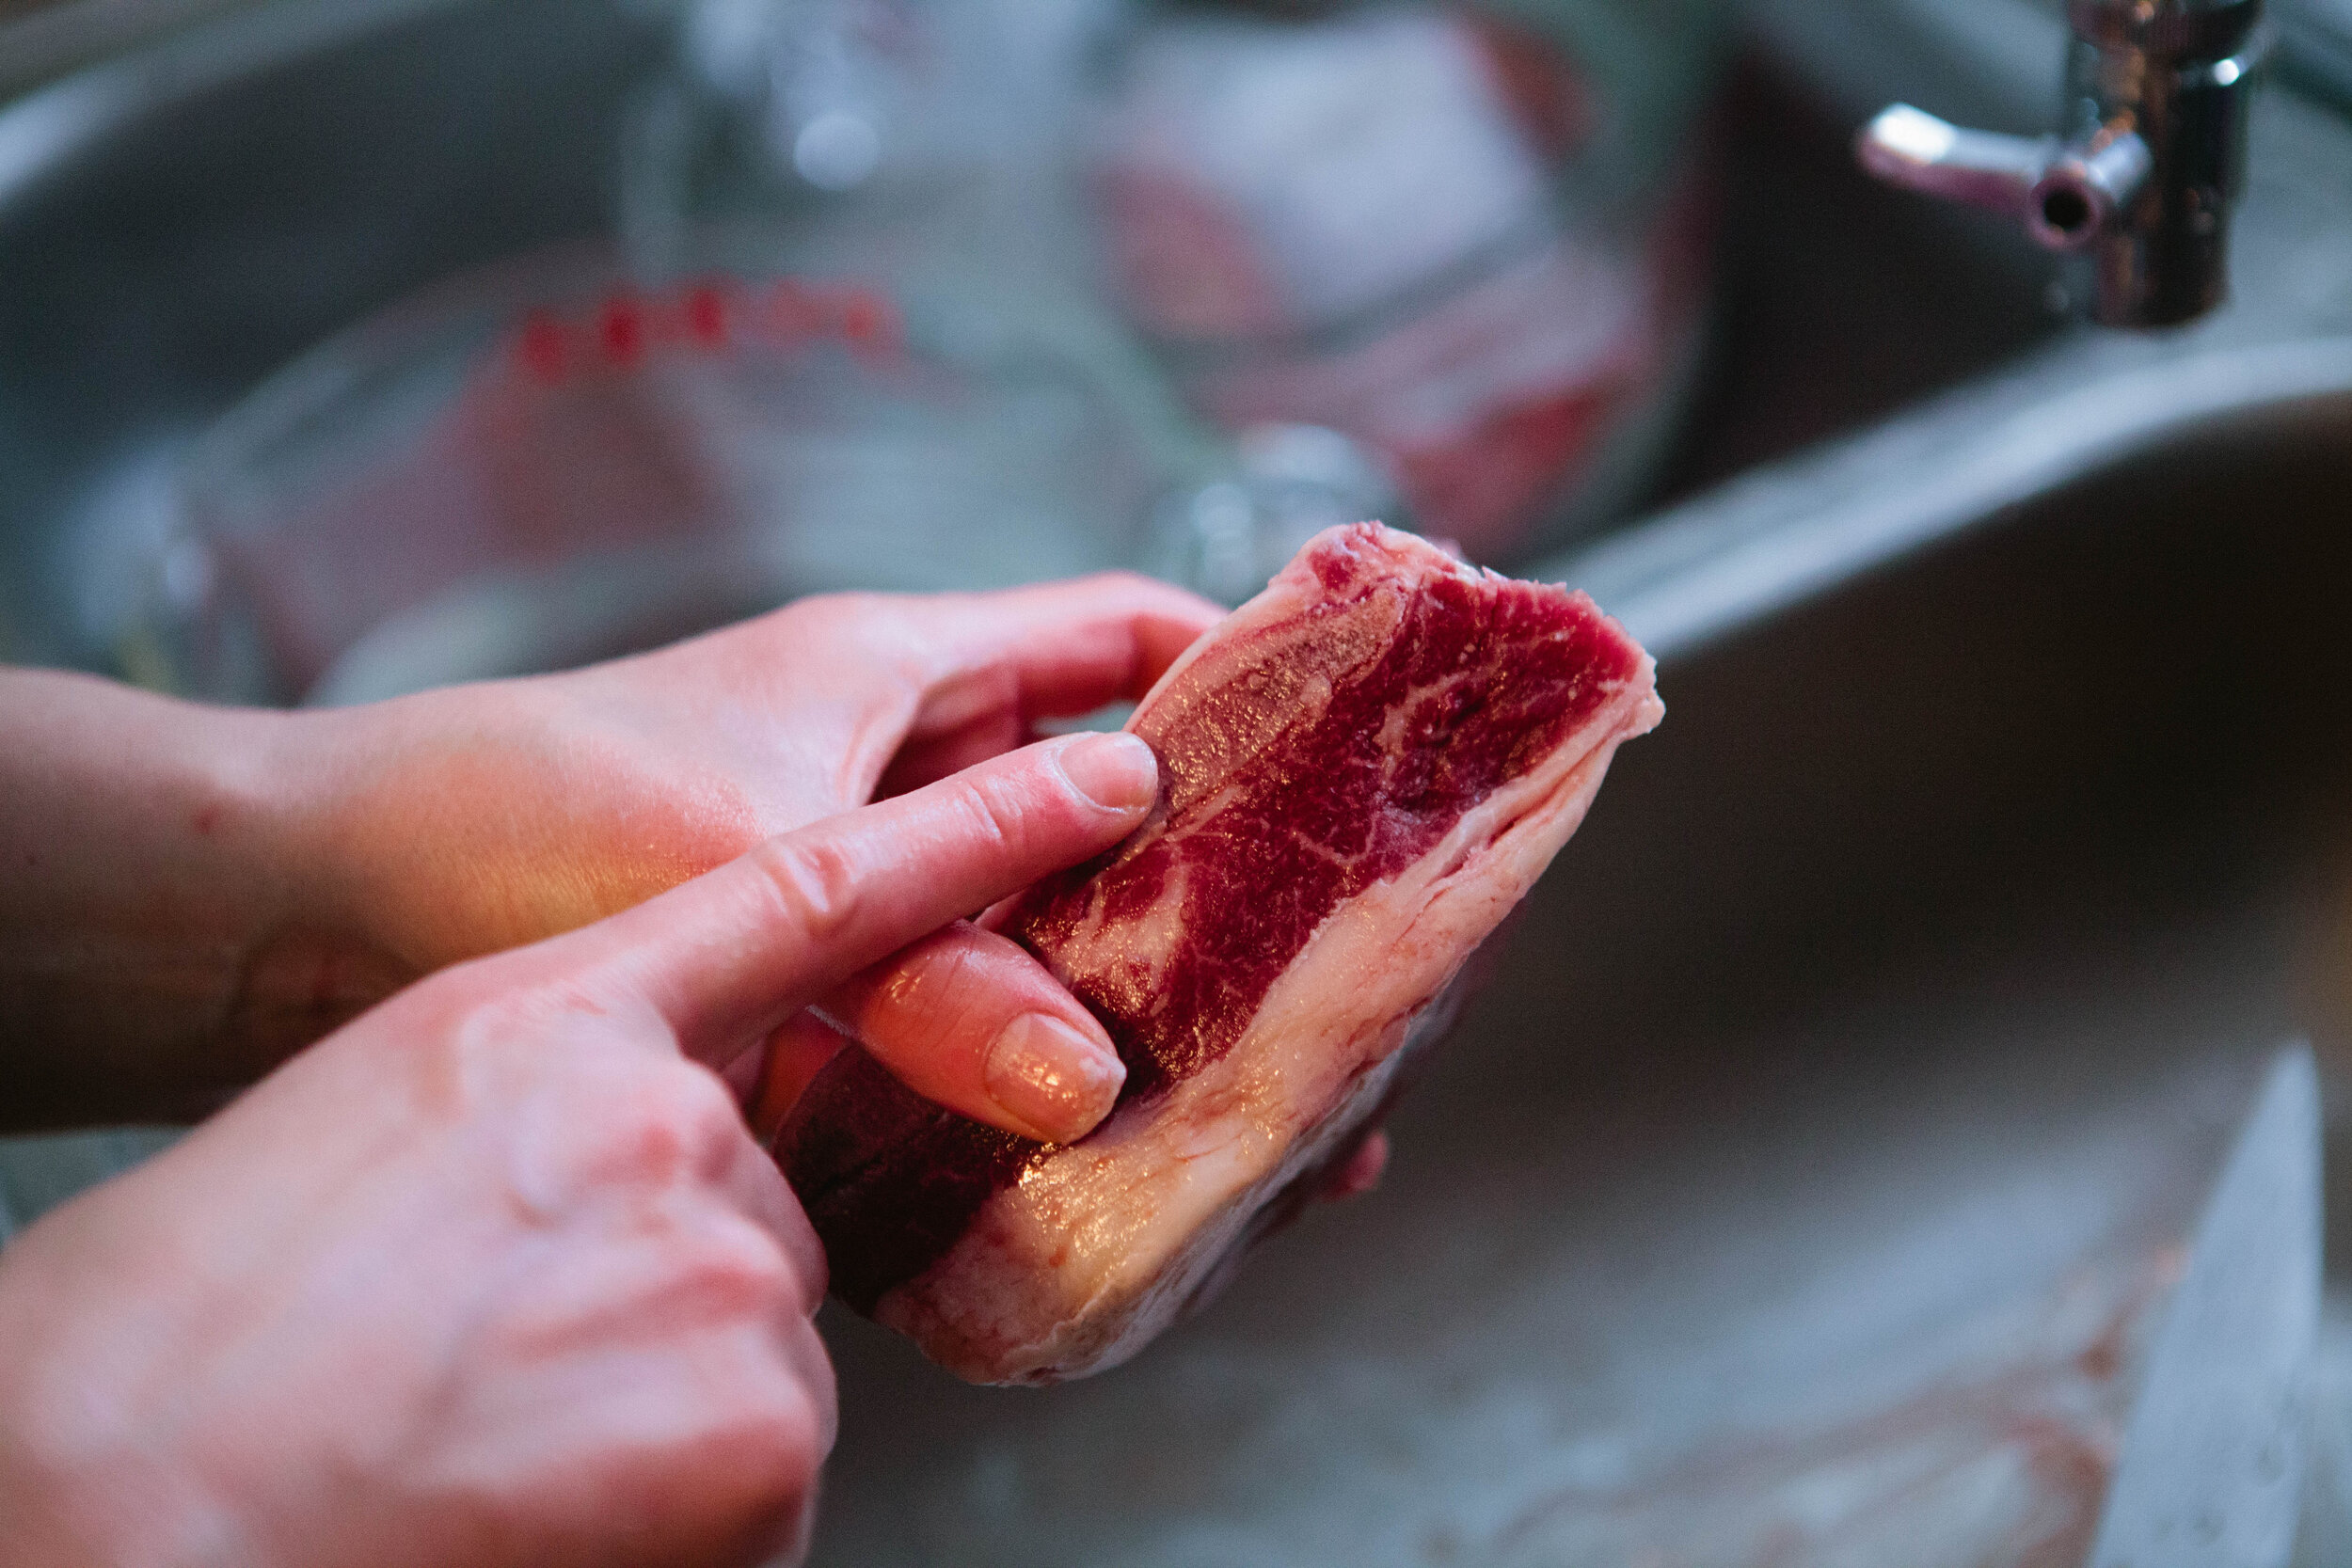
  • Beef. I am using 3 ½ lbs of beef short ribs. Whatever meat you use, remember it should be 80% meat and 20% bone with a joint. Depending on your cut, you might need to add additional meat to fulfill these ratios.

  • Small handful of peppercorns

  • 2 Bay Leaves

  • Filtered Water

Directions for Beef Stock:

IMG_8567.jpg

Cut your beef ribs apart so that each rib is separated.

Add to a pot and fill with filtered water.

IMG_8574.jpg

Add peppercorns whole and bay leaves to the pot.

If you are using dry herbs and are on Intro GAPS, pre-stage 4, put your herbs in a reusable herb or tea infuser or muslin pouch for easy removal. This is not necessary if you are using fresh herbs.

IMG_8580.jpg

Turn pot up to high to bring to a boil. Skim the scum off the top of your pot.

Turn heat down lower to a simmer. Simmer beef stock for 3-5 hours. 

IMG_8725.jpg

Strain the beef stock using a large mesh strainer and a funnel or large measuring cup with a lip.

Place in jars or a large bowl and allow to cool completely before placing in the fridge or freezer.

HowtoMakeBeefStockfortheGAPSDiet.png

Bacon Wrapped Livers

I’m always searching for new ways and additional recipes to recommend for eating livers. Liver is an important superfood because the nutrients in liver are very important to our health. It’s recommended to consume liver on a regular basis. However, many people do not enjoy eating liver in the previous ways they have had it prepared.

This is a basic recipe but you can experiment in adding other things to your stuffing mixture like onions, cheese, cream cheese, carrots, etc.

IMG_7590.jpg

Ingredients for Bacon Wrapped Liver:

  • ½ lb. Bacon, 1 piece per liver bite

  • ½ lb. Liver, I’m using chicken

Directions for Bacon Wrapped Liver

IMG_7567.jpg

Pre-heat oven to 400. Rinse your livers and pat to dry. Slice livers into chunks, approximately two bite size. Cut bacon strips in half.

IMG_7572.jpg

Fold bacon around livers. Place seam side down in a deep sided baking dish.

IMG_7593.jpg

Cover with parchment paper and aluminum foil. Do not allow foil to touch your food.

Place in oven covered for 15 minutes.

Uncover and cook for 10 minutes.

Serve and enjoy!


BaconWrappedLiver.png

Bacon Wrapped Livers

Author: Amy Mihaly, Be Well Clinic

Ingredients

  • ½ lb. Bacon, 1 piece per liver bite
  • ½ lb. Liver, I’m using chicken

Instructions

  1. Pre-heat oven to 400. Rinse your livers and pat to dry. Slice livers into chunks, approximately two bite size. Cut bacon strips in half.
  2. Fold bacon around livers. Place seam side down in a deep sided baking dish.
  3. Cover with parchment paper and aluminum foil. Do not allow foil to touch your food.
  4. Place in oven covered for 15 minutes.
  5. Uncover and cook for 10 minutes.
  6. Serve and enjoy!

French Onion Soup

This is a simple rich recipe that can bring back familiar tastes and memories. This is a great recipe to make in the winter as onions and stock are great food for the immune system. Onions are an amazing supporting food because they are high in vitamin C, calcium, and quercetin. 

The red wine gives it a distinctive taste. If you’re on a GAPS Stage where wine is not allowed, it can definitely be omitted.

This was especially delicious with grated cheese on top! I used Monterey Jack but any white cheese that you have on hand would be a great choice. If you are dairy free, it is ok to omit the cheese. Also be sure to substitute lard for your butter as the fat to cook the onions in.

Ingredients for French Onion Soup:

  • 4 Onions

  • 2 sticks / 1 cup of Butter

  • 6 Garlic Cloves

  • 2-3 Bay Leaves

  • 2 sprigs Thyme

  • 1 cup Red Wine

  • 2 Quarts of Beef Stock

  • Grated Monterey Jack or Gruyere Cheese

Directions:

IMG_7835.jpg

Thinly slice 4 onions. Yes really, 4 onions!

IMG_7839.jpg

Add 1 cup of butter to a large stock pot and turn on to medium heat. When butter is melted, add in the onion and stir to coat. Caramelize the onions for approximately 20 minutes until soft.

When soft, add in 5-6 cloves of chopped garlic, bay leaves, and thyme. Stir and allow to cook for a few more minutes.

IMG_7930.jpg

Add in red wine and allow to cook for 15-20 minutes for the wine to boil off. I cook it until I cannot smell the alcohol anymore, generally about 20 minutes. Stir fairly frequently.

Add in beef stock and cook for 5-10 minutes more.

Top with grated cheese & enjoy!


GAPSLegalFrenchOnionSoup.png

French Onion Soup

Author: Amy Mihaly, Be Well Clinic

Ingredients

  • 4 Onions
  • 2 sticks / 1 cup of Butter
  • 6 Garlic Cloves
  • 3 Bay Leaves
  • 2 sprigs Thyme
  • 1 cup Red Wine
  • 2 Quarts of Beef Stock
  • Grated Monterey Jack or Gruyere Cheese

Instructions

  1. Thinly slice 4 onions. Yes really, 4 onions!
  2. Add 1 cup of butter to a large stock pot and turn on to medium heat. When butter is melted, add in the onion and stir to coat. Caramelize the onions for approximately 20 minutes until soft.
  3. When soft, add in 5-6 cloves of chopped garlic, bay leaves, and thyme. Stir and allow to cook for a few more minutes.
  4. Add in red wine and allow to cook for 15-20 minutes for the wine to boil off. I cook it until I cannot smell the alcohol anymore, generally about 20 minutes. Stir fairly frequently.
  5. Add in beef stock and cook for 5-10 minutes more.
  6. Top with grated cheese & enjoy!

Stuffed Game Meat - 3 Ways!

I have recently been successful in harvesting an elk and am now undergoing the quest of finding ways to up the amount of fat I eat alongside the game meat. 

It is not advisable to eat lean protein frequently. When we eat protein, our bodies require a significant amount of vitamins, like Vitamin A, to utilize and absorb the protein. When we don’t eat fats that contain fat soluble vitamins like Vitamin A alongside our protein, we have to borrow it from our livers. If you do not regularly eat fat to replace what you’ve used, you will deplete your body of Vitamin A. Symptoms of Vitamin A deficiency dry skin, dry eyes, night blindness, infertility, poor growth, frequent infections, poor wound healing, acne, and memory problems. Learn more about the importance of fat here. 

The recipes below were three combinations that I came up with but I encourage you to experiment with your own combinations! I recommend choosing vegetables that can take plenty of fat as the whole point of this dish is to put more fat into your meat.

IMG_7643.jpg

Dairy Free Stuffed Game Steaks

Legal on GAPS Stage 2

Ingredients for Dairy Free Stuffed Game Meat:

  • 2-3 Small Elk Steaks

  • 3 tbsp Onion

  • 1 Small Stalk Celery

  • ¼ - ½ Red Pepper

  • 3 Small Cremini Mushrooms

  • 2-3 Cloves of Garlic

  • 2 tbsp of lard or other fat 

Directions:

IMG_7595.jpg

Butterfly the elk steaks. Do not cut all the way through.

Preheat the oven to 350°. Finely chop all the vegetables to the same size. 

IMG_7655.jpg

Add lard or other fat to a small pan and turn heat to medium. Once fat is melted, all add vegetables and stir to coat with fat. Add salt and pepper to taste. For added fat, you could also add pieces of bacon, marrow, or other pieces of fat. 

Once the mixture is soft and mostly cooked, remove from heat.

IMG_7671.jpg

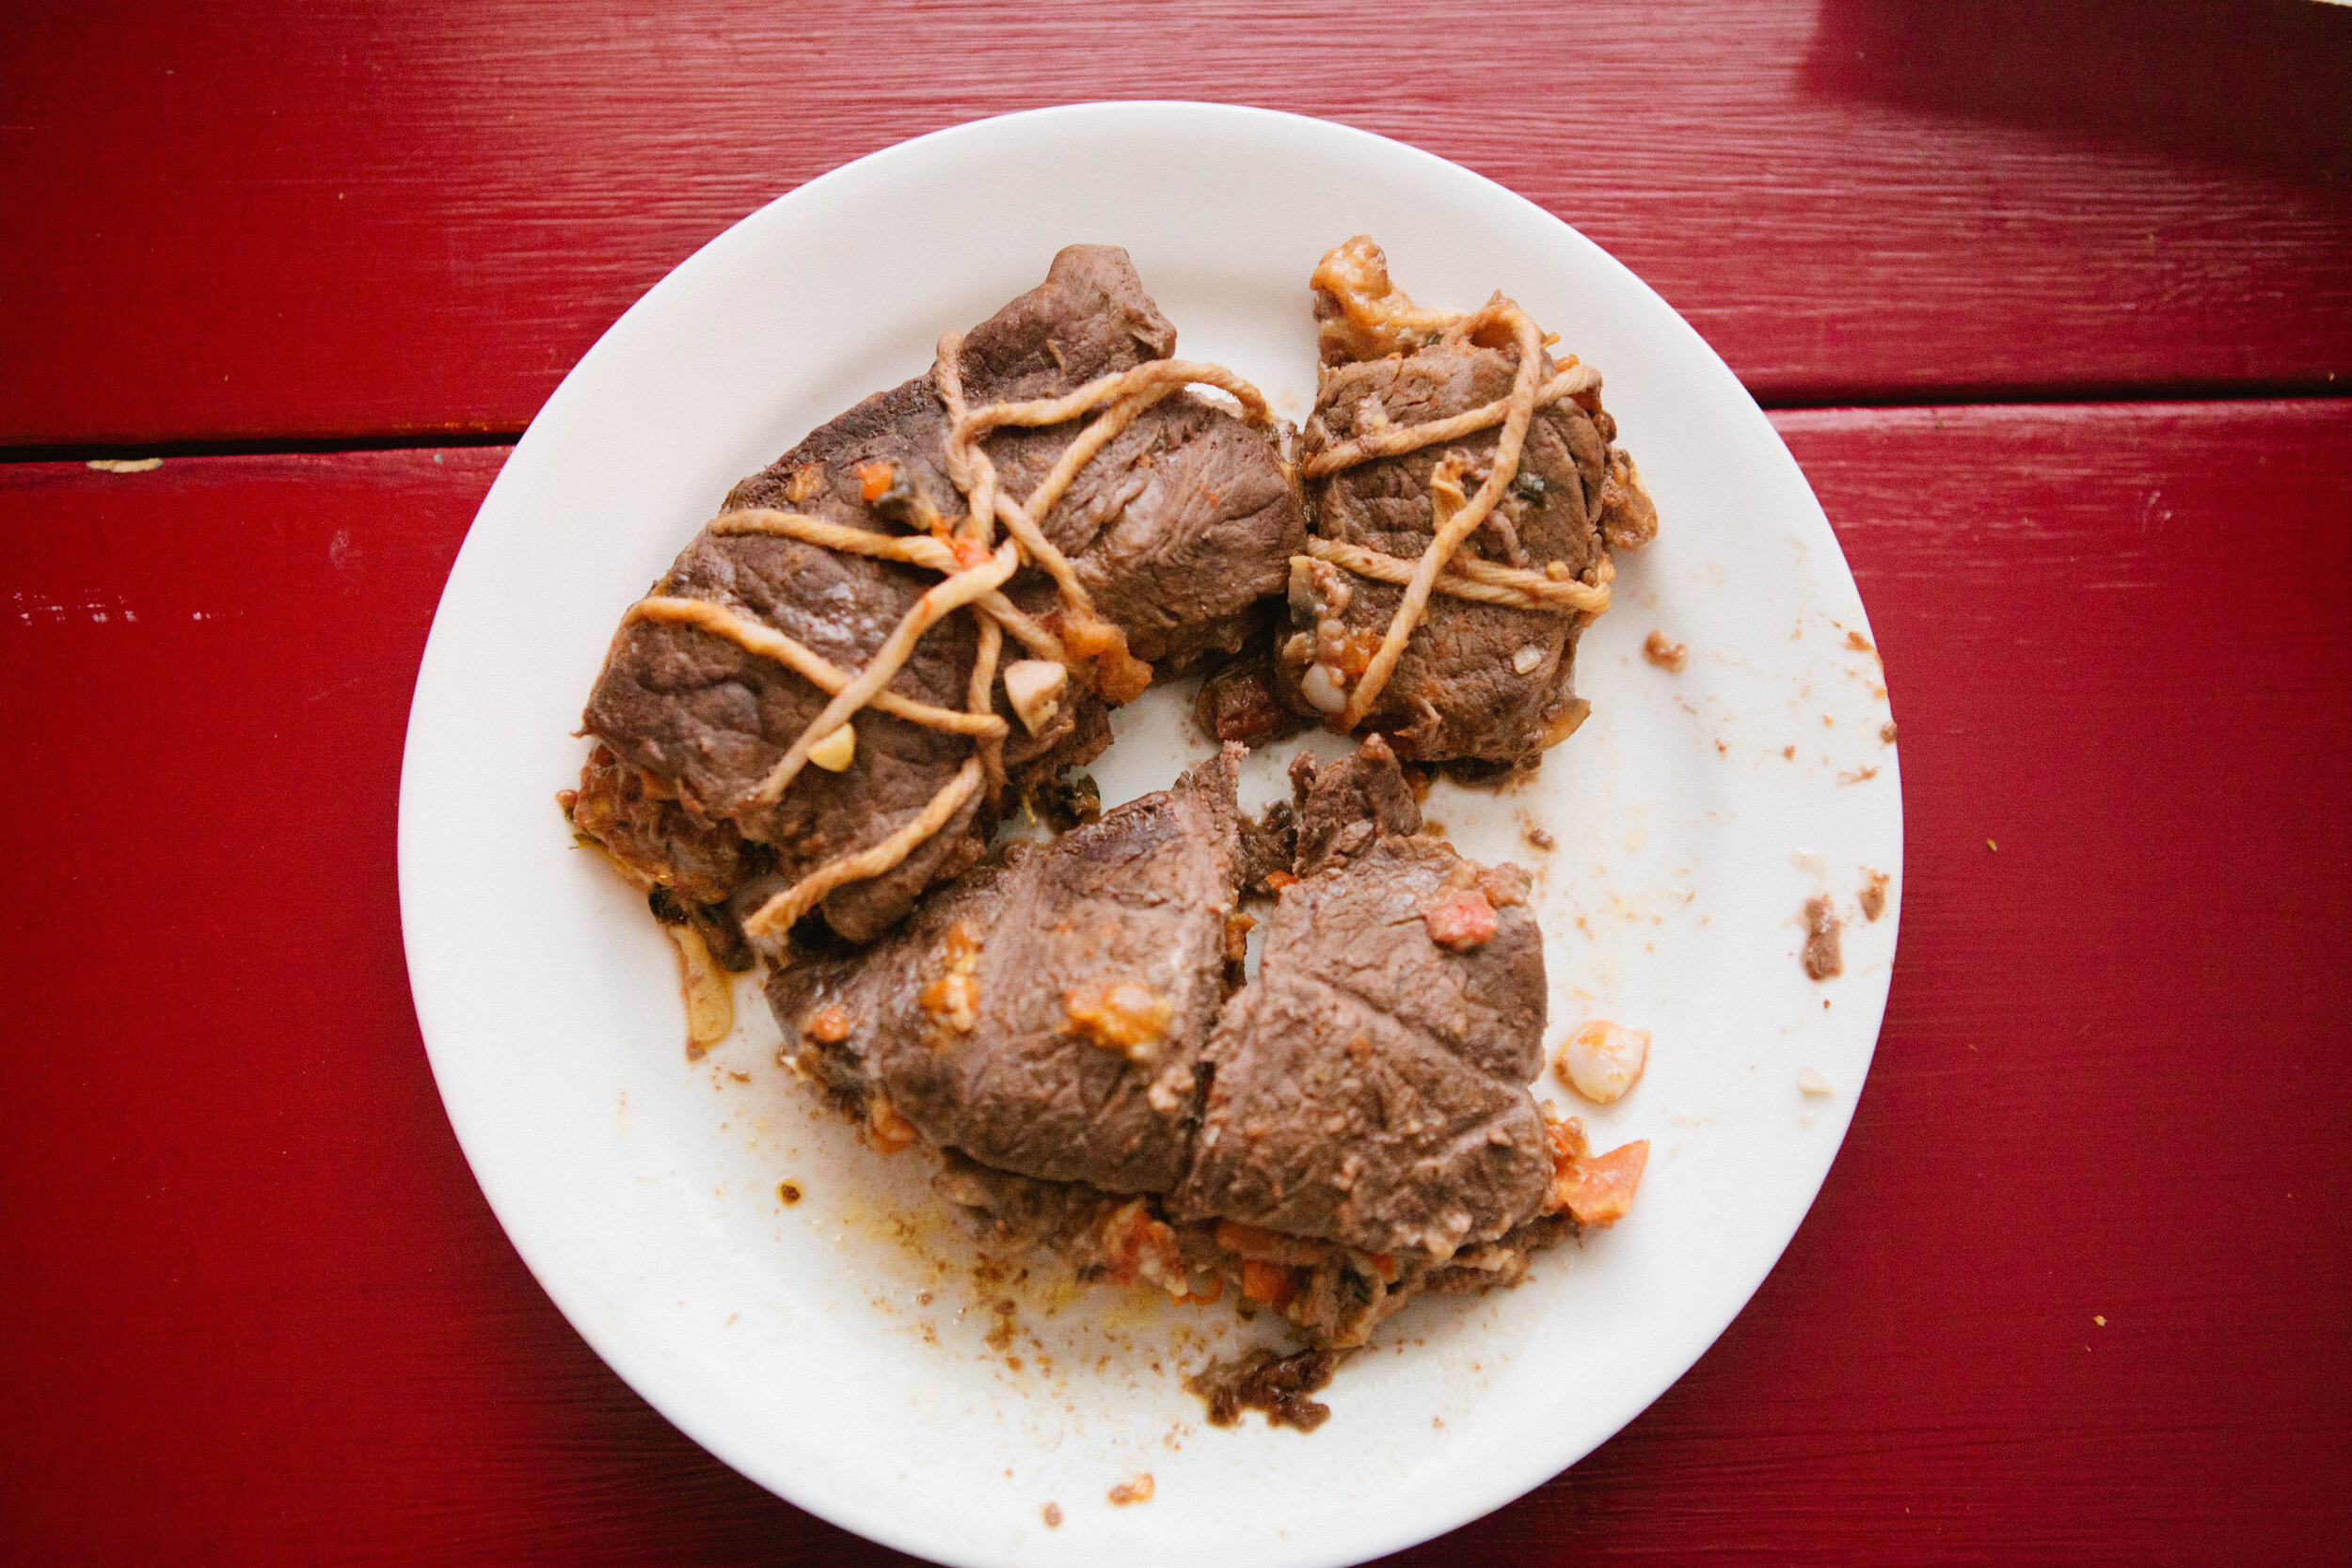
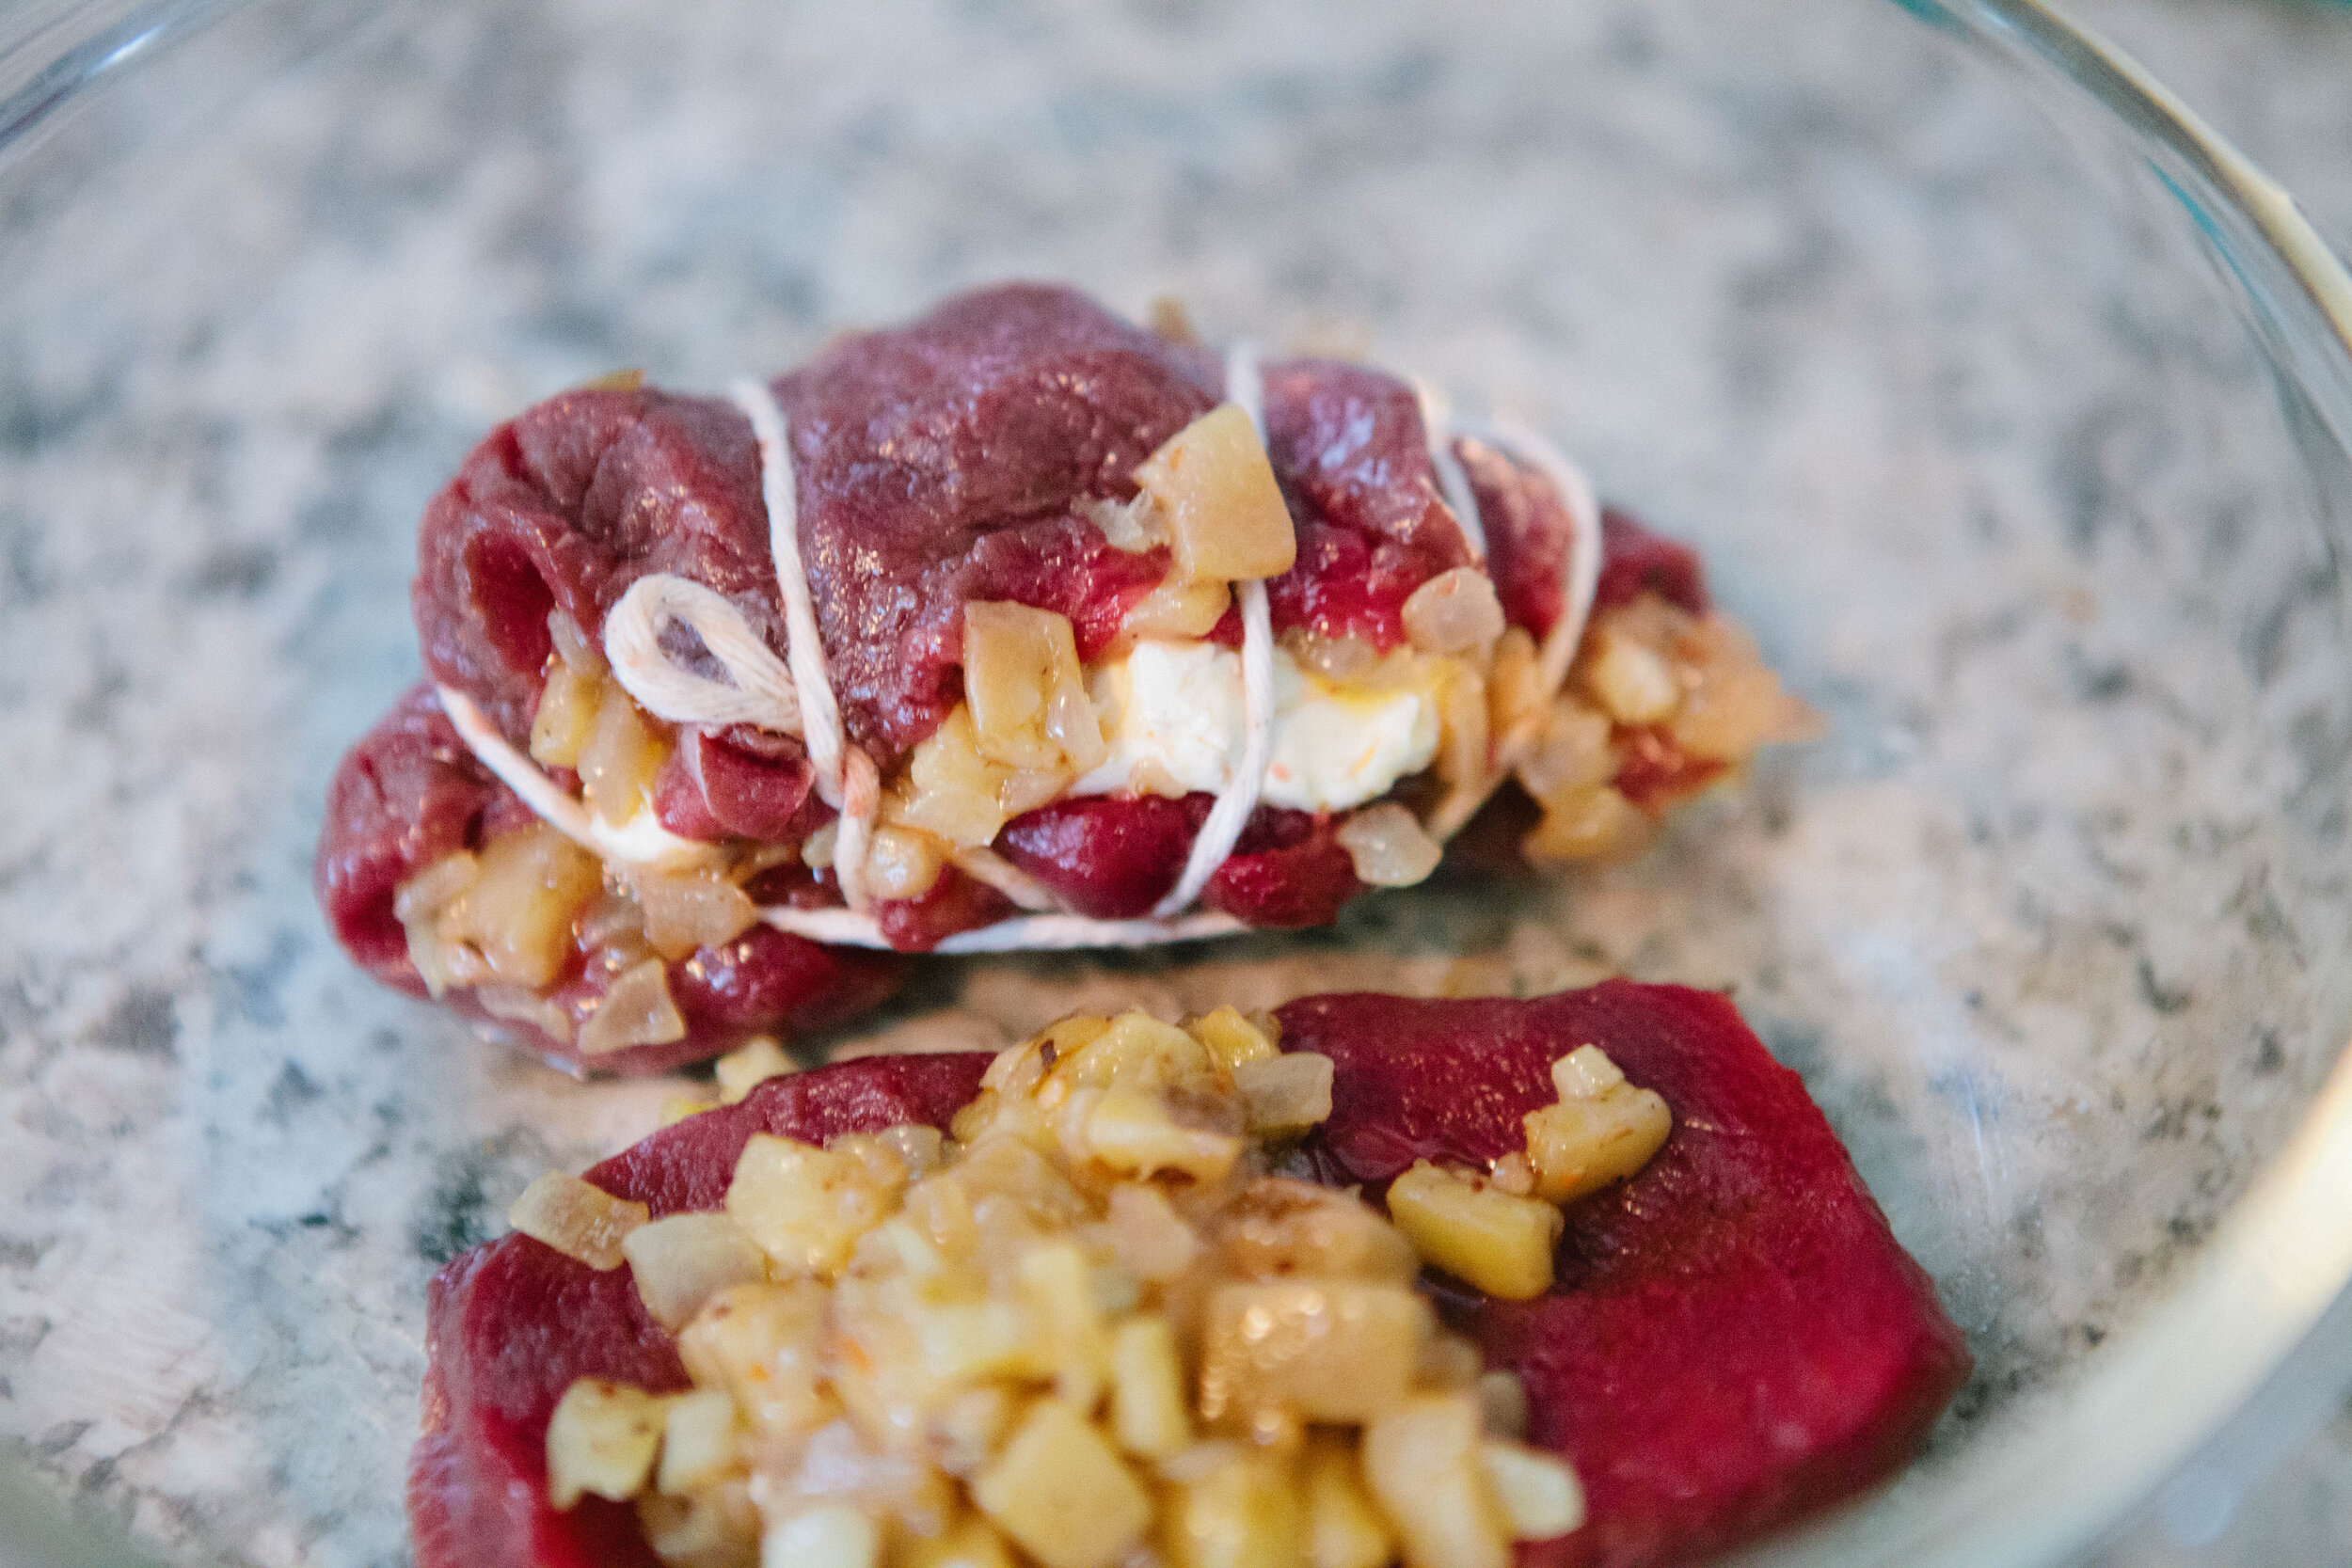
Using a spoon or your fingers, stuff the steaks with ⅓ of the mixture. Roll or fold the meat together, securing with butcher twine.

IMG_7678.jpg

Top with additional teaspoon of fat and salt. I recommend using tallow or lard on top as butter will burn easily (and is not dairy free.) Cover and place in an oven for 20-25 minutes until the juices are clear.

Let sit for 10 minutes to rest.

Dairy Free Stuffed Game Meat Steaks

Author: Amy Mihaly, Be Well Clinic

Ingredients

  • 2-3 Small Elk Steaks
  • 3 tbsp Onion
  • 1 Small Stalk Celery
  • ¼ - ½ Red Pepper
  • 3 Small Cremini Mushrooms
  • 3 Cloves of Garlic
  • 2 tbsp of lard or other fat

Instructions

  1. Butterfly the elk steaks. Do not cut all the way through.
  2. Preheat the oven to 350°. Finely chop all the vegetables to the same size.
  3. Add lard or other fat to a small pan and turn heat to medium. Once fat is melted, all add vegetables and stir to coat with fat. Add salt and pepper to taste. For added fat, you could also add pieces of bacon, marrow, or other pieces of fat.
  4. Once the mixture is soft and mostly cooked, remove from heat.
  5. Using a spoon or your fingers, stuff the steaks with ⅓ of the mixture. Roll or fold the meat together, securing with butcher twine.
  6. Top with additional teaspoon of fat and salt. I recommend using tallow or lard on top as butter will burn easily (and is not dairy free.) Cover and place in an oven for 20-25 minutes until the juices are clear.
  7. Let sit for 10 minutes to rest.

Italian Stuffed Game Steaks

Legal on Full GAPS

Ingredients for Italian Stuffed Game Meat:

  • 2-3 Small Elk Steaks

  • 3 Cloves Garlic

  • 1 Large Tomatoes

  • 2 Cremini Mushrooms

  • 1 ½  oz Freshly Grated Mozzarella Cheese

  • 2 tbsp of Butter or Other Fat

  • 1 Heaping tsp Oregano

  • 4 Fresh Leaves or 1 Heaping tsp Basil

  • Salt

  • Pepper

Directions:

IMG_7603.jpg

Butterfly the elk steaks. Do not cut all the way through.

IMG_7649.jpg

Preheat the oven to 350°. Finely dice the tomatoes and chop the garlic.

Add 2 tbsp of butter or other fat to a pan and turn heat to medium. Once fat is melted, add in the onion, mushrooms, and tomatoes.

While the mixture cooks, grate your mozzarella cheese.

Once the mixture is soft and mostly cooked, remove from heat. Add cheese into mixture and stir to melt slightly.

Using a spoon or your fingers, stuff the steaks with ⅓ of the mixture. Roll or fold the meat together, securing with butcher twine.

IMG_7756.jpg

Top with additional teaspoon of fat and salt. I recommend using tallow or lard on top as butter will burn easily. Cover and place in an oven for 20-25 minutes until the juices are clear.

Let sit for 10 minutes to rest.

Hello

Italian Stuffed Game Steaks

Author: Amy Mihaly, Be Well Clinic

Ingredients

  • 2-3 Small Elk Steaks
  • 3 Cloves Garlic
  • 1 Large Tomatoes
  • 2 Cremini Mushrooms
  • 1 ½ oz Freshly Grated Mozzarella Cheese
  • 2 tbsp of Butter or Other Fat
  • 1 Heaping tsp Oregano
  • 4 Fresh Leaves or 1 Heaping tsp Basil
  • Salt
  • Pepper

Instructions

  1. Butterfly the elk steaks. Do not cut all the way through.
  2. Preheat the oven to 350°. Finely dice the tomatoes and chop the garlic.
  3. Add 2 tbsp of butter or other fat to a pan and turn heat to medium. Once fat is melted, add in the onion, mushrooms, and tomatoes.
  4. While the mixture cooks, grate your mozzarella cheese.
  5. Once the mixture is soft and mostly cooked, remove from heat. Add cheese into mixture and stir to melt slightly.
  6. Using a spoon or your fingers, stuff the steaks with ⅓ of the mixture. Roll or fold the meat together, securing with butcher twine.
  7. Top with additional teaspoon of fat and salt. I recommend using tallow or lard on top as butter will burn easily. Cover and place in an oven for 20-25 minutes until the juices are clear.
  8. Let sit for 10 minutes to rest.
, World!


Cream Cheese Eggplant Stuffed Game Steaks

Legal on Full GAPS, as long as you’re tolerating cream cheese

Ingredients for Cream Cheese and Eggplant Stuffed Game Meat:

  • 2-3 Small Elk Steaks

  • 3 tbsp Chopped Onion

  • ½ cup of Chopped Eggplant

  • 3 cloves Garlic

  • 3-4 tbsp Butter

  • ½ tsp Mace

  • 4 Juniper Berries

  • 2-3 tbsp Cream Cheese

Directions:

IMG_7604.jpg

Butterfly the elk steaks. Do not cut all the way through.

Preheat the oven to 350°.

IMG_7633.jpg

Finely chop the onion, eggplant and garlic. In a pan add 3-4 tbsp of butter. Eggplant is notorious for grabbing up lots of fat, which makes it a great choice for this recipe. If you find your fat is disappearing, don’t be afraid to add more!

Crush mace and juniper berries.

Once the mixture is soft and mostly cooked, remove from heat.

IMG_7701.jpg

Using a spoon or your fingers, stuff the steaks with ⅓ of the mixture, a piece of cream cheese, and a small piece of fat. Roll or fold the meat together, securing with butcher twine.

Top with additional teaspoon of fat and salt. I recommend using tallow or lard on top as butter will burn easily. Cover and place in an oven for 20=25 minutes until the juices are clear.

Let sit for 10 minutes to rest.

IMG_7697.jpg

Cream Cheese Eggplant Stuffed Game Steaks

Author: Amy Mihaly, Be Well Clinic

Ingredients

  • 2-3 Small Elk Steaks3 tbsp Chopped Onion
  • ½ cup of Chopped Eggplant
  • 3 cloves Garlic
  • 4 tbsp Butter
  • ½ tsp Mace
  • 4 Juniper Berries
  • 3 tbsp Cream Cheese

Instructions

  1. Butterfly the elk steaks. Do not cut all the way through.
  2. Preheat the oven to 350°.
  3. Finely chop the onion, eggplant and garlic. In a pan add 3-4 tbsp of butter. Eggplant is notorious for grabbing up lots of fat, which makes it a great choice for this recipe. If you find your fat is disappearing, don’t be afraid to add more!
  4. Crush mace and juniper berries.
  5. Once the mixture is soft and mostly cooked, remove from heat.
  6. Using a spoon or your fingers, stuff the steaks with ⅓ of the mixture, a piece of cream cheese, and a small piece of fat. Roll or fold the meat together, securing with butcher twine.
  7. Top with additional teaspoon of fat and salt. I recommend using tallow or lard on top as butter will burn easily. Cover and place in an oven for 20=25 minutes until the juices are clear.
  8. Let sit for 10 minutes to rest.

StuffedGameMeat3Ways.png

2021 Clinic Visions

2021 Clinic Visions

2020 brought so many opportunities for growth! For many reasons, people became more interested in learning about their bodies and nutrition and began to take an active role in their own health - which is AWESOME! 2020 also brought a lot of growth for our clinic. Our mission has always been to help you be empowered in understanding your body and working with your body on a journey of health. Because we grew so much, we needed to change a few things.

Warm Roasted Vegetable Salad

I am always shocked at how delicious roasted vegetables are, and wonder why I don’t do it more often! It does take a little bit of forethought and prep as it takes approximately 40 minutes to roast vegetables. But it’s well worth the effort whenever you remember to roast.

Although not what you would typically think of as a salad, this vegetable medley is a perfect salad for cozy winter days. 

It’s a great way to use any vegetables that you need to use up or have leftover pieces of. You can also roast them using any type of fat that you have on hand. I generally prefer using lard because I prefer the taste of lard better. I used tallow to make this recipe because that’s what I had on hand.

Ingredients for Roasted Vegetable Salad:

  • 1 Delicata Squash

  • 4-6 Carrots

  • 1 Beets

  • ½ Onion

  • 1 Head of Garlic Cloves, in Papers (you will remove the papers after baking and before serving)

  • ¼ - ½ cup of Fat Tallow or Lard

  • Homemade Salad Dressing

Directions for Roasted Vegetable Salad:

IMG_7810.jpg

Preheat the oven to 400. Slice the delicata squash and remove the seeds. There is no need to peel your squash. Dice into cubes.

Cut your other vegetables into similarly sized pieces for even cooking. . Remember if you choose to add beets, you will have a distinctly beet flavor no matter what other vegetables you add to your salad. But beets are great for the gallbladder and the liver and should be consumed regularly.

IMG_7815.jpg

Add the garlic cloves in their paper to the pan. This prevents them from burning. Add fat of choice to the top of the pan.

Place the pan into the oven. After about 15 minutes, stir the melted fat and vegetables. Add more fat if your vegetables do not appear to be moistened enough. 

Continue to cook for another 30-40 minutes until vegetables are soft.

IMG_7941.jpg

When vegetables are soft, take them out of the oven. Toss them with salad dressing.

Serve & enjoy!


WarmRoastedVegetableSalad.png

Warm Roasted Vegetable Salad

Author: Amy Mihaly, Be Well Clinic

Ingredients

  • 1 Delicata Squash
  • 6 Carrots
  • 1 Beets
  • ½ Onion
  • 1 Head of Garlic Cloves, in Paper
  • ¼ - ½ cup of Fat Tallow or Lard
  • Homemade Salad Dressing

Instructions

  1. Preheat the oven to 400. Slice the delicata squash and remove the seeds. There is no need to peel your squash. Dice into cubes.
  2. Cut your other vegetables into similarly sized pieces for even cooking. . Remember if you choose to add beets, you will have a distinctly beet flavor no matter what other vegetables you add to your salad. But beets are great for the gallbladder and the liver and should be consumed regularly.
  3. Add the garlic cloves in their paper to the pan. Add fat of choice to the top of the pan.
  4. Place the pan into the oven. After about 15 minutes, stir the melted fat and vegetables. Add more fat if your vegetables do not appear moistened.
  5. Continue to cook for another 30-40 minutes until vegetables are soft.
  6. When vegetables are soft, take them out of the oven. Toss them with salad dressing.
  7. Serve & enjoy!

Kid Friendly Rainbow Ferment

One of the best ways to get kids excited about eating real food is to make it fun! You can do this by making the preparation or cooking process fun, giving it a fun name, or making the presentation fun, like eating “Ants on a Log”.

When giving fermented food to your children, it’s best to consider what vegetables they already like and in what forms. For example, if your child really likes coleslaw, then sauerkraut will likely be a favorite but if they like carrot sticks, ginger carrots will probably go over well.

IMG_2506.jpg

Feel free to discuss and replace any of these vegetables with vegetables of similar color that your family likes better. You should be able to make this fun and interactive ferment a family favorite.

Some of my favorite salts for ferments are baja gold and Redman’s real salt. 

Ingredients for Rainbow Ferment:

  • Red Beets

  • Carrots

  • Yellow Pepper

  • Broccoli

  • Purple Cabbage

  • Baja Salt

  • Water

Directions for Rainbow Ferment:

IMG_2496.jpg

Fill a quart mason jar most of the way with cold filtered water. Remember filtered water is very important here otherwise you will kill your ferment.

Add 3 tbsp of salt. Stir to dissolve completely.

IMG_2520.jpg

Cut the vegetables into bite size pieces and layer them in the jar in rainbow color order. Try not to overfill the jar. The vegetables should not come any taller than the shoulder of the jar. A jar that is too full is more likely to leak and make a mess in your kitchen.

IMG_2552.jpg

When you get to the cabbage, set aside one full small leaf. Fill the jar with the brine up to the shoulder. Add the cabbage leaf to the top to hold all the vegetables under the level of the water.

Wipe off the top of the jar & add a lid and band. Close to finger tightness.

Leave on the counter for 5-7 days. Then move to cold storage.


RecipeforKidFriendlyRainbowFerment.png

Kid Friendly Rainbow Ferment

Author: Amy Mihaly, Be Well Clinic

Ingredients

  • Red Beets
  • Carrots
  • Yellow Pepper
  • Broccoli
  • Purple Cabbage
  • Baja Salt
  • Water

Instructions

  1. Fill a quart mason jar most of the way with cold filtered water. Remember filtered water is very important here otherwise you will kill your ferment.
  2. Add 3 tbsp of salt. Stir to dissolve completely.
  3. Cut the vegetables into bite size pieces and layer them in the jar in rainbow color order. Try not to overfill the jar. The vegetables should not come any taller than the shoulder of the jar. A jar that is too full is more likely to leak and make a mess in your kitchen.
  4. When you get to the cabbage, set aside one full small leaf. Fill the jar with the brine up to the shoulder. Add the cabbage leaf to the top to hold all the vegetables under the level of the water.
  5. Wipe off the top of the jar & add a lid and band. Close to finger tightness.
  6. Leave on the counter for 5-7 days. Then move to cold storage.
Created using The Recipes Generator

How to Make Homemade Raw Milk Eggnog

Fun fact about eggnog - it’s mentioned in Laura Ingalls Wilder’s Farmer Boy. “Father always maintained that a man would do more work in his twelve hours, if he had a rest and all the egg-nog he could drink, morning and afternoon.”

Not only did I learn that eggnog was a way to preserve bountiful milk and eggs for summer to winter, this recipe has historically been used to maintain productive work in the sun and nurse the sick back to health. I believe that the high fat content combined with the rich vitamins A & D in milk, specifically raw milk, which are known to be very helpful to the immune system, is what is so helpful about this recipe.

Since you are using raw eggs for this recipe, you want to make sure they are from healthy chickens - and good eggs! If you don’t have access to farm fresh eggs, learn more about commercial egg quality here.

If you are not working with raw milk for your recipe, you may want to re-pasteurize your milk before making this recipe. Because pasteurized milk can putrefy, it’s probably not safe to leave it to age for as long, depending on your alcohol content of the mixture. 

This has a fairly mild sweet. If you are looking for a sweeter drink, I recommend adding more sweetener.

Ingredients for Homemade Eggnog:

  • 6 Eggs

  • 3 Egg Whites

  • 1 Quart Raw Milk

  • Generous ½ cup Maple Syrup (If you’re looking for a sweet drink, add more!)

  • ¼ - ½ tsp Freshly Ground Nutmeg

  • 200 ml Brandy or Bourbon

Directions for Homemade Eggnog:

Learn to make your own eggnog from rawmilk. a recipe full of healthy fats! Recipe by Amy Mihaly, Certified GAPS Practitioner from Be Well Clinic, Loveland, Colorado.

Separate 6 eggs into yolks and whites. Beat the egg whites until stiff peaks form. Beat the egg yolks until the color changes. 

In a separate large bowl, add the raw milk. If you plan to serve this at a party function, add the raw milk to what you plan to serve the eggnog in so as not to disrupt the mixture later. Carefully mix the egg whites and egg yolks together.

Learn to make your own eggnog from rawmilk. a recipe full of healthy fats! Recipe by Amy Mihaly, Certified GAPS Practitioner from Be Well Clinic, Loveland, Colorado.

Add the maple syrup, nutmeg and brandy to the egg white/yolk/raw milk mixture.

Chill the mixture in the fridge while you whip the remaining 3 egg whites into stiff peaks.

Learn to make your own eggnog from rawmilk. a recipe full of healthy fats! Recipe by Amy Mihaly, Certified GAPS Practitioner from Be Well Clinic, Loveland, Colorado.

Carefully fold the egg whites into the chilled mixture. 

Place in fridge to chill again for a couple hours to a couple days.

Learn to make your own eggnog from rawmilk. a recipe full of healthy fats! Recipe by Amy Mihaly, Certified GAPS Practitioner from Be Well Clinic, Loveland, Colorado.

Ladle into glasses and top with more grated nutmeg.

Serve and enjoy!


Learn to make your own eggnog from rawmilk. a recipe full of healthy fats! Recipe by Amy Mihaly, Certified GAPS Practitioner from Be Well Clinic, Loveland, Colorado.

Homemade Raw Milk Eggnog

Author: Amy Mihaly, Be Well Clinic

Ingredients

  • 6 Eggs
  • 3 Egg Whites
  • 1 Quart Raw Milk
  • Generous ½ cup Maple Syrup (If you’re looking for a sweet drink, add more!)
  • ¼ - ½ tsp Freshly Ground Nutmeg
  • 200 ml Brandy or Bourbon

Instructions

  1. Separate 6 eggs into yolks and whites. Beat the egg whites until stiff peaks form. Beat the egg yolks until the color changes.
  2. In a separate large bowl, add the raw milk. If you plan to serve this at a party function, add the raw milk to what you plan to serve the eggnog in so as not to disrupt the mixture later. Carefully mix the egg whites and egg yolks together.
  3. Add the maple syrup, nutmeg and brandy to the egg white/yolk/raw milk mixture.
  4. Chill the mixture in the fridge while you whip the remaining 3 egg whites into stiff peaks.
  5. Carefully fold the egg whites into the chilled mixture.
  6. Place in fridge to chill again for a couple hours to a couple days.
  7. Ladle into glasses and top with more grated nutmeg.
  8. Serve and enjoy!
Created using The Recipes Generator

Panna Cotta

Panna cotta is Italian for “cooked cream.” I’ve never had panna cotta before but it seemed to be a good recipe to make as it is full of delicious fats and gelatin. I was not disappointed! This simple recipe turned out perfectly the first time and I will definitely be making it again!

I was gifted some goblets but you can really use any small bowl as a mold. You can also remove your panna cotta from the molds once it is set and top your panna cotta with a fruit sauce like this strawberry sauce or a rich chocolate fudge sauce. I felt that it was plenty sweet on it’s own but a sauce would take the wow factor up a notch.

I used date sugar for this recipe. I’m very excited to use this new sweetener for recipe! As far as I could tell, it’s minimally processed, just dried and pulverized dates. An additional test was to see how my body responded to it and it responded like it does to any other type of fruit sugar. I’m excited to use this as a fruit sweetener on GAPS and Full GAPS recipes!

Ingredients for Panna Cotta:

  • 1 cup raw milk

  • 2 ½ tsp gelatin

  • 2 cups cream

  • ½ cup + 1 tbsp date sugar

  • Pinch of Salt

  • 1 tsp vanilla extract

  • 1 cup sour cream

Directions for Panna Cotta:

An easy panna cotta recipe that is made with raw milk and is legal on the GAPS Diet. Panna Cotta recipe by Amy Mihaly, Certified GAPS Practitioner in Loveland, Colorado.

Place milk in a small sauce pan and sprinkle gelatin over. Let sit for 3 minutes until gelatin is soft.

Once gelatin is soft, place pan over low heat and stir until the gelatin fully dissolves. Do not boil!

An easy panna cotta recipe that is made with raw milk and is legal on the GAPS Diet. Panna Cotta recipe by Amy Mihaly, Certified GAPS Practitioner in Loveland, Colorado.

Add cream, date sugar, vanilla and salt. Stir constantly for five minutes until mixture is steaming and sugar is completely dissolved.

Remove from heat for 5 minutes.

An easy panna cotta recipe that is made with raw milk and is legal on the GAPS Diet. Panna Cotta recipe by Amy Mihaly, Certified GAPS Practitioner in Loveland, Colorado.

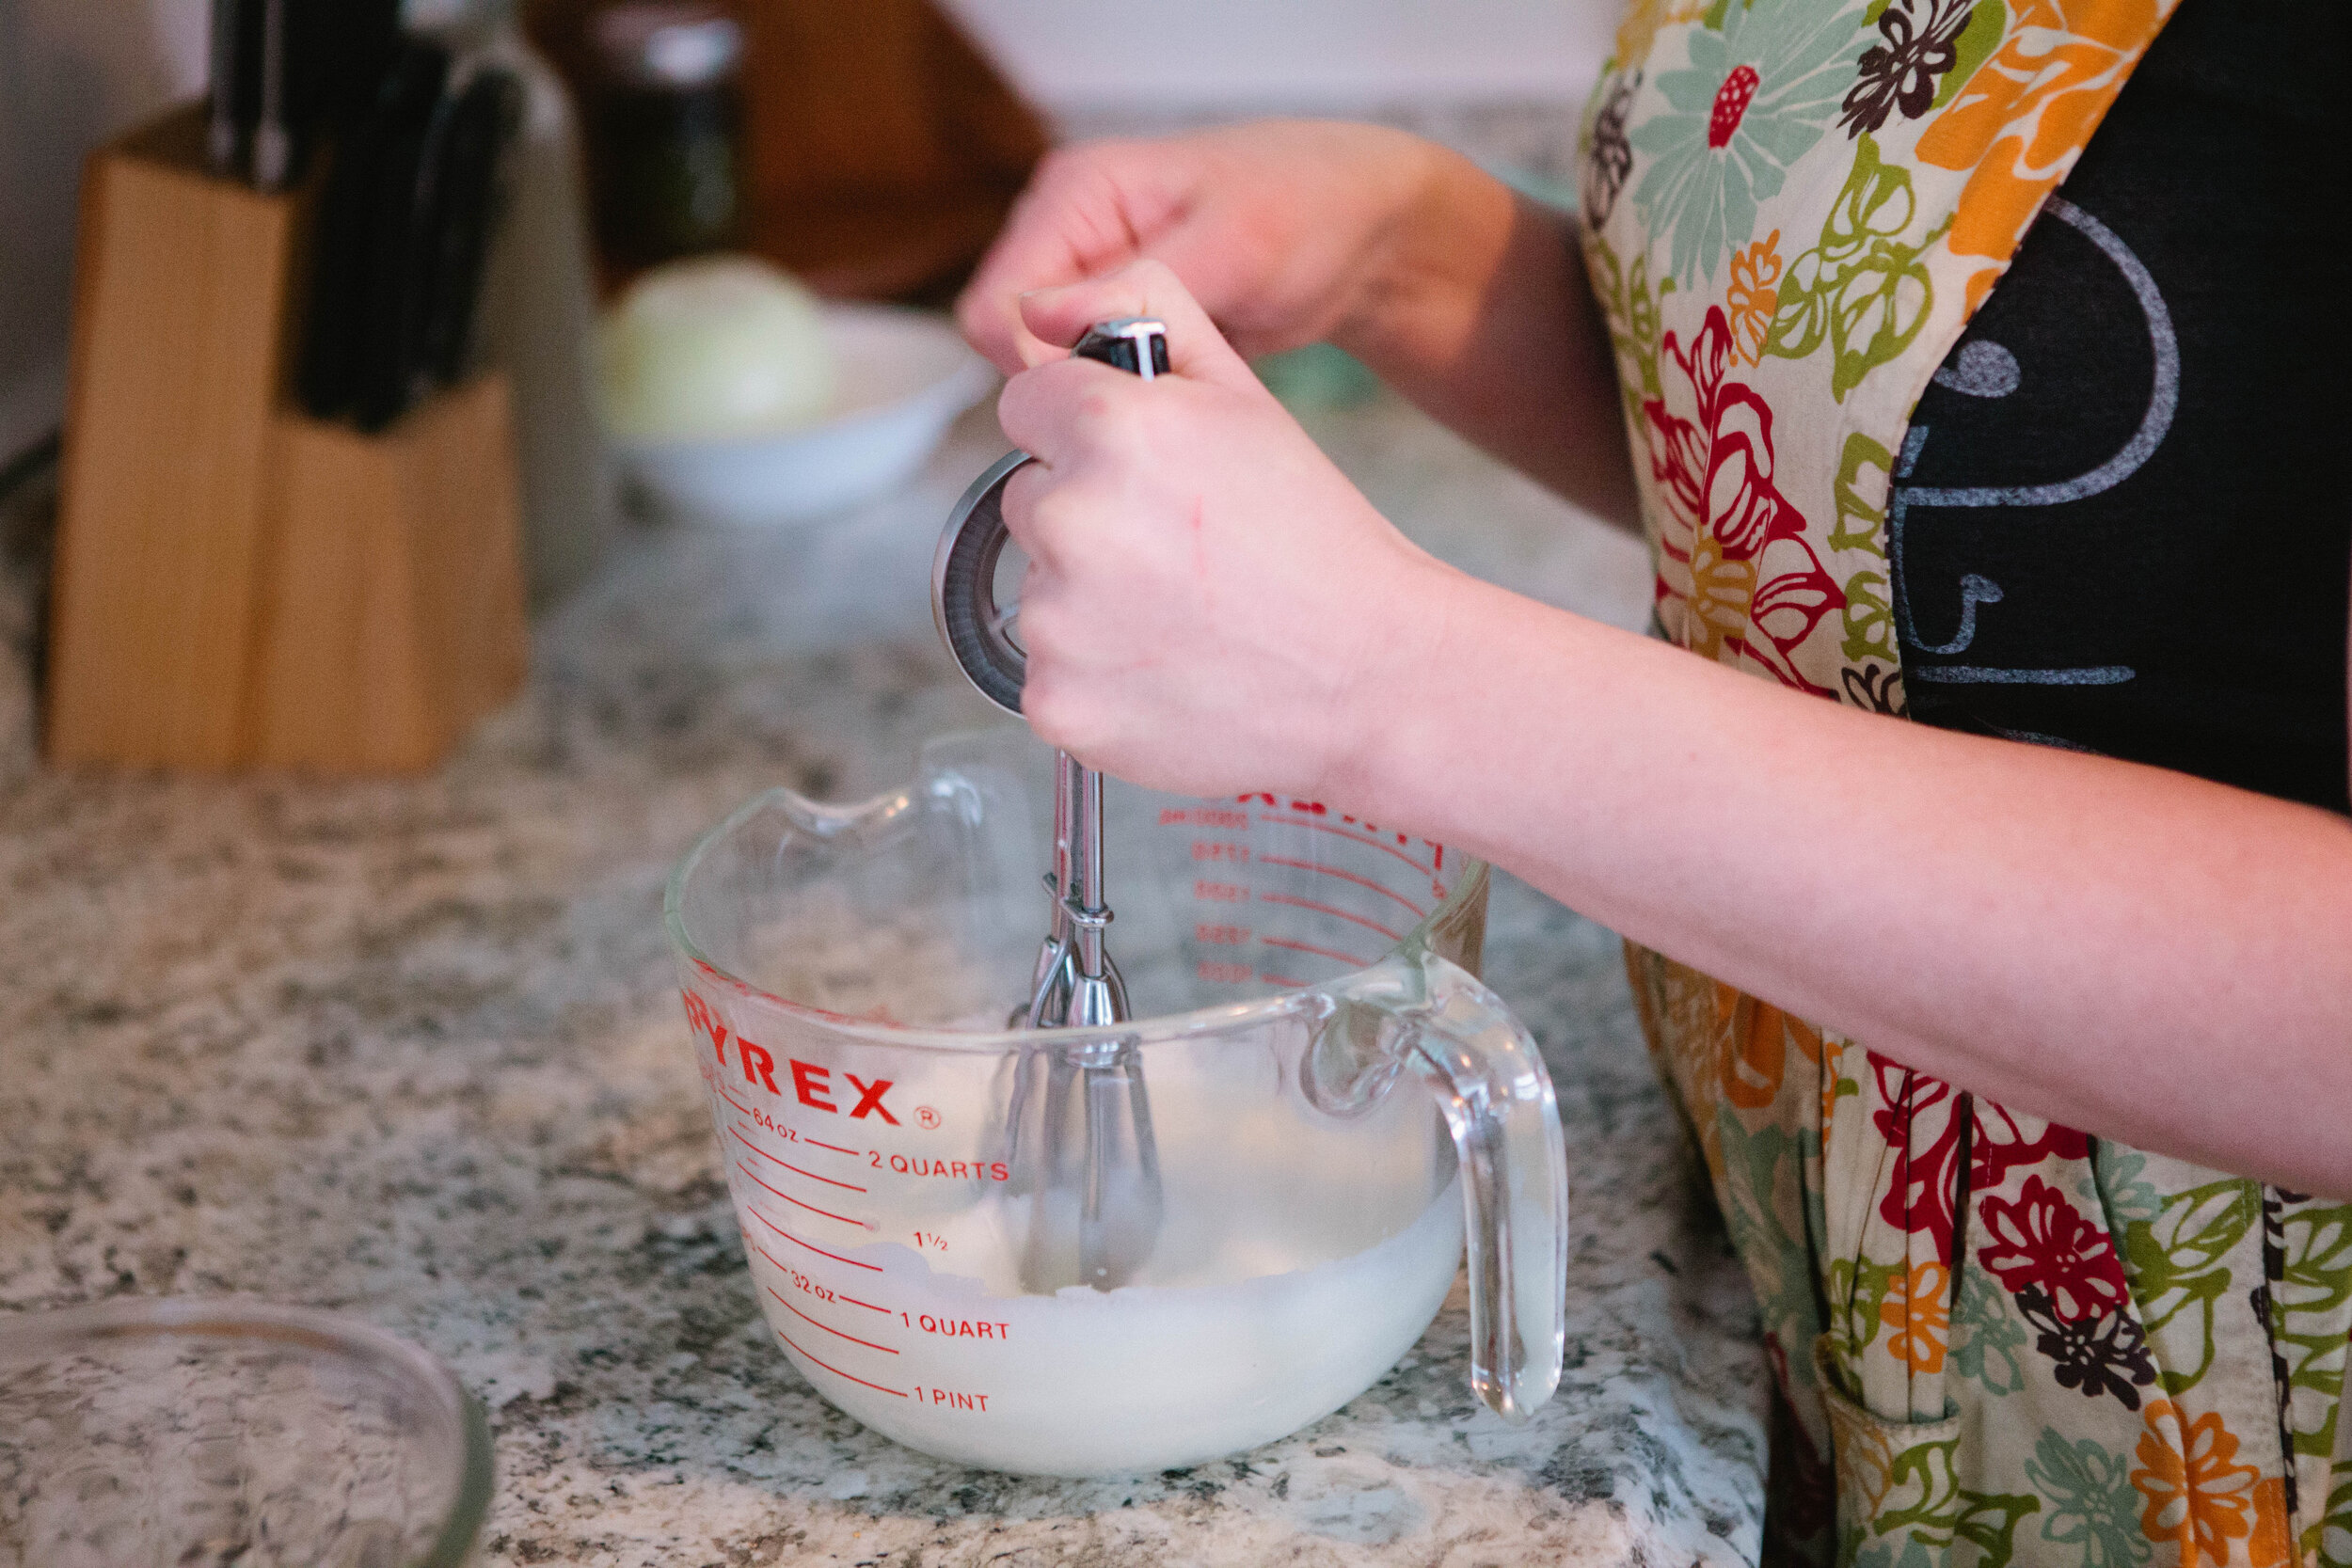
Place sour cream in a large measuring cup with a lip. Add the slightly cooled cream mixture & whisk constantly. Once the mixture is smoothed, pour into jars, ramekins, glasses or serving piece.


An easy panna cotta recipe that is made with raw milk and is legal on the GAPS Diet. Panna Cotta recipe by Amy Mihaly, Certified GAPS Practitioner in Loveland, Colorado.

Panna Cotta

Author: Amy Mihaly, Be Well Clinic

Ingredients

  • 1 cup raw milk
  • 2 ½ tsp gelatin
  • 2 cups cream
  • ½ cup + 1 tbsp date sugar
  • Pinch of Salt
  • 1 tsp vanilla extract
  • 1 cup sour cream

Instructions

  1. Place milk in a small sauce pan and sprinkle gelatin over. Let sit for 3 minutes until gelatin is soft.
  2. Once gelatin is soft, place pan over low heat and stir until the gelatin fully dissolves. Do not boil!
  3. Add cream, date sugar, vanilla and salt. Stir constantly for five minutes until mixture is steaming and sugar is completely dissolved.
  4. Remove from heat for 5 minutes.
  5. Place sour cream in a large measuring cup with a lip. Add the slightly cooled cream mixture & whisk constantly. Once the mixture is smoothed, pour into jars, ramekins, glasses or serving piece.
Created using The Recipes Generator

Coconut Macaroons

This is a really simple treat to make if you need an afternoon pick me up or to throw together a quick dessert for a special occasion.

Depending on what sugar you use for this recipe, you’ll be able to accommodate a wide variety of diets with this recipe. Because it’s also made mostly of air, it’s a nice way to eat a sweet treat without a lot of sugar.

With the leftover egg yolks from this recipe, try this easy Russian Custard recipe!

Ingredients for Coconut Macaroons:

  • 2 Egg Whites

  • 2 tbsp Date Sugar

  • 1 ½ cups Coconut Flakes

Directions:

These coconut macaroons are gluten free and dairy free. You can substitute any natural sugar you’d like, like date sugar. They are a great GAPS Legal treat!

Preheat oven to 325.

Beat egg whites until stiff with peaks.

These coconut macaroons are gluten free and dairy free. You can substitute any natural sugar you’d like, like date sugar. They are a great GAPS Legal treat!

Add in date sugar and mix gently. Fold in coconut flakes gently so as not to squish down air.

Form into cookies on a cookie sheet or heated baking stone.

Bake at 325 for 8-12 minutes.

The easiest way to remove these is to allow them to cool slightly first and then gently loosen with a spatula. 

Remove them from the baking sheet or stone and enjoy!

These coconut macaroons are gluten free and dairy free. You can substitute any natural sugar you’d like, like date sugar. They are a great GAPS Legal treat!

These coconut macaroons are gluten free and dairy free. You can substitute any natural sugar you’d like, like date sugar. They are a great GAPS Legal treat!

Coconut Macaroons

Author: The Be Well Clinic

Ingredients

  • 2 Egg Whites
  • 2 tbsp Date Sugar
  • 1 ½ cups Coconut Flakes

Instructions

  1. Preheat oven to 325.
  2. Beat egg whites until stiff with peaks.
  3. Add in date sugar and mix gently. Fold in coconut flakes gently so as not to squish down air.
  4. Form into cookies on a cookie sheet or heated baking stone.
  5. Bake at 325 for 8-12 minutes.
  6. The easiest way to remove these is to allow them to cool slightly first and then gently loosen with a spatula.
  7. Remove them from the baking sheet or stone and enjoy!
Created using The Recipes Generator

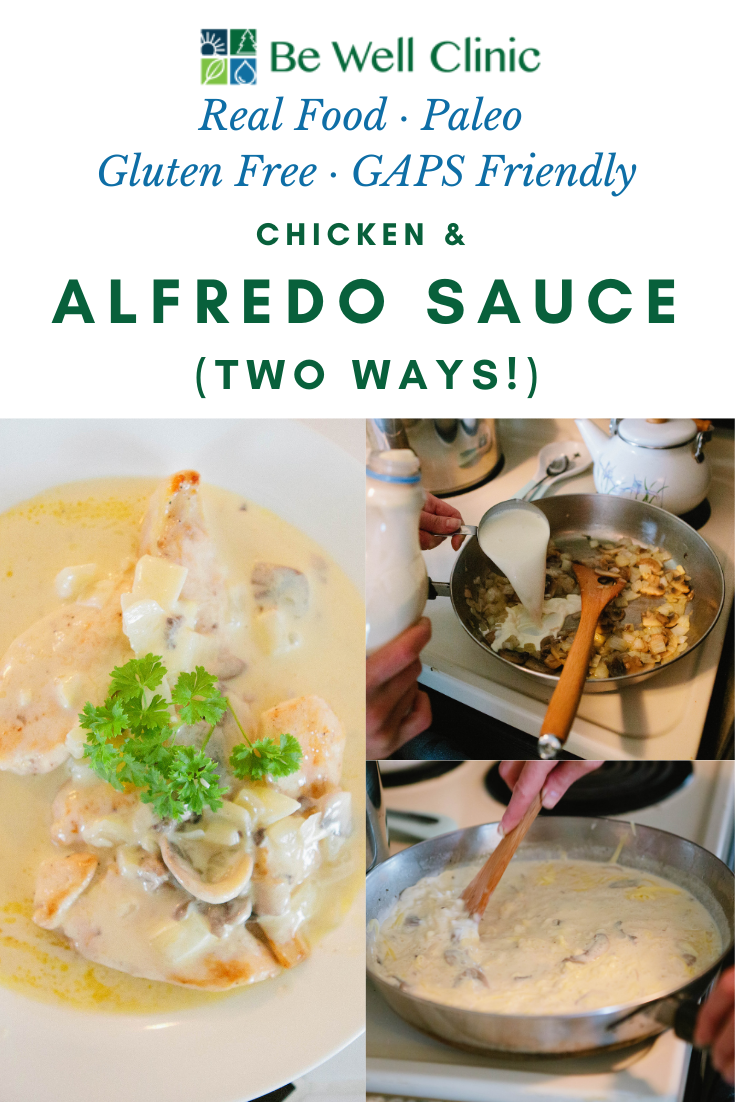
15 Minute Meal: Chicken & Alfredo Sauce, Two Ways

Alfredo Sauce used to be my favorite growing up but it often gave me a stomach-ache. I learned that was caused by a dairy intolerance and so I stopped eating it for many years. Now that I’ve healed my gut using the GAPS Protocol, I can freely enjoy dairy and alfredo sauce again!

Alfredo is a beautiful food because it is full of nourishing fats. It’s a food that gets a bad rap precisely because of this. Read more about the importance of fat here. Use alfredo sauce on whatever, like chicken, zoodles, pasta (I prefer Jovial as an ethically real food made option), or add extra stock and eat your alfredo as a nourishing, fat filled soup! Because it is so thick, you can also dip veggies or sourdough crackers in it.

I prefer a chunky sauce to a smooth sauce. However, if you want a pure smooth alfredo, you can add this sauce to a blender or use an immersion blender to really smooth it out.

Adding cheese to the sauce when it is too warm will cause it to curdle and ruin your dish. Keep the temperature low but not cool when you are ready to add the cheese. I made sure I could leave my finger in the sauce for a second or two before adding the cheese.

Below are two recipes to make alfredo sauce. If you’re following the GAPS Protocol, the bottom “Early Stage” recipe is for you and can be eaten from GAPS Stage 3 on as long as you are gently frying the mushrooms and onions in plenty of fat and do not burn. On the early stages of GAPS, top boiled chicken pieces with the alfredo sauce. On later stages, fry your pieces in fat! This recipe is a great way to get a lot of fat in your diet!

This recipe makes for a very cheesy and thick sauce. If you’d like a less dense sauce similar to more commercial canned varieties, simply add less cheese.

If you’re topping chicken, remember chicken cooks best high and quick so have your pan hot before adding your meat. I prefer small slices and pieces of chicken. Cook over high heat, turning every minute or so, until cooked through. 

Traditional Alfredo Sauce Ingredients:

  • 4 oz Mushrooms

  • ½ Onions

  • 3 Cloves of Garlic

  • 2-3 tbsp of butter

  • ½ tsp Salt, to taste. Depending on the saltiness of the cheese that you add, you may want to add less salt.

  • 1 tbsp Gelatin 

  • 2 cups of Whole Cream

  • 8 ounces of Freshly Grated Cheese (I used Havarit and Montery Jack but you can use any white cheese that you like)

Directions:

Alfredo Sauce is a great, fat rich meal that is simple to put together. Top chicken, zoodles or gluten free pasta with this easy sauce. Also includes a recipe for early stage GAPS Protocol. Recipe by Amy Mihaly, Be Well Clinic.

Roughly chop onion and slice mushrooms. Dice garlic.

Add at least 2 tbsp butter to a flat, large skillet. Once melted, add onions. Allow to cook for several minutes then add the mushrooms. If needed, add additional butter to give the mushrooms more fat to cook in.

In a small stock pot, add ¼ cup of filtered water and gelatin. Whisk mixture and allow to warm to blood temperature, about 100 degrees. Stir constantly to avoid burning.

Alfredo Sauce is a great, fat rich meal that is simple to put together. Top chicken, zoodles or gluten free pasta with this easy sauce. Also includes a recipe for early stage GAPS Protocol. Recipe by Amy Mihaly, Be Well Clinic.

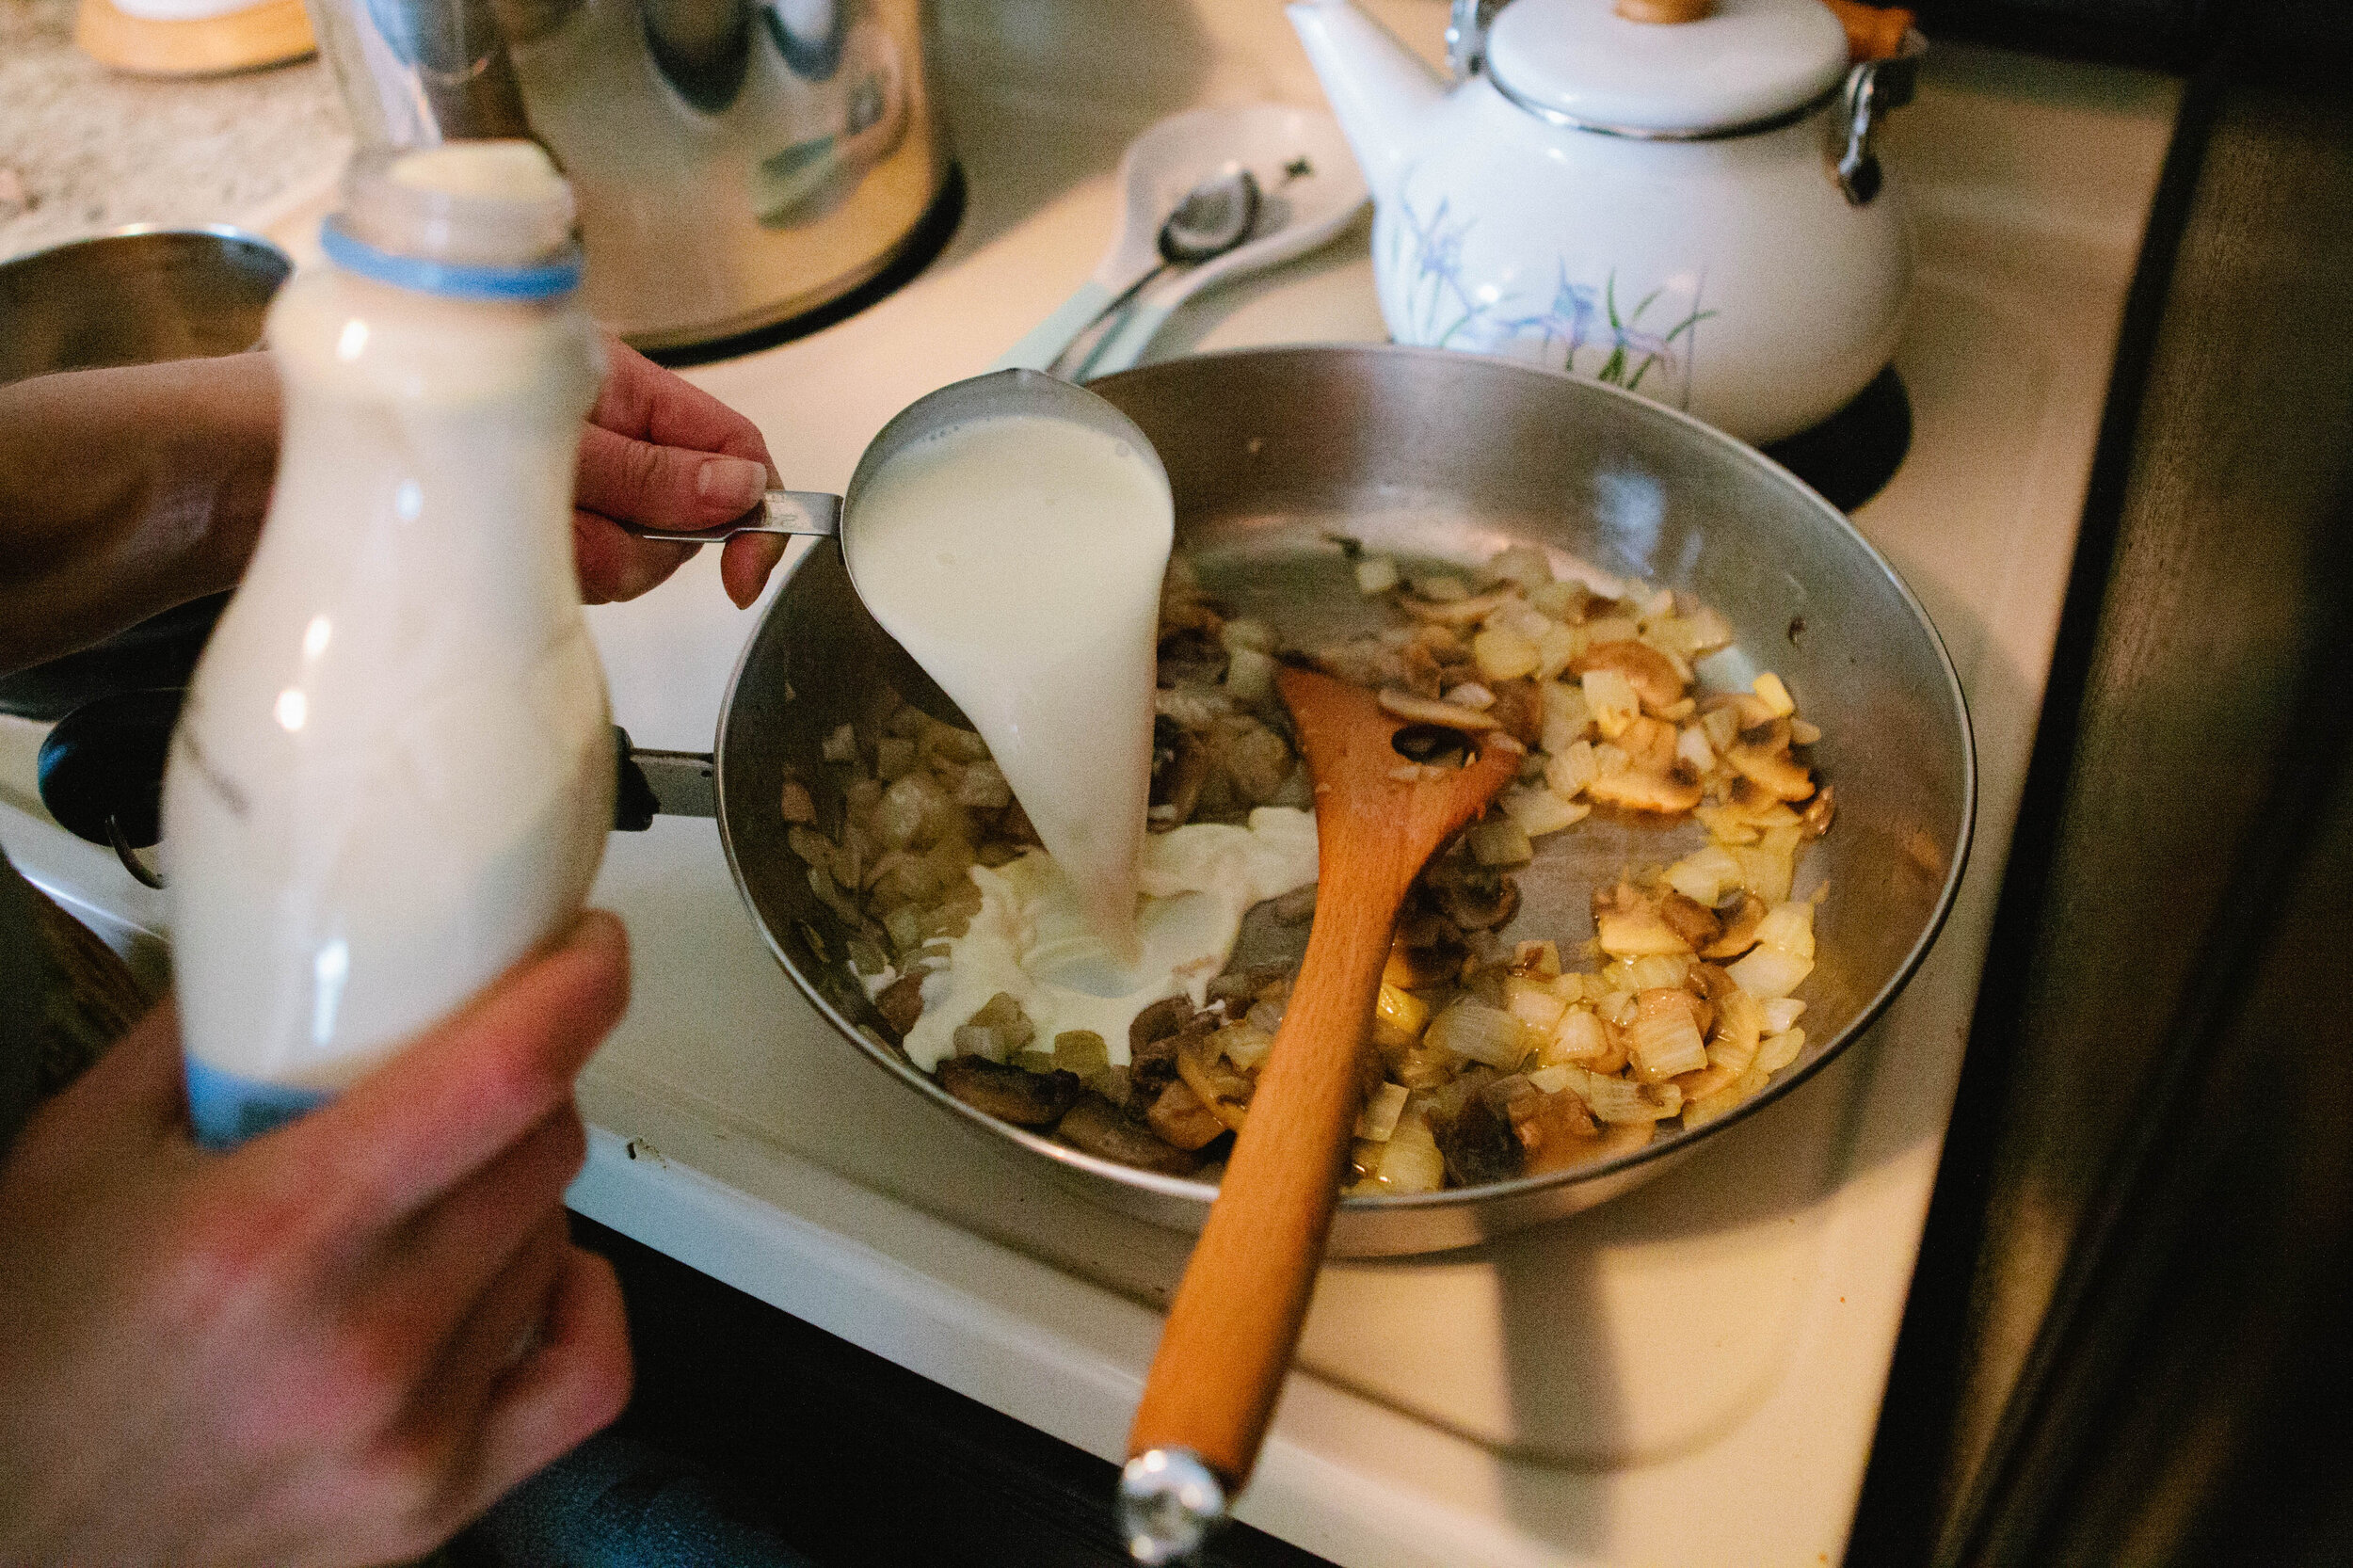
Reduce mushroom and onion mixture to a simmer. Add in the cream and heat to blood temperature. If gelatin is heated before the cream is heated, remove from heat.

Once cream is heated, add gelatin mixture and mix until smooth. Add ½ tsp of salt and freshly ground pepper to taste. You can also use white pepper if you’d like to keep the sauce white. Remove the sauce from the heat.

Grate your cheese fresh. Pre-grated cheese has additives in it that are no good!

Alfredo Sauce is a great, fat rich meal that is simple to put together. Top chicken, zoodles or gluten free pasta with this easy sauce. Also includes a recipe for early stage GAPS Protocol. Recipe by Amy Mihaly, Be Well Clinic.

Add your cheese into the slightly cooled sauce mixture and allow to melt. Whisk fully to melt and blend the cheese. Takes about 4-5 minutes to fully melt the cheese.

Pour over and enjoy!

When reheating this sauce, bring it to temperature slowly.

Alfredo Sauce is a great, fat rich meal that is simple to put together. Top chicken, zoodles or gluten free pasta with this easy sauce. Also includes a recipe for early stage GAPS Protocol. Recipe by Amy Mihaly, Be Well Clinic.

Traditional Alfredo Sauce

Author: The Be Well Clinic

Ingredients

  • 4 oz Mushrooms
  • ½ Onions
  • 3 Cloves of Garlic
  • 3 tbsp of butter
  • ½ tsp Salt, to taste. Depending on the saltiness of the cheese that you add, you may want to add less salt.
  • 1 tbsp Gelatin
  • 2 cups of Whole Cream 
  • 8 ounces of Freshly Grated Cheese (I used Havarit and Montery Jack but you can use any white cheese that you like)

Instructions

  1. Roughly chop onion and slice mushrooms. Dice garlic.
  2. Add at least 2 tbsp butter to a flat, large skillet. Once melted, add onions. Allow to cook for several minutes then add the mushrooms. If needed, add additional butter to give the mushrooms more fat to cook in.
  3. In a small stock pot, add ¼ cup of filtered water and gelatin. Whisk mixture and allow to warm to blood temperature, about 100 degrees. Stir constantly to avoid burning.
  4. Reduce mushroom and onion mixture to a simmer. Add in the cream and heat to blood temperature. If gelatin is heated before the cream is heated, remove from heat.
  5. Once cream is heated, add gelatin mixture and mix until smooth. Add ½ tsp of salt and freshly ground pepper to taste. You can also use white pepper if you’d like to keep the sauce white. Remove the sauce from the heat.
  6. Grate your cheese fresh. Pre-grated cheese has additives in it that are no good!
  7. Add your cheese into the slightly cooled sauce mixture and allow to melt. Whisk fully to melt and blend the cheese. Takes about 4-5 minutes to fully melt the cheese.
  8. Pour over and enjoy!
  9. When reheating this sauce, bring it to temperature slowly.
Created using The Recipes Generator

Early Stage Gaps Alfredo Sauce:

  • 4 oz Mushrooms

  • ½ Onion

  • 3 Large Cloves of Garlic

  • 16 oz. Sour Cream

Directions:

Alfredo Sauce is a great, fat rich meal that is simple to put together. Top chicken, zoodles or gluten free pasta with this easy sauce. Also includes a recipe for early stage GAPS Protocol. Recipe by Amy Mihaly, Be Well Clinic.

Roughly chop onion and slice mushrooms. Dice garlic.

Add at least 2 tbsp butter to a flat, large skillet. Once melted, add onions. Allow to cook for several minutes then add the mushrooms. If needed, add additional butter to give the mushrooms more fat to cook in.

Alfredo Sauce is a great, fat rich meal that is simple to put together. Top chicken, zoodles or gluten free pasta with this easy sauce. Also includes a recipe for early stage GAPS Protocol. Recipe by Amy Mihaly, Be Well Clinic.

Once onions and mushrooms, turn off the heat. Add in the sour cream. Return to very low heat to allow the sour cream to warm and melt.

Add over boiled chicken or eat on it’s own.

How to make GAPS Legal Alfredo Sauce for Early Stags of the GAPS Protocol by Amy Mihaly, Be Well Clinic.

Early Stage GAPS Alfredo Sauce

Author: The Be Well Clinic

Ingredients

  • 4 oz Mushrooms
  • ½ Onion
  • 3 Large Cloves of Garlic
  • 16 oz. Sour Cream

Instructions

  1. Roughly chop onion and slice mushrooms. Dice garlic.
  2. Add at least 2 tbsp butter to a flat, large skillet. Once melted, add onions. Allow to cook for several minutes then add the mushrooms. If needed, add additional butter to give the mushrooms more fat to cook in.
  3. Once onions and mushrooms, turn off the heat. Add in the sour cream. Return to very low heat to allow the sour cream to warm and melt.
  4. Add over boiled chicken or eat on it’s own.
Created using The Recipes Generator


Alfredo Sauce is a great, fat rich meal that is simple to put together. Top chicken, zoodles or gluten free pasta with this easy sauce. Also includes a recipe for early stage GAPS Protocol. Recipe by Amy Mihaly, Be Well Clinic.

Beef Stroganoff

Beef Stroganoff is one of my mom’s favorite go-to meals.  The creamy richness is so filling and comforting, especially on a cold night. It was one of my favorite dinners! It was quite sad during the period of time when I was reacting to dairy and could not eat it. Now that I’ve healed by doing the GAPS Protocol, I love this delicious meal made with real ingredients!

If you don’t have beef, you can substitute any red meat in this dish. In fact, the strong flavor of this dish will hide any potential gamey flavor from venison or elk. To make this dish even faster, you can simply cut up your meat, add 8 oz of this real food cream of mushroom soup and a cup of stock, simmer and then add more sour cream at the end for added richness. You can also add extra mushrooms and onions if you love them.

We used to eat beef stroganoff with the traditional egg noodles. I’ve found however that I very much enjoy it over properly prepared rice. You could also do it over riced cauliflower, zoodles or your favorite alternative noodle. 

This is legal on Full GAPS because of the cream. If you substitute only sour cream instead, it is legal on GAPS Stage 4. 

Ingredients for Beef Stroganoff:

  • 1 lbs Beef Rump Roast

  • 1 lb Fresh Mushrooms (4-5 cups sliced)

  • ½ onion

  • 3 cloves Garlic Cloves

  • 4 tbsp Butter 

  • 1 cup Meat Stock

  • 4 -6 Sprigs of Fresh Thyme 

  • 1 ½ tbsp Beef Gelatin Powder

  • 1 cup Cream or Milk

  • 2 tbsp Cooking Sherry

  • 1 cup Sour Cream

Directions for Beef Stroganoff:

Beef Stroganoff is an easy 15 minute GAPS friendly meal that is gluten free and thickened with gelatin. Recipe by Amy Mihaly, Be Well Clinic.

To a pot, add 4 tbsp of butter. Heat over medium heat.

Roughly chop mushrooms, onion and garlic.

Slice the meat against the grain into long, thin strips. 

Add onion to pan. Cook for several minutes on medium heat.

Beef Stroganoff is an easy 15 minute GAPS friendly meal that is gluten free and thickened with gelatin. Recipe by Amy Mihaly, Be Well Clinic.

Add mushrooms and garlic to pan and cook. Add a bit of stock to the pan to keep things from burning, approximately 2 tbsp, and help soften the mushrooms. Turn the heat off and allow to sit.

Add ½ cup of stock to a small pot. Warm on the stove. When warmed to ‘blood temperature” add beef gelatin powder. You know it’s hot enough when you can stick your finger in but not leave it in. Stir constantly to activate the gelatin powder.

Add the gelatin mixture to the pot of mushrooms and onions and turn the heat back up to medium.

Beef Stroganoff is an easy 15 minute GAPS friendly meal that is gluten free and thickened with gelatin. Recipe by Amy Mihaly, Be Well Clinic.

Add cream to mixture; stir. Turn heat up to medium high. Allow mixture to reduce for ten minutes. 

Add sliced beef and sherry to mixture. Add salt and pepper. Stir to coat and cover. Let simmer for 3-4 minutes. Your goal is to have the middle of the beef still slightly pink. Check and stir.

Beef Stroganoff is an easy 15 minute GAPS friendly meal that is gluten free and thickened with gelatin. Recipe by Amy Mihaly, Be Well Clinic.

Remove from heat and add in the sour cream.

Stir until sour cream is dissolved. Enjoy!

Beef Stroganoff is an easy 15 minute GAPS friendly meal that is gluten free and thickened with gelatin. Recipe by Amy Mihaly, Be Well Clinic.

Beef Stroganoff is an easy 15 minute GAPS friendly meal that is gluten free and thickened with gelatin. Recipe by Amy Mihaly, Be Well Clinic.

Beef Stroganoff

Author: The Be Well Clinic

Ingredients

  • 1 lbs Beef Rump Roast
  • 1 lb Fresh Mushrooms (4-5 cups sliced)
  • ½ onion
  • 3 cloves Garlic Cloves
  • 4 tbsp Butter
  • 1 cup Meat Stock
  • 6 Sprigs of Fresh Thyme
  • 1 ½ tbsp Beef Gelatin Powder
  • 1 cup Cream or Milk
  • 2 tbsp Cooking Sherry
  • 1 cup Sour Cream

Instructions

  1. To a pot, add 4 tbsp of butter. Heat over medium heat.
  2. Roughly chop mushrooms, onion and garlic.
  3. Slice the meat against the grain into long, thin strips.
  4. Add onion to pan. Cook for several minutes on medium heat.
  5. Add mushrooms and garlic to pan and cook. Add a bit of stock to the pan to keep things from burning, approximately 2 tbsp, and help soften the mushrooms. Turn the heat off and allow to sit.
  6. Add ½ cup of stock to a small pot. Warm on the stove. When warmed to ‘blood temperature” add beef gelatin powder. You know it’s hot enough when you can stick your finger in but not leave it in. Stir constantly to activate the gelatin powder.
  7. Add the gelatin mixture to the pot of mushrooms and onions and turn the heat back up to medium.
  8. Add cream to mixture; stir. Turn heat up to medium high. Allow mixture to reduce for ten minutes.
  9. Add sliced beef and sherry to mixture. Add salt and pepper. Stir to coat and cover. Let simmer for 3-4 minutes. Your goal is to have the middle of the beef still slightly pink. Check and stir.
  10. Remove from heat and add in the sour cream.
  11. Stir until sour cream is dissolved. Enjoy!
Created using The Recipes Generator

Real Food & GAPS Legal Thanksgiving Recipes

Thanksgiving is a time to gather & a time to feast! These real food recipes are sure to please anyone around your table, whether they are following the GAPS Protocol or not.

Be sure to check the prep instructions for them. Remember that grains, nuts, and seeds must be sprouted in advance so build that prep time into your cooking. Most of all, enjoy & Happy Thanksgiving!

Masterful Main Courses

Create a GAPS Legal Real Food Thanksgiving meal with these recipes. Recipes created by Amy Mihaly, Be Well Clinic, Colorado’s GAPS Practitioner.

Roasted Wild Turkey

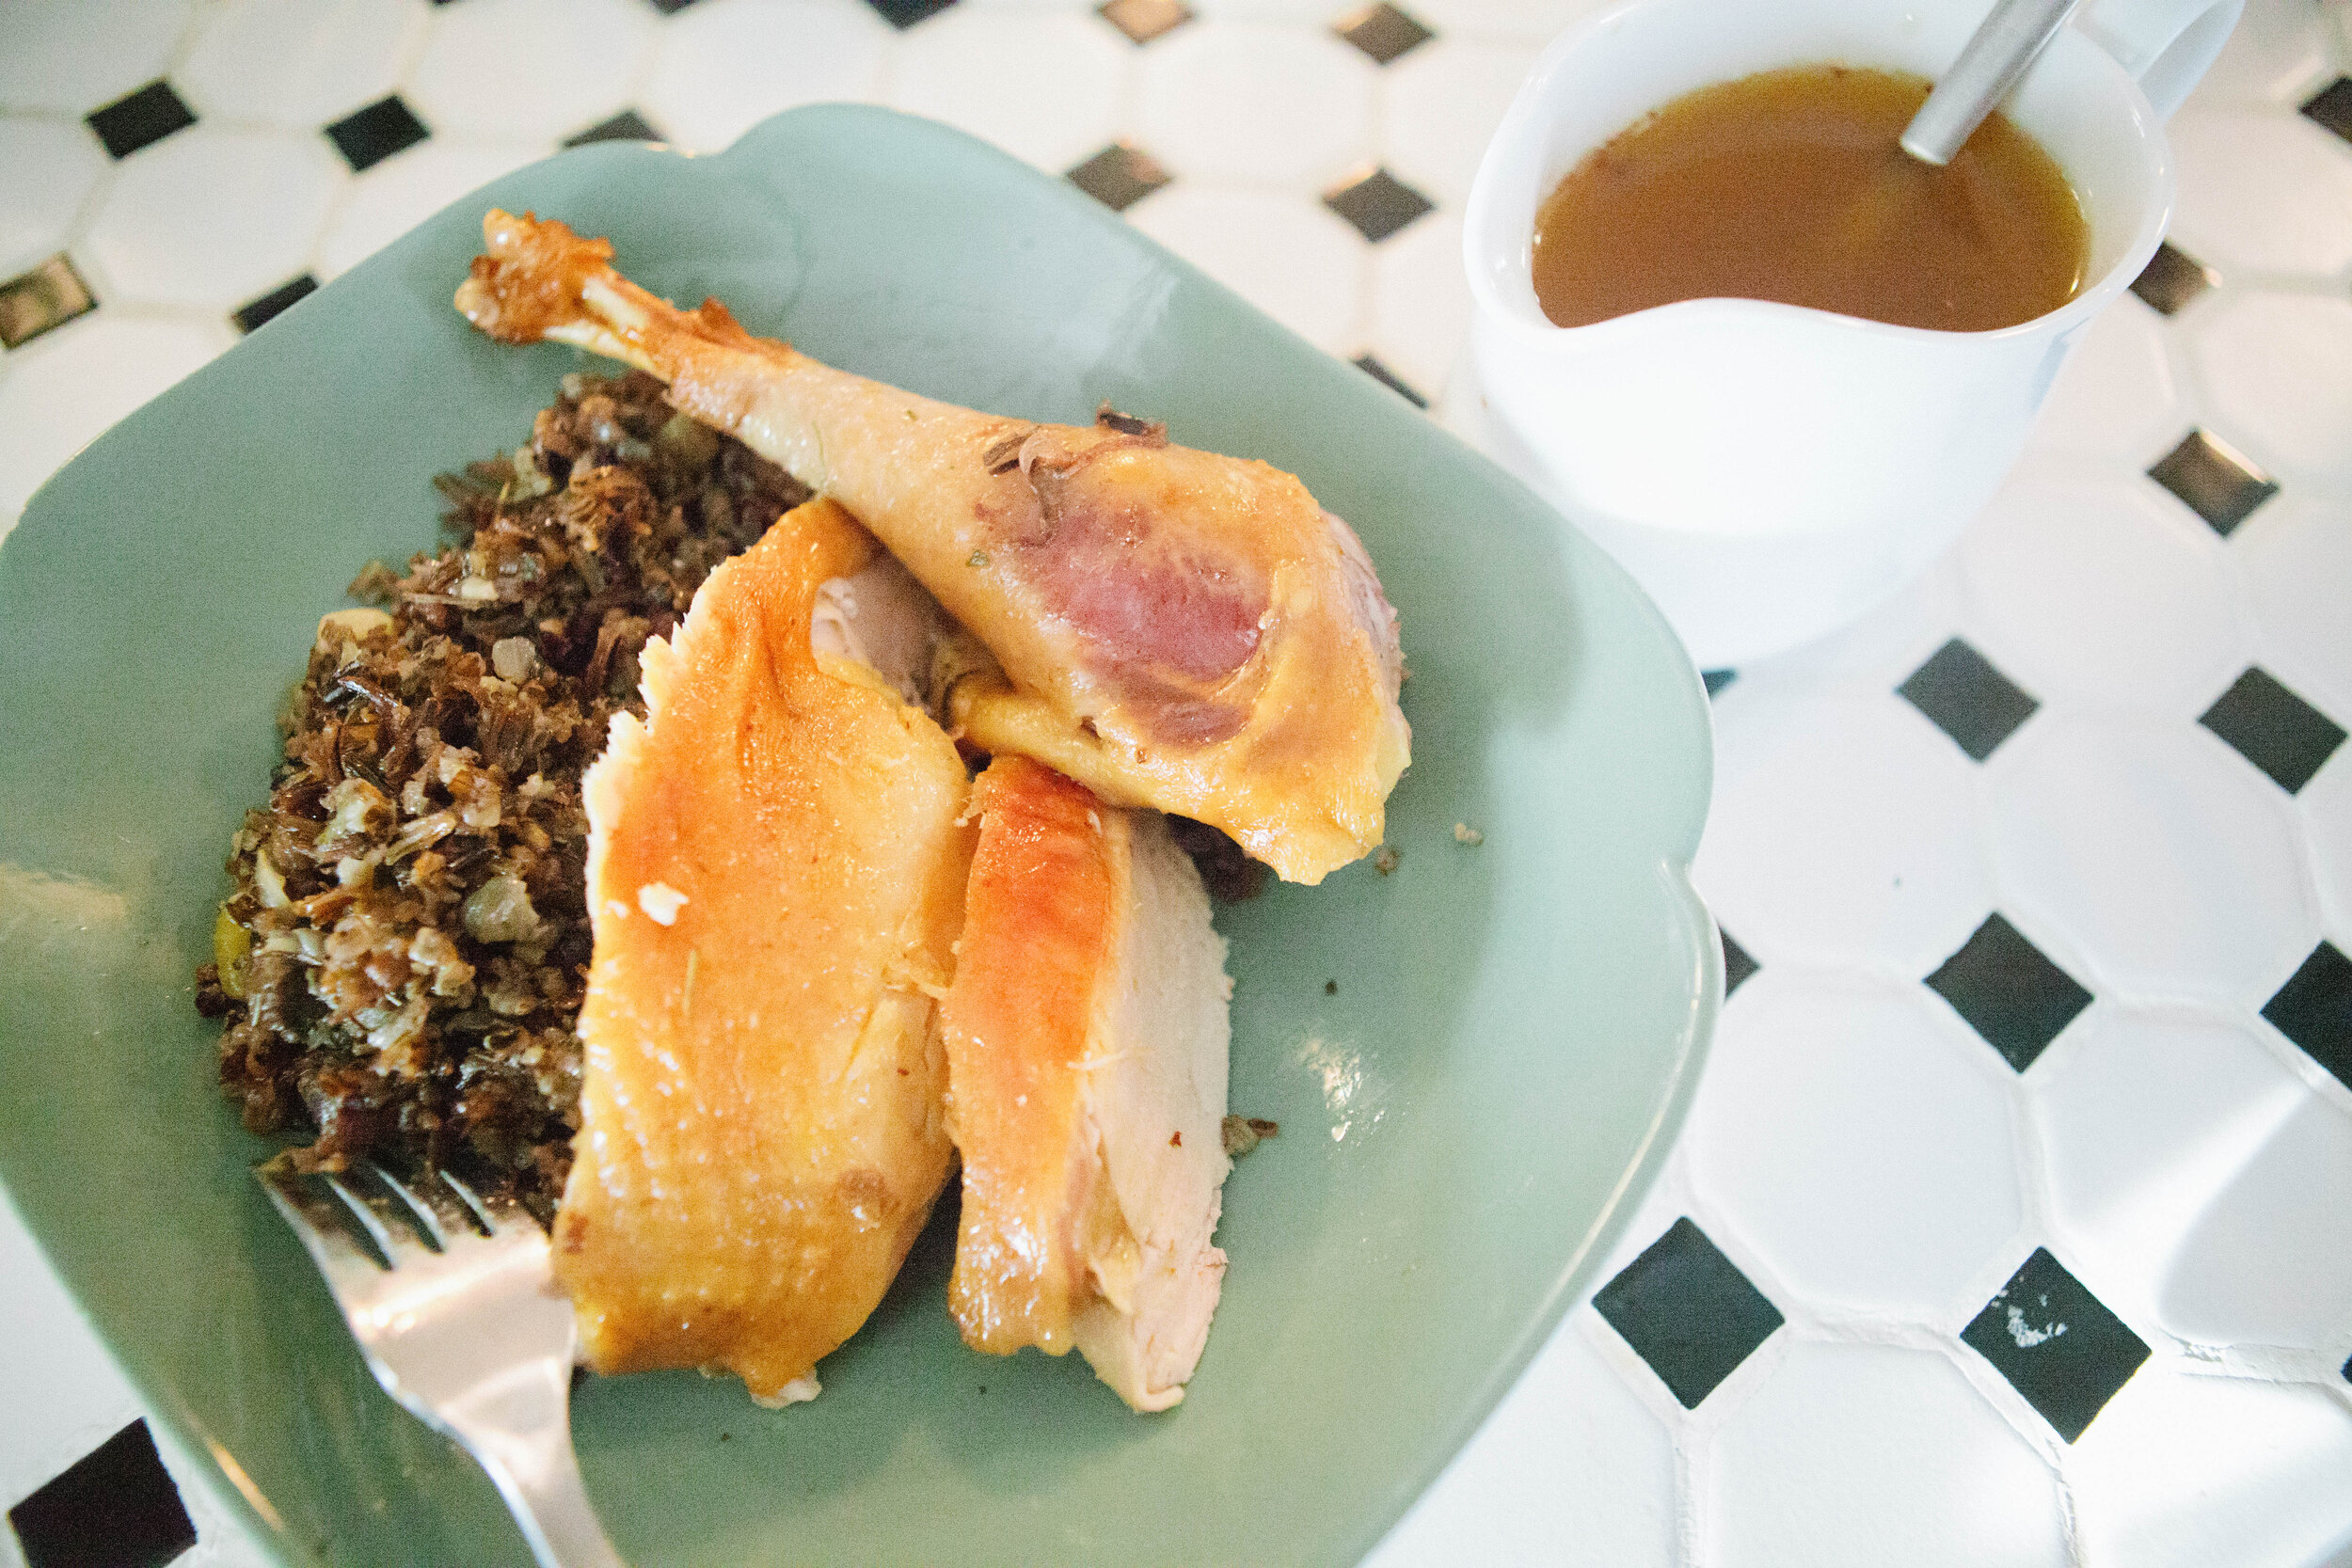
Create a GAPS Legal Real Food Thanksgiving meal with these recipes. Recipes created by Amy Mihaly, Be Well Clinic, Colorado’s GAPS Practitioner.

Roasted Goose

Sensational Side Dishes

Create a GAPS Legal Real Food Thanksgiving meal with these recipes. Recipes created by Amy Mihaly, Be Well Clinic, Colorado’s GAPS Practitioner.

Wild Rice Stuffing

Create a GAPS Legal Real Food Thanksgiving meal with these recipes. Recipes created by Amy Mihaly, Be Well Clinic, Colorado’s GAPS Practitioner.

Twice Baked Cauliflower

Create a GAPS Legal Real Food Thanksgiving meal with these recipes. Recipes created by Amy Mihaly, Be Well Clinic, Colorado’s GAPS Practitioner.

Sweet Potatoes or Butternut Squash with Marshmallows

Create a GAPS Legal Real Food Thanksgiving meal with these recipes. Recipes created by Amy Mihaly, Be Well Clinic, Colorado’s GAPS Practitioner.

Cast Iron Roasted Brussel Sprouts

Create a GAPS Legal Real Food Thanksgiving meal with these recipes. Recipes created by Amy Mihaly, Be Well Clinic, Colorado’s GAPS Practitioner.

Almond flour bread

Simple Roasted Beets

Delightful Desserts

Create a GAPS Legal Real Food Thanksgiving meal with these recipes. Recipes created by Amy Mihaly, Be Well Clinic, Colorado’s GAPS Practitioner.

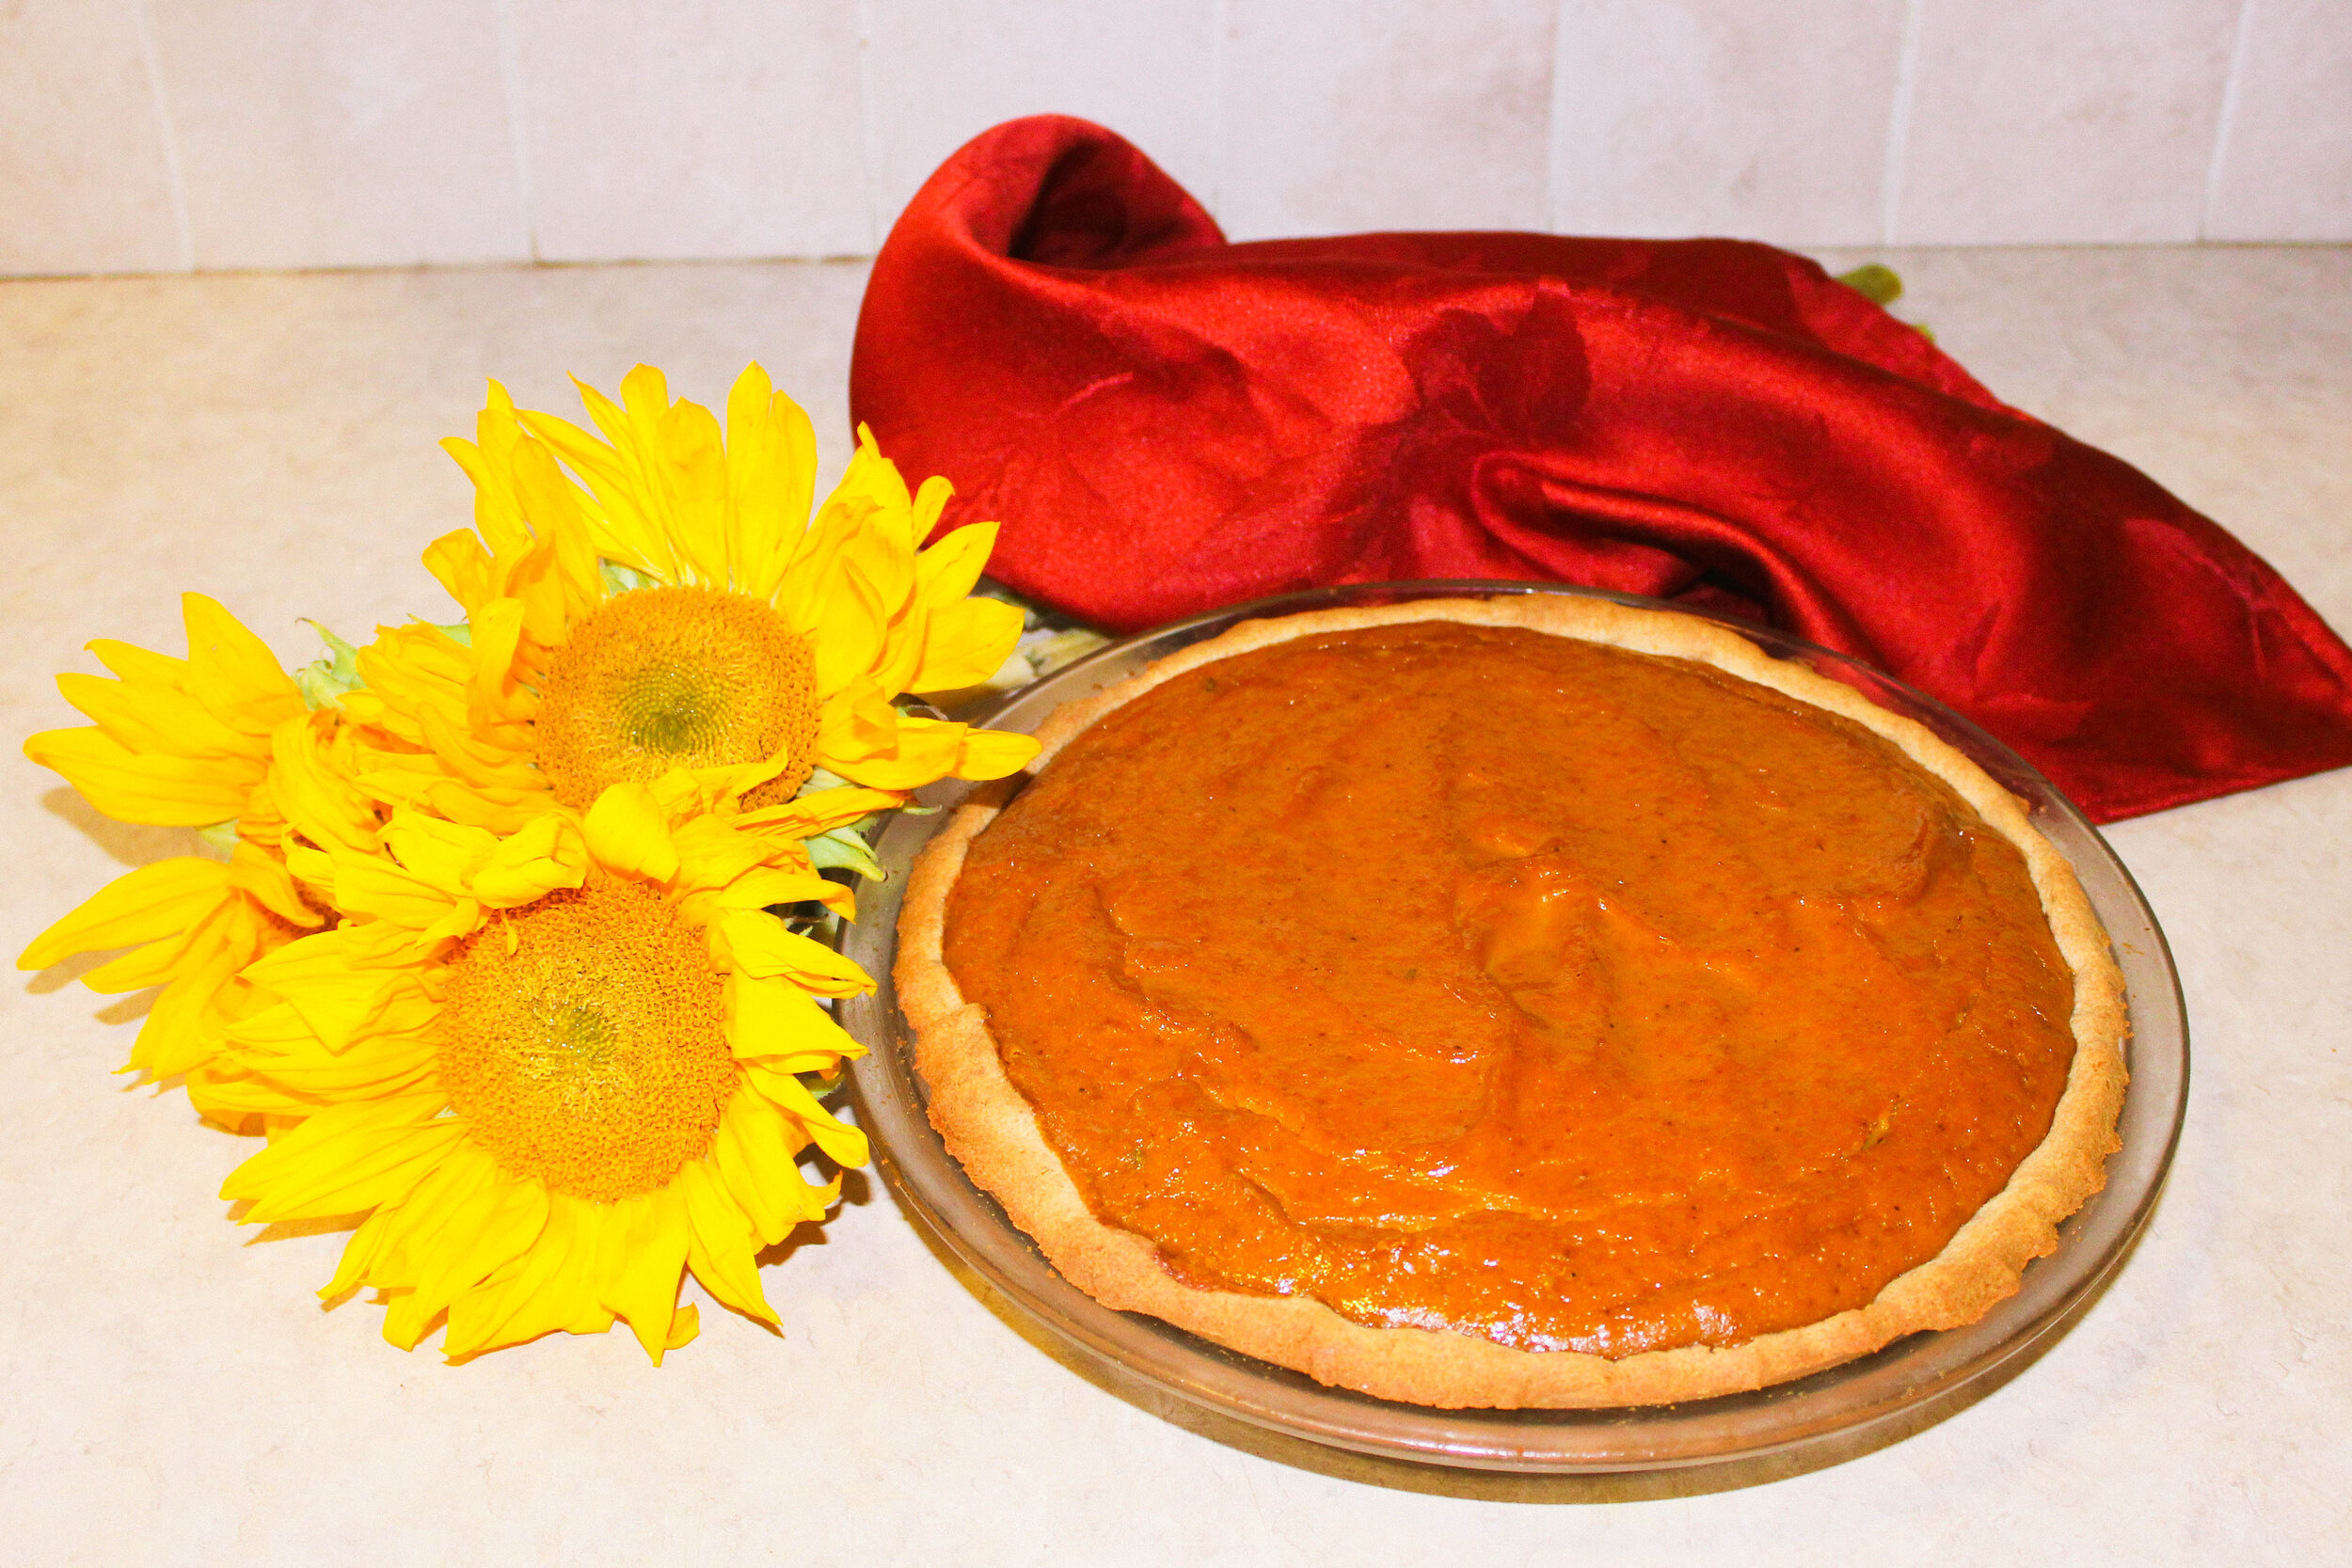
Pumpkin pie

Create a GAPS Legal Real Food Thanksgiving meal with these recipes. Recipes created by Amy Mihaly, Be Well Clinic, Colorado’s GAPS Practitioner.

Fruit Chutney

Create a GAPS Legal Real Food Thanksgiving meal with these recipes. Recipes created by Amy Mihaly, Be Well Clinic, Colorado’s GAPS Practitioner.

Baked Apples


Wild Rice Stuffing

Our family’s traditional stuffing recipe contains giblets, which are the organs of the bird. I highly approve of this method because there is so much nutrition in the organ meats of an animal.

The other family tradition we have with stuffing is to cook part of the stuffing inside the bird and part of the stuffing outside the bird in a separate casserole dish. Some people prefer their stuffing crisper than others.

Because turkey generally feeds a lot of people, we’re going to make a large batch of stuffing today. However, you could make a smaller batch to use as a side dish if you prefer.

Wild rice is not actually a grain. It’s actually the seed of a marsh growing plant. It’s pretty low in fat so it should be eaten with lots of fat. Because it falls into the seed family, wild rice can be eaten on the GAPS Diet. Of course, you should properly prepare it before eating it. Learn more about properly preparing grains.

You can make rice before hand and have it frozen in your freezer to easily add to this recipe. Or if you have leftover rice, you can add it easily to the mixture!

Ingredients for Wild Rice:

  • 2 cups Dry Wild Rice 

  • 4 ½ - 5 ½  cups Chicken or Turkey Stock

  • Giblets

  • 3 Celery Stalks (I include the leaves but you don’t have to.)

  • ½ Onion

  • 6 Cloves of Garlic

  • 2-3 tbsp Raw Turkey Fat

  • 2 tbsp Butter

  • 1 tbsp Dried Sage

  • 1 tsp Tarragon

  • 2 tsp Dried Parsley

  • 1 tsp Dried Rosemary

  • 1 tsp Marjoram 

  • Freshly Ground Black Pepper to Taste

  • Salt to Taste


Directions for Wild Rice Stuffing:

IMG_2300.jpg

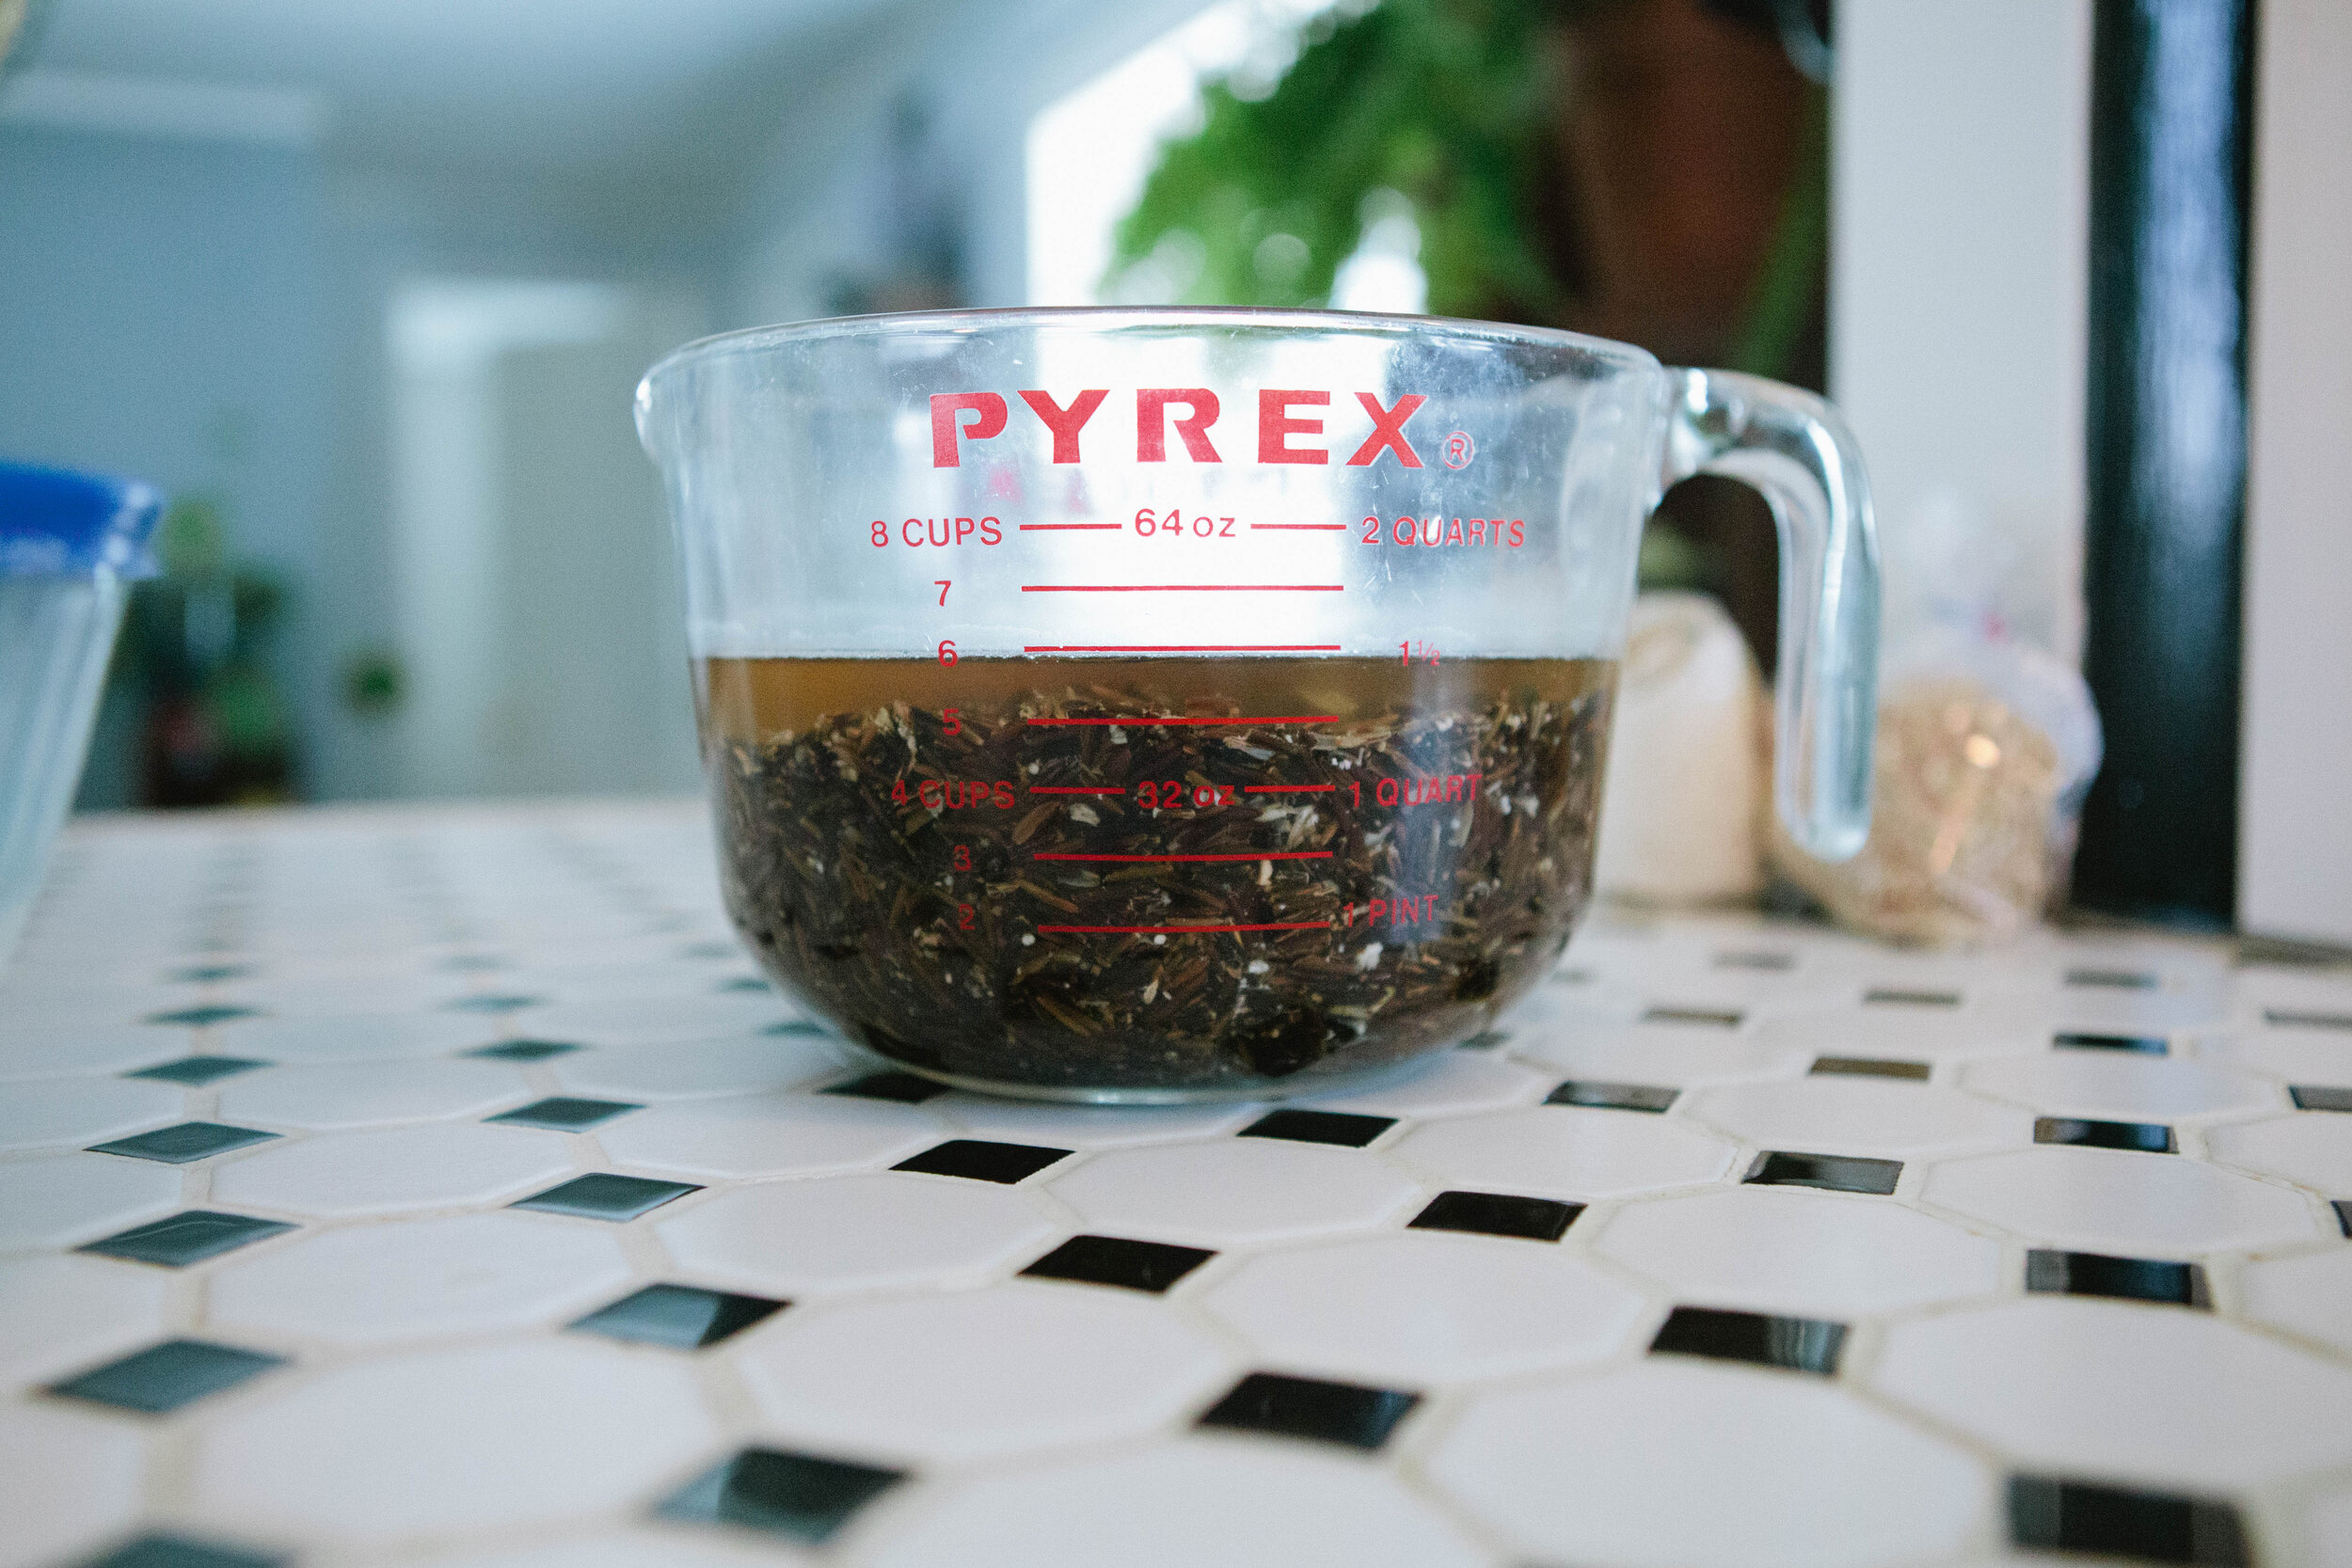
The night before, cover your rice with water, with enough water to double in size. Allow to soak on the counter for at least 8 hours until doubled in size.

IMG_2480.jpg

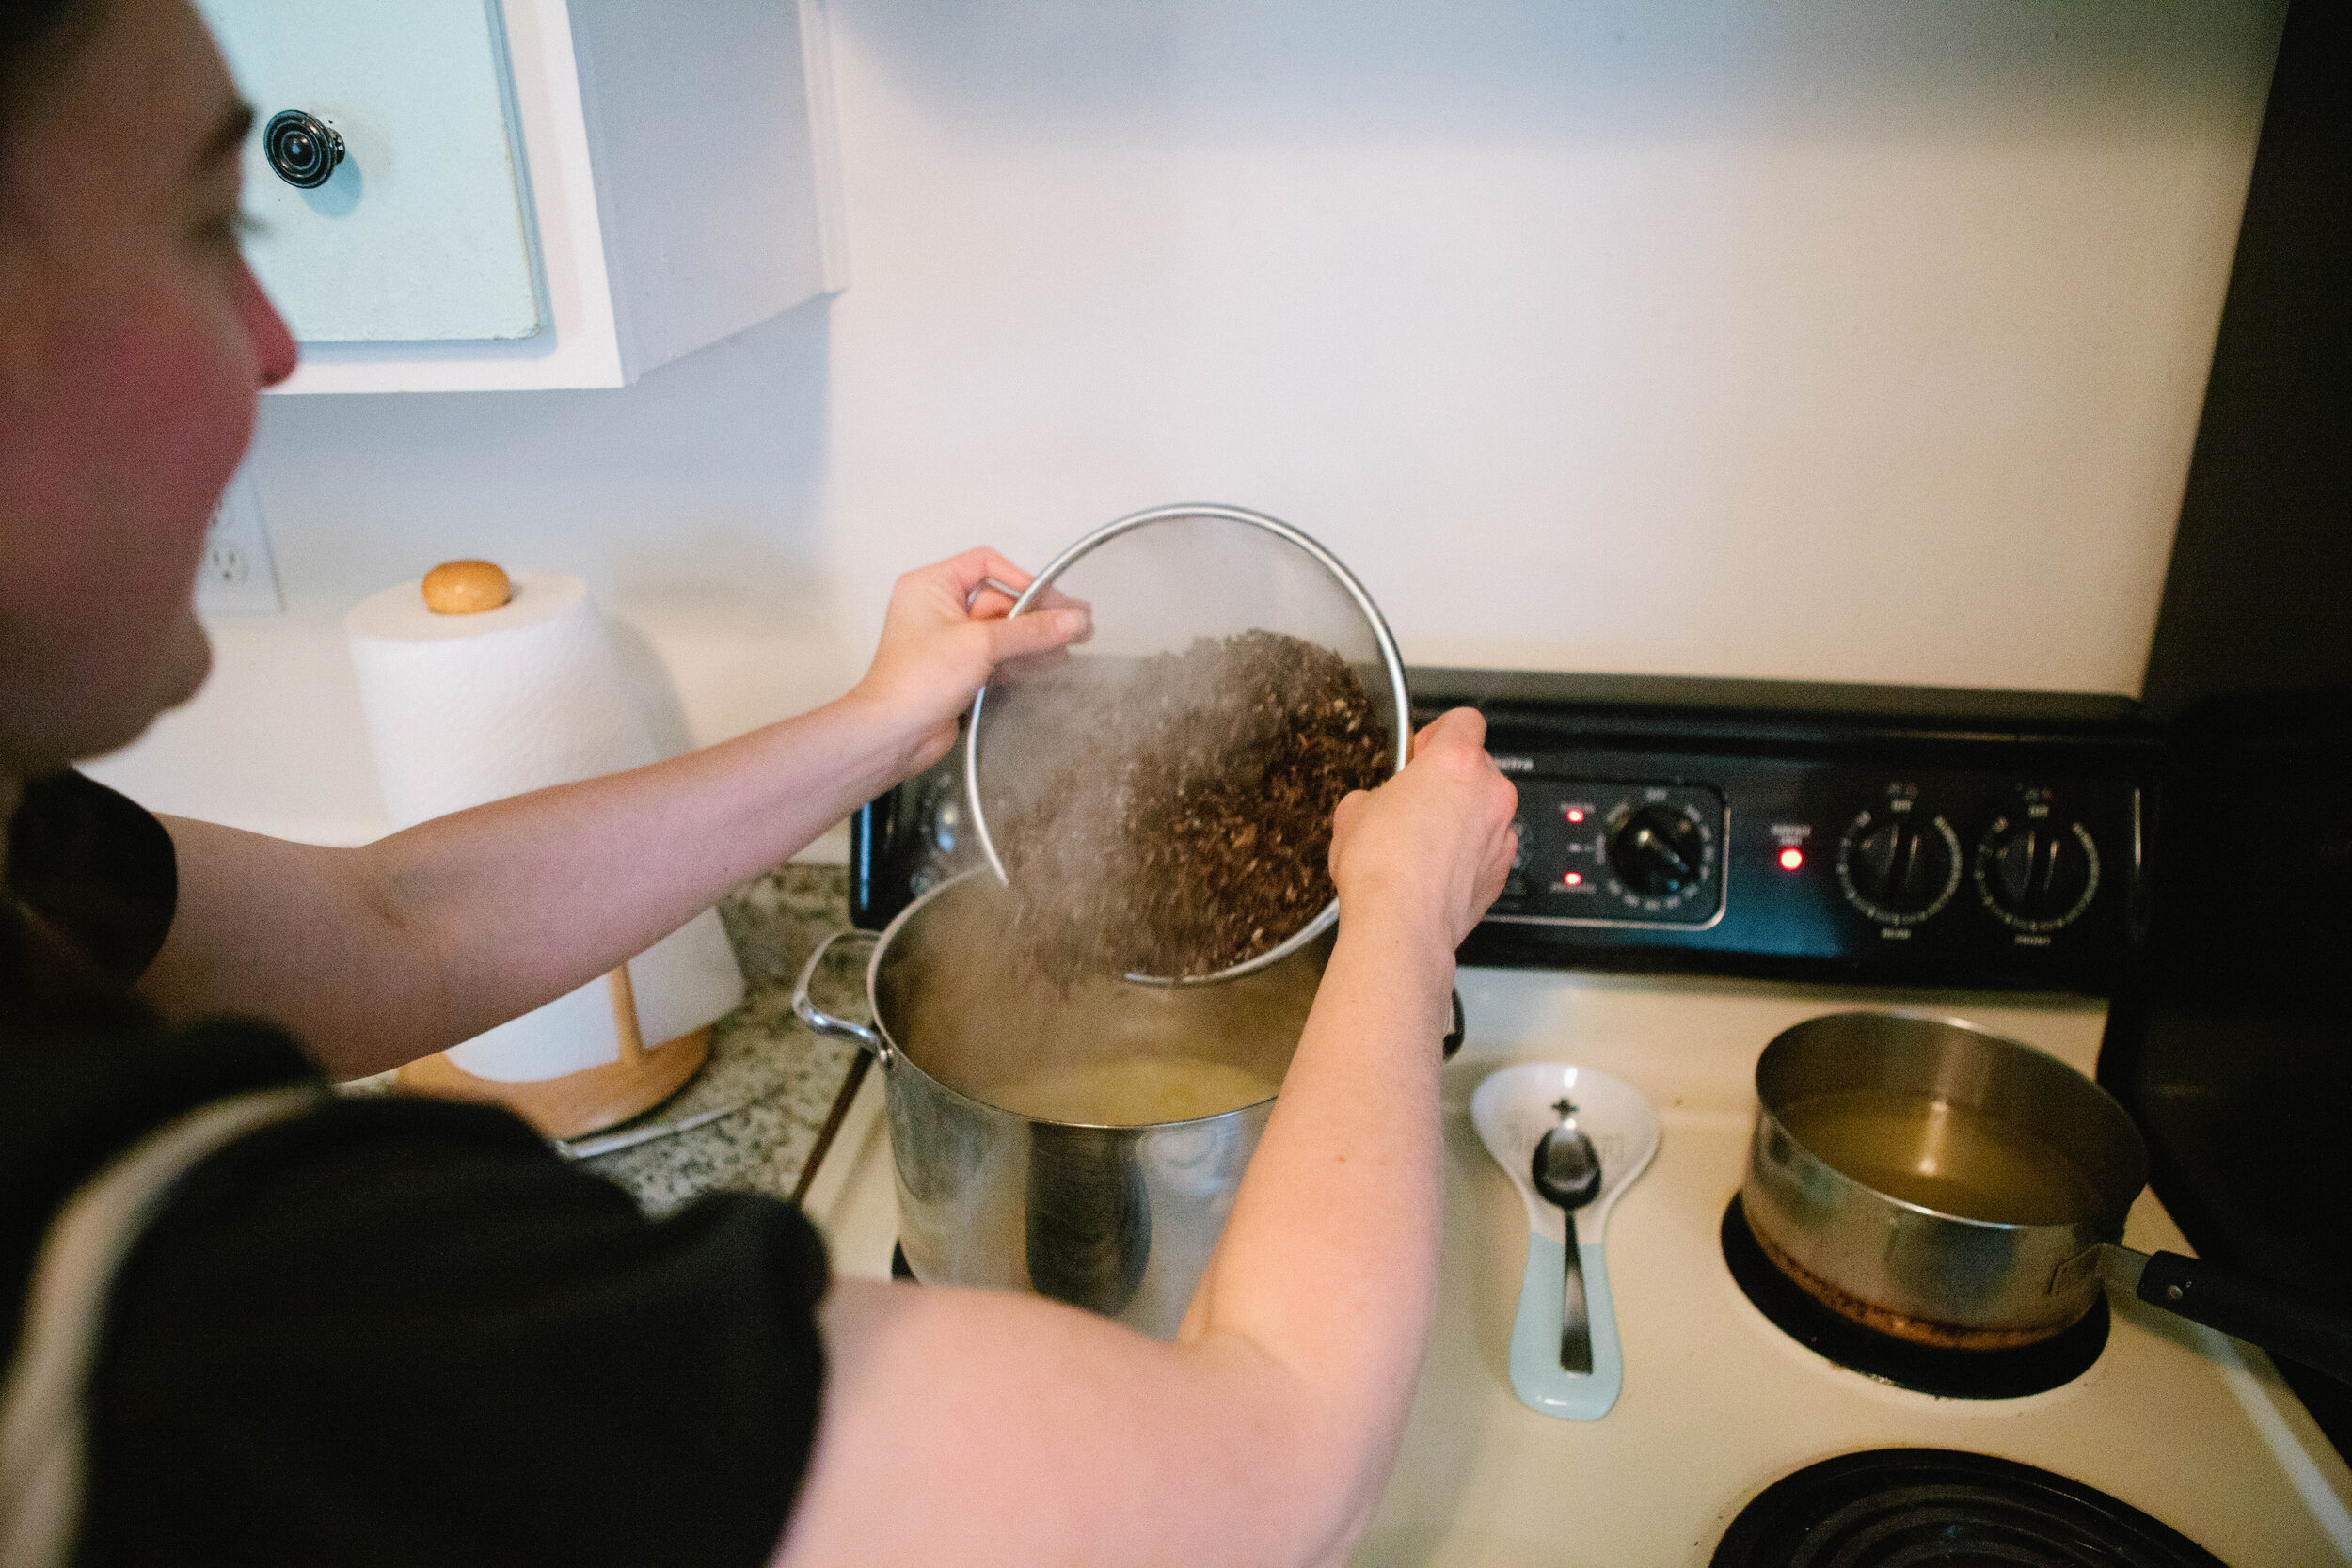
Once rice has doubled in size, drain and rinse. Add 4 ½ - 5 cups of stock to a pot. Bring stock to a boil then immediately lower the heat and add the prepared rice. Cook for 45 minutes at a simmer.

IMG_2282.jpg

Around 30 minutes into the rice cooking, preheat oven to 325.

Roughly chop celery, onion, and garlic.

Cut up the giblets. The heart and the gizzard are muscles so they don’t have any stronger of a taste than just of turkey. If you are serving this to people who you feel may not appreciate organ meats, you could leave out the liver but the others should be largely unnoticeable.

IMG_2304.jpg

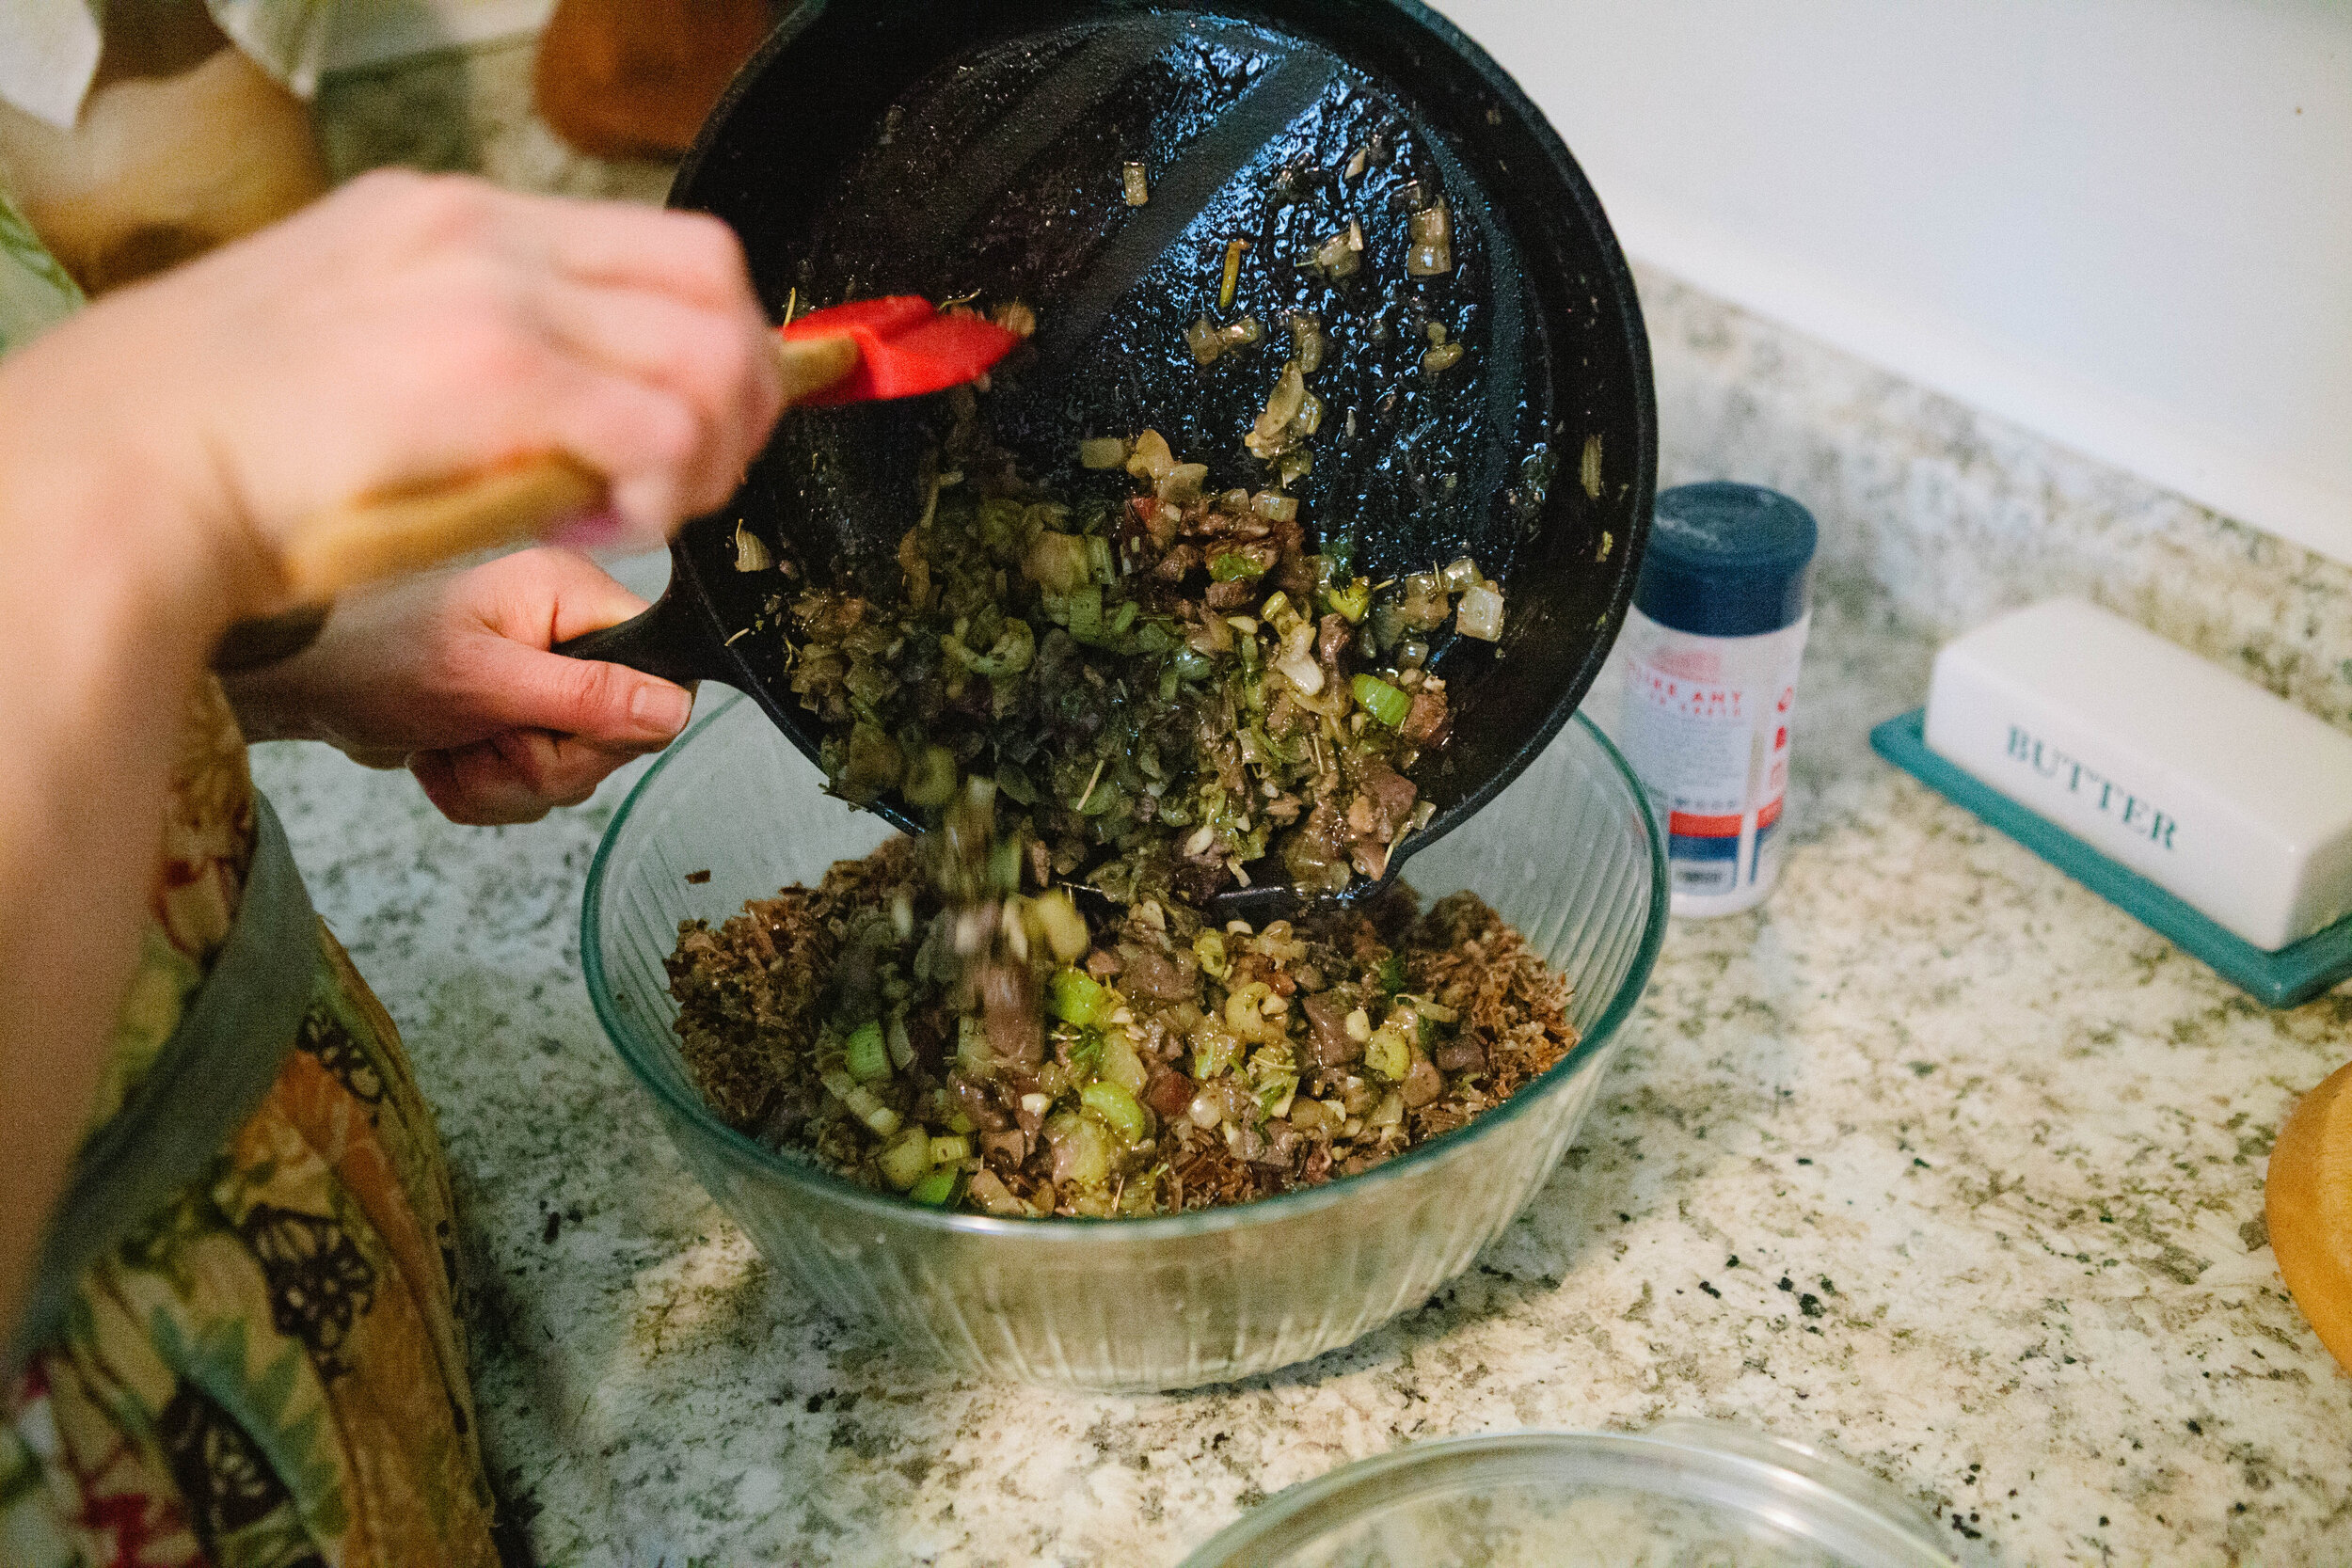
Slice up the turkey fat. Add ½ the turkey fat and butter to a cast iron pan.

Add celery and onions and cook for 2-5 minutes. Add garlic and cook until soft.

Add all dried herbs, the rest of the turkey fat and the giblets. Cook for 3-5 minutes until flavors are well combined. It doesn’t need to be fully cooked and softened as it will continue to cook in the oven.

IMG_2571.jpg

In a large mixing bowl, mix together rice and celery mixture.

Set aside half to be stuffed into your turkey and place half into a glass baking dish that can be covered. Add an additional ¼ cup meat stock to make sure you have enough liquid. You can also use water.

Place the covered dish in the oven and cook for an hour.

Serve & enjoy!

IMG_2904.jpg

WildRiceStuffingwithGibletsRecipe.png

Wild Rice Stuffing

Author: The Be Well Clinic

Ingredients

  • 2 cups Dry Wild Rice
  • 4 ½ - 5 ½ cups Chicken or Turkey Stock
  • Giblets
  • 3 Celery Stalks (I include the leaves but you don’t have to.)
  • ½ Onion
  • 6 Cloves of Garlic
  • 3 tbsp Raw Turkey Fat
  • 2 tbsp Butter
  • 1 tbsp Dried Sage
  • 1 tsp Tarragon
  • 2 tsp Dried Parsley
  • 1 tsp Dried Rosemary
  • 1 tsp Marjoram
  • Freshly Ground Black Pepper to Taste
  • Salt to Taste

Instructions

  1. The night before, cover your rice with water, with enough water to double in size. Allow to soak on the counter for at least 8 hours until doubled in size.
  2. Add 4 ½ - 5 cups of stock to a pot. Bring stock to a boil then immediately lower the heat and add the prepared rice. Cook for 45 minutes at a simmer.
  3. Preheat oven to 325.
  4. Roughly chop celery, onion, and garlic.
  5. Cut up the giblets. The heart and the gizzard are muscles so they don’t have any stronger of a taste than just of turkey. If you are serving this to people who you feel may not appreciate organ meats, you could leave out the liver but the others should be largely unnoticeable.
  6. Slice up the turkey fat. Add ½ the turkey fat and butter to a cast iron pan.
  7. Add celery and onions and cook for 2-5 minutes. Add garlic and cook until soft.
  8. Add all dried herbs, the rest of the turkey fat and the giblets. Cook for 3-5 minutes until flavors are well combined. It doesn’t need to be fully cooked and softened as it will continue to cook in the oven.
  9. In a large mixing bowl, mix together rice and celery mixture.
  10. Set aside half to be stuffed into your turkey and place half into a glass baking dish that can be covered. Add an additional ¼ cup meat stock to make sure you have enough liquid. You can also use water.
  11. Place the covered dish in the oven and cook for an hour.
  12. Serve & enjoy!
Created using The Recipes Generator

The Best Roasted Wild Turkey

People either love or hate turkey. I don’t mind turkey although I definitely love recipes that make turkey more moist - and fatty!

Modern turkeys are bred for high amounts of muscle meat which is actually the least nutritious meat. In fact, eating meat too high in lean protein can lead to starvation symptoms because you need fat soluble vitamins, especially Vitamin A, to utilize proteins in your body. I’m excited to try this turkey, which is a ___ breed, because I’m hopeful it will give more proper ratios. It also likely will be needing special cooking care to keep it tender and that special care is usually adding plenty of fat.

If you need this to be dairy free, you could substitute a different fat than butter but butter just makes everything better.

IMG_2226.jpg

A note about the fat on your bird: properly fed birds (like turkey & chicken) will have yellow colored fat! 

Ingredients:

  • 1 Wild Turkey (Mine was 8 lb. 13 oz.)

  • ½ Stick of Kerrygold Butter

  • Wild Rice Stuffing

Directions:

IMG_2232.jpg

Preheat oven to 400.

Remove the giblets from your turkey & set aside.

Rinse turkey inside and out. Pat dry.

IMG_2248.jpg

Coat turkey well with butter and place in a glass baking dish, breast side down. Cover with parchment paper and foil.

Place in the oven for 45-50 minutes. 

Decrease the oven temperature to 325 and bake for 2 ½ to 3 hours.

IMG_2623.jpg

Remove the bird from the oven. Uncover and turn so the large opening of the cavity is face up. Add wild rice stuffing to the cavity of the bird.

Press the stuffing firmly into the cavity so it does not fall out. Turn the bird back over so it is again breast side down.

Cook for another 40 minutes with the cover on.  Remove the cover and cook for an additional 15 minutes to further brown the skin.

Carve and enjoy!

You can also pour off the gravy to enjoy with your bird.

IMG_2908.jpg

HowtoMakeWildTurkey.png

Roasted Wild Turkey

Author: The Be Well Clinic

Ingredients

  • 1 Wild Turkey (Mine was 8 lb. 13 oz.)
  • ½ Stick of Kerrygold Butter
  • Wild Rice Stuffing

Instructions

  1. Preheat oven to 400.
  2. Remove the giblets from your turkey & set aside.
  3. Rinse turkey inside and out. Pat dry.
  4. Coat turkey well with butter and place in a glass baking dish, breast side down. Cover with parchment paper and foil.
  5. Place in the oven for 45-50 minutes.
  6. Decrease the oven temperature to 325 and bake for 2 ½ to 3 hours.
  7. Remove the bird from the oven. Uncover and turn so the large opening of the cavity is face up. Add wild rice stuffing to the cavity of the bird.
  8. Press the stuffing firmly into the cavity so it does not fall out. Turn the bird back over so it is again breast side down.
  9. Cook for another 40 minutes with the cover on. Remove the cover and cook for an additional 15 minutes to further brown the skin.
  10. Carve and enjoy!
  11. You can also pour off the liquid to enjoy as a gravy.
Created using The Recipes Generator

Apple Scrap Vinegar

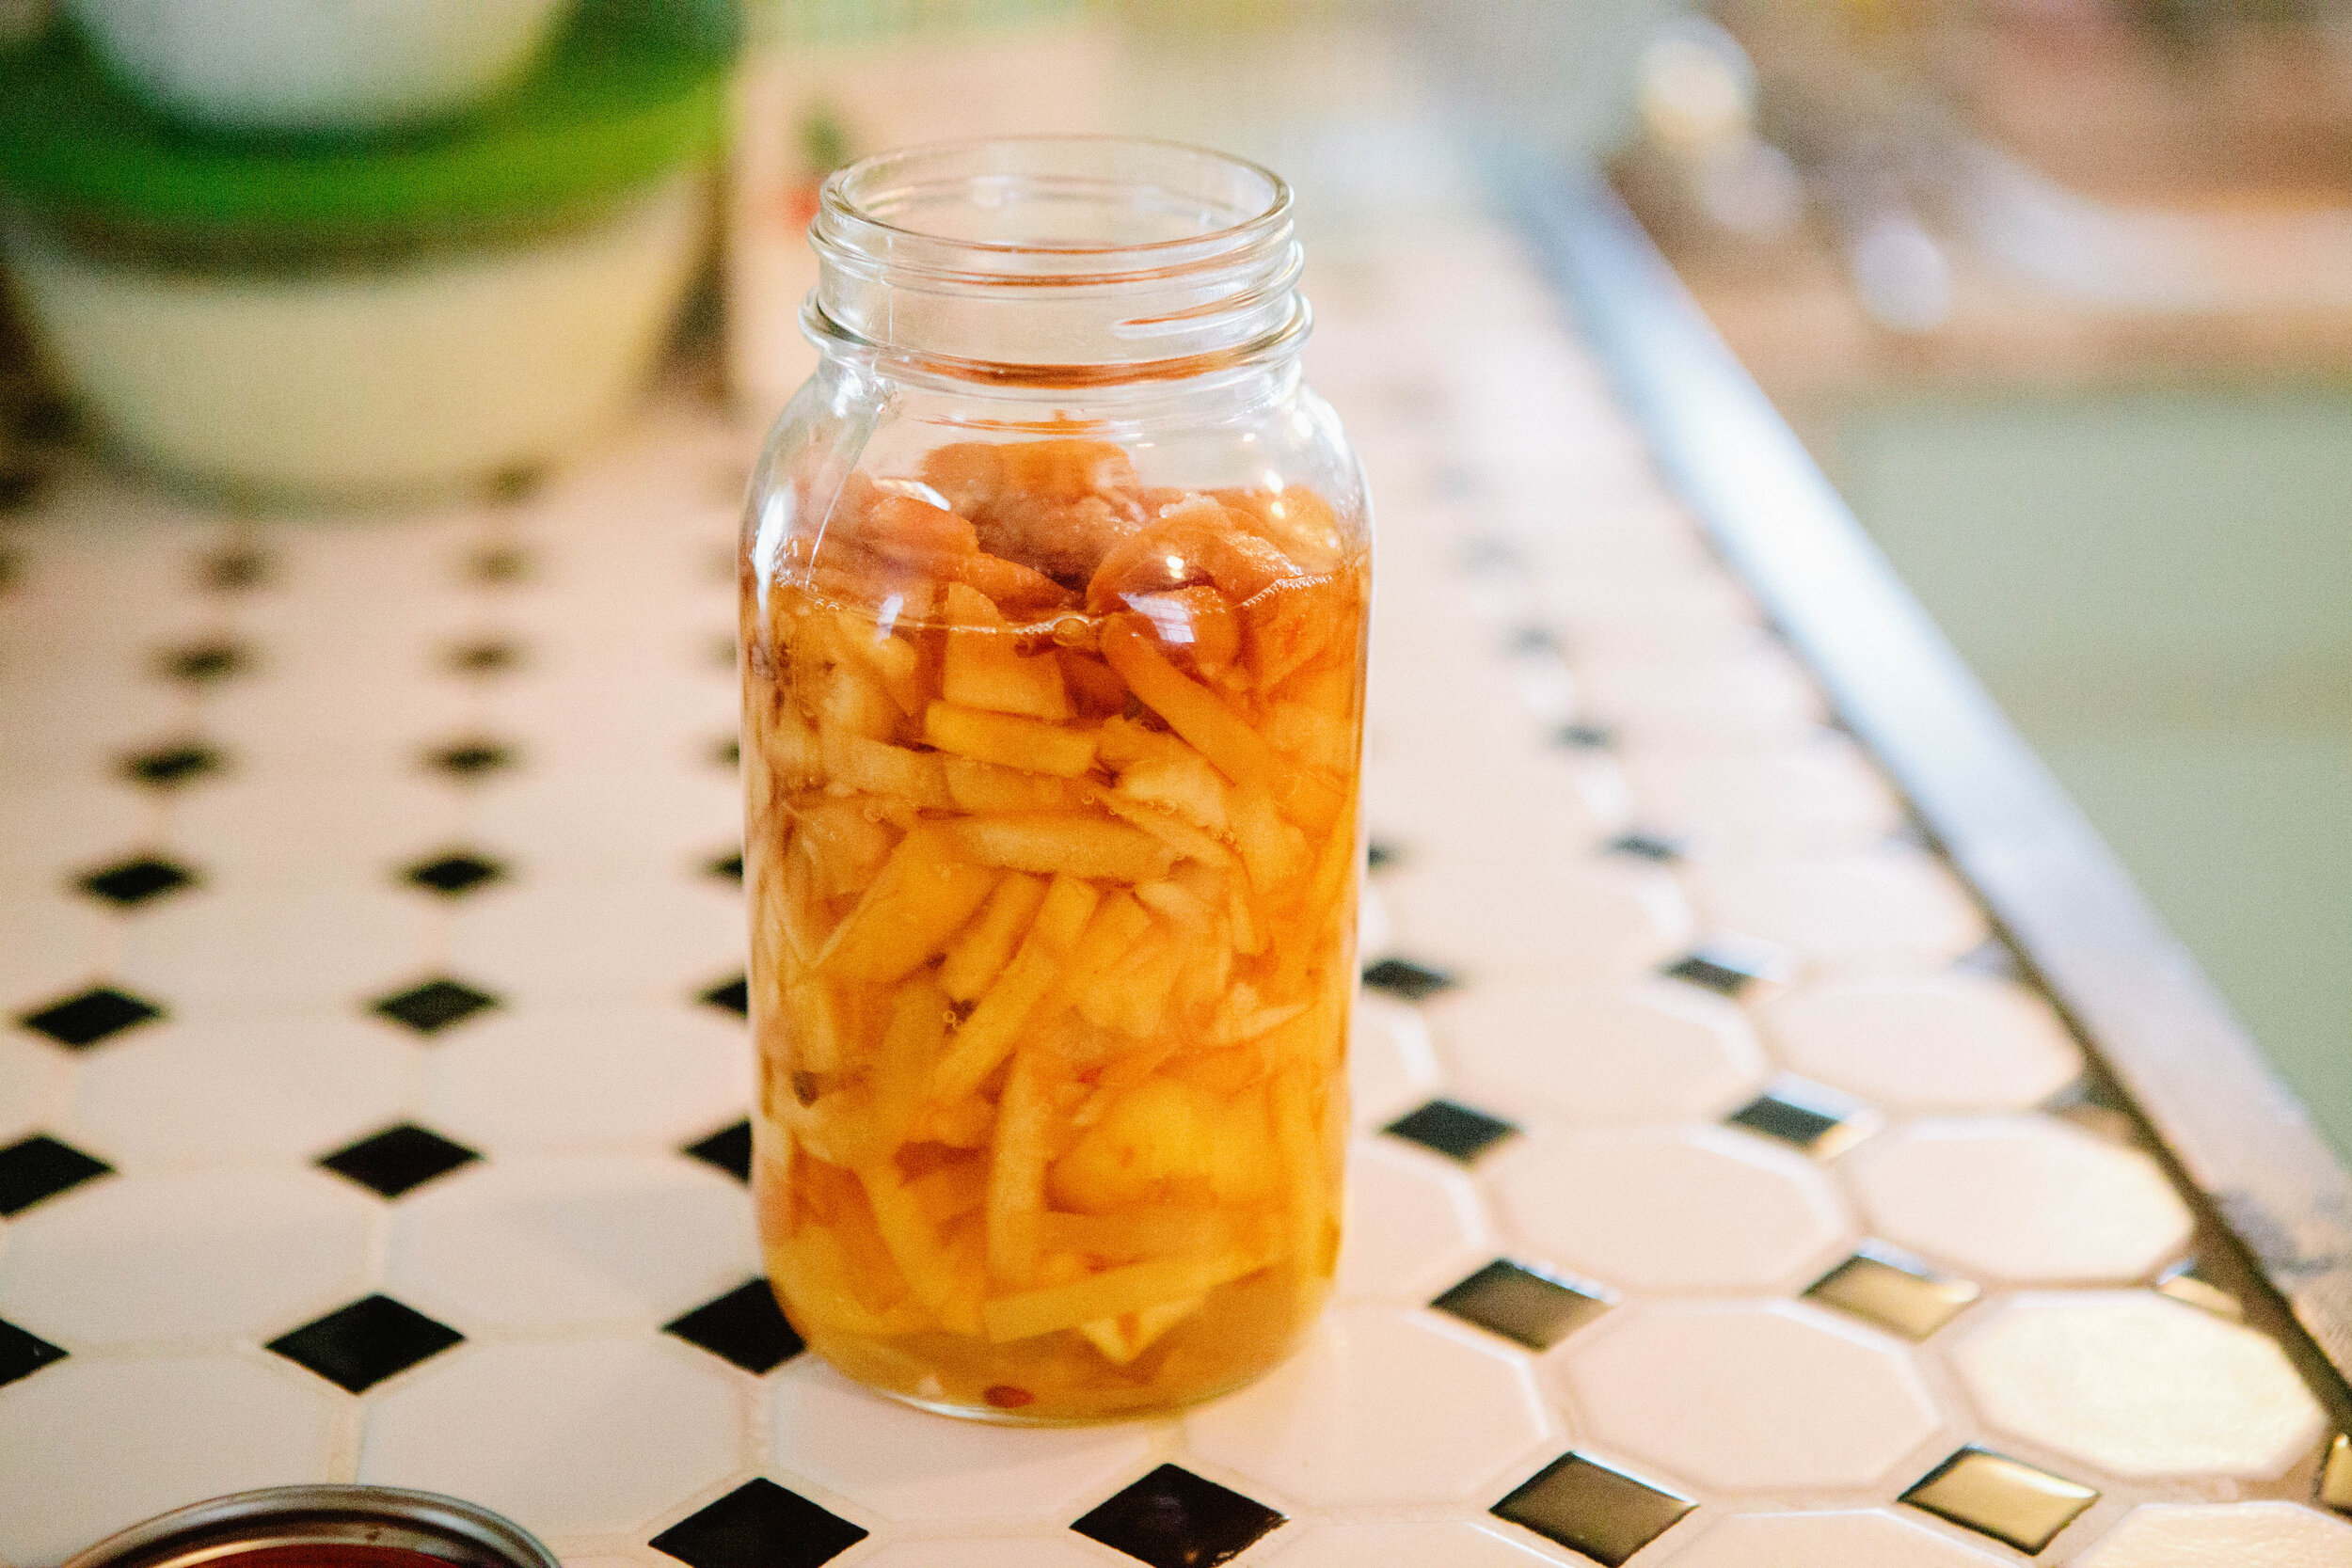
This recipe makes a type of apple cider vinegar. The difference is it’s made with apple scraps, as opposed to starting with apple cider that gets turned into apple cider vinegar. I love the idea of apple scrap vinegar because you utilize the entire apple! 

IMG_0419.jpg

My main use of apple cider vinegar is detox baths so I don’t necessarily need apple vinegar as rich in taste as apple vinegar made from cider. You can also use it to make this salad dressing.

This is so simple and easy that you can throw a jar together any time you are creating anything else with apples like dried apples or applesauce.

Ingredients for Apple Scrap Vinegar:

  • Apple Scraps from 5-6 Apples

  • Filtered Water

  • Apple Cider Vinegar with the Mother

Directions for Apple Scrap Vinegar:

IMG_2912.jpg

Add your apple scraps to a jar. You want the scraps to be packed into the jar fairly tightly.

Add filtered water almost to the shoulder.

Top with 2 tbsp of apple cider vinegar to jump start the fermentation process.

Seal with a lid. Leave on the counter for 3 weeks. 

IMG_2931.jpg

Strain out liquid into a separate jar.

Put the lid back on and set aside for 2-4 additional weeks.

It will develop a vinegar smell and taste. If, after 2 weeks, it does not have that, wait an additional two weeks. 

Once it’s done, keep it in the fridge if it will take you a while to use it.


15 Minute Meal: Stirfry

Stir fry is a very versatile dish because you can make it out of practically anything and flavor it any way that you want. Certain vegetables do tend to pair with certain flavor profiles so if you’re at a loss of what flavors to use, let your vegetables be your guide.

In my brain, there are two types of stir fry. There is an Asian stir fry that uses soy sauce and a “fresh” stir fry that is merely sauteed vegetables and herbs. While most people may think of stir fry as primarily Asian, my preference most of the time is a “fresh” soy sauceless stir fry. 

To make stir fry, simply use any vegetables that you have in the fridge; even ones that are starting to wilt! This is a great way to use up vegetables. Cut them into pieces. Determine the order you will add them to the pan depending on how long they will take to cook i.e. carrots and onions will go in first because they take much longer to cook than tomatoes or greens. 

This is also an excellent recipe to practice listening to your body. You can use the vegetable mixture that your body has been interested in, even if they don’t fit another recipe. You can make it as a small, single serving of only the vegetables that you are interested in. For example, for this particular stir fry, I used only the vegetables that I was craving at that time. I had thought about adding onions as well but they didn’t sound very good to me when it came time to cook so I simply didn’t use them!

As you are adding vegetables, keep an eye on the amount of fat in your pan. Some vegetables, such as eggplant or zucchini, will soak up a lot of the fat and you may need to add more as you go. Additionally to get a delicious flavor throughout, add a little salt and herbs each time you add a new vegetable.

You can easily add a cut of meat to the pan, such as thinly sliced chicken or beef strips, for an easy one pot dish or you can serve the stir fry as a side alongside a steak or other meat dish. 

Ingredients for Stirfry:

For today’s stir fry I will be using:

  • Zucchini

  • Carrots

  • Bok Choy

  • Brussel Sprouts

  • Celery

  • Peppers

  • Oregano

  • Thyme

  • Rosemary

You will also need the fat of your choice.

Directions for Stirfry:

IMG_0769.jpg

Cut all your vegetables. I like to keep my vegetables relatively the same size, especially by thickness. I find I much more enjoy spears in stir fry than rounds. Have all your vegetables ready to go before you start cooking your stir fry. Once you start cooking, it will go too fast to be chopping while you are cooking.

To a cast iron pan, add 2-3 tbsp of the fat of your choice. Today I am using tallow. When the fat is simmering in your pan, add your first vegetable.

Continue to add vegetables in the order that it takes for them to be done. Keep an eye on your fat and add more as needed. 

Add salt to each vegetable type as you add it. An easy way to do this is to add it to the top of the pan and then salt it as you would as if it was on the table; then stir in to the other vegetables.

Remember that each vegetable will continue to cook as you continue to add other vegetables. It takes practice to know how long to cook vegetables to your desired softness so keep cooking and don’t get discouraged!

Go as bold or as simple with flavors as you want. 

Enjoy!


15MinuteMealStirfry.png

15 Minute Meals: Stirfry

Author: The Be Well Clinic

Ingredients

  • For today’s stir fry I will be using:
  • Zucchini
  • Carrots
  • Bok Choy
  • Brussel Sprouts
  • Celery
  • Peppers
  • Oregano
  • Thyme
  • Rosemary
  • You will also need the fat of your choice.

Instructions

  1. Cut all your vegetables. I like to keep my vegetables relatively the same size, especially by thickness. I find I much more enjoy spears in stir fry than rounds. Have all your vegetables ready to go before you start cooking your stir fry. Once you start cooking, it will go too fast to be chopping while you are cooking.
  2. To a cast iron pan, add 2-3 tbsp of the fat of your choice. Today I am using tallow. When the fat is simmering in your pan, add your first vegetable.
  3. Continue to add vegetables in the order that it takes for them to be done. Keep an eye on your fat and add more as needed.
  4. Add salt to each vegetable type as you add it. An easy way to do this is to add it to the top of the pan and then salt it as you would as if it was on the table; then stir in to the other vegetables.
  5. Remember that each vegetable will continue to cook as you continue to add other vegetables. It takes practice to know how long to cook vegetables to your desired softness so keep cooking and don’t get discouraged!
  6. Go as bold or as simple with flavors as you want.
  7. Enjoy!

Notes:


Created using The Recipes Generator

How to Make Apple Chips - Dehydrated Apples

I love apples! I think they’re one of the easiest things to preserve. If you are trying to eat in season and preserve your own food, apples are a great way to start! (Check out our other recipes using apples!)

My dad is the best at stopping to ask people if they are going to use their apples. I have so many memories of spending hours with him in the evening drying apples and making applesauce. Every evening when he brings them home, he will spend hours making applesauce and getting them in a dehydrator.

For a long time my parents gave up making dried apples because my siblings and I would open up the dehydrator before the apples were ready and eat them.

You can use any variety of apples to do these. Some apples will end up sweeter than others but when you dry them, it doesn’t really matter much as we don’t generally eat dried apples for sweetness, only for crunch. I like to use firm apples only for dried apples. If you have any apples that are older or softer, you can turn them into apple sauce! 

I have an antique apple corer & slicer that I love to use and that makes this process so much faster. You can also manually peel, core or slice them using a knife or a mandolin but that takes longer.

Any dehydrator will do for this recipe! I’ve been using this one recently but have to keep a close eye on the temperature. You can also make them in the oven but you must keep a close eye on them. Use the lowest temperature setting. It takes about 2-4 hours depending on how crunchy you want them. Err on the side of caution when checking dryness levels. They will continue to dry when you take them out of the oven as they cool so if you dry them too much in the oven, you’ll end up with an apple that is too dry. 

When I process large amounts of apples, I always think about making apple cider vinegar! Save your peels and cores (but not any rotting or bruised parts) to make your own apple cider vinegar.

These dried apples should keep for a few months if you manage proper moisture control on them but we always ate them much faster!

P.s> Raw apples are stage 6 on the GAPS Diet. Dried fruit counts as raw fruit.

Ingredients for Dried Apples:

  • Apples: Peeled, Cored & Sliced

  • Lemons

  • Filtered Water

  • Essential Oils (Optional)

  • Cinnamon (Optional)

  • Dehydrator


Directions for Dried Apples:

IMG_0369.jpg

Fill a bowl with filtered water and lemon juice. You can also add some drops of essential oils if you’d like. On Guard is pretty delicious! Lemon essential oil will not work to keep the apples from turning brown; it is the acid in the lemon that does that.

IMG_0371.jpg

Rinse your apples & start to peel and core them. As they come off the machine, add them to the bowl with lemon juice and water. 

Set the peels and cores aside to use to make your own Apple Cider Vinegar. 

IMG_0400.jpg

Once you have the amount of apples that you want to dry, lay them out in single layers on dehydrator racks or on a pan. You can top them with cinnamon if you’d like.

Allow the apples to dry in a dehydrator for 5 to 6 hours.

Enjoy!

IMG_0776.jpg

HowToDryApplesDIYAppleChips.png
Author: The Be Well Clinic

Ingredients

  • Apples: Peeled, Cored & Sliced
  • Lemons
  • Filtered Water
  • Essential Oils (Optional)
  • Cinnamon (Optional)
  • Dehydrator

Instructions

  1. Fill a bowl with filtered water and lemon juice. You can also add some drops of essential oils if you’d like. On Guard is pretty delicious! Lemon essential oil will not work to keep the apples from turning brown; it is the acid in the lemon that does that.
  2. Rinse your apples & start to peel and core them. As they come off the machine, add them to the bowl with lemon juice and water.
  3. Set the peels and cores aside to use to make your own Apple Cider Vinegar.
  4. Once you have the amount of apples that you want to dry, lay them out in single layers on dehydrator racks or on a pan. You can top them with cinnamon if you’d like.
  5. Allow the apples to dry in a dehydrator for 5 hours.

Notes:


Created using The Recipes Generator

Healing and Maintaining Lung Health

Healing and Maintaining Lung Health

Our lungs are obviously essential for life! Healing our lungs can be tricky because they are something we have to keep using frequently even in the midst of healing. In this article, we’ll share more to help you understand the lungs function, what can harm the lungs and how they get hurt, and, finally, what the lungs need to heal.