Breakfast

Switchel

What is switchel? Switchel is a fermented lemon/ginger drink that is especially refreshing during the summer when working in the heat! The fermented aspect provides probiotics for the gut, the apple cider vinegar helps you be able to drink greater amounts without feeling bloated, and the lemon and ginger help hydrate you more effectively! Plus, it is simply delicious. I try to always have a few bottles brewing throughout the summer.

Ingredients for switchel:

  • 2-3 inches of fresh ginger (peeled and chopped)

  • 1 cup hot water + enough filtered water to fill the jar

  • 4 Lemons (juiced)

  • ¼ - ⅓ cup Apple Cider Vinegar - raw, unfiltered with the mother 

  • ¼ cup raw honey

  • A ½ gallon mason jar (or similar vessel that can close tightly) 


Additional Supplies for switchel:

  • ½ Gallon sized mason jar or similar vessel with a sealing lid

  • Metal strainer

Directions for making switchel:

In a small bowl, combine the hot water with the honey. We want the water to be just hot enough to allow the honey to dissolve - it should not be boiling, or this will kill off the beneficial microbes in the honey. 


To the mason jar, add the chopped ginger, fresh lemon juice and apple cider vinegar. Add the honey-water mixture, then add filtered water to fill up to approximately 1 inch from the top of the jar. Cover tightly and give the jar a few shakes to mix everything up. Loosen the lid slightly and leave on the counter at room temperature for 24-36 hours.


Once done, strain the switchel into a clean glass vessel (I use just another mason jar or a swing-top bottle) and store in the refrigerator. 


Pour over ice and enjoy!


- Hollie

Switchel

Author:

Ingredients

  • 2-3 inches of fresh ginger (peeled and chopped)
  • 1 cup hot water + enough filtered water to fill the jar
  • 4 Lemons (juiced)
  • ¼ - ⅓ cup Apple Cider Vinegar - raw, unfiltered with the mother
  • ¼ cup raw honey
  • A ½ gallon mason jar (or similar vessel that can close tightly)

Instructions

  1. In a small bowl, combine the hot water with the honey. We want the water to be just hot enough to allow the honey to dissolve - it should not be boiling, or this will kill off the beneficial microbes in the honey.
  2. To the mason jar, add the chopped ginger, fresh lemon juice and apple cider vinegar. Add the honey-water mixture, then add filtered water to fill up to approximately 1 inch from the top of the jar. Cover tightly and give the jar a few shakes to mix everything up. Loosen the lid slightly and leave on the counter at room temperature for 24-36 hours.
  3. Once done, strain the switchel into a clean glass vessel (I use just another mason jar or a swing-top bottle) and store in the refrigerator.
  4. Pour over ice and enjoy!
Honey Sweetened Vanilla Custard

Honey Sweetened Vanilla Custard:


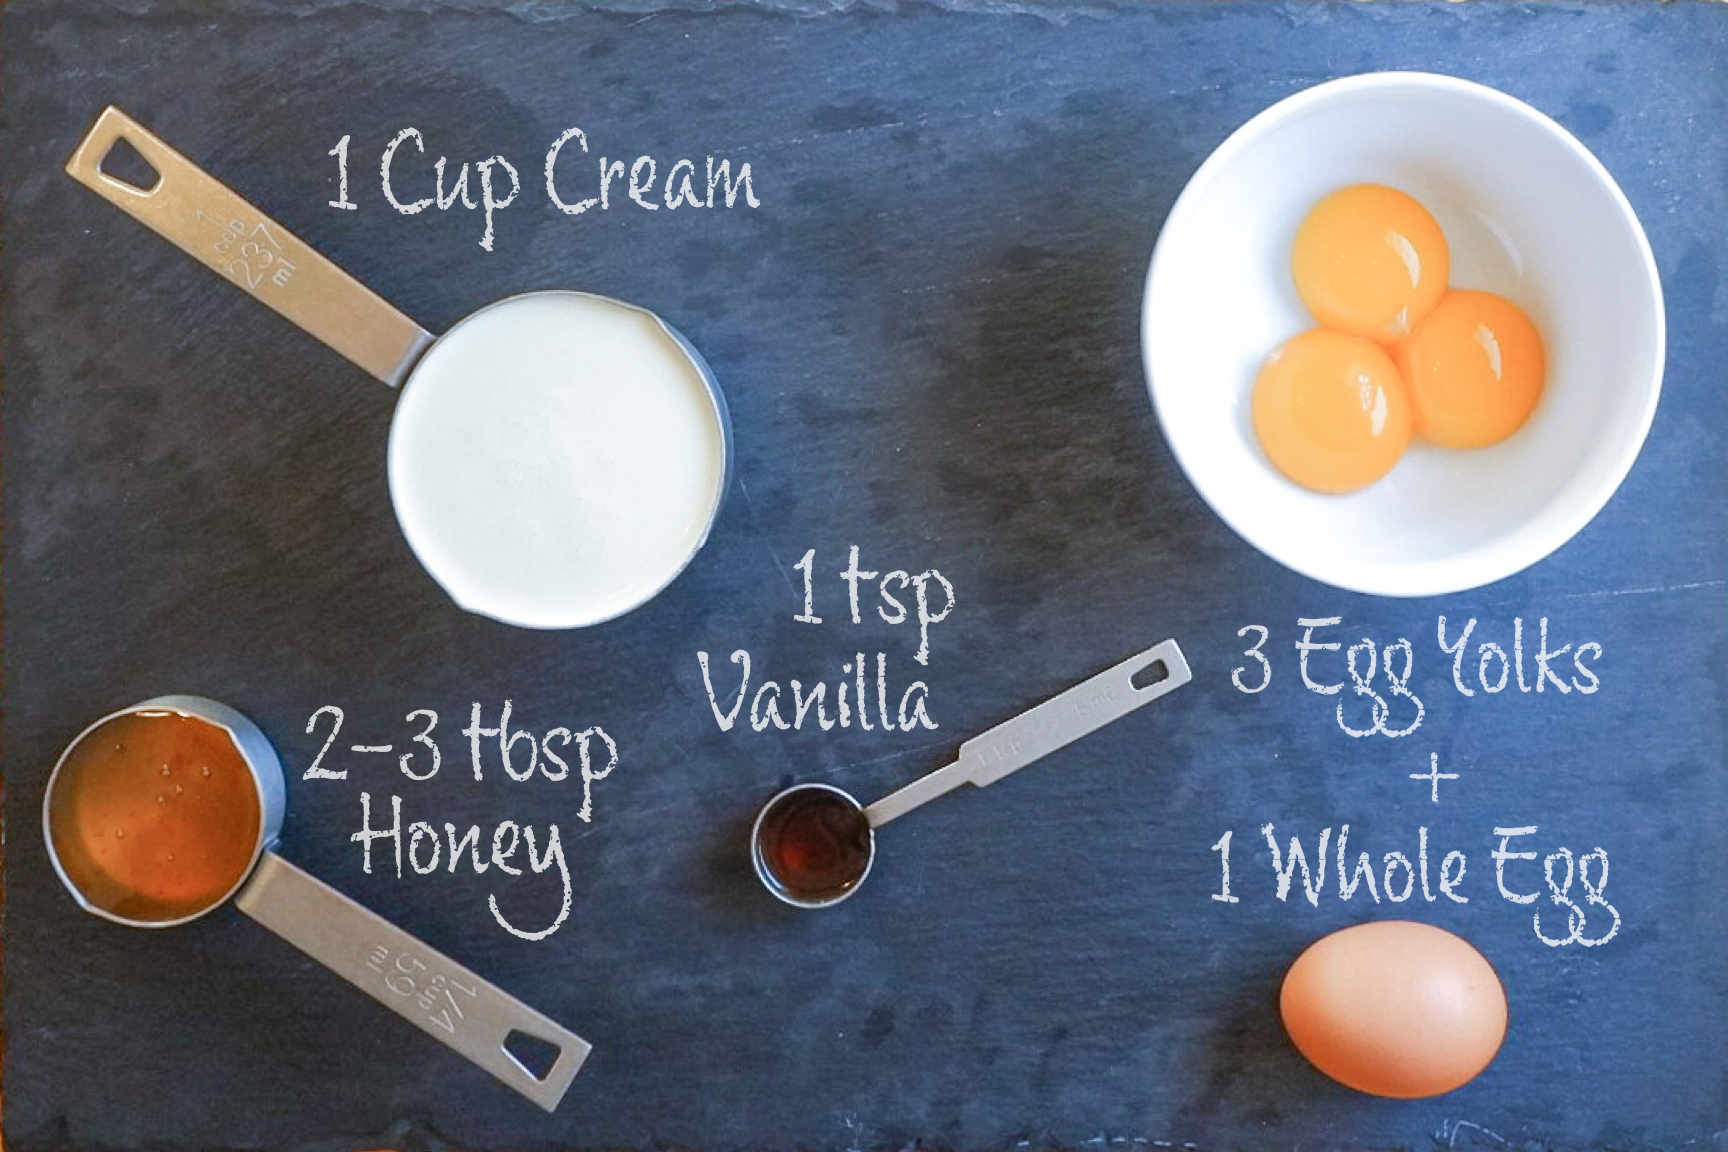
Ingredients for Honey Sweetened Vanilla Custard:

  • 1 cup cream 

  • 3 egg yolks + 1 whole egg

  • 1 tsp vanilla

  • 2-3 tbsp honey

  • (sprinkle of cinnamon or nutmeg if desired)


Directions for Honey Sweetened Vanilla Custard:

  1. Preheat oven to 340F

  2. Place all ingredients in a blender, blend on low until just combined. Try not to blend too long - we don’t want it getting frothy. 

3. Pour equally into small oven-safe cups (depending on the size, it will fill 6-10 cups).

4. Place all of the cups in a baking pan with sides at least 1.5 inches high. 

5. Add water to the pan (careful not to get it in the cups!) to fill about ⅔ of the height of the cups to create a water bath. 

6. Place the baking pan in the oven, bake for 45 minutes or until custard is set and not runny when poked with a toothpick. 


*Note: depending on the size of your cups, you may need to adjust the baking time. If you take it out and it is still runny you can leave the custard cups in the hot water bath to set.

Practical uses:

  • To help relieve headaches (while pregnant or not!)

  • For help sleeping if you typically wake up around 1-3 am

  • To help babies sleep (after you’ve introduced dairy/eggs) - for this one just omit the honey, it’s still great!

  • For a pick-me-up snack in the afternoon when you might crave sugar or caffeine

Honey Sweetened Vanilla Custard Pinterest

Honey Sweetened Vanilla Custard

Author: Hollie Bigham, Be Well Clinic

Ingredients

  • 1 cup cream
  • 3 egg yolks + 1 whole egg
  • 1 tsp vanilla
  • 3 tbsp honey
  • (sprinkle of cinnamon or nutmeg if desired)

Instructions

  1. Preheat oven to 340F
  2. Place all ingredients in a blender, blend on low until just combined. Try not to blend too long - we don’t want it getting frothy.
  3. Pour equally into small oven-safe cups (depending on the size, it will fill 6-10 cups).
  4. Place all of the cups in a baking pan with sides at least 1.5 inches high.
  5. Add water to the pan (careful not to get it in the cups!) to fill about ⅔ of the height of the cups to create a water bath.
  6. Place the baking pan in the oven, bake for 45 minutes or until custard is set and not runny when poked with a toothpick.
  7. Note: depending on the size of your cups, you may need to adjust the baking time. If you take it out and it is still runny you can leave the custard cups in the hot water bath to set.

GAPS Friendly Homemade Yogurt

Let’s make yogurt! Around here we are very into fermented and cultured foods. Not only are they delicious but they are so full of probiotics, vitamins and minerals that are easy for our bodies to utilize! 

Fermented and cultured foods can seem intimidating to those who have not made them, but once you’ve started in the world of ferments and cultures, you will see how easy, quick, and fun they are. 

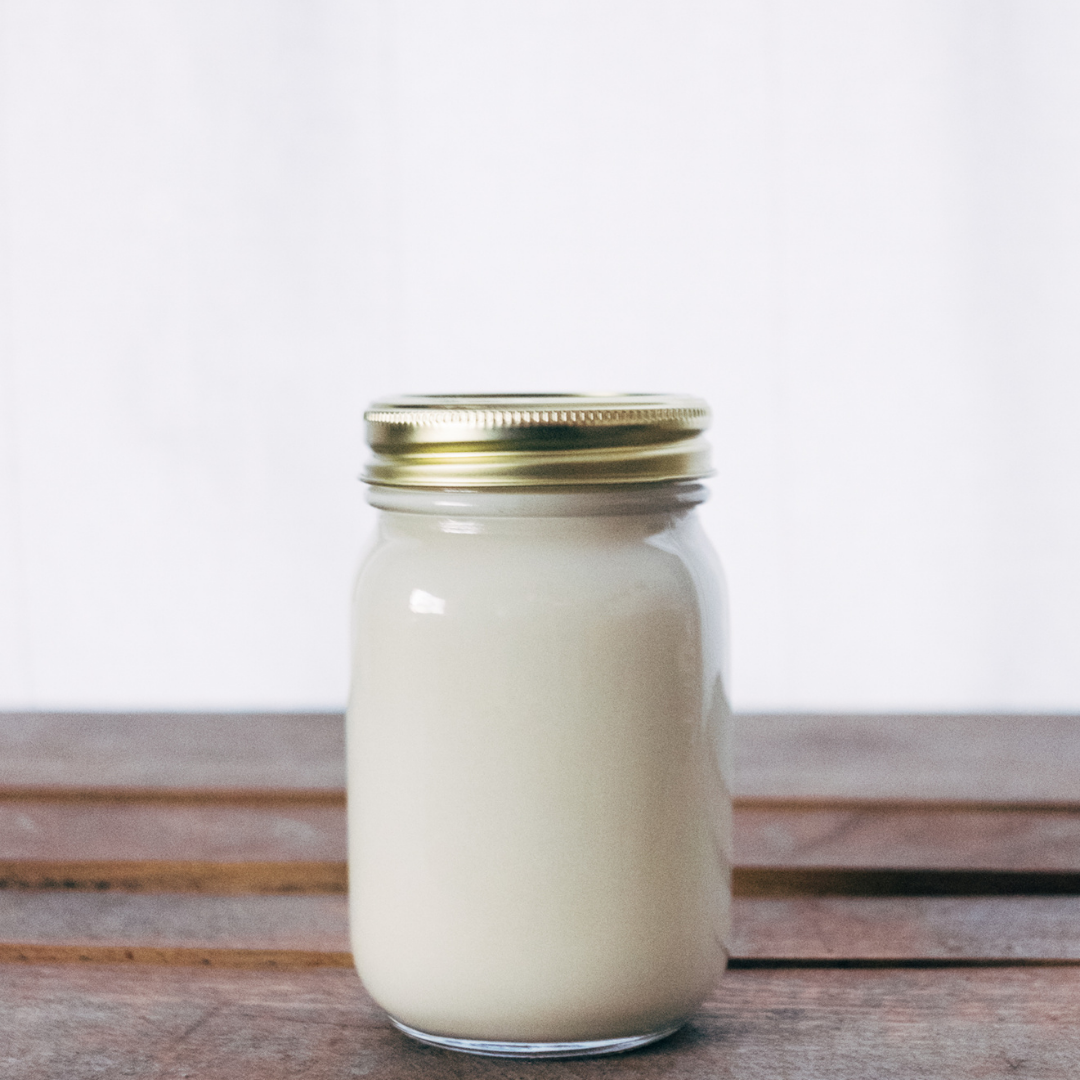
Yogurt is one of my family’s favorites. We use raw milk, but you can use pasteurized milk if that is all you have access to. It will need to be whole milk, preferably organic, and grass fed, and it cannot be UHT (or ultra-high temperature) pasteurized. You’ll treat it a little differently than raw milk, so pay attention to those directions. You can also use numerous types of starters - whey, creme fraiche, another yogurt - if you have any of these on hand, you can make yogurt! Like the milk, if you are using yogurt as a starter, you can use one that you previously made, or you can use yogurt from the store. Just make sure it is whole milk, organic, plain, with no other ingredients added beside the milk and the probiotic strains. 

As far as cultured dairy products go, yogurt is high in protein versus fat. For this reason, we usually recommend it to people who are more prone to diarrhea or soft stools instead of people who are constipated (for whom we would recommend a higher fat content dairy like sour cream or creme fraiche). 

Let’s dive in! 

Ingredients for Homemade Yogurt:

  • Milk

  • Whey

Pour your milk into a pot and slowly heat it over the stove. Raw milk should be heated to 110 F. Pasteurized milk needs to be heated up to 180 F, then cooled to 110 F. 


This is very important because when milk is pasteurized, it starts growing bacteria that are not beneficial, and can actually be quite harmful (this is why pasteurized milk has an expiration date and why it “goes bad” when it is too old or left out of refrigeration). We have to kill these off first before we let the culturing process happen.

Milk heated for Homemade yogurt.jpg

Once your milk is at temperature, remove from heat and add your starter. This can be yogurt, whey or crème fraiche. Whey generally makes a thinner yogurt, a previous yogurt will make a thicker yogurt, and crème fraiche tends to make a creamier yogurt. Stir briefly to combine.

Adding starter to GAPS friendly homemade yogurt.jpg

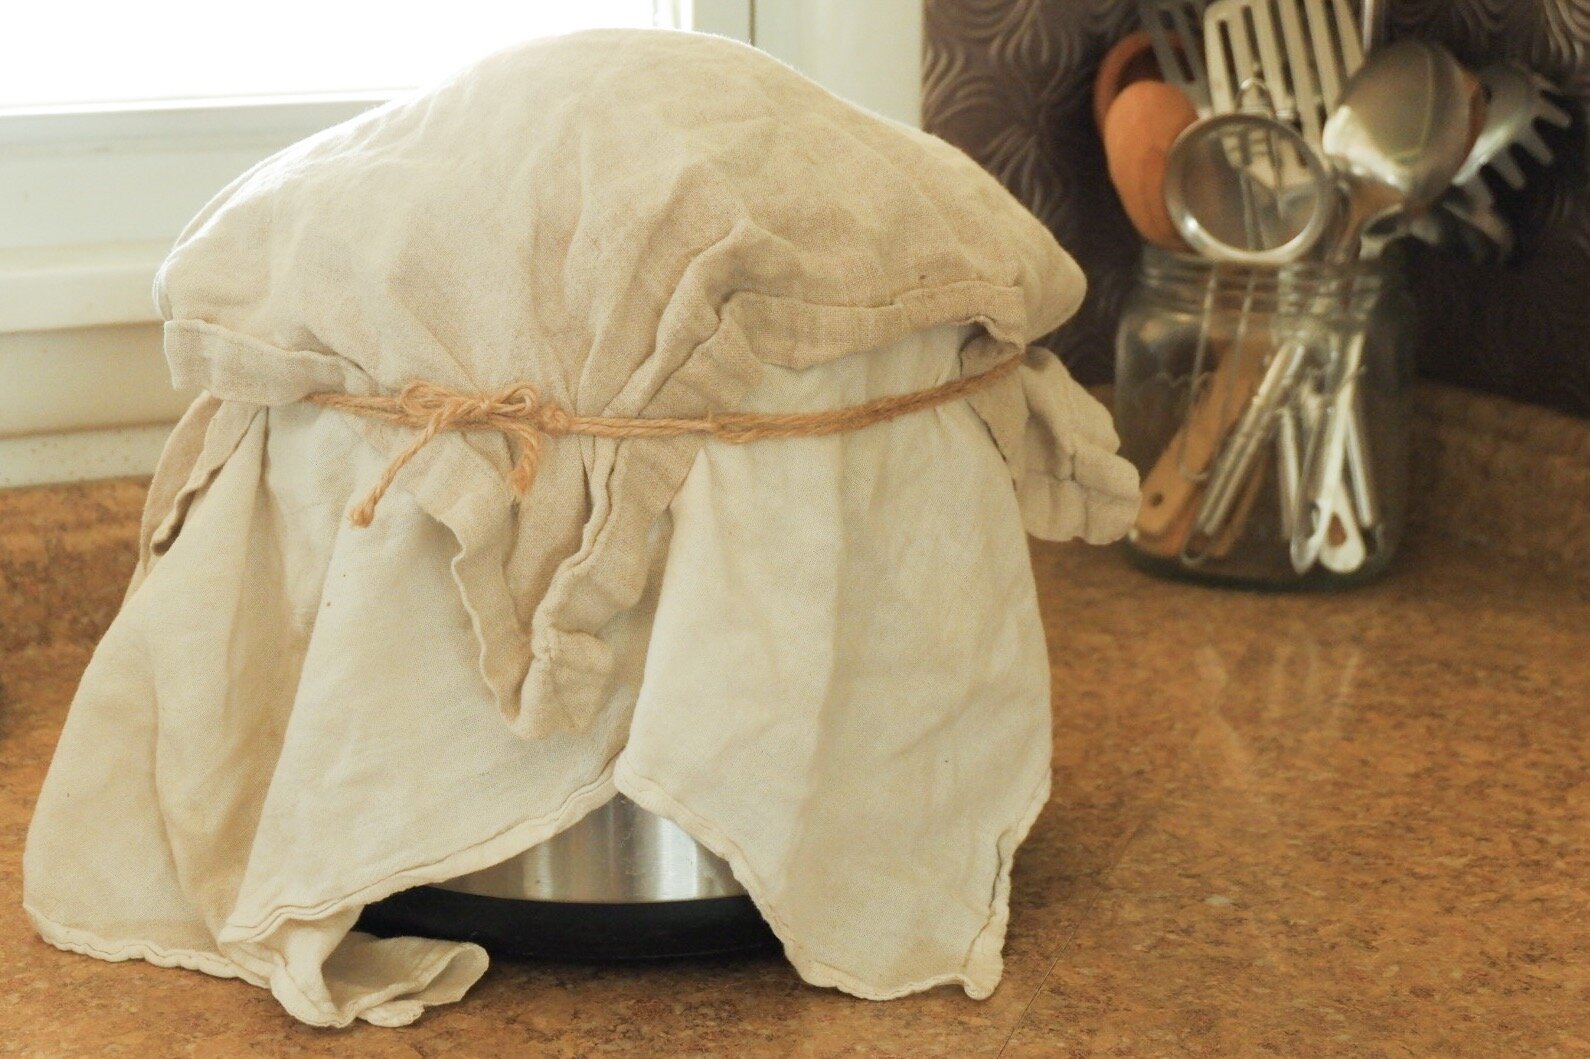
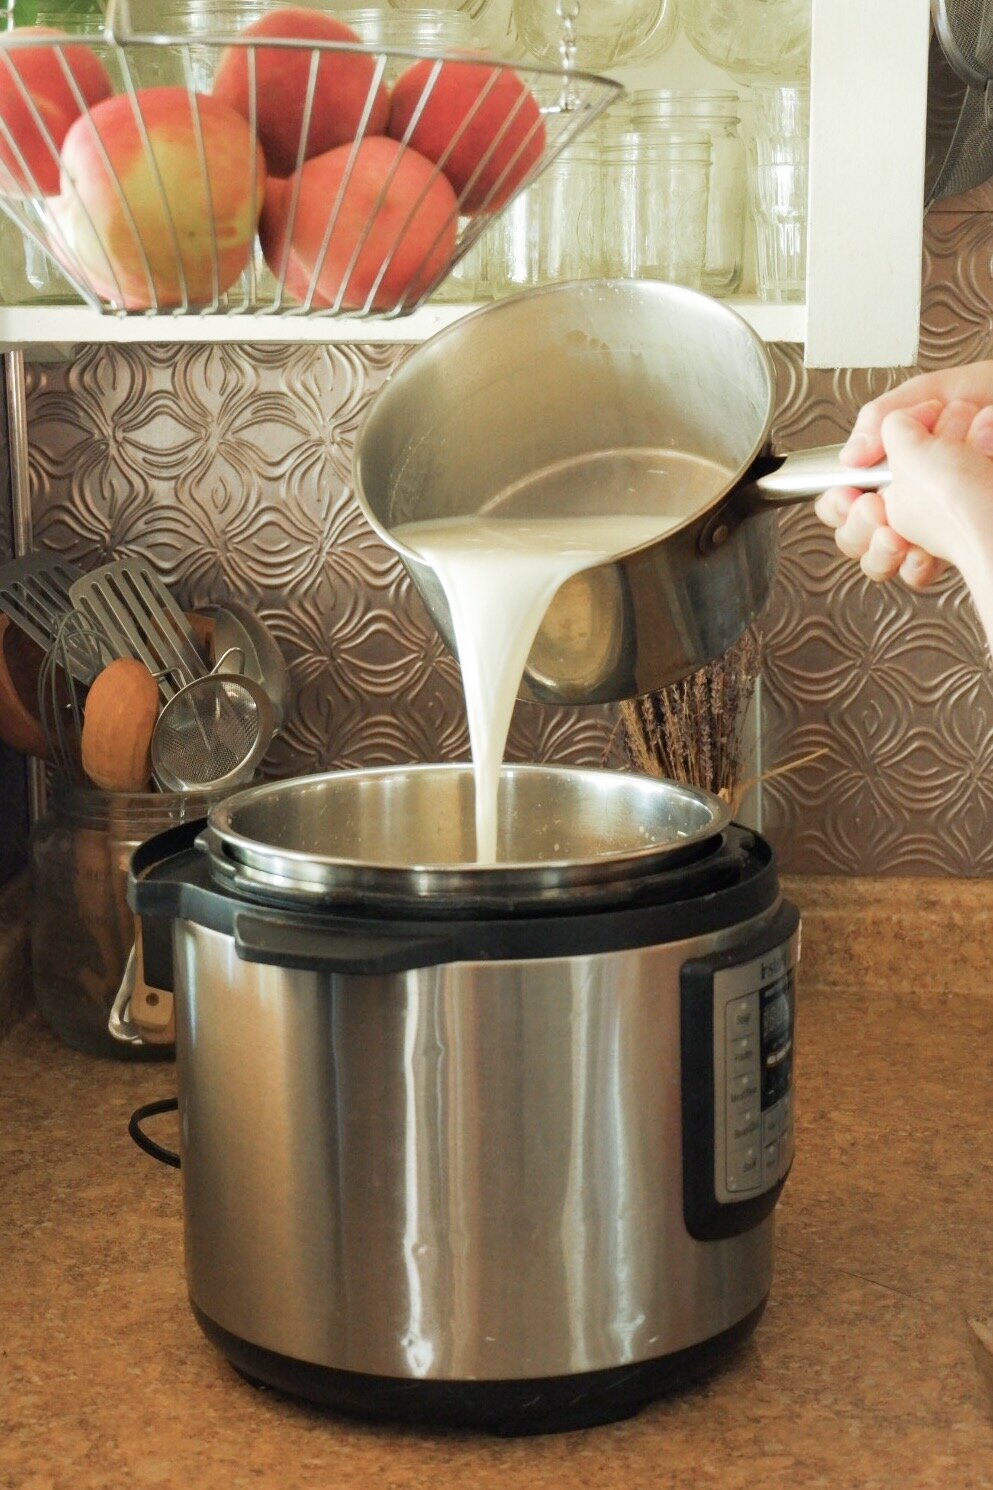
Pour the milk/starter mixture into an insulated container. I use my instant pot with it unplugged and covered. Then I wrap a couple towels around it to keep any heat from leaking out. You can use a thermos, or place your milk in a jar and put it somewhere where you can regulate the temperature such as in a dehydrator or in the oven with the pilot light on. The goal is to keep the milk at 110 F for the next 24-36 hours. Many recipes will say 8-12 hours is fine. When trying to reduce the lactose level and predigest the proteins as much as possible, we aim for at least 24 hours. I find that closer to 28-30 hours produces my favorite consistency/flavor balance. (If you are following the GAPS nutritional protocol, stick to the longer timeframe.)

When the culturing process is done (24-36 hours later), your yogurt is complete! Pour into a glass jar, store in the fridge and enjoy!

GAPS Friendly Homemade Yogurt.jpg
Be Well Clinic GAPS Friendly Homemade Yogurt Recipe.png

Homemade Yogurt

Author:

Ingredients

  • Milk
  • Whey

Instructions

  1. Pour your milk into a pot and slowly heat it over the stove. Raw milk should be heated to 110 F. Pasteurized milk needs to be heated up to 180 F, then cooled to 110 F.
  2. This is very important because when milk is pasteurized, it starts growing bacteria that are not beneficial, and can actually be quite harmful (this is why pasteurized milk has an expiration date and why it “goes bad” when it is too old or left out of refrigeration). We have to kill these off first before we let the culturing process happen.
  3. Once your milk is at temperature, remove from heat and add your starter. This can be yogurt, whey or crème fraiche. Whey generally makes a thinner yogurt, a previous yogurt will make a thicker yogurt, and crème fraiche tends to make a creamier yogurt. Stir briefly to combine.
  4. Pour the milk/starter mixture into an insulated container. I use my instant pot with it unplugged and covered. Then I wrap a couple towels around it to keep any heat from leaking out. You can use a thermos, or place your milk in a jar and put it somewhere where you can regulate the temperature such as in a dehydrator or in the oven with the pilot light on. The goal is to keep the milk at 110 F for the next 24-36 hours. Many recipes will say 8-12 hours is fine. When trying to reduce the lactose level and predigest the proteins as much as possible, we aim for at least 24 hours. I find that closer to 28-30 hours produces my favorite consistency/flavor balance. (If you are following the GAPS nutritional protocol, stick to the longer timeframe.)
  5. When the culturing process is done (24-36 hours later), your yogurt is complete! Pour into a glass jar, store in the fridge and enjoy!

GAPS Legal Turkish Eggs

Eating eggs is a huge part of a healthy diet. However, it is easy to get bored with traditional egg recipes like omelets, scrambled eggs, or hard boiled eggs. This recipe is quick and simple, with an exciting blend of flavors, making it a great way to change up eating eggs.

Most consumers know greek yogurt as a thick, high protein yogurt. Greek yogurt is not just yogurt with whey strained out but is actually a unique culture used to inoculate the milk (growing bacteria on purpose to make the cultured dairy.) It is these particular probiotic strains that make the particular taste and texture of greek yogurt. You can buy these specific cultures online including from Cultures for Health.

If you don’t like Greek Yogurt, you can use any yogurt. Simply strain some of the whey out of it to make it thicker. While this recipe is traditionally made with greek yogurt, you could also make this particular recipe using any thick yogurt, creme fraiche, or sour cream.

While I prepared this with only one egg per bowl, you could easily add two or three eggs to the herbed yogurt. Feel free to play with the spices you add to find a palate and flavor profile that you like. I ate this simply with a spoon but you could also dip cut vegetables like carrots into it.

Ingredients for Turkish Eggs

  • 3 tbsp Butter

  • 1 cup Greek Yogurt

  • ½ tsp Hot Smoked or Hungarian Paprika

  • 1 tbsp High Quality Olive Oil

  • 1 Clove Garlic, Minced

  • 1 tsp Dried Oregano

  • 2 eggs

Directions for Turkish Eggs

Melt butter in a small sauce pan on the stove. Add the paprika.

IMG_0828.jpg

In a bowl, mix the greek yogurt, olive oil, garlic, and oregano. 

Add filtered water to a pot. Bring to a gentle simmer.

IMG_0870.jpg

Add eggs gently to poach them. Simmer for 2-3 minutes depending on how done you’d like the yolk to be. 

Divide the yogurt mixture between two bowls. Add one egg to each bowl. 

IMG_0884.jpg

Drizzle half the butter mixture over each bowl. Top with parsley.

If you are not on GAPS, serve with a toasted piece of sourdough, topped with plenty of butter or not. 


HowtoMakeGAPSLegalTurkishEggs.png

GAPS Legal Turkish Eggs

Author: Amy Mihaly, Be Well Clinic

Ingredients

  • 3 tbsp Butter
  • 1 cup Greek Yogurt
  • ½ tsp Hot Smoked or Hungarian Paprika
  • 1 tbsp High Quality Olive Oil
  • 1 Clove Garlic, Minced
  • 1 tsp Dried Oregano
  • 2 eggs

Instructions

  1. Melt butter in a small sauce pan on the stove. Add the paprika.
  2. In a bowl, mix the greek yogurt, olive oil, garlic, and oregano.
  3. Add filtered water to a pot. Bring to a gentle simmer.
  4. Add eggs gently to poach them. Simmer for 2-3 minutes depending on how done you’d like the yolk to be.
  5. Divide the yogurt mixture between two bowls. Add one egg to each bowl.
  6. Drizzle half the butter mixture over each bowl. Top with parsley.
  7. If you are not on GAPS, serve with a toasted piece of sourdough, topped with plenty of butter or not.
Created using The Recipes Generator

Cured Pork Belly at Home

Pork belly is a great meat because it is so high in fat! That’s why we enjoy bacon so much. Unfortunately most conventional bacons are cured with chemicals, natural and unnatural, some of which are not GAPS Legal - or good for us! If you have access to pork belly, this is a great way to enjoy this fatty cut of meat while on the GAPS Diet.

When sourcing your pork, make sure you find pastured pork. Pigs need to eat dirt within hours of life in order to have a proper microbiome which will set up the gut (and thus full body) health of the pig for their whole life. 

Once your pork belly is cured, you can slice into bacon pieces. Freeze it wrapped in packages or cook up the whole batch and invite your friends to a bacon party. While delicious on it’s own for breakfast, you can also add bacon to this baked beans recipe. You can also use the grease from the bacon for this wilted salad recipe. If you like the taste of bacon, you can also use the fat as the fat to fry your vegetables in.

Ingredients for Cured Pork Belly:

5 lbs Pork Belly

3 tbsp Juniper Berries

2  tbsp Freshly Ground Pepper

2 tbsp Fresh Sage

1 tbsp Thyme 

2 tbsp Salt

8 ish tsp Honey

Directions for Curing Pork Belly at Home:

IMG_8284.jpg

Add your herbs to a mortar and pestle to grind. Mix herbs and pepper in a small bowl.

IMG_8314.jpg

Trim any less than fresh pieces off your meat and slice into chunks.

IMG_8330.jpg

Add spice mixture to chunks and rub into the meat.

Drizzle approximately 1 tsp of honey on each side. 

IMG_8363.jpg

Wrap each piece in unbleached butcher paper or in parchment paper. Close with tape or twine. 

Add pork belly to fridge. 

Every day, flip the pork belly over.

Allow to cure for 5-6 days depending on the thickness of the pork belly. If it’s thicker, you may need to allow it to cure for longer.

IMG_8365.jpg

HowtoCurePorkBelly.png

Cured Pork Belly

Author: The Be Well Clinic
Prep time: Cook time: Total time:

Ingredients:

  • 5 lbs Pork Belly
  • 3 tbsp Juniper Berries
  • 2 tbsp Freshly Ground Pepper
  • 2 tbsp Fresh Sage
  • 1 tbsp Thyme
  • 2 tbsp Salt
  • 8 ish tsp Honey

Instructions:

  1. Add your herbs to a mortar and pestle to grind. Mix herbs and pepper in a small bowl.
  2. Trim any less than fresh pieces off your meat and slice into chunks.
  3. Add spice mixture to chunks and rub into the meat.
  4. Drizzle approximately 1 tsp of honey on each side.
  5. Wrap each piece in unbleached butcher paper or in parchment paper. Close with tape or twine.
  6. Add pork belly to fridge.
  7. Every day, flip the pork belly over.
  8. Allow to cure for 5-6 days depending on the thickness of the pork belly. If it’s thicker, you may need to allow it to cure for longer.
Created using The Recipes Generator

How to Make Your Own Dairy Free, Egg Free Sausage

I was searching for the perfect sausage recipe. I discovered I don’t like a sausage that is heavily flavored with sage. My ideal tasting sausage was Jimmy Dean’s sausage which, of course, contains MSG. 

I needed to find a recipe that would keep me from occasionally caving and eating Jimmy Dean. While watching one of my favorite YouTube shows, 18th Century Cooking, I saw their Oxford Gate sausage recipe from Martha Washington’s Book of Cookery which seemed ideal! I’ve modified it below.

This sausage is the ideal breakfast sausage. It wouldn’t work well as a sausage with marinara sauce. It’s great alongside eggs or in an omelette. If I don’t want to eat cheese, it’s also a great, easy snack on the go.

The original recipe for this called for suet, which is rendered kidney fat. The suet melts while cooking and creates a lighter patty. That’s not something I usually have on hand but this recipe works just as well without it. If you don’t mind a denser patty (think like a hamburger) than you’ll enjoy this sausage without the suet.

This is a dairy free, egg free sausage recipe which is great if you’re not currently tolerating either.

You’ll notice a spice used in this recipe is Blade Mace. Blade mace is the shell that surrounds and protects nutmeg. Mace has a sharper taste than nutmeg but if you don’t have blade mace, equal amounts of ground nutmeg can be substituted.

What will you eat alongside this sausage?

If you’re looking for a DIY sausage recipe that tastes like Jimmy Dean but is made with real ingredients, try this one! It’s GAPS Legal, good for the Whole 30 Diet and paleo. Recipe by Amy Mihaly, Certified GAPS Practitioner in Colorado.

Ingredients for How to Make Your Own Sausage:

  • 1 lb fresh ground pork

  • 1 1/2 tsp. Salt

  • ½ tsp Ground Pepper

  • ¼ tsp Blade Mace, coarsely ground

  • 1 ½ tsp Sage

  • ¼ tsp Ground Cloves

  • 2 - 3 tbsp Lard

Directions for How to Make Your Own Sausage:

If you’re looking for a DIY sausage recipe that tastes like Jimmy Dean but is made with real ingredients, try this one! It’s GAPS Legal, good for the Whole 30 Diet and paleo. Recipe by Amy Mihaly, Certified GAPS Practitioner in Colorado.

In a large bowl, mix the meat with the spices.

If you’re looking for a DIY sausage recipe that tastes like Jimmy Dean but is made with real ingredients, try this one! It’s GAPS Legal, good for the Whole 30 Diet and paleo. Recipe by Amy Mihaly, Certified GAPS Practitioner in Colorado.

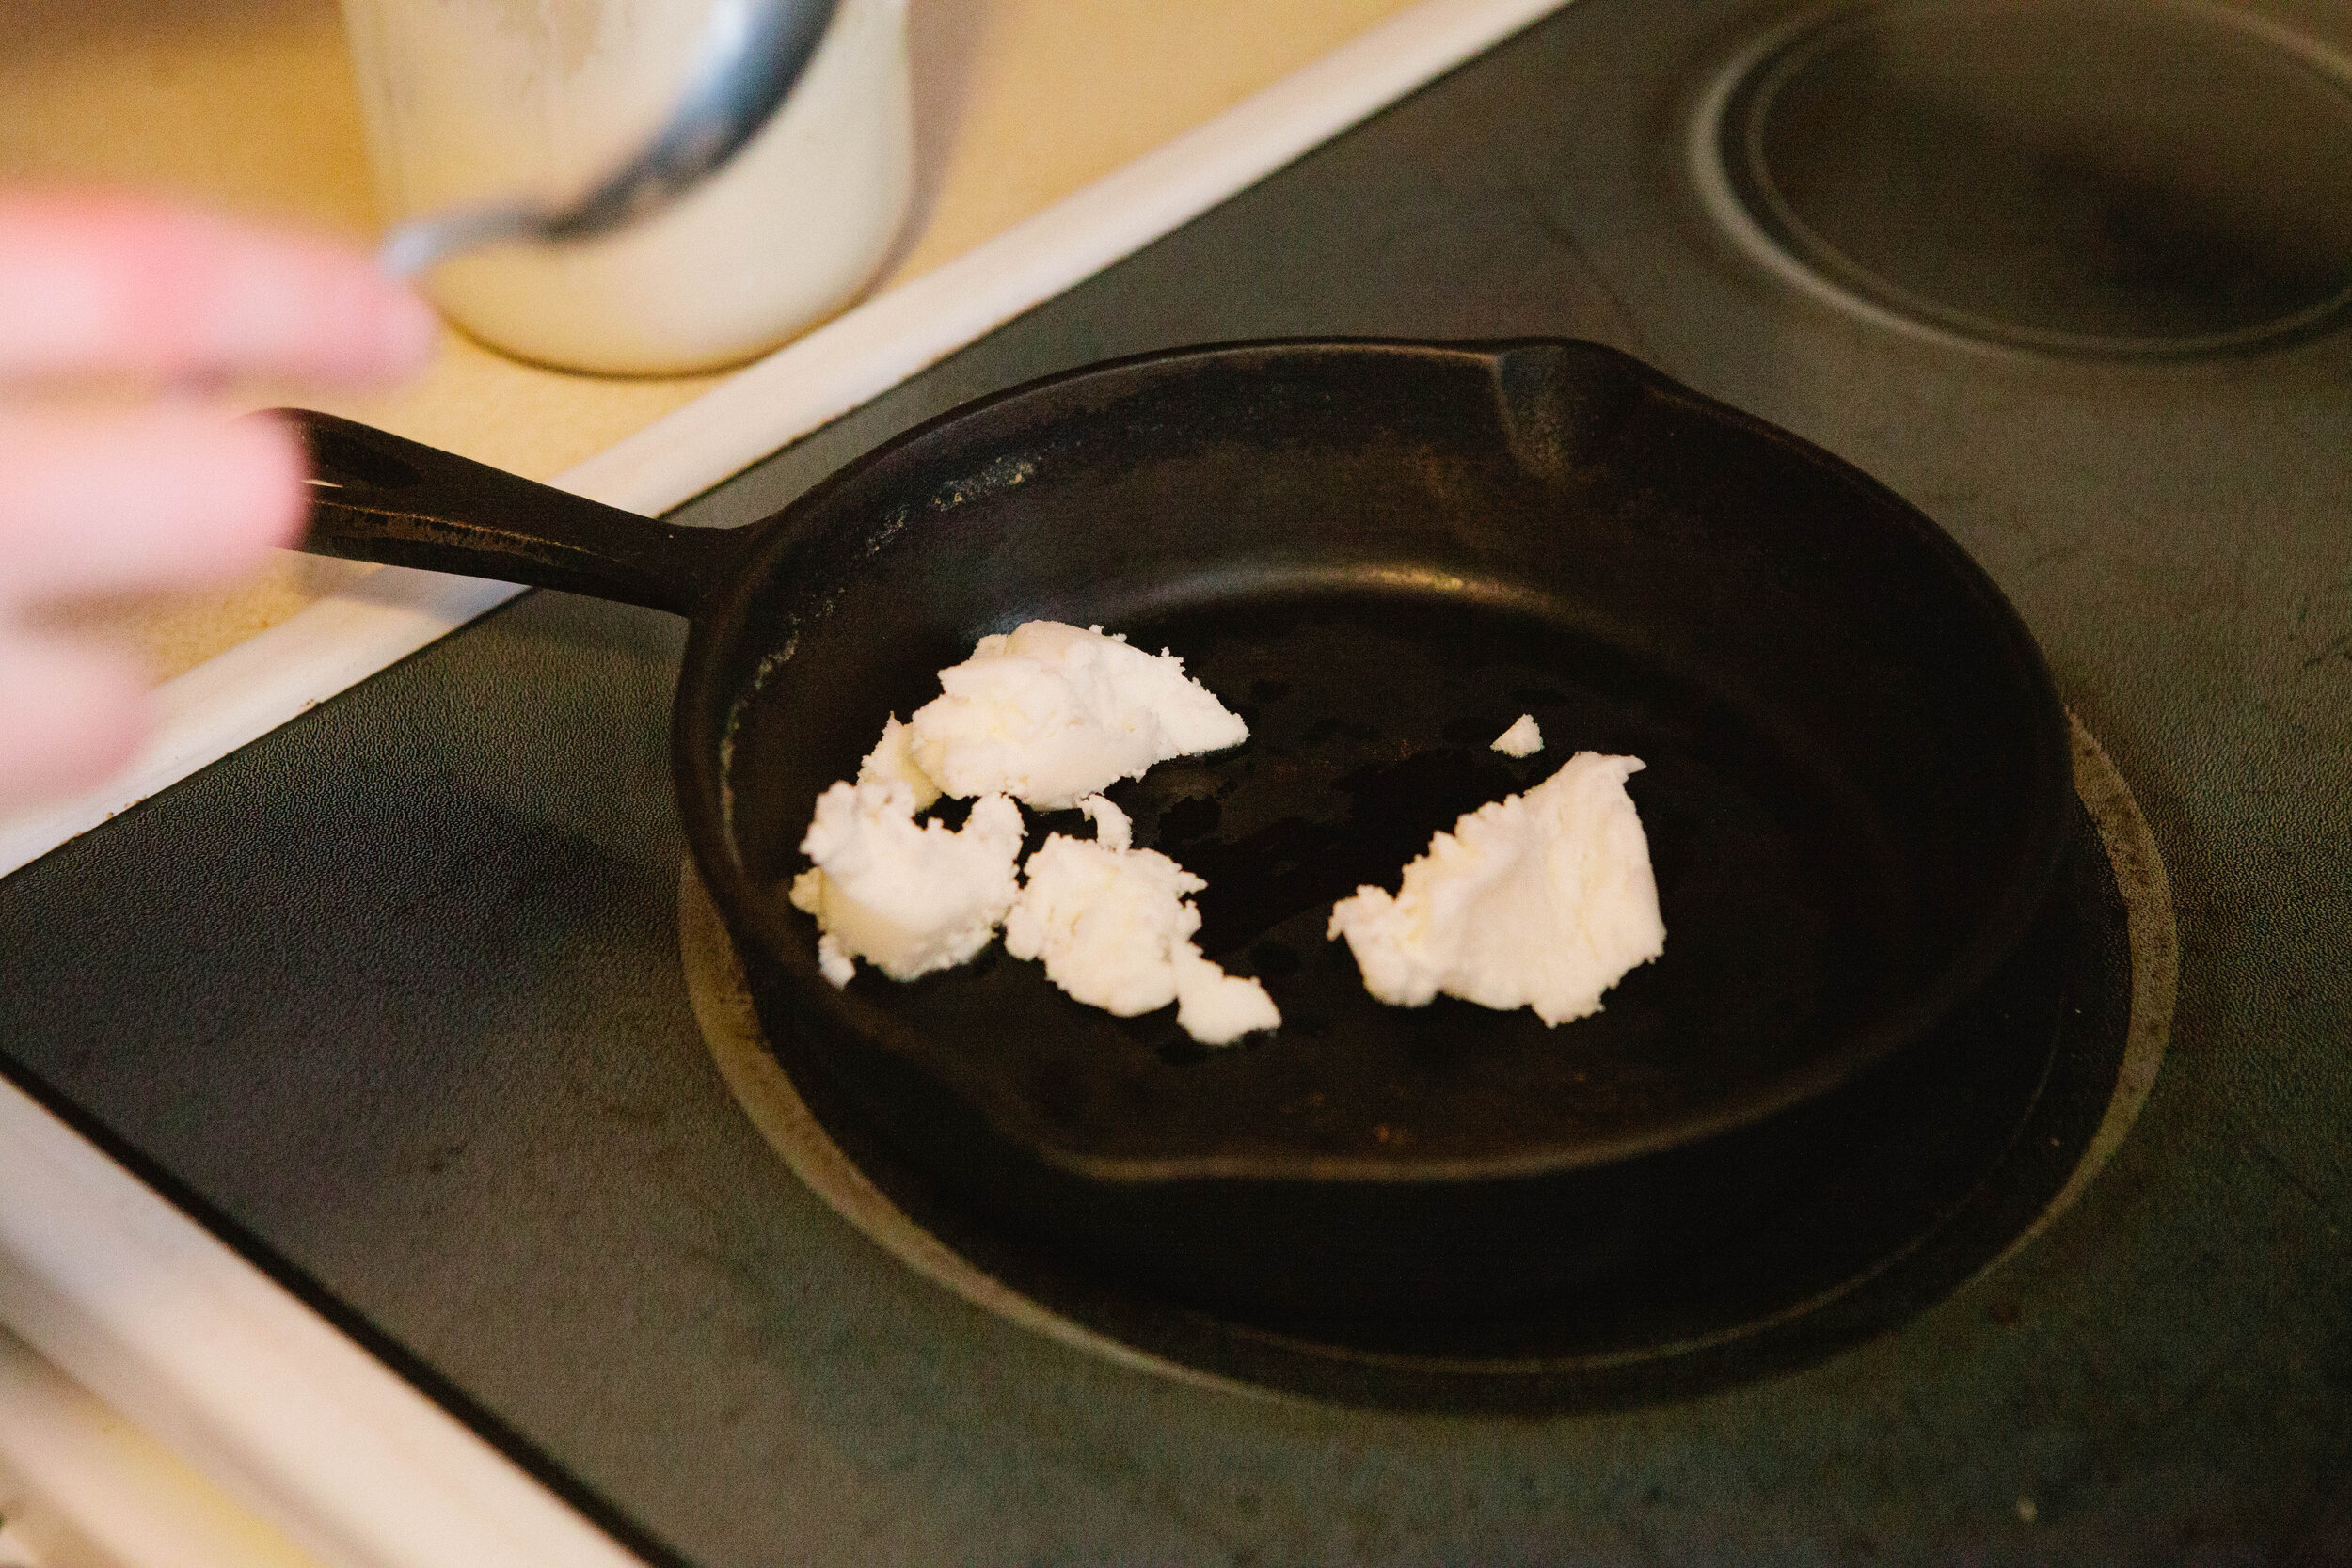
Heat a cast iron pan on low to medium heat. Add 2 - 3 tbsp of lard to the pan, enough to give yourself a good amount of cooking fat. If your pan is too hot, your sausages will burn!

If you’re looking for a DIY sausage recipe that tastes like Jimmy Dean but is made with real ingredients, try this one! It’s GAPS Legal, good for the Whole 30 Diet and paleo. Recipe by Amy Mihaly, Certified GAPS Practitioner in Colorado.

Roll sausages into finger like shapes. Add them to a pan, a small amount at a time.

These need tending! As soon as you can, move them on the bottom of the pan to prevent them from burning. Then roll them gently to cook on all sides. Because they are thicker and take longer to cook, you do need to roll them a bit to prevent them cooking too long on one side.

If you’re looking for a DIY sausage recipe that tastes like Jimmy Dean but is made with real ingredients, try this one! It’s GAPS Legal, good for the Whole 30 Diet and paleo. Recipe by Amy Mihaly, Certified GAPS Practitioner in Colorado.

Cook the sausage for about 5-7 minutes, depending on how thick you make them. They will start to feel more solid as they cook.

Enjoy warm or cold! Cold sausage tastes more salty to me so if you plan to eat them cold, adjust your salt slightly. These also freeze extremely well, cooked or raw! I cooked and took a large batch of them with me when I went hunting and ate them for breakfast cold. 

How to Make the Perfect Hard Boiled and Soft Boiled Eggs

Egg whites are best eaten cooked. They are very detoxifying when they’re raw and when they’re raw, they require a lot of things to properly digest them. All the necessary things needed for digestion are in egg yolks so it’s important to consume the egg whites and egg yolks at the same time. Egg yolks are best eaten raw or very lightly cooked. This keeps the fragile nutrients inside egg yolks intact.

If you are having digestive issues, you should eat egg whites cooked only. After you have healed, you can consume raw egg whites.*

IMG_1622.jpg

Dr. Natasha recommends that a child eats between three and six egg yolks a day and an adult should eat six to twelve. You may consume the whites with this if you are tolerating them or simply use the yolk only.

There are multiple recipes for using egg whites only or you can feed them to your dog or cat.

*Eating uncooked or raw eggs or feeding raw eggs to your pets can pose a risk to your health.

Keeping hard boiled eggs on hand is a great and easy protein on the go! If you want to take your hard boiled eggs one step further, check out my recipe on making mayo free deviled eggs.

Directions for Hard Boiled Eggs

IMG_1620.jpg

Fill a medium saucepan with cold water.

Add eggs.

IMG_1630.jpg

Bring eggs to a boil and cook for 5-6 minutes covered.

Remove eggs from heat.

Let set for 5 minutes.

IMG_1940.jpg

Test if your egg is hard boiled by removing one from the pan and spinning it. A hard boiled egg will spin upright if the yolk is hard.

Rinse the eggs under cold water or place them in an ice bath.

IMG_1944.jpg

Tap the end of the egg and peel the shell off. Enjoy! Try these Mayo Free Deviled Eggs 2 Ways with your Hard Boiled Eggs.


I love soft boiled eggs! It makes me feel like royalty whenever I eat them. The best part of this fancy seeming dish is it’s actually very simple to make!

Directions for Soft Boiled Eggs

IMG_1503.jpg

Add filtered water to a pot. Bring water to a boil.

Once water is boiling, add eggs.

IMG_1630.jpg

Boil for 5 to 6 minutes.

Rinse under cold water or add to an ice bath.

IMG_1523.jpg

Tap one end of the egg and peel half of the egg. Scoop out the inside and enjoy!


Hard Boiled Eggs

Author:
prep time: cook time: total time:

ingredients:

  • Eggs

instructions:

How to cook Hard Boiled Eggs

  1. Fill a medium saucepan with cold water.
  2. Add eggs.
  3. Bring eggs to a boil and cook for 5-6 minutes covered.
  4. Remove eggs from heat.
  5. Let set for 5 minutes.
  6. Test if your egg is hard boiled by removing one from the pan and spinning it. A hard boiled egg will spin upright if the yolk is hard.
  7. Rinse the eggs under cold water or place them in an ice bath.
  8. Tap the end of the egg and peel the shell off. Enjoy! Try these Mayo Free Deviled Eggs 2 Ways with your Hard Boiled Eggs.
Created using The Recipes Generator
20.png

Soft Boiled Eggs

Author:
prep time: cook time: total time:

ingredients:

  • Eggs

instructions:

How to cook Soft Boiled Eggs

  1. Add filtered water to a pot. Bring water to a boil.
  2. Once water is boiling, add eggs.
  3. Boil for 5 to 6 minutes.
  4. Rinse under cold water or add to an ice bath.
  5. Tap one end of the egg and peel half of the egg. Scoop out the inside and enjoy!
Created using The Recipes Generator
19.png

Eggs Poached in Stock

Eggs poached in stock  was a new food for me when I started the GAPS Diet. It quickly became one of my favorite breakfasts that I am still enjoying. Sometimes, I poach an entire egg in the stock but I often I simply poach the yolks in stock.

Poaching your eggs in stock is great on cold winter’s days. It really helps you get going and warms you right off! It’s also a great way to get in your stock for the day in the summer, as it’s often cool enough in the mornings still to enjoy a warm beverage.

Beef Stock Recipe

Chicken Stock Recipe

IMG_1260.jpg

I’ve always liked over easy eggs so I enjoy runny yolks. If you don’t like runny yolks, you can poach your eggs longer, or if you are poaching in your mug, you can break the yolk in the mug. The warmth of the soup will help to cook the yolk but very gently, which will help to leave much of the beneficial enzymes of the yolks intact.

Egg whites are best consumed cooked and egg yolks are best consumed raw. This is for ease of digestion as well as full nutrient potential.

You can use any stock of your choice to poach your eggs in. I had chicken stock on hand when making this recipe so I used that! Be sure to salt your eggs in the stock generously while cooking them and after.

Ingredients to Make Eggs Poached in Stock

  • 2 cups of Your Choice of Stock

  • 1-2 Eggs

  • Salt and pepper

Directions for Eggs Poached in Stock:

Bring two cups of stock to a boil. Add a generous shake of salt.

IMG_1269.jpg

Once stock is rapidly boiling, use a spoon to create a swirling vortex.

To the vortex, break in one to two eggs.

IMG_1284.jpg

Move them gently off the bottom, where they will settle.

IMG_1294.jpg

When your yolk gets to your desired firmness, remove the egg or pour the entire thing into a bowl or mug. This takes anywhere between 3 to 5 minutes.


GAPS Diet Stage 2 Modification: If you are on Stage 2 of the GAPS Diet, this modification will make this recipe legal.

Bring a mug’s worth of stock to a boil.

IMG_1315.jpg

Once the stock is boiling, add it to a mug.

IMG_1322.jpg

To the mug, add one to three egg yolks.

IMG_1345.jpg

I like to let them warm for a couple minutes. Then, I pop one entire egg yolk into my mouth, whole.  Others prefer to break the egg in the mug and stir it around. This only lightly cooks the egg yolk.


Eggs Poached in Stock

Author:
prep time: cook time: total time:

ingredients:

  • 2 cups of Your Choice of Stock
  • 1-2 Eggs
  • Salt and pepper

instructions:

How to cook Eggs Poached in Stock

  1. Bring two cups of stock to a boil. Add a generous shake of salt.
  2. Once stock is rapidly boiling, use a spoon to create a swirling vortex.
  3. To the vortex, break in one to two eggs.
  4. Move them gently off the bottom, where they will settle.
  5. When your yolk gets to your desired firmness, remove the egg or pour the entire thing into a bowl or mug. This takes anywhere between 3 to 5 minutes.
GAPS Diet Stage 1 Modification:
  1. If you are on Stage 1 of the GAPS Diet, this modification will make this recipe legal.
  2. Bring a mug’s worth of stock to a boil.
  3. Once the stock is boiling, add it to a mug.
  4. To the mug, add one to three egg yolks.
  5. I like to let them warm for a couple minutes. Then, I pop one entire egg yolk into my mouth, whole. Others prefer to break the egg in the mug and stir it around. This only lightly cooks the egg yolk.
Created using The Recipes Generator
18.png

How to Make the Best Omelette

I have fond memories of omelettes!  I lived in Guatemala doing mission work for four months when I was 18. During my time there, we took a trip and stayed at a nice hotel. We had a gourmet breakfast with omelettes, complete with the freshest vegetables and fresh eggs. The skill of the chefs was amazing to watch.  It was some of the best food I had ever eaten! Whenever I make omelettes at home now, I think fondly back on that memory. Making an omelette in a cast iron pan is very different from what I experienced in that restaurant but it’s still a delicious and filling meal any time of the day.

You can use the suggested vegetables or any that you have on hand. Making an omelette in the morning is a great way to use up any vegetables that you have leftover from dinner the night before. In general, eggs, peppers, tomatoes, and spinach make great omelettes.

You can also had ham, bacon, or pieces of chicken into your omelette if you’d like. I prefer the simplicity of just vegetables in mine. Cheese is another great ingredient to add to an omelette. If you are cooking in a cast iron pan, which I recommend, wait to add your cheese until your omelette is ready to be folded. The heat of the omelette will melt the cheese and you won't have gooey strings of cheese in your cast iron.

Cooking your omelette can go quick so pre-slicing all the vegetables you want to use before you start heating the fat or cooking the eggs is important for timing! If you wash any of your vegetables, make sure you dry them completely before adding them to your omelette.

This recipe makes 1 very large omelette that can easily be split between two people. It's an especially great recipe if you're preparing food for multiple family members at a time, especially little ones! It's a one pan solution that will feed many.

Easy Omelette Breakfast on GAPS

Ingredients for a GAPS Friendly Omelette

  • 1 tbsp Lard or butter

  • 3 Eggs

  • 1 ½ tbsp Water

  • ¼ Red Bell Pepper

  • ¼ Green Bell Pepper

  • ¼ Onion

  • 1 Small Tomato

  • 1 Handful of Spinach

Directions for a GAPS Friendly Omelette

how-to-make-an-omelette-best-way-to-make-an-omelette-huge-omelette-gaps-legal-eggs-gaps-legal-omelette-gaps-friendly-breakfast-gaps-friendly-omelette-gaps-diet-gaps-protocol-certified-gaps-practitioner-northern-colorado-holistic-healthcare-amy-mihaly

Chop all vegetables you will add to your meal before you start heating your pan. Try to keep pieces as uniform as possible so they cook quickly.

how-to-make-an-omelette-best-way-to-make-an-omelette-huge-omelette-gaps-legal-eggs-gaps-legal-omelette-gaps-friendly-breakfast-gaps-friendly-omelette-gaps-diet-gaps-protocol-certified-gaps-practitioner-northern-colorado-holistic-healthcare-amy-mihaly

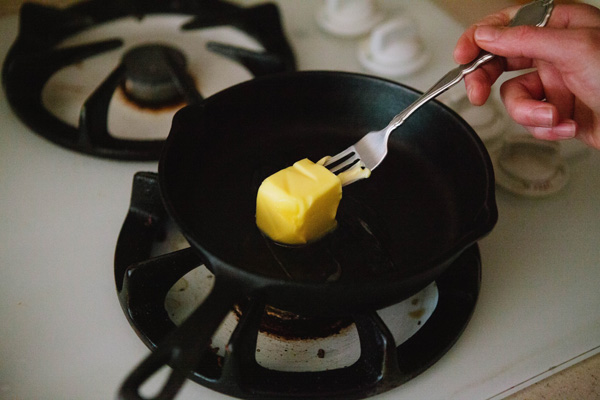
Heat your fat in a pan.

how-to-make-an-omelette-best-way-to-make-an-omelette-huge-omelette-gaps-legal-eggs-gaps-legal-omelette-gaps-friendly-breakfast-gaps-friendly-omelette-gaps-diet-gaps-protocol-certified-gaps-practitioner-northern-colorado-holistic-healthcare-amy-mihaly

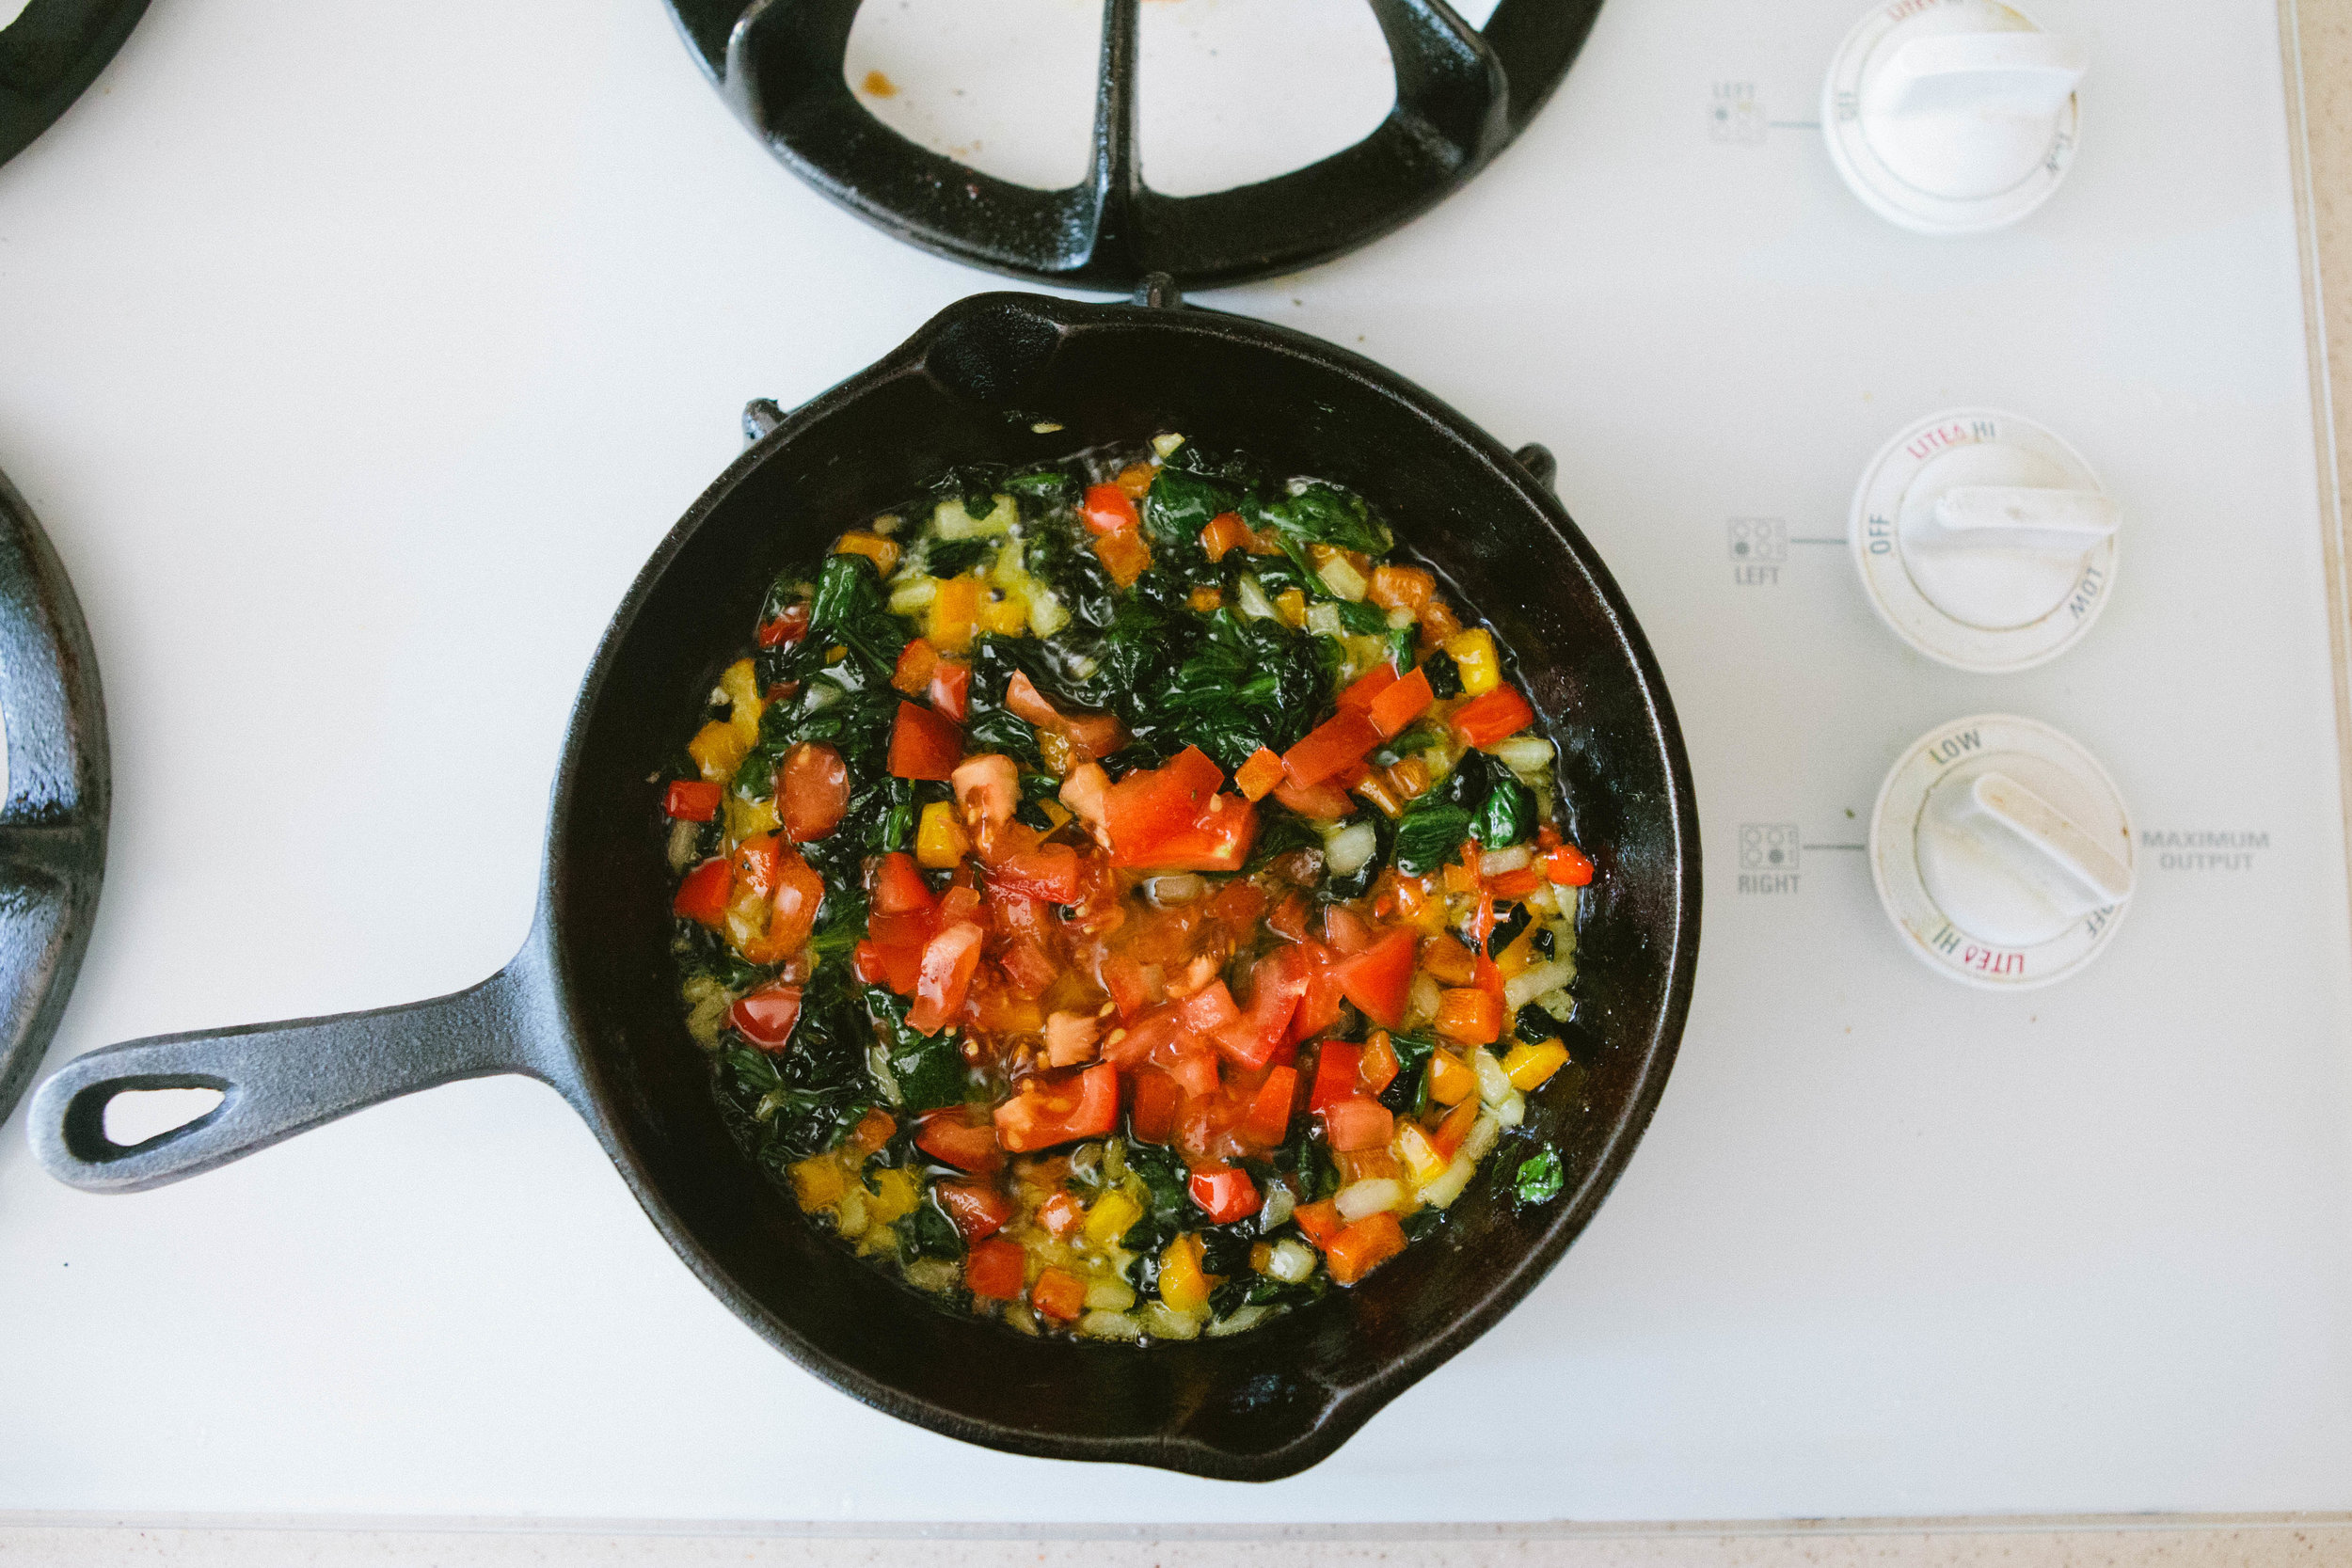
Add spinach to pan and saute until soft.

how-to-make-an-omelette-best-way-to-make-an-omelette-huge-omelette-gaps-legal-eggs-gaps-legal-omelette-gaps-friendly-breakfast-gaps-friendly-omelette-gaps-diet-gaps-protocol-certified-gaps-practitioner-northern-colorado-holistic-healthcare-amy-mihaly

Meanwhile, crack three eggs into a dish. Scramble the eggs quickly with a fork.

how-to-make-an-omelette-best-way-to-make-an-omelette-huge-omelette-gaps-legal-eggs-gaps-legal-omelette-gaps-friendly-breakfast-gaps-friendly-omelette-gaps-diet-gaps-protocol-certified-gaps-practitioner-northern-colorado-holistic-healthcare-amy-mihaly

Add all other vegetables except tomatoes. Add a few shakes of salt and cook for five minutes.

When your vegetables are soft, add the tomatoes.

how-to-make-an-omelette-best-way-to-make-an-omelette-huge-omelette-gaps-legal-eggs-gaps-legal-omelette-gaps-friendly-breakfast-gaps-friendly-omelette-gaps-diet-gaps-protocol-certified-gaps-practitioner-northern-colorado-holistic-healthcare-amy-mihaly

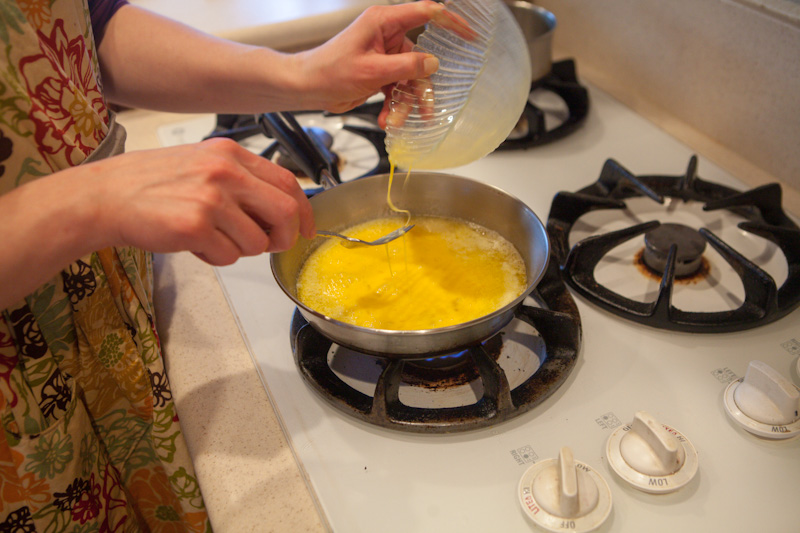
After five minutes, add the eggs. Stir to incorporate the vegetables. Try to leave a little fat on the bottom of the pan, which can be difficult.

how-to-make-an-omelette-best-way-to-make-an-omelette-huge-omelette-gaps-legal-eggs-gaps-legal-omelette-gaps-friendly-breakfast-gaps-friendly-omelette-gaps-diet-gaps-protocol-certified-gaps-practitioner-northern-colorado-holistic-healthcare-amy-mihaly

Once your eggs are incorporated, turn the stove to low heat and place a cover over the top of the eggs.

how-to-make-an-omelette-best-way-to-make-an-omelette-huge-omelette-gaps-legal-eggs-gaps-legal-omelette-gaps-friendly-breakfast-gaps-friendly-omelette-gaps-diet-gaps-protocol-certified-gaps-practitioner-northern-colorado-holistic-healthcare-amy-mihaly

As your eggs start to harden, help them pull away from the sides of the pan by loosening them with a fork. This helps release some fat which will make it easier to remove the omelette from the pan once it is done.

how-to-make-an-omelette-best-way-to-make-an-omelette-huge-omelette-gaps-legal-eggs-gaps-legal-omelette-gaps-friendly-breakfast-gaps-friendly-omelette-gaps-diet-gaps-protocol-certified-gaps-practitioner-northern-colorado-holistic-healthcare-amy-mihaly

When eggs are set, transfer to a plate and fold over. Help loosen the omelette from the pan with a fork.

how-to-make-an-omelette-best-way-to-make-an-omelette-huge-omelette-gaps-legal-eggs-gaps-legal-omelette-gaps-friendly-breakfast-gaps-friendly-omelette-gaps-diet-gaps-protocol-certified-gaps-practitioner-northern-colorado-holistic-healthcare-amy-mihaly

Top with what you’d like! I like sour cream on my omelettes but you could add salsa or avocado.


Omelette

Author:
prep time: cook time: total time:

ingredients:

  • 1 tbsp Lard or butter
  • 3 Eggs
  • 1 ½ tbsp Water
  • ¼ Red Bell Pepper
  • ¼ Green Bell Pepper
  • ¼ Onion
  • 1 Small Tomato
  • 1 Handful of Spinach

instructions:

How to cook Omelette

  1. Chop all vegetables you will add to your meal before you start heating your pan. Try to keep pieces as uniform as possible so they cook quickly.
  2. Heat your fat in a pan.
  3. Add spinach to pan and saute until soft.
  4. Meanwhile, crack three eggs into a dish. Scramble the eggs quickly with a fork.
  5. Add all other vegetables except tomatoes. Add a few shakes of salt and cook for five minutes.
  6. When your vegetables are soft, add the tomatoes.
  7. After five minutes, add the eggs. Stir to incorporate the vegetables. Try to leave a little fat on the bottom of the pan, which can be difficult.
  8. Once your eggs are incorporated, turn the stove to low heat and place a cover over the top of the eggs.
  9. As your eggs start to harden, help them pull away from the sides of the pan by loosening them with a fork. This helps release some fat which will make it easier to remove the omelette from the pan once it is done.
  10. When eggs are set, transfer to a plate and fold over. Help loosen the omelette from the pan with a fork.
  11. Top with what you’d like! I like sour cream on my omelettes but you could add salsa or avocado.
Created using The Recipes Generator
21.png

How to Make the Ultimate Scrambled Eggs

Light, fluffy scrambled eggs are the starter to so many great dishes and an easy addition to any meal. For me, having access to farm fresh eggs means I make scrambled eggs a lot! They're quick for when I'm on the go. It's simple enough to make decent scrambled eggs.

There’s a way to take your scrambled eggs over the top. It transforms them from just ok eggs to the creamiest, dreamiest eggs you've ever had. It’s by playing a little game I like to play called “See how much fat you can get your eggs to absorb.” Hint: scrambled eggs can absorb a LOT of fat!

Scrambled-Eggs-How-To-Make-Scrambled-Eggs-Eggs-on-the-GAPS-Diet-GAPS-Protocol-Best-Scrambled-Eggs-Ever

You can use the animal fat of your choice in this recipe; I prefer the taste of butter but anything you have on hand will take your scrambled eggs over the top.

Plain old scrambled eggs can be dressed up lots of different ways! You can keep it simple with just salt and pepper, add salsa or sauerkraut or sour cream, or if you have a hankering for something sweet, try a drizzle of honey or date syrup over the top. I find this last one especially helpful if I need a little get up and go in the morning. It’s just enough sugar to kick start my energy levels for the day. If you are able to tolerate grains, you can have a nice piece of sourdough bread on the side.

How do you like your scrambled eggs?

The Best Scrambled Eggs on the GAPS Diet

Ingredients for Scrambled Eggs

  • 4 tbsp Butter or Lard

  • 2 Eggs

Directions for scrambled eggs

Scrambled-Eggs-How-To-Make-Scrambled-Eggs-Eggs-on-the-GAPS-Diet-GAPS-Protocol-Best-Scrambled-Eggs-Ever

Add your animal fat to a cast iron pan and melt on medium heat. If it doesn’t look like you have enough fat in your pan, feel free to add more!

IMG_1647.jpg

Crack two eggs into a bowl or directly into the pan if you're in a hurry and don't mind a little shell that might end up in your eggs.

Scrambled-Eggs-How-To-Make-Scrambled-Eggs-Eggs-on-the-GAPS-Diet-GAPS-Protocol-Best-Scrambled-Eggs-Ever

Scramble them with a fork or whisk and add them into the melted fat.

Stir quickly to mix the fat and the eggs together.

Scrambled-Eggs-How-To-Make-Scrambled-Eggs-Eggs-on-the-GAPS-Diet-GAPS-Protocol-Best-Scrambled-Eggs-Ever

Keep stirring, about two or three minutes, until your eggs look set.

Scrambled-Eggs-How-To-Make-Scrambled-Eggs-Eggs-on-the-GAPS-Diet-GAPS-Protocol-Best-Scrambled-Eggs-Ever

Serve and enjoy!


Ultimate Scrambled Eggs

Author:
prep time: cook time: total time:

ingredients:

  • 4 tbsp Butter or Lard
  • 2 Eggs

instructions:

How to cook Ultimate Scrambled Eggs

  1. Add your animal fat to a cast iron pan and melt on medium heat. If it doesn’t look like you have enough fat in your pan, feel free to add more!
  2. Crack two eggs into a bowl or directly into the pan if you're in a hurry and don't mind a little shell that might end up in your eggs.
  3. Scramble them with a fork or whisk and add them into the melted fat.
  4. Stir quickly to mix the fat and the eggs together.
  5. Keep stirring, about two or three minutes, until your eggs look set.
  6. Serve and enjoy!
Created using The Recipes Generator
17.png

Simple Easy Hollandaise Sauce Recipe

GAPS Legal Hollandaise Sauce Recipe Made with Limes

What do you do when you are bored or eggs two ways (scrambled or fried?)... make hollandaise sauce, of course!

I'm not sure how the true chefs will react to this recipe because I'm sure I don't get my hollandaise sauce as smooth as it's supposed to be, but so many of you have asked for this favorite recipe of mine that I want to share it here! I have now made this sauce dozens of times and there are a few principles I have learned about what makes this dish different than plain scrambled eggs.

#1 Don't do this in a cast-iron or your eggs will taste like iron.

#2 Lower heat makes for smoother sauce. But if you are in a hurry and don't mind lumps, more heat and less time still creates a delicious meal.

#3 The acid (lime or lemon juice) is the real key to this dish. I make my plain scrambled eggs with similar amounts of butter, but it is the lime that makes the eggs more smooth.

#4 I prefer lime over lemon because it is more mild and I feel I can add more of it without overpowering the dish. I believe this makes the hollandaise sauce easier to successfully make. After having done this many times there is a color change I look for when adding the lime juice. When I achieve this color change I know that my sauce will turn out decently smooth.

As you make this sauce, don't give up if you don't achieve your desired smoothness the first time! As with most cooking, this is an art and skill that you will get better at with practice. Enjoy your hollandaise sauce!

Simple Hollandaise Sauce

Ingredients

  • 2 eggs

  • 3 (ish) tablespoons Butter

  • ½ lime, freshly squeezed

Directions

Hollandaise-Sauce-Easy-Sauce-for-Eggs-Hollandaise-with-Limes-

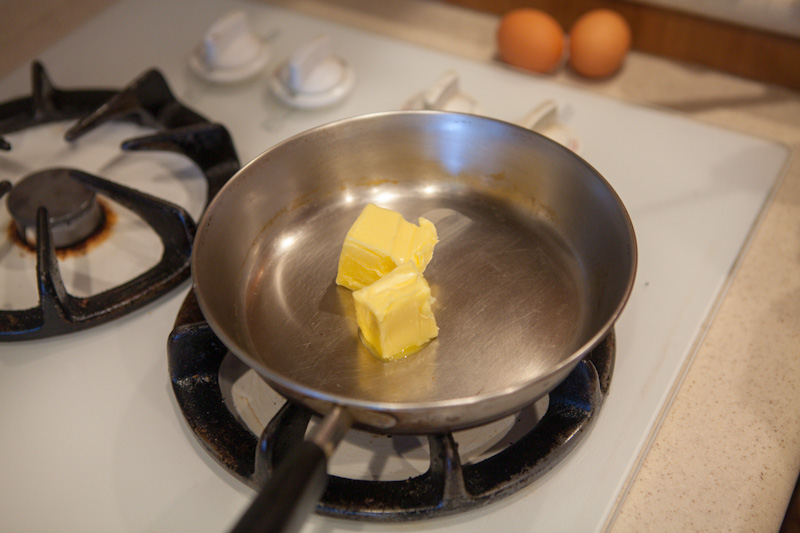
Melt butter in pan on very low heat.

Hollandaise-Sauce-Easy-Sauce-for-Eggs-Hollandaise-with-Limes

A smooth hollandaise sauce is achievable! Whisk the eggs quickly before adding to melted butter. Recipe by certified GAPS Practitioner Amy Mihaly, Be Well Clinic.

Beat two eggs in a bowl.

Hollandaise-Sauce-Easy-Sauce-for-Eggs-Hollandaise-with-Limes

Hollandaise Sauce is my most requested recipe! I eat this GAPS Legal and GAPS friendly sauce on chicken, vegetables and with eggs. It's also Whole 30 and Paleo friendly! Recipe by certified GAPS Practitioner Amy Mihaly, Be Well Clinic.

Add eggs to pan as soon as butter is melted.

Hollandaise-Sauce-Easy-Sauce-for-Eggs-Hollandaise-with-Limes

The key to making a good Hollandaise Sauce is to whisk constantly for a smooth sauce. This GAPS legal recipe couldn't be easier! Recipe by certified GAPS Practitioner Amy Mihaly, Be Well Clinic.

Mix sauce together, stirring constantly. Add lime juice. Using a whisk will get you a smoother sauce but I don’t mind a chunkier sauce.

If your eggs start to thicken, turn down your heat or add more lime juice.

Hollandaise-Sauce-Easy-Sauce-for-Eggs-Hollandaise-with-Limes

An easy simple recipe for Hollandaise Sauce with only three ingredients. This recipe is legal on the GAPS Diet, Whole 30 and Paleo. Recipe by certified GAPS Practitioner Amy Mihaly, Be Well Clinic.

The sauce is done when it holds together more and you can start to see the bottom of the pan.

Serve immediately! Serve with chicken, artichokes, vegetables.

Note:

Do not cook this is in an cast iron pan! Use a stainless steel pan with good heat protection.

HollandaiseSauce-683x1024.png

Hollandaise Sauce with Limes

Author:
prep time: cook time: total time:

ingredients:

  • 2 eggs
  • 3 (ish) tablespoons Butter
  • ½ lime, freshly squeezed

instructions:

How to cook Hollandaise Sauce with Limes

  1. Melt butter in pan on very low heat.
  2. A smooth hollandaise sauce is achievable! Whisk the eggs quickly before adding to melted butter. Recipe by certified GAPS Practitioner Amy Mihaly, Be Well Clinic.
  3. Beat two eggs in a bowl.
  4. Hollandaise Sauce is my most requested recipe! I eat this GAPS Legal and GAPS friendly sauce on chicken, vegetables and with eggs. It's also Whole 30 and Paleo friendly! Recipe by certified GAPS Practitioner Amy Mihaly, Be Well Clinic.
  5. Add eggs to pan as soon as butter is melted.
  6. The key to making a good Hollandaise Sauce is to whisk constantly for a smooth sauce. This GAPS legal recipe couldn't be easier! Recipe by certified GAPS Practitioner Amy Mihaly, Be Well Clinic.
  7. Mix sauce together, stirring constantly. Add lime juice. Using a whisk will get you a smoother sauce but I don’t mind a chunkier sauce.
  8. If your eggs start to thicken, turn down your heat or add more lime juice.
  9. An easy simple recipe for Hollandaise Sauce with only three ingredients. This recipe is legal on the GAPS Diet, Whole 30 and Paleo. Recipe by certified GAPS Practitioner Amy Mihaly, Be Well Clinic.
  10. The sauce is done when it holds together more and you can start to see the bottom of the pan.
  11. Serve immediately! Serve with chicken, artichokes, vegetables.
  12. Note:
  13. Do not cook this is in an cast iron pan! Use a stainless steel pan with good heat protection.
Created using The Recipes Generator

Butternut Squash GAPS Pancakes Recipe

This recipe was adapted from the GAPS Pancake Recipe in the Gut and Psychology Syndrome book by Dr. Natasha Campbell. Makes 3 Pancakes.

GAPS Legal Pancakes Ingredients

  • 1/2 c. cooked Butternut Squash

  • 3 Farm Fresh Eggs

  • Fat such as lard, butter or sour cream

  • Salt

  • Toppings such as date syrup or cinnamon

  • Food Processor or Blender

Directions for gaps legal pancakes

gaps-legal-pancakes-pancakes-made-with-butternut-squash-gaps-diet-gaps-protocol

Cut butternut squash into halves. Deseed and bake face down on a parchment lined baking tray for 40 minutes at 400 degrees until very soft.

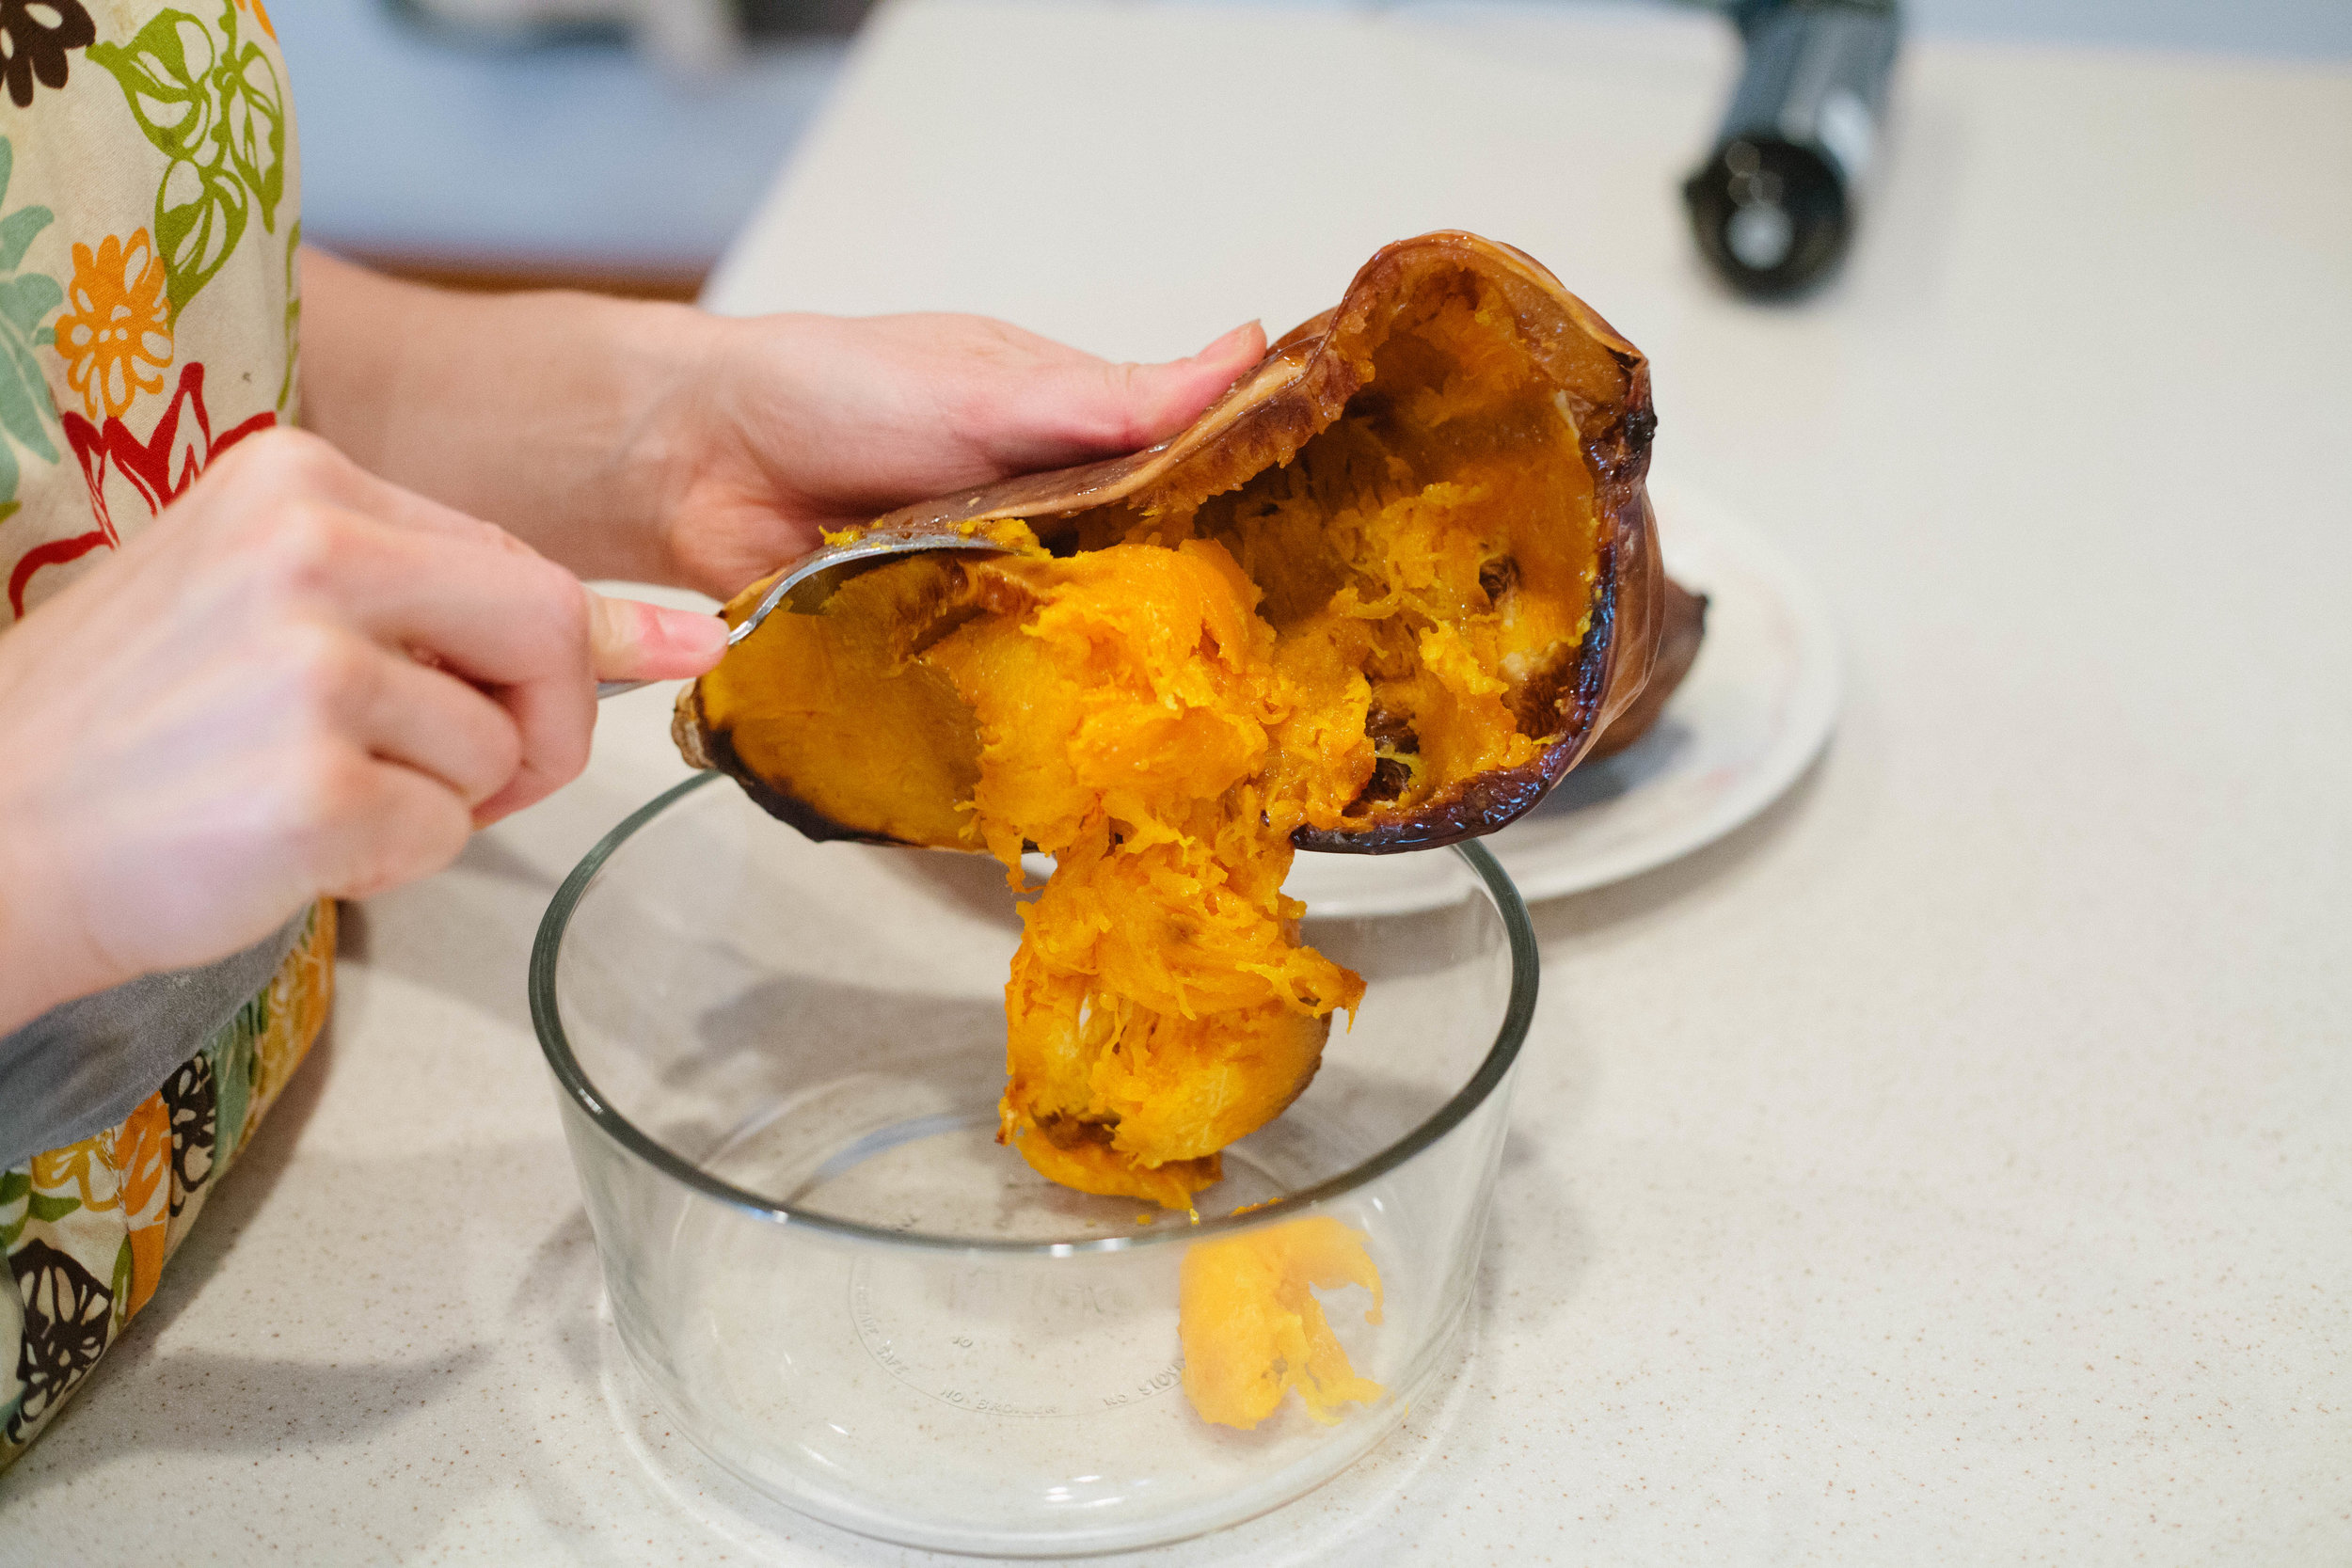
When squash has cooled and can be handled, scoop out the flesh with a spoon into a large bowl.

gaps-legal-pancakes-pancakes-made-with-butternut-squash-gaps-diet-gaps-protocol

Add squash, eggs and fat to blender. For every 1/2 cup of squash, add 3 eggs, 1 tbsp of fat and 2 pinches of salt. The traditional GAPS pancake recipe uses almond butter to thicken instead of fat. Since this is a nut free recipe, I used fat to thicken instead. Blend until smooth.

gaps-legal-pancakes-pancakes-made-with-butternut-squash-gaps-diet-gaps-protocol

Add a couple tablespoons of fat to a pan. Heat on low heat until oil is simmering.

Make sure your fat is glistening in the pan before adding your pancake batter. You can also add one drop of water into the pan. If it sizzles, the oil is ready.When pan is ready, add scoop of pancake batter. Cook pancake on low heat for about 10 minutes.

You can cook multiple pancakes at a time but I’ve had the best luck cooking one at a time!

gaps-legal-pancakes-pancakes-made-with-butternut-squash-gaps-diet-gaps-protocol

Similar to traditional pancakes, they will bubble on top when they are ready to flip.

Cook on the second side for about two to three minutes. Be careful - this second side will cook much faster than the first!

gaps-legal-pancakes-pancakes-made-with-butternut-squash-gaps-diet-gaps-protocol

Once cooked, add butter. Keep as a savory pancake or for a sweeter treat, add date syrup or cinnamon. Do not add cinnamon to the mixture before you cook - it will burn!

Notes: If your fat gets too hot and burns, rinse your pan out and start with new fat for the next pancake. Otherwise, all the pancakes will taste burn.

Blackened and burnt sections of the pancake contain high levels of carbon, which is difficult to digest. These should be avoided as much as possible on the introduction stages of the GAPS diet.


Butternut Squash Pancakes

Author:
prep time: cook time: total time:
This recipe was adapted from the GAPS Pancake Recipe in the Gut and Psychology Syndrome book by Dr. Natasha Campbell. Makes 3 Pancakes.

ingredients:

  • 1/2 c. cooked Butternut Squash
  • 3 Farm Fresh Eggs
  • Fat such as lard, butter or sour cream
  • Salt
  • Toppings such as date syrup or cinnamon
  • Food Processor or Blender

instructions:

How to cook Butternut Squash Pancakes

  1. Cut butternut squash into halves. Deseed and bake face down on a parchment lined baking tray for 40 minutes at 400 degrees until very soft.
  2. When squash has cooled and can be handled, scoop out the flesh with a spoon into a large bowl.
  3. Add squash, eggs and fat to blender. For every 1/2 cup of squash, add 3 eggs, 1 tbsp of fat and 2 pinches of salt. The traditional GAPS pancake recipe uses almond butter to thicken instead of fat. Since this is a nut free recipe, I used fat to thicken instead. Blend until smooth.
  4. Add a couple tablespoons of fat to a pan. Heat on low heat until oil is simmering.
  5. Make sure your fat is glistening in the pan before adding your pancake batter. You can also add one drop of water into the pan. If it sizzles, the oil is ready.When pan is ready, add scoop of pancake batter. Cook pancake on low heat for about 10 minutes.
  6. You can cook multiple pancakes at a time but I’ve had the best luck cooking one at a time!
  7. Similar to traditional pancakes, they will bubble on top when they are ready to flip.
  8. Cook on the second side for about two to three minutes. Be careful - this second side will cook much faster than the first!
  9. Once cooked, add butter. Keep as a savory pancake or for a sweeter treat, add date syrup or cinnamon. Do not add cinnamon to the mixture before you cook - it will burn!
  10. Notes: If your fat gets too hot and burns, rinse your pan out and start with new fat for the next pancake. Otherwise, all the pancakes will taste burn.
  11. Blackened and burnt sections of the pancake contain high levels of carbon, which is difficult to digest. These should be avoided as much as possible on the introduction stages of the GAPS diet.
Created using The Recipes Generator

GAPS Friendly Waffle Recipe

Recently the idea struck me to try to make a GAPS waffle. I had made many GAPS pancakes, so I thought maybe it could be done. And it turns out... it can! It was not a simple task, however.

The ratios are fairly different than a GAPS pancake... for one thing, putting in too many eggs caused it to overflow and made quite a mess. But after some trial and error I found a recipe that is delicious, and delivered consistent results (which is a big deal when cooking without flour).

I was also excited to make this a dairy-free recipe (except for the whey). Unfortunately, I can't make it nut free, the almond butter is essential! I hope you enjoy them!

GAPS Friendly Waffles

(makes about 8 waffle squares or 2 full-size waffles)

GAPs legal waffle Batter Ingredients

  • 1 cup cooked butternut squash

  • 4 TBS fermented almond butter (see note)

  • 1 TBS melted lard

  • 2 eggs

  • ¼ tsp sea salt

Additional Ingredients

  • About ¼ cup melted lard or butter to grease the waffle iron

Tools for gaps legal waffles

  • Food processor or high-powered blender

  • Waffle iron

  • Chopsticks (this is very helpful to get the waffles off in one piece)

Directions for gaps legal waffles

This recipe is quick to put together if you do a little prep work first!

Prep the Fermented Almond Butter:
At least 24 hours in advance, ferment the almond butter. Add 2 TBS whey to 1 cup almond butter. Stir. Leave at room temperature for 24 hours. This will keep in the fridge for at least 2 weeks.

Prep the Butternut Squash:
Cut the butternut squash in half and place face down on a baking sheet lined with parchment paper. Bake at 350 degrees for 35-45 min until soft. Remove the squash flesh and place in a bowl.

For the GAPS Waffles:
Combine all ingredients in a food processor and blend until very smooth and mixed.

gaps-legal-waffles-how-to-make-waffles-for-the-gaps-diet-paleo-waffles-butternut-squash-waffles-how-to-make-waffles-gaps-legal-waffle-recipe-waffles-for-the-gaps-protocol-healing-gut-waffles

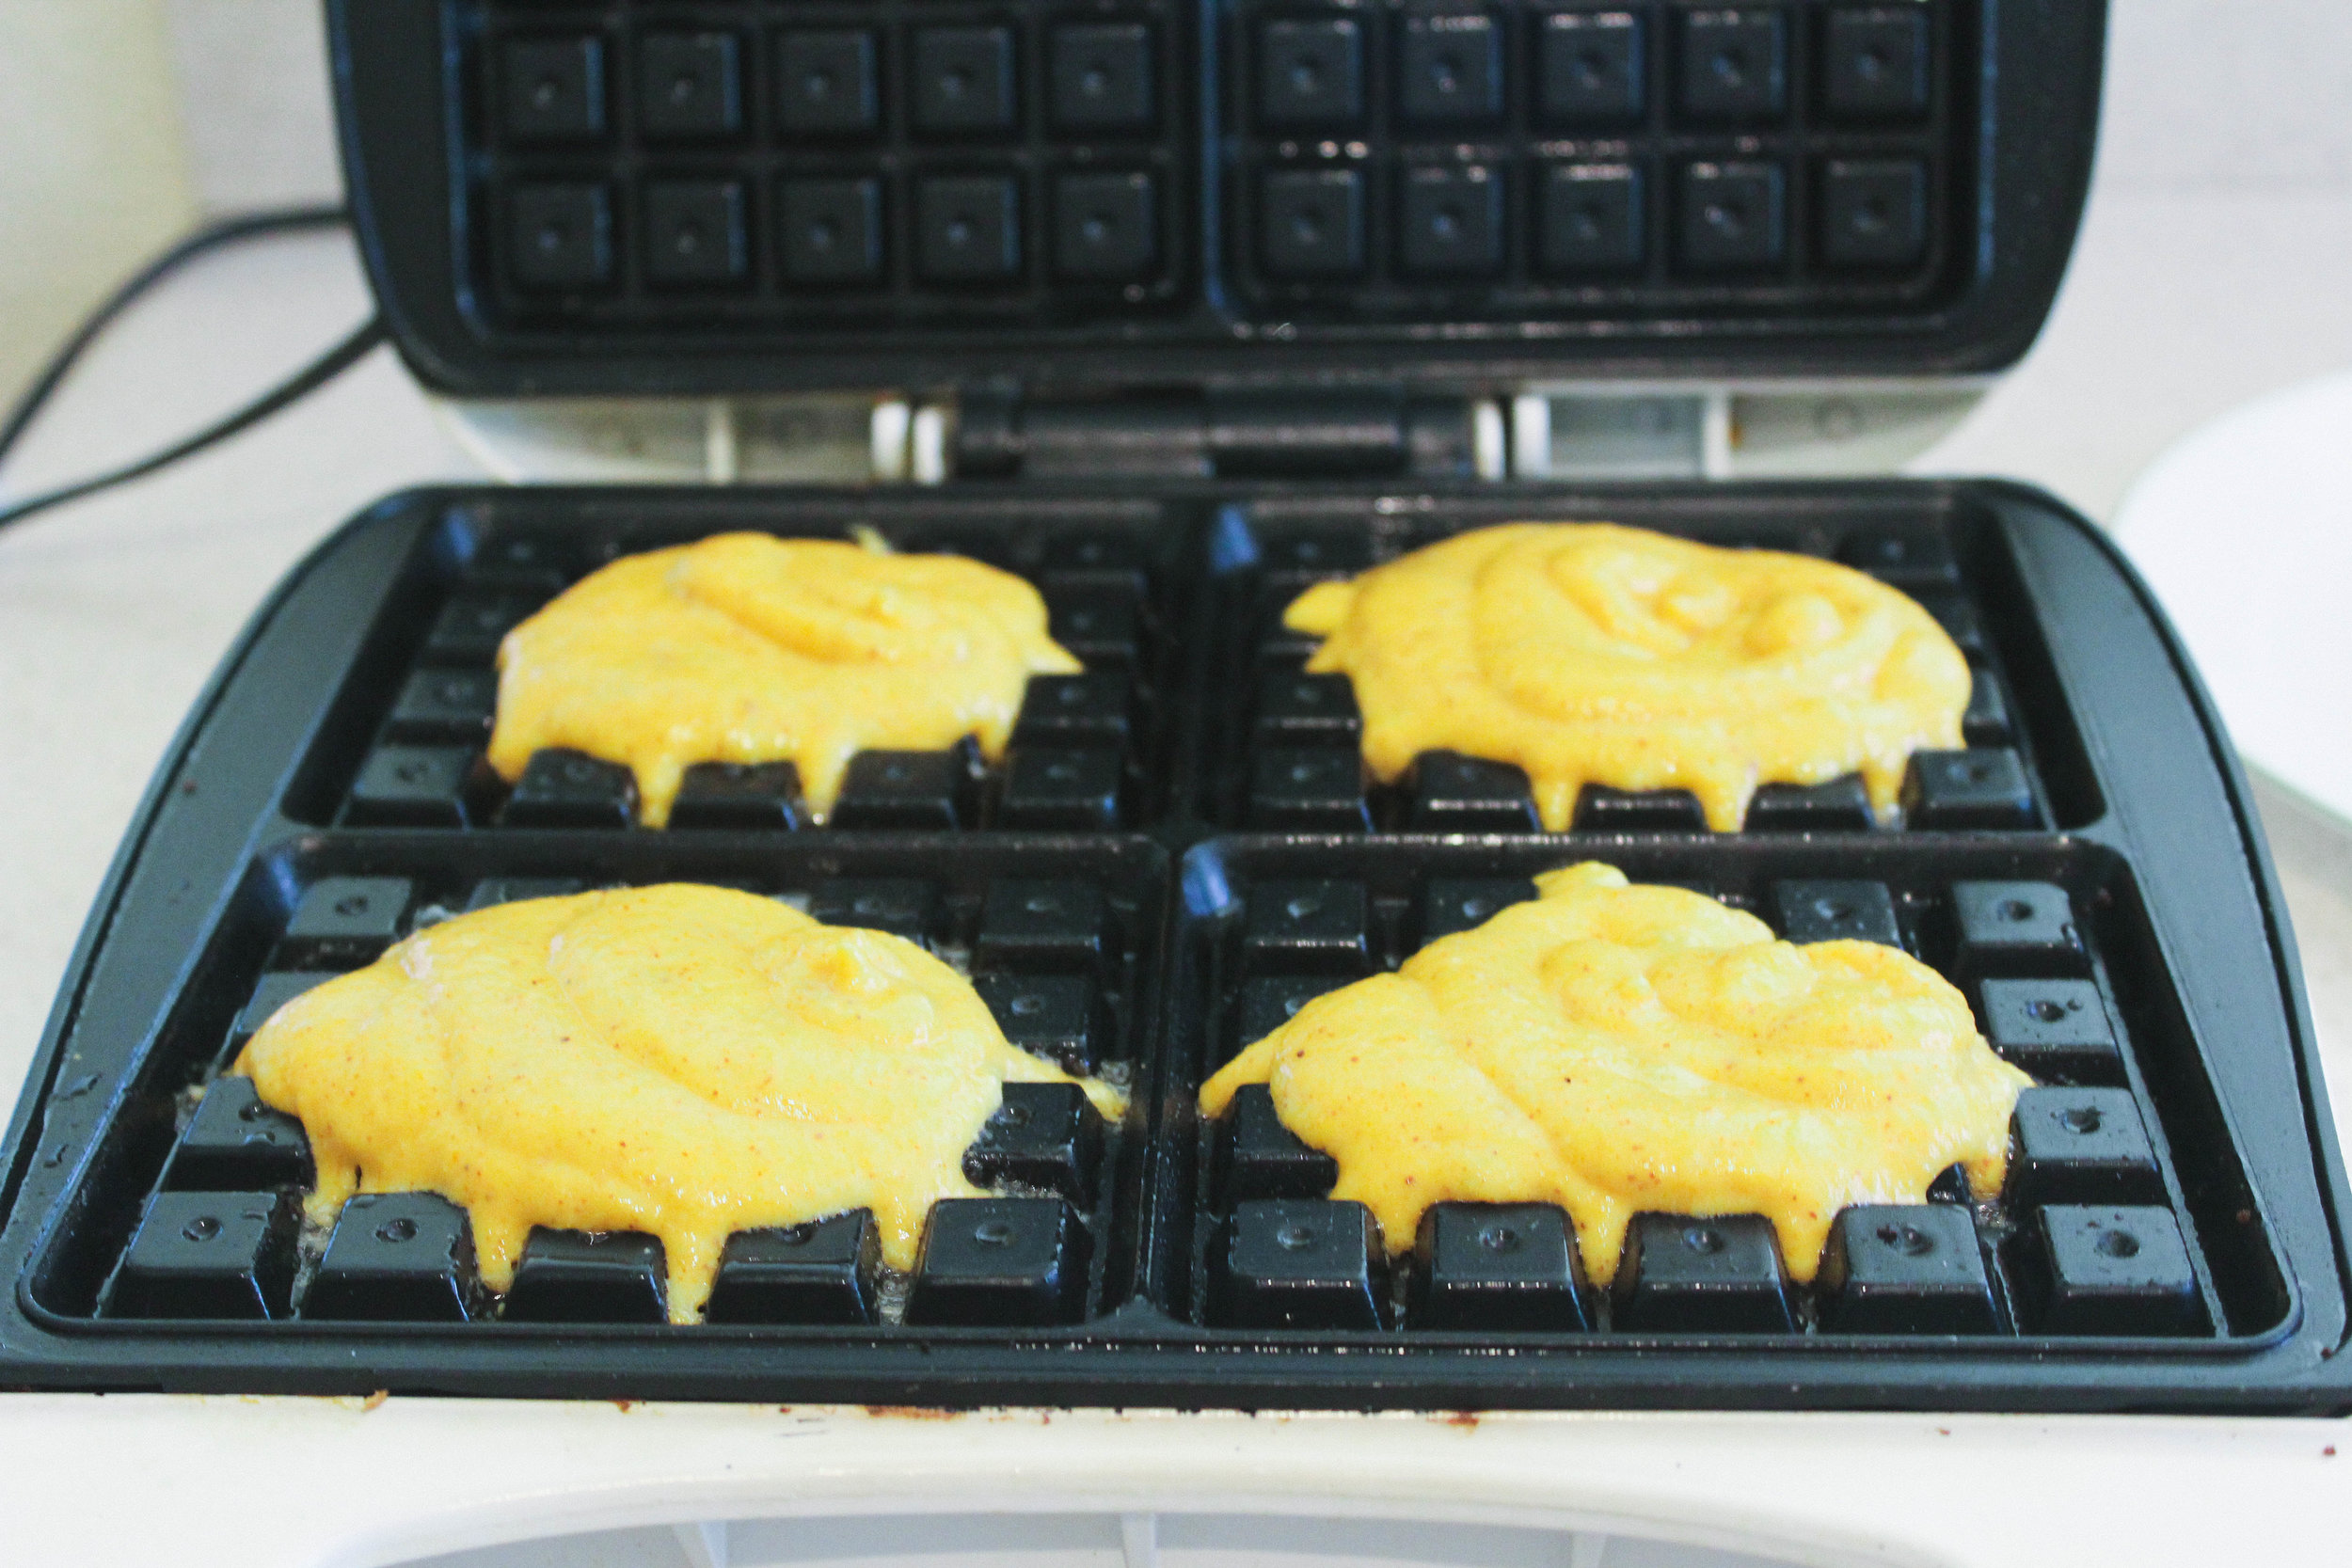
I recommend pouring the mixture into a bag and using it like a pastry bag. The more quickly you can get the waffle batter on the iron and close the lid, the better it turns out!

gaps-legal-waffles-how-to-make-waffles-for-the-gaps-diet-paleo-waffles-butternut-squash-waffles-how-to-make-waffles-gaps-legal-waffle-recipe-waffles-for-the-gaps-protocol-healing-gut-waffles

When everything is ready, and the waffle iron is hot, use the pastry brush to spread fat on the upper and lower waffle irons. Do this as quickly as possible.

Add batter to the waffle iron, then close the lid.

gaps-legal-waffles-how-to-make-waffles-for-the-gaps-diet-paleo-waffles-butternut-squash-waffles-how-to-make-waffles-gaps-legal-waffle-recipe-waffles-for-the-gaps-protocol-healing-gut-waffles

There is a lot of moisture in this recipe, so expect a lot of steam!

Wait for the green light to go on, and then another 30 seconds or so.

Slowly open the waffle iron.

gaps-legal-waffles-how-to-make-waffles-for-the-gaps-diet-paleo-waffles-butternut-squash-waffles-how-to-make-waffles-gaps-legal-waffle-recipe-waffles-for-the-gaps-protocol-healing-gut-waffles

Remove the waffles from the iron, using the chopstick in the groves in any areas it is sticking.Top with fried eggs, honey, date syrup, berries, homemade whipped cream, or anything you want to!

gaps-legal-waffles-how-to-make-waffles-for-the-gaps-diet-paleo-waffles-butternut-squash-waffles-how-to-make-waffles-gaps-legal-waffle-recipe-waffles-for-the-gaps-protocol-healing-gut-waffles

Enjoy!


GAPS Friendly Waffle Recipe

Author:
prep time: cook time: total time:

ingredients:

Waffle Batter Ingredients
  • 1 cup cooked butternut squash
  • 4 TBS fermented almond butter (see note)
  • 1 TBS melted lard
  • 2 eggs
  • ¼ tsp sea salt
Additional Ingredients
  • About ¼ cup melted lard or butter to grease the waffle iron
Tools Needed
  • Food processor or high-powered blender
  • Waffle iron
  • Chopsticks (this is very helpful to get the waffles off in one piece)

instructions:

How to cook GAPS Friendly Waffle Recipe

  1. This recipe is quick to put together if you do a little prep work first!
  2. Prep the Fermented Almond Butter:
  3. At least 24 hours in advance, ferment the almond butter. Add 2 TBS whey to 1 cup almond butter. Stir. Leave at room temperature for 24 hours. This will keep in the fridge for at least 2 weeks.
  4. Prep the Butternut Squash:
  5. Cut the butternut squash in half and place face down on a baking sheet lined with parchment paper. Bake at 350 degrees for 35-45 min until soft. Remove the squash flesh and place in a bowl.
  6. For the GAPS Waffles:
  7. Combine all ingredients in a food processor and blend until very smooth and mixed.
  8. I recommend pouring the mixture into a bag and using it like a pastry bag. The more quickly you can get the waffle batter on the iron and close the lid, the better it turns out!
  9. When everything is ready, and the waffle iron is hot, use the pastry brush to spread fat on the upper and lower waffle irons. Do this as quickly as possible.
  10. Add batter to the waffle iron, then close the lid.
  11. There is a lot of moisture in this recipe, so expect a lot of steam!
  12. Wait for the green light to go on, and then another 30 seconds or so.
  13. Slowly open the waffle iron.
  14. Remove the waffles from the iron, using the chopstick in the groves in any areas it is sticking. Top with fried eggs, honey, date syrup, berries, homemade whipped cream, or anything you want to!
Created using The Recipes Generator

Zucchini Bread {GAPS legal}

Zucchini... if there is one harvest that defines summer, it's zucchini.

Zucchini is great because of its versatility: it can be used hot or cold, baked or fried, and in soups, salads, breads, or even as a noodle substitute.

Today I want to share with you a recipe for a zucchini bread that is legal on the full GAPS diet, WAPF diet, Paleo diet and Whole30. I want you to remember (and take hope in) the fact that I am not primarily a chef. I am just average in the kitchen. If I can make this, so can you! This recipe is very forgiving—so try it!

There are a couple keys to this recipe that need to be followed. Don't shortcut them...they are what make this recipe forgiving, and the bread yummy! The first key is also the first step: fermenting the almond flour. Have you eaten baked goods made of almond flour that are dense and dry? Fermenting the flour creates a lighter, fluffier end product. But that's not all! Fermenting is one of the three processes that can be used to make nuts more digestible.

For more about soaking, sprouting or fermenting, watch this video.

The other key is using sour cream (you could also substitute in a full-fat yogurt) for the fat. As a cultured food, sour cream helps make the bread lighter as well.

Fermented Almond Flour Zucchini Bread

Ingredients

  • 2 1/2 cups almond flour (organic preferred)

  • 1/2 cup whey (strained from yogurt or kefir)

  • 2 cups zucchini (grated and squeezed to remove the liquid)

  • 2-3 eggs (chicken or duck)

  • 1 tsp cinnamon

  • 1/4 tsp ginger

  • 1/4 tsp nutmeg

  • 1 tsp sea salt (source)

  • 1/2 cup sour cream

  • 2/3 cup date syrup (source)

Directions

24 hours (or more) before

Mix almond flour and whey together in a bow.l Cover and set on the counter for 24 hours

This fermentation, which takes place at room temperature, will change the texture of the "flour." At the end of 24 hours you will have something that resembles dough more than wet flour. This is a base that can be used for many recipes. It will keep in the fridge about a week, so many people make this ahead of time and keep it in their fridge for future use. With this step done ahead of time, you can pull it out, add ingredients, and have a fermented baked good in about an hour.

The Next Day

Preheat the oven to 350° F Grate more than 2 cups of zucchini. The zucchini is very wet, so squeeze it dry using a cloth or towel (you can see it in the picture below).

Next, measure 2 cups of the zucchini (dry, but not compressed) and mix it into the 24 hour fermented flour. Add 2-3 eggs (it depends on the size of your egg, those pictured are duck eggs, which are larger than chicken eggs).

Mix in the rest of the ingredients (sour cream, date syrup, salt and spices).

I used date paste instead of honey because cooking honey is thought to turn the honey toxic. You can also make your own date paste in a strong blender like a Vitamix.

Pour into a greased pan (I prefer lining mine with parchment paper, but this is optional).

Bake at 350° for 45-50 minutes, or until toothpick comes out clean from the middle. Wait at least 10 minutes before cutting into the bread. This allows the steam to finish the cooking progress, and will make the texture of the bread better. Add butter, and enjoy!
This post contains affiliate links. Your trust is important to me, and I only recommend products that I trust.


Fermented Almond Flour Zucchini Bread

Author:
prep time: cook time: total time:

ingredients:

  • 2 1/2 cups almond flour (organic preferred)
  • 1/2 cup whey (strained from yogurt or kefir)
  • 2 cups zucchini (grated and squeezed to remove the liquid)
  • 2-3 eggs (chicken or duck)
  • 1 tsp cinnamon
  • 1/4 tsp ginger
  • 1/4 tsp nutmeg
  • 1 tsp sea salt (source)
  • 1/2 cup sour cream
  • 2/3 cup date syrup (source)

instructions:

How to cook Fermented Almond Flour Zucchini Bread

24 hours (or more) before
  1. Mix almond flour and whey together in a bow.l Cover and set on the counter for 24 hours
  2. This fermentation, which takes place at room temperature, will change the texture of the "flour." At the end of 24 hours you will have something that resembles dough more than wet flour. This is a base that can be used for many recipes. It will keep in the fridge about a week, so many people make this ahead of time and keep it in their fridge for future use. With this step done ahead of time, you can pull it out, add ingredients, and have a fermented baked good in about an hour.
The Next Day
  1. Preheat the oven to 350° F Grate more than 2 cups of zucchini. The zucchini is very wet, so squeeze it dry using a cloth or towel (you can see it in the picture below).
  2. Next, measure 2 cups of the zucchini (dry, but not compressed) and mix it into the 24 hour fermented flour. Add 2-3 eggs (it depends on the size of your egg, those pictured are duck eggs, which are larger than chicken eggs).
  3. Mix in the rest of the ingredients (sour cream, date syrup, salt and spices).
  4. I used date paste instead of honey because cooking honey is thought to turn the honey toxic. You can also make your own date paste in a strong blender like a Vitamix.
  5. Pour into a greased pan (I prefer lining mine with parchment paper, but this is optional).
  6. Bake at 350° for 45-50 minutes, or until toothpick comes out clean from the middle. Wait at least 10 minutes before cutting into the bread. This allows the steam to finish the cooking progress, and will make the texture of the bread better. Add butter, and enjoy!
Created using The Recipes Generator

GAPS Milkshake

Our recipe this week is a simple, but powerful one! It is called the GAPS™ milkshake, and it packs a powerful punch! This delicious, satisfying and helpful beverage is a wonderful way to daily consume your freshly-pressed juices, and can even be a meal.

The GAPS™ milkshake is mix of juice, protein, and fat. Because it is easily digested, usually in about 20 minutes, it can be eaten when you don't have much time to sit and digest. But because it contains fat and protein, as well as sugar, it can sustain you for a while, often a few hours.

Let's get down to making it! You need a few simple ingredients.

  1. Freshly pressed juices (I like carrots, but you can use any juice mixture)

  2. Sour cream (creme fraische), coconut oil, or another fat

  3. Raw egg (whole or just the yoke)

  4. Raw honey (optional, and only a little!)

IMG_7397.jpg

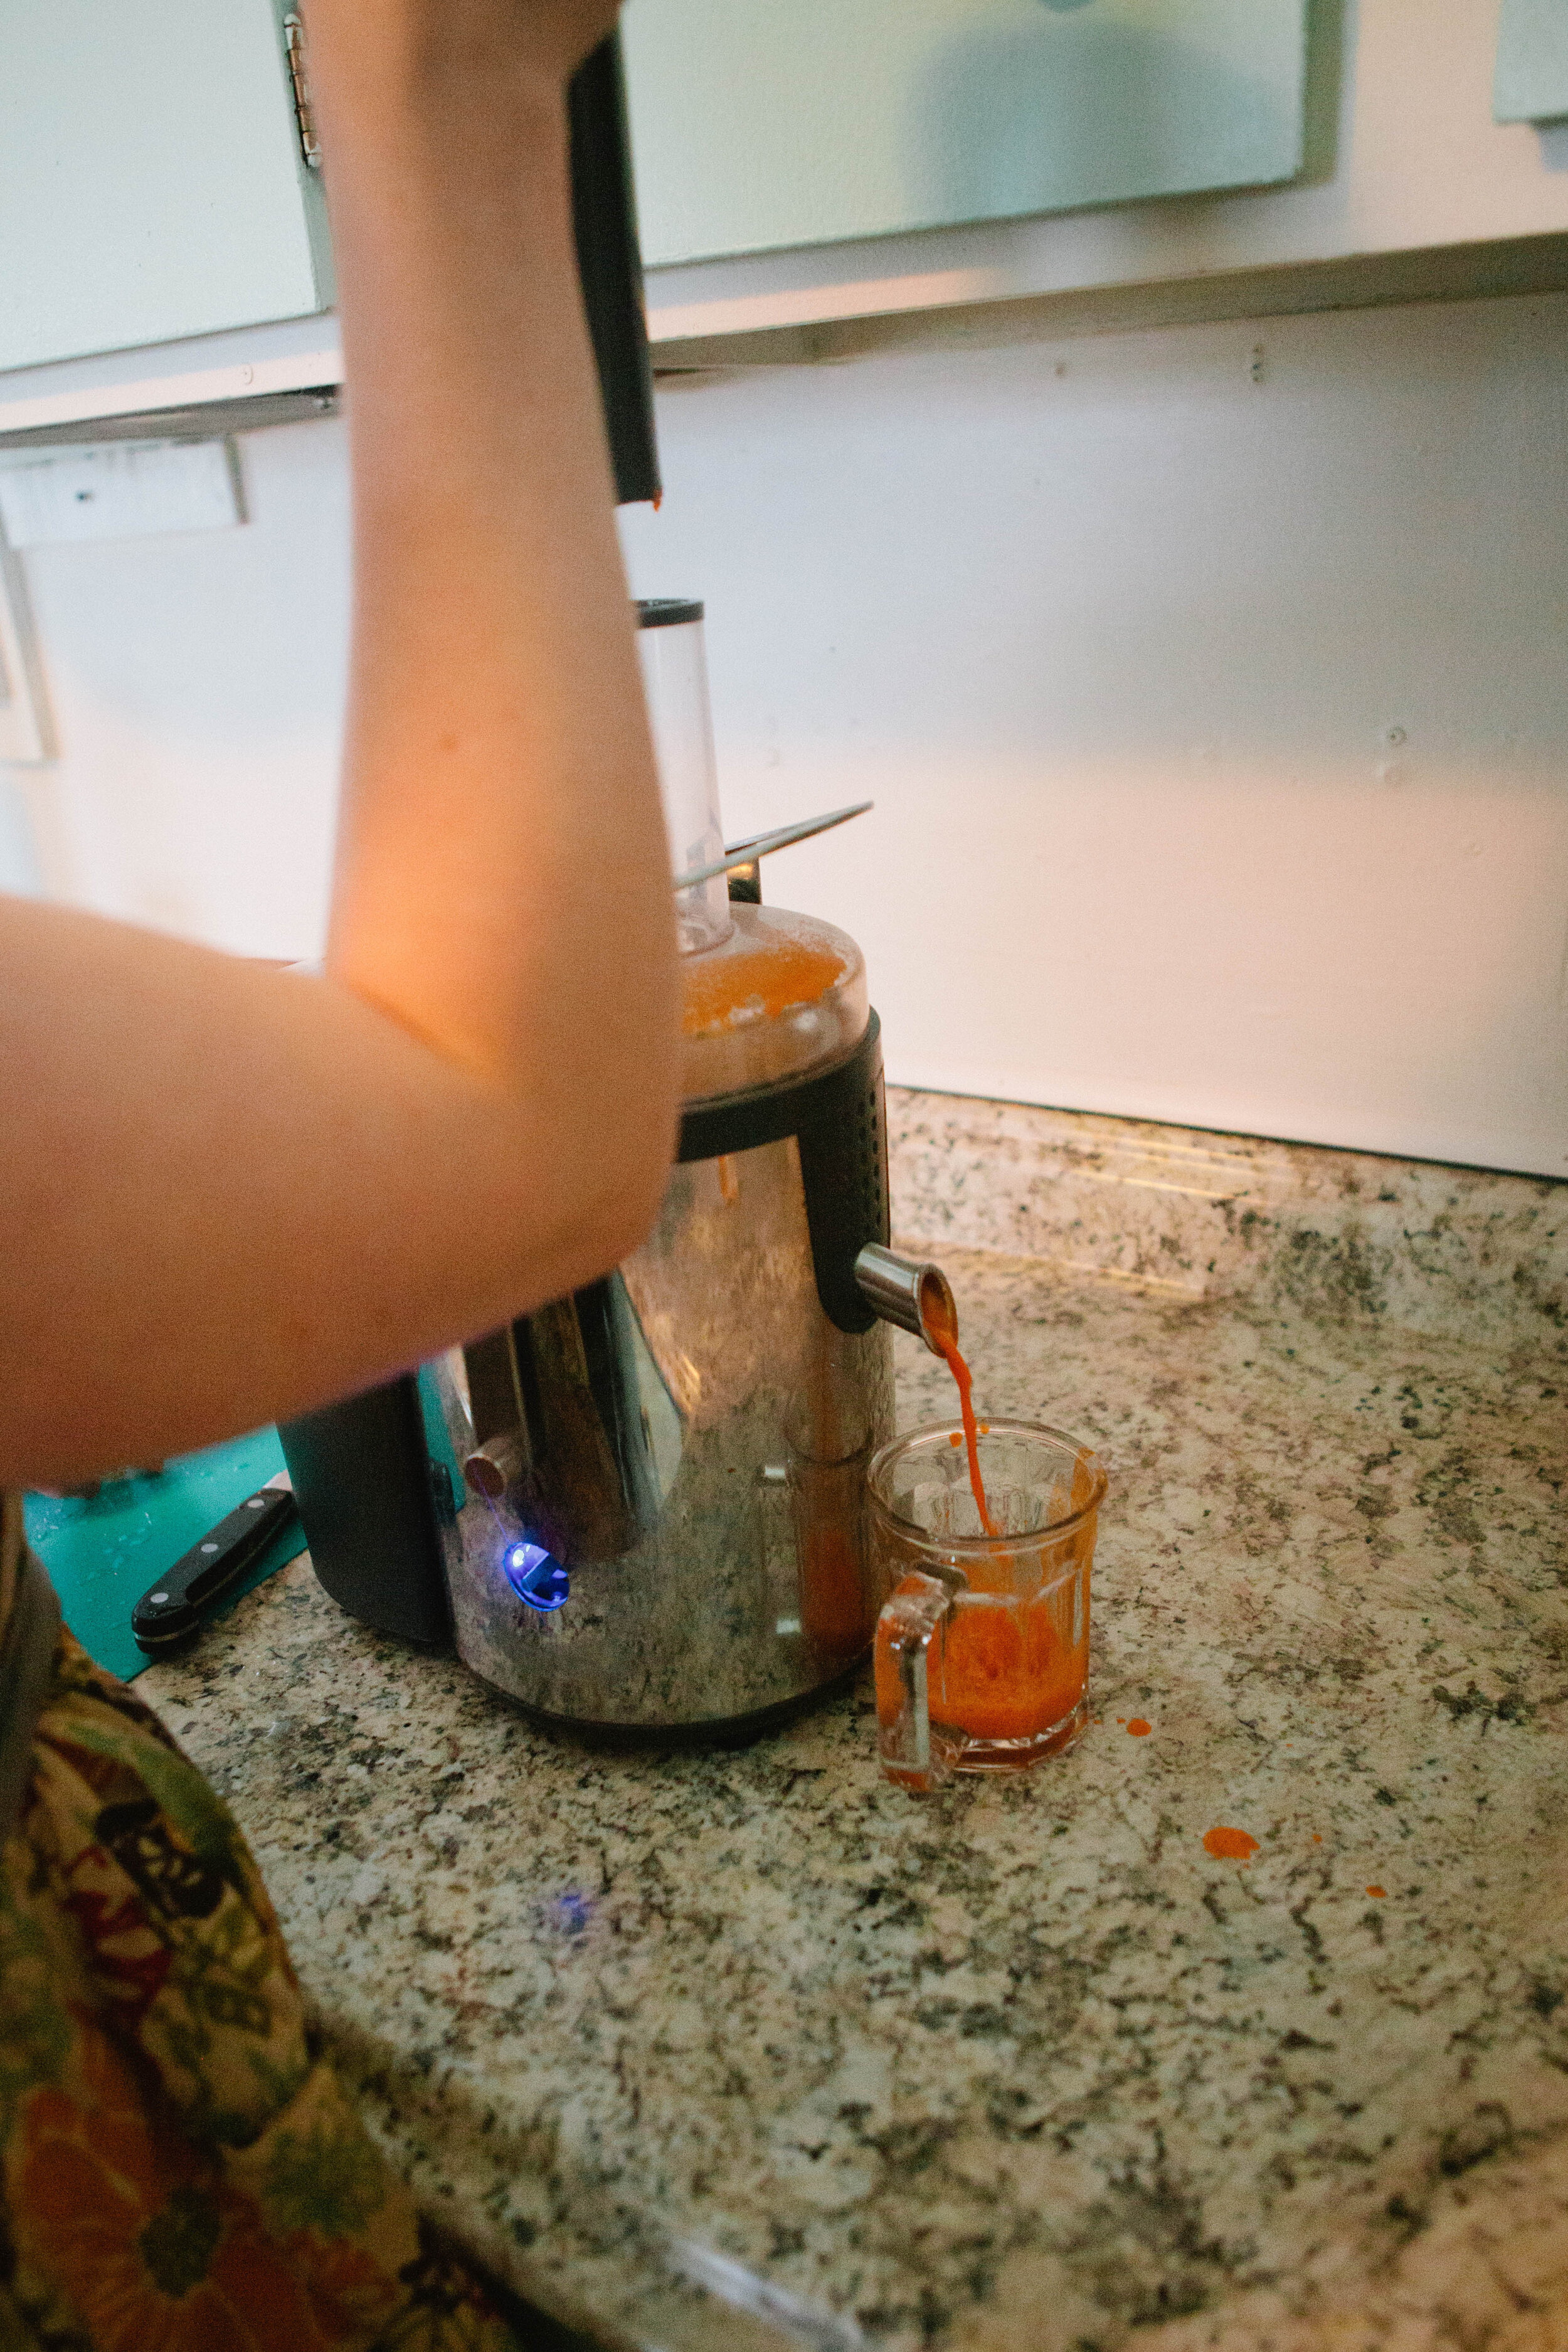
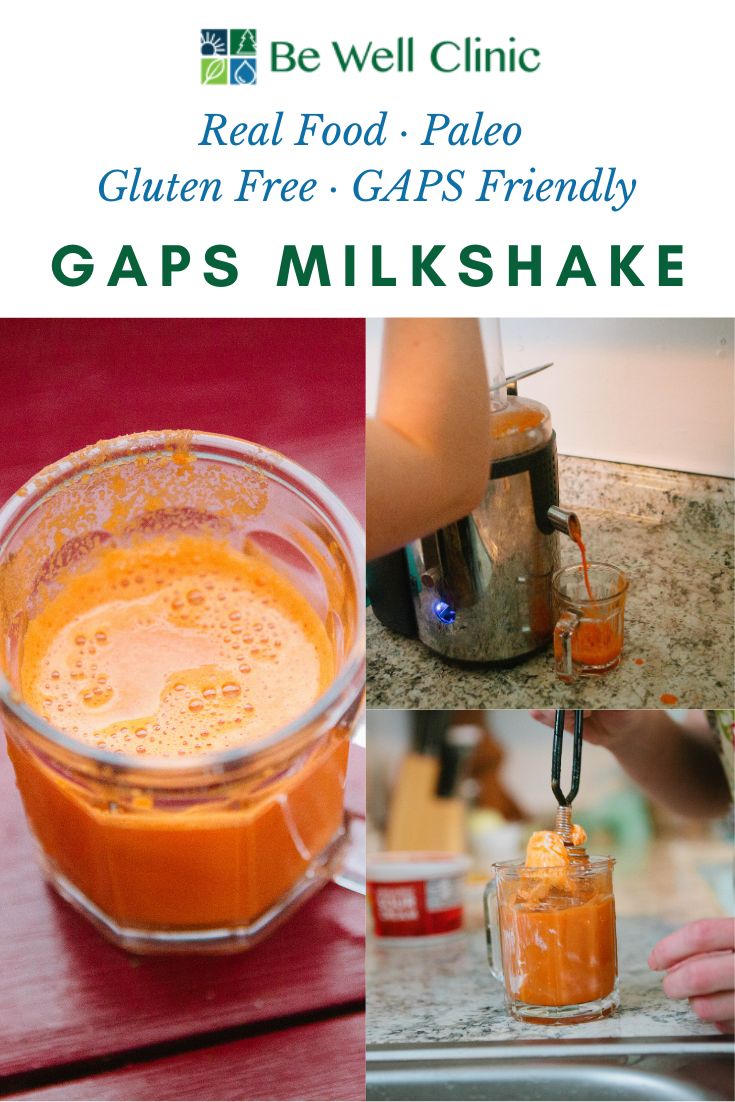
Juice the carrot (and/or other vegetables and fruits). I use organic vegetables so I just rinse them off (sometimes). You can see my (not) high-end juicer in the picture! But it works! Don't feel like you have to spend hundreds of dollars to juice (this one was about $40). It is a centrifuge juicer, and I try to consume the juices within 15 minutes to get the most enzyme activity, but again, it works! Successful GAPS is not about perfection, it is about action!

IMG_7433.jpg

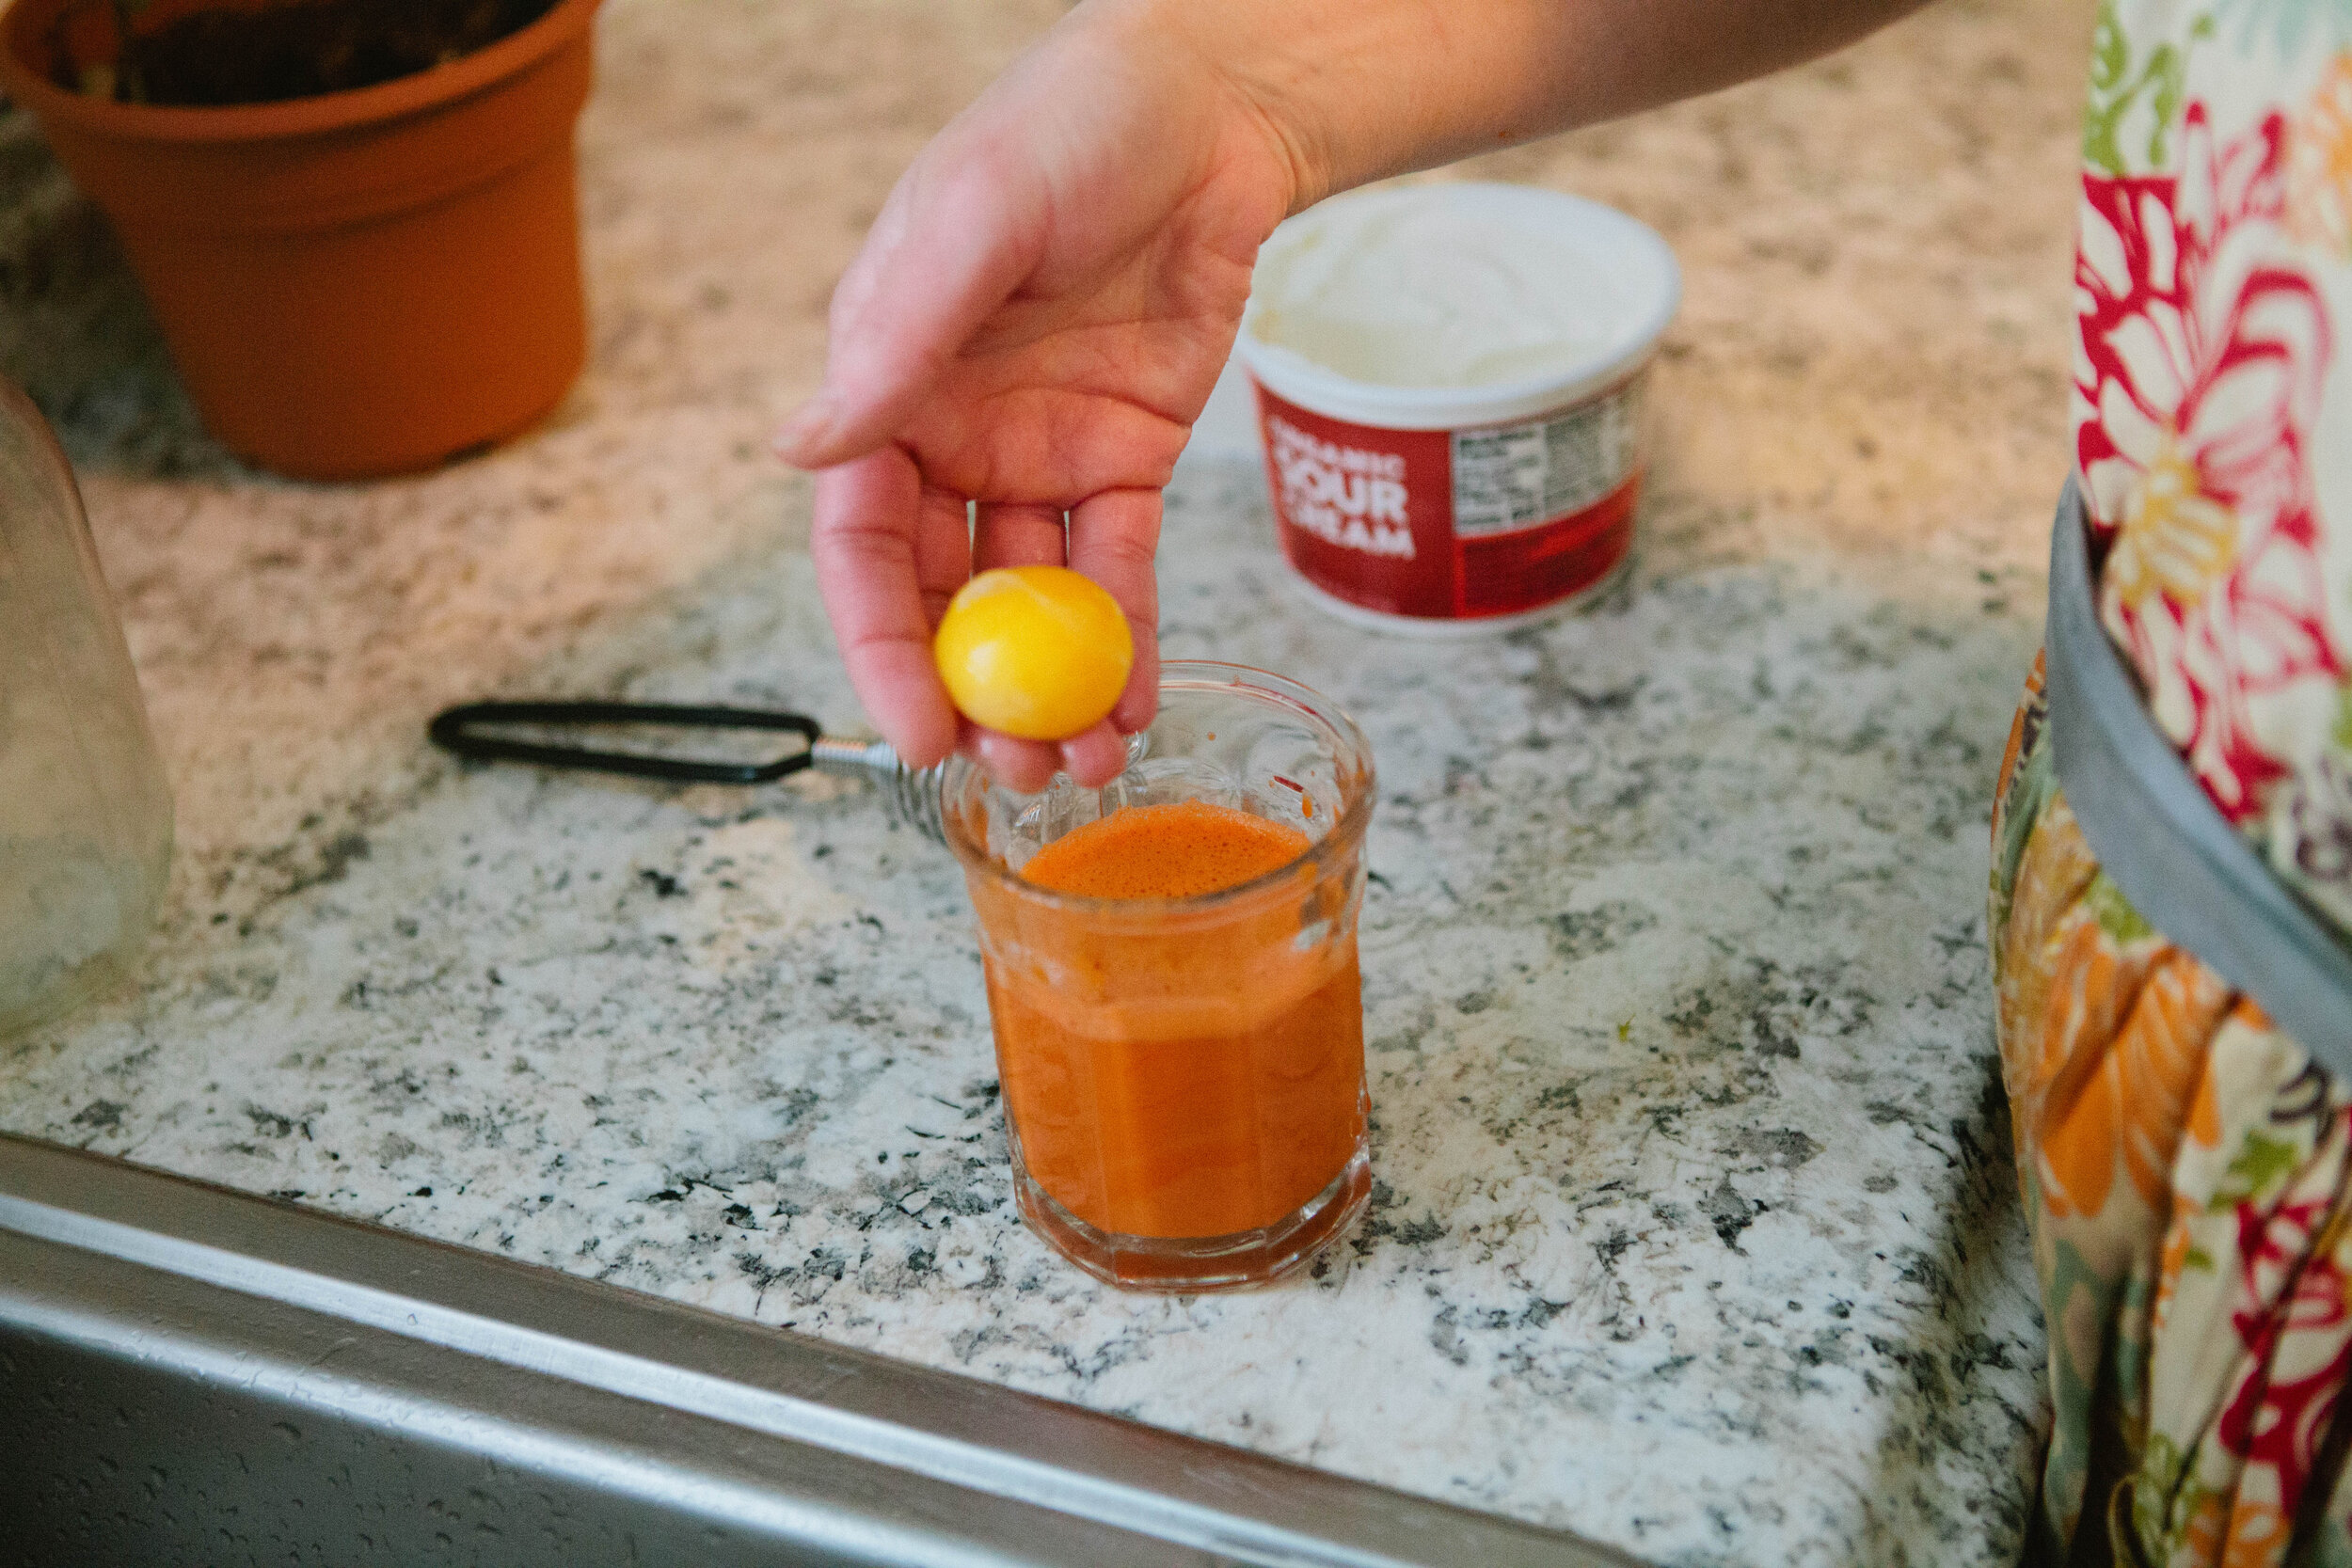
Once you have your juice in a glass, you are ready to add your other ingredients. Add 1-2 raw egg yolks or whole raw eggs. If you do add the white, I recommend using a spring whisk or a blender to break up the white--that is a hard texture to get down! With raw eggs, it is also important to know the source of your eggs (were the chickens healthy) and try not to touch the shell with the egg. If there happens to be any salmonella present, it is likely still on the outside of the egg, not the inside. Of course, there is no guarantee, especially if the eggs are washed (this breaks down the protective layer around the egg), so consume at your own risk! But I have yet to get sick, even using store bought eggs sometimes.

IMG_7441.jpg

Add the sour cream (a good-sized dollop). The sour cream is there primarily to slow the absorption of sugar from the juice—add to taste. You can also add coconut oil if you are not tolerating dairy (technically this makes it a GAPS Smoothie) Stir, whisk or blend together.

You can add a little honey if you need to. It is better to add some fruit to your juice ingredients instead of honey, but that isn't always an option, especially on early stages. I have found that the egg whites are a little bitter, and when I add a whole egg instead of just the yolk, I often need a little honey to help it go down. That's it! All that's left is to enjoy it!

As I said, this is a great "meal" for those on-the-go mornings. Especially if you are hungry early in the morning, this is a great thing to drink, as it is not a burden to the digestive system. The juices support your body's cleansing processes, which are often happening from 4am-10am every day. You could also add beet kvass to this beverage as an extra liver cleanser. It can overwhelm the flavor, so I prefer to drink mine separately. Experiment with your preferences, and with the recipe! Let us know how you like it best!

Onward!

GAPS Milkshake

GAPSmilkshake-150x150.jpg
  • Freshly Pressed Juices

  • Sour cream, creme faiche, coconut oil, or another fat

  • Raw Egg ((whole or just the yoke))

  • Raw Honey ((optional and only a little))

  1. Juice the carrot (and/or other vegetables and fruits).

  2. Add 1-2 raw egg yolks or whole raw eggs. If you do add the white, I recommend using a spring whisk or a blender to break up the white–that is a hard texture to get down!

  3. Add the sour cream to taste. The sour cream is there primarily to slow the absorption of sugar from the juice.

  4. Stir, whisk or blend together.

  5. Add a little honey if you need to

With raw eggs, it is also important to know the source of your eggs (were the chickens healthy) and try not to touch the shell with the egg. If there happens to be any salmonella present, it is likely still on the outside of the egg, not the inside. Of course, there is no guarantee, especially if the eggs are washed (this breaks down the protective layer around the egg), so consume at your own risk! 

I have found that the egg whites are a little bitter, and when I add a whole egg instead of just the yolk, I often need a little honey to help it go down.


HowtoMaketheGAPSMilkshakeJuiceCleanseGAPSDietRecipe.png

GAPS Milkshake

Author:
prep time: cook time: total time:

ingredients:

  • Freshly Pressed Juices
  • Sour cream, creme faiche, coconut oil, or another fat
  • Raw Egg ((whole or just the yoke))
  • Raw Honey ((optional and only a little))

instructions:

How to cook GAPS Milkshake

  1. Juice the carrot (and/or other vegetables and fruits).
  2. Add 1-2 raw egg yolks or whole raw eggs. If you do add the white, I recommend using a spring whisk or a blender to break up the white–that is a hard texture to get down!
  3. Add the sour cream to taste. The sour cream is there primarily to slow the absorption of sugar from the juice.
  4. Stir, whisk or blend together.
  5. Add a little honey if you need to

NOTES:

With raw eggs, it is also important to know the source of your eggs (were the chickens healthy) and try not to touch the shell with the egg. If there happens to be any salmonella present, it is likely still on the outside of the egg, not the inside. Of course, there is no guarantee, especially if the eggs are washed (this breaks down the protective layer around the egg), so consume at your own risk! I have found that the egg whites are a little bitter, and when I add a whole egg instead of just the yolk, I often need a little honey to help it go down.
Created using The Recipes Generator